Home / Blanket
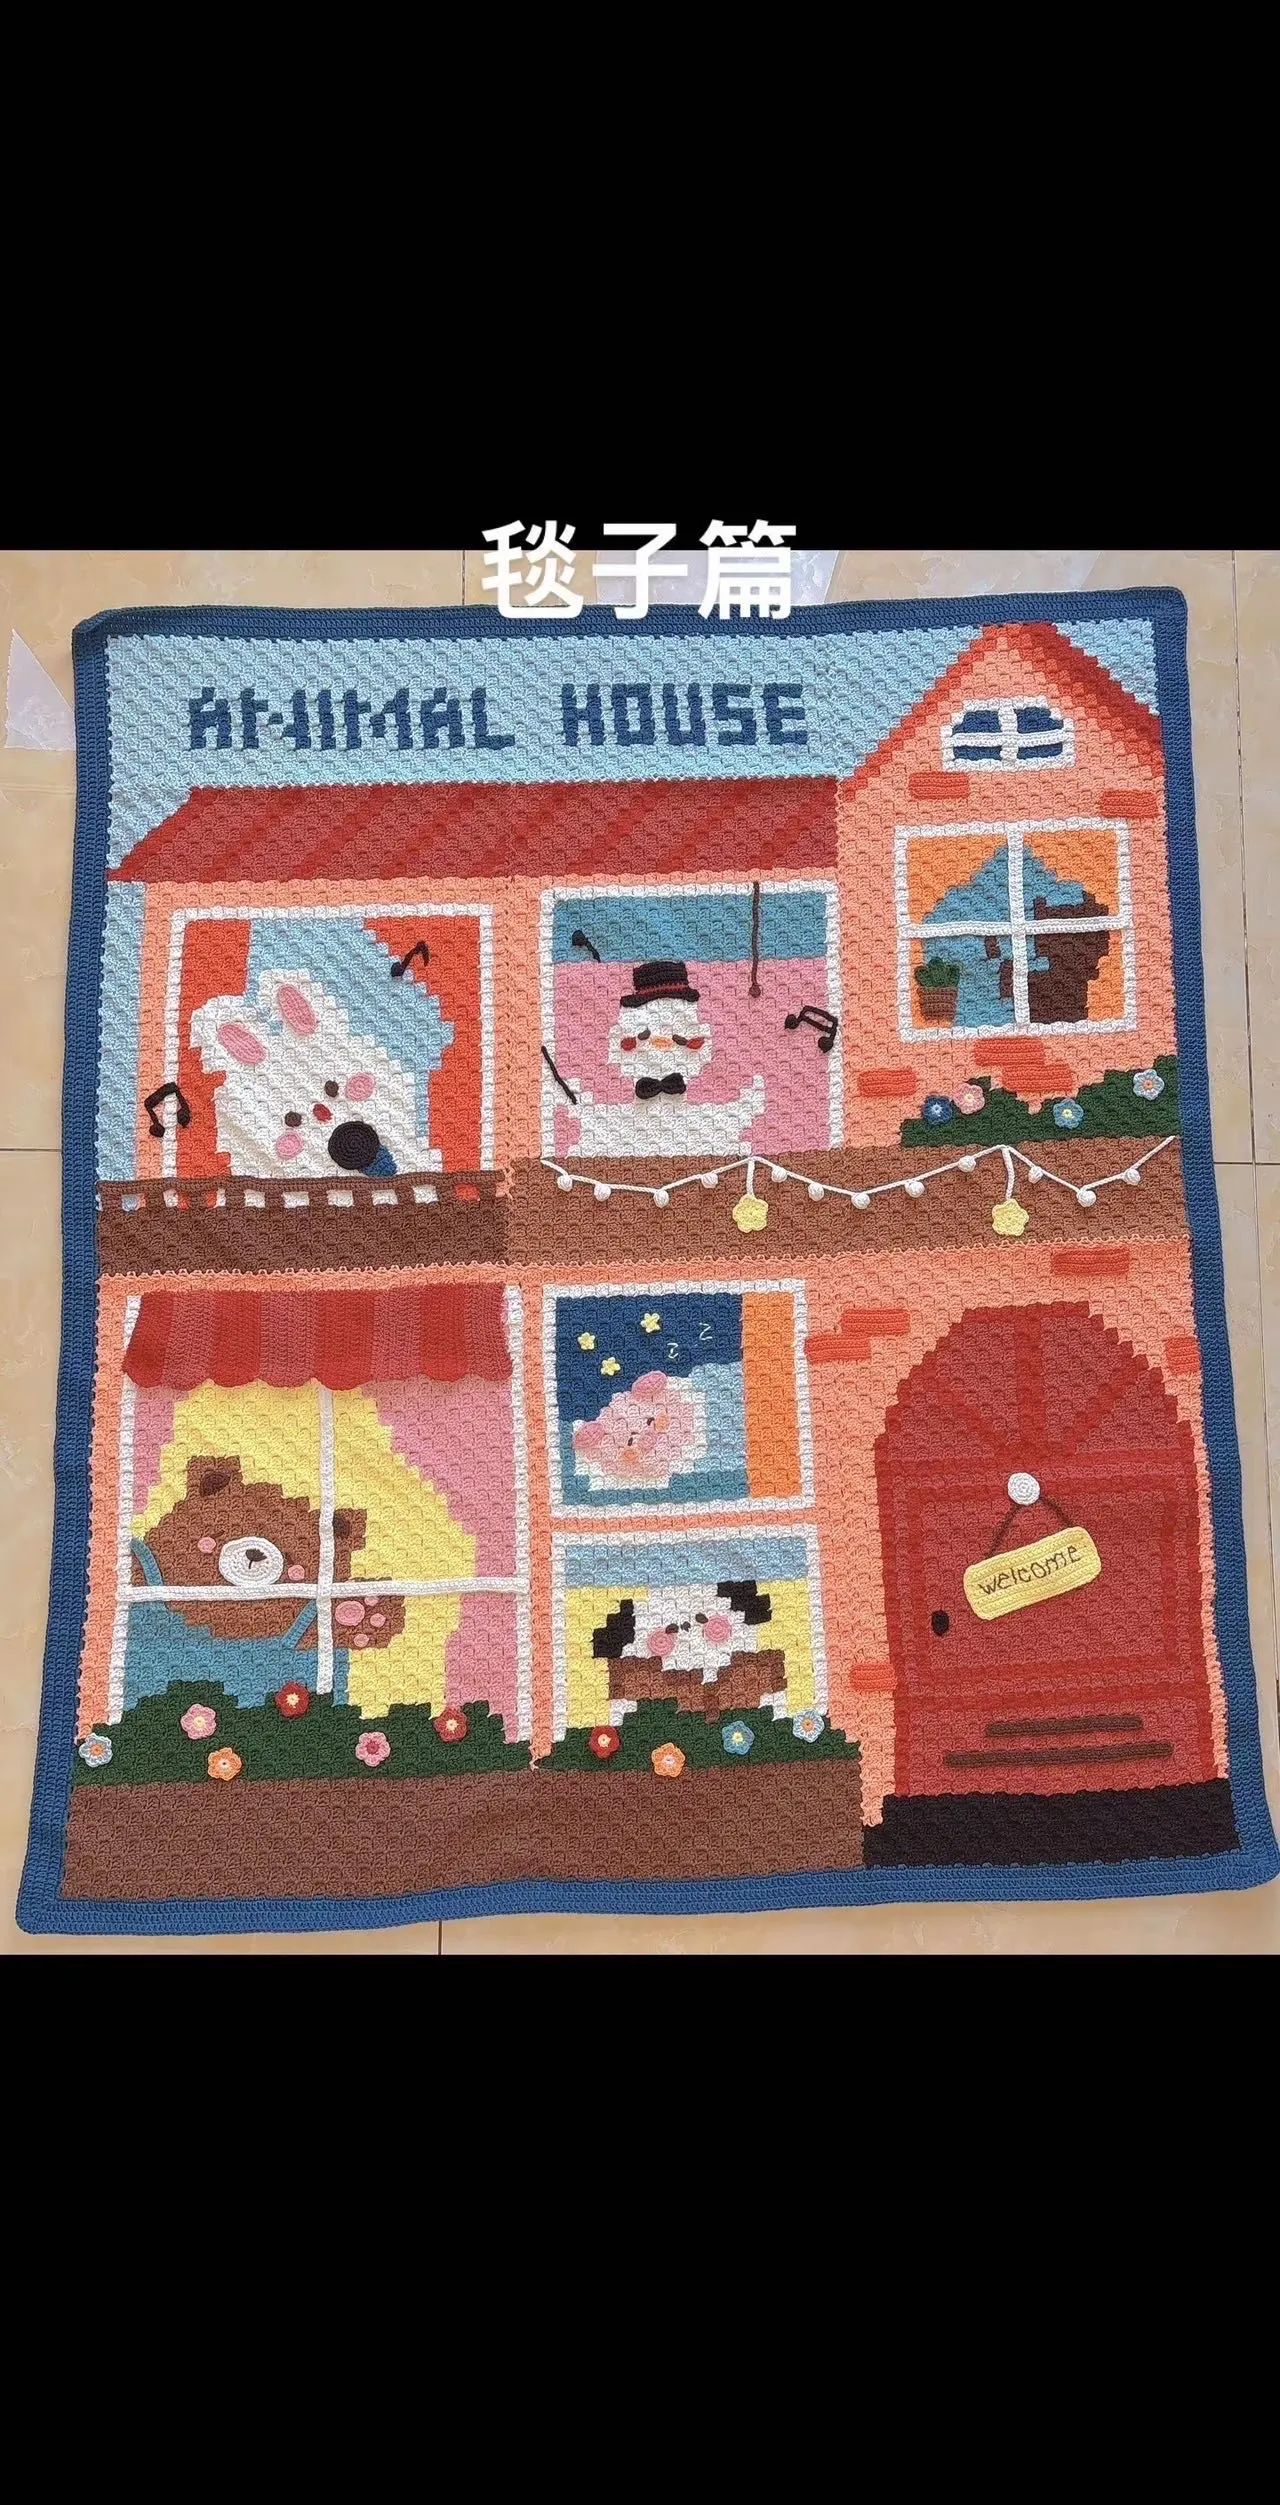
Animal Home Blanket
Project preview
See the finished project
Pattern format
Instructions
Watch and follow
Video tutorial
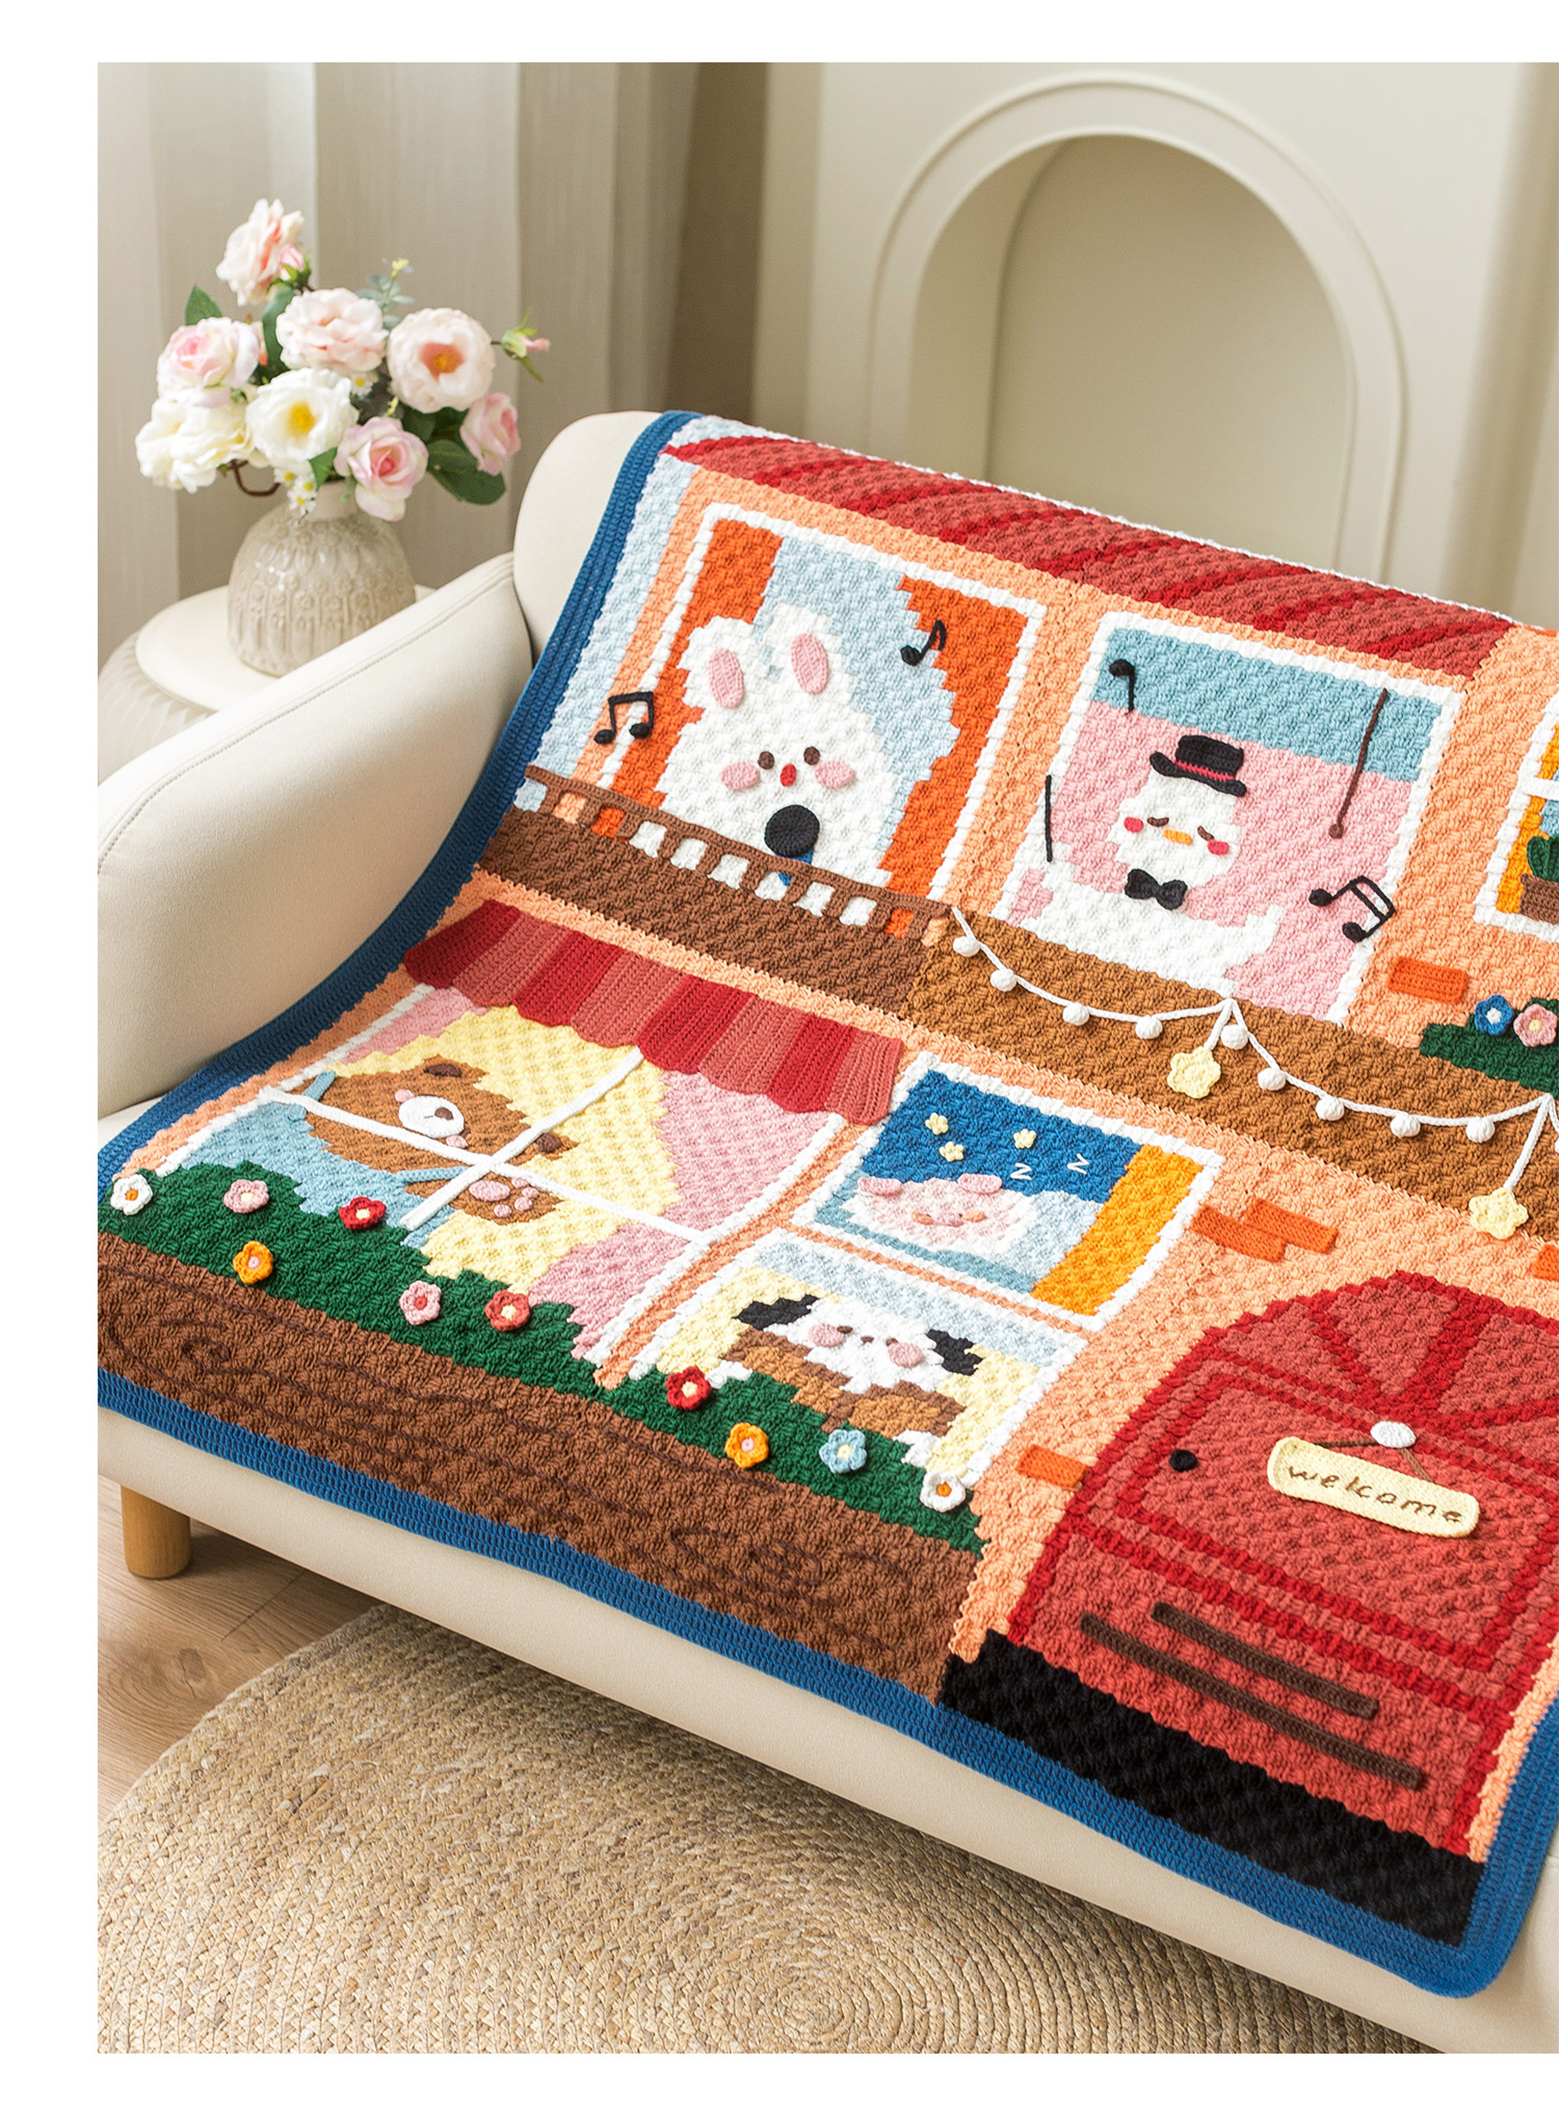
The blanket consists of the main body and decorations.Let's start from the main body.After completion, make and sew the decorations.
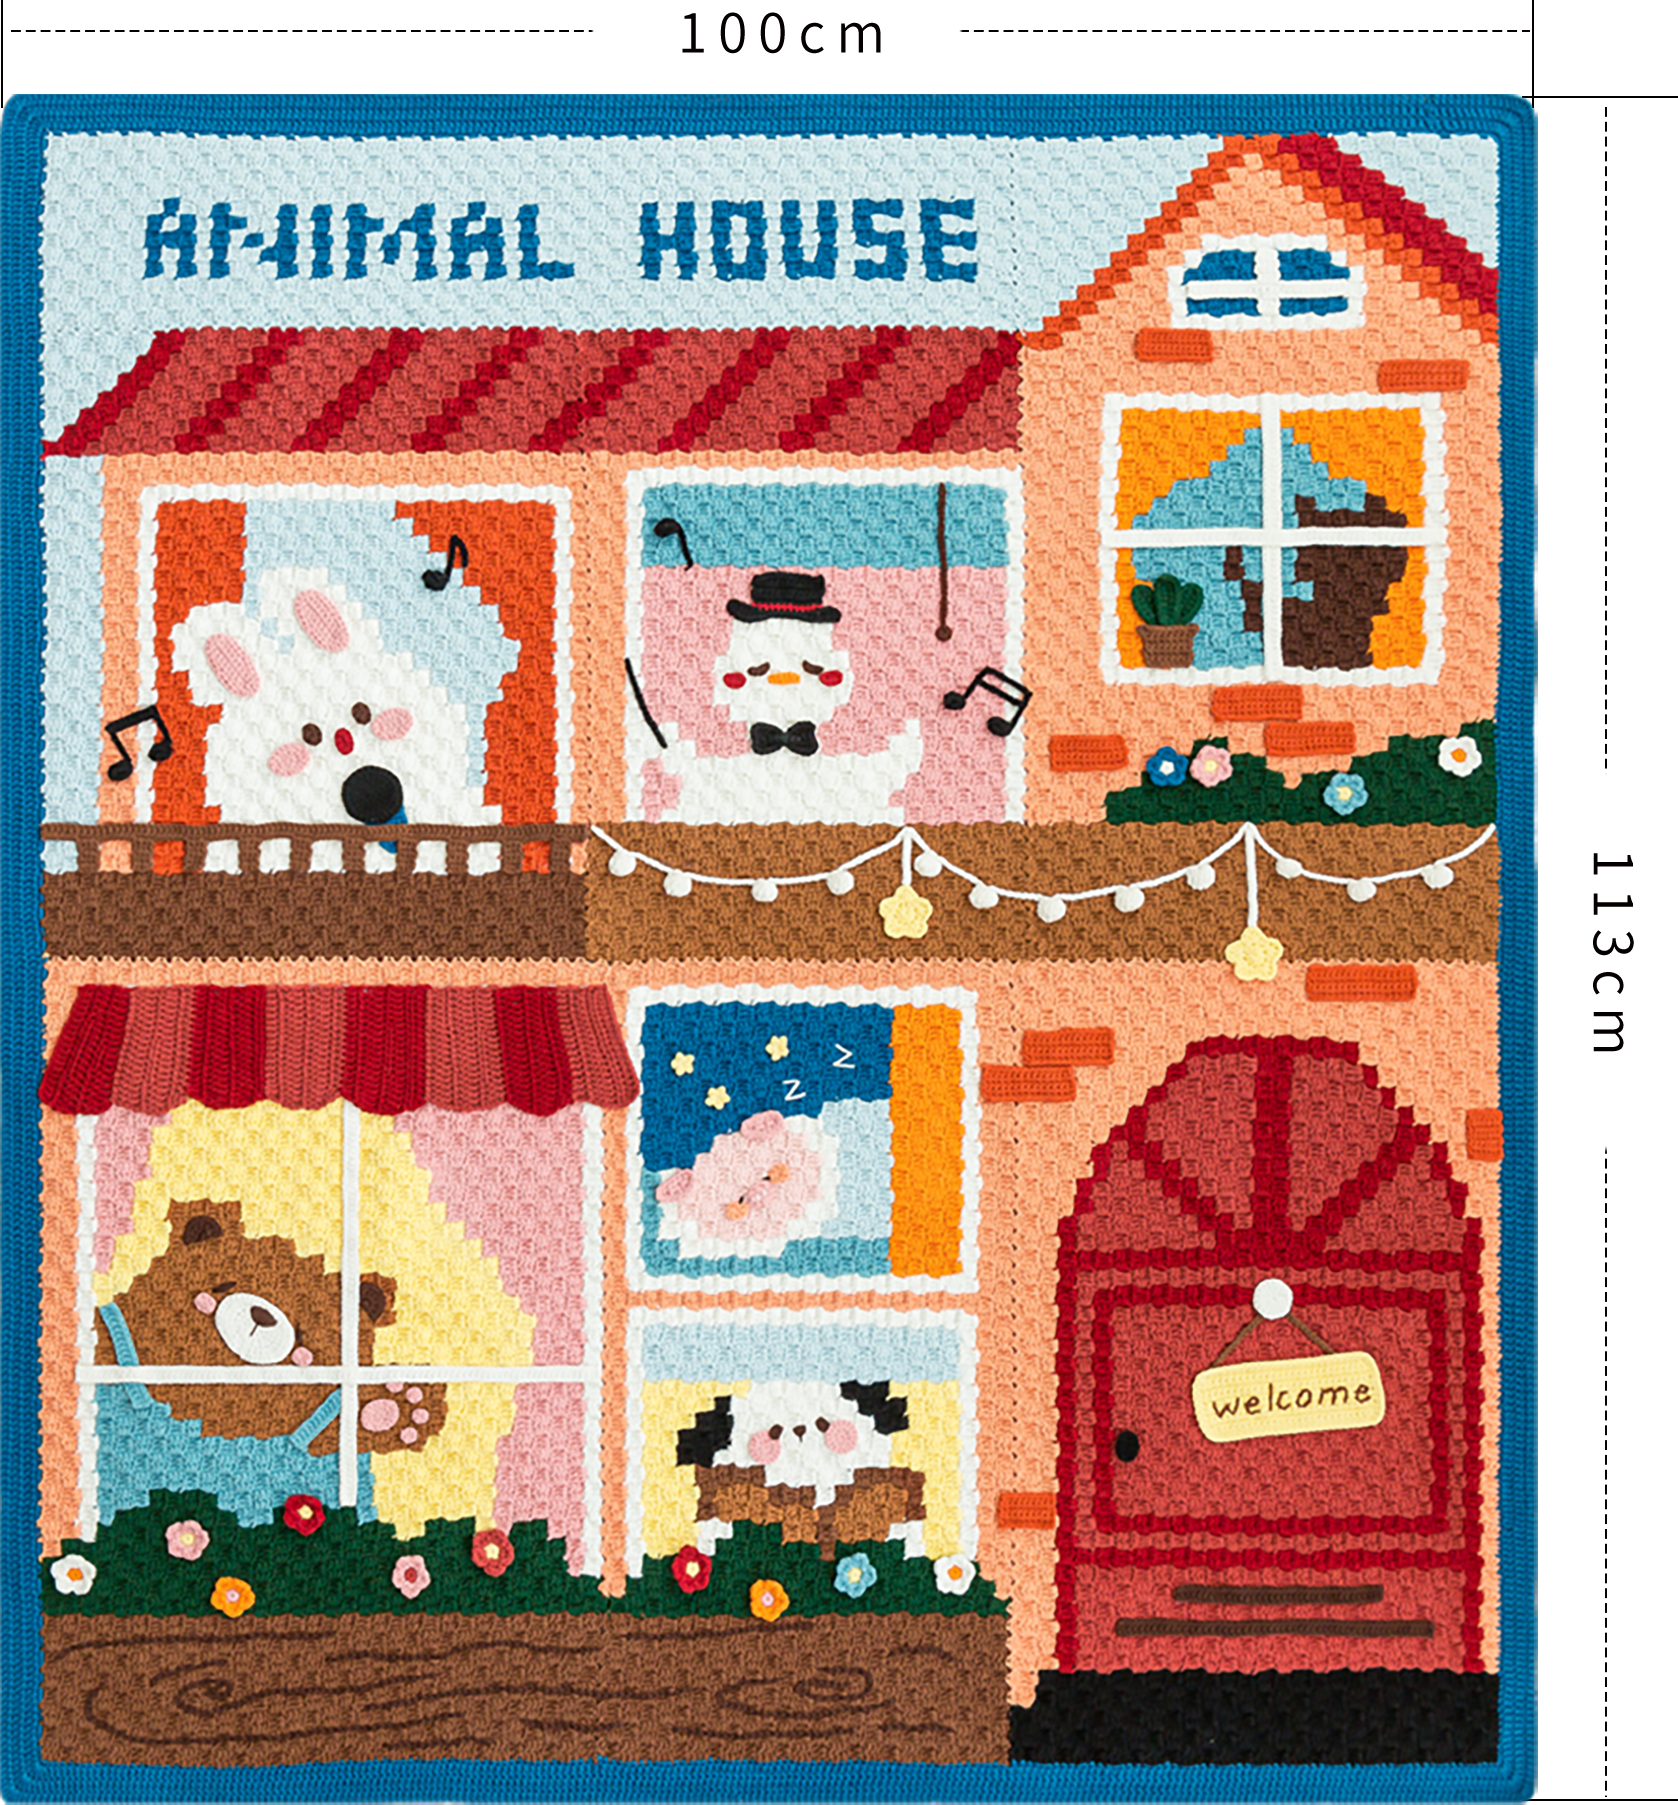
The handcrafted measurements may have an error of 1 to 2cm. Due to variations in individual tension, the size of the sample is for reference only.
Materials: 4-Ply Combed Cotton & Acrylic Fibre Hand Knitting Yarn
Hook: 2.0mm crochet hook
Note:
1.This pattern is written using American terminology and is worked in rows. All measurements in charts are in cm.
2.When crocheting in rounds, you have to make the beginning chain of each round during our crocheting,and the beginning chain dose not count as a stitch.
Chart Key






ABBREVIATIONS
MRadjustable magic ring
CHchain
SLslip stitch
XX stitch single crochet
V = sc2-in-12 single crochets into the same stitch
Fdouble crochet
FV = dc2-in-12 double crochets into the same stitch
FA = dc2togdouble crochet 2 stitches together
A = sc2toginvisible single crochet 2 stitches together
Kskip
[...]in the same stitch
W = sc3-in-13 single crochets into the same stitch
Thalf double crochet
(...)×6crochet item in the parentheses six times
turnturn the piece
TW = hdc3-in-13 half double crochets into the same stitch
TV = hdc2-in-12 half double crochets into the same stitch
[(7E)Q] = tr7-bobble7 treble crochets into the same stitch and crocheted together
PART1 Main bodyA
The main body involves various-sized pieces.Finally, connect the pieces and edging around the main body.First, make the pieces.Once done,connect the pieces together and edging around the main body.
STEP1 PiecesA1 01' 23''
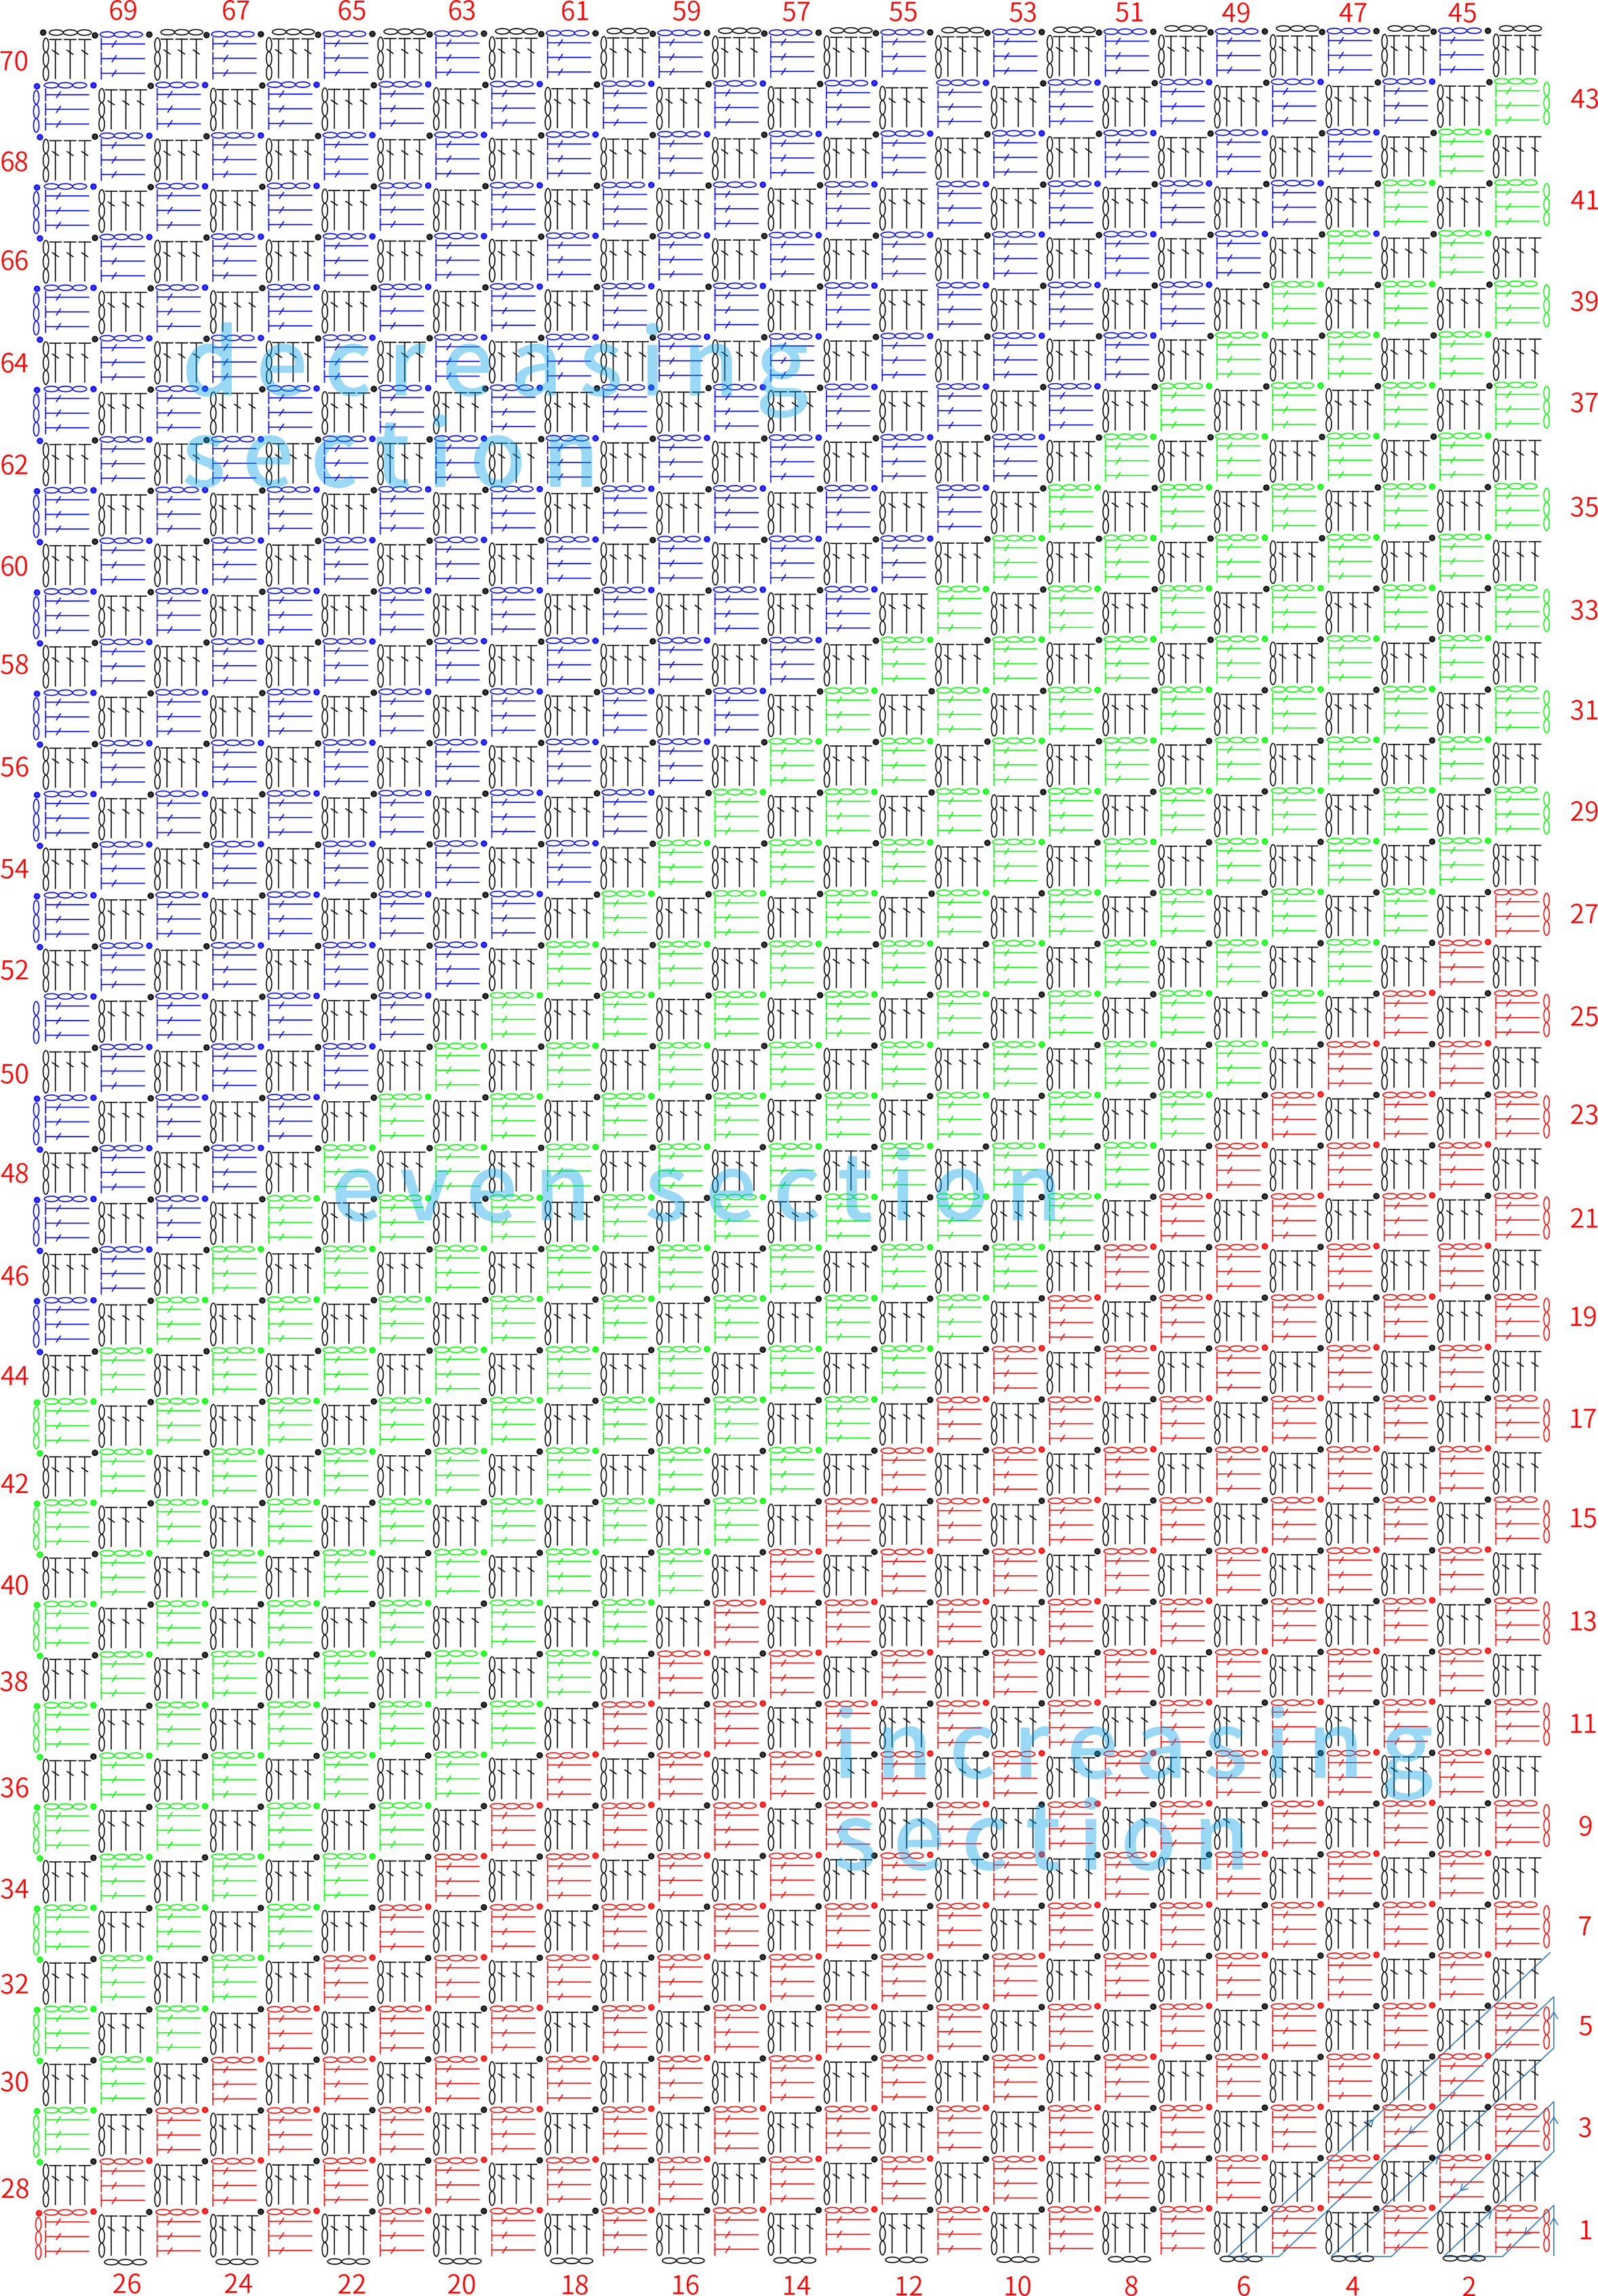
All the pieces are using the same method,just with different rows and groups.These pieces are worked using a diagonal method.Crochet in rows.It's divided into an increasing section,an even section and a decreasing section.Make the corresponding groups by switching colors.Please refer to the video demonstration for more details.
【Piece 1 pattern】
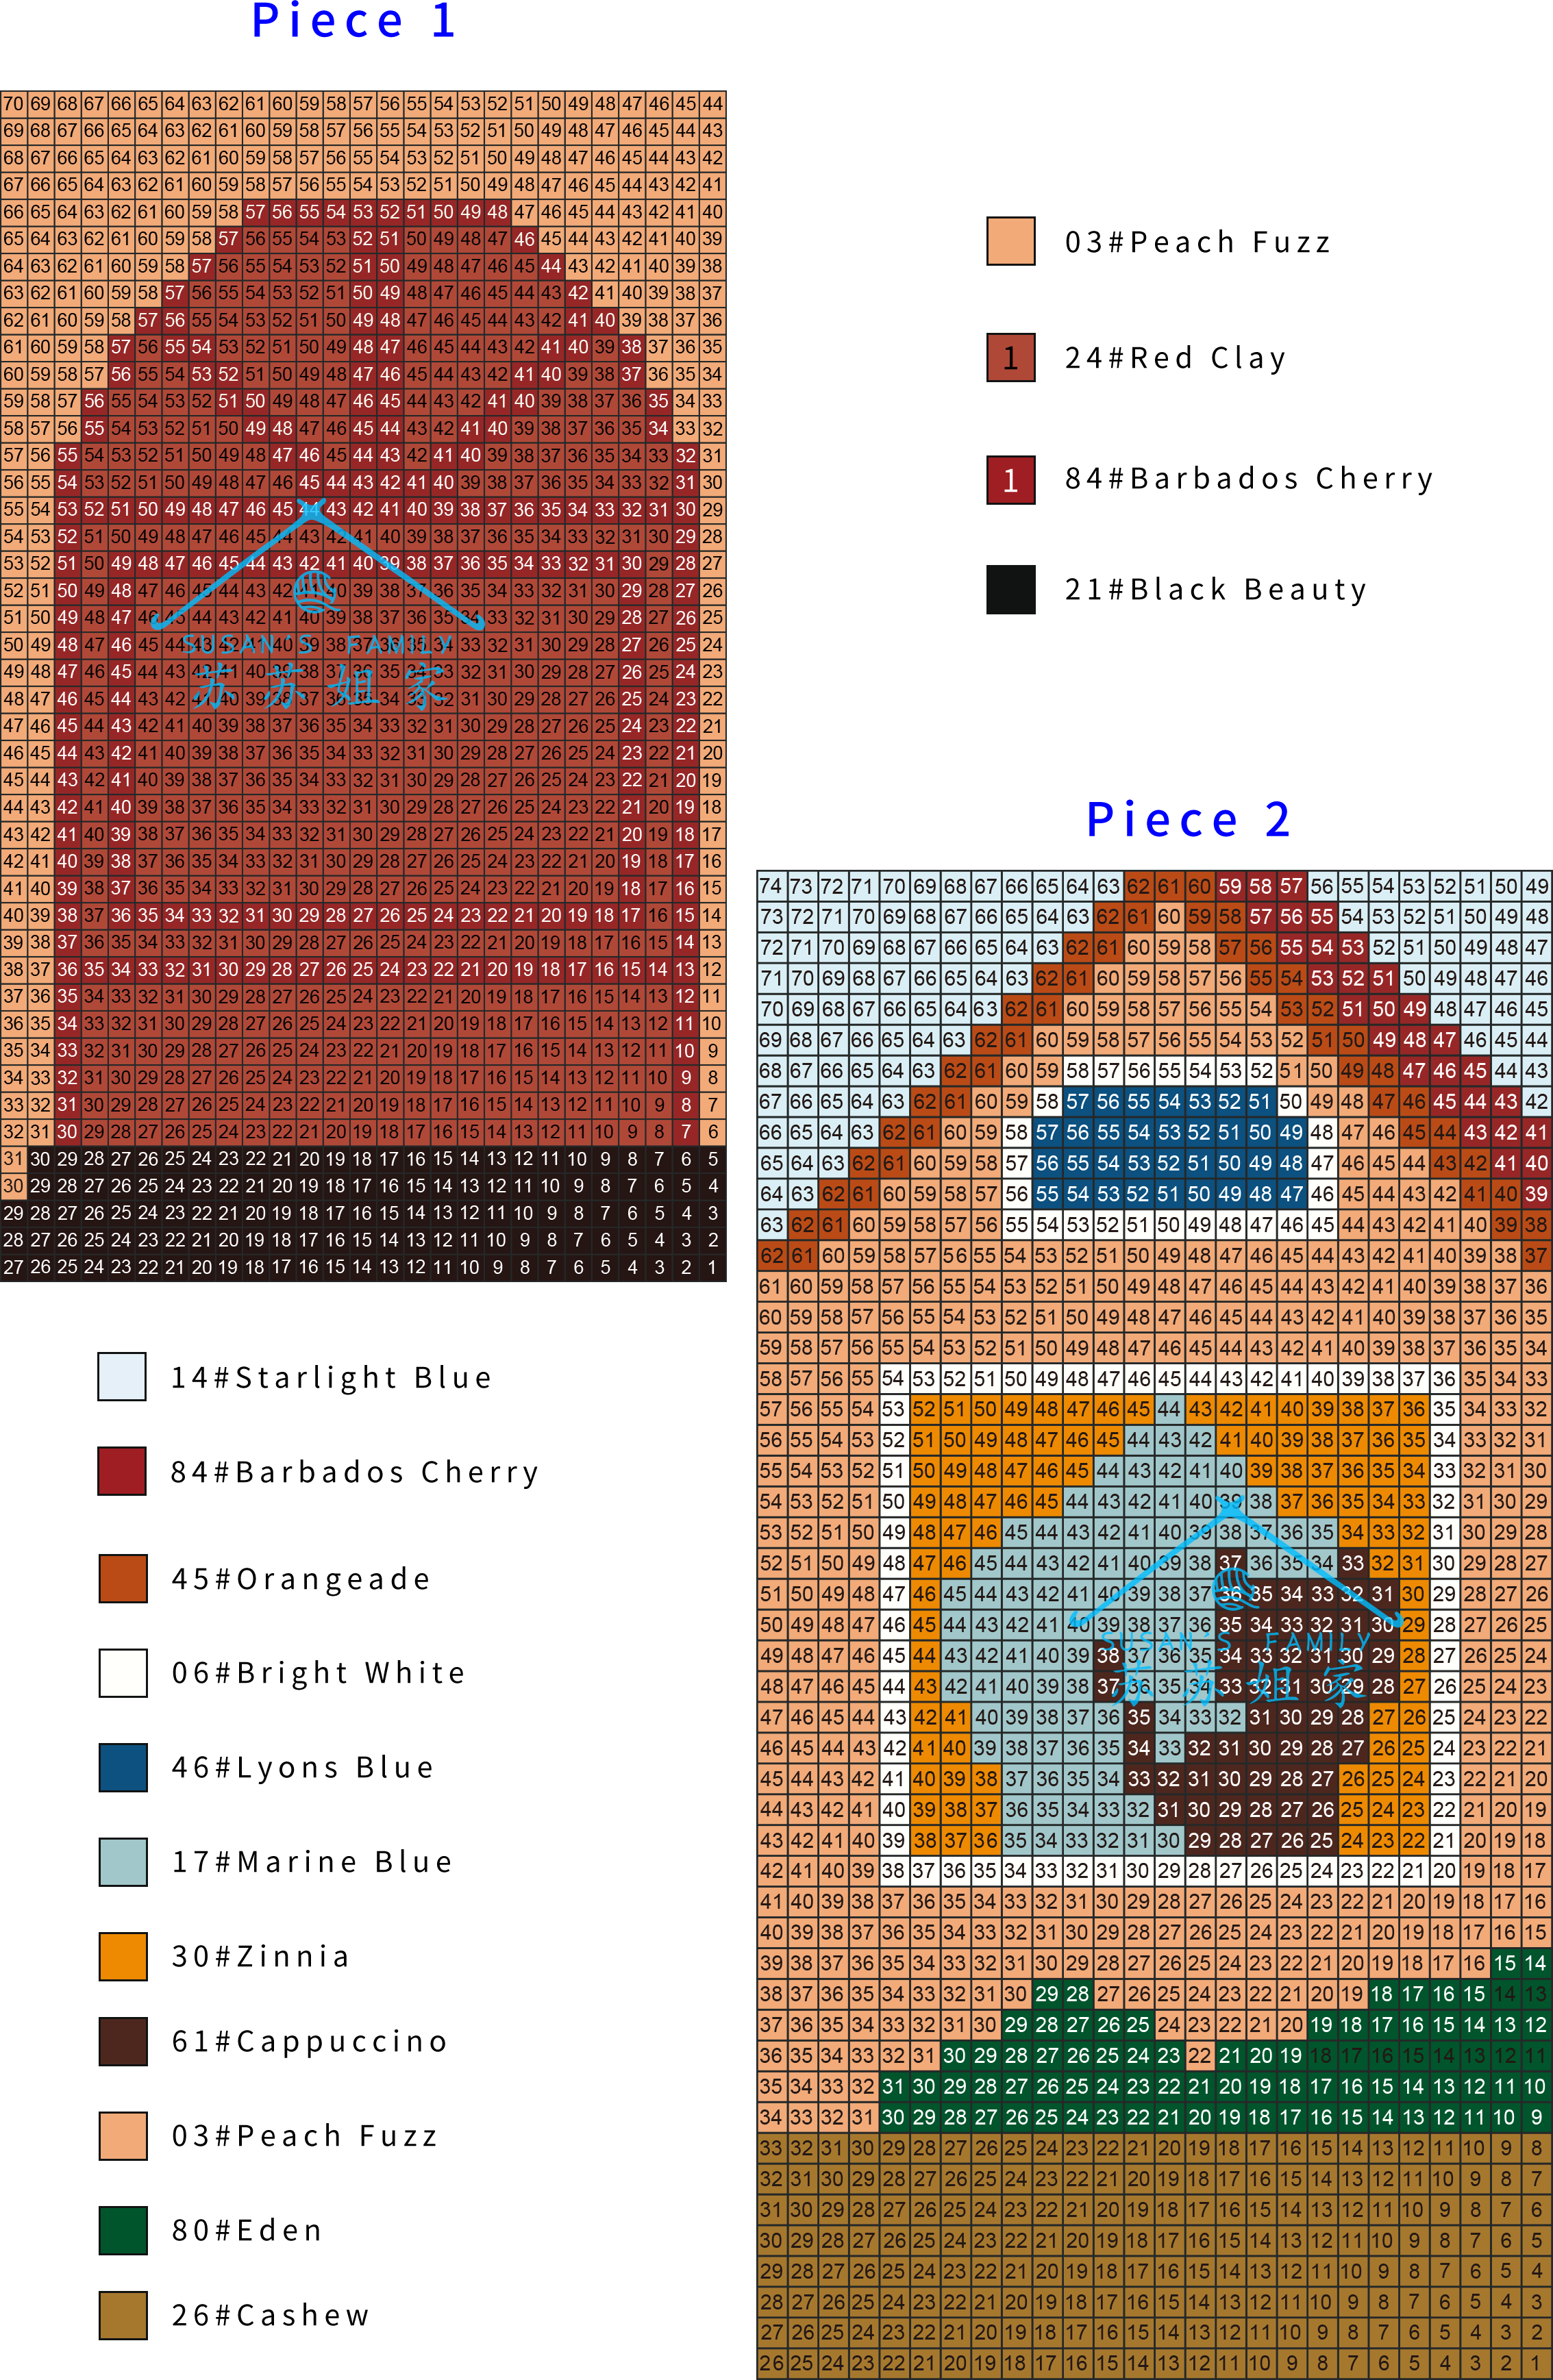
Piece 3
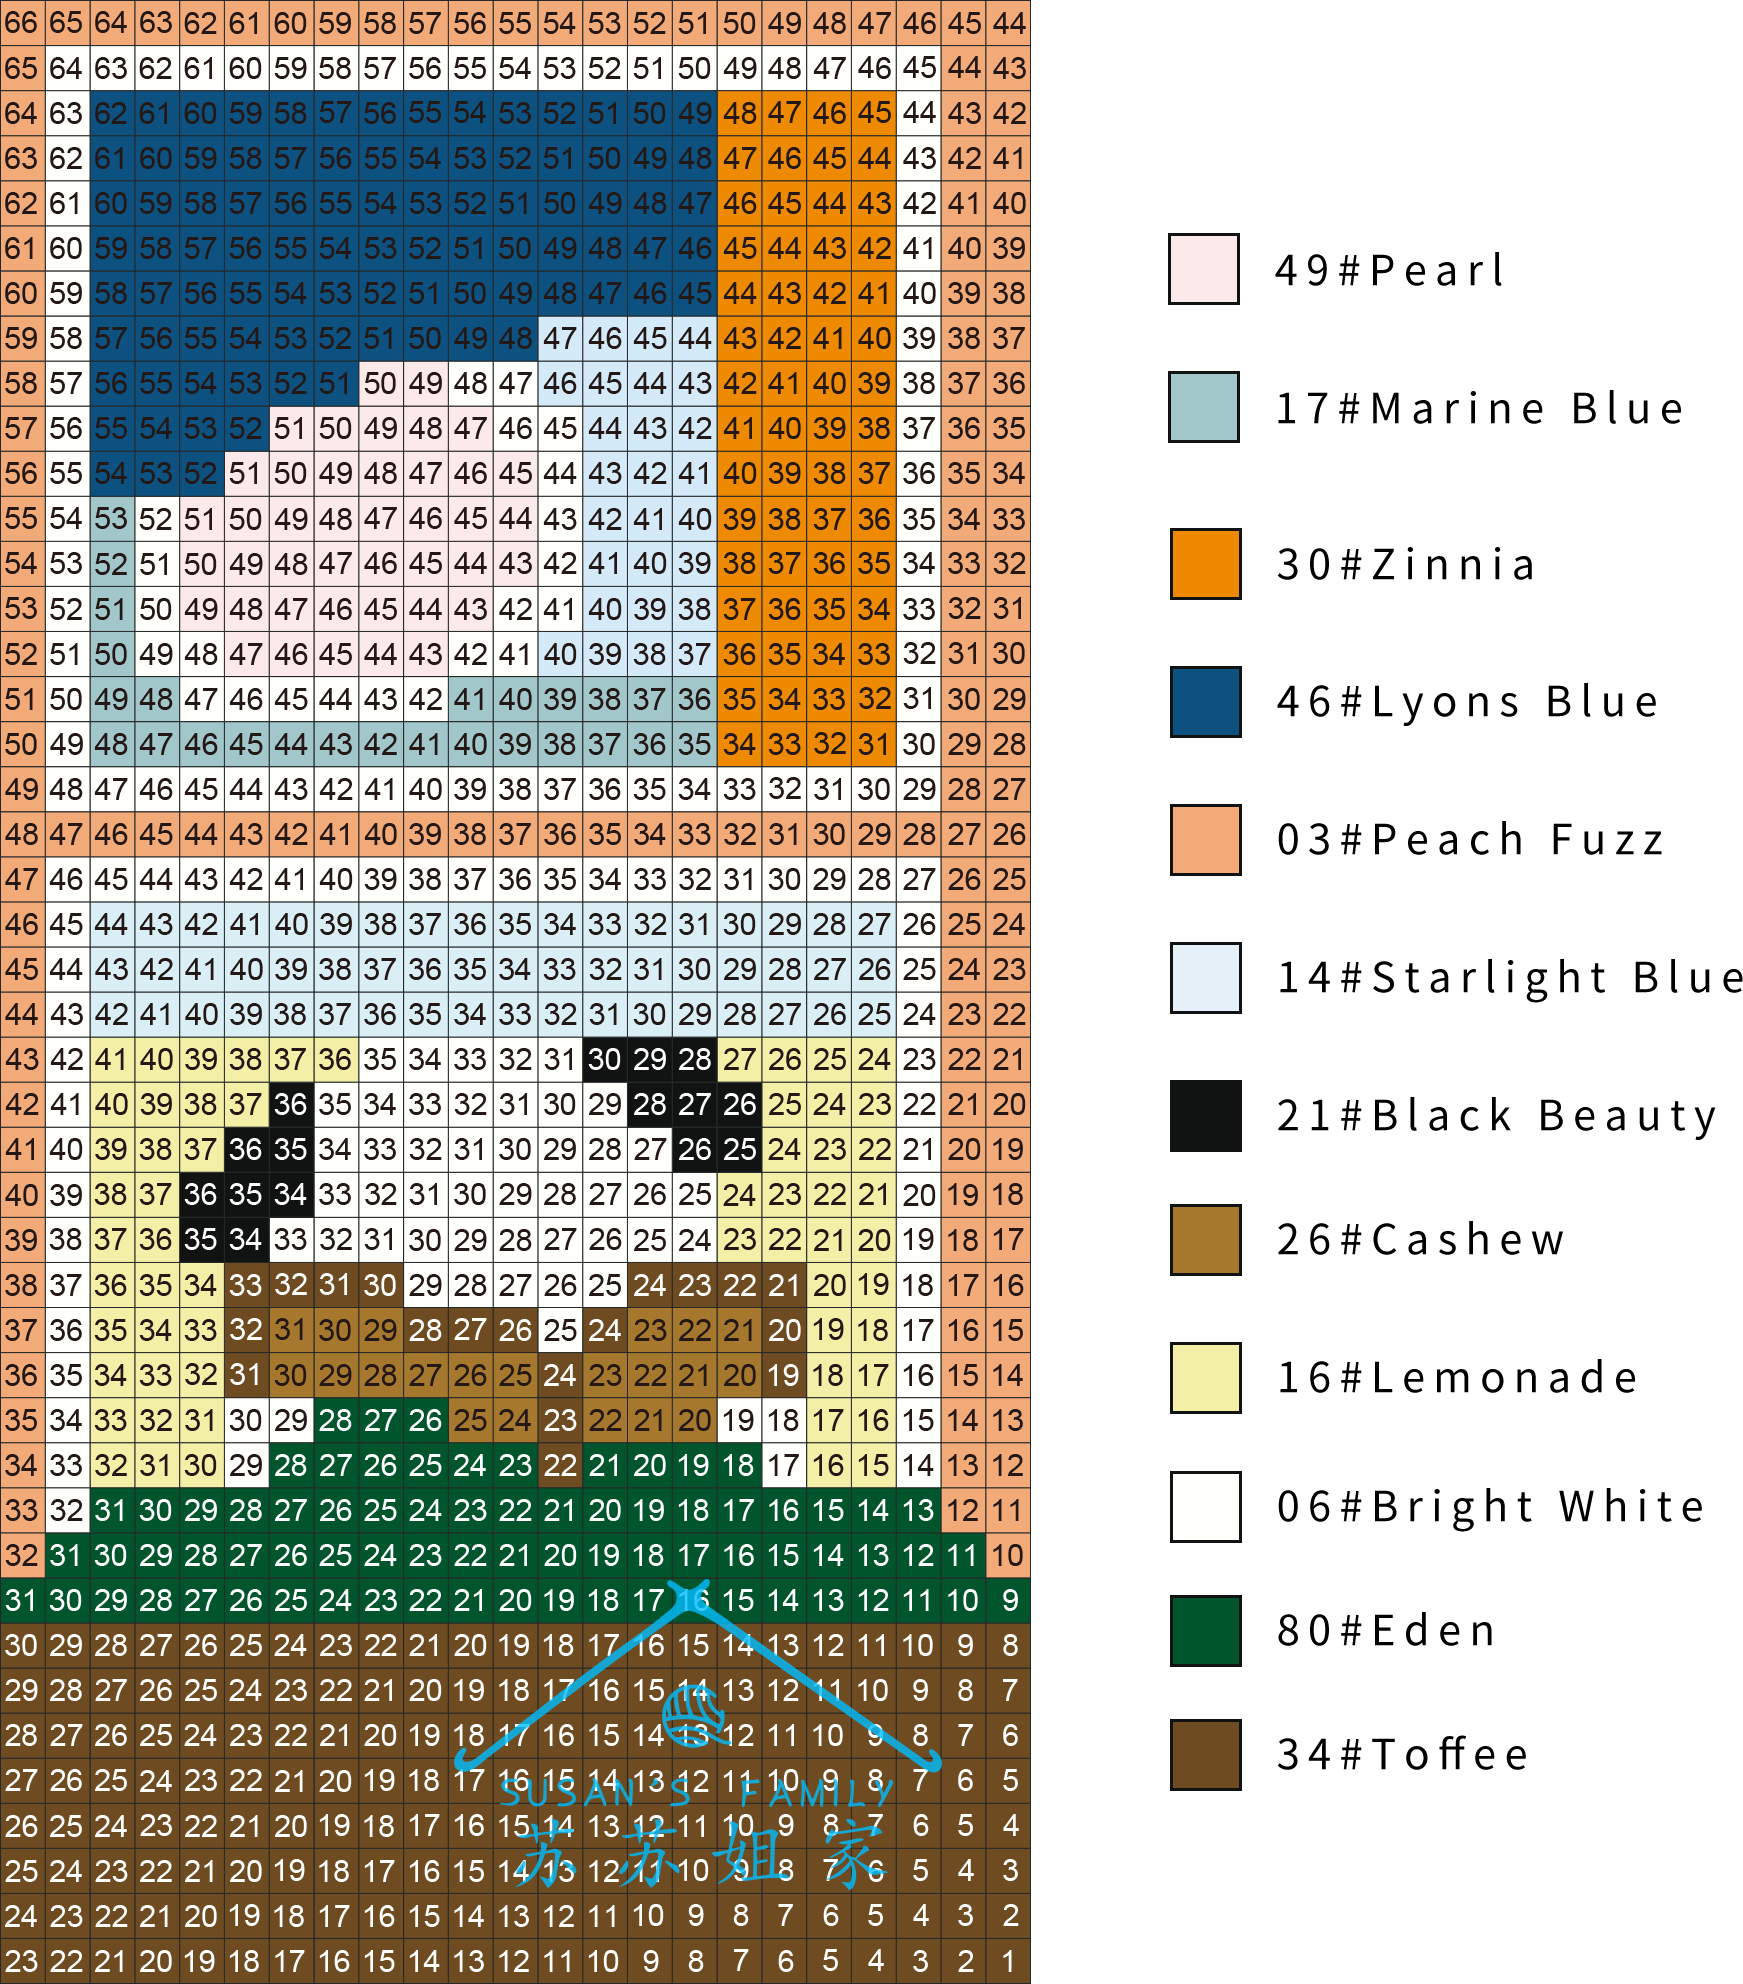
Piece 4
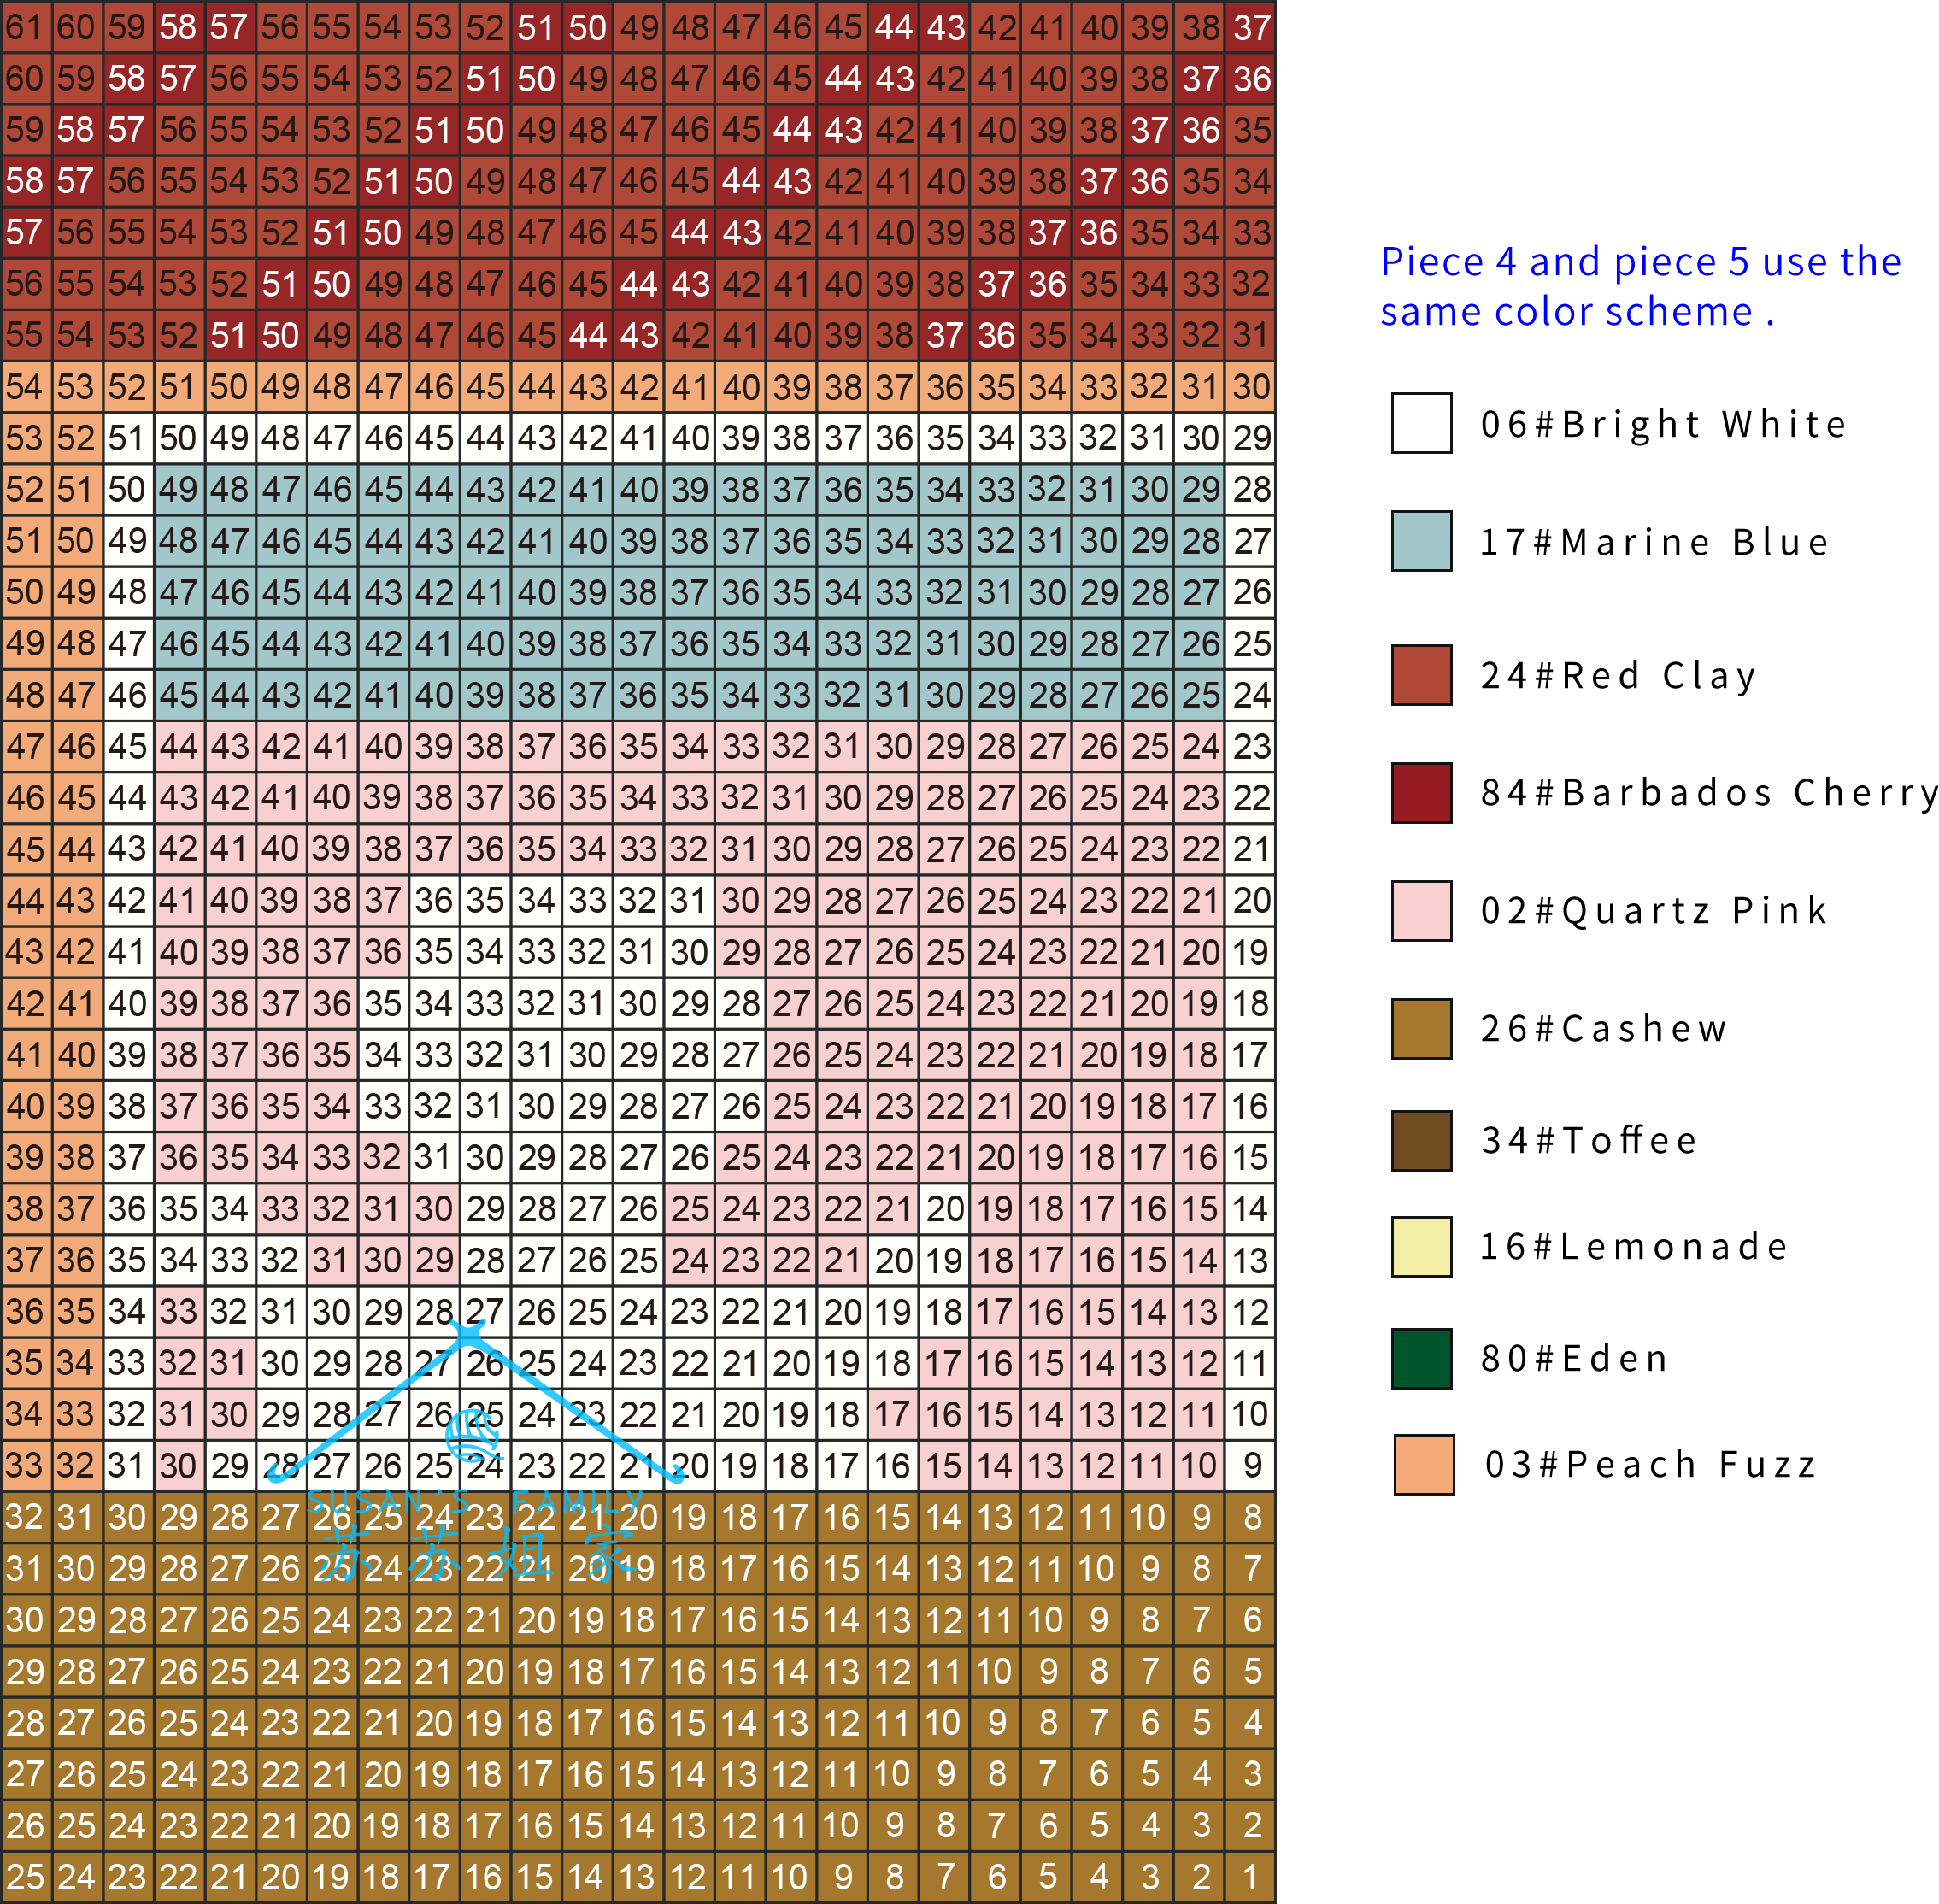
Piece 5
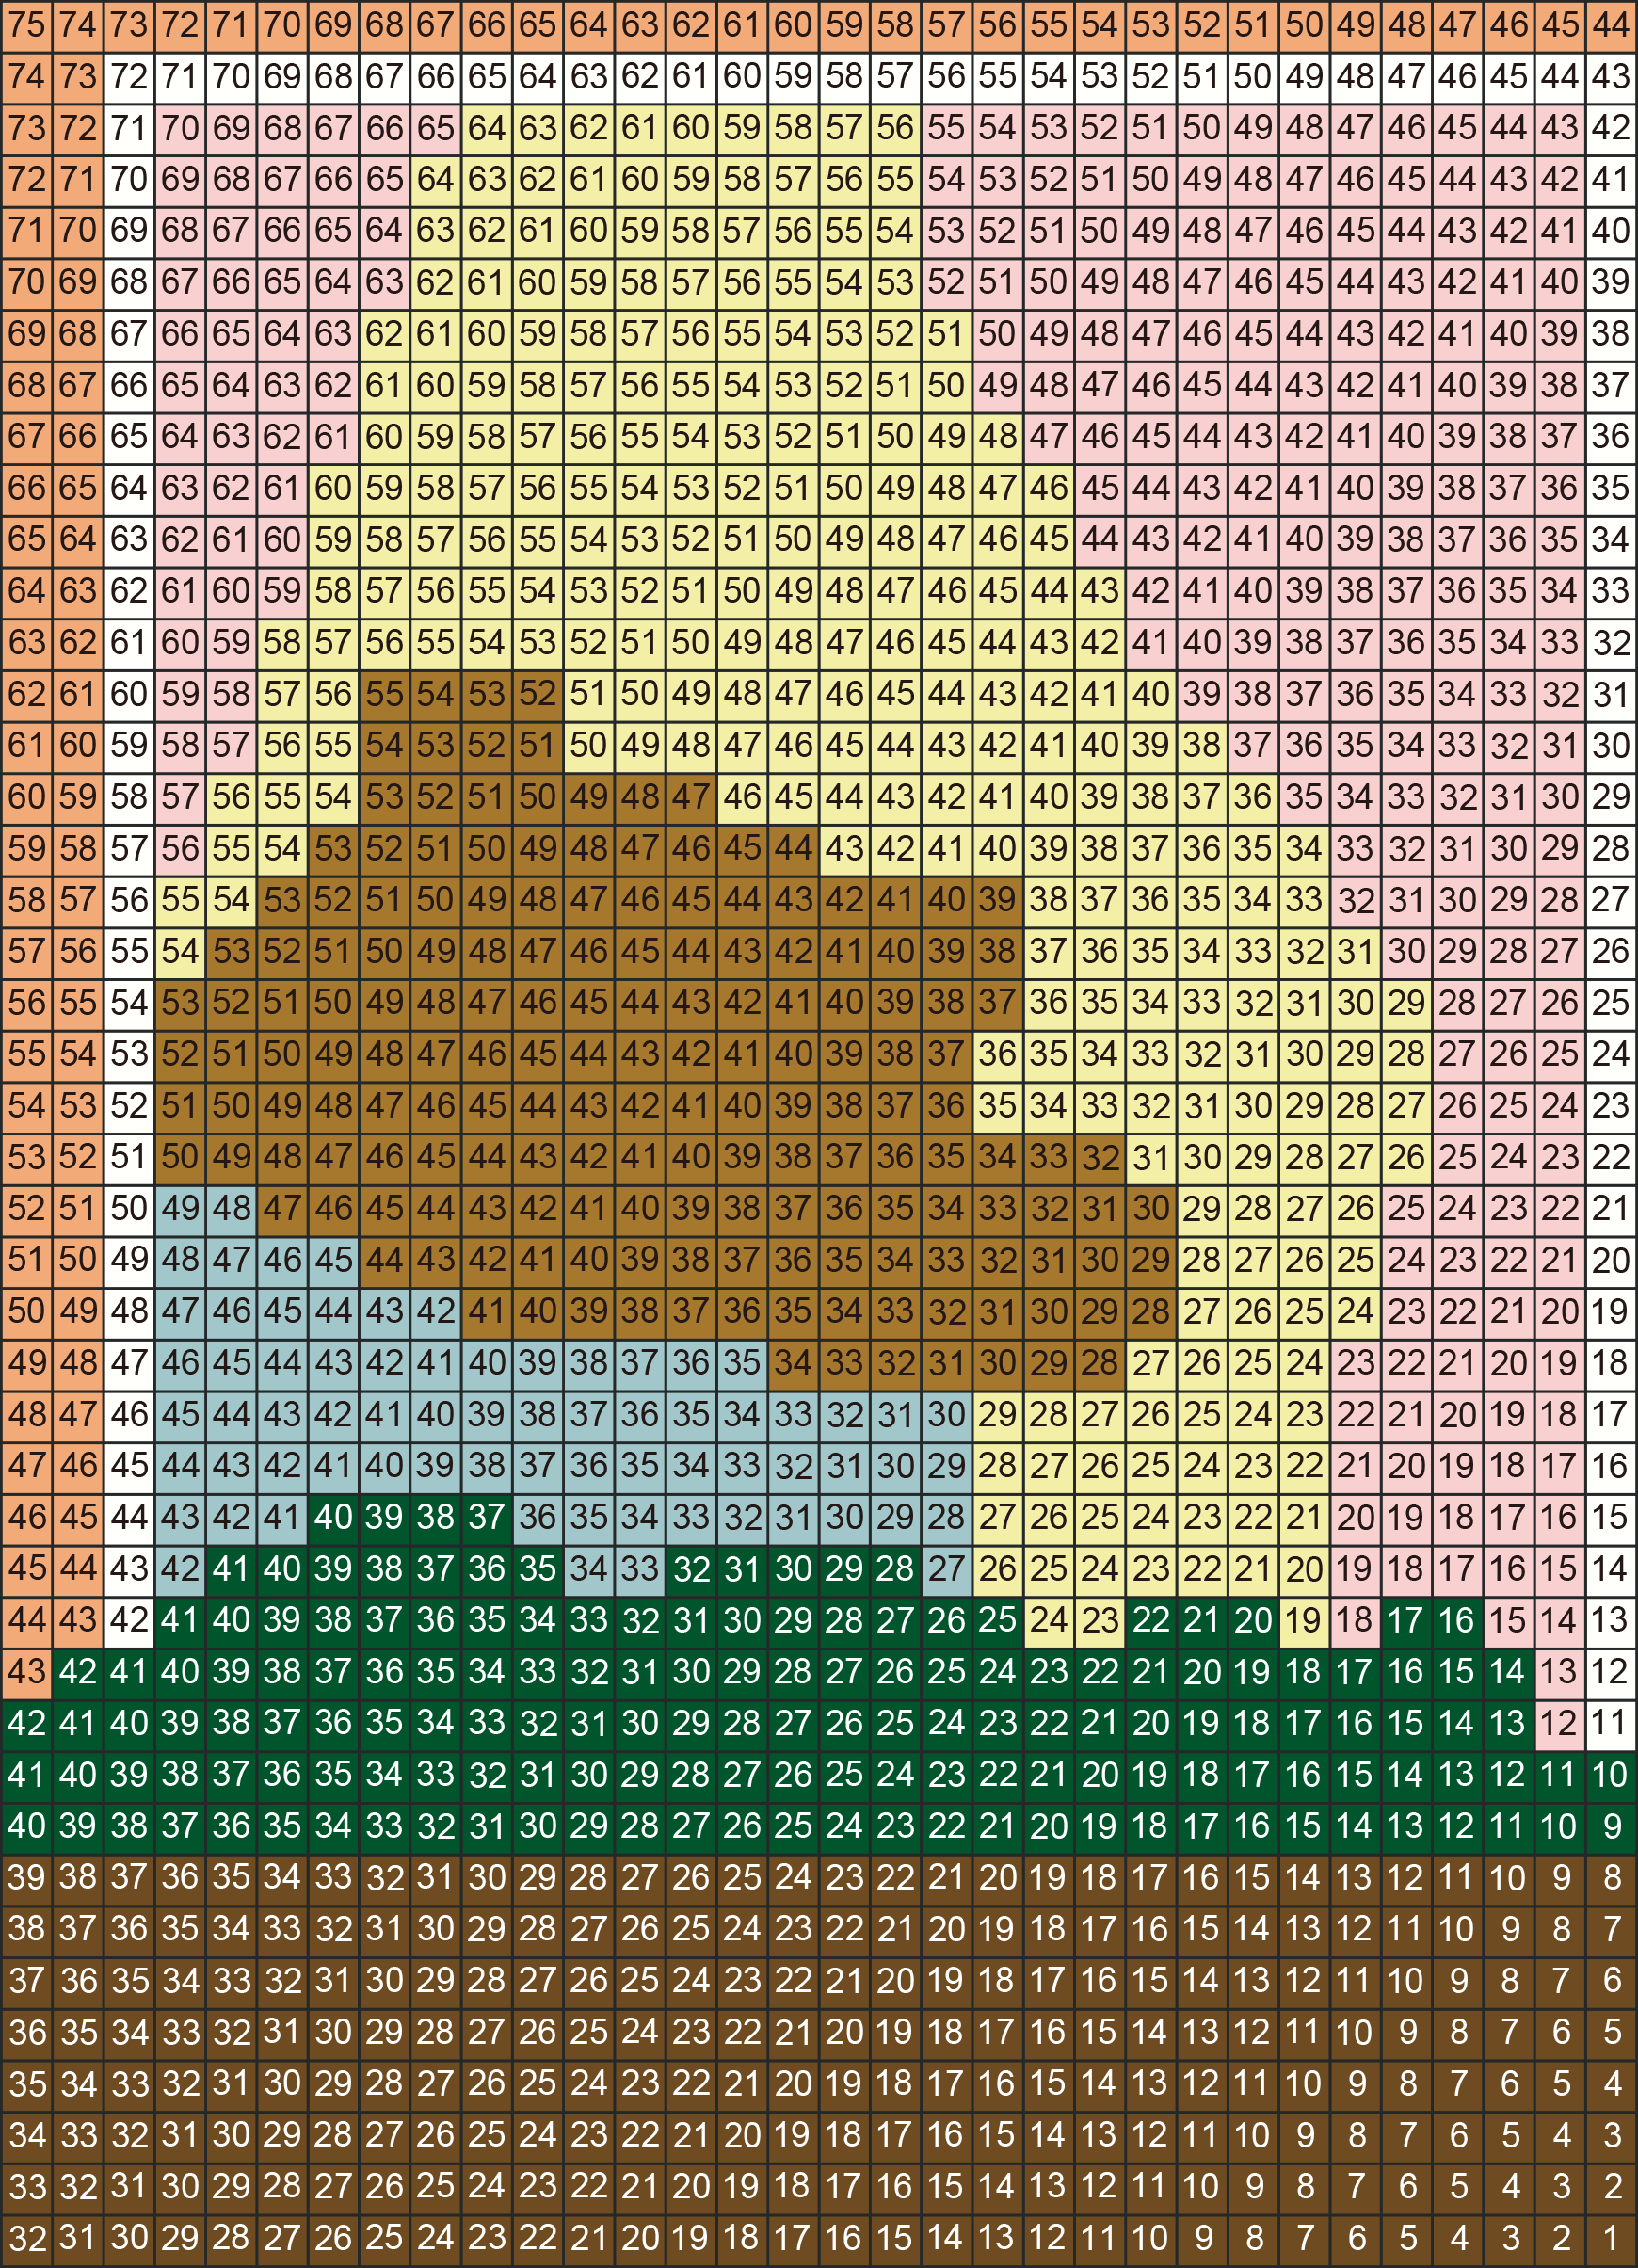
Piece 6
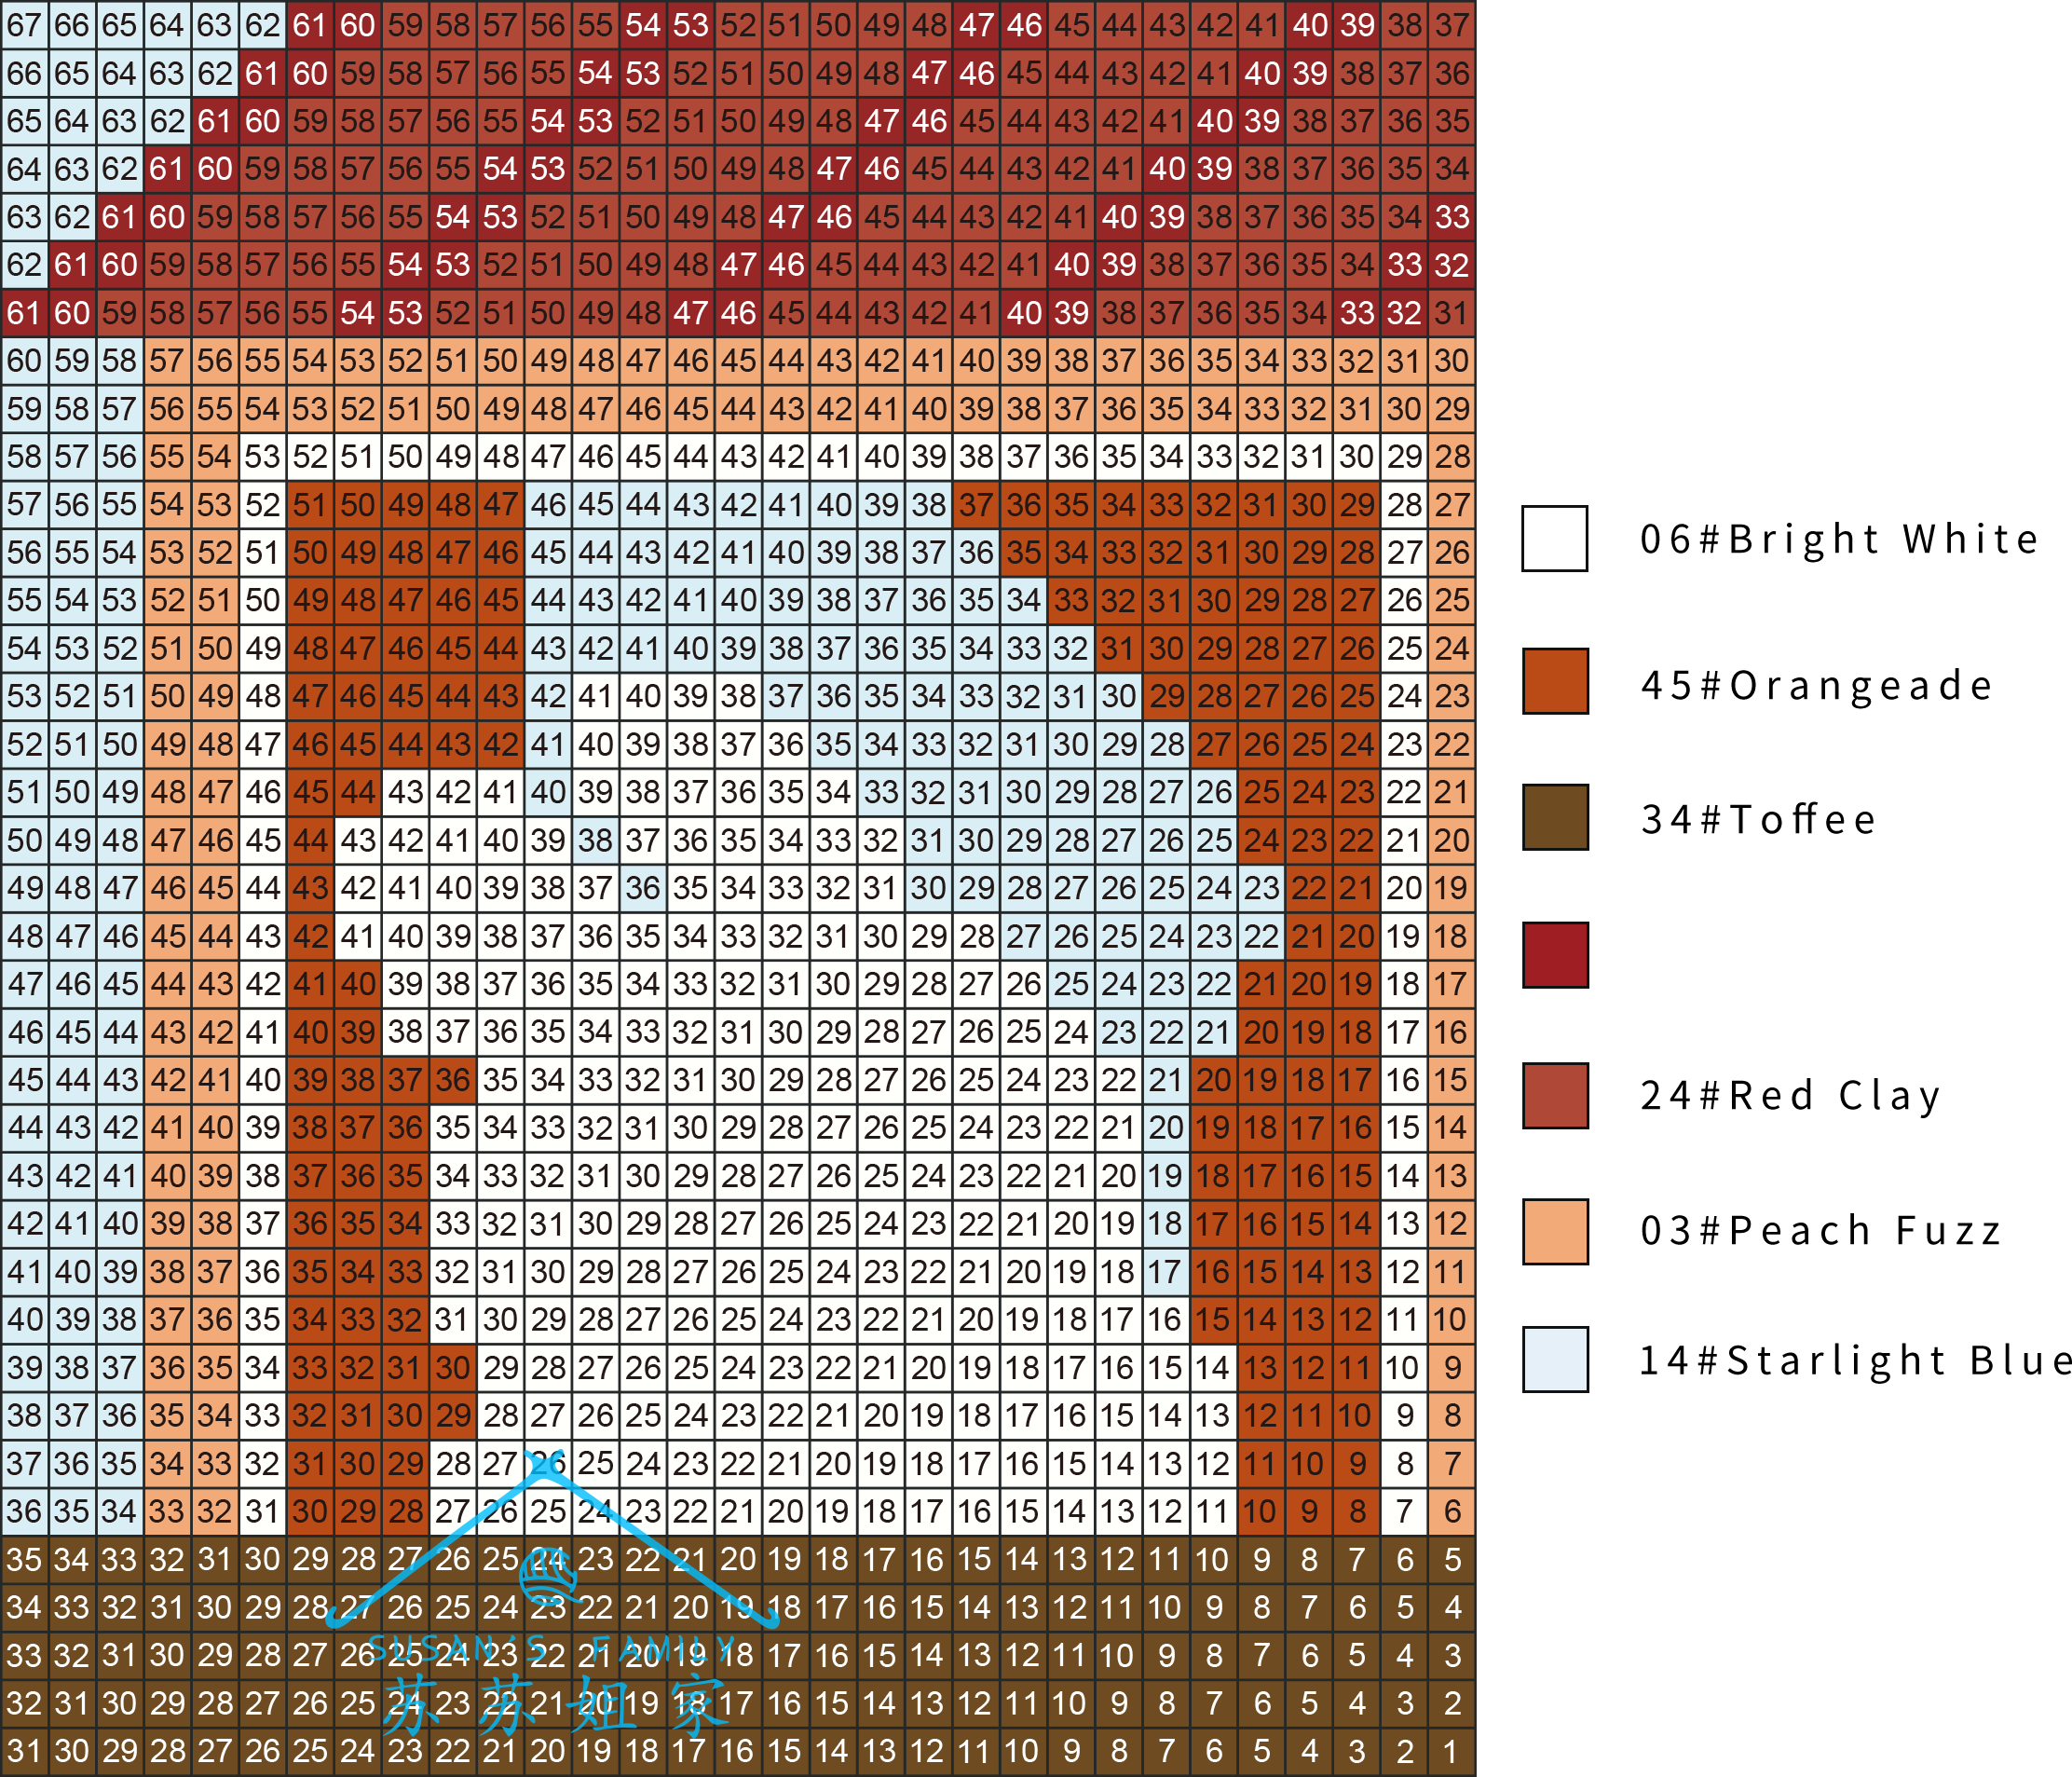
Piece 7
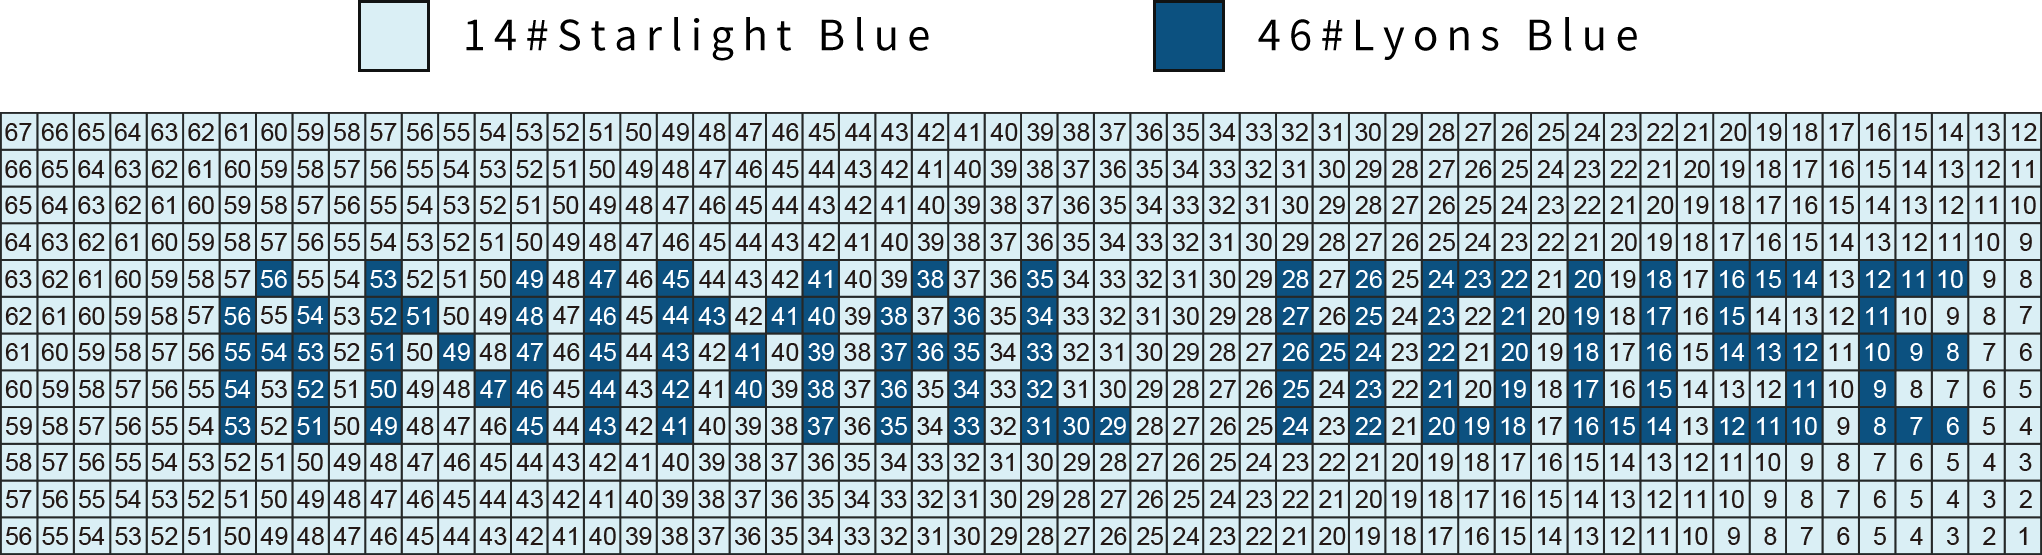
STEP2 Connect the piecesA2 28' 25'' (Part 1)
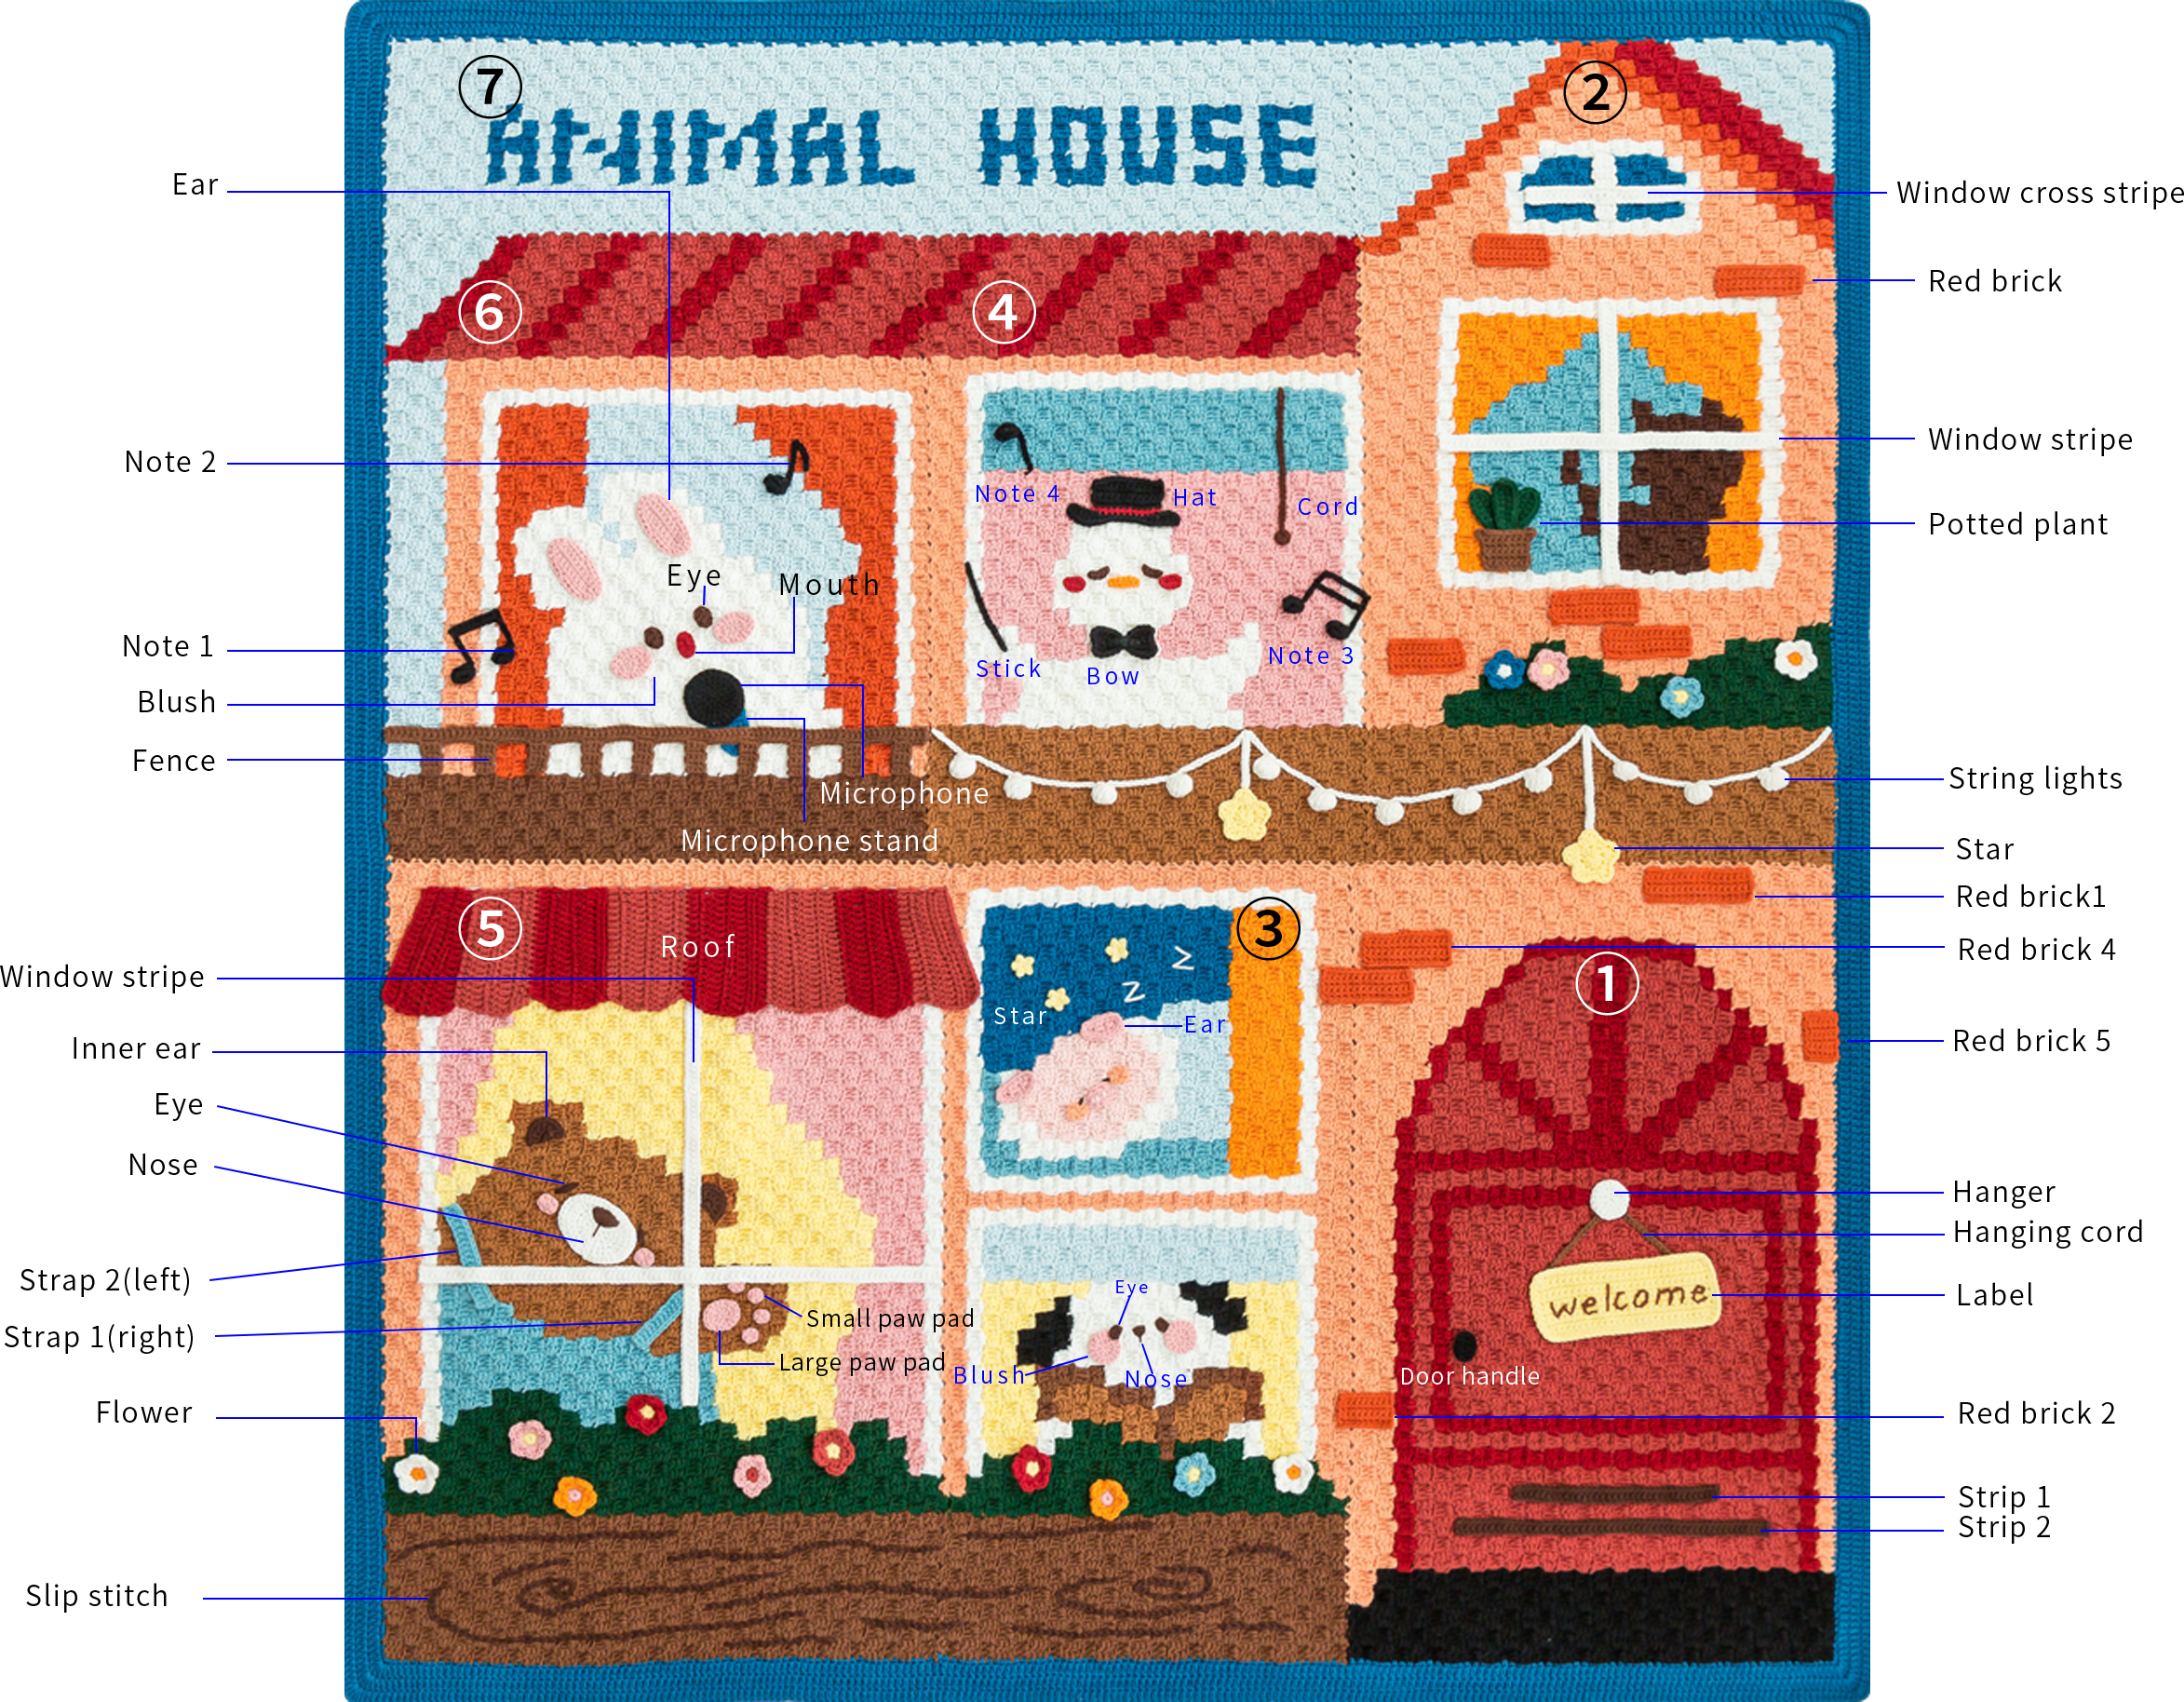
Once all the pieces are complete, start by referring to the finished product and the chart for the placement sequence. Arrange the pieces accordingly, then connect them from bottom-up and from right to left, following the order indicated.Please refer to the video demonstration for more details.
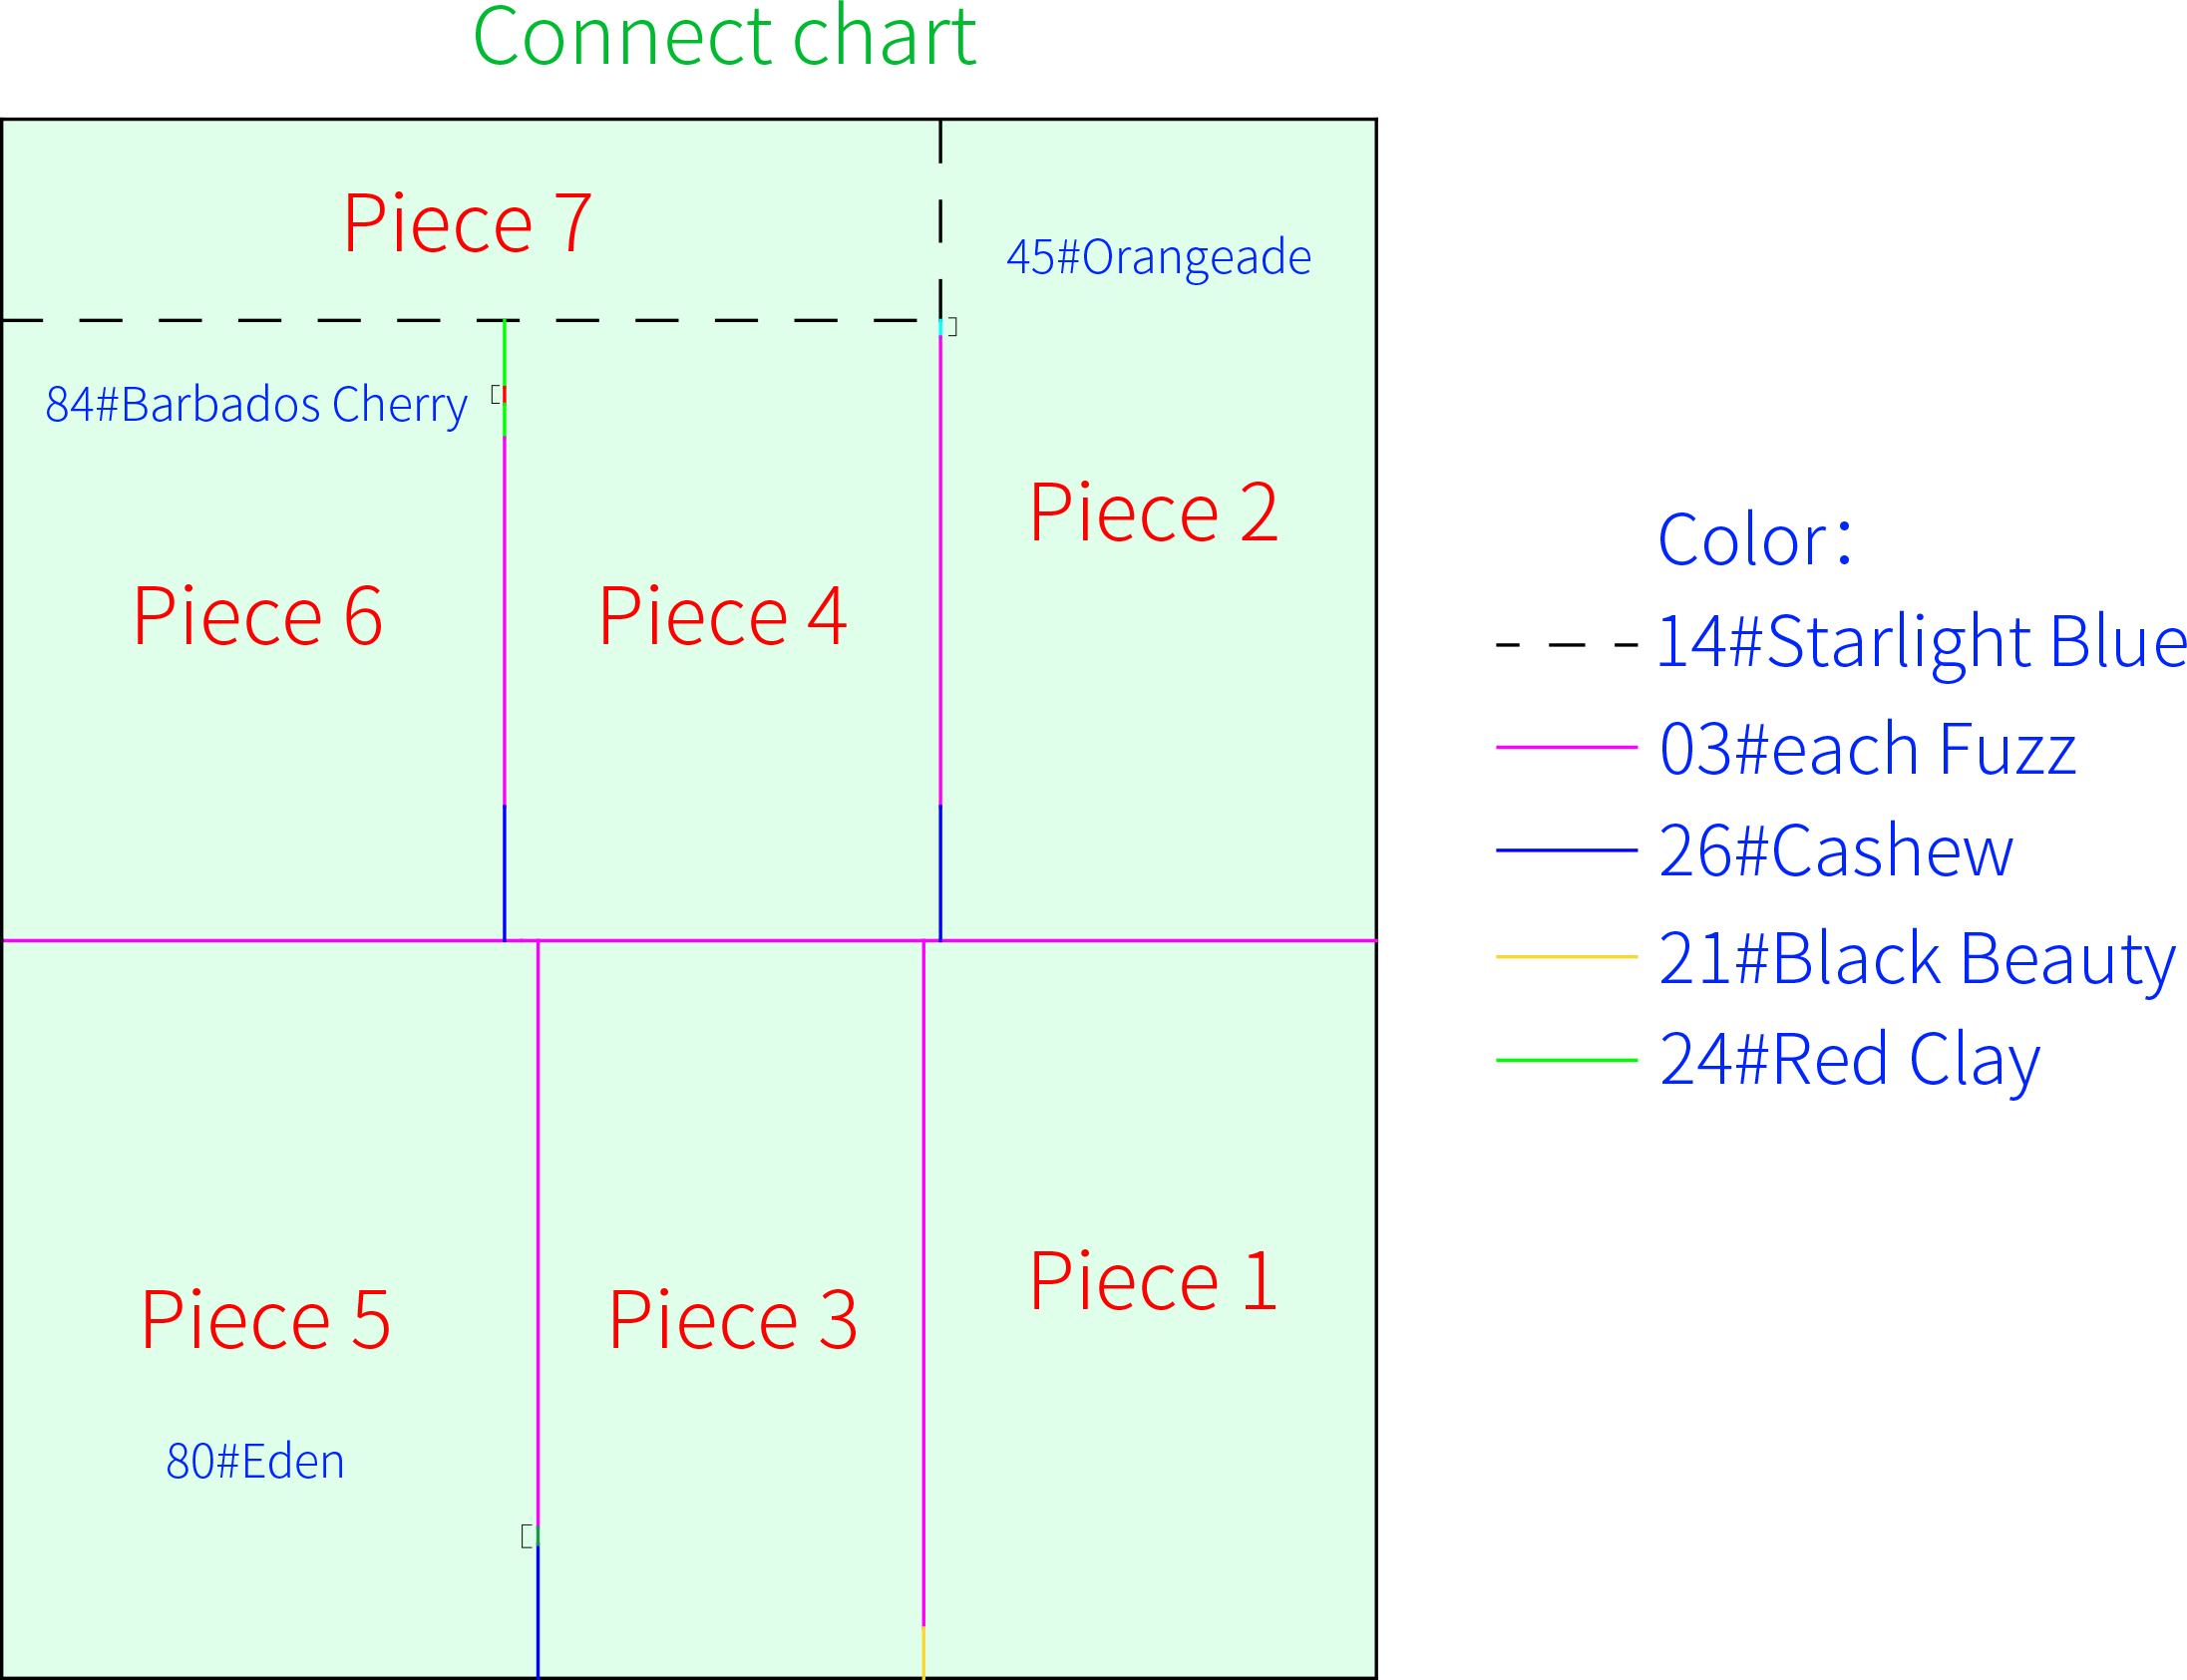
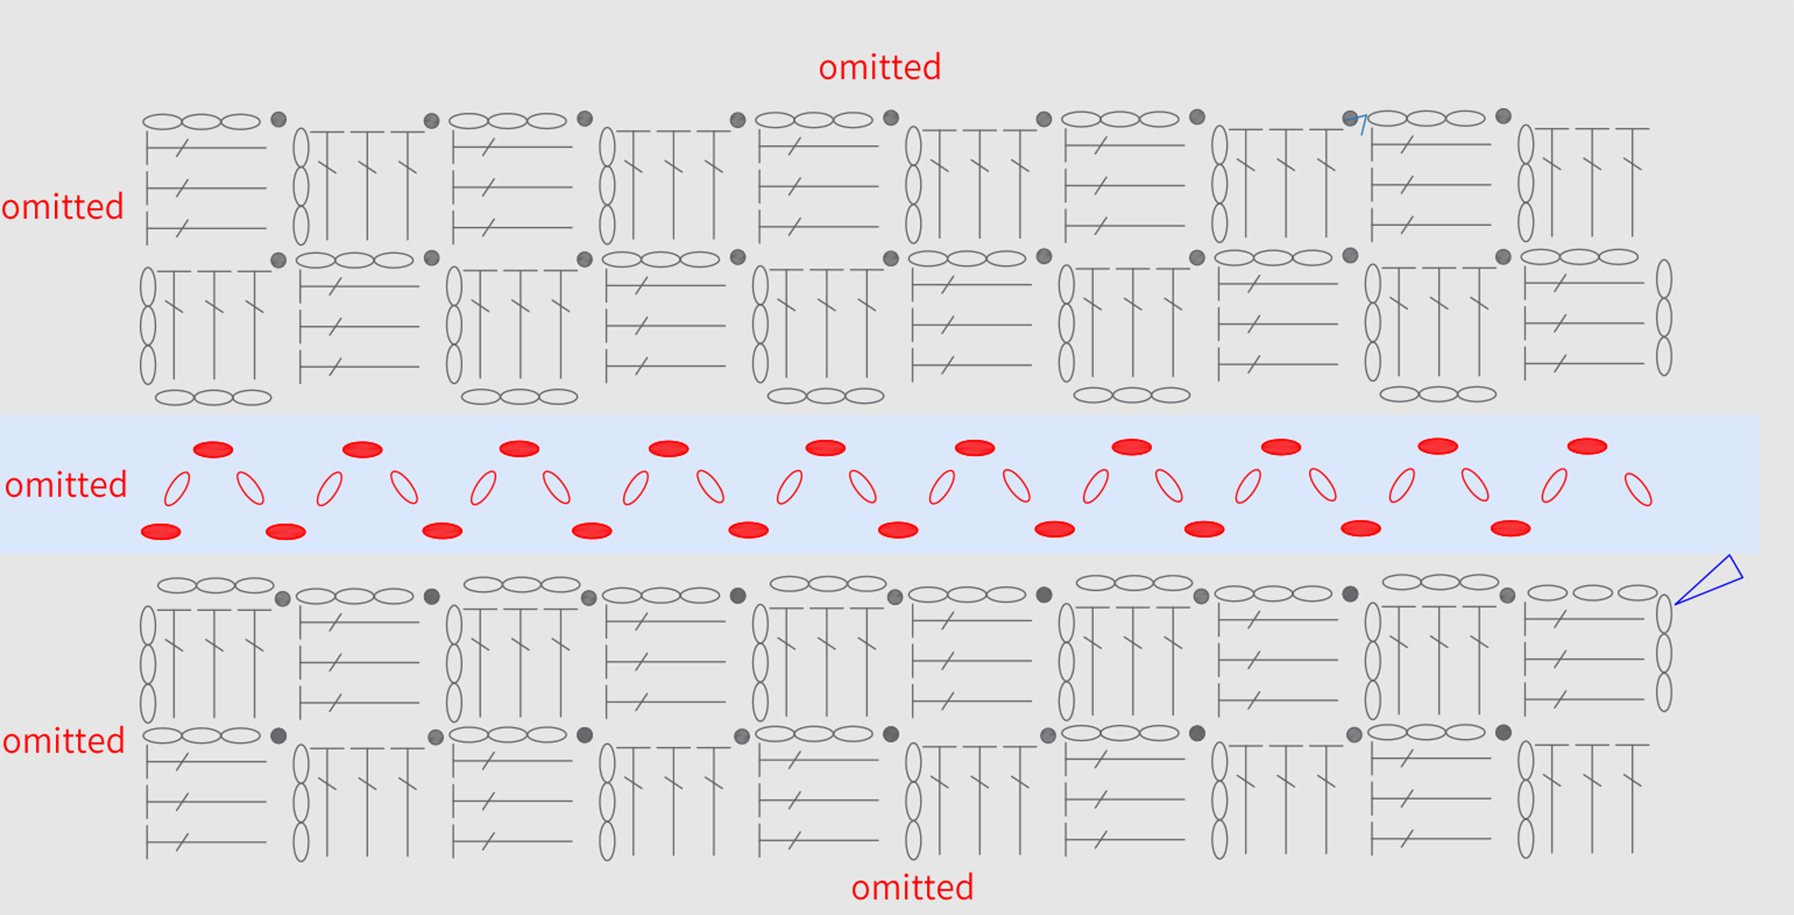
connecting method
STEP3 EdgingA3 38' 20'' (Part 1)
After connecting,edging around the blanket.Please refer to the video demonstration for more details.
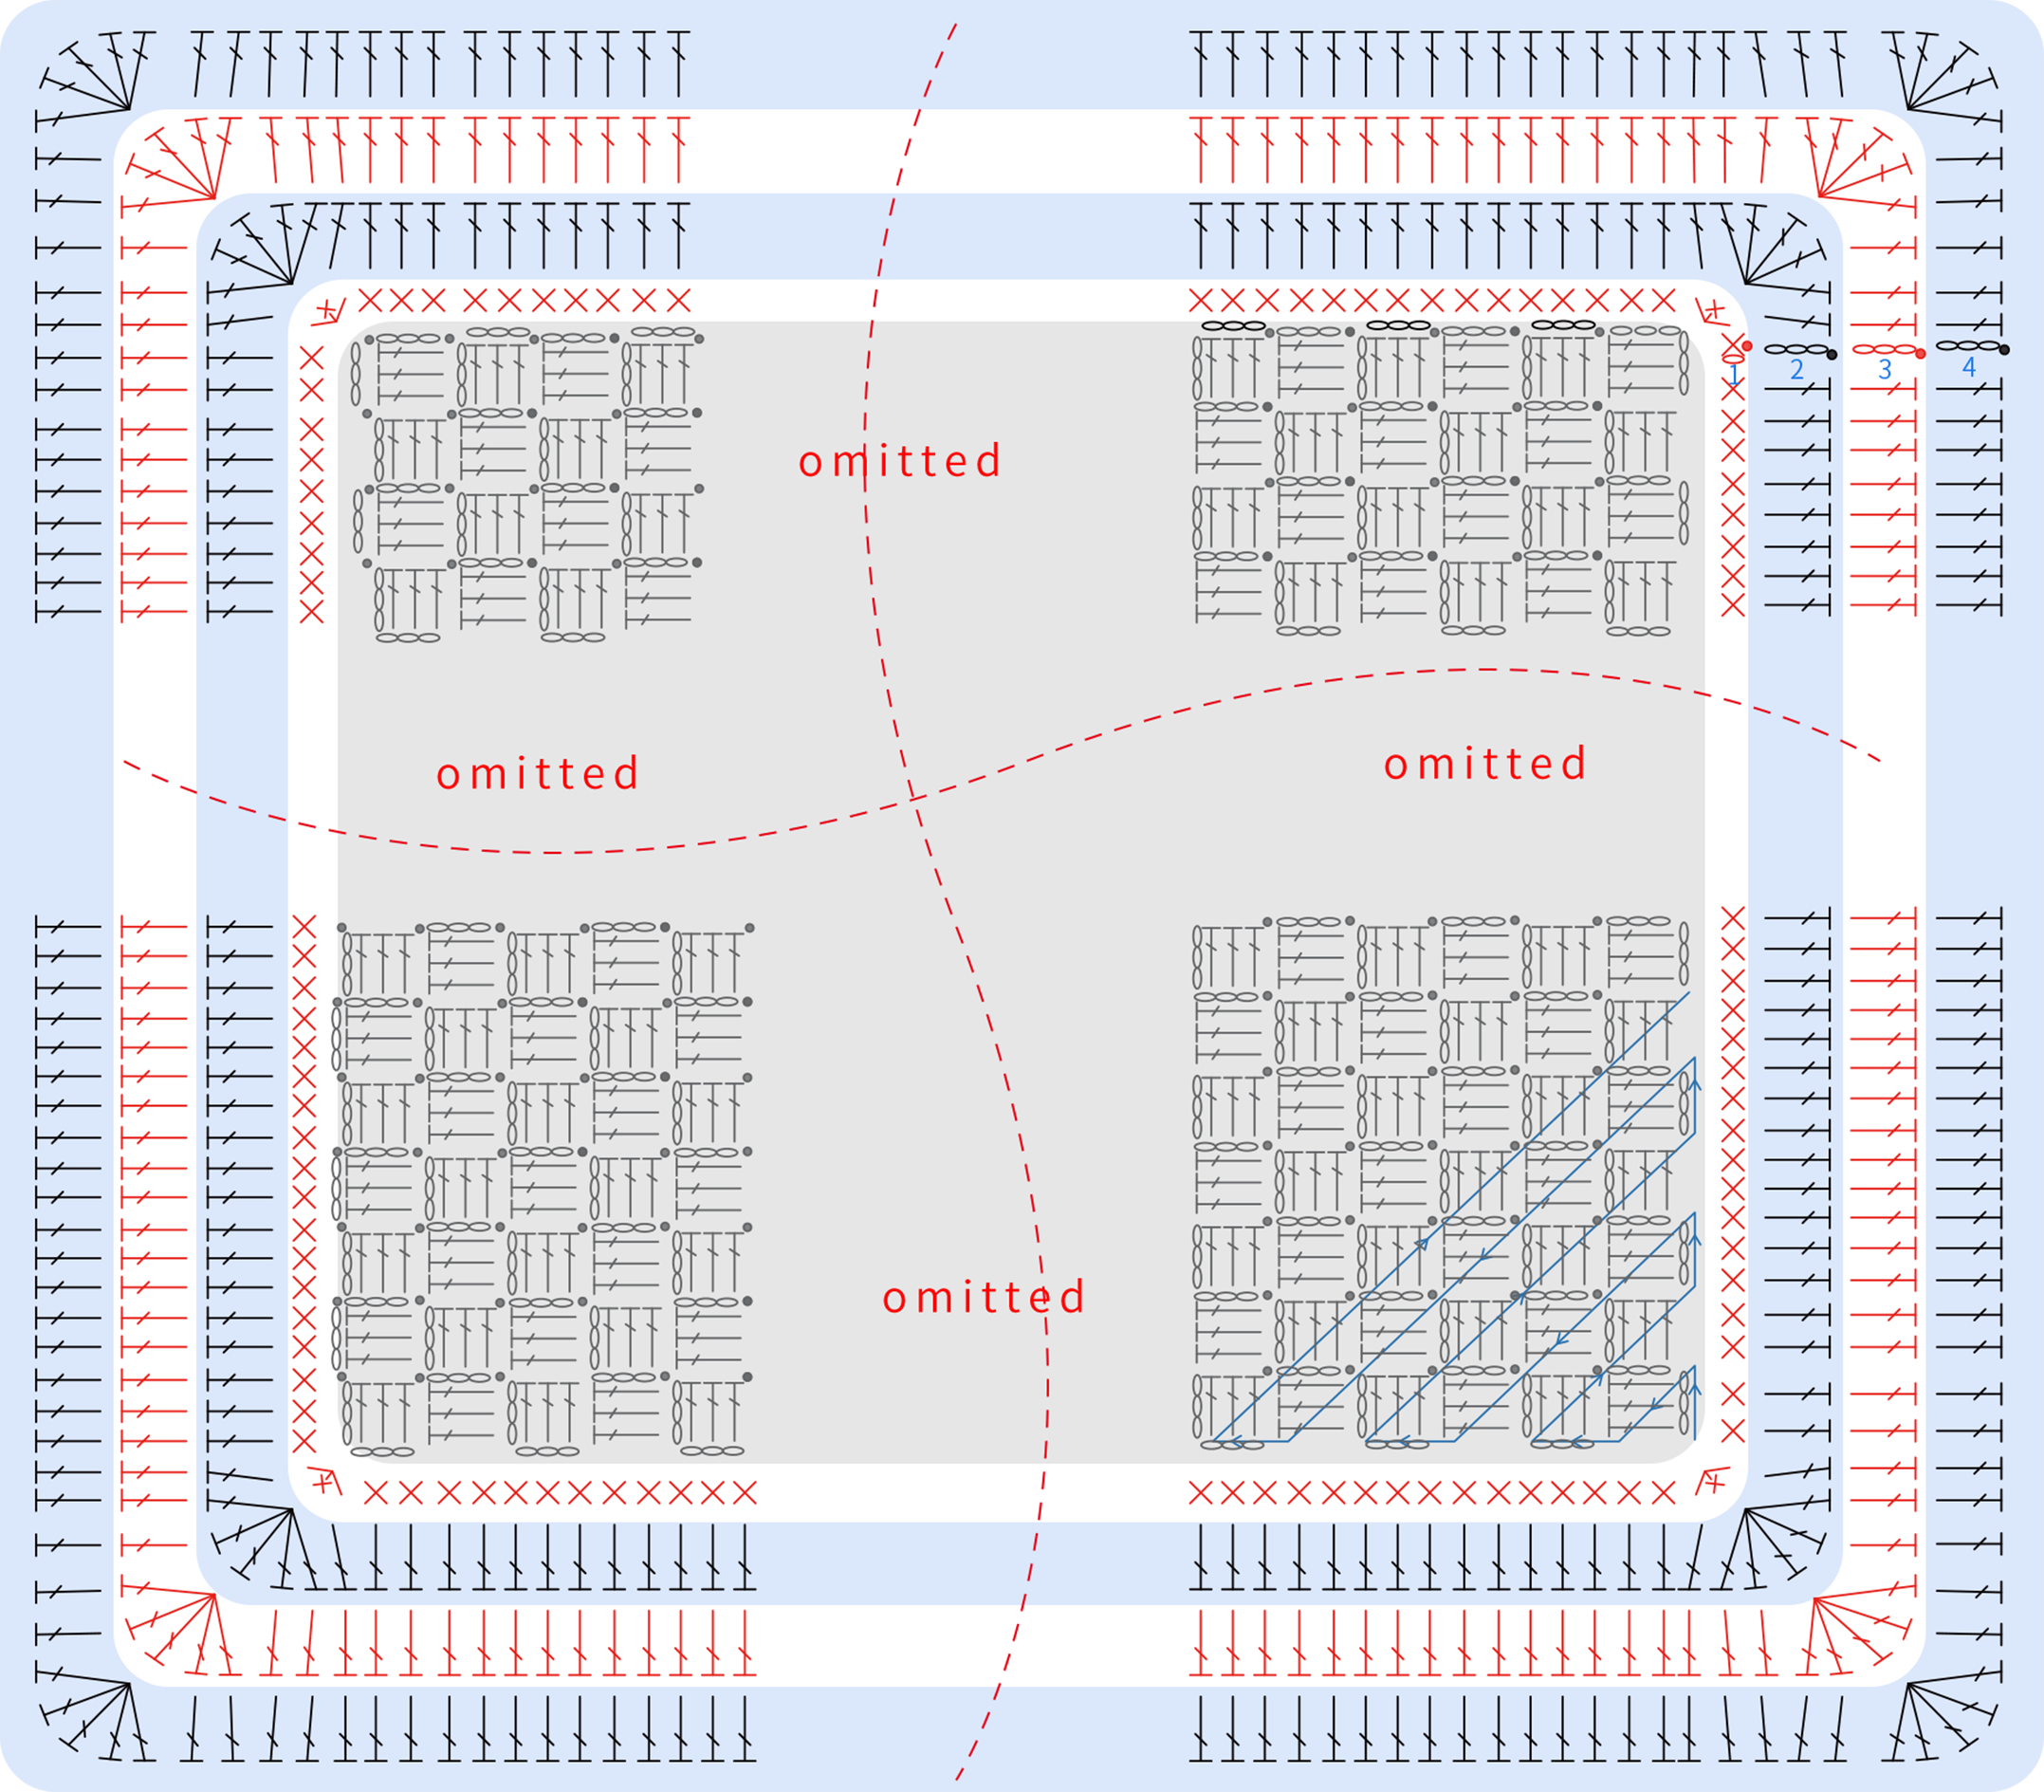
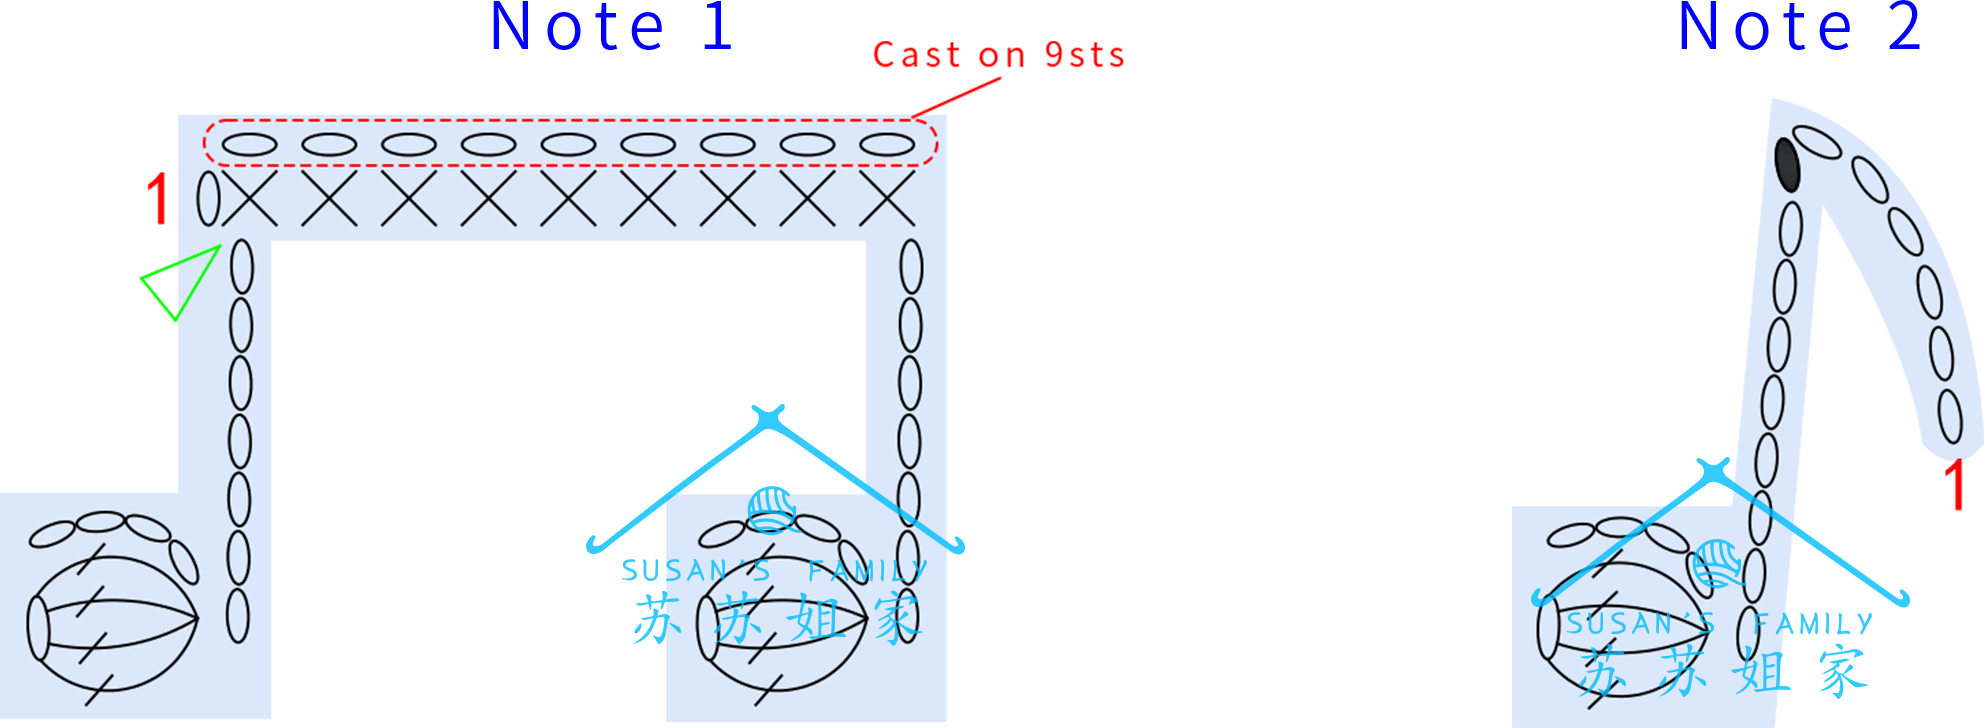
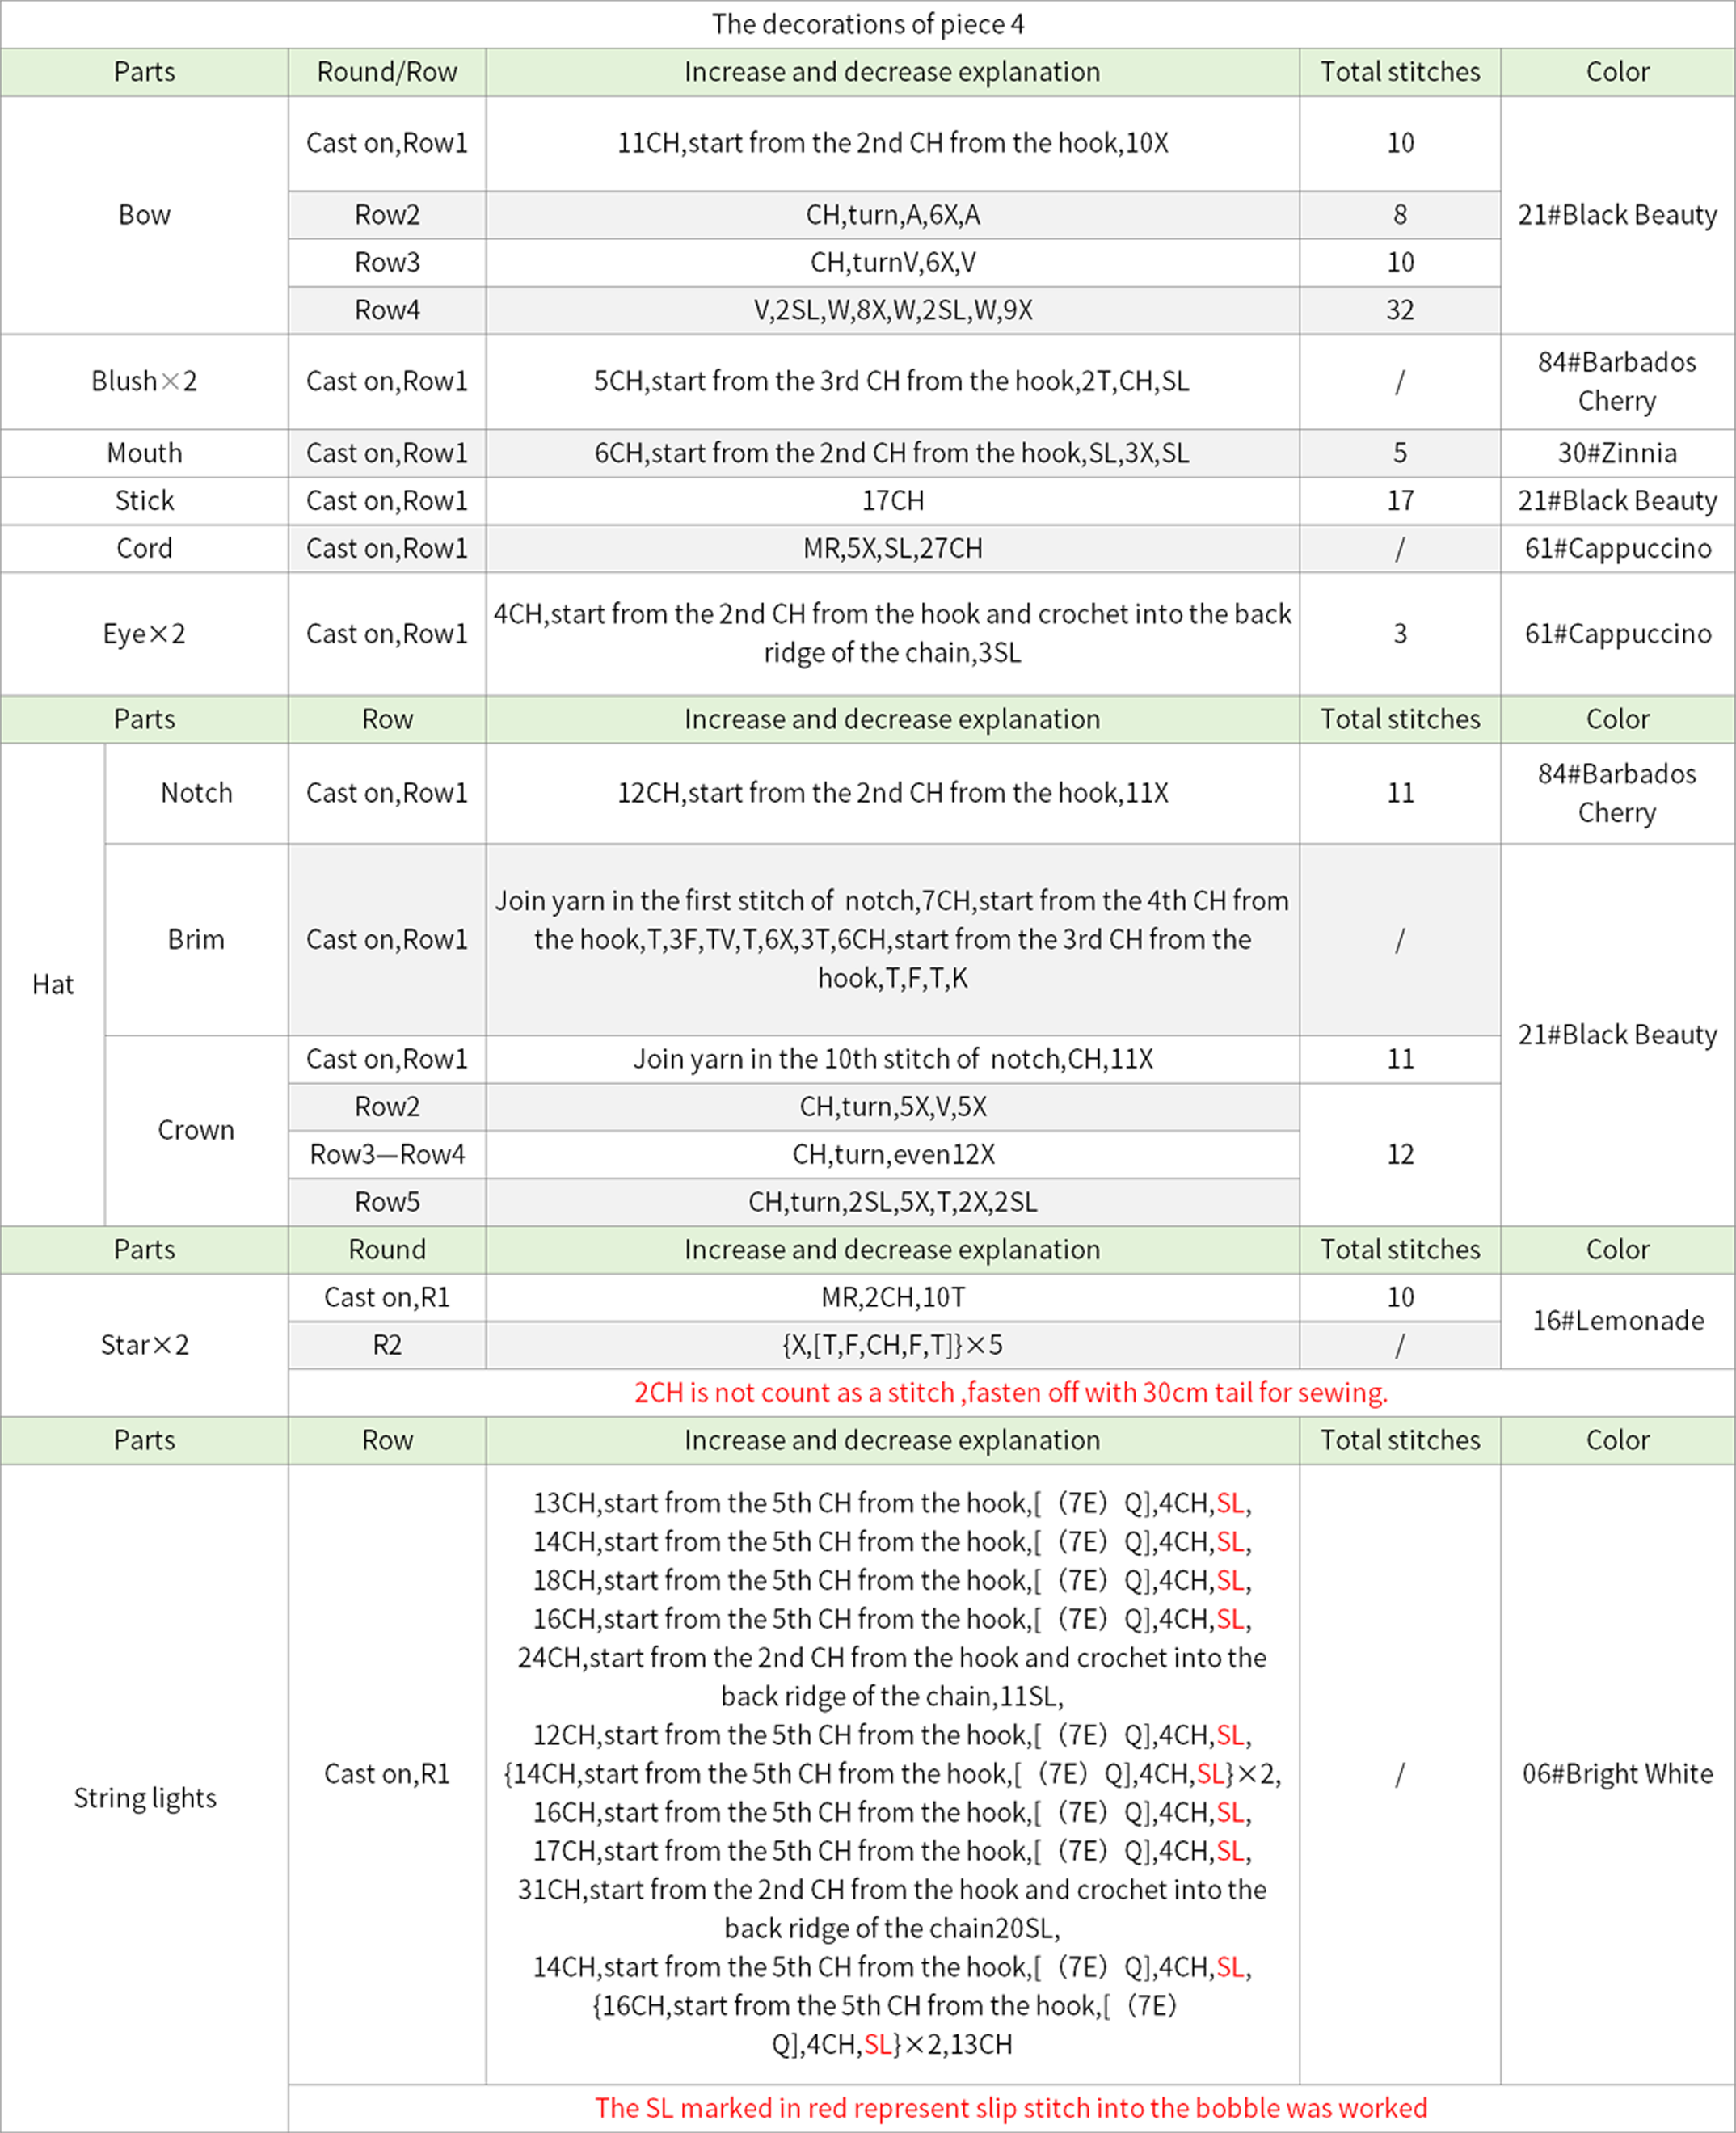
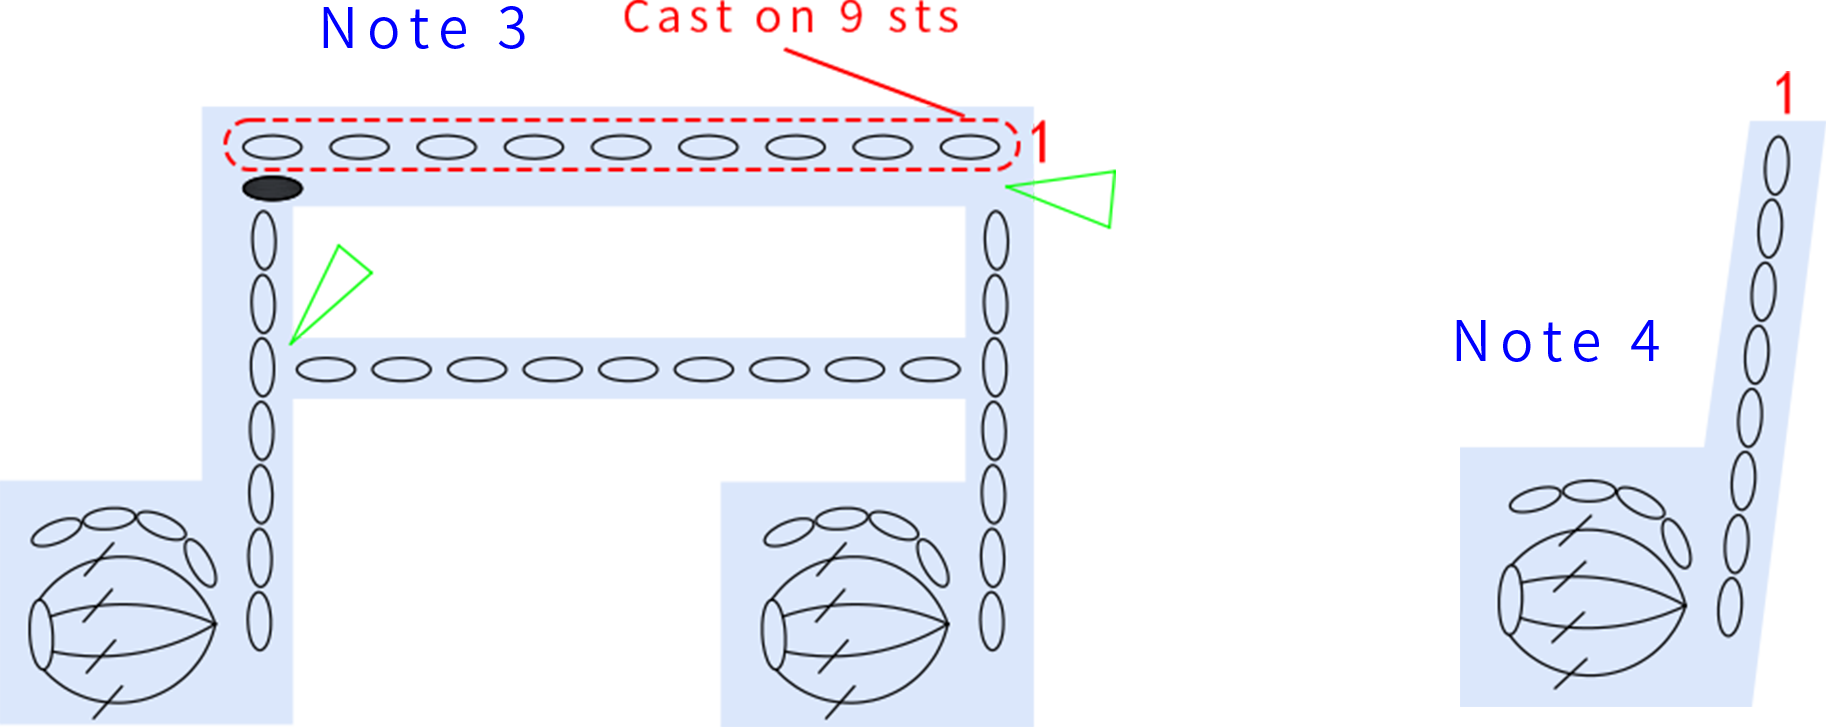
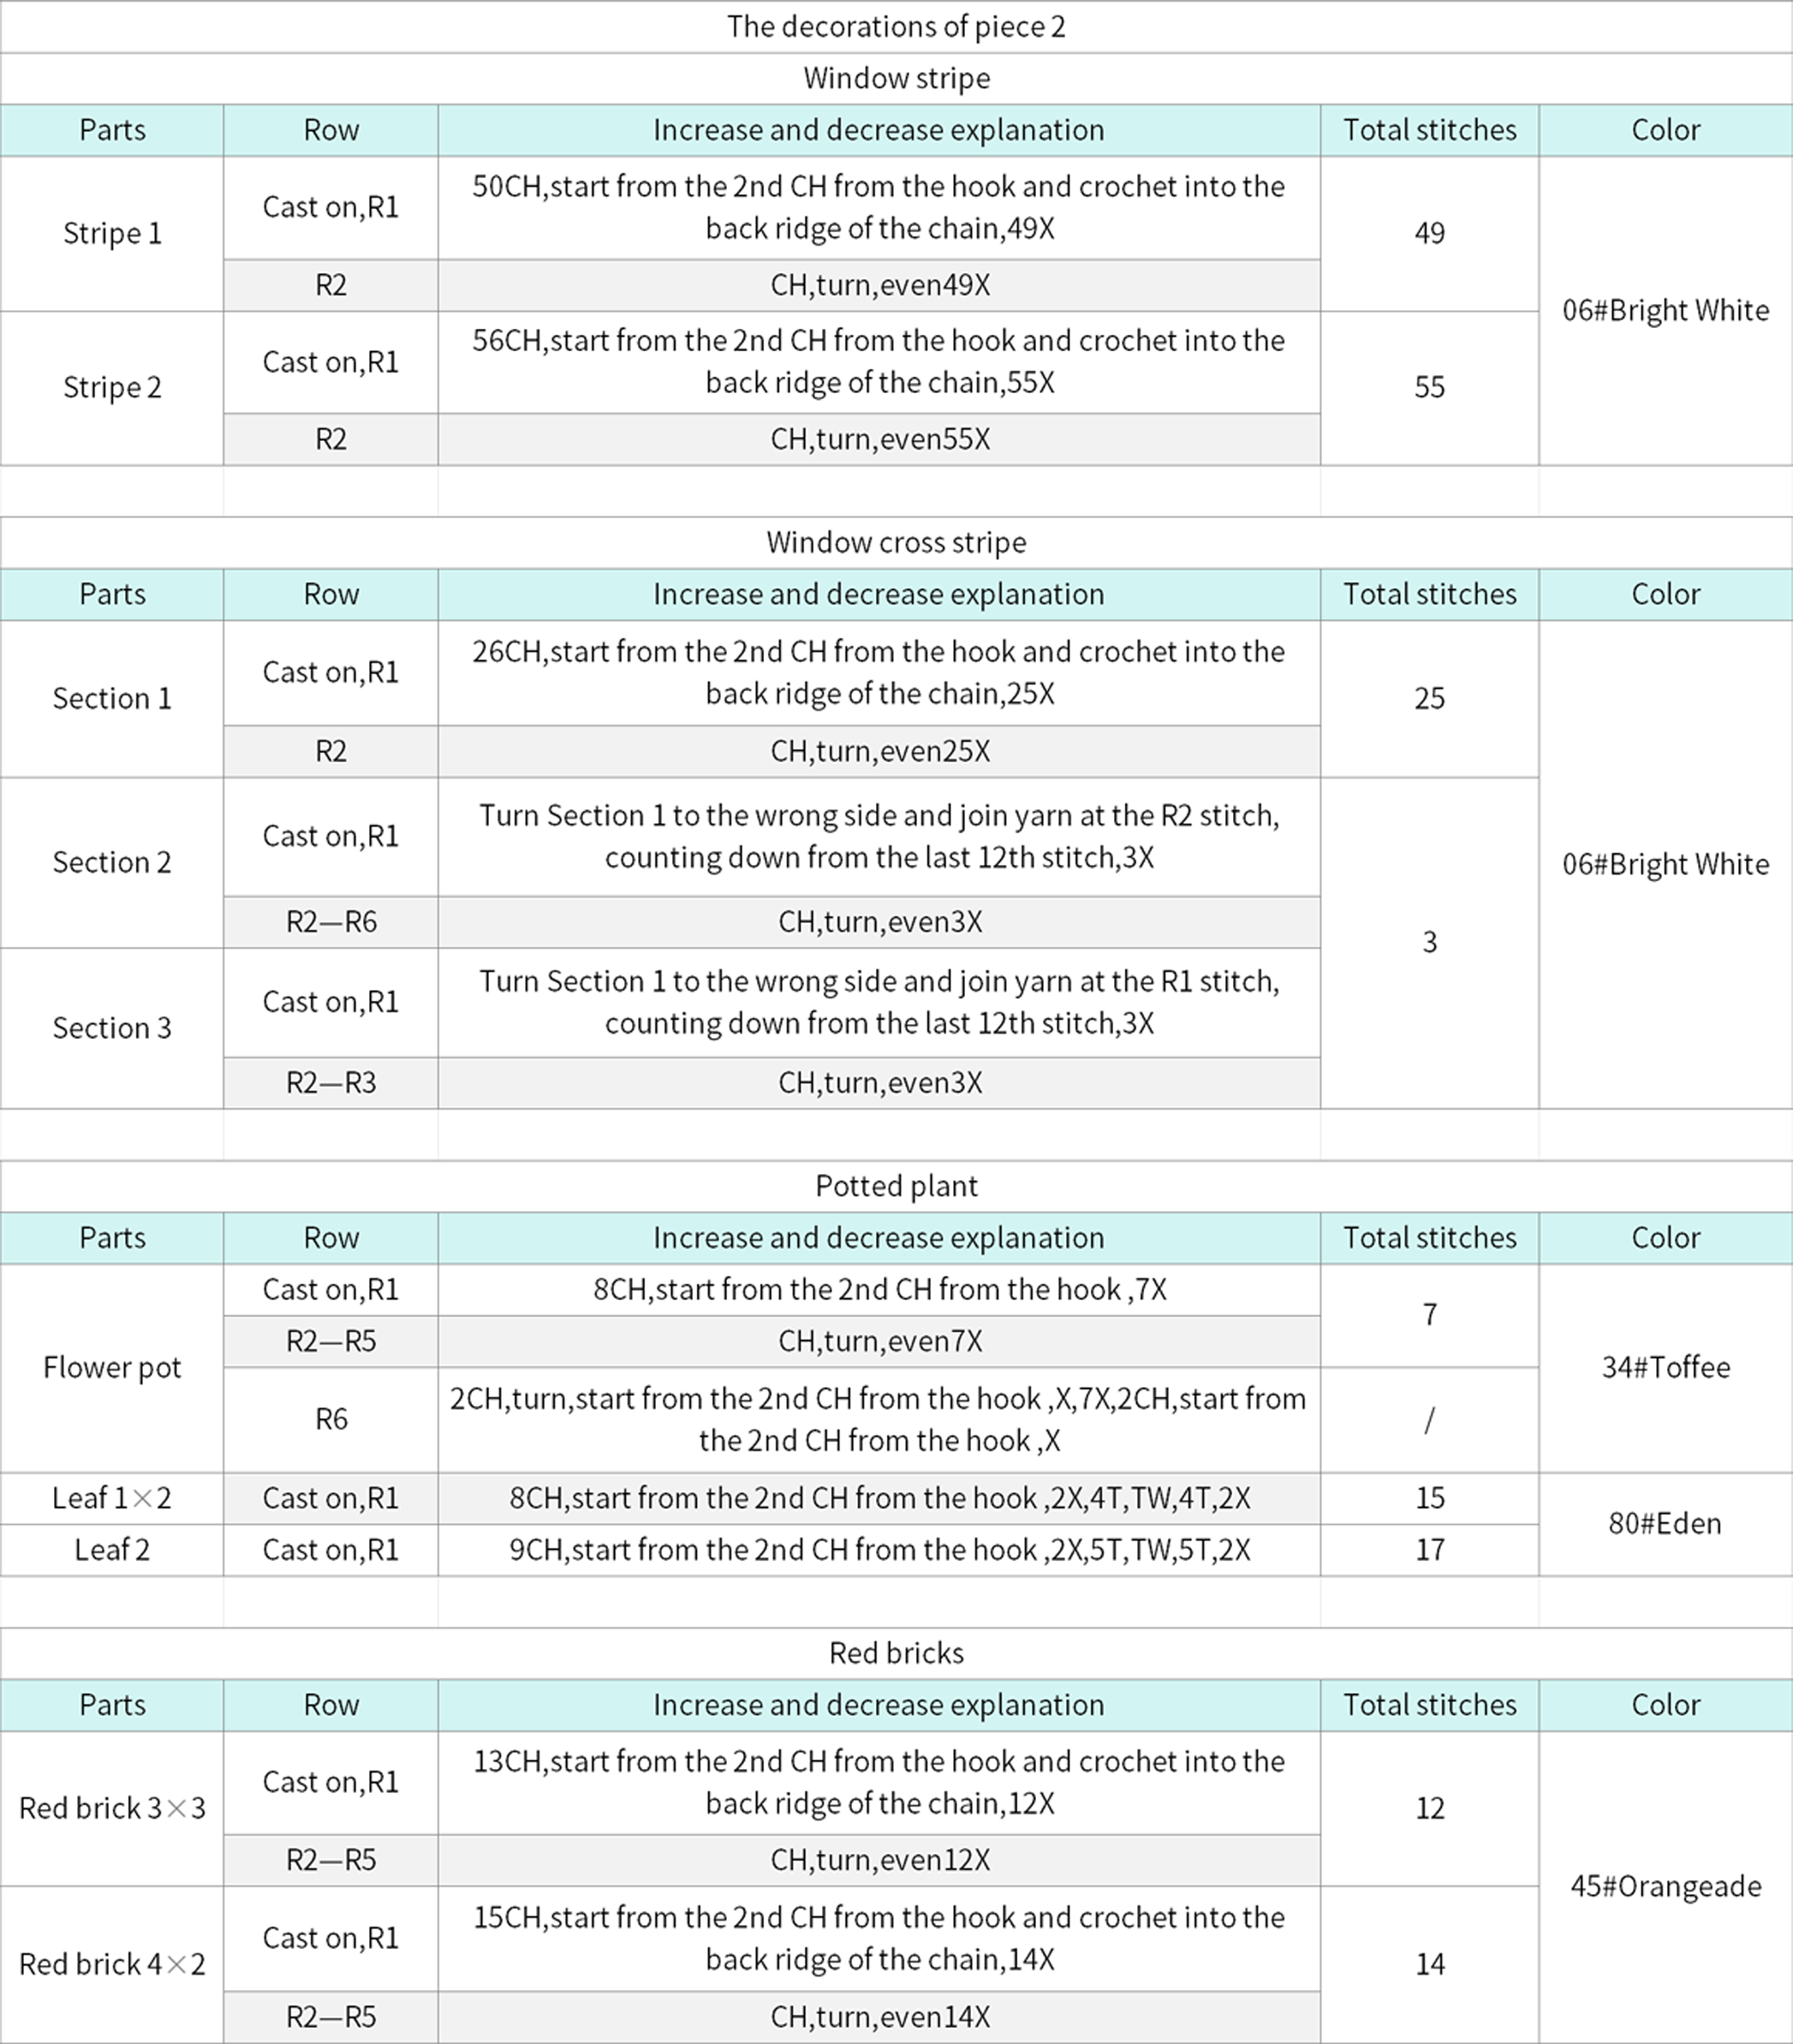
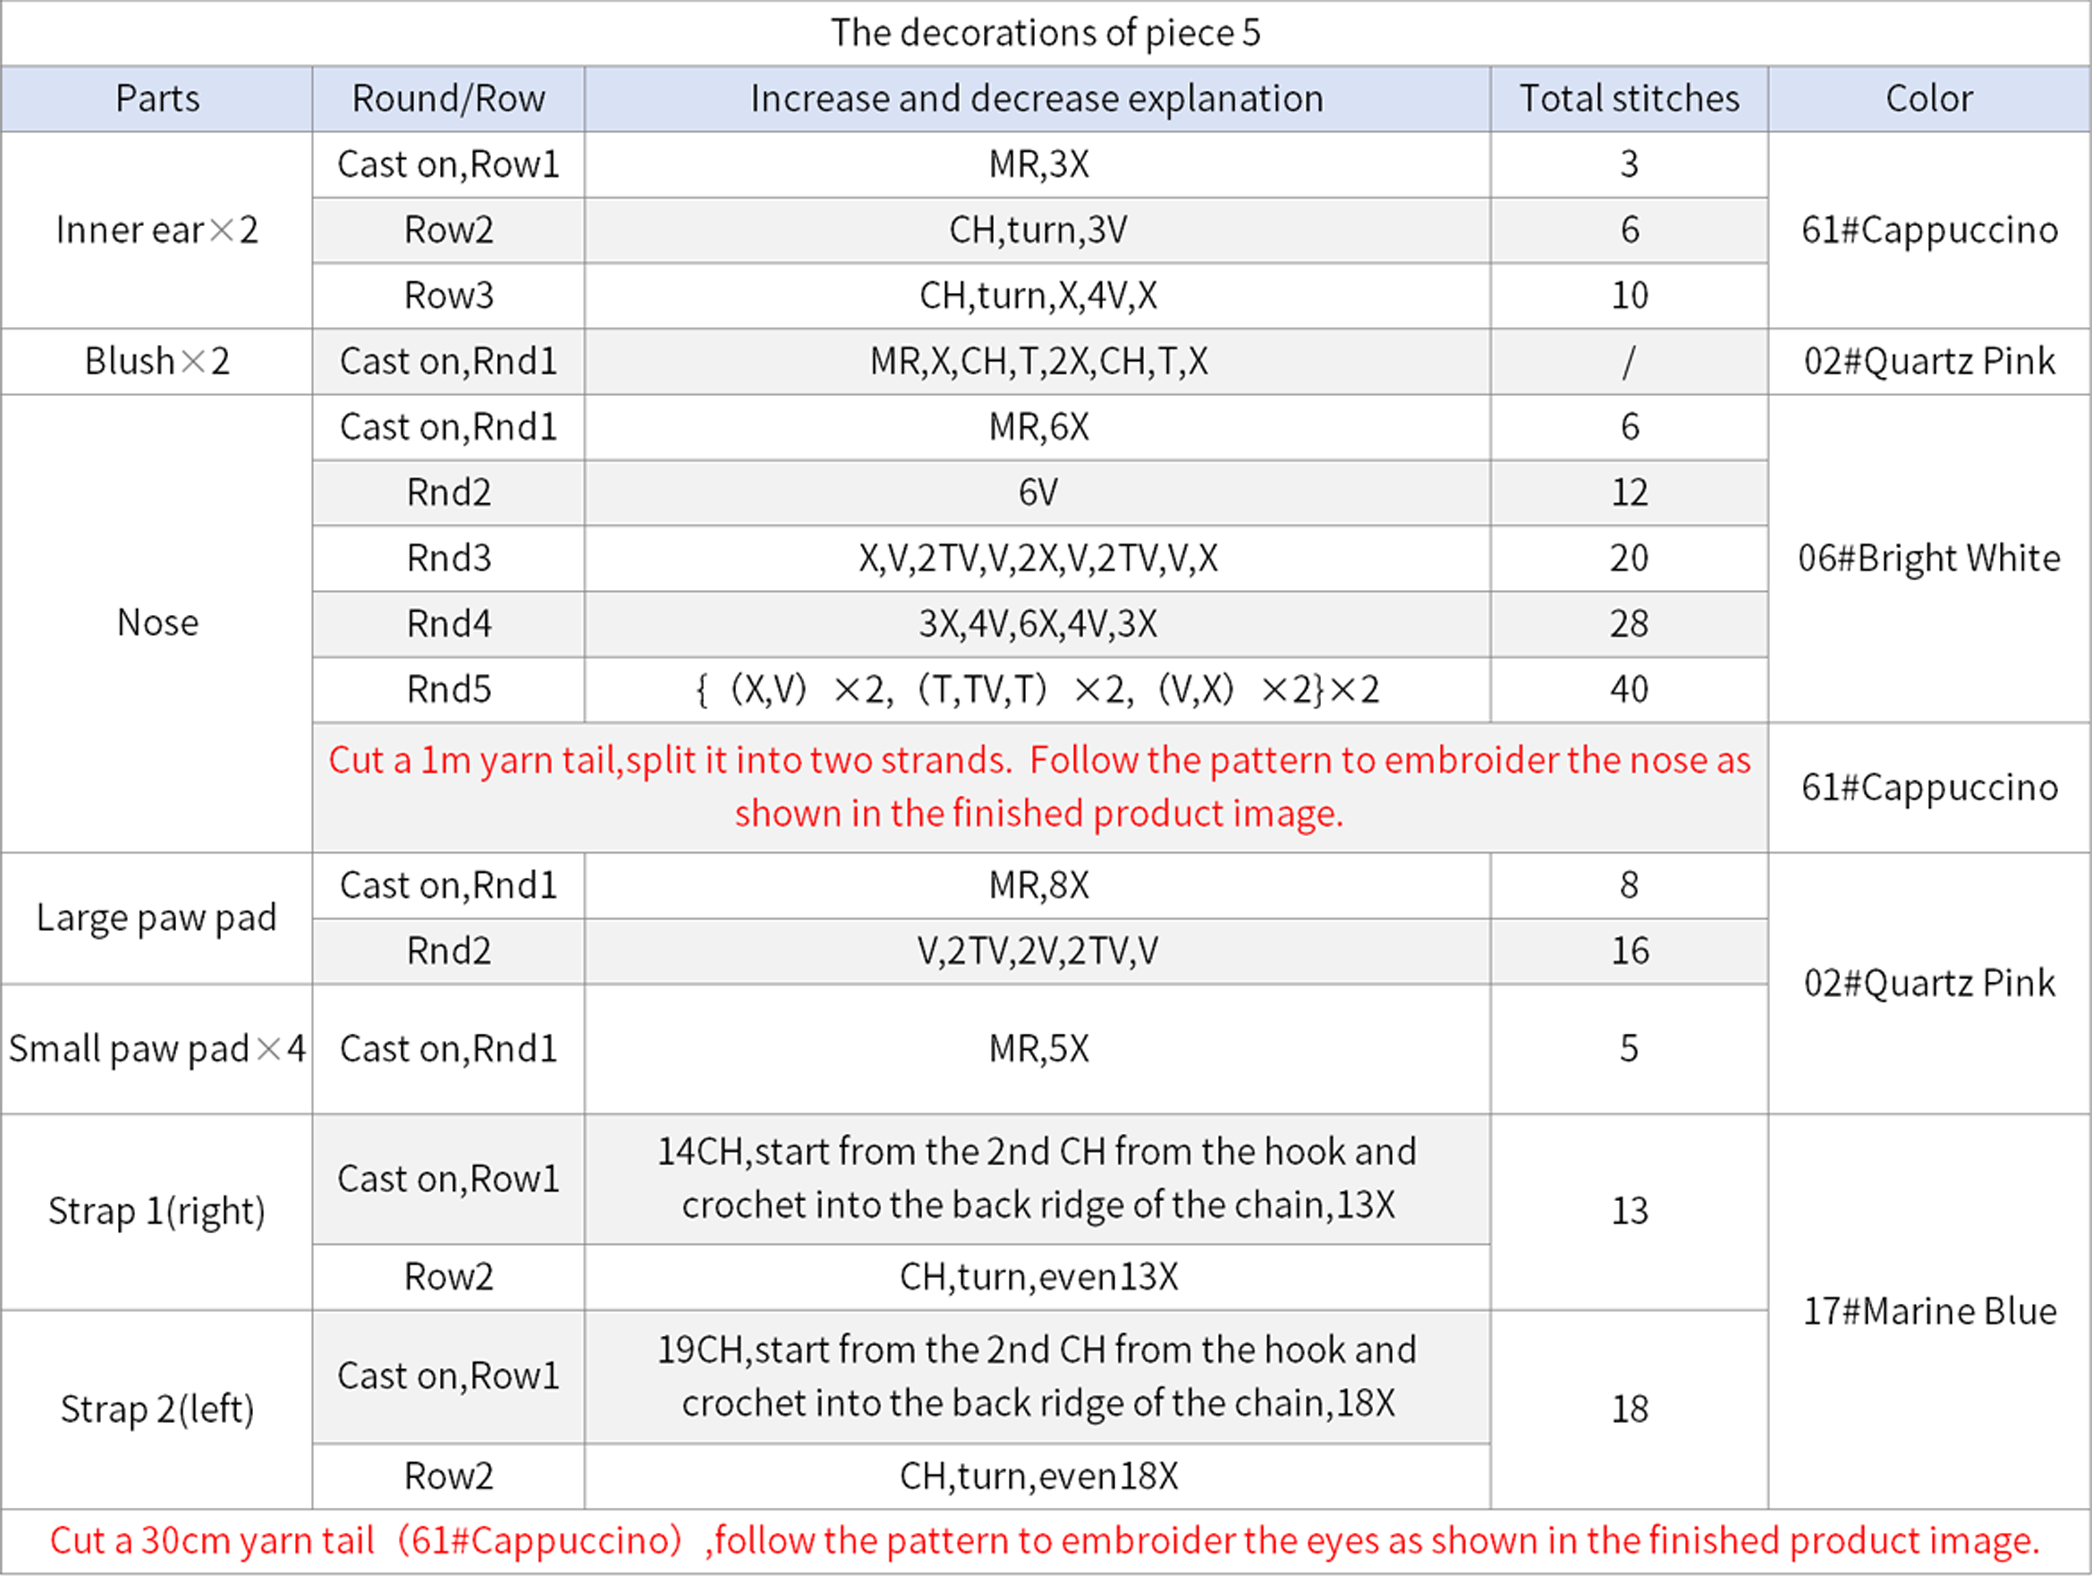
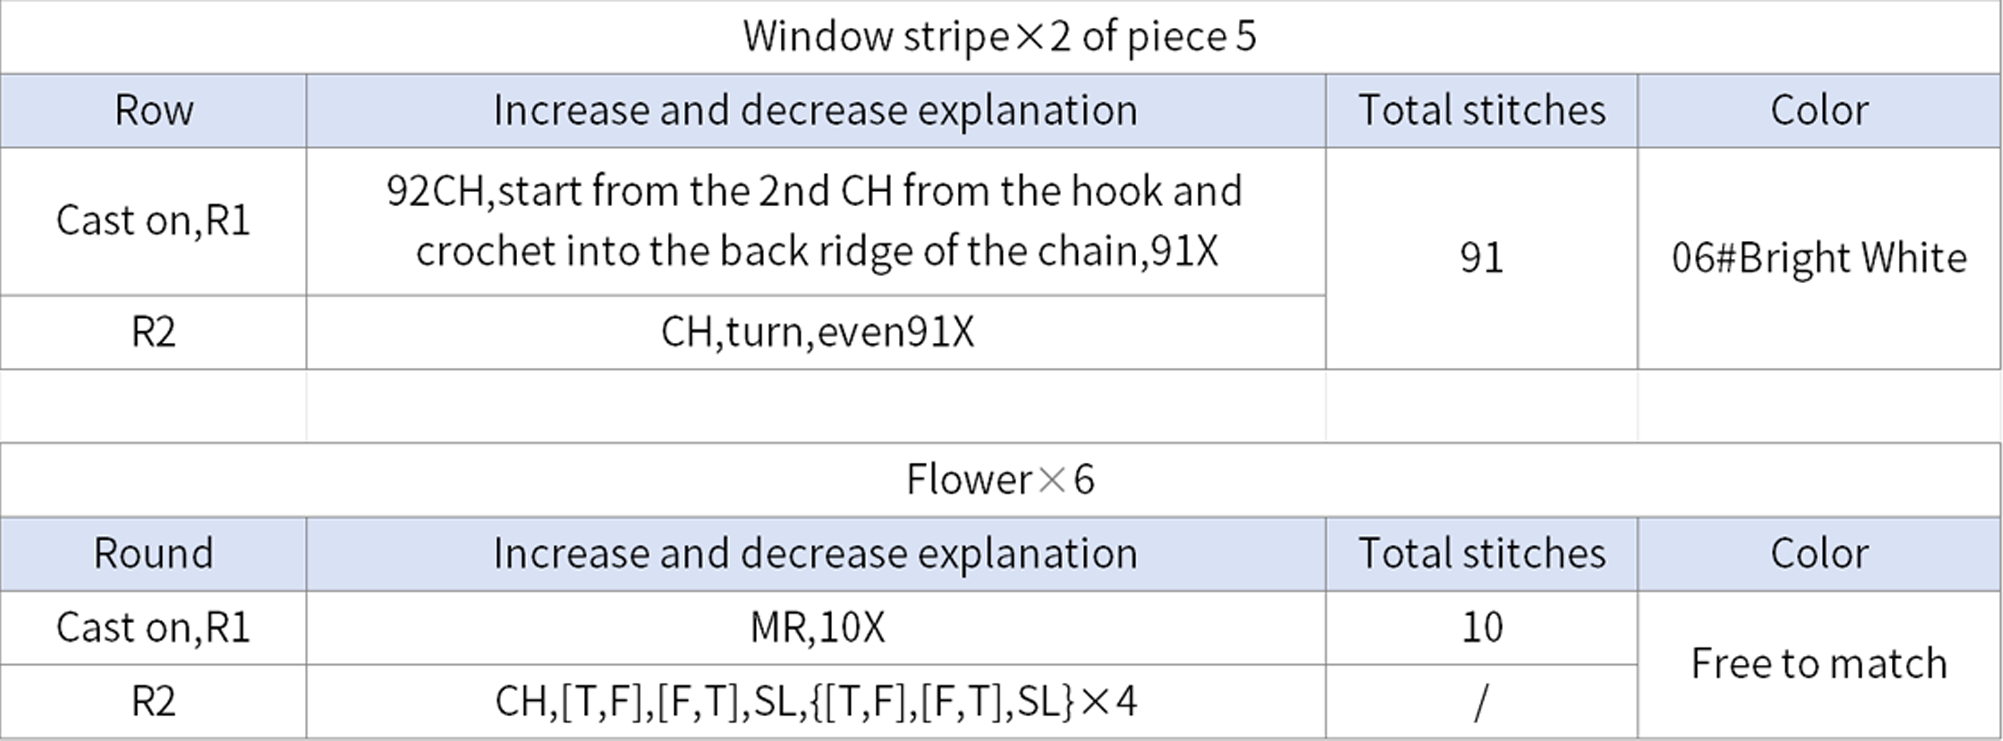
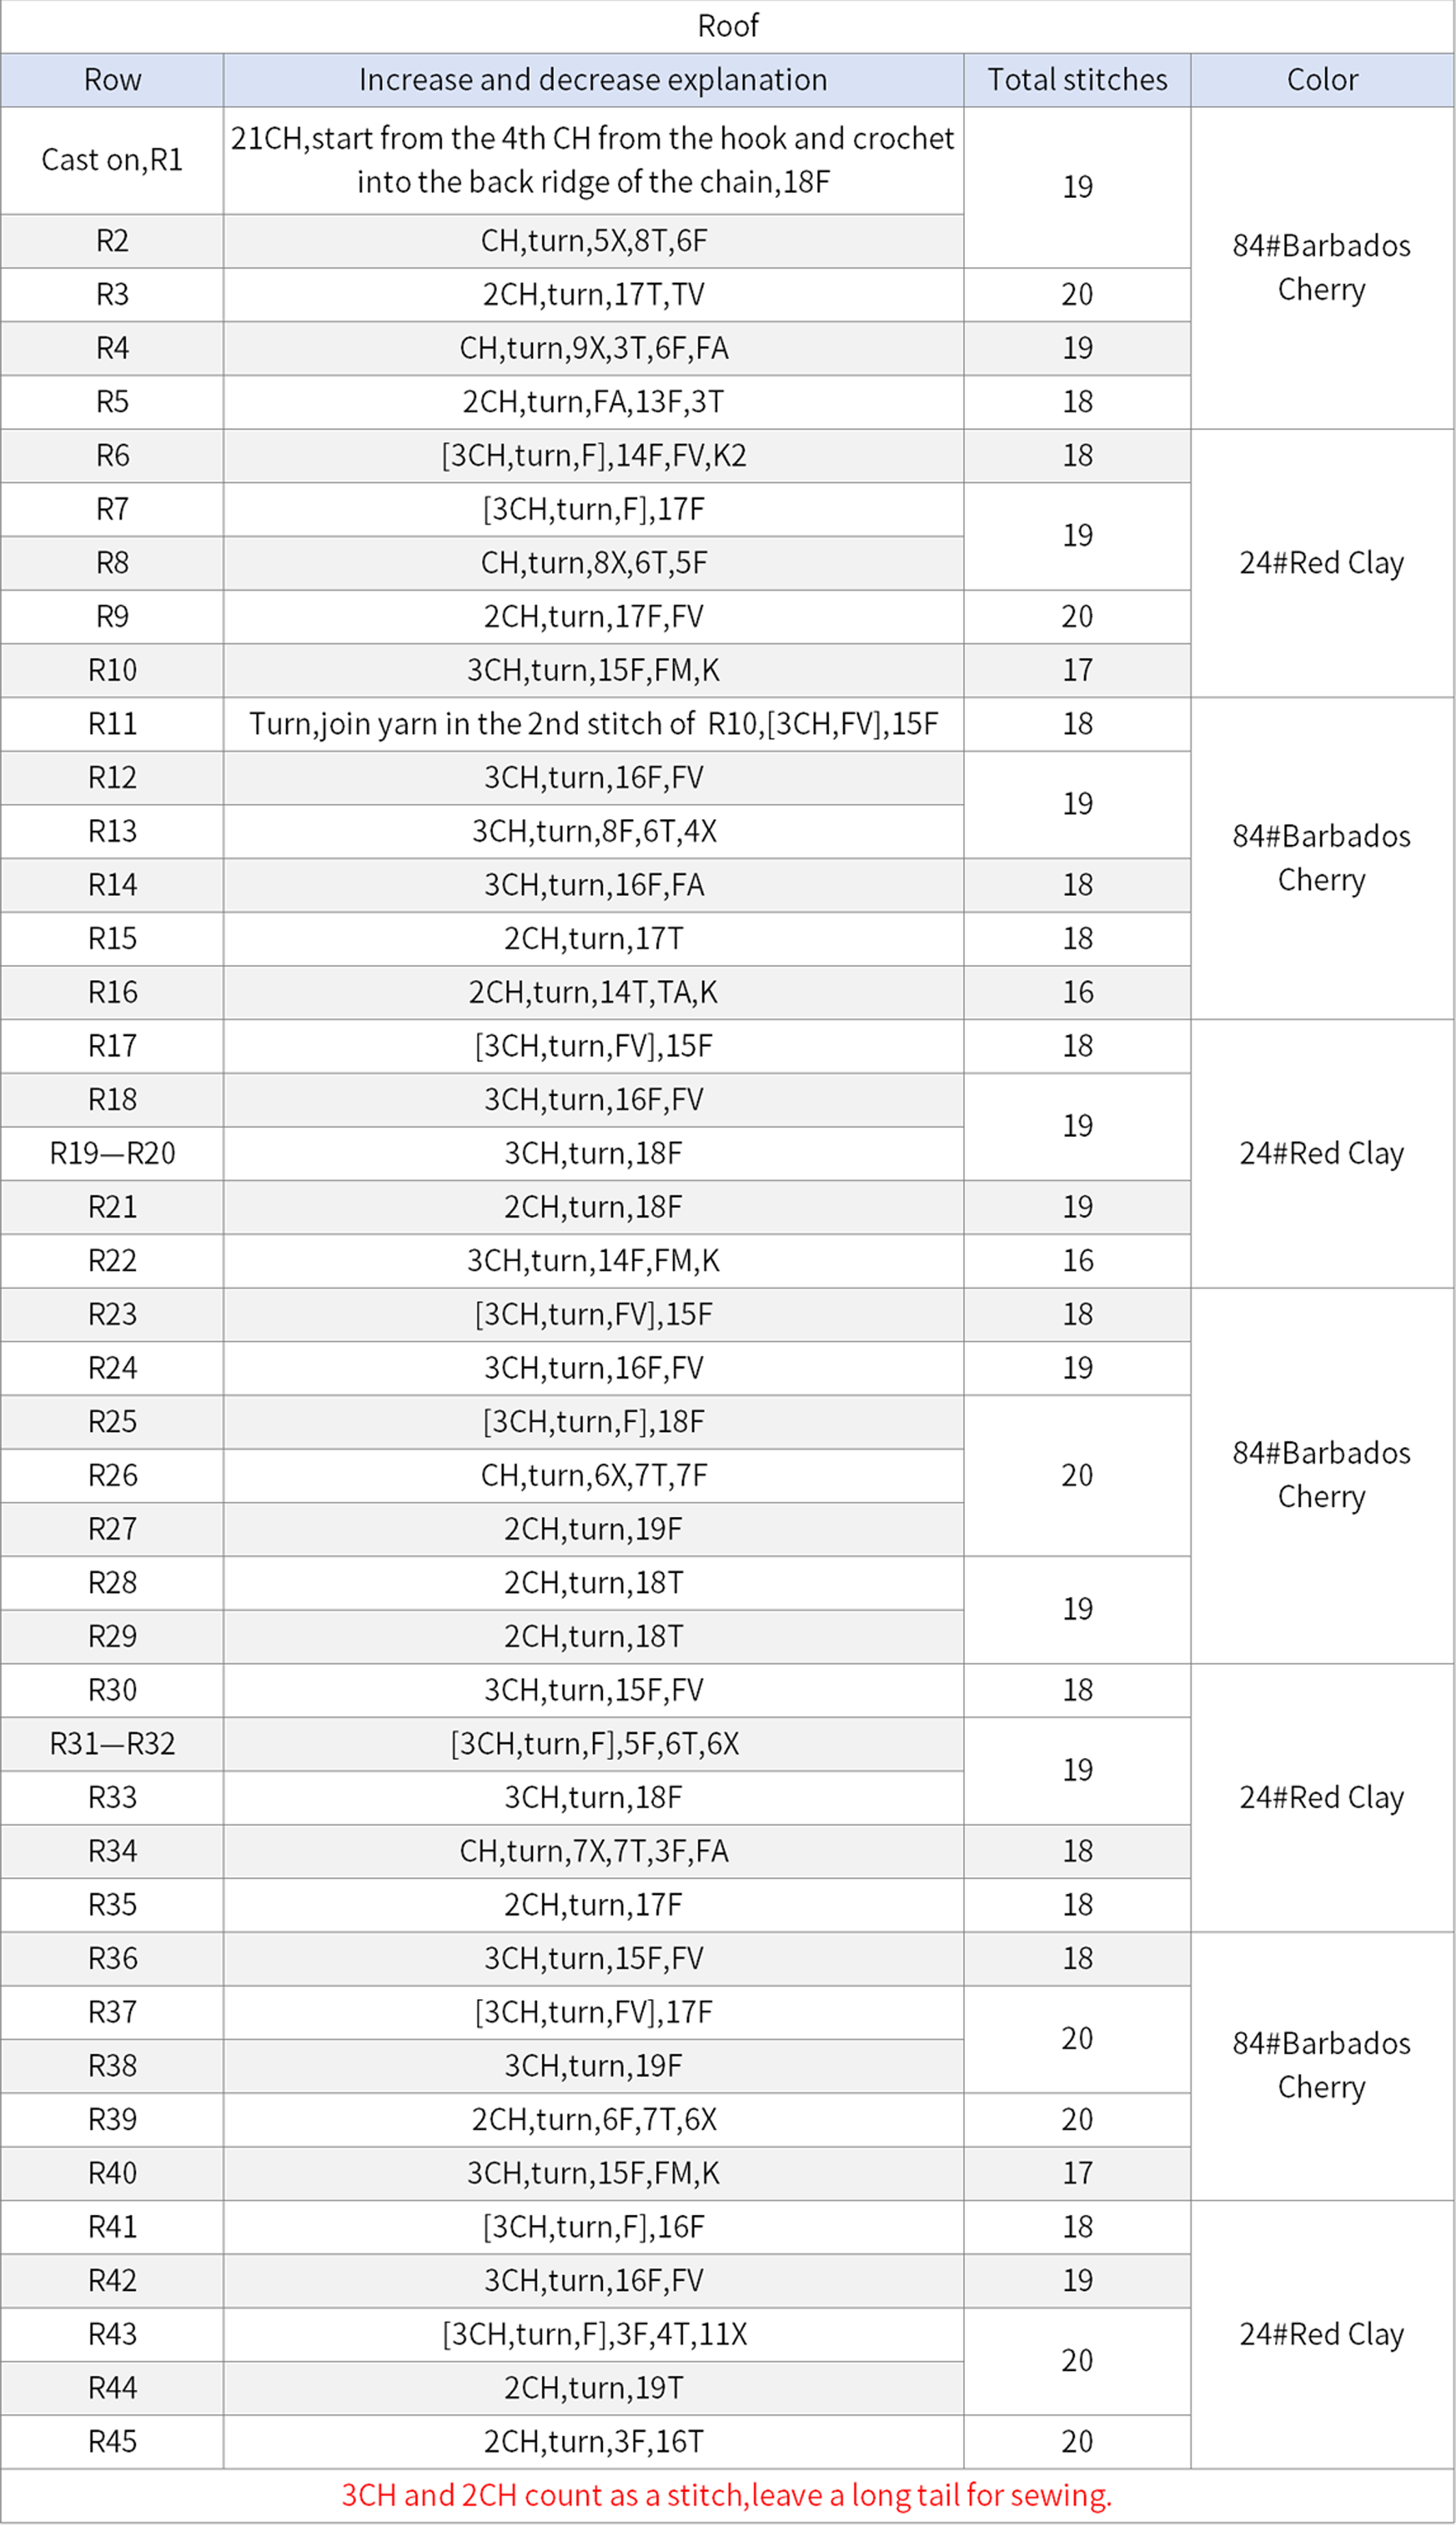
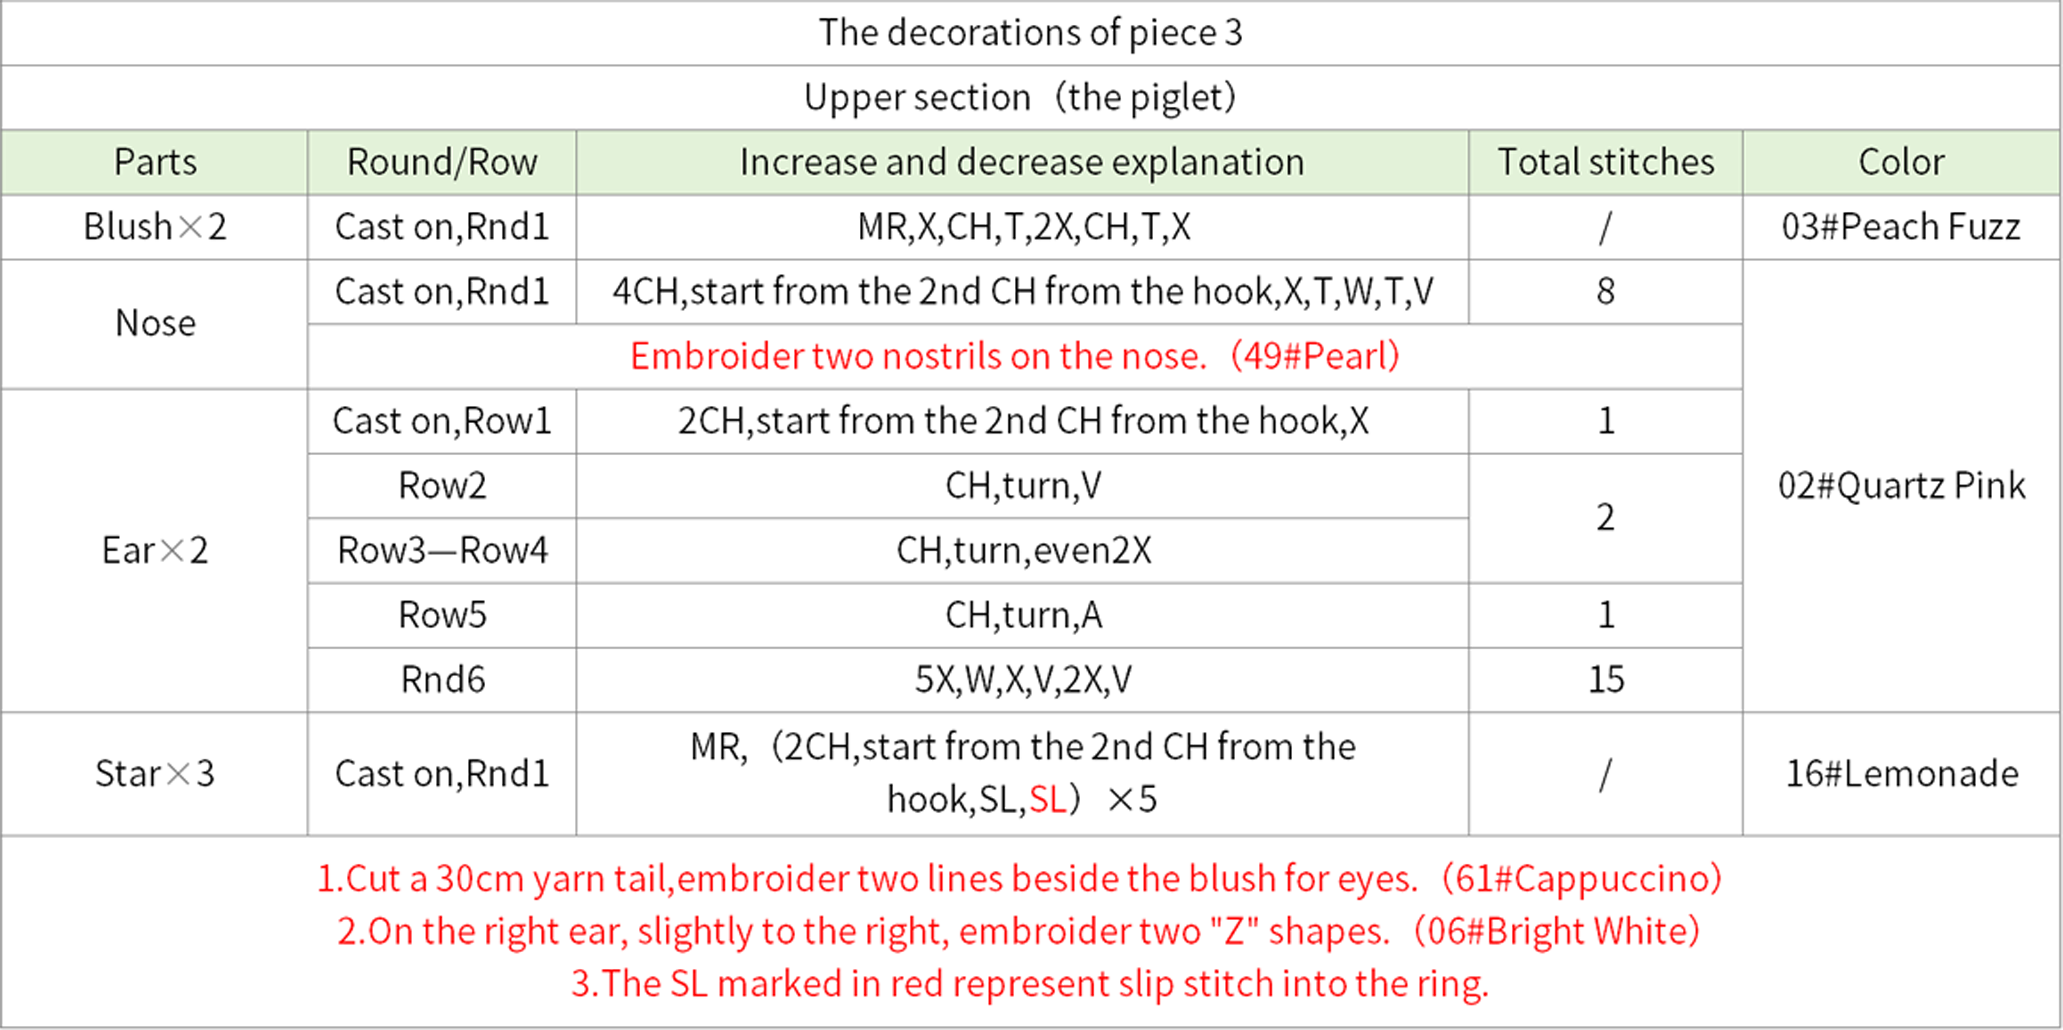
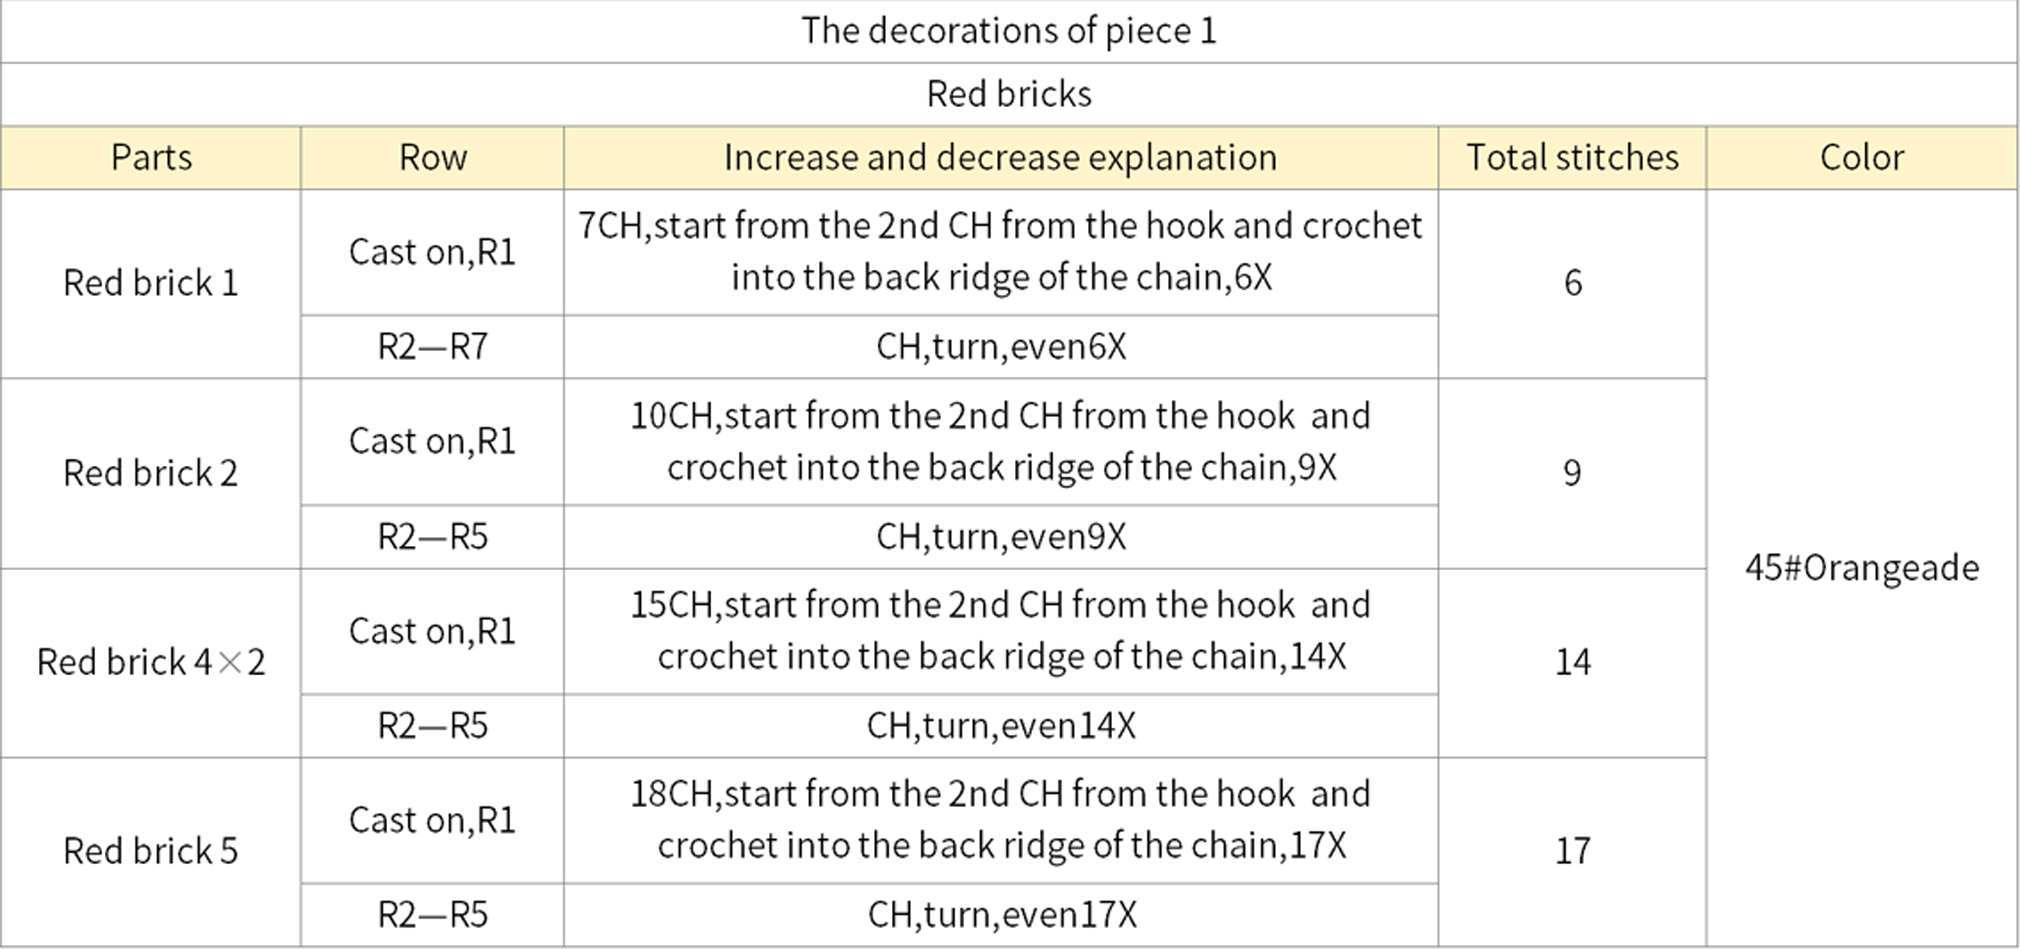
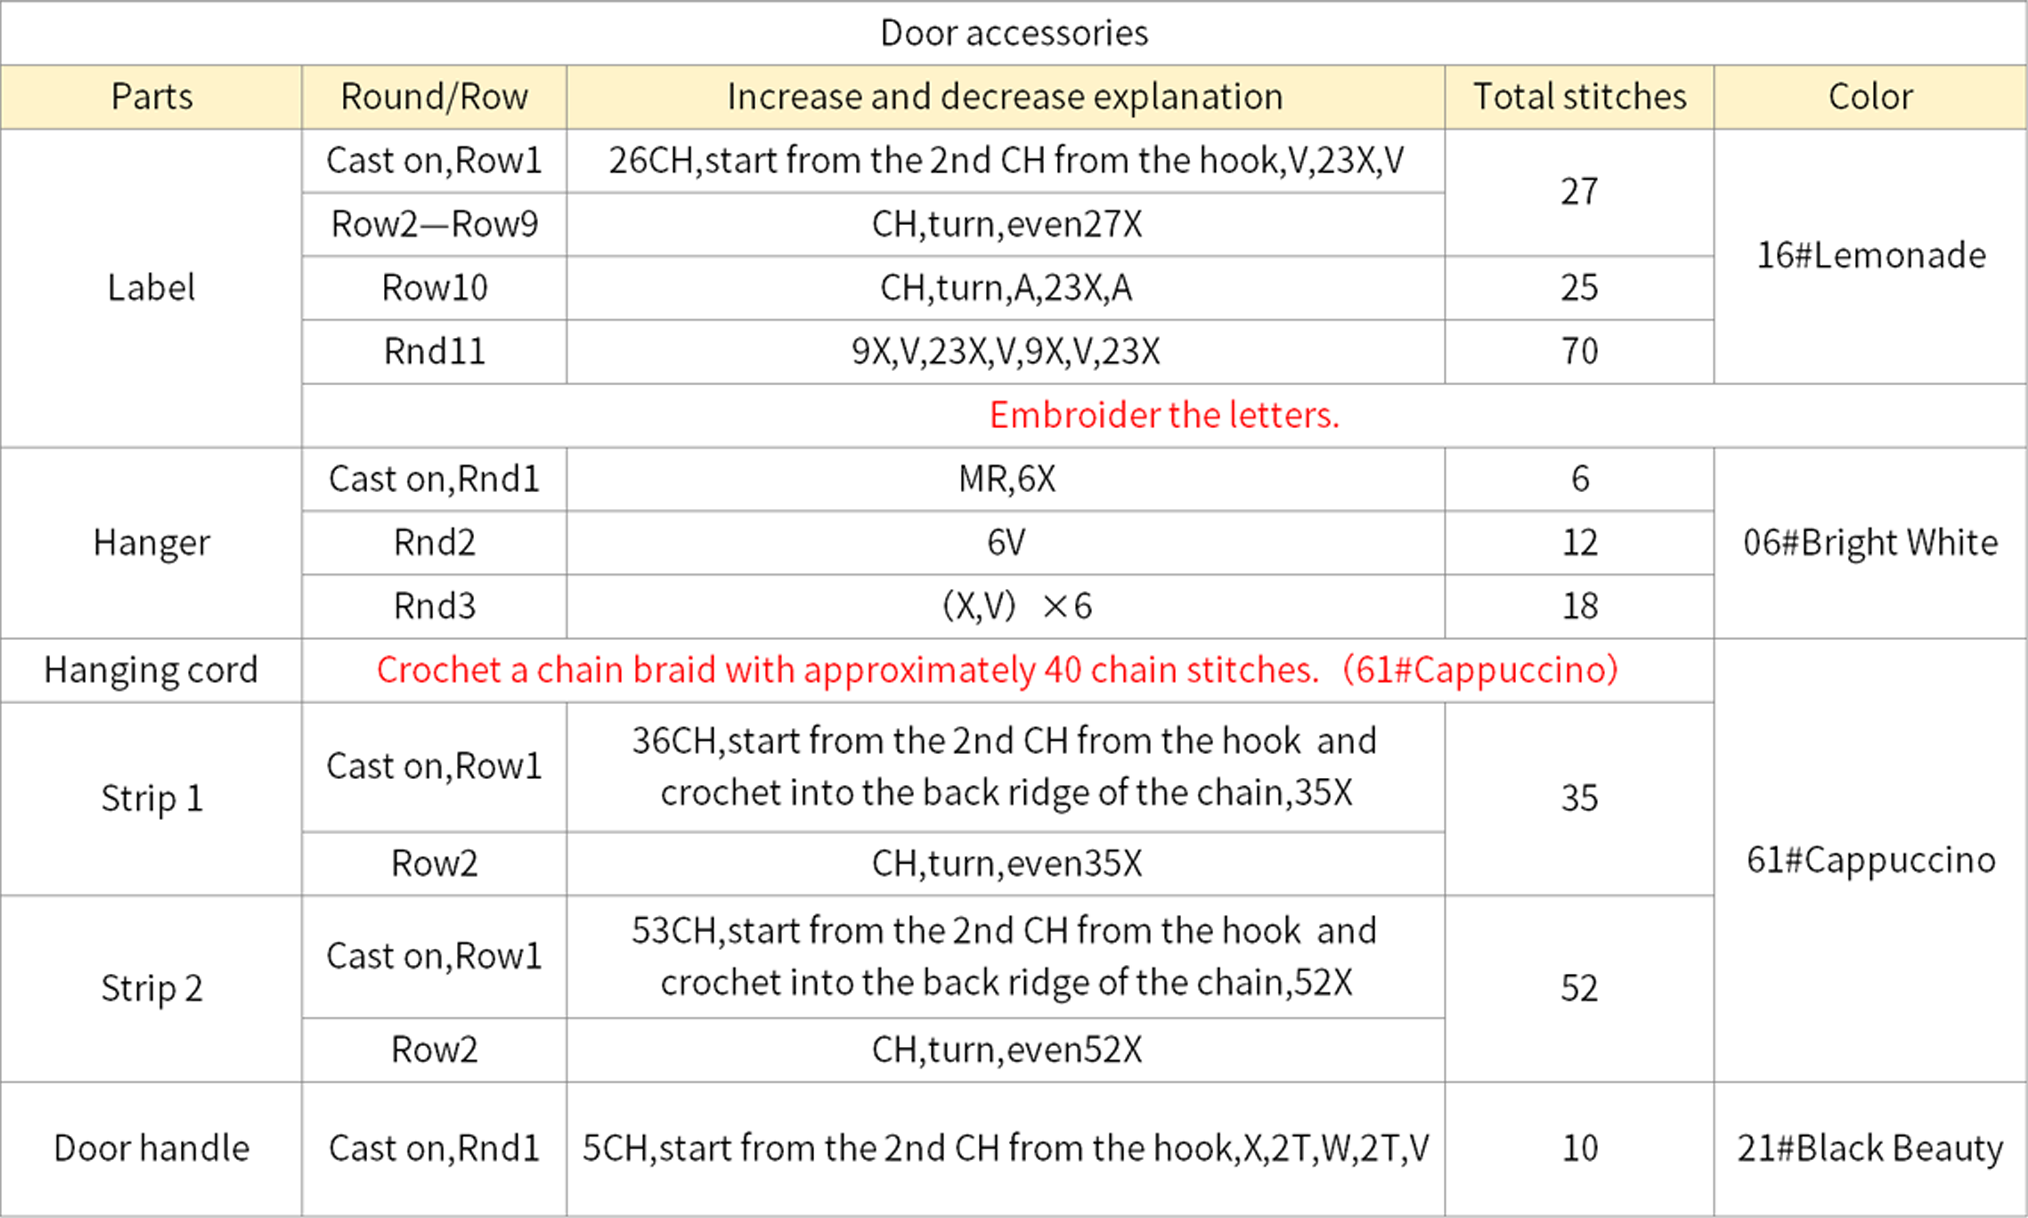
PART2 DecorationsB 00' 08'' (Part 2)
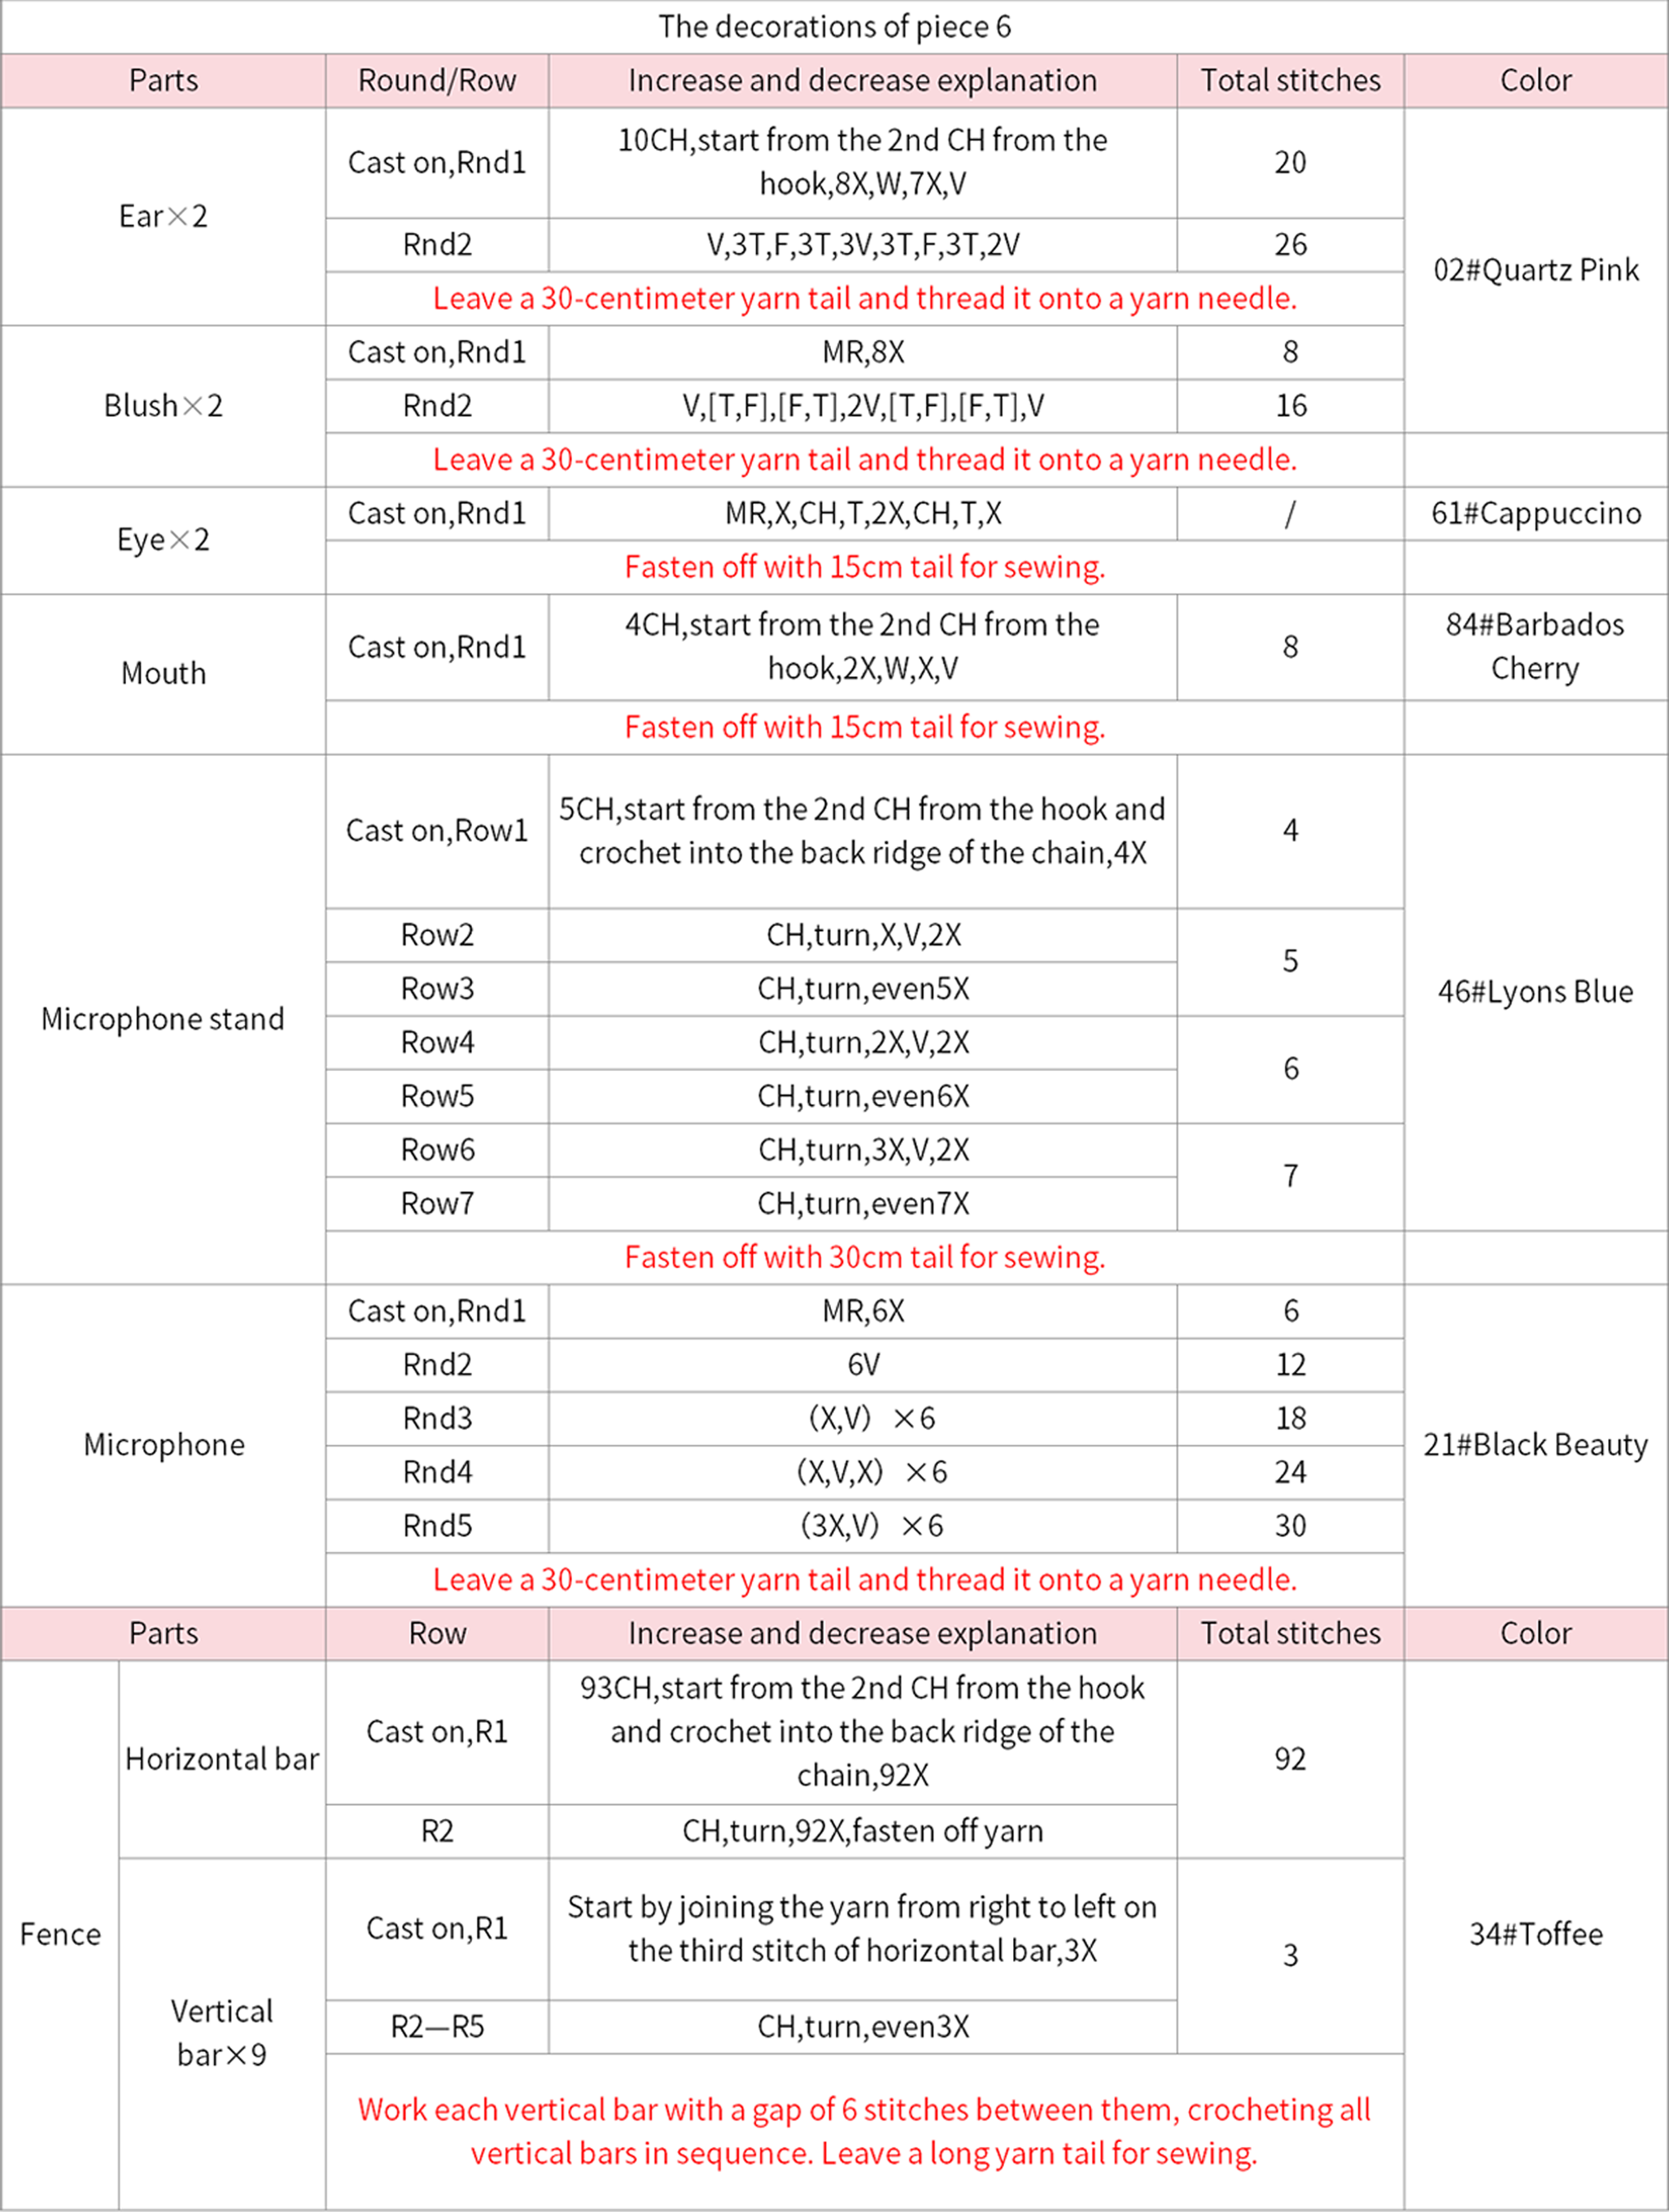




Made by the community