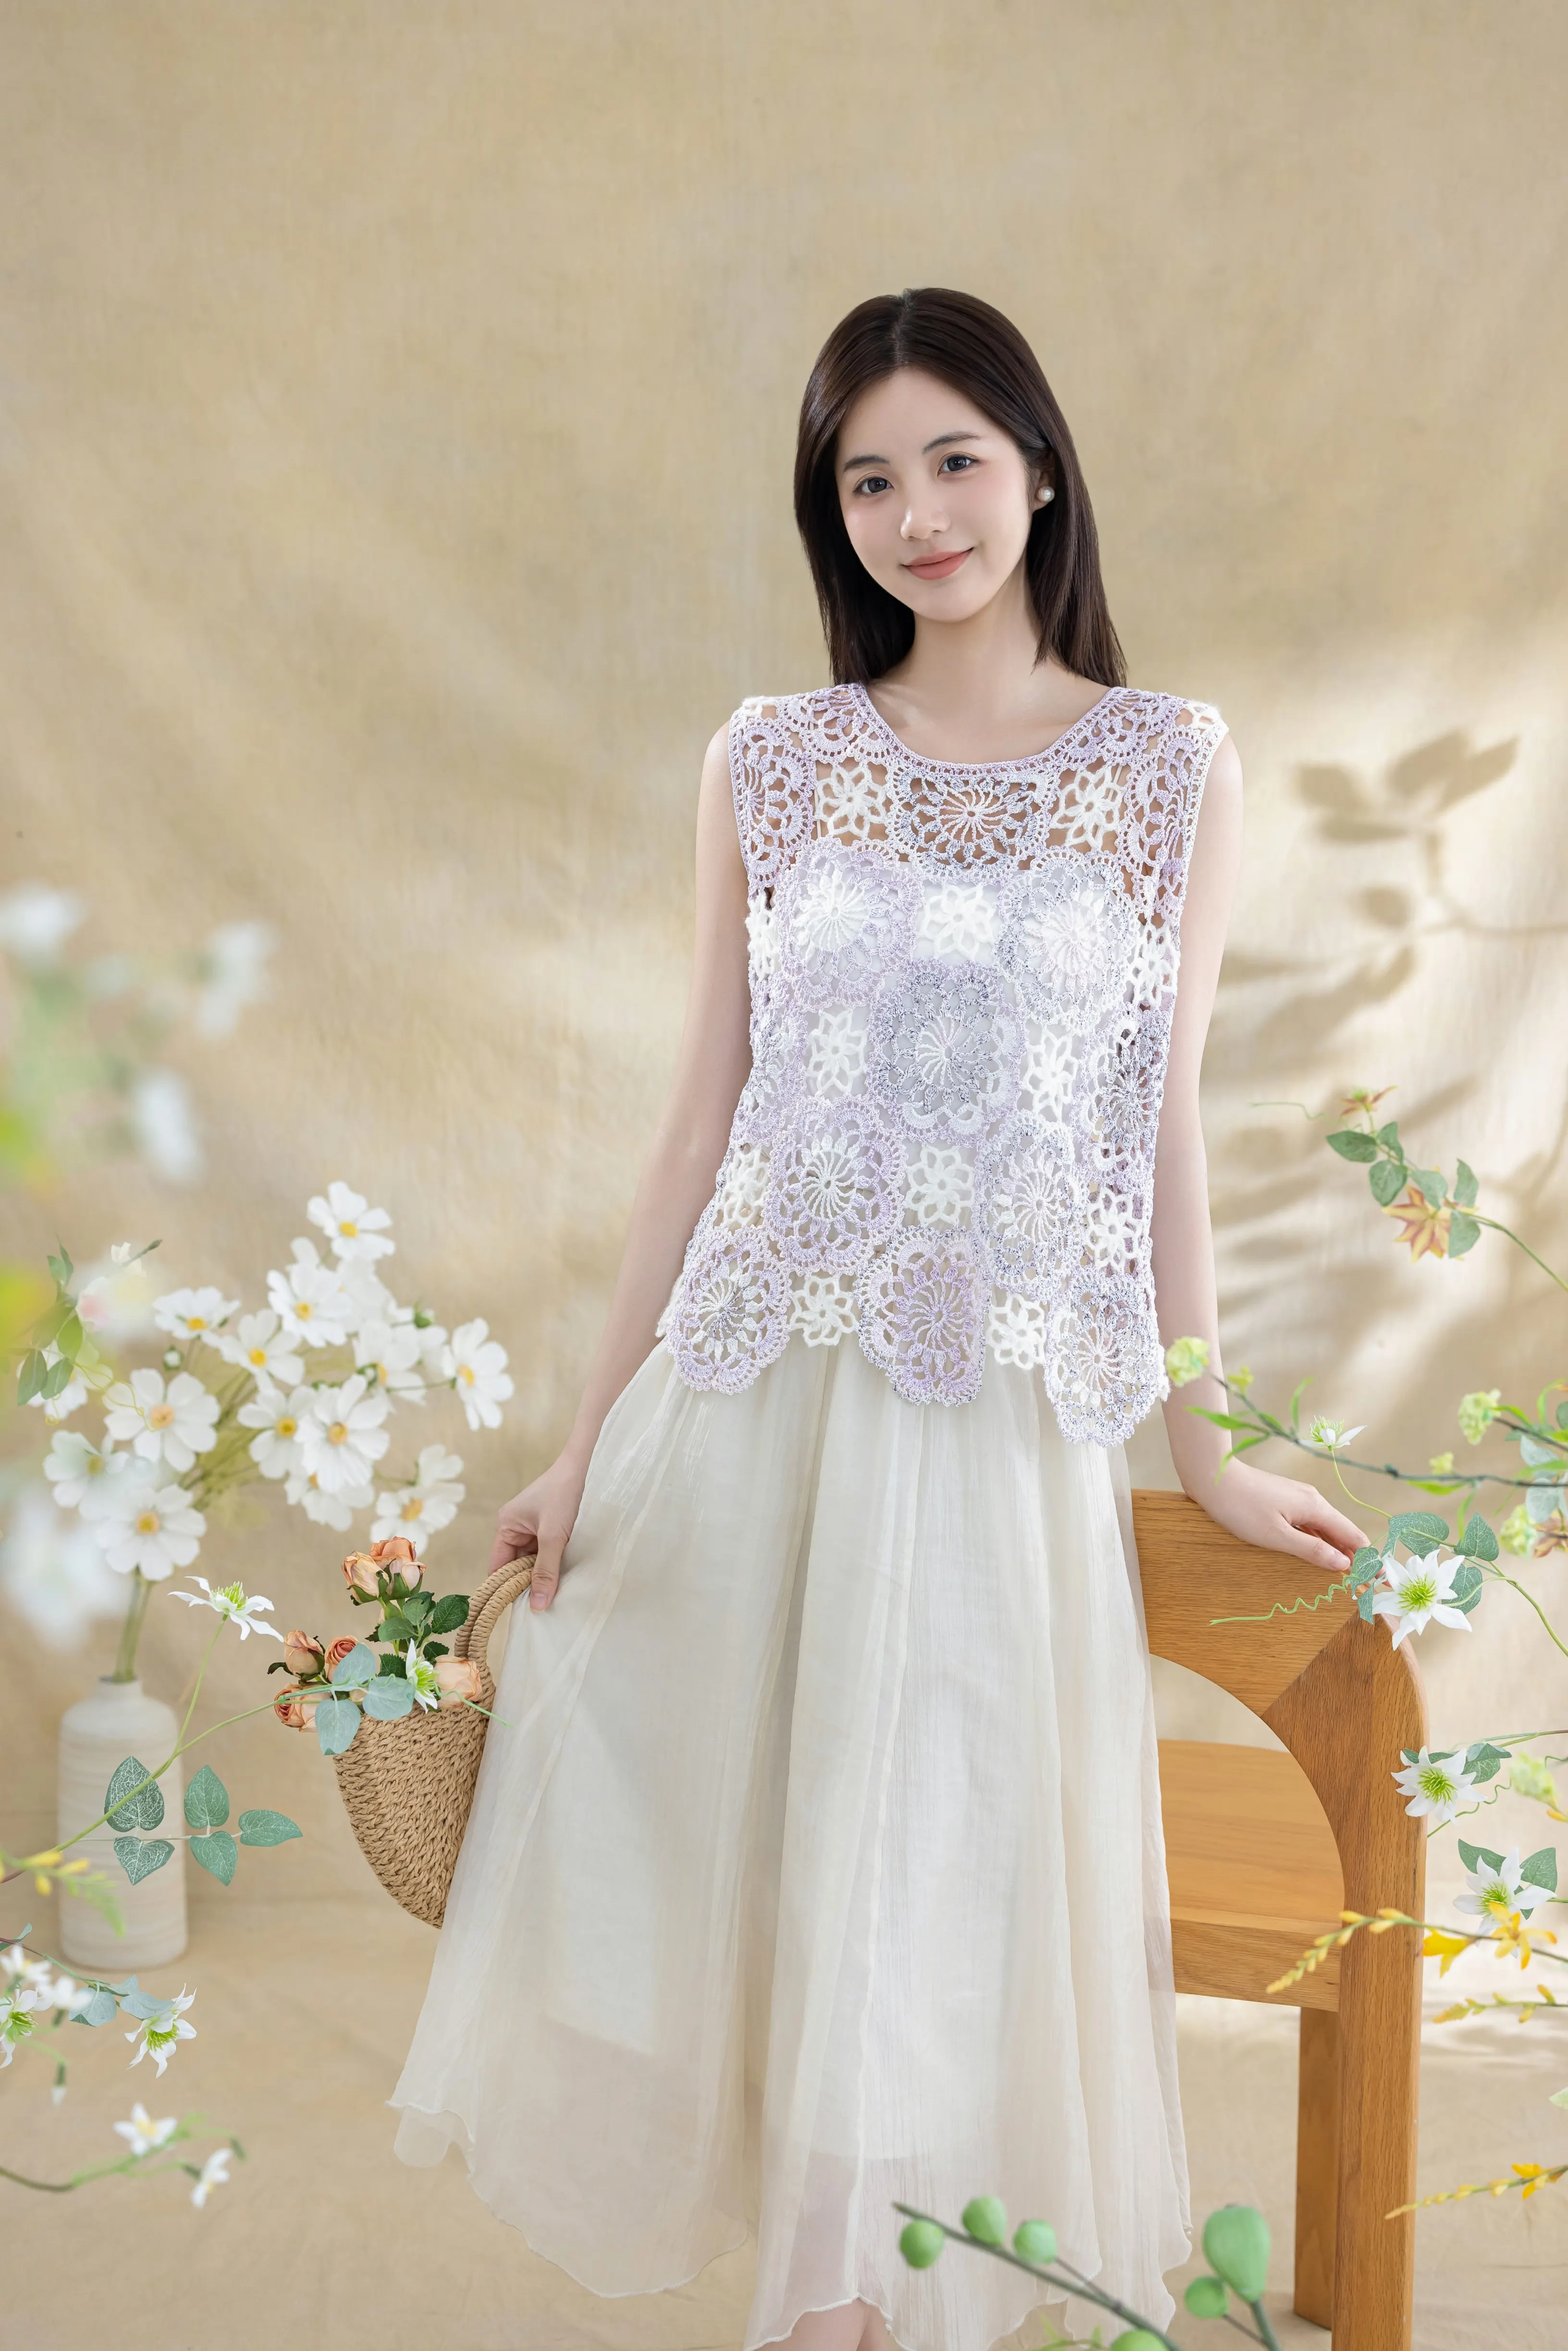
Clothes
Dust Wrap Front Vest
Project preview
See the finished project
Pattern format
Instructions
Watch and follow
Video tutorial
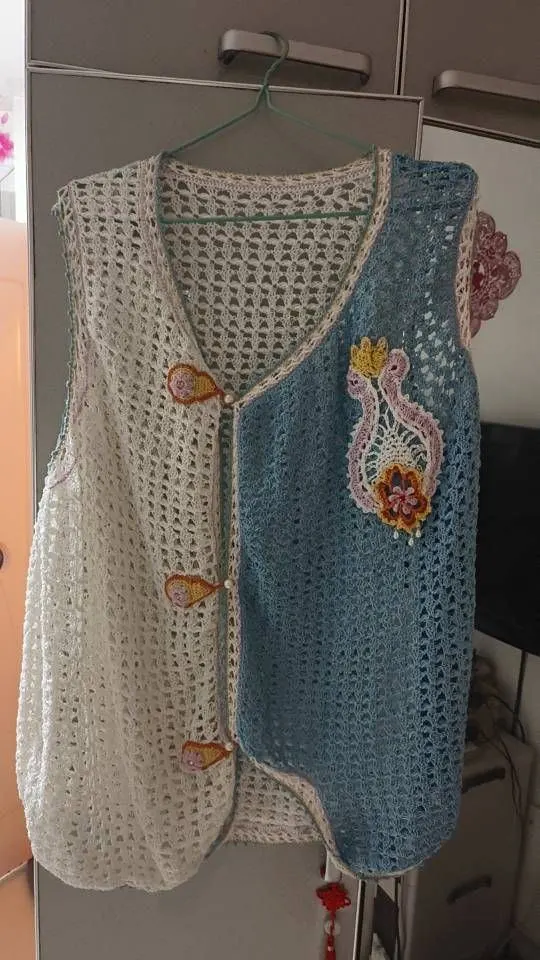
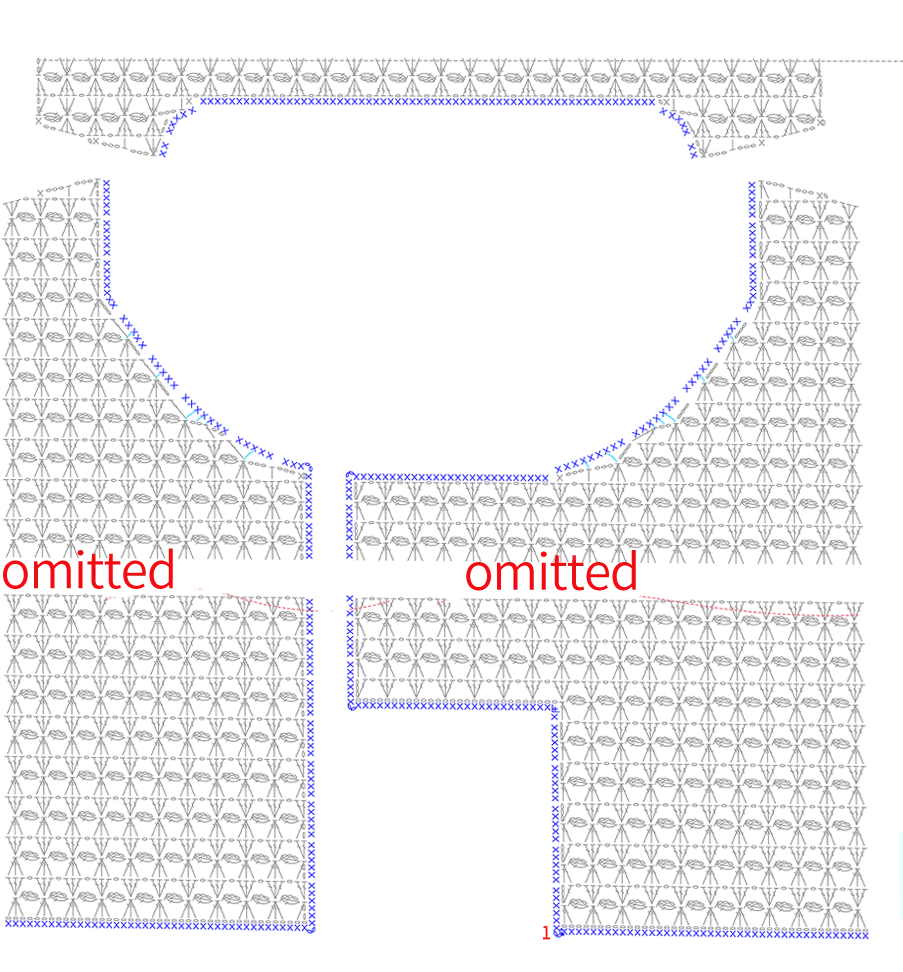
This vest consists of the left front piece, the right front piece, the back piece, joining, edging, decoration and buttons.
First, crochet the front and back pieces. Then join them together. Next, edge the cuffs and the band respectively. Then, make and attach the decoration. Finally, make and attach the buttons.
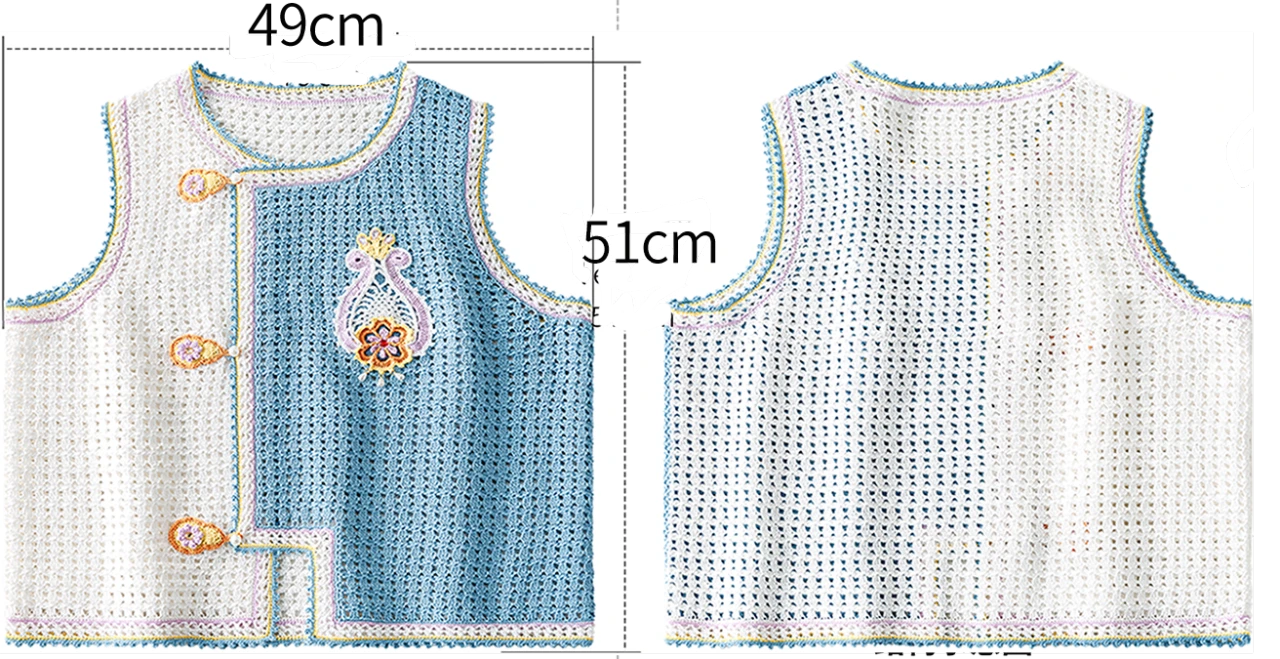
The handcrafted measurements may have an error of 1 to 2 cm. Due to variations in individual tension, the size of the sample is for reference only.
Materials: Susan's Family Combed 5# Lace
Hook: 2.00 mm crochet hook (for main part)
1.50 mm crochet hook (for decoration and buttons)
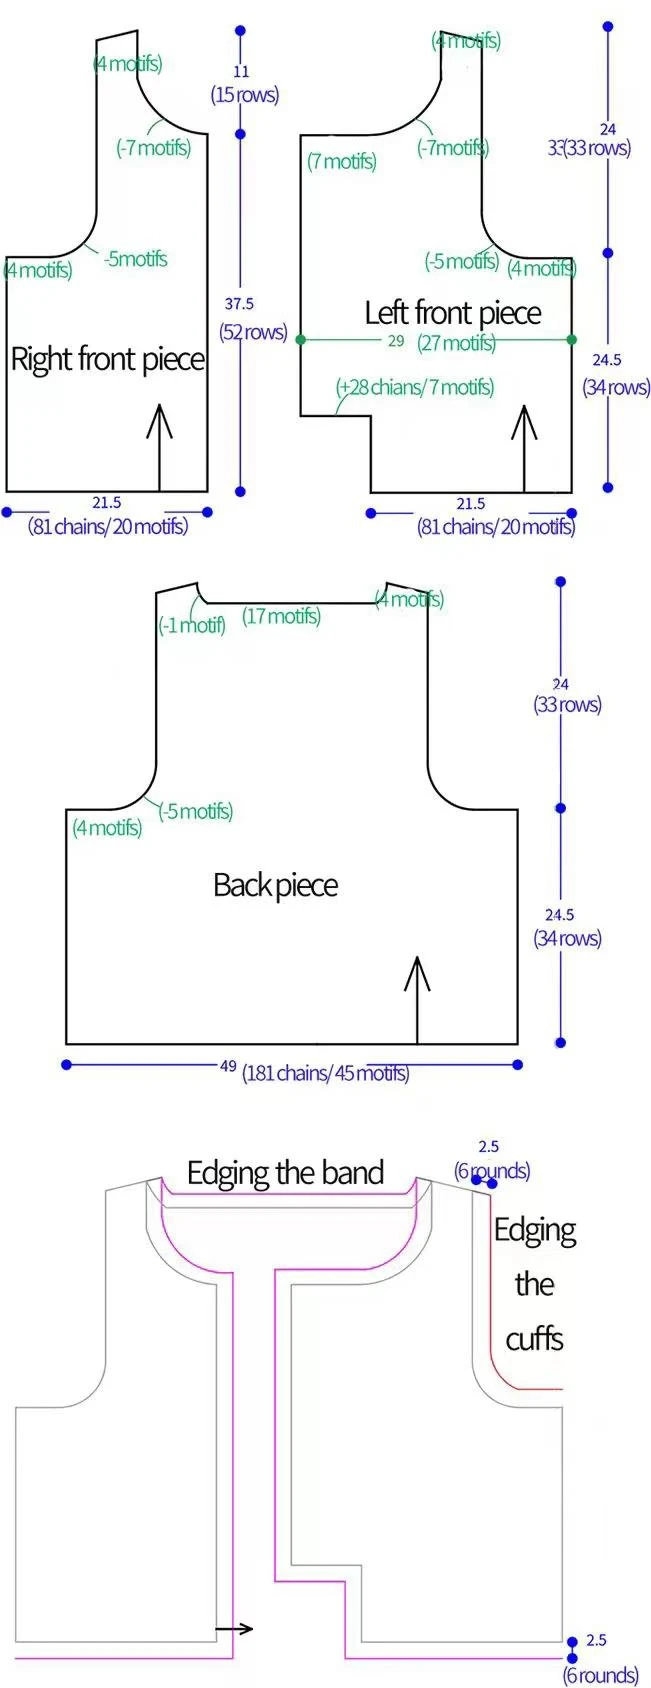
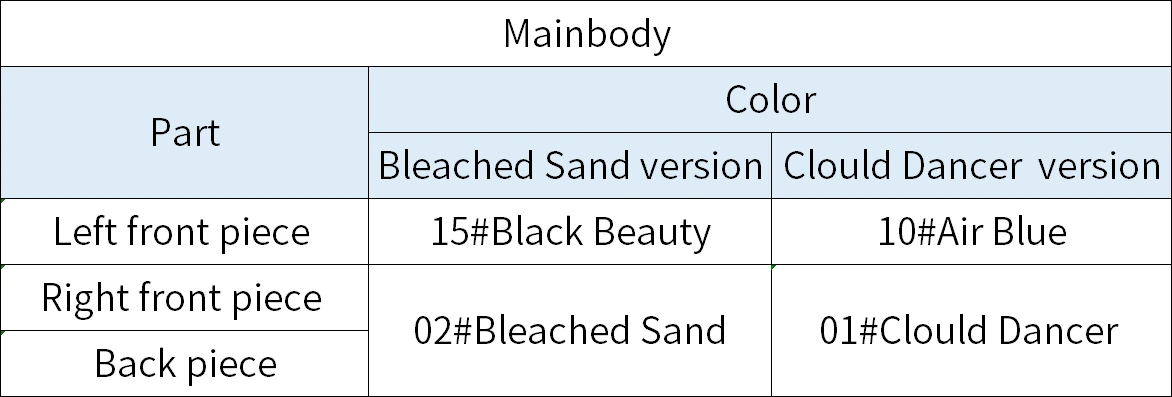

Chart Key




















Note:
1. This pattern is making in Chinese crochet pattern terms, and the stitch name is written using American terminology. All measurements in charts are in cm. 
Part 1 Left front pieceA 00' 50'' (Part1 )
It's divided into the body partA1, the breast partA2 and the shoulder partA3. The body is divided into two sections. Work each section upwards from bottom to top. Please refer to the video demonstration for more details.
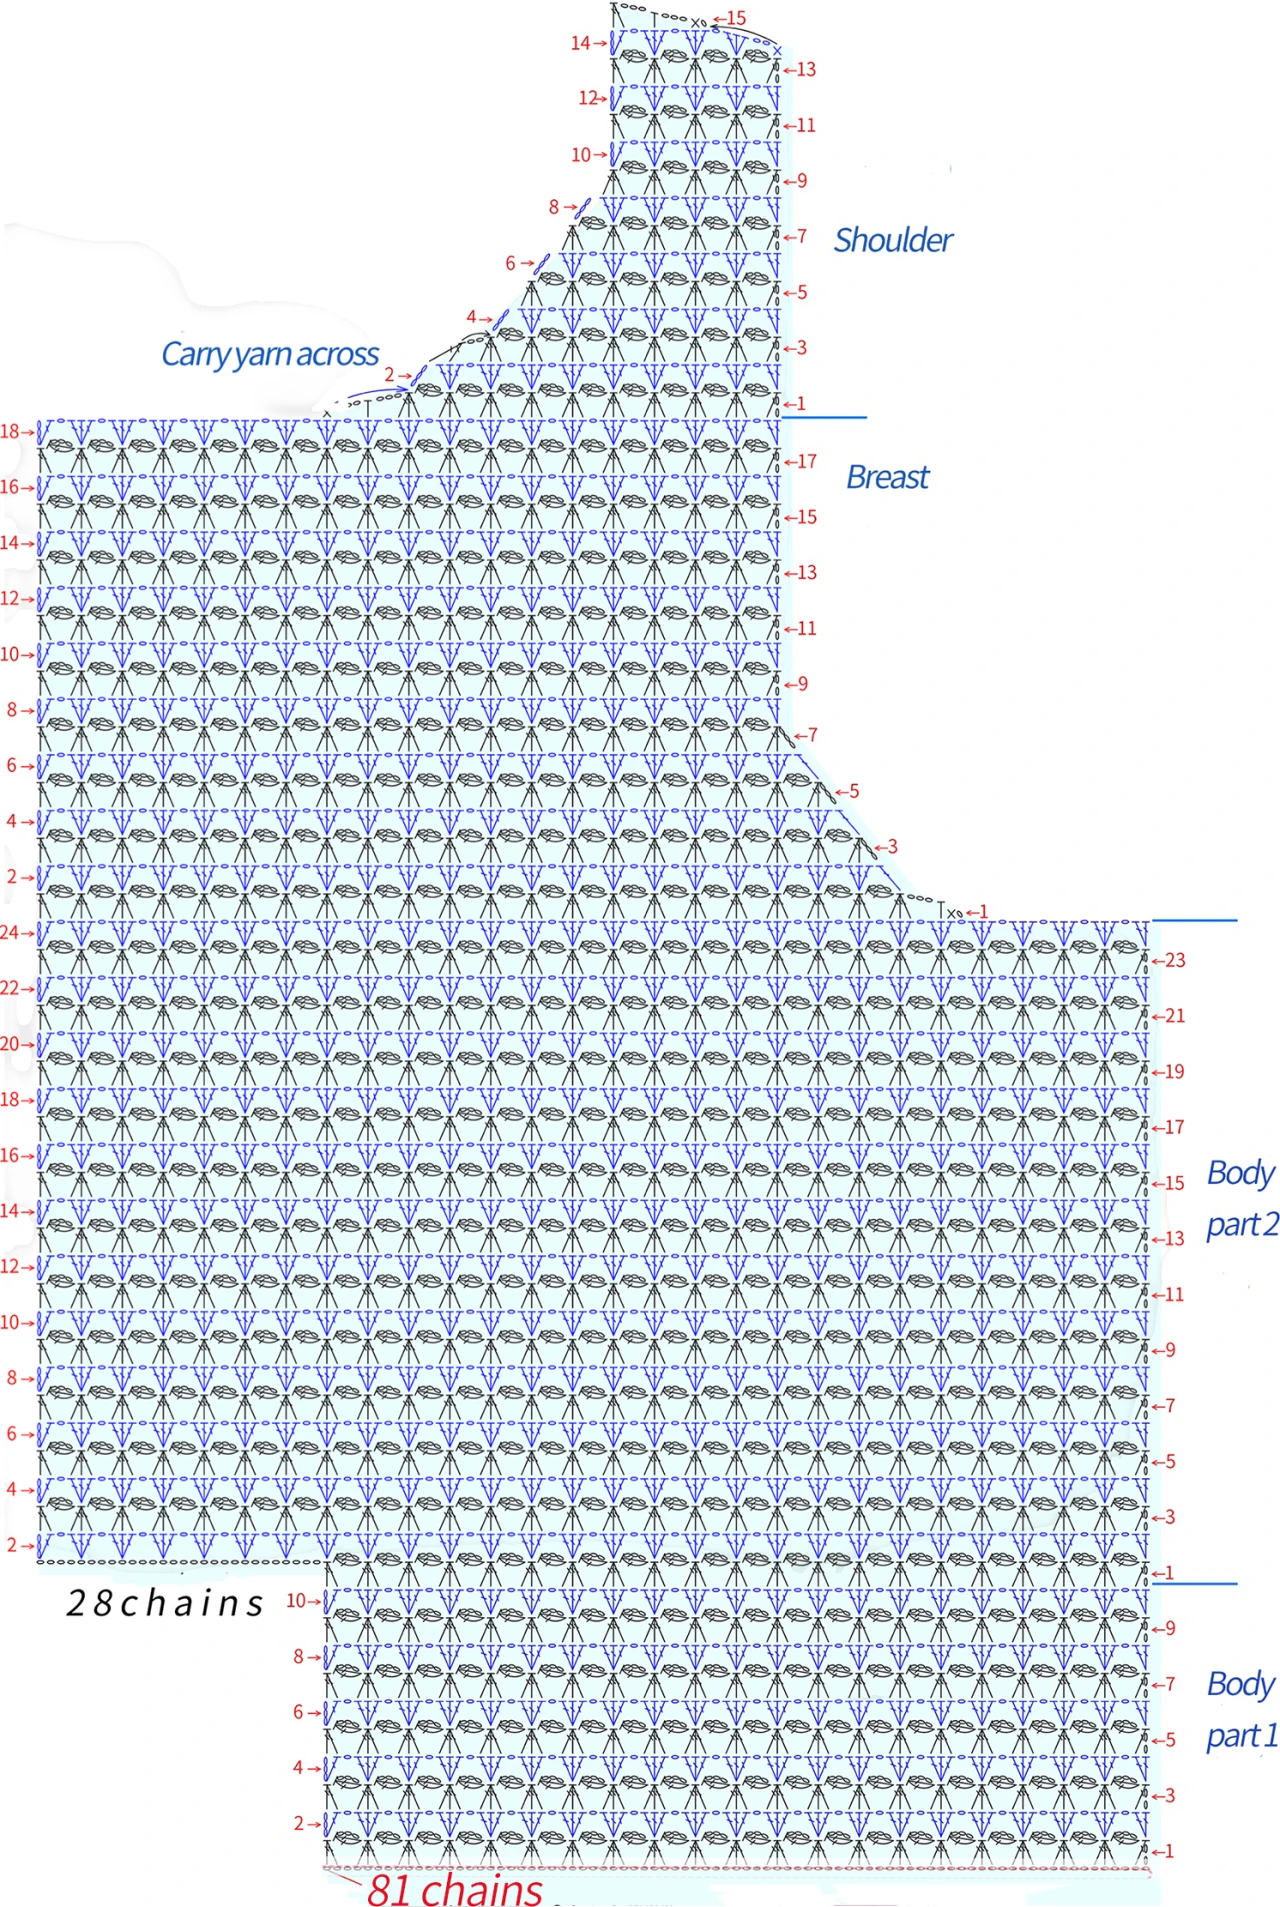
Note: After you finish the third row, measure the dimensions: the width should be 21.5 cm and the height should be 2 cm. If the measurements are significantly off, adjust your tension or switch to a different hook size and re-crochet.
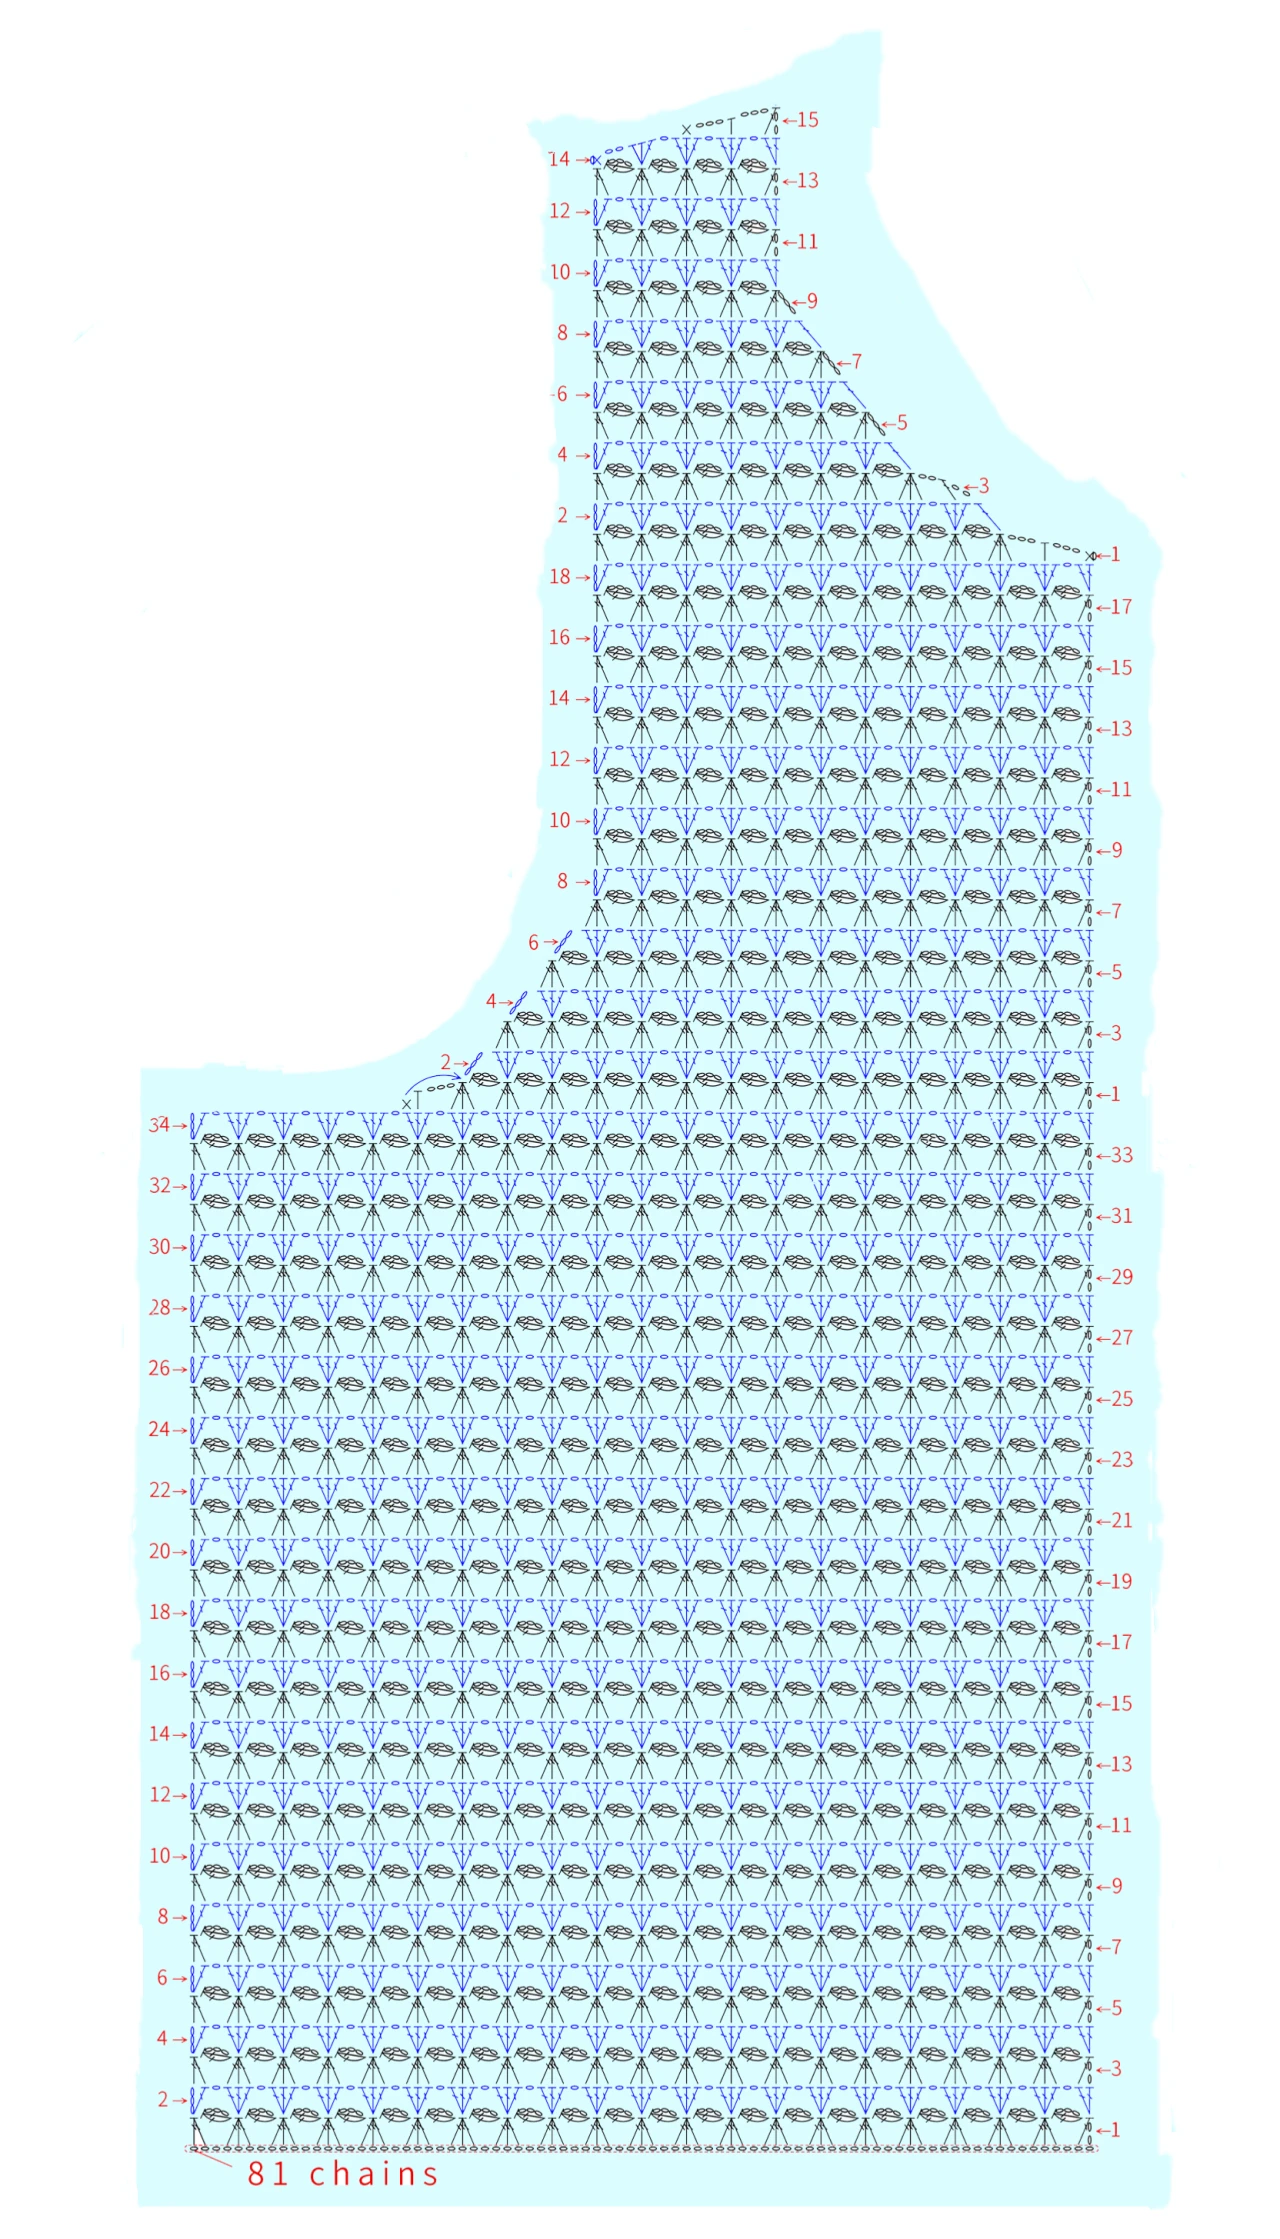
Part 2 Right front pieceB 25' 58'' (Part 1)
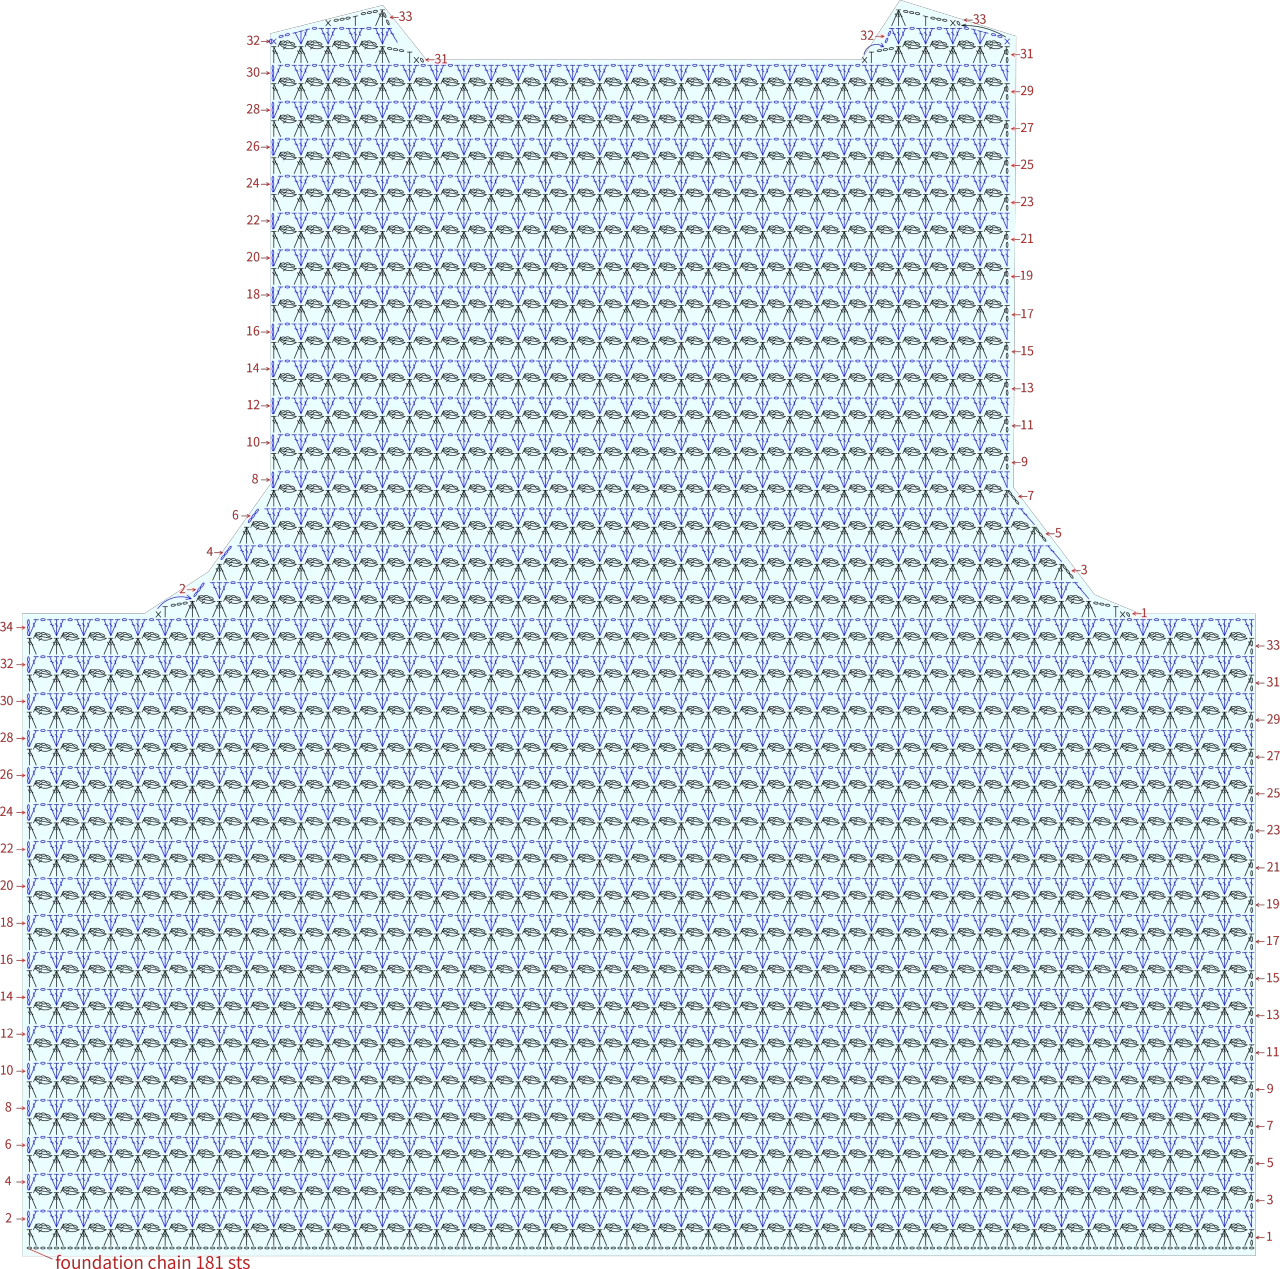
Part 3 Back piece Cand joinngD 26' 49'' (Part 1)
First, crochet the back piece. With the front and back pieces crocheted, join at the shoulder part and the body part. Please refer to the video demonstration for more details.
Note: Use the working yarn from the front piece to connect.

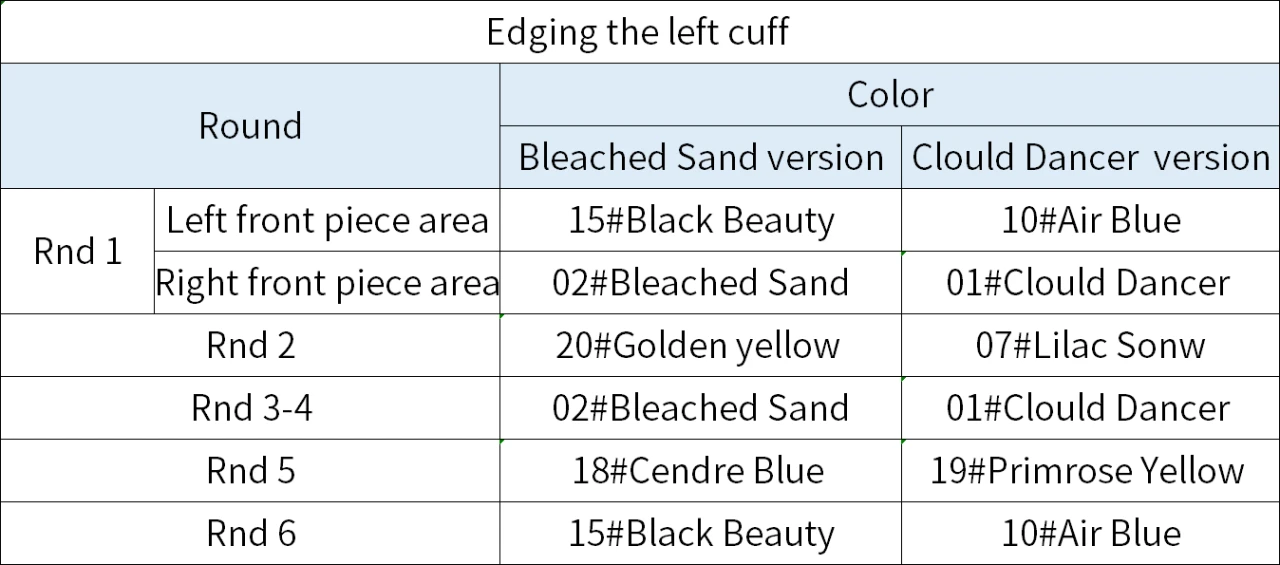
Part 4 EdgingE 32' 46'' (Part 1)
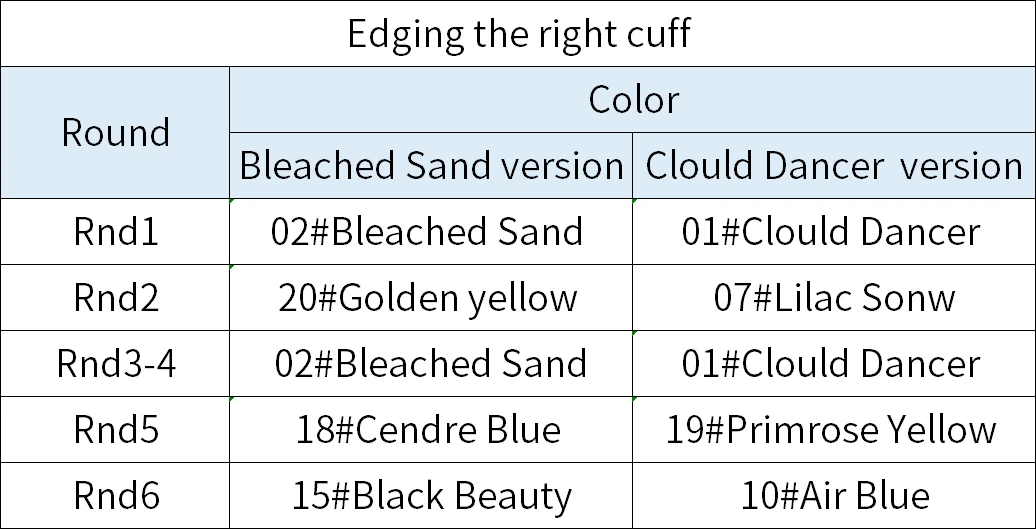
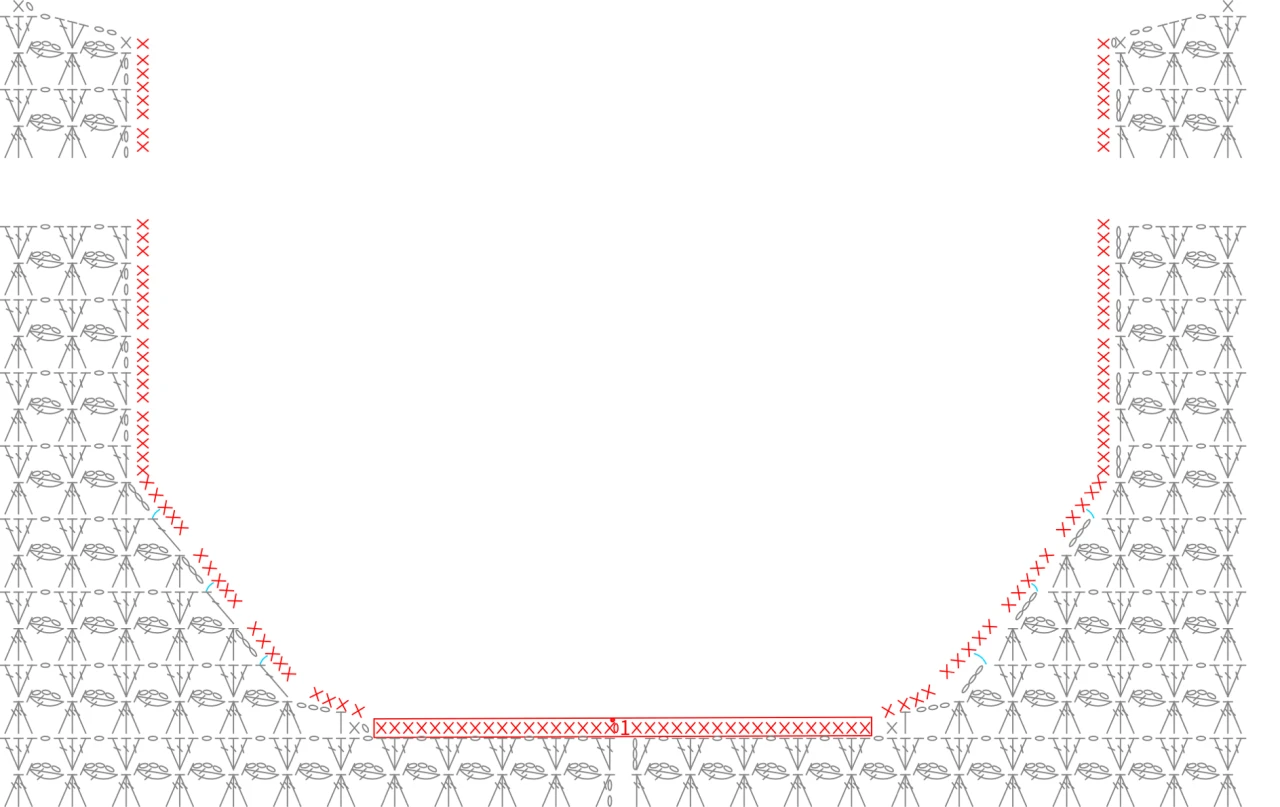
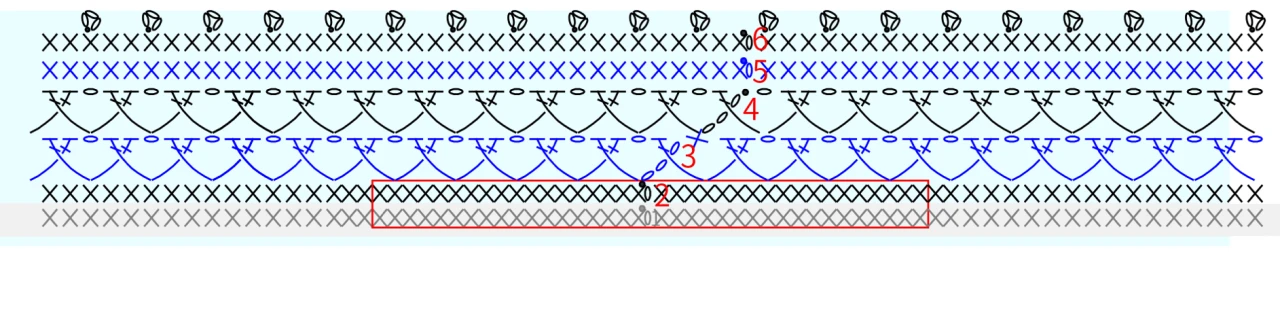
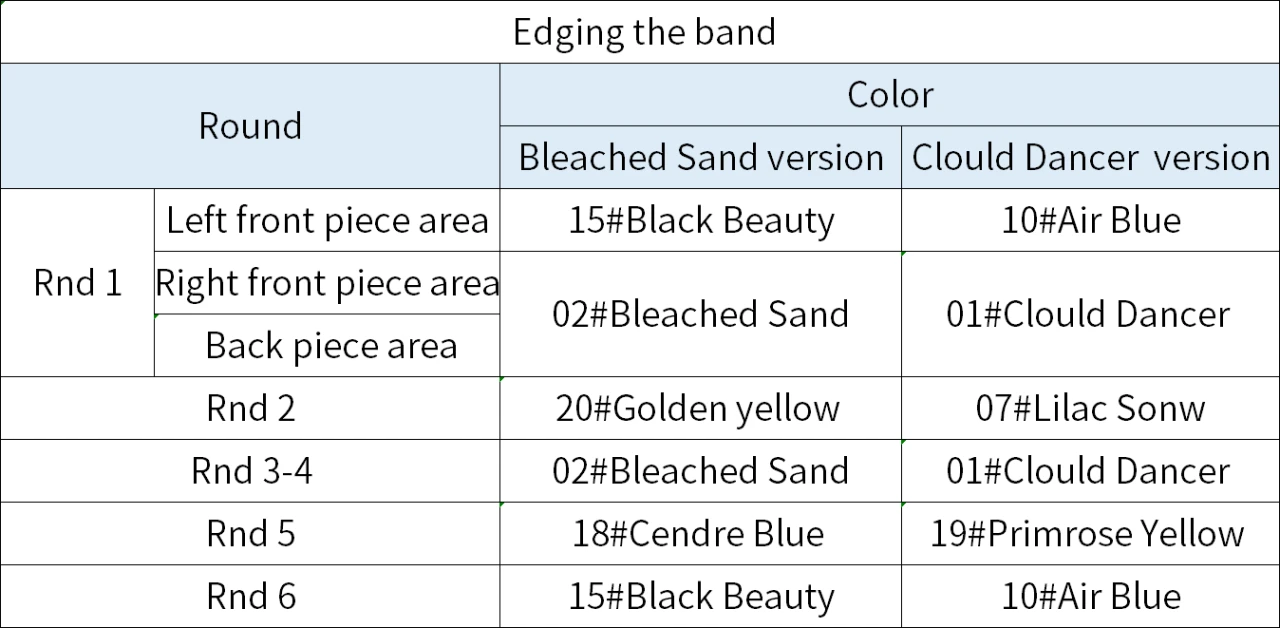
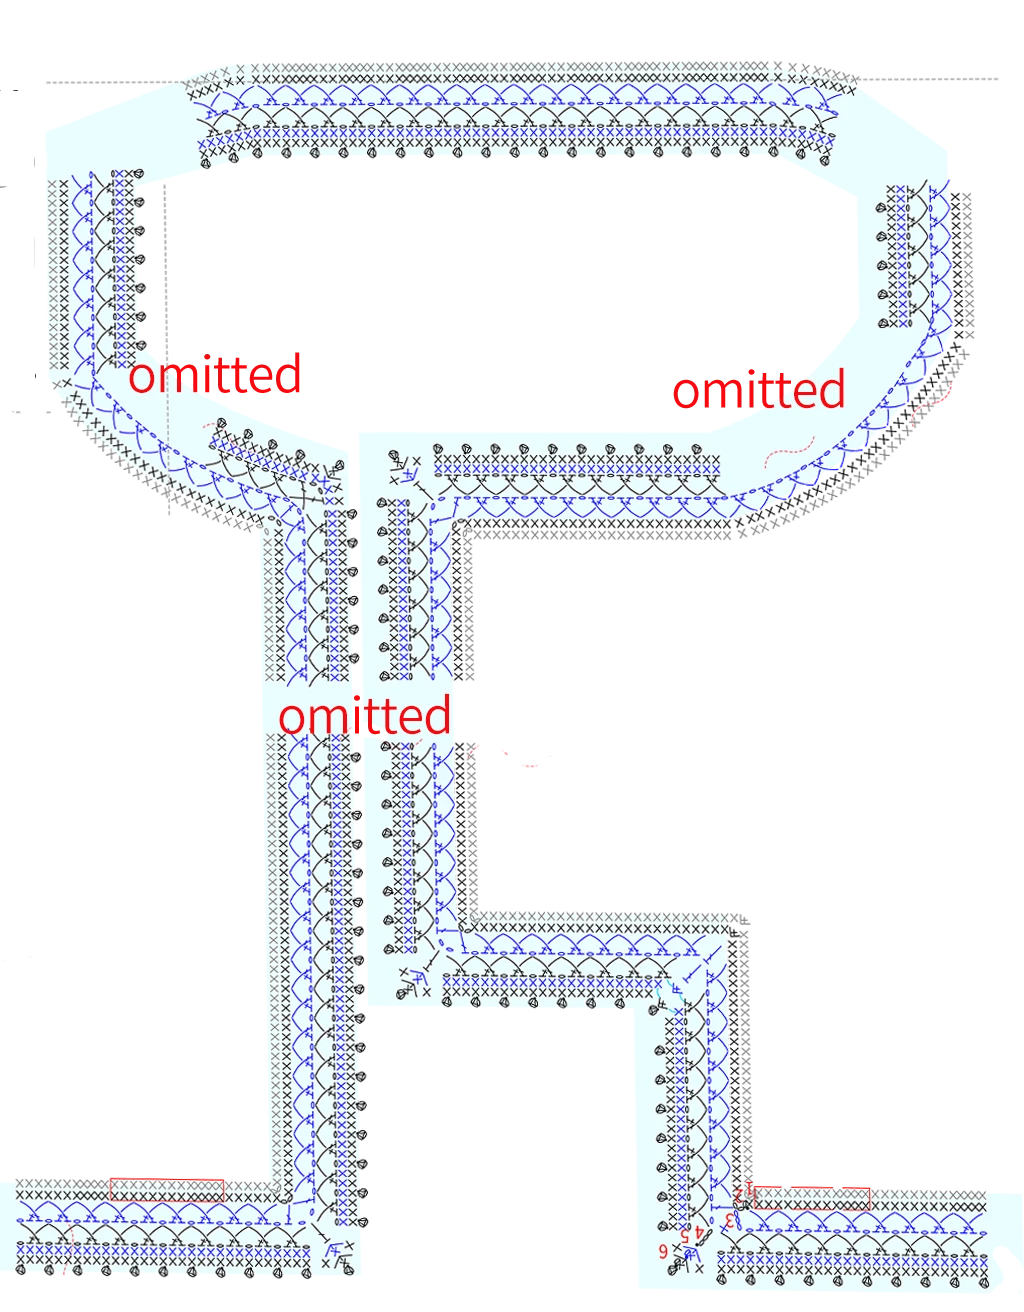
It includes the cuff edging and the front band edging. Pick up and work in the corresponding areas separately. Please refer to the video demonstration for more details.
Part 5 DecorationF and buttonsG 00' 07'' (Part2)
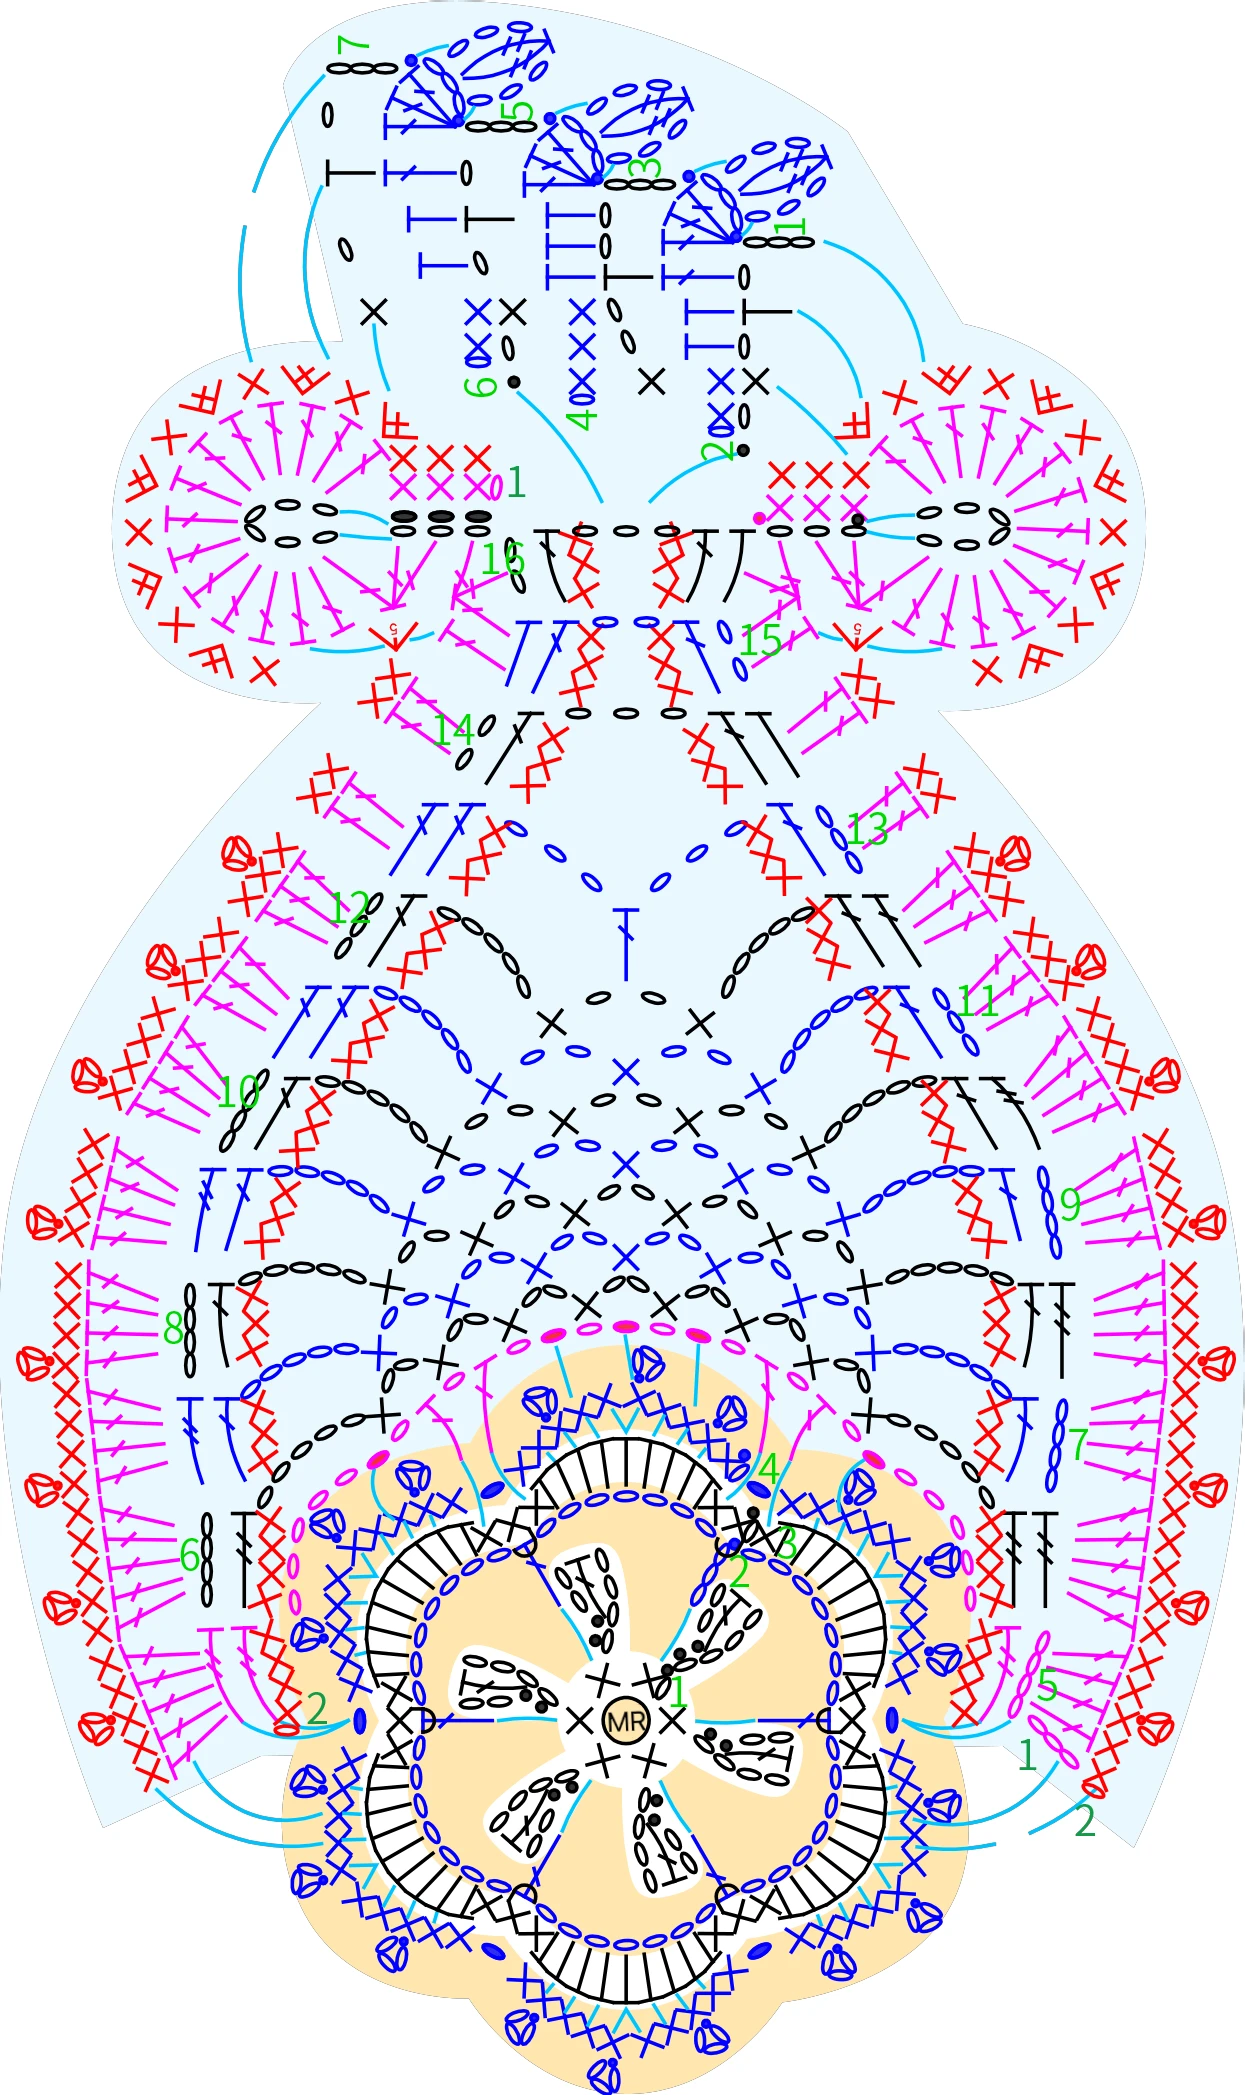
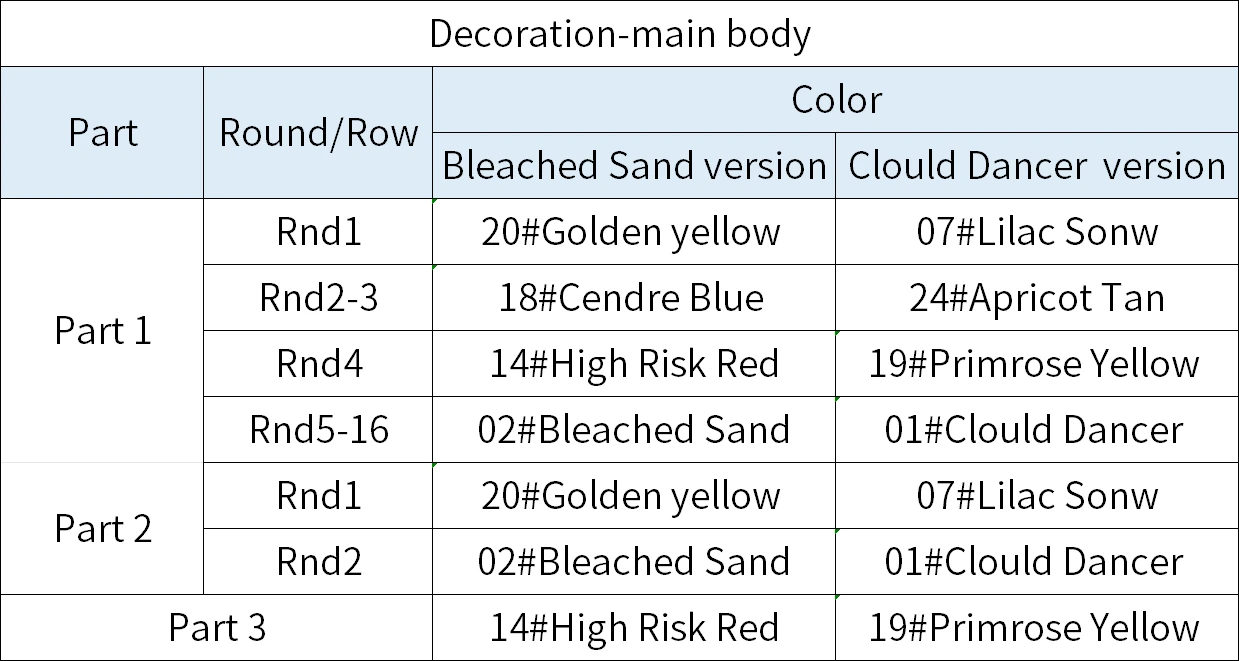
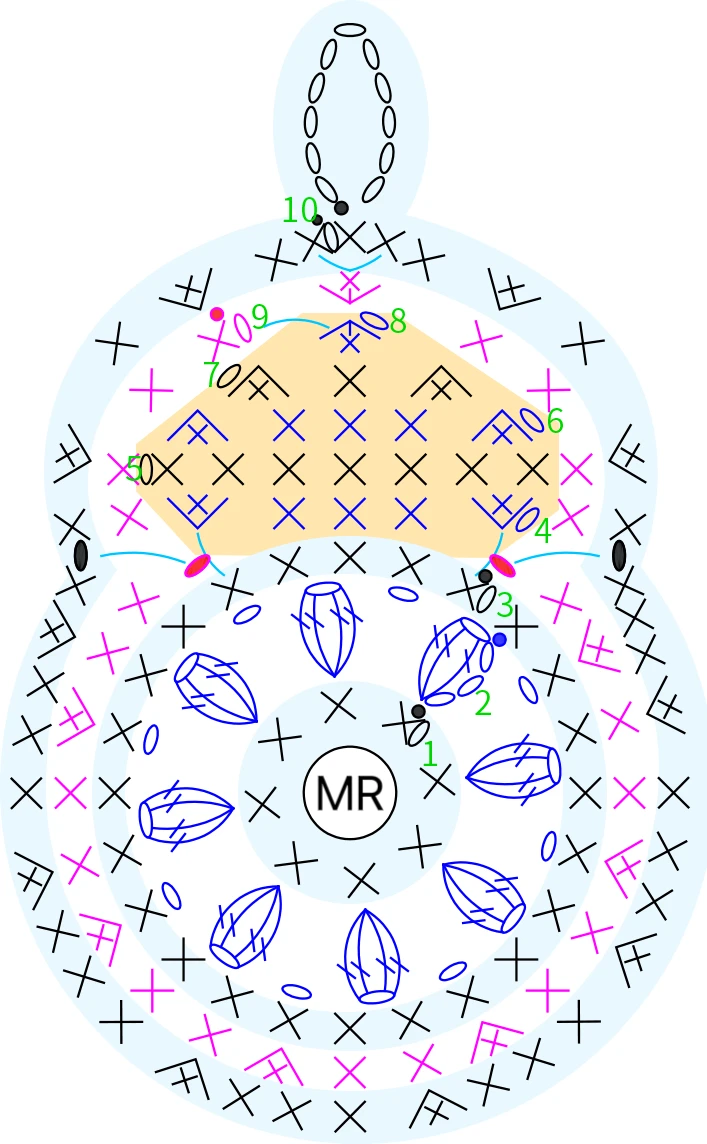
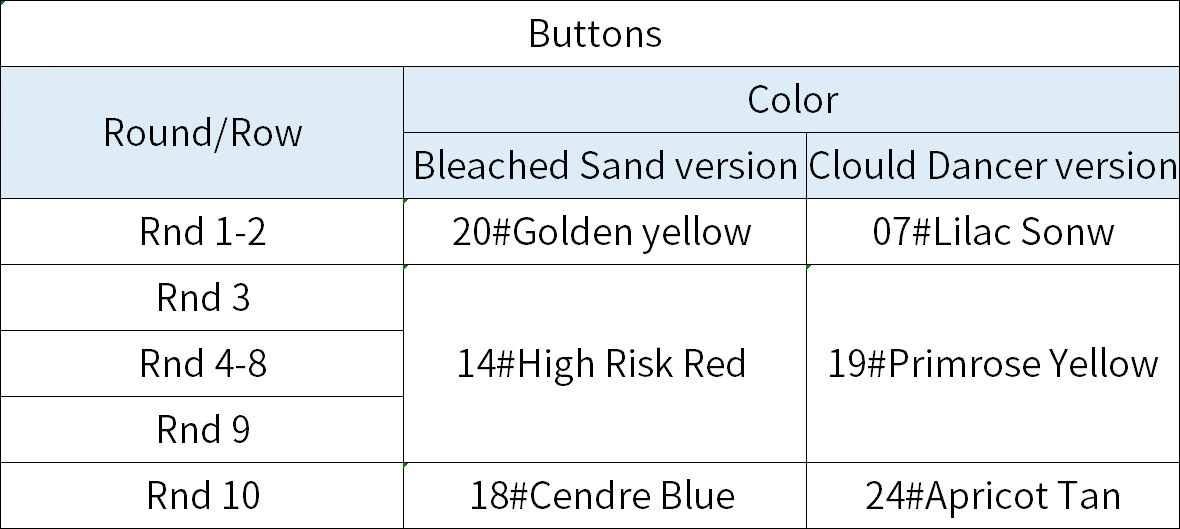
The decoration is adivided into the main body and the accessories. First, work the main body of it. Then attach the accessories. Place and attach on the left front piece. The buttons include Chinese frogs and pearl buttons. First, crochet the Chinese frog and attach it to the corresponding placement, then attach the pearl button on the opposite side of the buttonholes. Please refer to the video demonstration for more details.
Note: After finishing the Chinese frog, leave a length of yarn 2-3 times its circumference for sewing.
Made by the community