Clothes
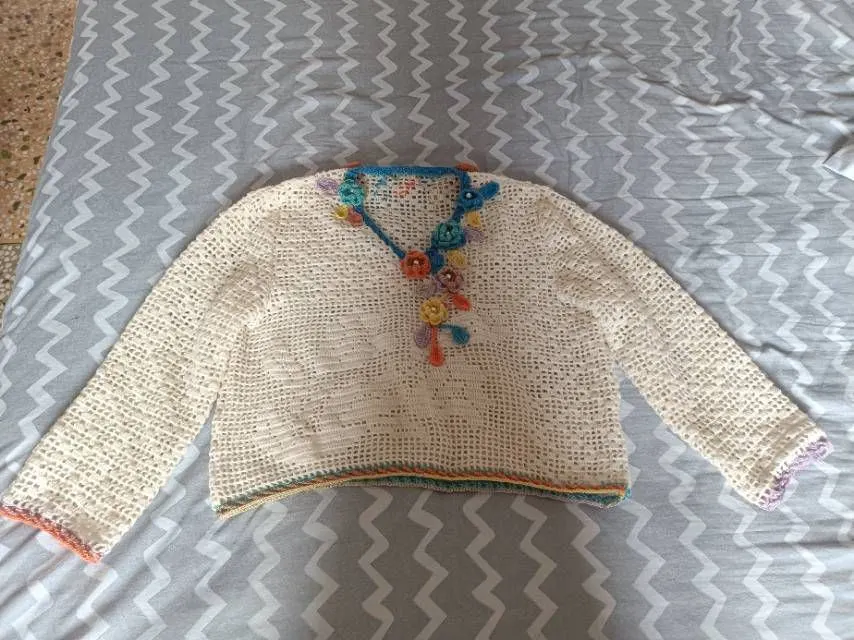
Flora V-neck Pullover
Project preview
See the finished project
Pattern format
Instructions
Watch and follow
Video tutorial
This pullover consists of the front piece, the back piece, the joining, the sleeves, the edging and the decorations. First, crochet the front and back pieces, then join them together. Next, crochet the sleeves and assemble them. After that, crochet the edging. Finally, make the decorations.
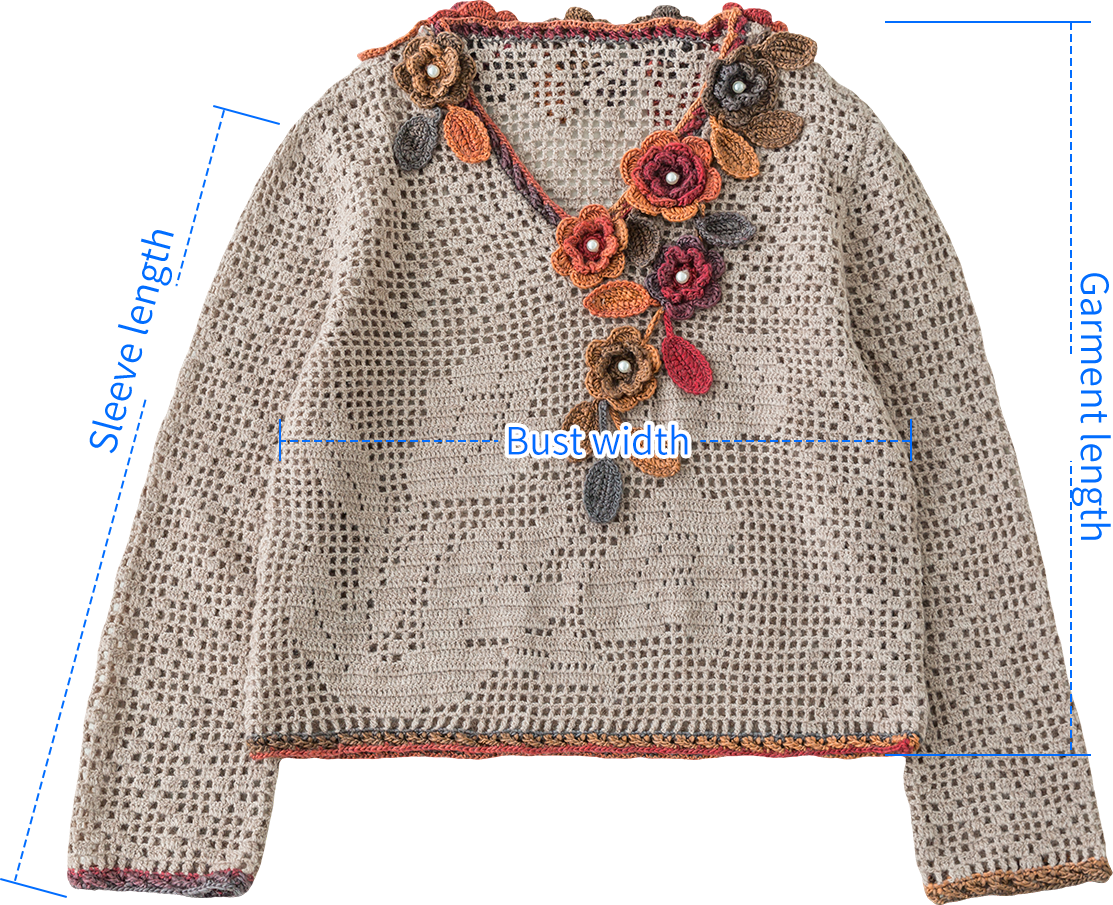

The handcrafted measurements may have an error of 1 to 2 cm. Due to variations in individual tension, the size of the sample is for reference only.
Materials 1: Susan's Family Alpaca
Hook 1: 2.00 mm crochet hook (for the front and back pieces and sleeves)
Materials 2: Susan's Family Monet Impression
Hook 2: 2.50 mm crochet hook (for the edging and the decorations)
Note: The left and right on the charts refer to the actual wearing position.
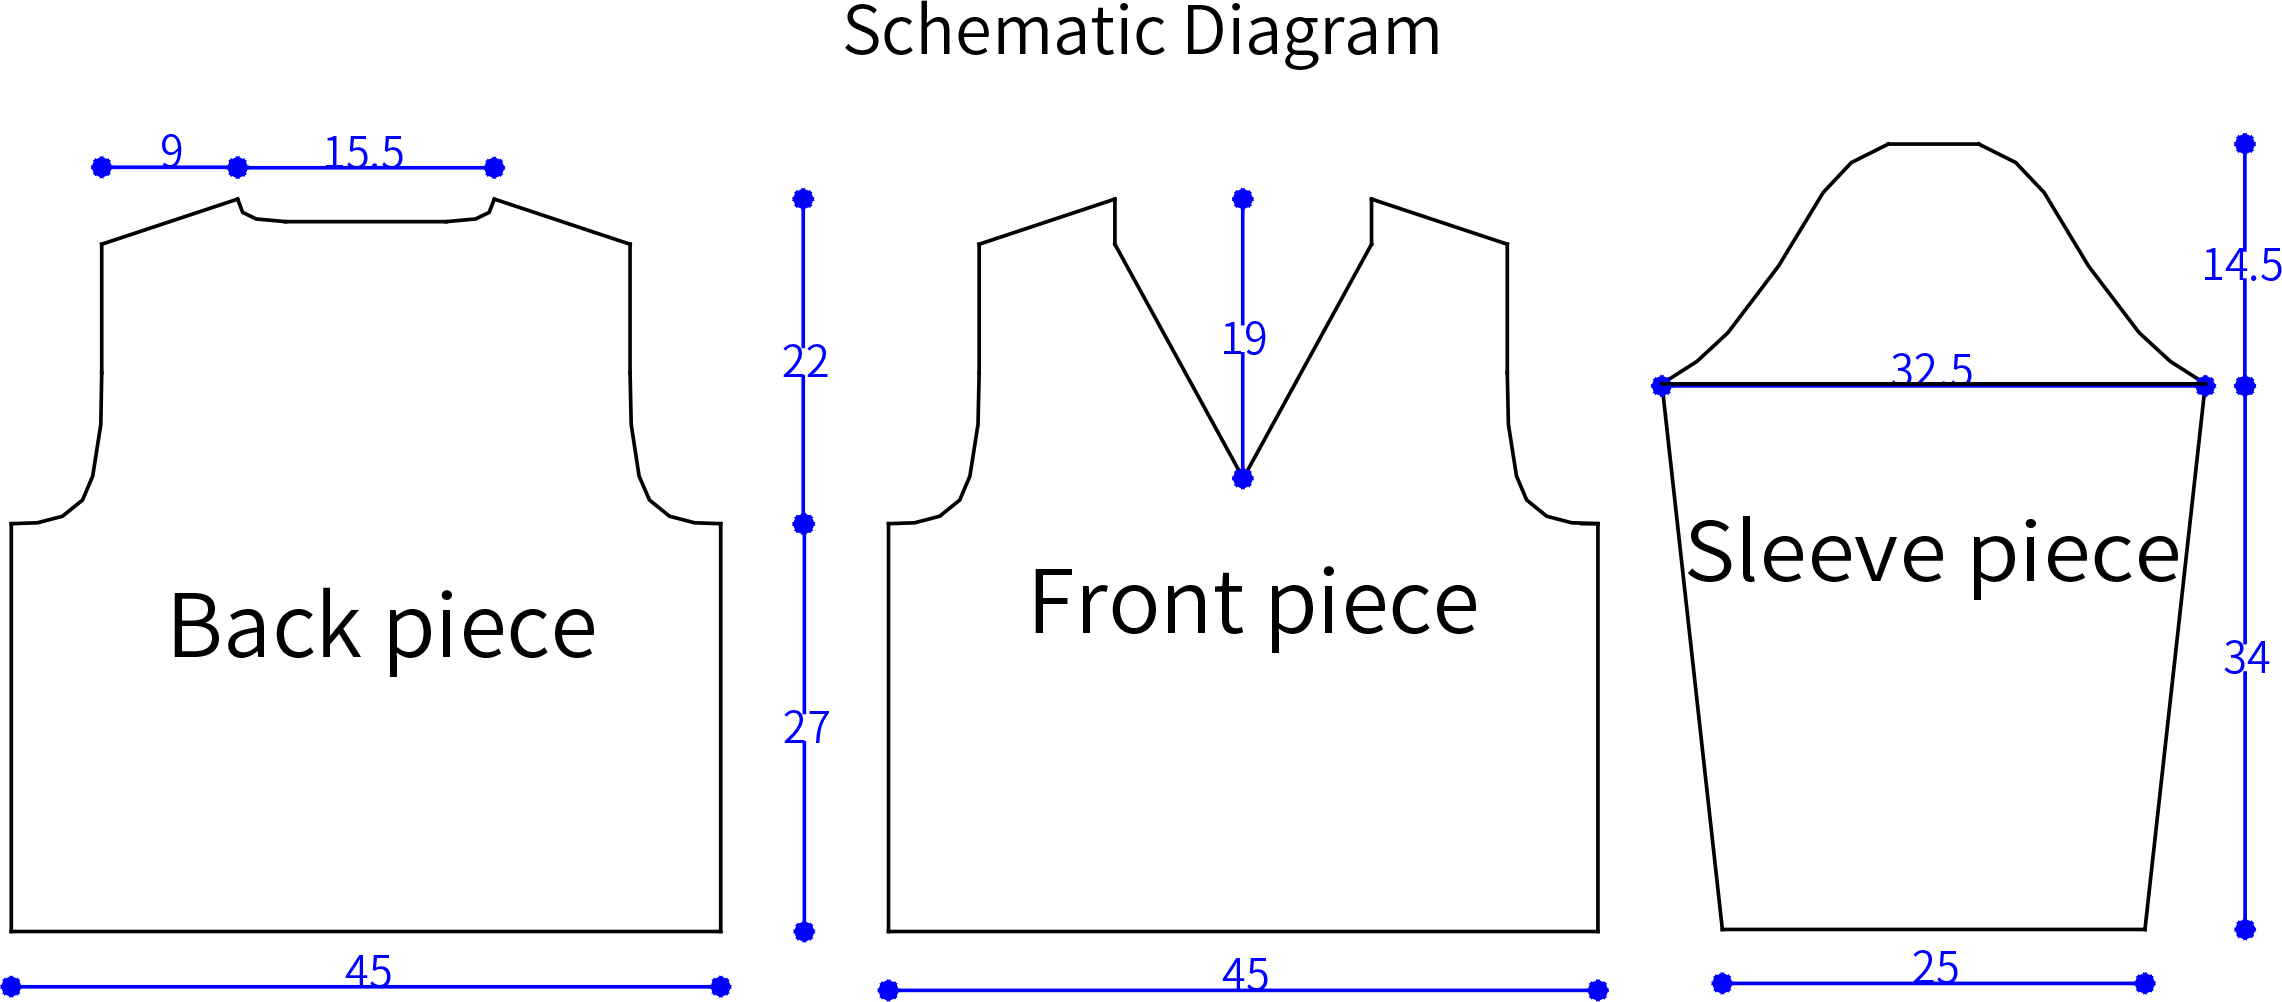

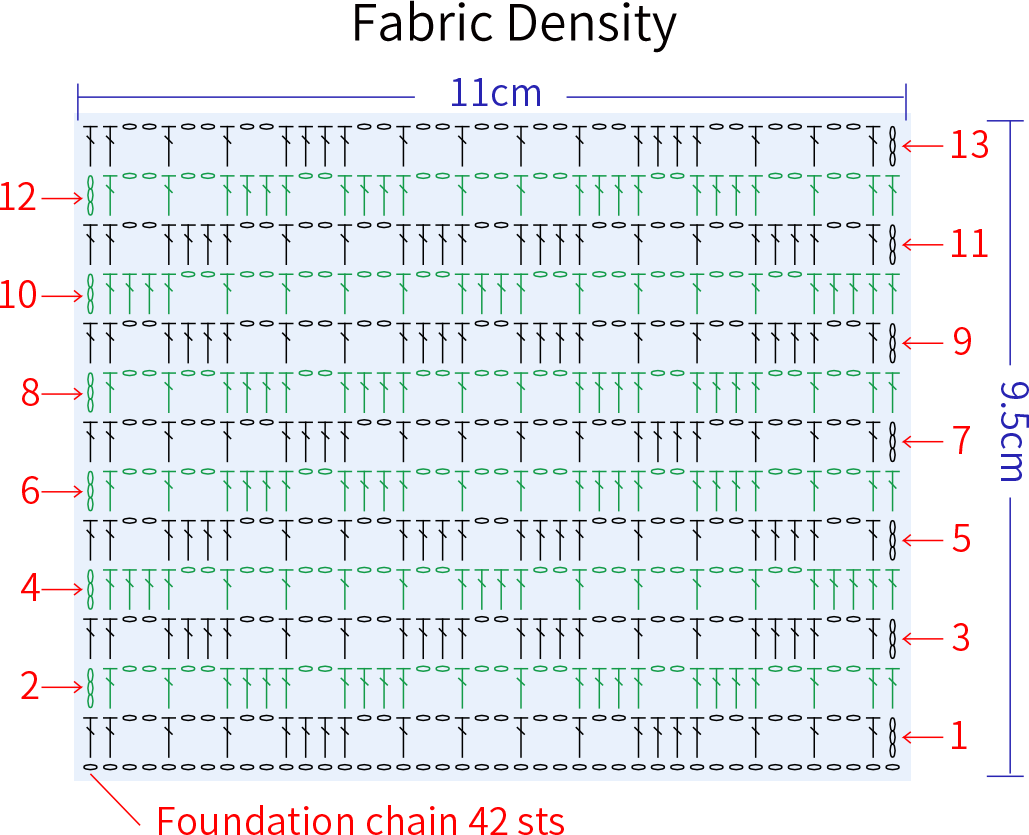
Note: This pattern is making in Chinese crochet pattern terms, and the stitch name is written using American terminology. All measurements in charts are in cm. 
Chart Key









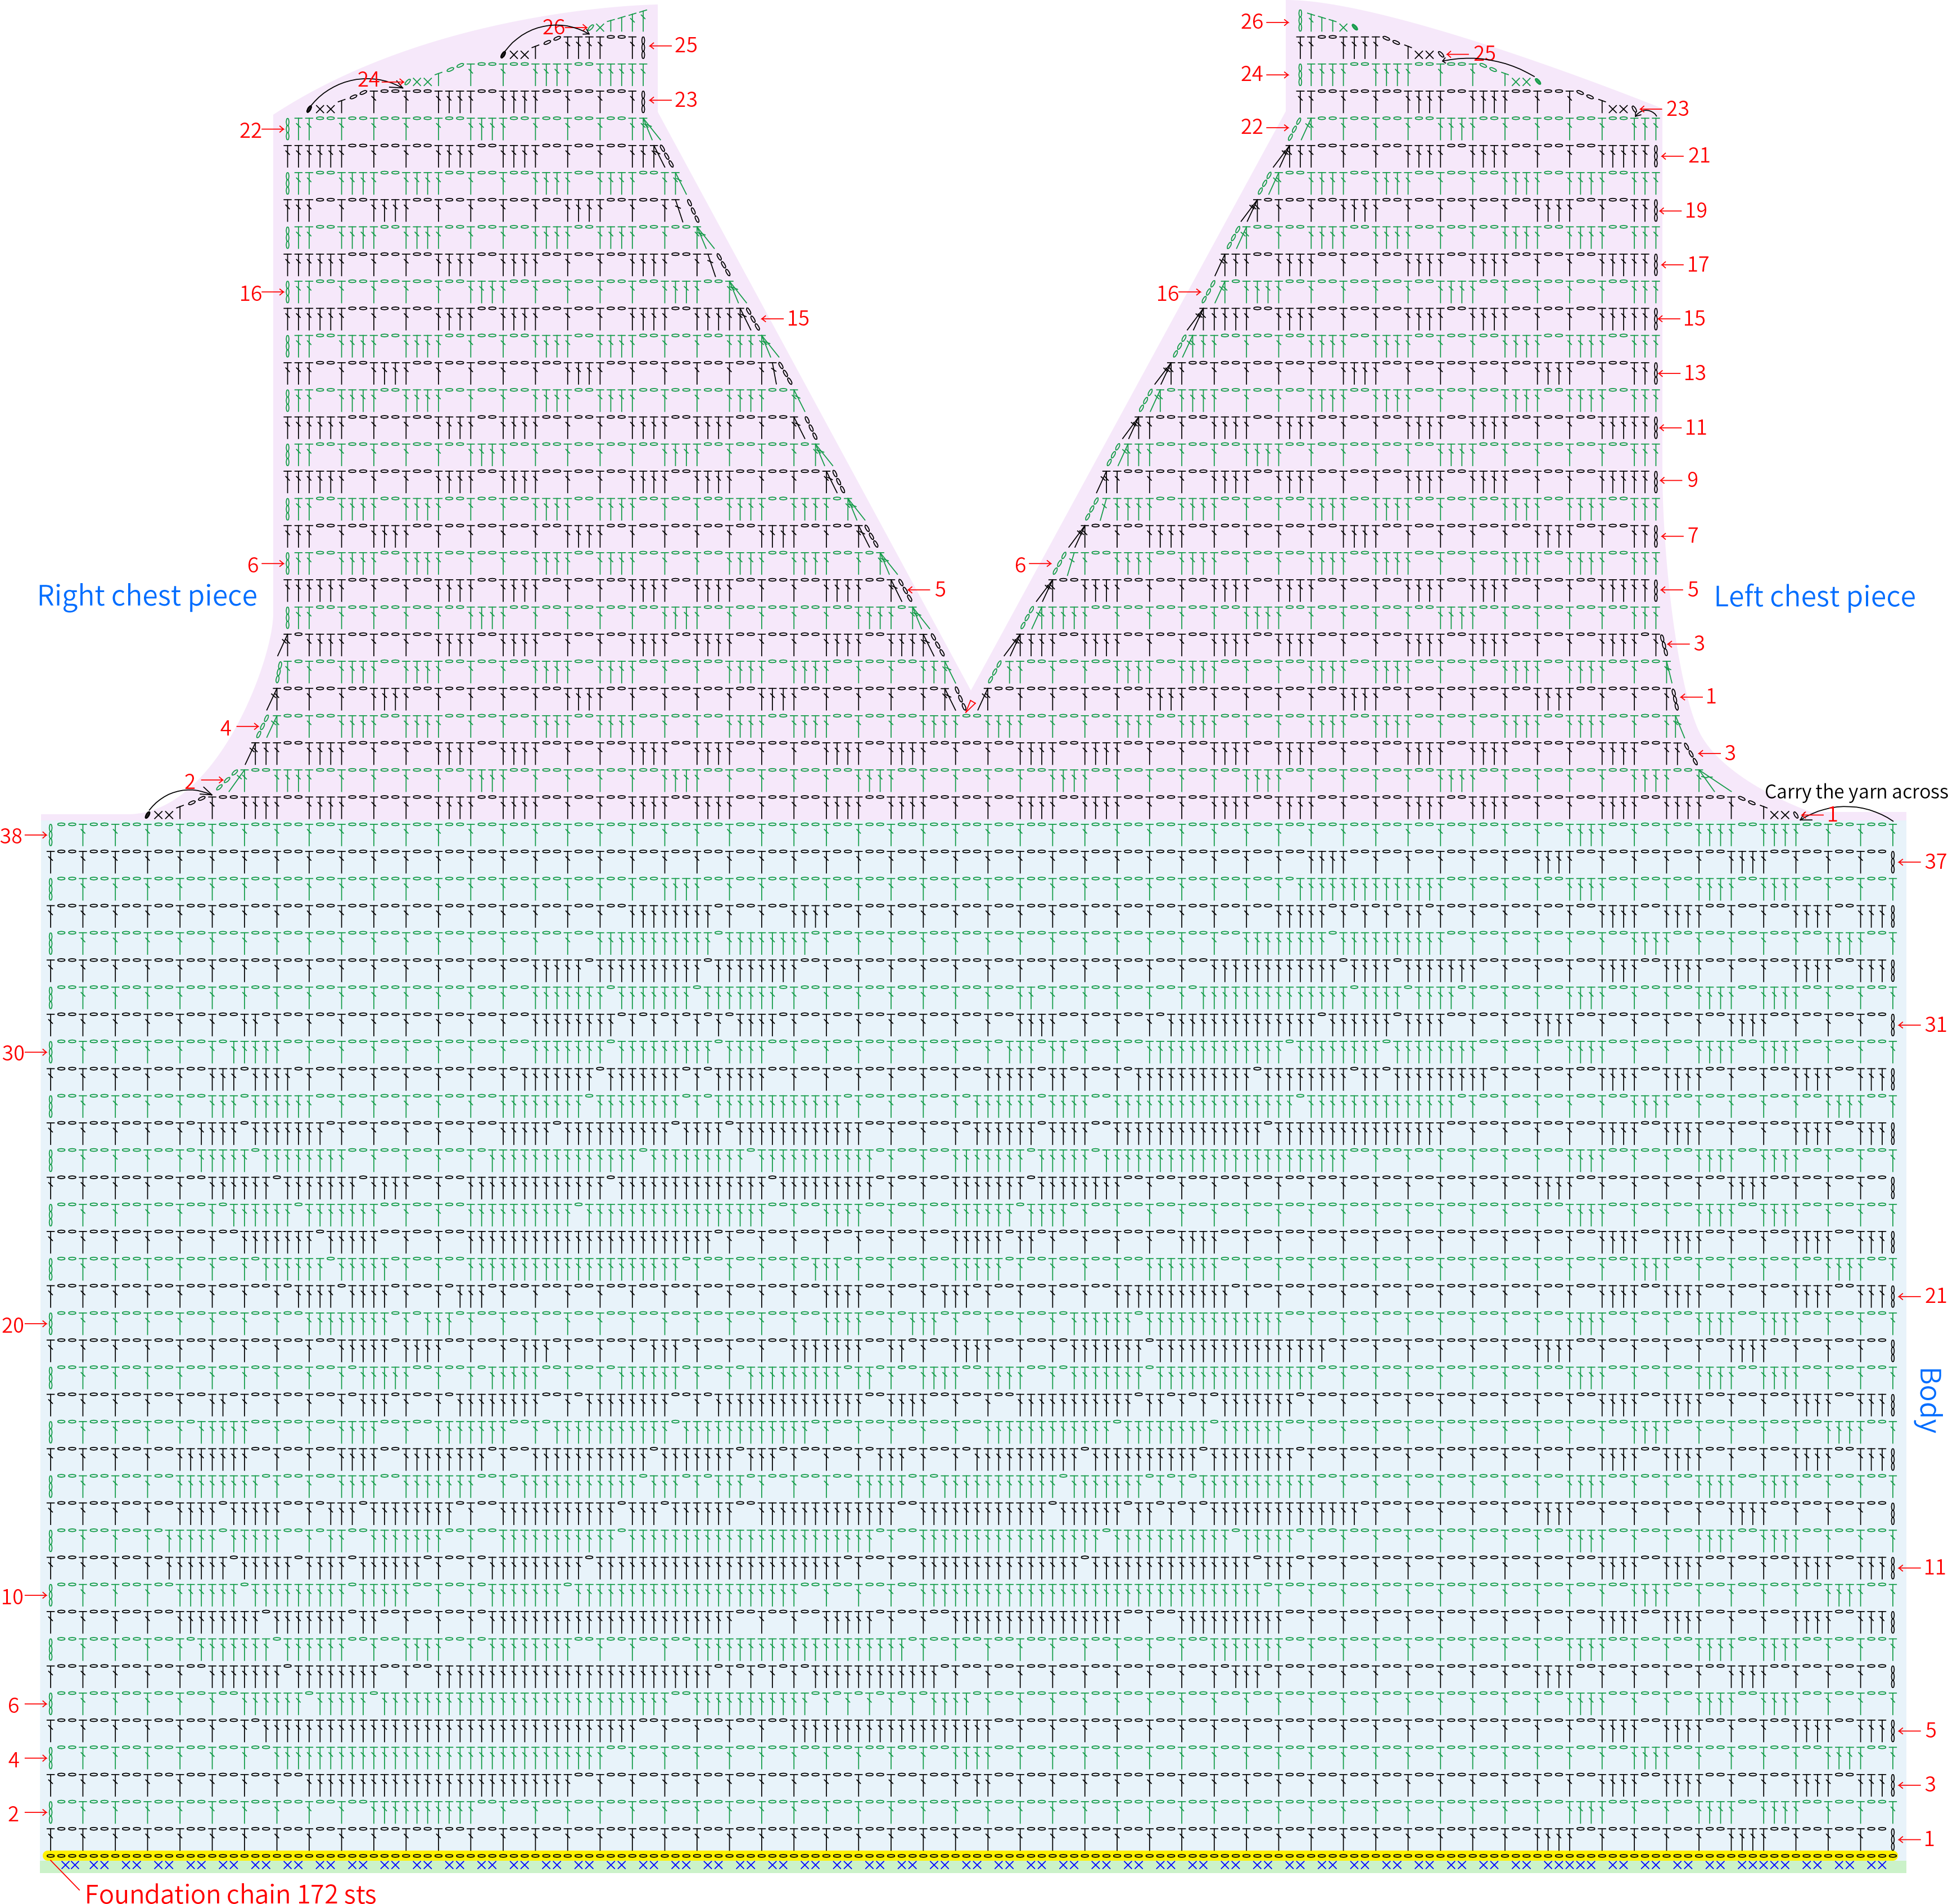
Part 1 Front pieceA 01' 30''
It's divided into the body and the chest piece. Start with a foundation chain. Work back and forth in rows. Please refer to the video demonstration for more details.
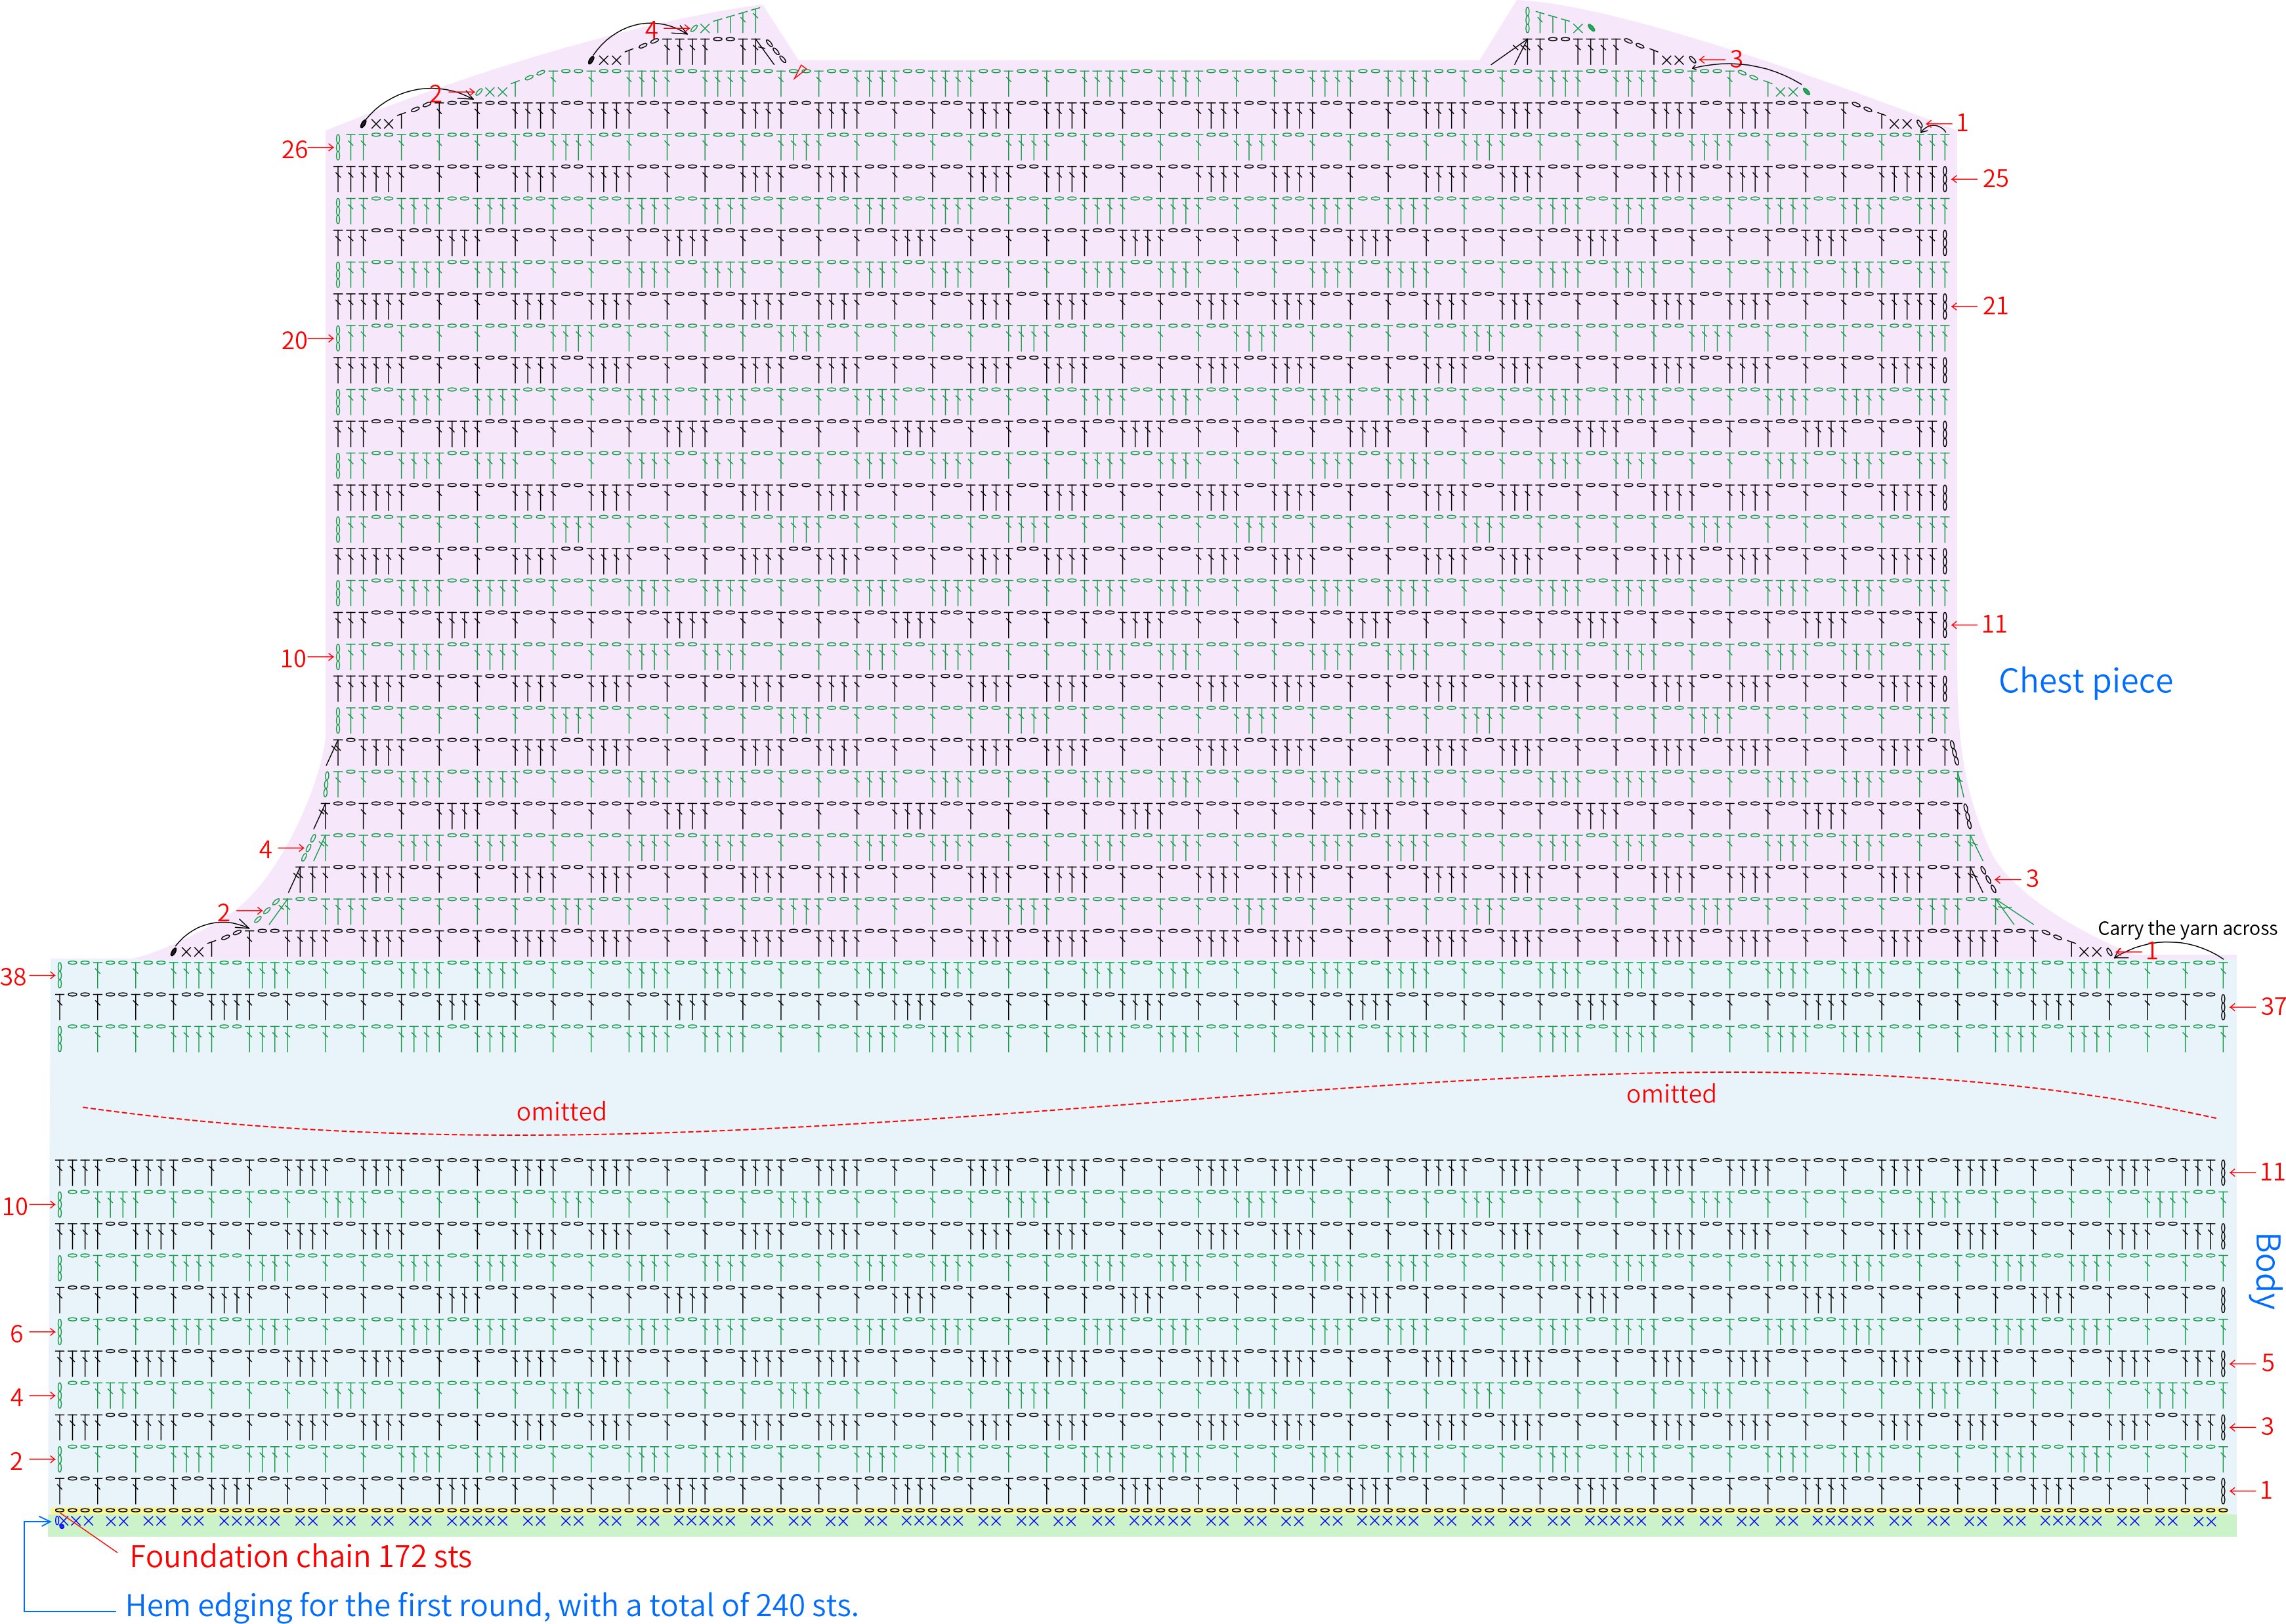
Part 2 Back pieceB 36' 45''
The back piece is divided into the body, the chest piece, and the shoulders. Similarly, crochet the body first, then the chest piece. Finally, crochet the shoulders. Please refer to the video demonstration for more details.
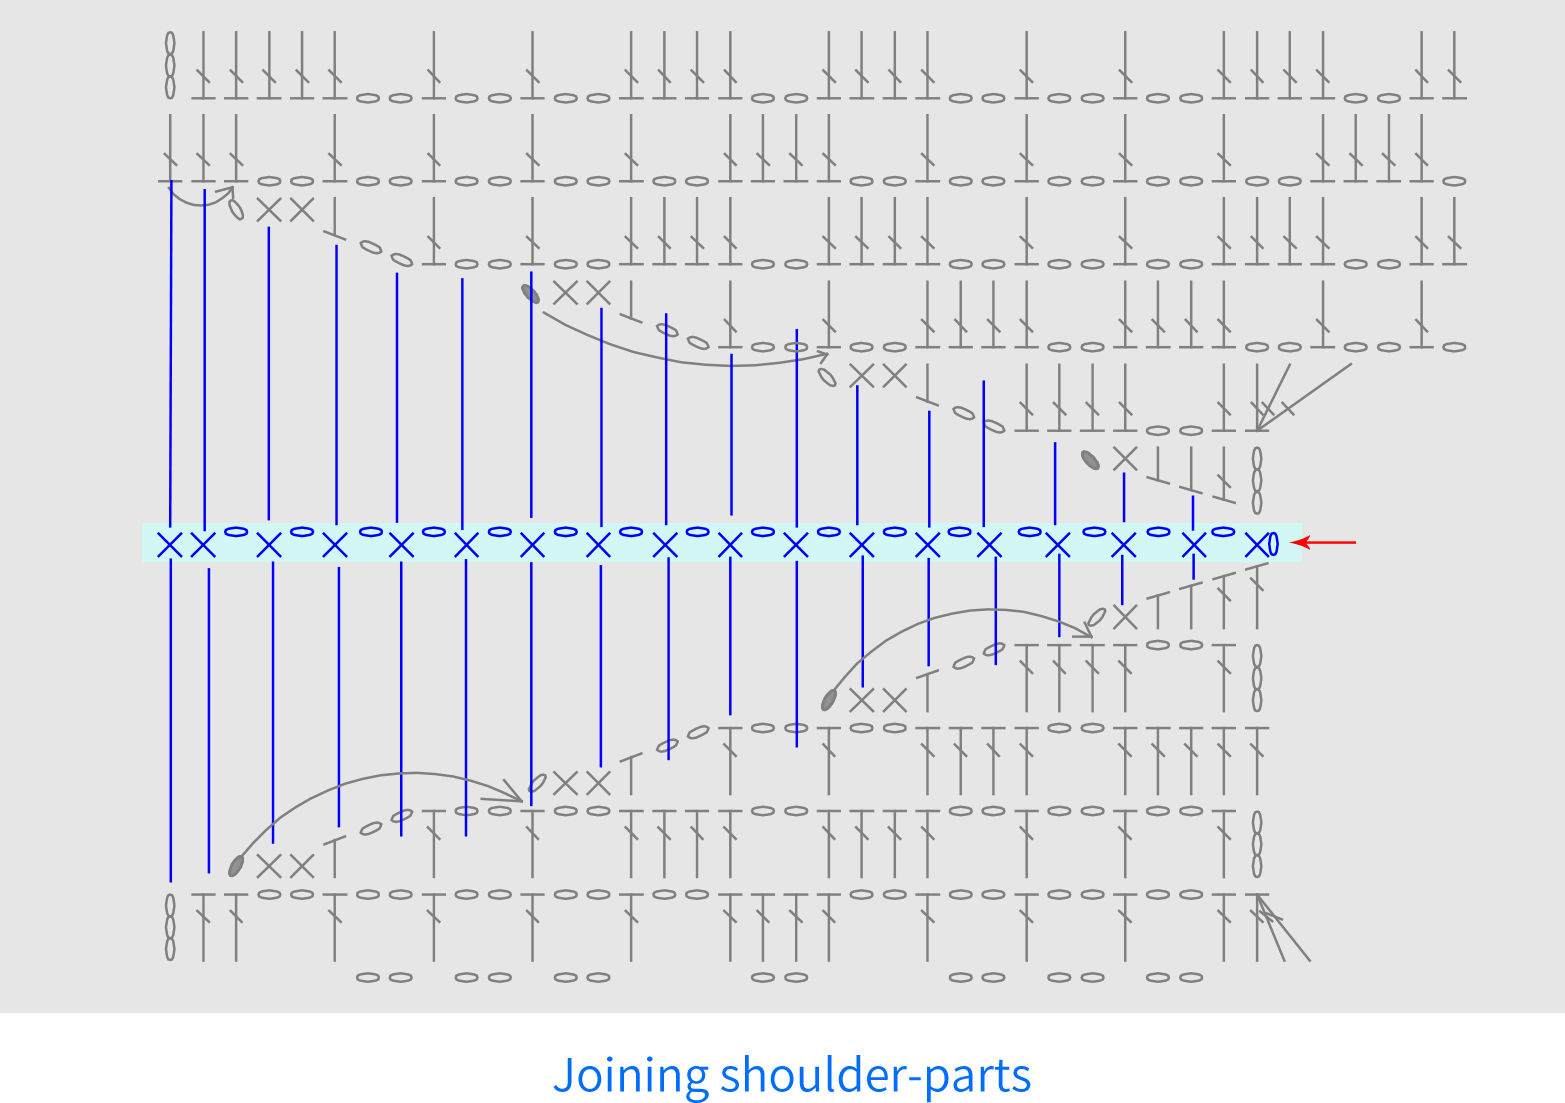
Part 3 JoiningC 37' 31''
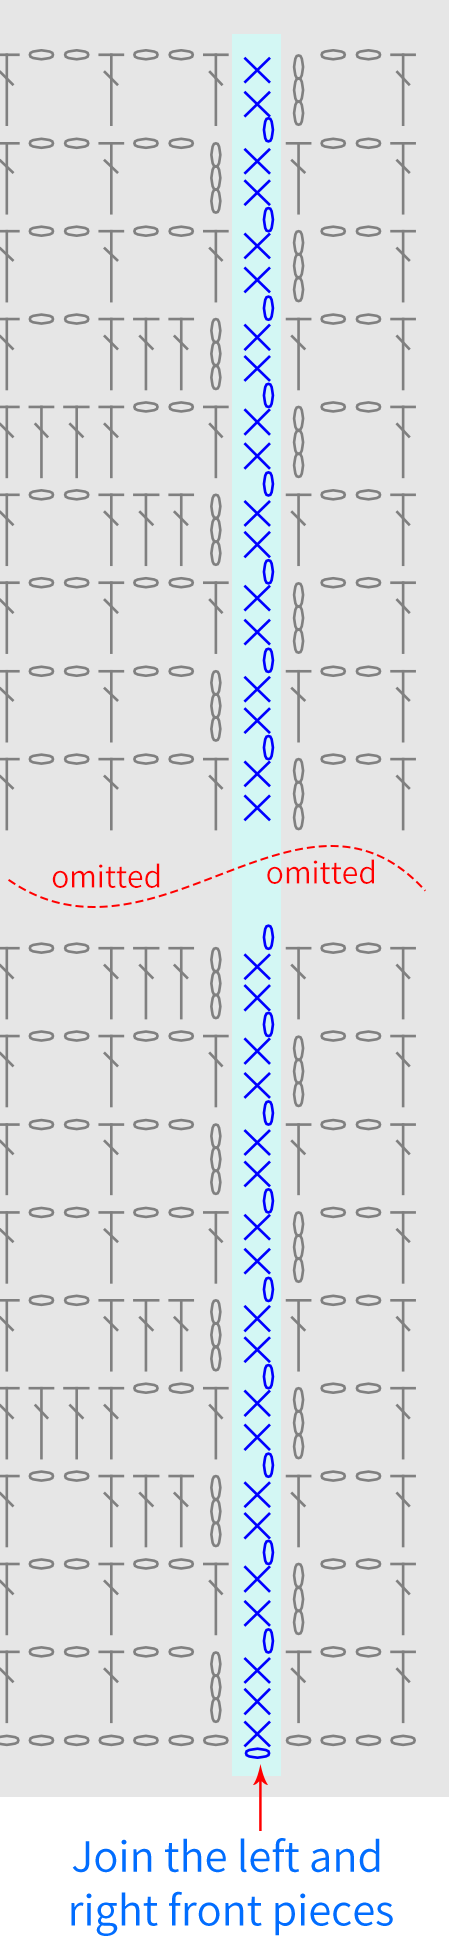
First, join the shoulders. Then join the side edges. When joining, place the fronts of the front and back pieces facing each other and crochet from the back. Please refer to the video demonstration for more details.
Part 4 SleevesD 46' 26''
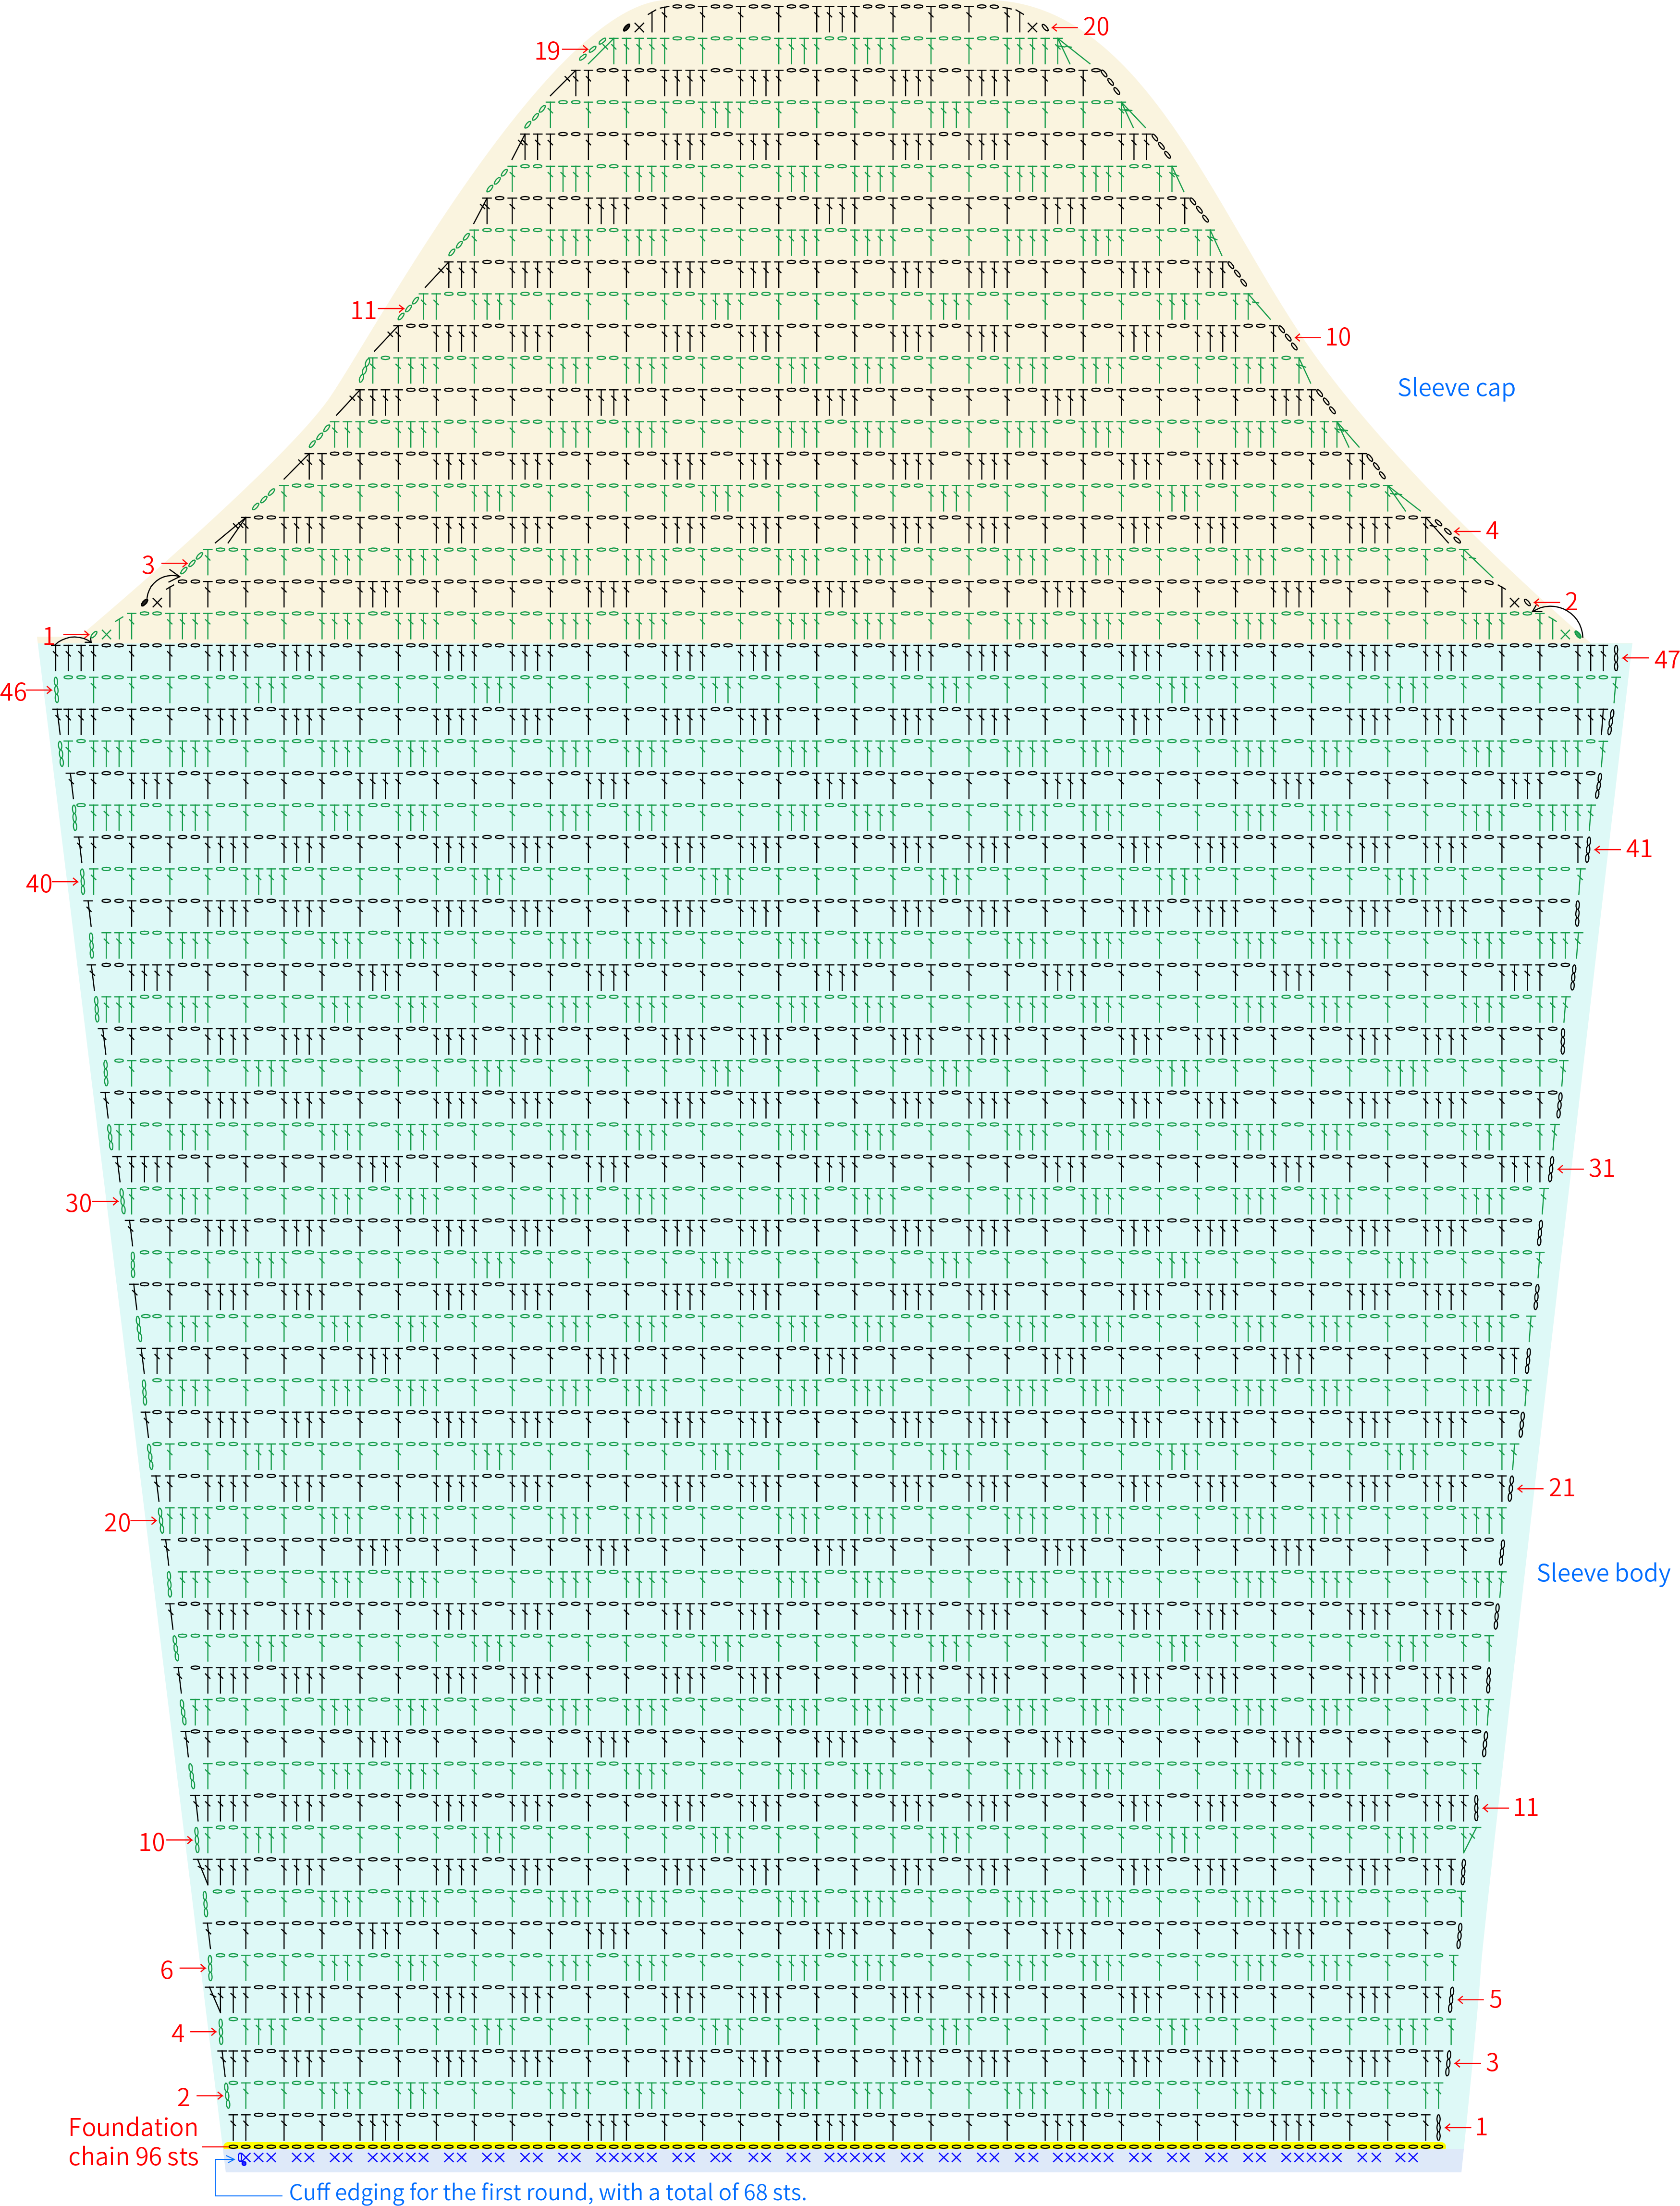
There are two identical sleeves. Each is divided into the sleeve body and the sleeve cap. Start by crocheting the sleeve body, then the sleeve cap. After the sleeves are crocheted, first join the sleeve body, then join the sleeve to the armhole. Please refer to the video demonstration for more details.
Part 5 EdgingE 50' 16''
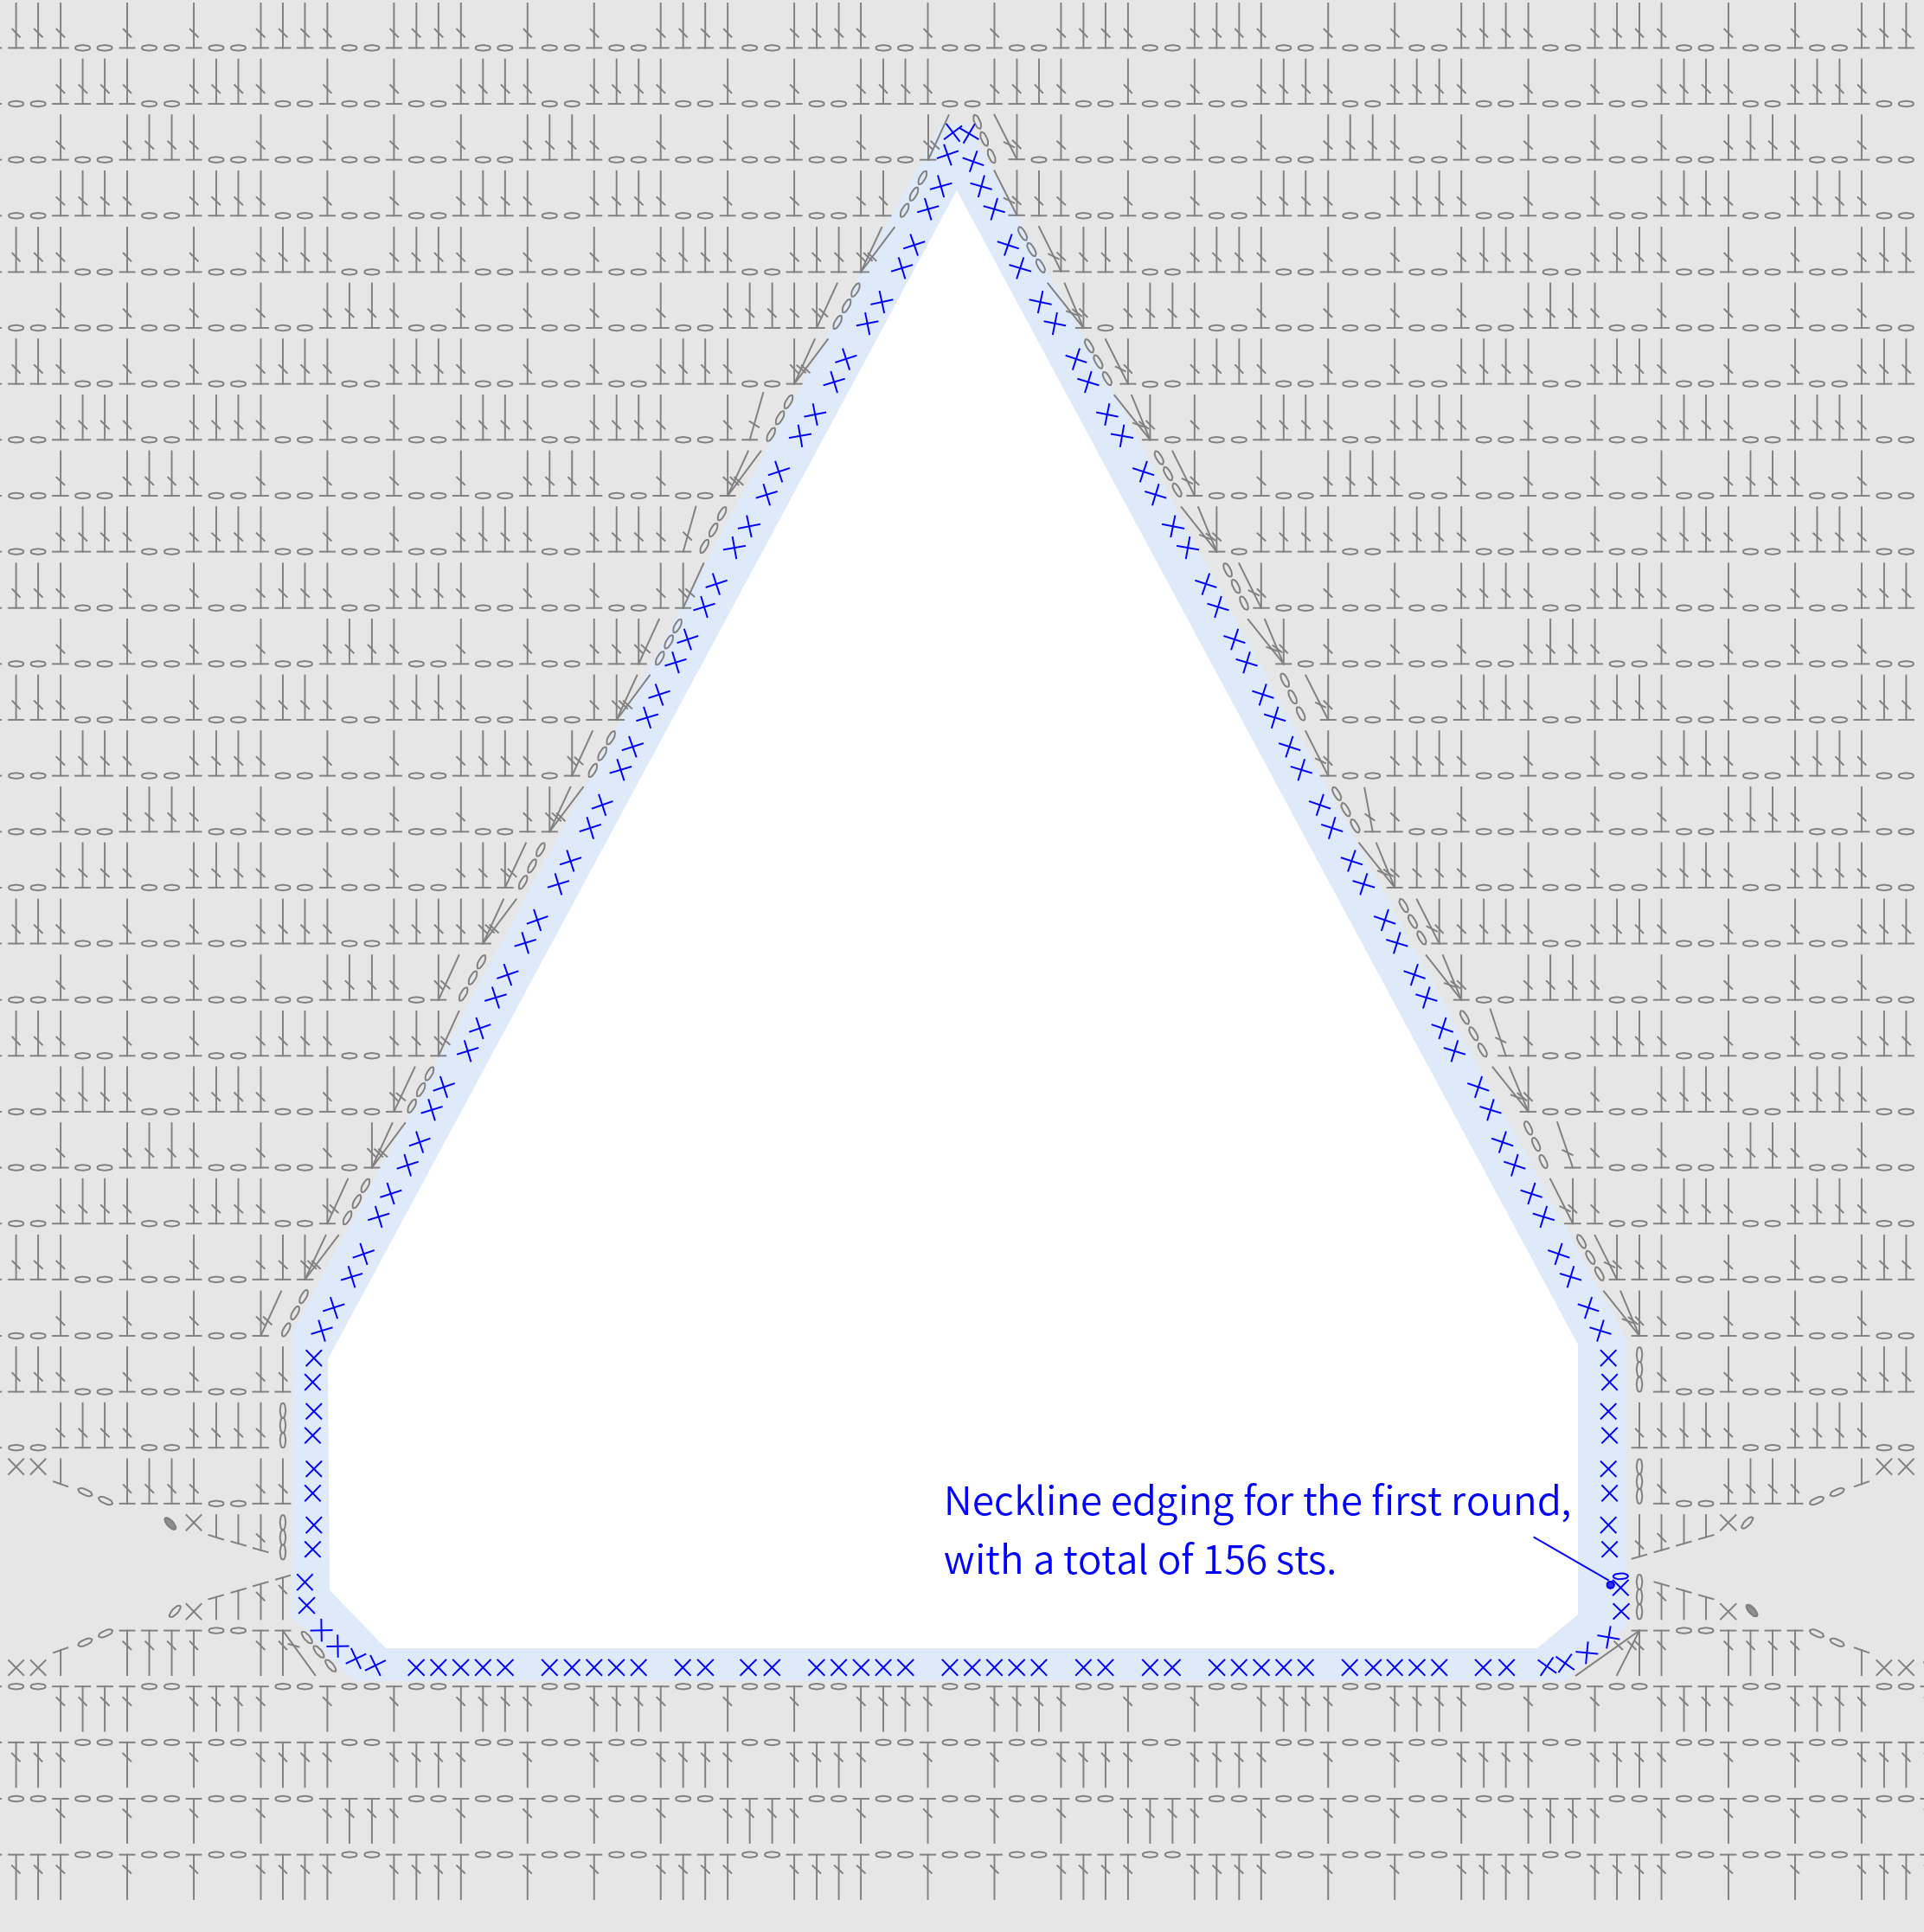
It includes neckline edging, cuff edging, and hem edging. Please refer to the video demonstration for more details.

Part 6 DecorationsF 62' 34''
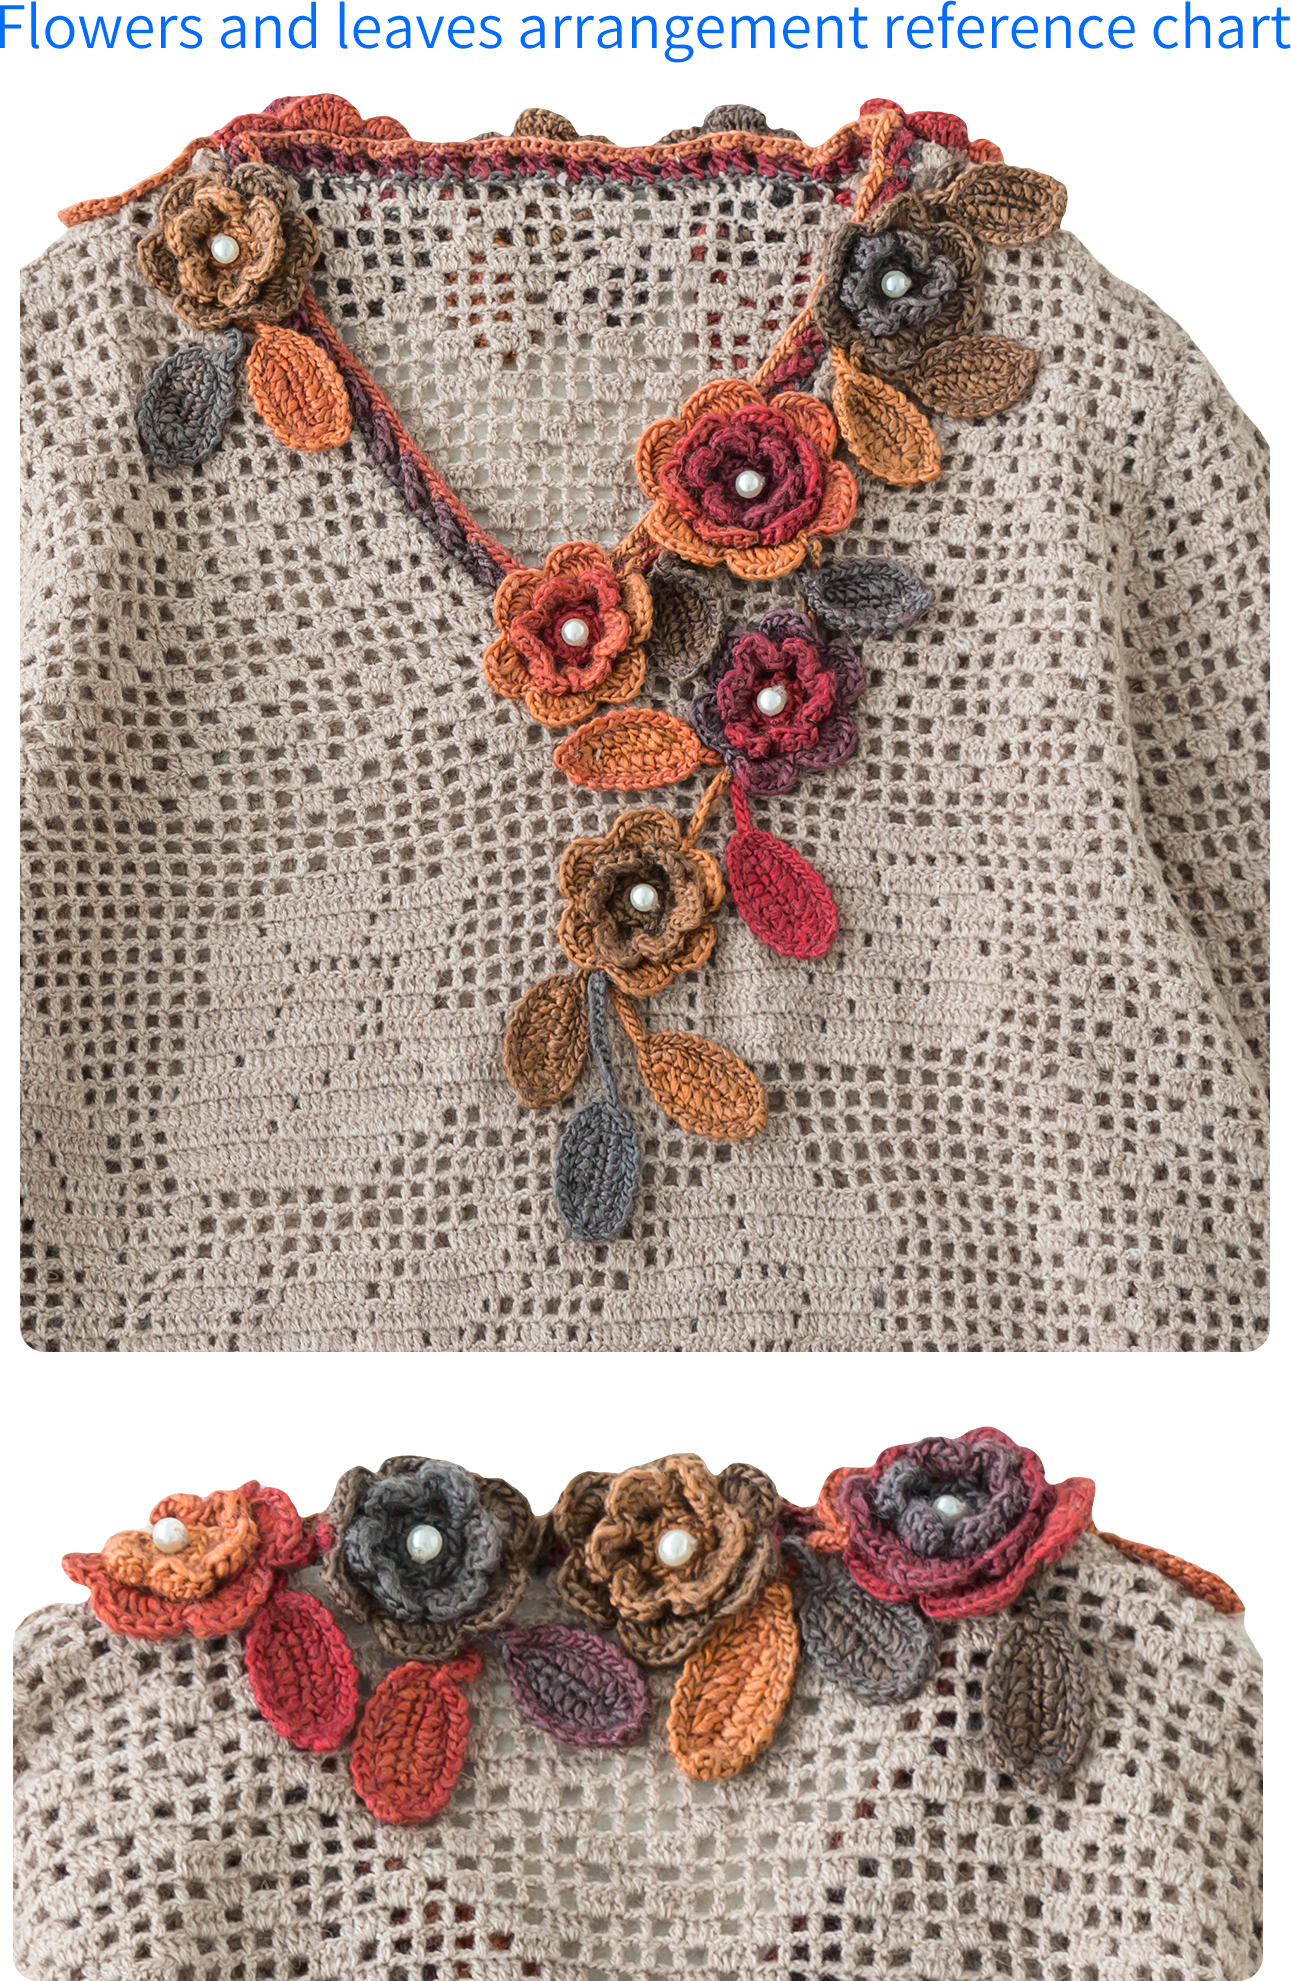
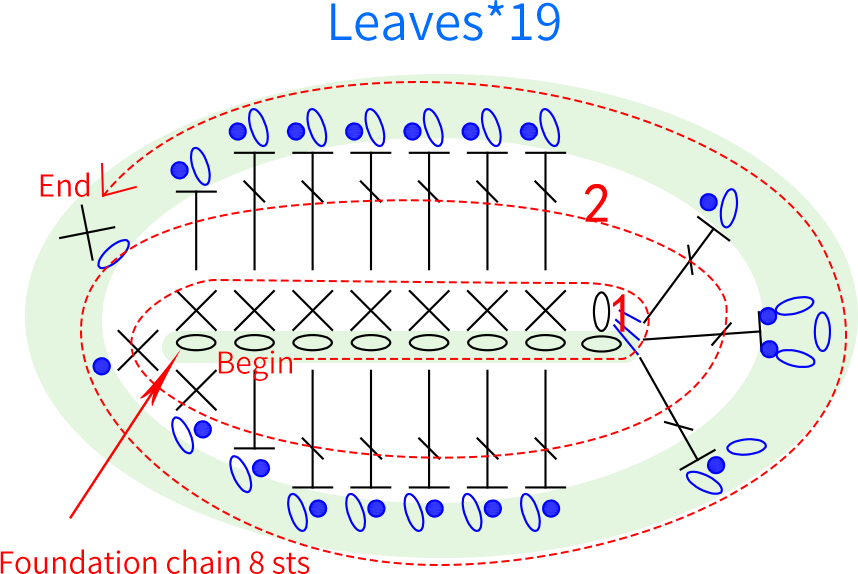
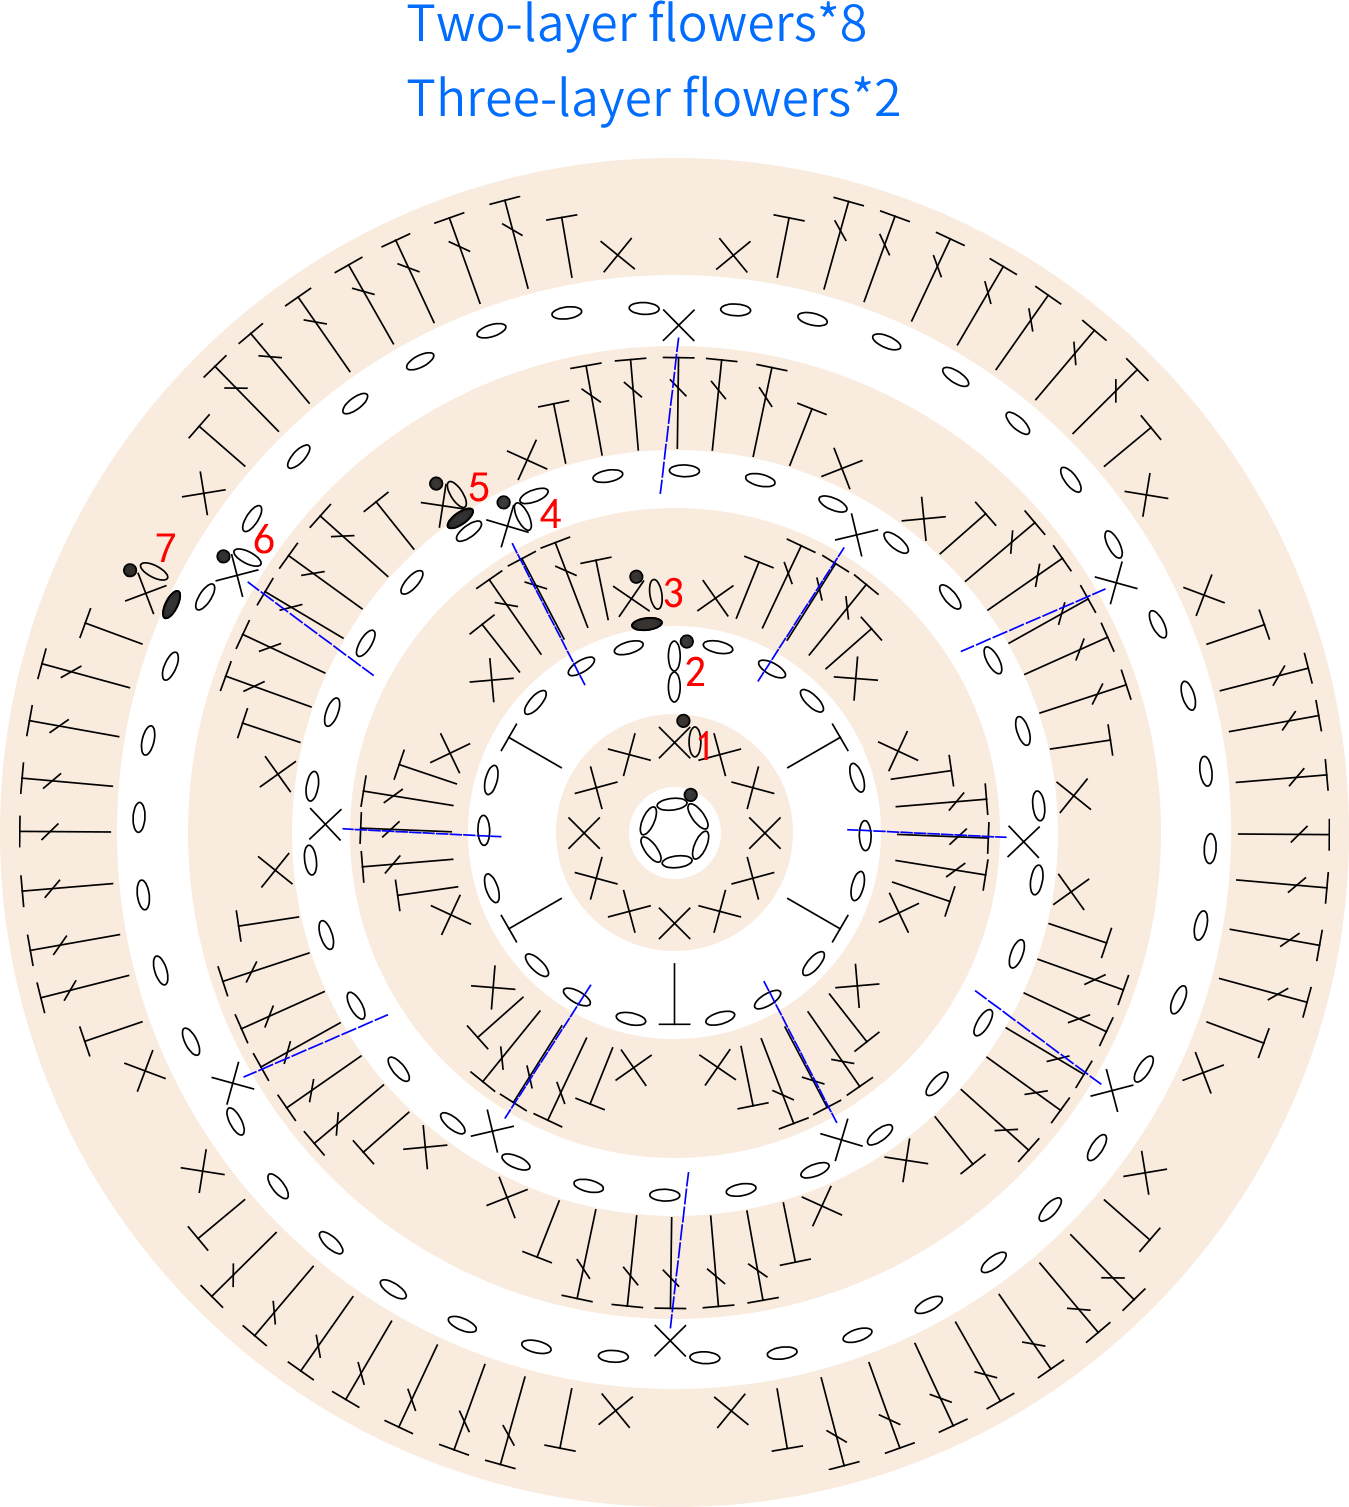
These consist of leaves, flowers, and assembly. First, crochet the flowers and leaves separately. After crocheting, assemble them. Please refer to the video demonstration for more details.
Note:
① Before and after crocheting the leaves and flowers, leave about 20cm of yarn tail. After completing them, hang the yarn and crochet a chain stitch.
② For the 4th and 6th rounds of the flower, you need to carry the yarn across before crocheting.
③ A two-layer flower requires crocheting only the first five rounds.
Made by the community