Home / Blanket
Spiritual Lotus Blanket
Project preview
See the finished project
Pattern format
Instructions
Watch and follow
Video tutorial
This blanket consists of the main piece and decorations. First, crochet and join the main part, then crochet and make the decorations.
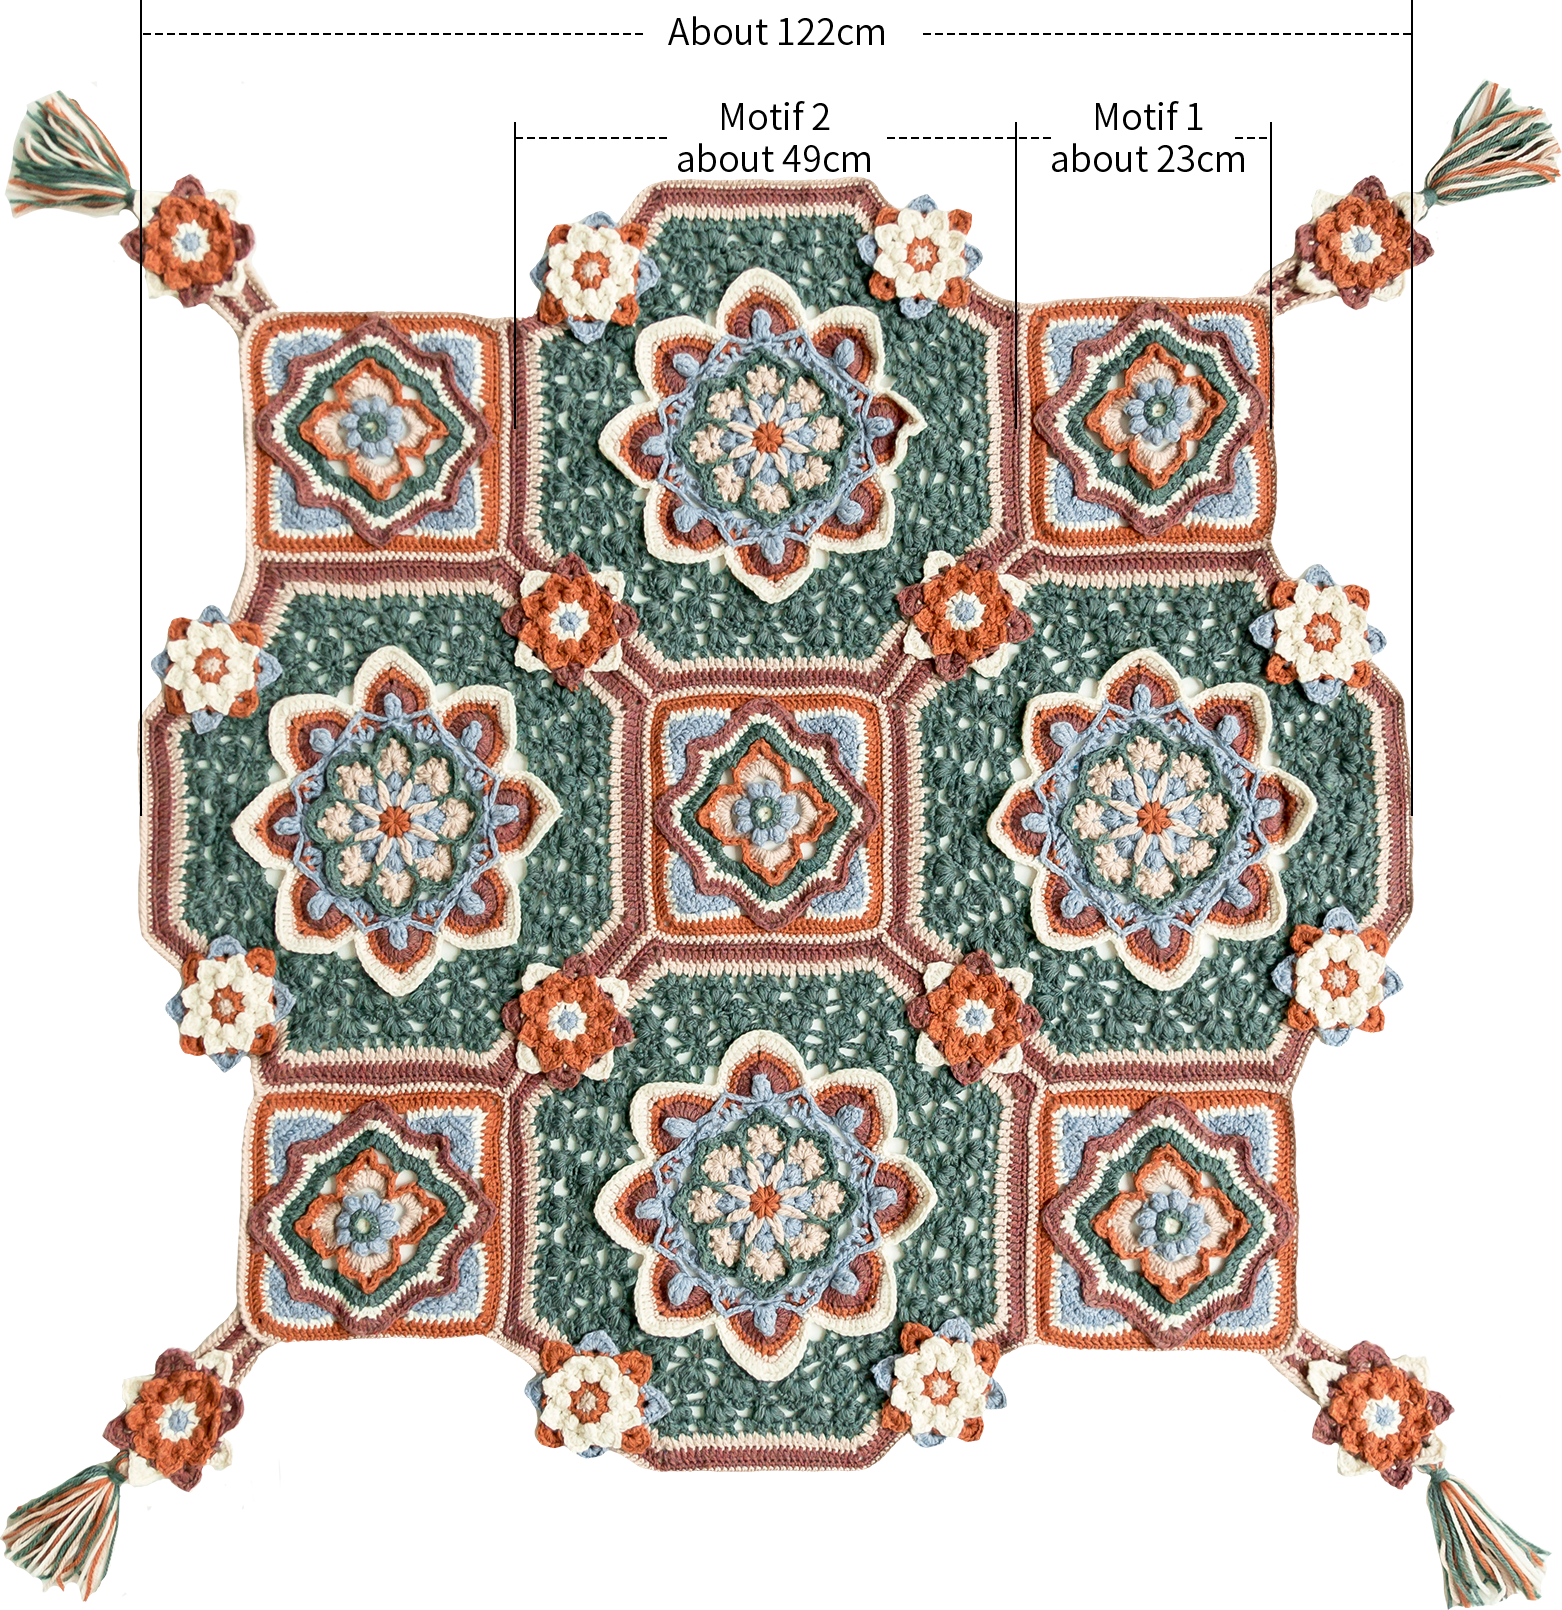
The handcrafted measurements may have an error of 1 to 2 cm. Due to variations in individual tension, the size of the sample is for reference only.
Materials: , Susan's Family Morandi 8#
Hook: 4.50 mm crochet hook
Chart Key
























Note: This pattern is making in Chinese crochet pattern terms, and the stitch name is written using American terminology. All measurements in charts are in cm.

Part 1 Main PieceA
The main part includes motif 1, motif 2, motif 3, edging, and sewing. First, crochet all three motifs. Then, join motif 1 and motif 2 together and crochet the edging. Finally, sew on motif 3.
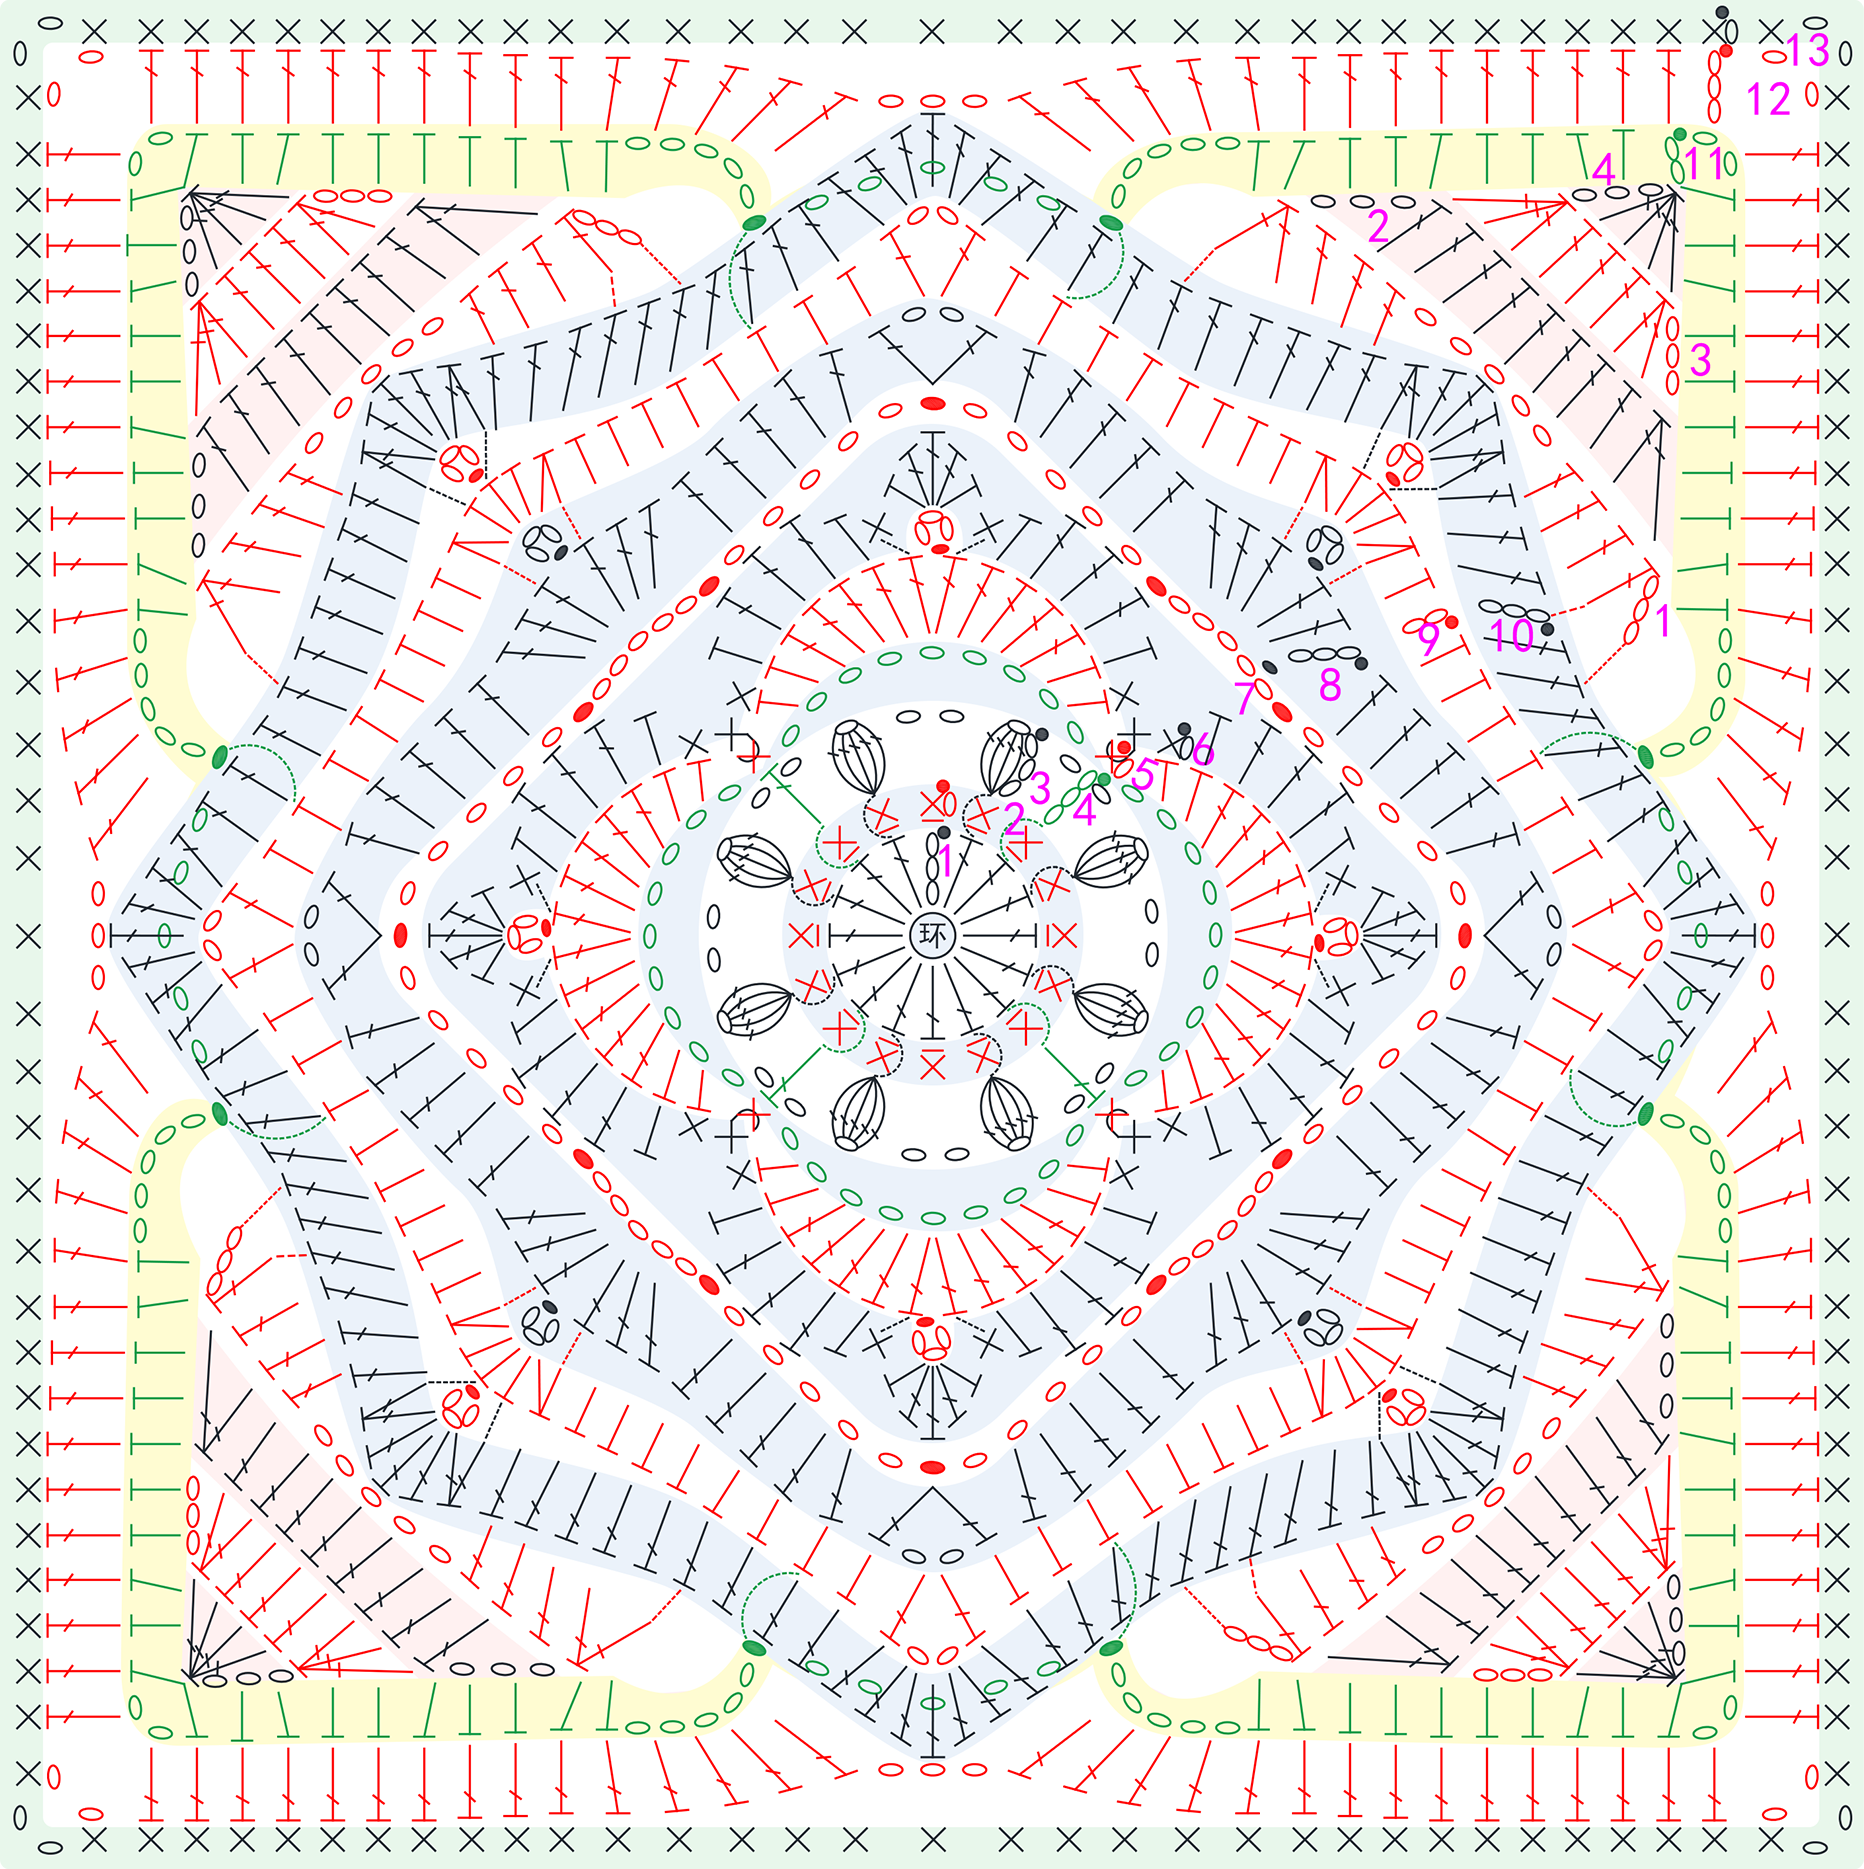
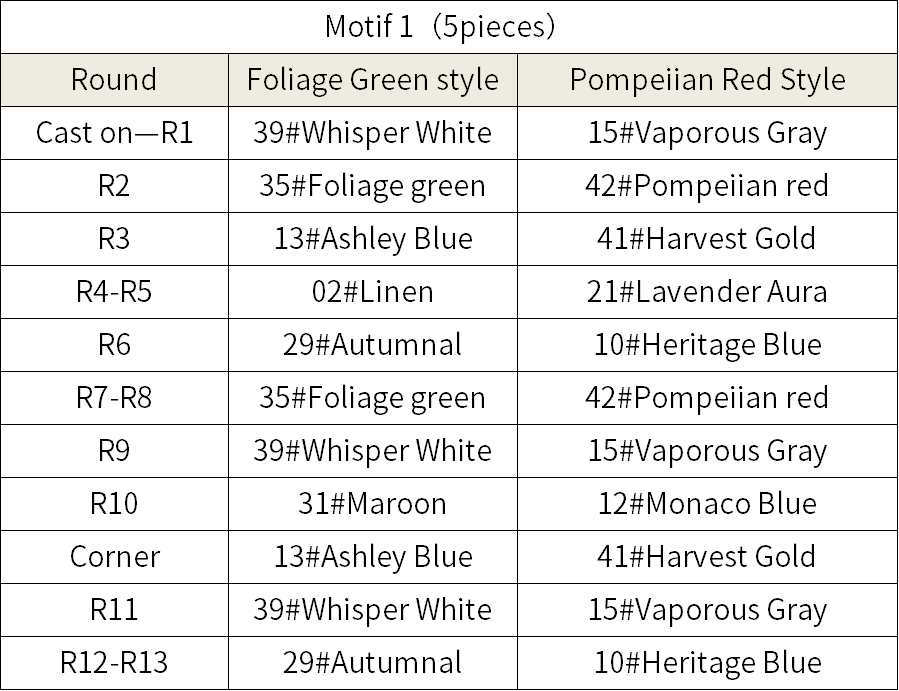
Step 1 Motif 1A1 00' 56'' (Part 1)
Note: The working points for the 3rd, 4th, 5th, and 7th rounds, the 3rd row of the corners, and the 11th and 13th rounds are special. You need to refer to the video demonstration.
Step 2 Motif 2A2 48' 03'' (Part 1)
[Motif 2, Rounds 1-14]
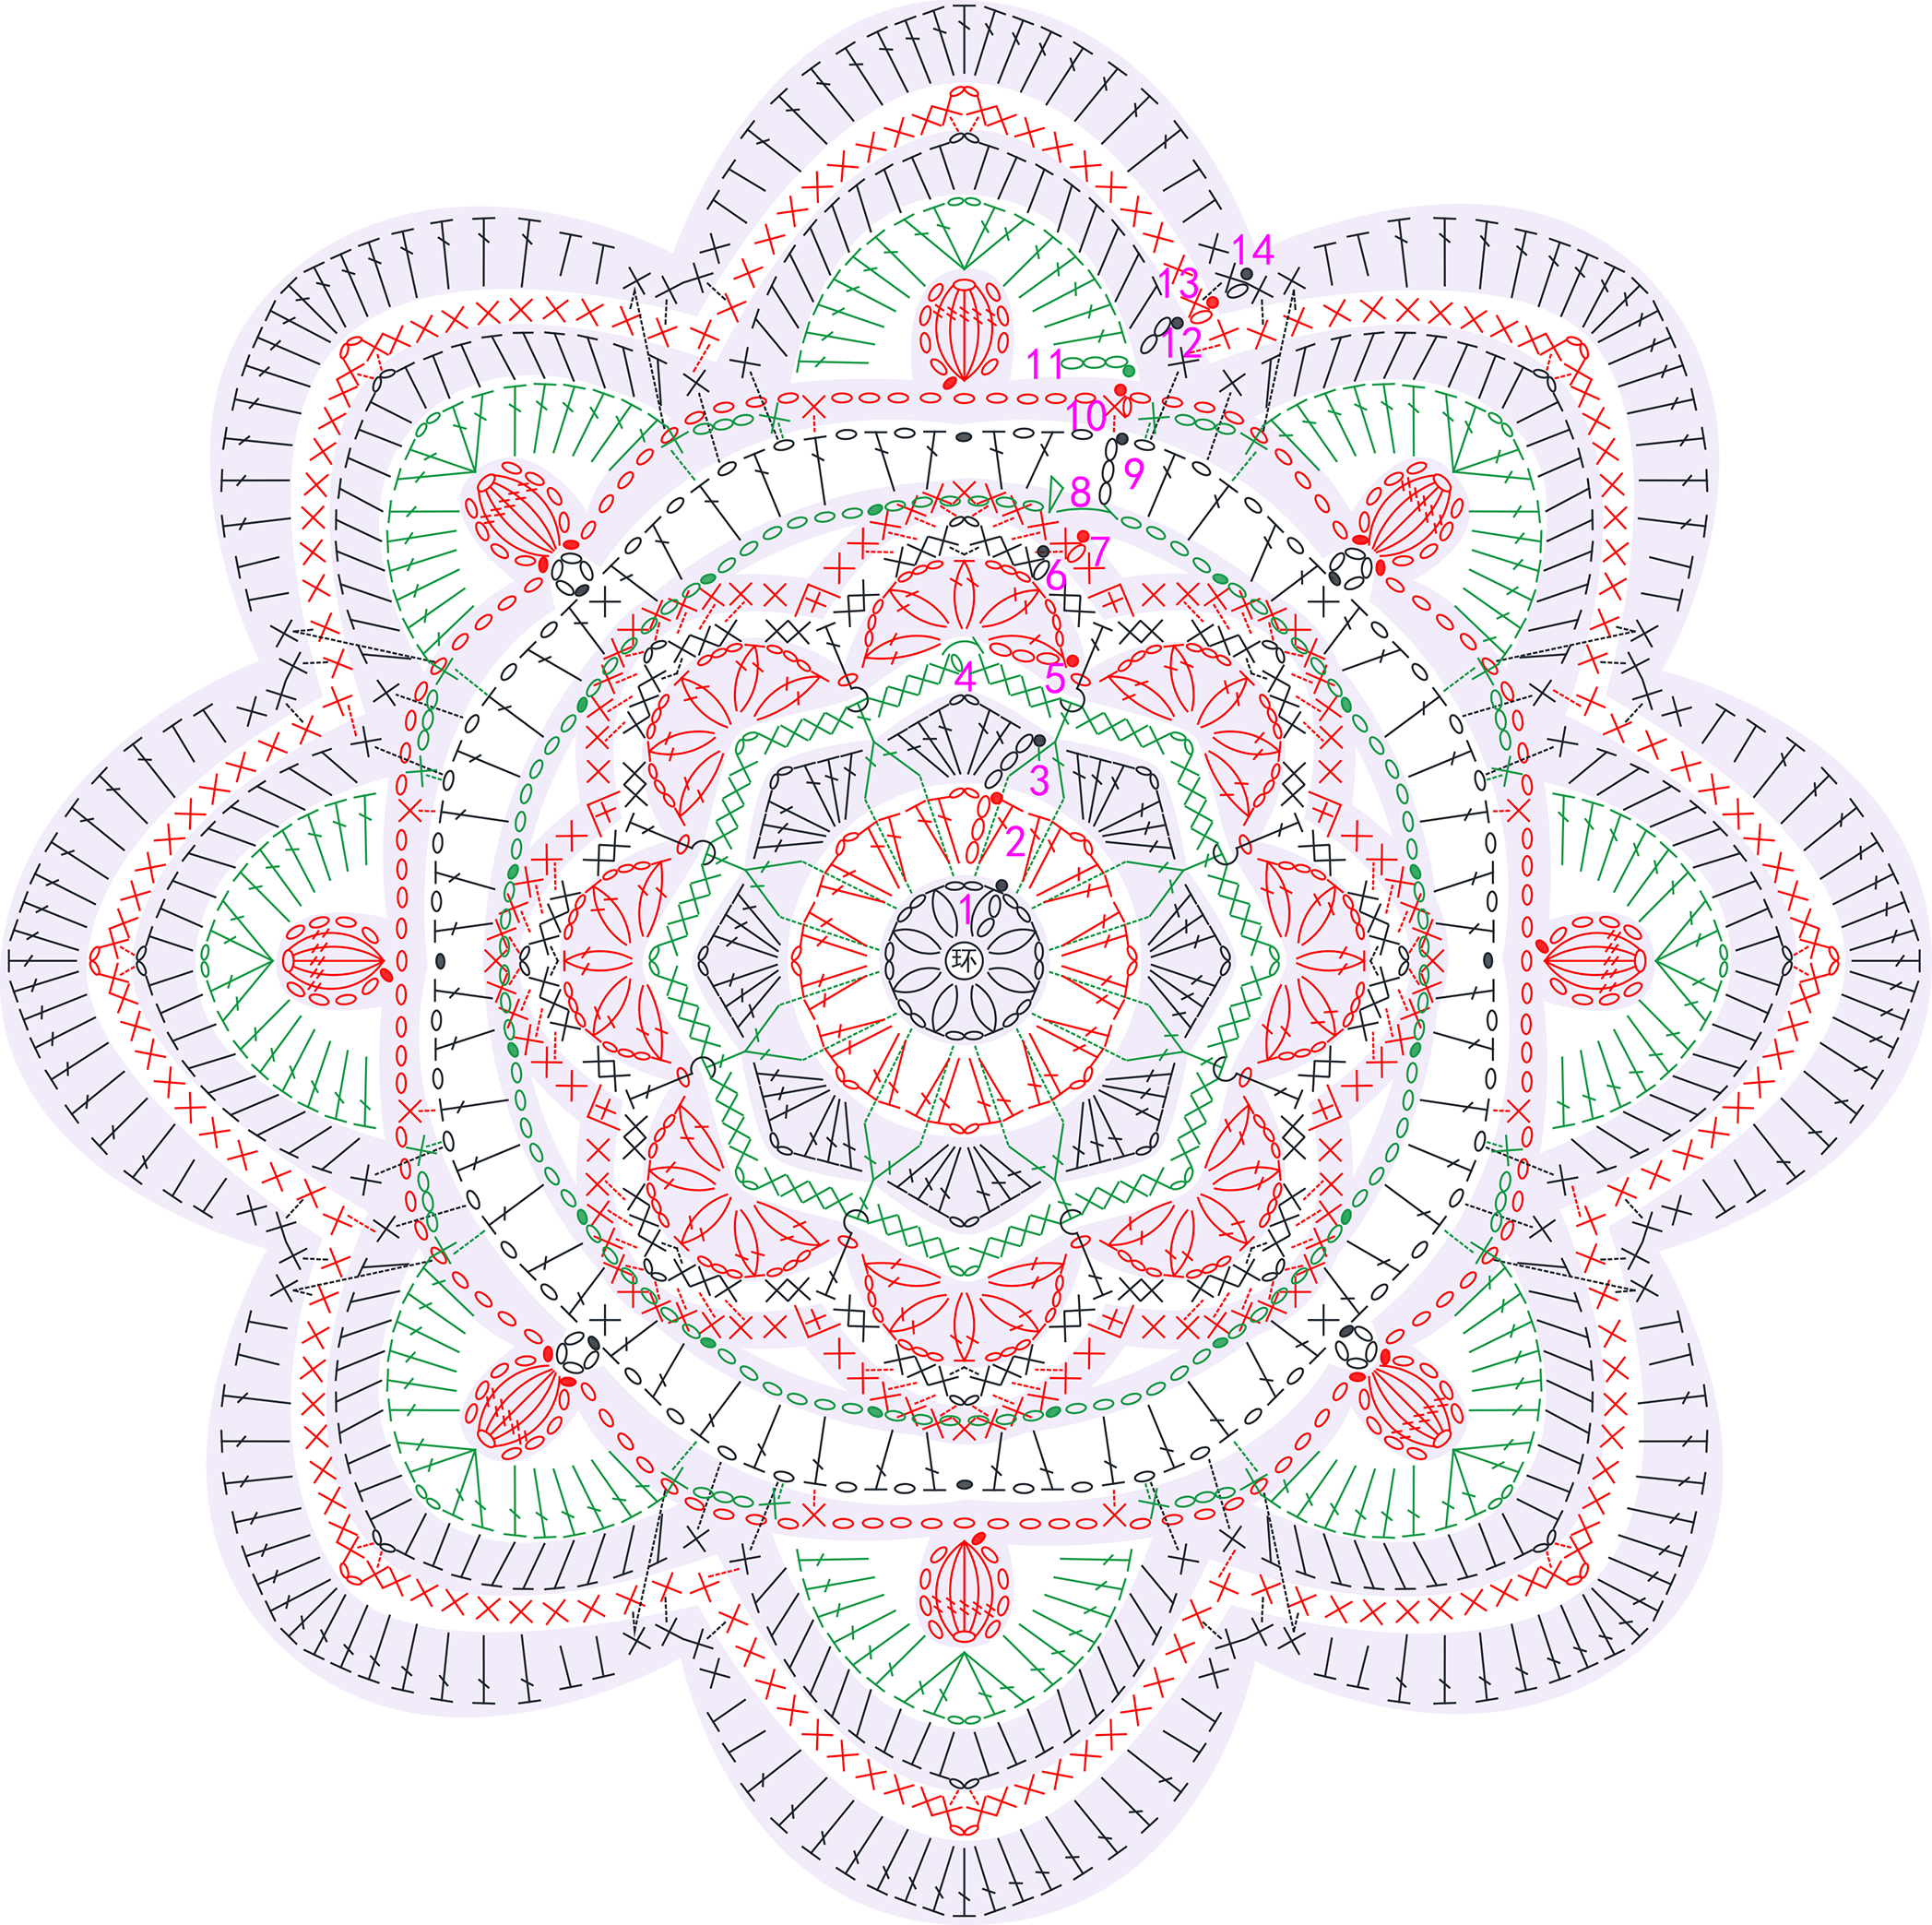
Note: For rounds 4, 8, 9, and 11-14, the insertion points are special, so you need to refer to the video demonstration. The motif might not be flat while crocheting, but you can steam block it slightly after completing all the rounds.
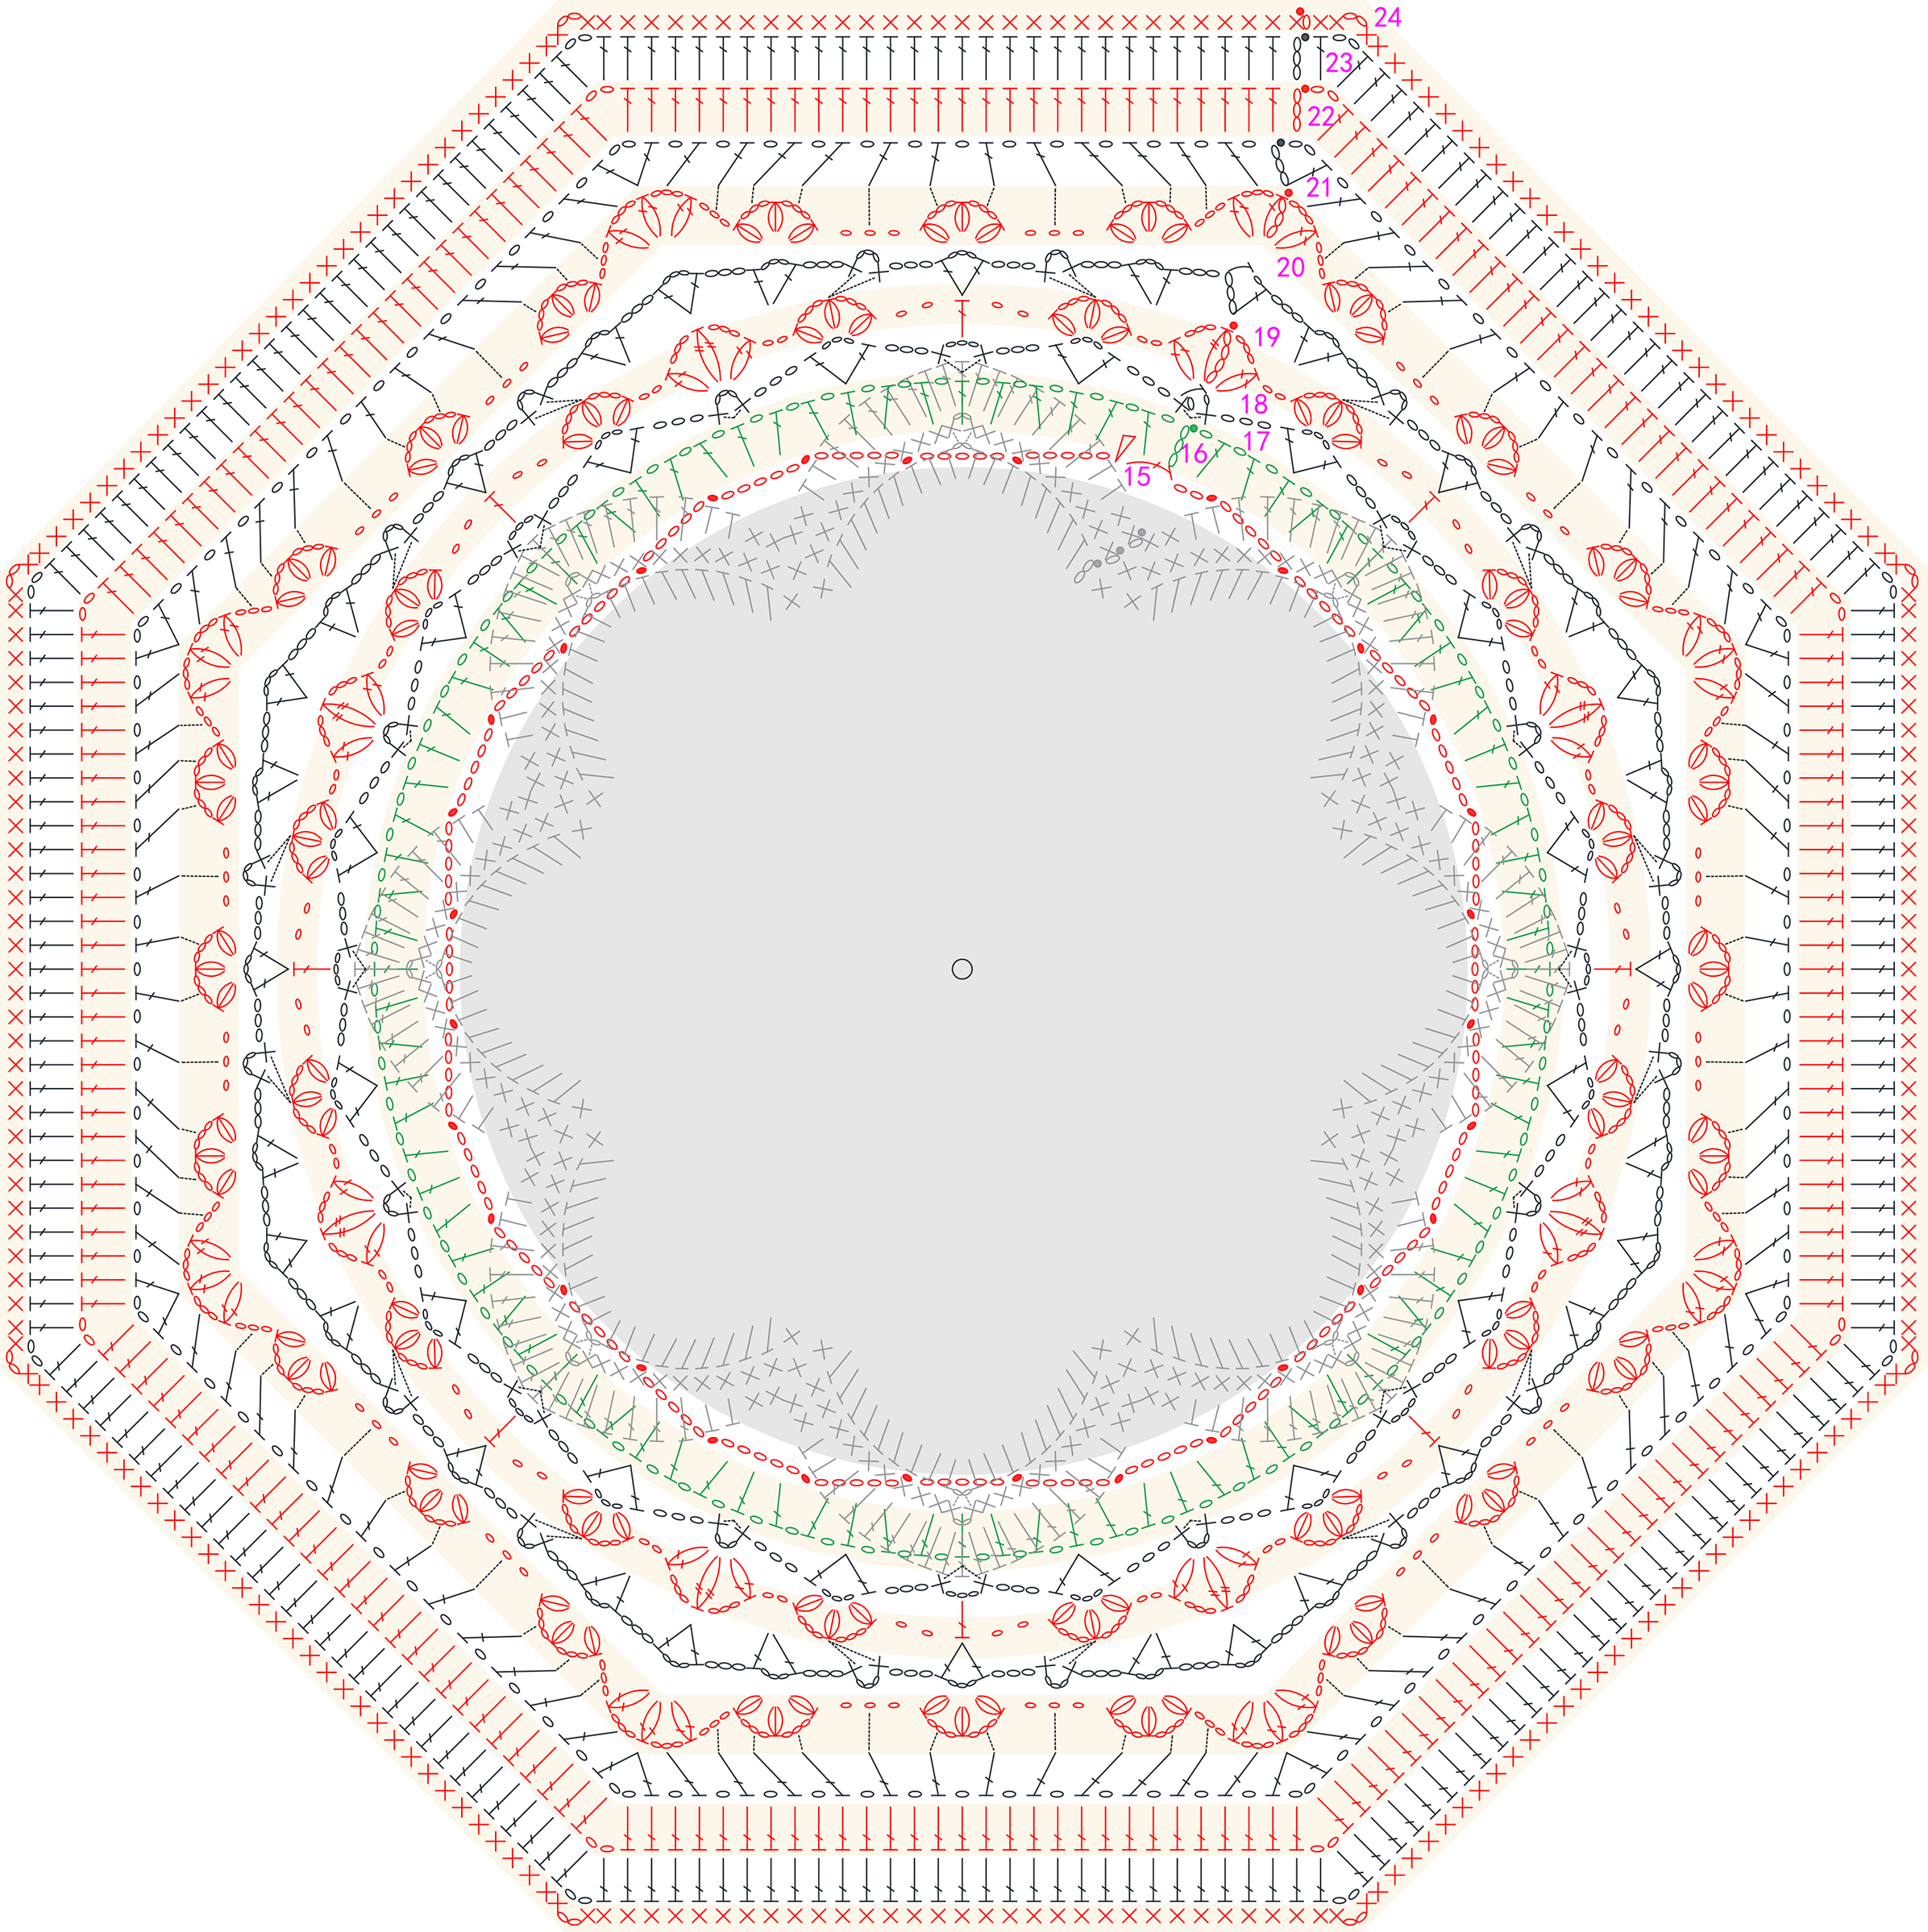
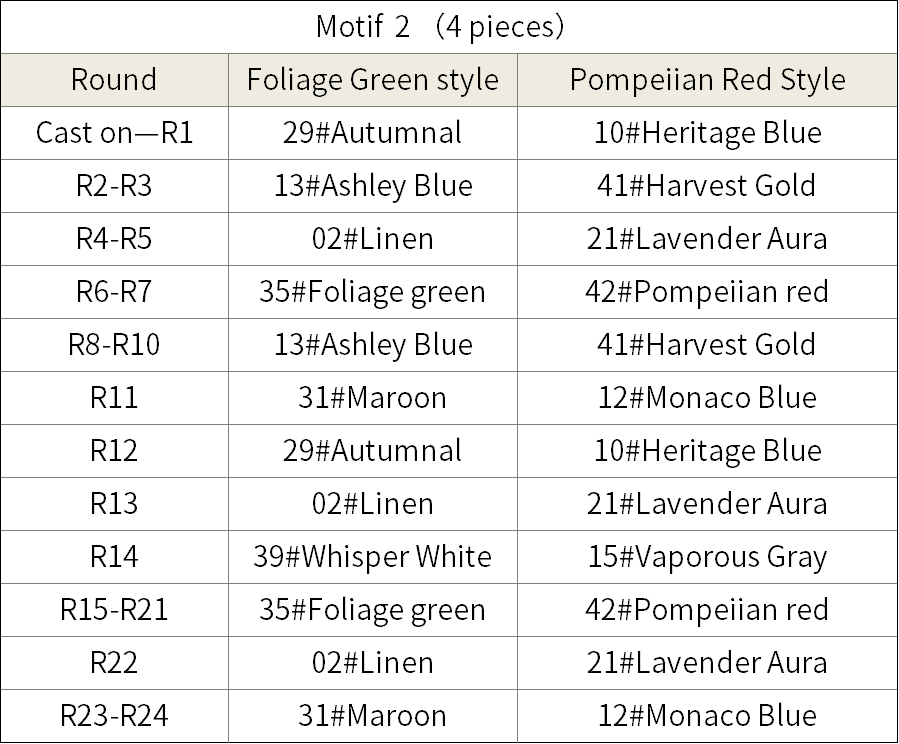
【Motif 2 Rounds 15-24】
Note: For rounds 15 and 17, the insertion position is special, and you need to refer to the video demonstration.
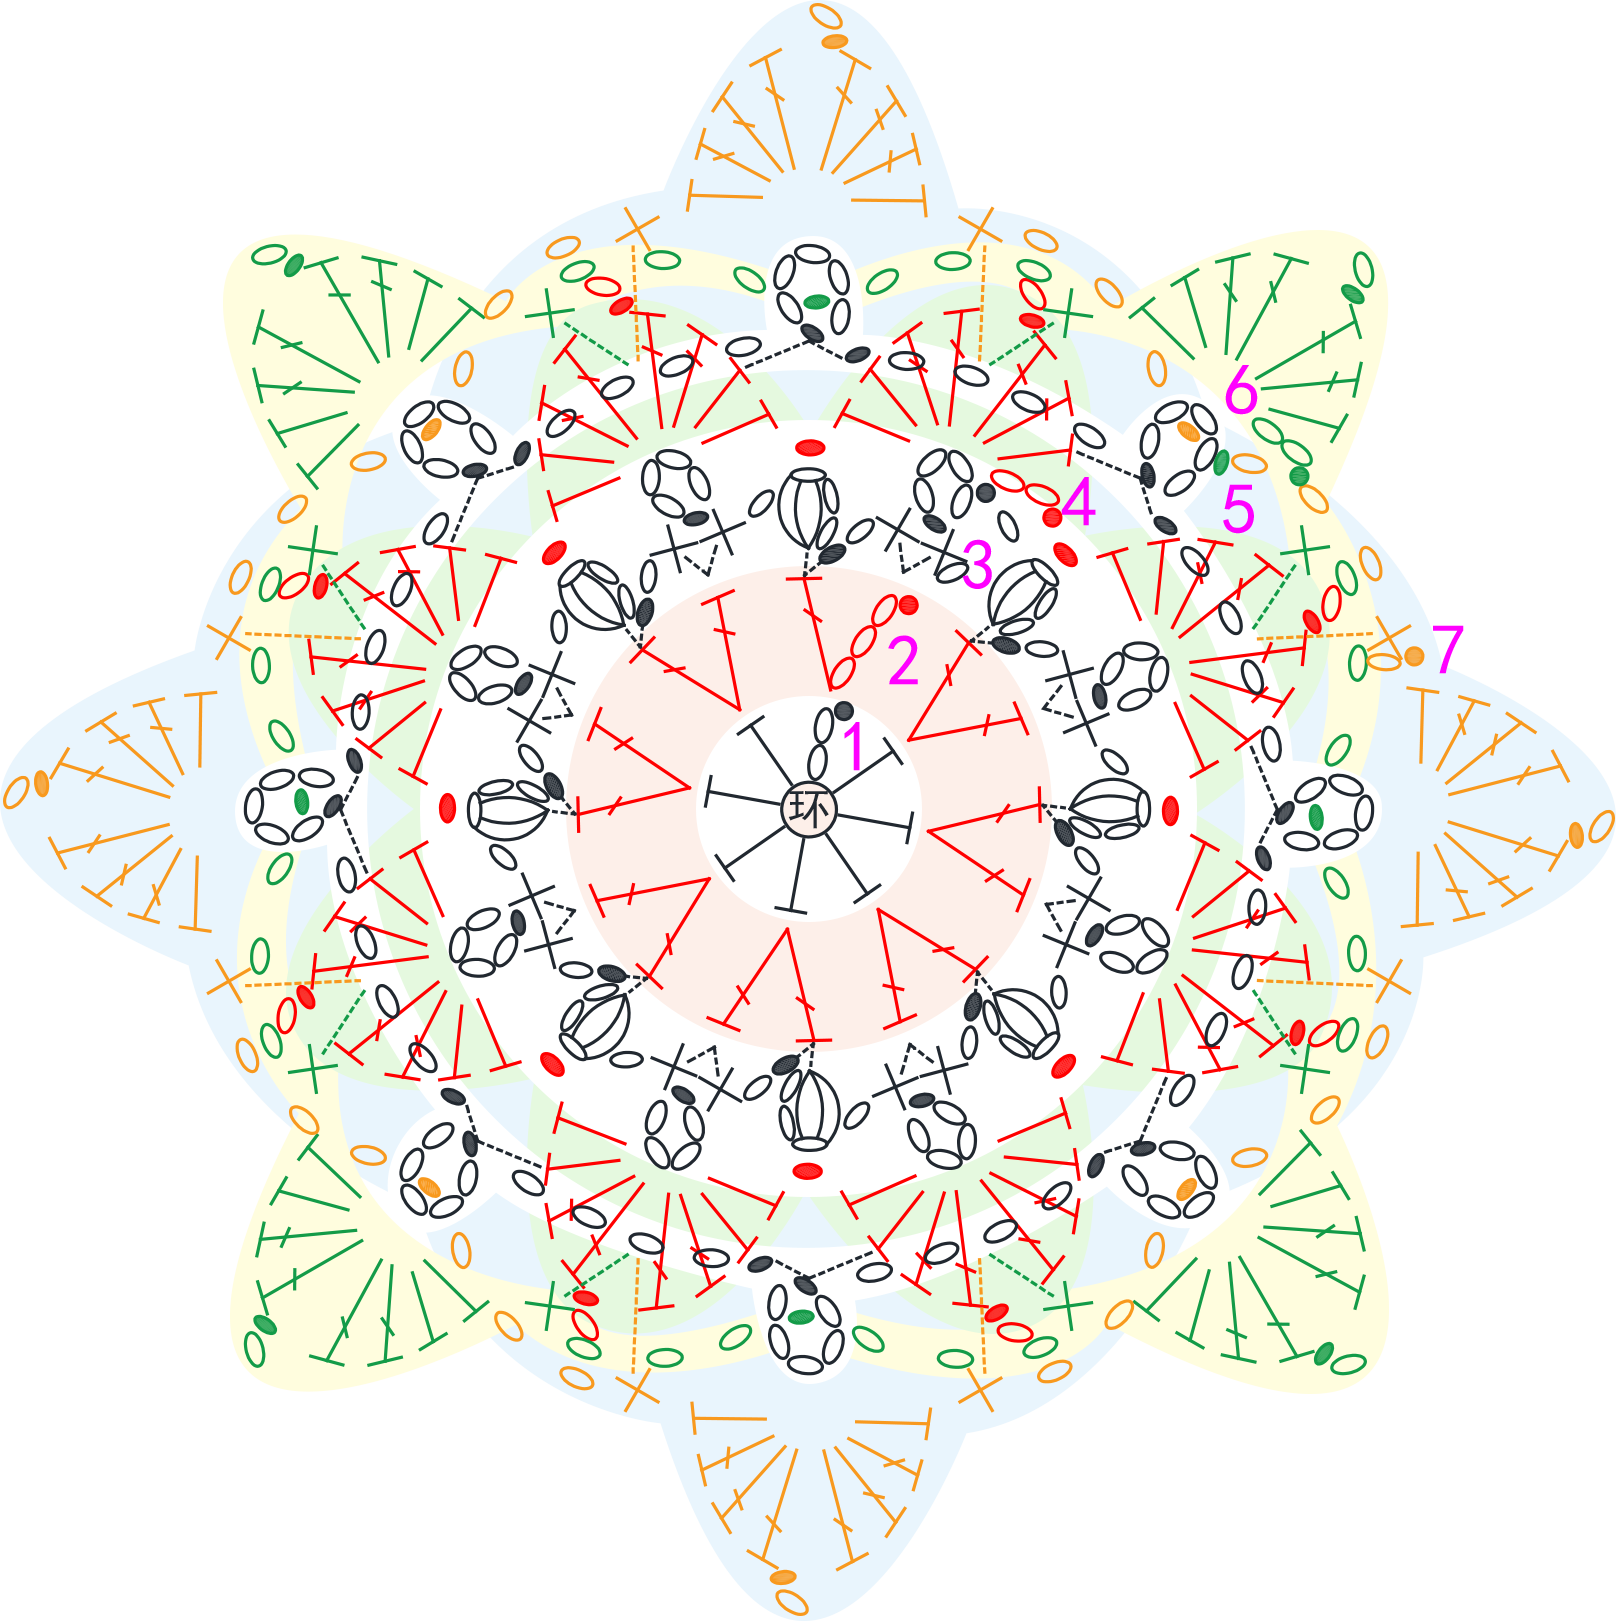
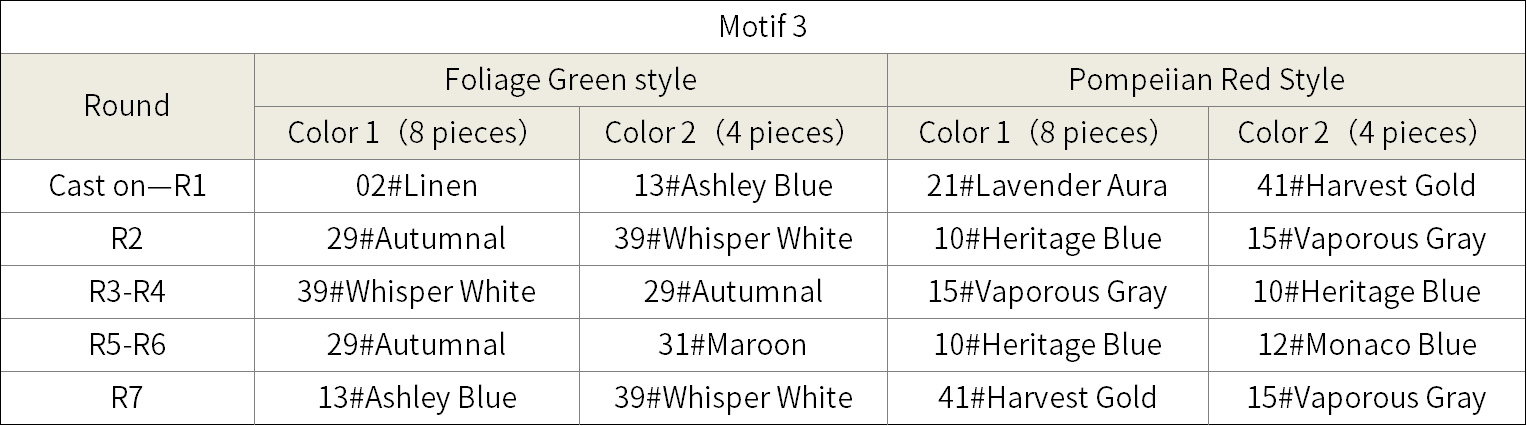
Step3 Motif 3A3 00' 08'' (Part 2)
Note: The insertion points for rounds 5-7 are special, and you need to refer to the video demonstration.
Part 2 DecorationB 14' 42'' (Part 2)
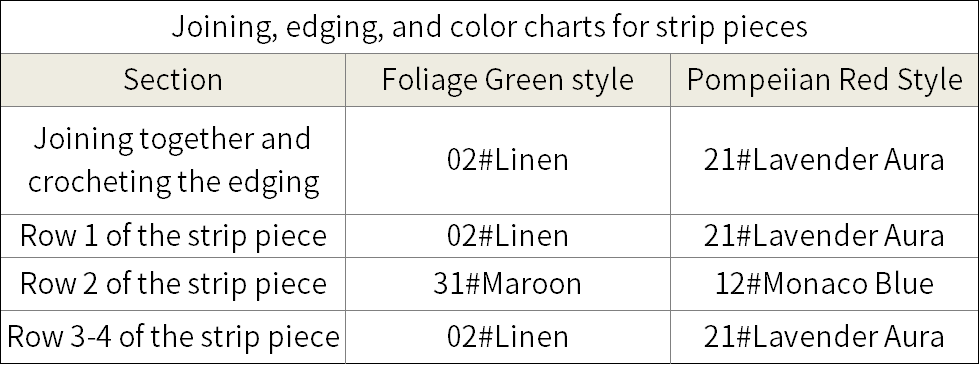
The decorations include strip pieces, motif 3, and tassels. First, crochet the strip pieces and motif three (4 pieces in color 2), then make the tassels, and finally sew and assemble everything together. Please refer to the video demonstration for details.
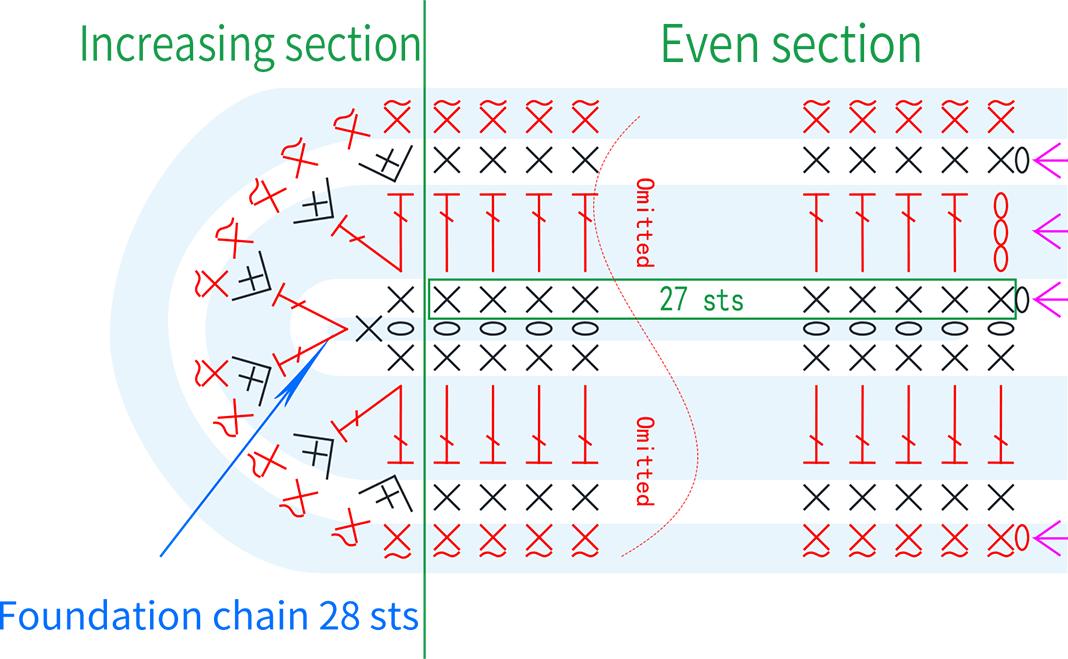
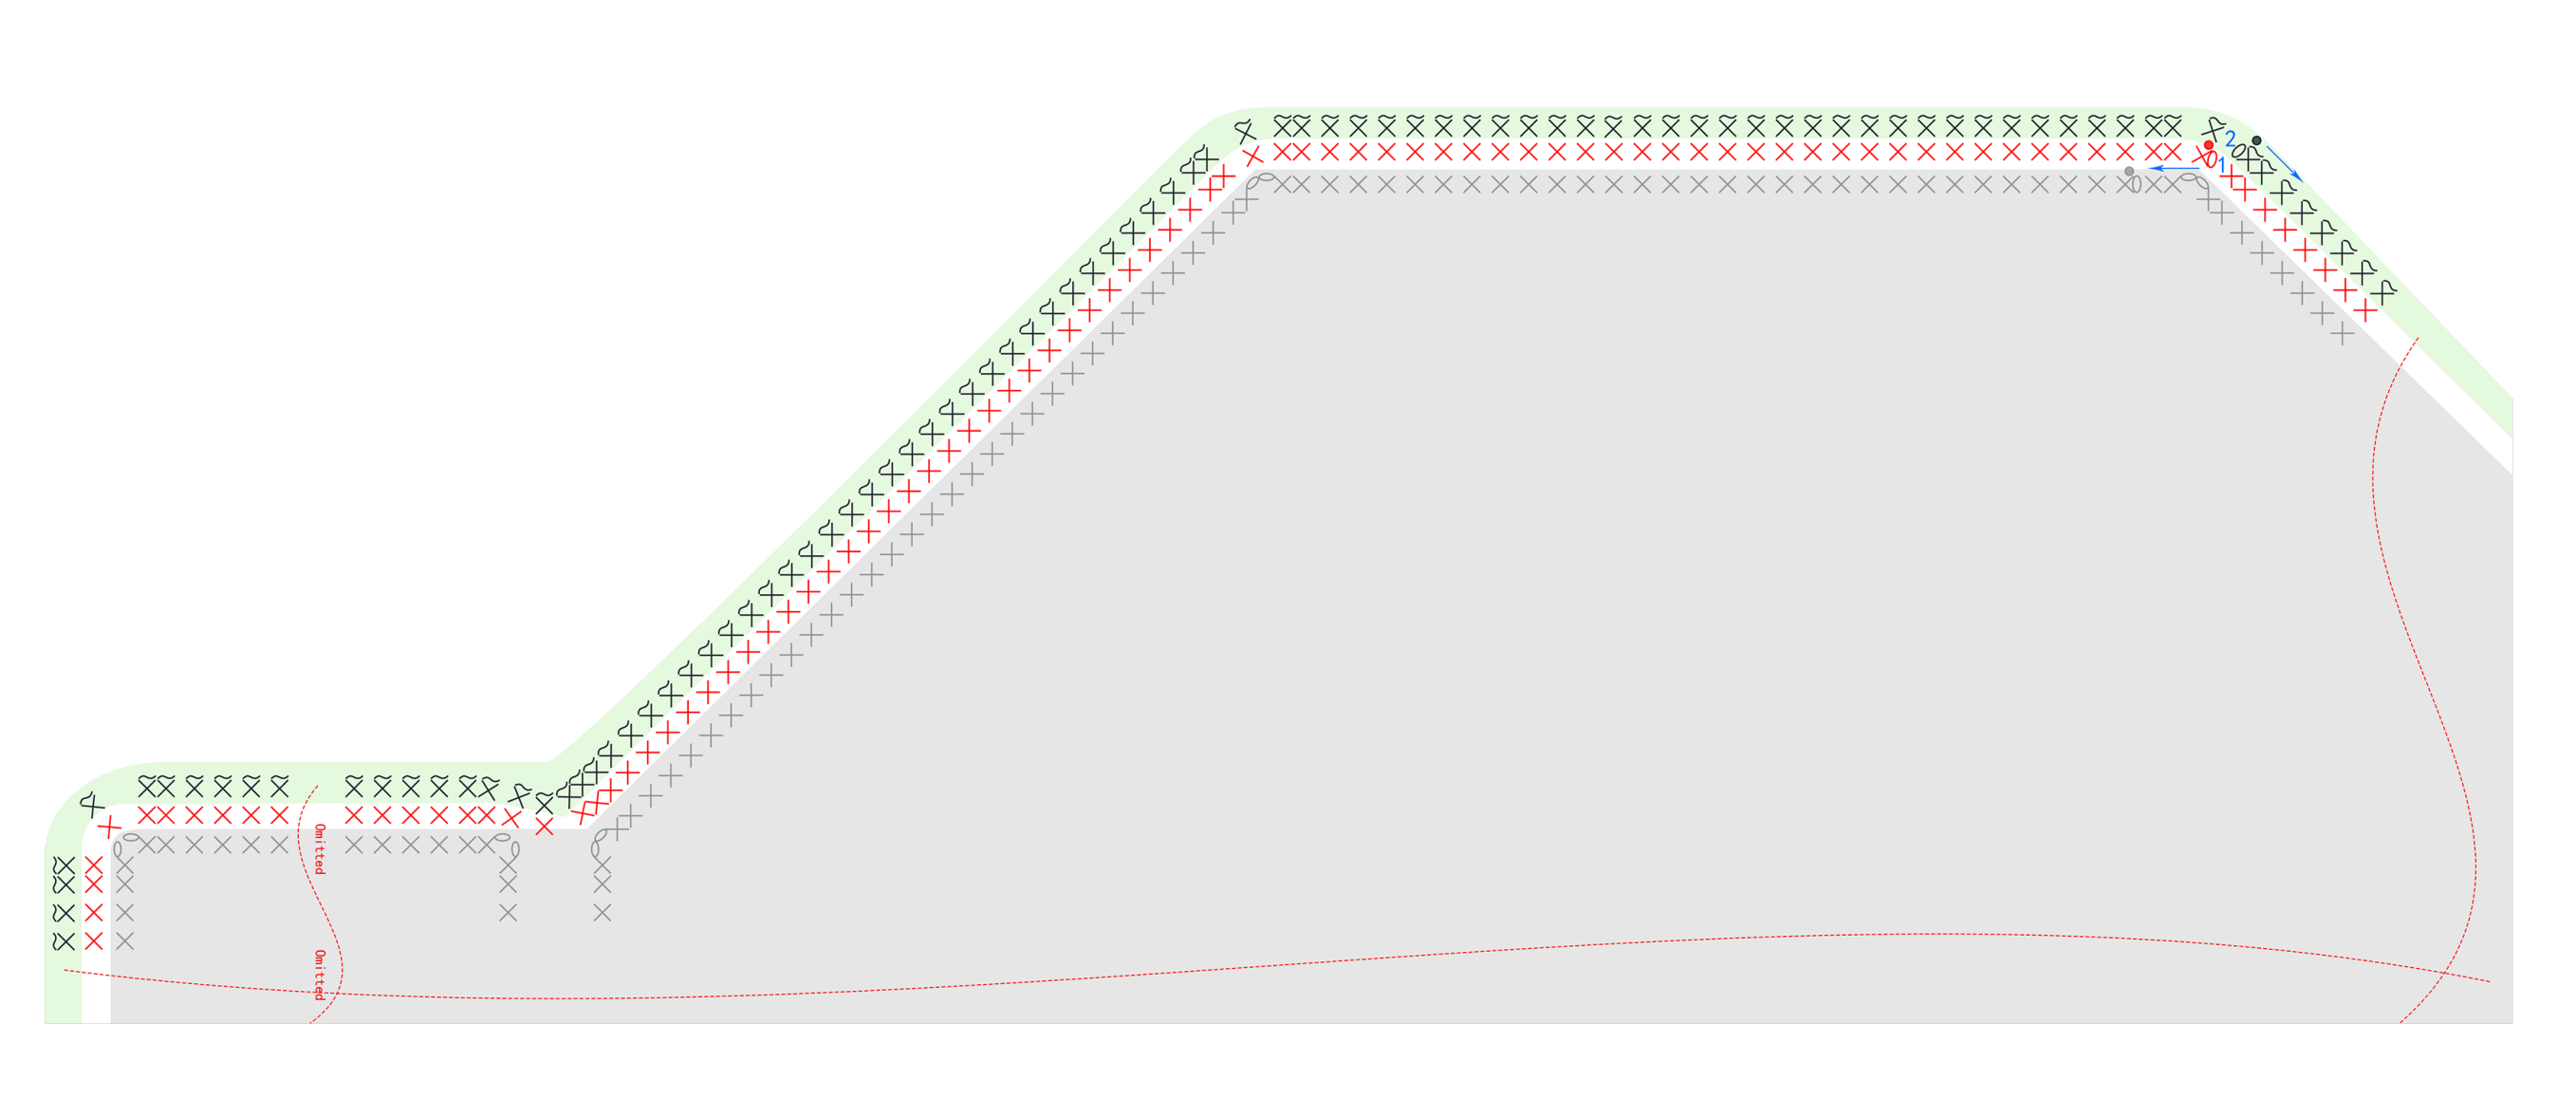
Step 4 Joining, crocheting the edging, and sewingA4 20' 51'' (Part 2)
Note: Sew 8 pieces of motif 3 in color 1 around the outer edge of the main piece, and 4 in color 2 in the middle. Please refer to the sample picture for details.
Made by the community