Home / Blanket
Jaipur Floral Blanket
Project preview
See the finished project
Pattern format
Instructions
Watch and follow
Video tutorial
This blanket includes motifs, sewing motifs together, side groups and edging.
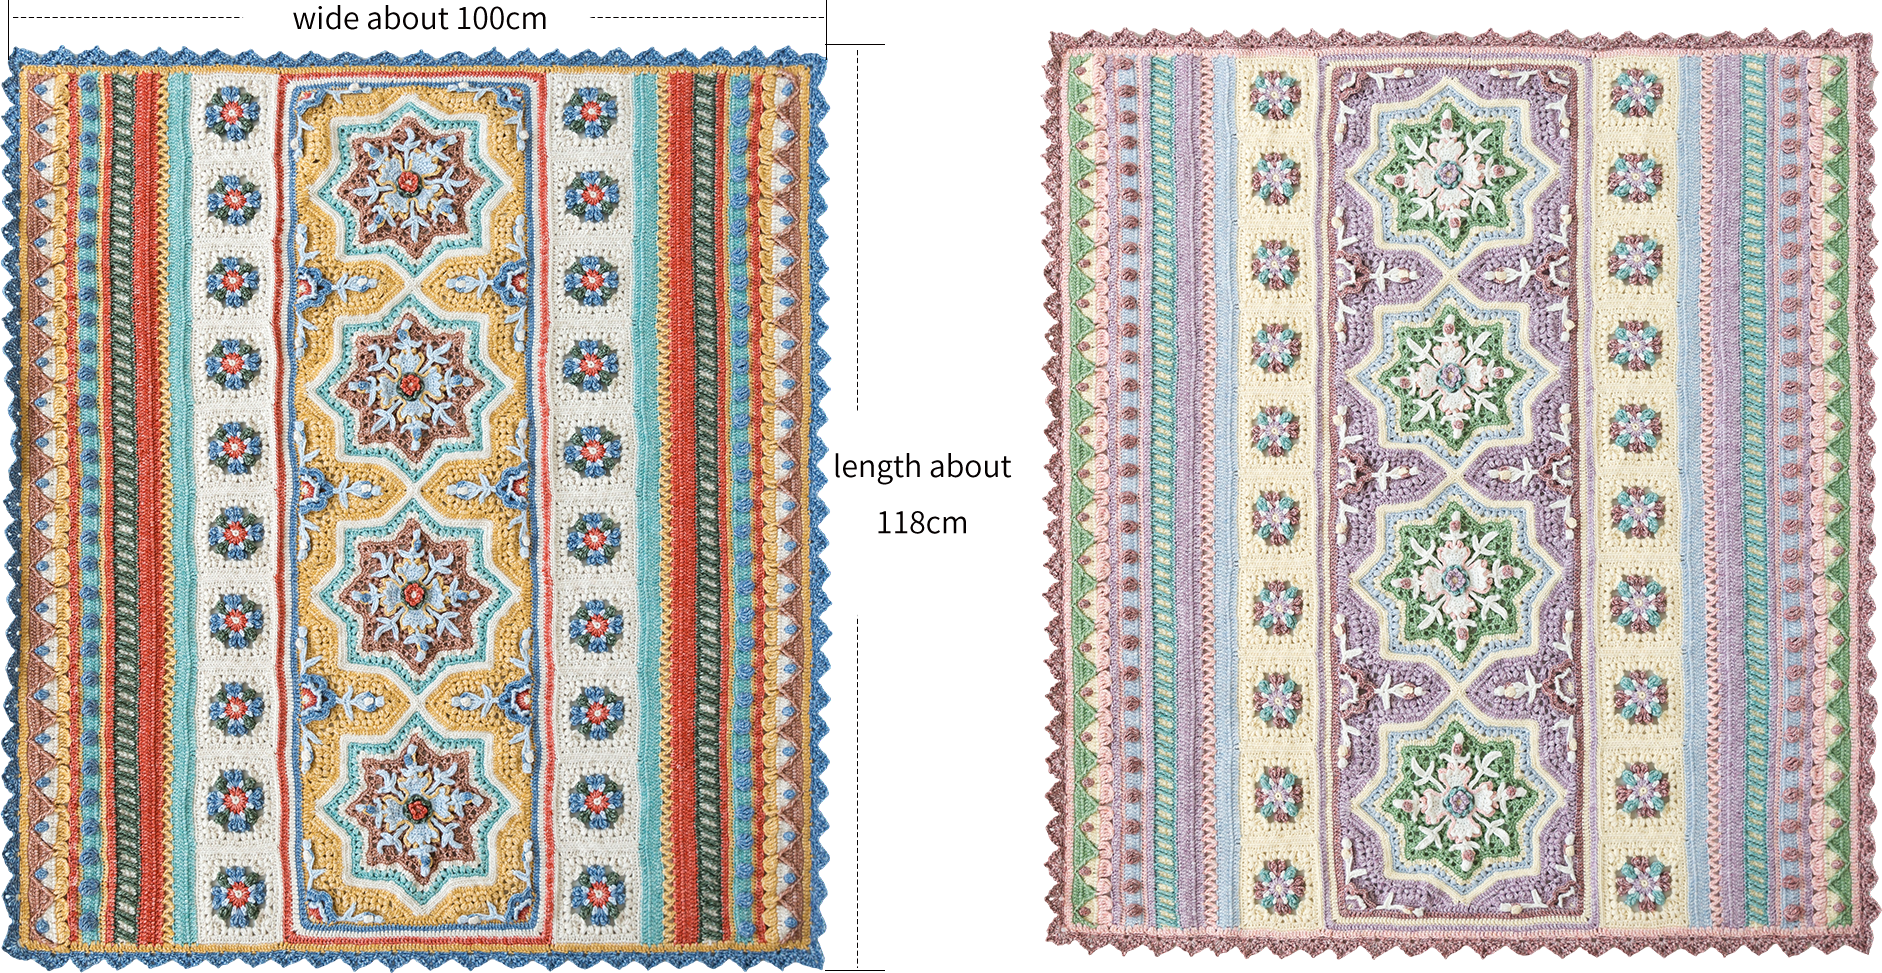
The handcrafted measurements may have an error of 1 to 2 cm. Due to variations in individual tension, the size of the sample is for reference only.
Materials: Susan's Family Impression Misty Feather
Hook: 3.00 mm crochet hook

Chart Key

























Part 1 MotifsA
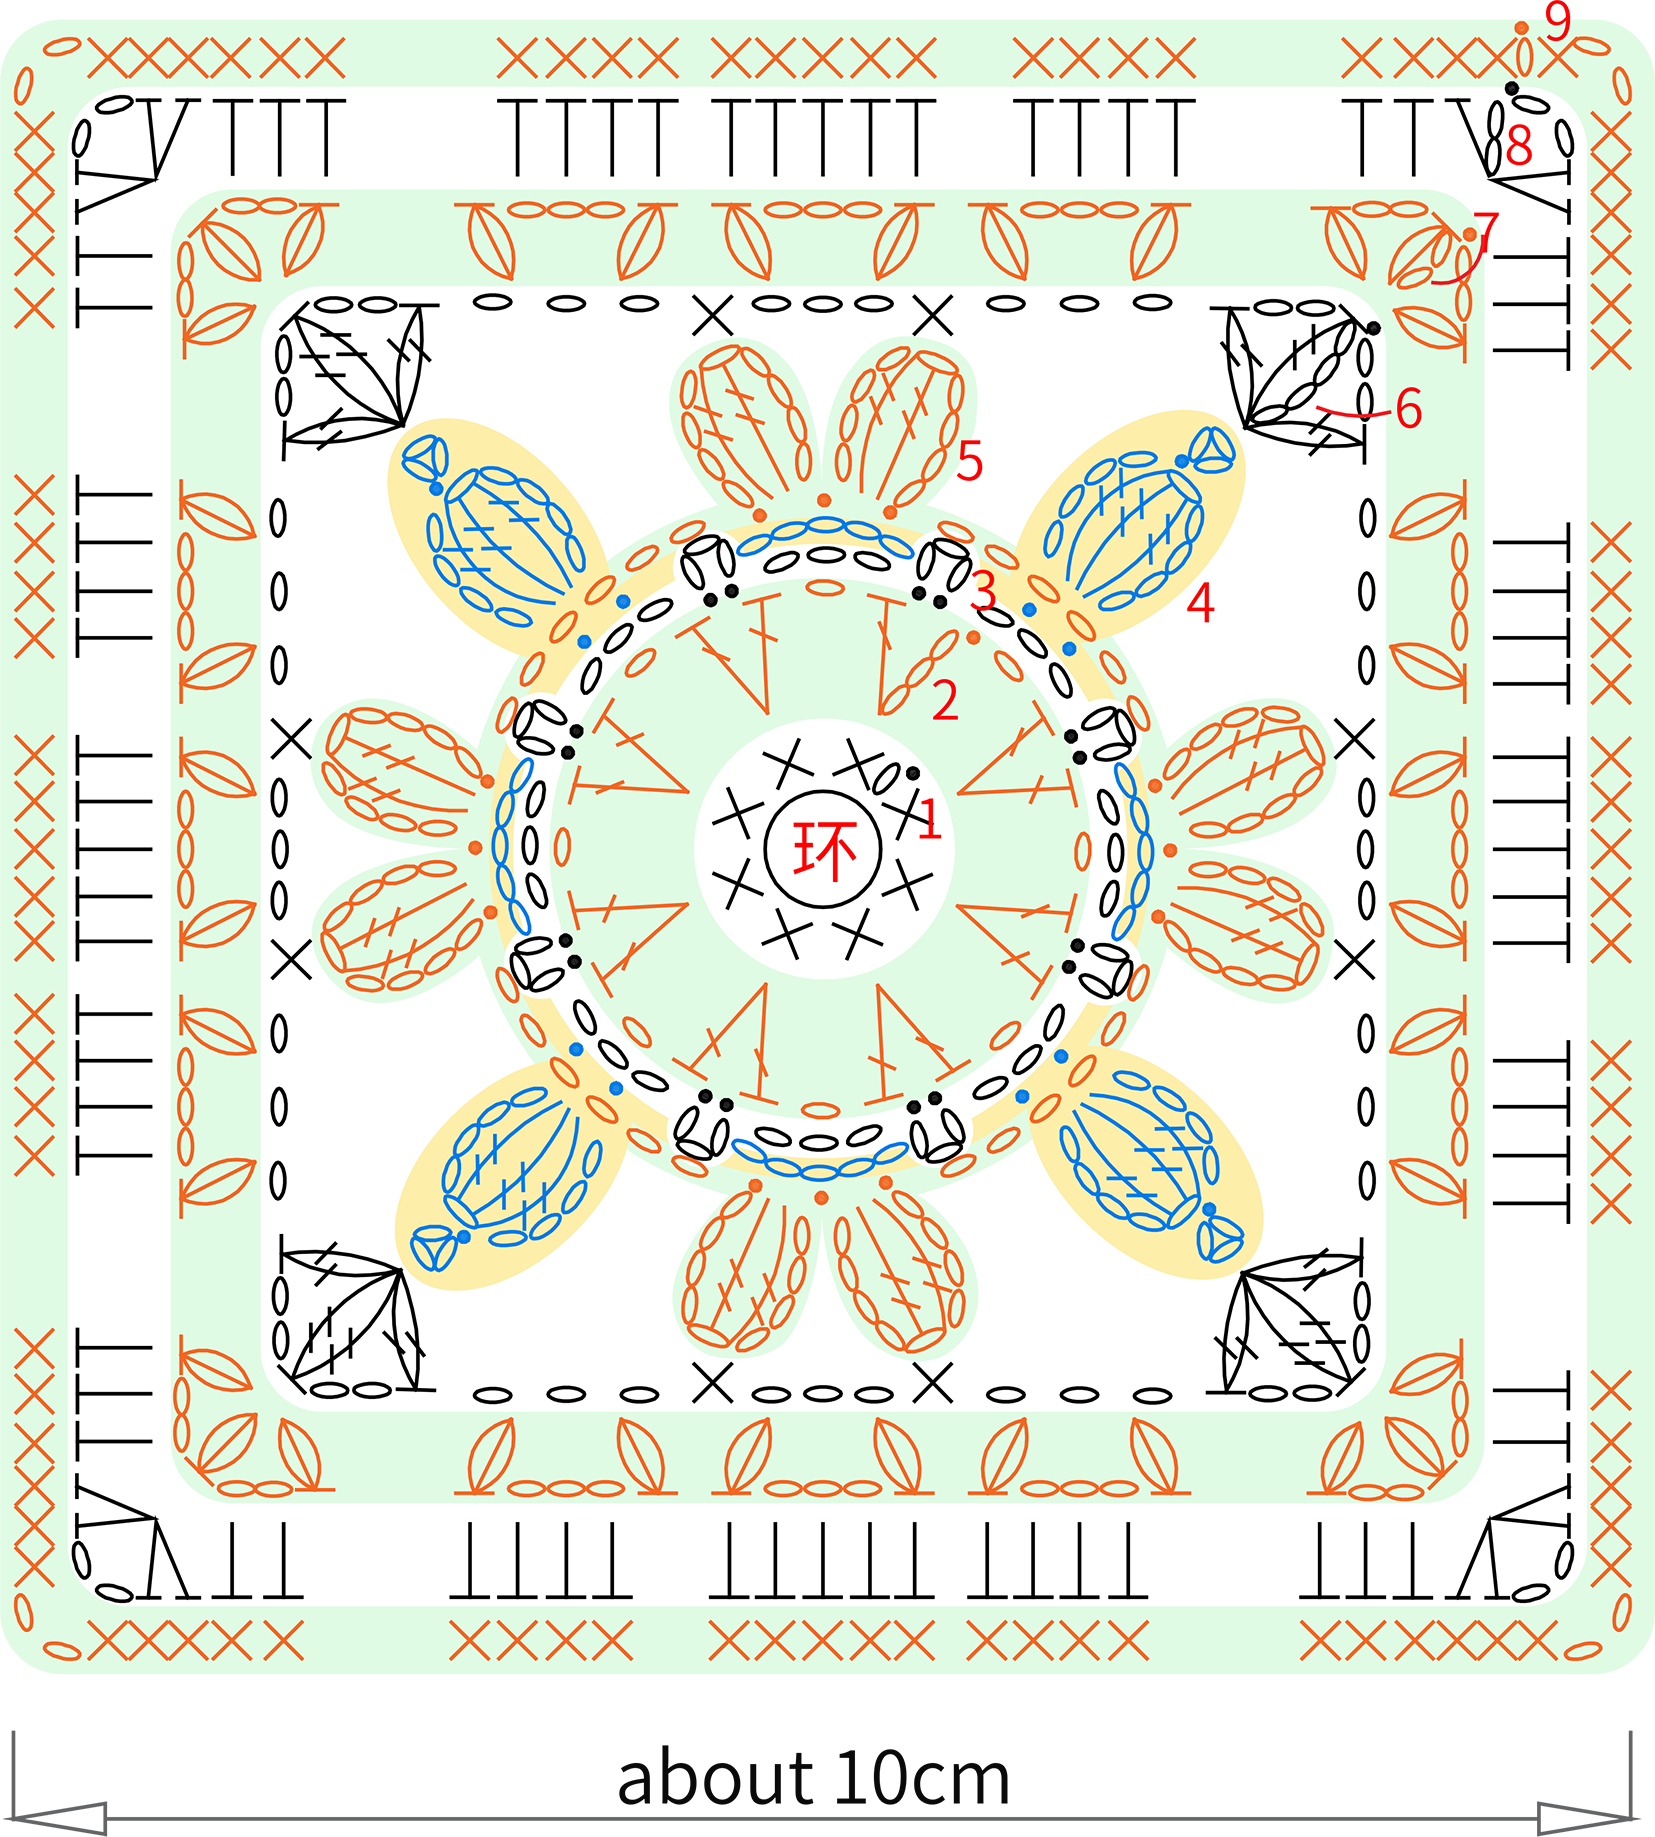
The motifs include four types: motif 1, motif 2, motif 3 and motif 4.
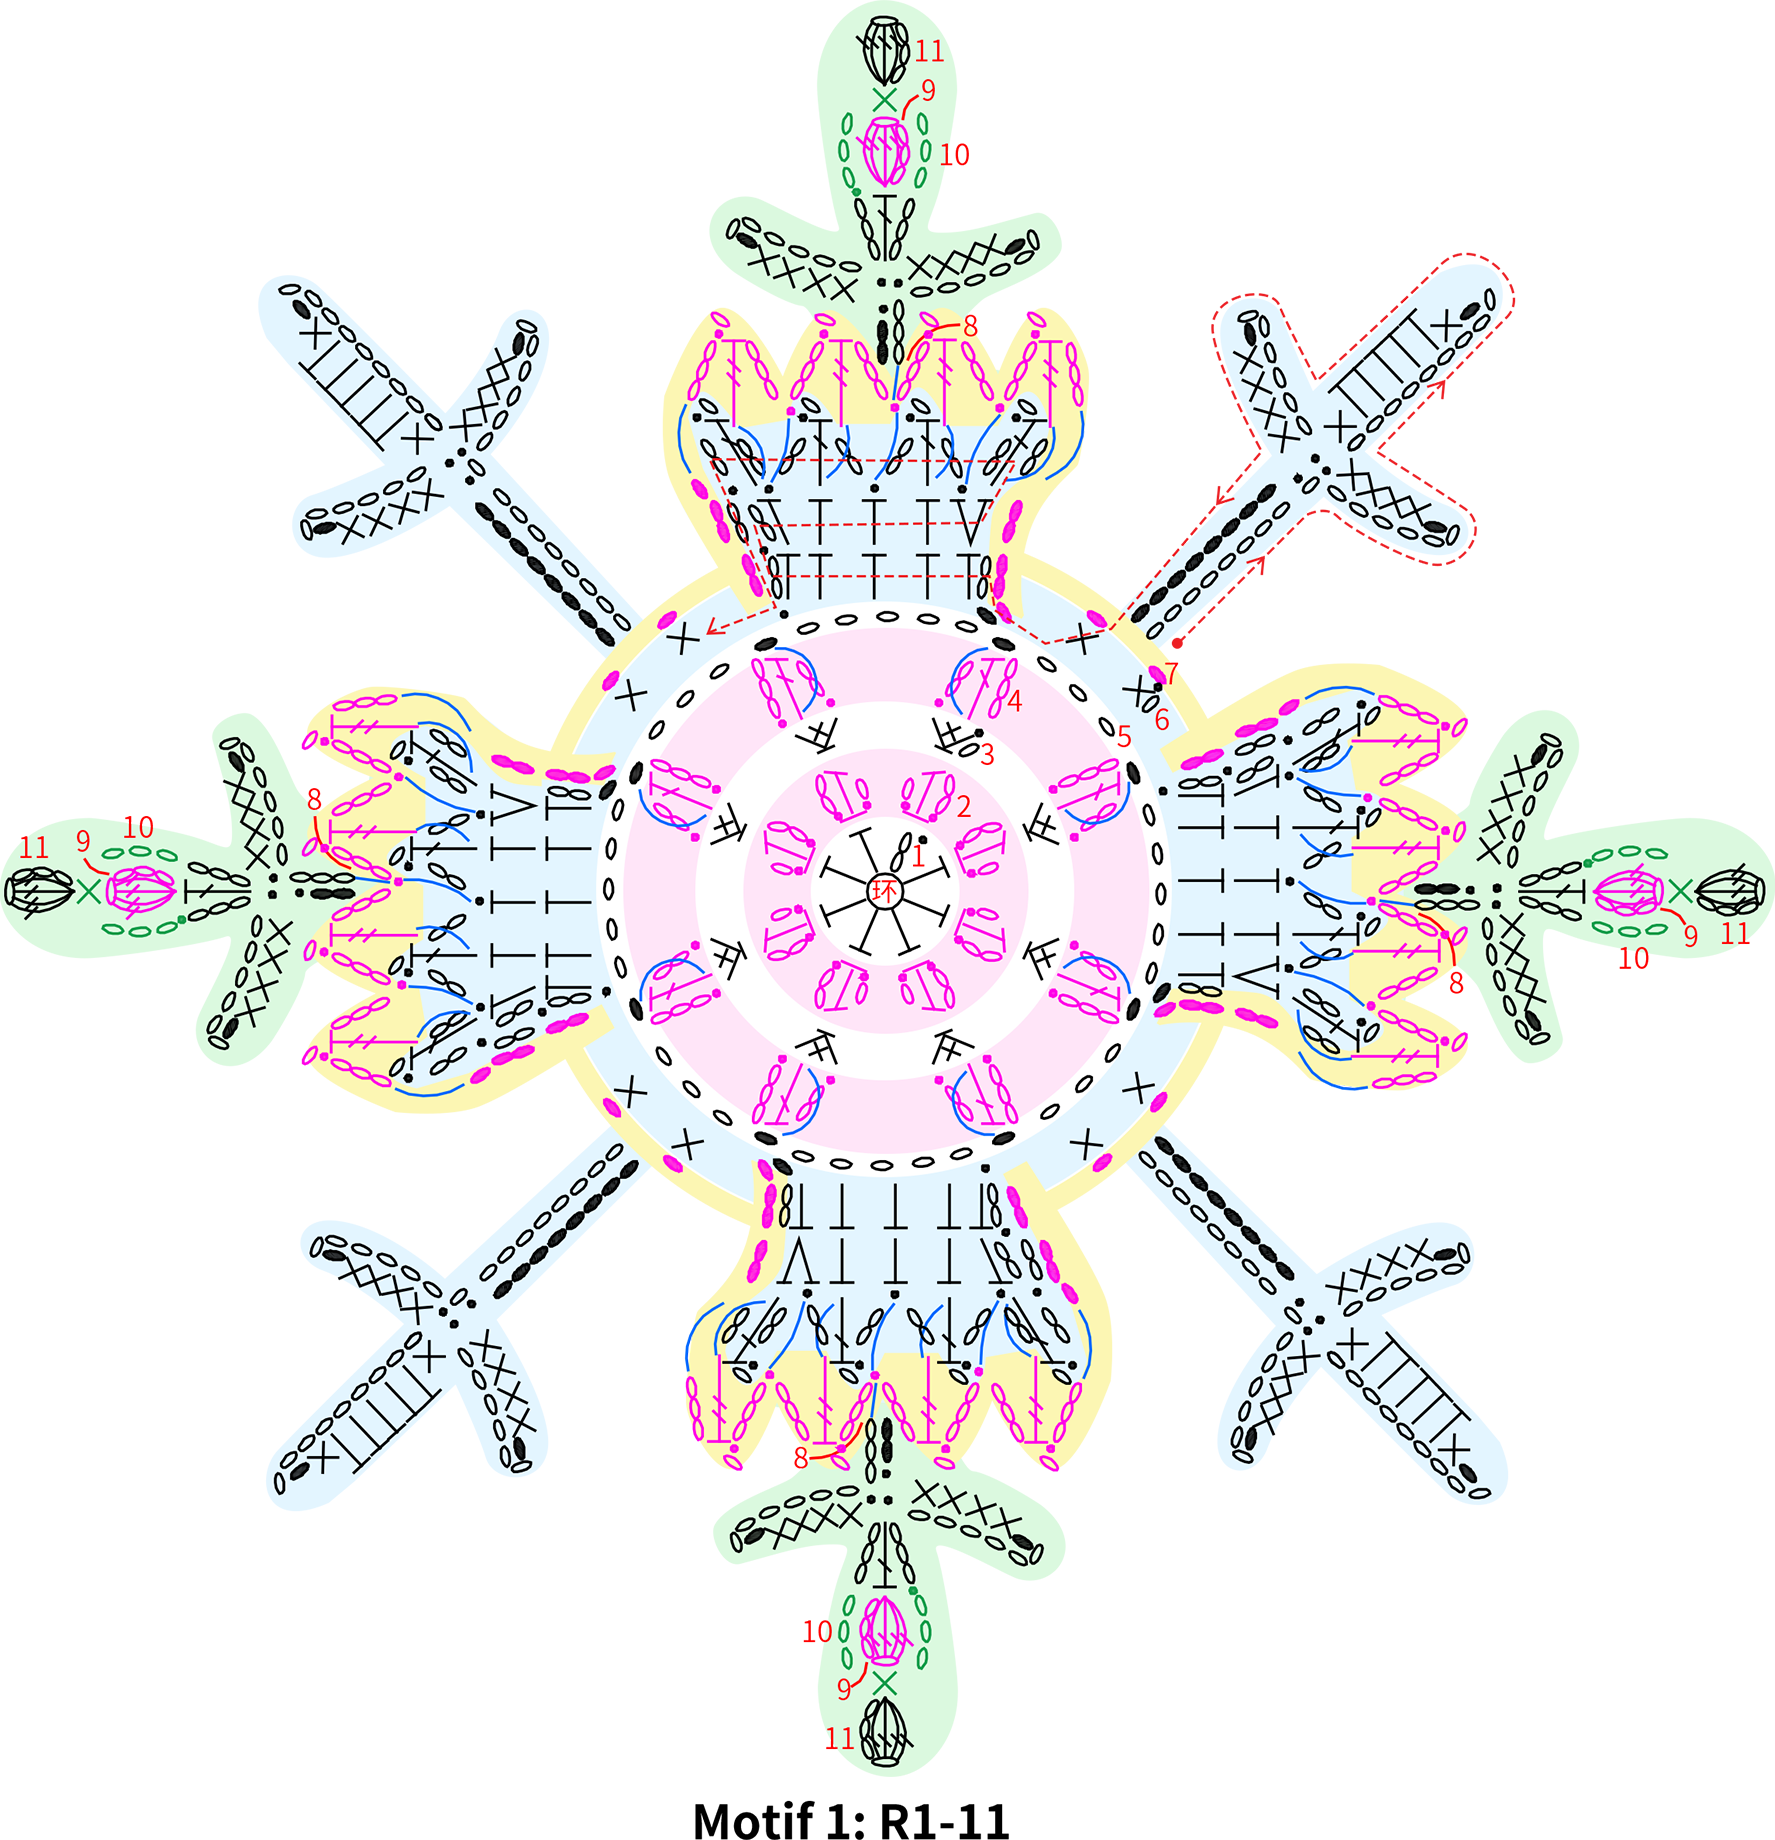
Step 1 Motif 1A1 00' 57'' (Part 1)
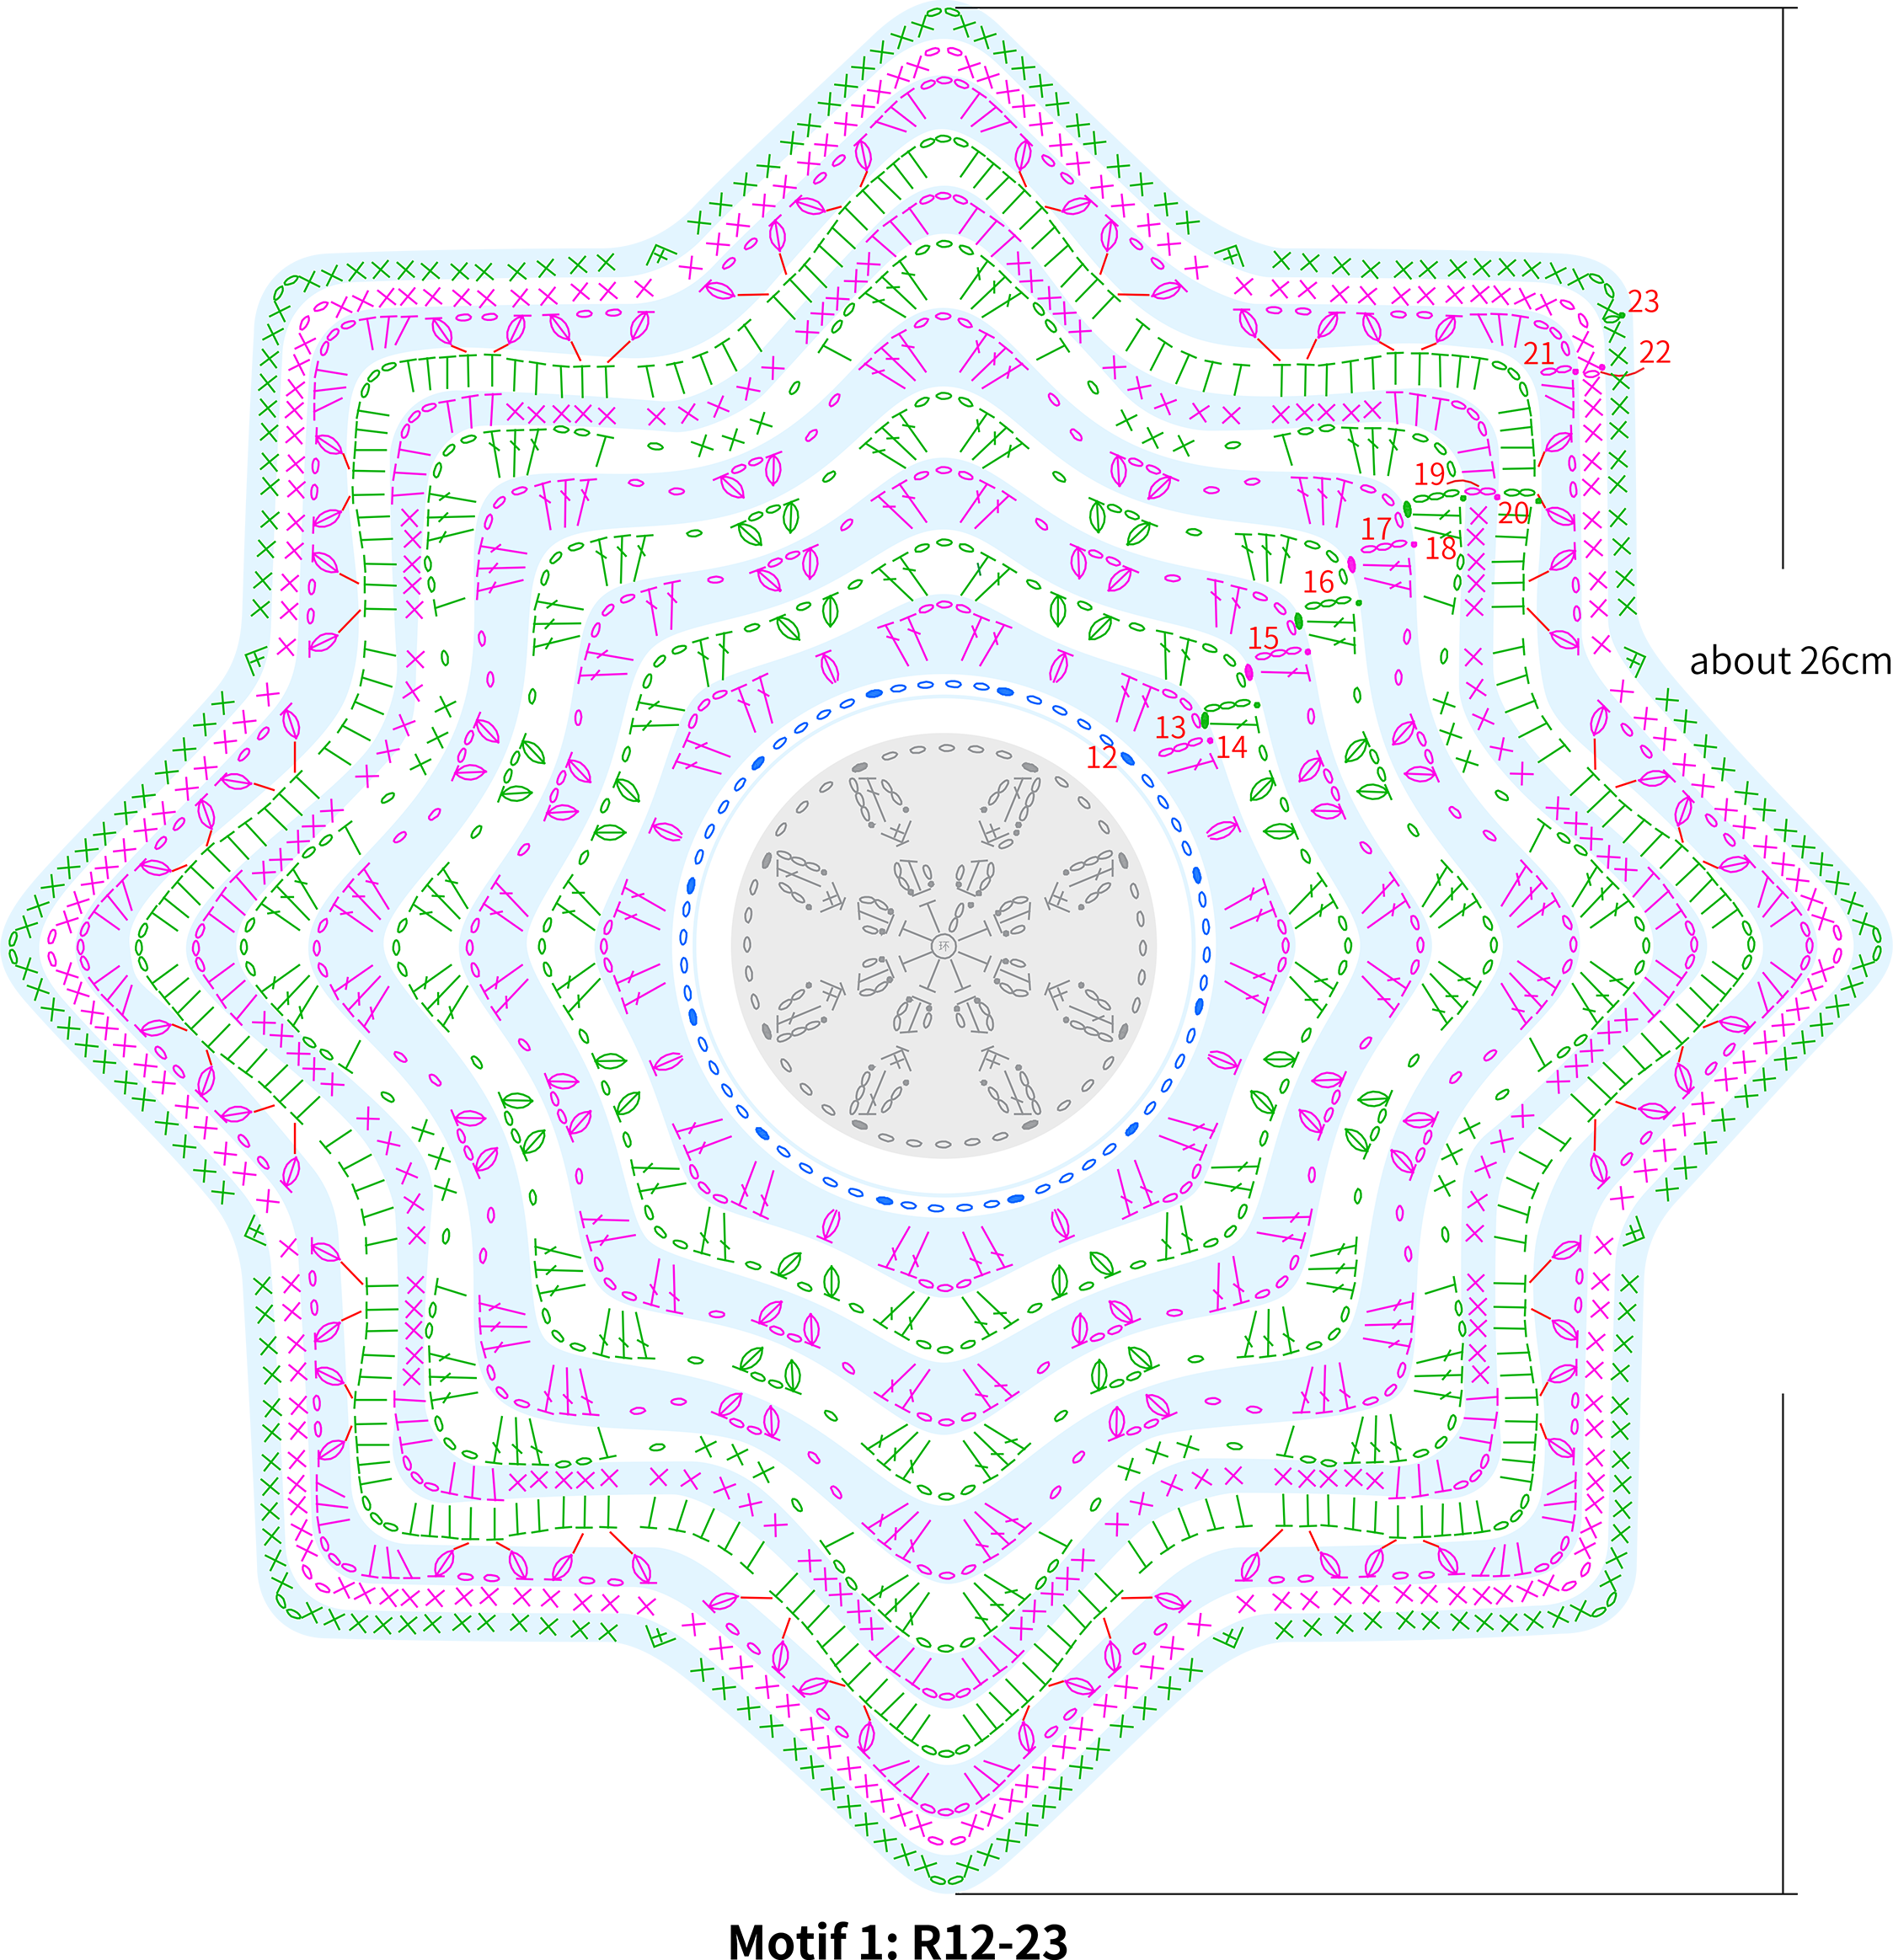
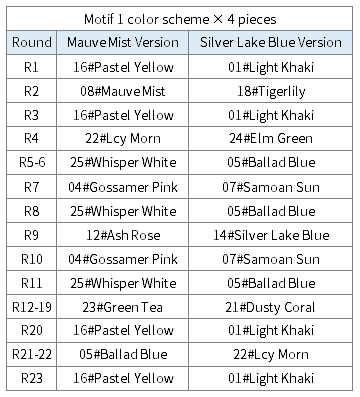
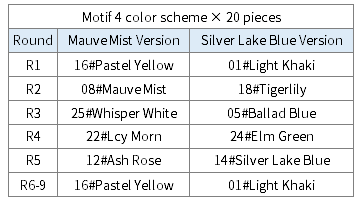
Motif 1 start with the magic ring, crochet in rounds counterclockwise, you’ll need to change colors during the process. Please refer to the video demonstration for more details.
Note:
1. The slip stitch in R5 is on the back side of the double crochets in R4.
2. The treble crochets and some slip stitches in R7 are on the back side of R6.
3. The slip stitches in R12 are on the back side of the flower branches and petals in R6.
4. R14, R15, R17 and R18 should be joined to the corresponding positions from previous rows.
Step 2 Motif 2A2 00' 08'' (Part 2)
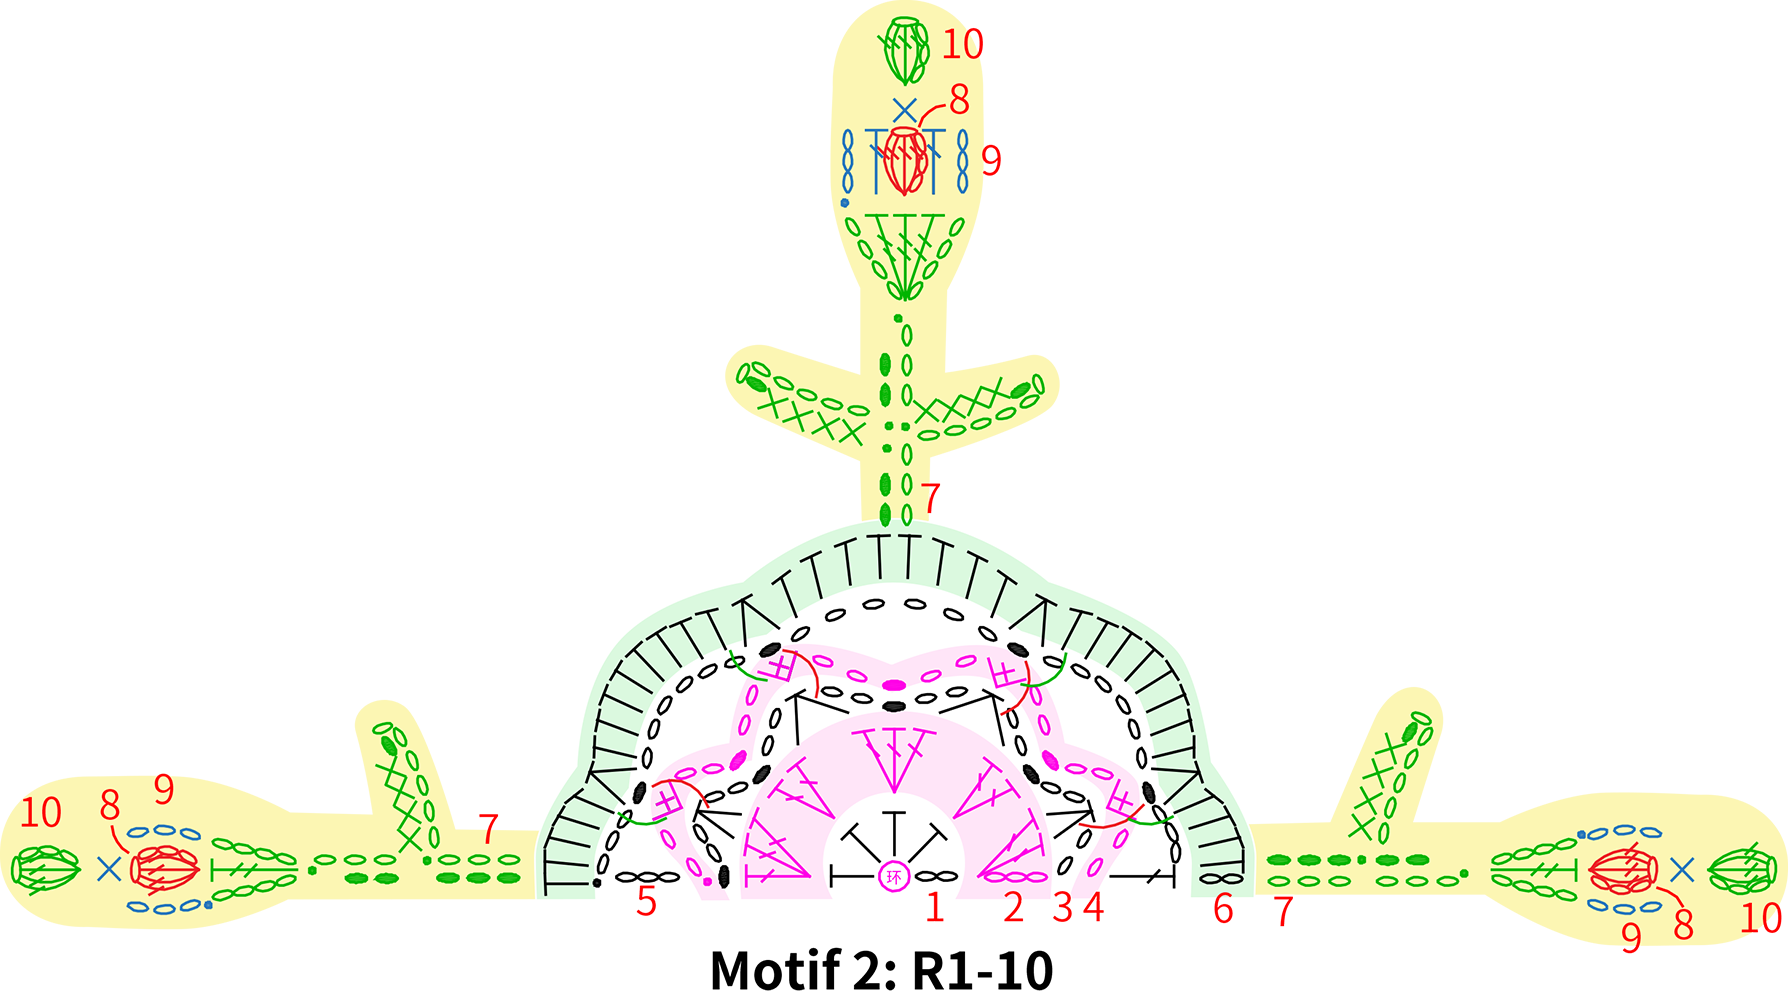
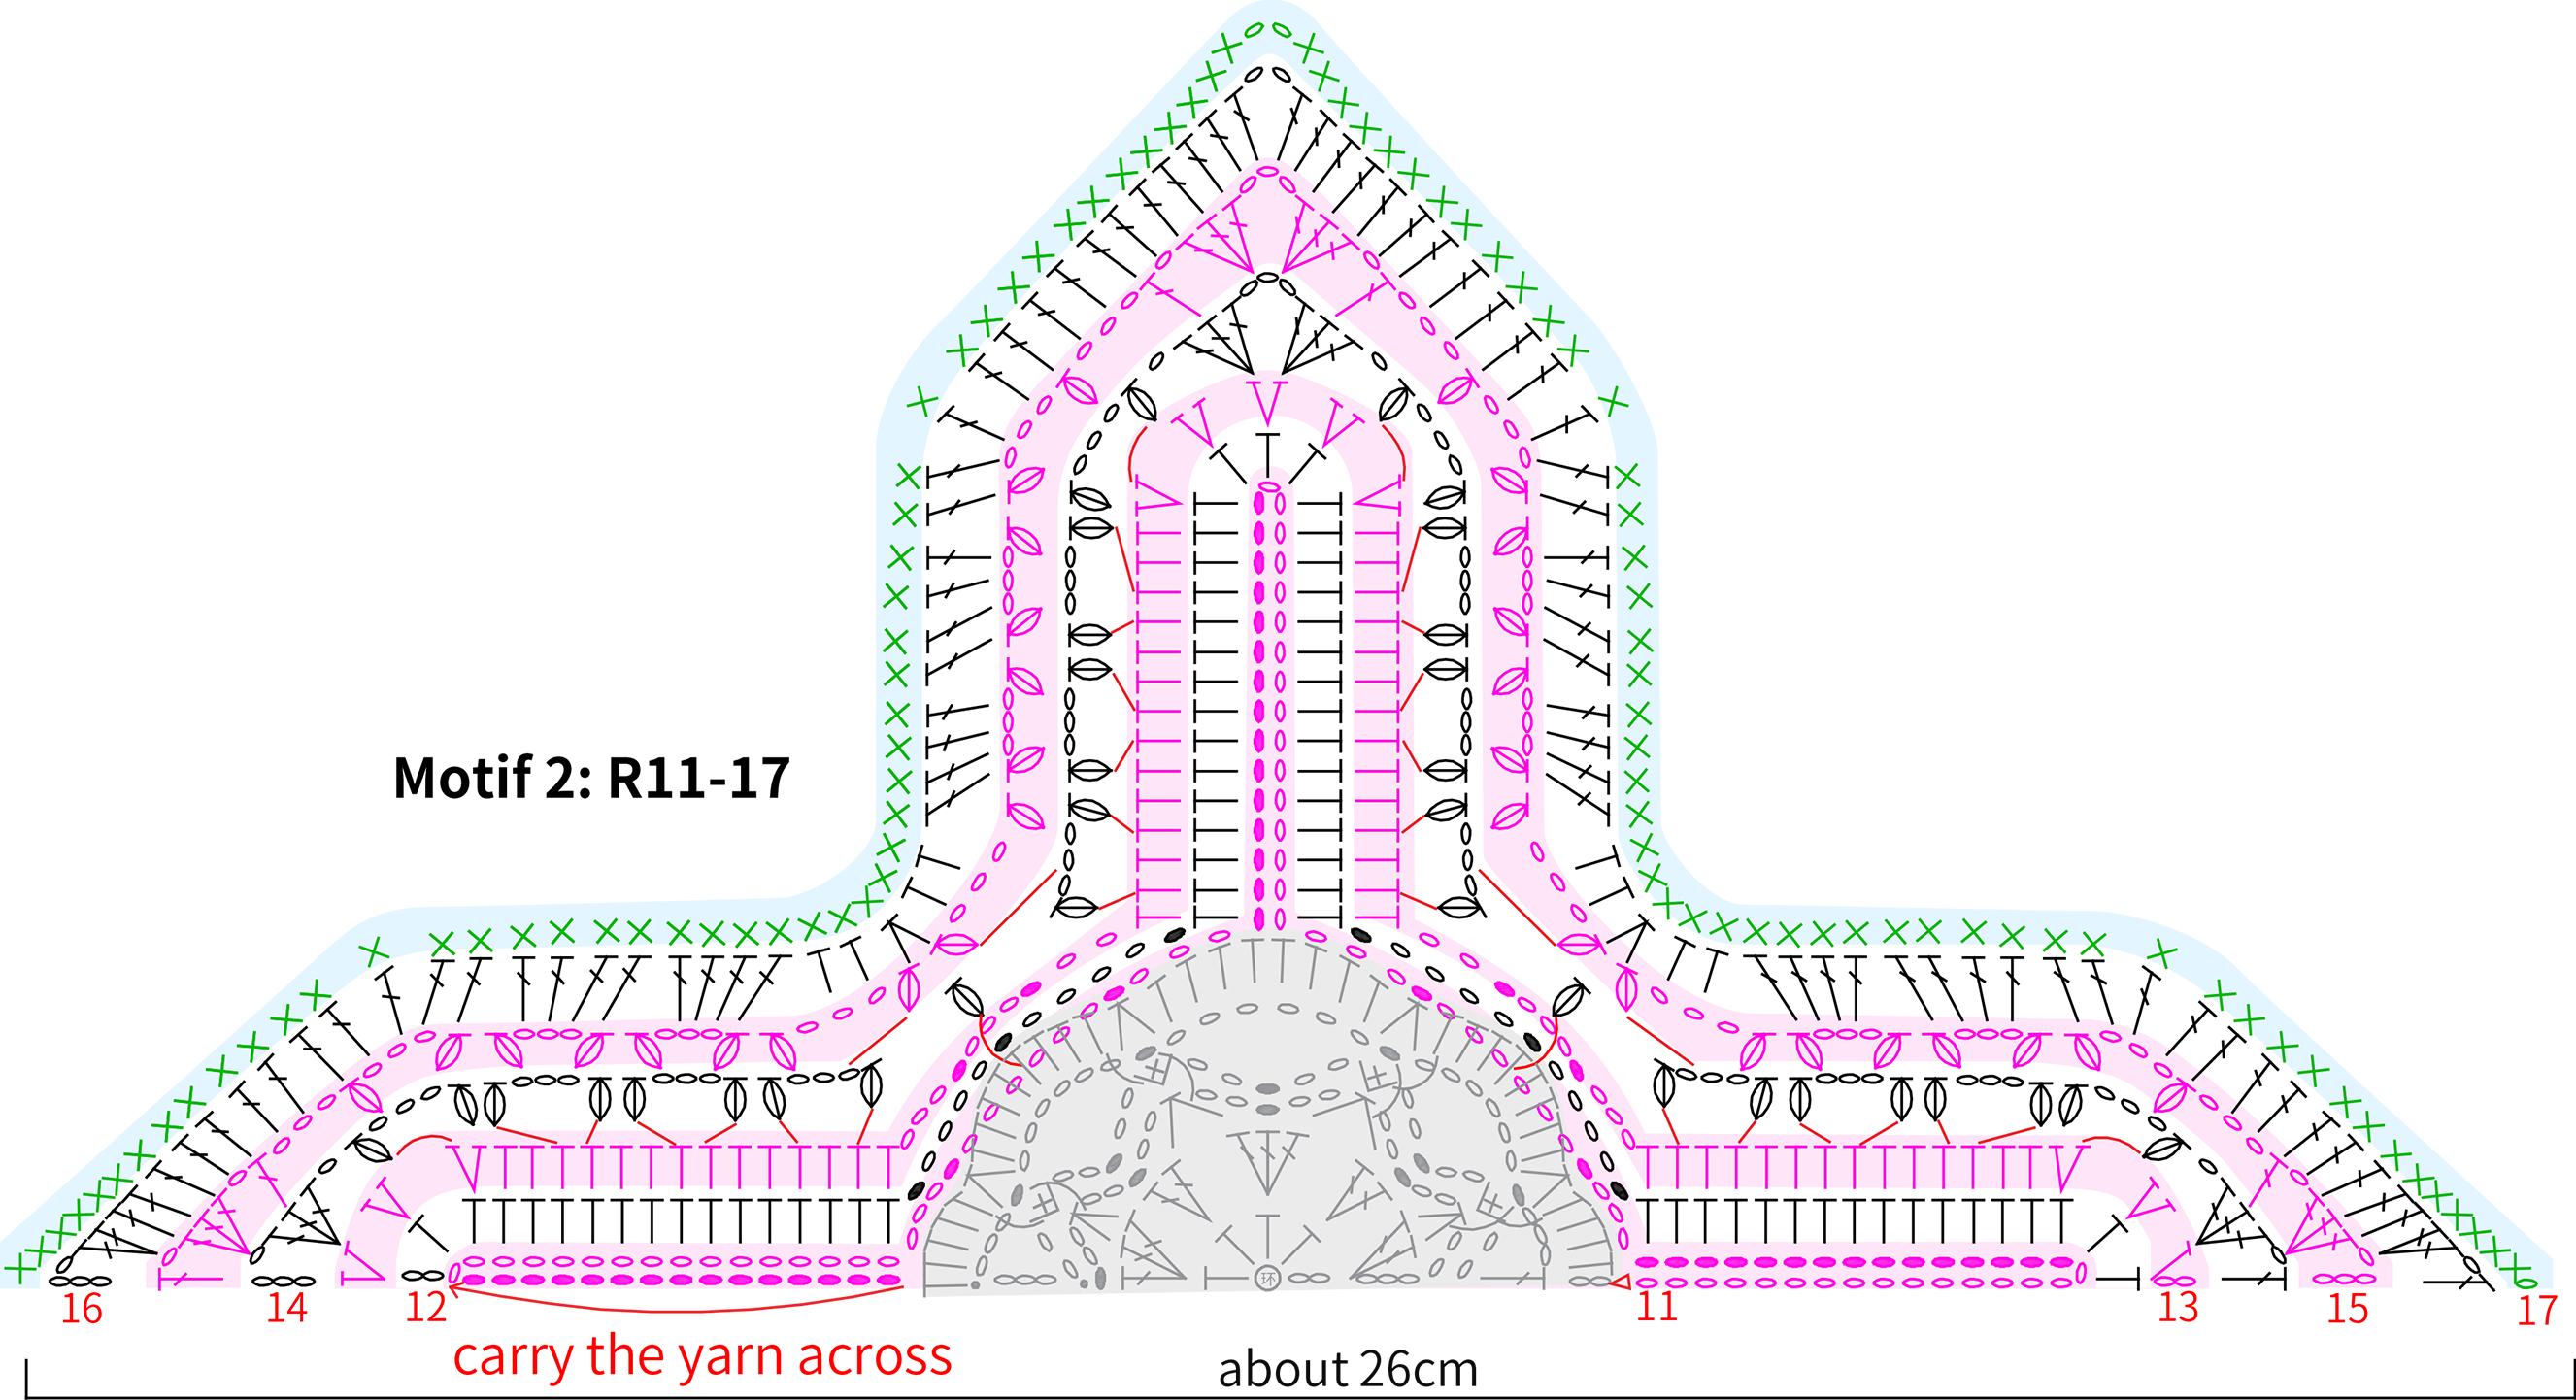
Motif 2 start with the magic ring, work back and forth, you’ll need to change colors during the process. Please refer to the video demonstration for more details.
Note:
1. The slip stitch in R11 working position is on the back of the half double crochet from R6.
2. R13, R14, R15 connect to the corresponding positions from the previous rows.
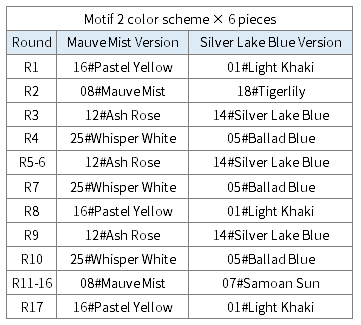
Step 3 Motif 3A3 25' 15'' (Part 2)
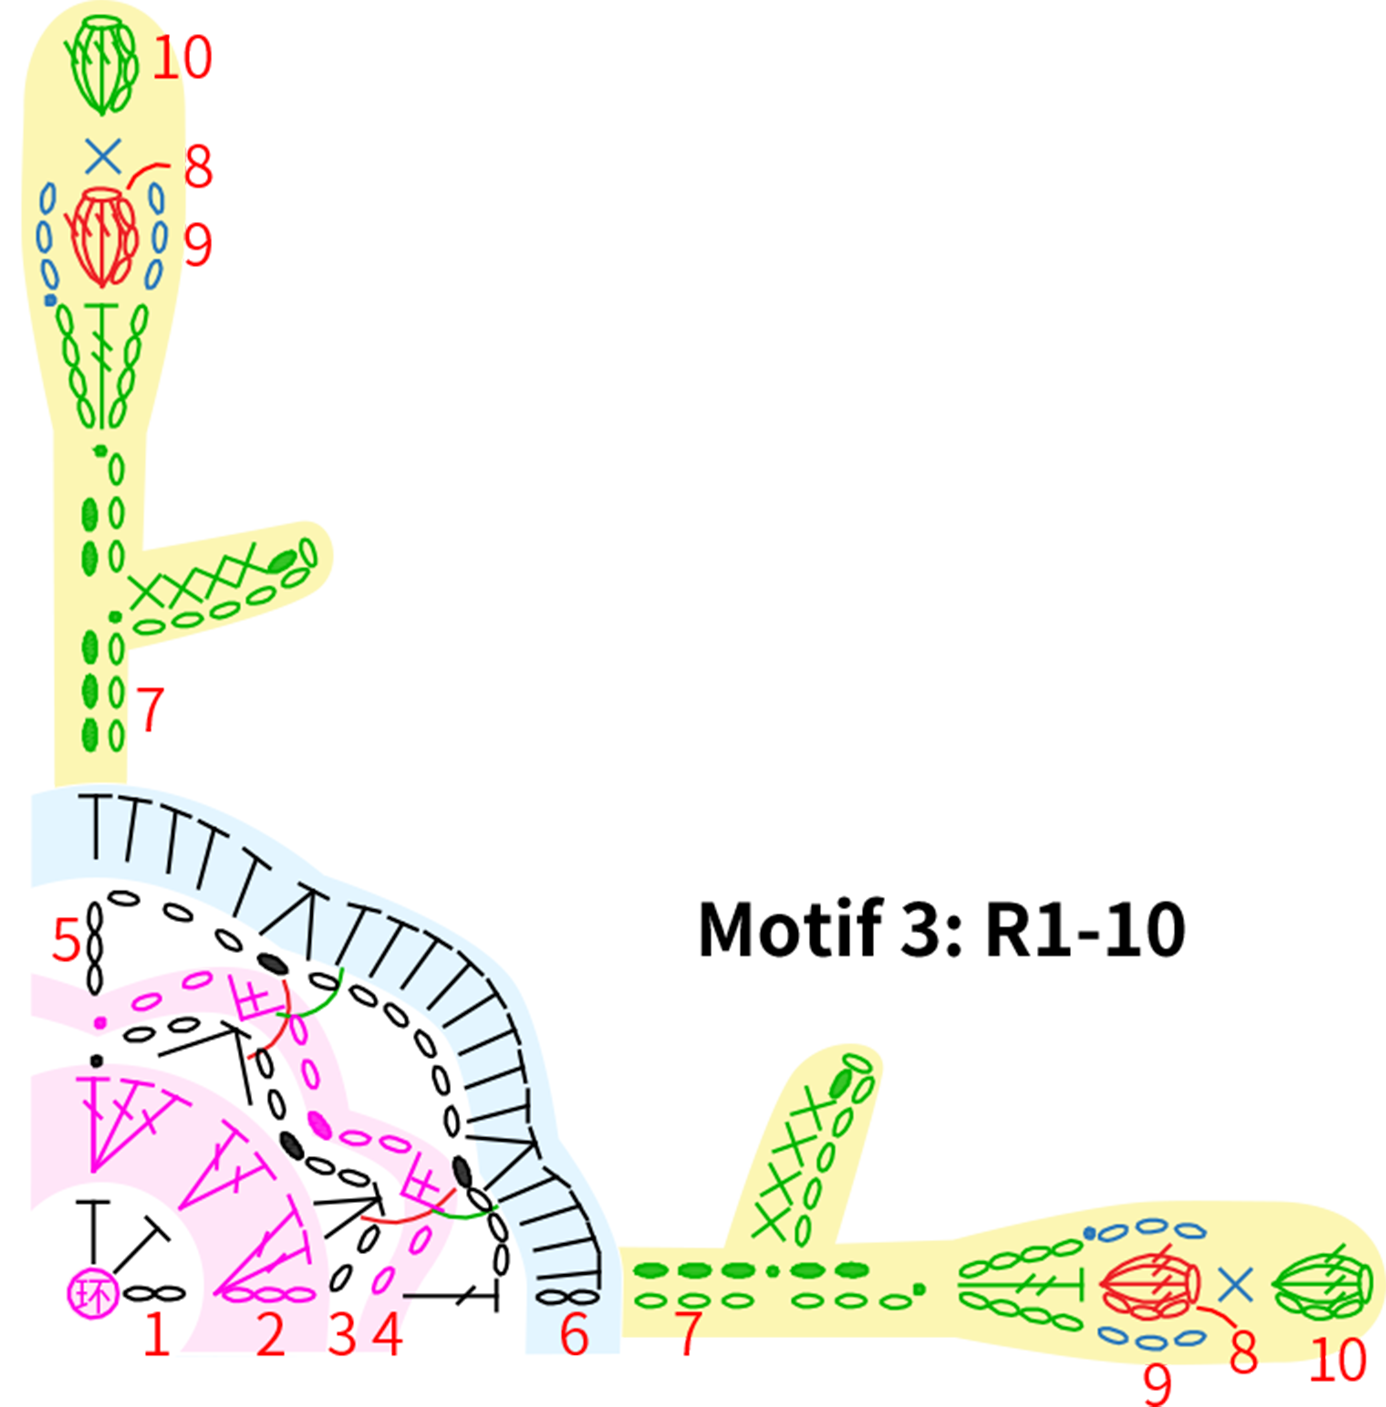
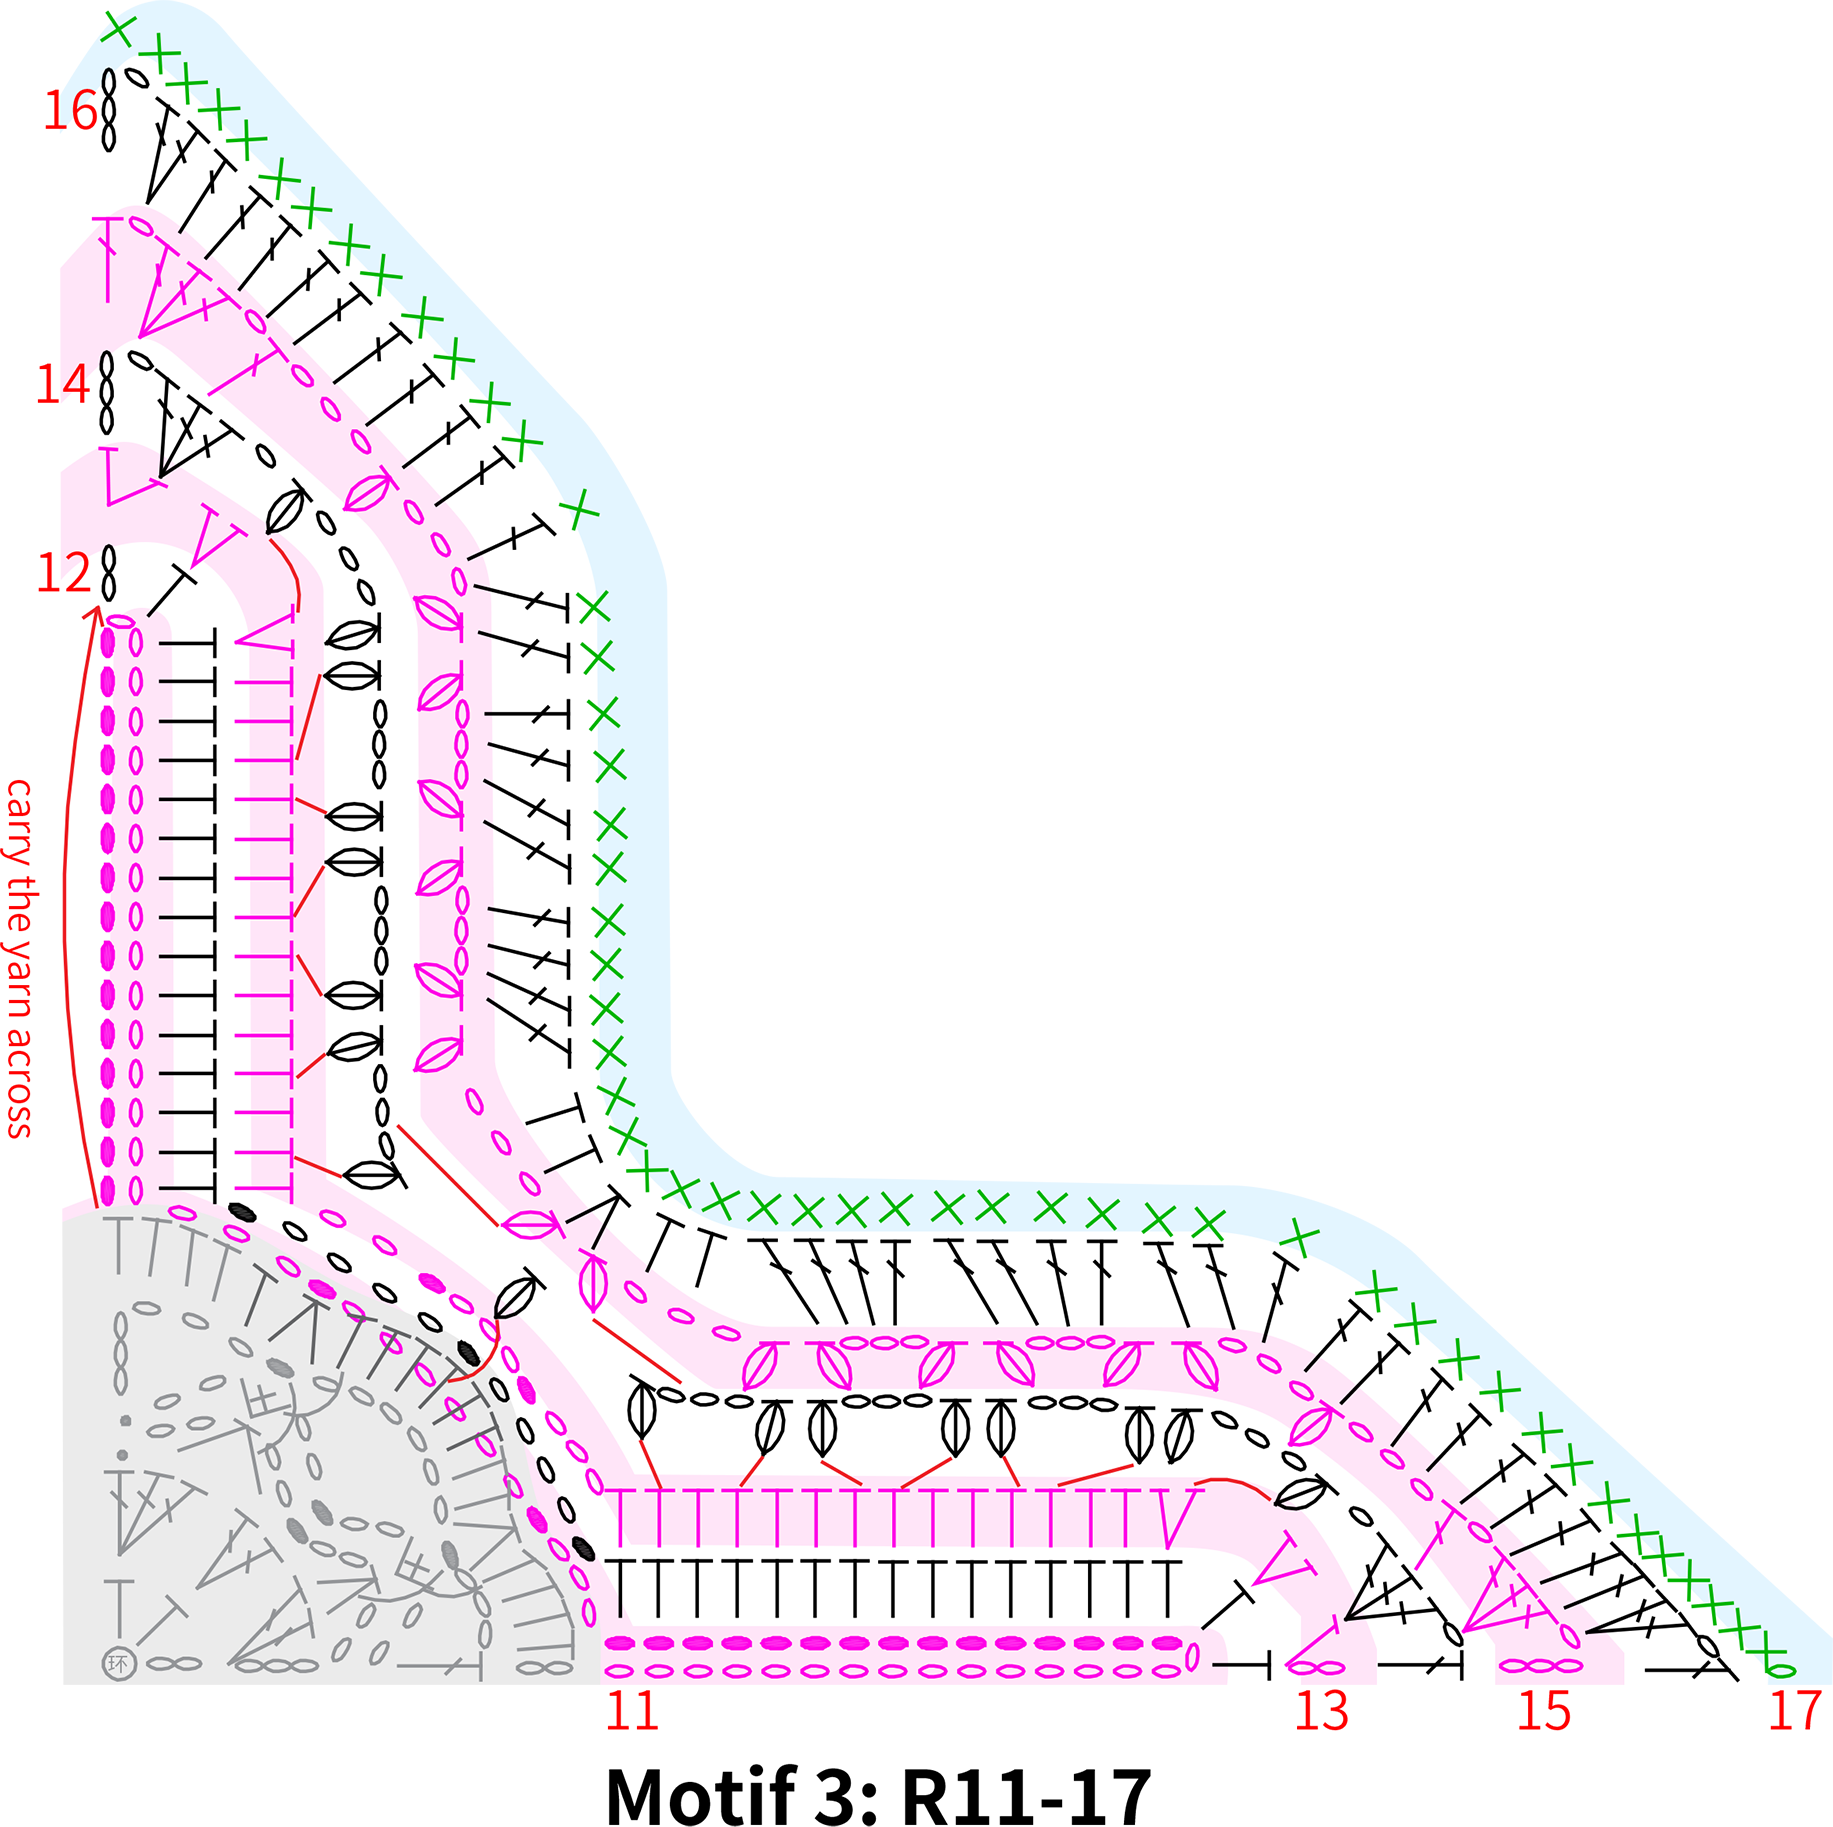
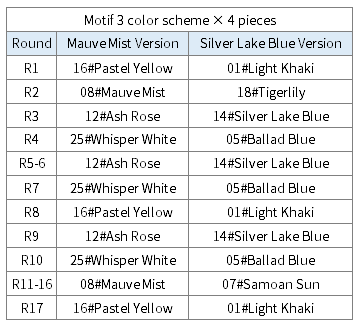
Motif 3 start with the magic ring, work back and forth, you’ll need to change colors during the process. Similar to Motif 2, just with different stitch counts. Please refer to the video demonstration for more details.
Note:
1. The slip stitch in R11 working position is on the back of the half double crochet from R6.
2. R13, R14, R15 connect to the corresponding positions from the previous rows.
Step 4 Motif 4A4 25' 34'' (Part 2)
Motif 4 start with the magic ring, crochet in rounds counterclockwise, you’ll need to change colors during the process, finally leave a tail for sewing. Please refer to the video demonstration for more details.
Part 2 Sewing motifs togetherB
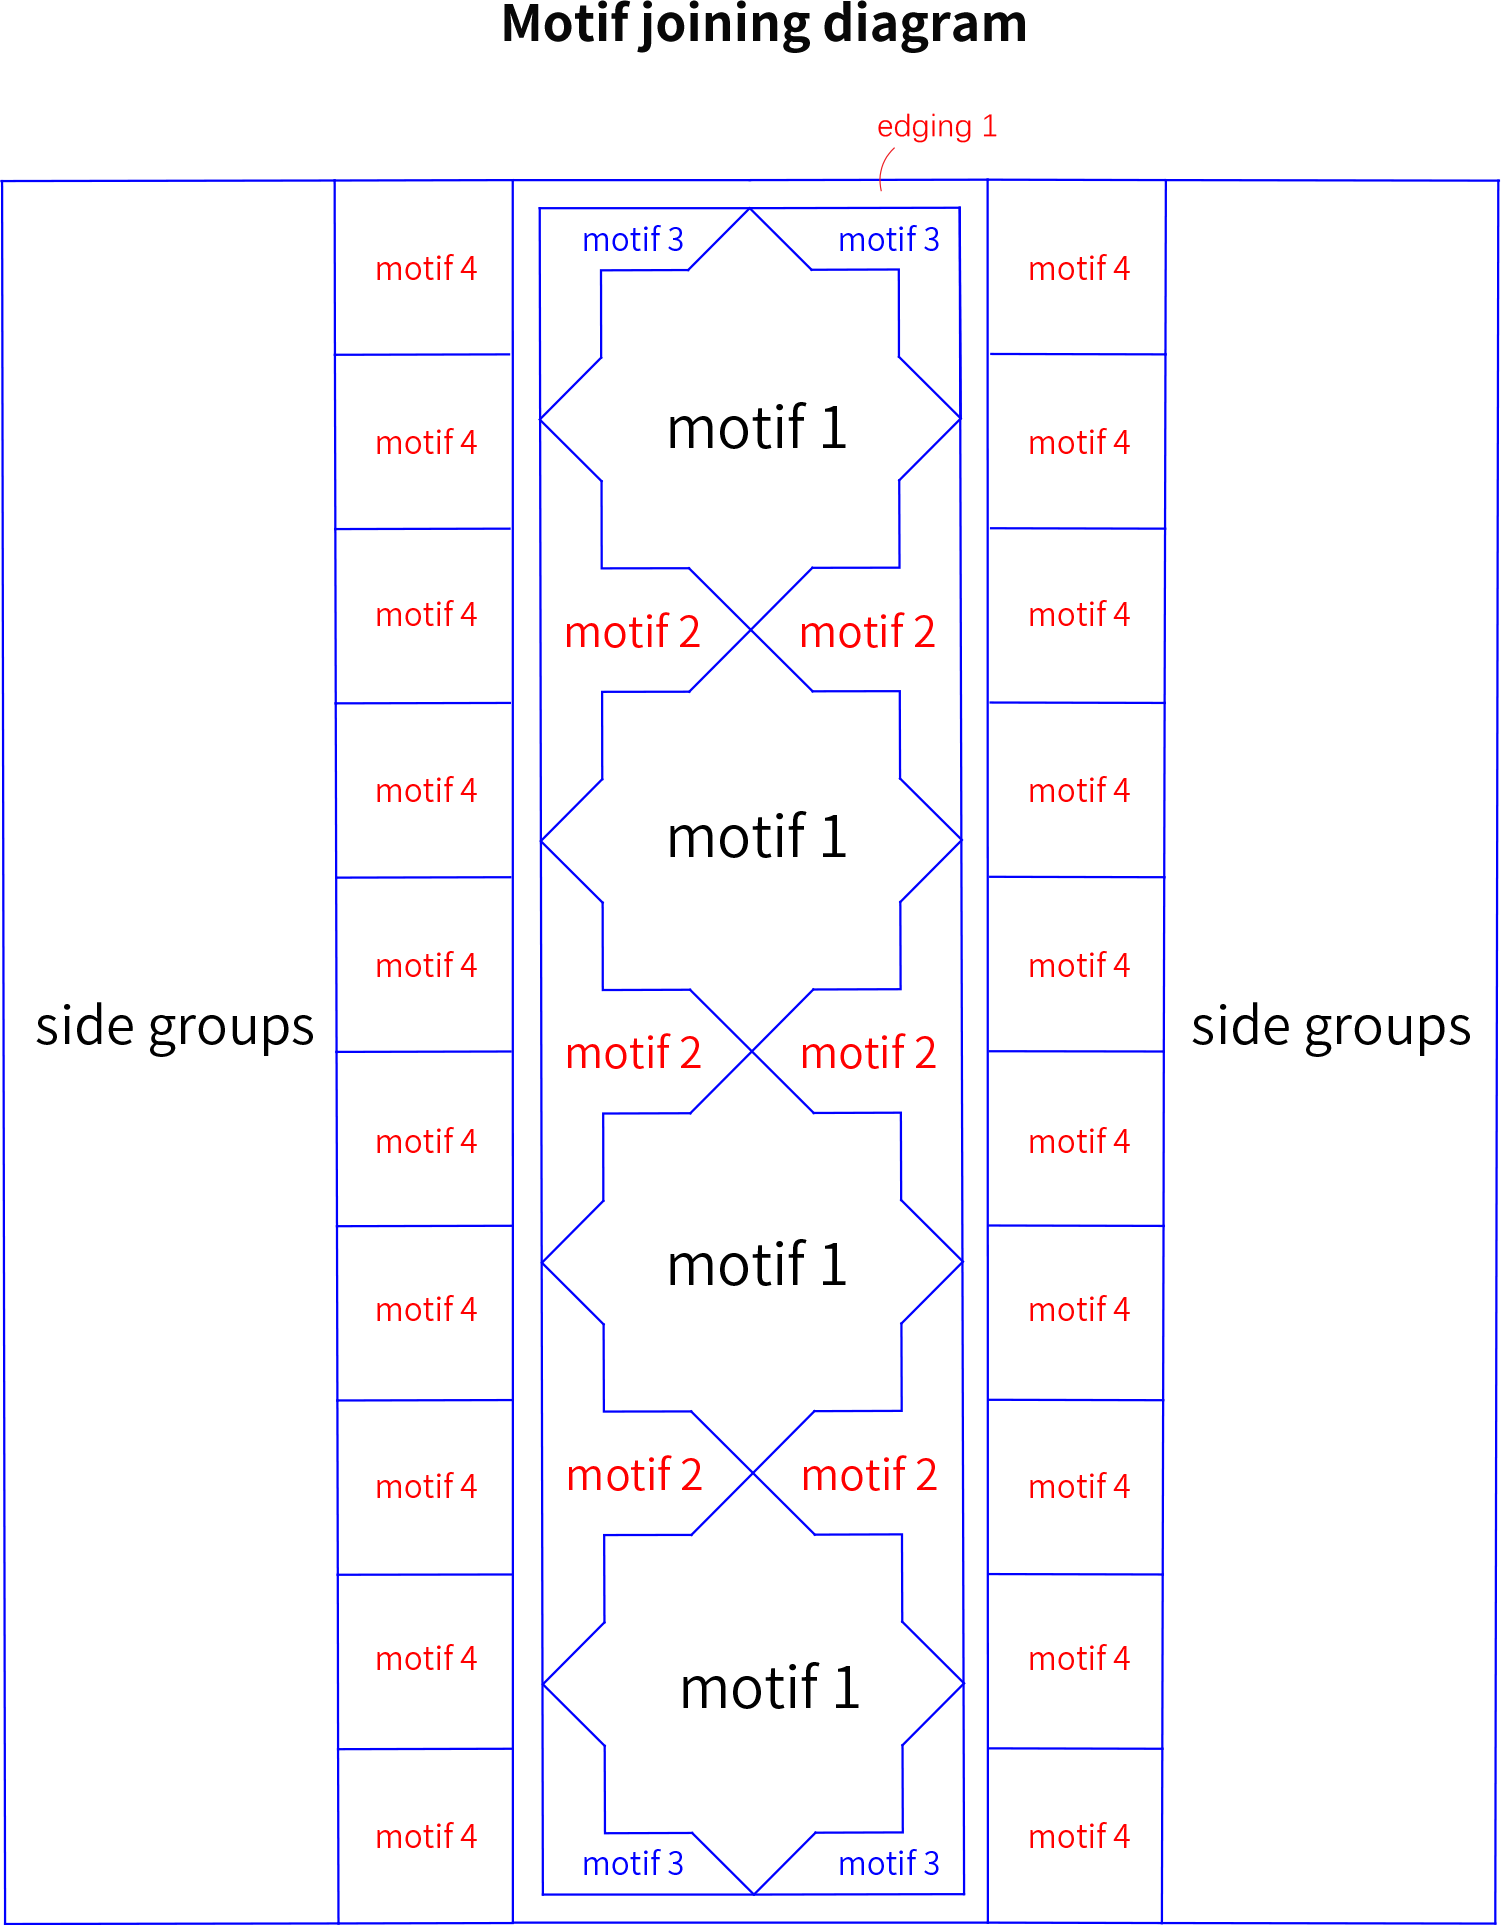
The sewing mainly consists of two parts: sewing motifs 1, motifs 2,motifs 3 and sewing motif 4. Please refer to the video demonstration and motif joining diagram for more details.
Step 1 Sewing motifs 1, motifs 2 and motifs 3B1 42' 49'' (Part 2)
Sew motifs 1, motifs 2 and motifs 3 into a square shape using the yarn in the color of the motif edges. Please refer to the video demonstration for more details.
Step 2 Sewing motif 4B2 55' 28'' (Part 2)
Use the reserved yarn tails to sew together the corresponding edges with the whip stitch, 10 stitches in each group, for a total of 2 groups. Please refer to the video demonstration for more details.
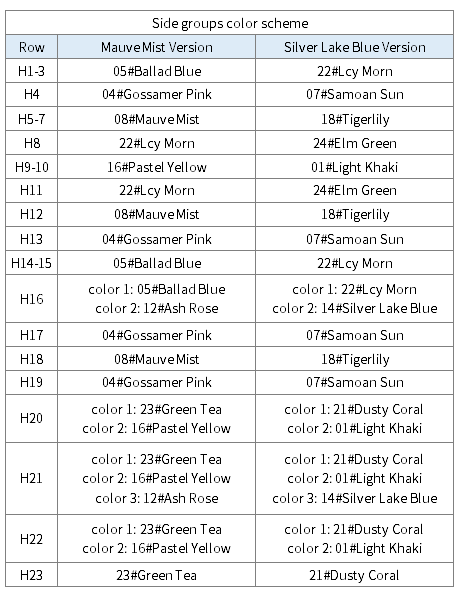
Part 3 Side groupsC 00' 08'' (Part 3)
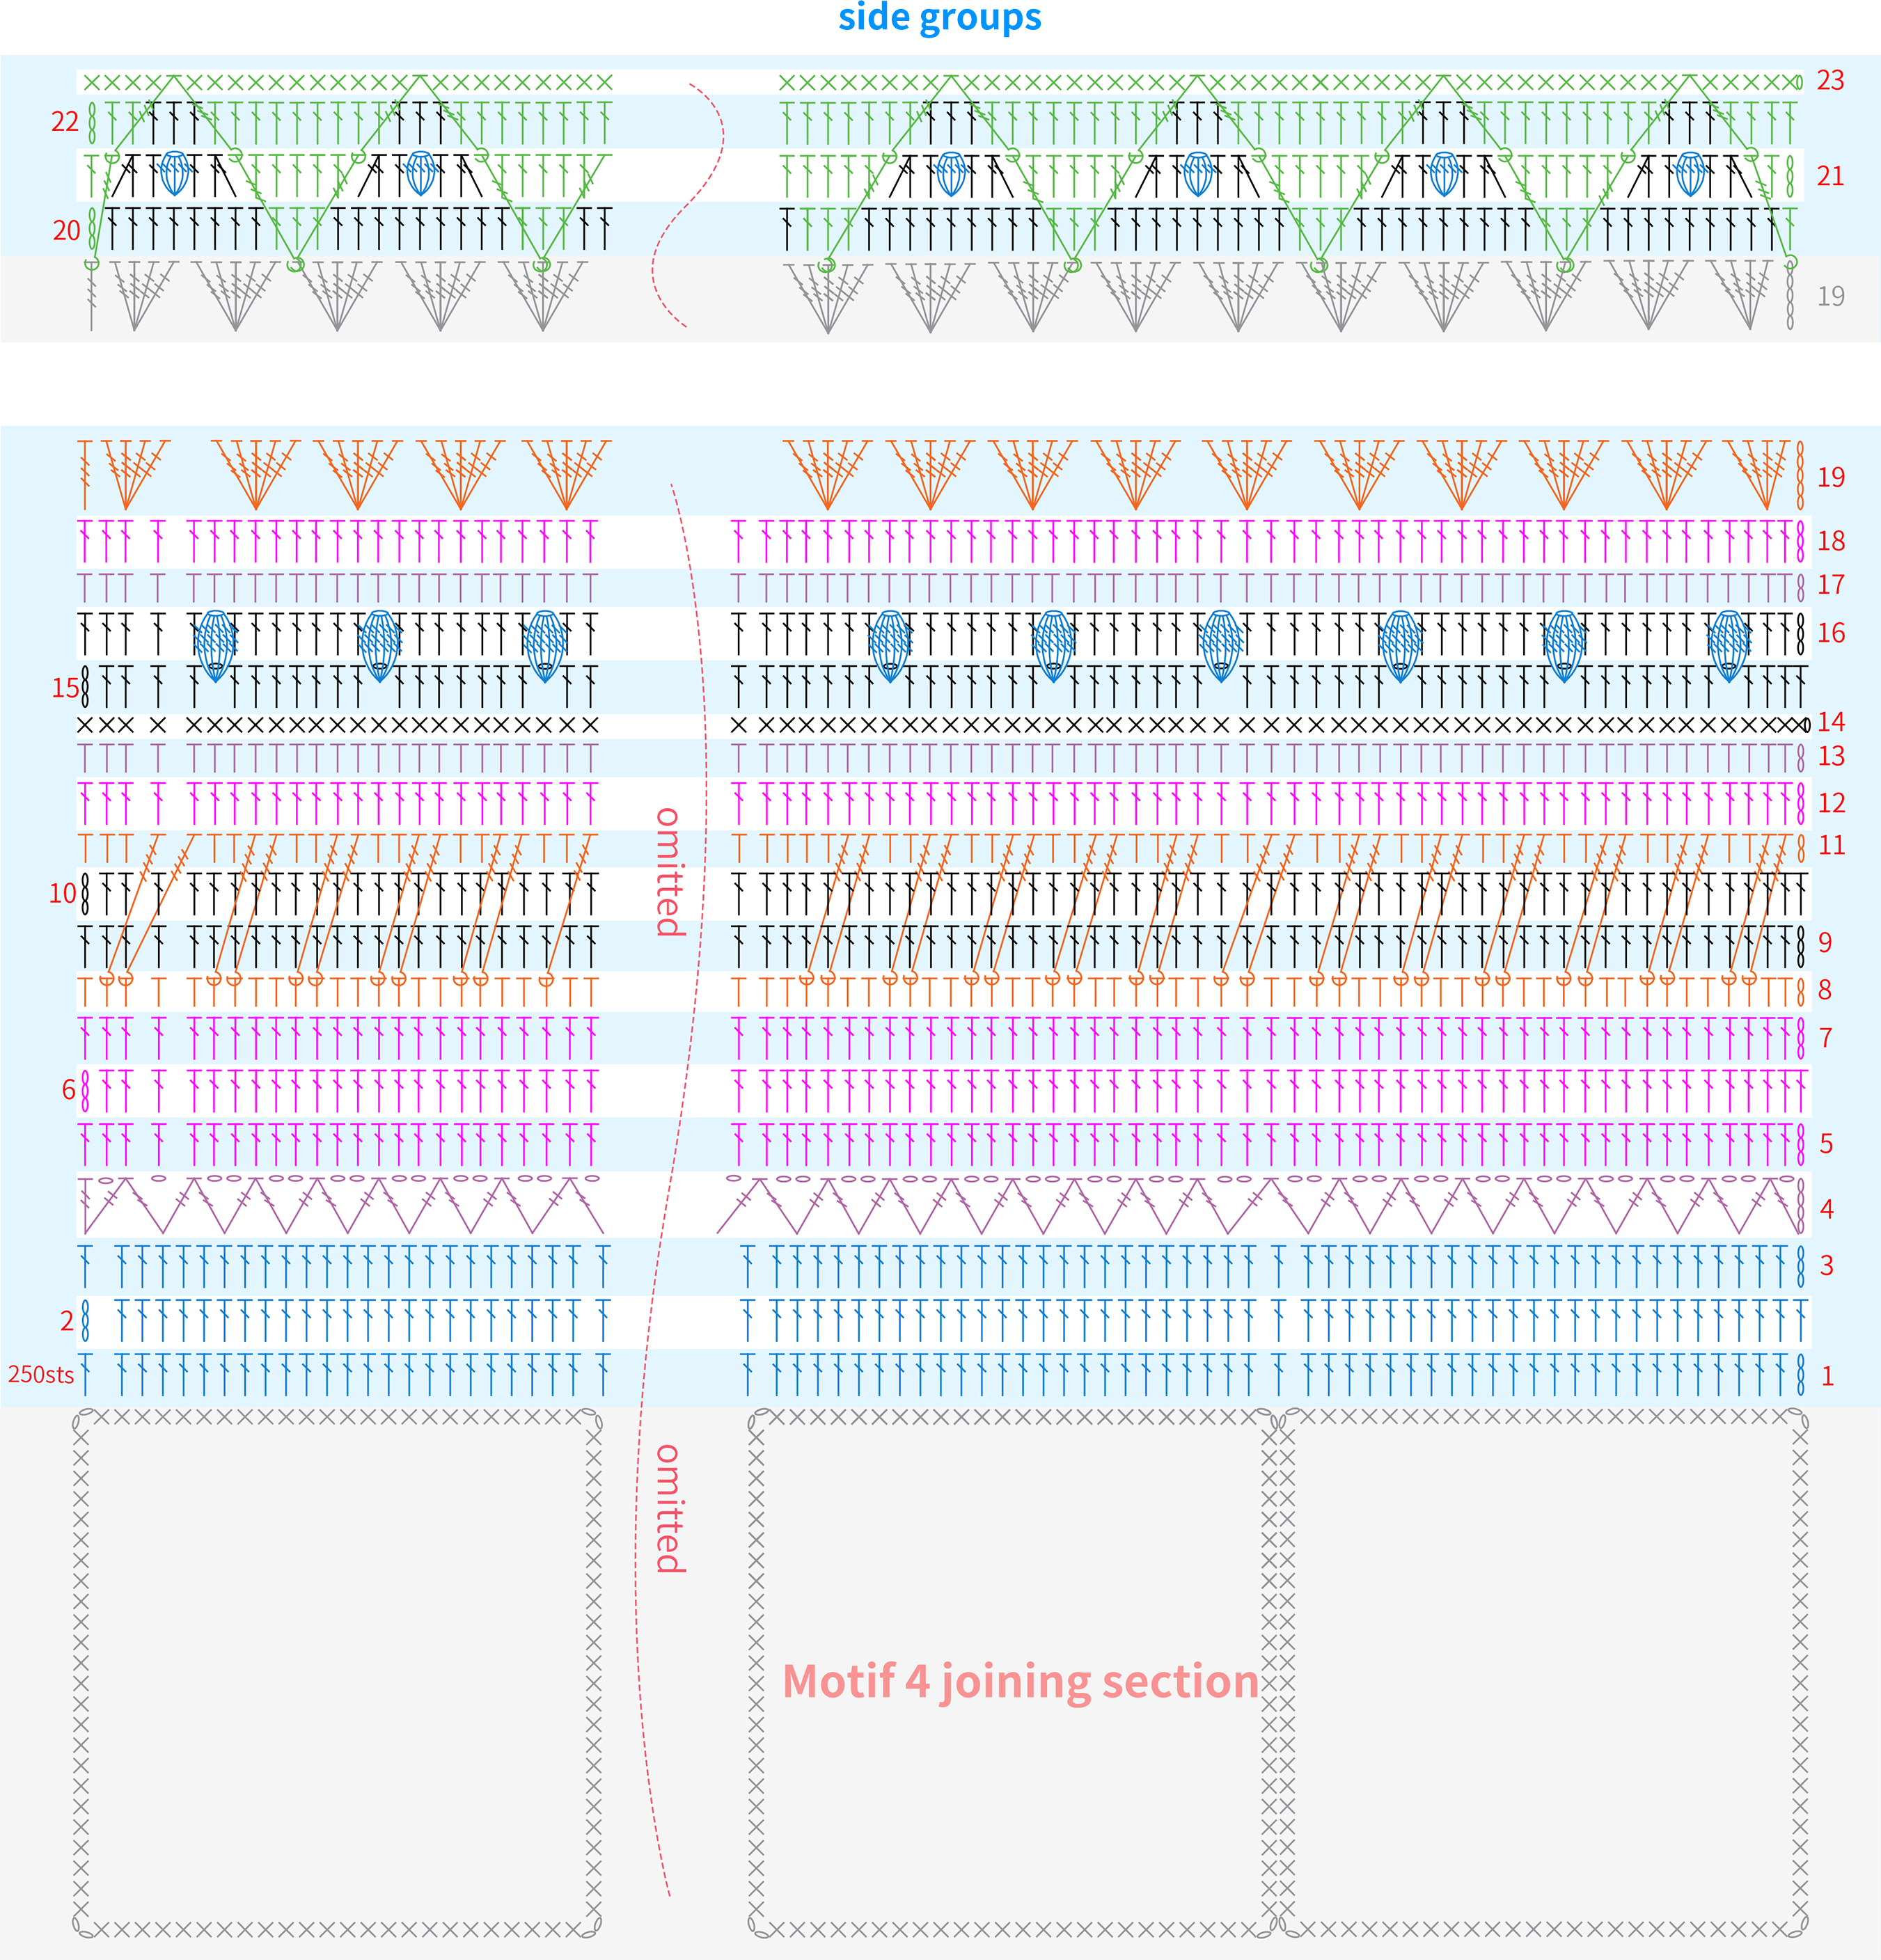
Side groups work back and forth on the strips sewn together with motifs 4. Please refer to the video demonstration for more details.
Part 4 EdgingD
The edging is divided into edging 1, edging 2 and edging 3.
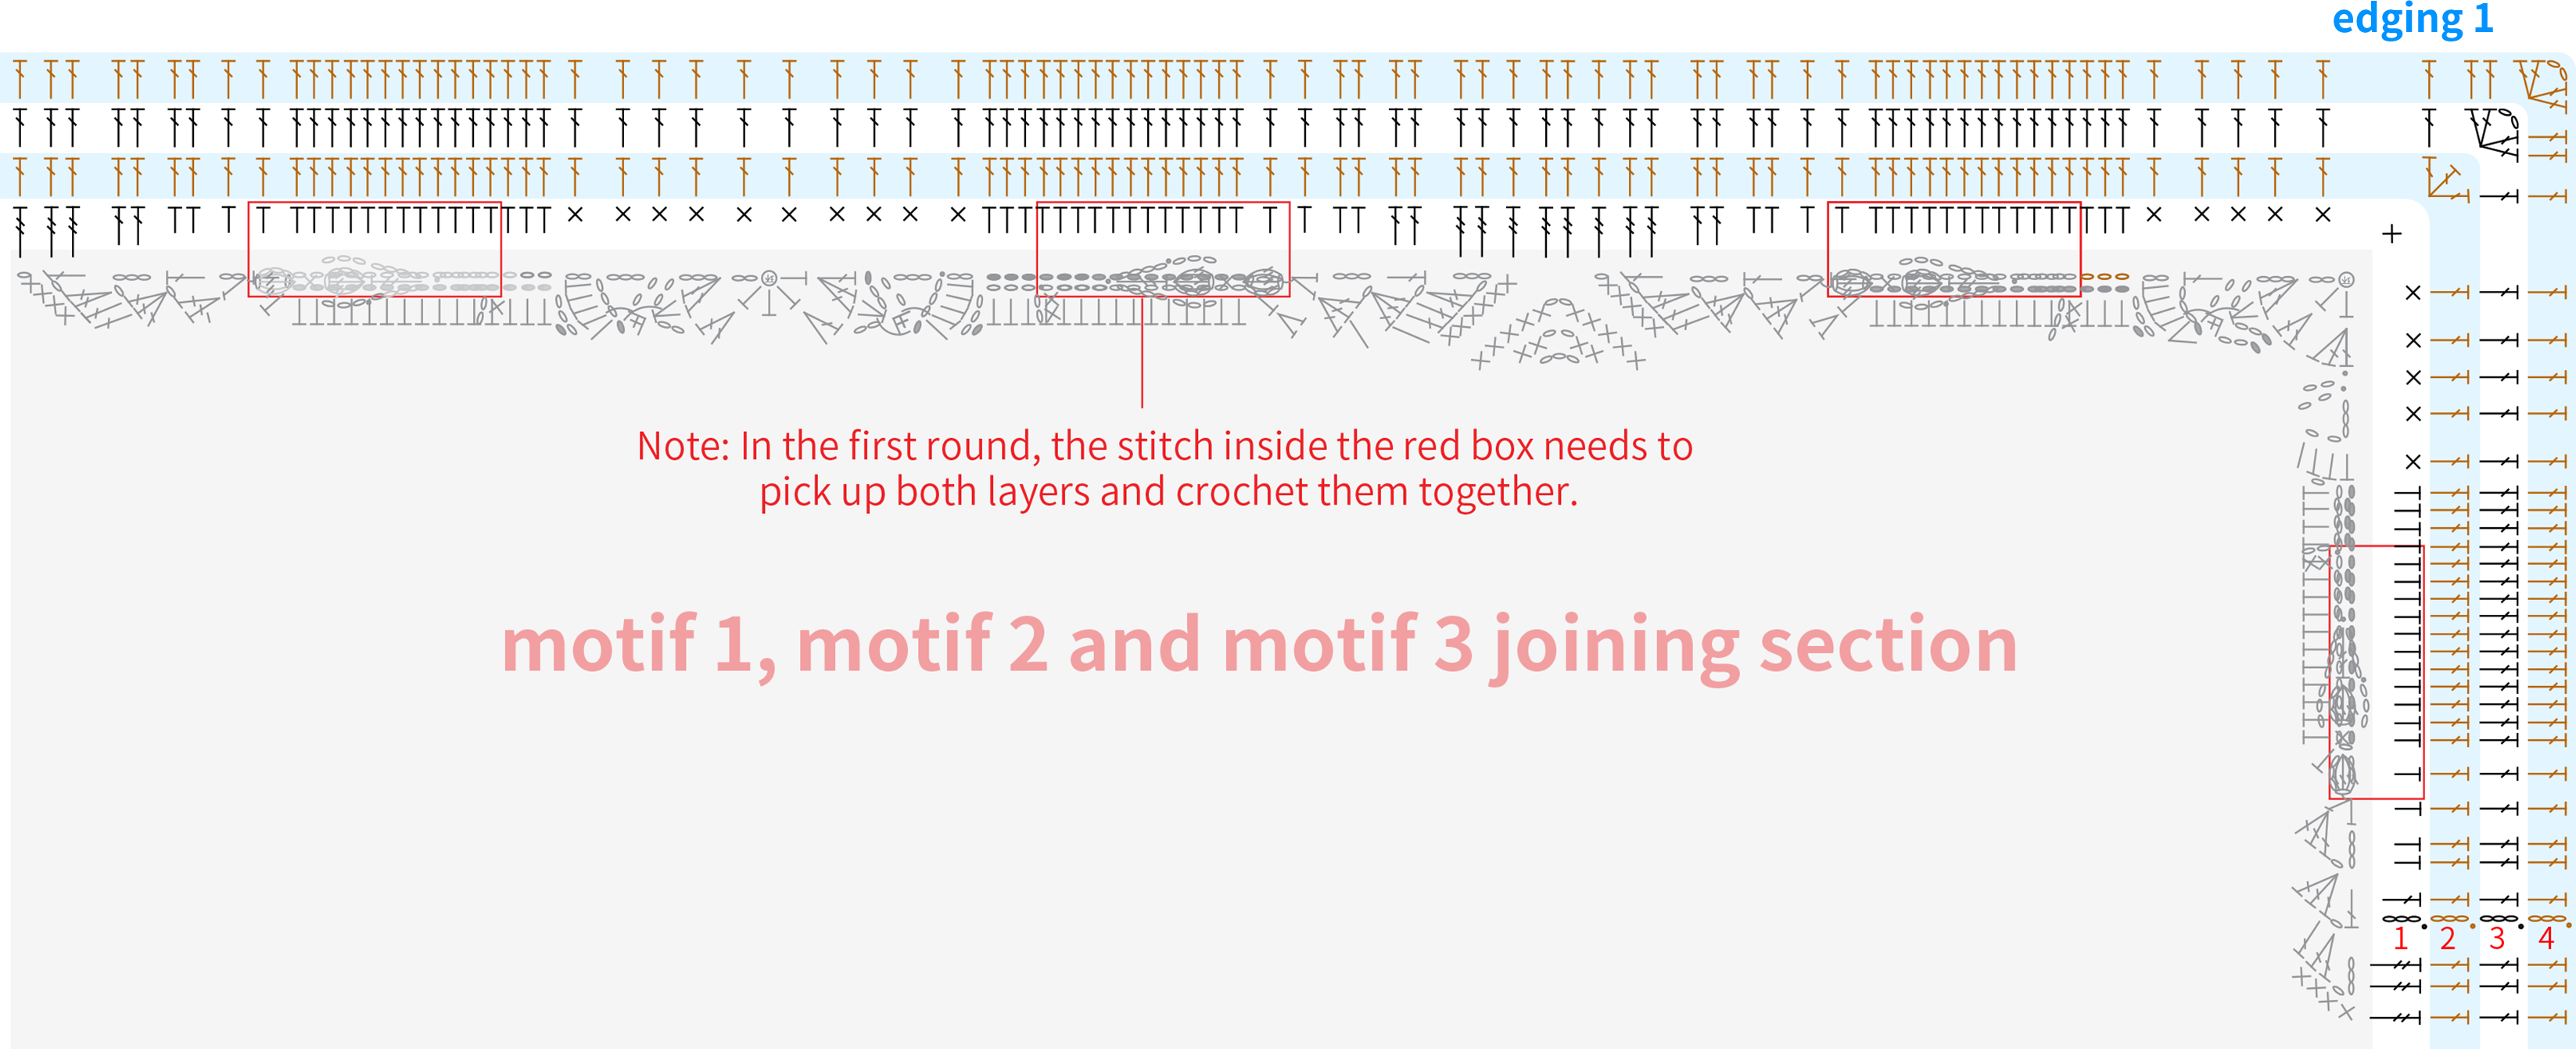
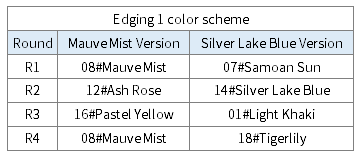
Step 1 Edging 1D1 35' 07'' (Part 3)
Edging 1 Work on the joined motifs 1, motifs 2, motifs 3 and connect it to the flower branch section . Please refer to the video demonstration for more details.
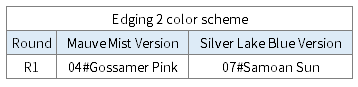
Step 2 Edging 2D2 47' 20'' (Part 3)
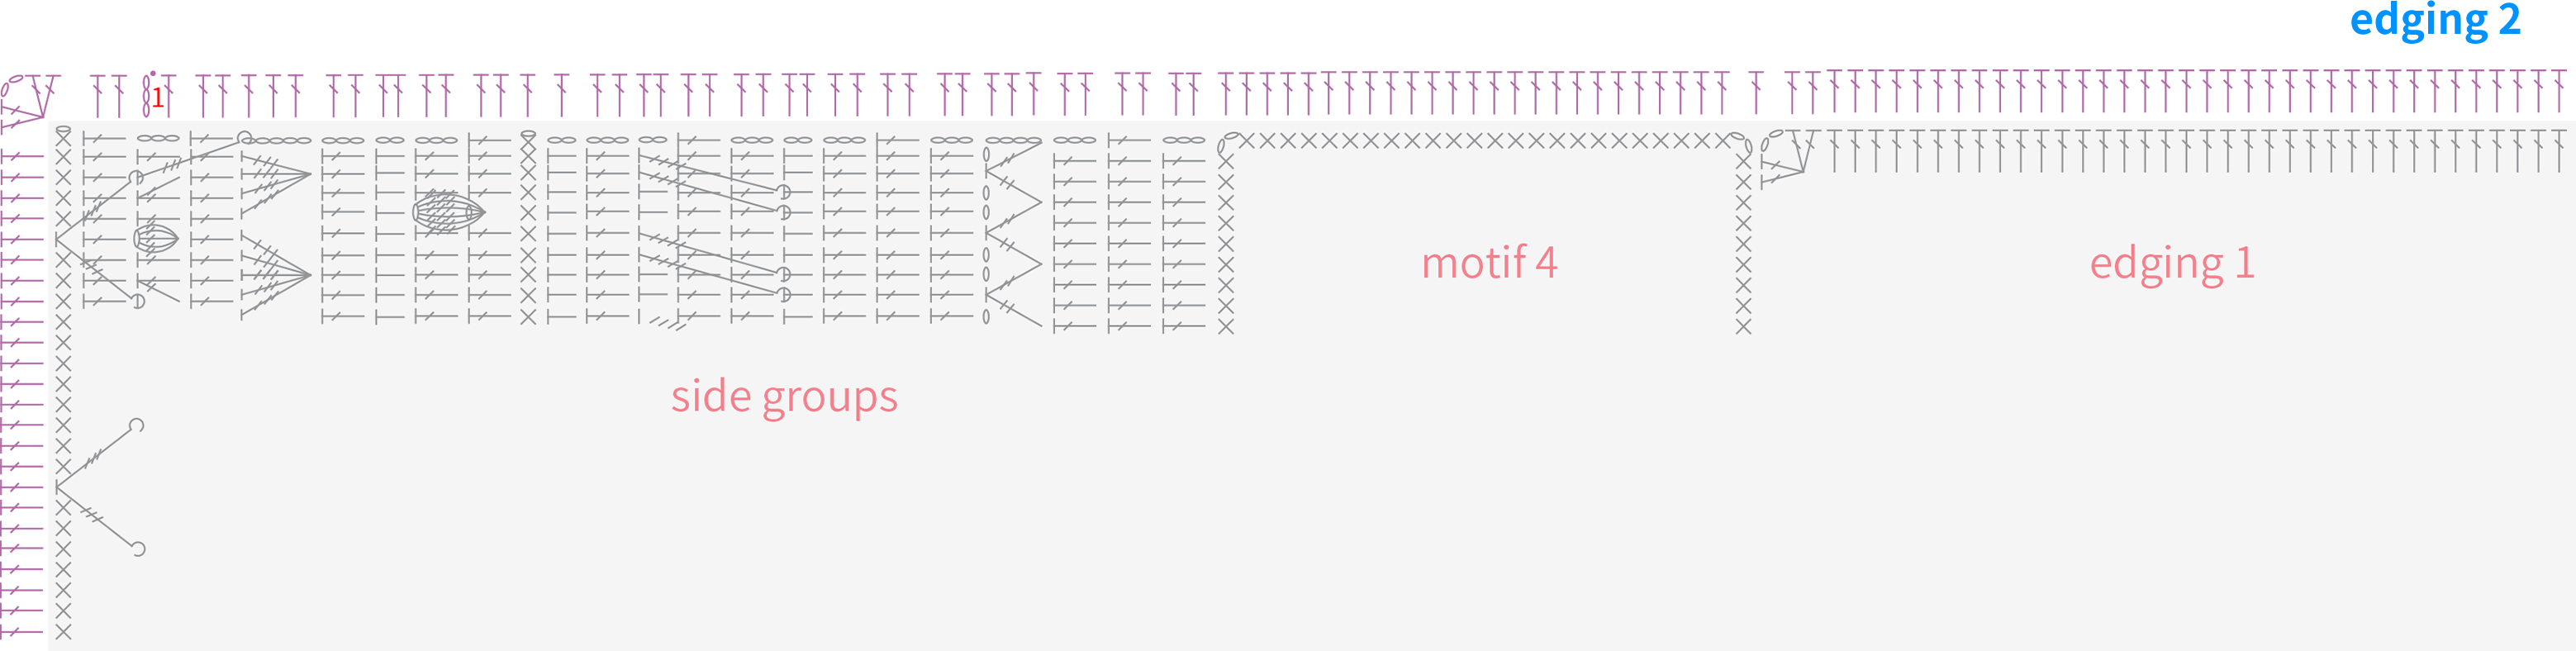
First, sew the remaining side of motif 4 strip to the long edge of the edging one, use the same color as the edge of motif 4. After completing, crochet the edging 2.Please refer to the video demonstration for more details.
Step 3 Edging 3D3 53' 48'' (Part 3)
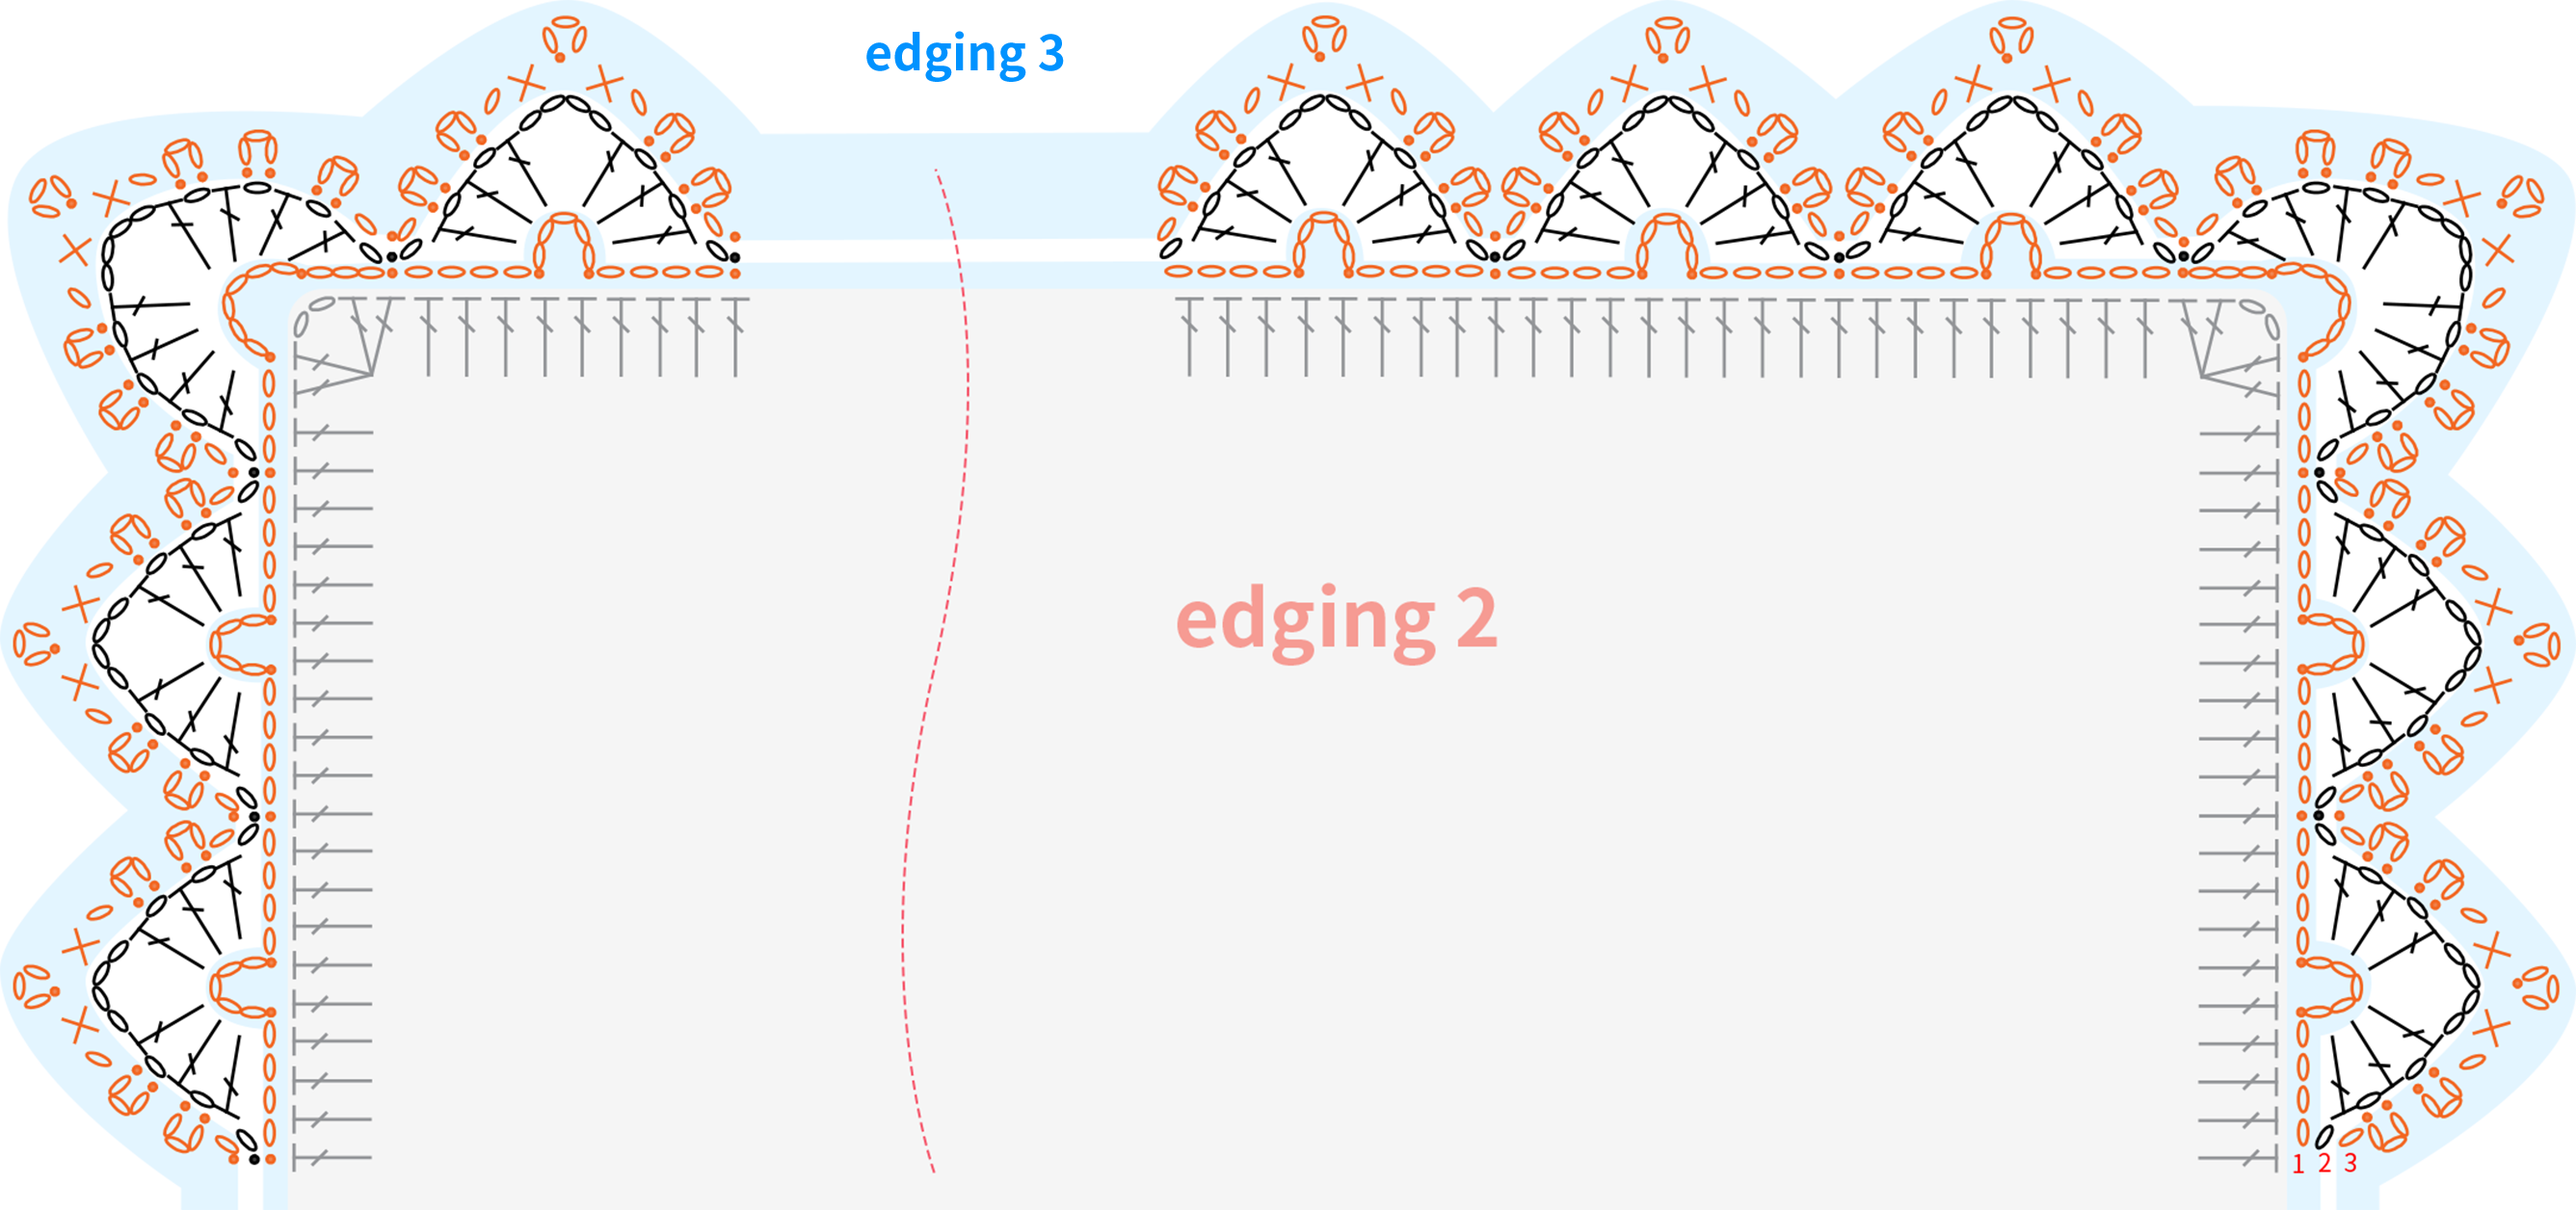
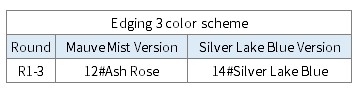
Crochet edging 3 around the edge of the piece. Please refer to the video demonstration for more details.
Made by the community