Accessories / Shawl
Sunglow Shawl
Project preview
See the finished project
Pattern format
Instructions
Watch and follow
Video tutorial
The shawl consists of two parts: the main piece and the i-cord. The main piece is divided into three sections. First, complete the main piece. Then work the i-cord around the main piece.
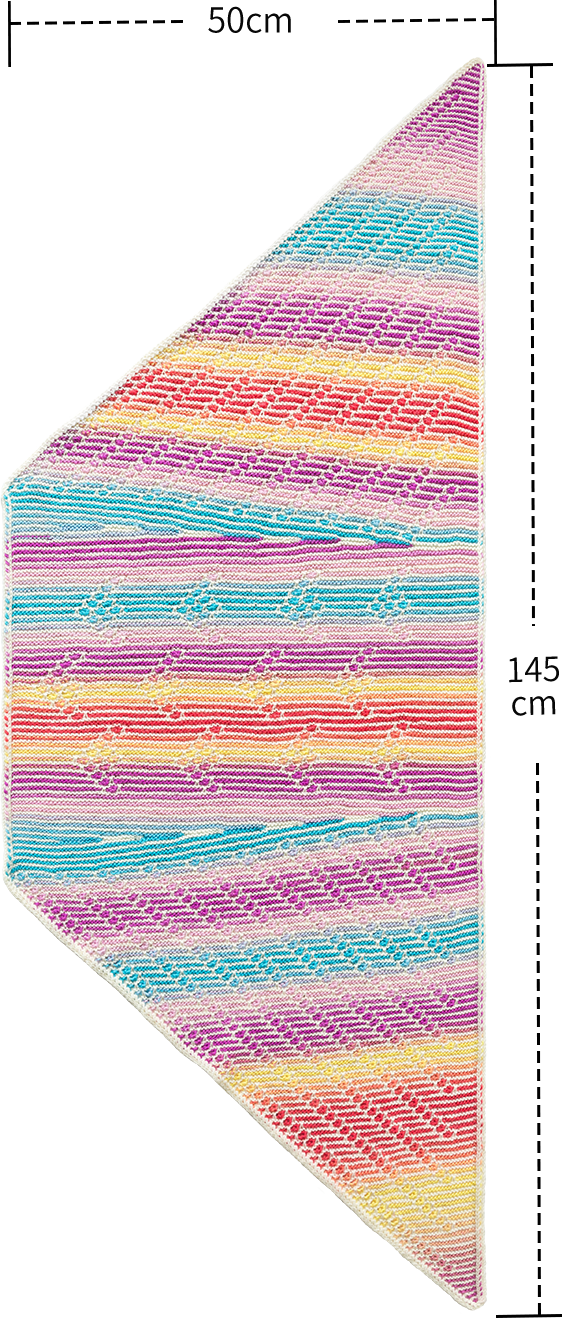
The handcrafted measurements may have an error of 1 to 2 cm. Due to variations in individual tension, the size of the sample is for reference only.
Materials: Susan's Family Impression Misty Feather & Morandi 4#
Hook: 3.25 mm needle
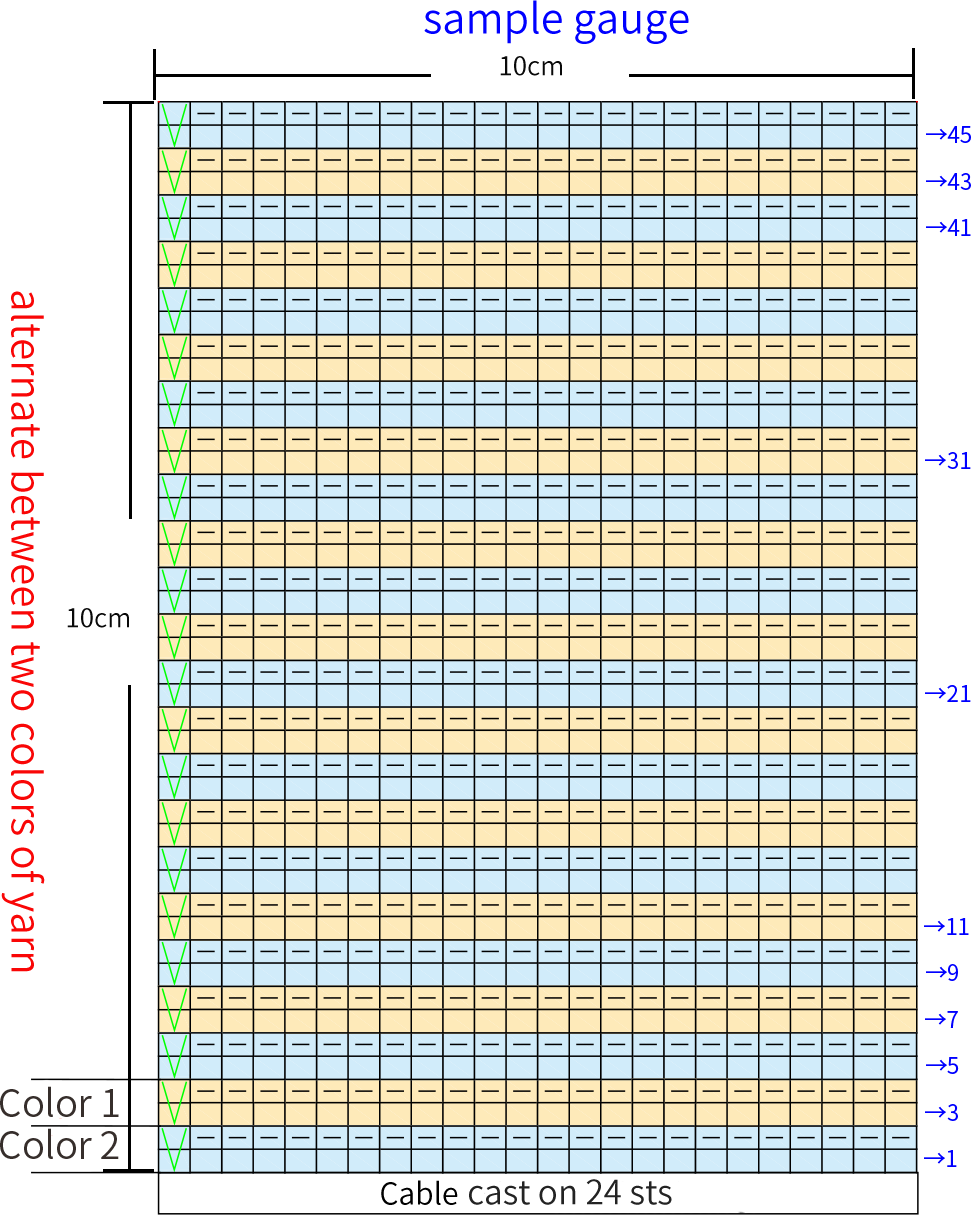
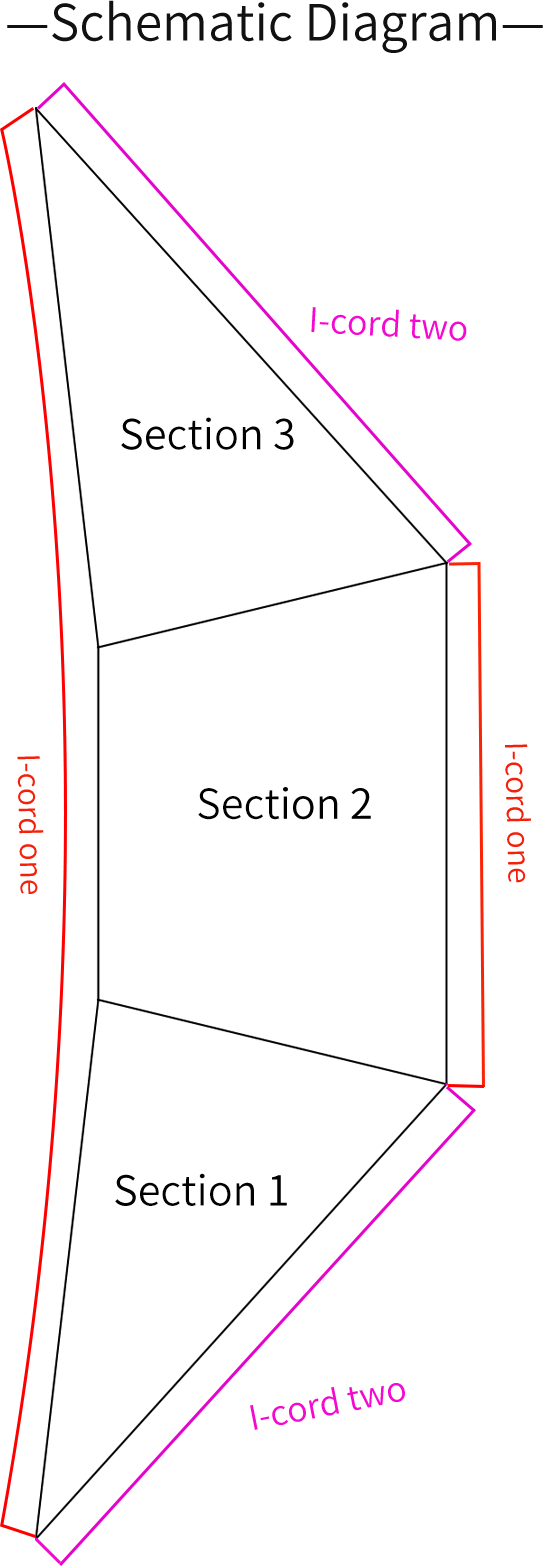
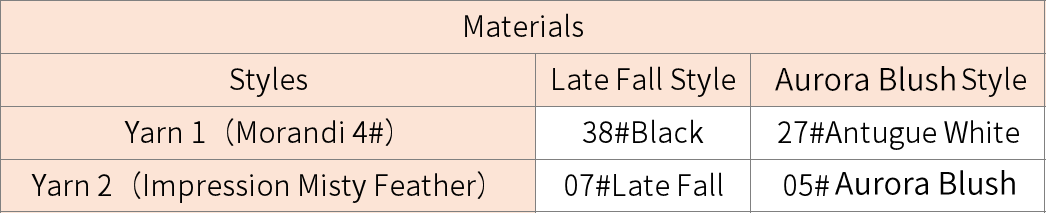

Chart Key





Note:
1,This pattern is making in Chinese crochet pattern terms, and the stitch name is written using American terminology. All measurements in charts are in cm.
2,The chart represent the right side of fabric, so check the key to see how to work a certain symbol on the right side and on the wrong side.

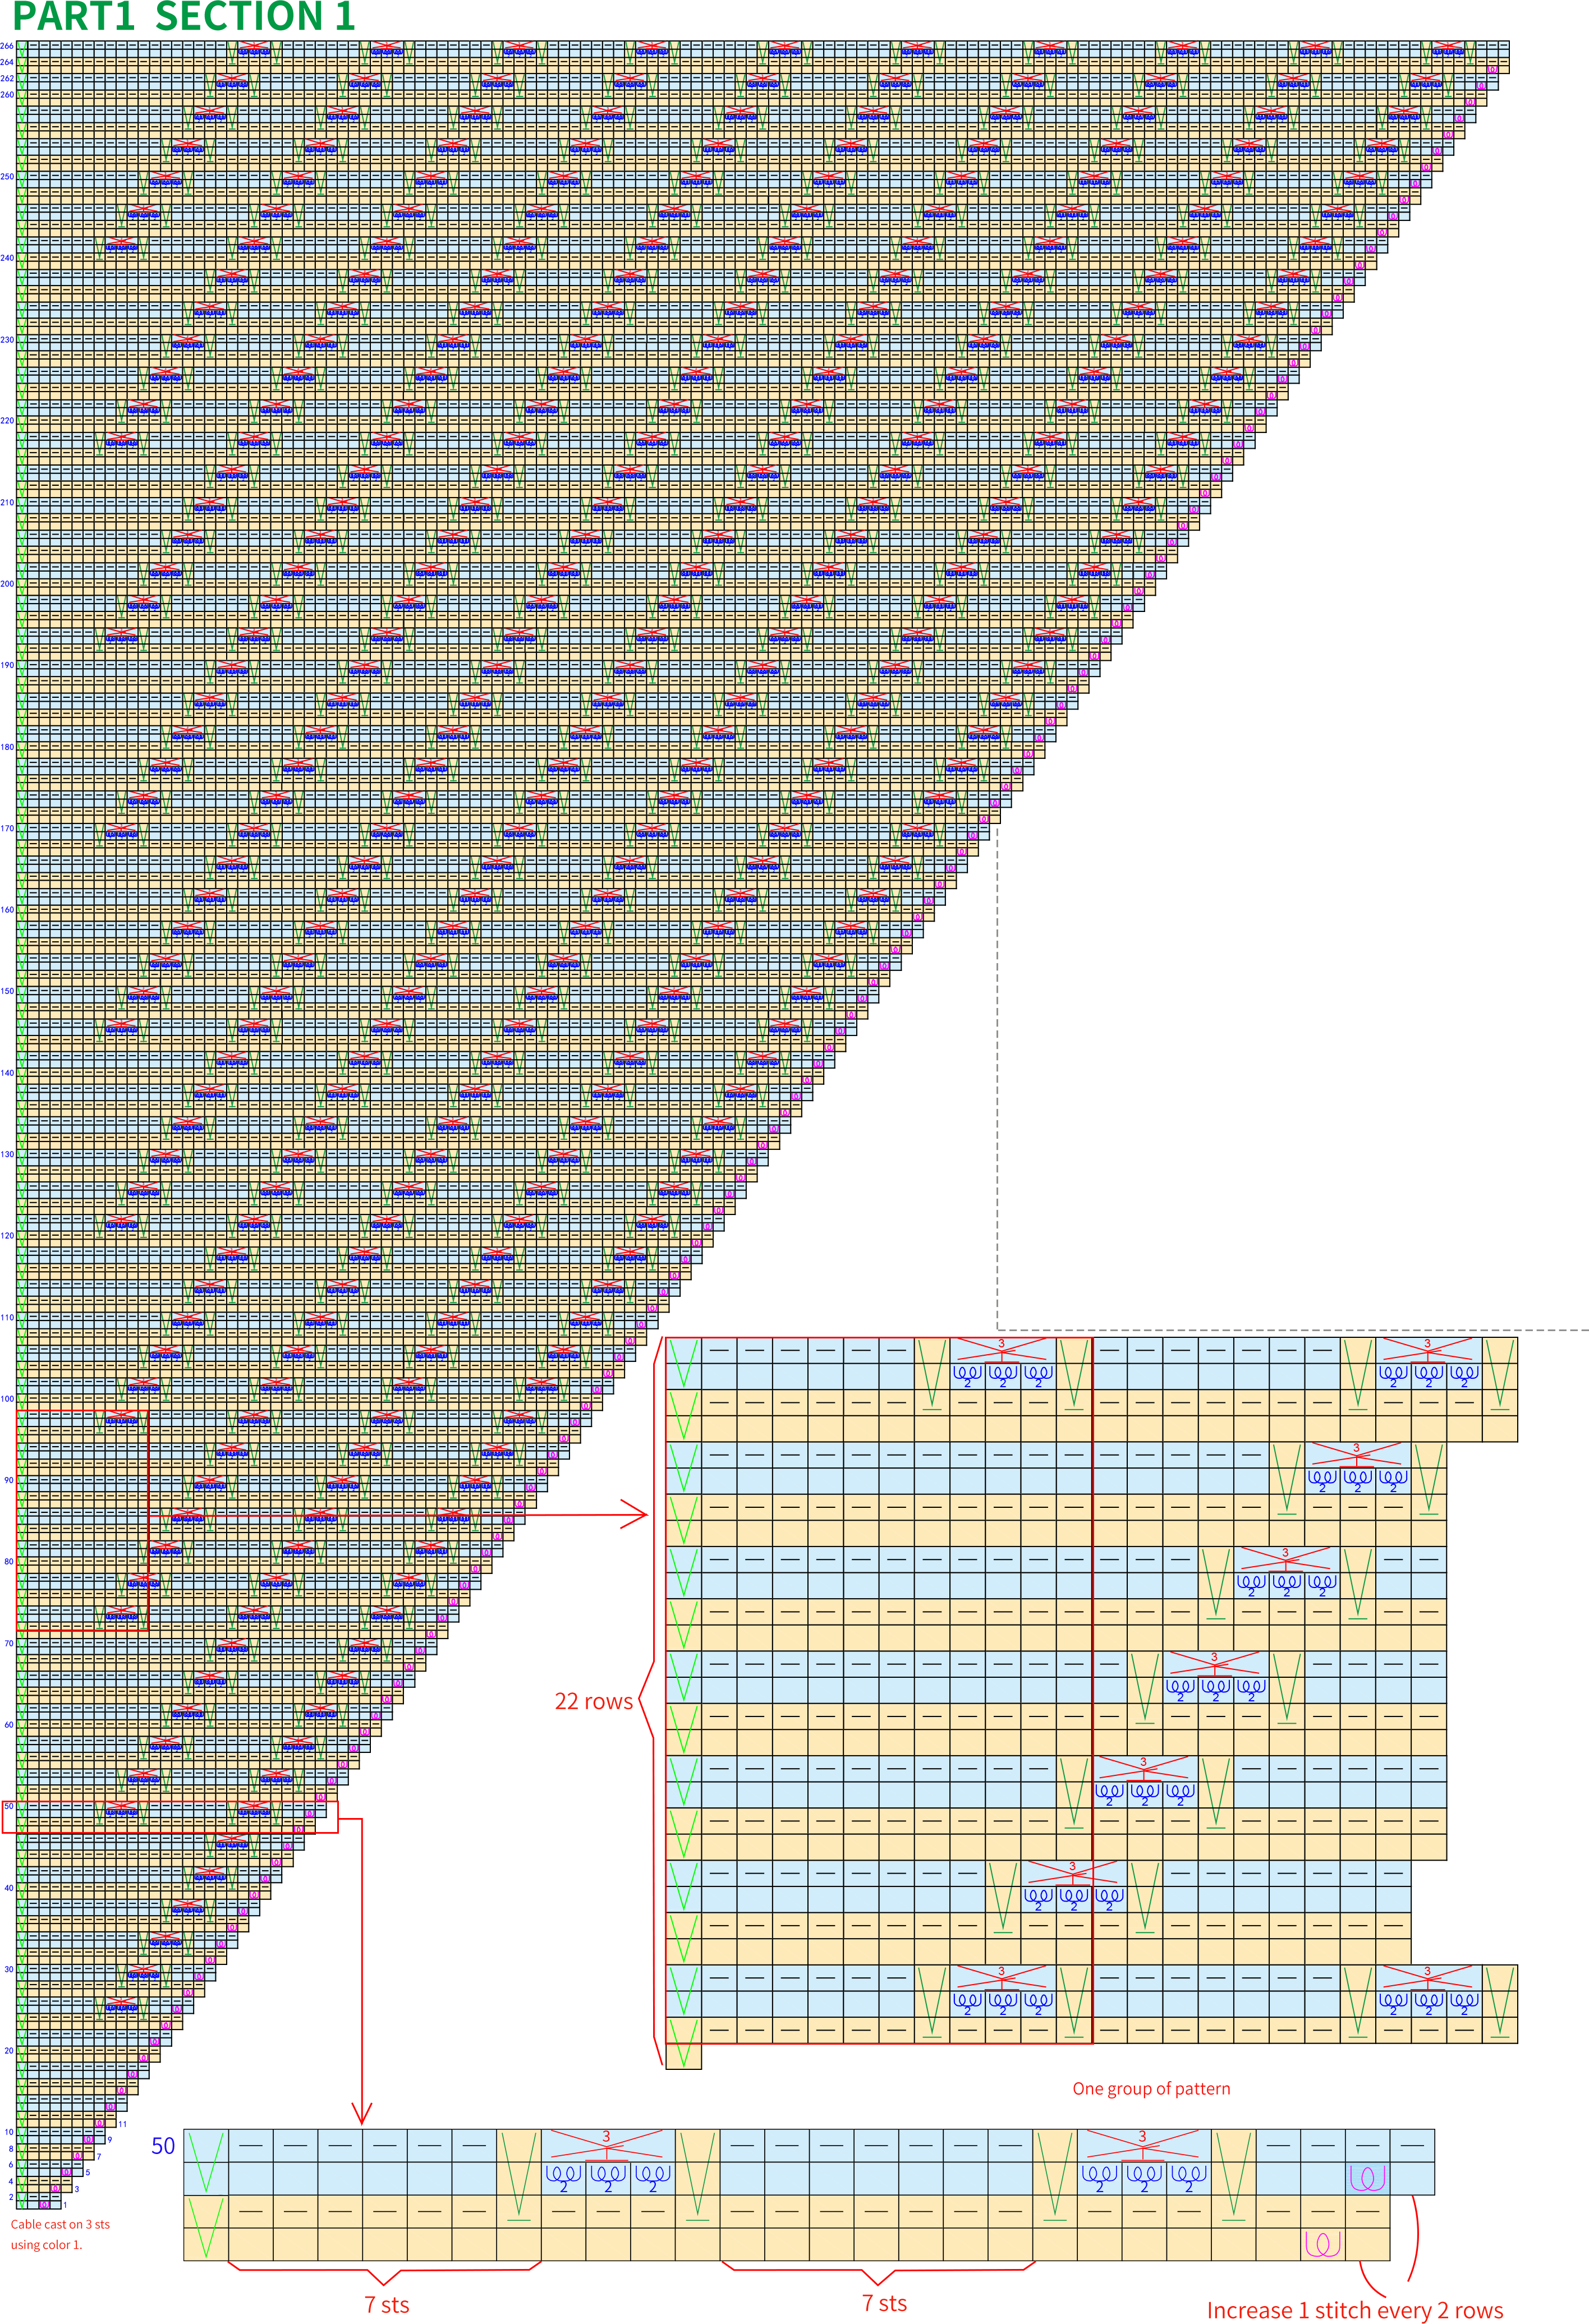
Part 1 Section 1A 00' 38''
NOTE:
①Cable cast on 3 sts using color 1,work row 1-2nd using color 2,then work alternate between two colors and change colors every 2 rows.
②Increase a group of pattern every 22 rows, and always keep 7 stitches between the pattern.
There are ten patterns at the last row of section 1.
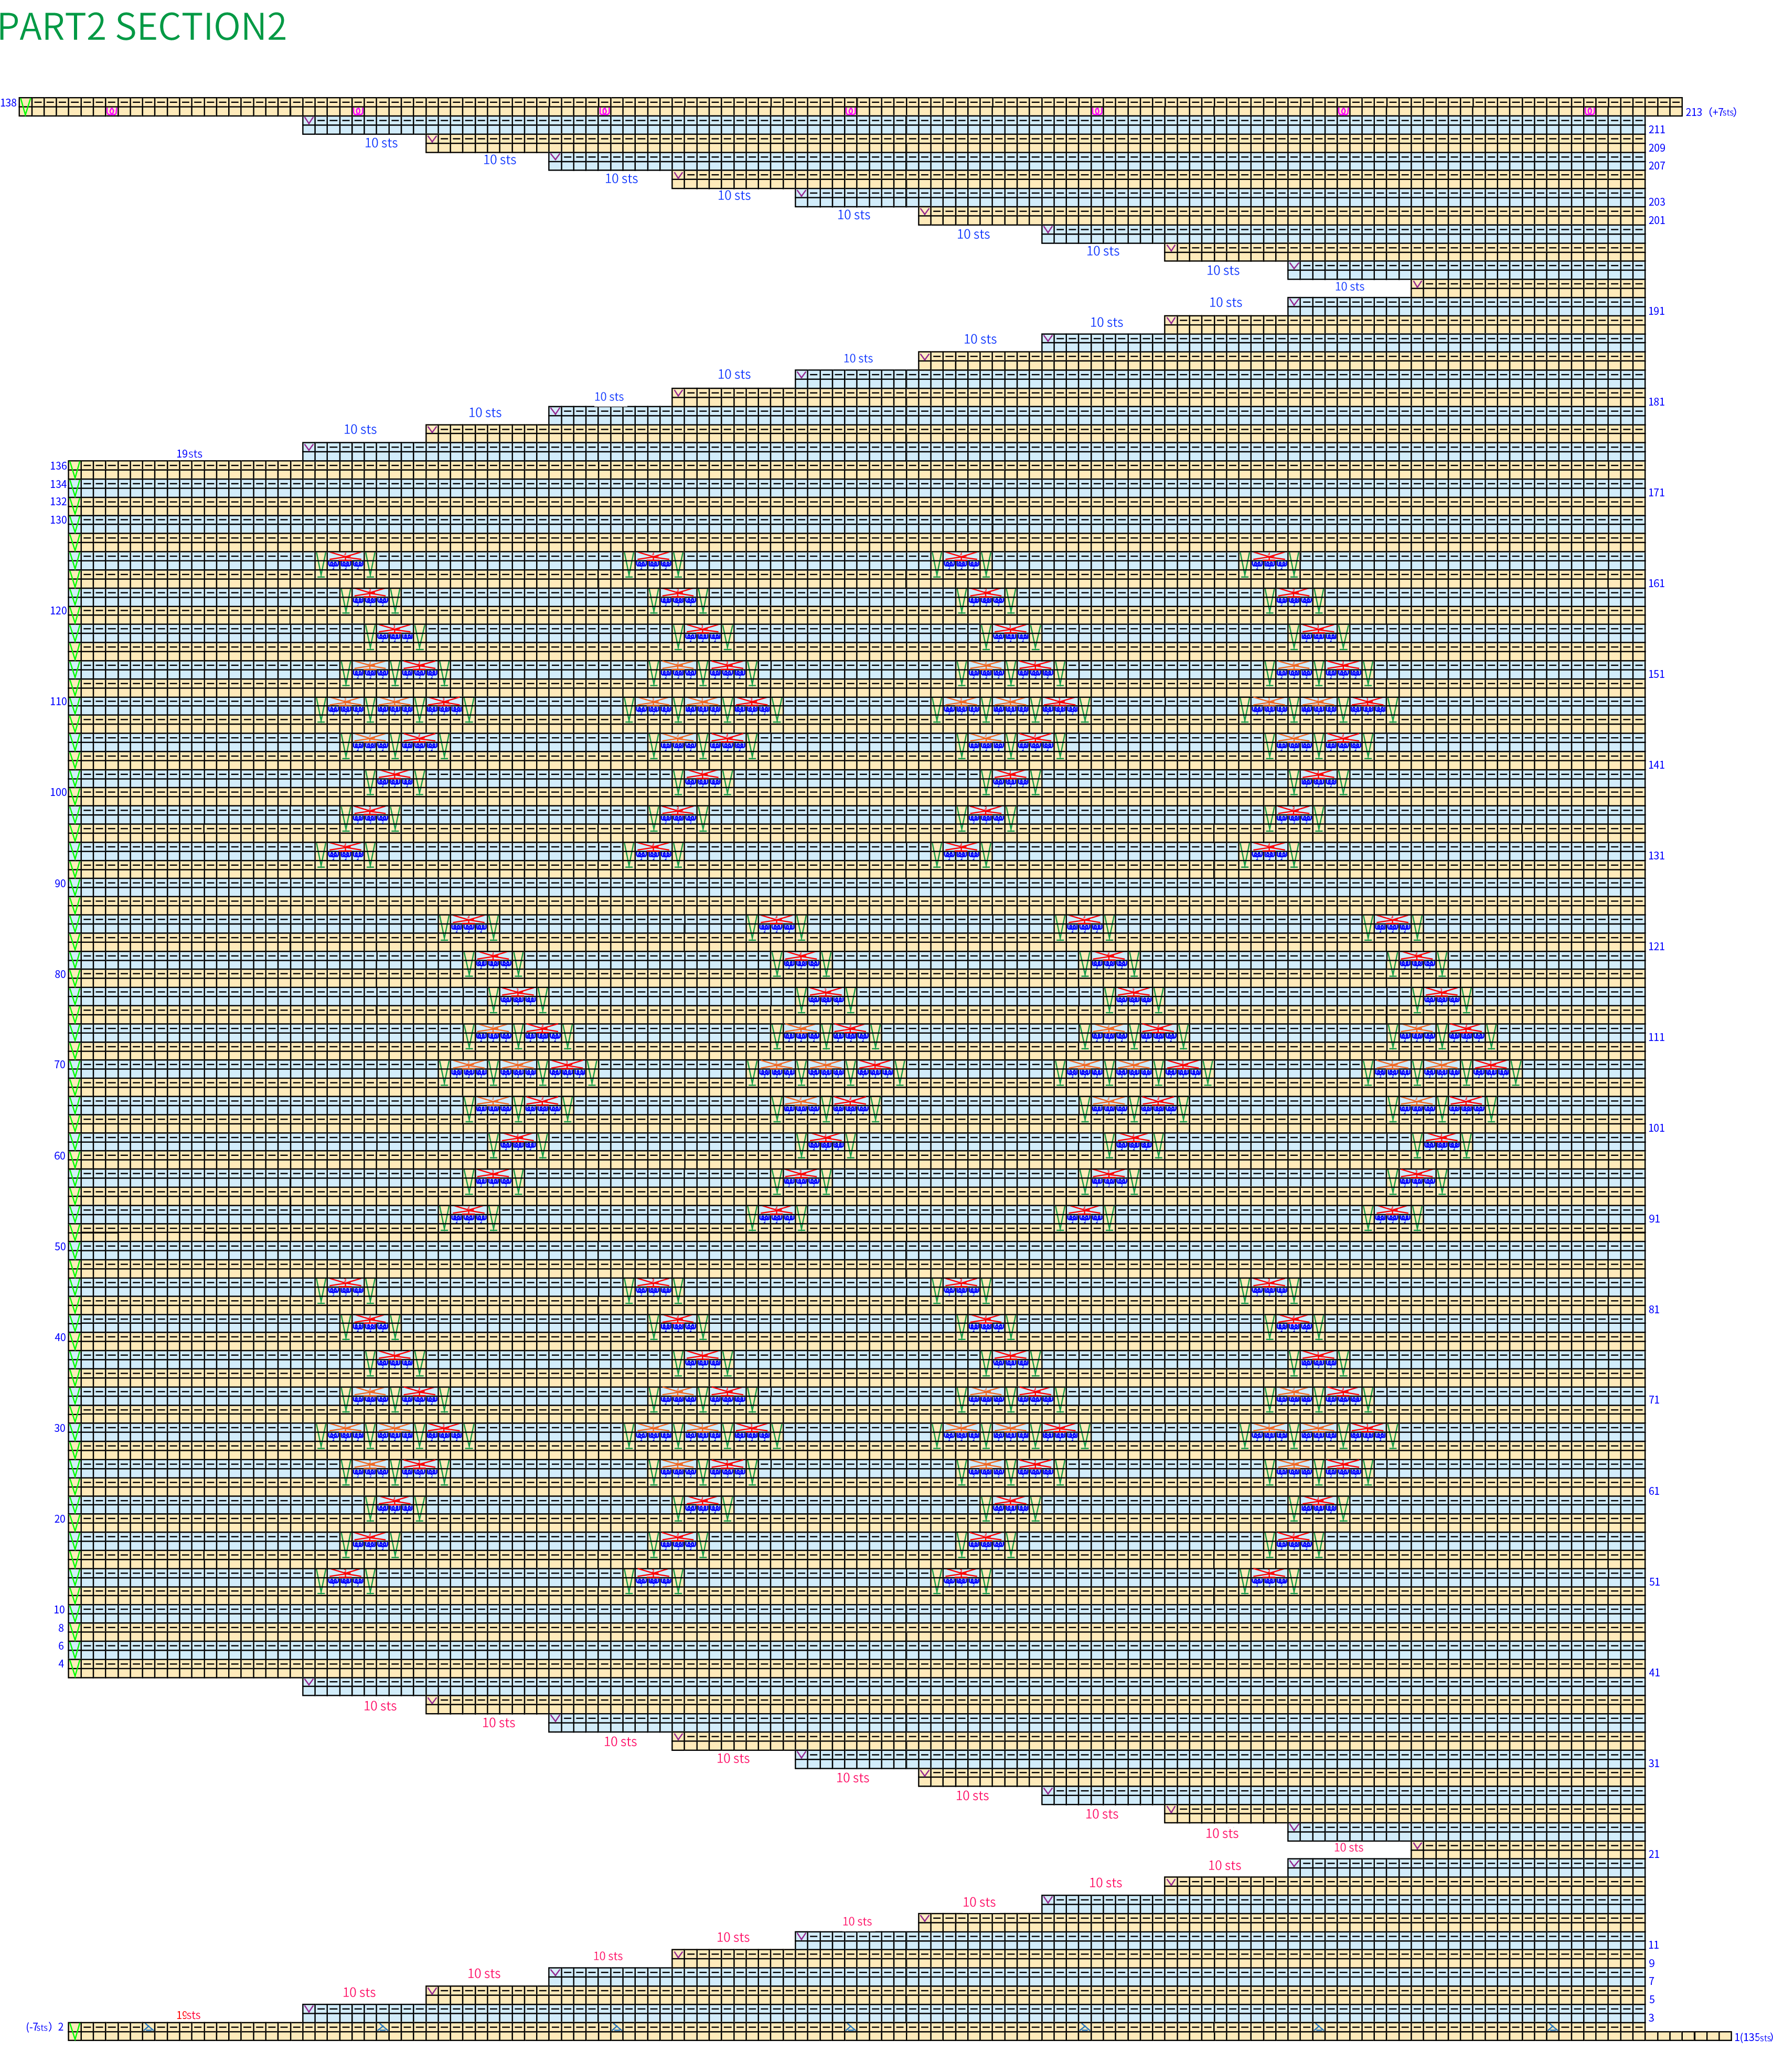
Part 1 Section 2B 23' 22''
Next, we move on to Section 2.Work back and forth along the top area of Section 1. During this process, some rows require decreasing and some rows require increasing. In certain positions, short rows need to be worked.To creates the texture. Please watch video demonstration.
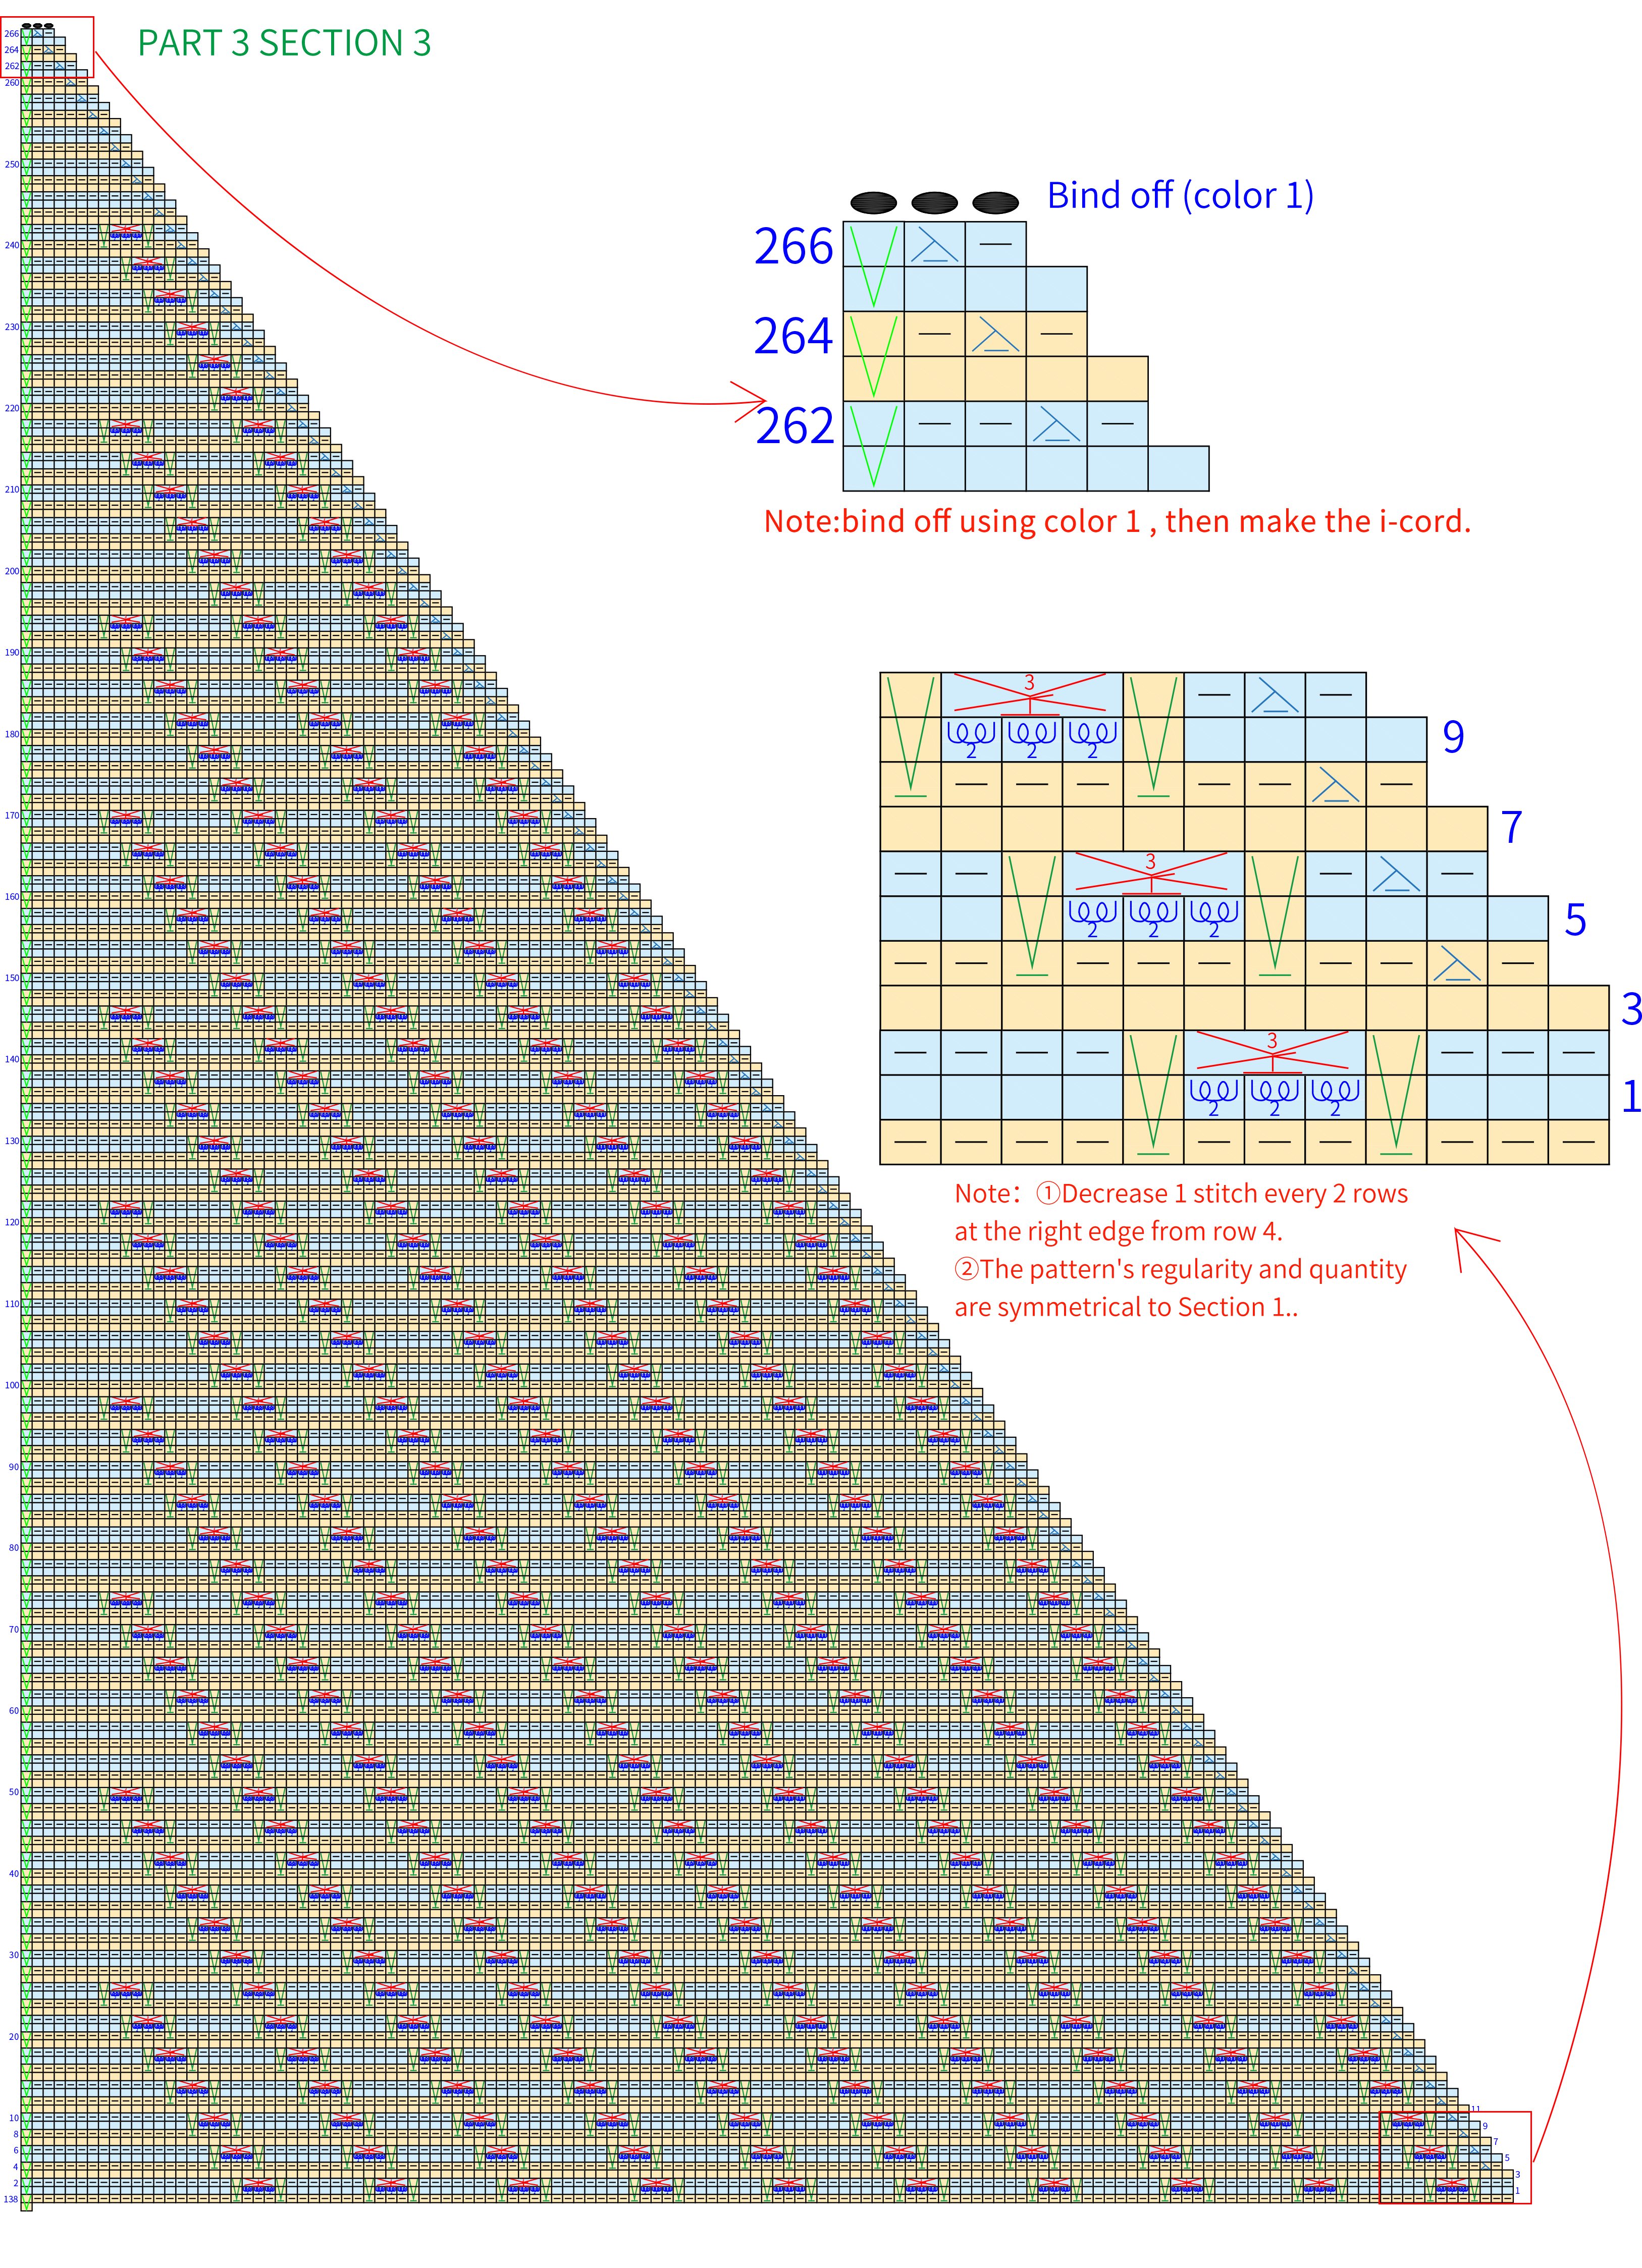
Part1 Section3C 33' 45''
Next, we move on to Section 3. This section is symmetrical to Section 1. Decreases are needed on the right side of the fabric. Gradually reduce the number of groups. The decreases are made at the end of even-numbered rows. Change the color every two rows as well.
Part2 The i-cordD 35' 58''
This part is divided to i-cord one and i-cord two. You can make them according to the structural diagram.
Made by the community