Clothes
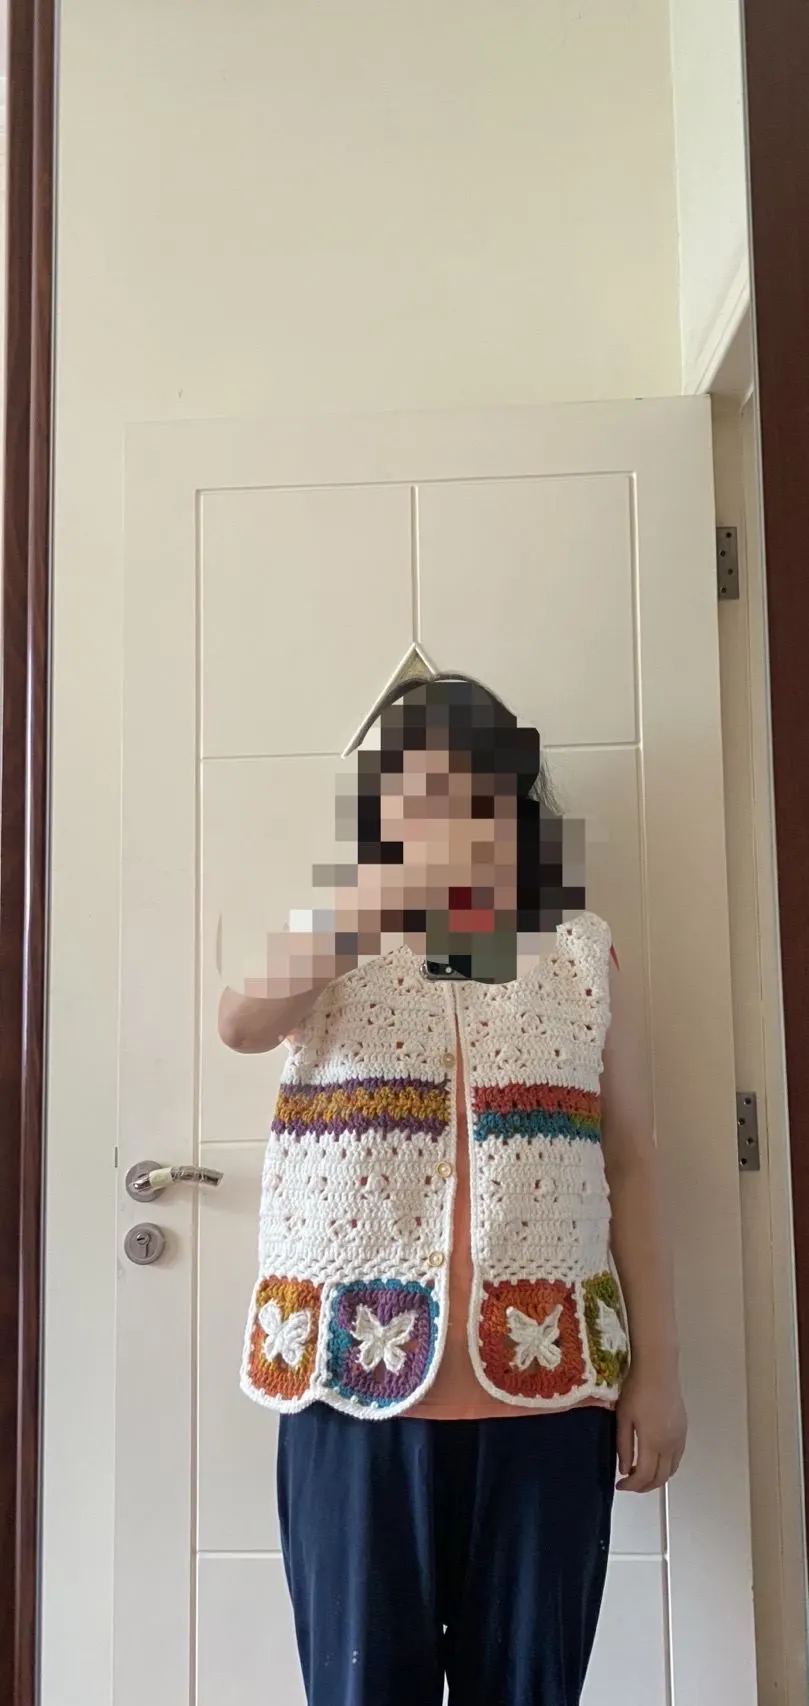
Butterfly Vest
Project preview
See the finished project
Pattern format
Instructions

This vest includes the main part, edging, and accessories. The main part consists of butterfly motifs, connecting motifs, even rows, left front, right front, and back body. First, crochet the butterfly motifs and connect them, then work even, followed by crocheting the left front, then crochet the right front, next crochet the back body, then crochet the edging, and finally sew on buttons.
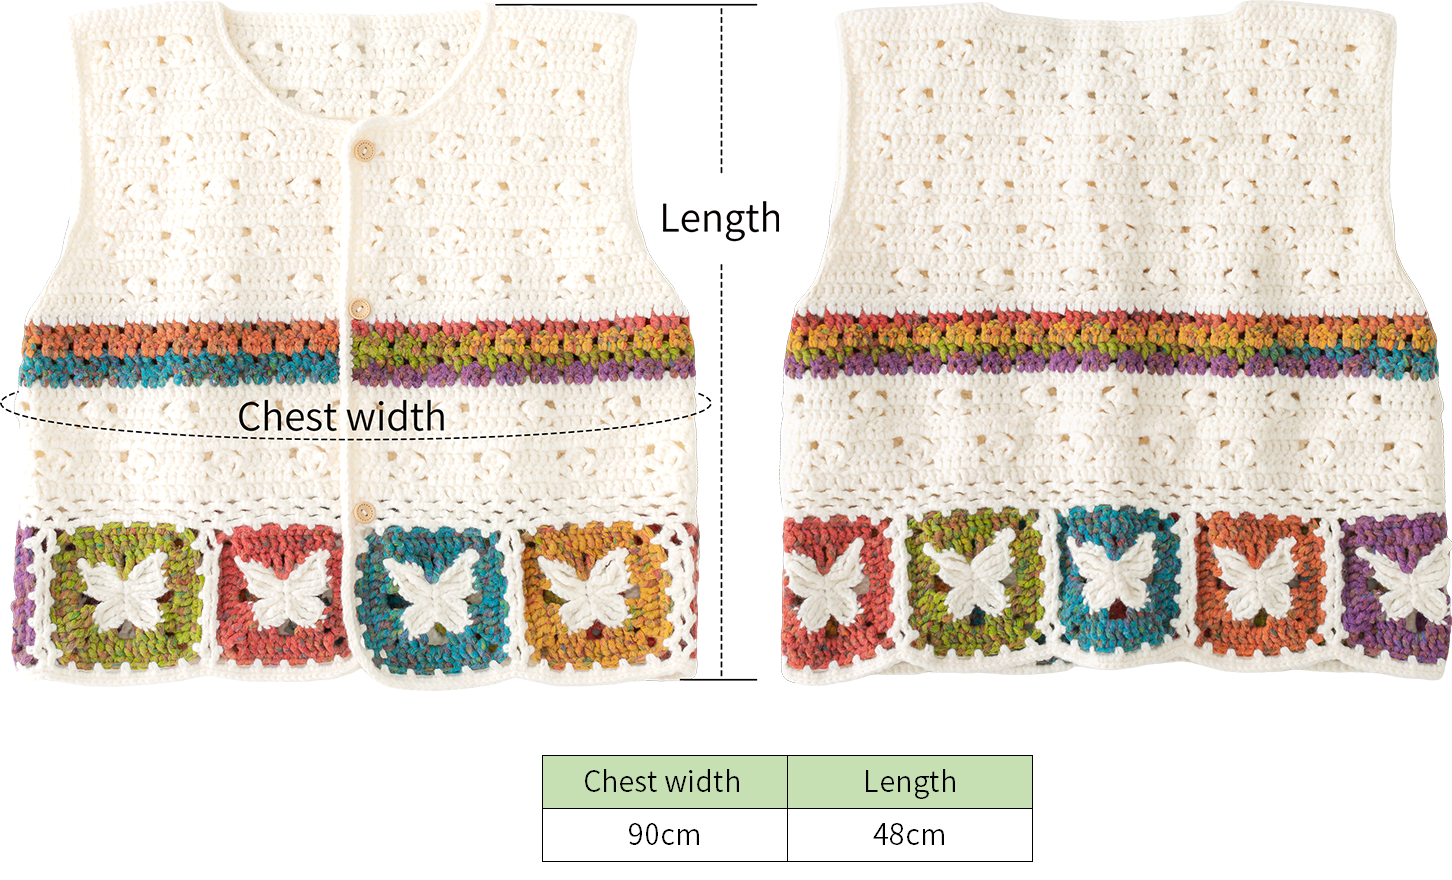
Note: Hand-measured, with an error margin of 1-2 cm.
Due to variations in individual tension, the size of the sample is for reference only.
Materials: Handcrafted No.2 Knit Thread
Hook: 4.50 mm crochet hook
Chart Key




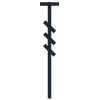


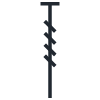




Note: This pattern is making in Chinese crochet pattern terms, and the stitch name is written using American terminology. All measurements in charts are in cm.
Part 1 Motifs and Connections
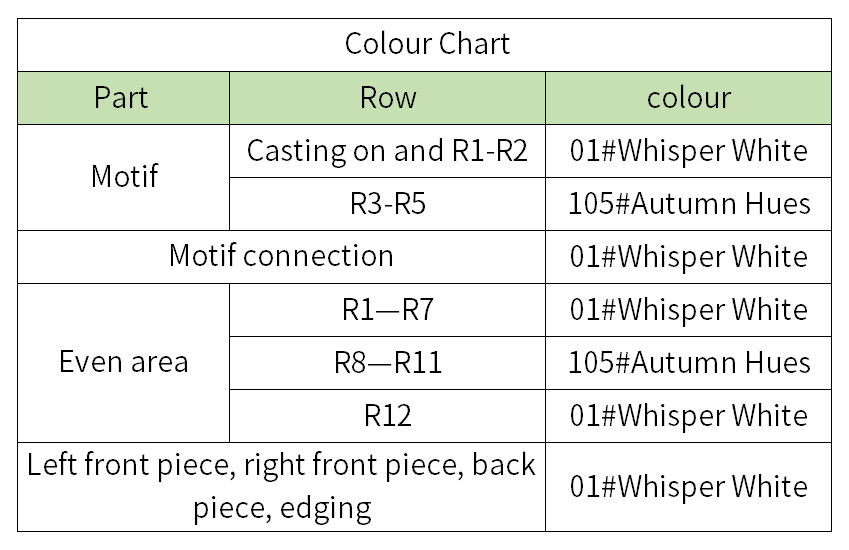
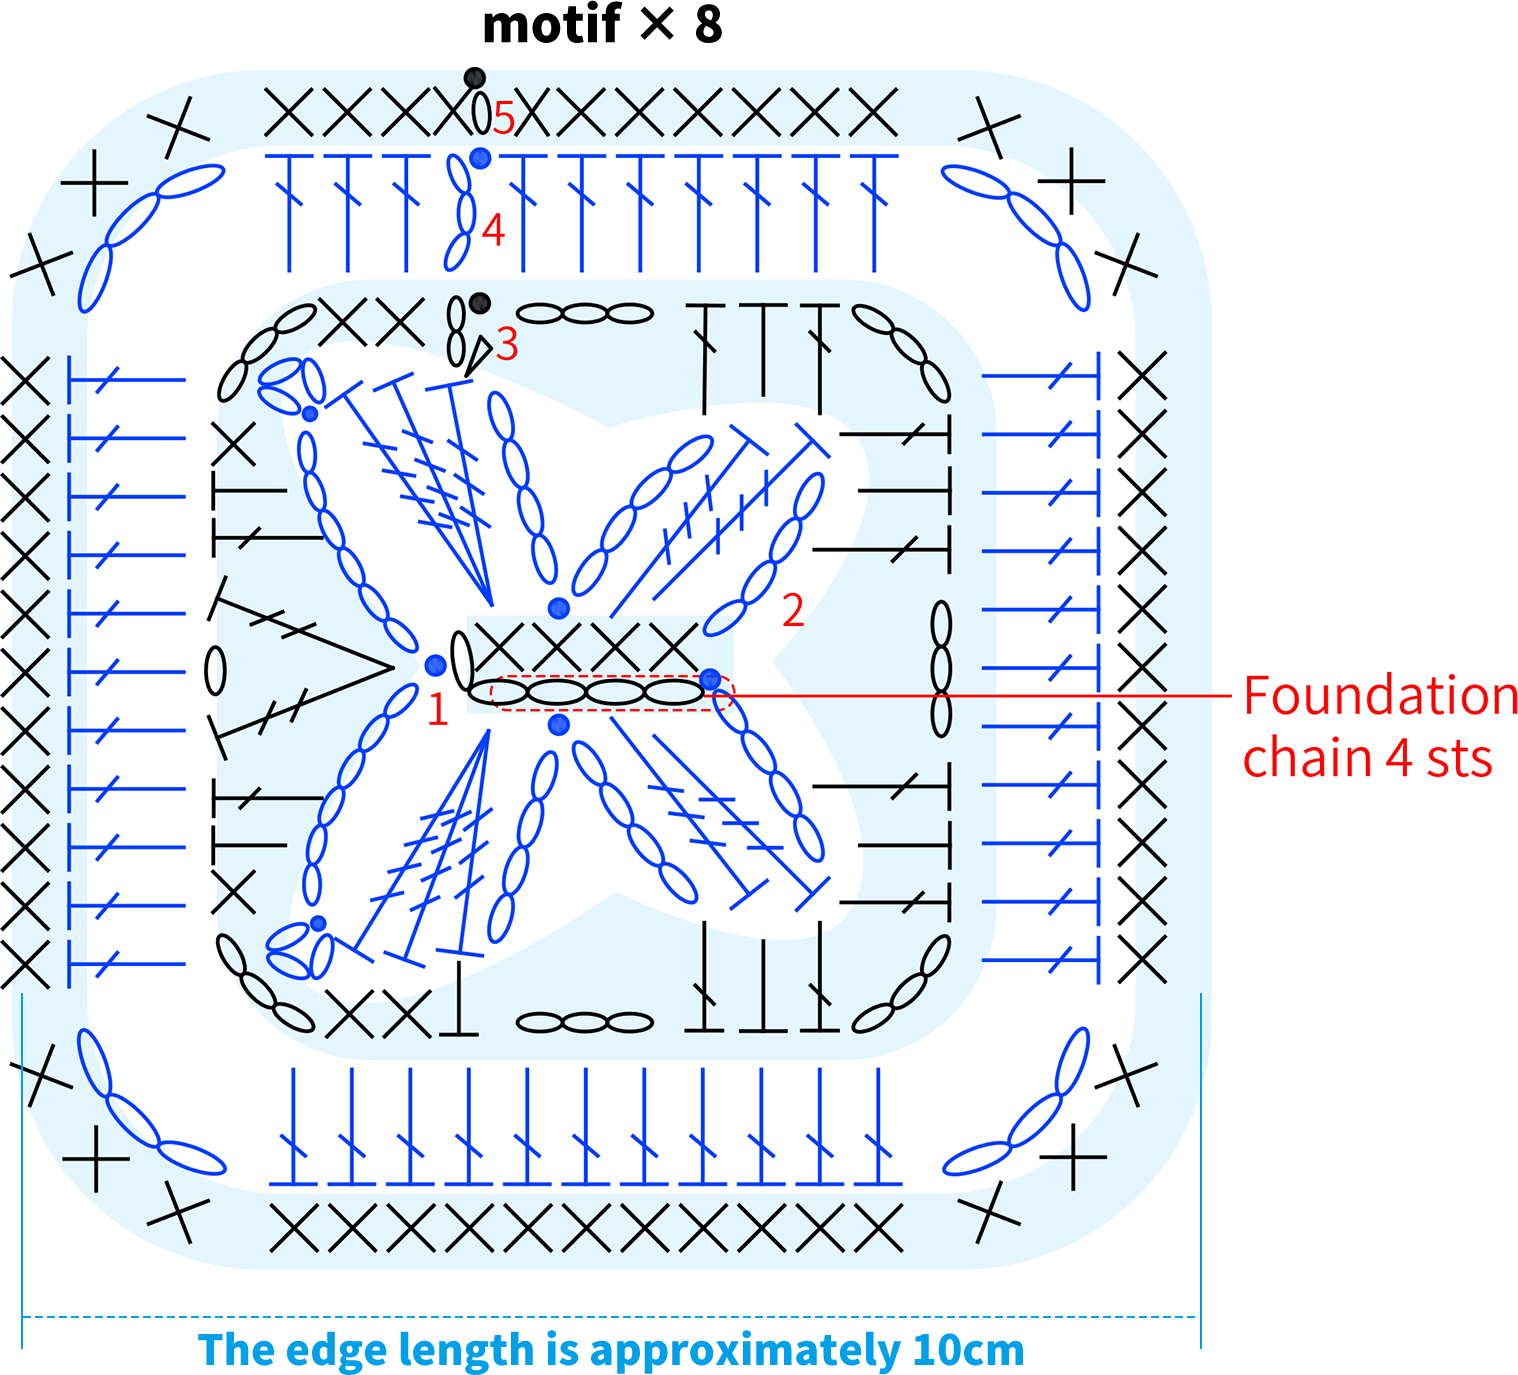
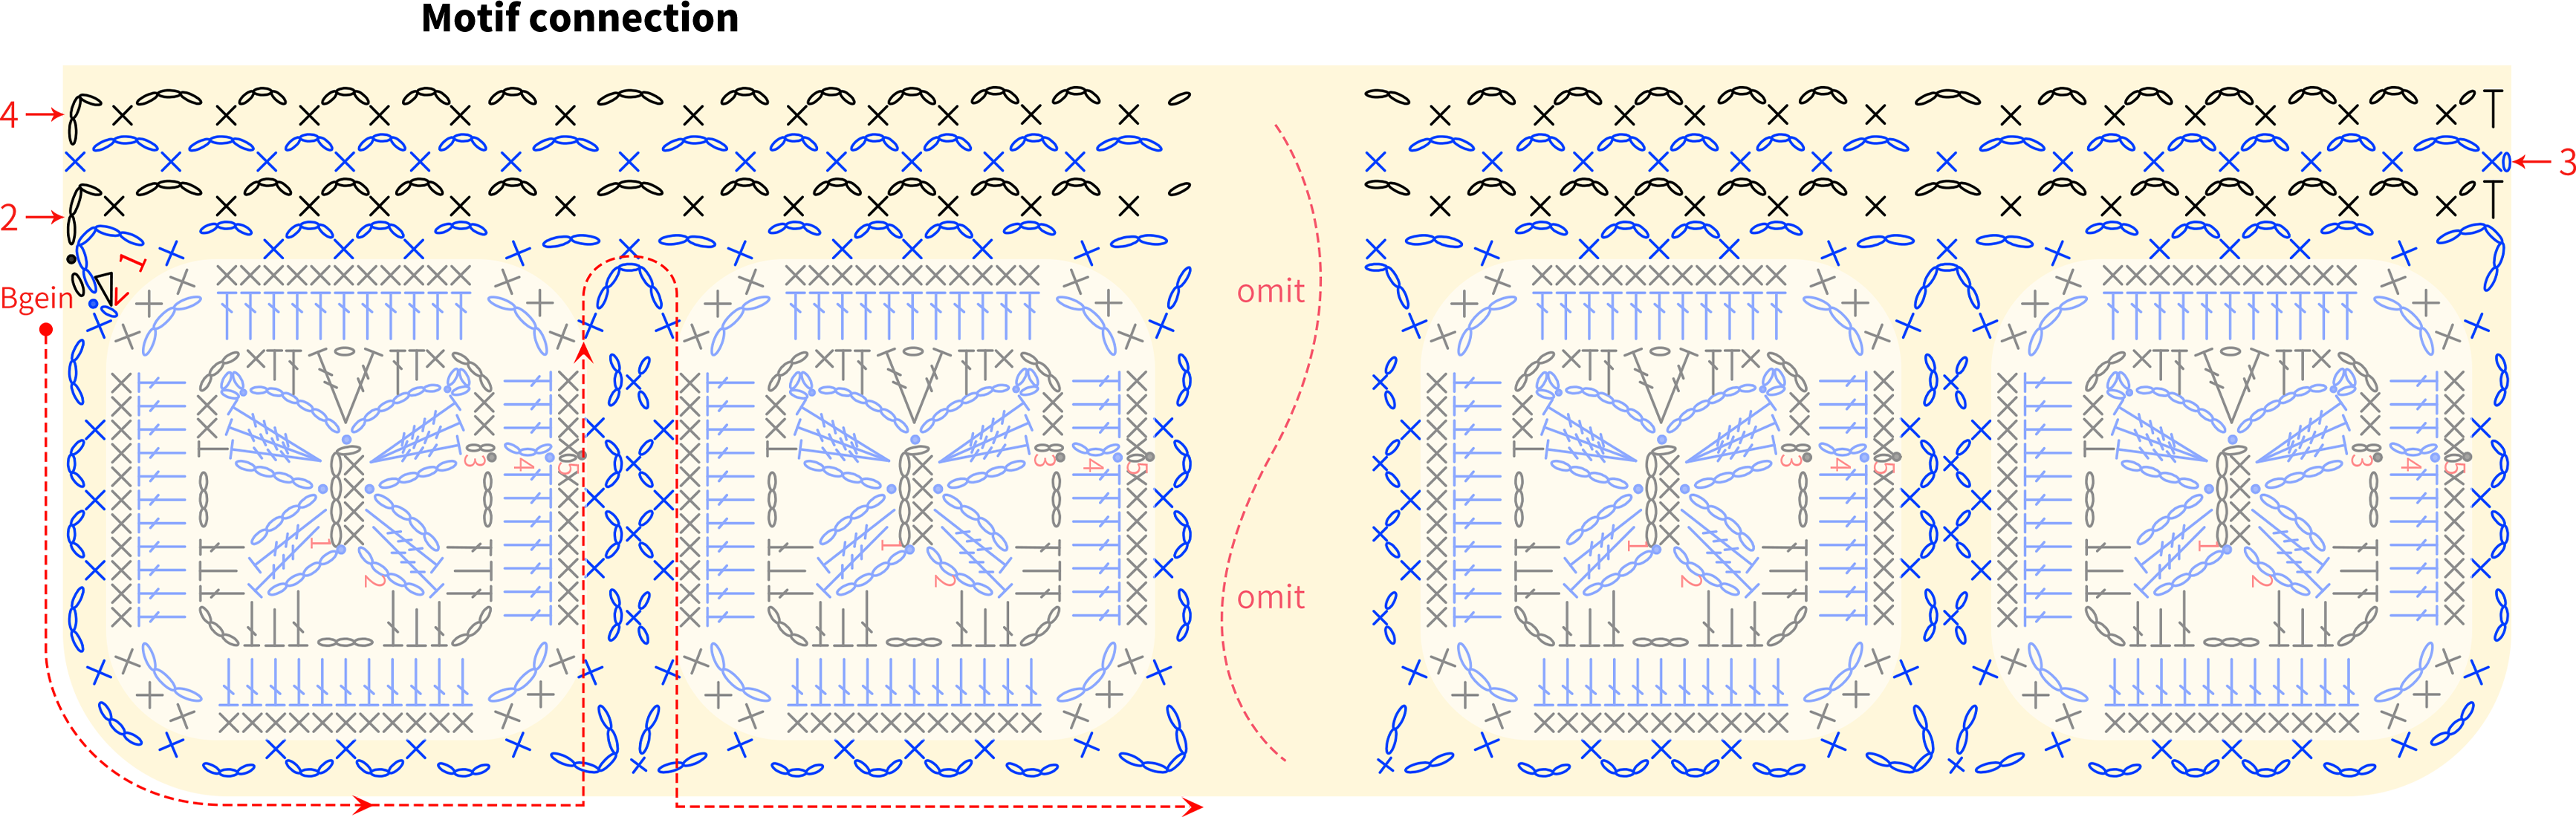
Each motif begins with a chain cast on, works one row of single crochets, then crochets in rounds counter clockwise. Pay attention to color changes. After completing all motifs, start connecting them. Be mindful of the starting position and connection direction.
Part 2 Even Section
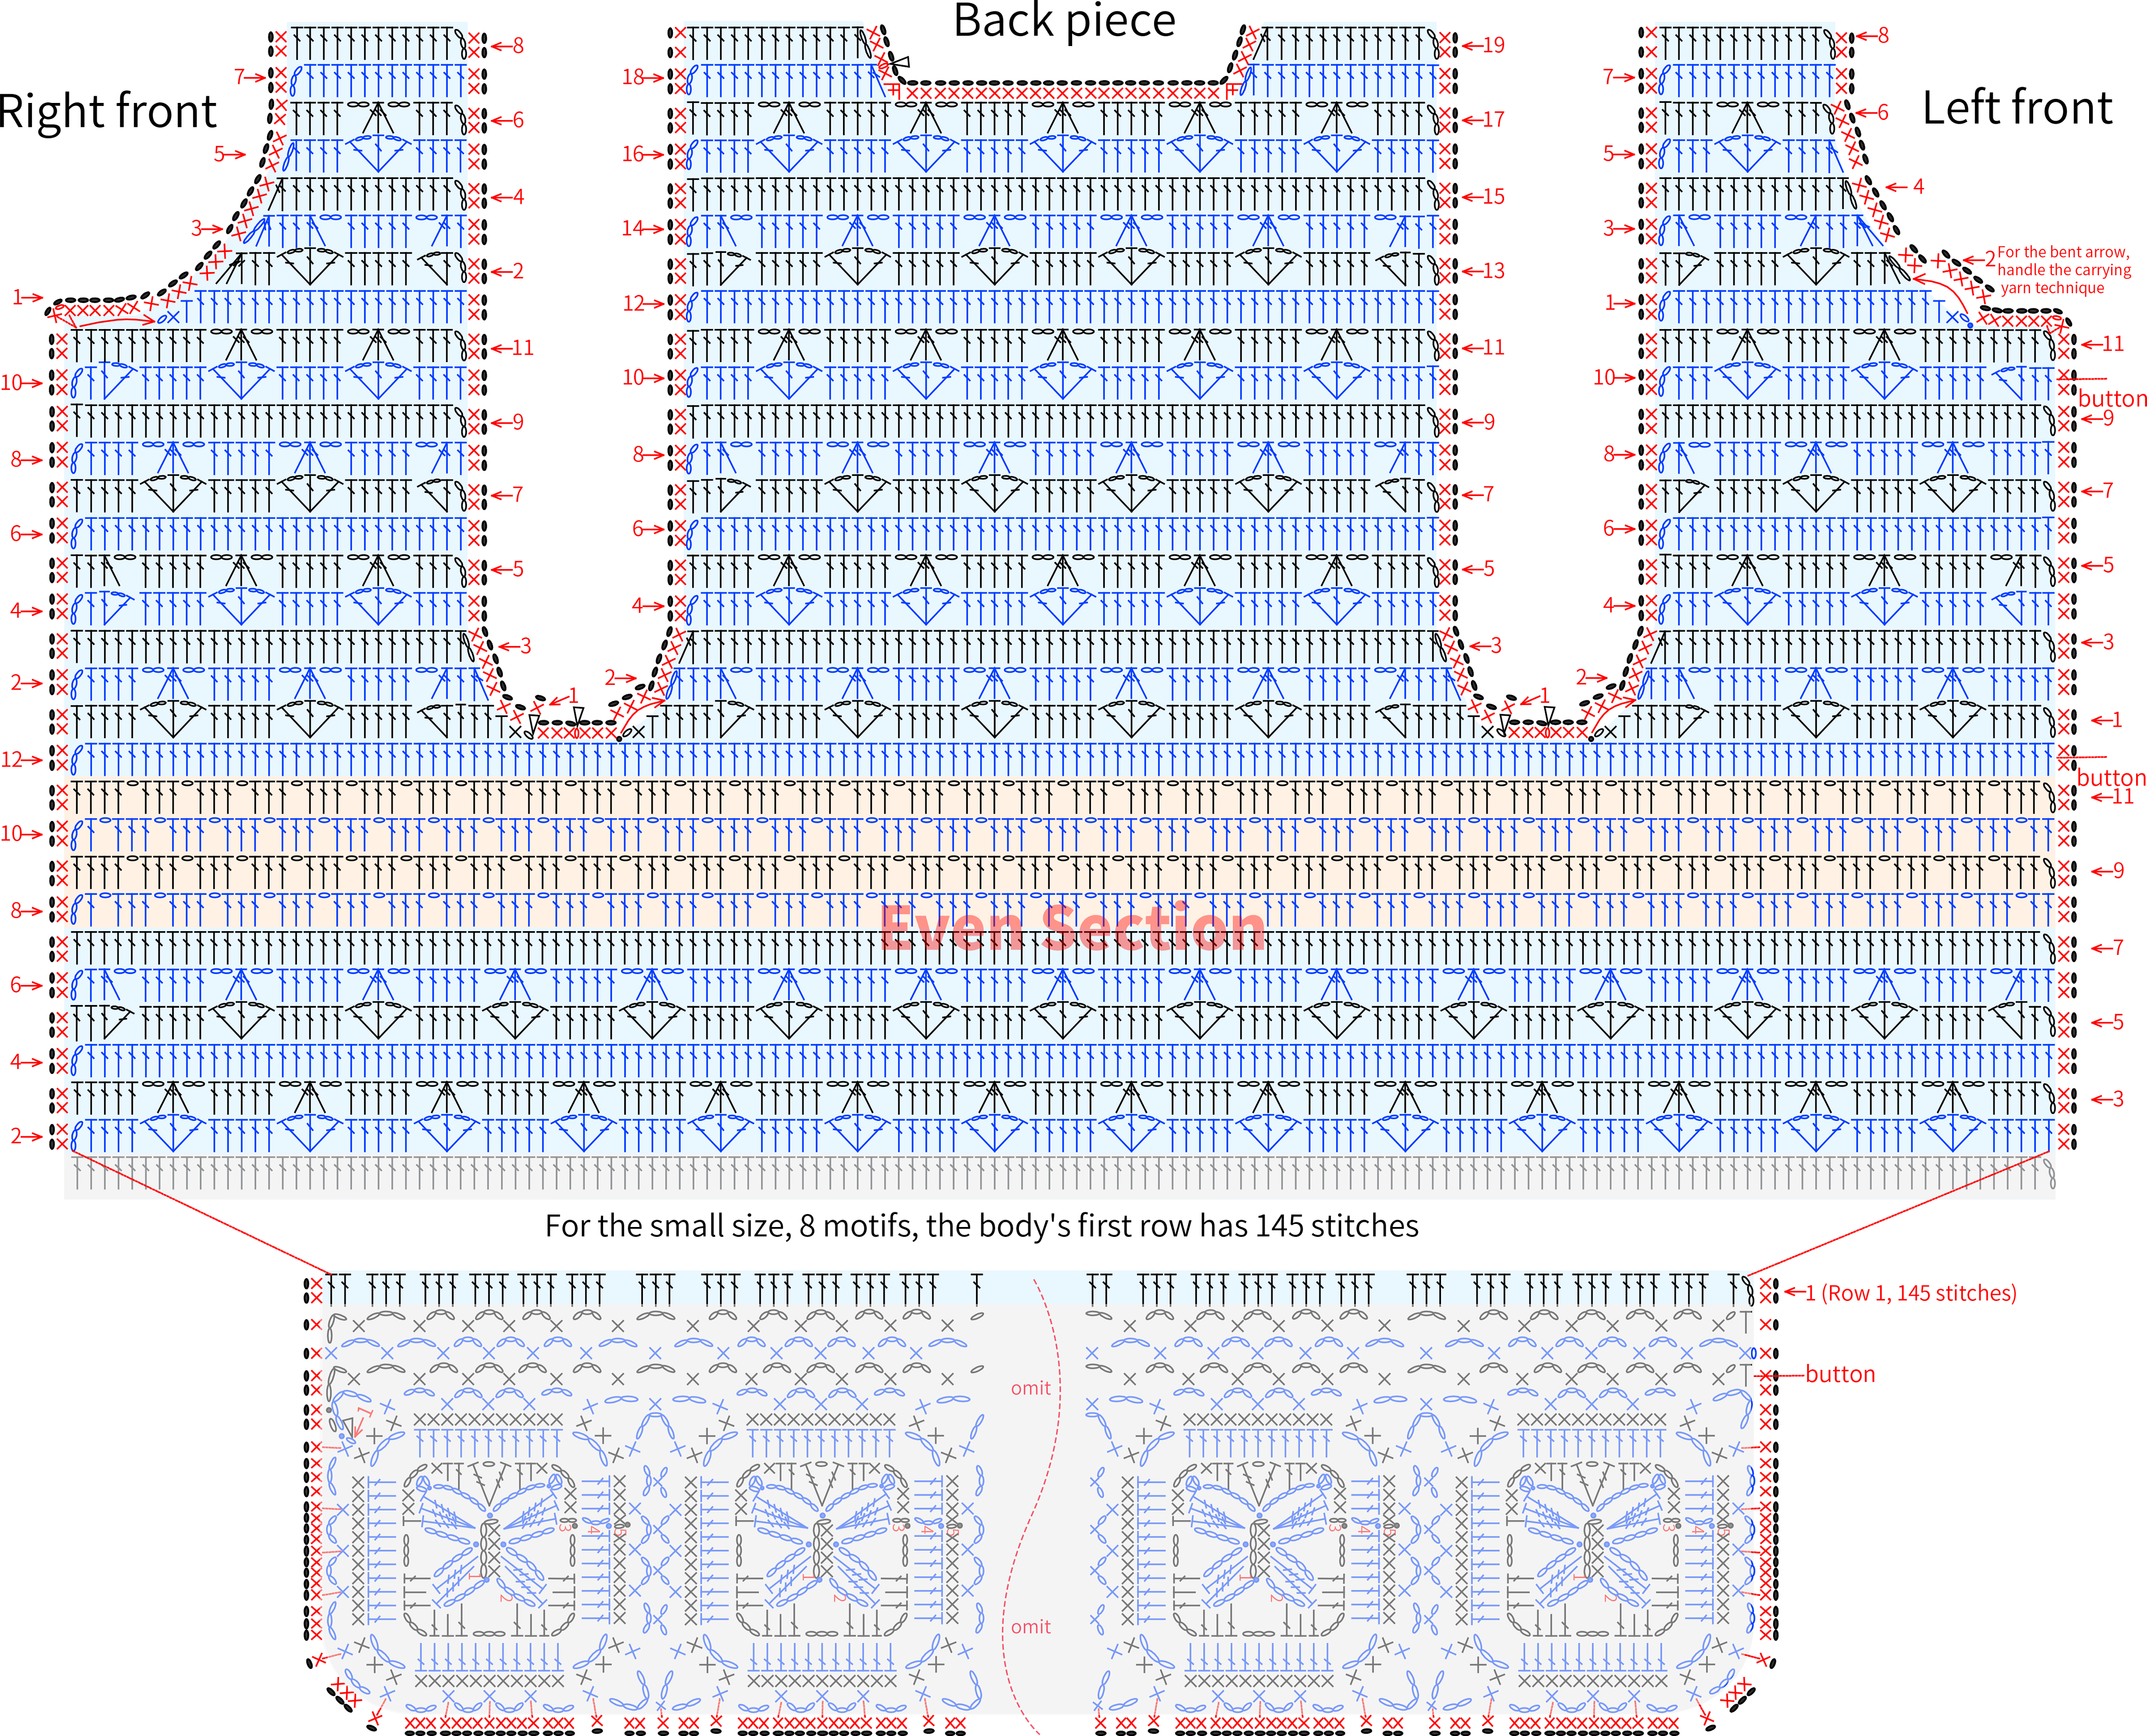
On the last row of the connection, work even in the area without increasing or decreasing. Pay attention to the stitch count and color changes.
Part 3 Left Front Piece, Right Front Piece, Back Piece
Work even on the left front piece, right front piece, and back piece.
Part 4 Edging and Accessories
The edging includes the neckline and front band worked as one piece, as well as the armhole edging. The continuous edging starts from the back of the neck. After completing the edging, sew on the buttons.
Made by the community