Clothes
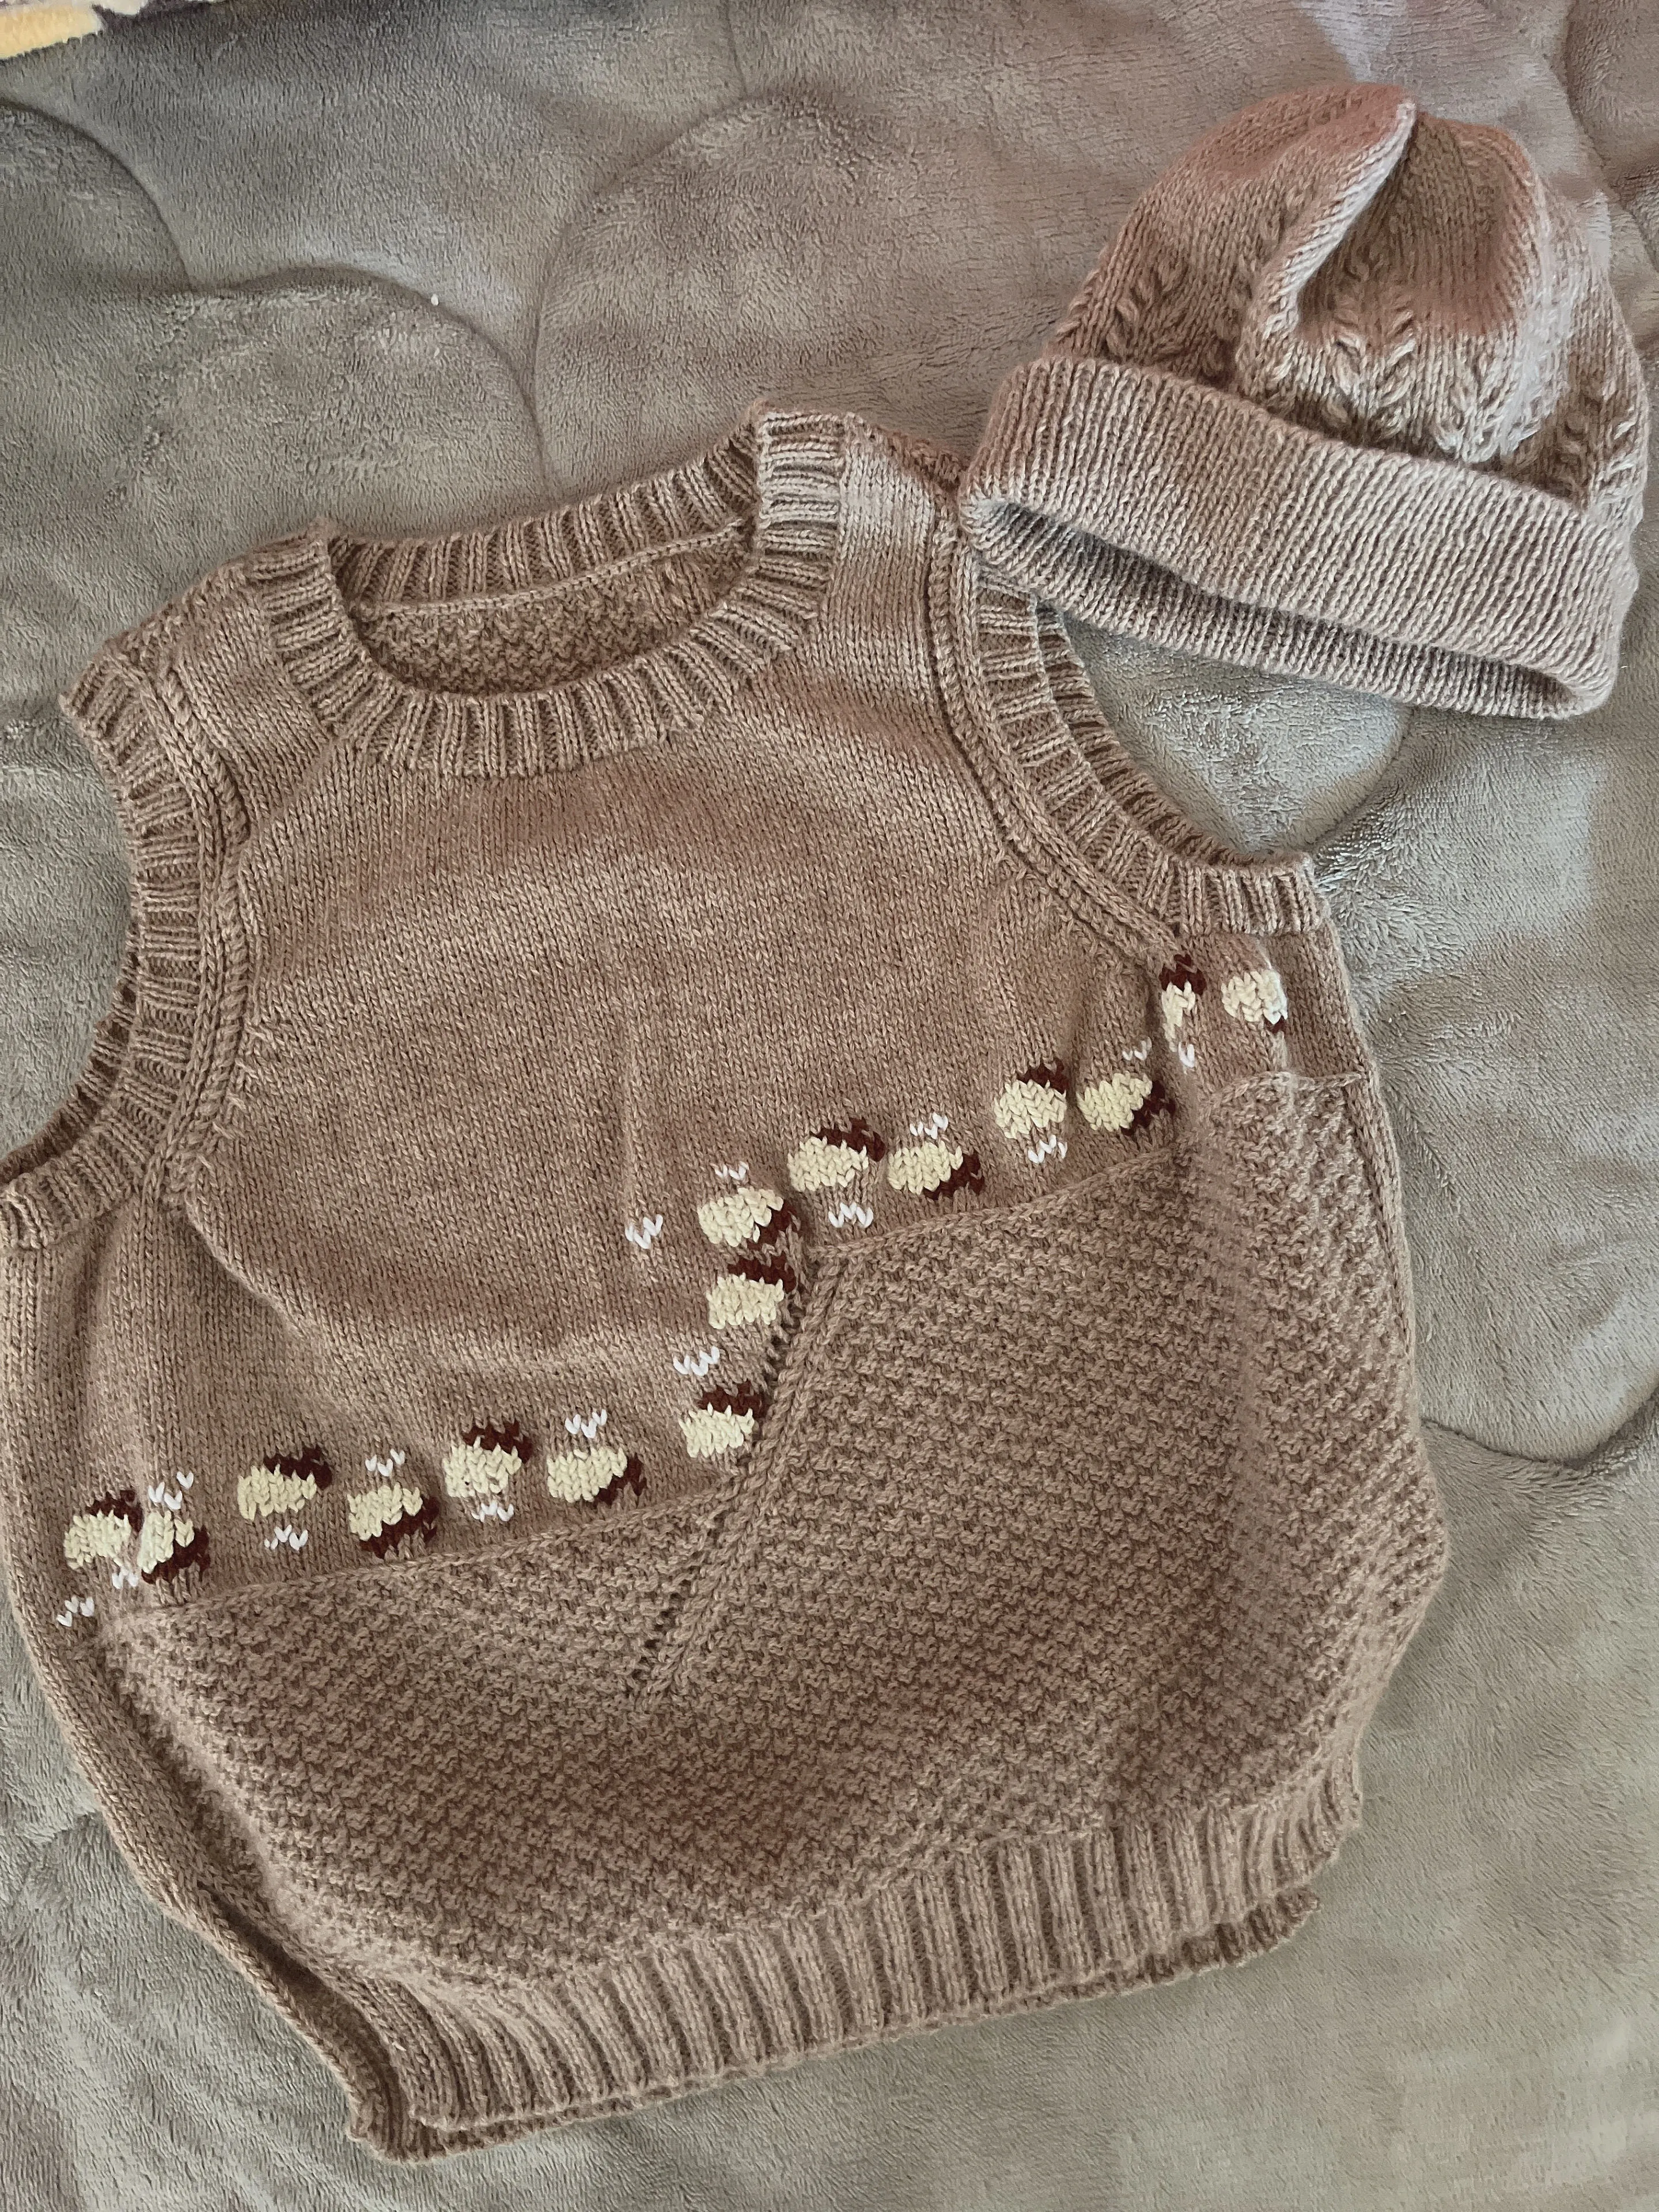
Acorn Vest
Project preview
See the finished project
Pattern format
Instructions
The vest consists of a front piece and a back piece. Knit them separately, and join with the shoulders of the front piece as you work the back piece. After that, sew them together along the seam. Then, pick up stitches for the collar and cuffs. Finally, attach the buttons.
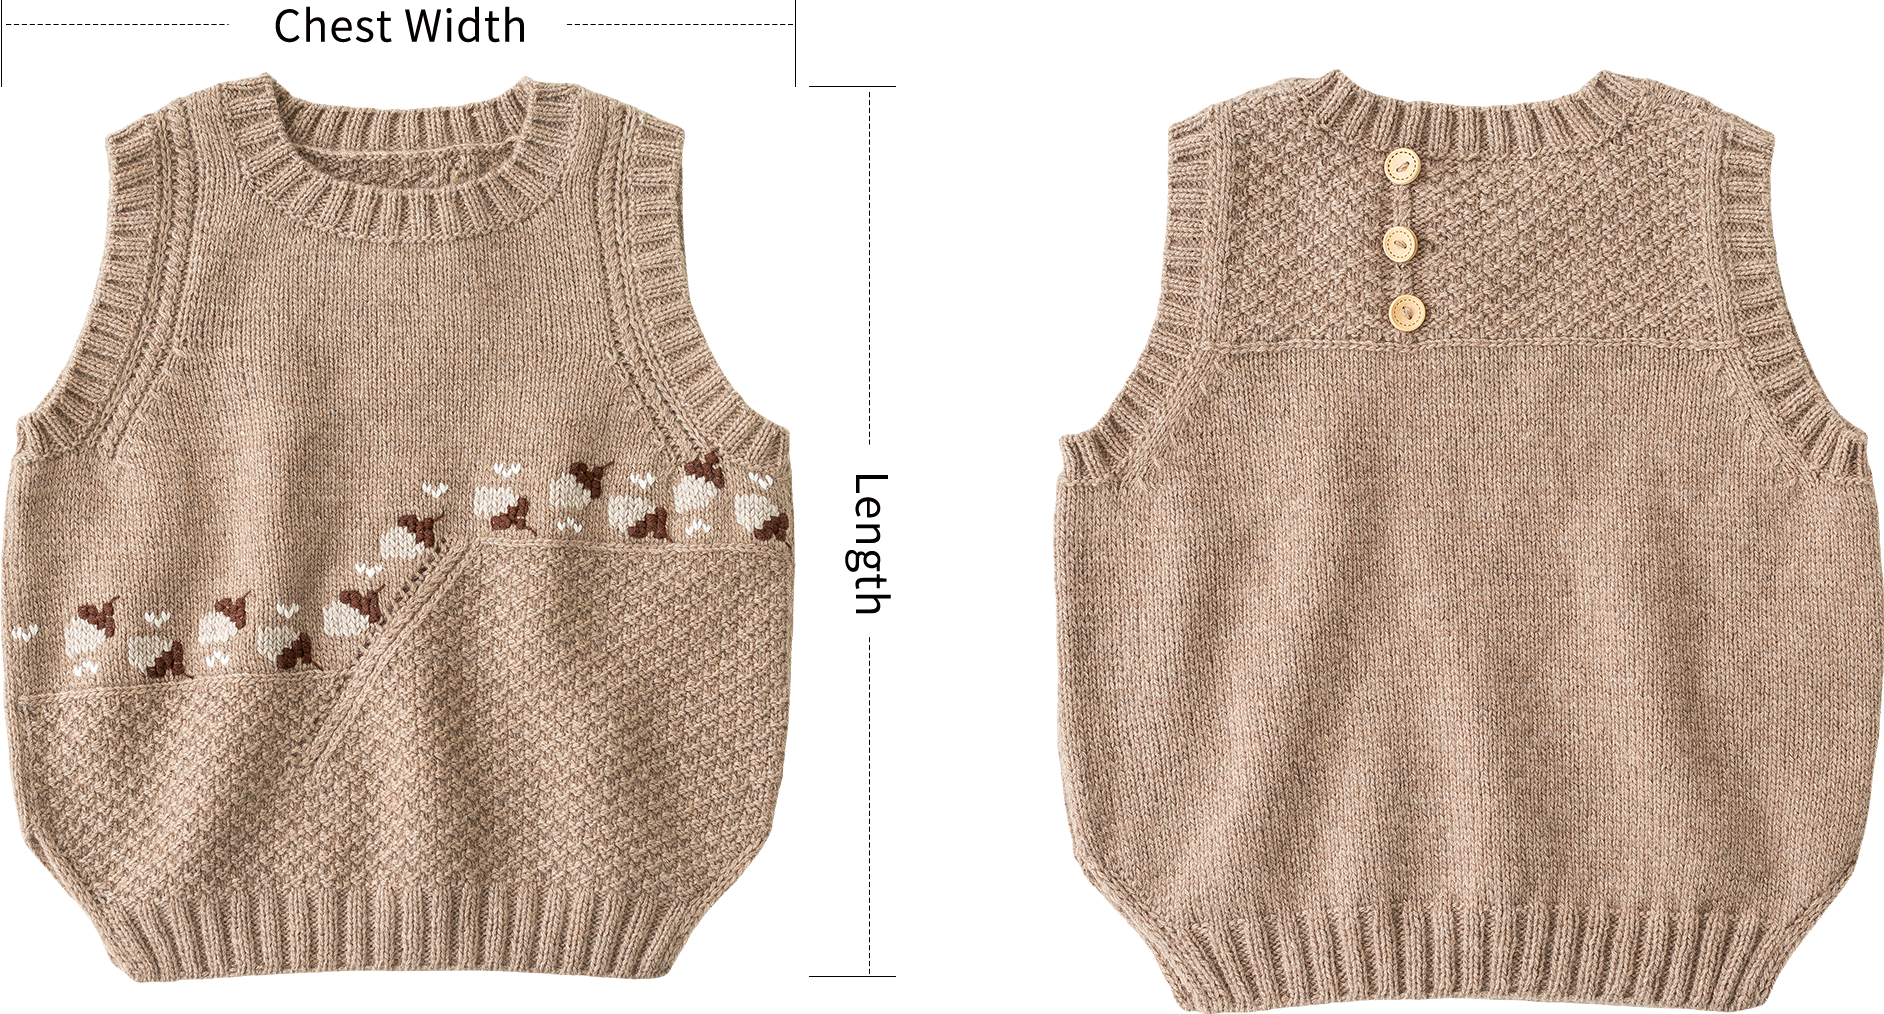

Due to variations in individual tension, the size of the sample is for reference only.
Materials: 3-Ply 30% Cashmere Hand Knitting Yarn
4-Ply Combed Cotton & Acrylic Fibre Hand Knitting Yarn
Needles: 3.25 mm circular needle(main body)
3.00 circular needle(collar, cuffs, hem)

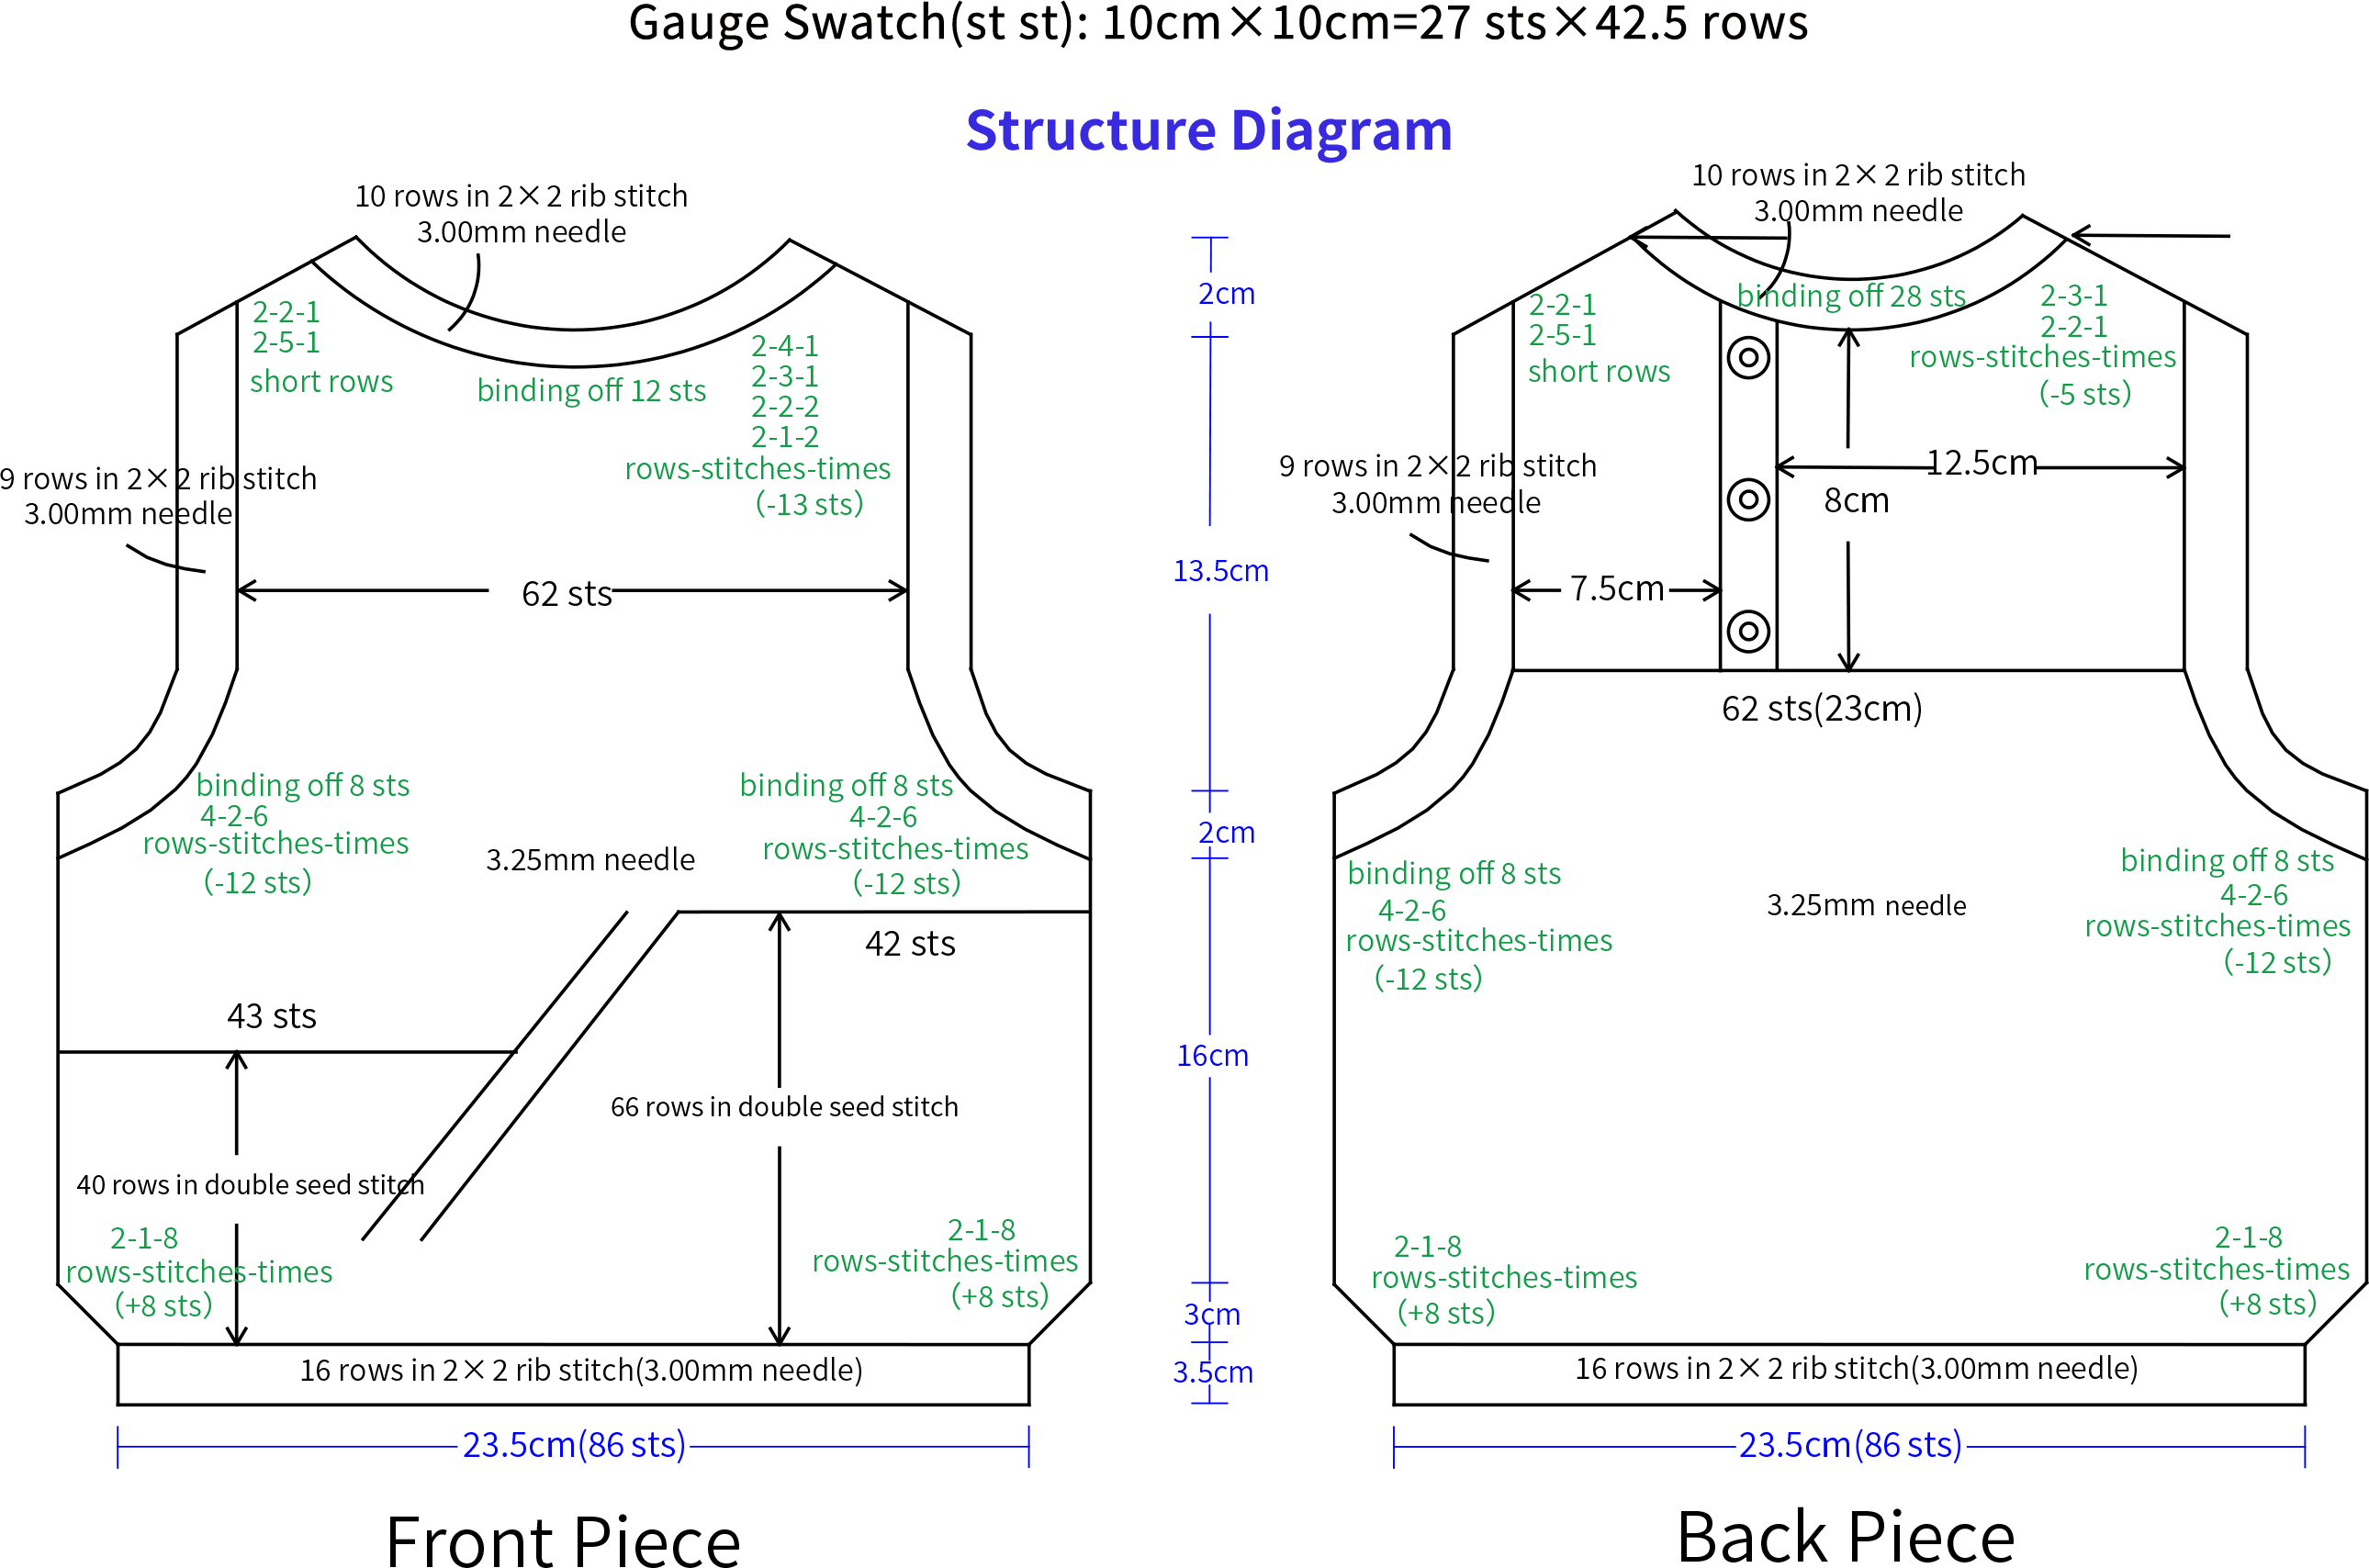
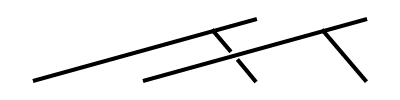
Chart Key




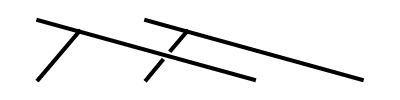
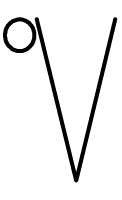
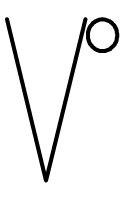


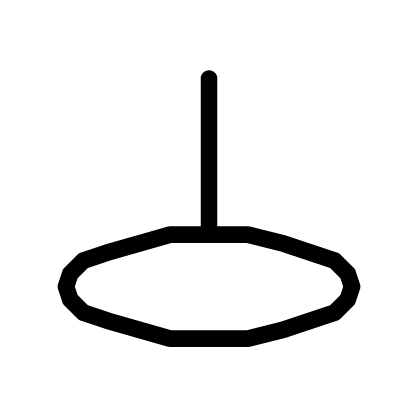
Note:
1. This pattern is making in Chinese crochet pattern terms, and the stitch name is written using American terminology. All measurements in charts are in cm.
2. The chart represent the right side of fabric, so check the key to see how to work a certain symbol on the right side and on the wrong side.
3.The left and right on the charts refer to the actual wearing position.
Part 1 Front Piece
Cast on using the tubular method, then work back and forth. The acorn pattern are embroidered later.
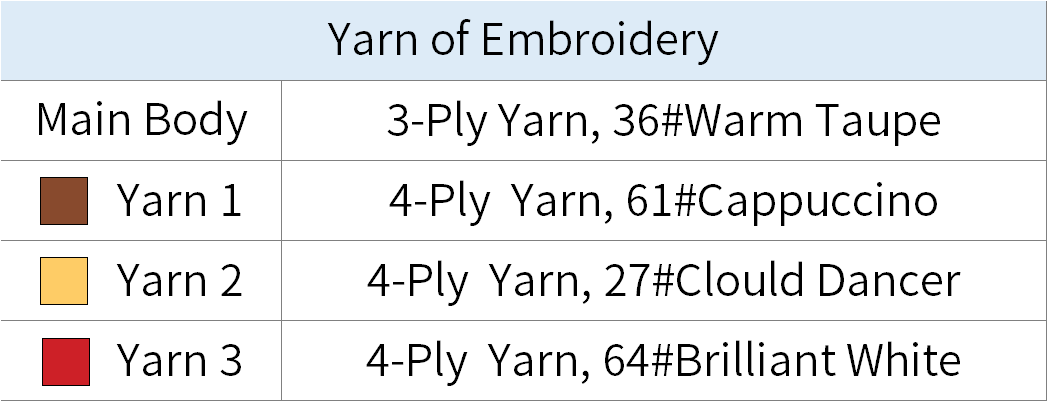
Note: Separate 3 strands out from the 4-ply yarn to embroider.
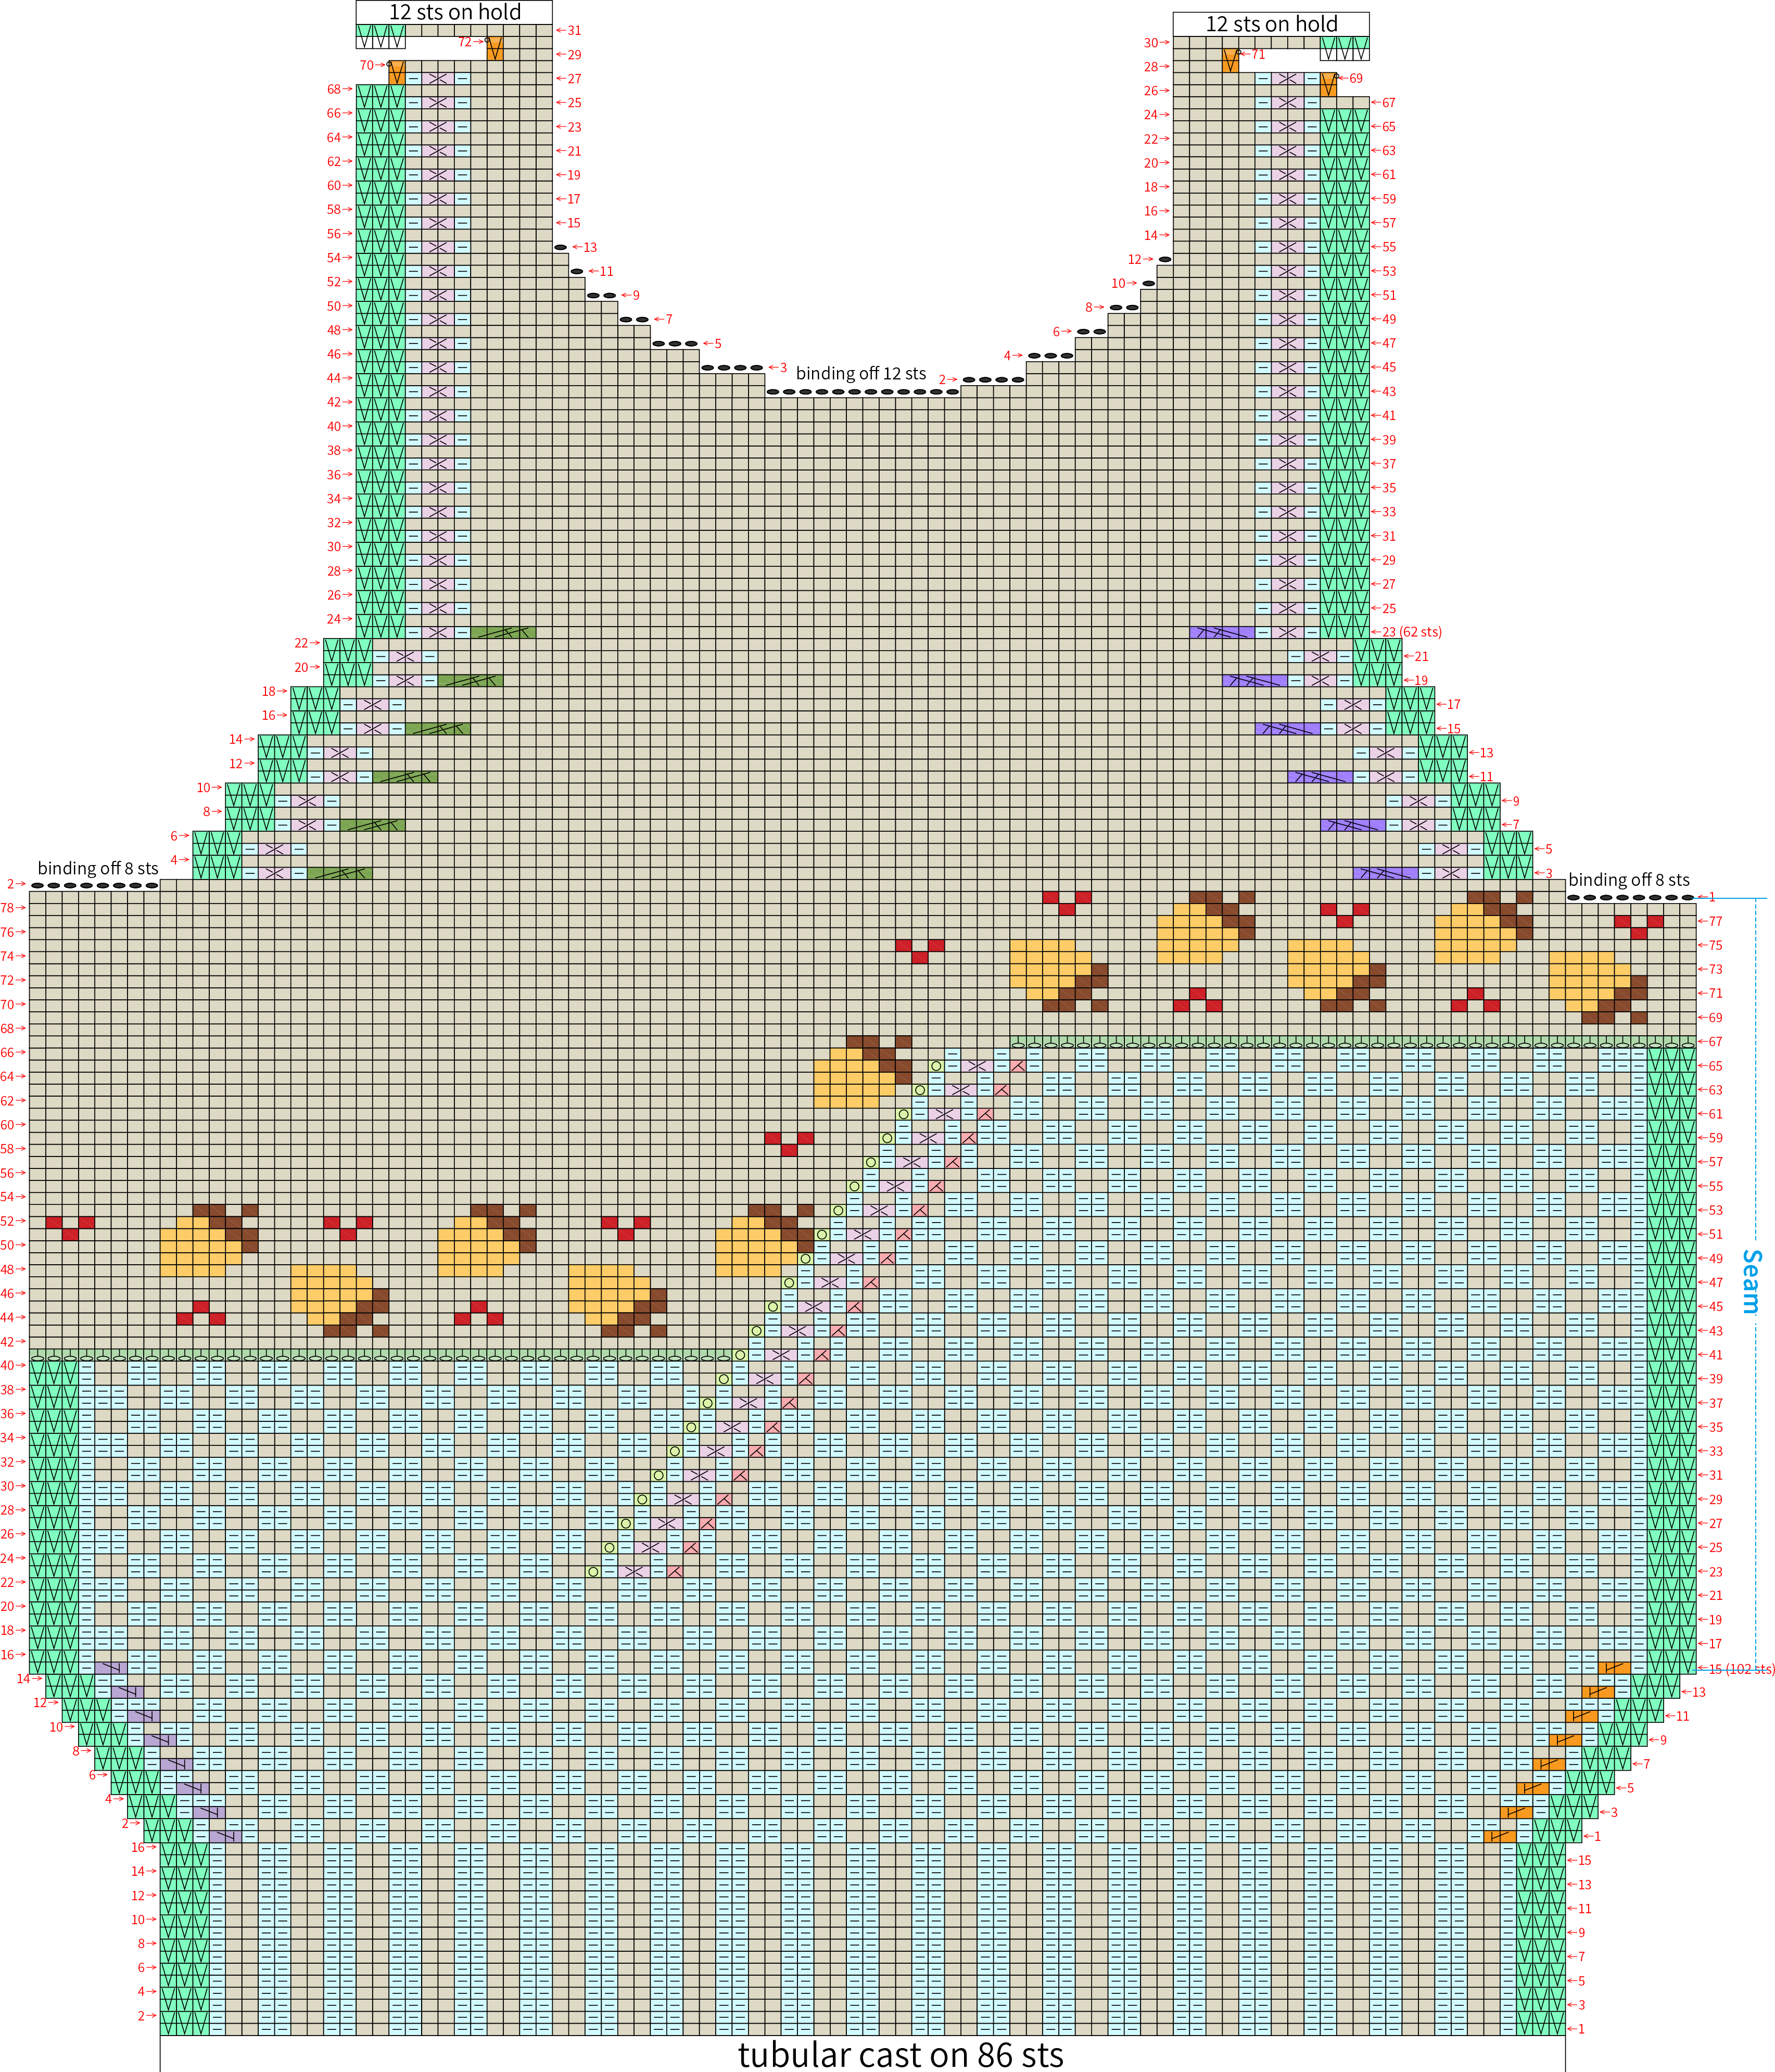
Part 2 Back Piece
Cast on using the tubular method, then work back and forth. After completion, join it with the front piece and sew on buttons at where you worked the right across stitches.
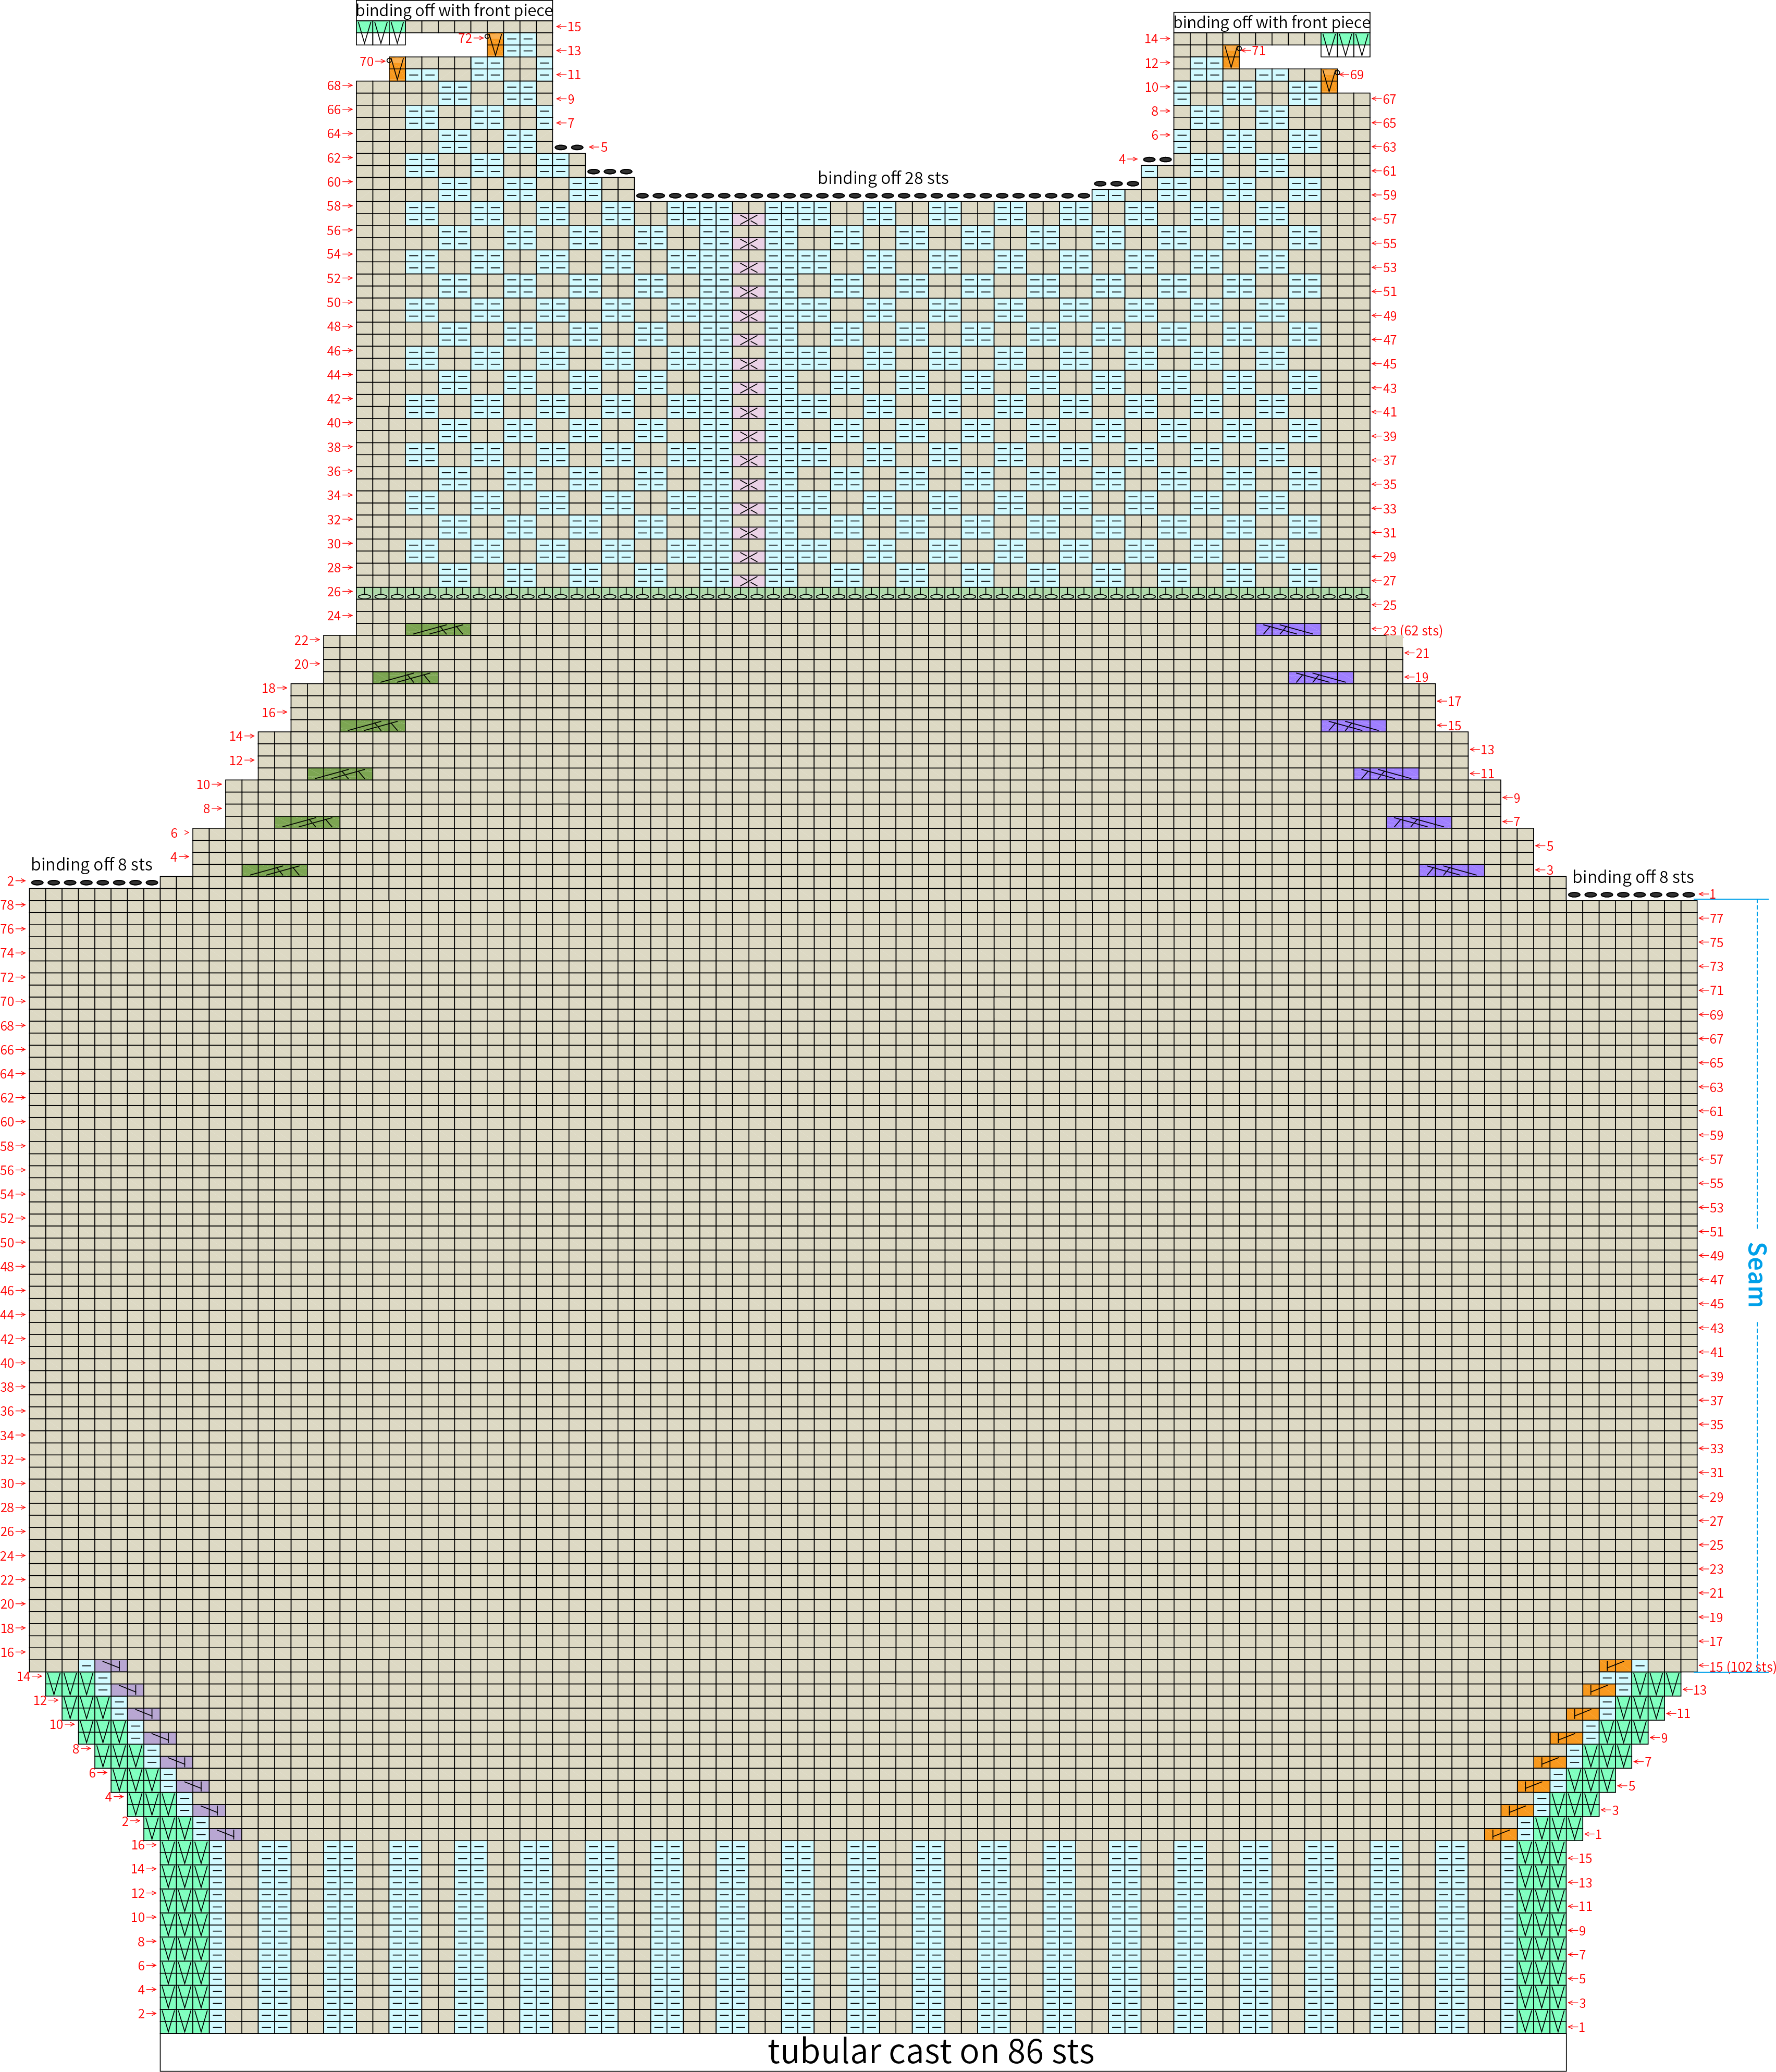
Part 3 Collar, Cuffs and Acorn Pattern
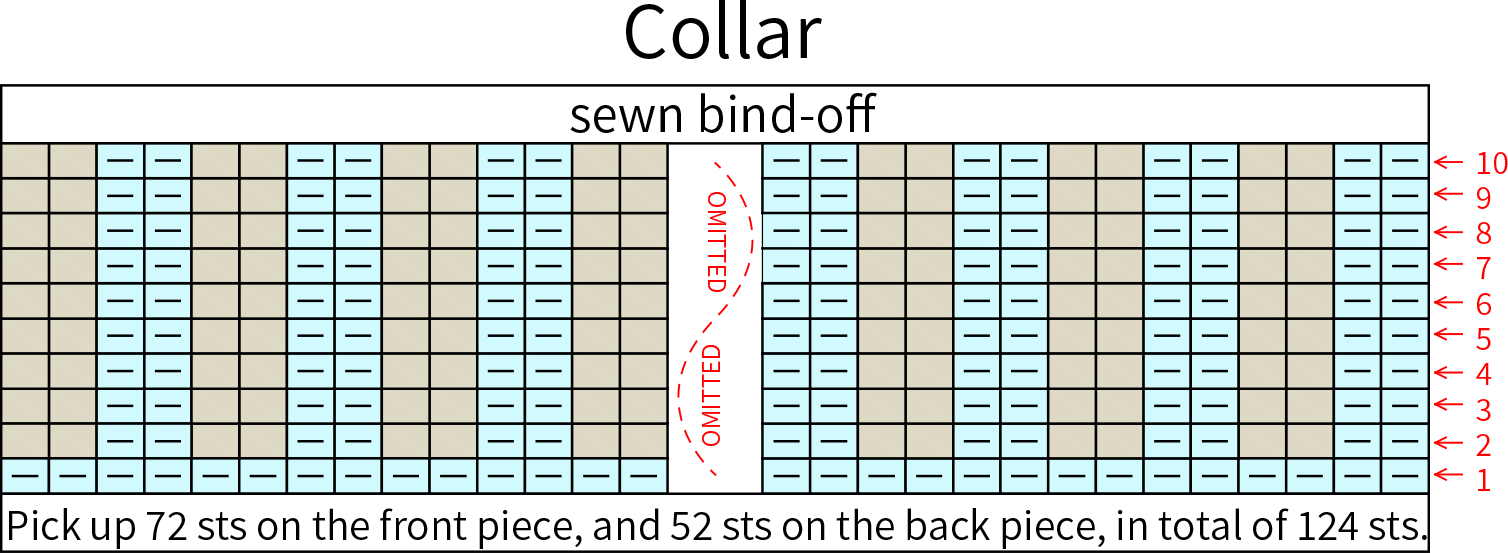
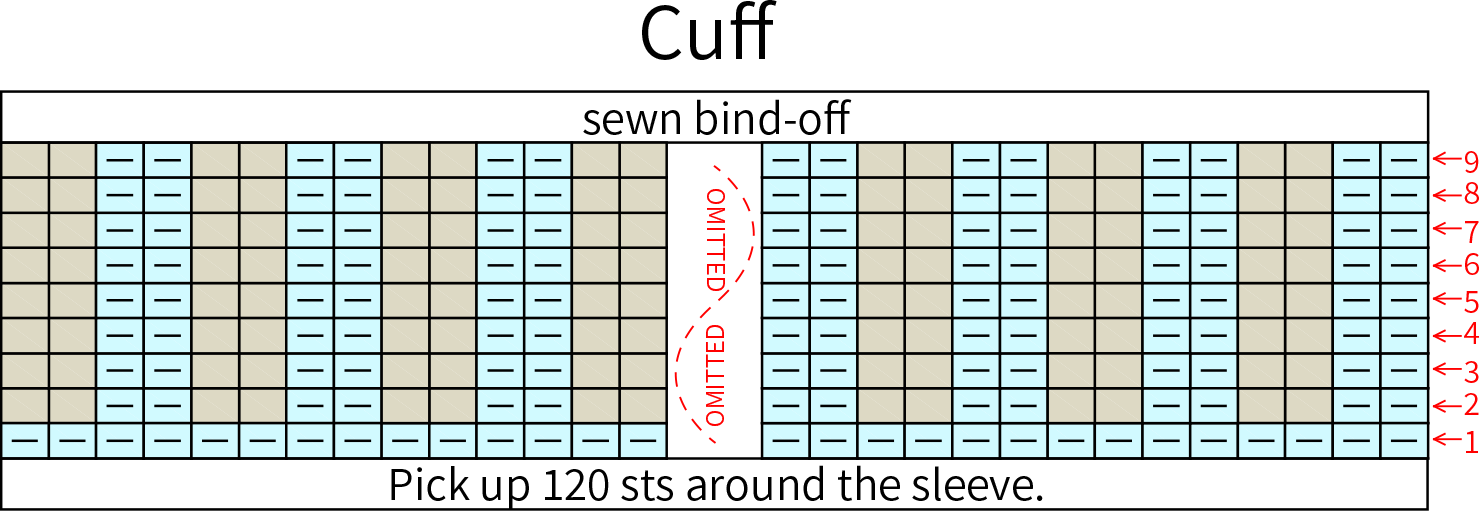
Pick up stitches to work the collar and cuffs, then embroider the pattern on the front piece. The position, shape, and other details of the pattern can be adjusted according to the actual situation and your preference.
Made by the community