Clothes
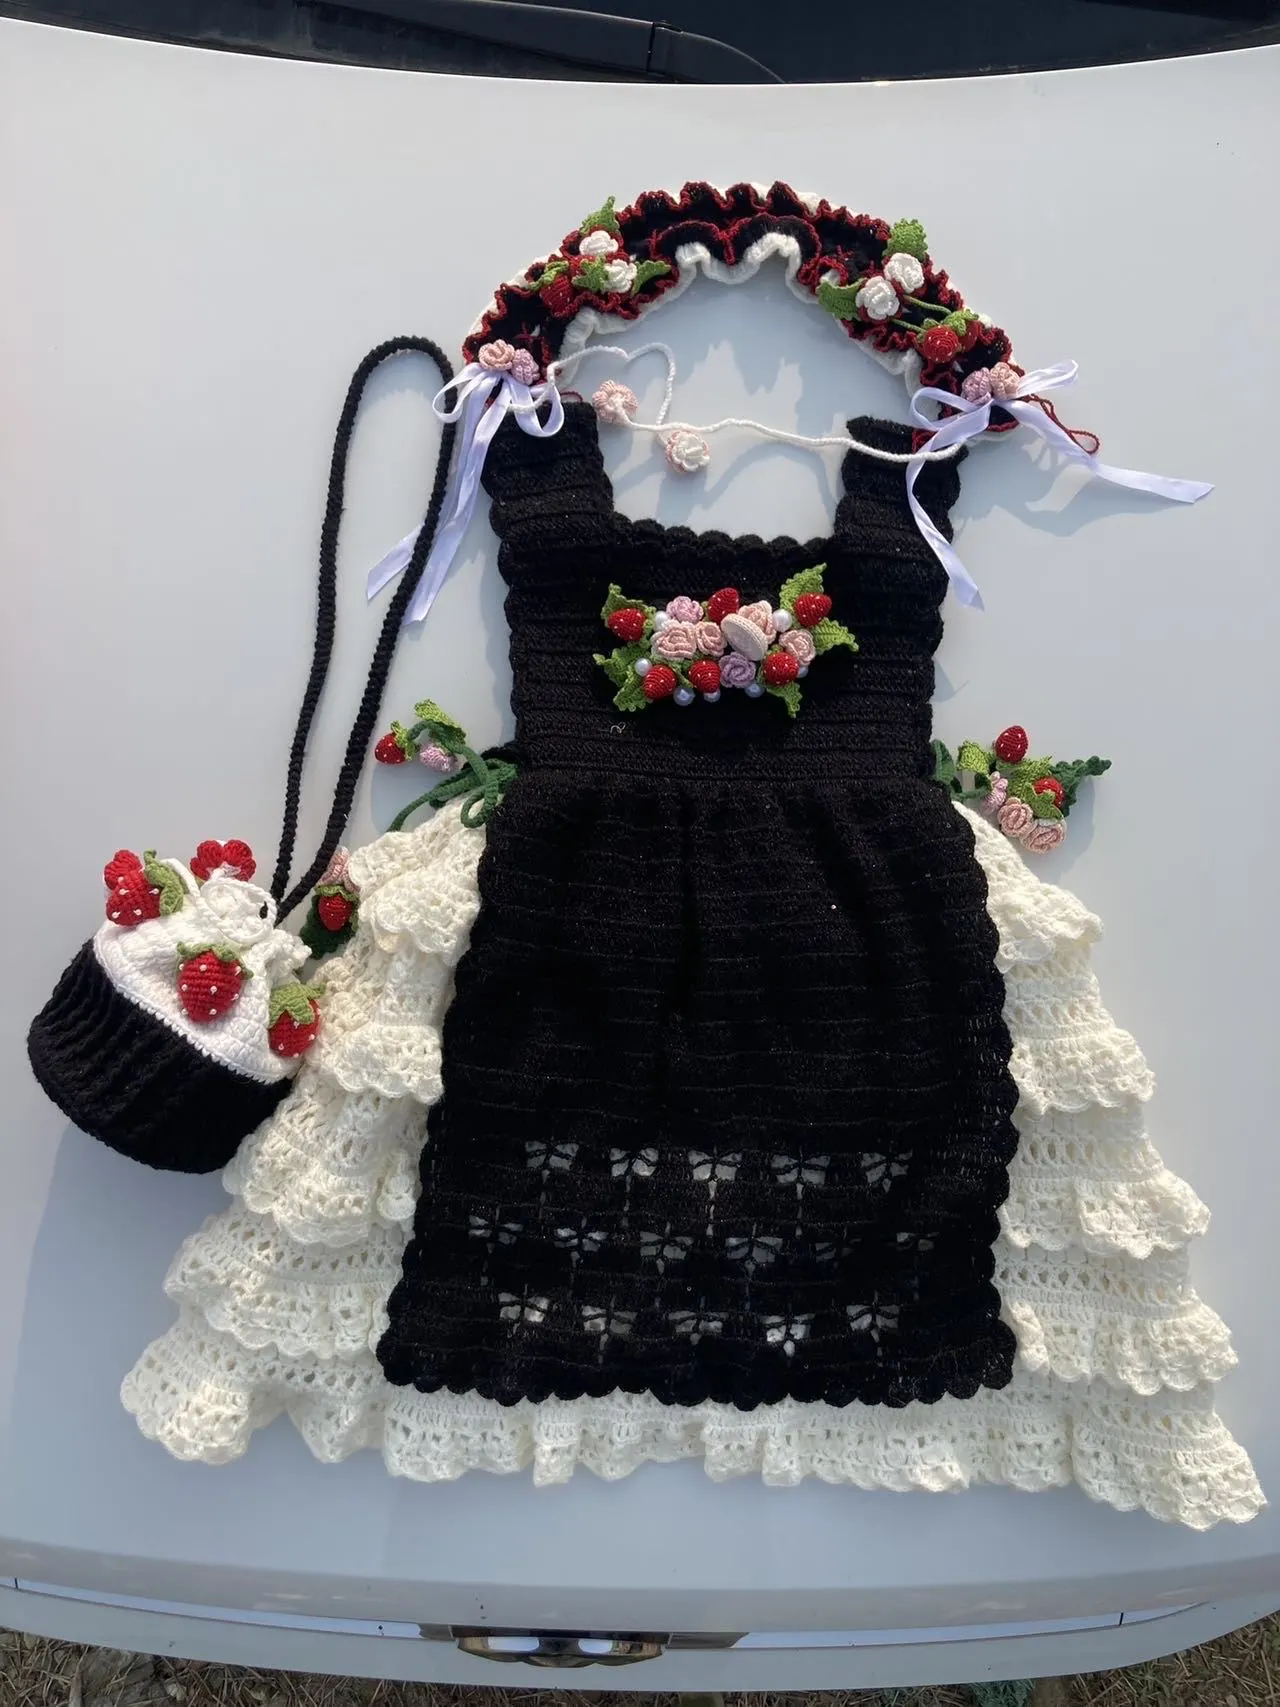
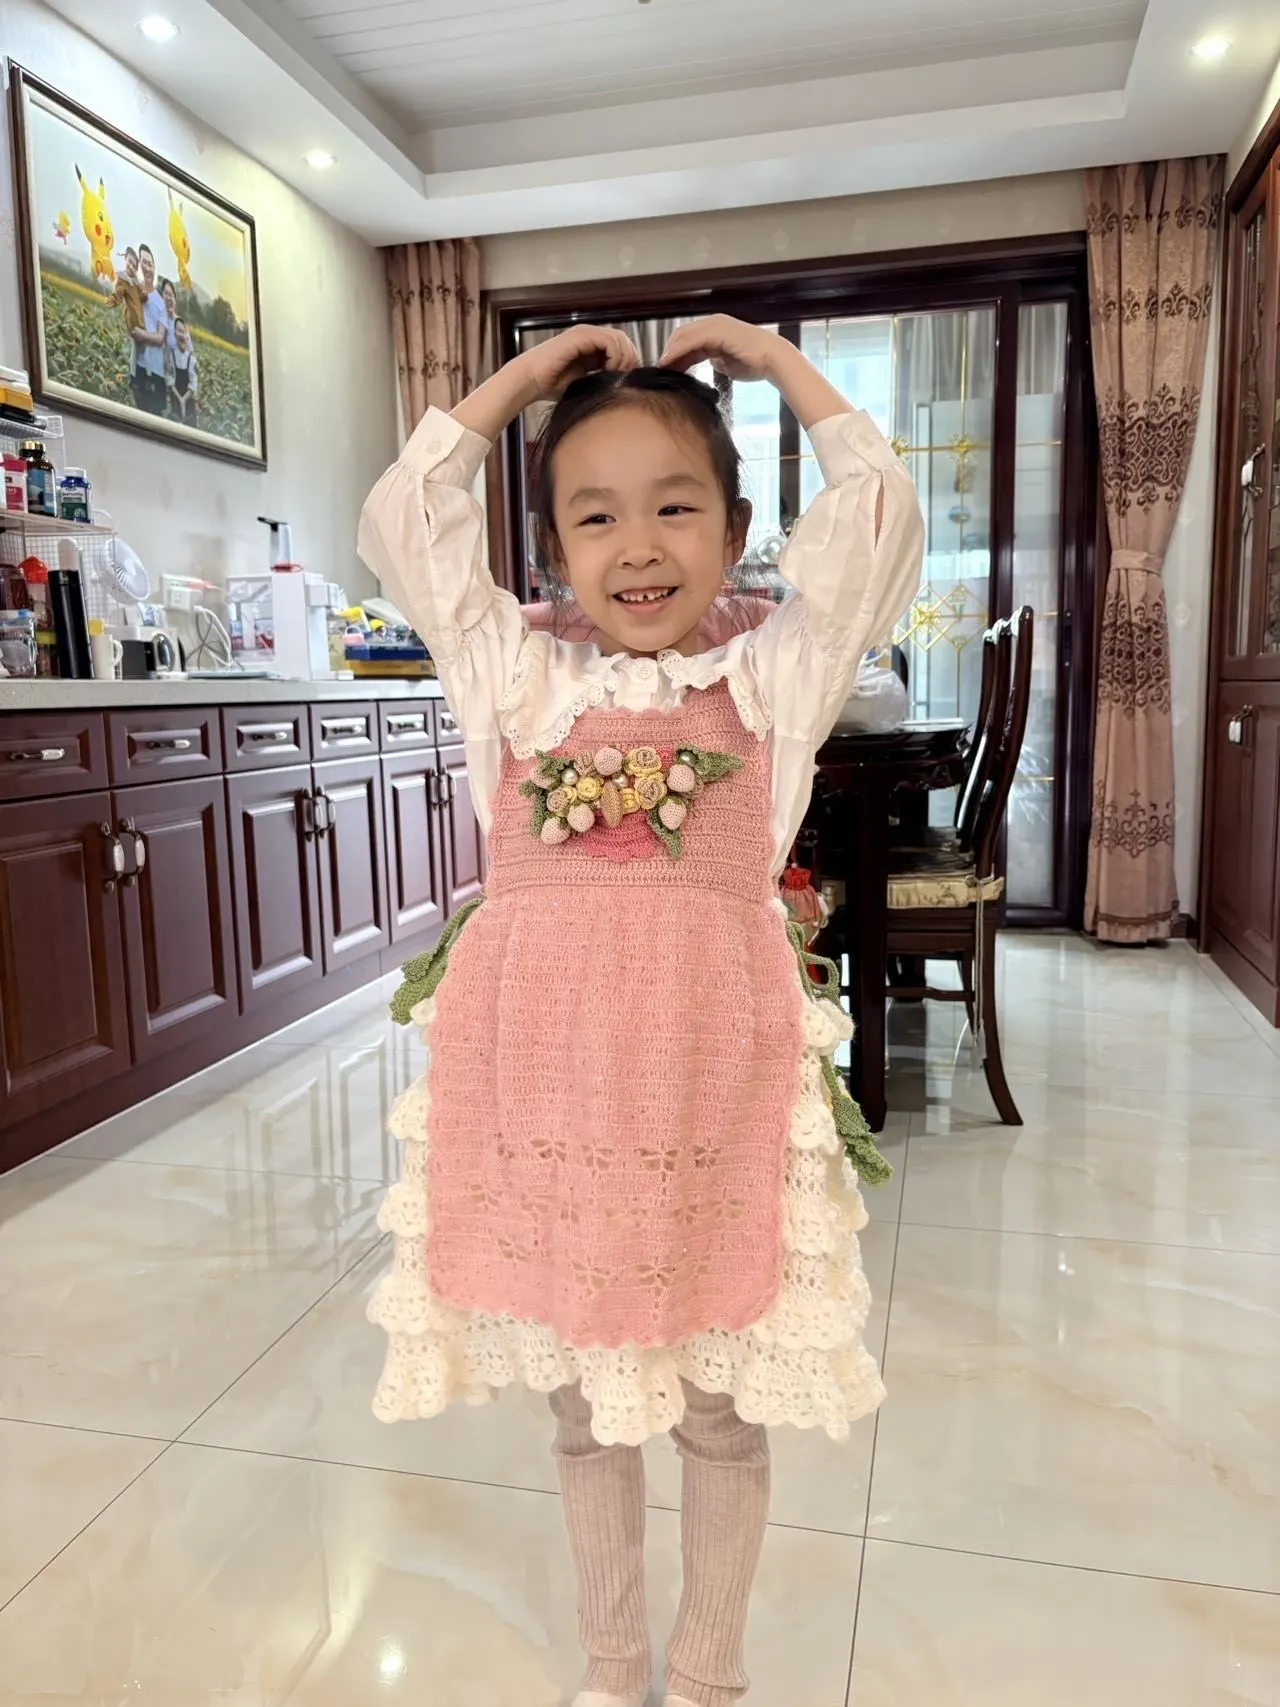
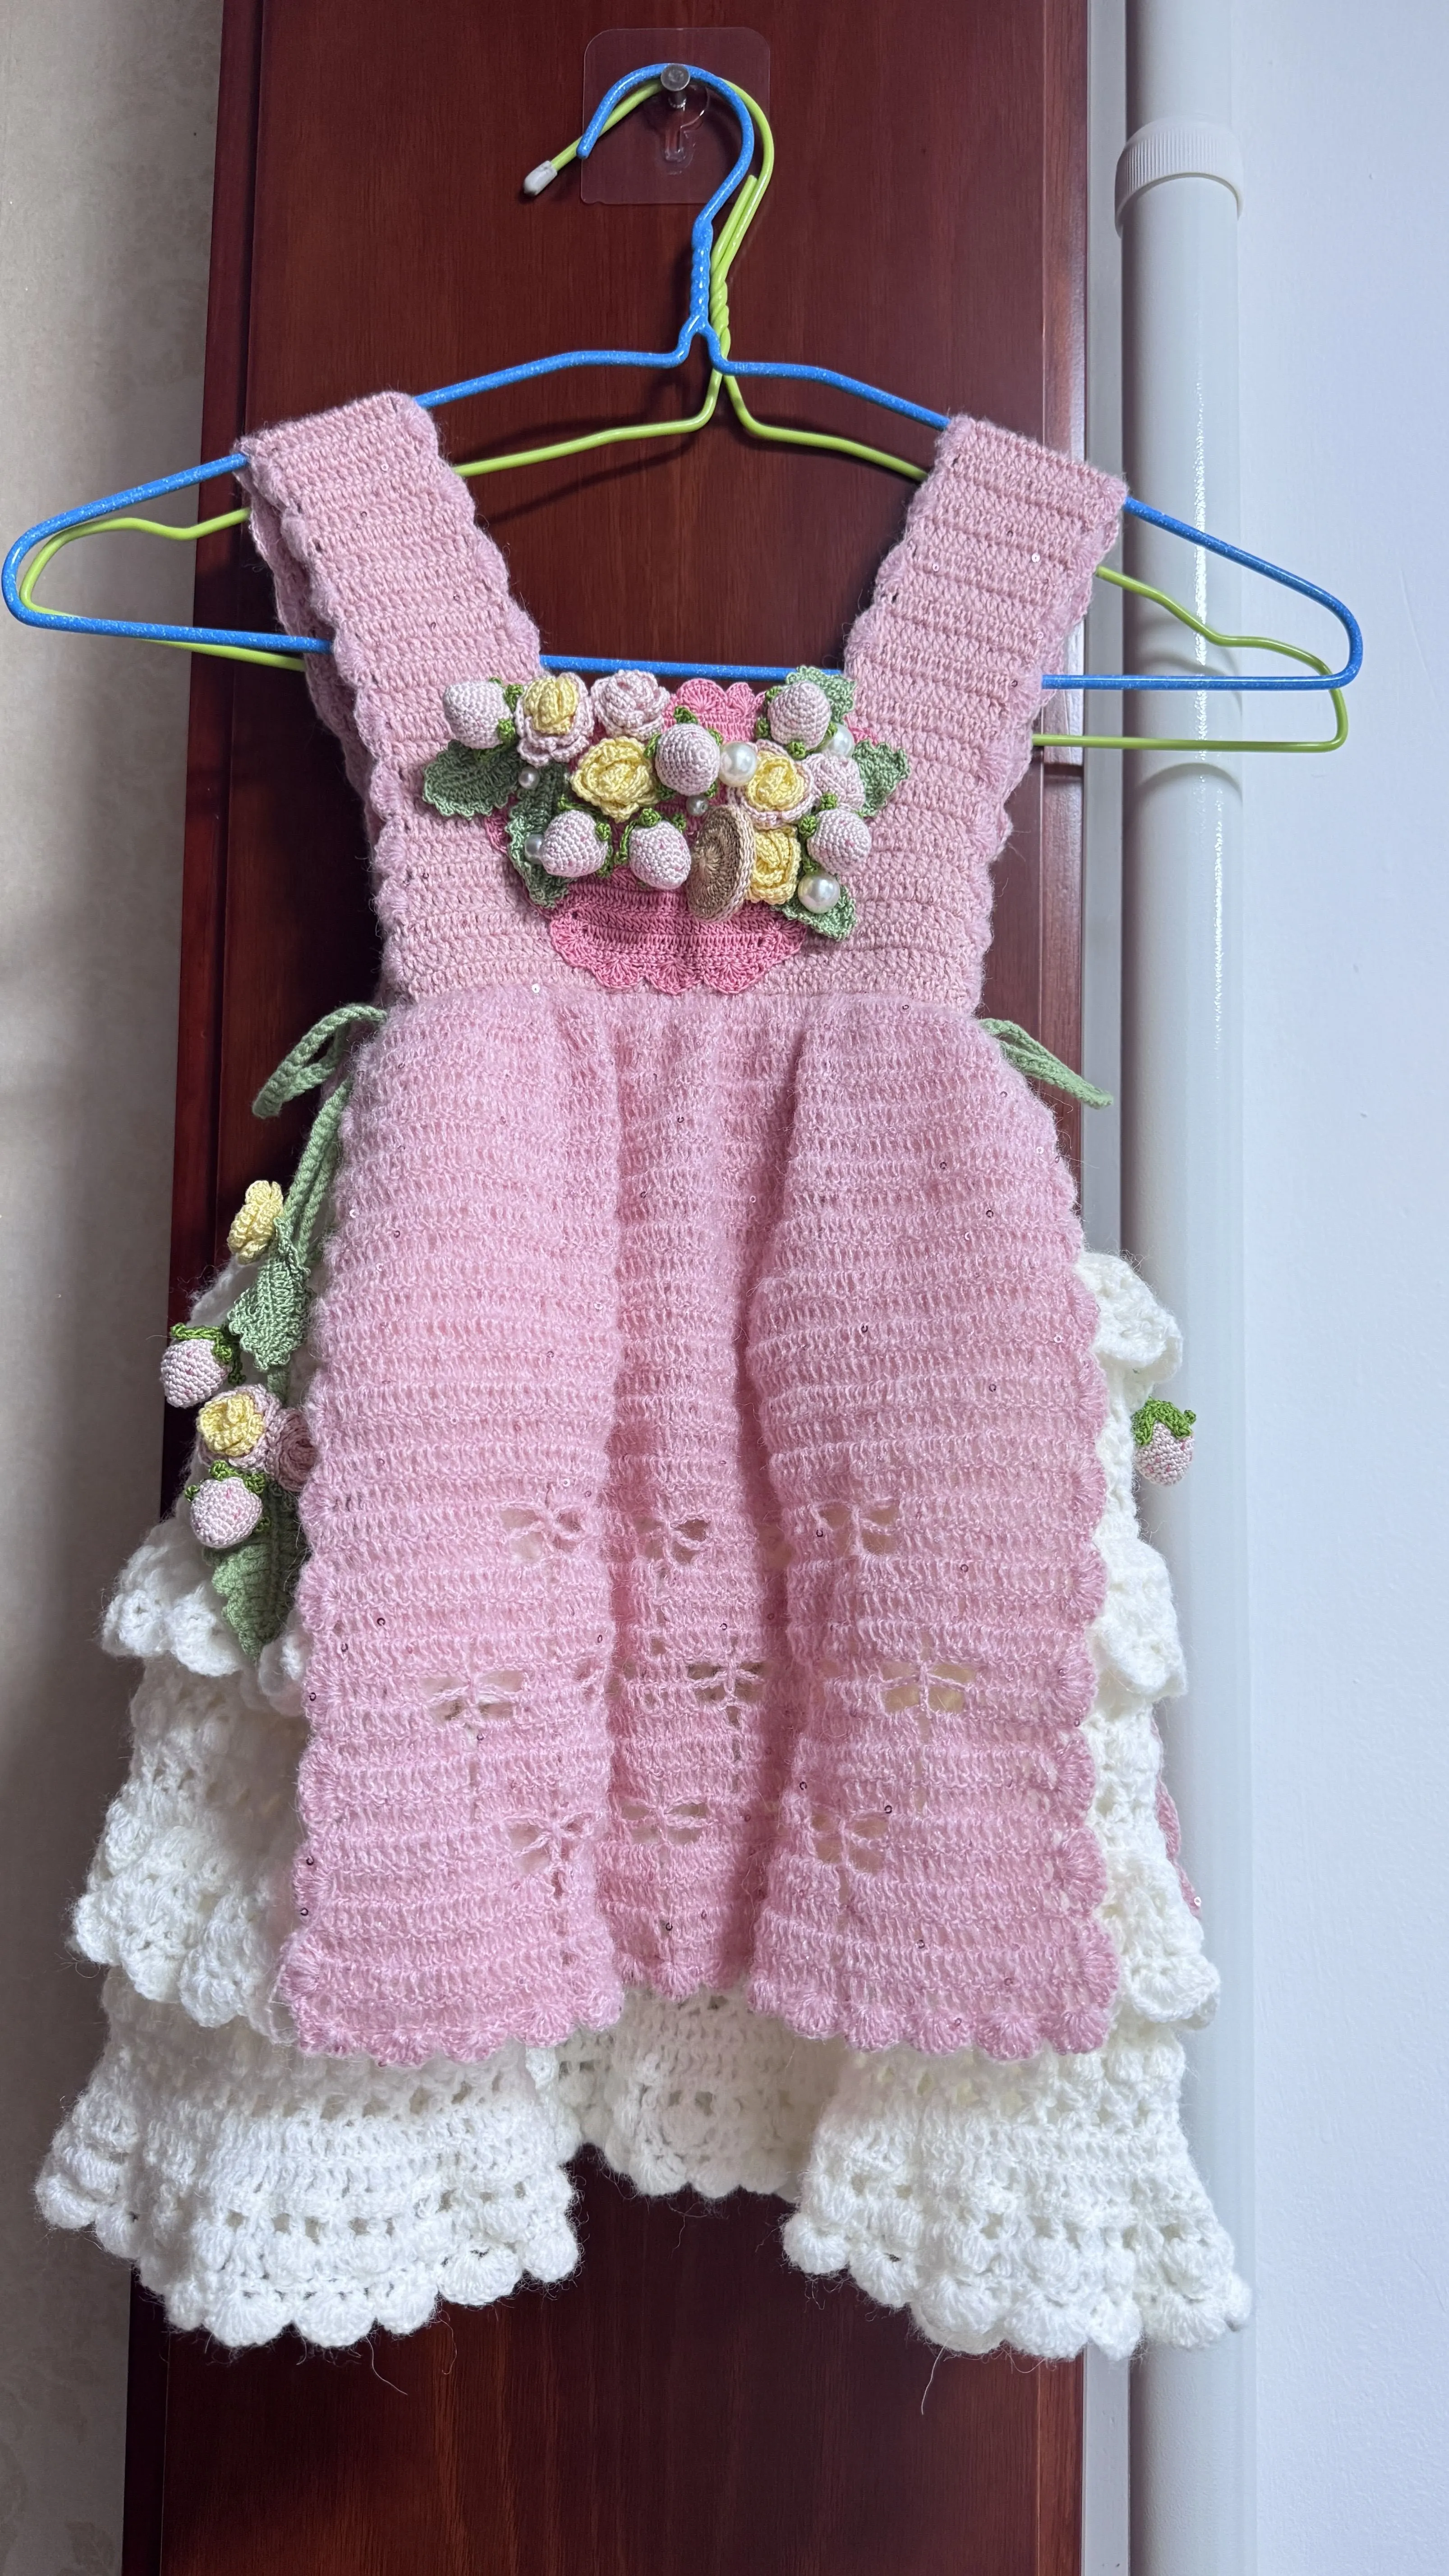
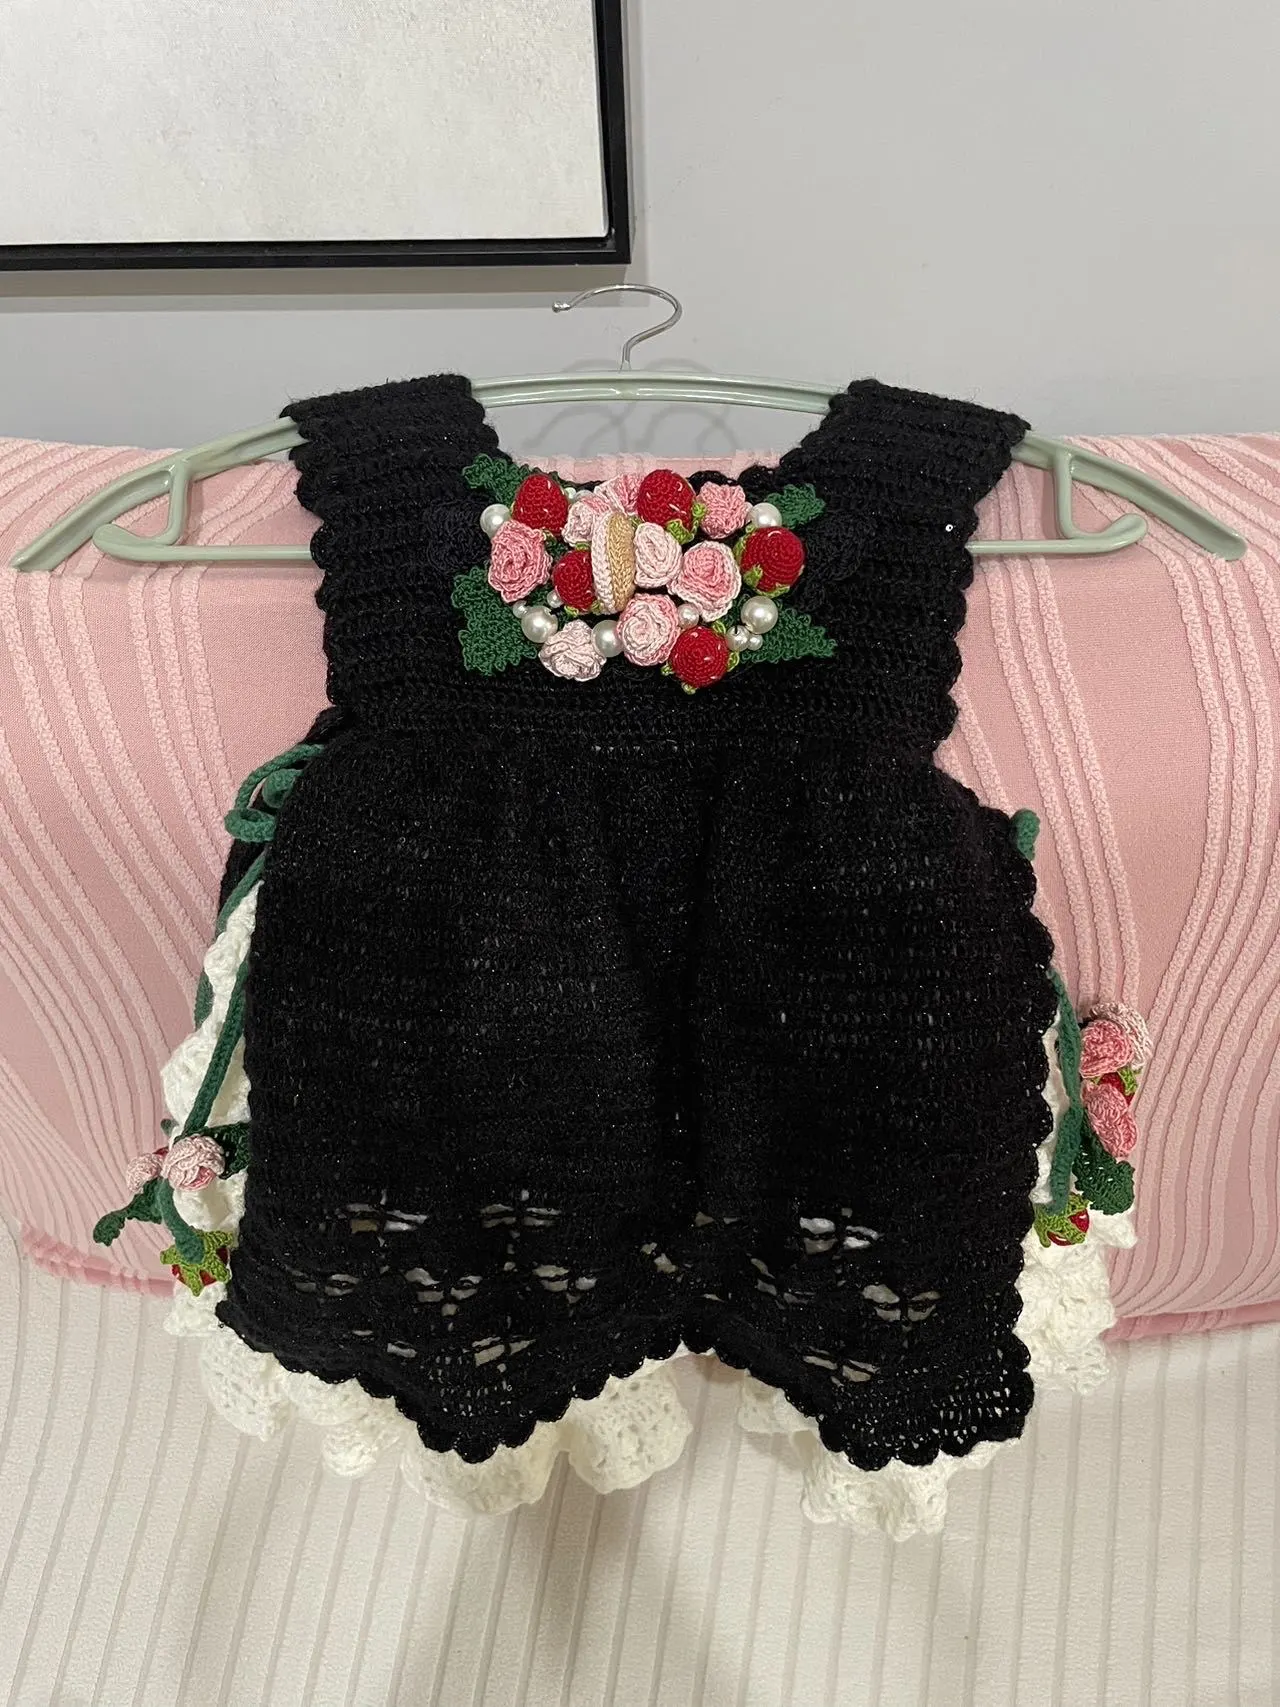
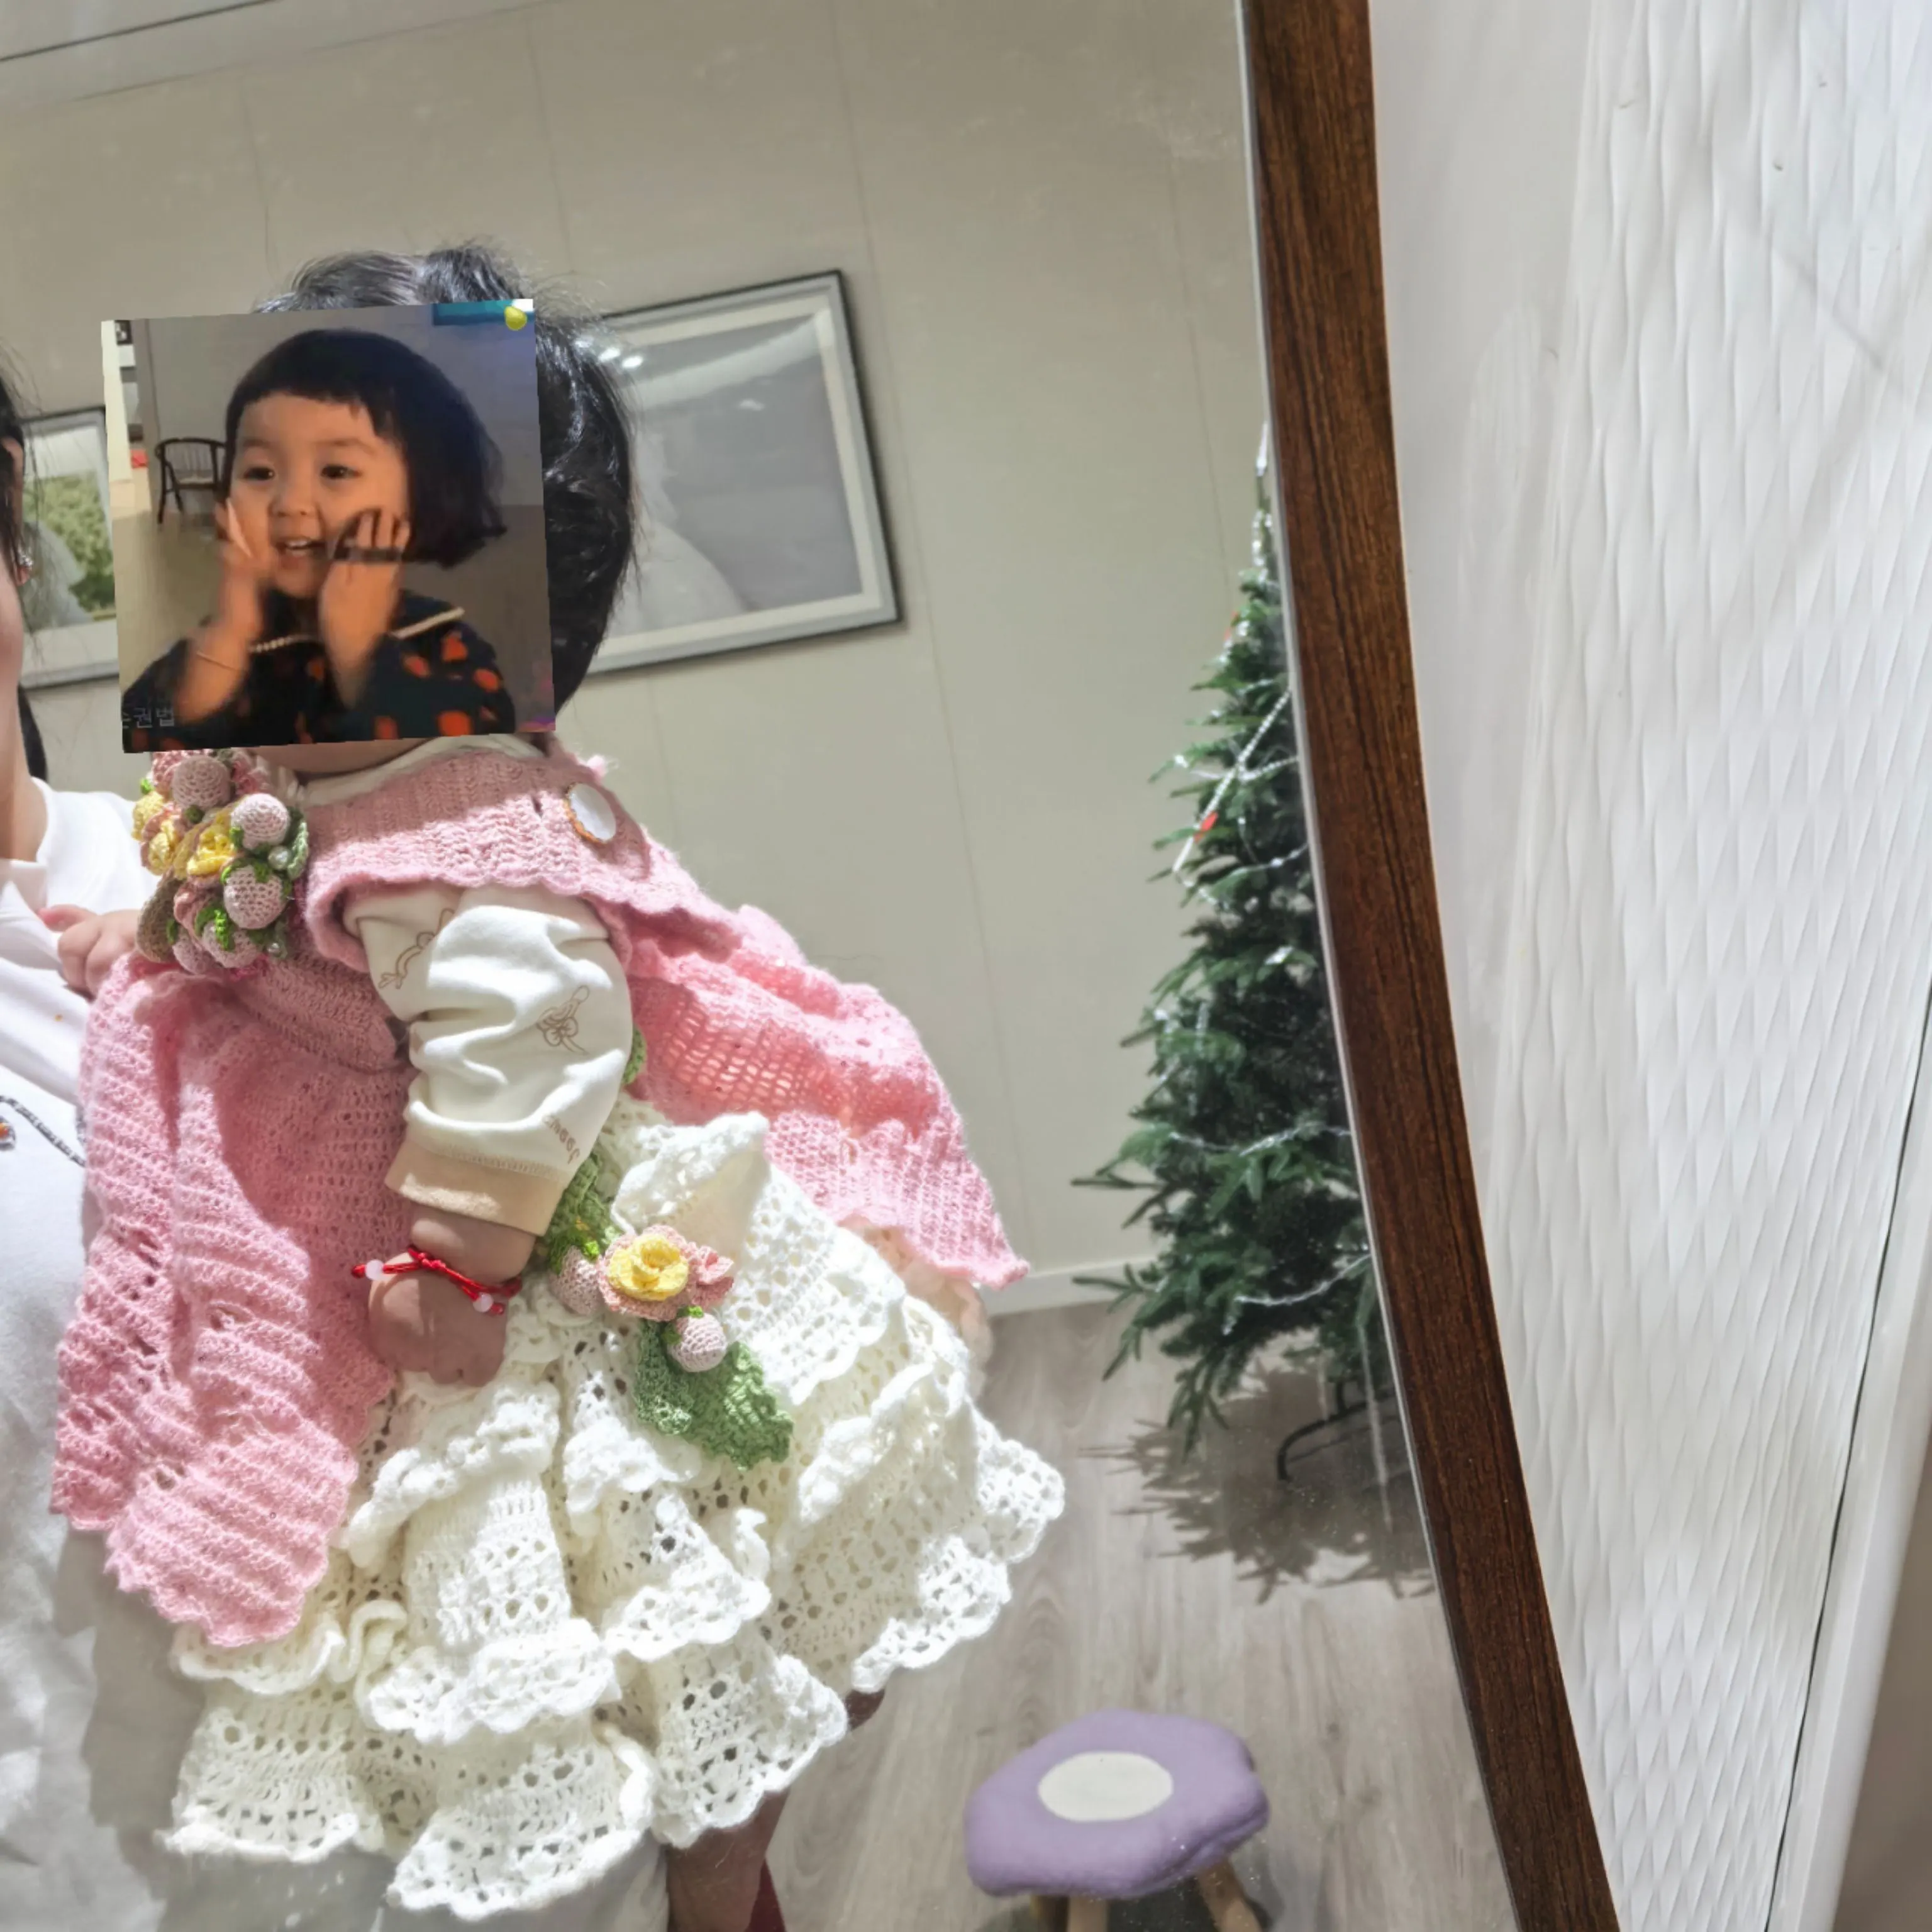
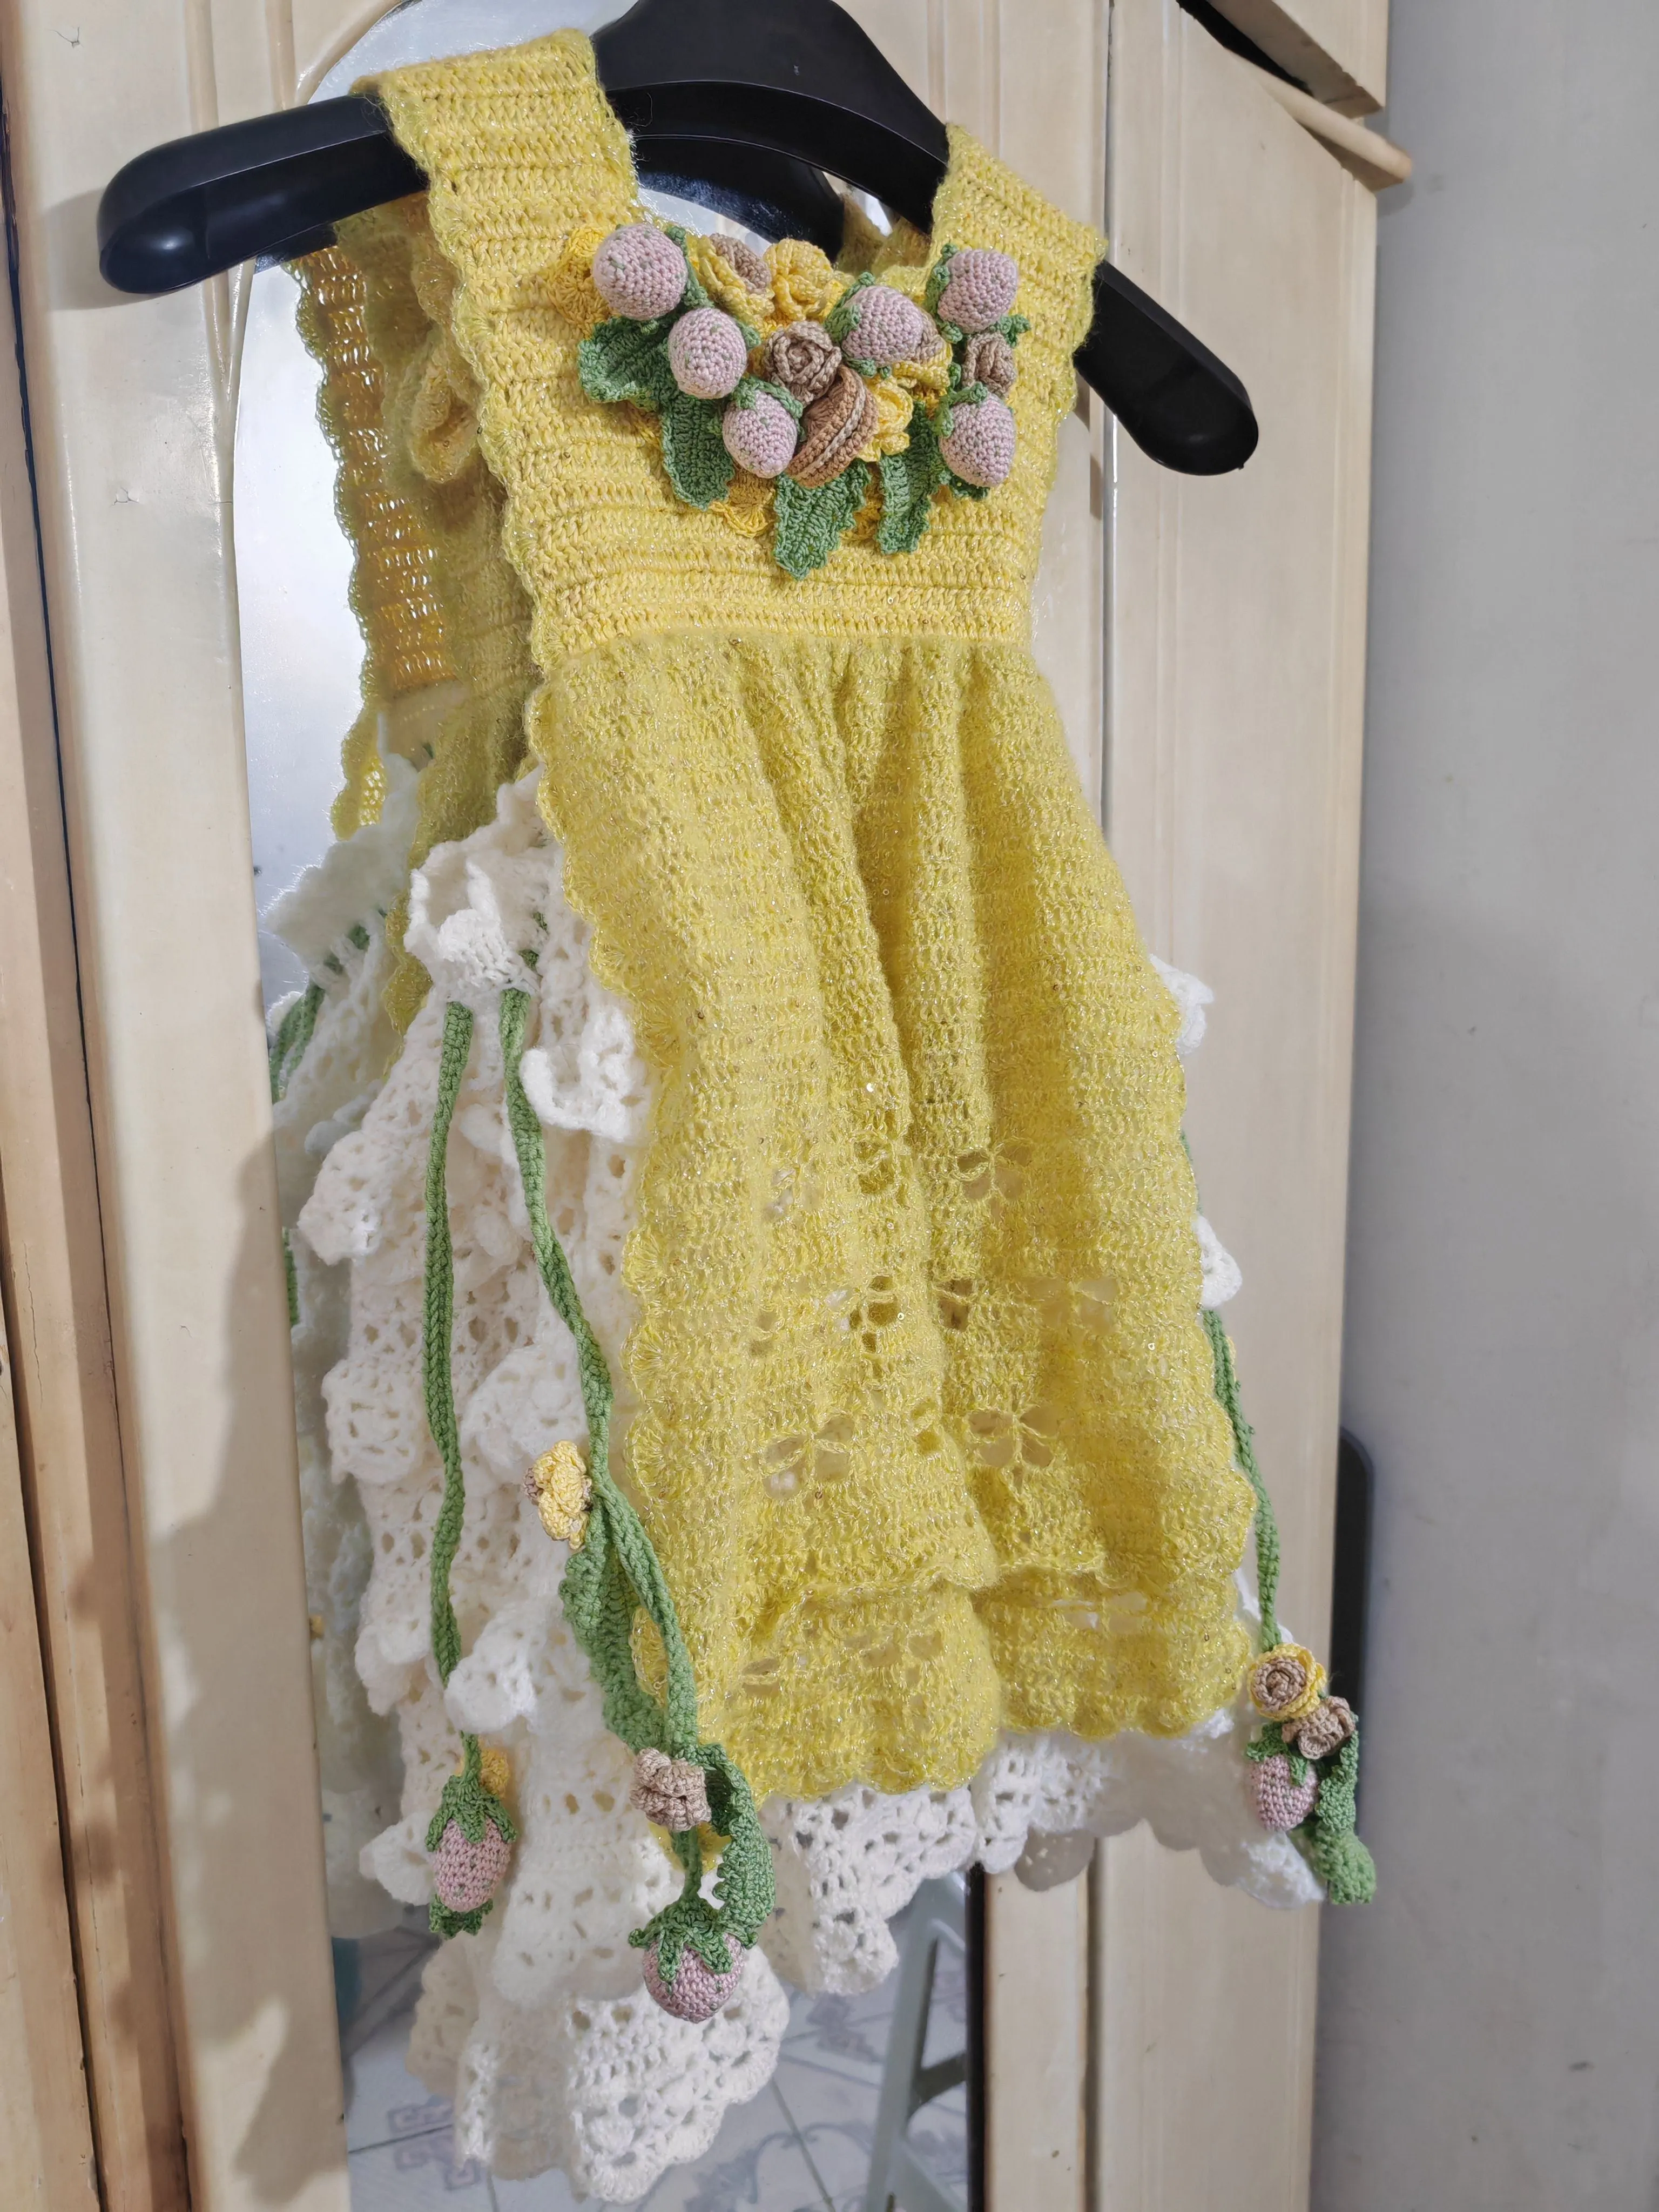
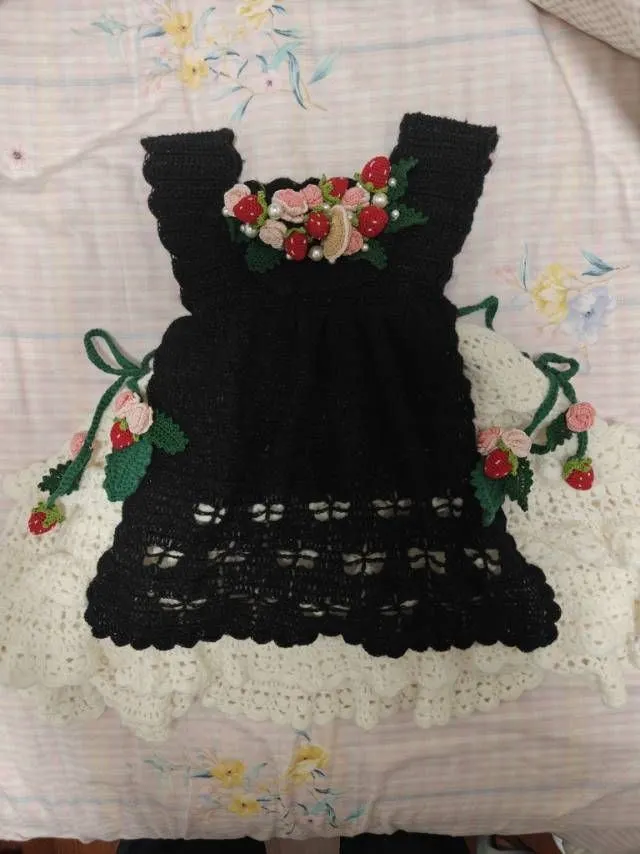
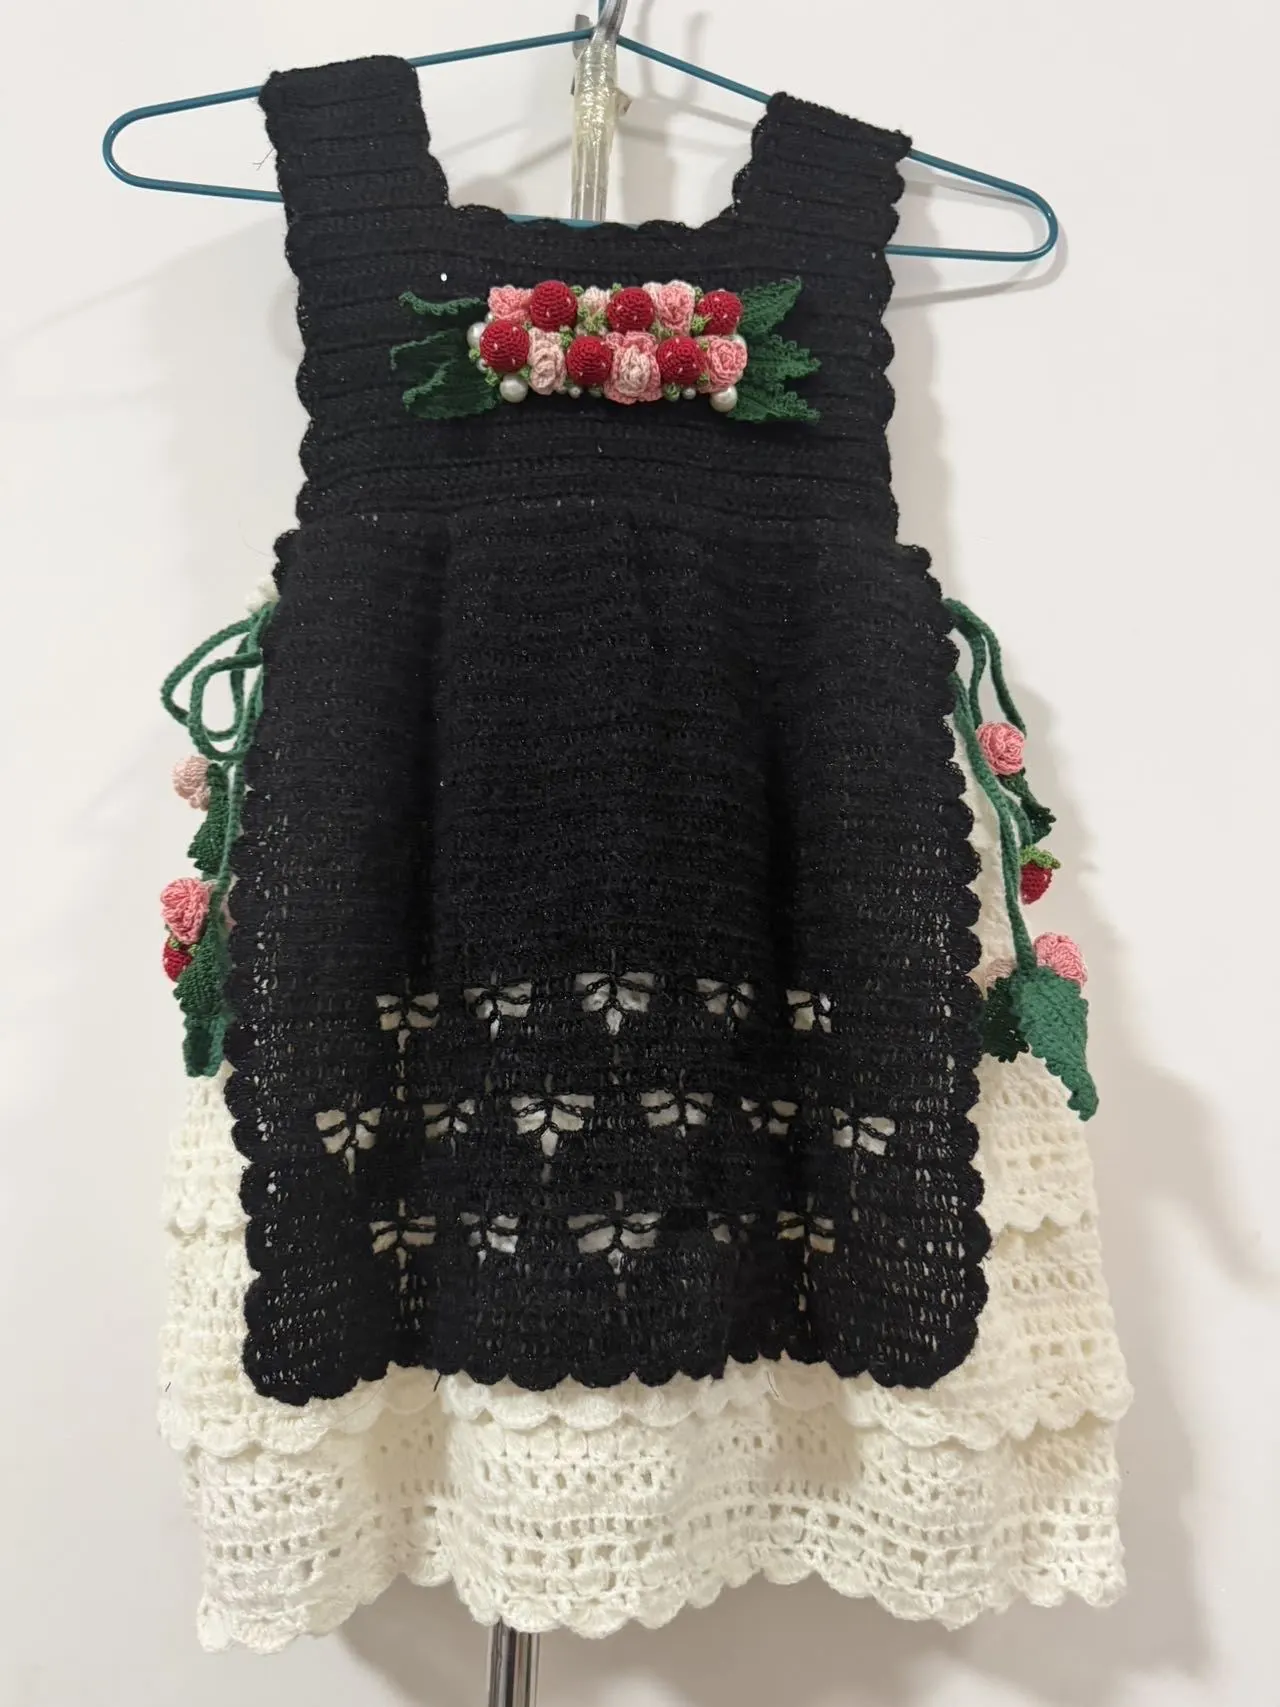
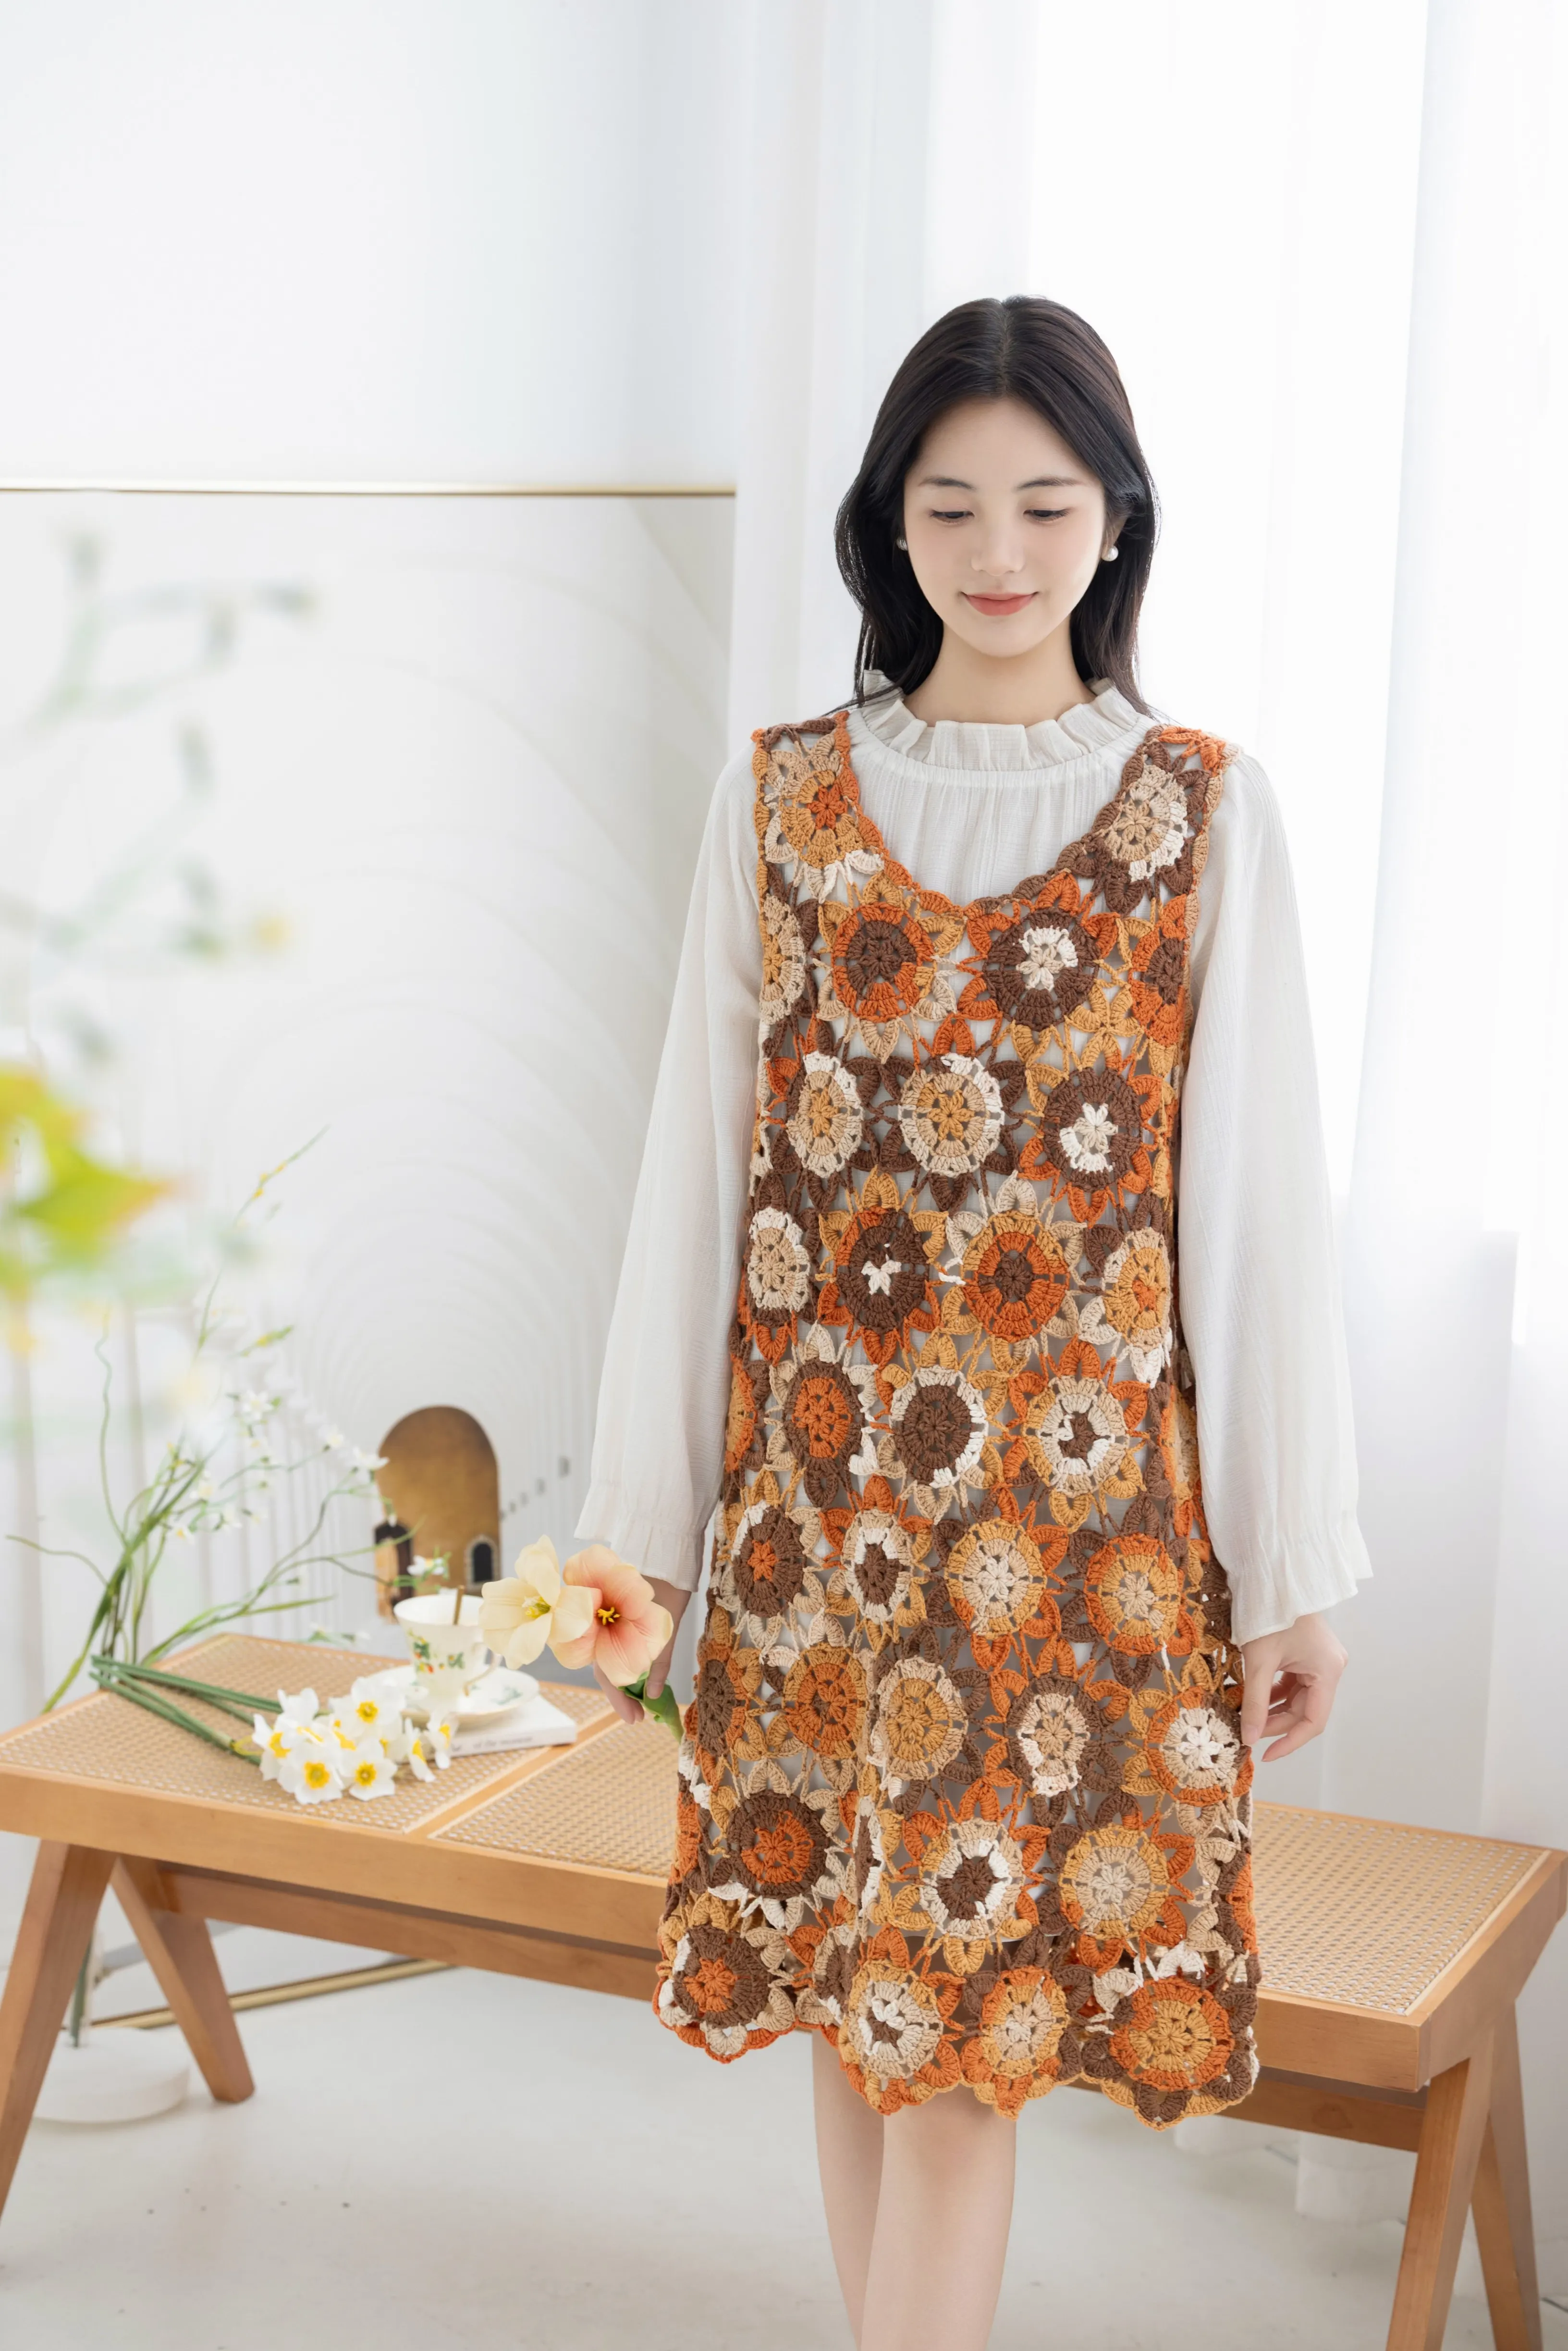
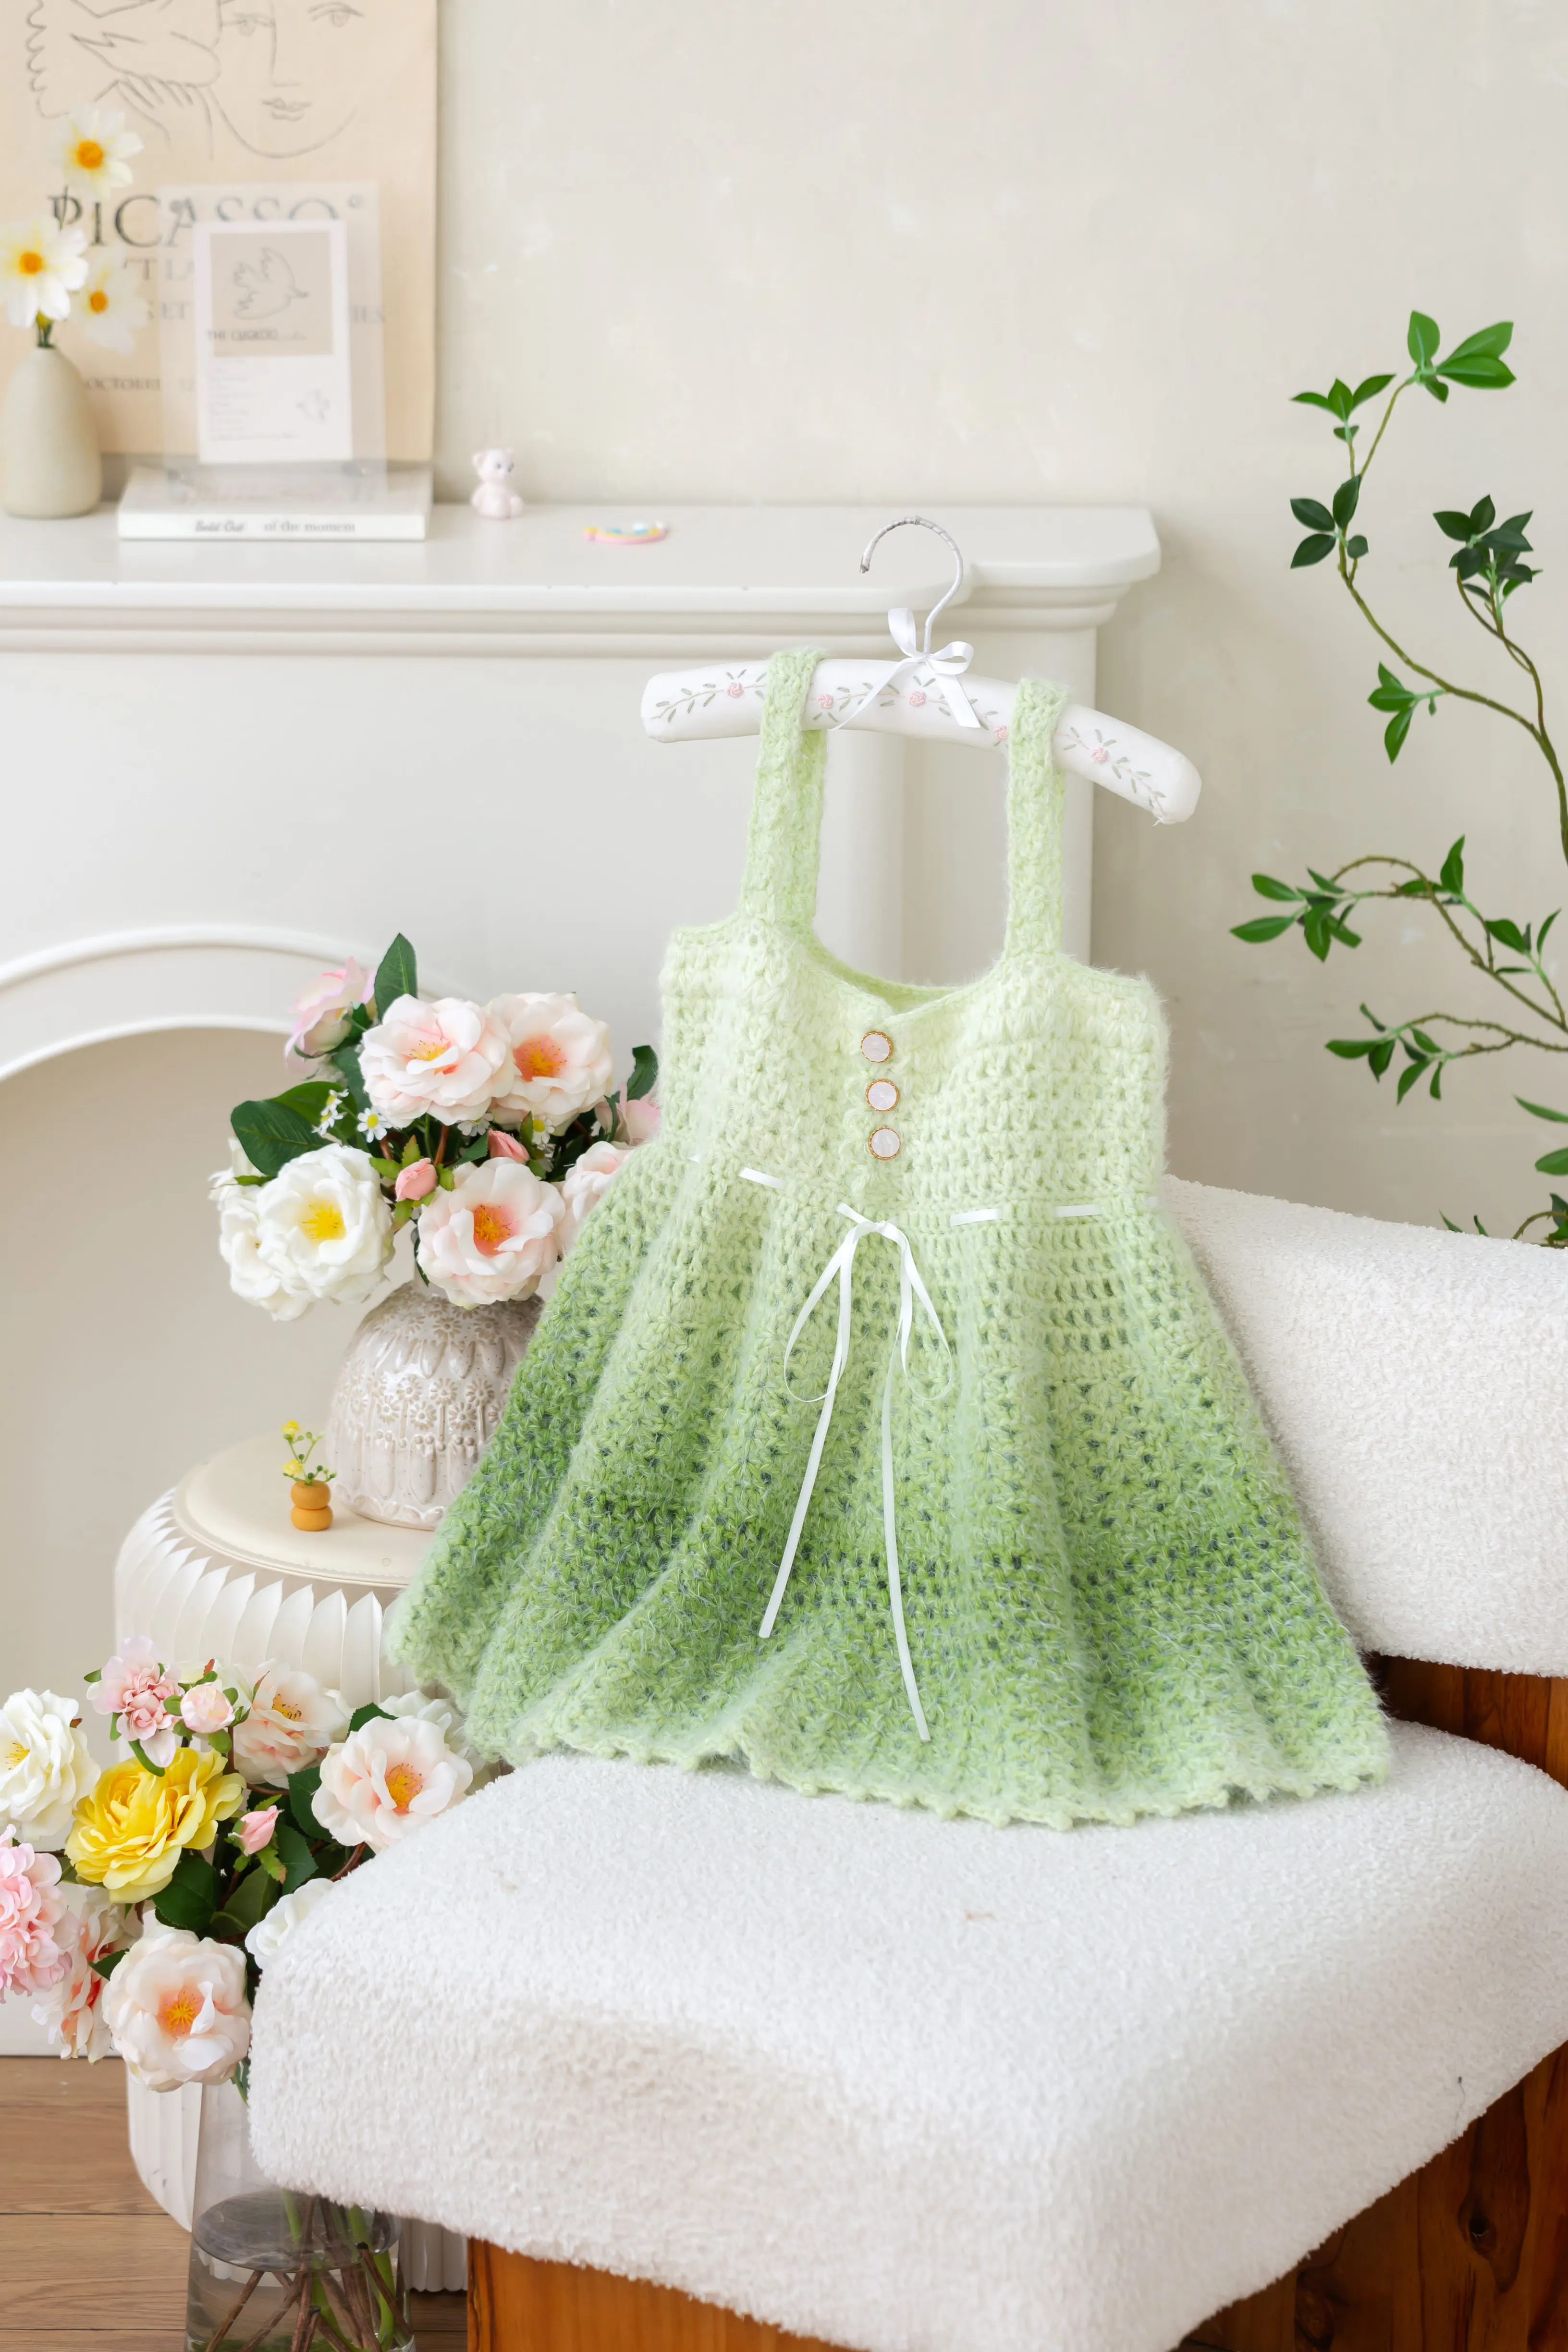
Afternoon Tea Dress
Project preview
See the finished project
Pattern format
Instructions
This garment divides into several sections: the skirt hem, front and back pieces, and accessories.
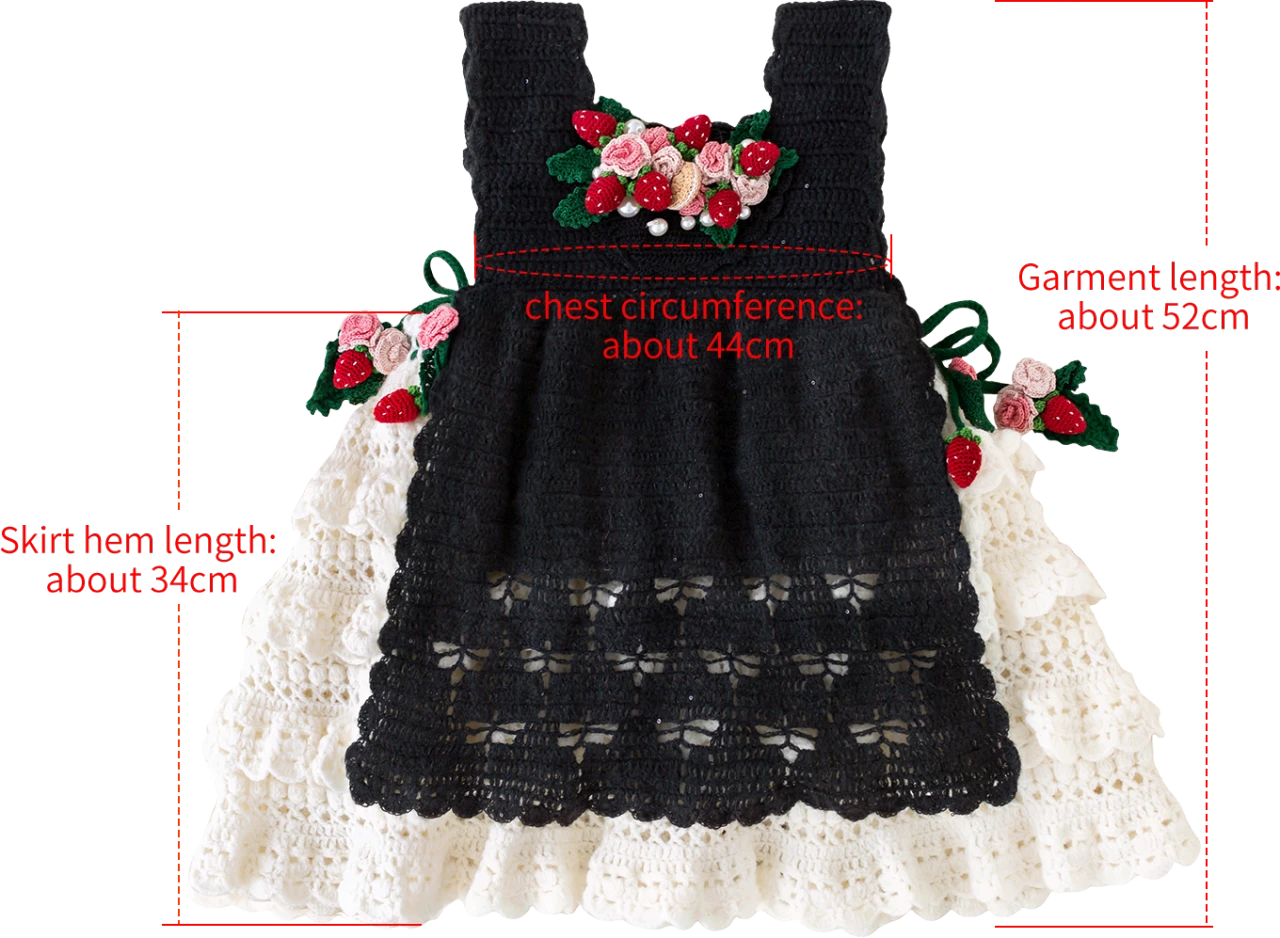
Note: Hand-measured, with an error margin of 1-2 cm.
Due to variations in individual tension, the size of the sample is for reference only.
Materials: Susan's Family Alpaca, Sequin Mohair, PureSoft Baby Cotton Yarn, Combed 5# Lace
Hook: 1.50 mm crochet hook (Combed 5# Lace );
2.00 mm crochet hook (other yarn options)
Chart Key











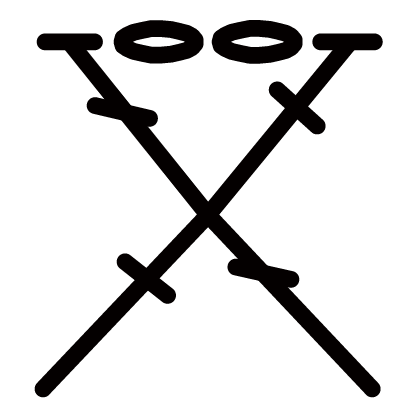

Note: This pattern is making in Chinese crochet pattern terms, and the stitch name is written using American terminology. All measurements in charts are in cm.
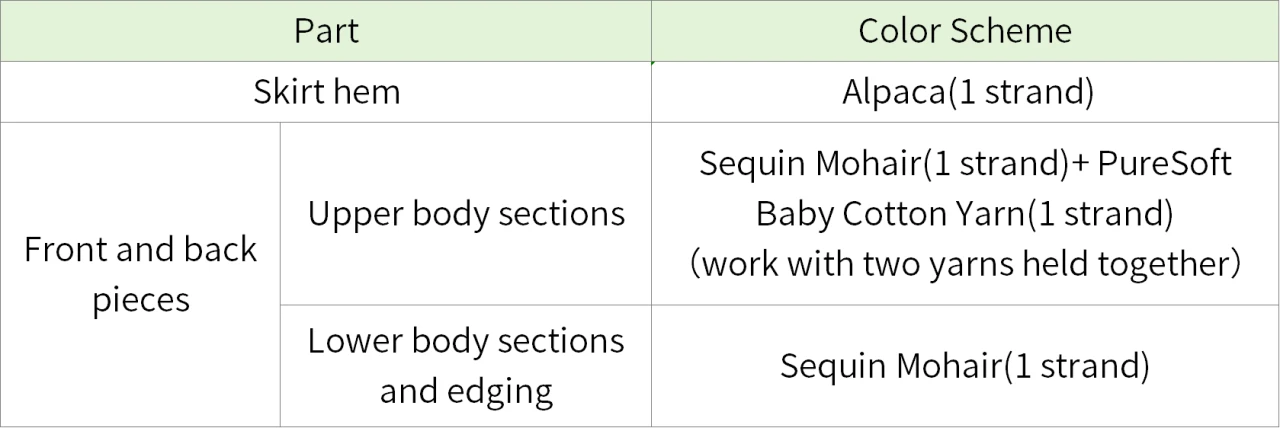
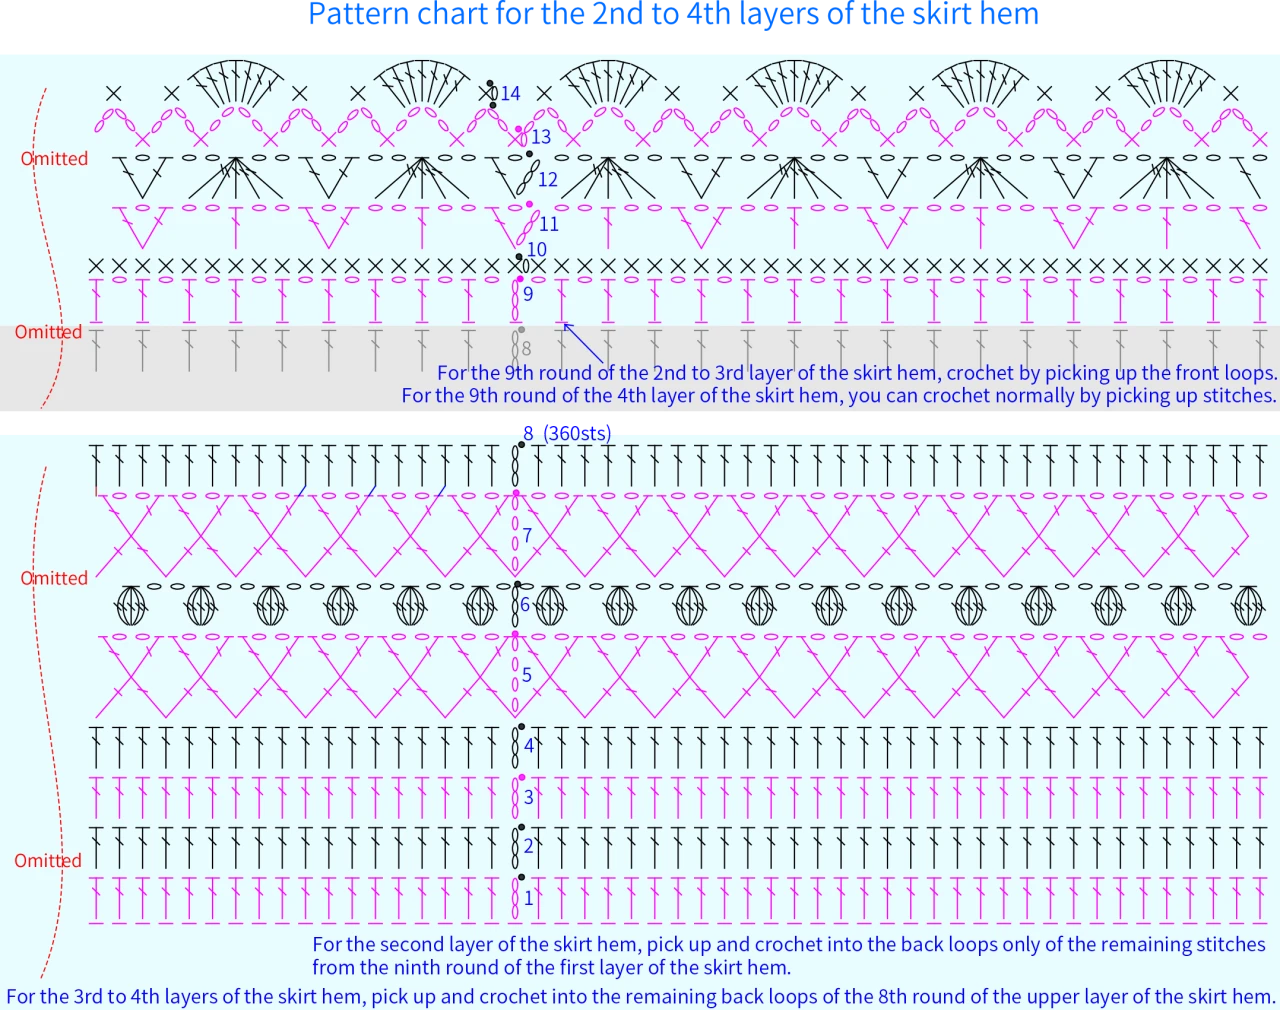
Part 1 Skirt hemA 00' 36''
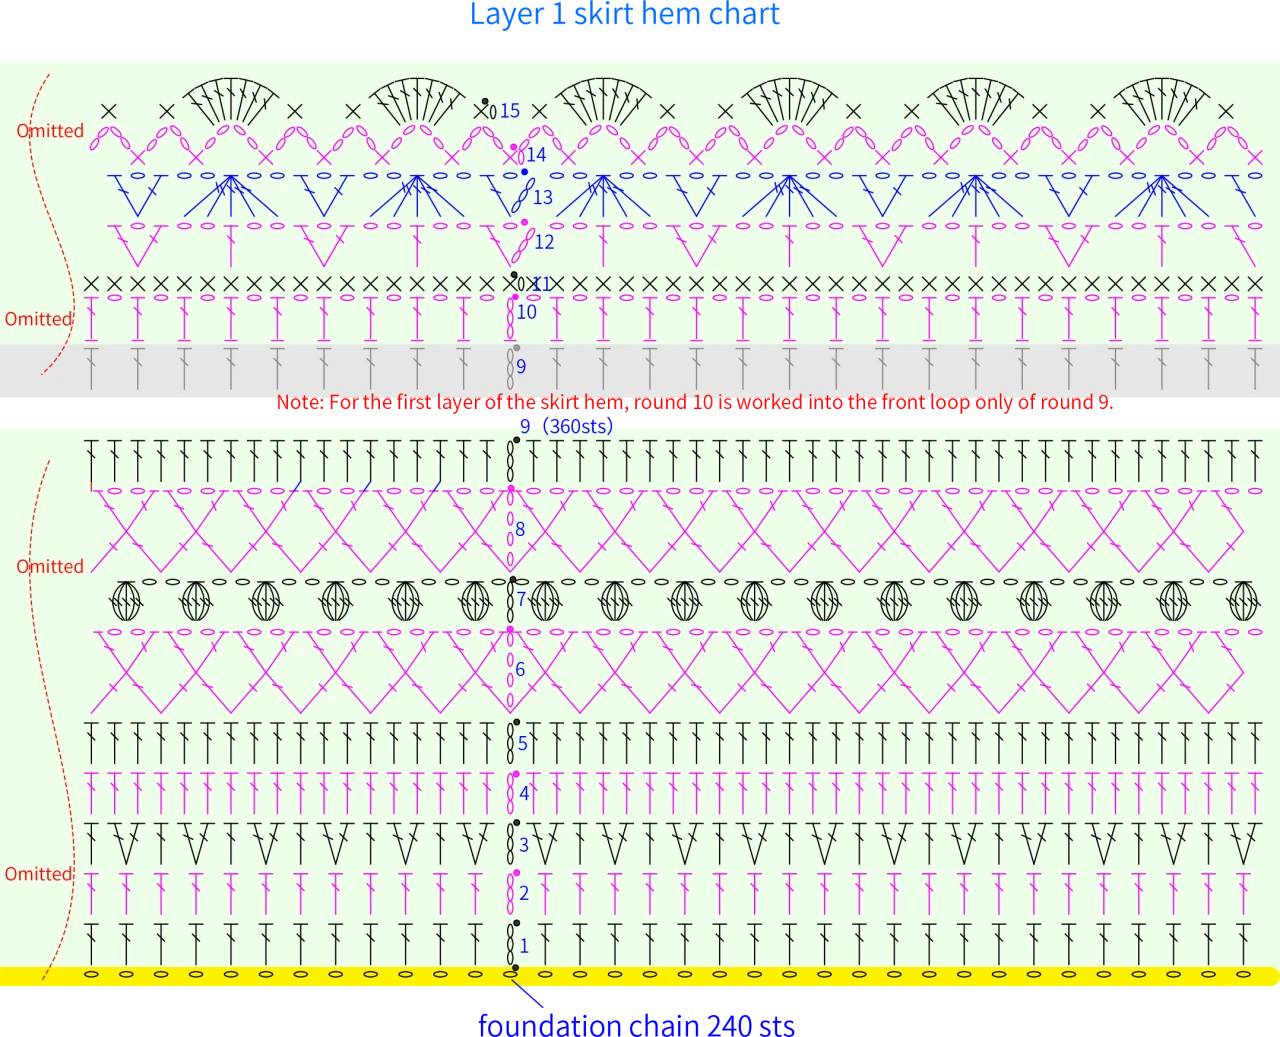
The skirt hem is started with a chain ring method, crocheting in rounds counterclockwise, dividing into multiple layers from top to bottom. Please refer to the video demonstration for more details.
Note: After completing the fifth round of the first layer of the skirt hem, you can measure the height of the fabric piece (4cm). If there's a significant difference, pay attention to adjusting your tension as you crochet later to avoid an improper length.
Part 2 Front and back piecesB 27' 25''
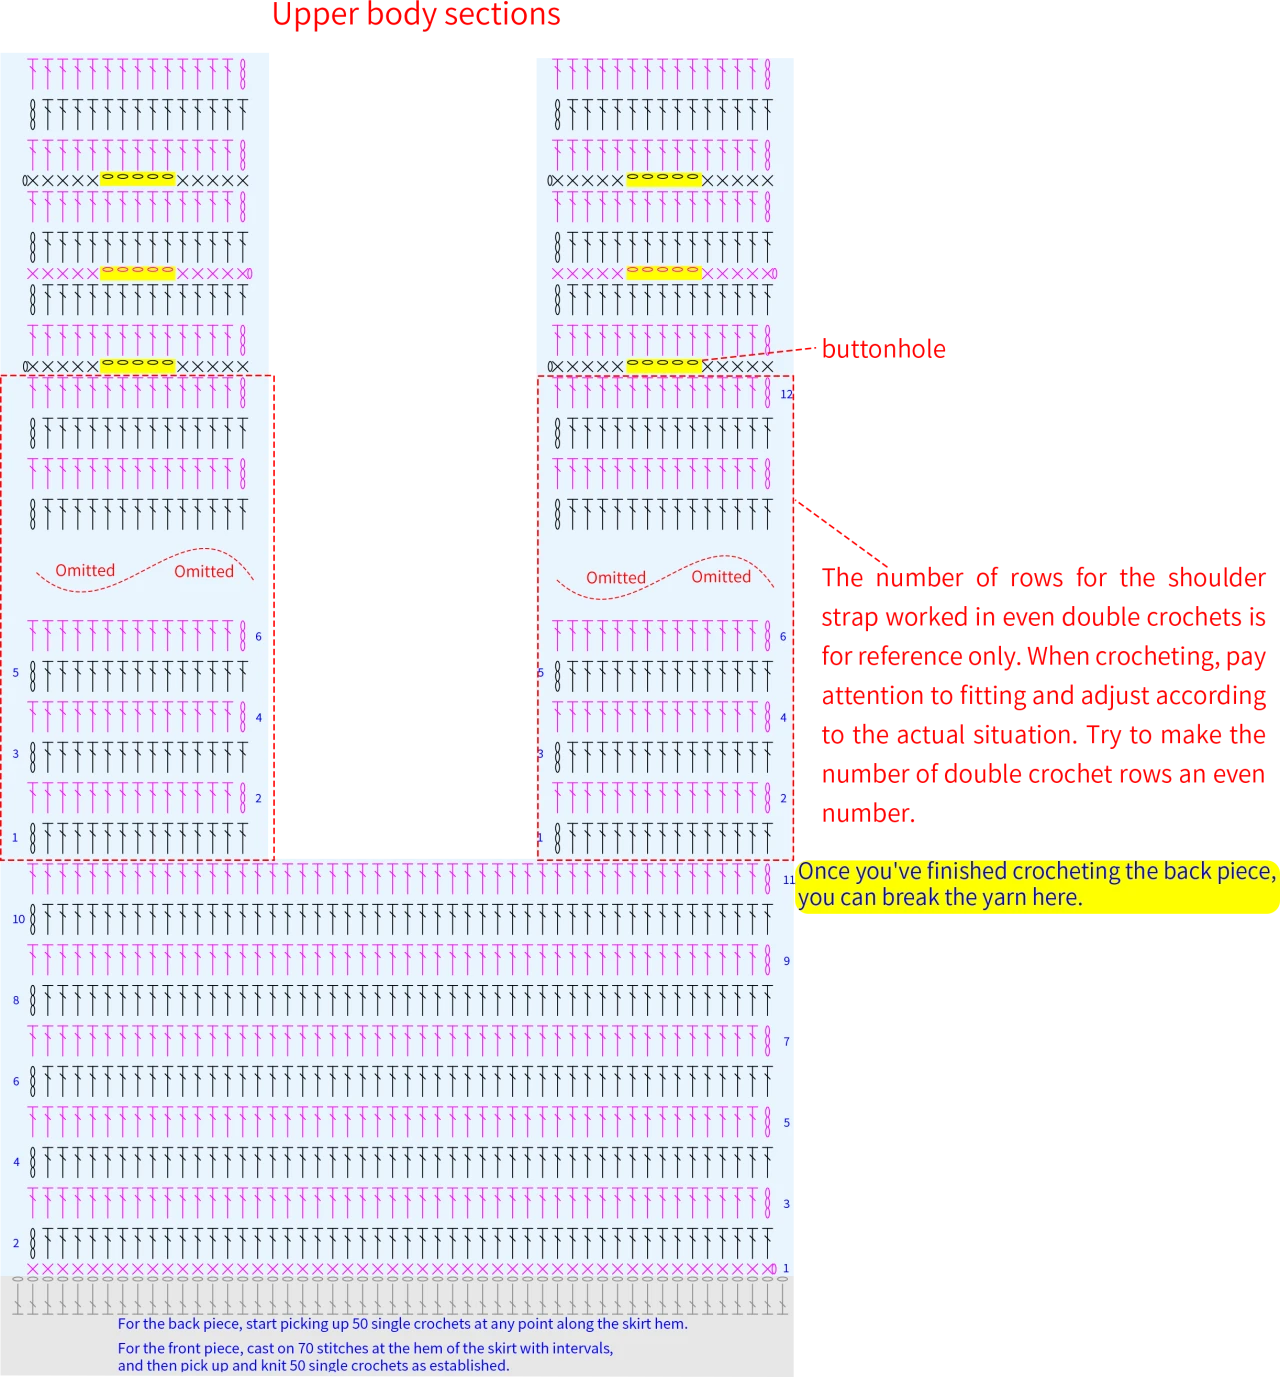
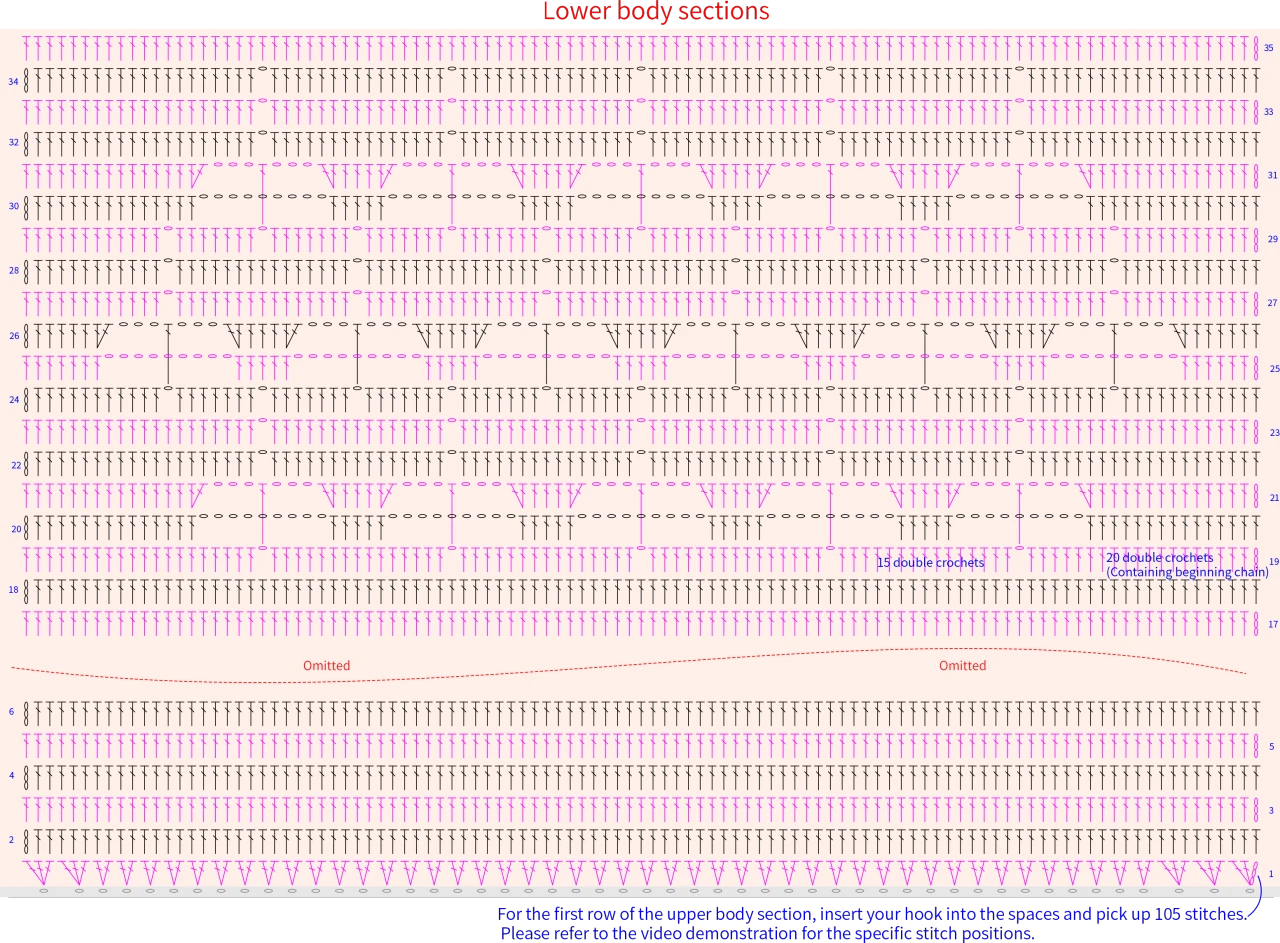
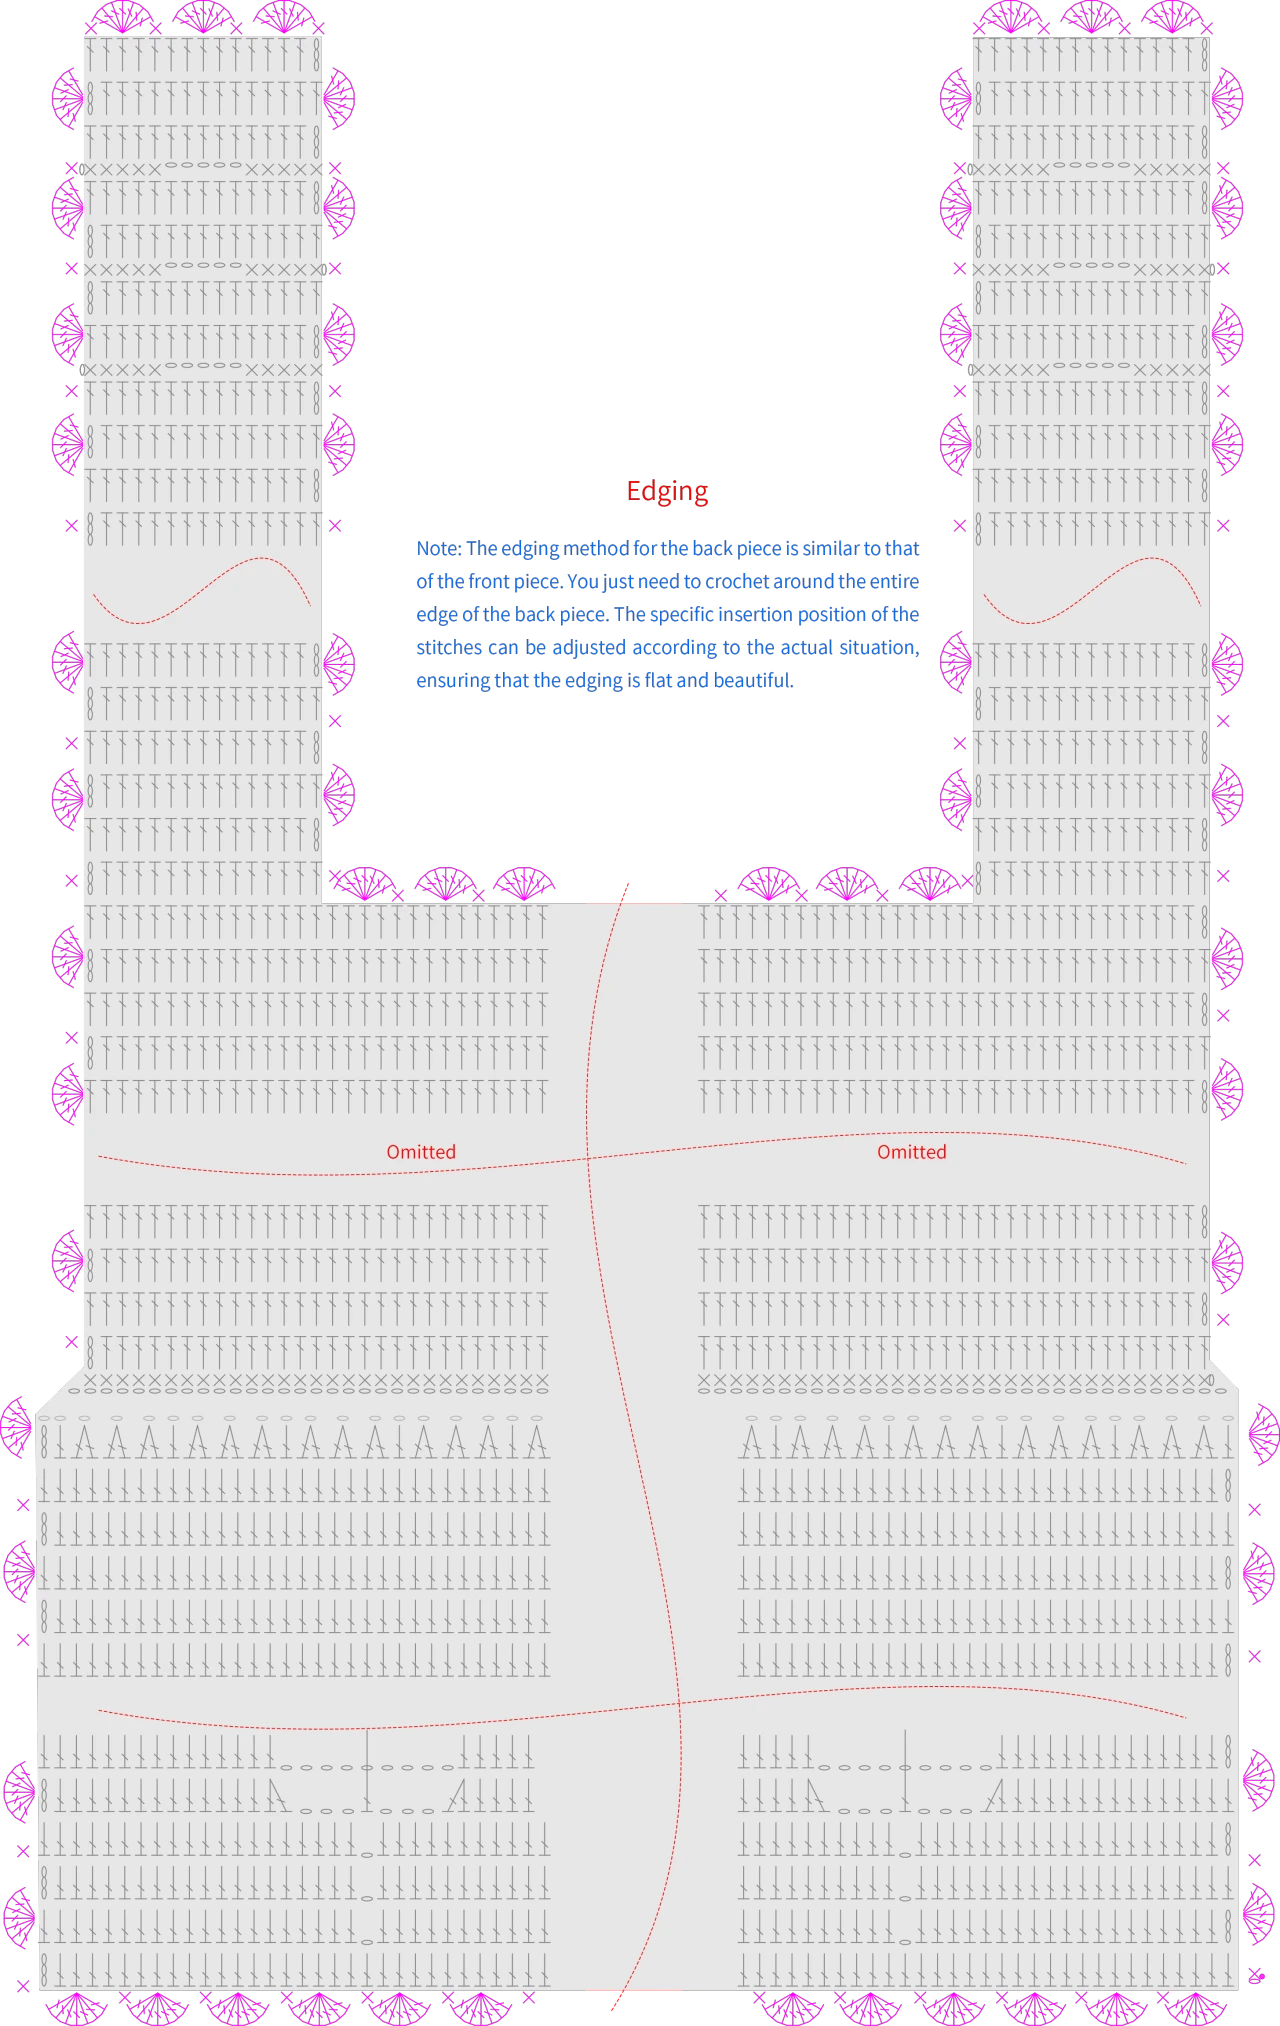
First, crochet the back piece, then crochet the front piece. Both the front and back pieces are divided into upper body sections, lower body sections, and edging. Among these, the upper body section of the front piece needs to crochet shoulder straps and leave buttonholes. Please refer to the video demonstration for more details.
Part 3 AccessoriesC
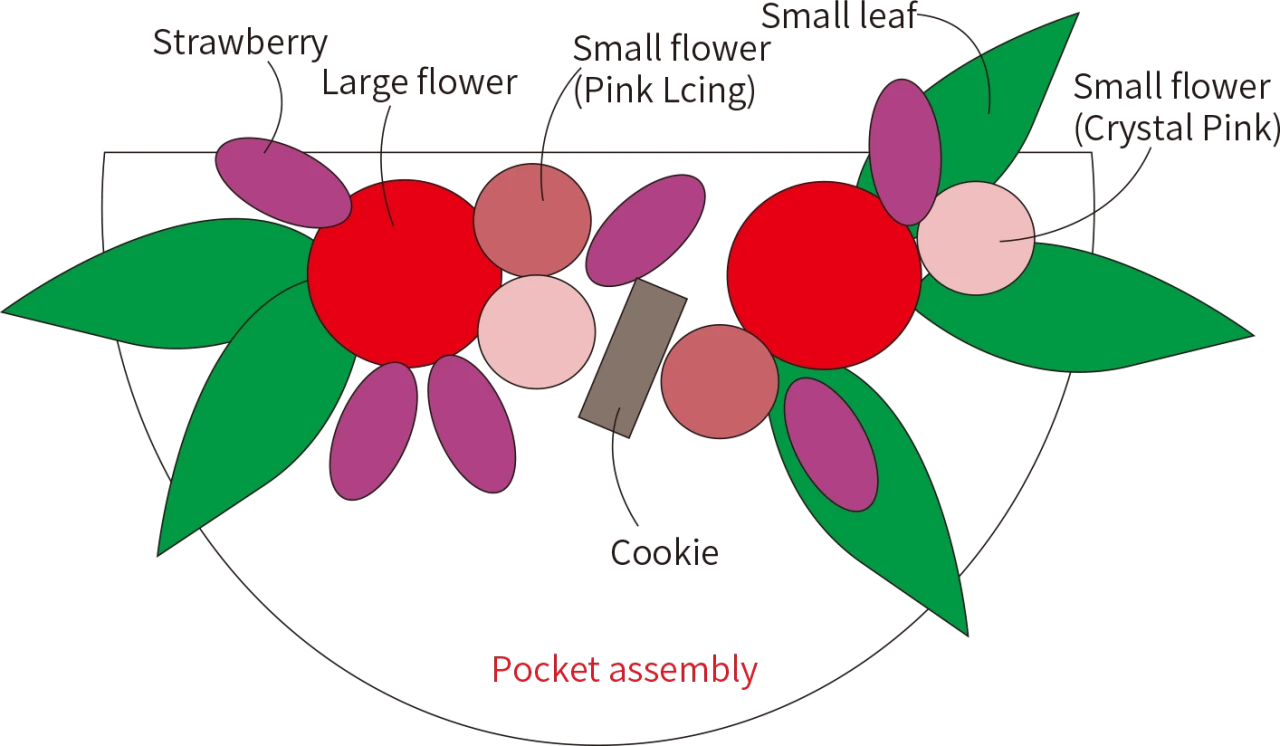
The accessories include underarm lace trim, pockets, flowers, leaves, cookies, ties, strawberries, and assembling these parts.
Step 1 Underarm lace trim (Alpaca: 1 strand) 46' 29''
The underarm lace trim is crocheted back and forth in the space left between the front and back pieces, which is the skirt hem position. Please refer to the video demonstration for more details.
Note: The exact insertion point for the single crochets in the first row can be adjusted as needed, and the number of stitches skipped in the second row can also be adjusted. Just make sure to keep the lace trim flat and beautiful.

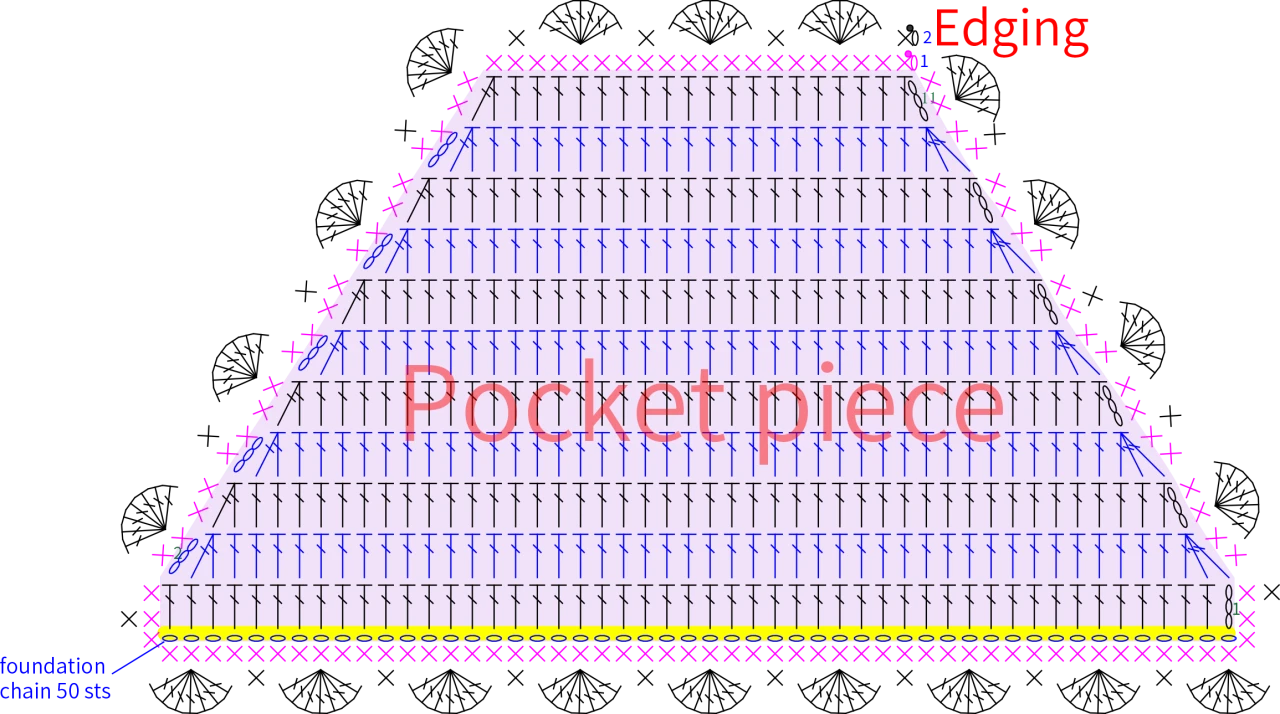
Step 2 Pocket 50' 10''
The pocket is divided into the pocket piece and the edging. Start with a foundation chain and work back and forth in rows to crochet the pocket piece, then work in rounds to crochet the edging. Please refer to the video demonstration for more details.
Note:
1. pocket color:
Black Style: 15# Black Beauty; Baby Blue Style: 09#Bleached Aqua; Lime Cream Style: 11# Lime Cream
2. The specific insertion position of the single crochet for the first round of the pocket edging can be adjusted according to the actual situation, and the number of stitches skipped for the second round can also be adjusted, just ensure the edging is flat and beautiful. After assembly, sew it onto the centered position of the front body with the same color yarn.
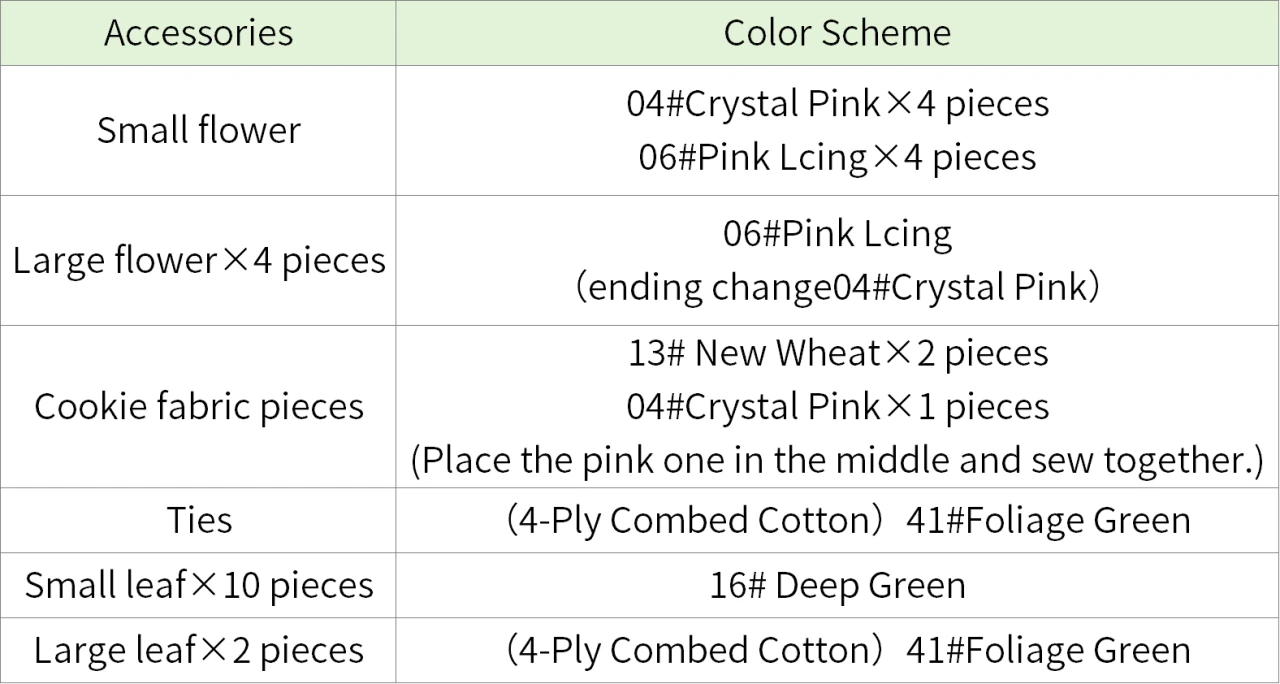
Step 3 Flowers 57' 17''
The flowers are divided into large flowers and small flowers. Both start with a foundation chain and are worked back and forth. The large flowers require switching colors. Please refer to the video demonstration for more details.
Note: Leave a 30cm yarn tail at the end of the flower for sewing.


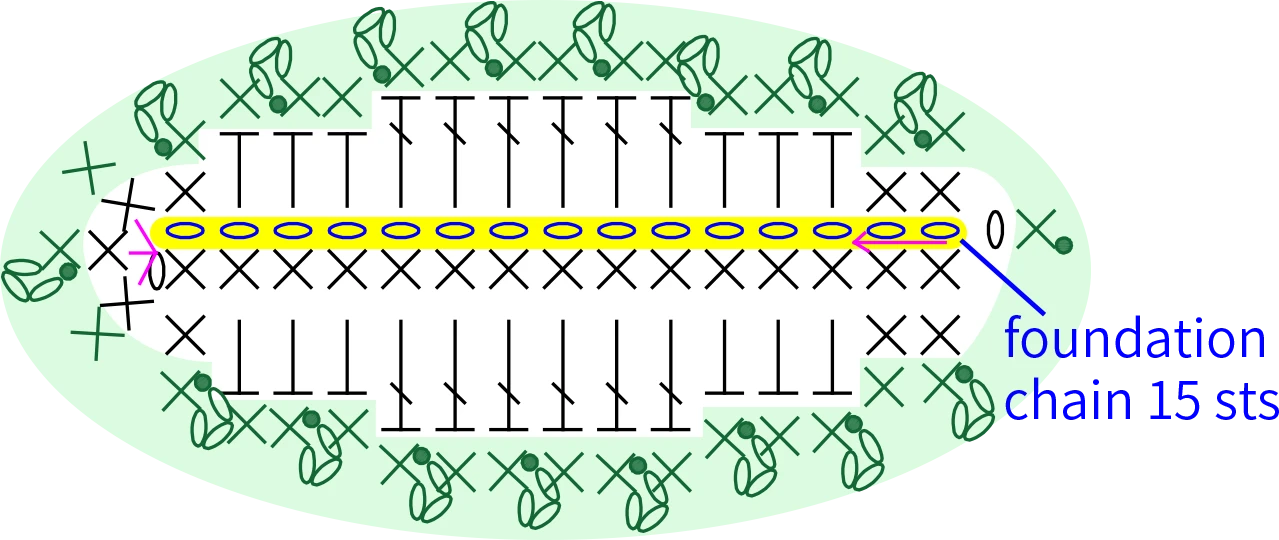
Step 4 Leaves 63' 27''
Here, there are multiple leaves, divided into large and small sizes based on the yarn. The crocheting method is identical for both: we will start with a foundation chain and work in rounds following the magic ring form a loop. Please refer to the video demonstration for more details.
Note: leave a 30 centimeters or so yarn tail at the end for sewing.
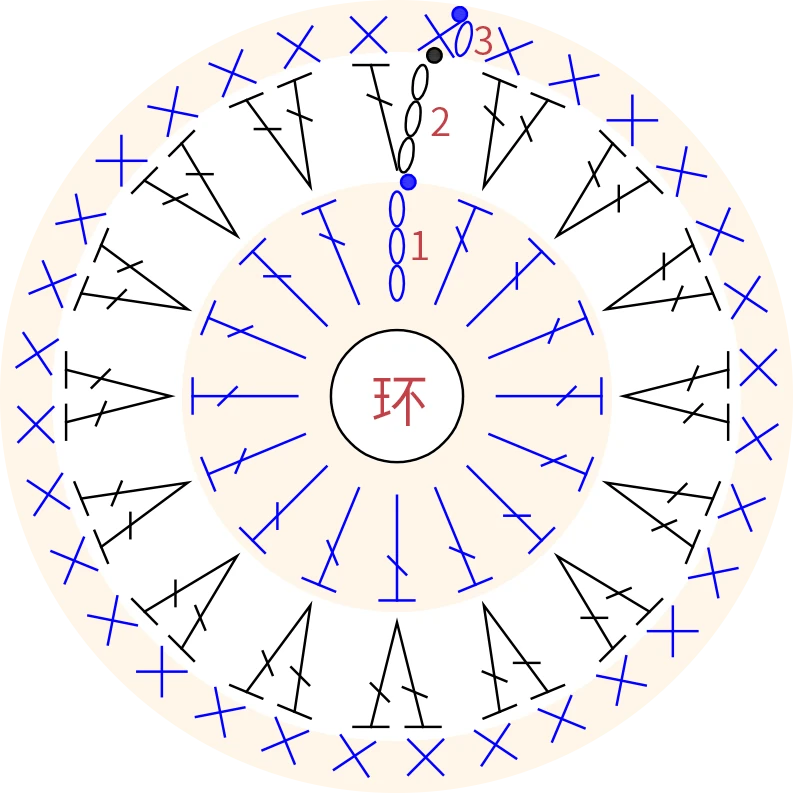
Step 5 Cookie 68' 19''
The cookie is divided into cookie fabric pieces and sewing. There are 3 cookie fabric pieces, each in a different color. All are crocheted in rounds counterclockwise starting with a magic ring method. Please refer to the video demonstration for more details.
Note: For one of the outer cookie pieces, leave a yarn tail of about 30 centimeters at the end for sewing.
Step 6 Ties 71' 57''
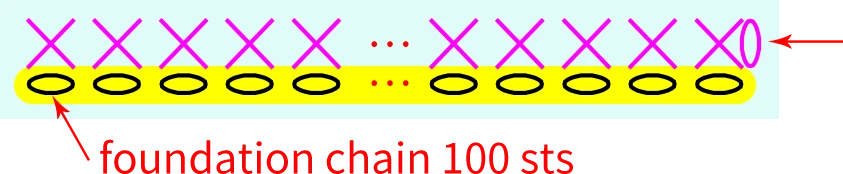
The ties total 4 strands, all starting with a foundation chain, then working back and forth in single crochets. If you want to adjust the length of the ties, you can modify the number of chains in the starting chain. Please refer to the video demonstration for more details.
Ties (4 pieces): Cast on 100 stitches with foundation chain, the specific length can be adjusted as needed, leave a 20cm yarn tail at the end for sewing.
Step 7 Strawberry 72' 26''
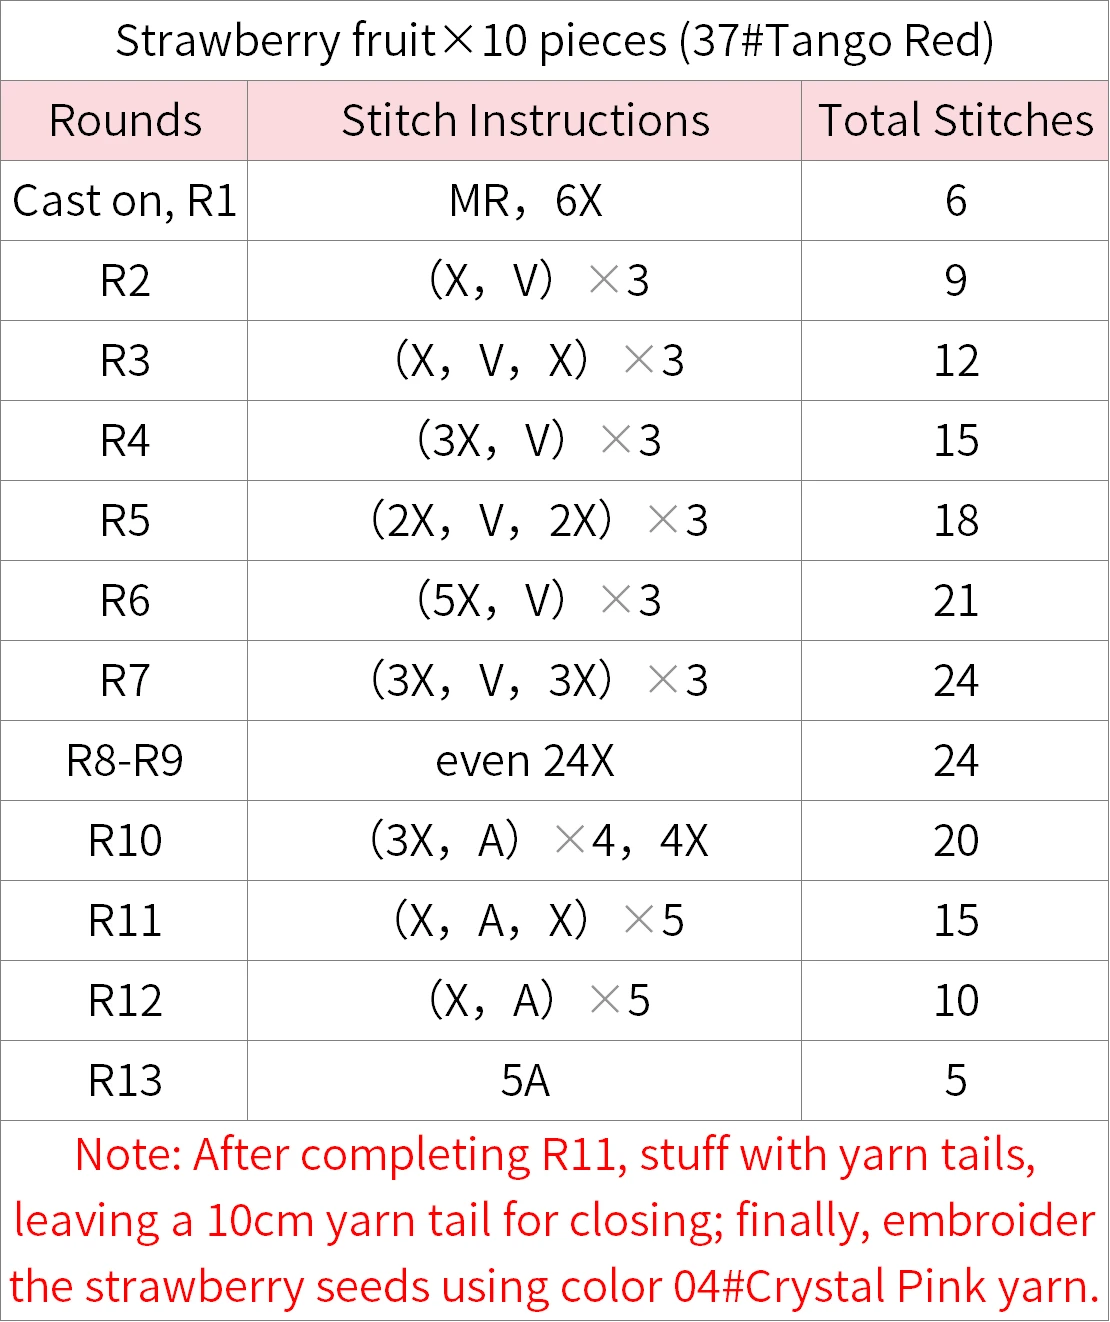
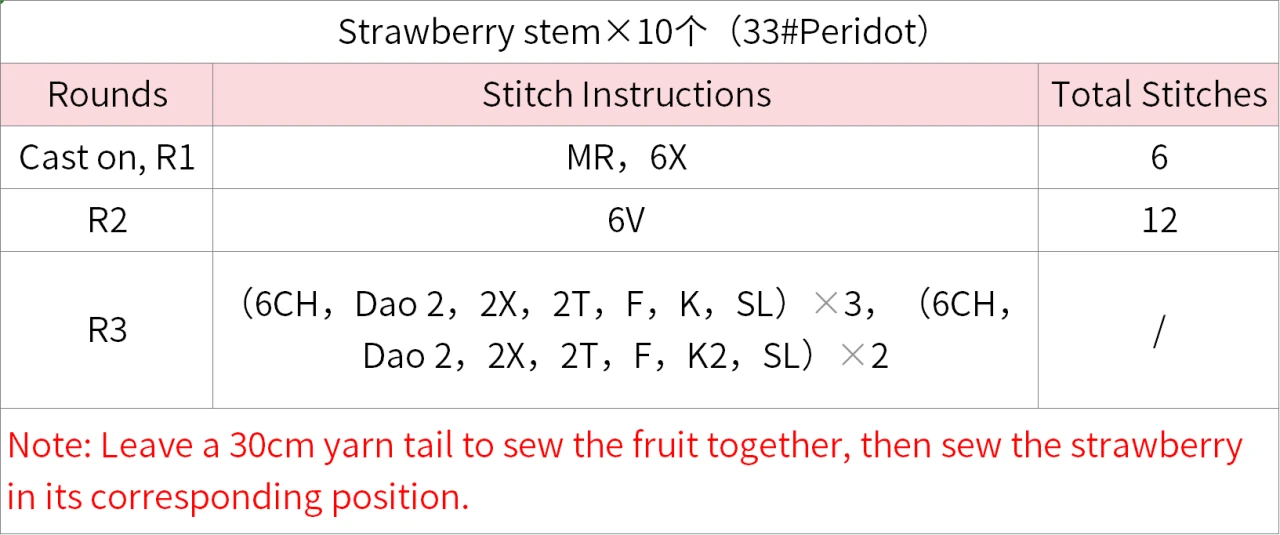
The strawberry is divided into the strawberry fruit and the strawberry stem. For the fruit, start with a magic ring and crochet in rounds counterclockwise, stuff during the process, and then embroider strawberry seeds after completion. For the stem, begin with a magic ring, crochet in rounds, and then sew it onto the fruit after completion. Please refer to the video demonstration for more details.
Note: When crocheting in rounds, each round begins with a turning chain and ends with a slip stitch join. The turning chain for single crochet and the closing slip stitch do not count as a stitch.
Step 8 Assembly 87' 02''
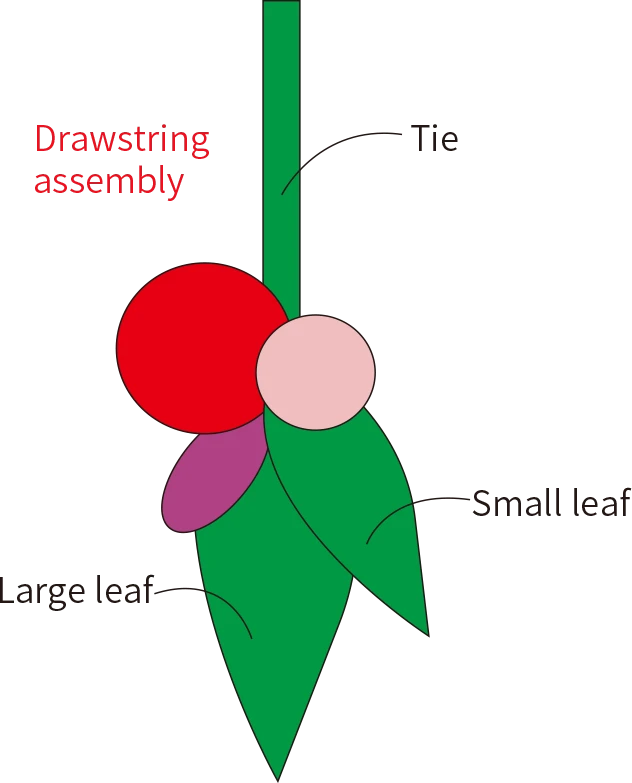
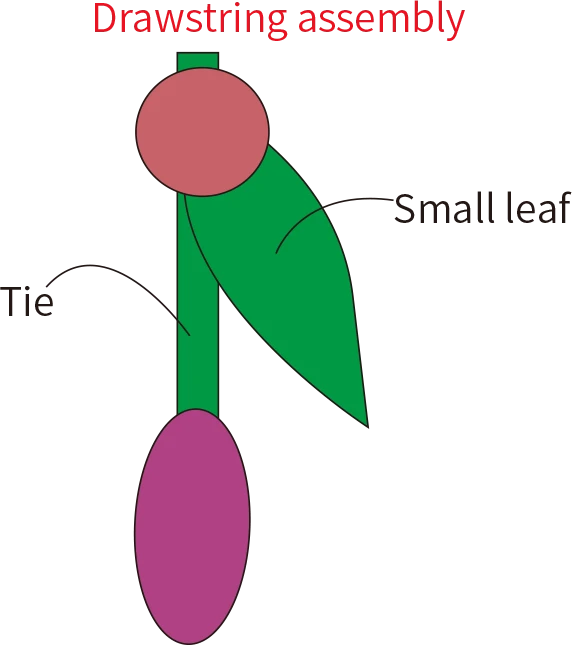
The assembly is divided into three parts: drawstring, pockets, and buttons. You can refer to the assembly diagram for the layout. Please refer to the video demonstration for more details.
Made by the community