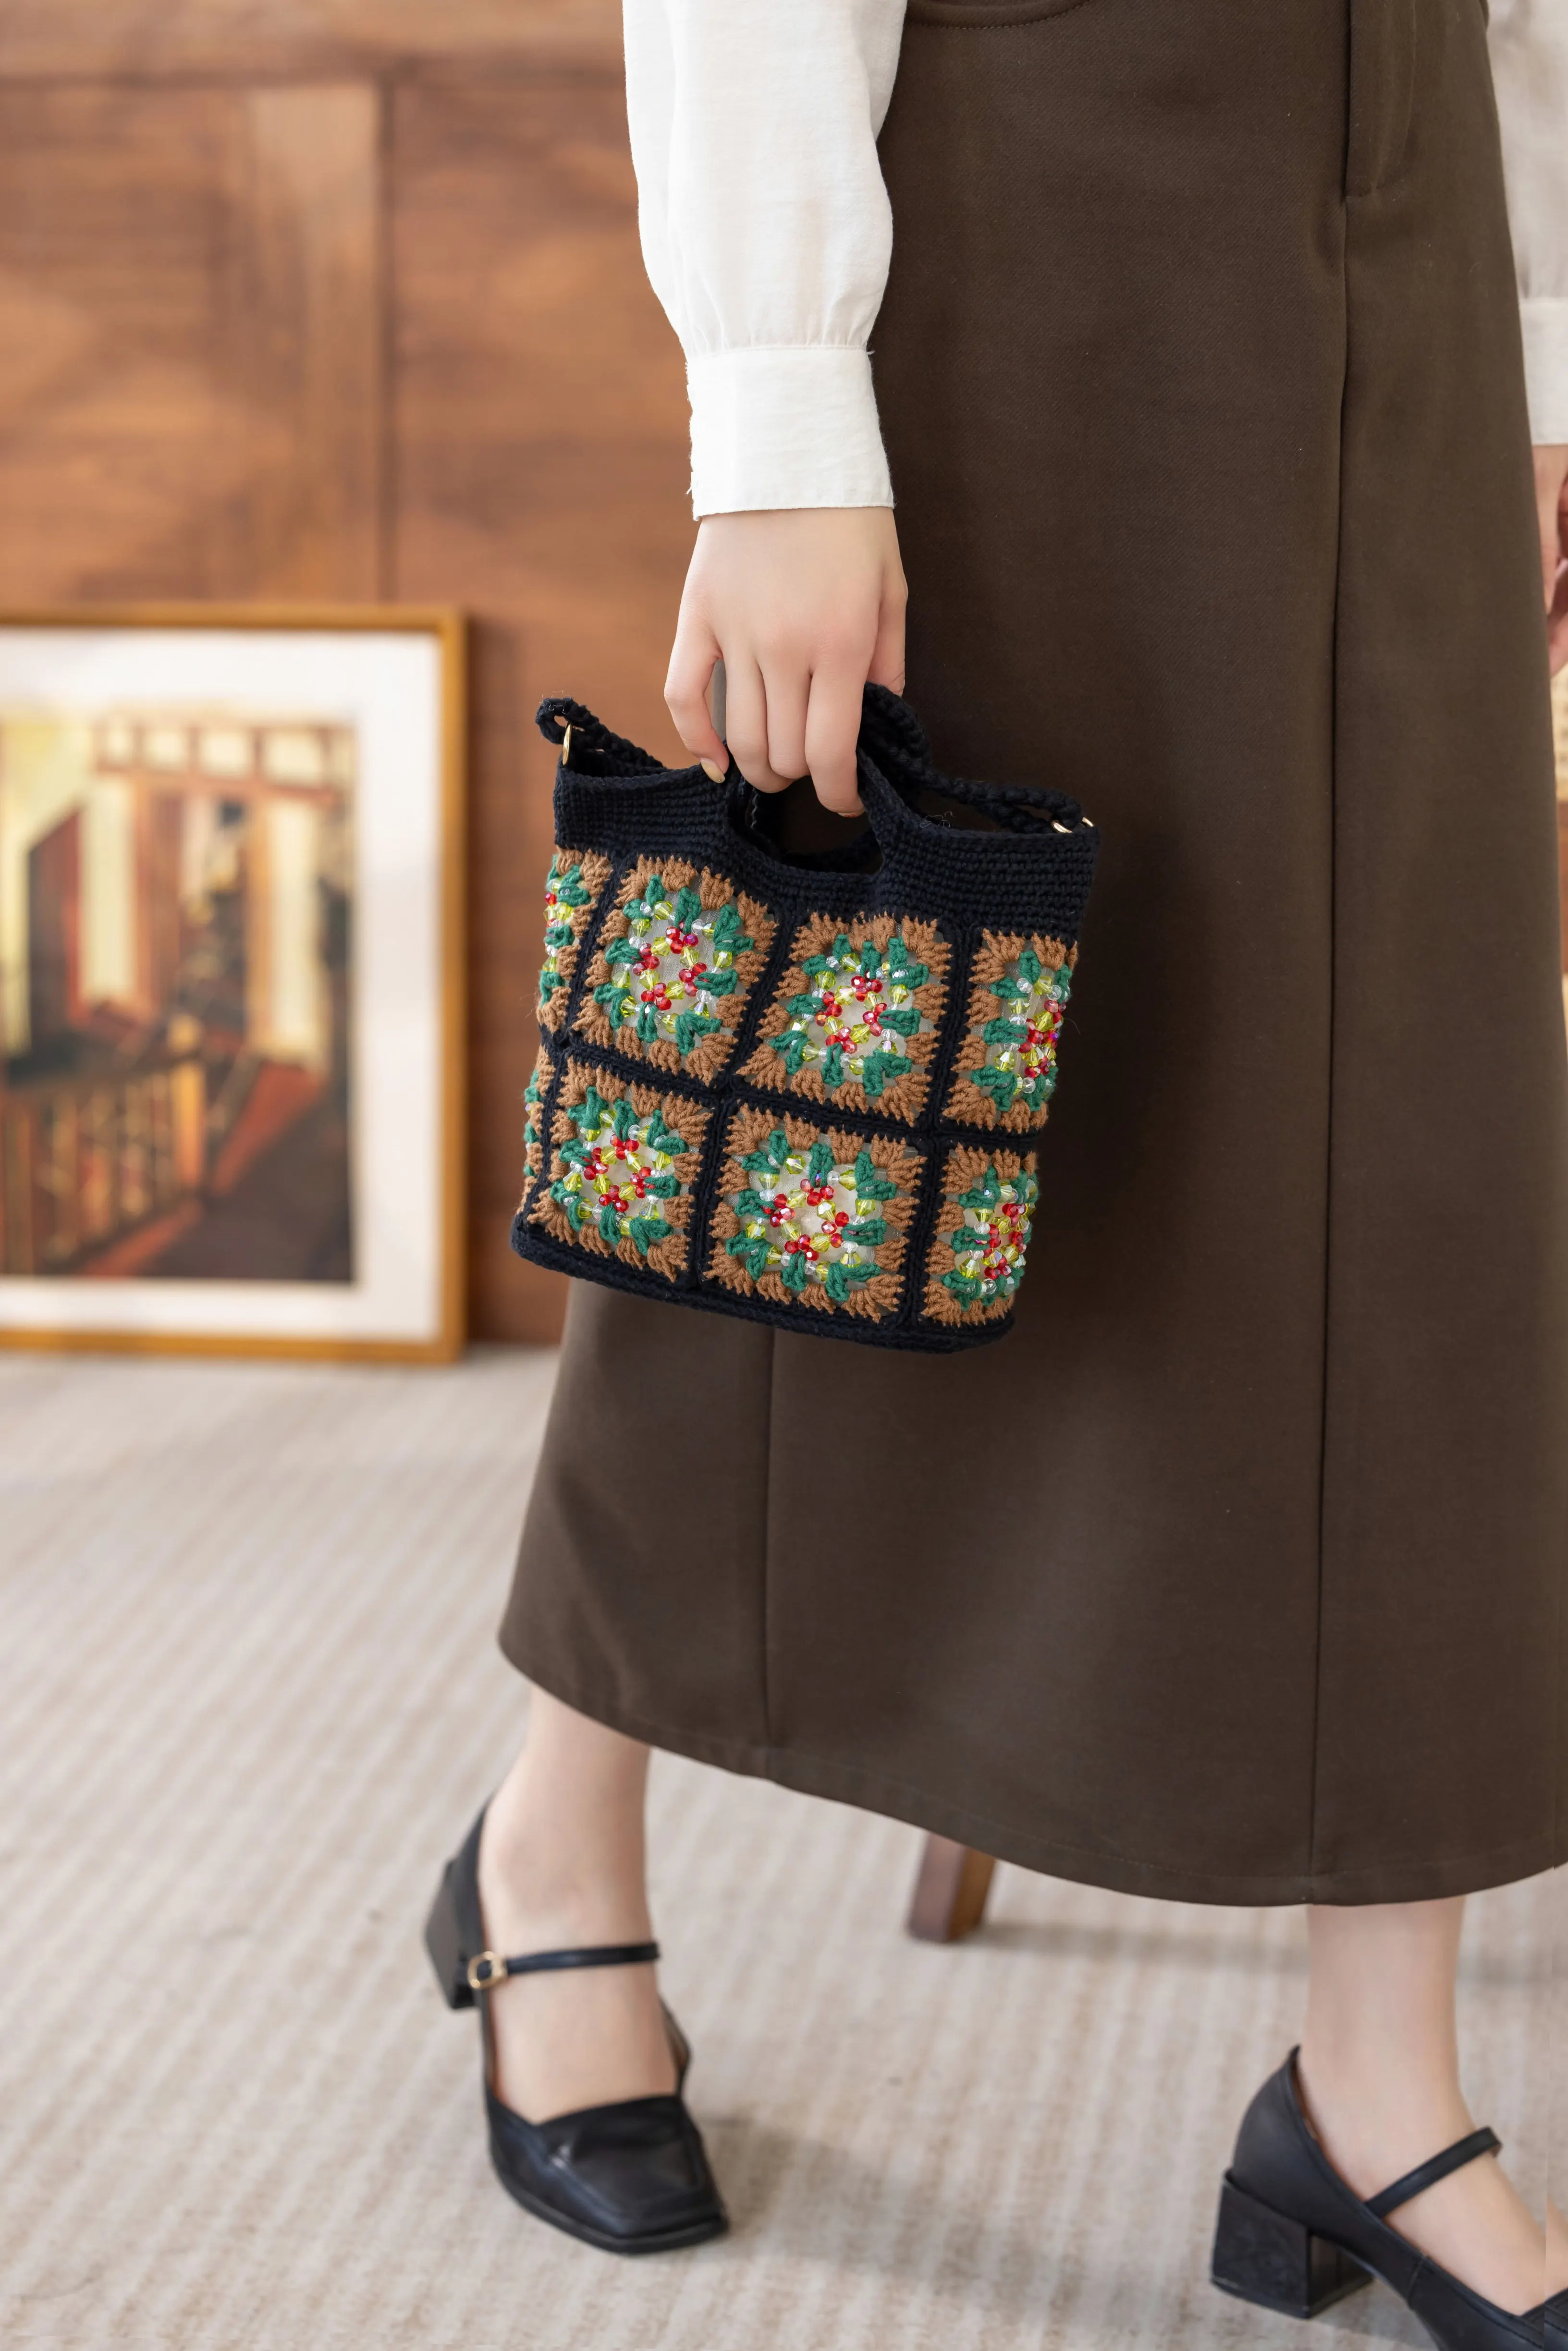
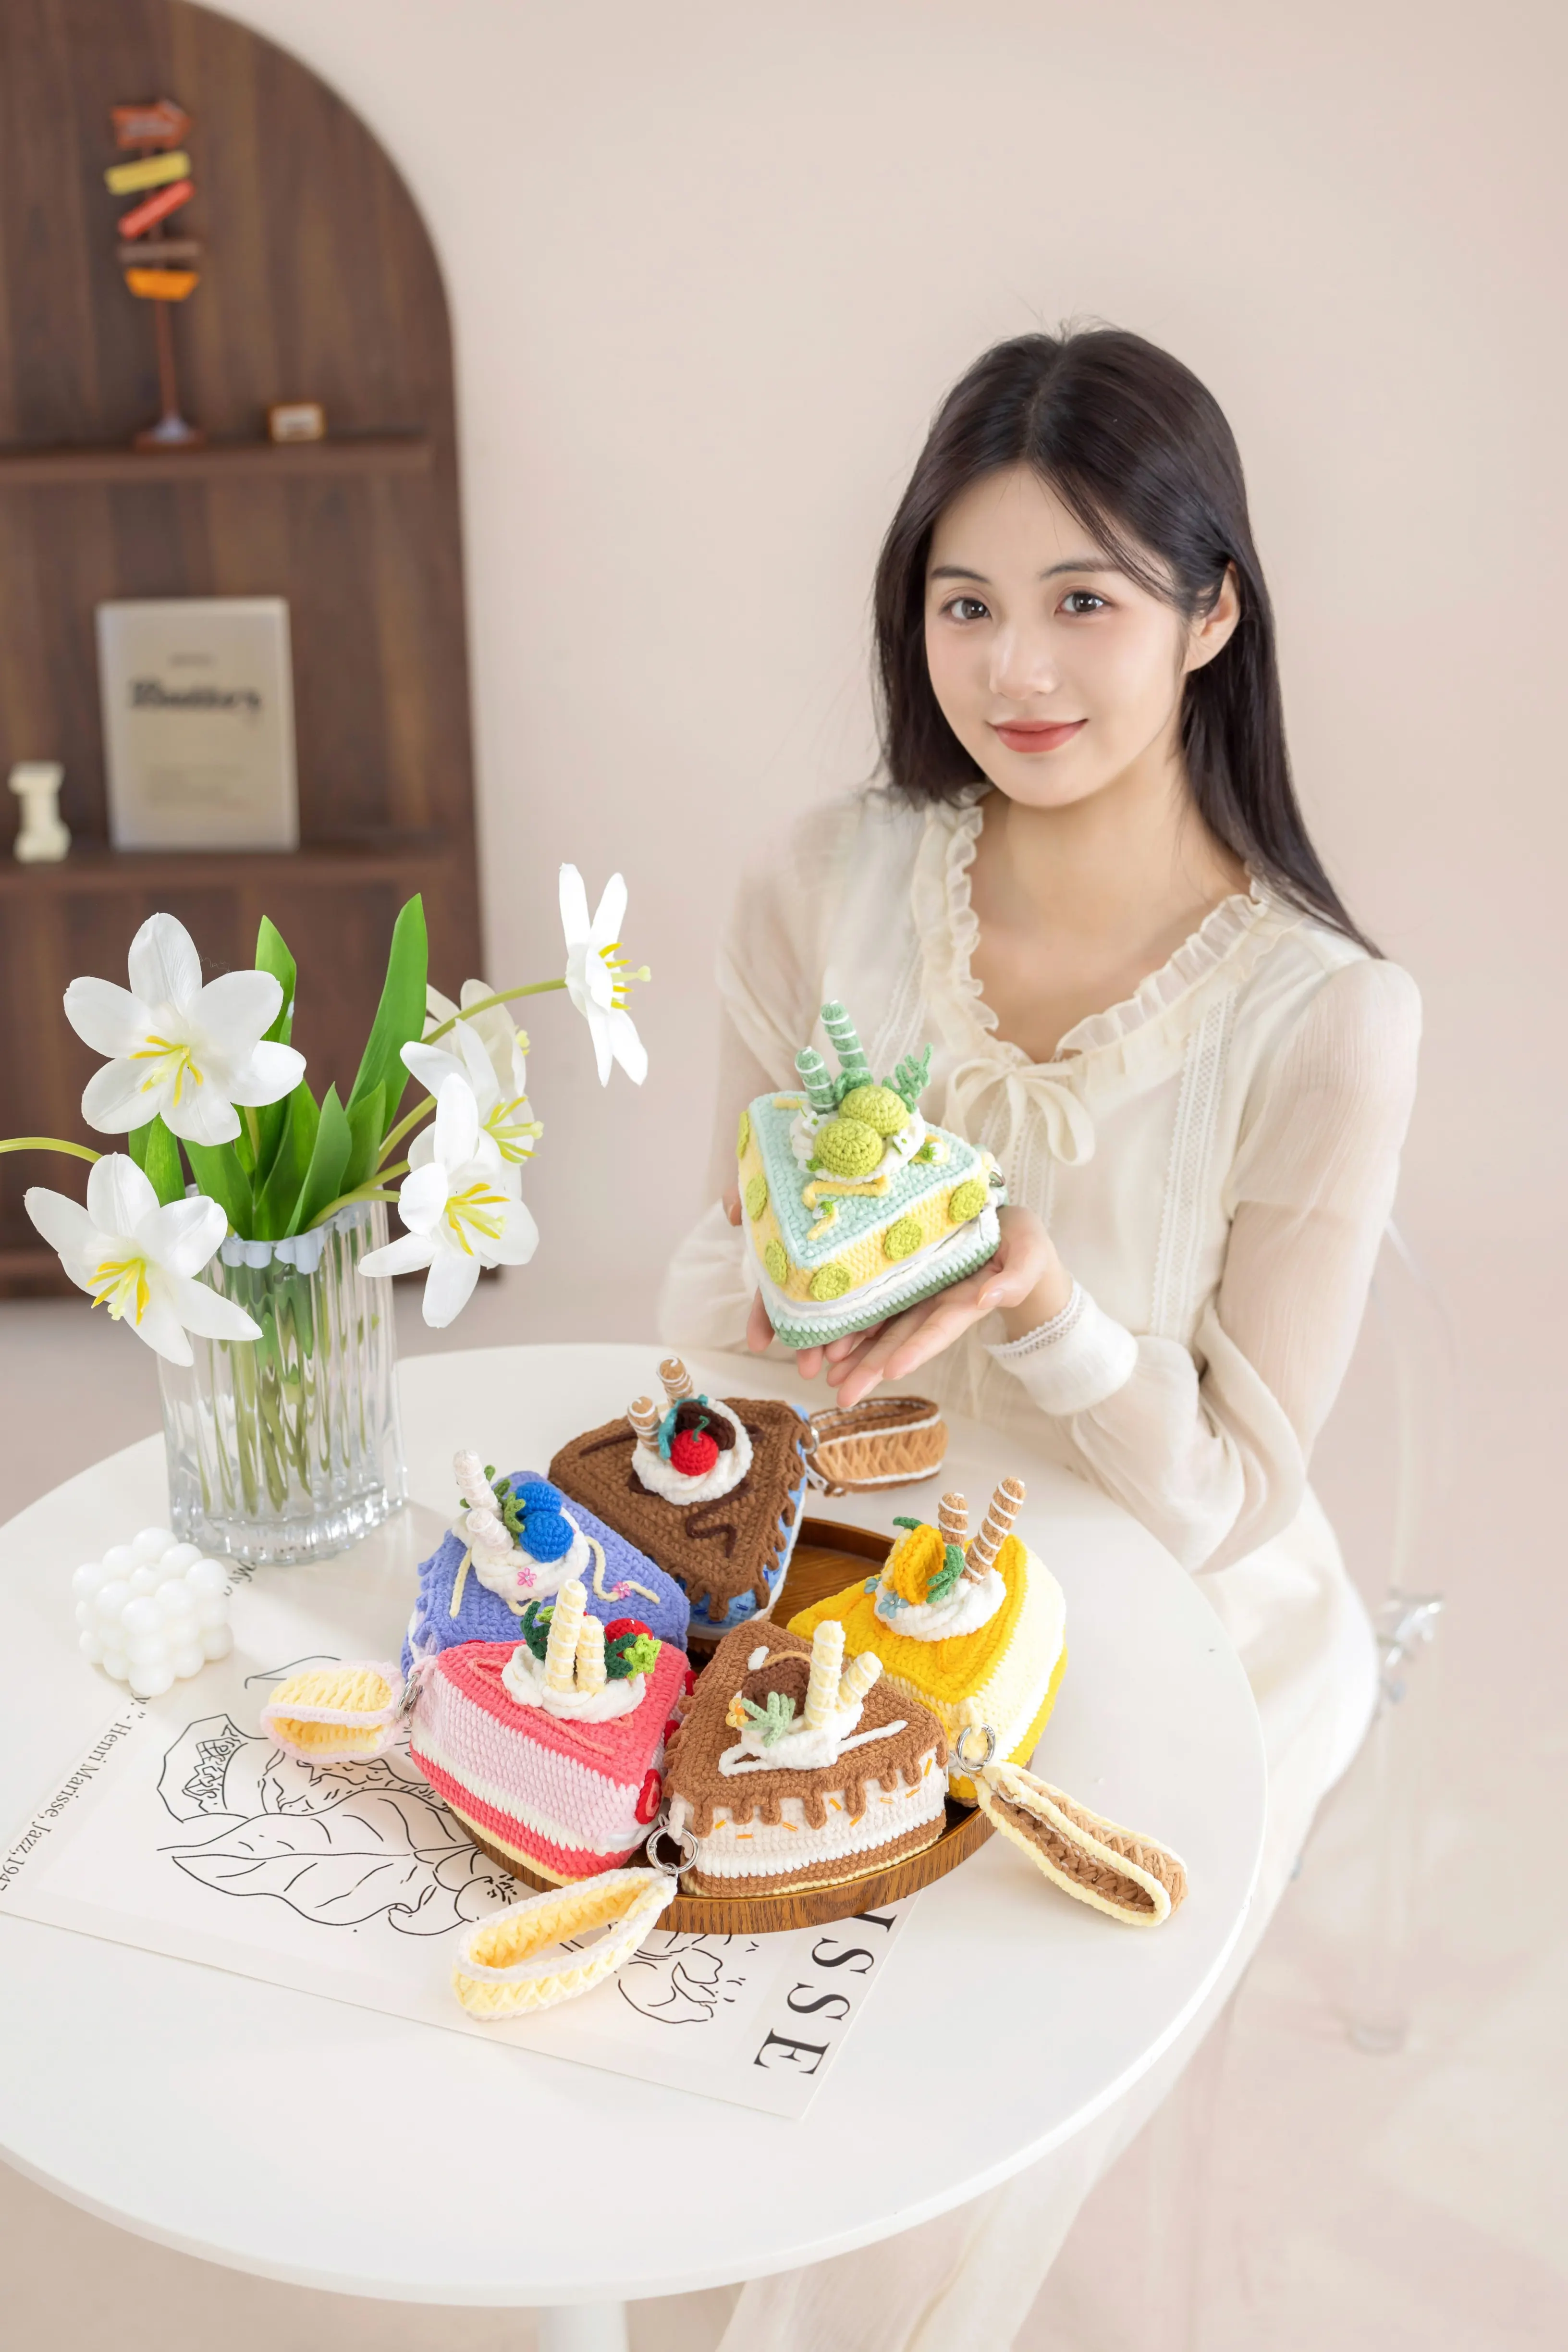
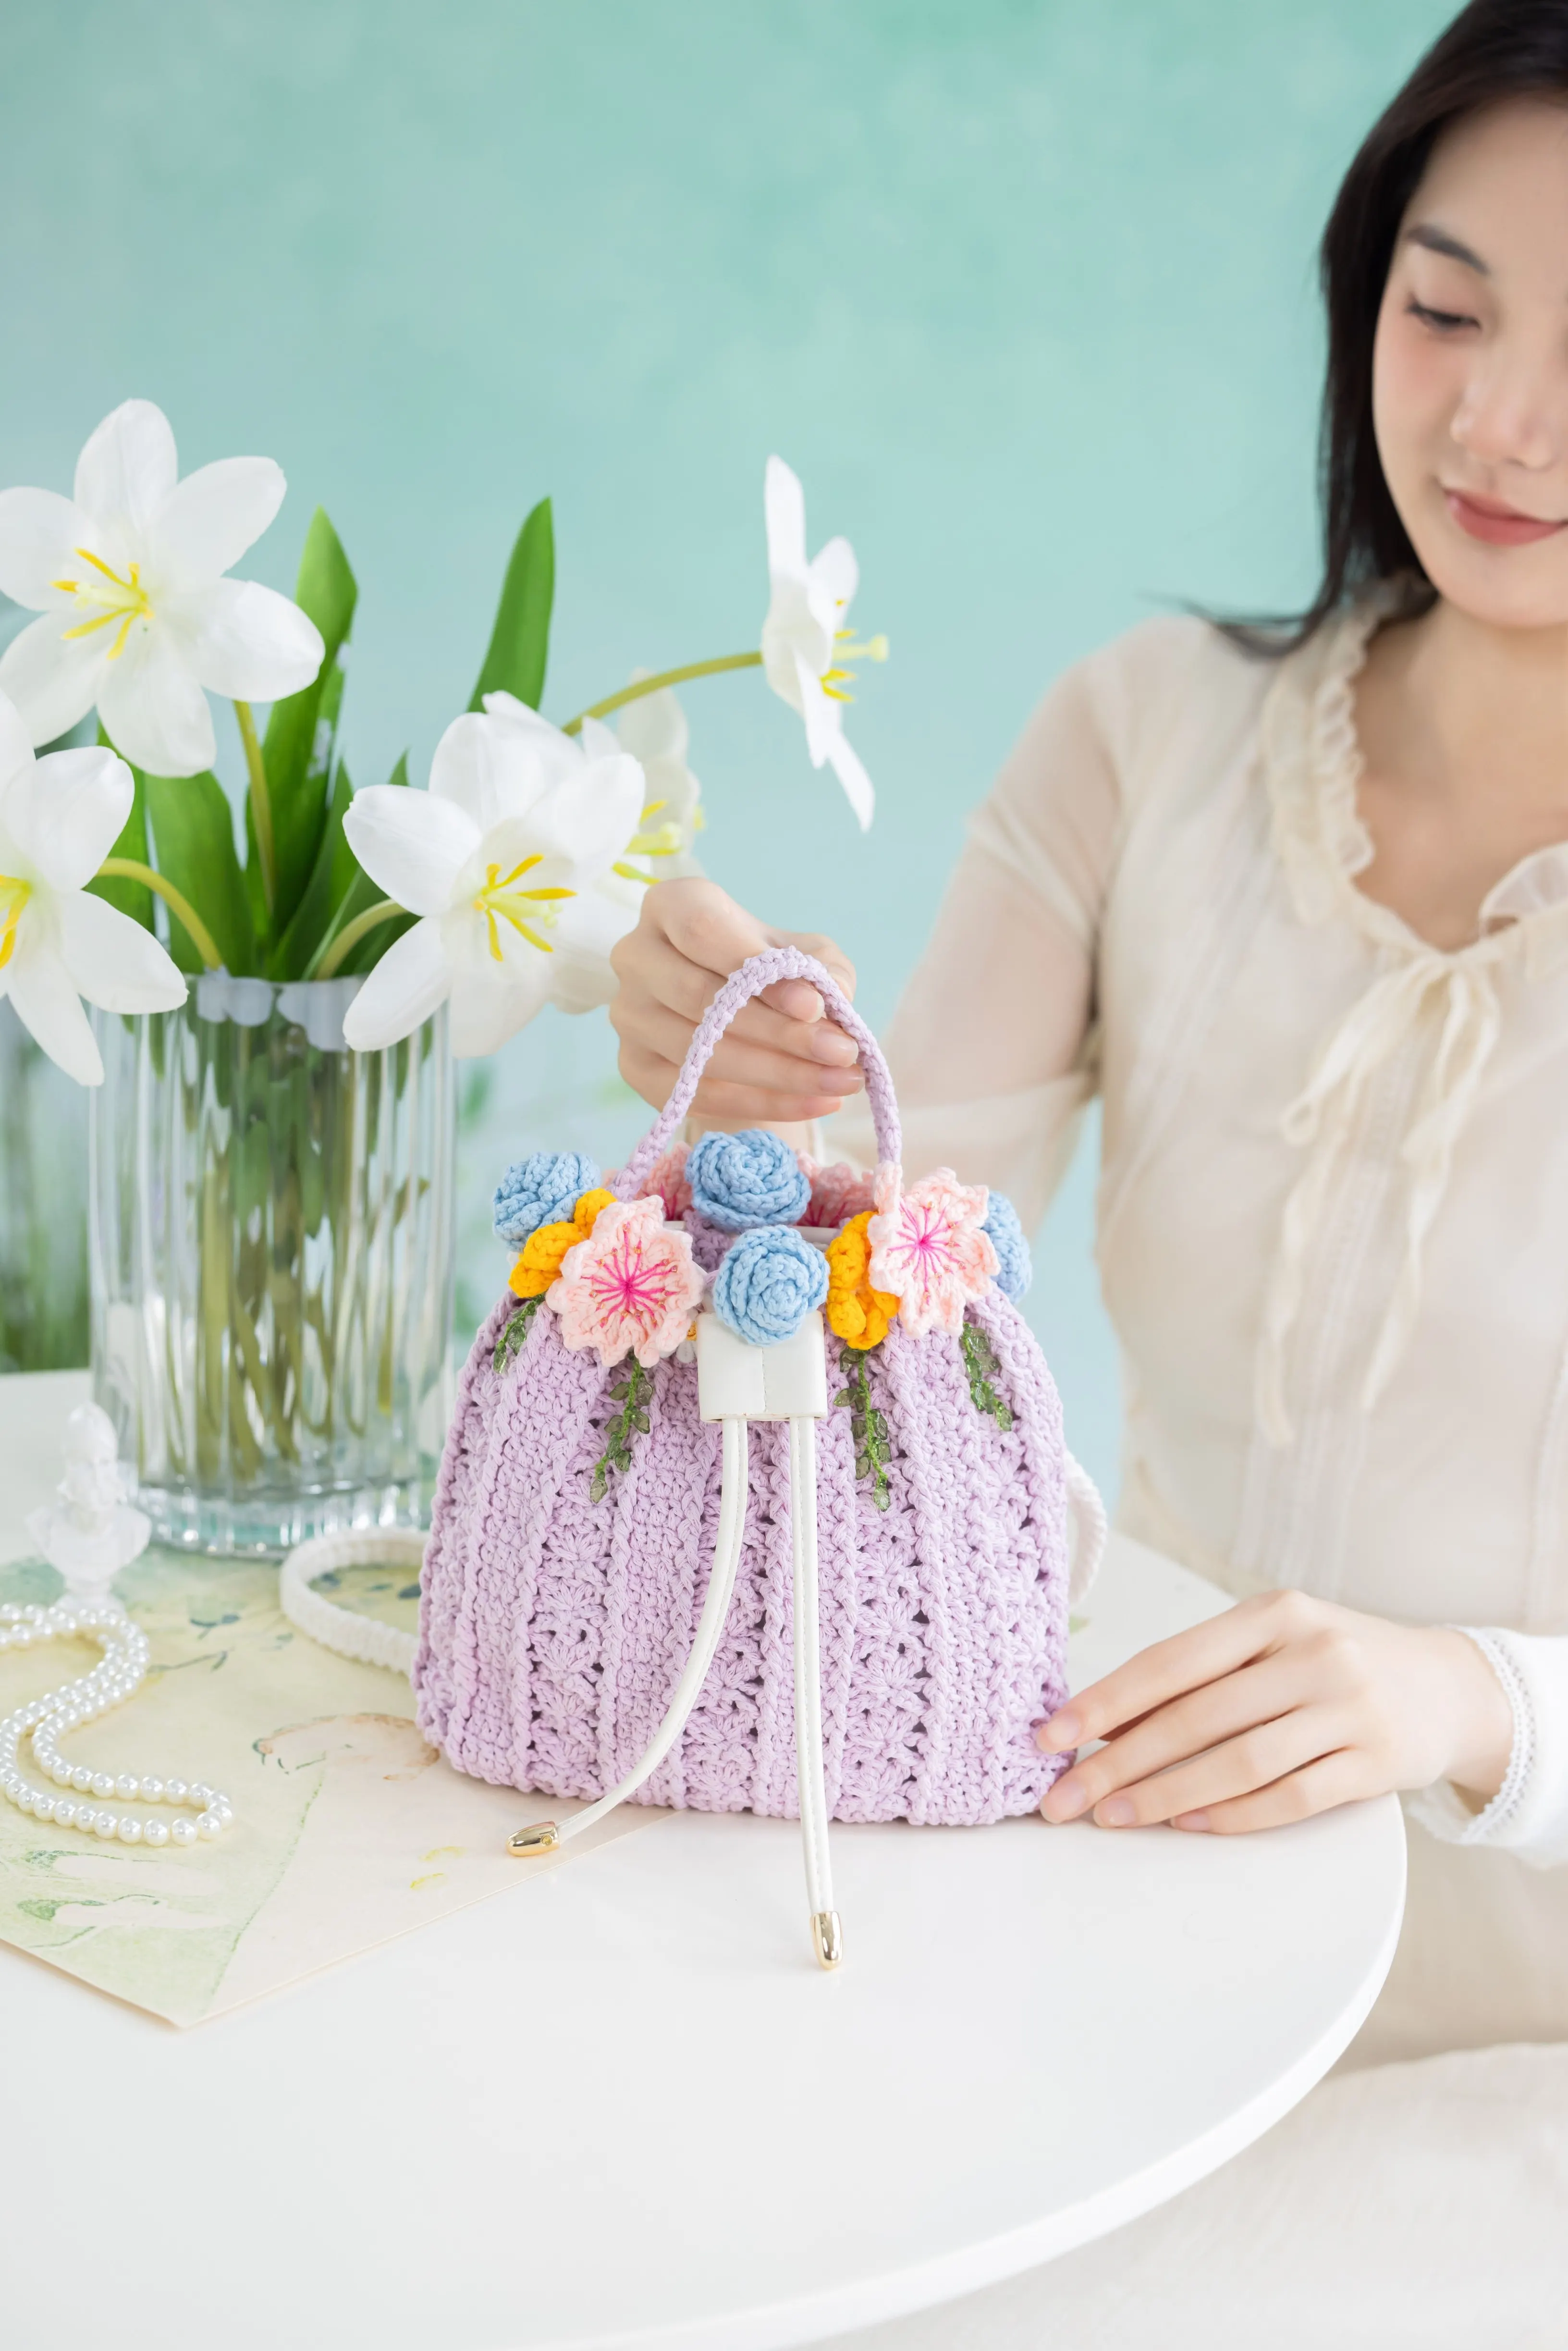
Bag
Aimer Bag
Project preview
See the finished project
Pattern format
Instructions
| Style | Yarn | Color |
|---|---|---|
| Yu Mu double shoulder bag | Combed 8# Lace |  409#Jadesheen 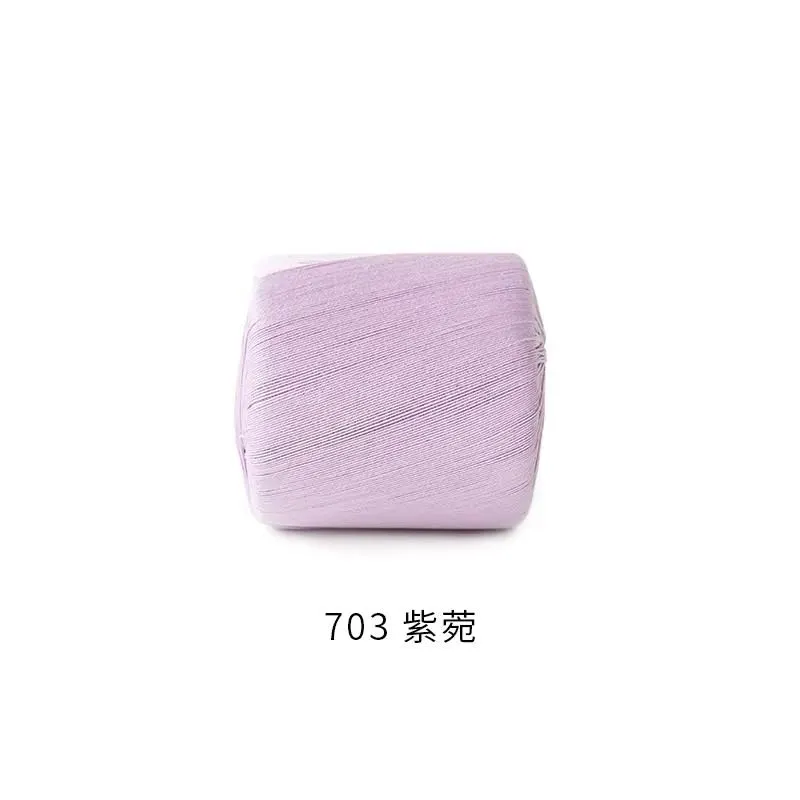 703#Mauve Mist 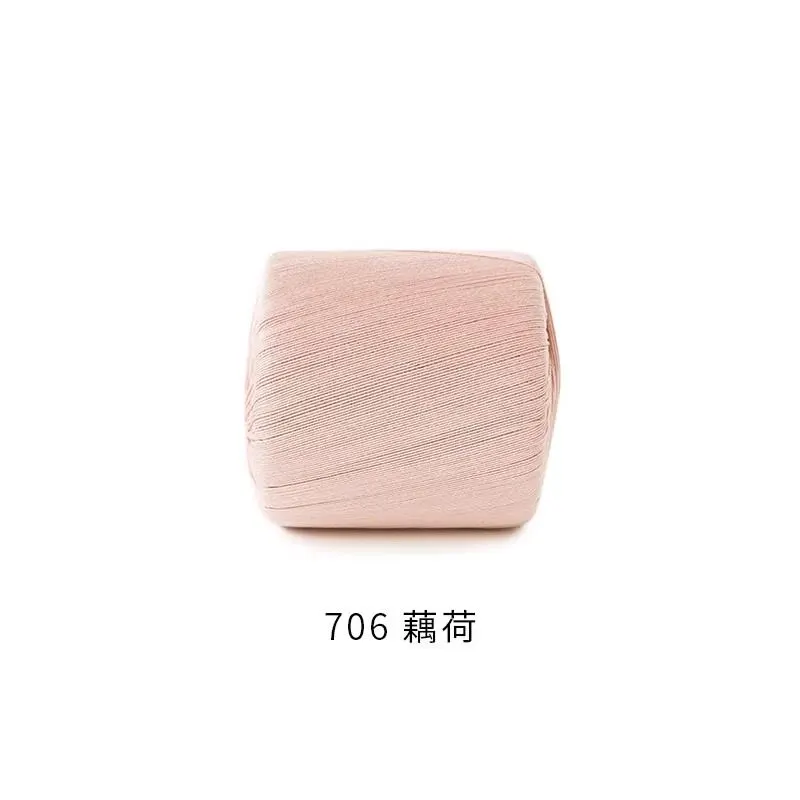 706#Silver Pink |
| 5-Ply Combed Cotton & Acrylic Fibre Hand Knitting Yarn |  02#Cannoli Cream  67#Chalk Pink |
This bag is divided into the bottom, body, lid, waffle pattern fabric piece, side pocket, decorations, and accessories.
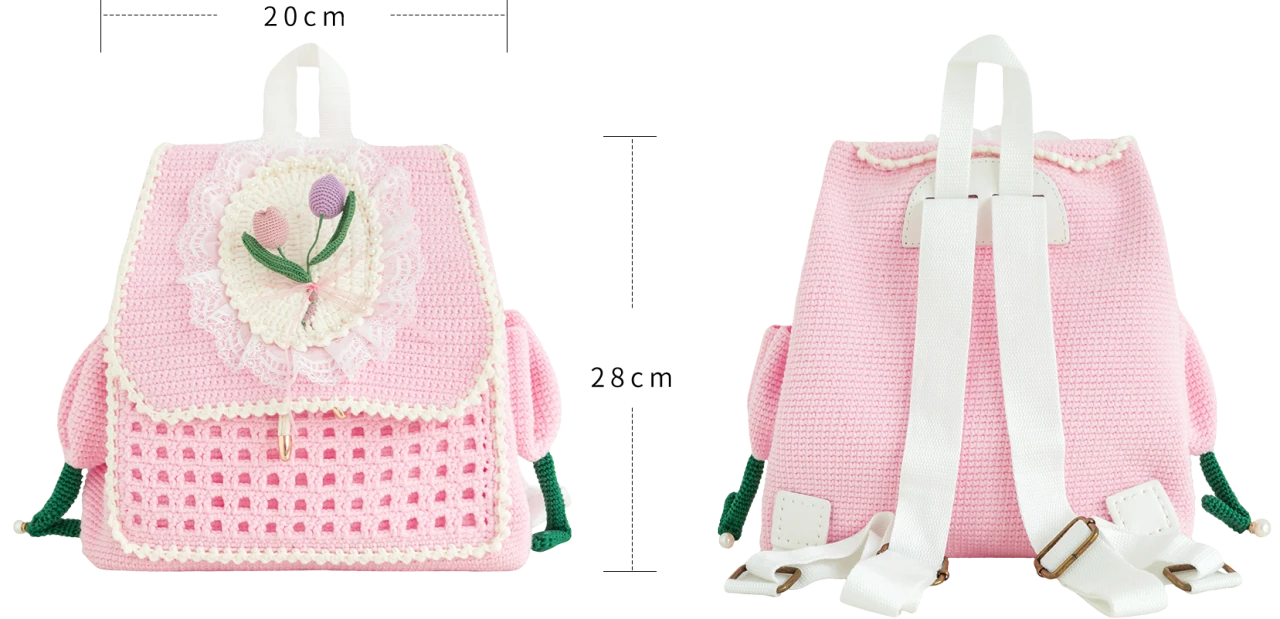
Due to variations in individual tension, the size of the sample is for reference only.
Materials: 5-Ply Combed Cotton & Acrylic Fibre Hand Knitting Yarn(3.0mm hook), Combed 3# Lace(1.75mm hook), Combed 8# Lace(1.5mm hook)
Crochet Hook: 3.00 mm , 1.75mm, 1.5mm Crochet Hook

Chart Key









ABBREVIATIONS
V = sc2-in-12 single crochets into the same stitch
CHchain
MRadjustable magic ring
RRound
(...)×6crochet item in the parentheses six times
Kskip
Dao2start in 2nd CH from the hook
Xsingle crochet
Note:
1. This pattern is making in Chinese crochet pattern terms, and the stitch name is written using American terminology. All measurements in charts are in cm.
2. Working in joined round: When crocheting in rounds without further guidance, working in closed rounds, start each round with a set number of beginning chains and close with a slip stitch. The beginning chain preceding a single crochet and the slip stitch used for joining rounds are not included in the total stitches.
Part 1 Bag Bottom, Bag Body
(5-Ply Combed Cotton & Acrylic Fibre Hand Knitting Yarn, 67#Chalk Pink)
The bottom of the bag is started with a foundation chain and worked back and forth. After completion, cut the mesh board according to the fabric size, then crochet the edging in rounds, and finally sew the mesh board on the wrong side of the fabric edge. The body of the bag continues crocheting from the bottom, first in spirals, then with slip stitch crochet, and leave space for buttonholes in the last few rounds.
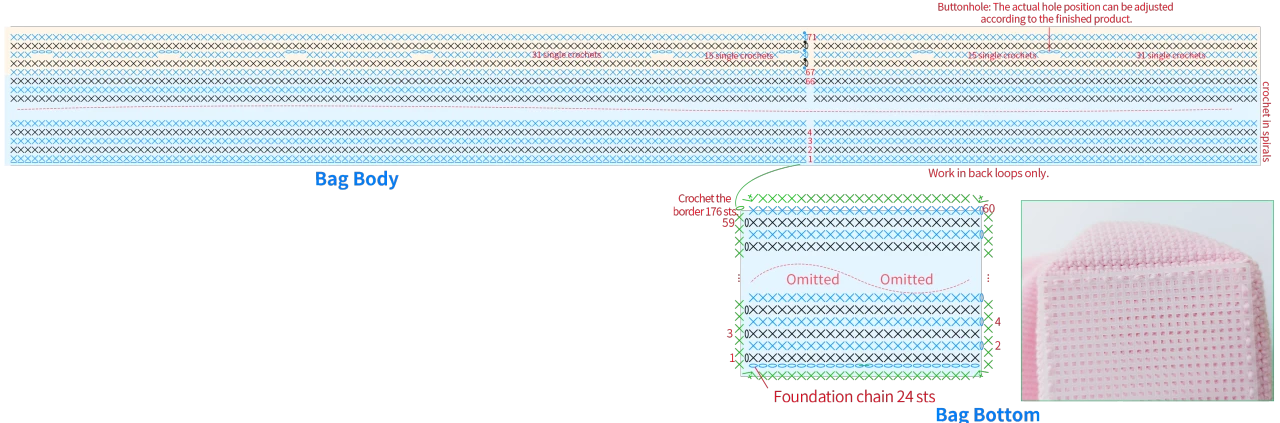
Grid plate: Using the same color yarn as the bottom, sew the insertion points of the outer grid squares of the grid plate and the edging.
Part 2 Lid
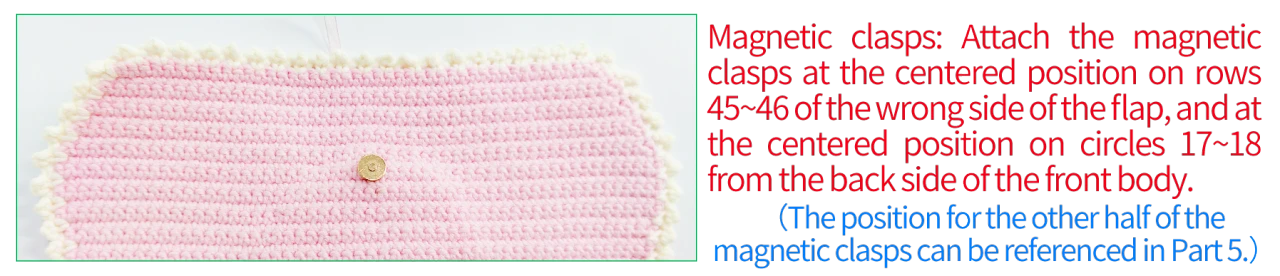
The bag cover starts with a foundation chain cast on, works back and forth, then crochets in rounds for the edging. Finally, attach the magnetic clasps at the corresponding positions between the bag cover and the bag body.
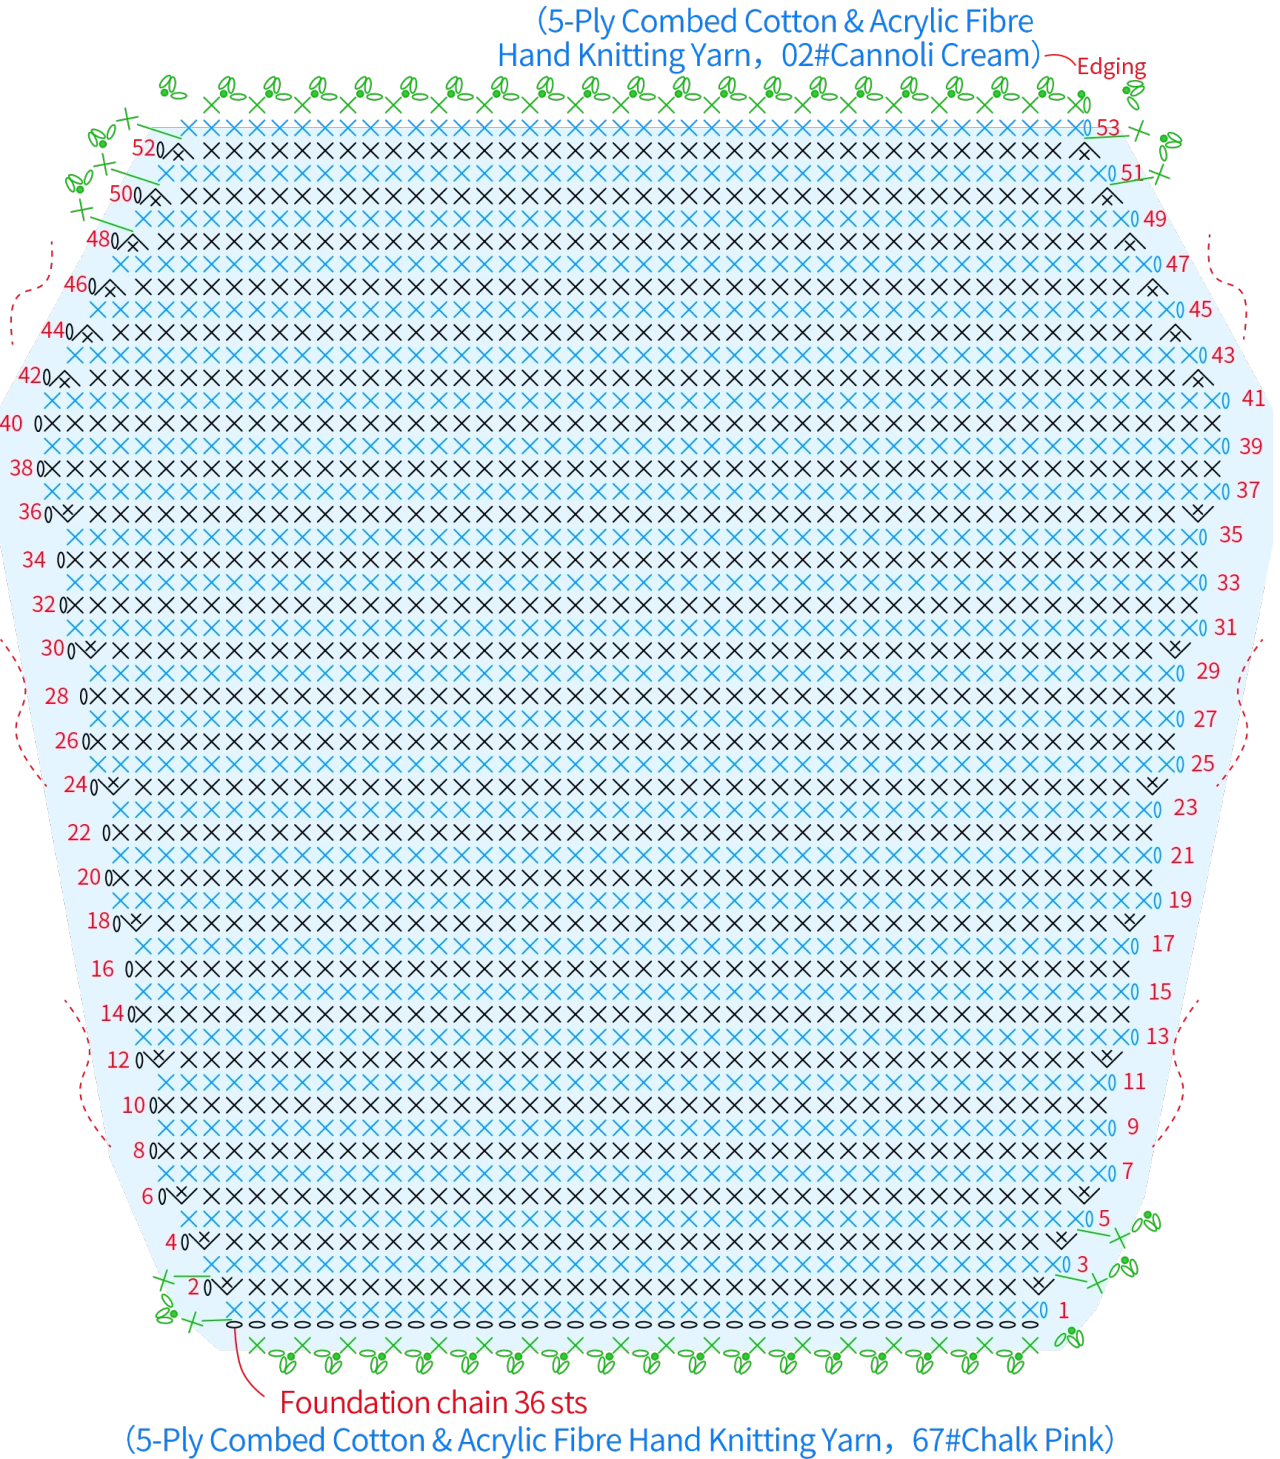
Part 3 waffle pattern fabric piece
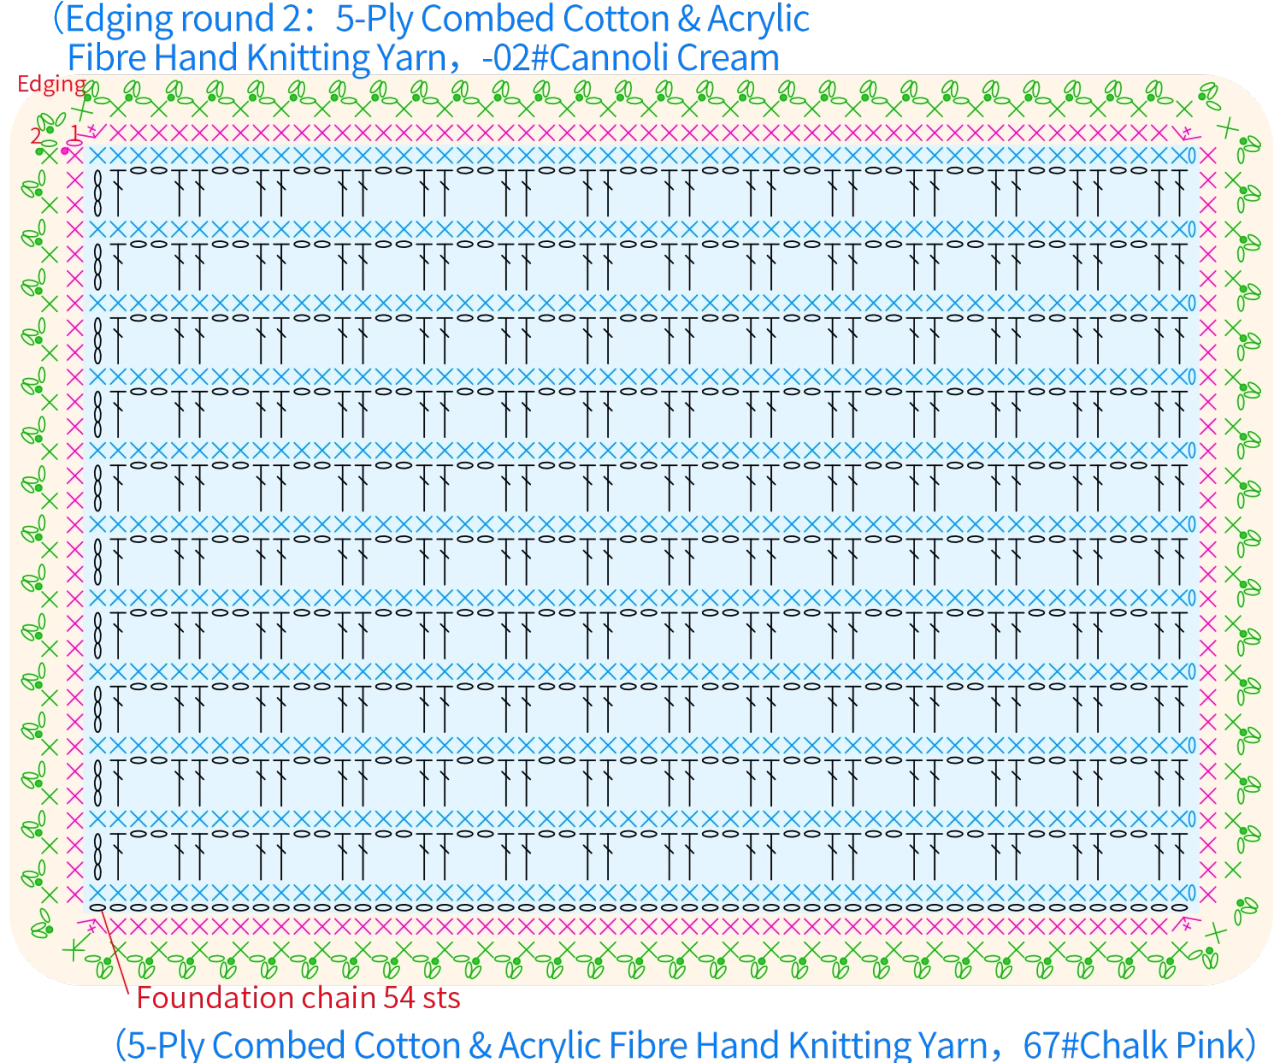
The waffle stitch fabric starts with a foundation chain and is crocheted back and forth in rows. Then, crochet the edging in rounds. Finally, sew it onto the bag at the position above the 6th round, centered on the front. Pick up and sew the first round of the edging stitches. Mind that the top edge should not be sewn.
Part 4 Decorations
The decoration is divided into lid decoration and side bag.
Step 1 Lid Decorations
Note:
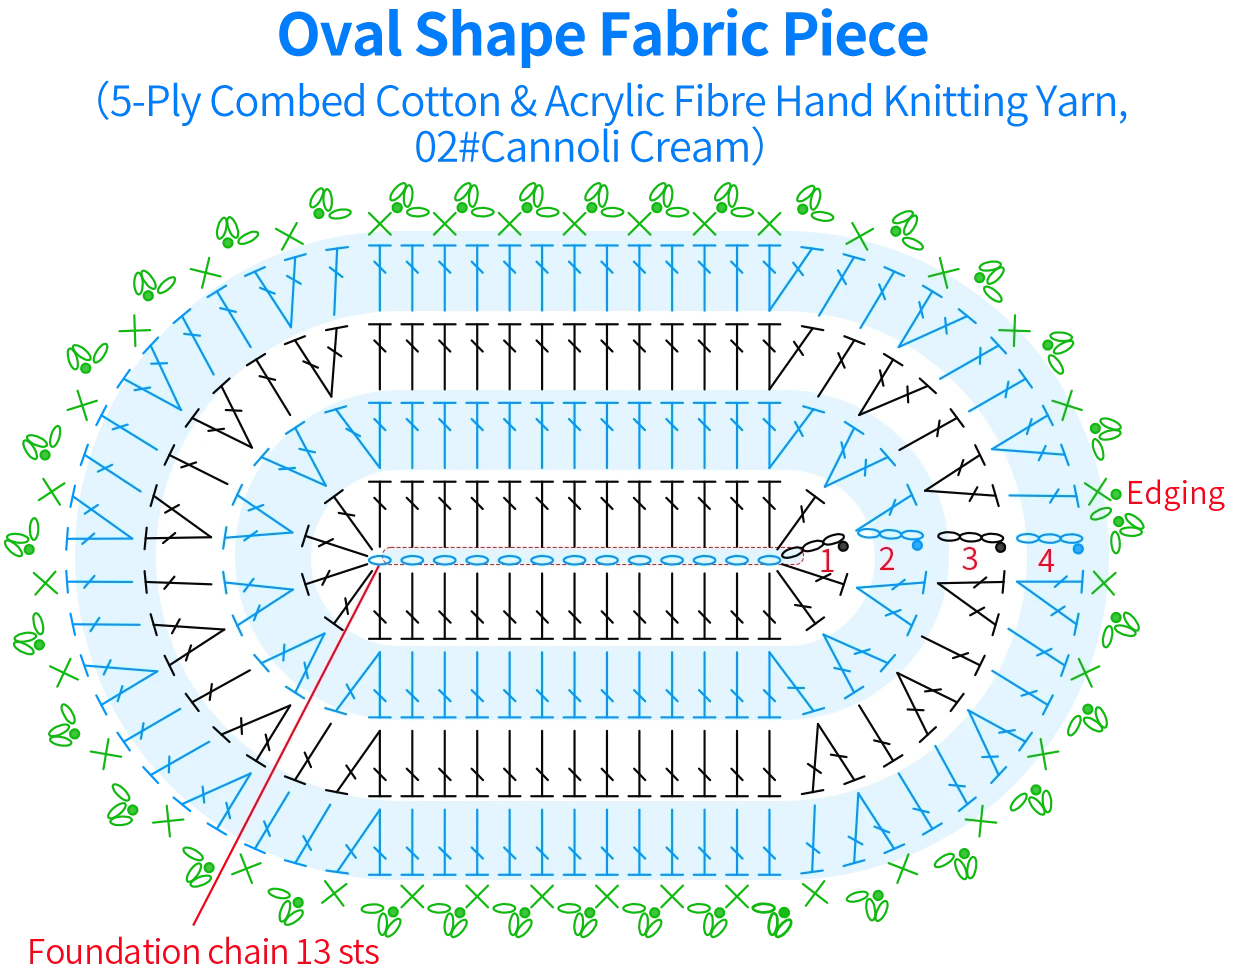
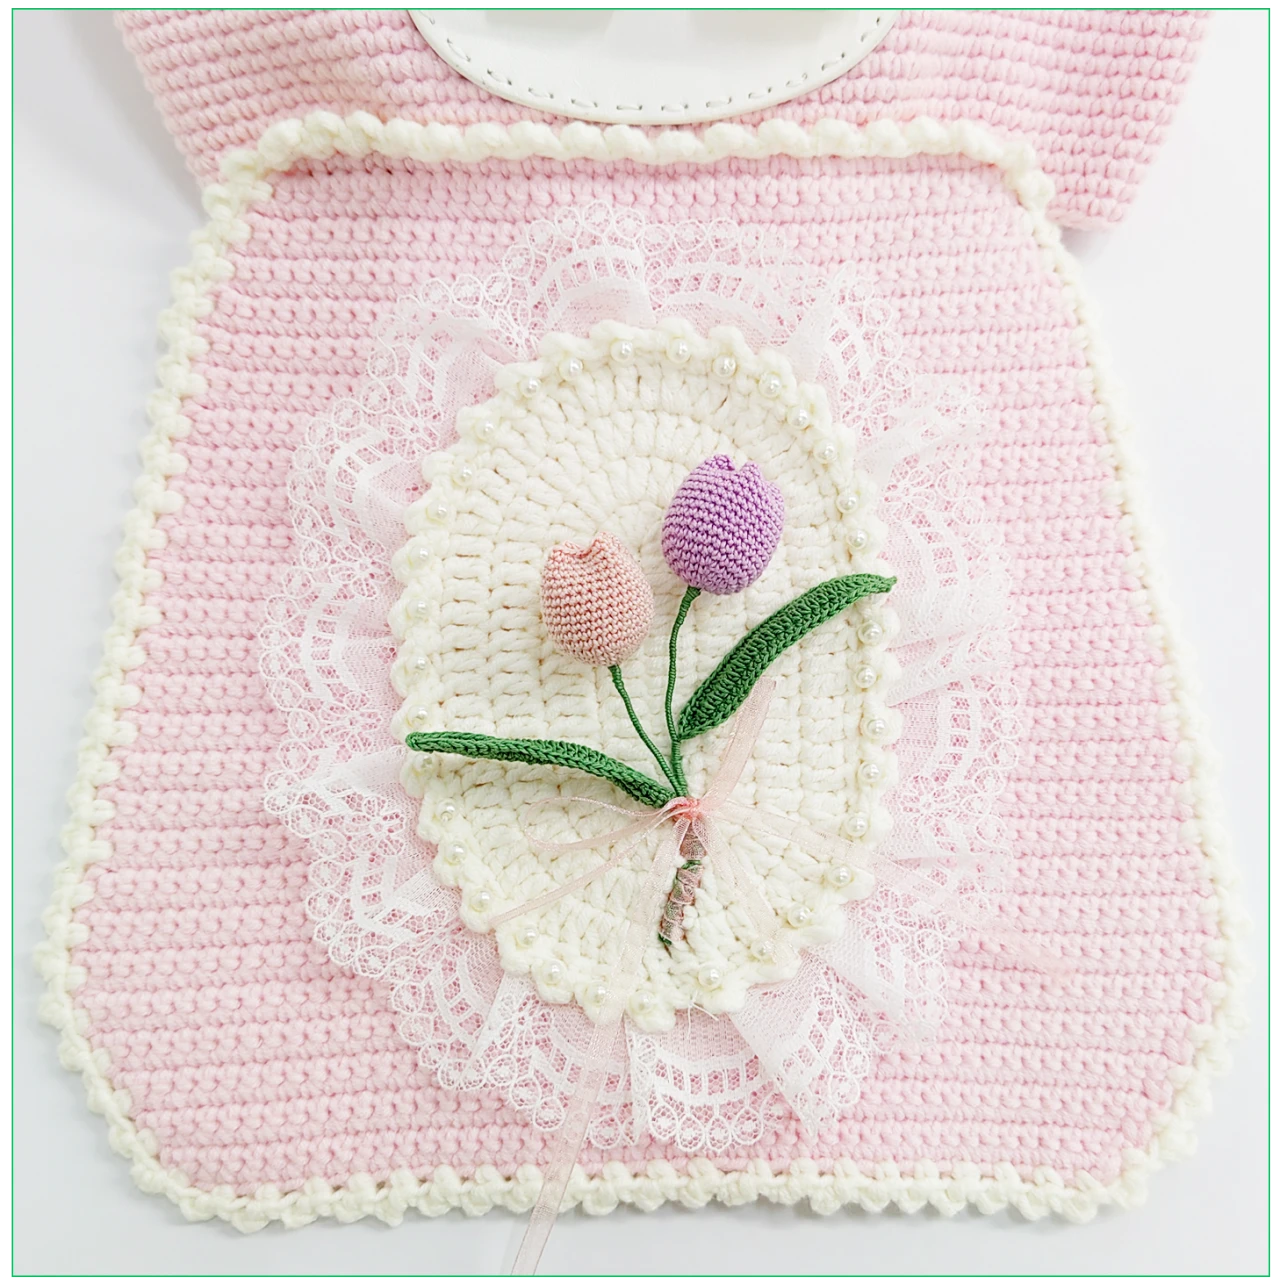
1. First, crochet an oval-shaped piece, then sew lace trim onto its backside using sewing thread. Next, secure a circle of pearls on the picot stitches on the right side.
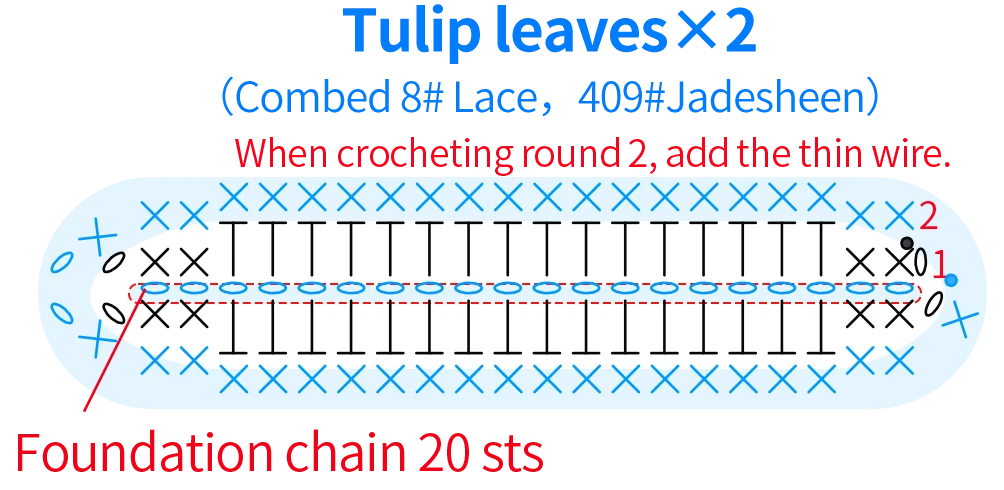
2. Then crochet tulip flowers and leaves. Wrap the flower wire with 409#Jadesheen yarn, incorporating the leaves while wrapping, assemble them into a bouquet. Secure it with ribbon in the center-lower position on the right side of the oval piece, and make a bow with the ribbon on top.
3. Afterwards, sew the entire decoration vertically onto the center of the bag lid's right side. Use sewing thread to sew through the surface at the connecting positions of the pieces, ensuring no visible stitches are left on either side.
4. Finally, sew the starting edge of the bag lid to the fourth round from the bottom, centered on the back side of the bag body, using 67#Chalk Pink yarn for the stitching.
| Tulip Flower×2 | |||
| Rounds | Stitch instruction | Total stitches | Color |
| CO and R1 | MR,6X | 6 | Combed 8# Lace 703#Mauve Mist×1, 706#Silver pink×1 |
| R2 | 6V | 12 | |
| R3 | (X,V)×6 | 18 | |
| R4 | (X,V,X)×6 | 24 | |
| R5 | (3X,V)×6 | 30 | |
| R6—R16 | even30X | 30 | |
| Leave a 30cm tail end before breaking the yarn. Add a 14cm thin wire at the starting point and fold it in half. Stuff the Flower with yarn scraps, then whip stitch the opening into an X-shape. |
|||
Step 2 Side Bag
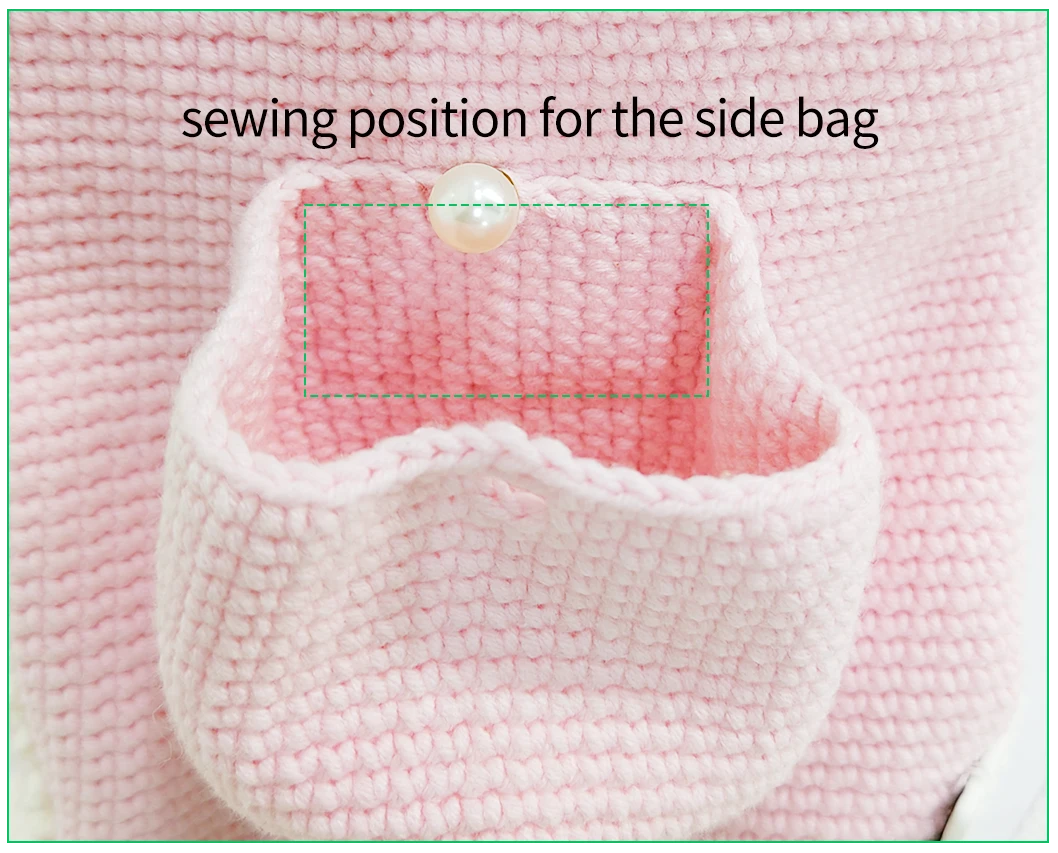
The side bag includes flowers, stems, and decorative elements sewn on.
Note:
1. Crochet the flowers and stems first, then sew the opening of the stem to the starting point of the flower.
2. Secure a pearl pendant centered on the side of the flower opposite the buttonhole. Bend the stem and secure it with another pearl pendant.
3. Sew the side of the flower with the pendant to the side edge of the bag, ensuring that the pendant on the stem reaches the bottom of the bag.
| Side Bag Flower×2 | |||
| Rounds | Stitch instruction | Total stitches | Color |
| CO and R1 | MR,6X | 6 | 5-Ply Cotton 67#Chalk Pink |
| R2 | 6V | 12 | |
| R3 | (X,V)×6 | 18 | |
| R4 | (X,V,X)×6 | 24 | |
| R5 | (3X,V)×6 | 30 | |
| R6 | (2X,V,2X)×6 | 36 | |
| R7 | (5X,V)×6 | 42 | |
| R8 | (3X,V,3X)×6 | 48 | |
| R9 | (7X,V)×6 | 54 | |
| R10—R22 | even54X | 54 | |
| R23 | 26X,2CH,K2,26X | 54 | |
| R24 | even54X | 54 | |
| Leave a 10cm yarn tail at the end for binding off. | |||
| Side Bag Stem×2 | |||
| Rounds | Stitch instruction | Total stitches | Color |
| CO and R1 | MR,6X | 6 | Combed 3# Lace 19#Verdant Green |
| R2 | (X,V)×3 | 9 | |
| R3—R27 | even9X | 9 | |
| Leave a 30cm tail end and break the yarn, then sew it to the stitch position of the first round on the right side of the Side Bag Flower. Bend down 4cm and shape it, then secure a pearl pendant at the bending point. |
|||
Part 5 Accessories
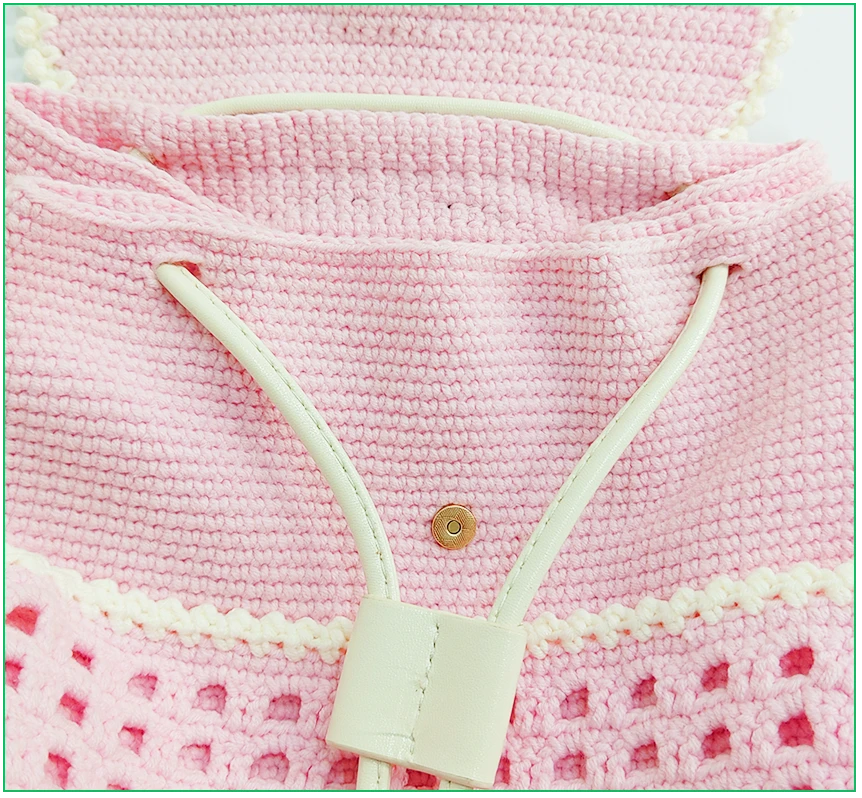
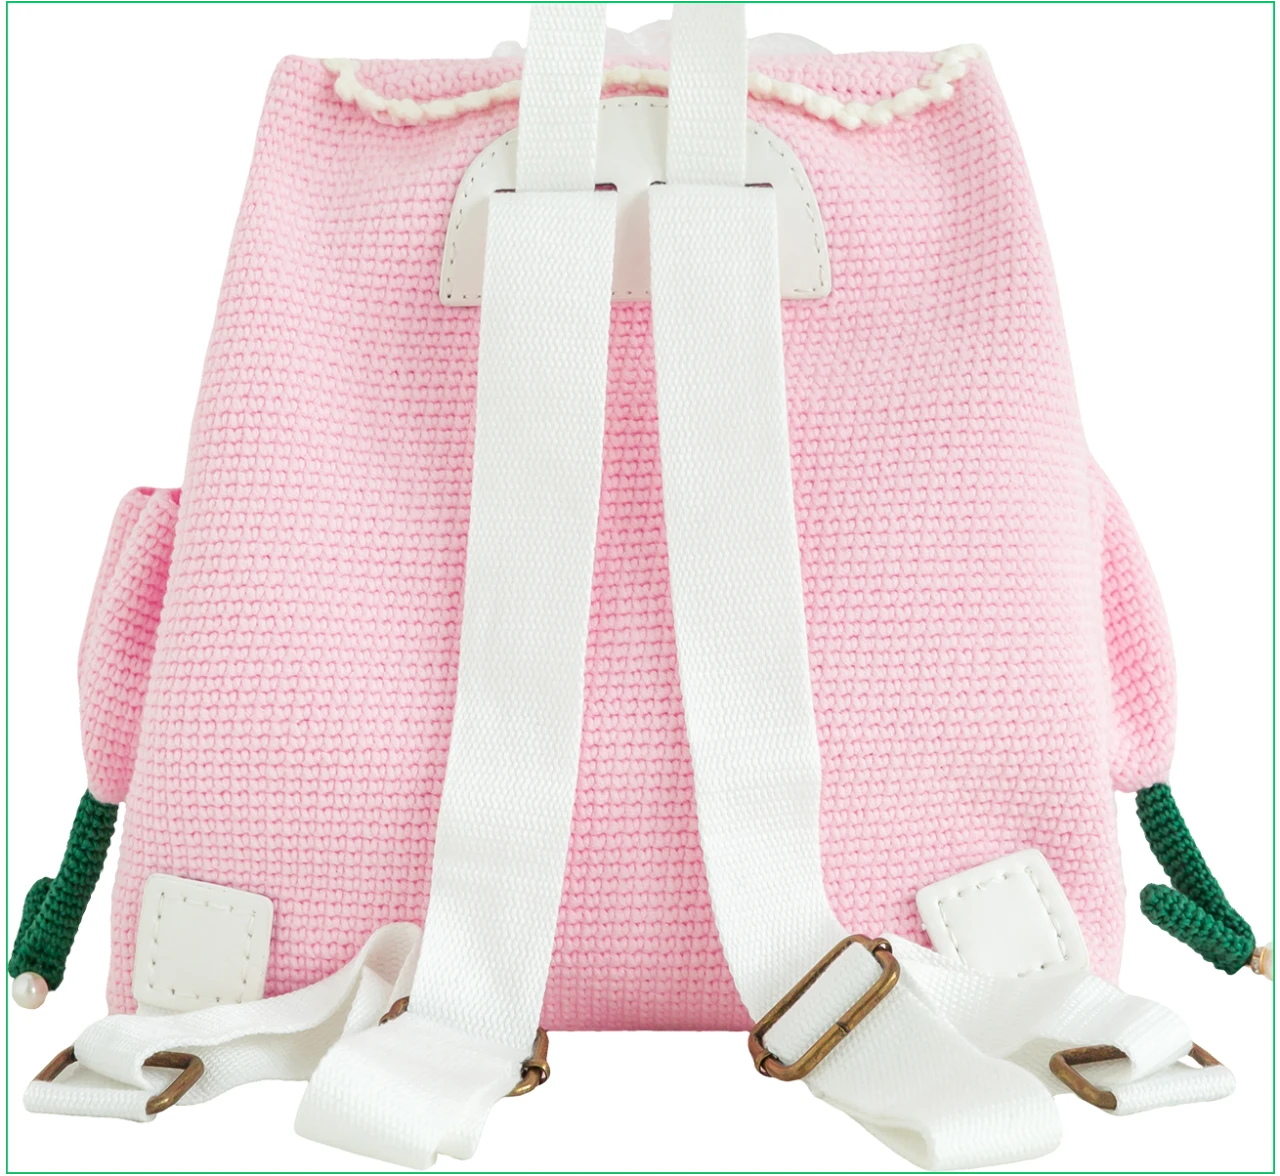
Last, secure the accessories. First, attach the drawstring at the buttonhole of the bag, then symmetrically and centered on the back of the bag, fix the strap (sewing thread).
Made by the community