Home / Blanket
Ancient Intarsia Blanket
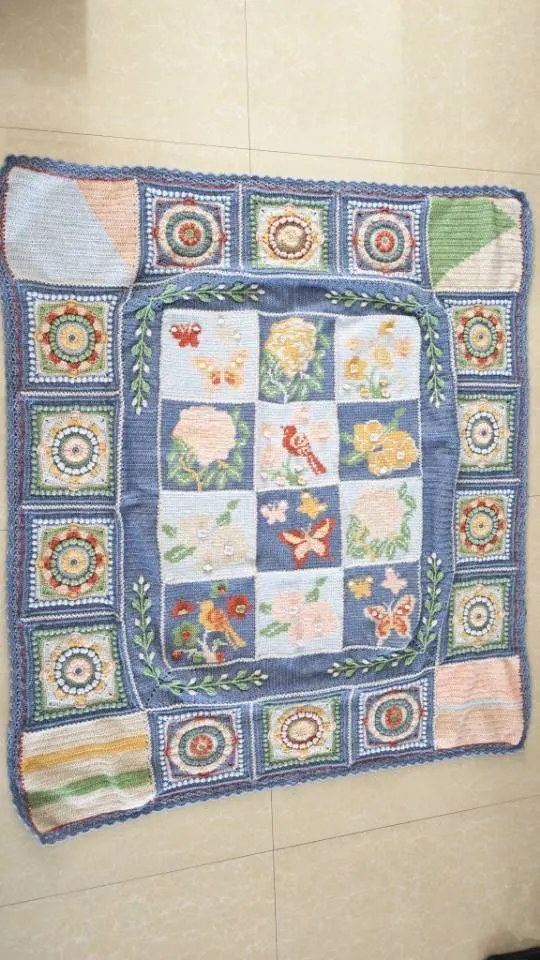
Project preview
See the finished project
Pattern format
Instructions
This blanket is divided into Section 1, Section 2, and the joining. First, complete Section 1 and Section 2 separately, then connect them.
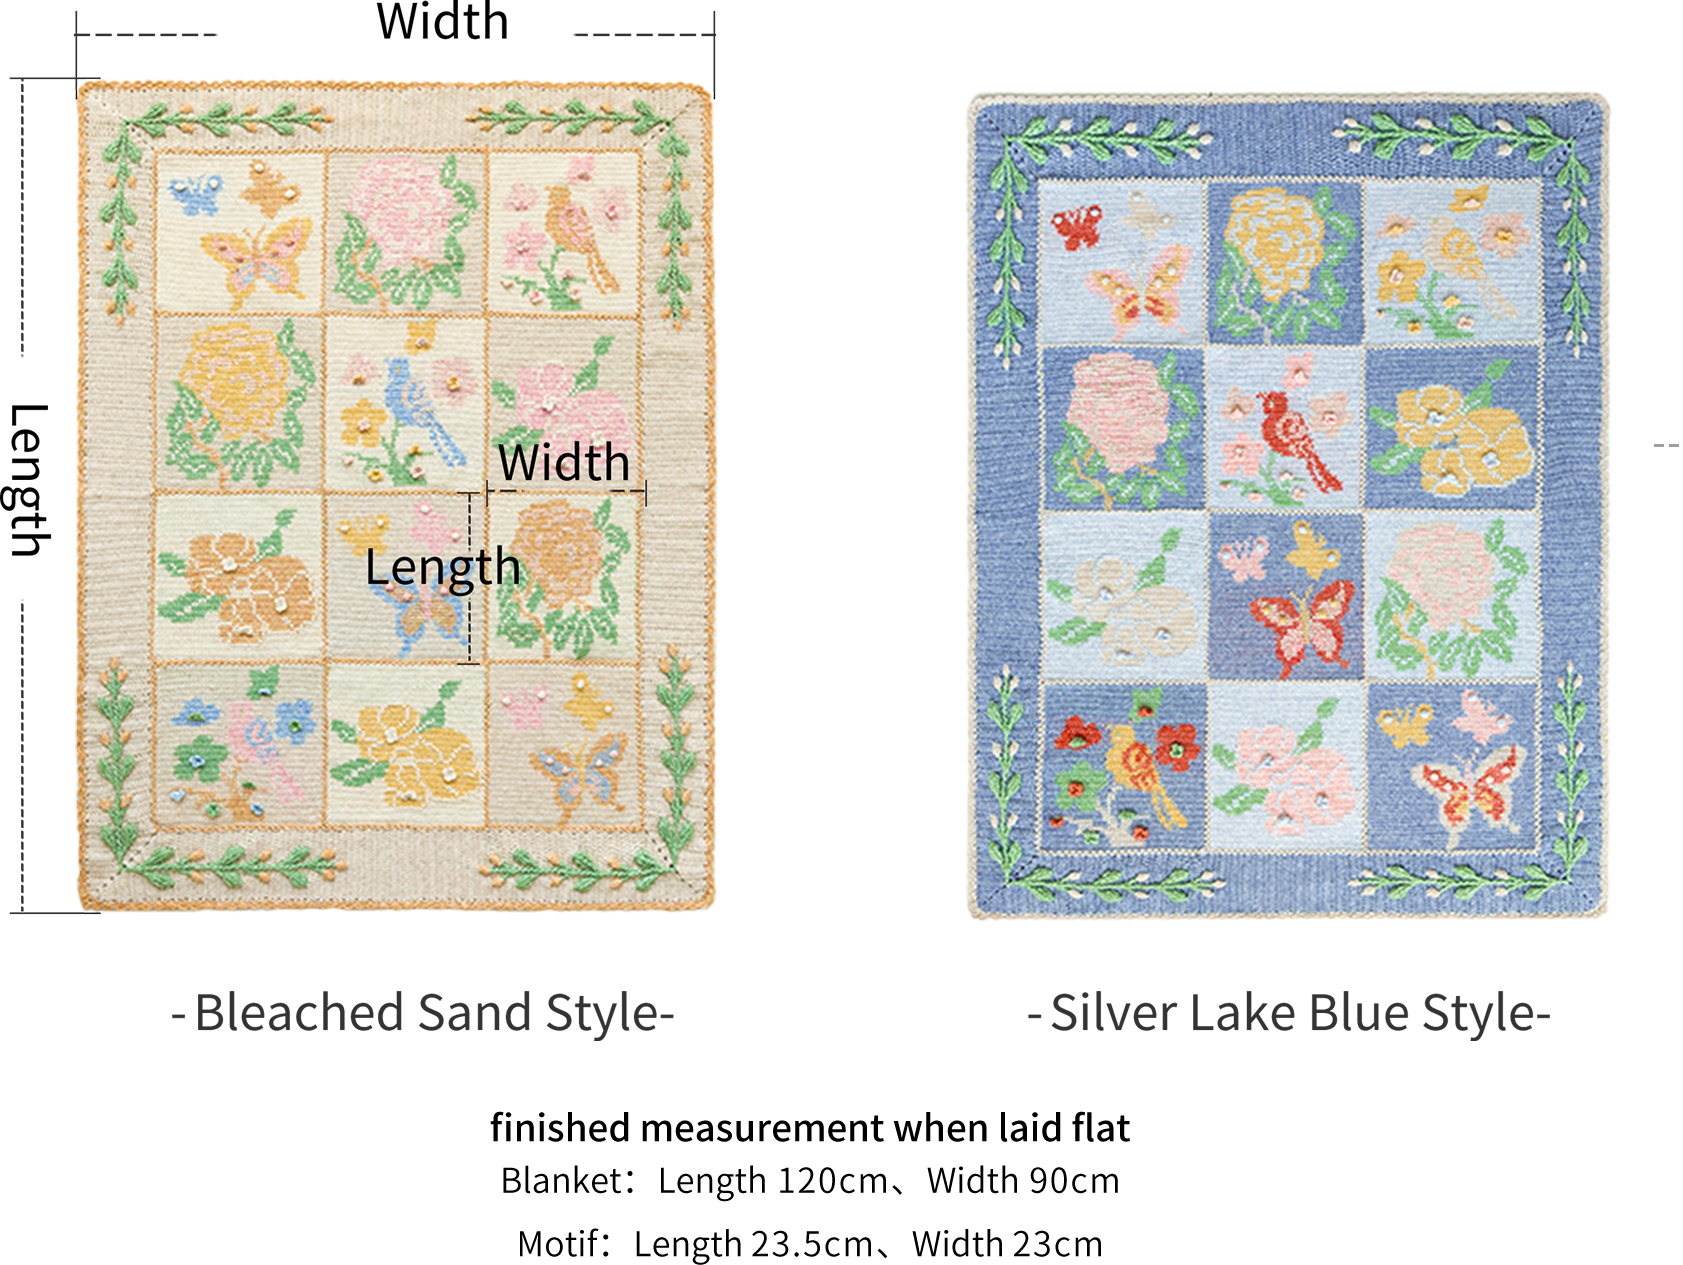
Due to variations in individual tension, the size of the sample is for reference only.
Materials: Susan's Family Impression Misty Feather
Hook: 3.50 mm crochet hook

Chart Key



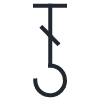


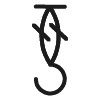
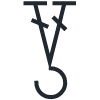
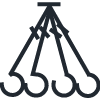
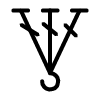
Note: This pattern is making in Chinese crochet pattern terms, and the stitch name is written using American terminology. All measurements in charts are in cm.

Part 1 Section 1A
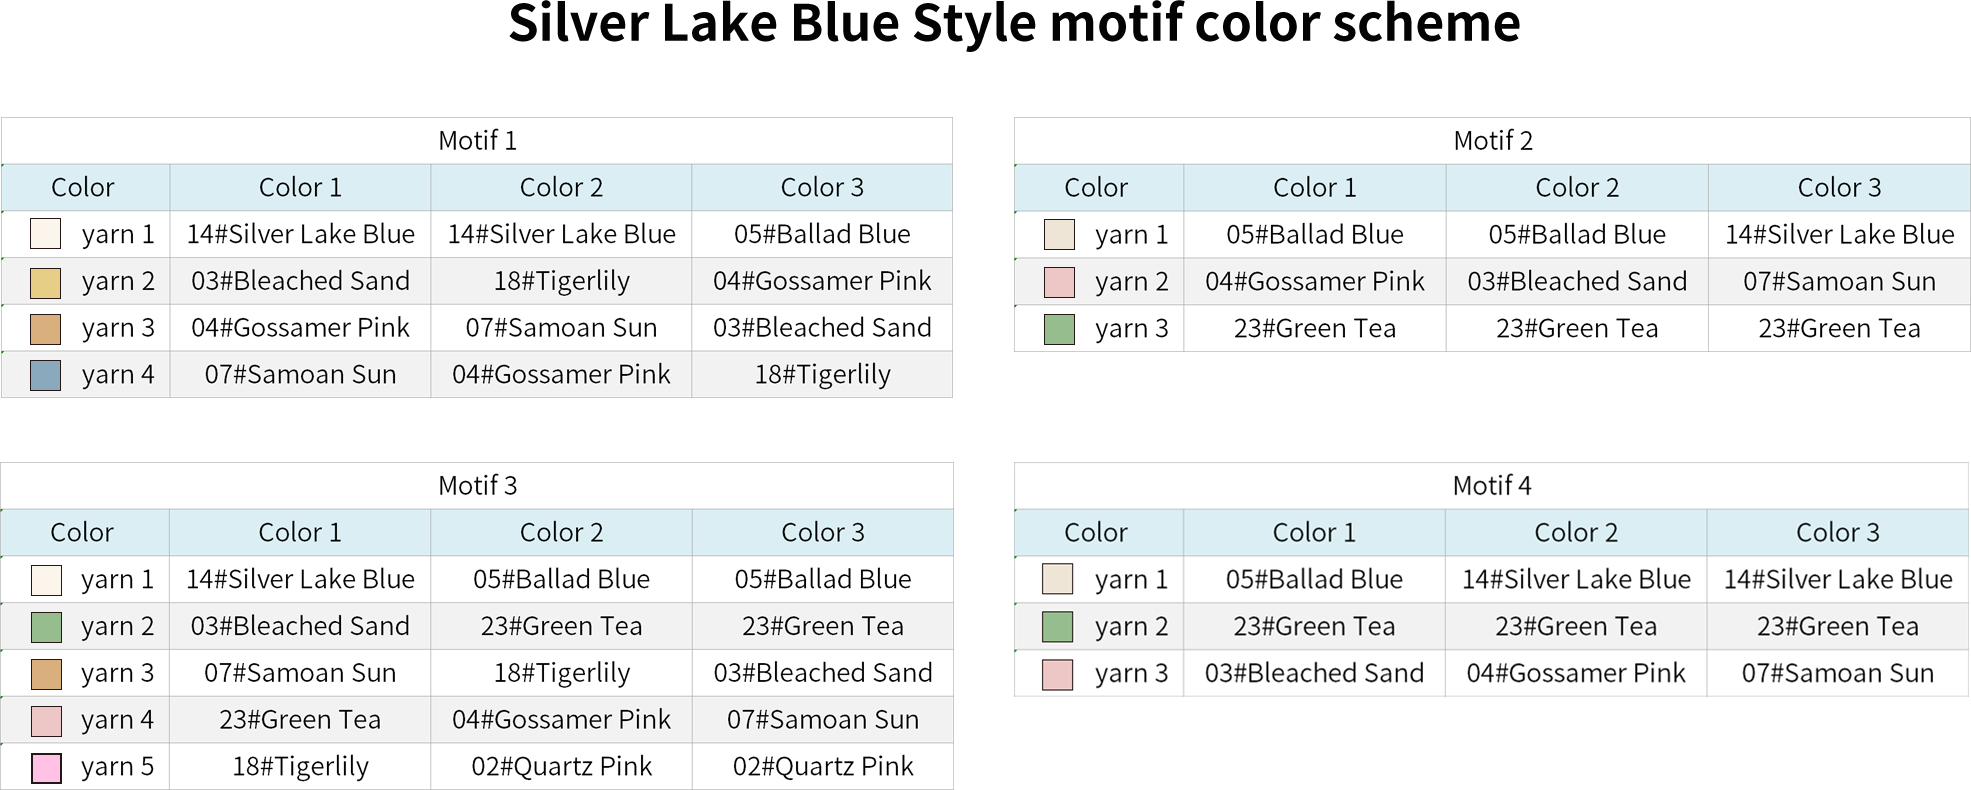
Section 1 consists of 12 motifs, each motif divided into the main piece and decorations.
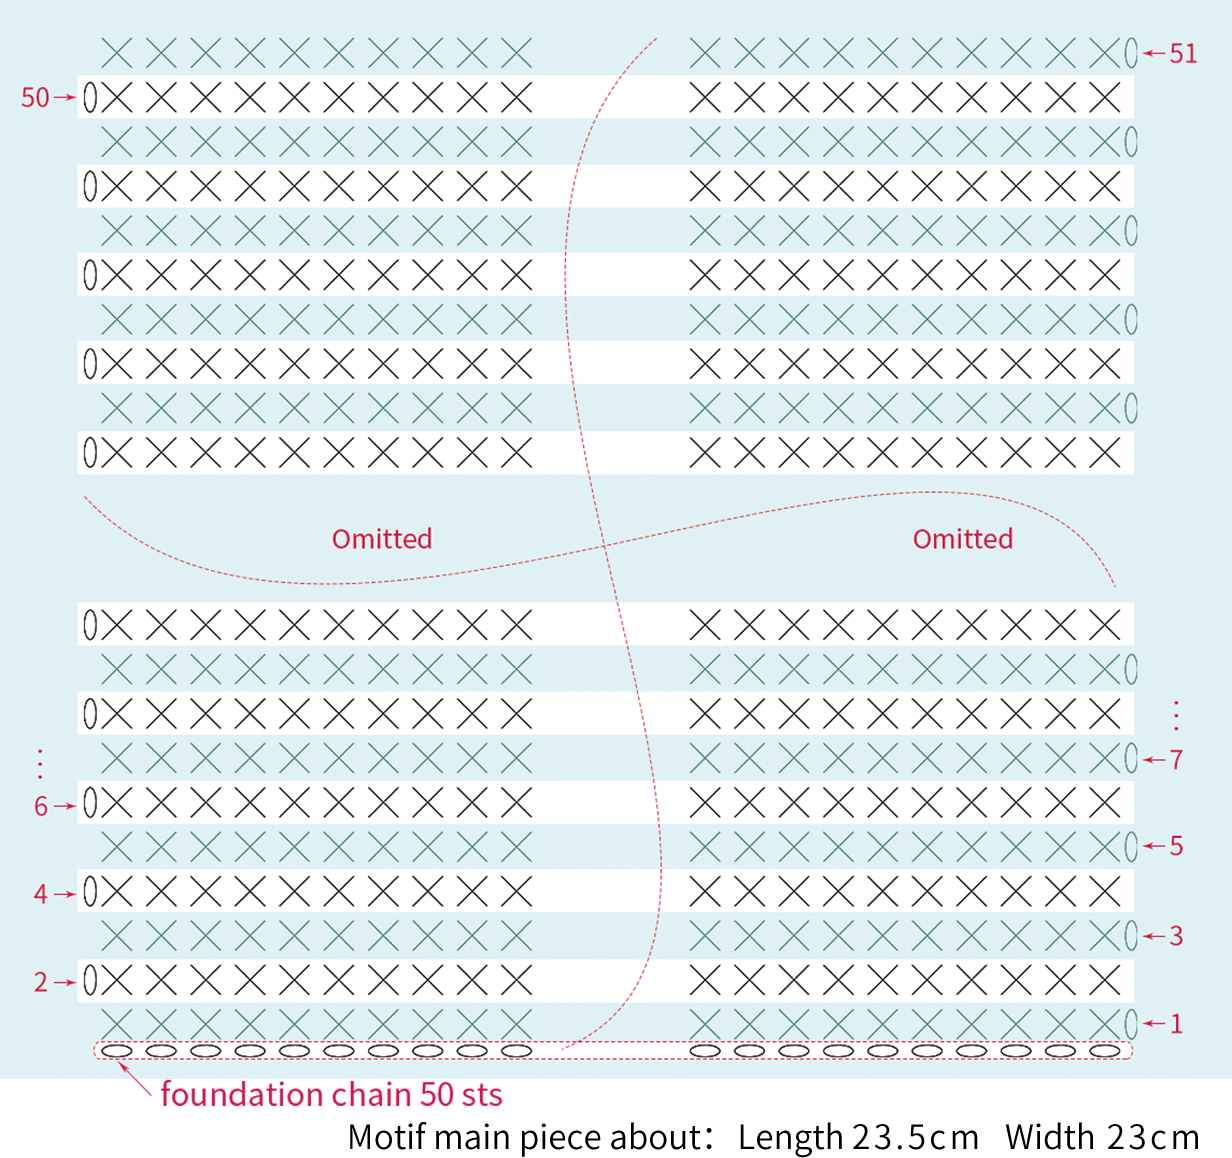
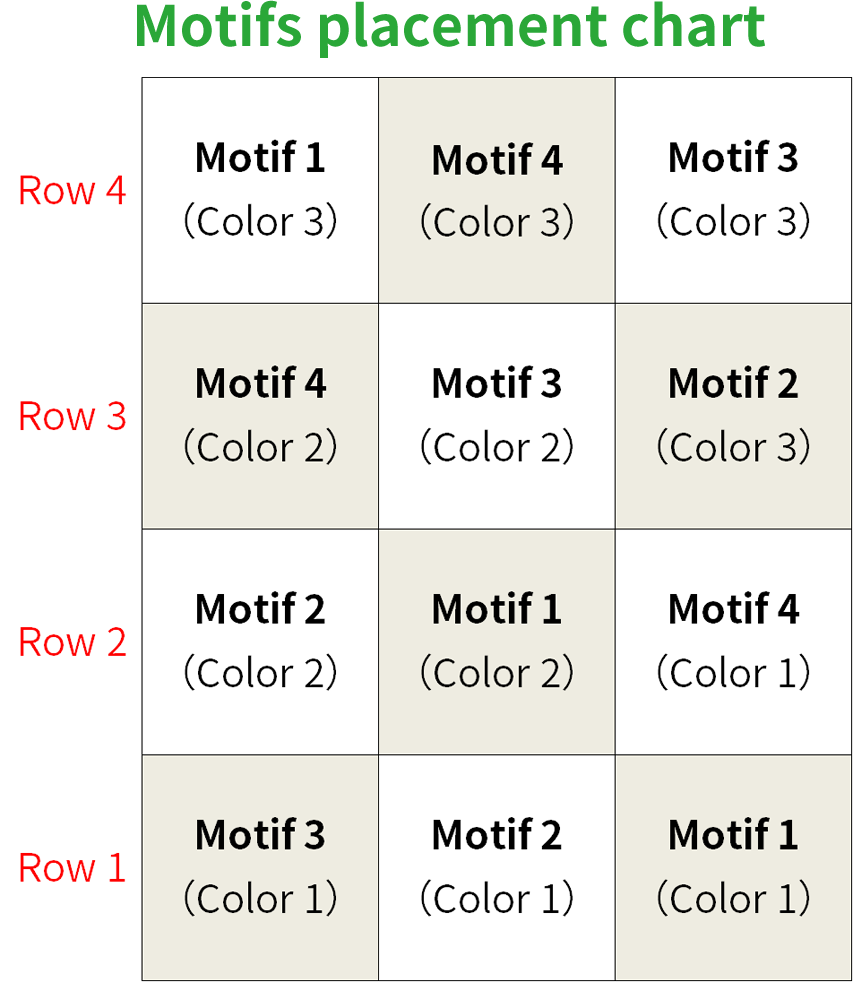
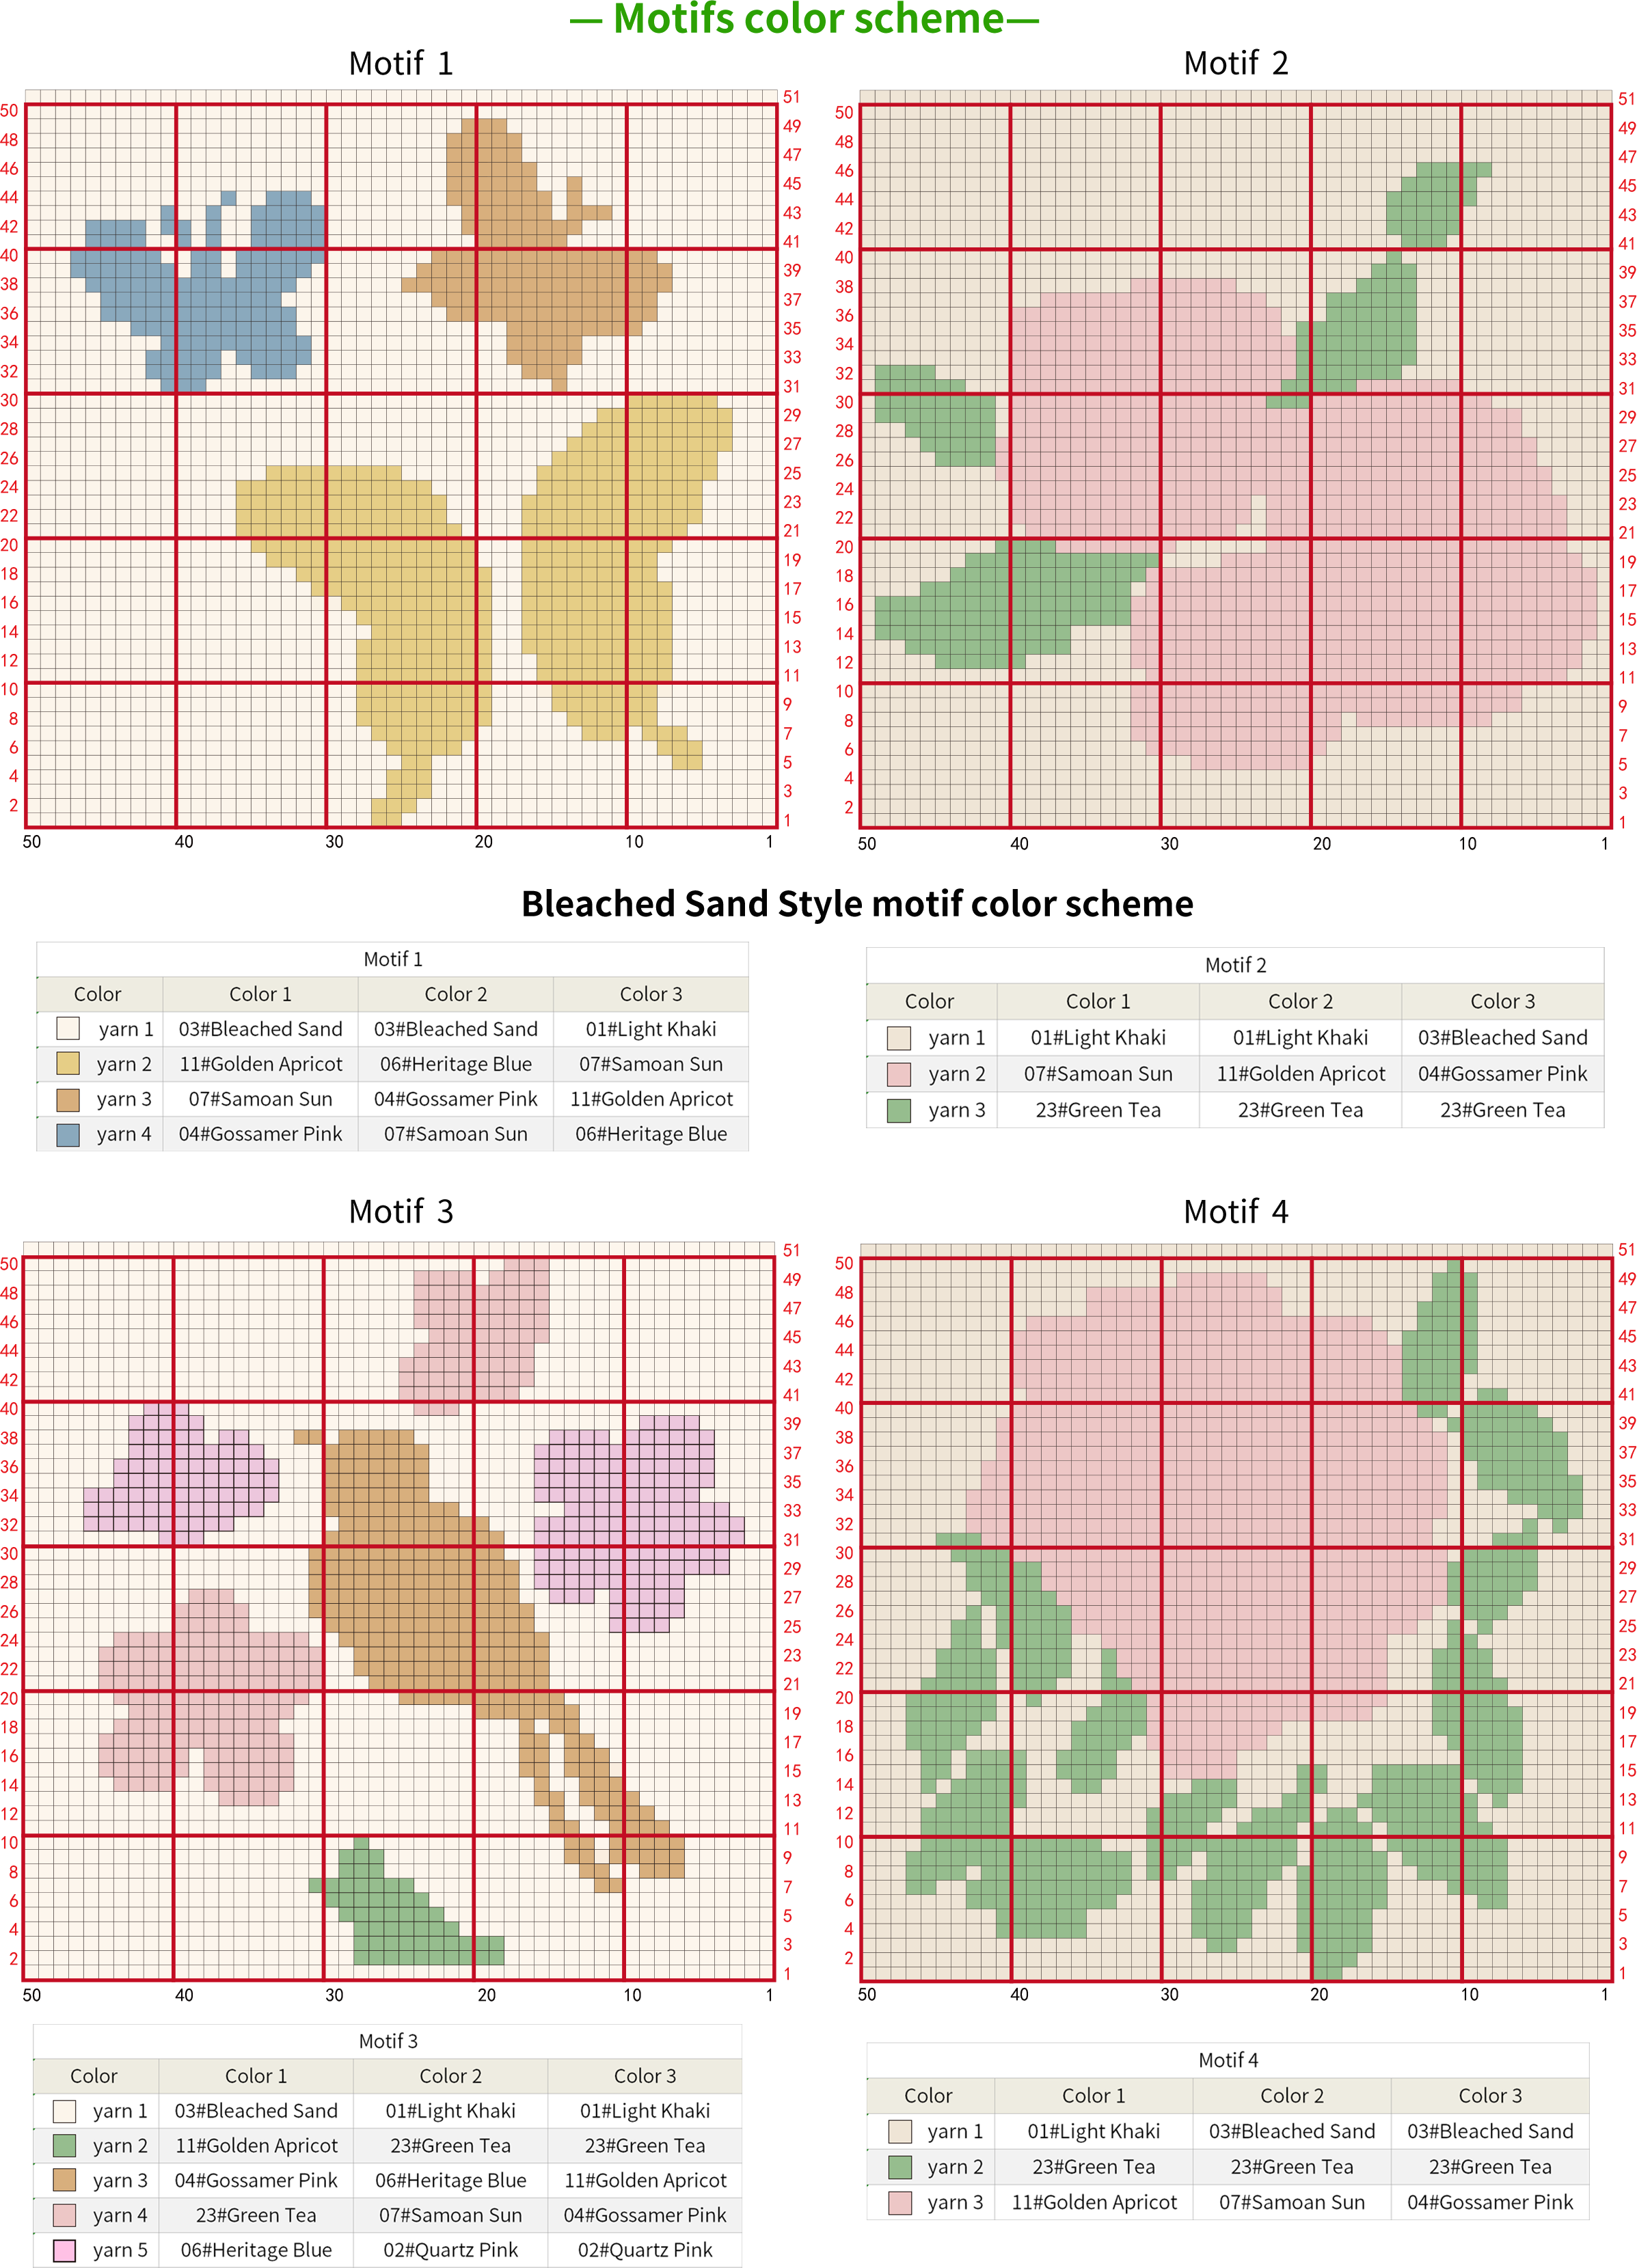
Step 1 Motif main pieceA1 01' 08'' (Part 1)
The main piece of the motif starts with a foundation chain, and then work back and forth in rows from this starting chain. Please refer to the video demonstration for more details.
Note:
1. Since there are many yarn tails on the fabric, to prevent them from tangling, remember to separate the yarn tails after every 1 to 2 rows of crocheting.
2. When you're actually crocheting, pay attention to the current color scheme while also considering the color placement of the previous and following few rows, and arrange the carrying of the yarn according to the actual situation.
3. The principle for crocheting the main part of the motif is to always wrap only one strand of yarn. The specific color scheme must not be wrong, and the yarn carried on the wrong side can be adjusted freely, as long as the yarn on the back is not too long.
Step 2 Motif decorationsA2 00' 12'' (Part 2)
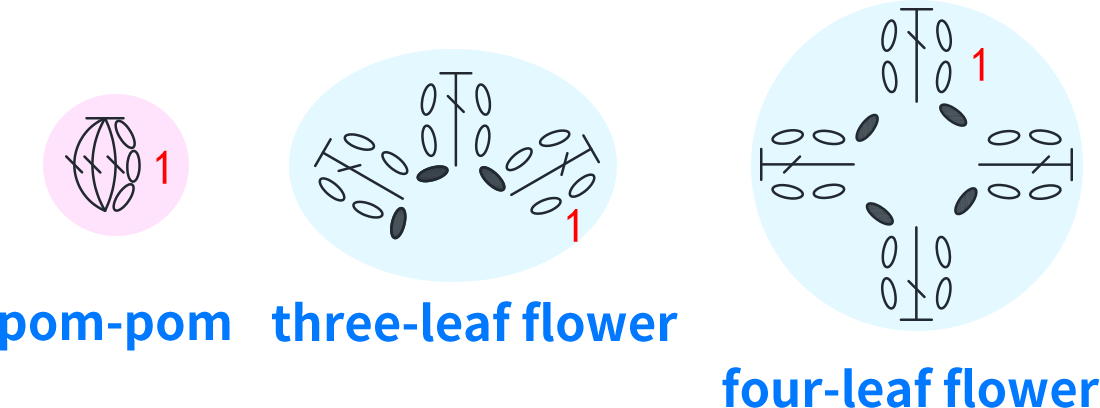
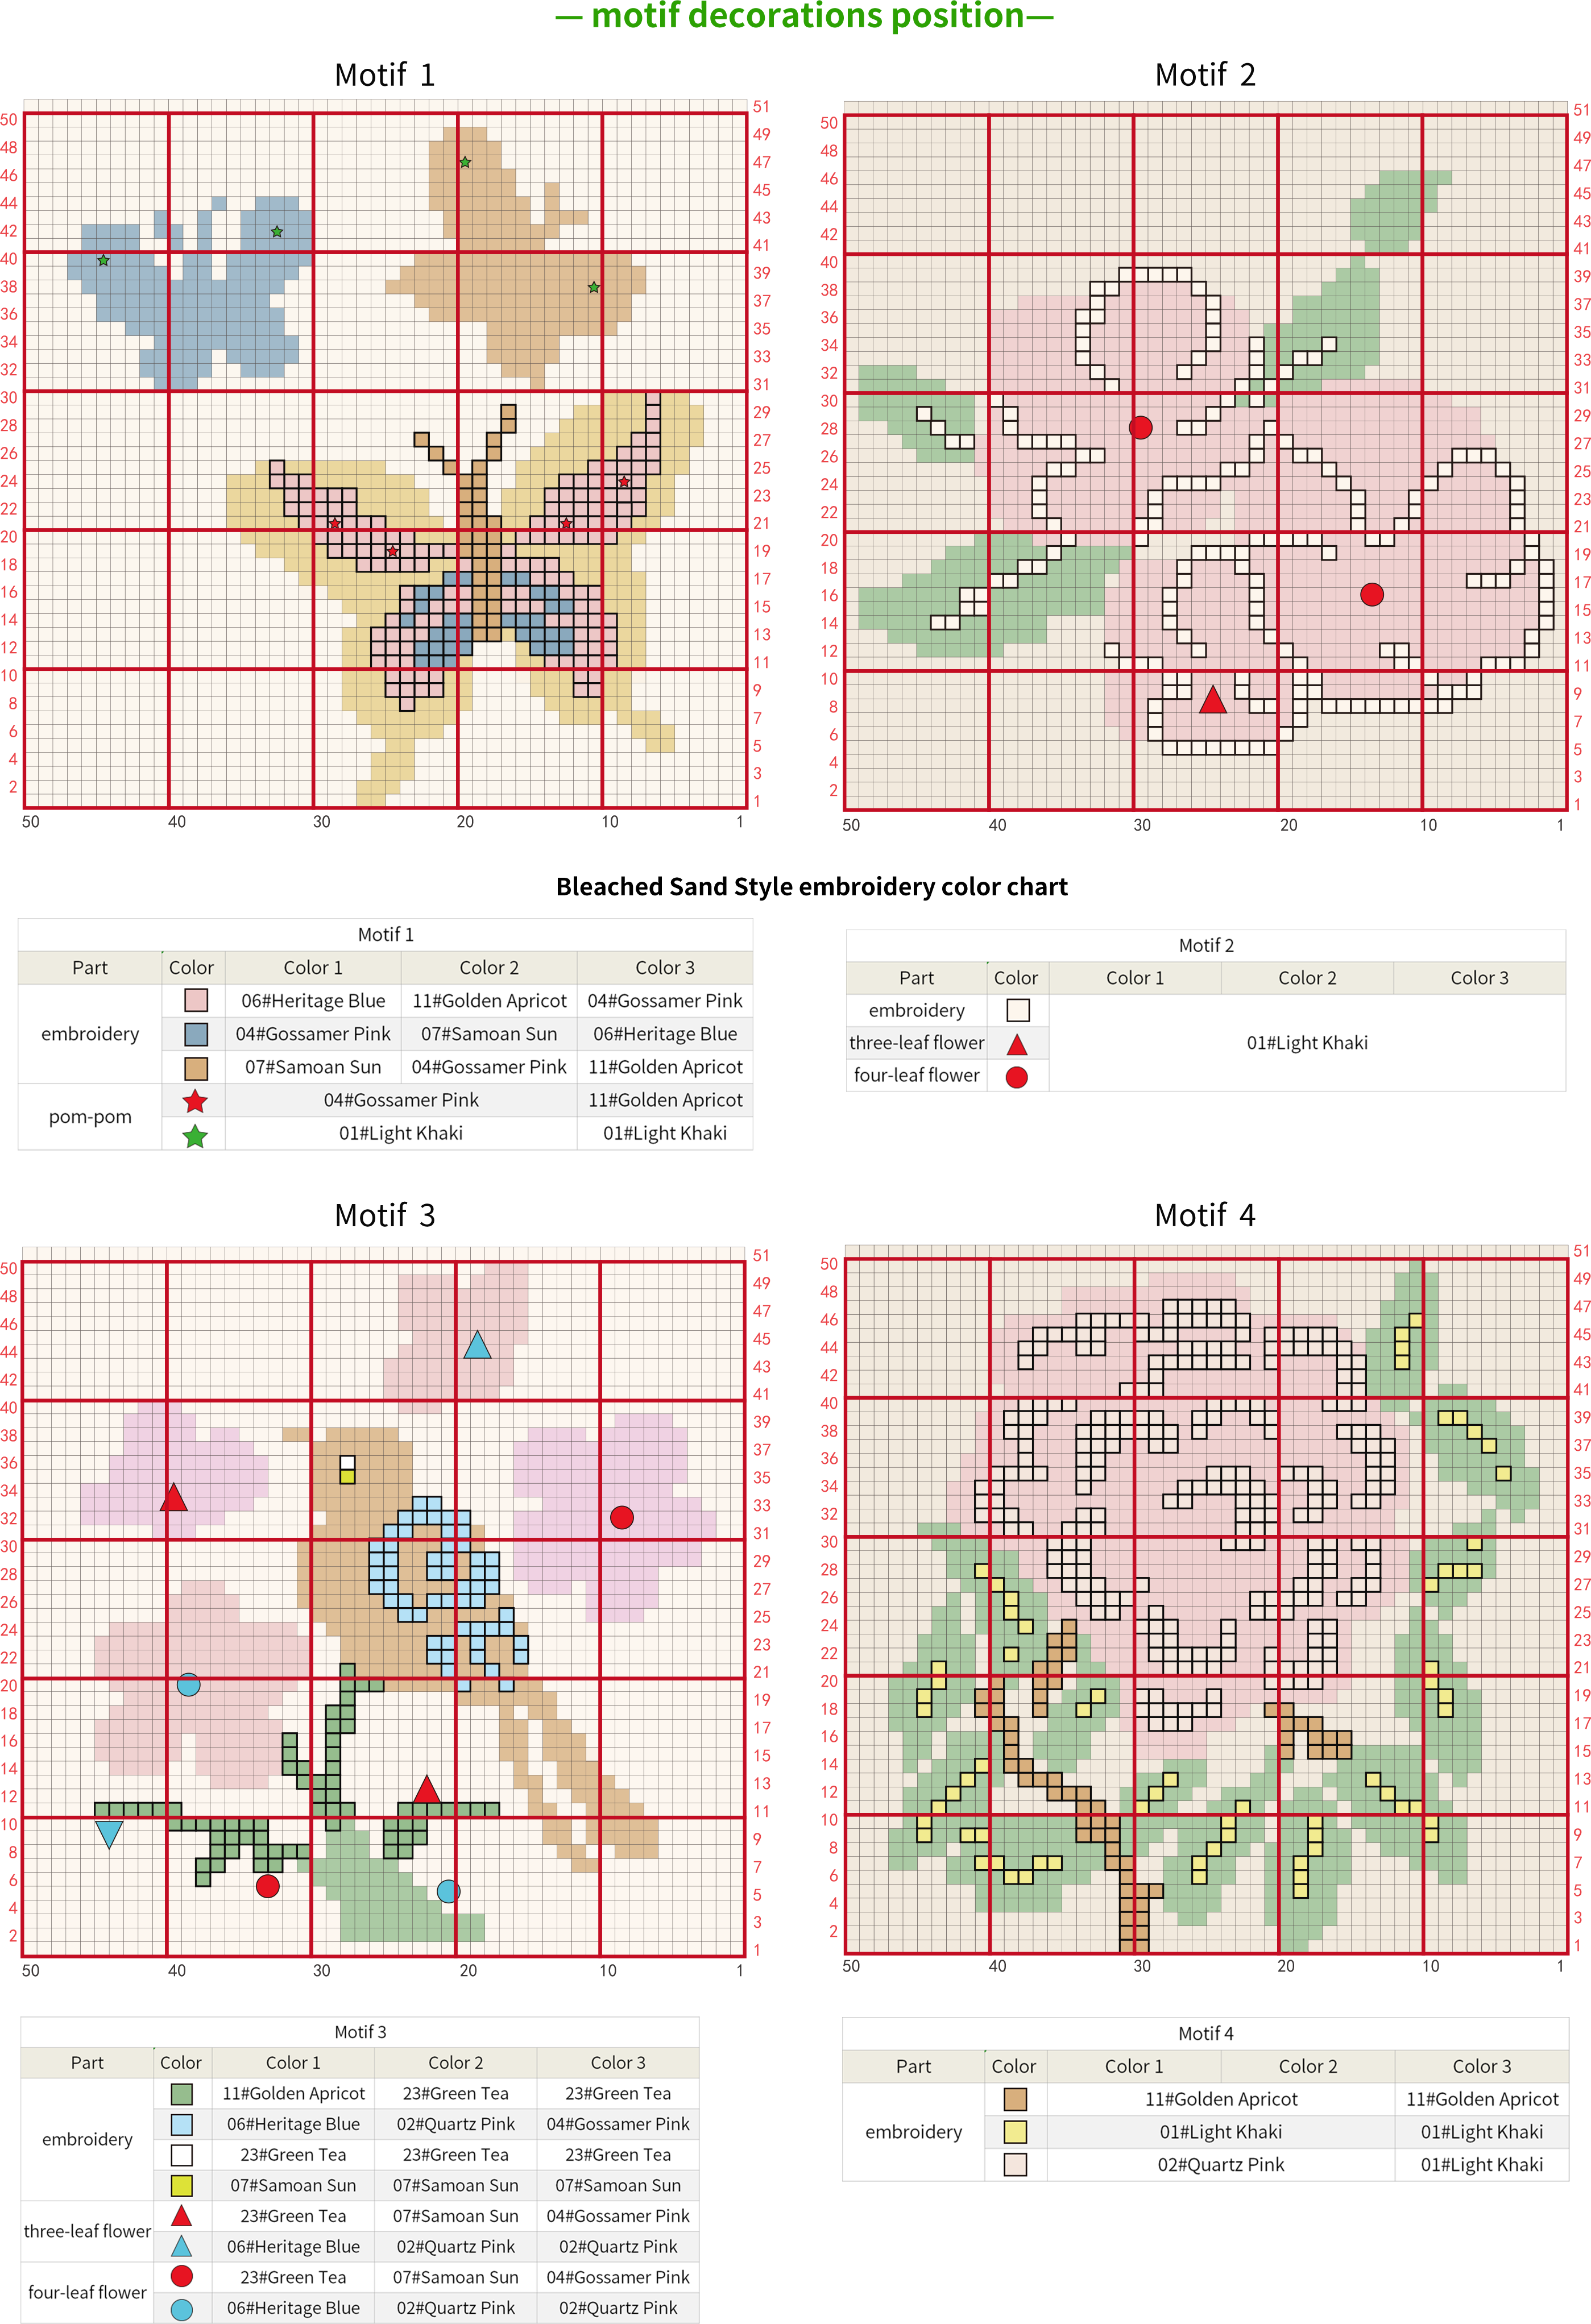
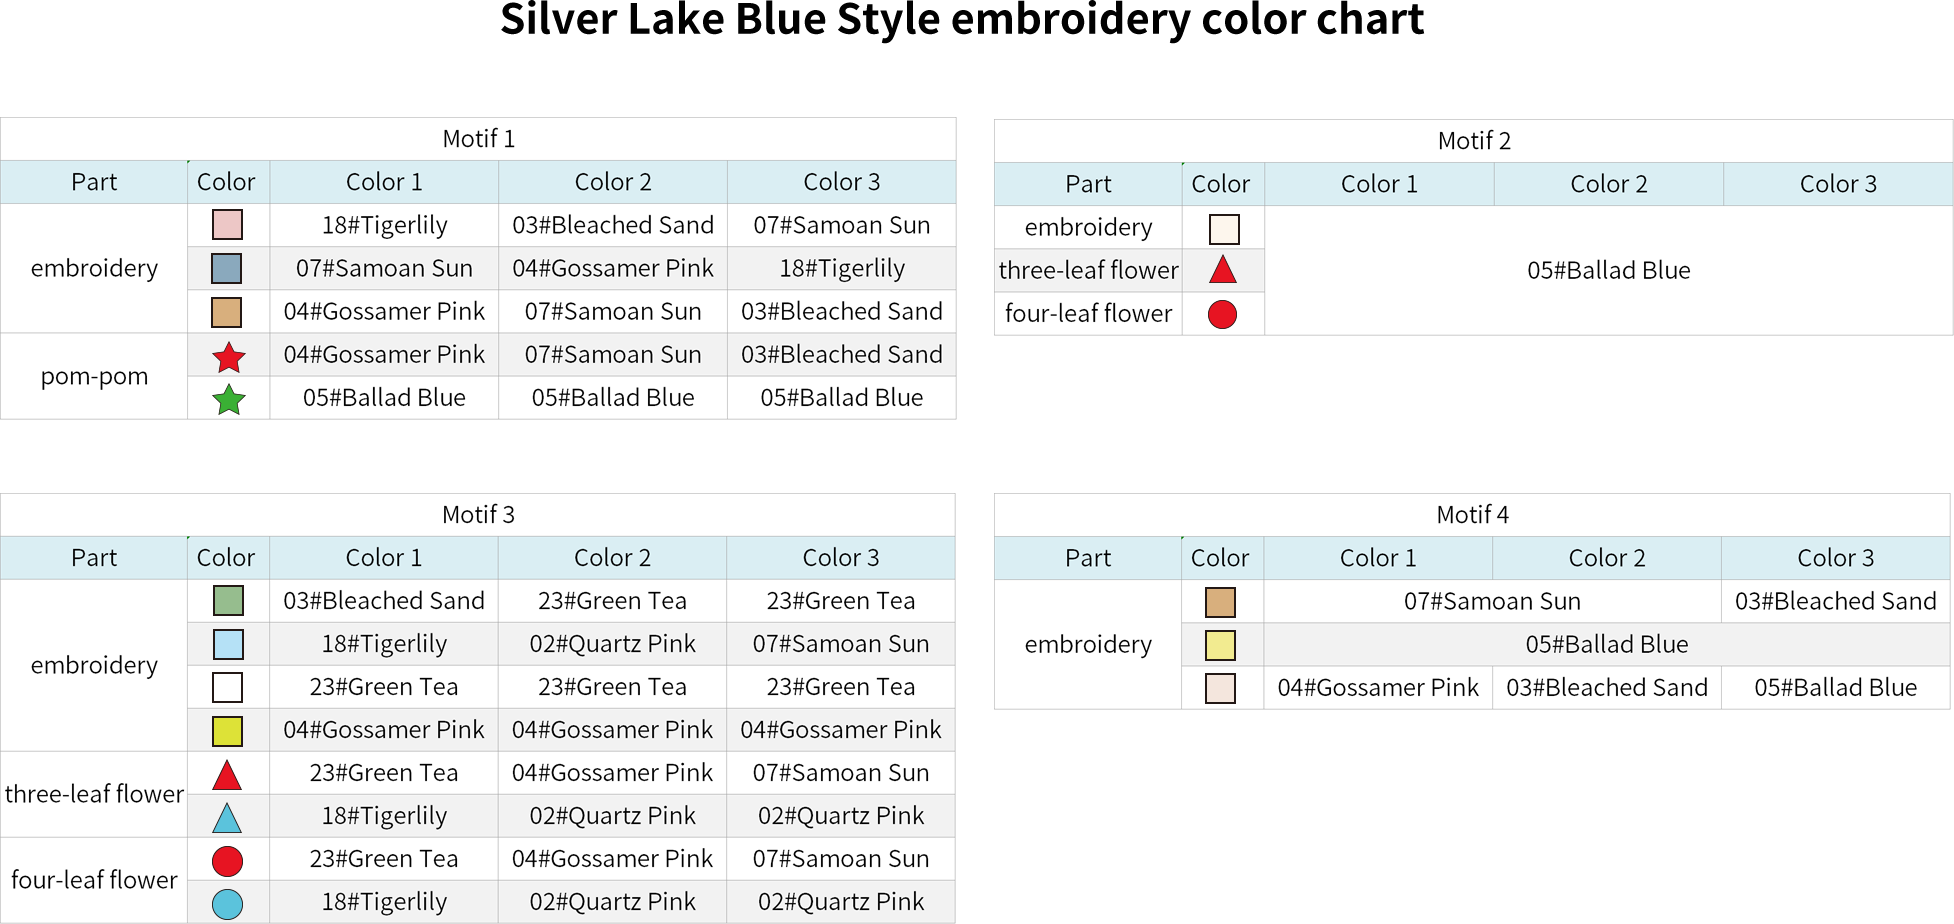
The motif decorations are divided into embroidery, pom-poms, and three-leaf and four-leaf flowers. The embroidery is sewn using the cross-stitch method; the pom-poms, three-leaf flowers, and four-leaf flowers are all crocheted by picking up stitches on the main part of the motif. Please refer to the video demonstration for more details.
Note:
1. To avoid skewing while embroidering, embroider the corresponding squares on the right side according to the color scheme, and determine the embroidery positions on the wrong side based on the right side rows.
2. The star represents pom-pom, the triangle represents a three-leaf flower, and the circle represents a four-leaf flower. The placement can be approximate, and you can also embroider in positions according to your preference.
Part 2 Section 2B 28' 40'' (Part 2)
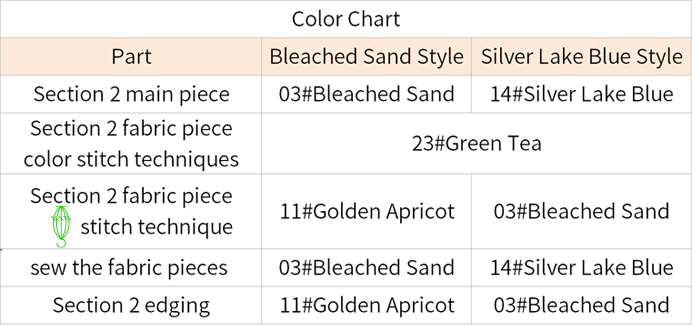
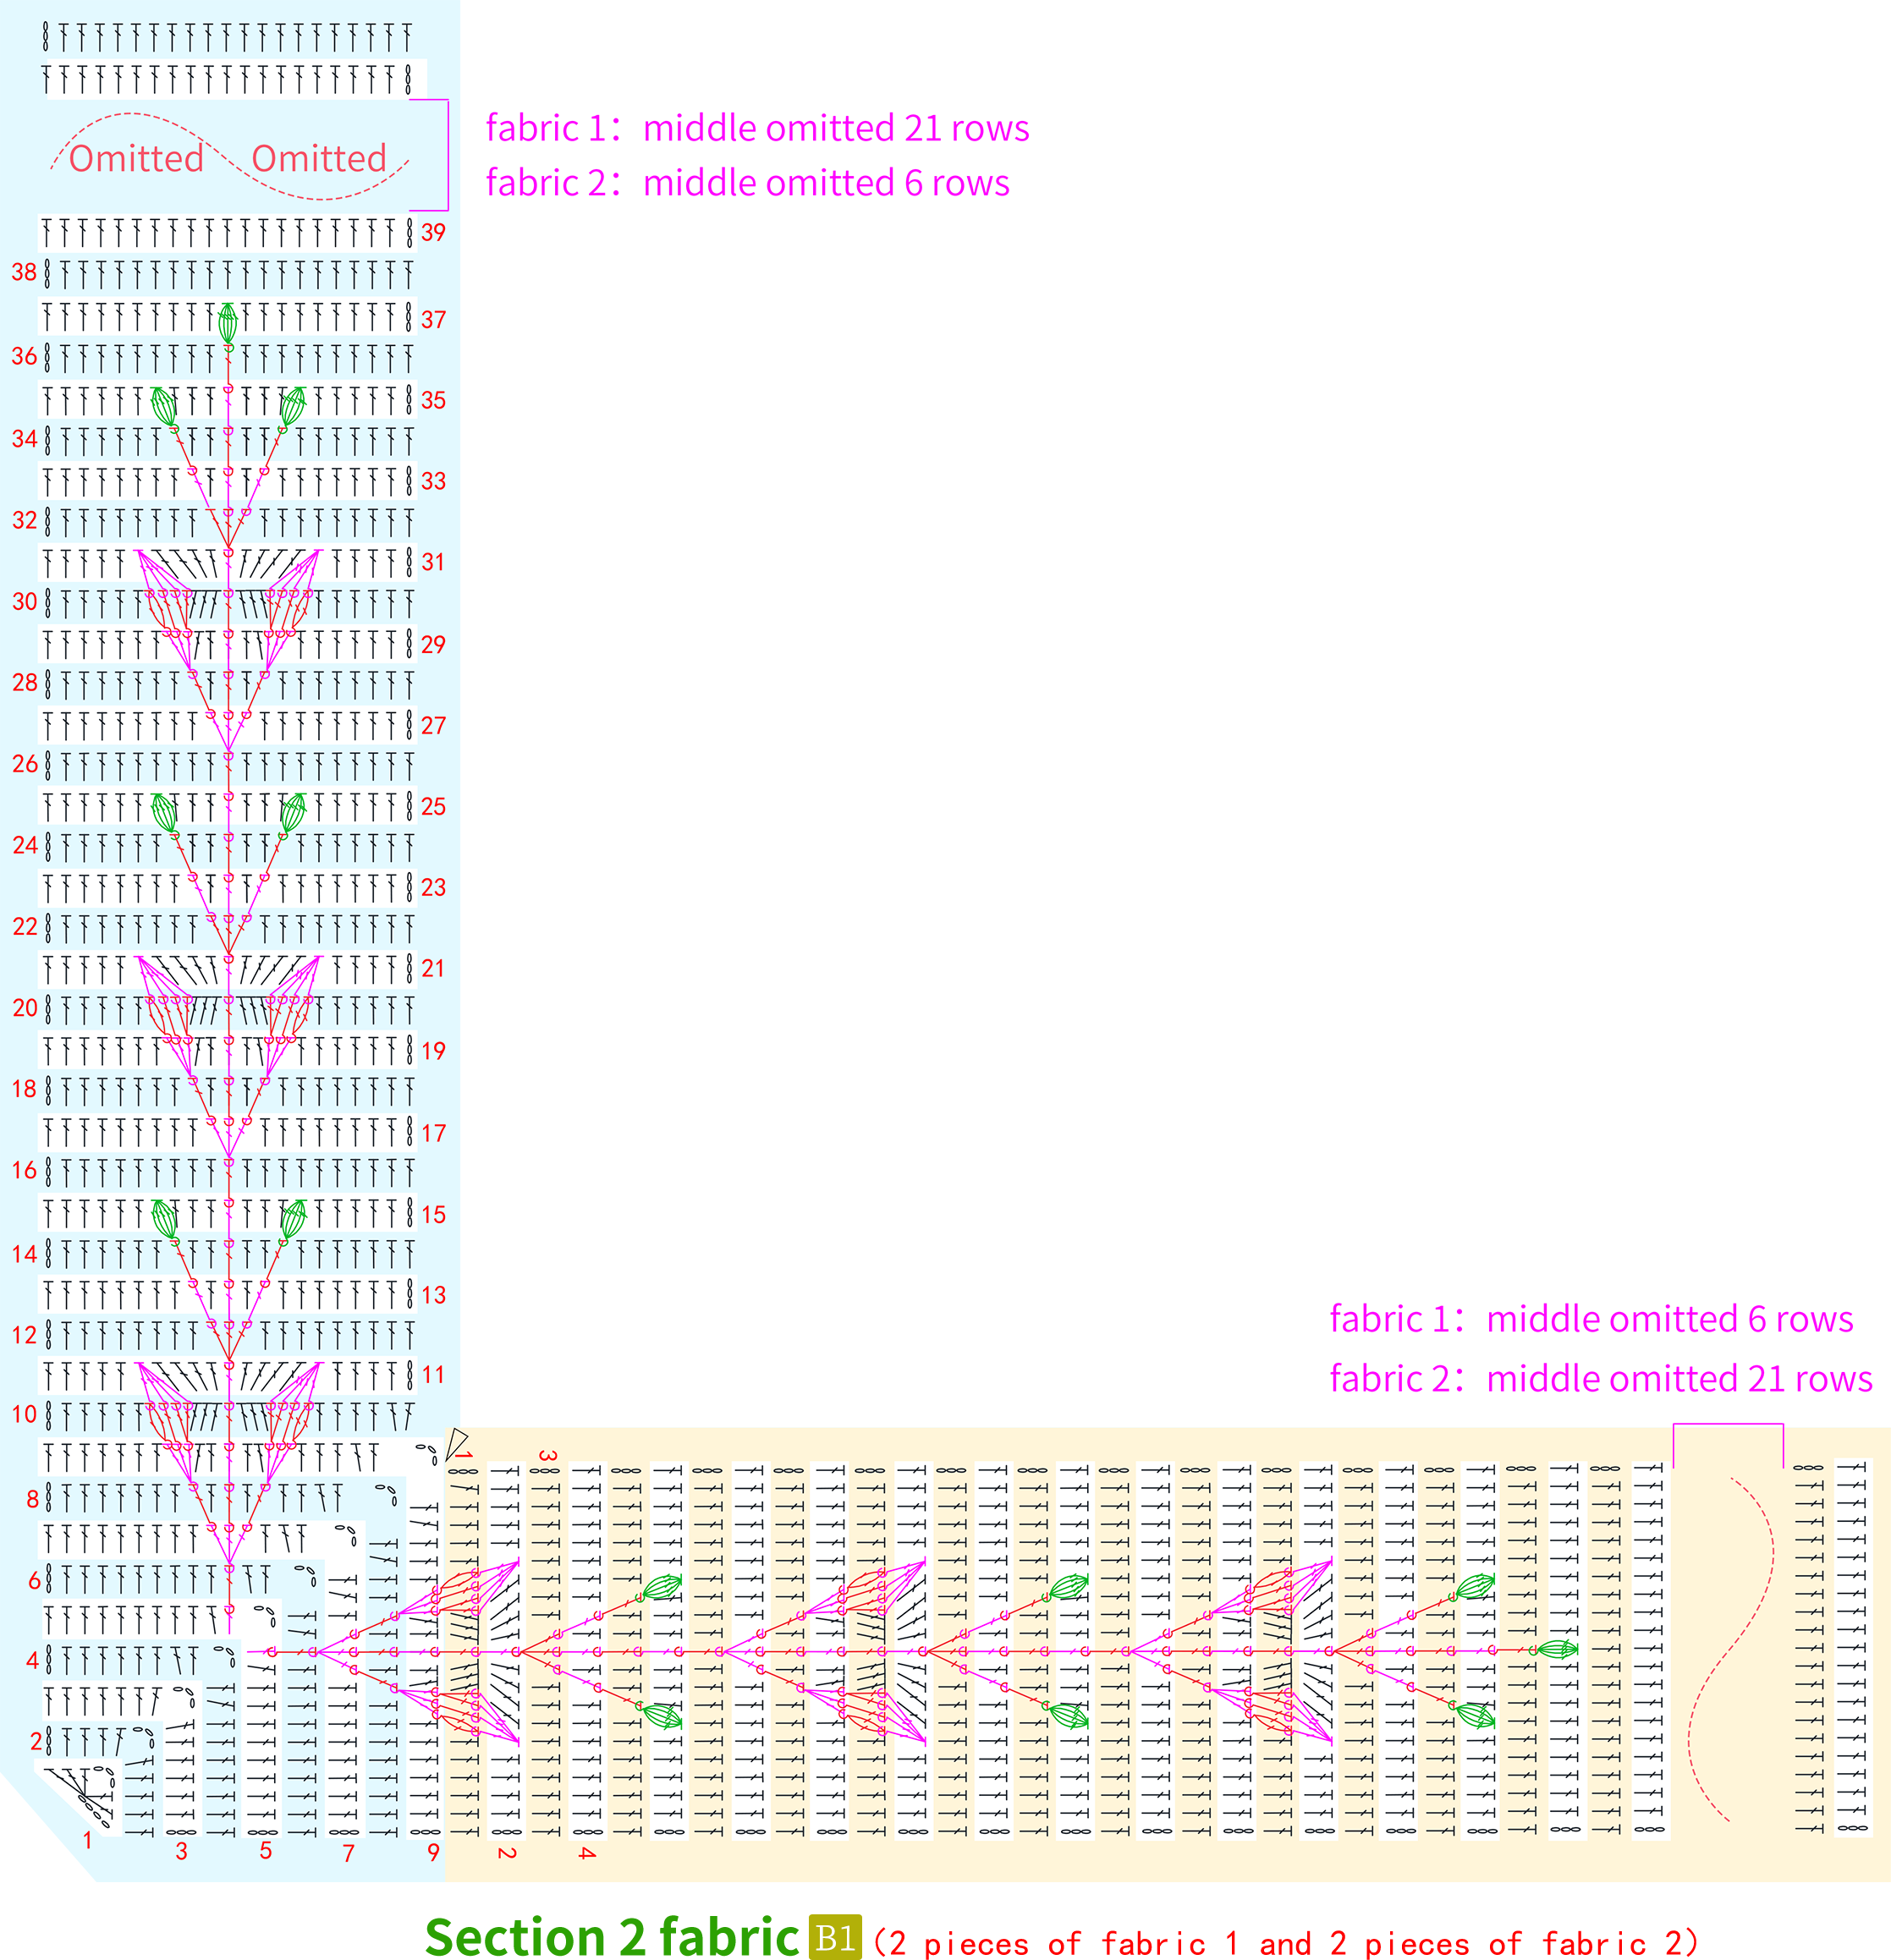
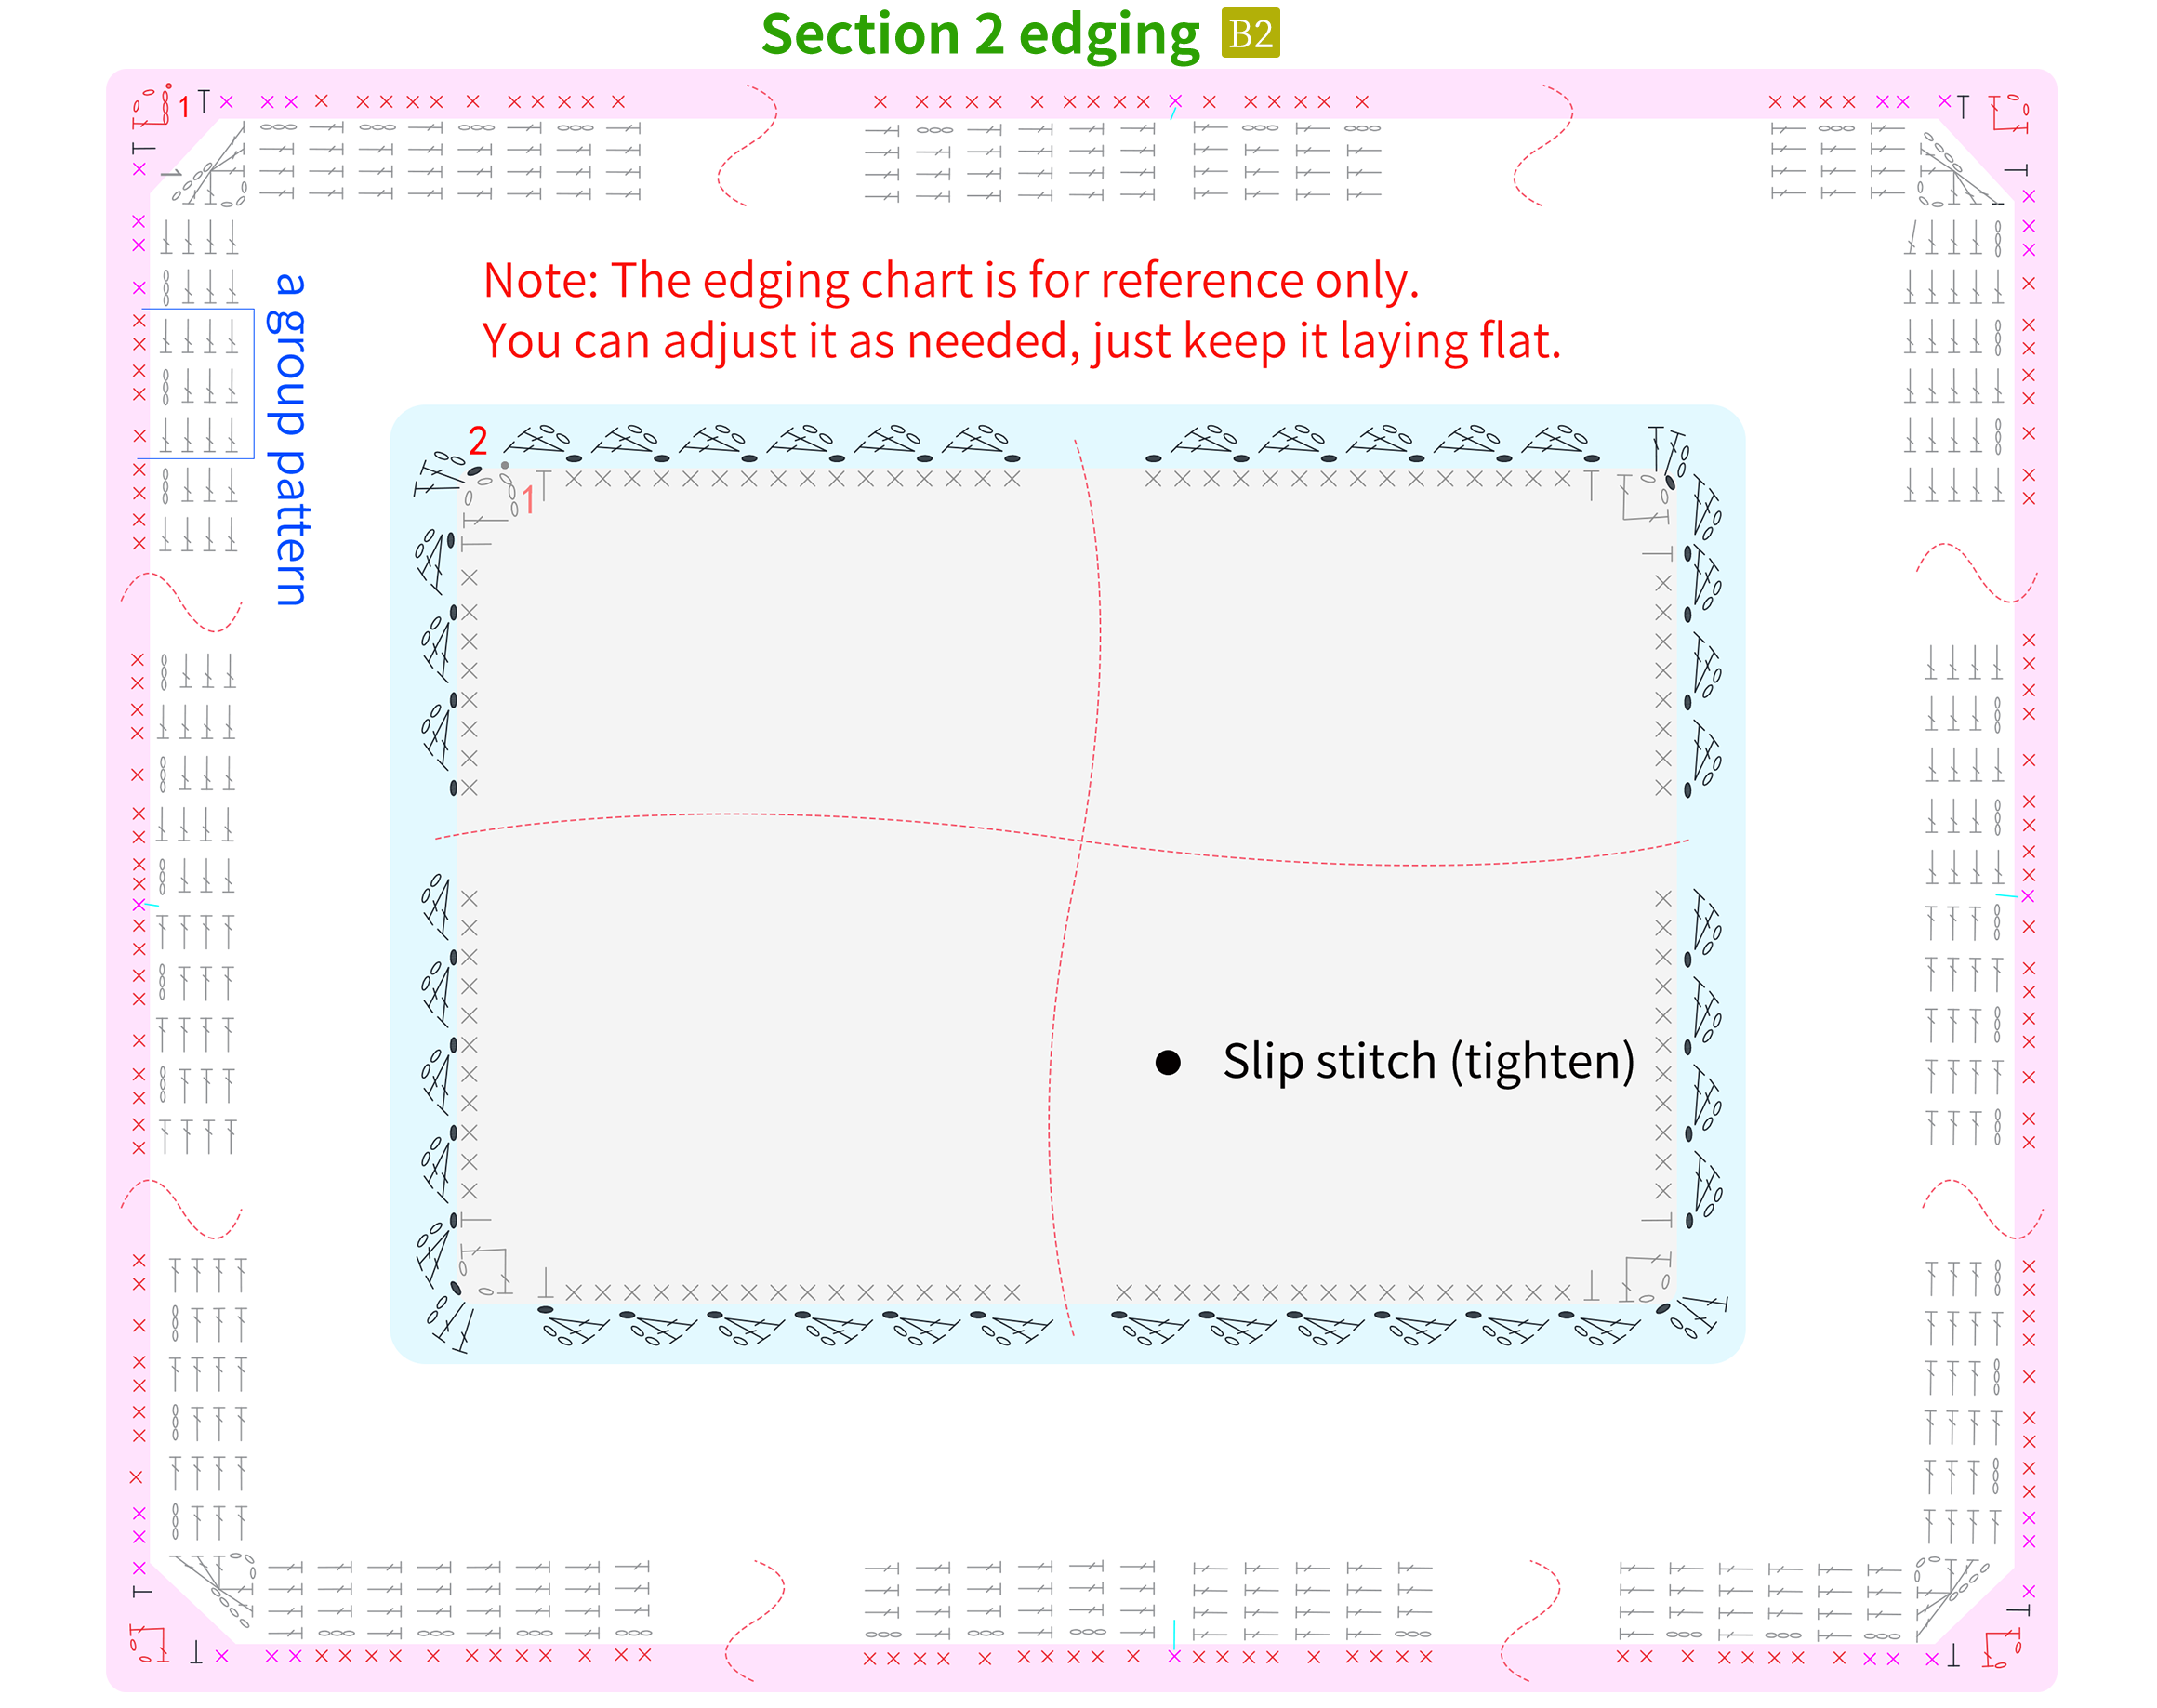
Section 2 consists of four fabric pieces and an edging. The fabric pieces are divided into two identical pairs, referred to as fabric 1 and fabric 2. These pieces are worked back and forth starting from a foundation chain. Please refer to the video demonstration for more details.
Note:
1. On the wrong side row, work the opposite stitch.
2. The number of even rows of double crochets can also be adjusted according to your motif, as needed.
Part 3 JoiningC 16' 18'' (Part 3)
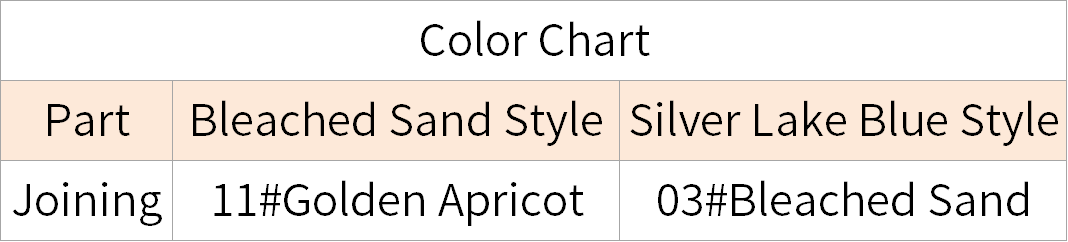
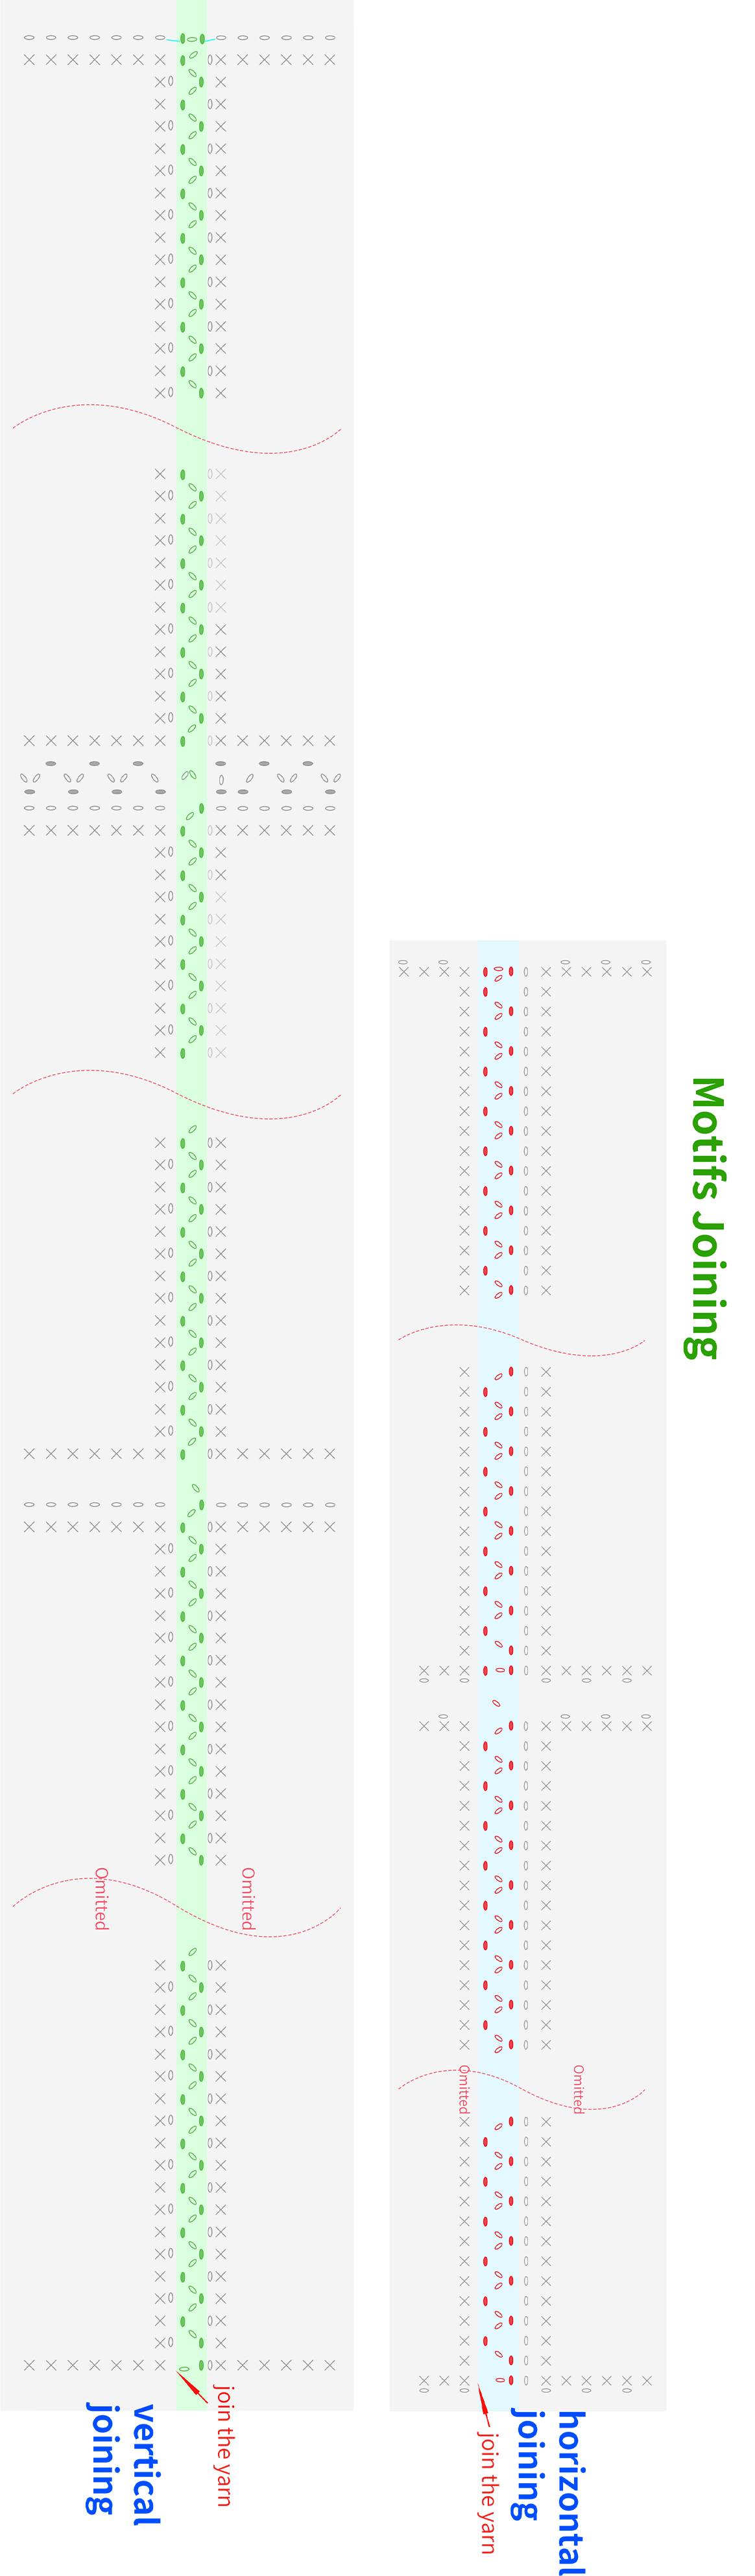
The joining are divided into motif connectionsC1 and connections between Section 1 and Section 2C2, completed using crochet chains and slip stitches. Please refer to the video demonstration for more details.
Note:
1. The chart only shows part of the pattern, and the crochet method is similar and is for reference only; adjustments can be made. Just make sure it lays flat, and please refer to the video demonstration for more details.
2. When joining, refer to the finished product for the direction of the motif pattern.
Made by the community