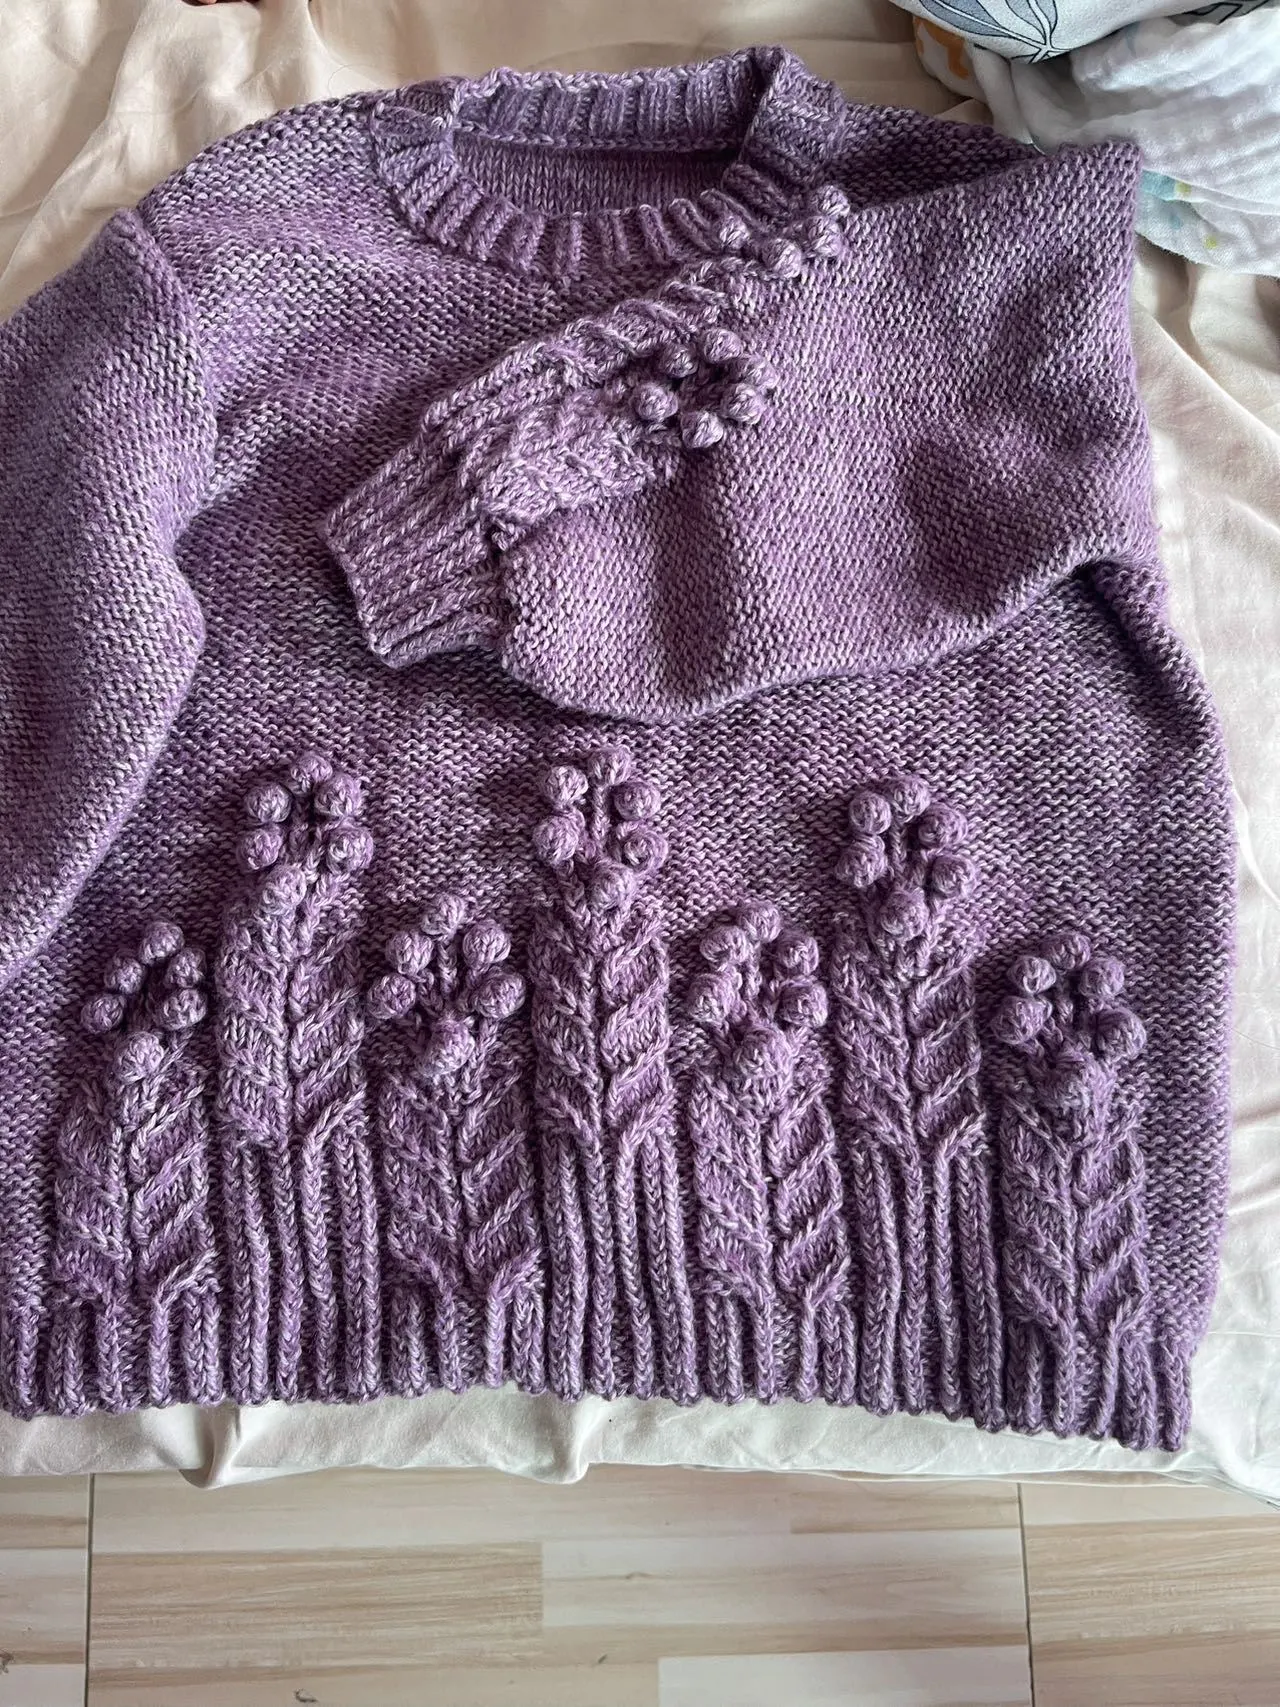
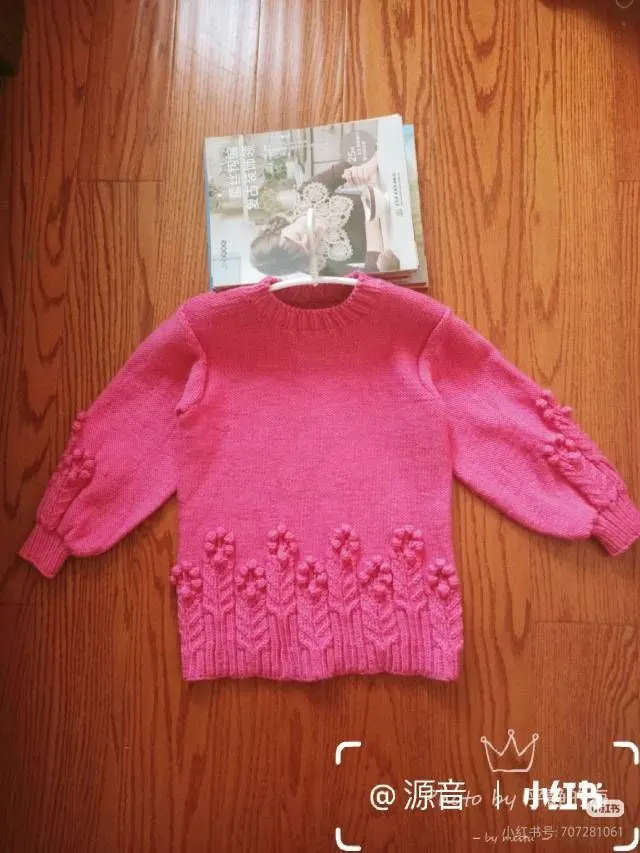
Clothes
Begonia
Project preview
See the finished project
Pattern format
Instructions
| Style | Yarn | Color |
|---|---|---|
| Mahogany Rose Style | Morandi 6# |  07#Mahogany Rose x 6 07#Mahogany Rose x 6 |
| Misted Yellow Style | Morandi 6# |  08#Misted Yellow x 6 08#Misted Yellow x 6 |
Mahogany Rose Style
07#Mahogany Rose x 6Misted Yellow Style
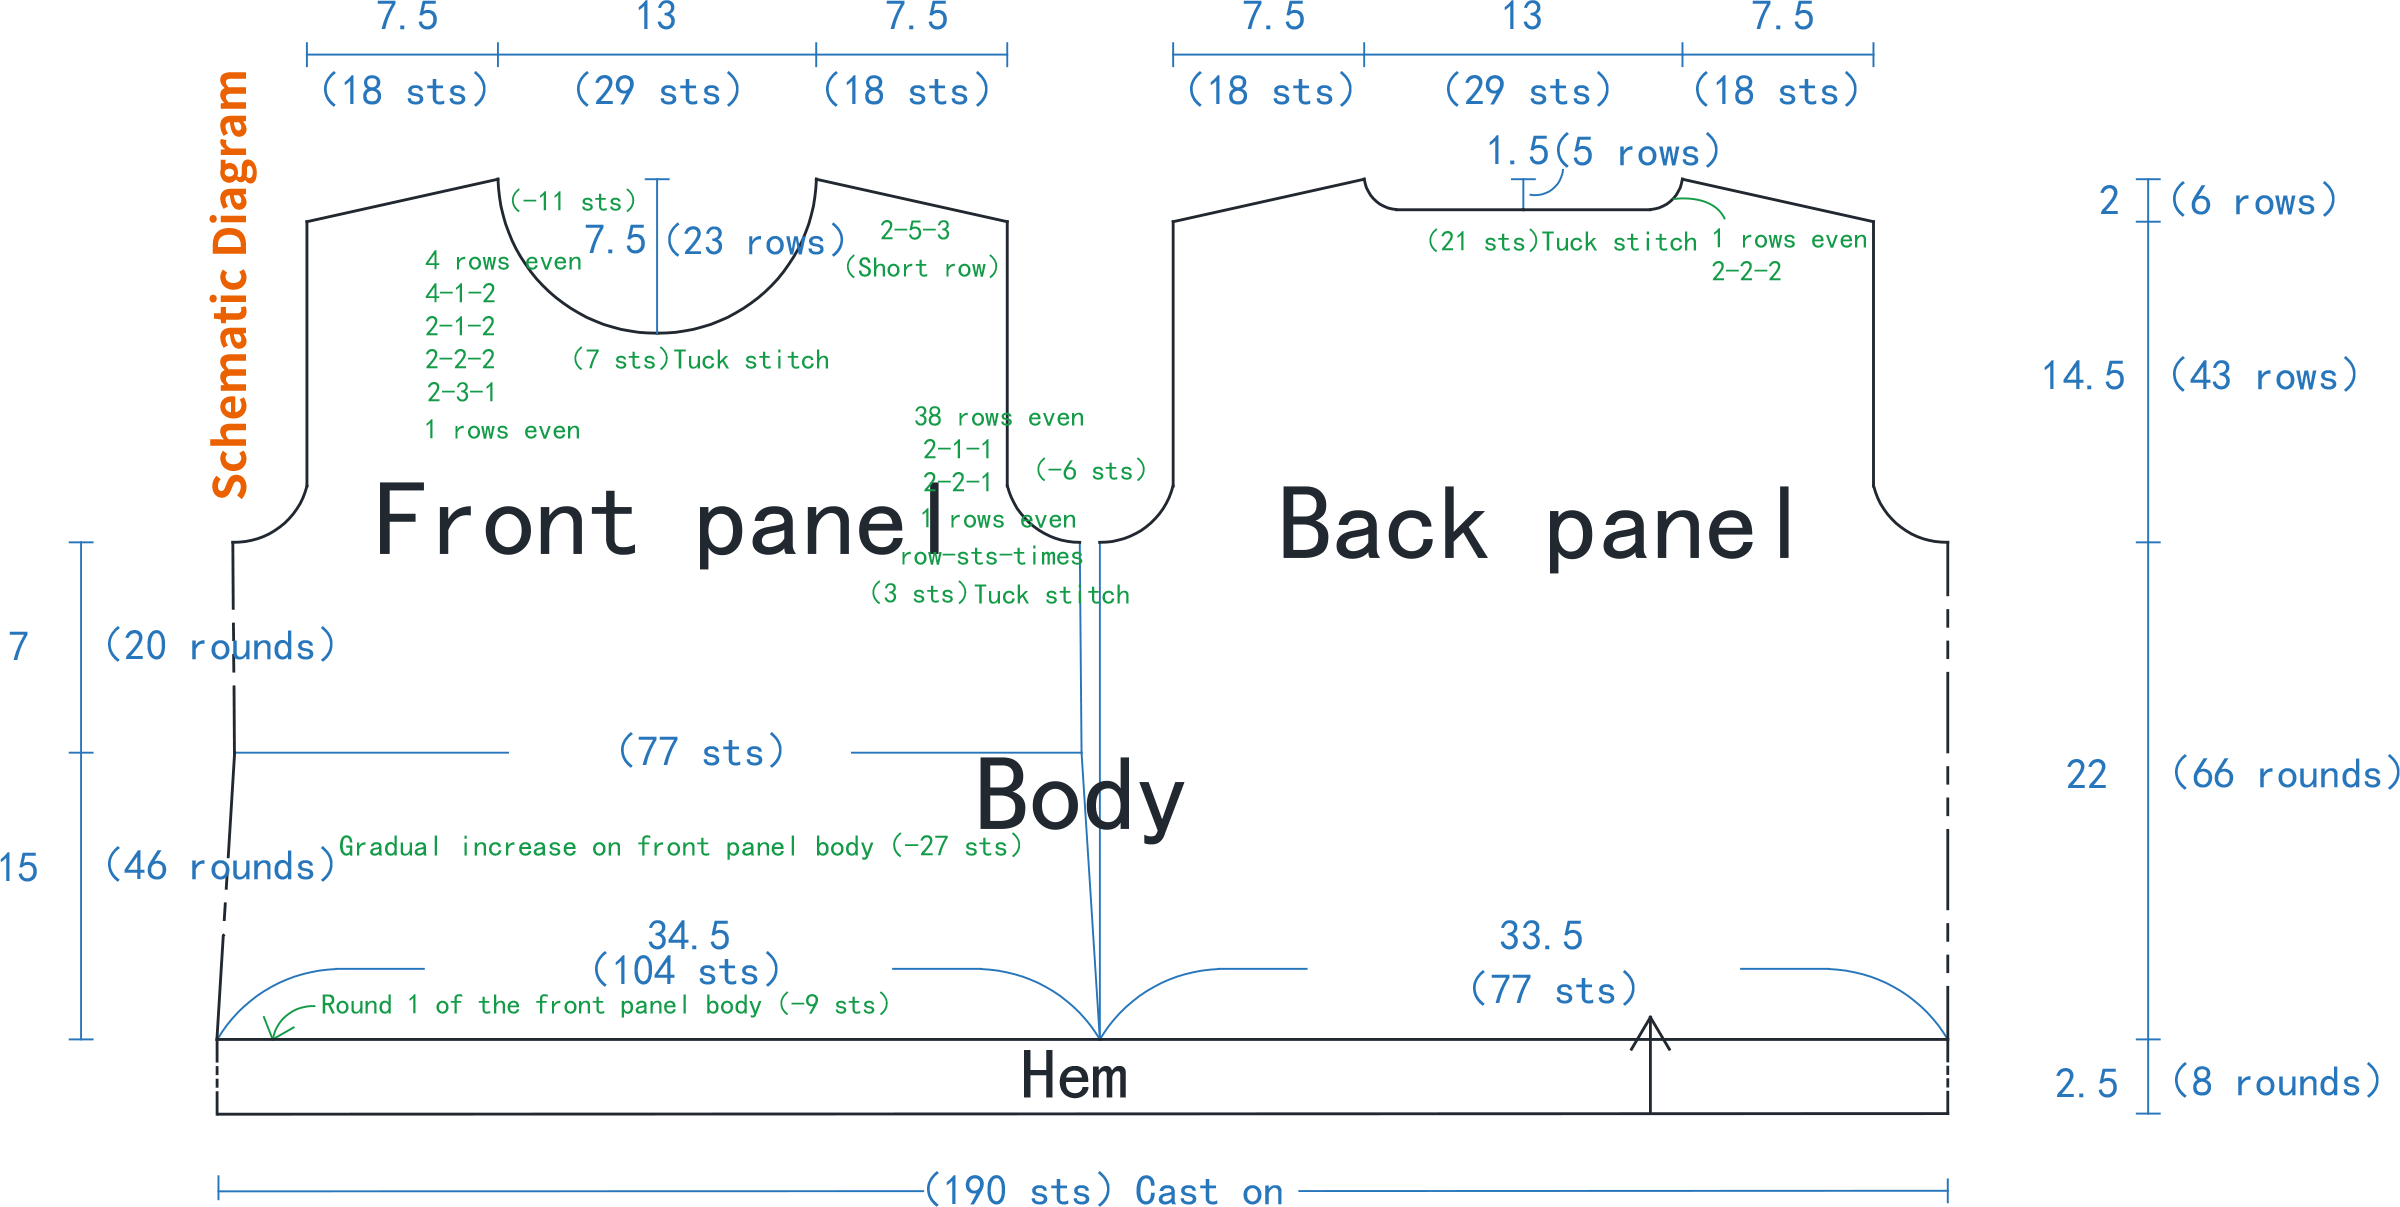
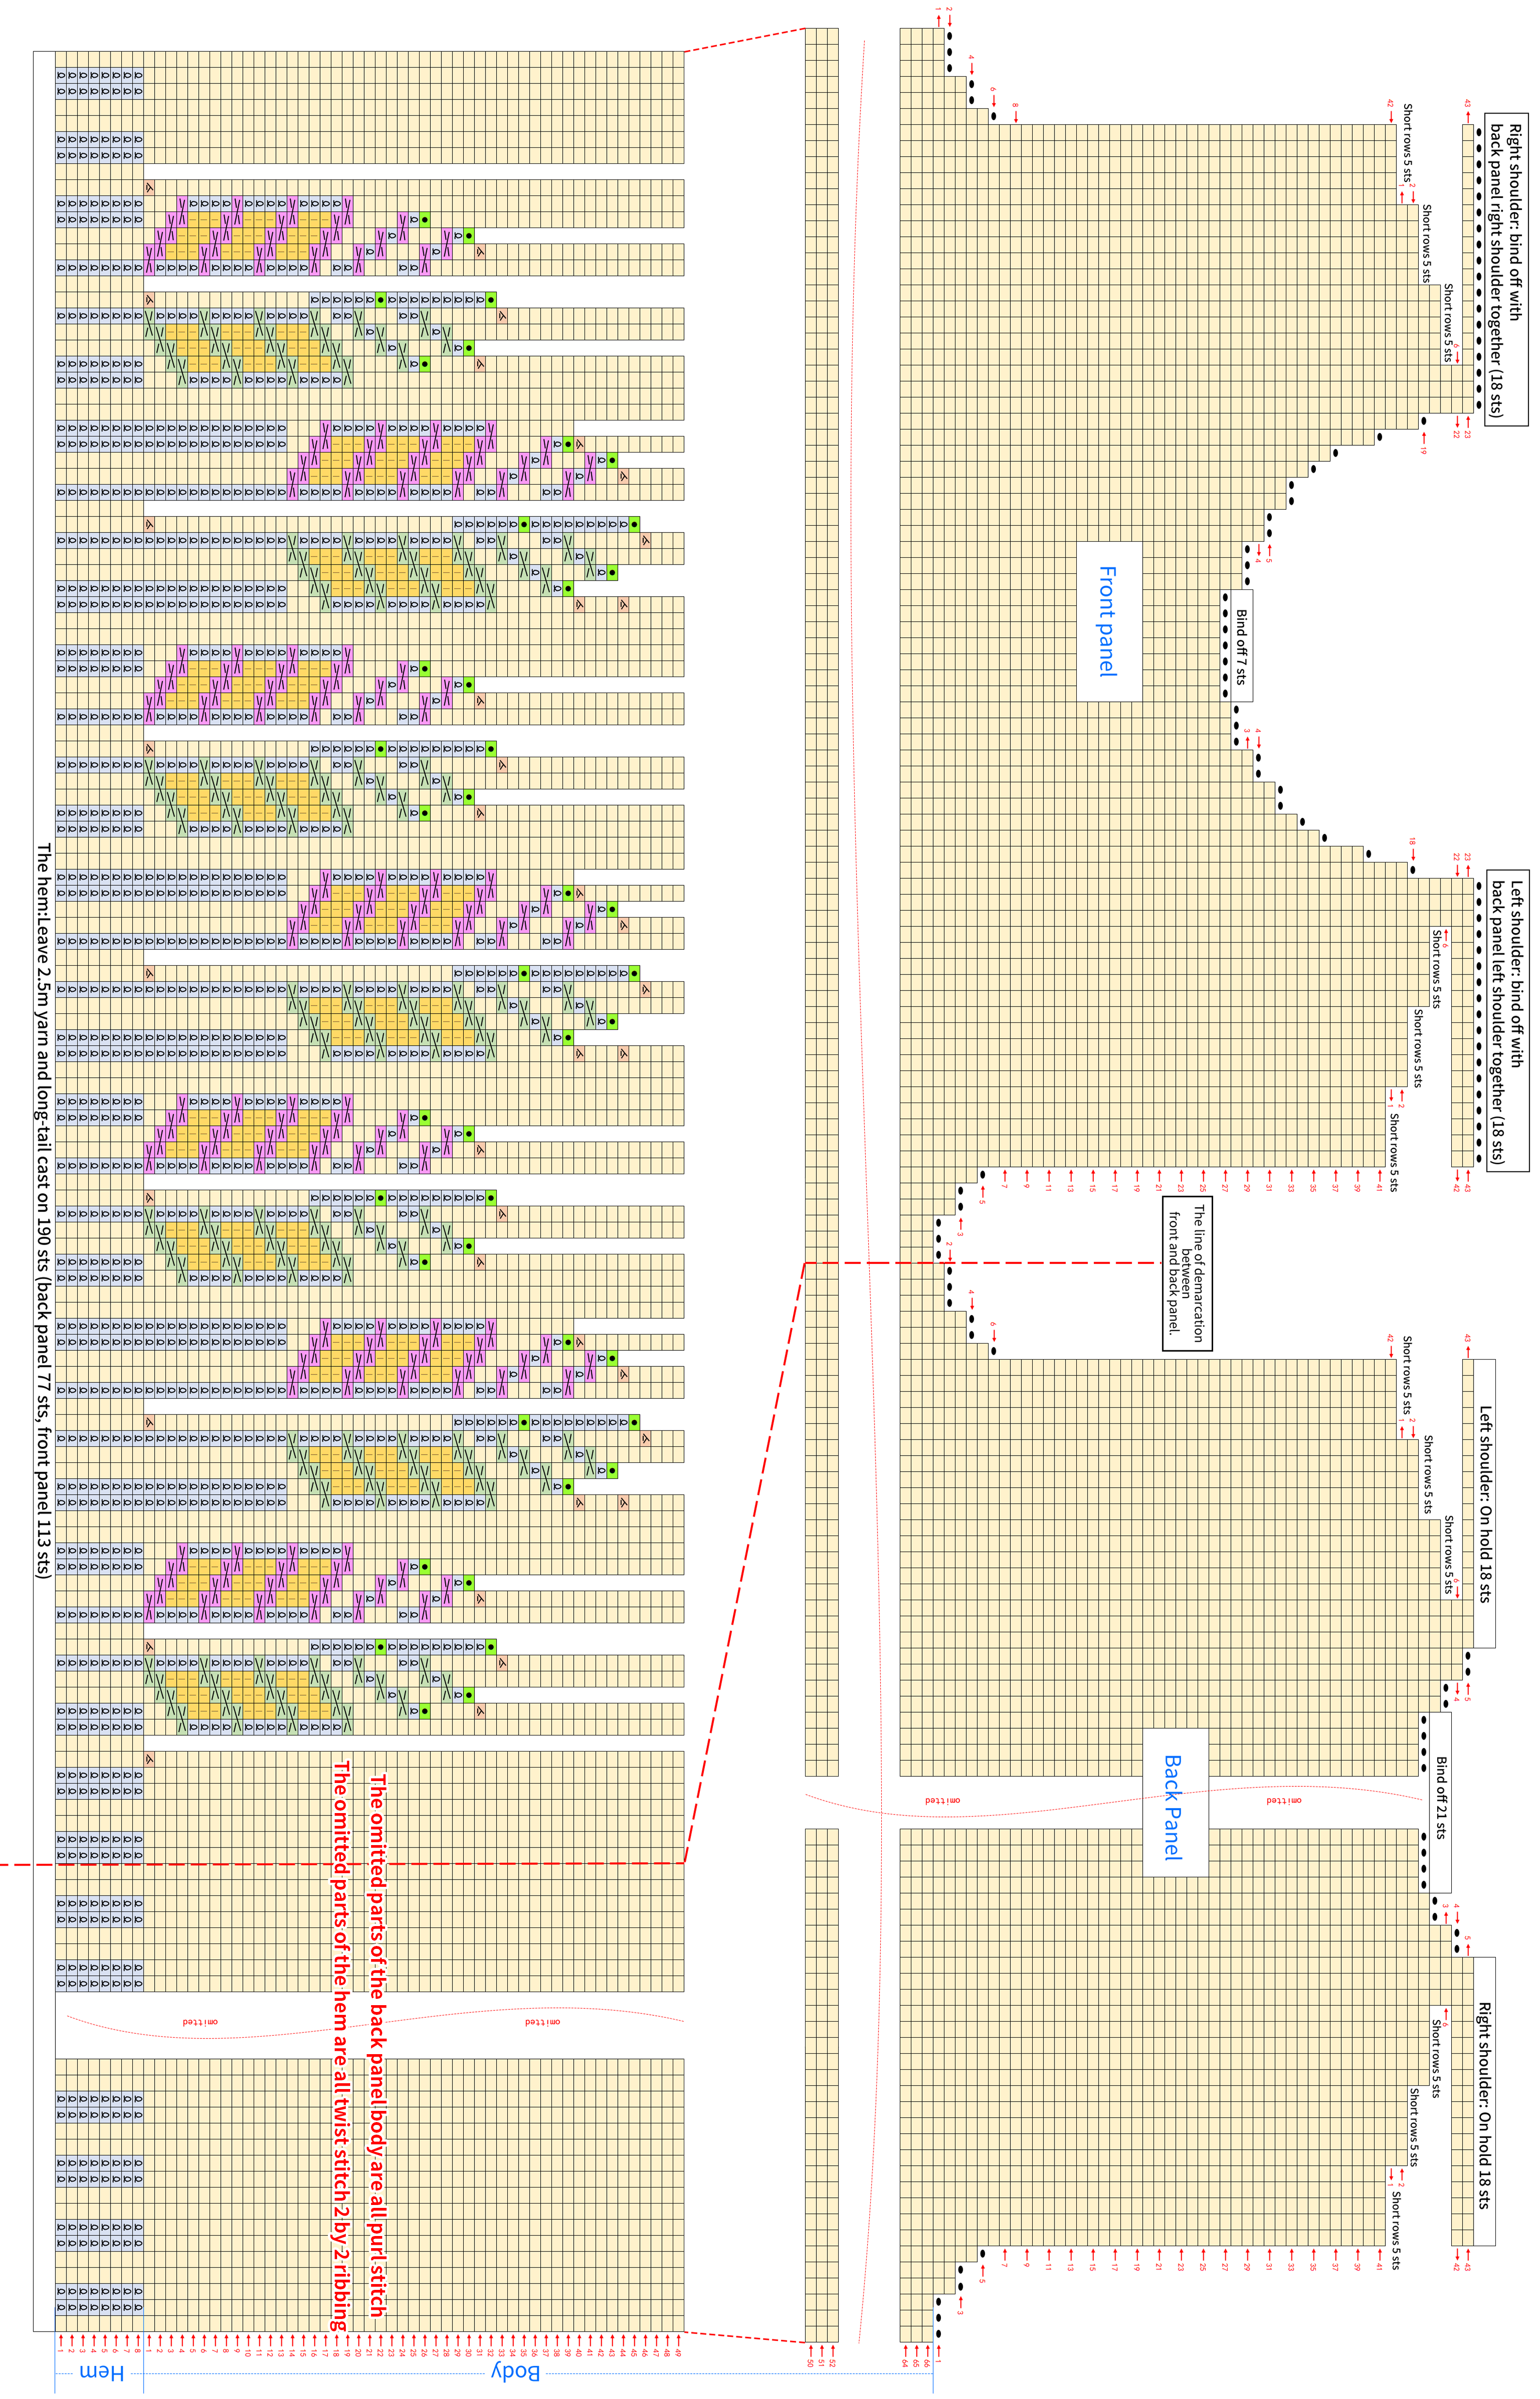
08#Misted Yellow x 6This sweater consists of the hem,the body, the front and back panel,the sleeves and the collar, First, knit in rounds for the hem and body, then work back and front panel, Next knit the sleeves and sew them together, Finally, pick up stitches around the neckline to knit the collar.
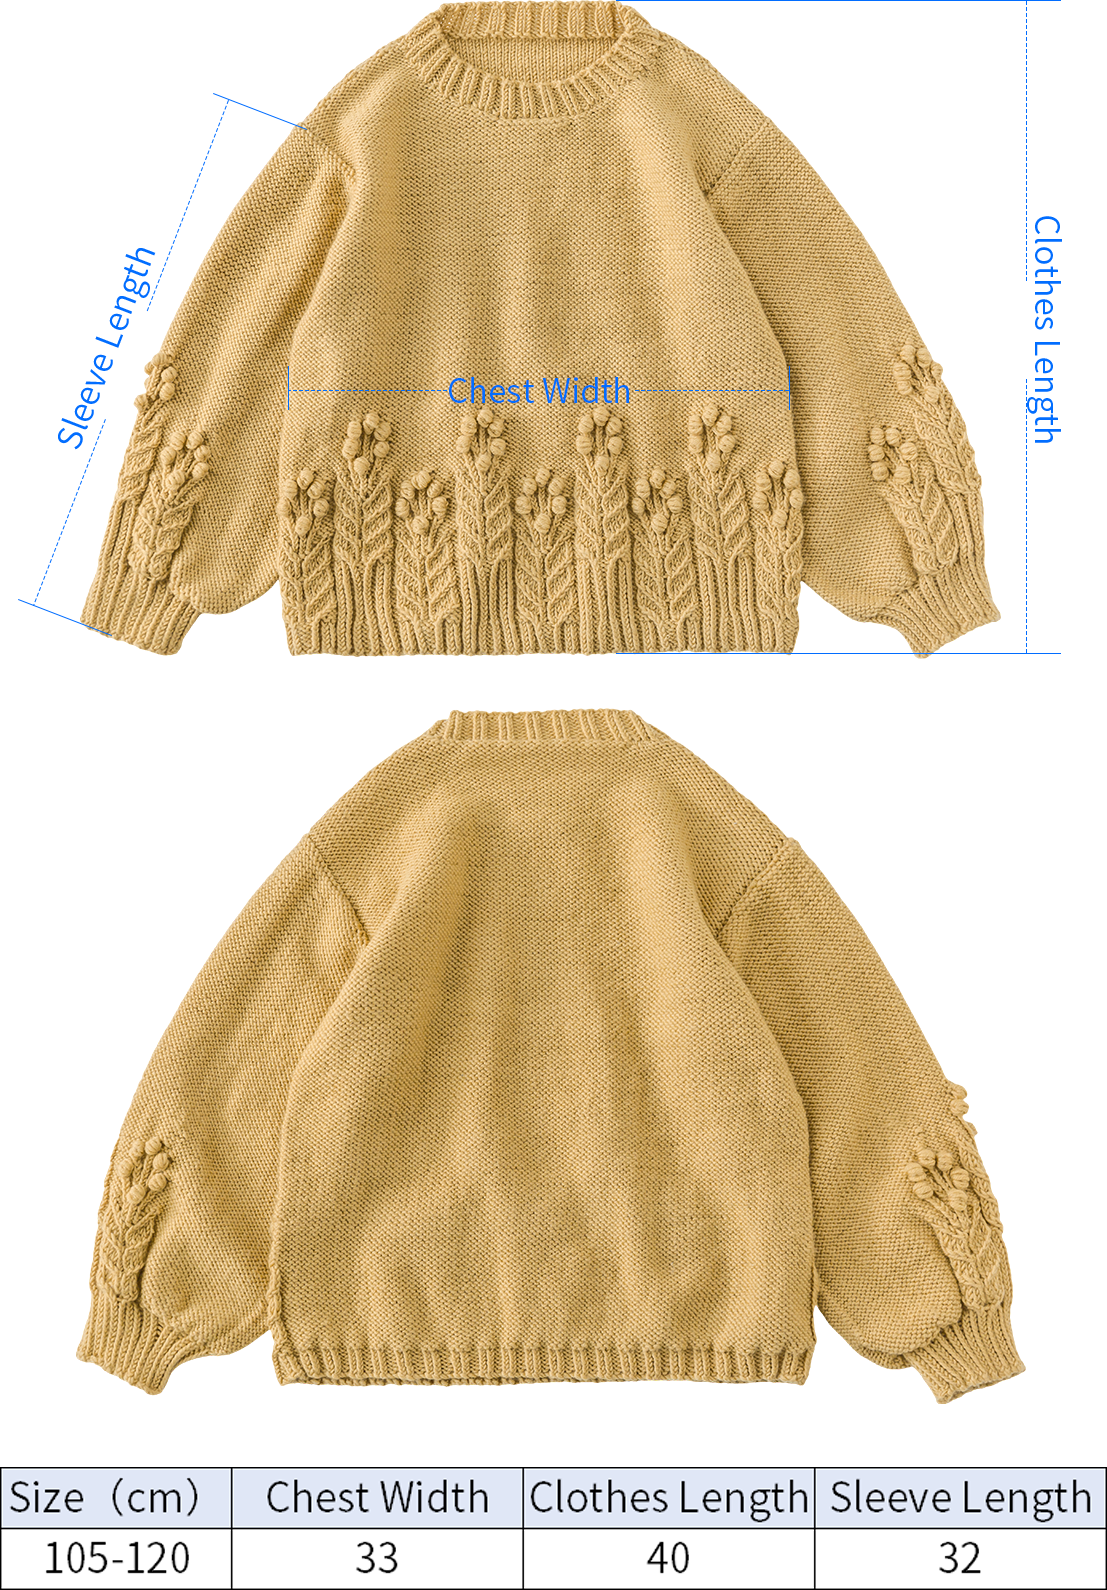
The handcrafted measurements may have an error of 1 to 2 cm. Due to variations in individual tension, the size of the sample is for reference only.
Materials: Susan's Family Morandi 6#
Needles & Hook: 4.00 mm circular needles & 4.00 mm double pointed needle & 3.50 mm crochet hook
Guage: 10*10cm
[Garter stitch:23 sts, 30 rows ]
Note:
1.This pattern is making in Chinese crochet pattern terms, and the stitch name is written using American terminology. All measurements in charts are in cm.
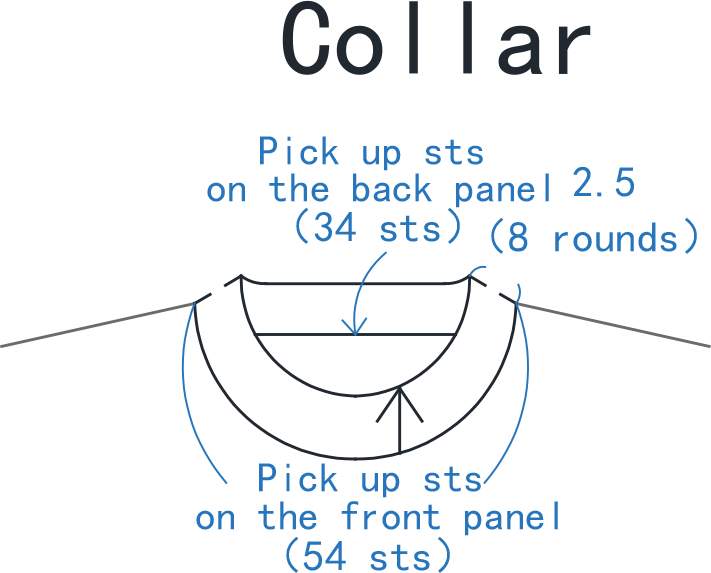
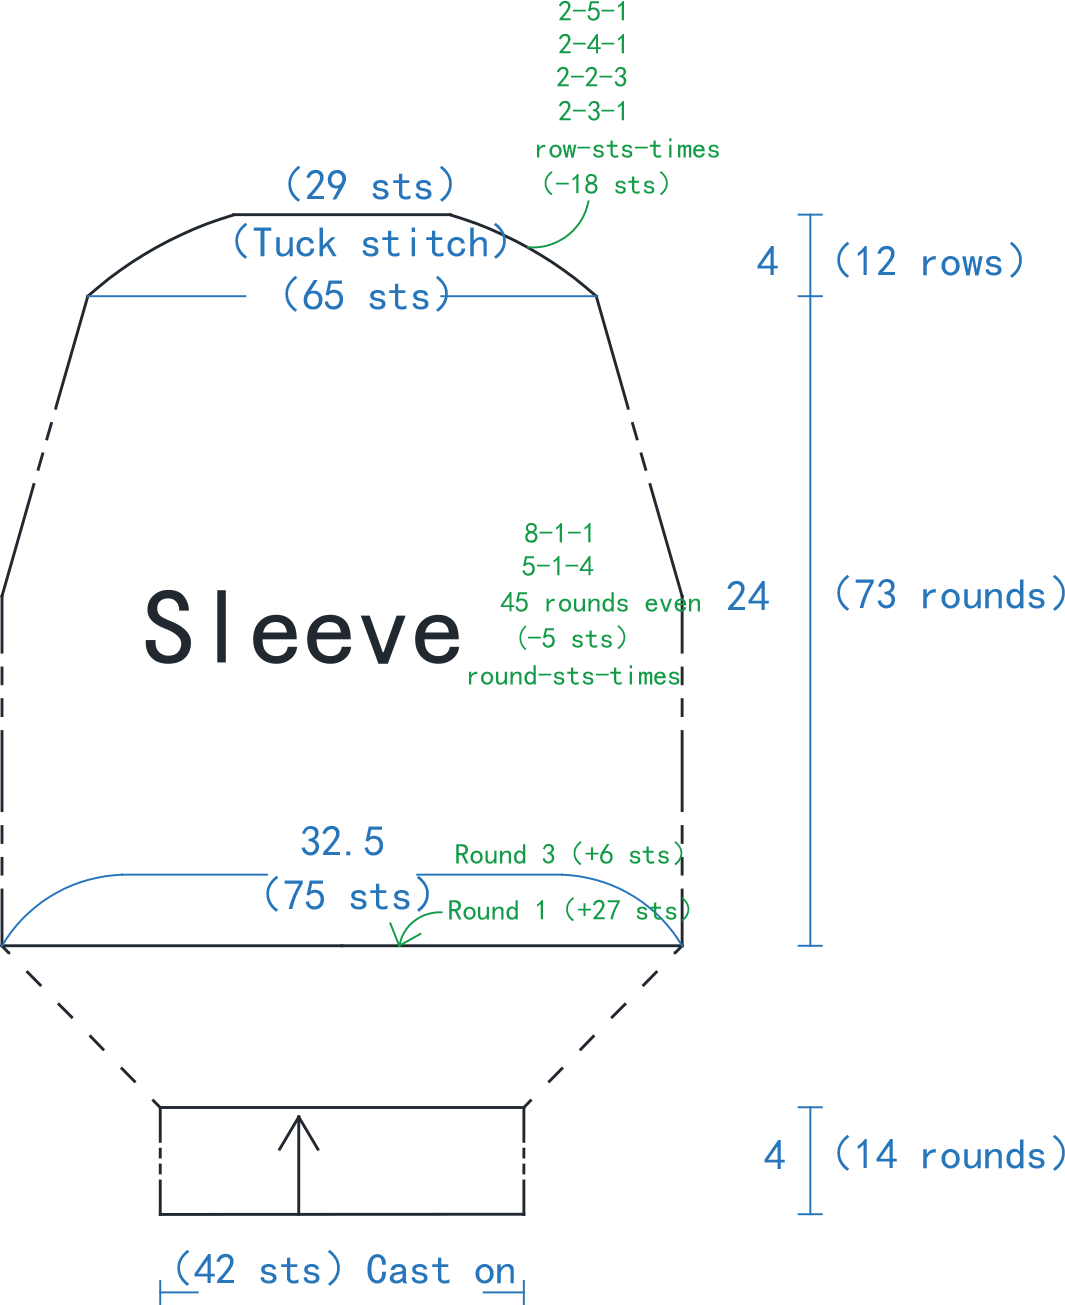
2.The collar and sleeves are worked with double pointed needles, and the rest are knitted with circular needles.
3.The left and right on the charts refer to the actual wearing position.
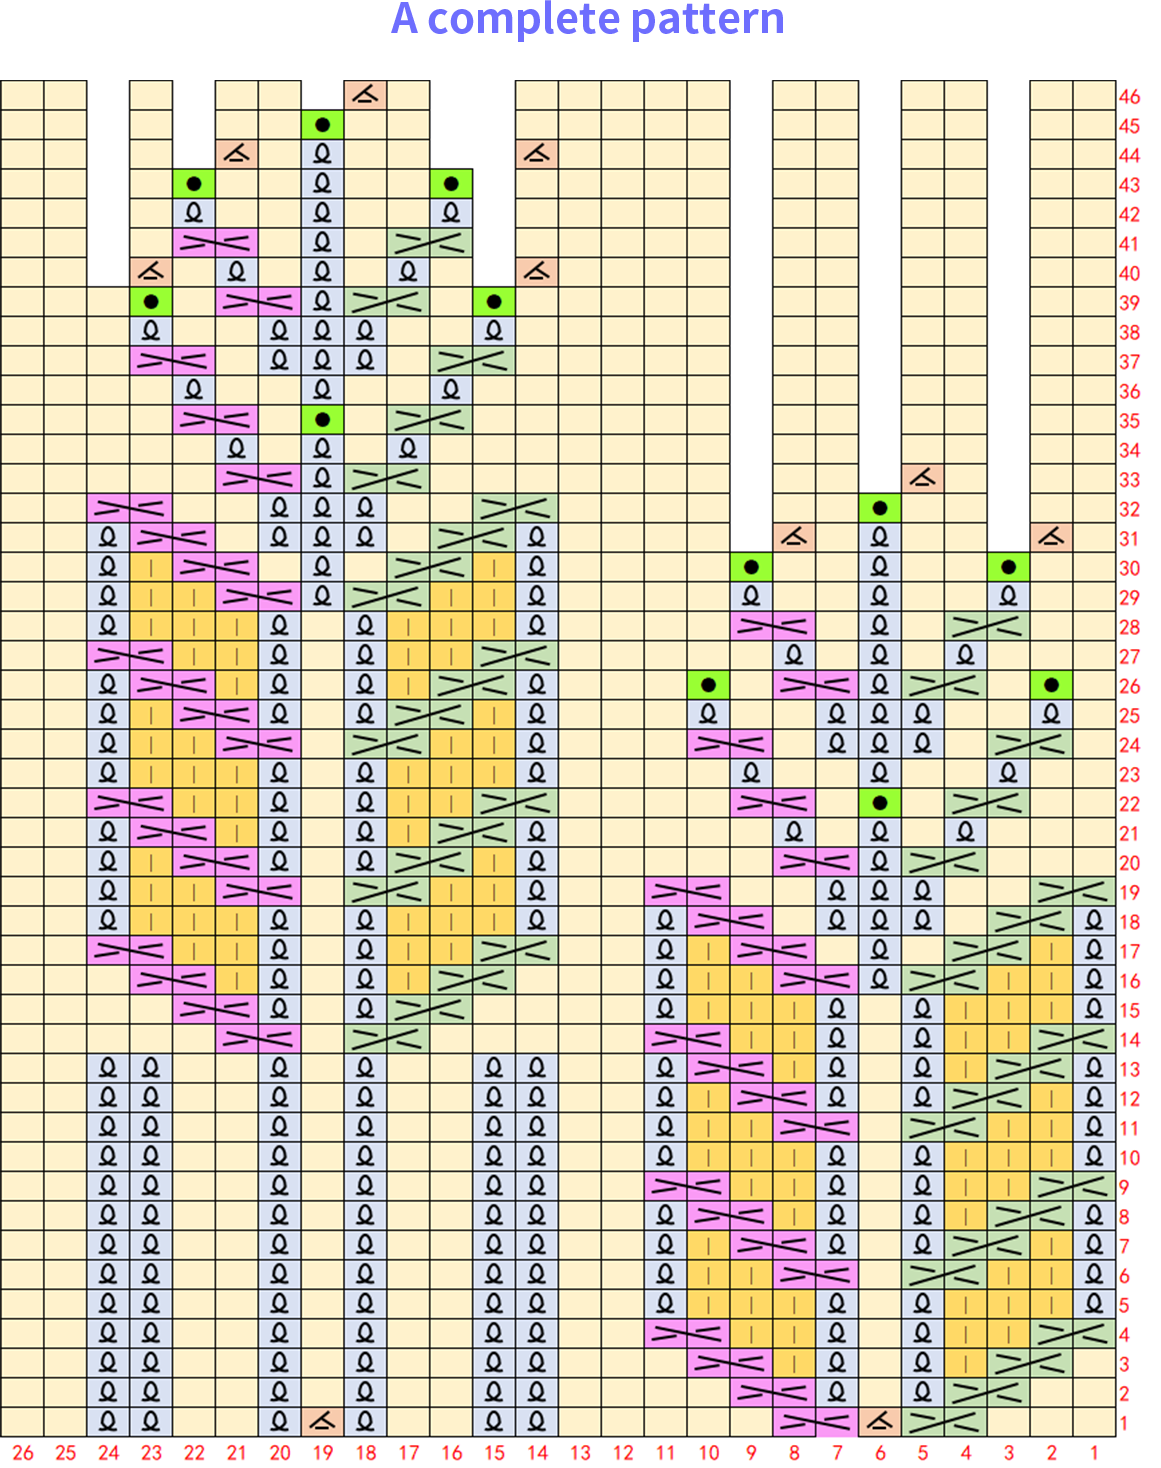
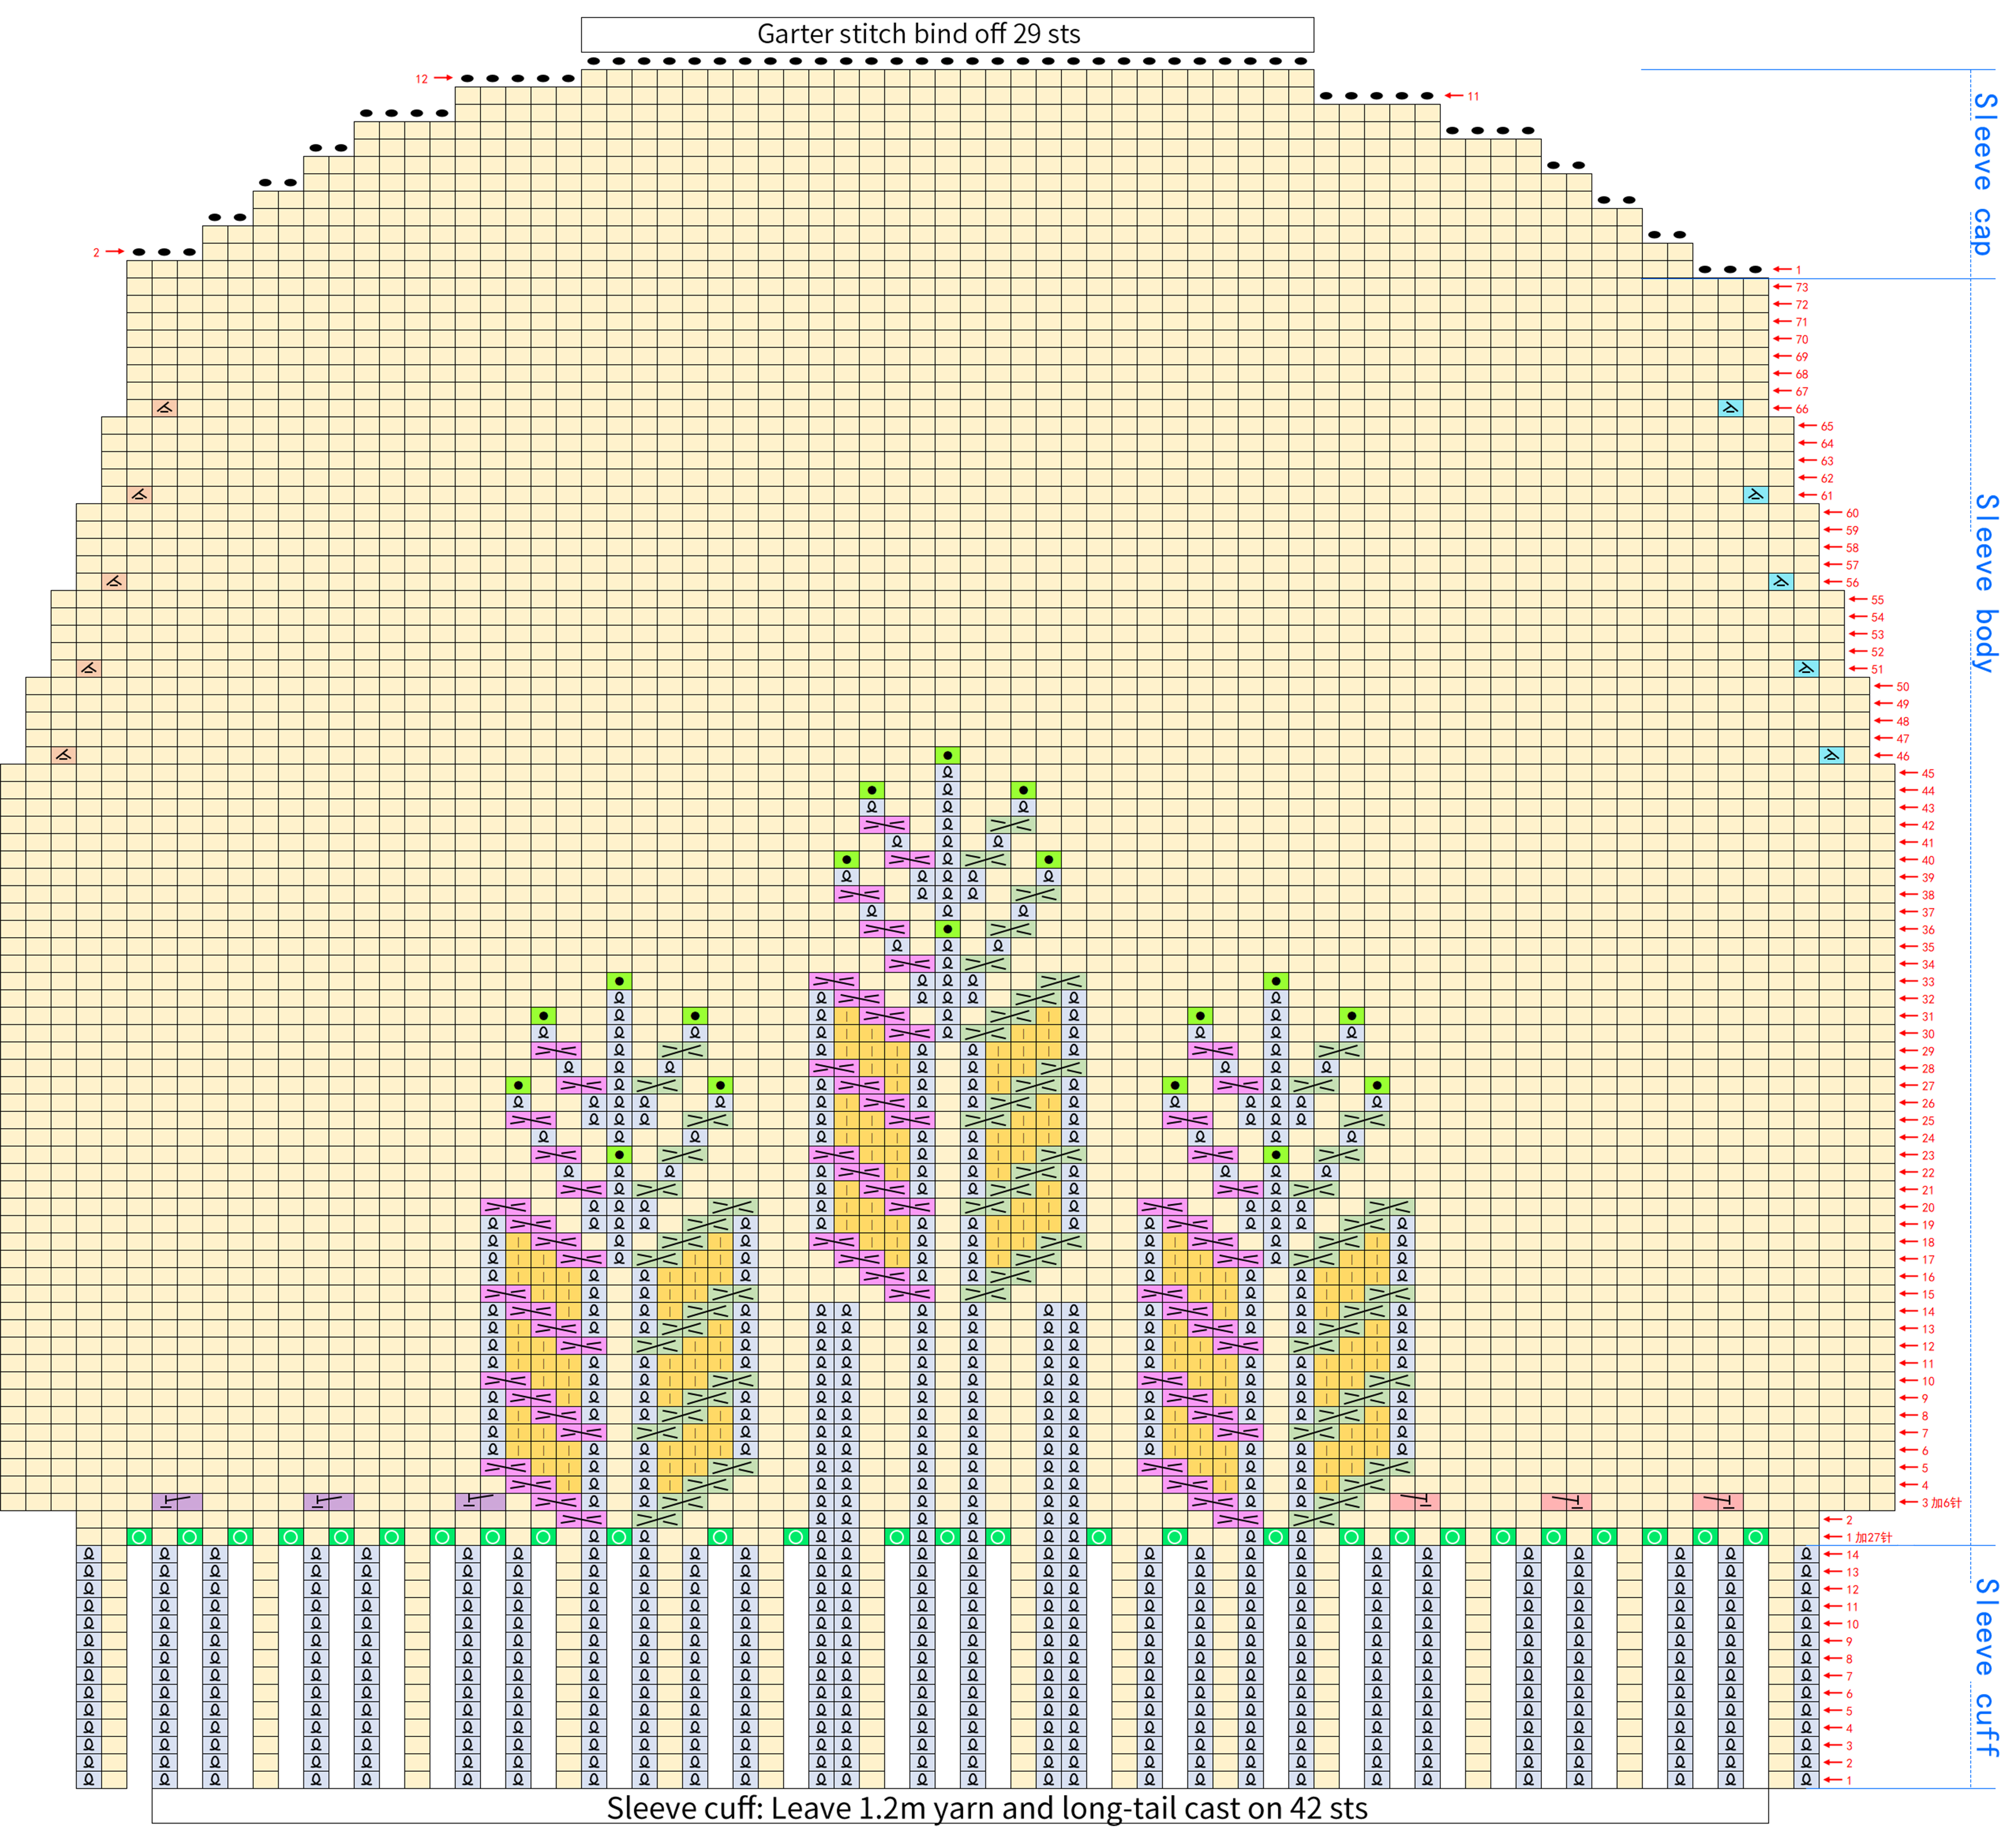
4.The pattern chart shows the texture of the right side of the knitted piece, on the wrong side, you should to work the stitches in opposite way according to the chart.
Chart Key





Part 1 The hem,the body, the front and back panel
Refer to diagram 4-4
Part 2 The sleeves and sew
Part 3 The collar

Made by the community