
Clothes
Bloom Reflection Blouse
Project preview
See the finished project
Pattern format
Instructions
Watch and follow
Video tutorial
This top consists of the back piece, the front piece, the sleeves, the bands, and the decorations. For the specific needles, yarns, and color schemes, please refer to the paper instructions.
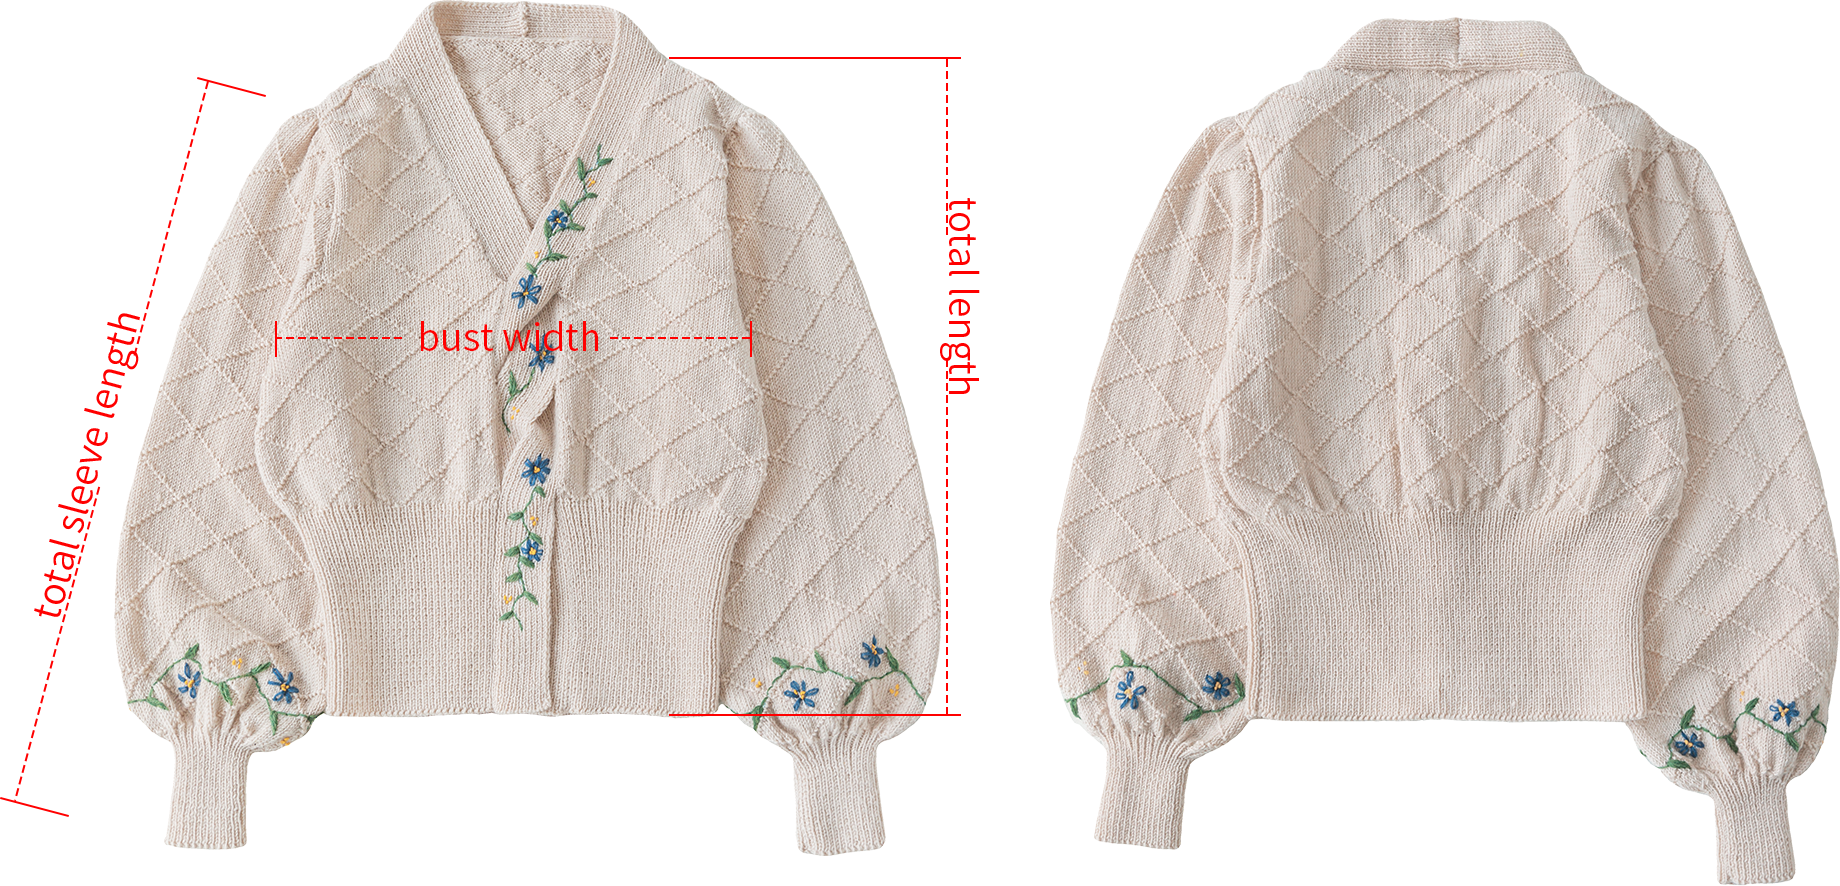
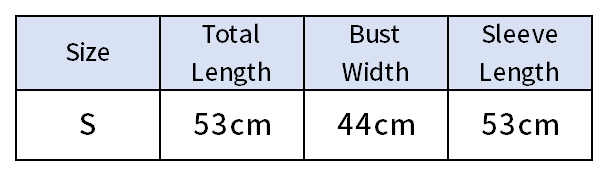
The handcrafted measurements may have an error of 1 to 2 cm. Due to variations in individual tension, the size of the sample is for reference only.
Materials: Susan's Family Morandi 4#, Shetland and 4-Ply Combed Cotton & Acrylic Fibre Hand Knitting Yarn.
Hook: 10# 3.25 mm circular needle
12# 2.75 mm circular needle
This pattern is making in Chinese crochet pattern terms, and the stitch name is written using American terminology. All measurements in charts are in cm.

The Structure Diagram
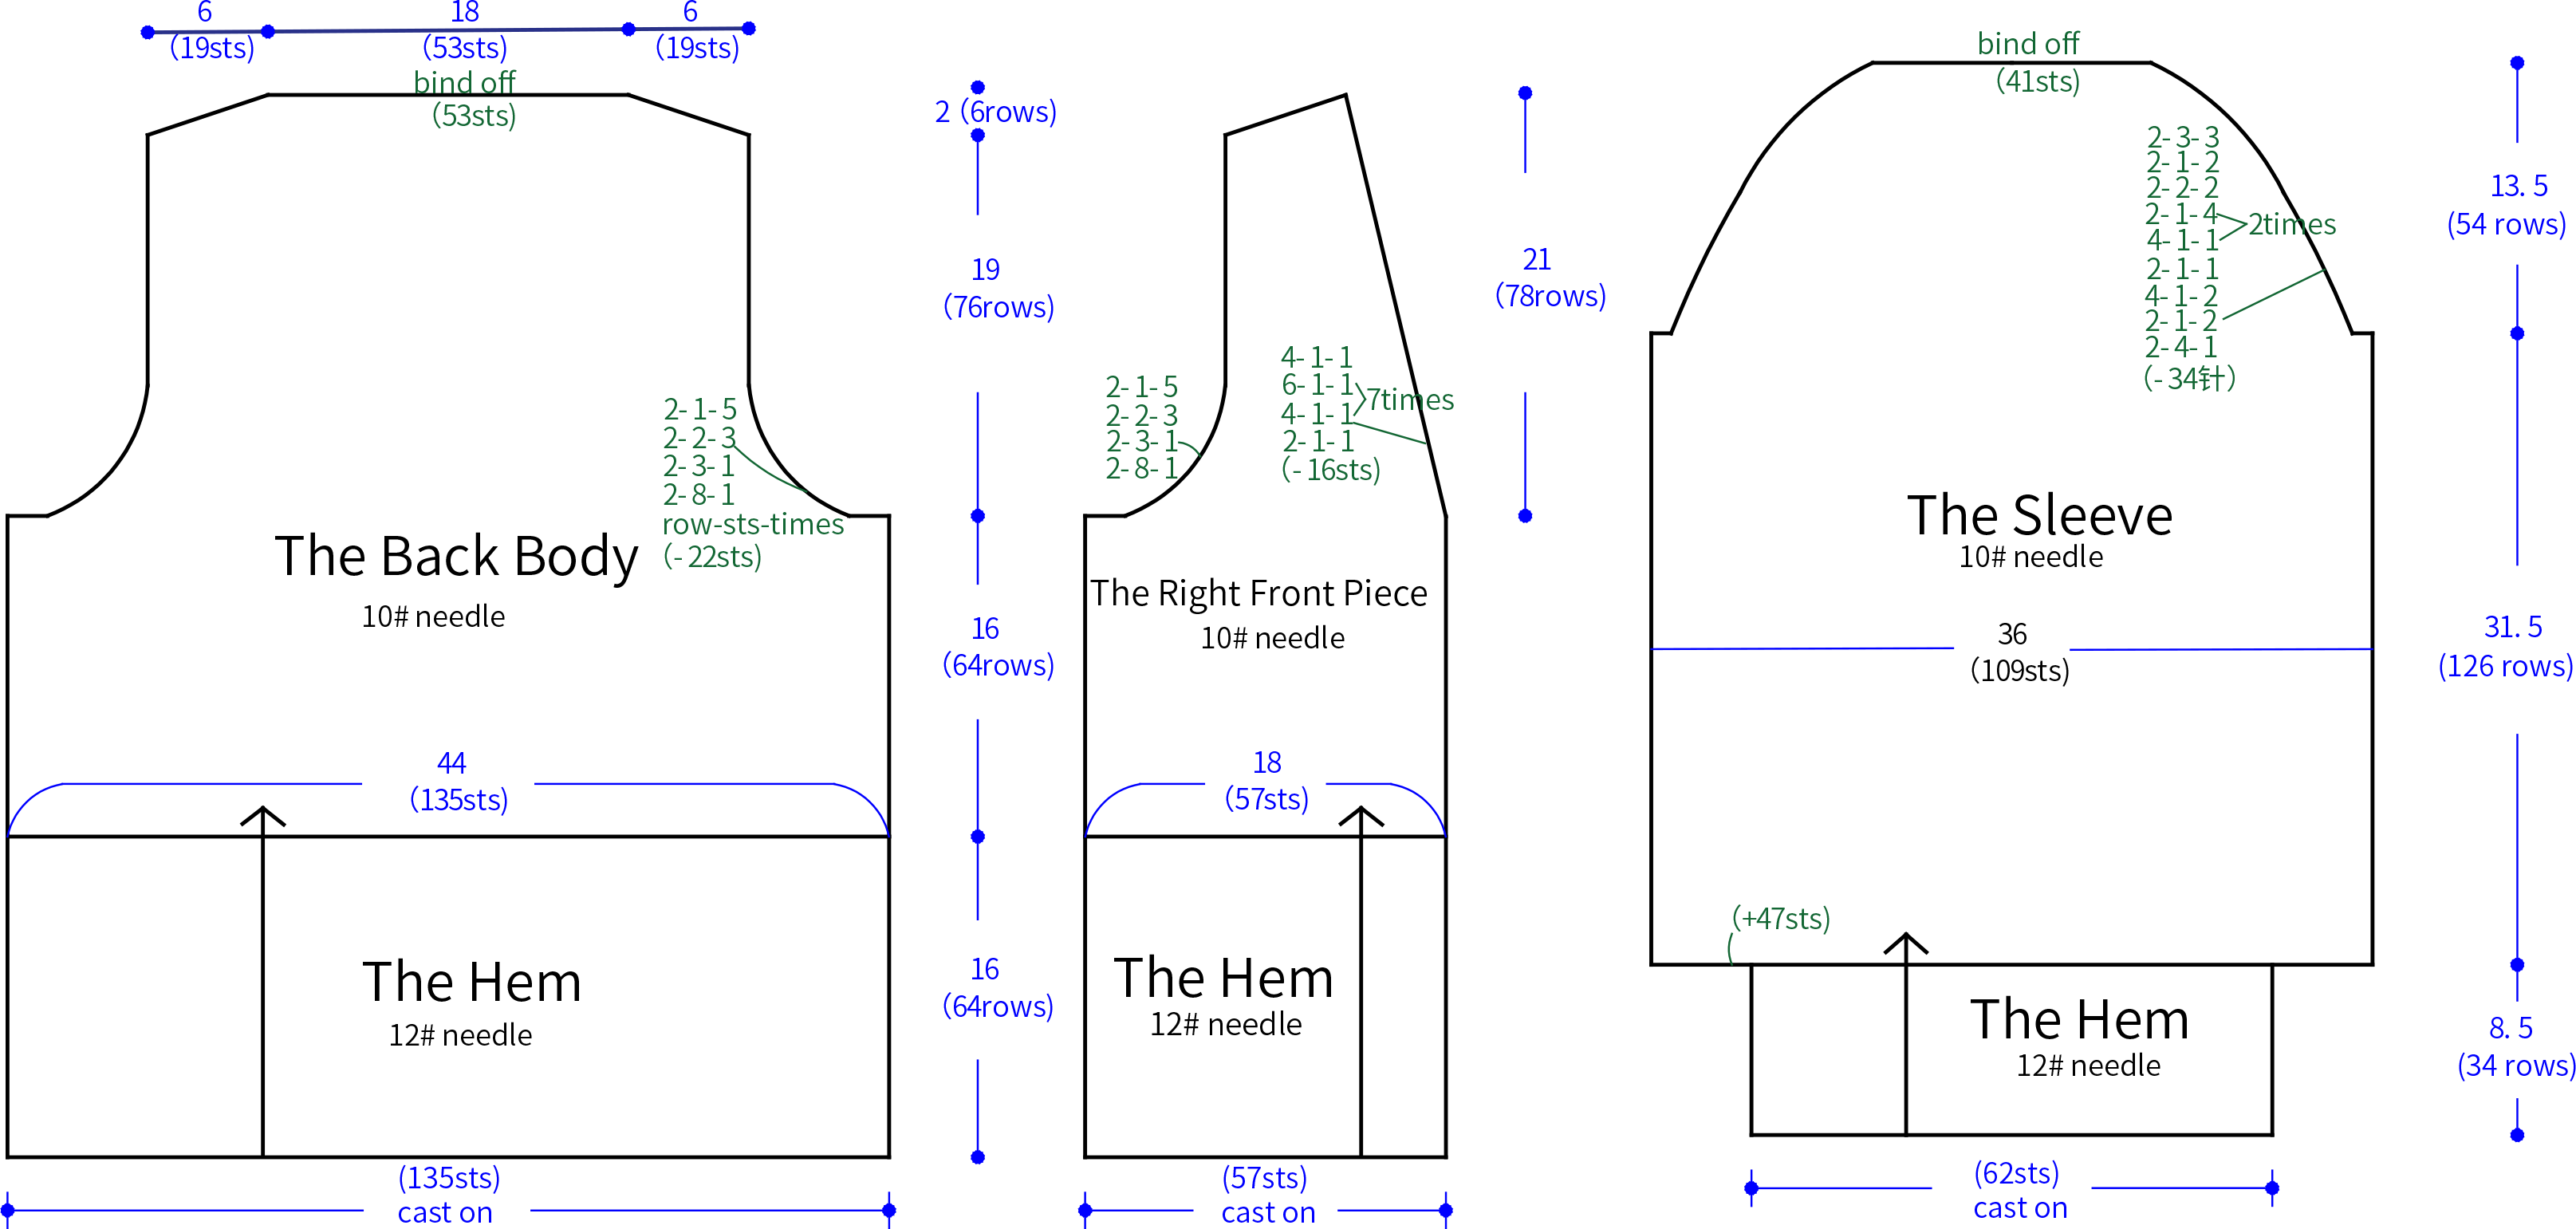
Note:
1. The left and right in the chart refer to the actual left and right when worn.
2. On the wrong side, knit the opposite stitch pattern of what is shown in the chart.
Before you start knitting, make a gauge swatch first. [SA 938]
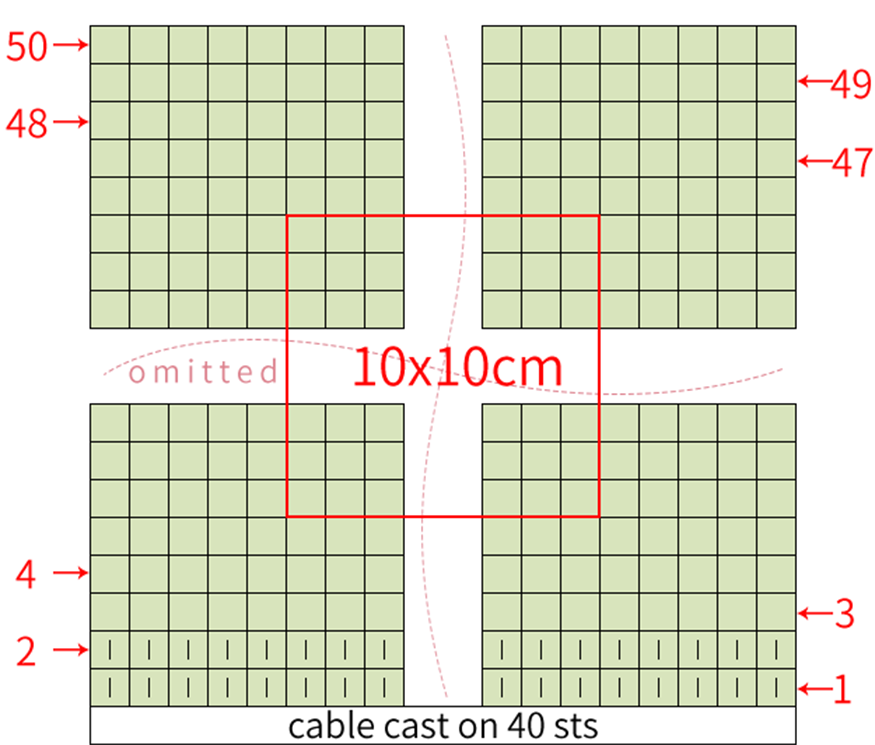
Note: Use Morandi-4#, 10# needle for knitting. Within a 10x10 cm area, the stockinette stitch pattern is 30 stitches and 40 rows.
Chart Key


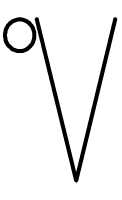
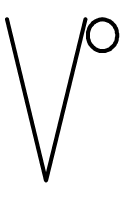

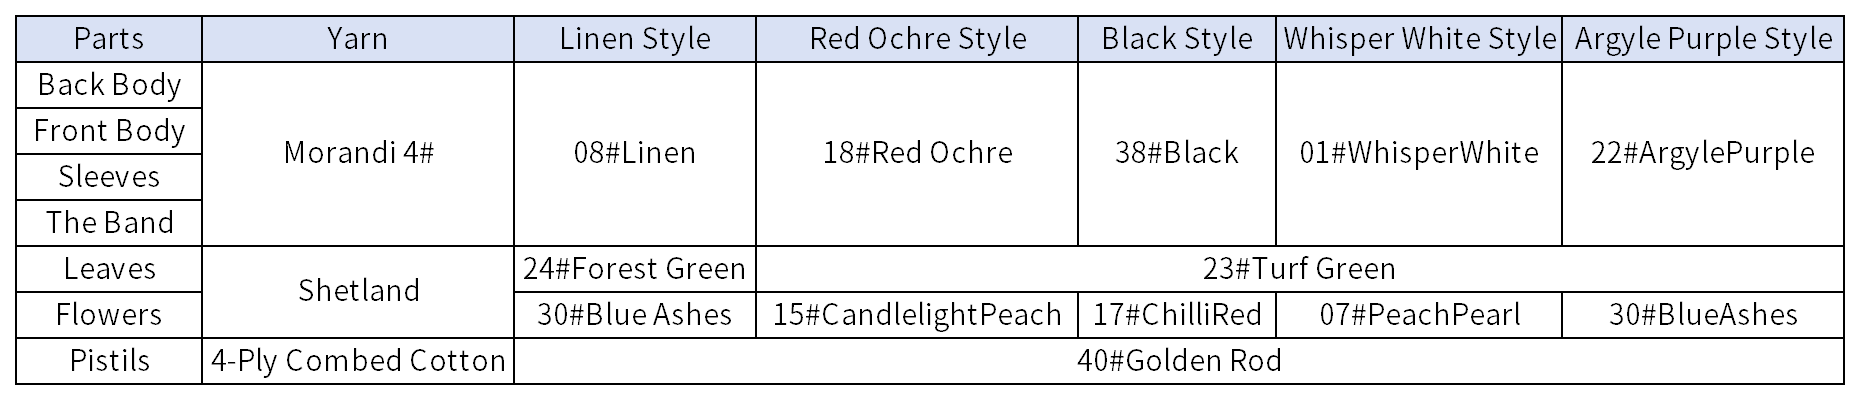
The Color Chart

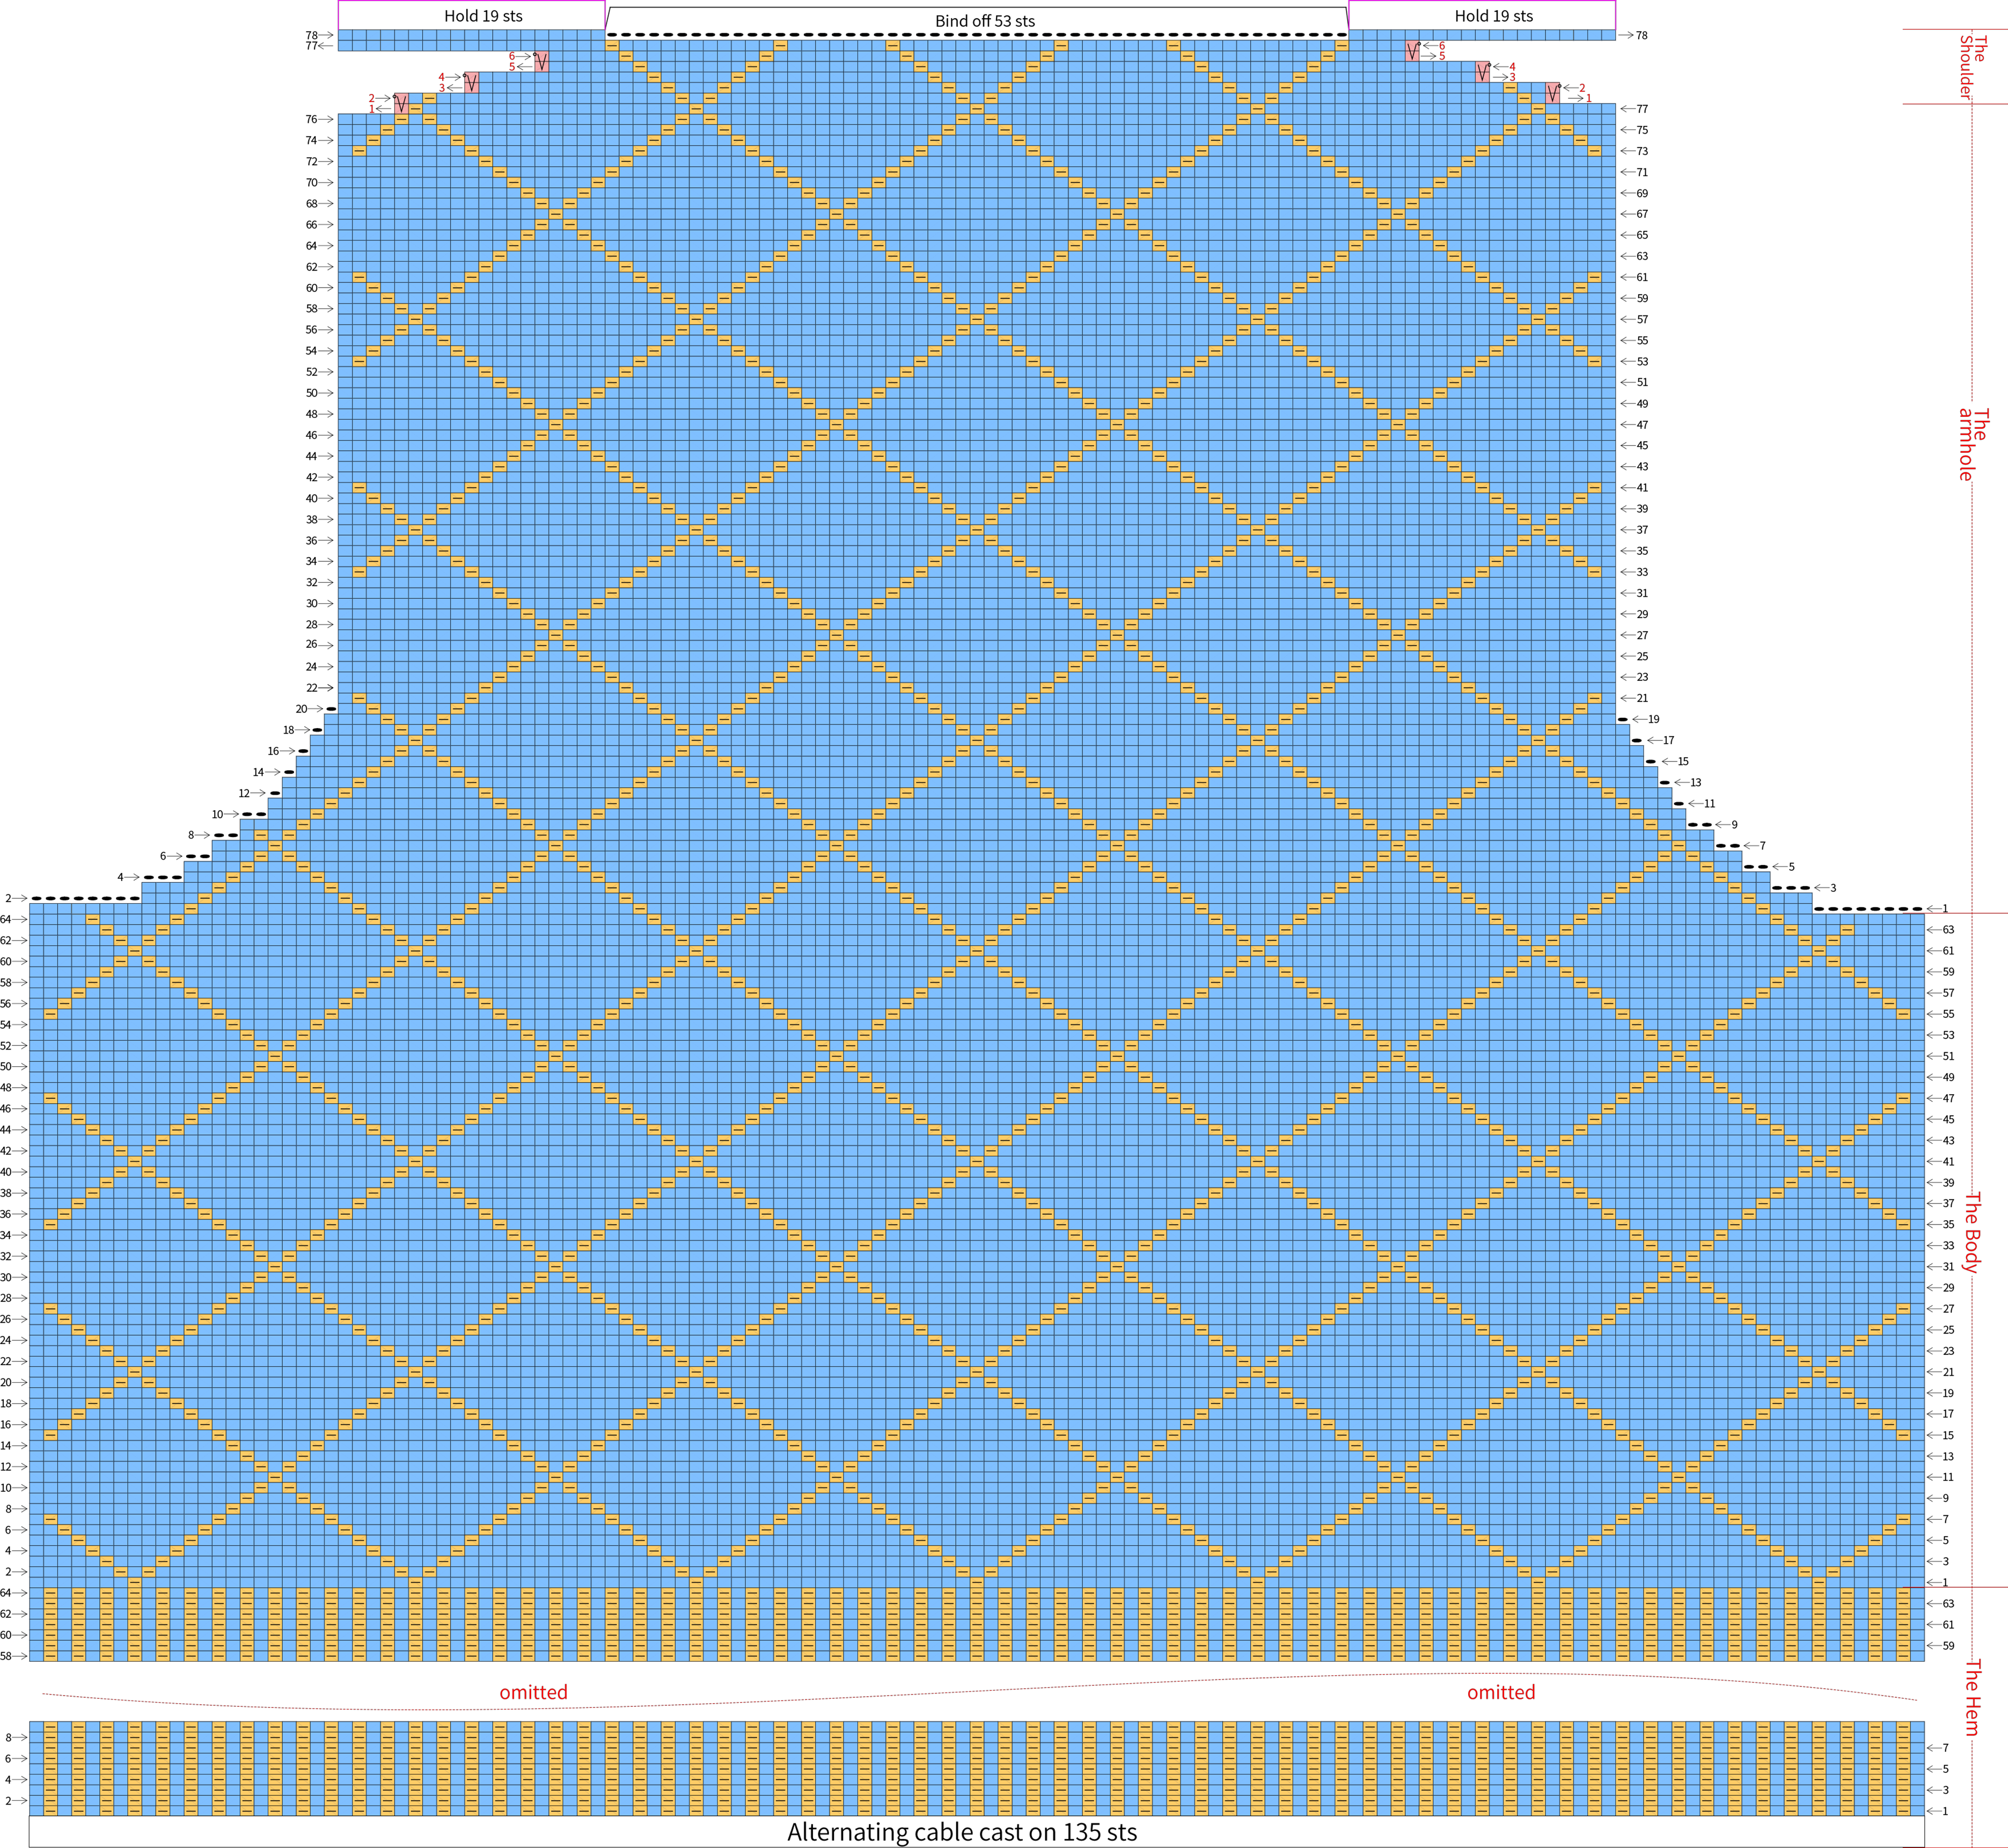
Part 1 The Back BodyA 01' 00''
The back body is made from bottom to top. And divided into the hem, the body, the armholes, the shoulder and the collar.
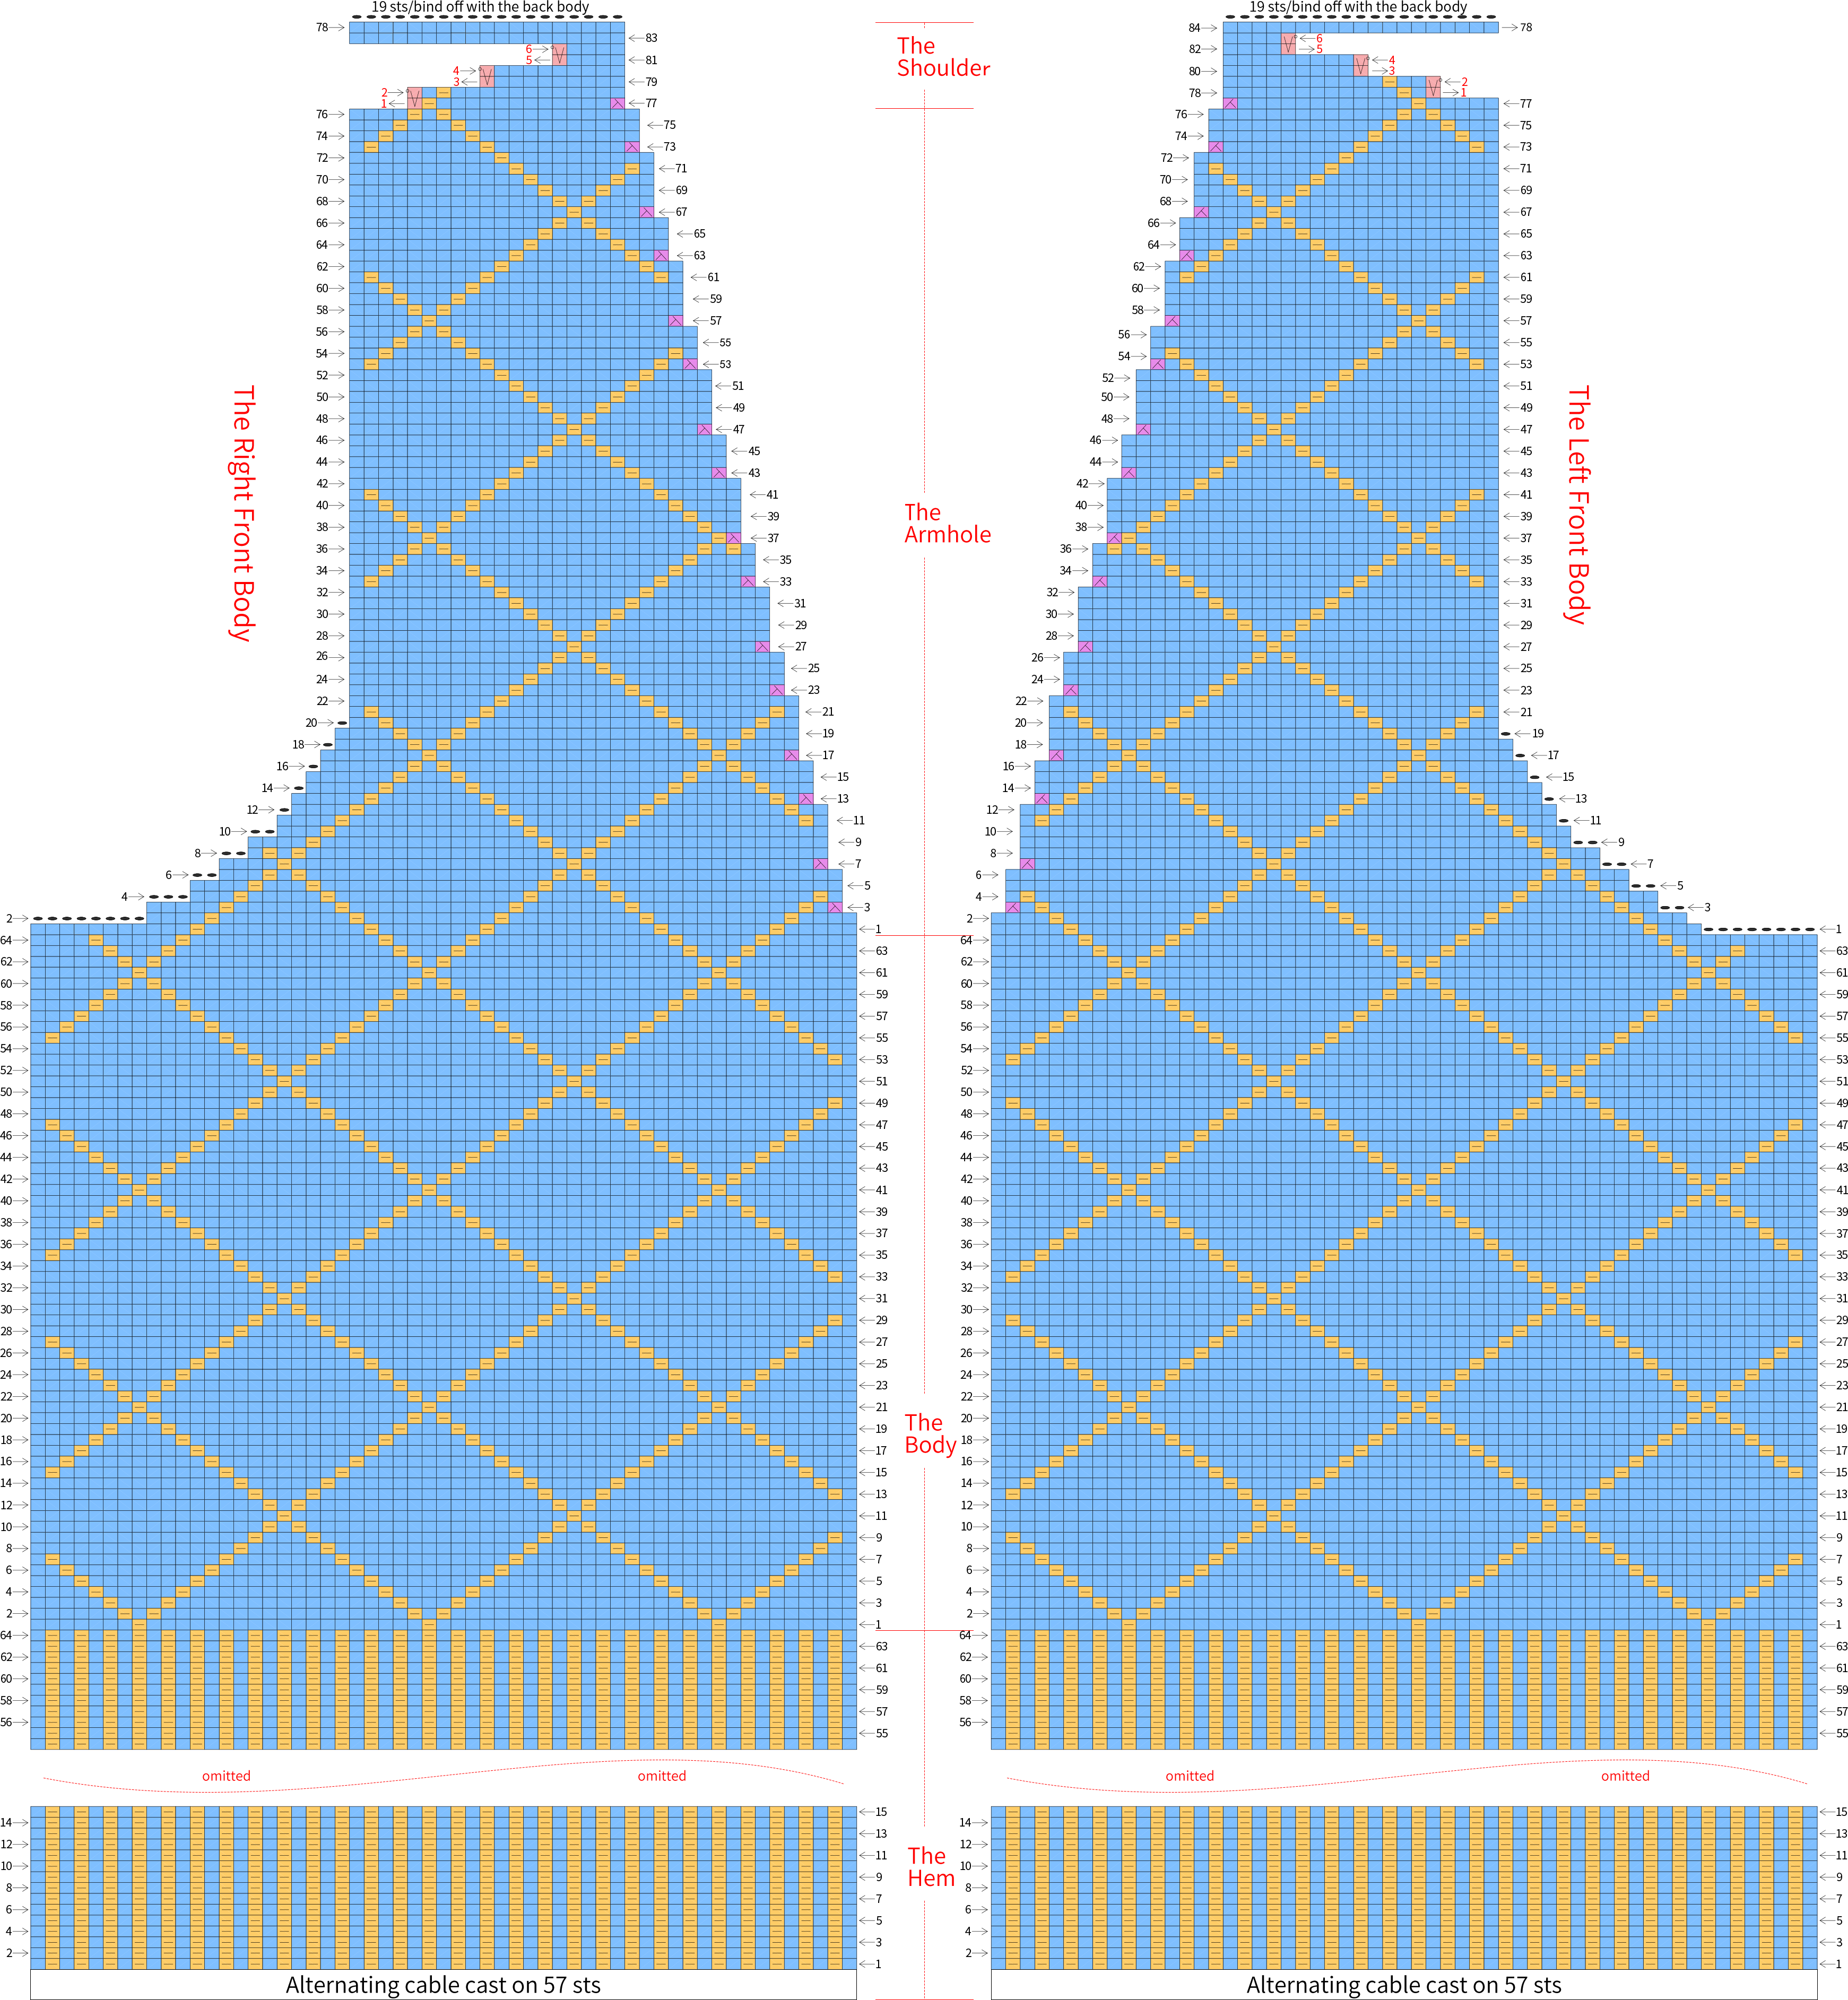
Part2 The Front BodyB 40' 08''
It divided into two sections: the left front and the right front. The method of knitting is similar, and the direction is symmetrical. After completing the knitting, sew them together with the back piece. For specific details, please refer to the video demonstration.
Part3 The SleevesC 54' 59''
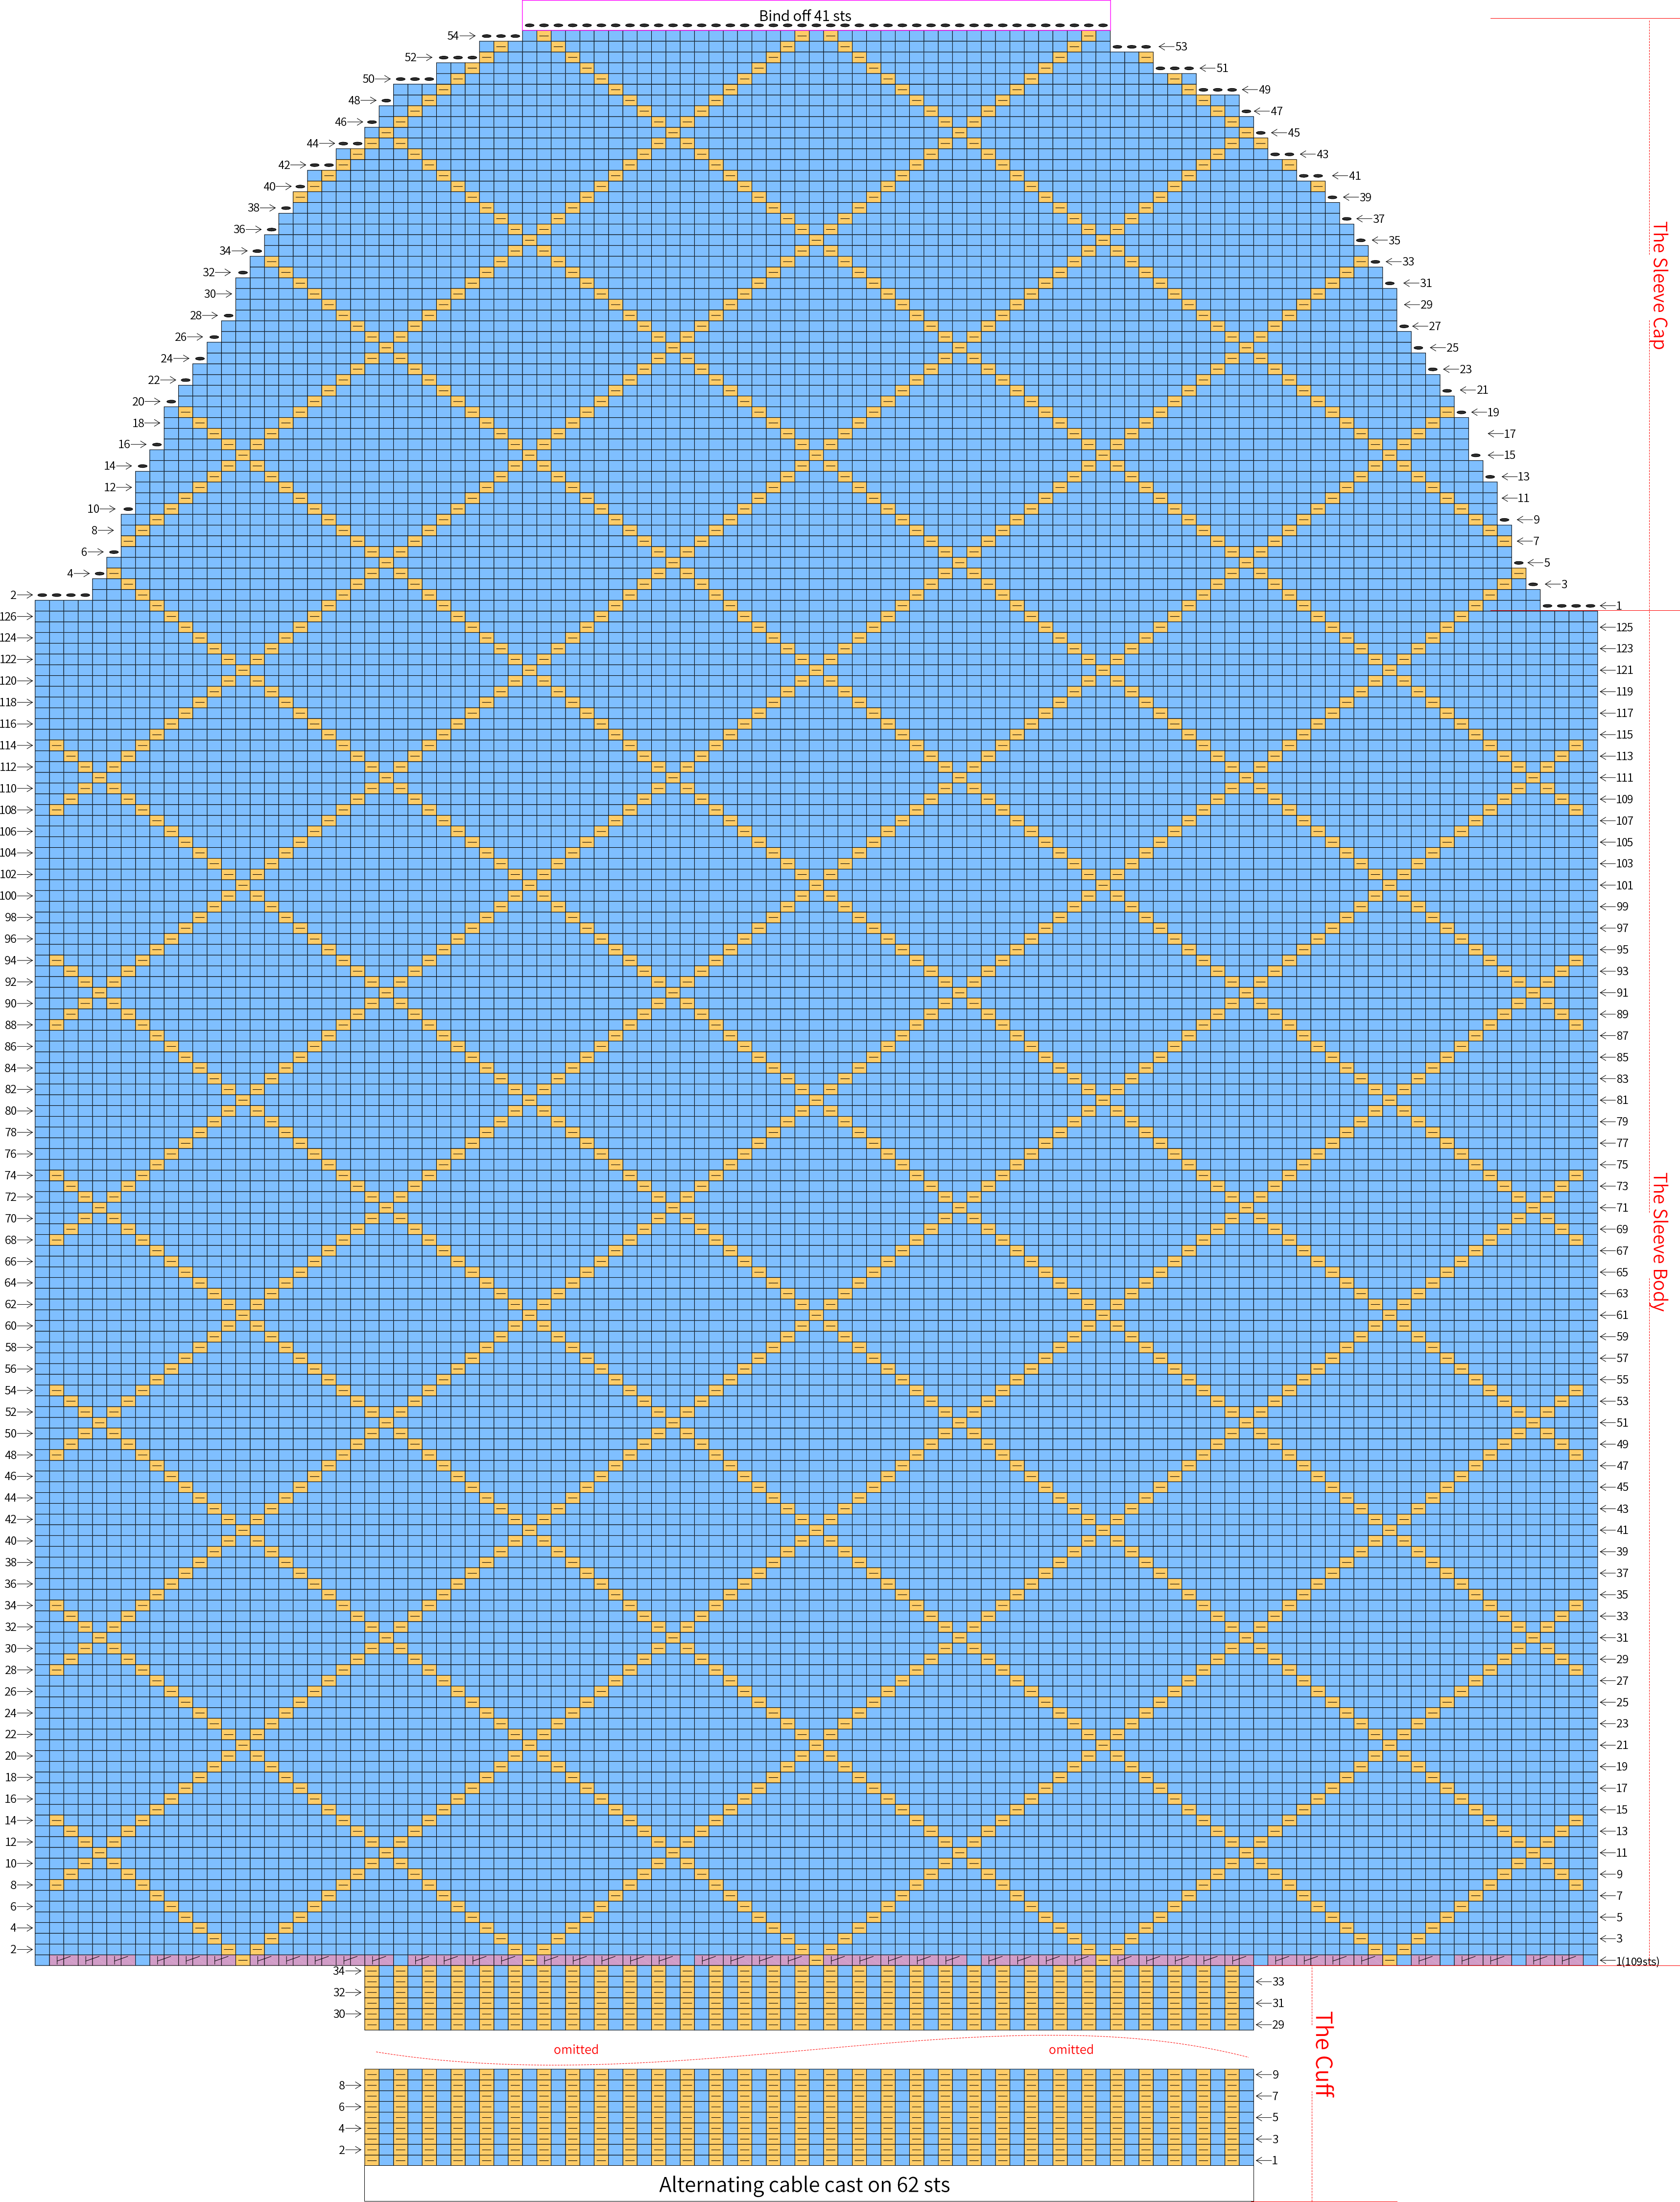
The sleeves are identical and consist of the cuffs, the sleeve body, and the sleeve cap. For the sleeve body, you need to increase stitches on the first row, and work even for the rest. The sleeve cap involves binding off stitches on both sides. After completing it, bind off the stitches. Please refer to the video demonstration for specifics.
Part4 The BandD 59' 53''
The sleeves are identical and consist of the cuffs, the sleeve body, and the sleeve cap. For the sleeve body, you need to increase stitches on the first row, and work even for the rest. The sleeve cap involves binding off stitches on both sides. After completing it, bind off the stitches. Please refer to the video demonstration for specifics.
[The Bands *2 12# needle]
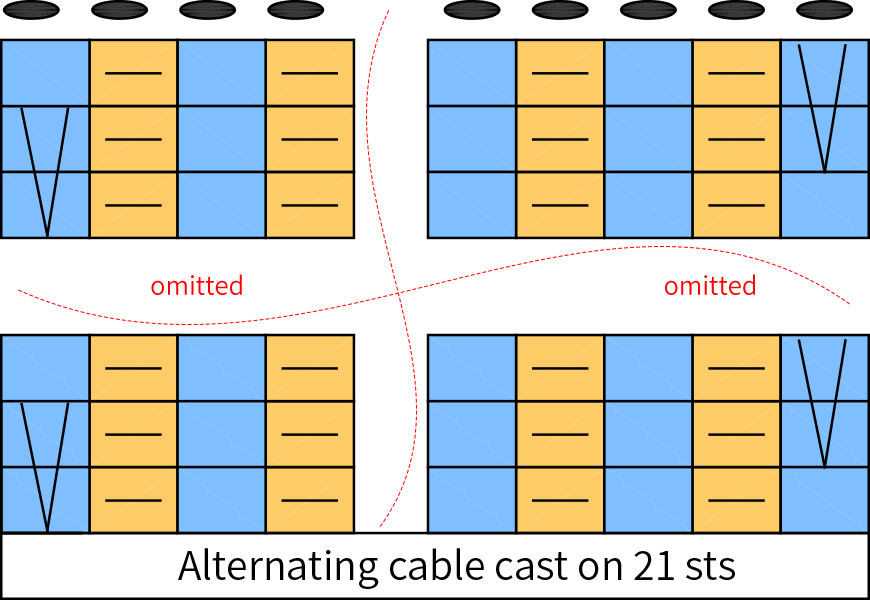
Note: After knitting a few rows, measure the width to be about 4.5 cm. You can also adjust the width according to your preference. Measure the height as you go, from the bottom edge to the middle of the back neck. Finally, join the two pieces and bind off.
Part5 DecorationsE 63' 45''
The sleeves are identical and consist of the cuffs, the sleeve body, and the sleeve cap. For the sleeve body, you need to increase stitches on the first row, and work even for the rest. The sleeve cap involves binding off stitches on both sides. After completing it, bind off the stitches. Please refer to the video demonstration for specifics.
Made by the community





