
Clothes
Blossom Pullover
Project preview
See the finished project
Pattern format
Instructions
The front body is divided into a motif section and a bust section. These two parts are completed separately; you crochet them independently first, and then join them together after they're done. The back body is crocheted from the bottom up, working back and forth. Finally, crochet the edge on the hem of the back body.
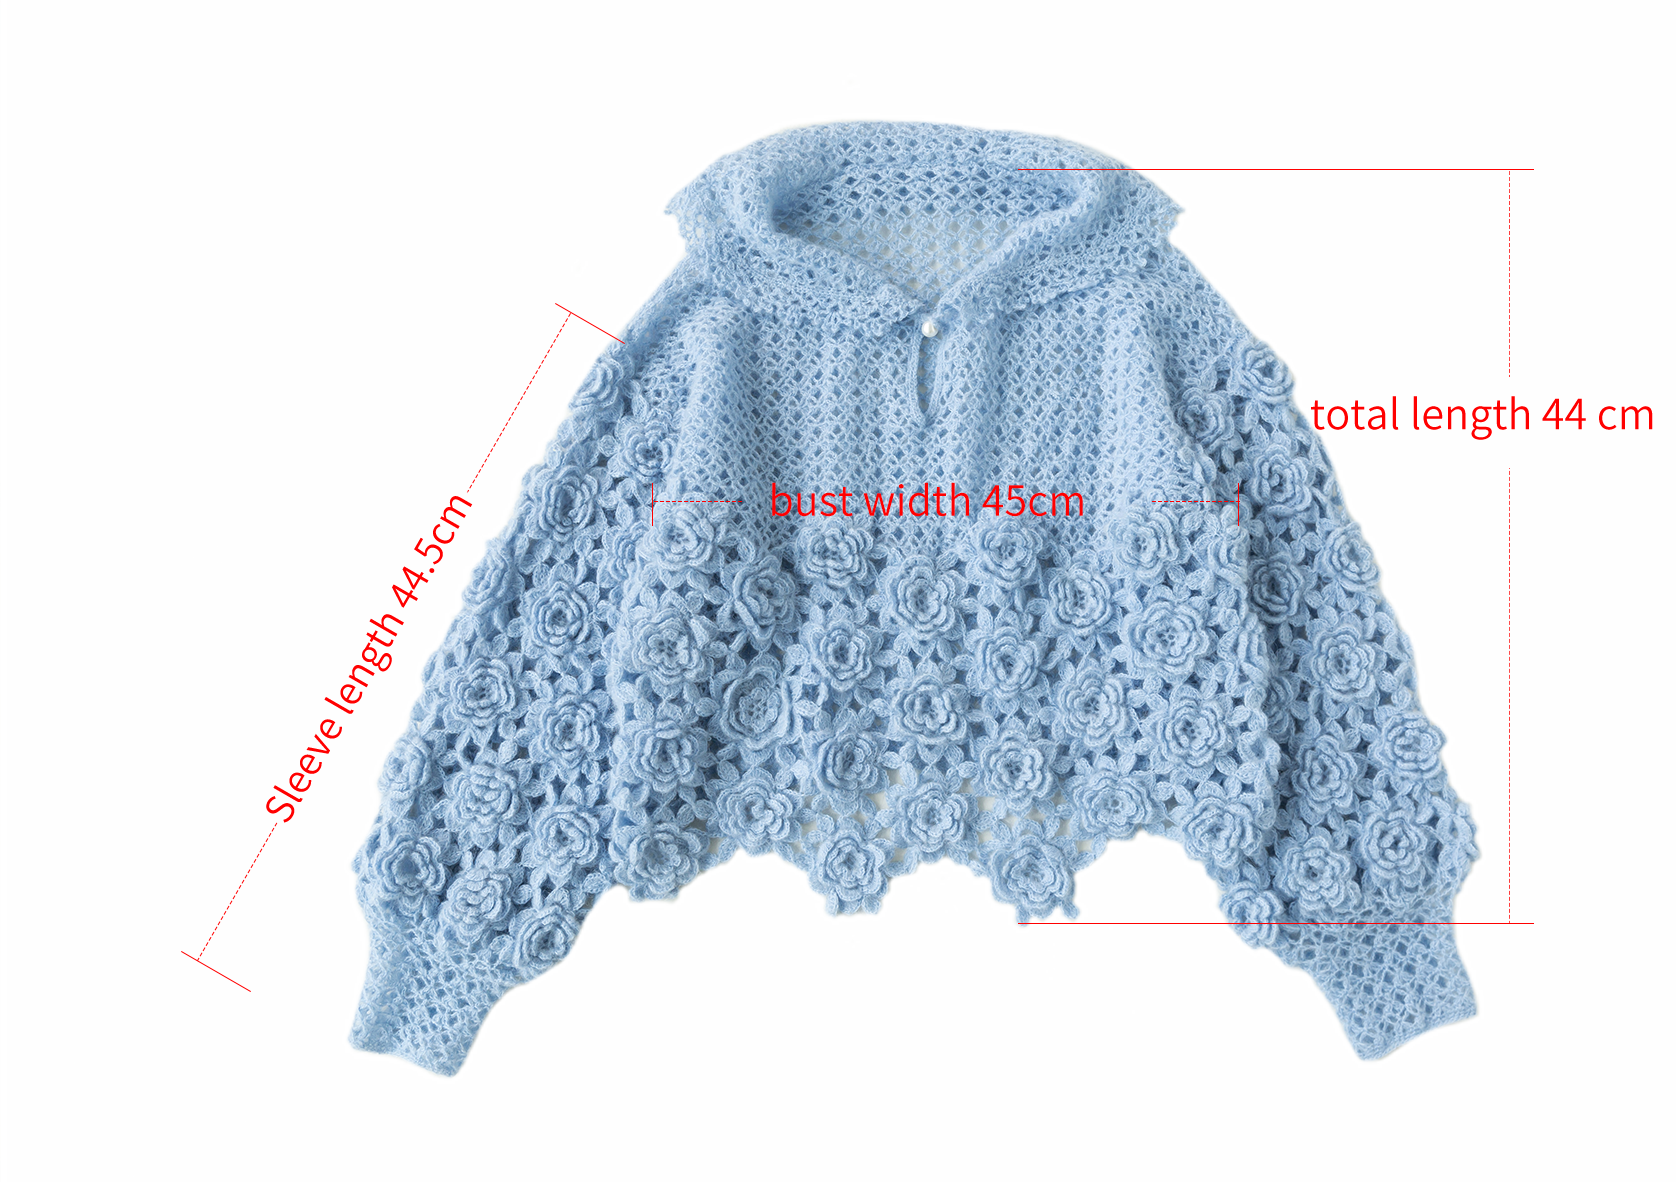
The handcrafted measurements may have an error of 1 to 2 cm. Due to variations in individual tension, the size of the sample is for reference only.
Materials: Susan's Family South African Soft Mohair Mixed Hand-Knitting Yarn
Hook: 2.00 mm crochet hook
Note: This pattern is making in Chinese crochet pattern terms, and the stitch name is written using American terminology. All measurements in charts are in cm.


Structure Diagram
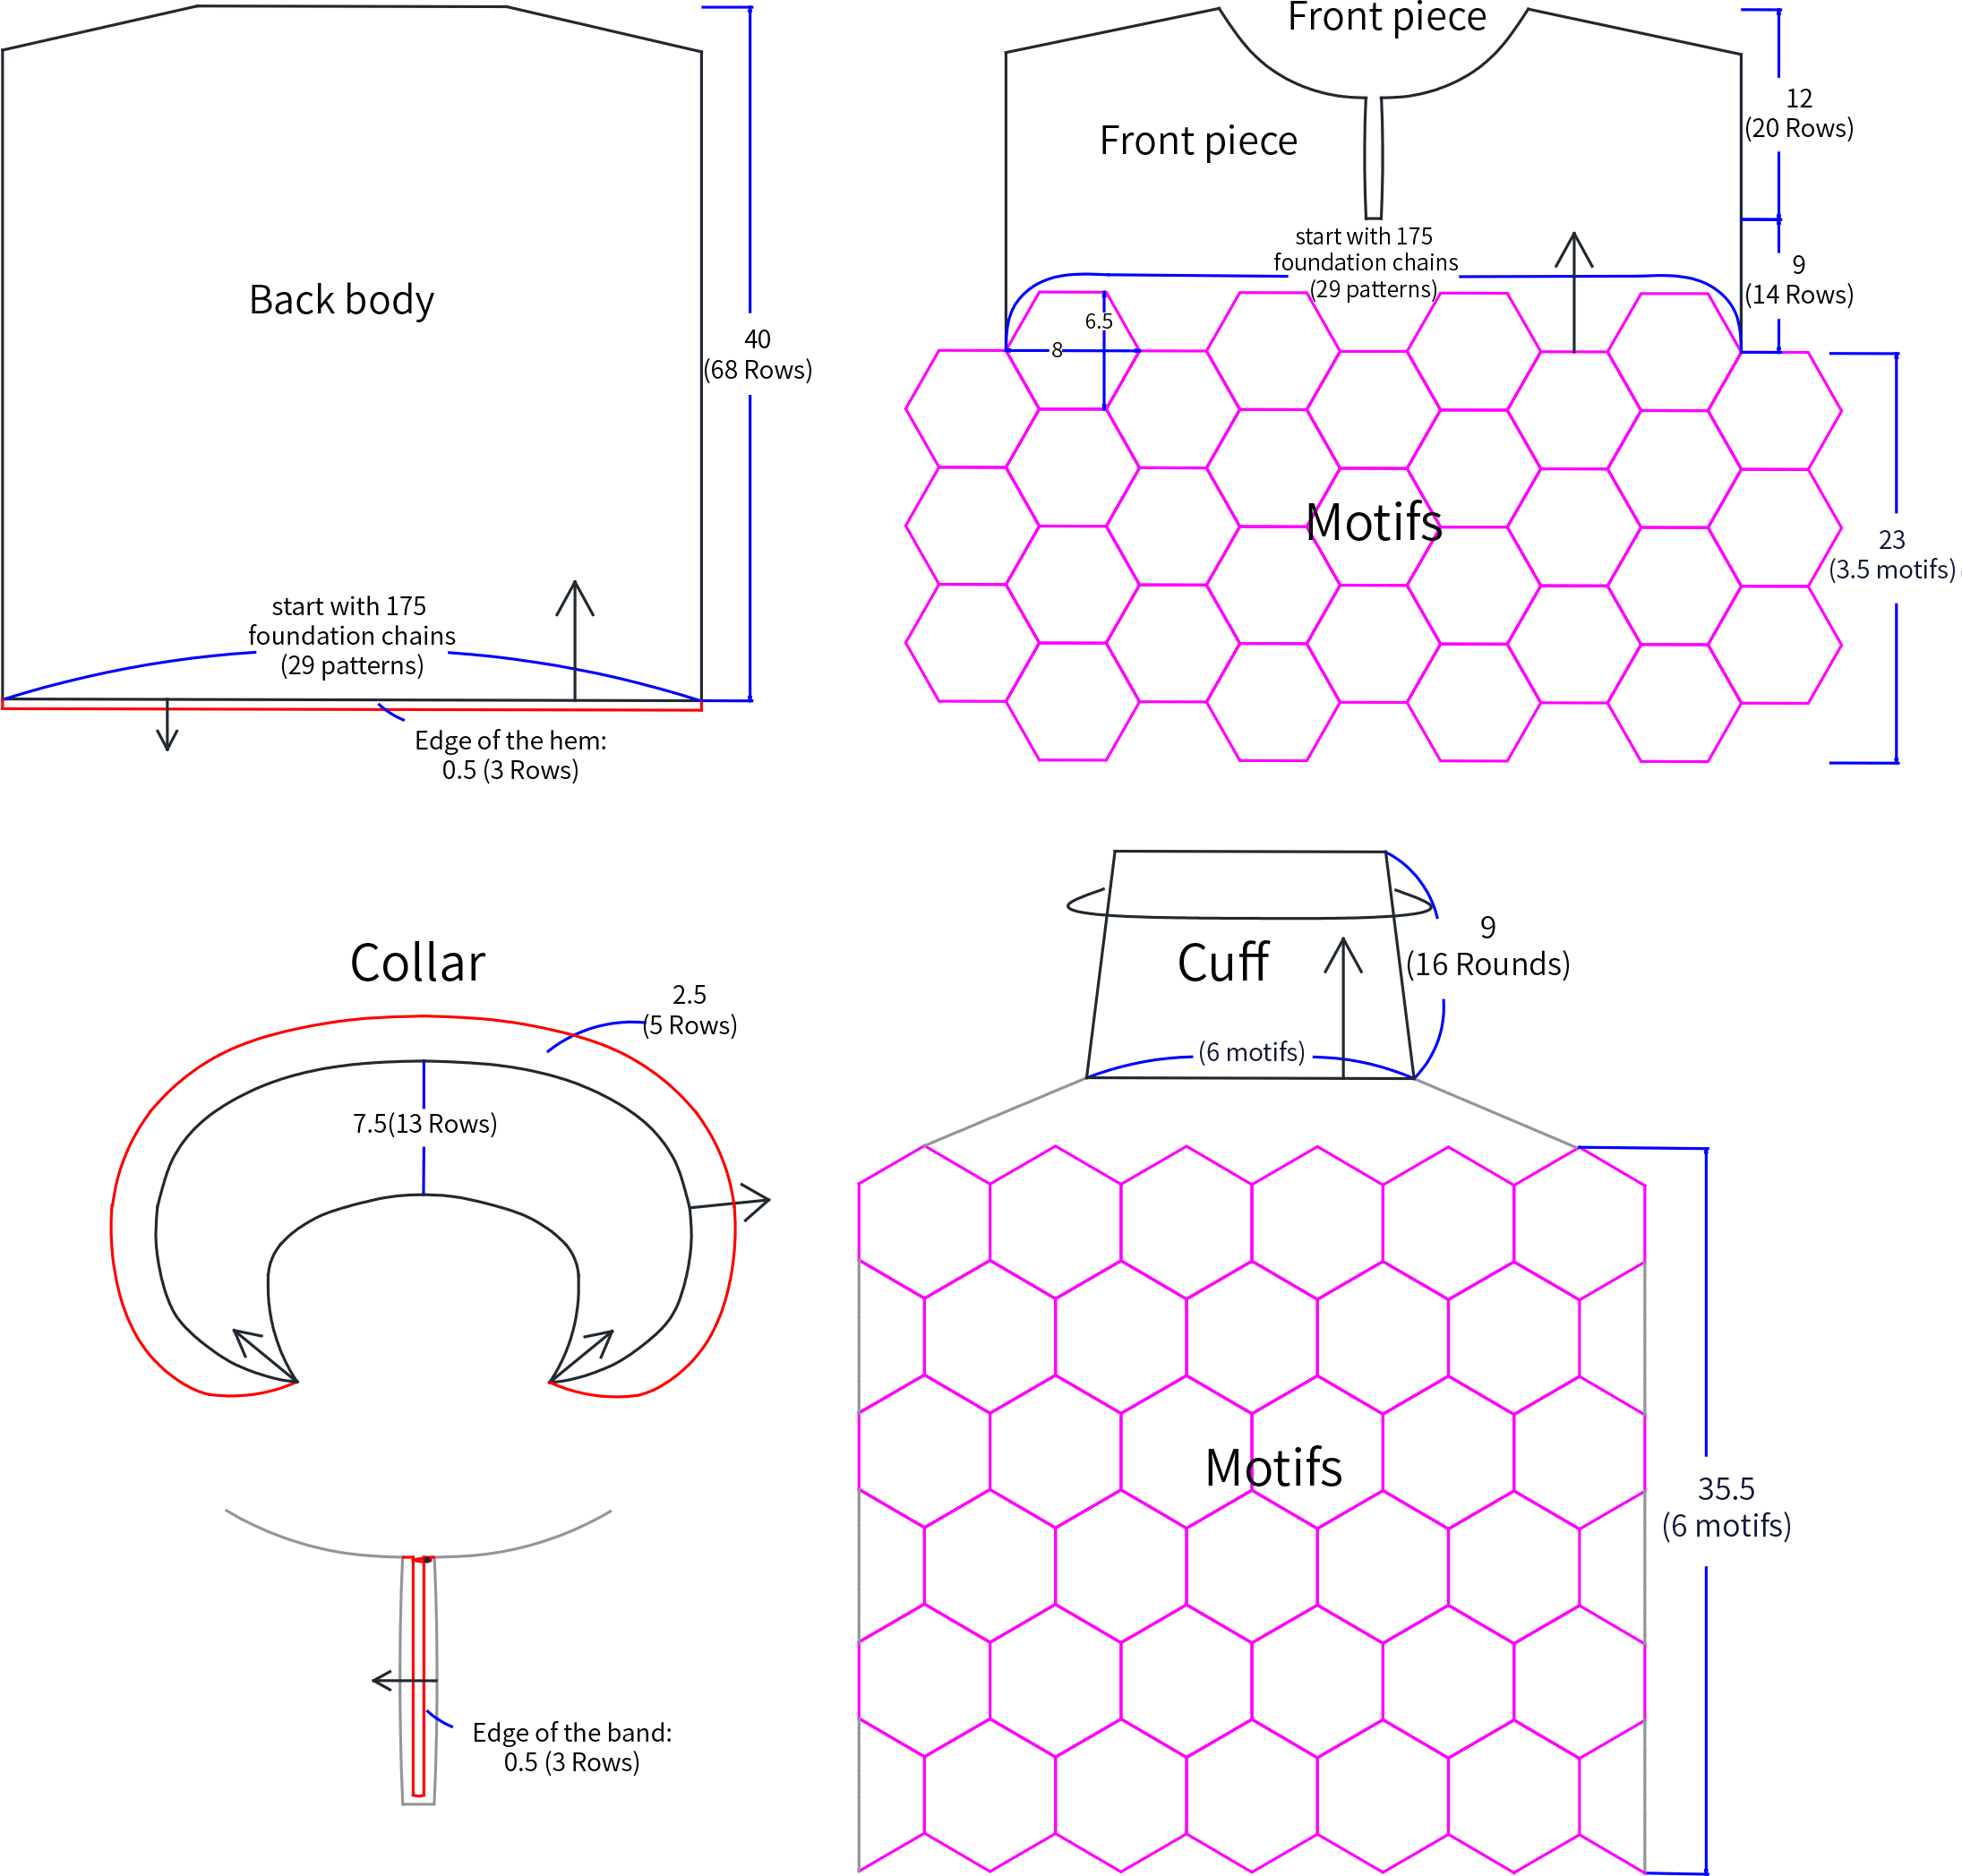
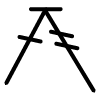
Chart Key









Part 1 The front and back bodyA
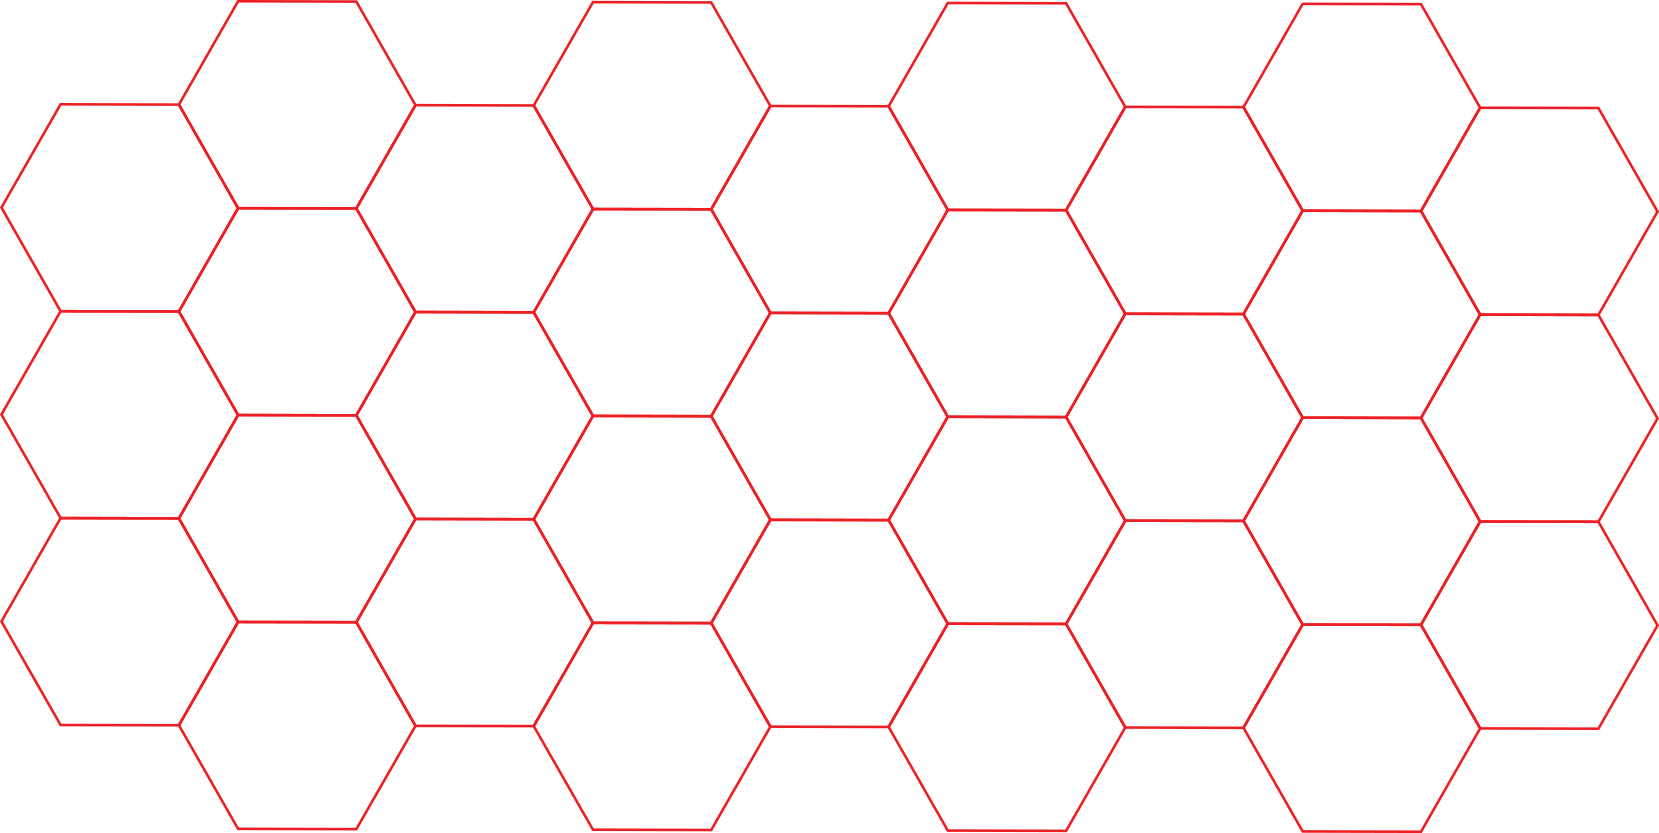
The front body is divided into a motif section and a bust section. These two parts are completed separately; you crochet them independently first, and then join them together after they're done. The back body is crocheted from the bottom up, working back and forth. Finally, crochet the edge on the hem of the back body. Please refer to the pattern chart and video demonstration for details.
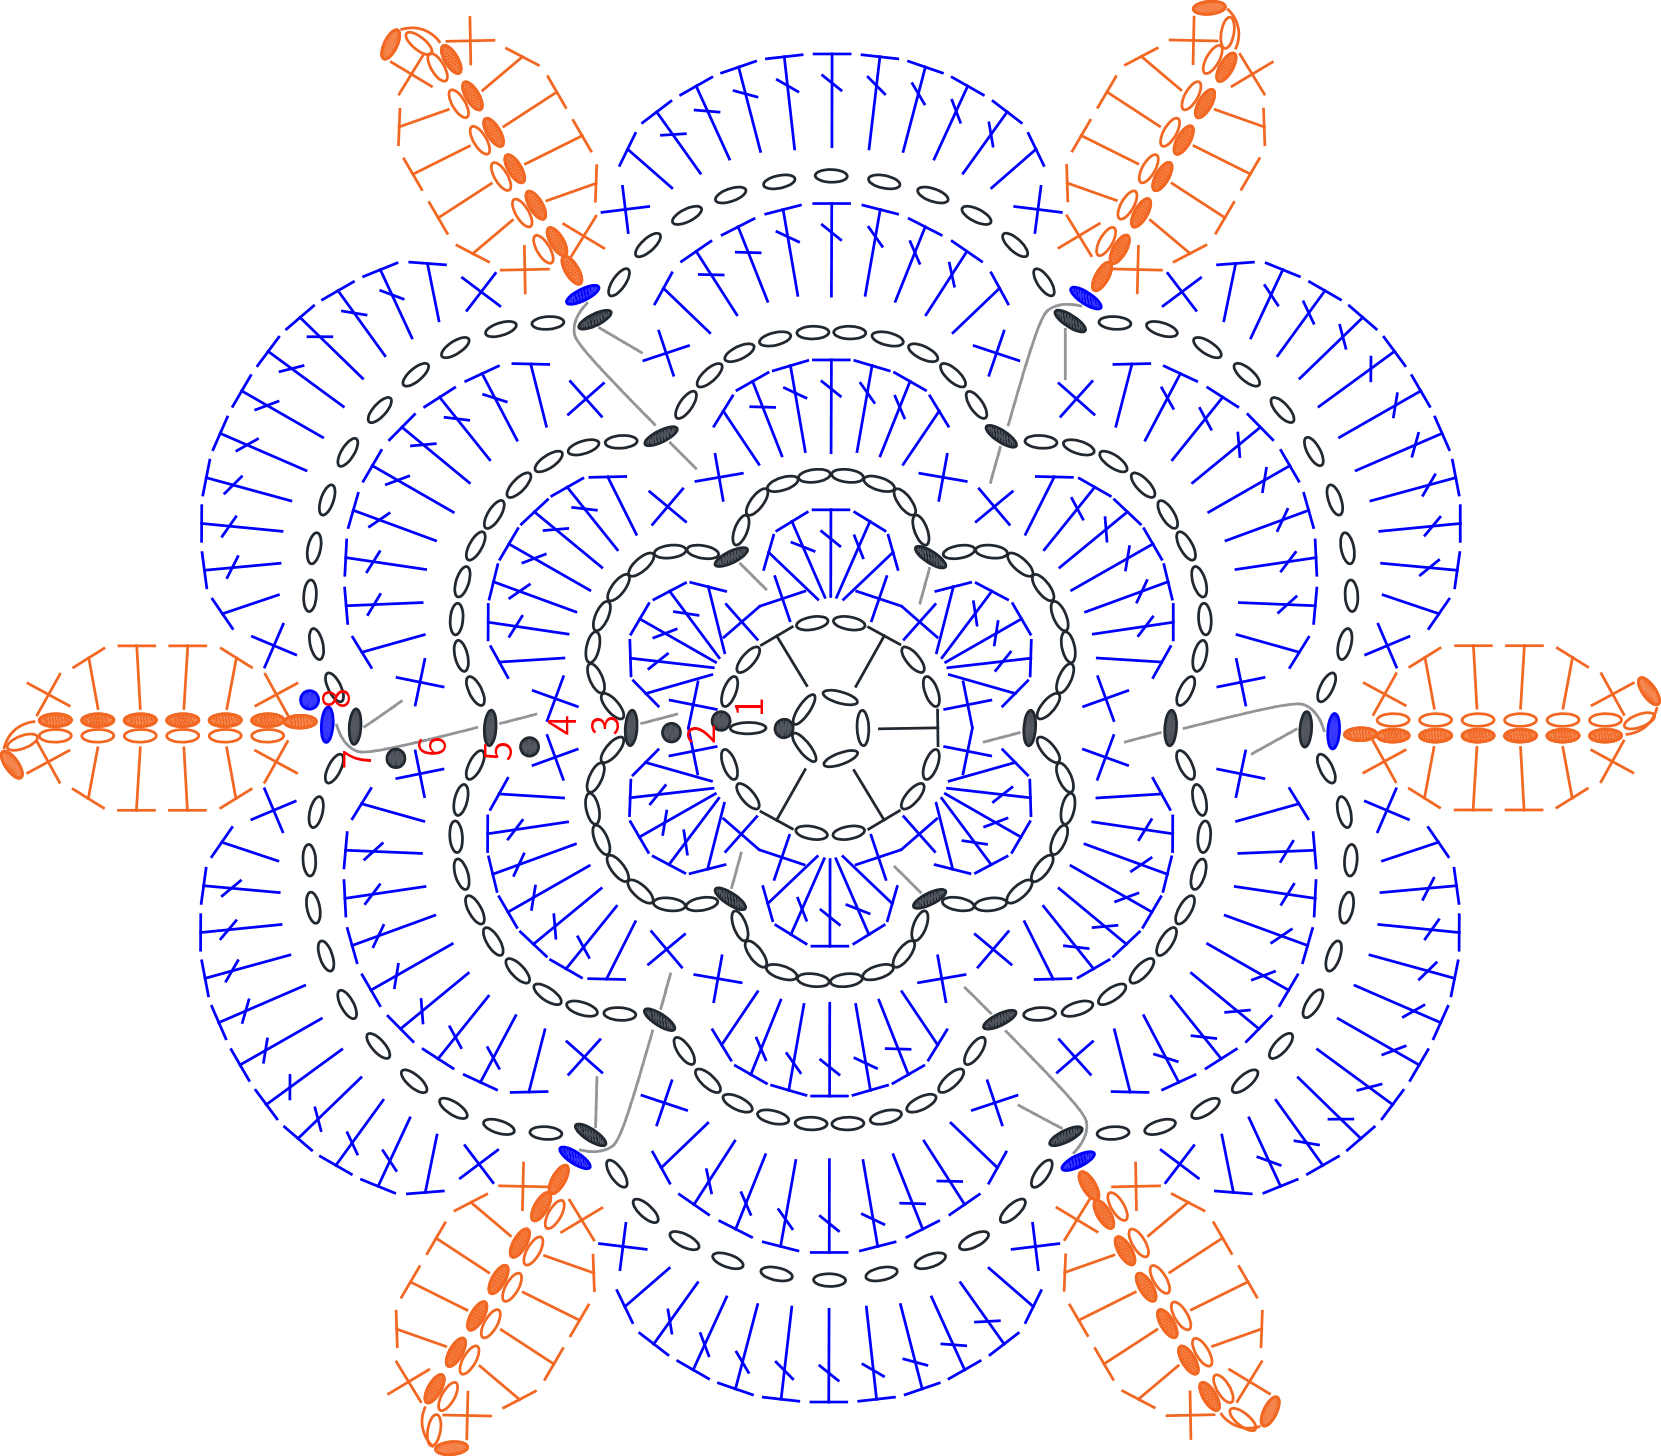
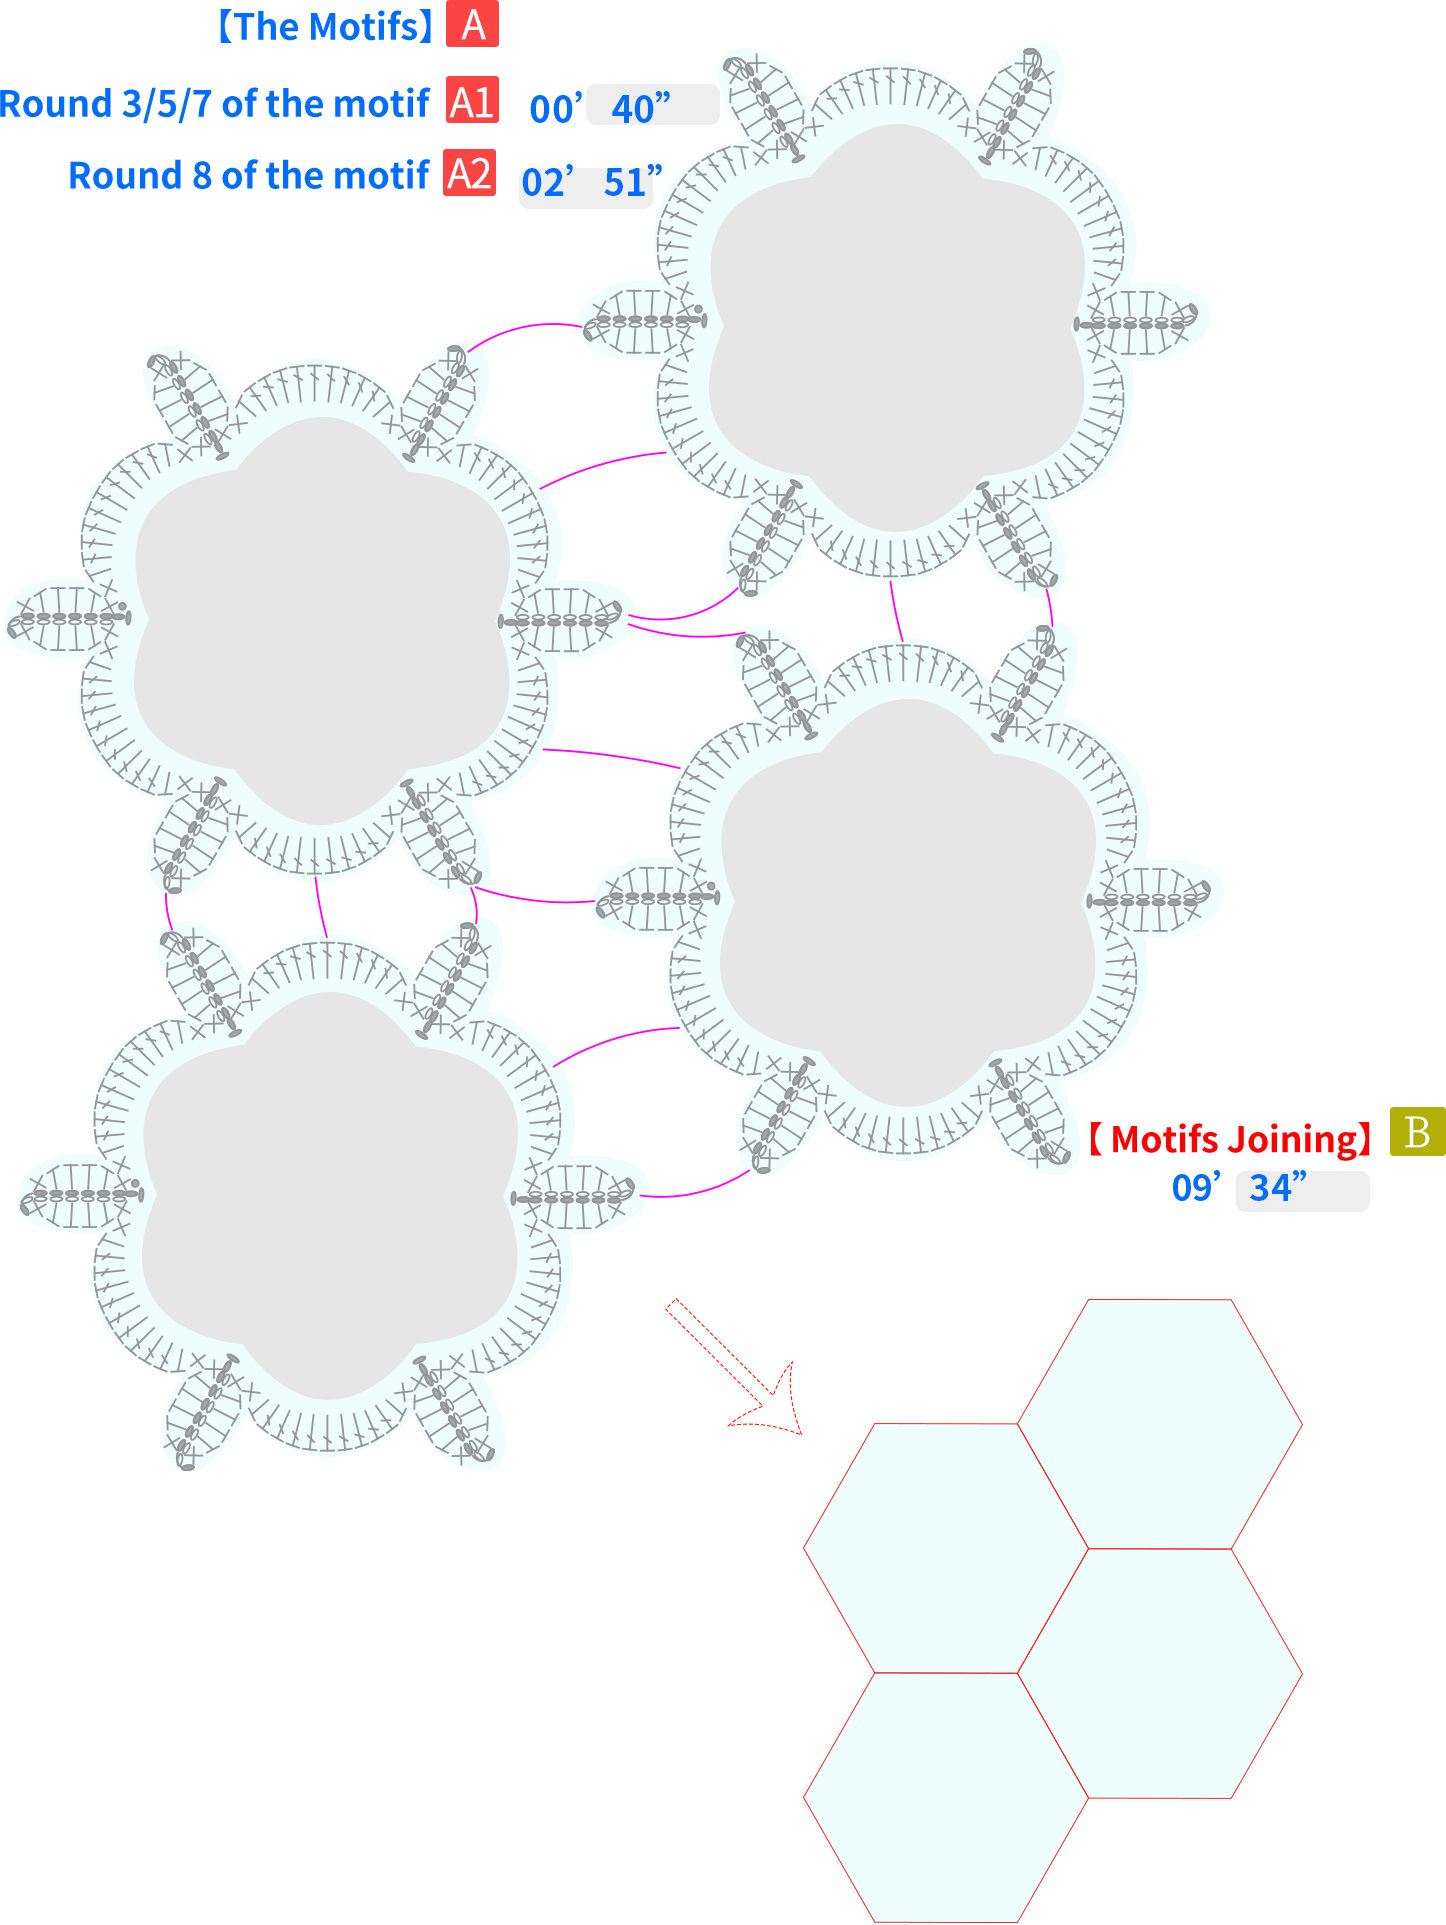
Note:
1. The placement of slip stitches in the third, fifth, and seventh rounds is special. Please refer to the video for details.
2. For the motif section, crochet one complete motif first. When working on the outer edge, crochet and join as you go.
【Motif Layout Diagram】
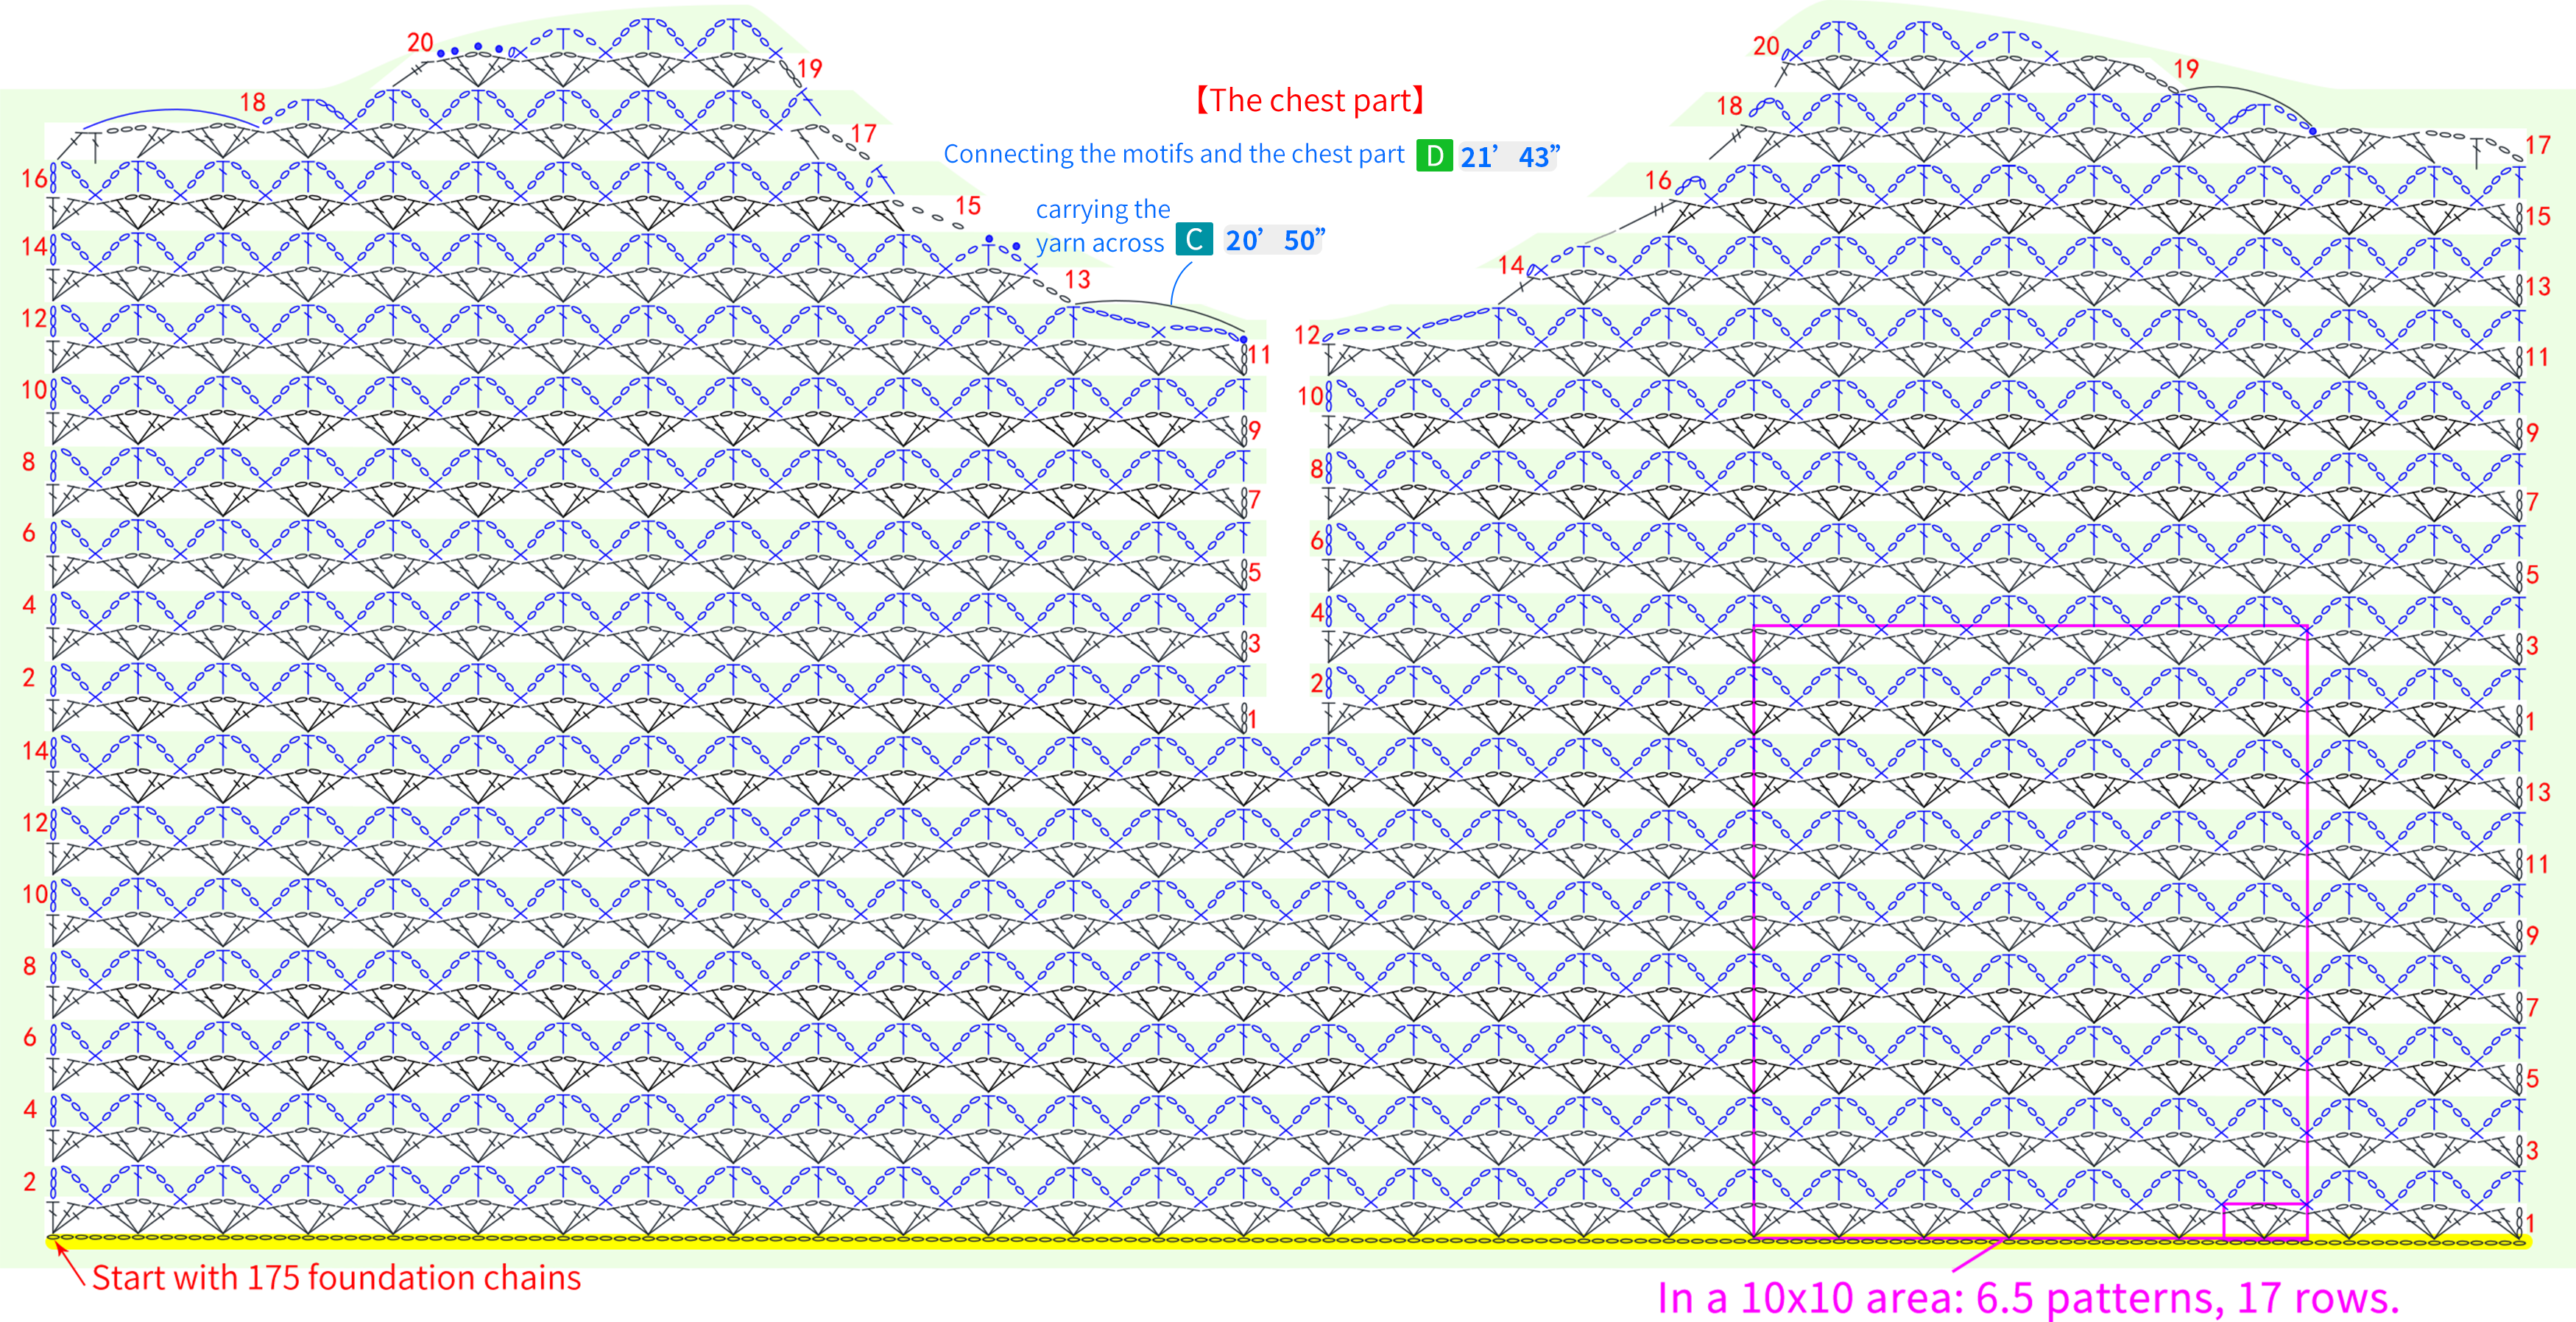
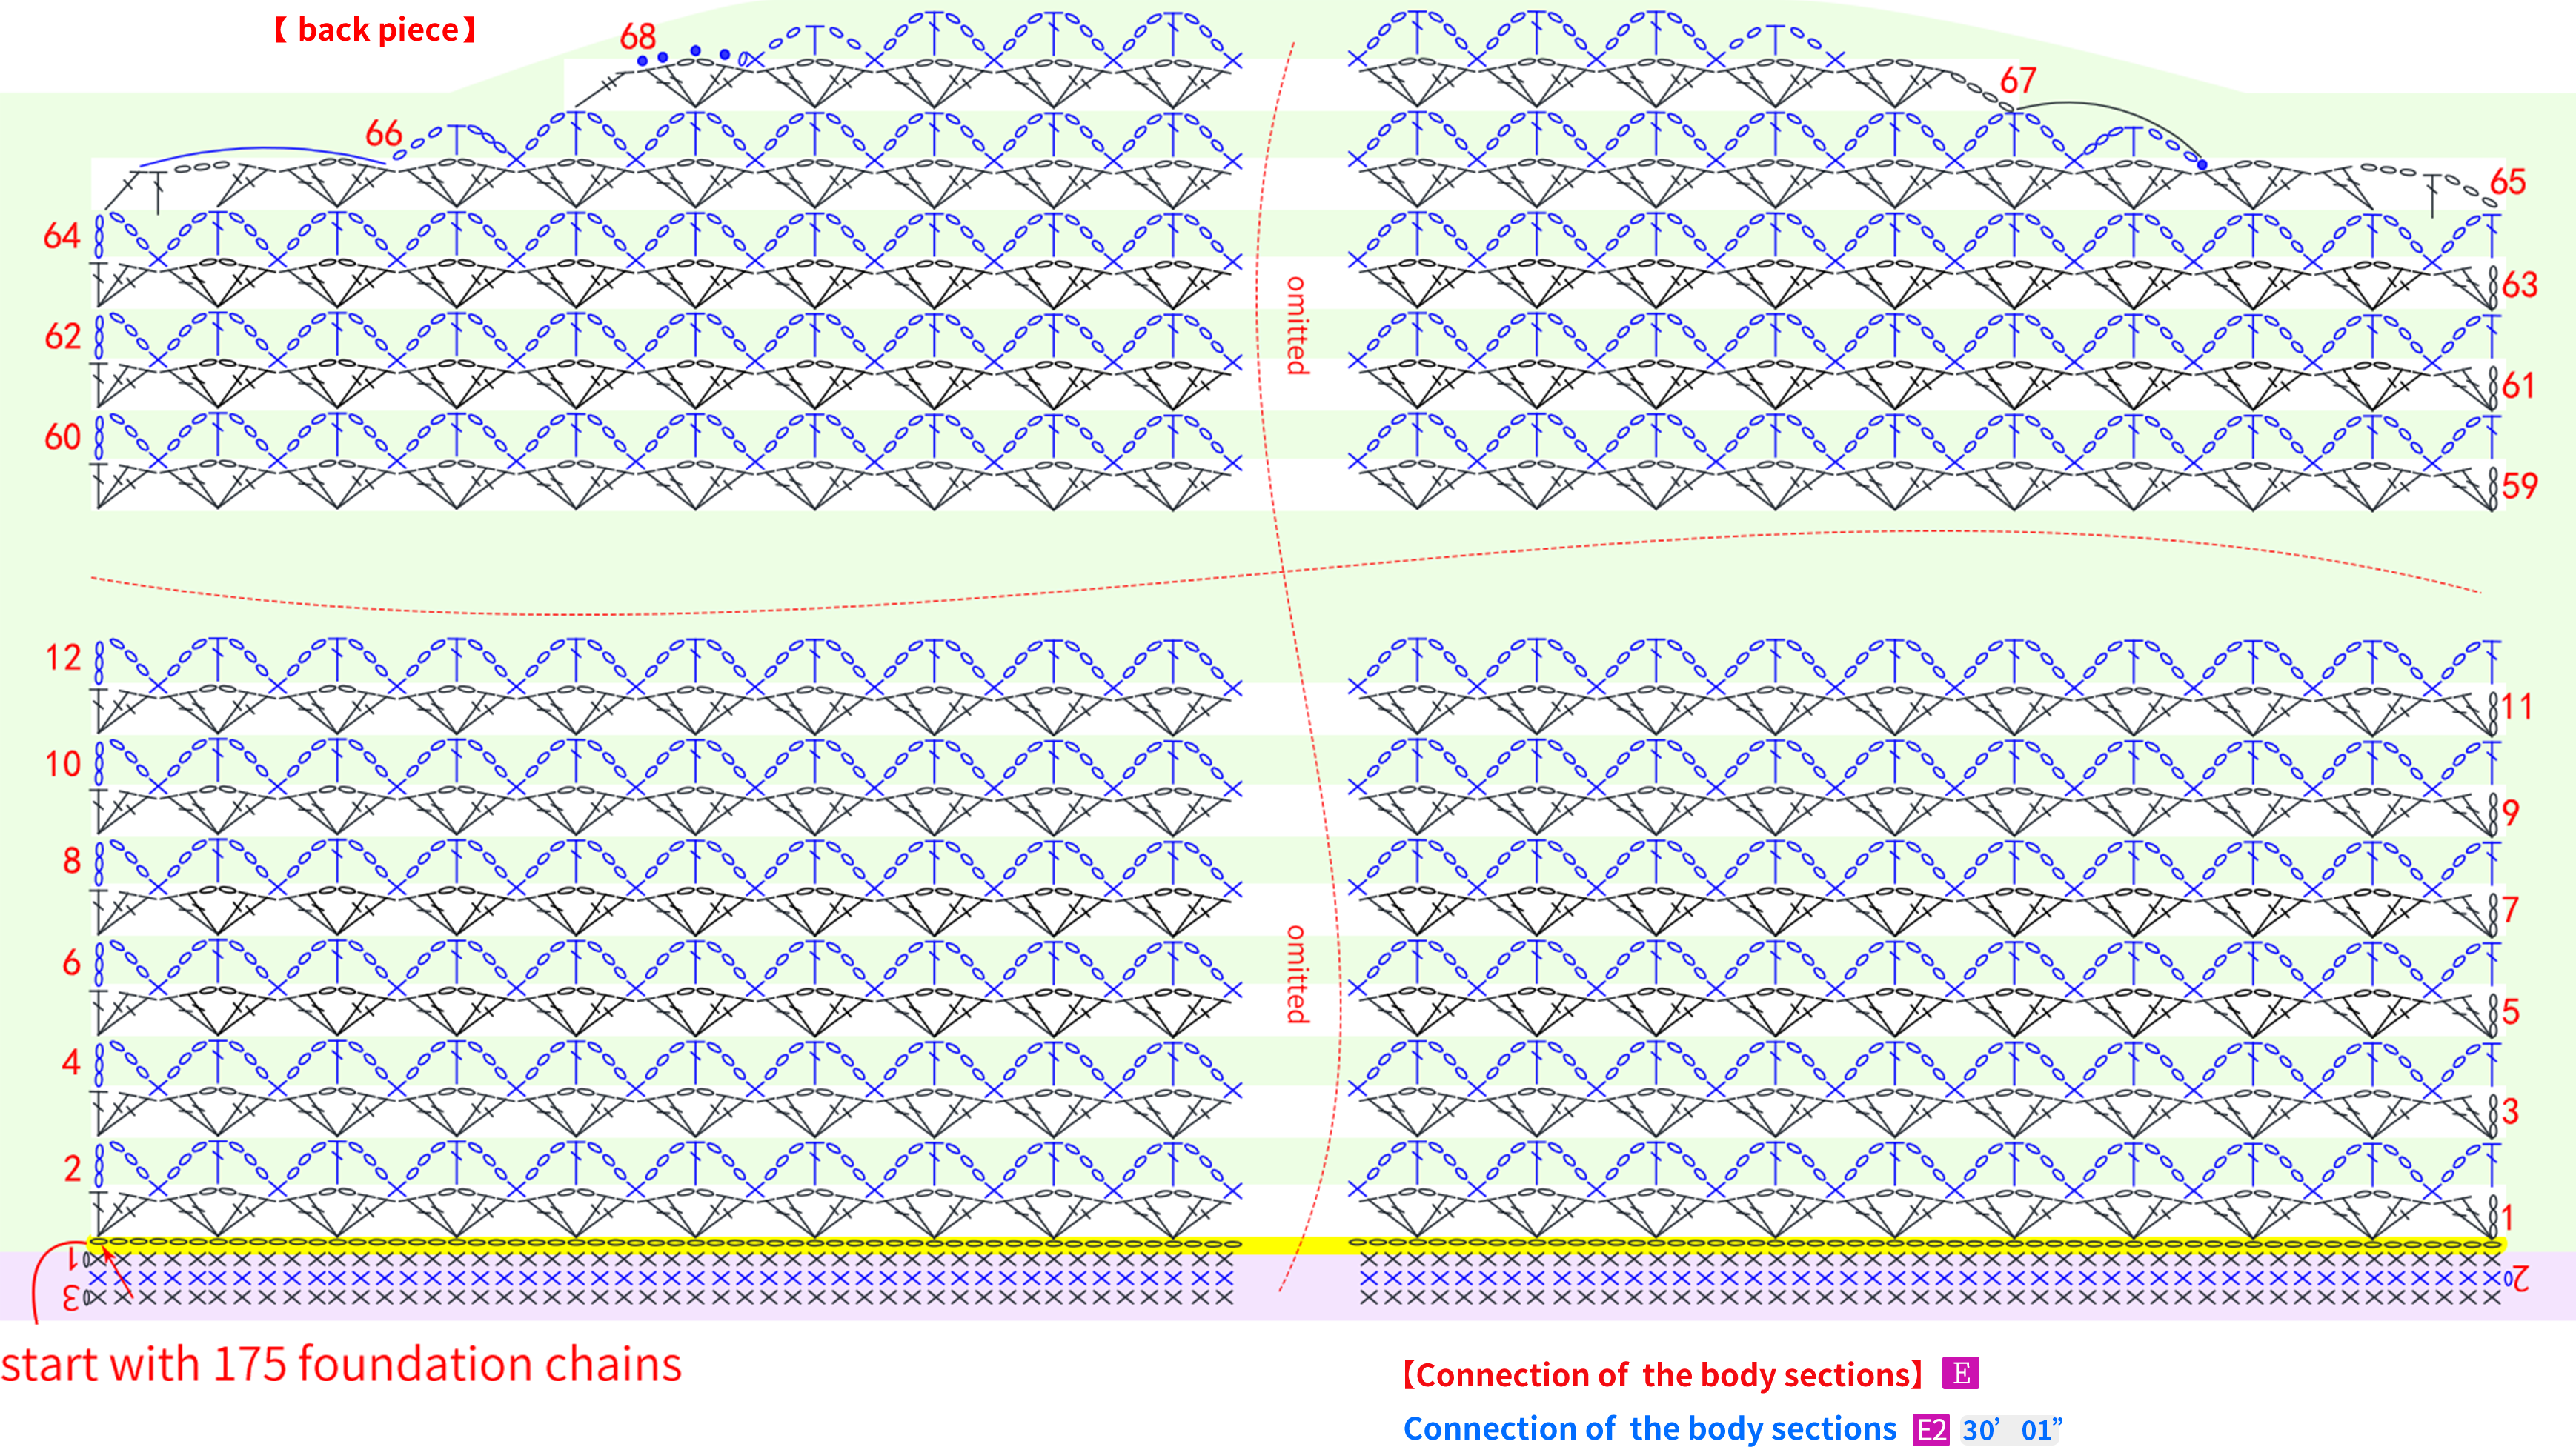

Part2 The SleevesF 31' 56''
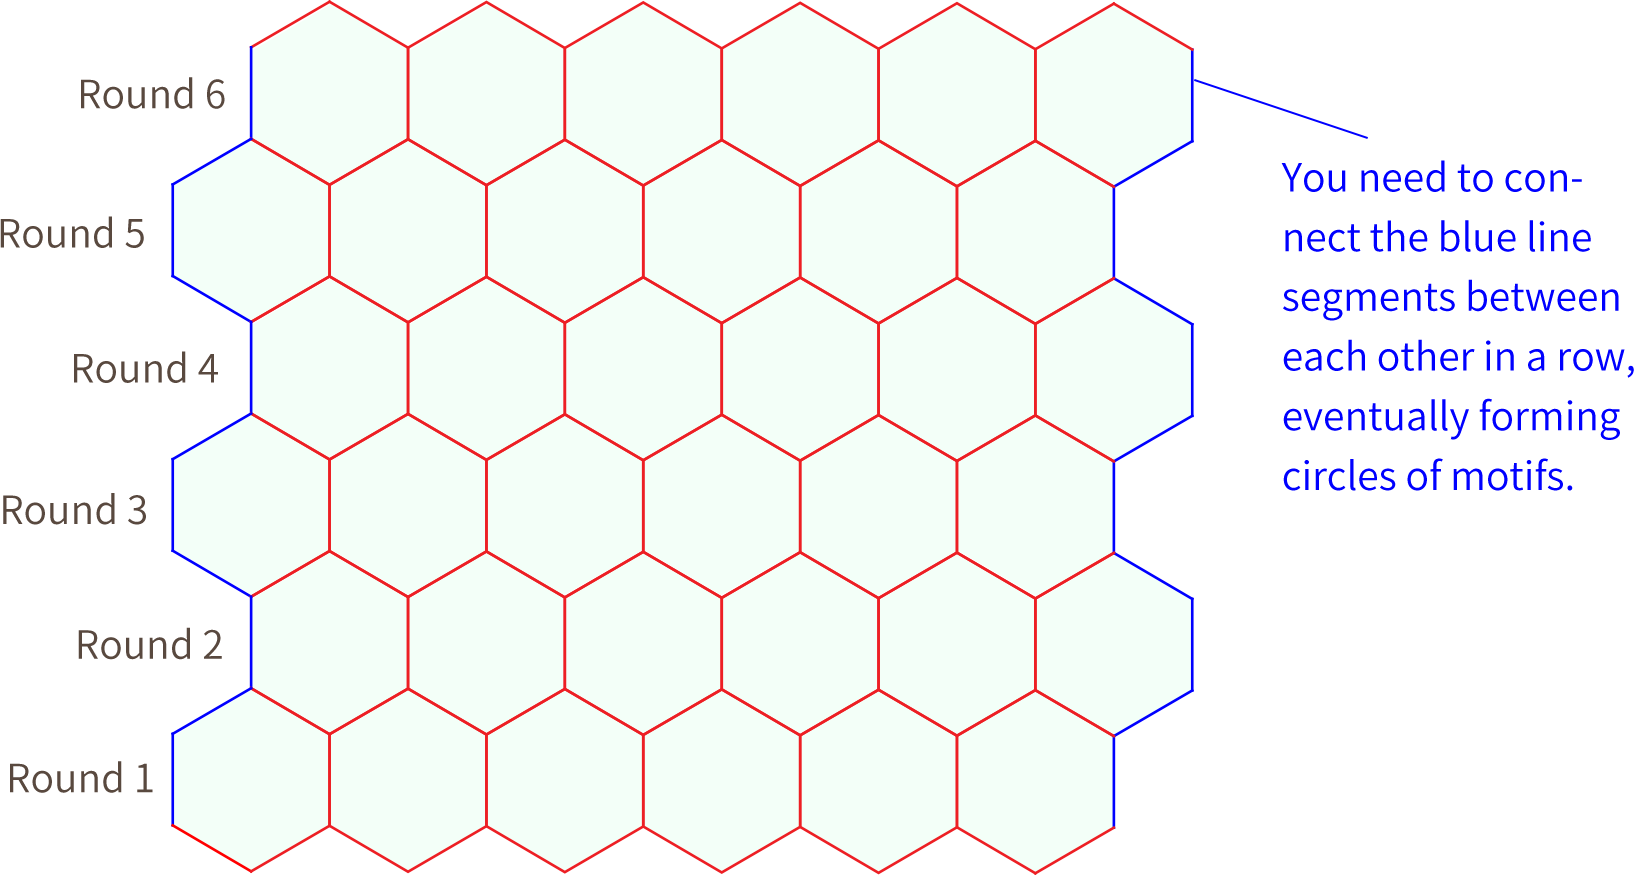
Divide into two areas: the motif section and the cuffs. For the motif section, start by crocheting one motif, then work and join the remaining motifs according to the placement diagram. Next, pick up stitches along one side of a motif to crochet the cuff. Finally, attach the entire piece to the armhole position. Please refer to the pattern chart and video demonstration for details.
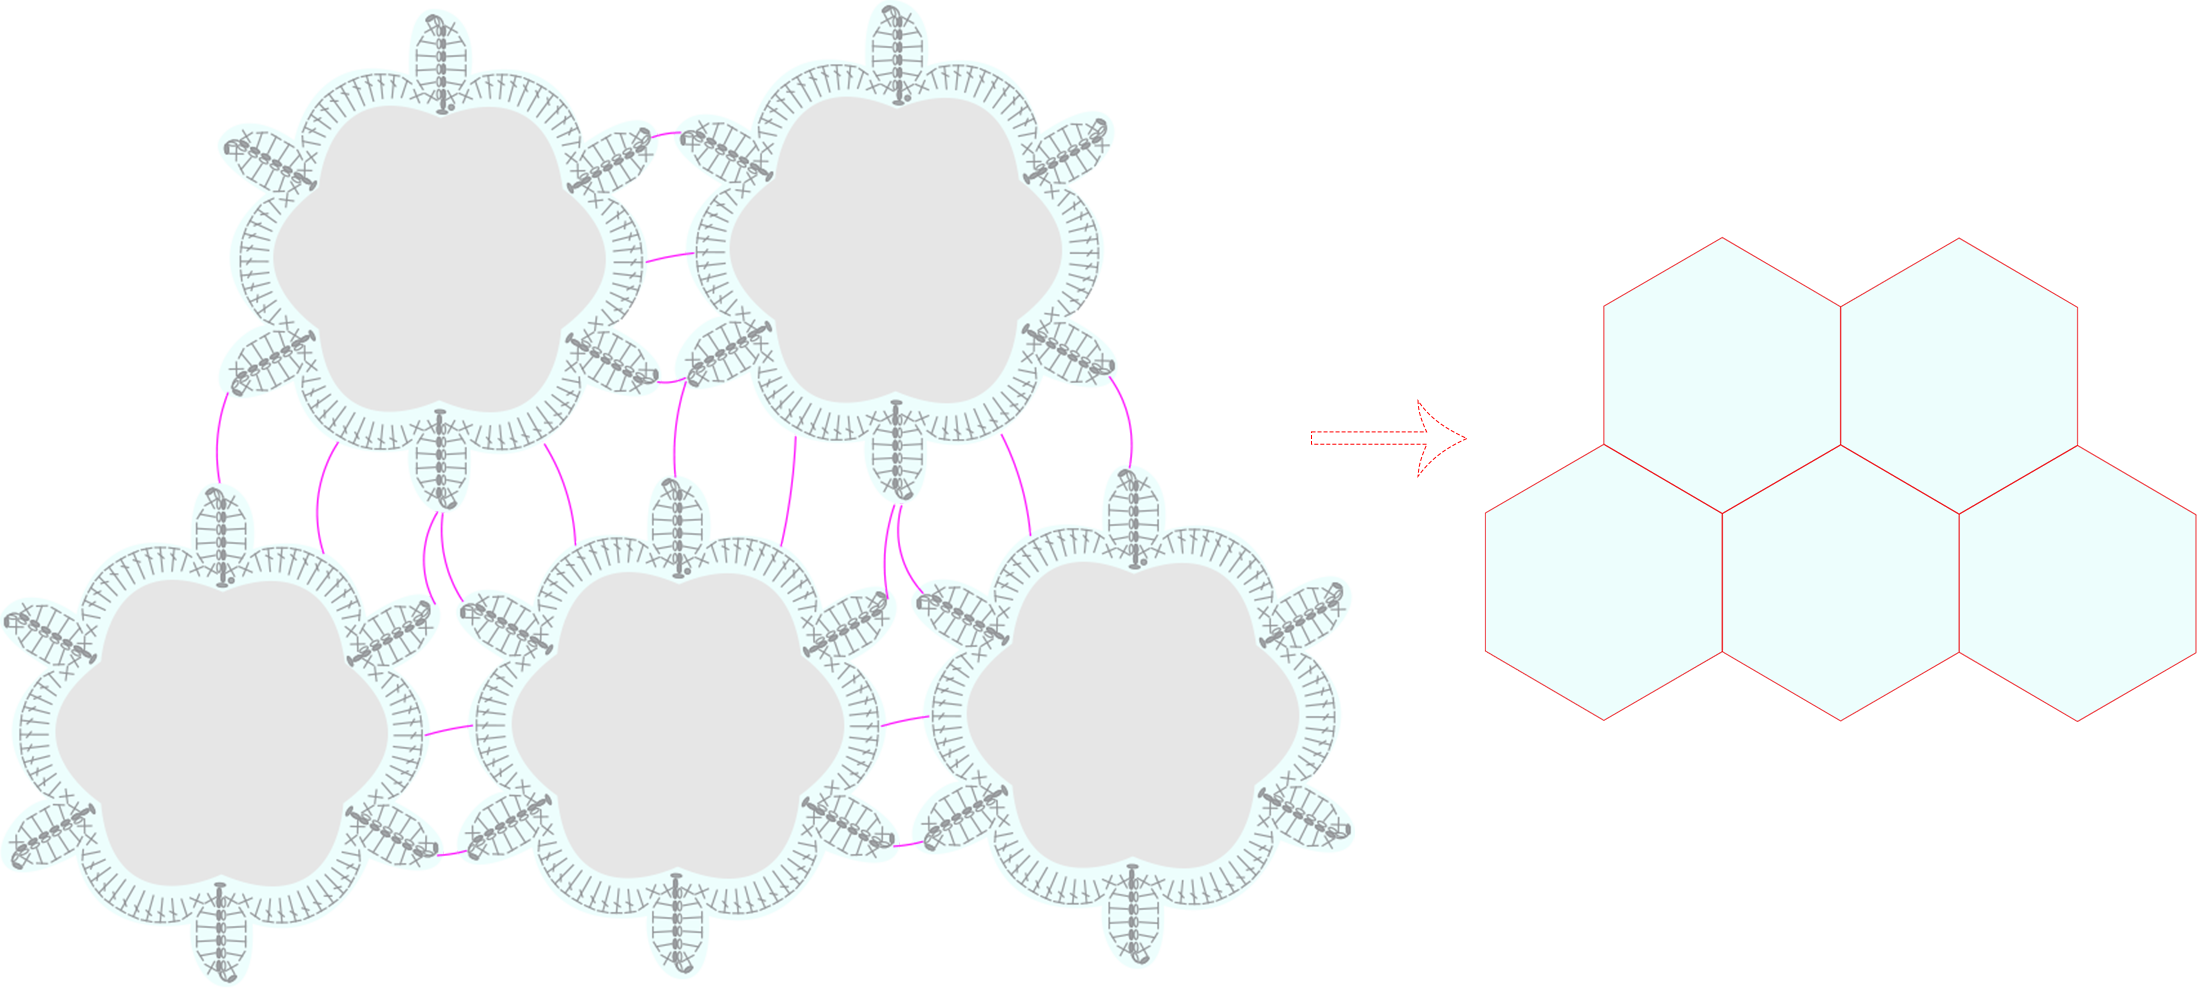
【Motif Layout Diagram】
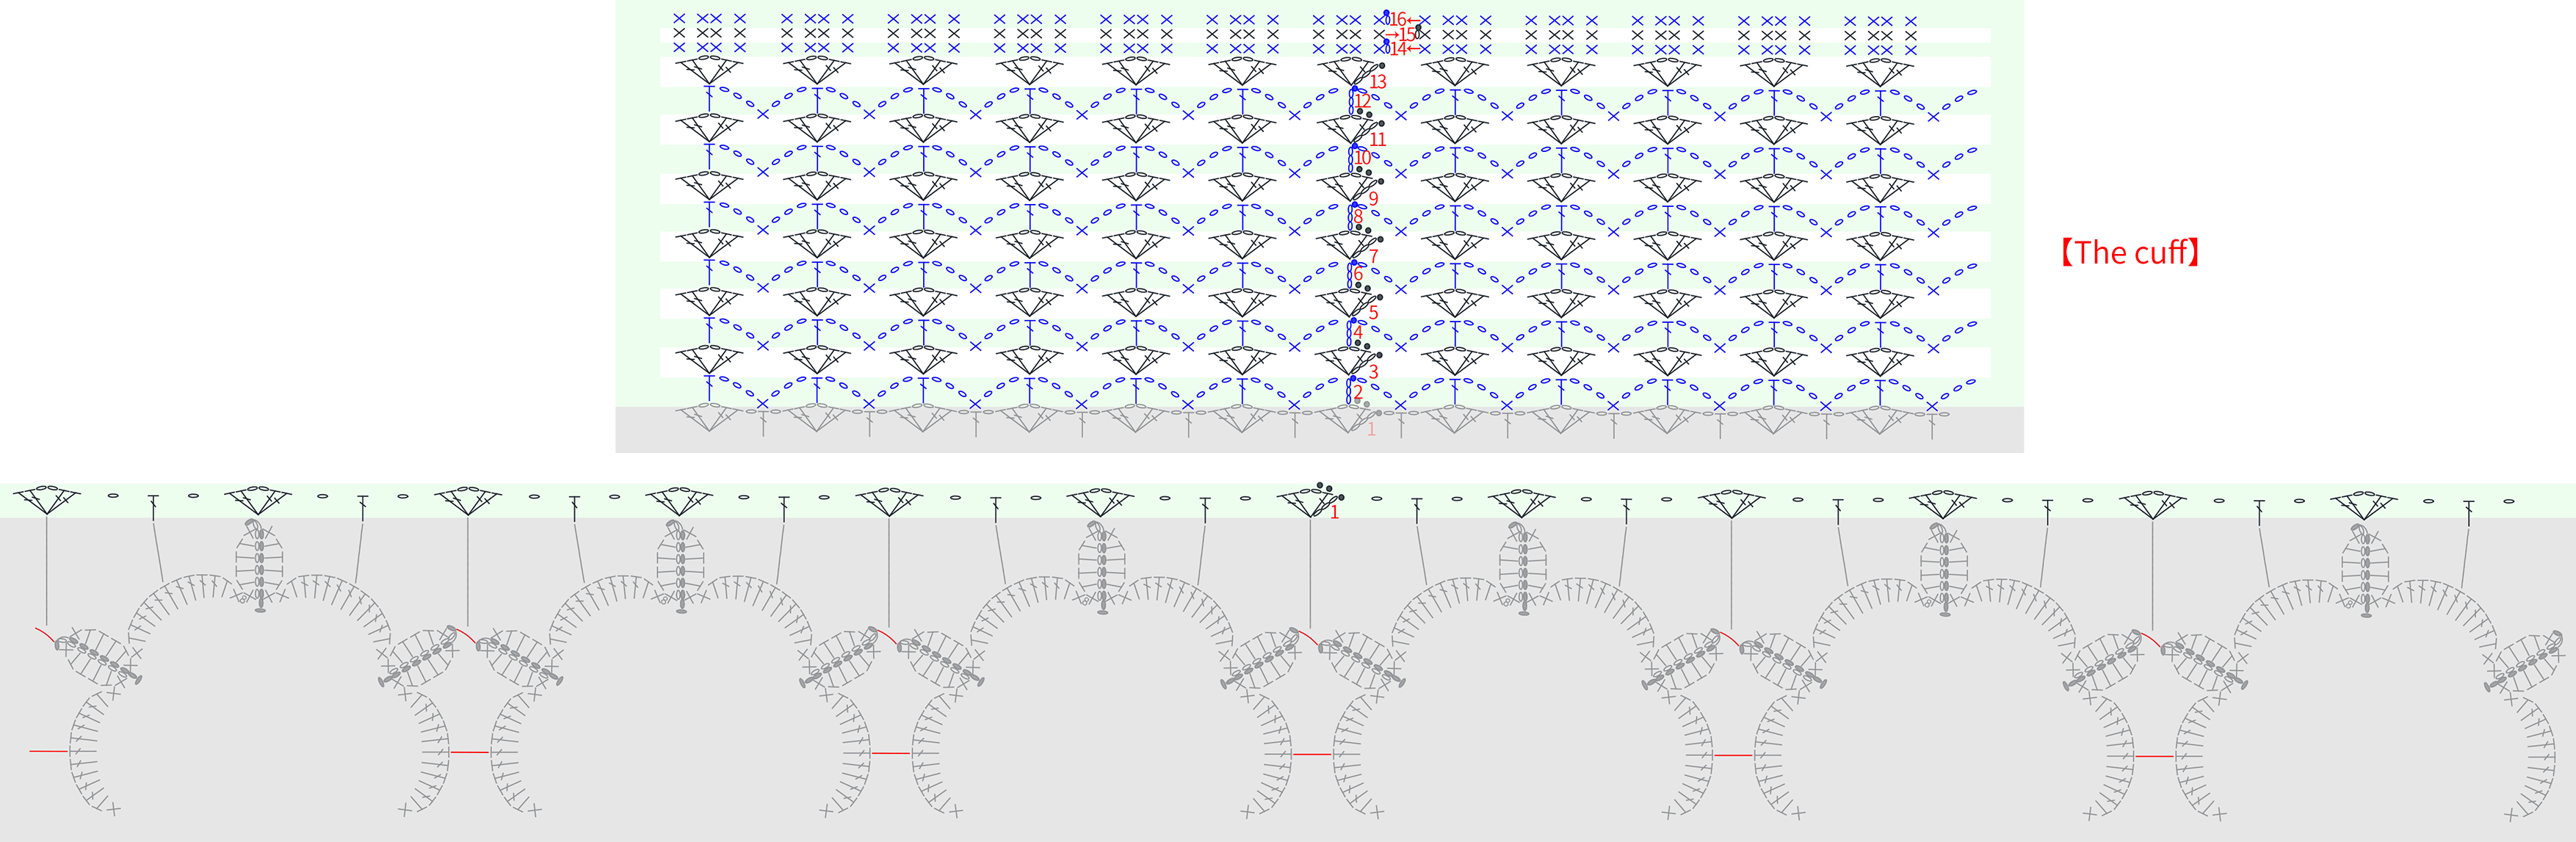
Part3 Collar, buttons, and front band edging
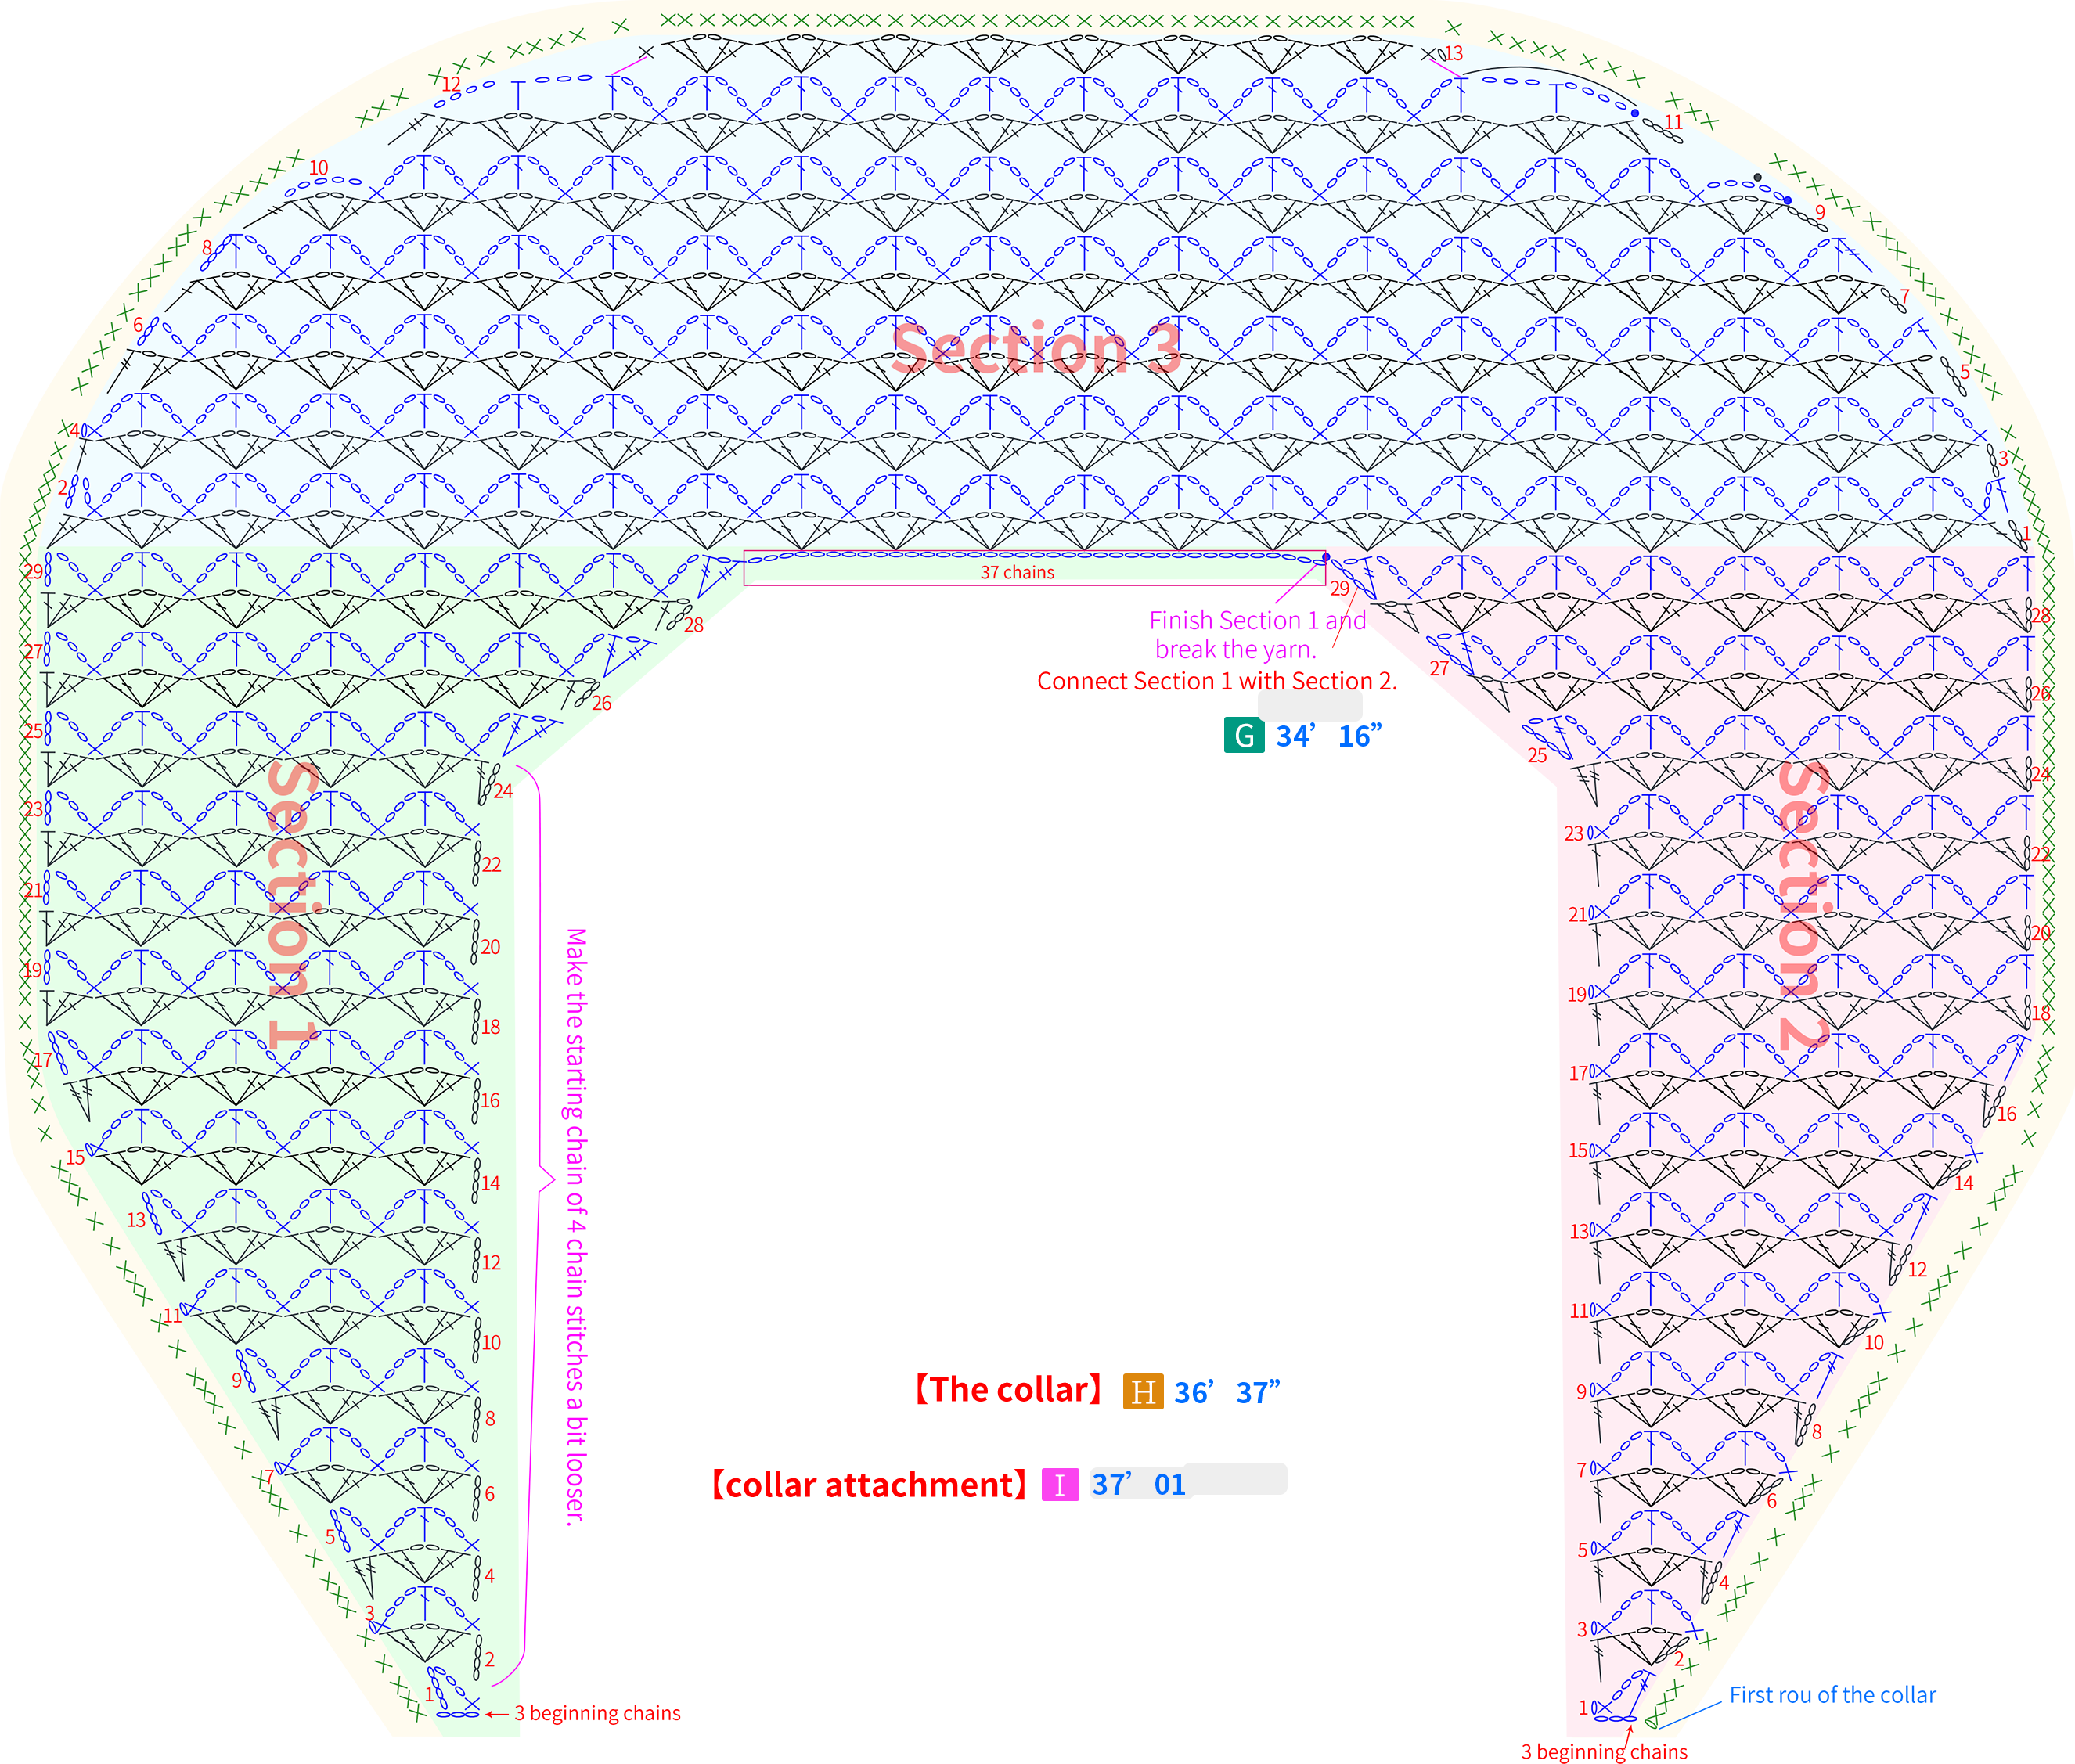
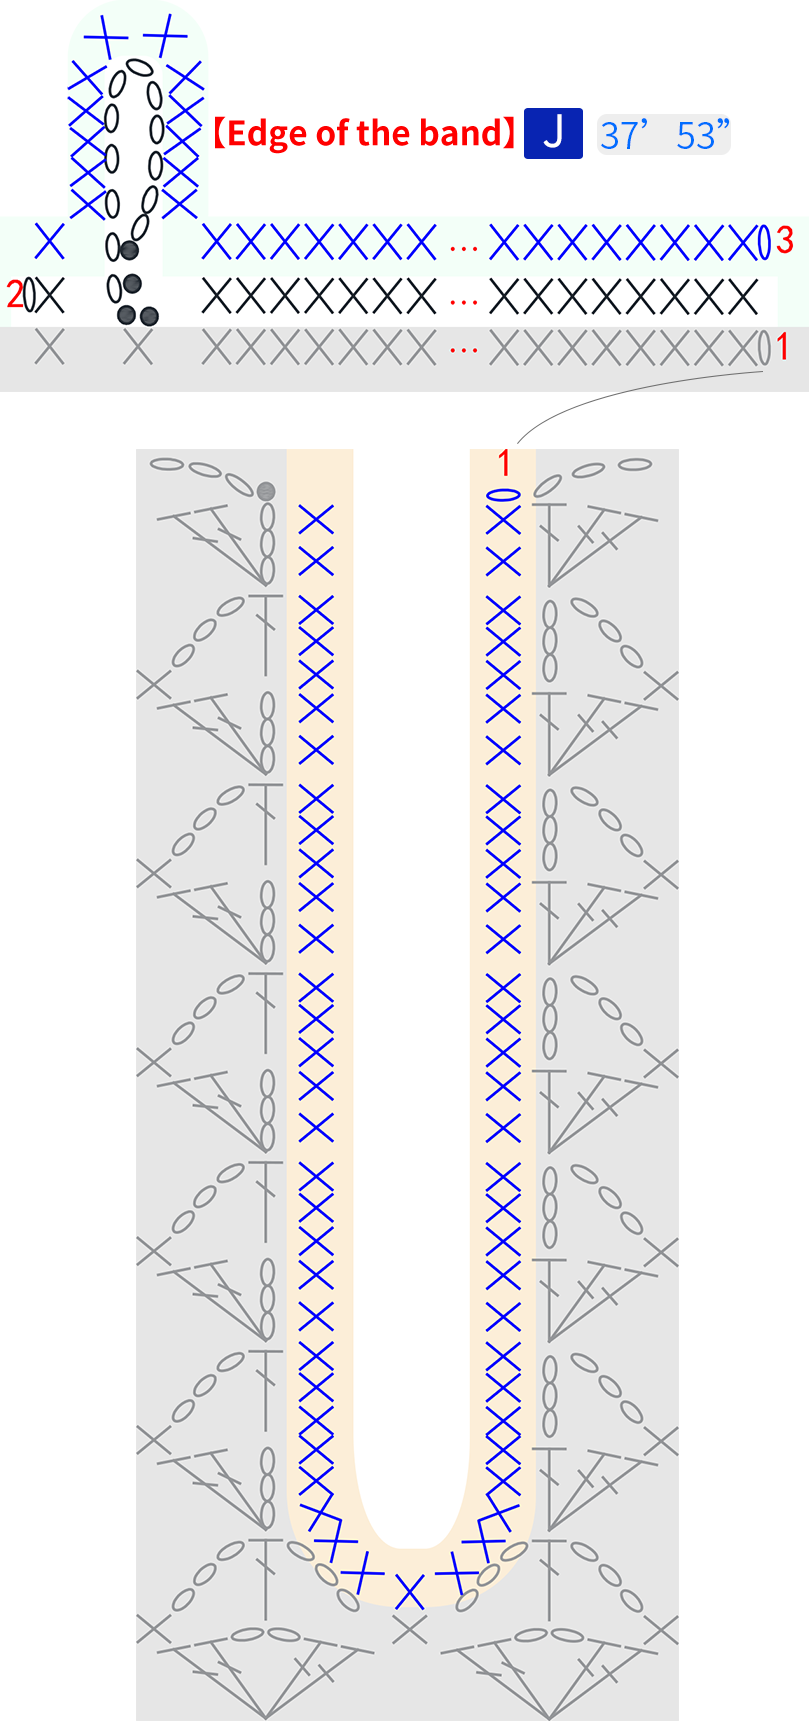
First, crochet the collar section, dividing it into Section 1, Section 2, Section 3, and the collar edge. After completing it, attach it to the neckline positions of the front and back bodies. Then, crochet the edging on the front band of the neckline. Finally, install the buttons at the corresponding positions for the buttonholes. Please refer to the charts and videos for more details.

Made by the community





