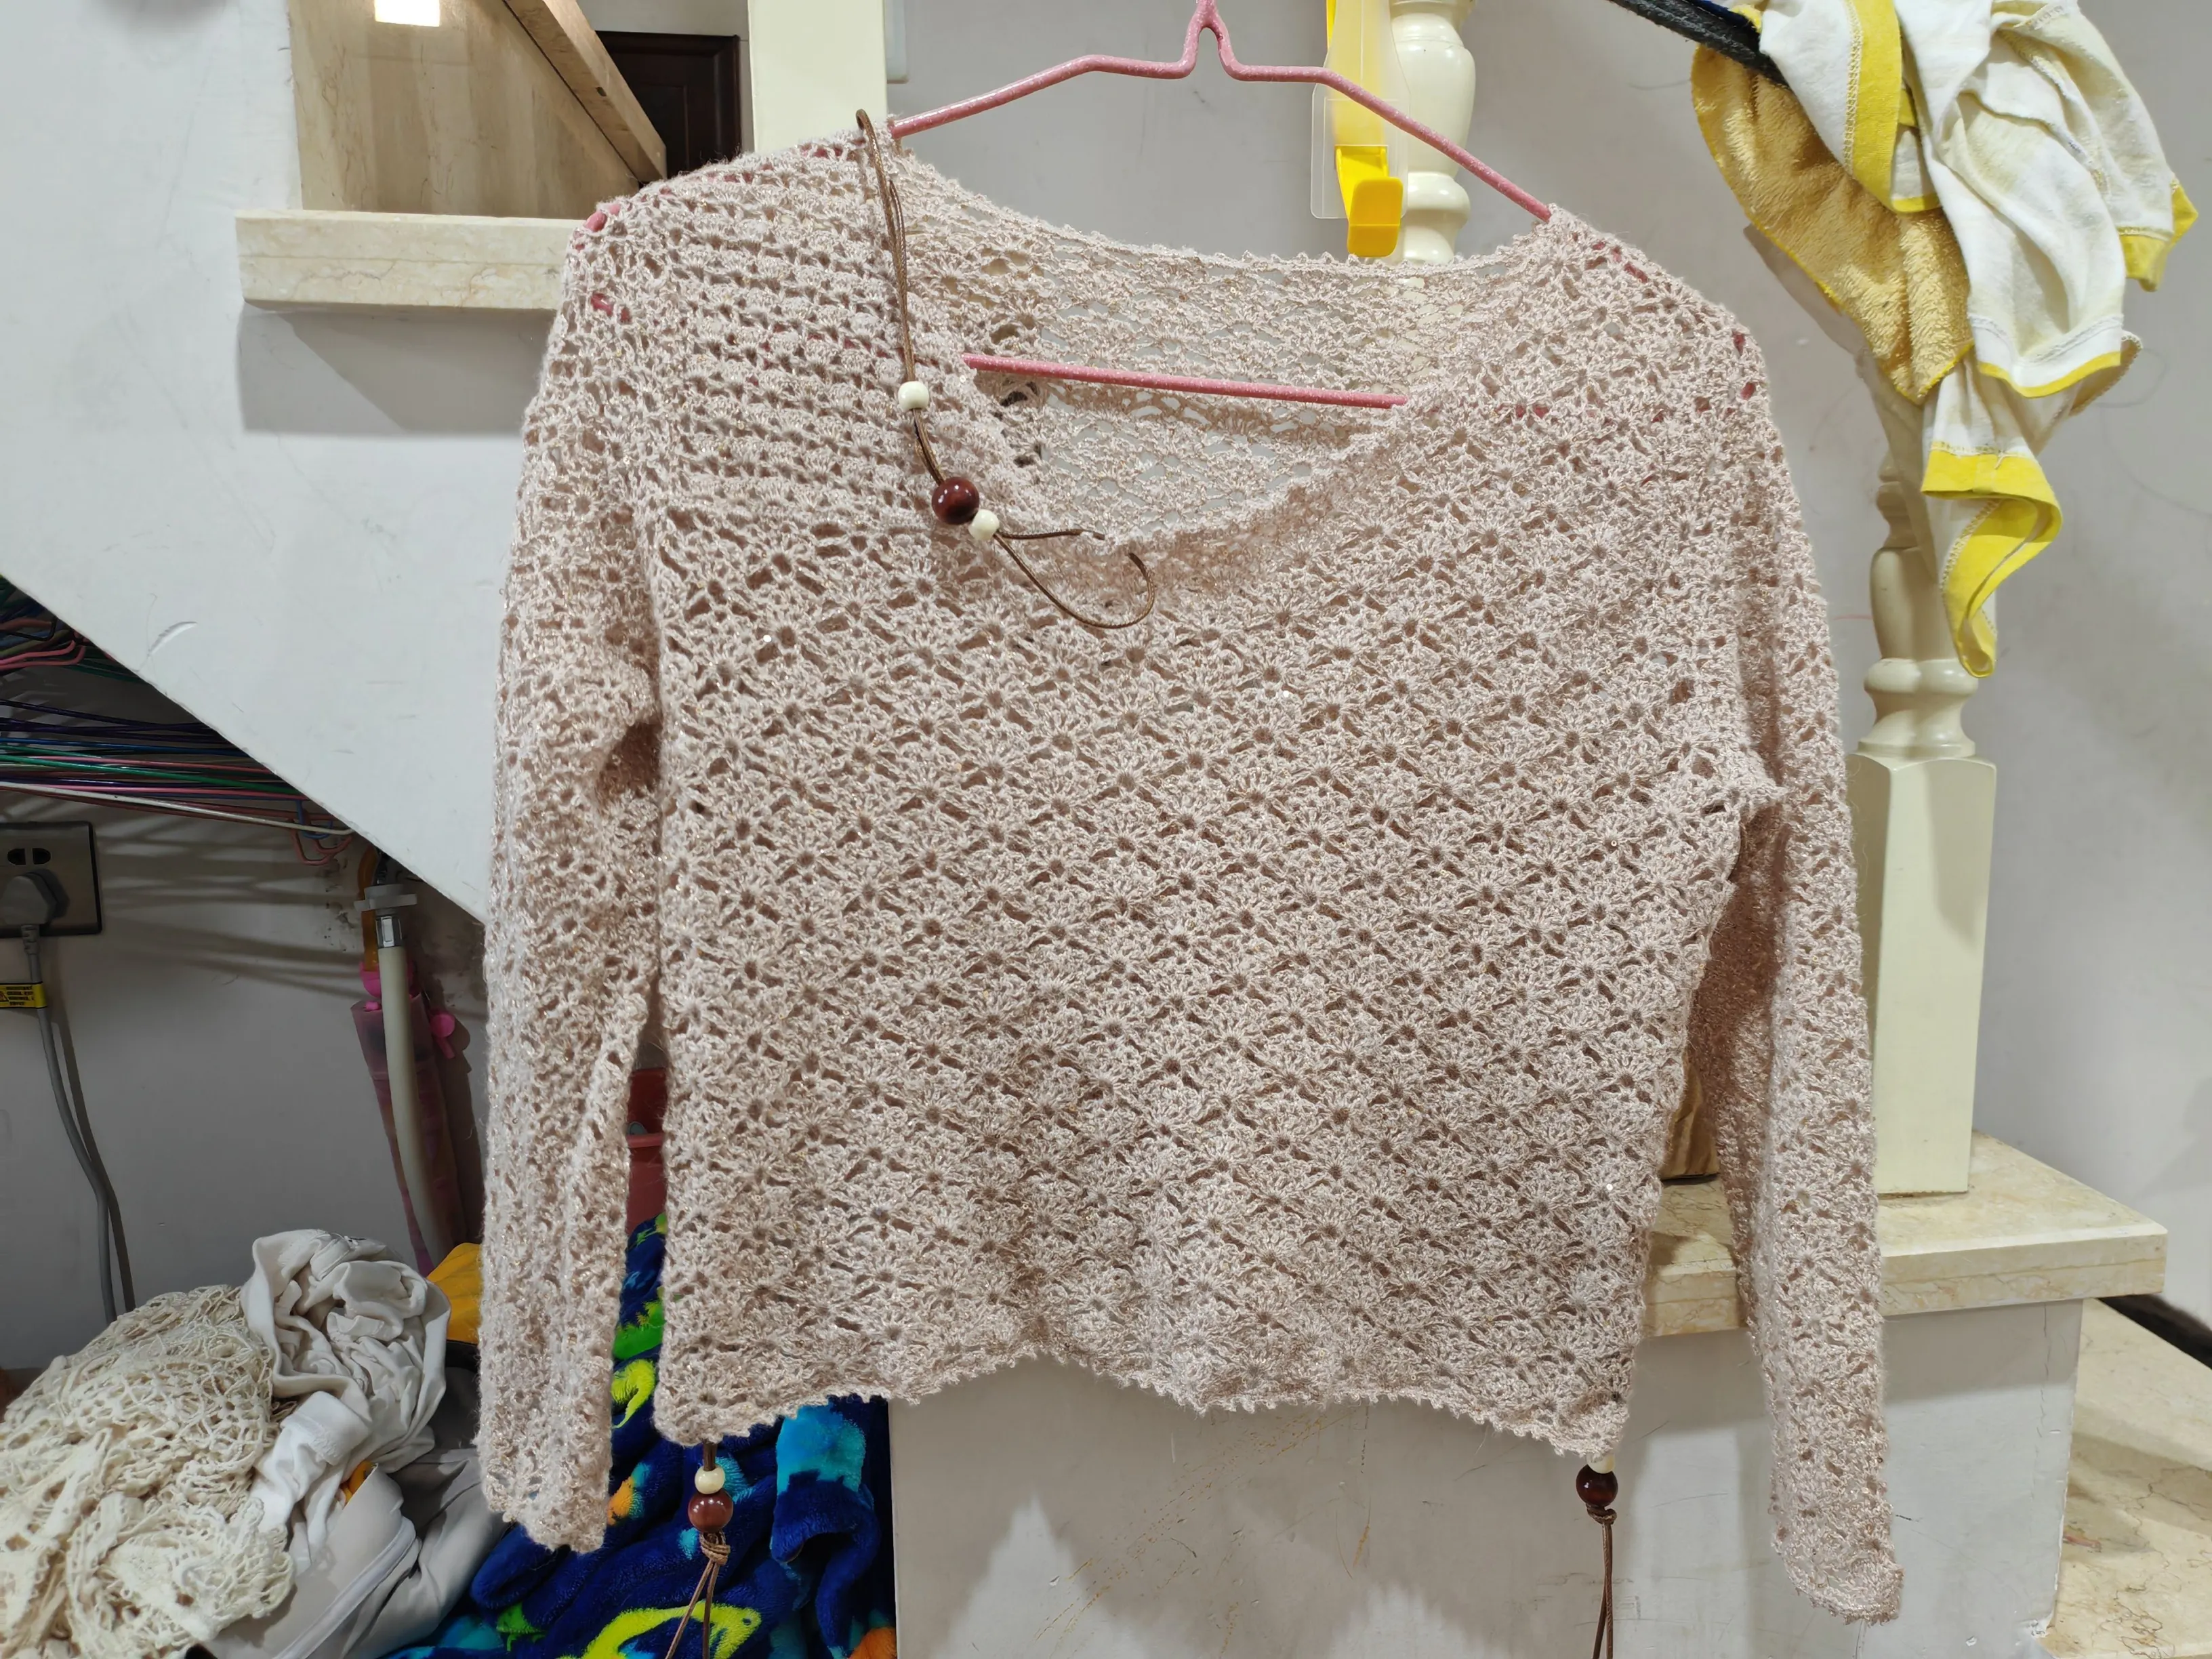
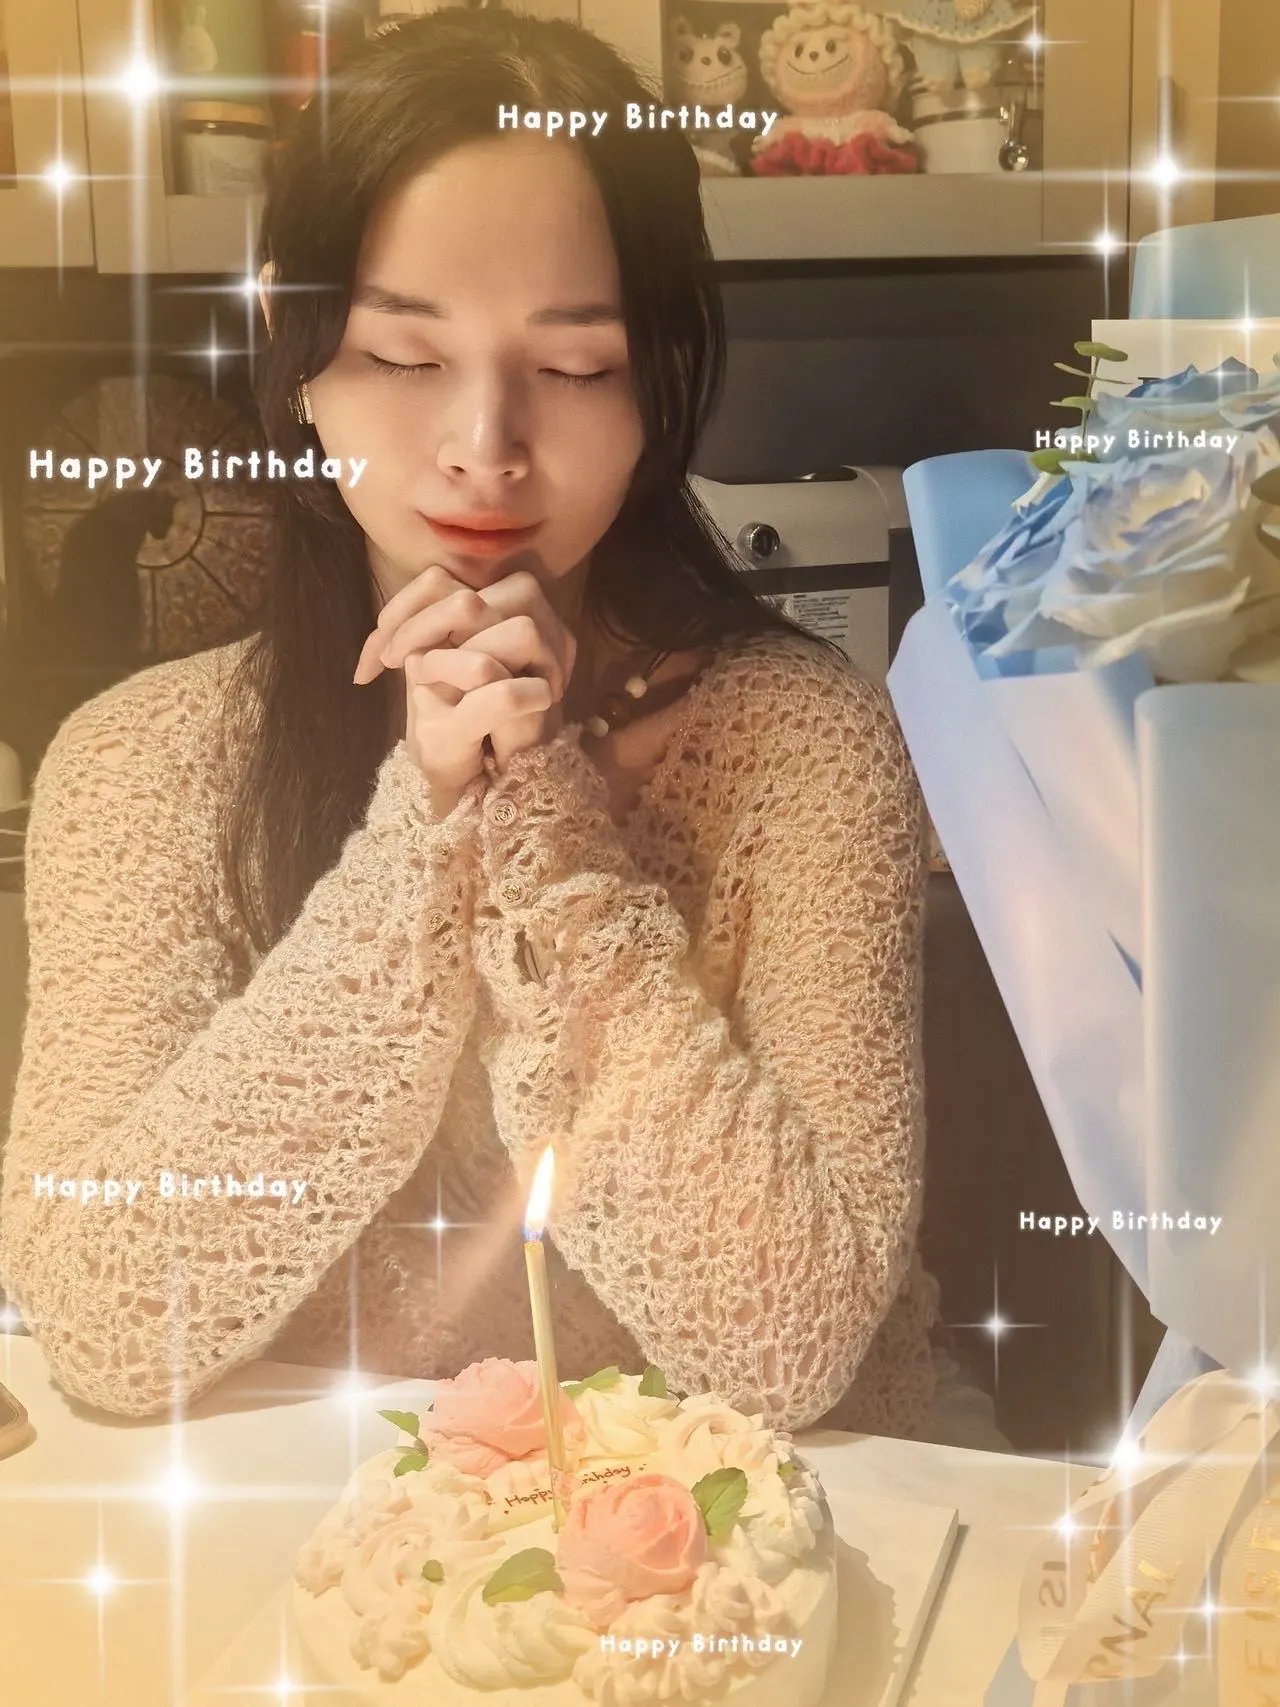
Clothes
Blossom Times
Project preview
See the finished project
Pattern format
Instructions
Watch and follow
Video tutorial
| Style | Yarn | Color |
|---|---|---|
| Snow White Version | Sequin Mahai |  03#Snow White x 3 03#Snow White x 3 |
| Bleached Sand Version | Sequin Mahai |  05#Bleached Sand x 3 05#Bleached Sand x 3 |
| Black Version | Sequin Mahai |  16#Black x 3 16#Black x 3 |
It consists of front body, back body, sleeves, joining, edging and decorations. First, crochet the front and back bodies as well as the sleeves separately. Once completed, join the corresponding areas of the pieces. Then, pick up stitches around the neckline, cuffs and hem to crochet the edging. Finally, make and attach the decorations.
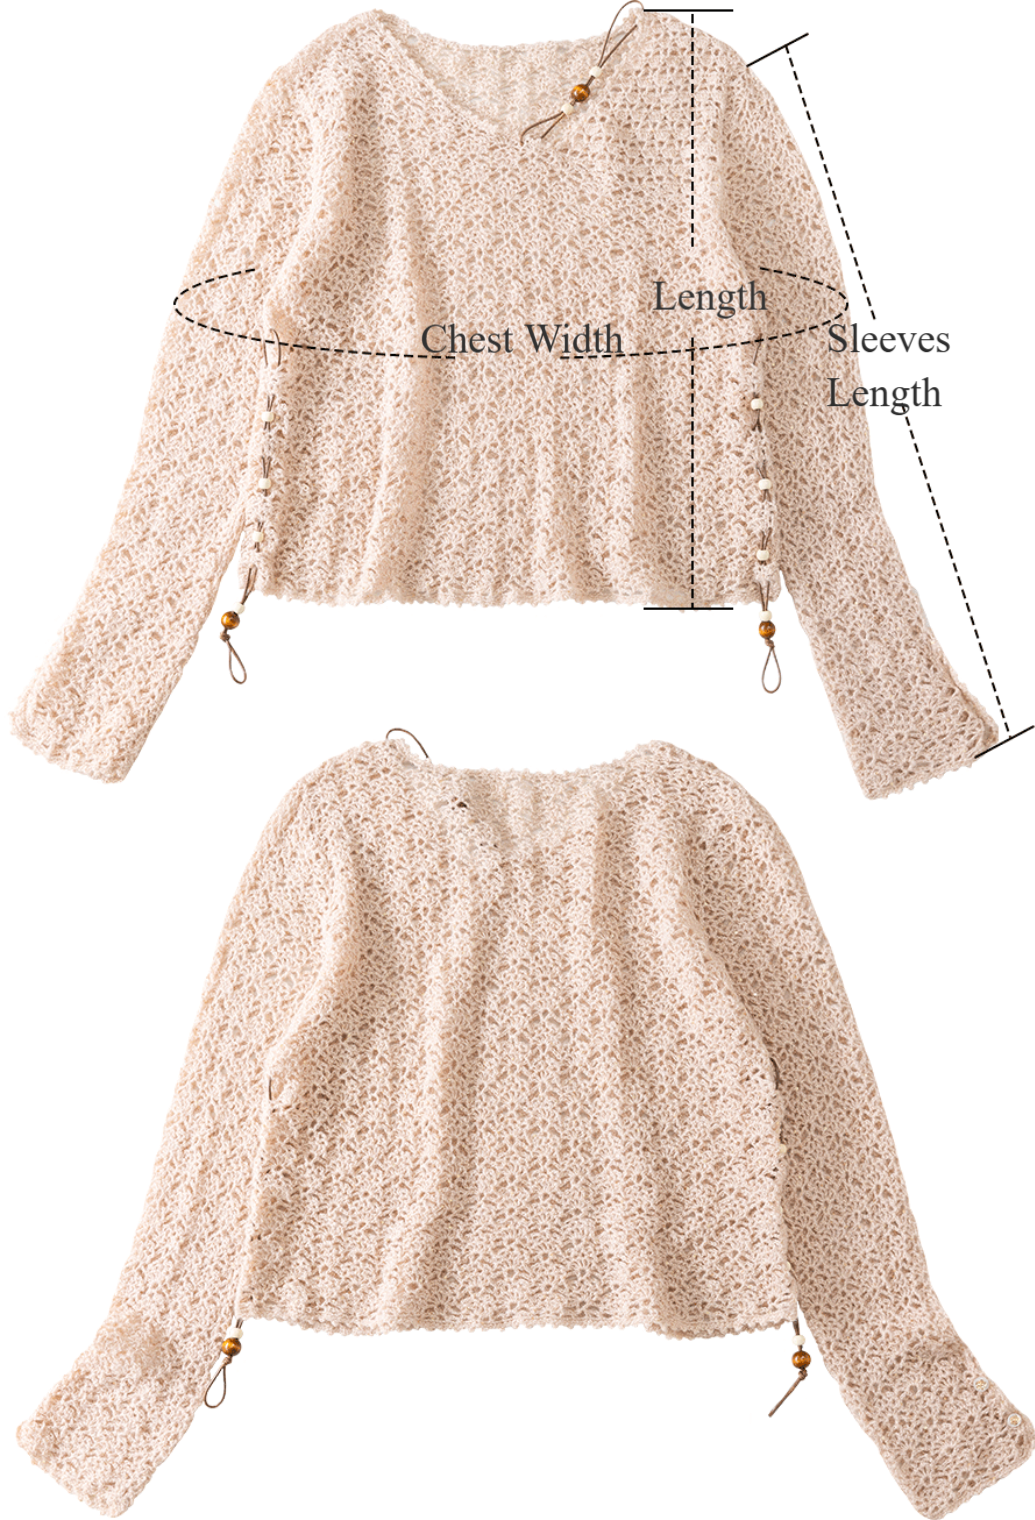
Note: Hand-measured, with a tolerance of 1-2 cm. Due to individual differences in hand tension, the size of the swatch is for reference only.
| Unit: cm | Chest Width | Length | Sleeves Length |
| Small size | 98 cm | 48.5 cm | 54 cm |
Materials : Sequin Mohair .
Tool: 3.60 mm crochet hook or a regular 3.50 mm crochet hook.

The tutorial is demonstrated using the smallest size as an example. Please refer to the corresponding diagrams for other sizes.
Structure diagram
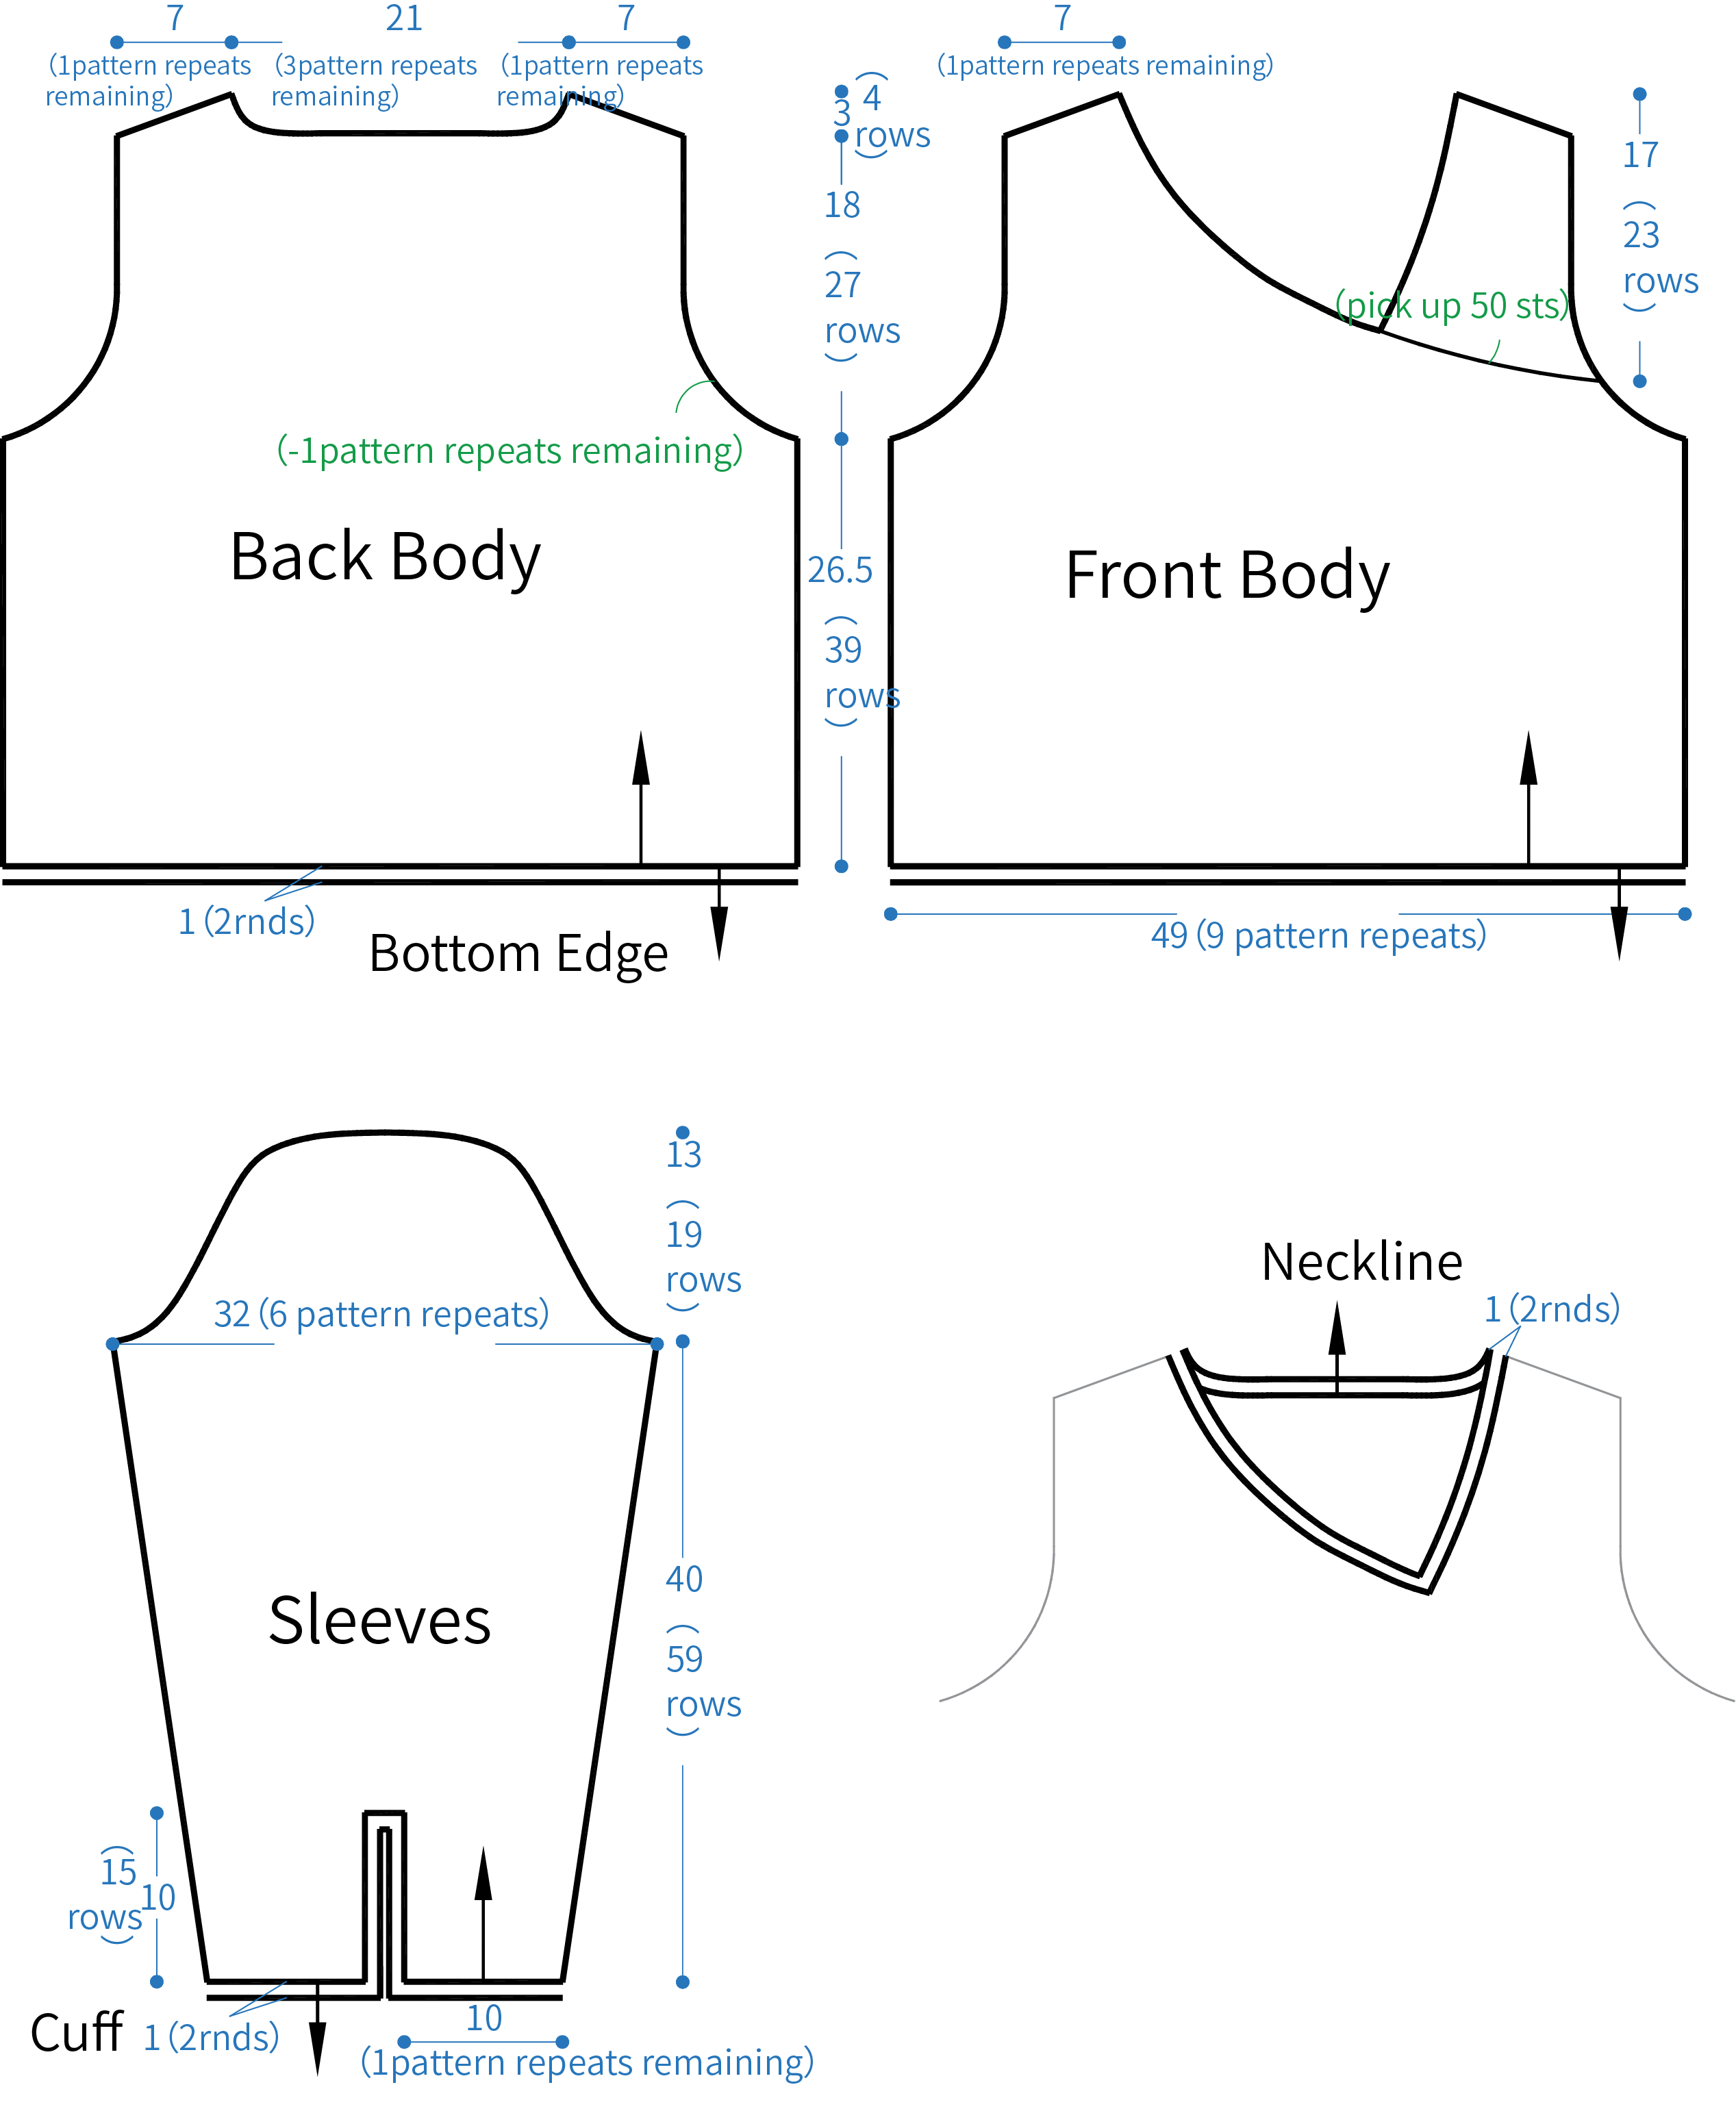
Chart Key









swatch
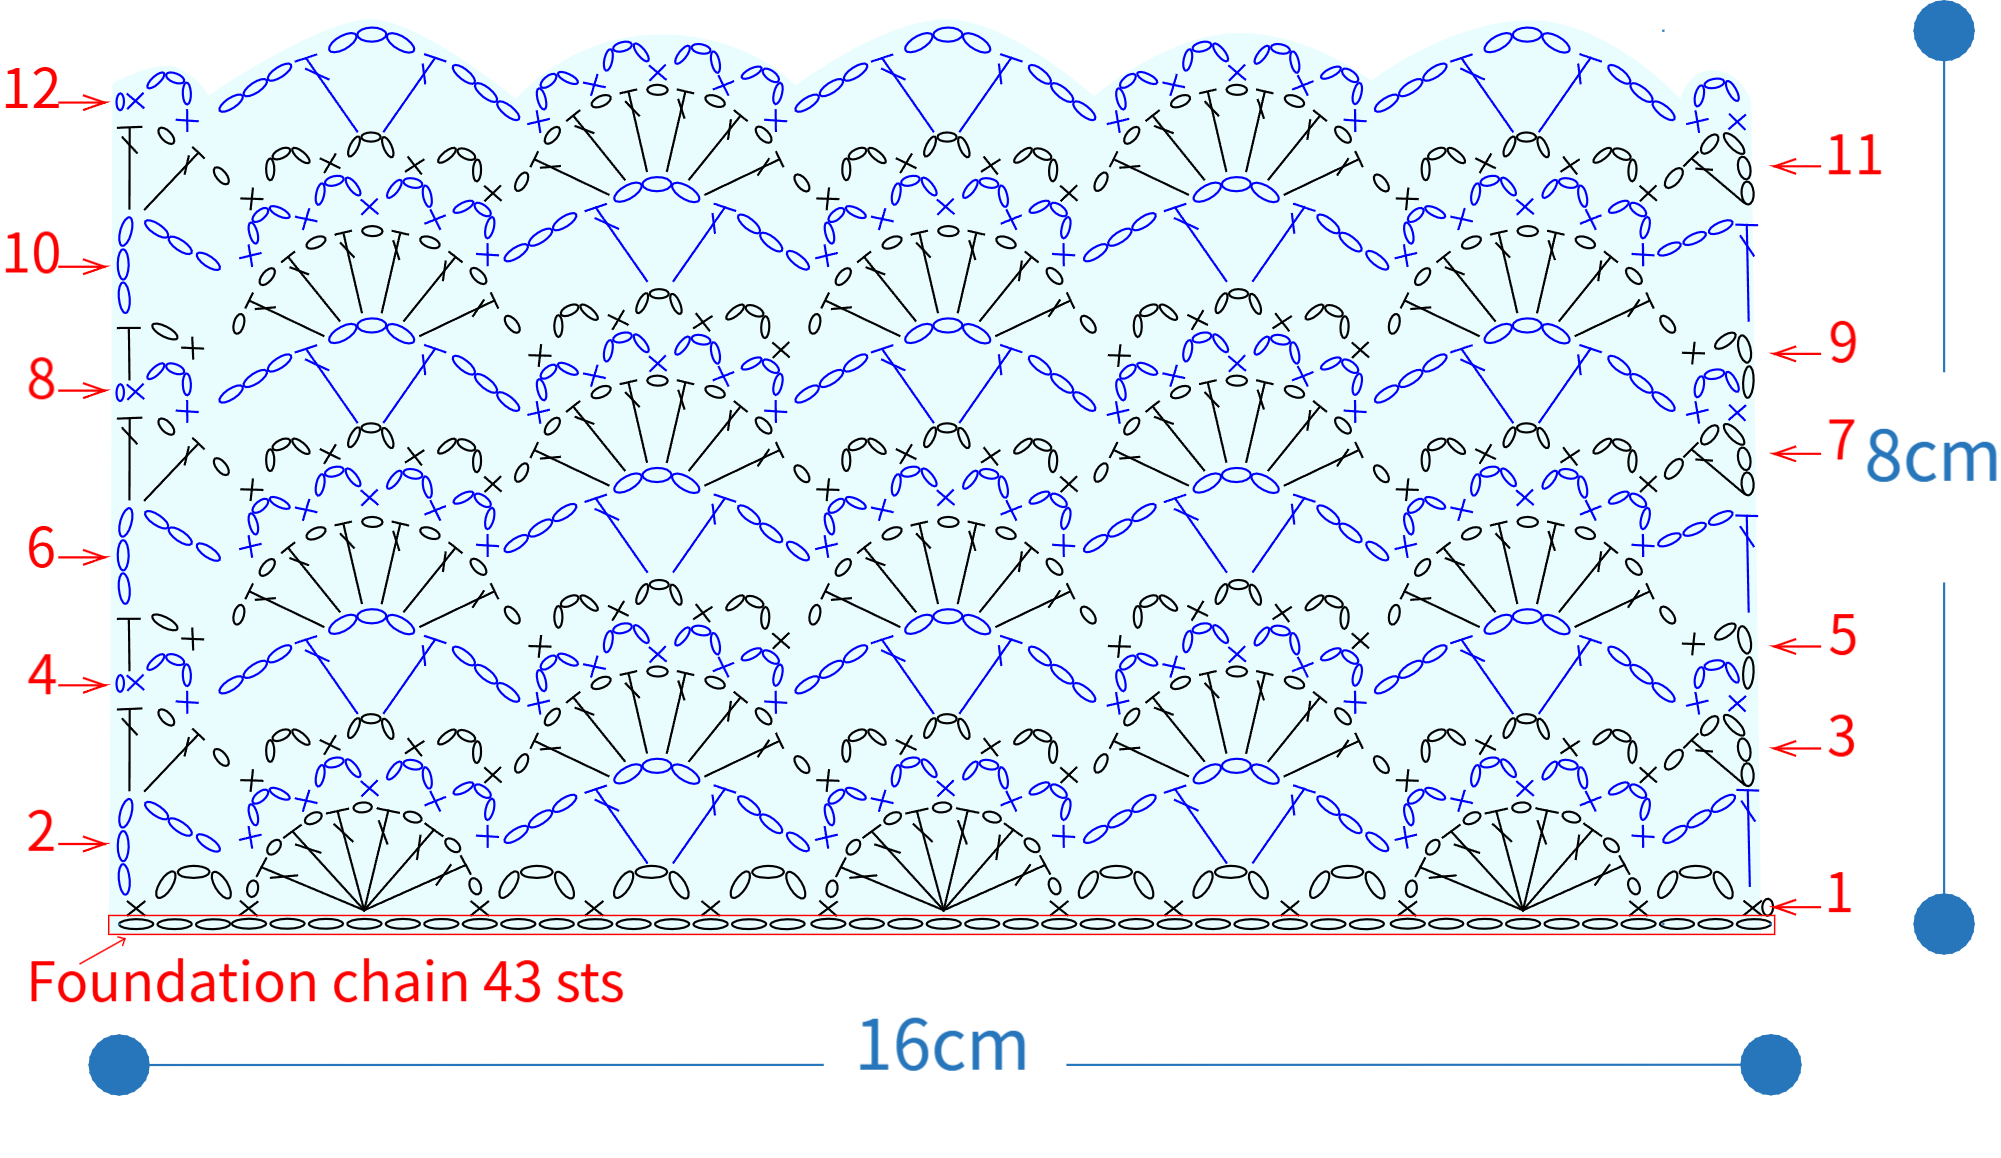
Note: This pattern is making in Chinese crochet pattern terms, and the stitch name is written using American terminology. All measurements in charts are in cm.

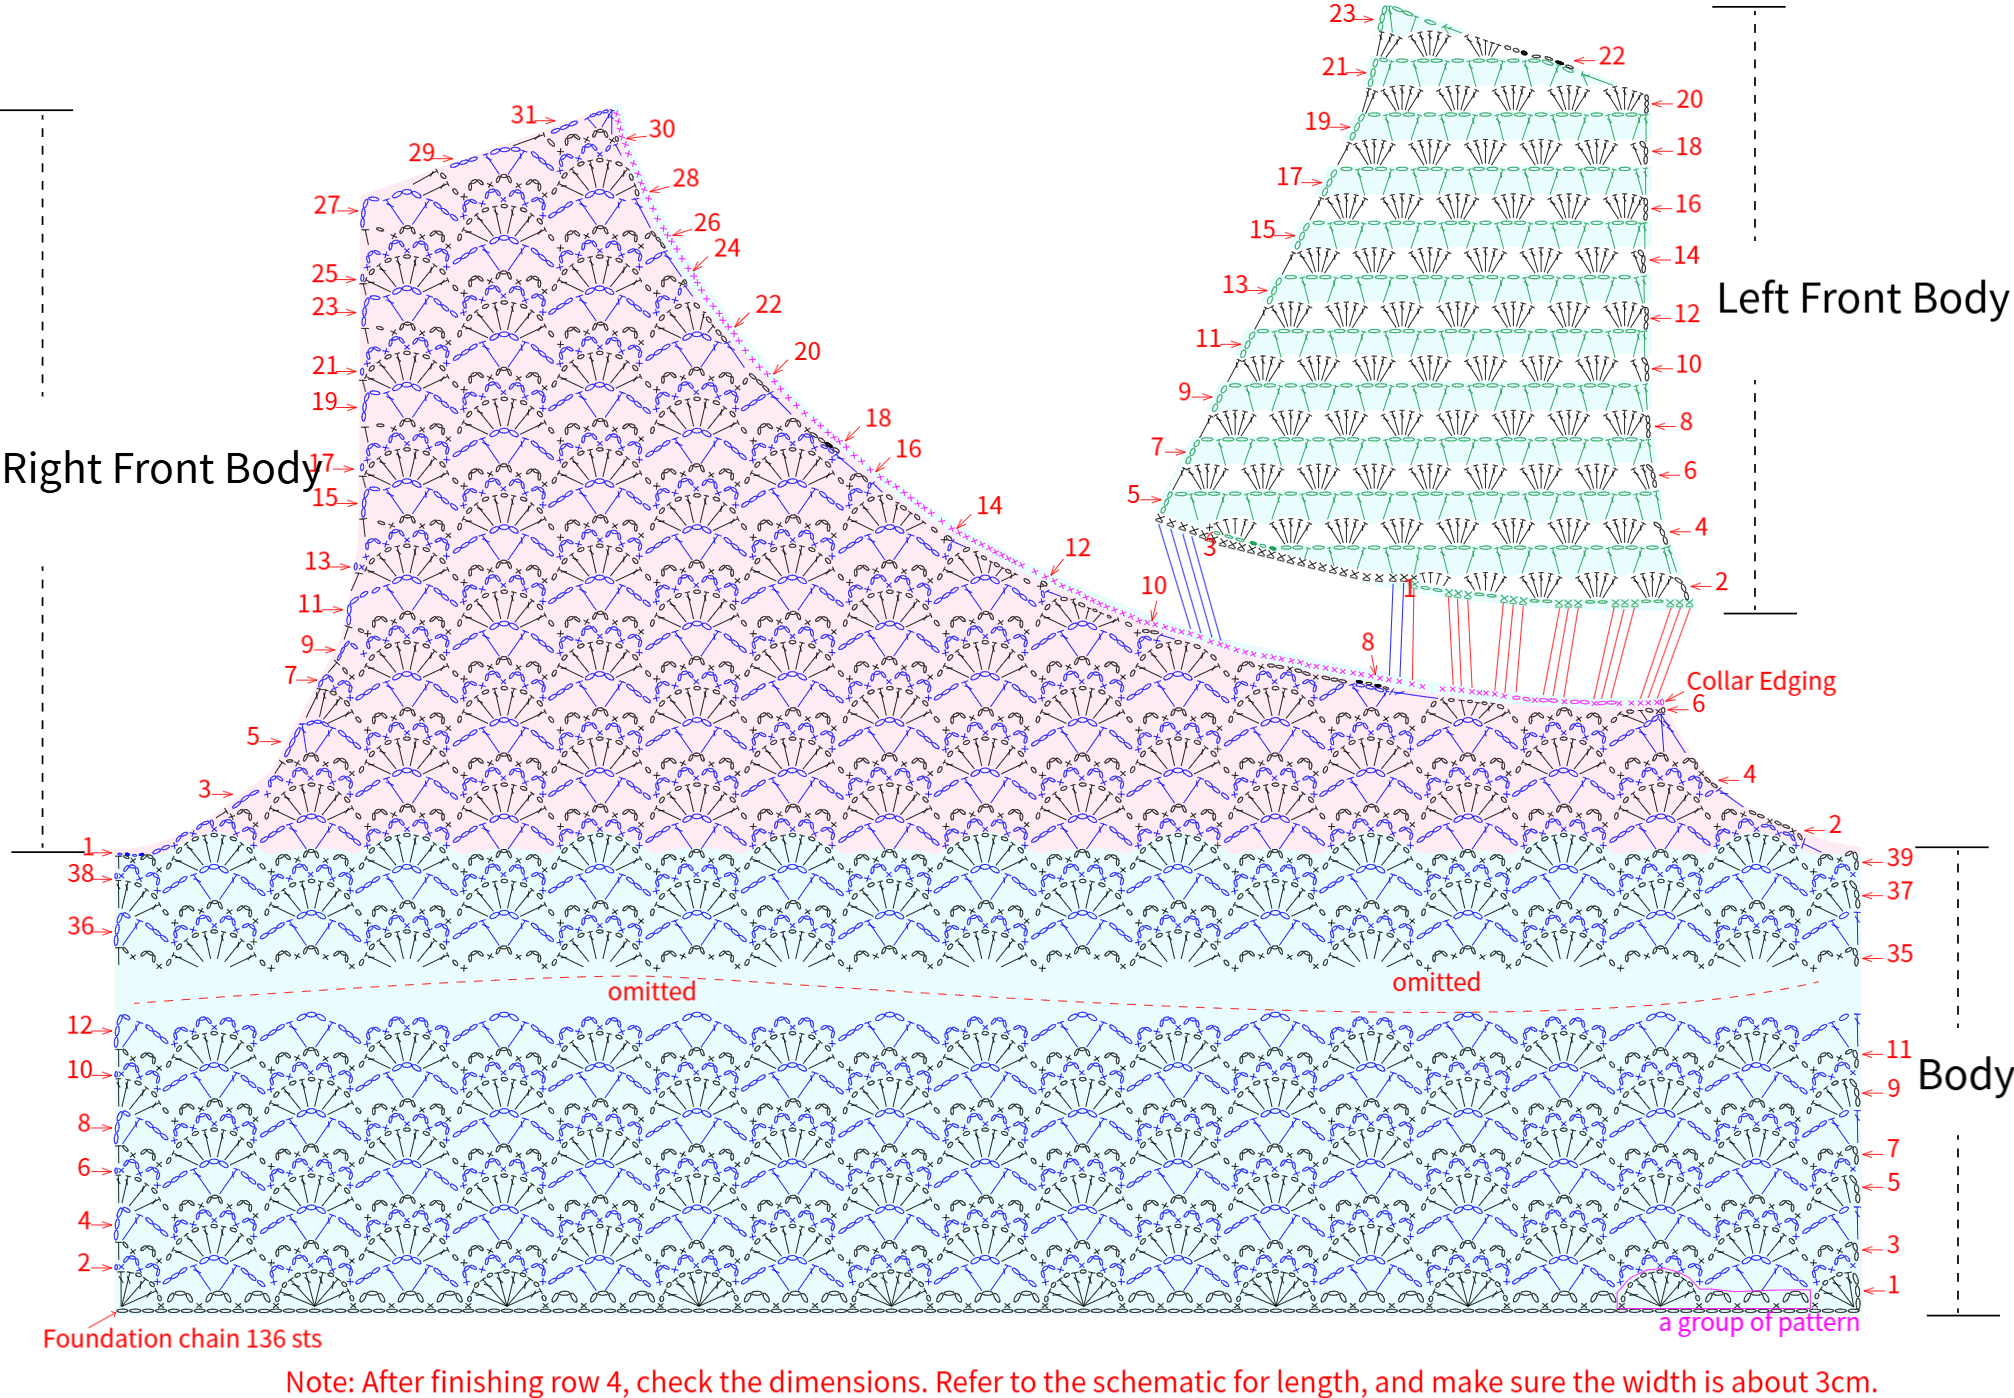
PART 1 Front Body A 01' 04''
Divide into several parts: the back body, right front body, and left front body. The left and right are distinguished based on the actual wearing position. The back body and right front body are crocheted together, while the left front body is separately picked up and crocheted from the corresponding position of the right front piece. Please refer to the video demonstration for more details.
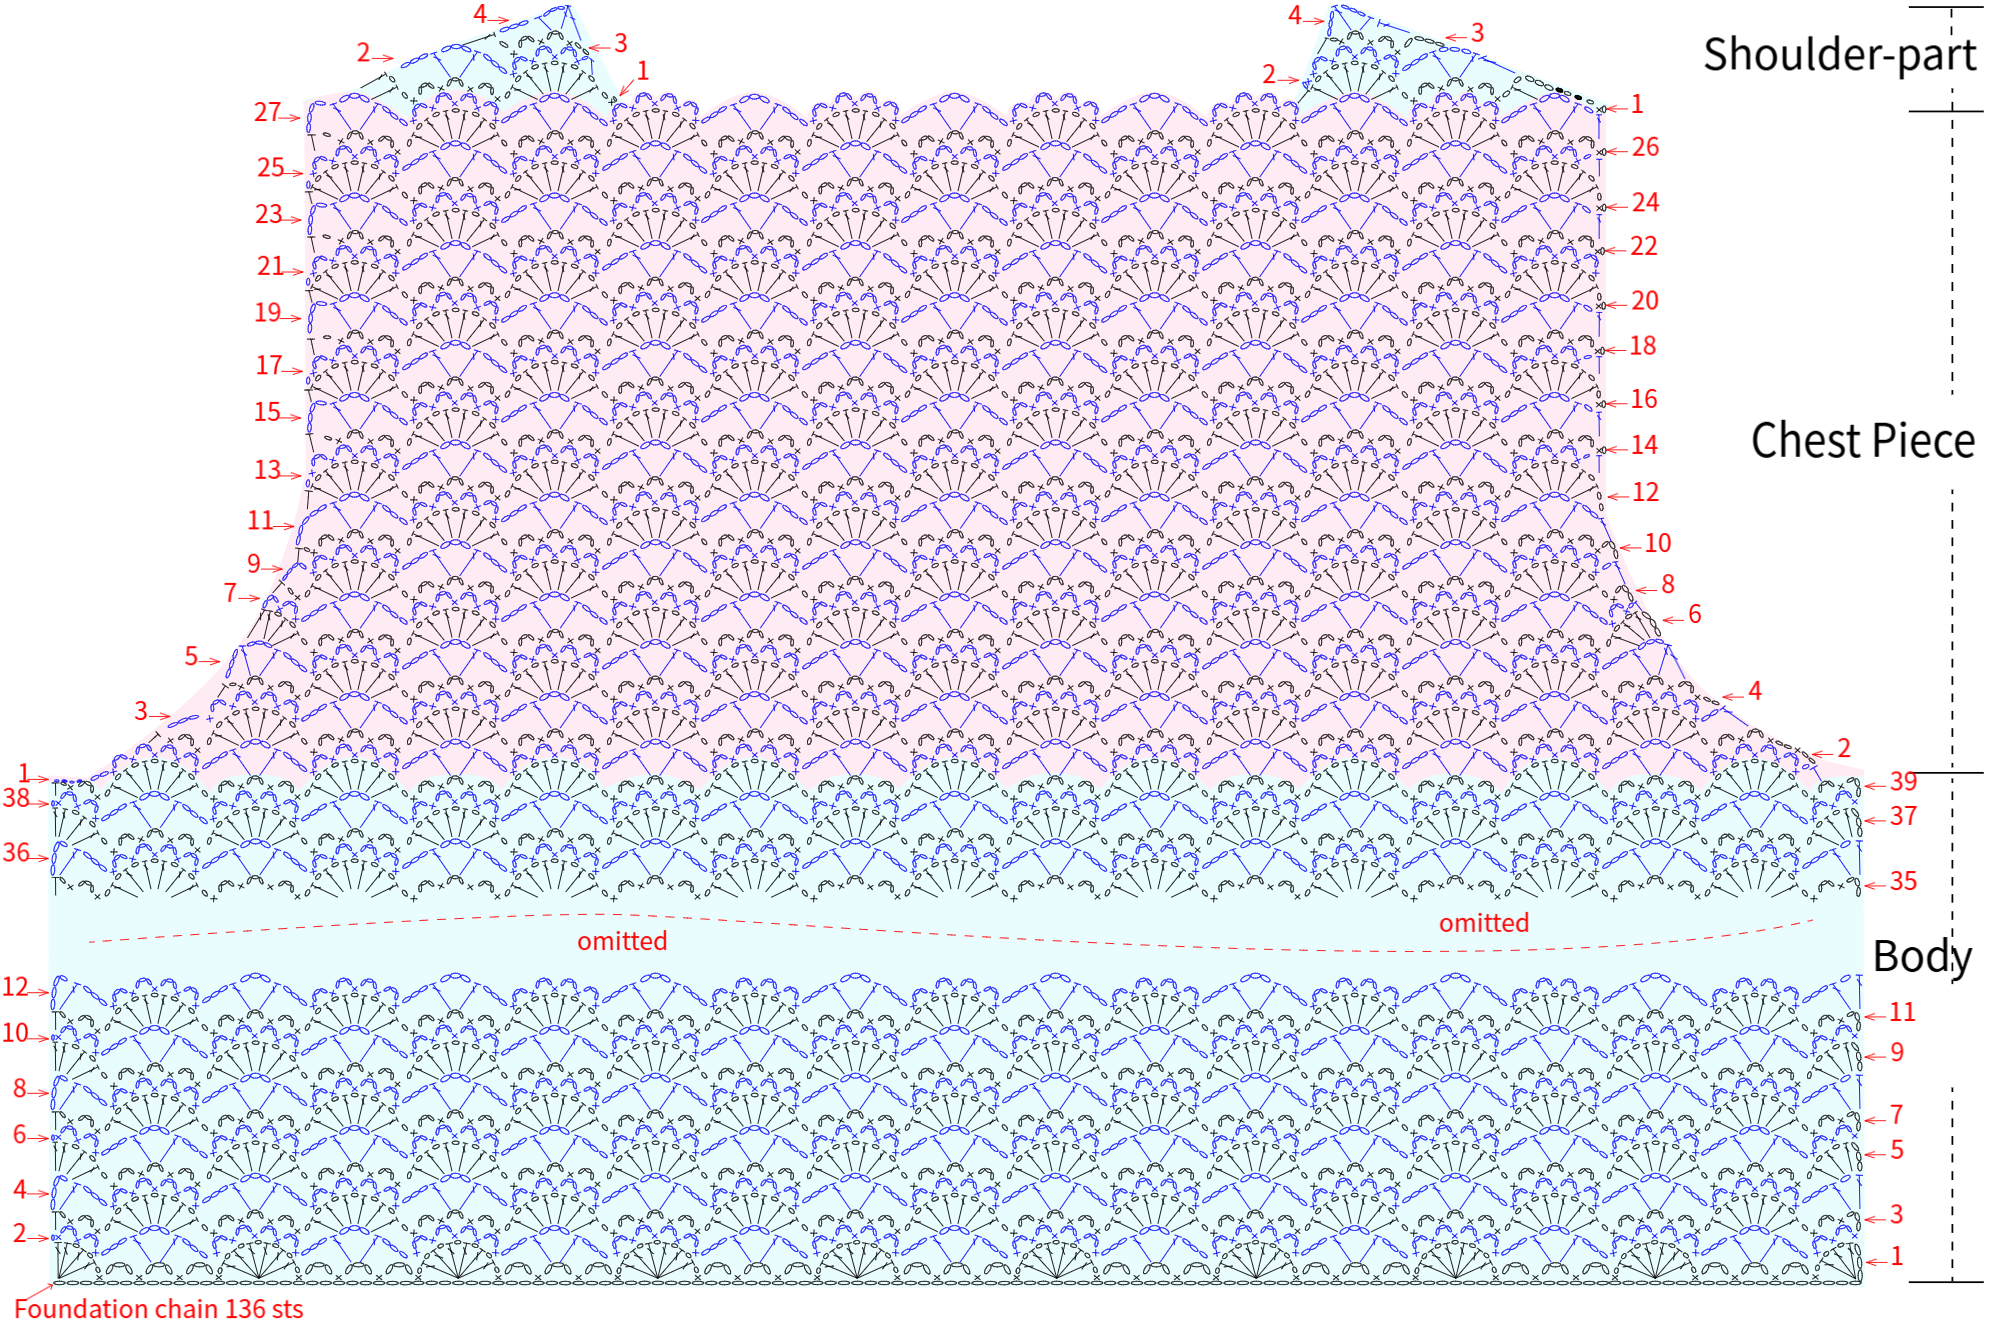
PART 2 Back Body B 56' 21''
Divide into three sections: body, chest piece, and shoulder - parts. Work each section separately using back-and-forth rows, starting from the bottom. Please refer to the video demonstration for more details.
PART 3 Sleeves C 47' 30''
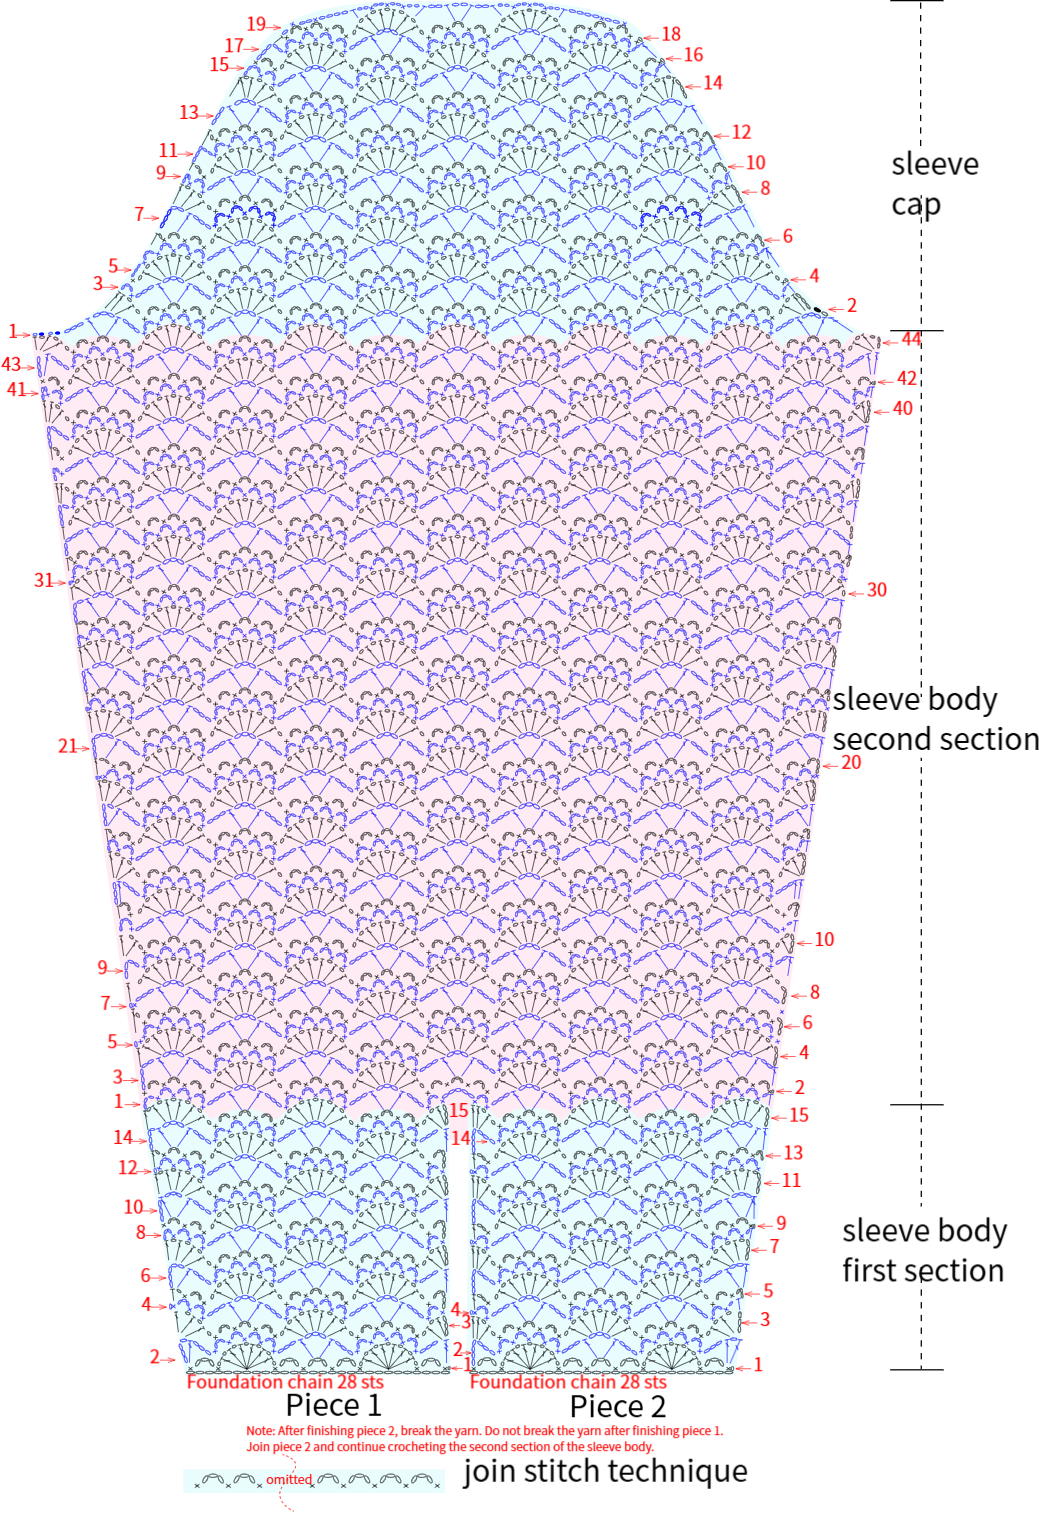
There are 2 sleeves in total. Each sleeve is divided into two main parts: the sleeve body and the sleeve cap. The sleeve body is further divided into the first section and the second section. You'll crochet each area from bottom to top. Once finished, connect the front and back pieces with the sleeves. Please refer to the video demonstration for more details.
PART 4 Crochet edging E and decorations F 65' 55''
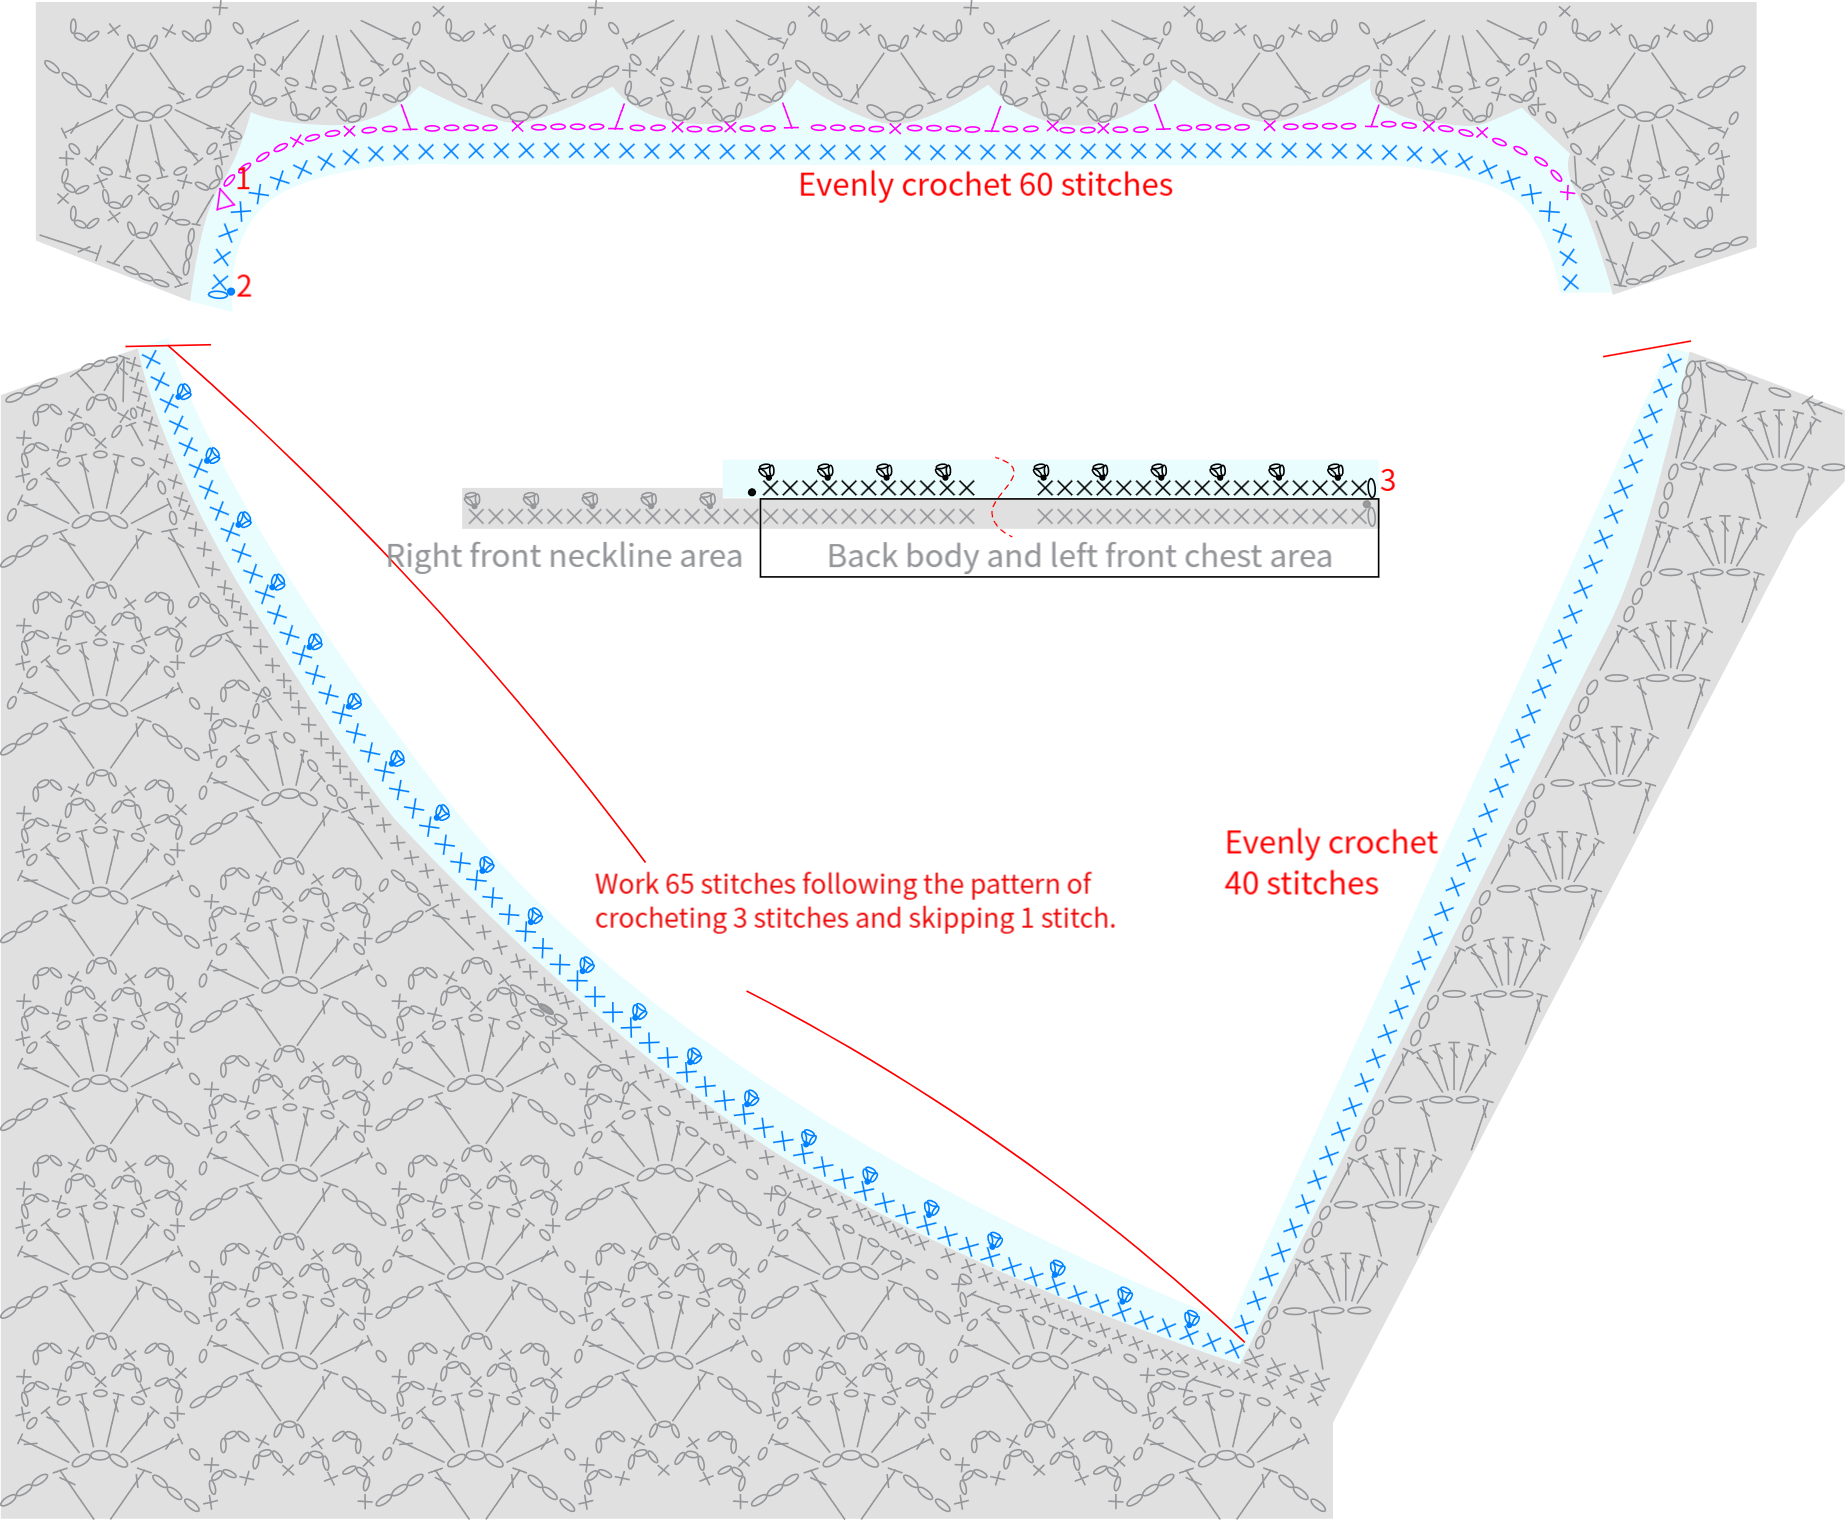
The edging is divided into neckline E1, sleeve edges E2, and bottom edgeE3. Each part is crocheted separately by picking up stitches along the corresponding area. After completing the edging, decorations are made and attached, which include leather cords F1 and buttons F2. Please refer to the video demonstration for more details.
Neckline
Cuffs
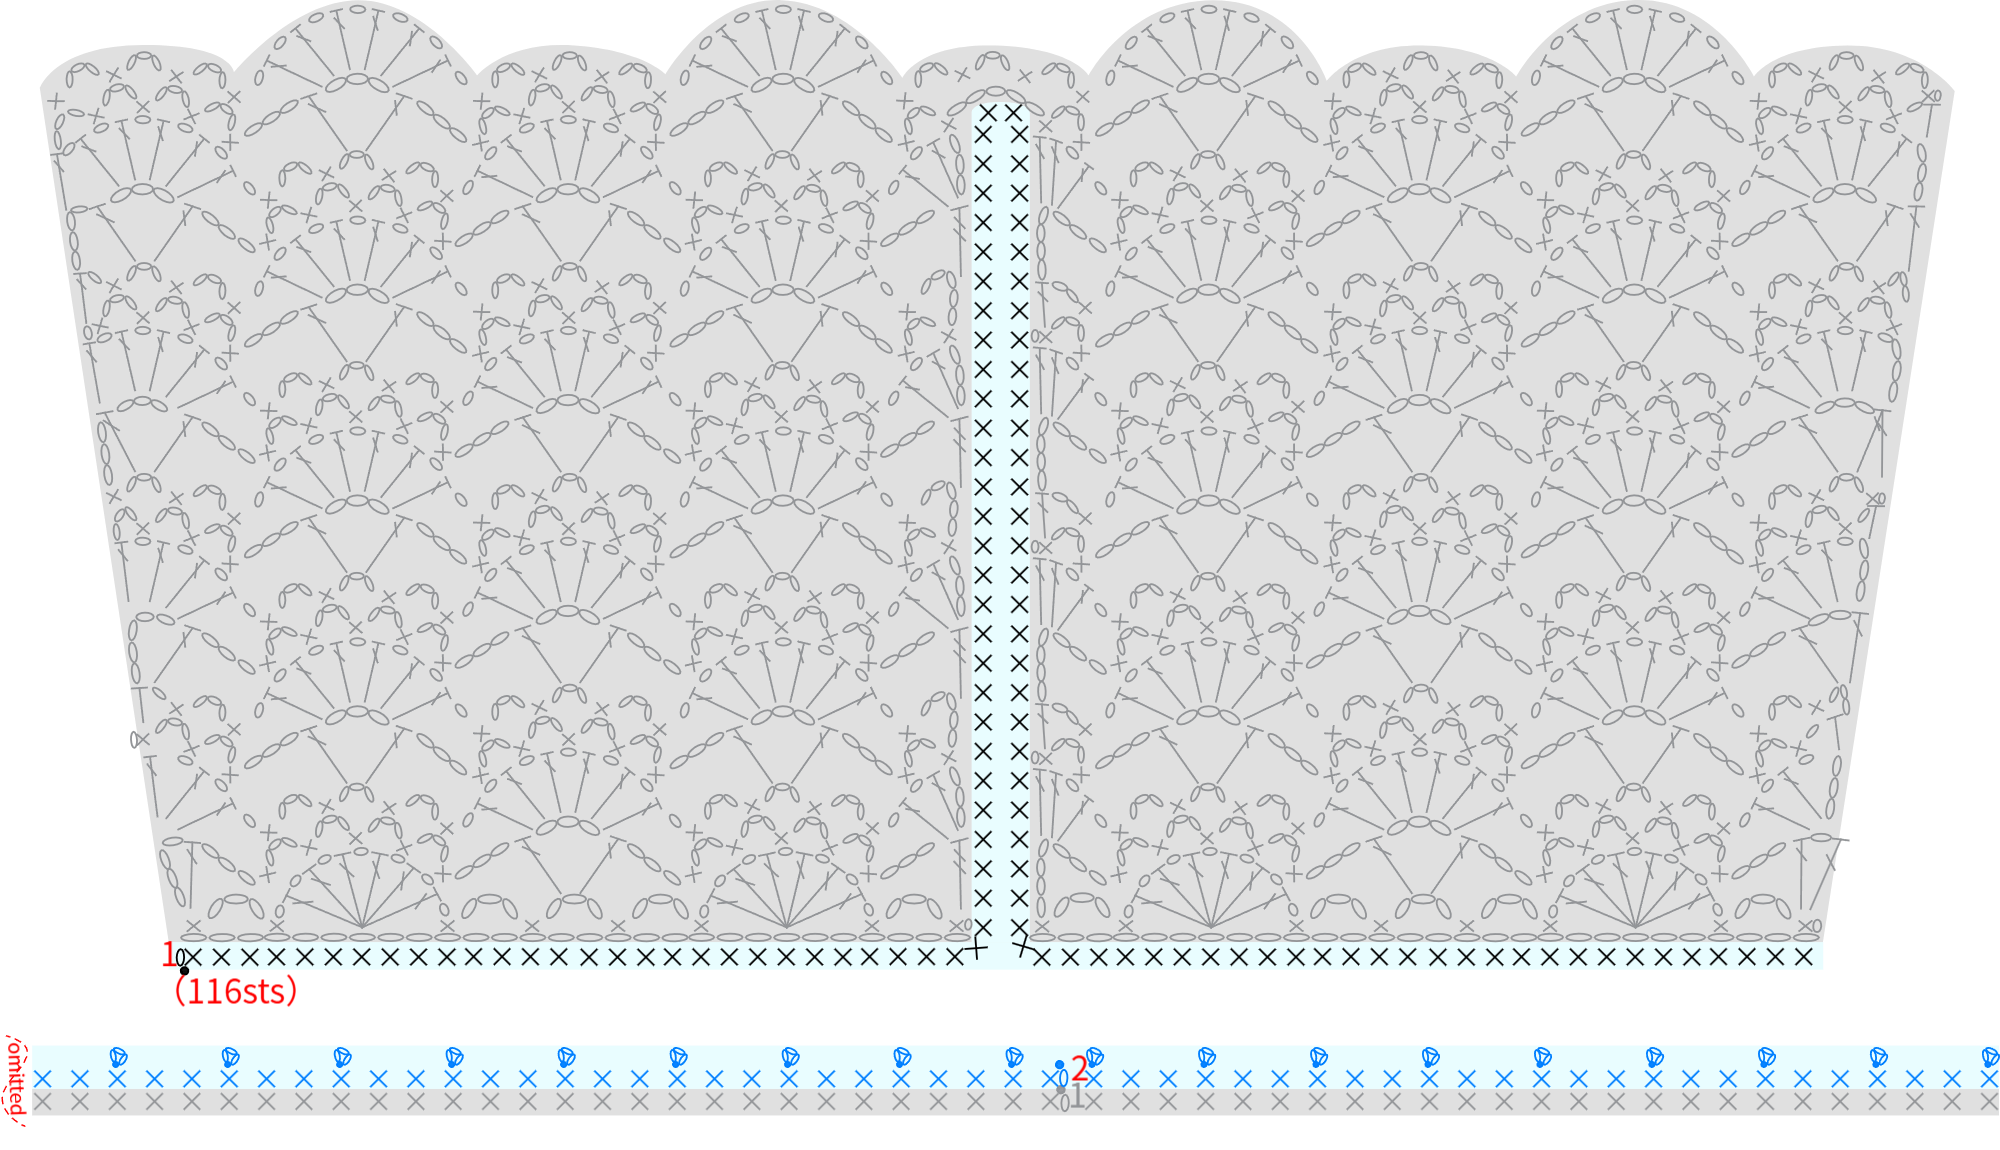
Bottom Edge

Made by the community