Clothes
Blossom Yoke Lace Pullover
Project preview
See the finished project
Pattern format
Instructions
Watch and follow
Video tutorial
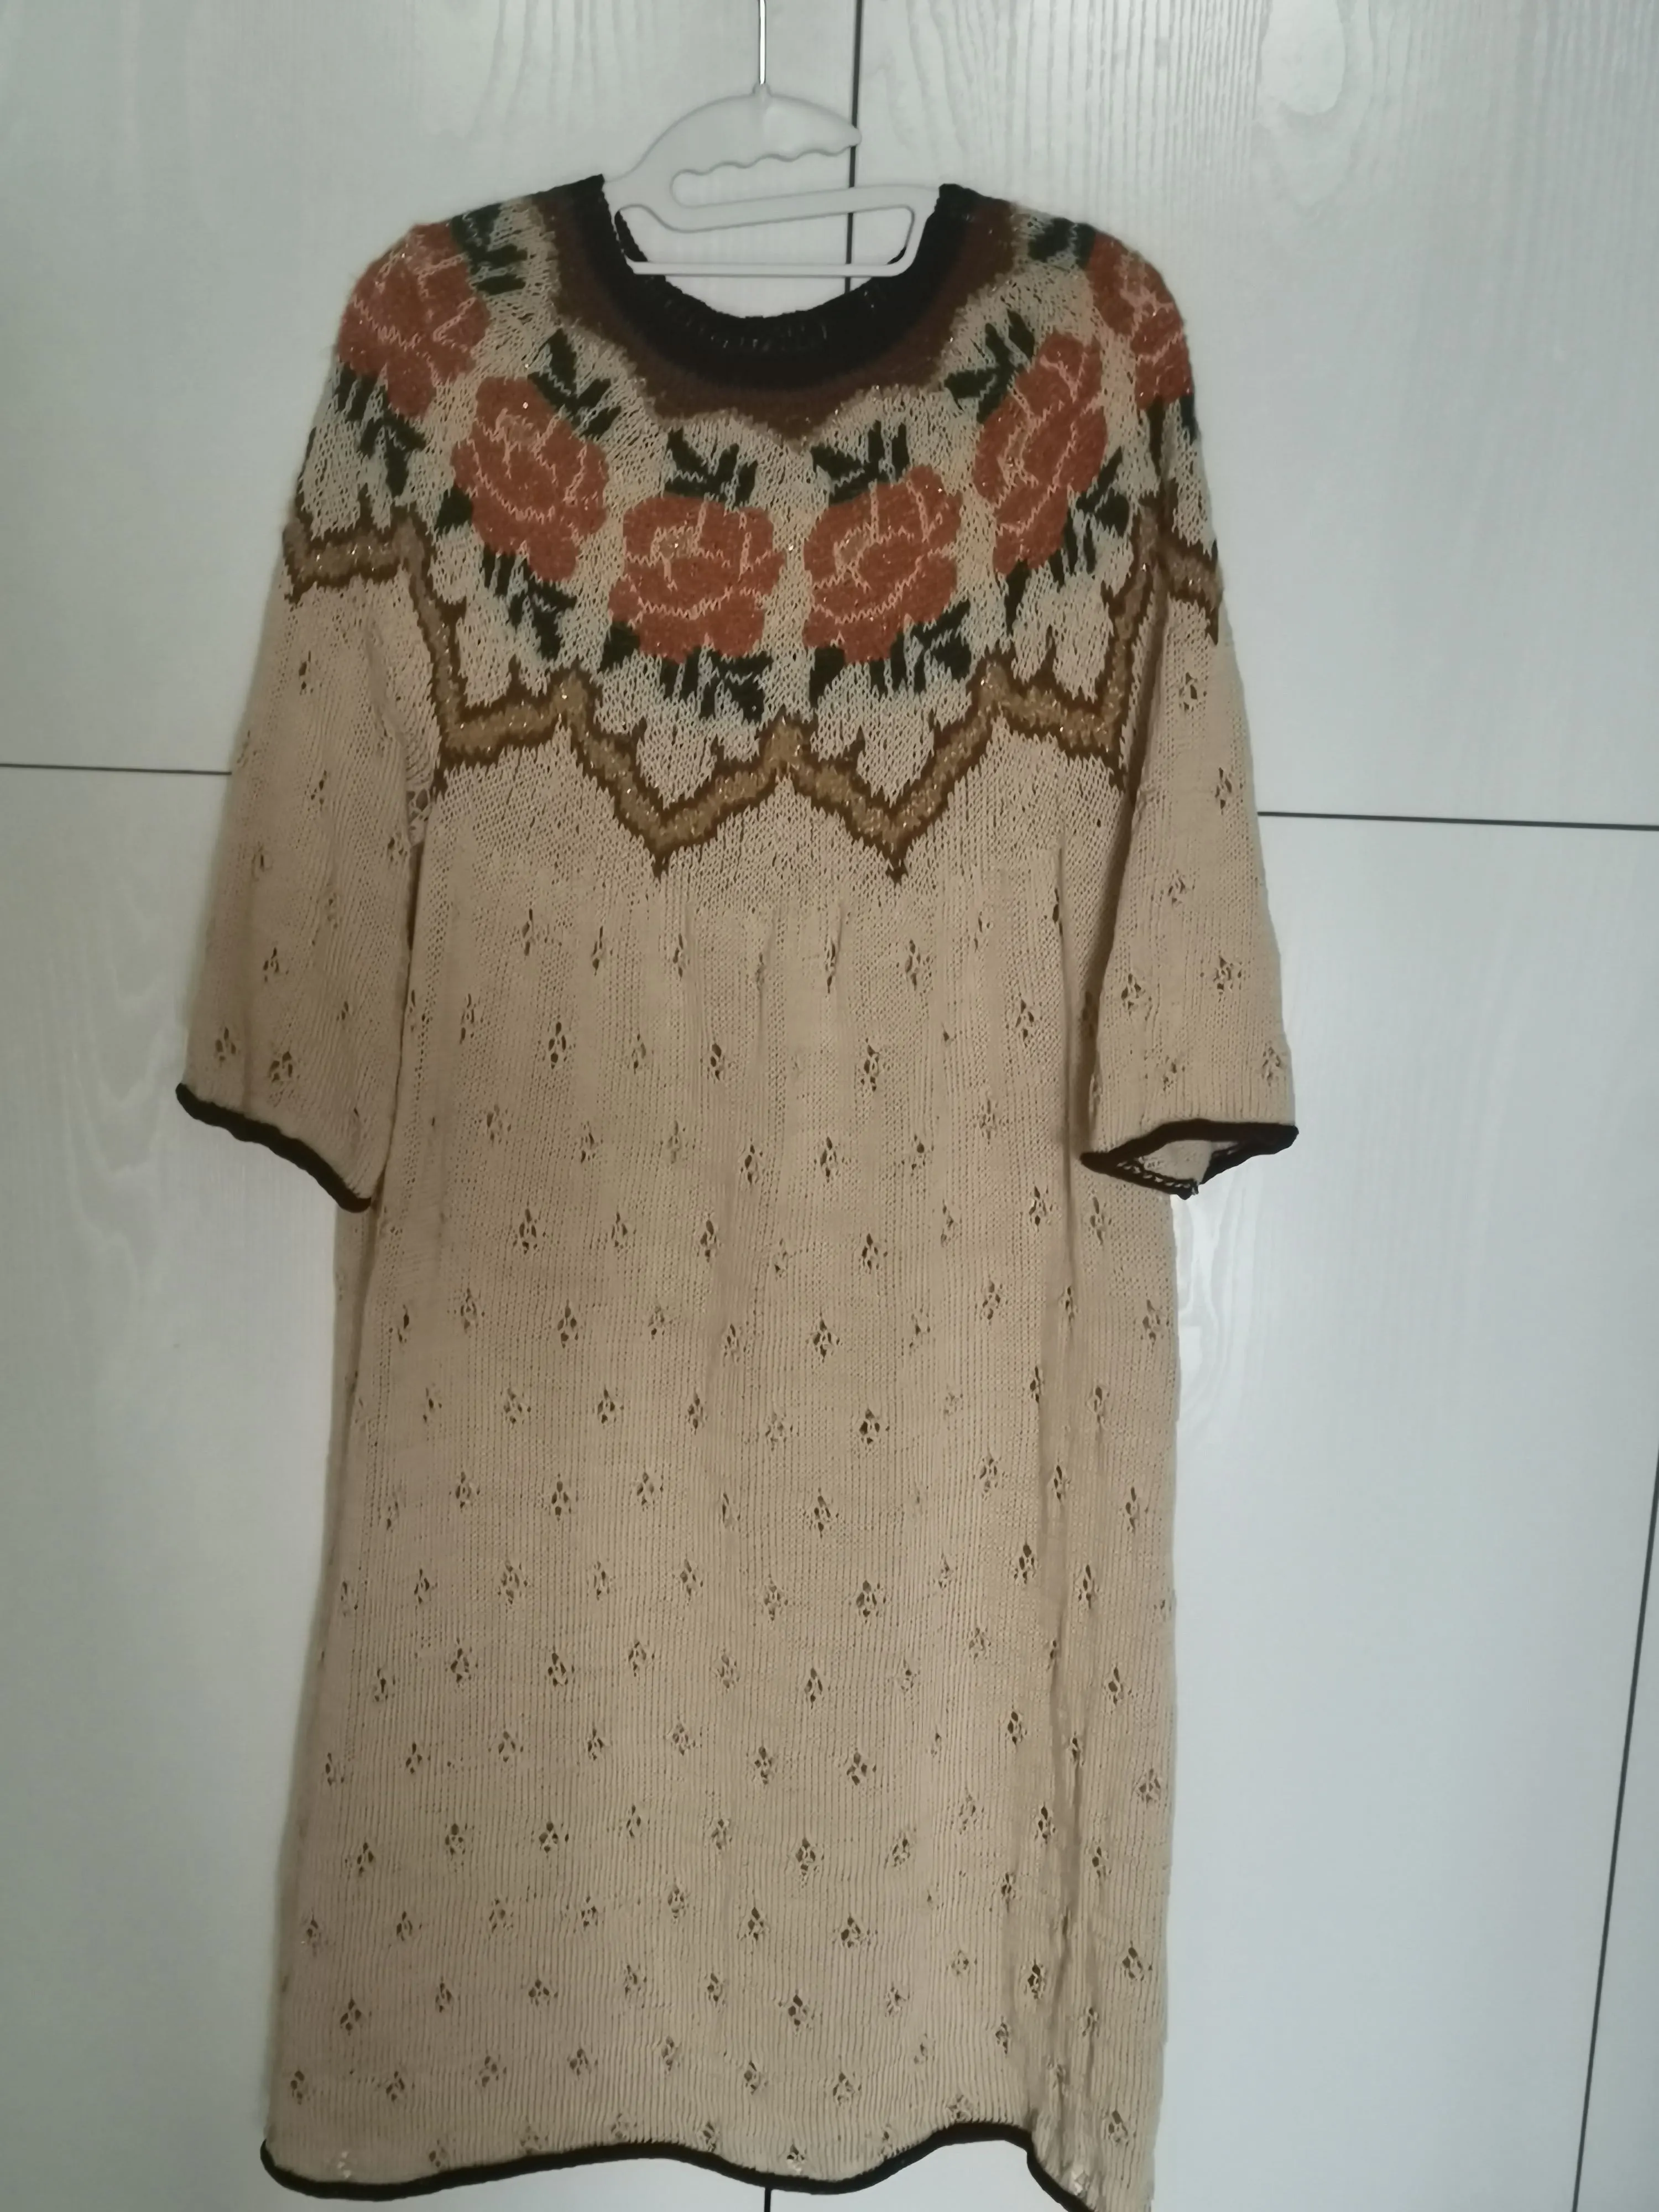
This lace top comes in both long and short versions, both of them consisting of a collar, shoulder parts, body, hem, and sleeves. The longer version also requires knitting a belt. Start by working the collar, shoulder parts, and body from the top down. Once that’s done, pick up stitches to work the sleeves.
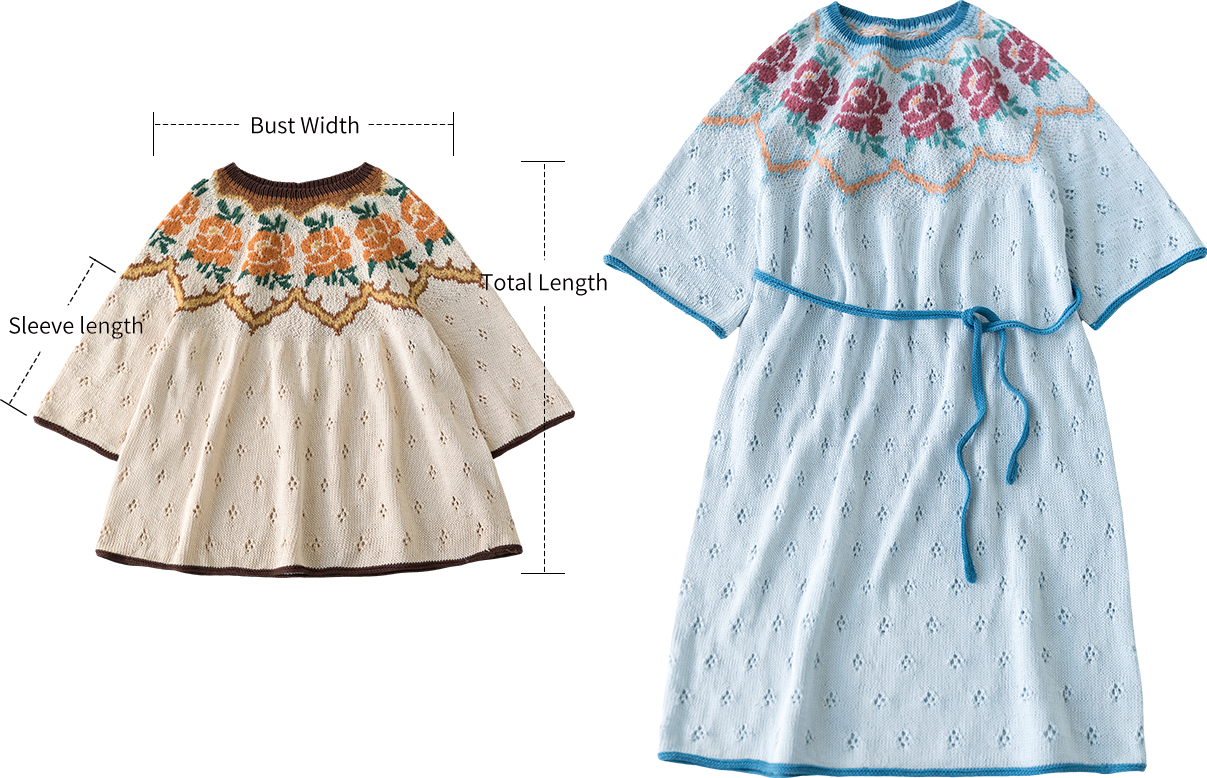
Gauge: 22.5*30=10*10cm
Unit: cm Bust Width Total Length(short version) Total Length(long version) Sleeve length Small Size 49 56 87 22

The handcrafted measurements may have an error of 1 to 2 cm.
Due to variations in individual tension, the size of the sample is for reference only.
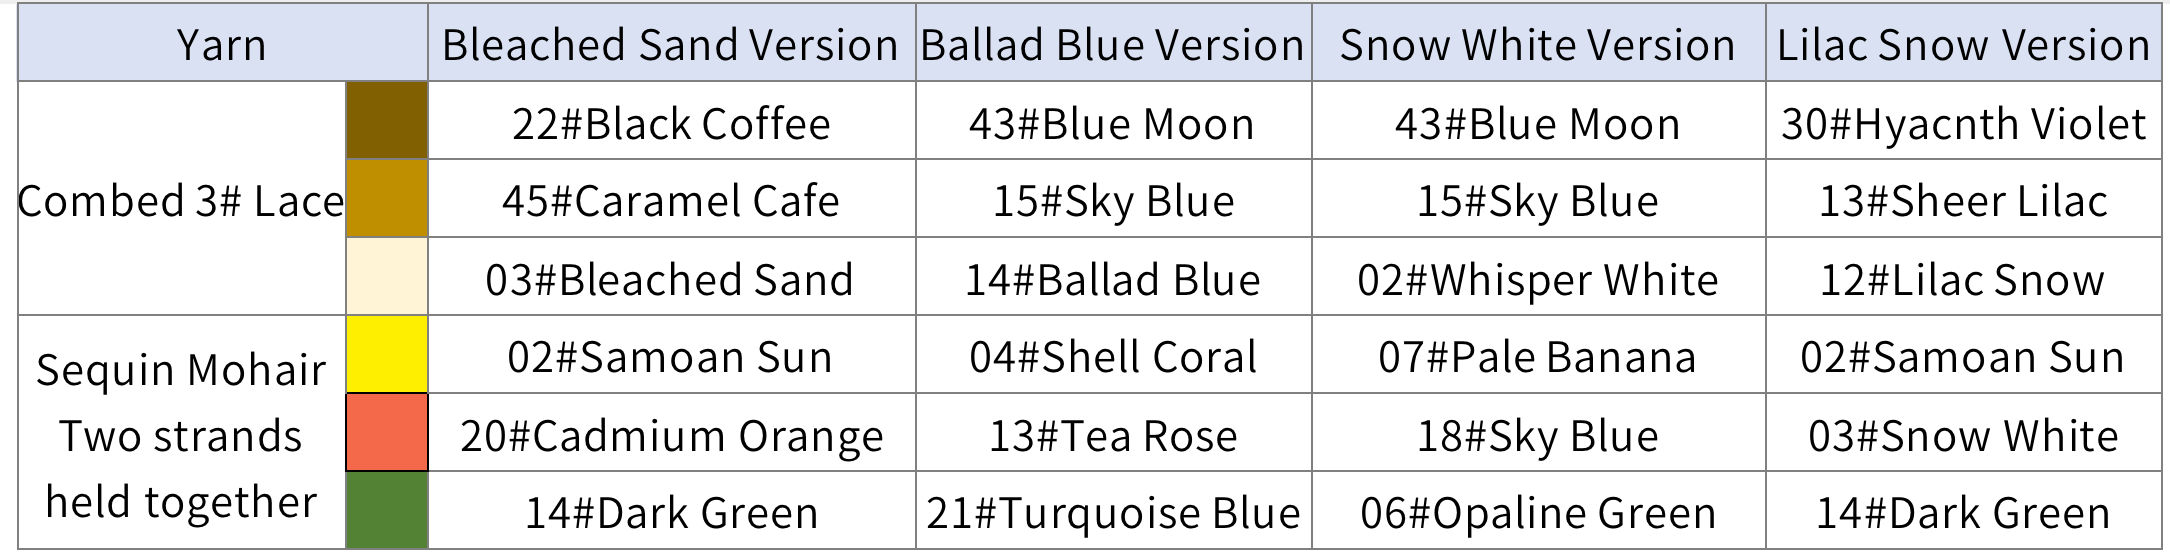
Materials: Susan's Family one strand of Combed 3# Lace and Two strands of Sequin Mohair held together
Needles: 4.0mm straight needles & circular needle;
3.25mm straight needles & circular needle

Chart Key


Note:
1, The chart represent the right side of fabric, so check the key to see how to work a certain symbol on the right side and on the wrong side.
2, This pattern is making in Chinese crochet pattern terms, and the stitch name is written using American terminology. All measurements in charts are in cm. 
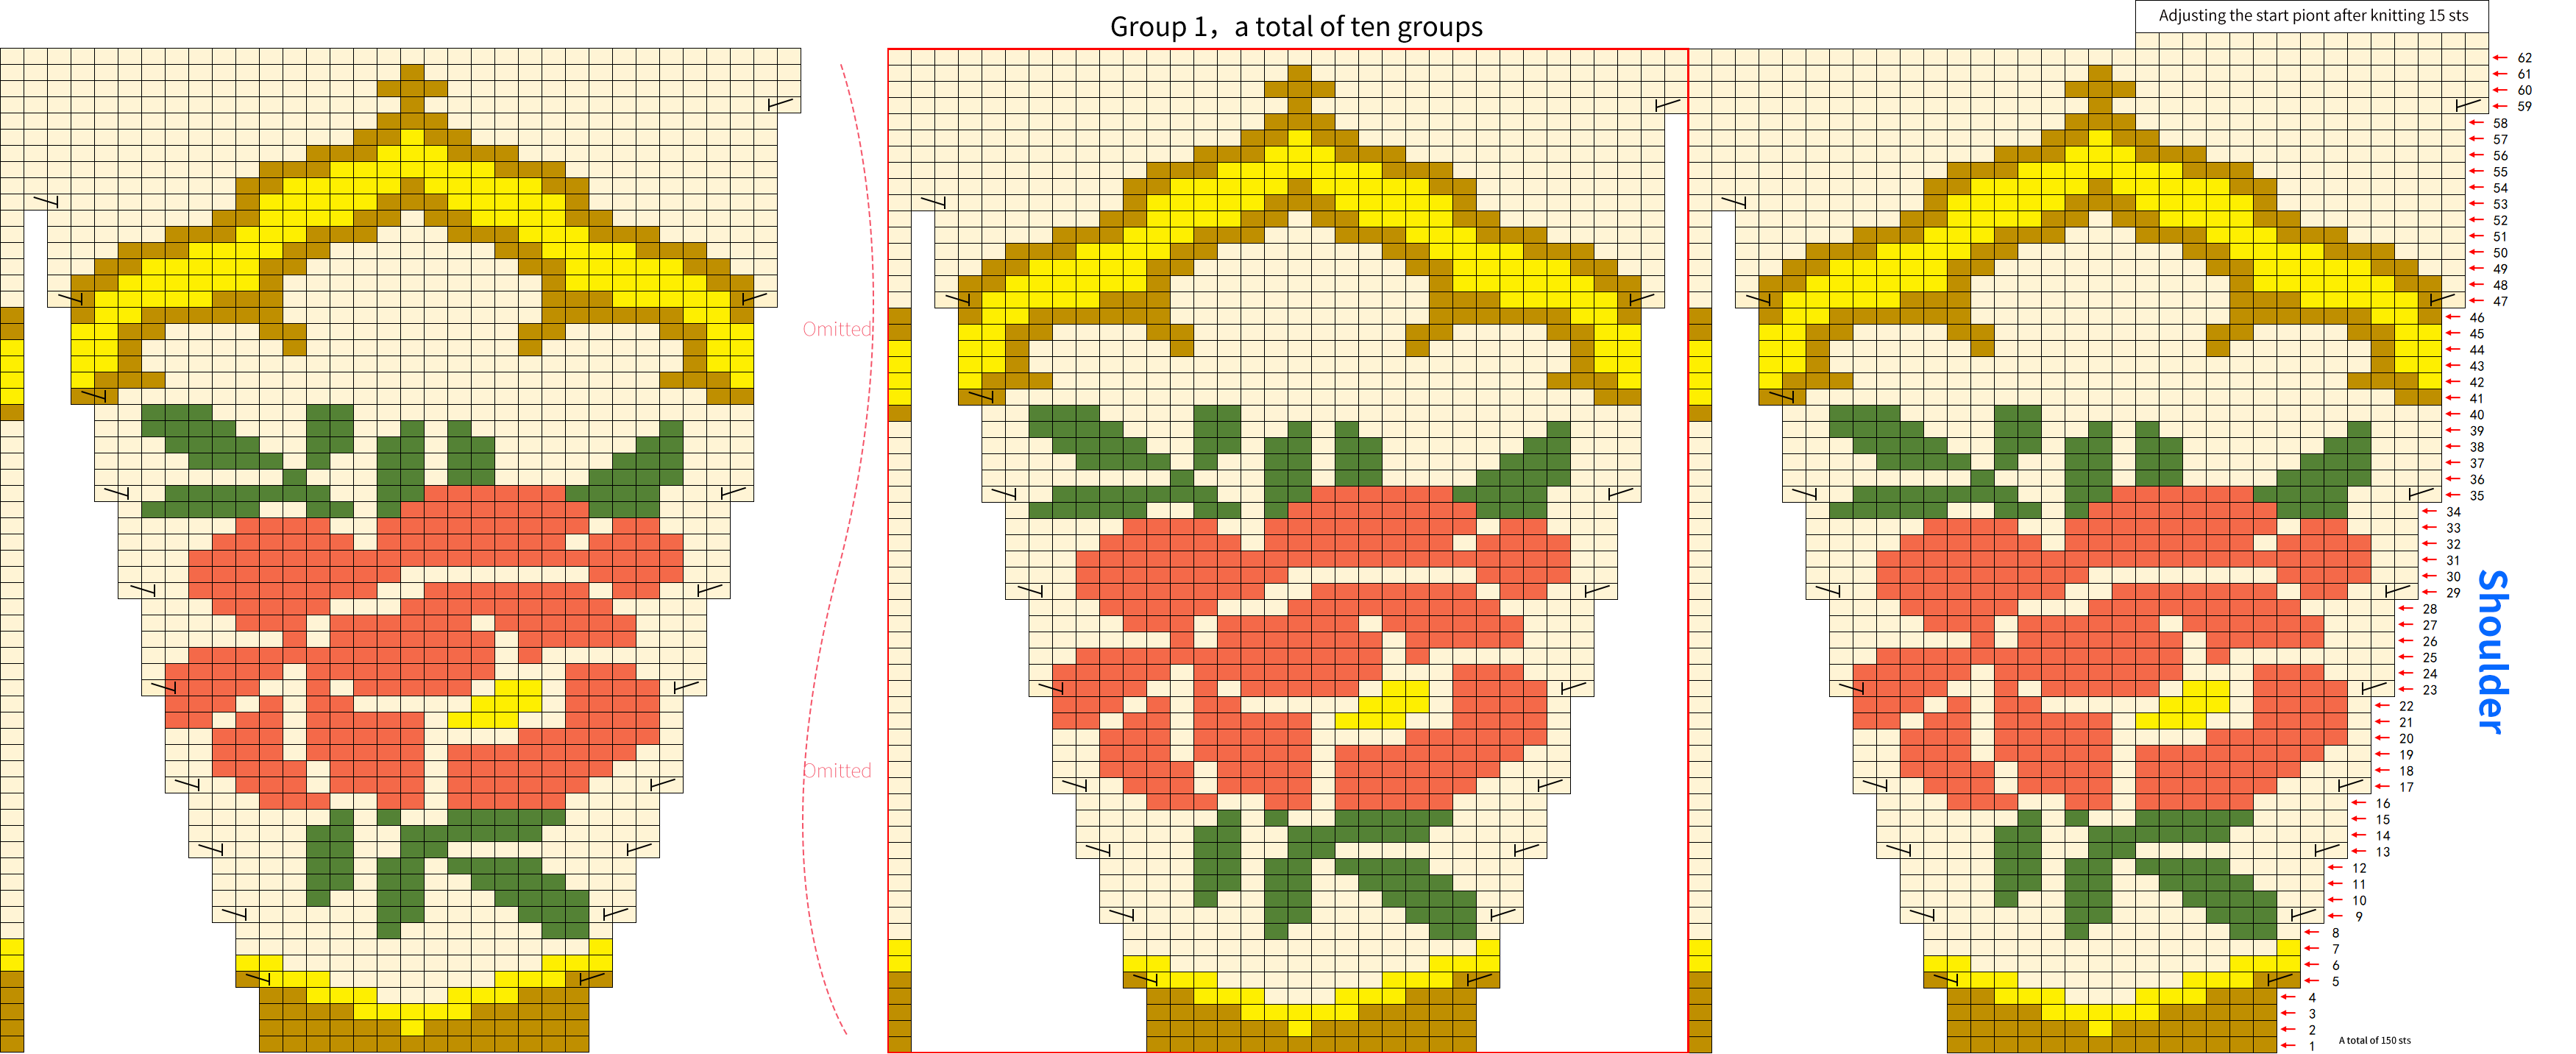
Part 1 Collar And YokeA 01' 00'' (Part 1)
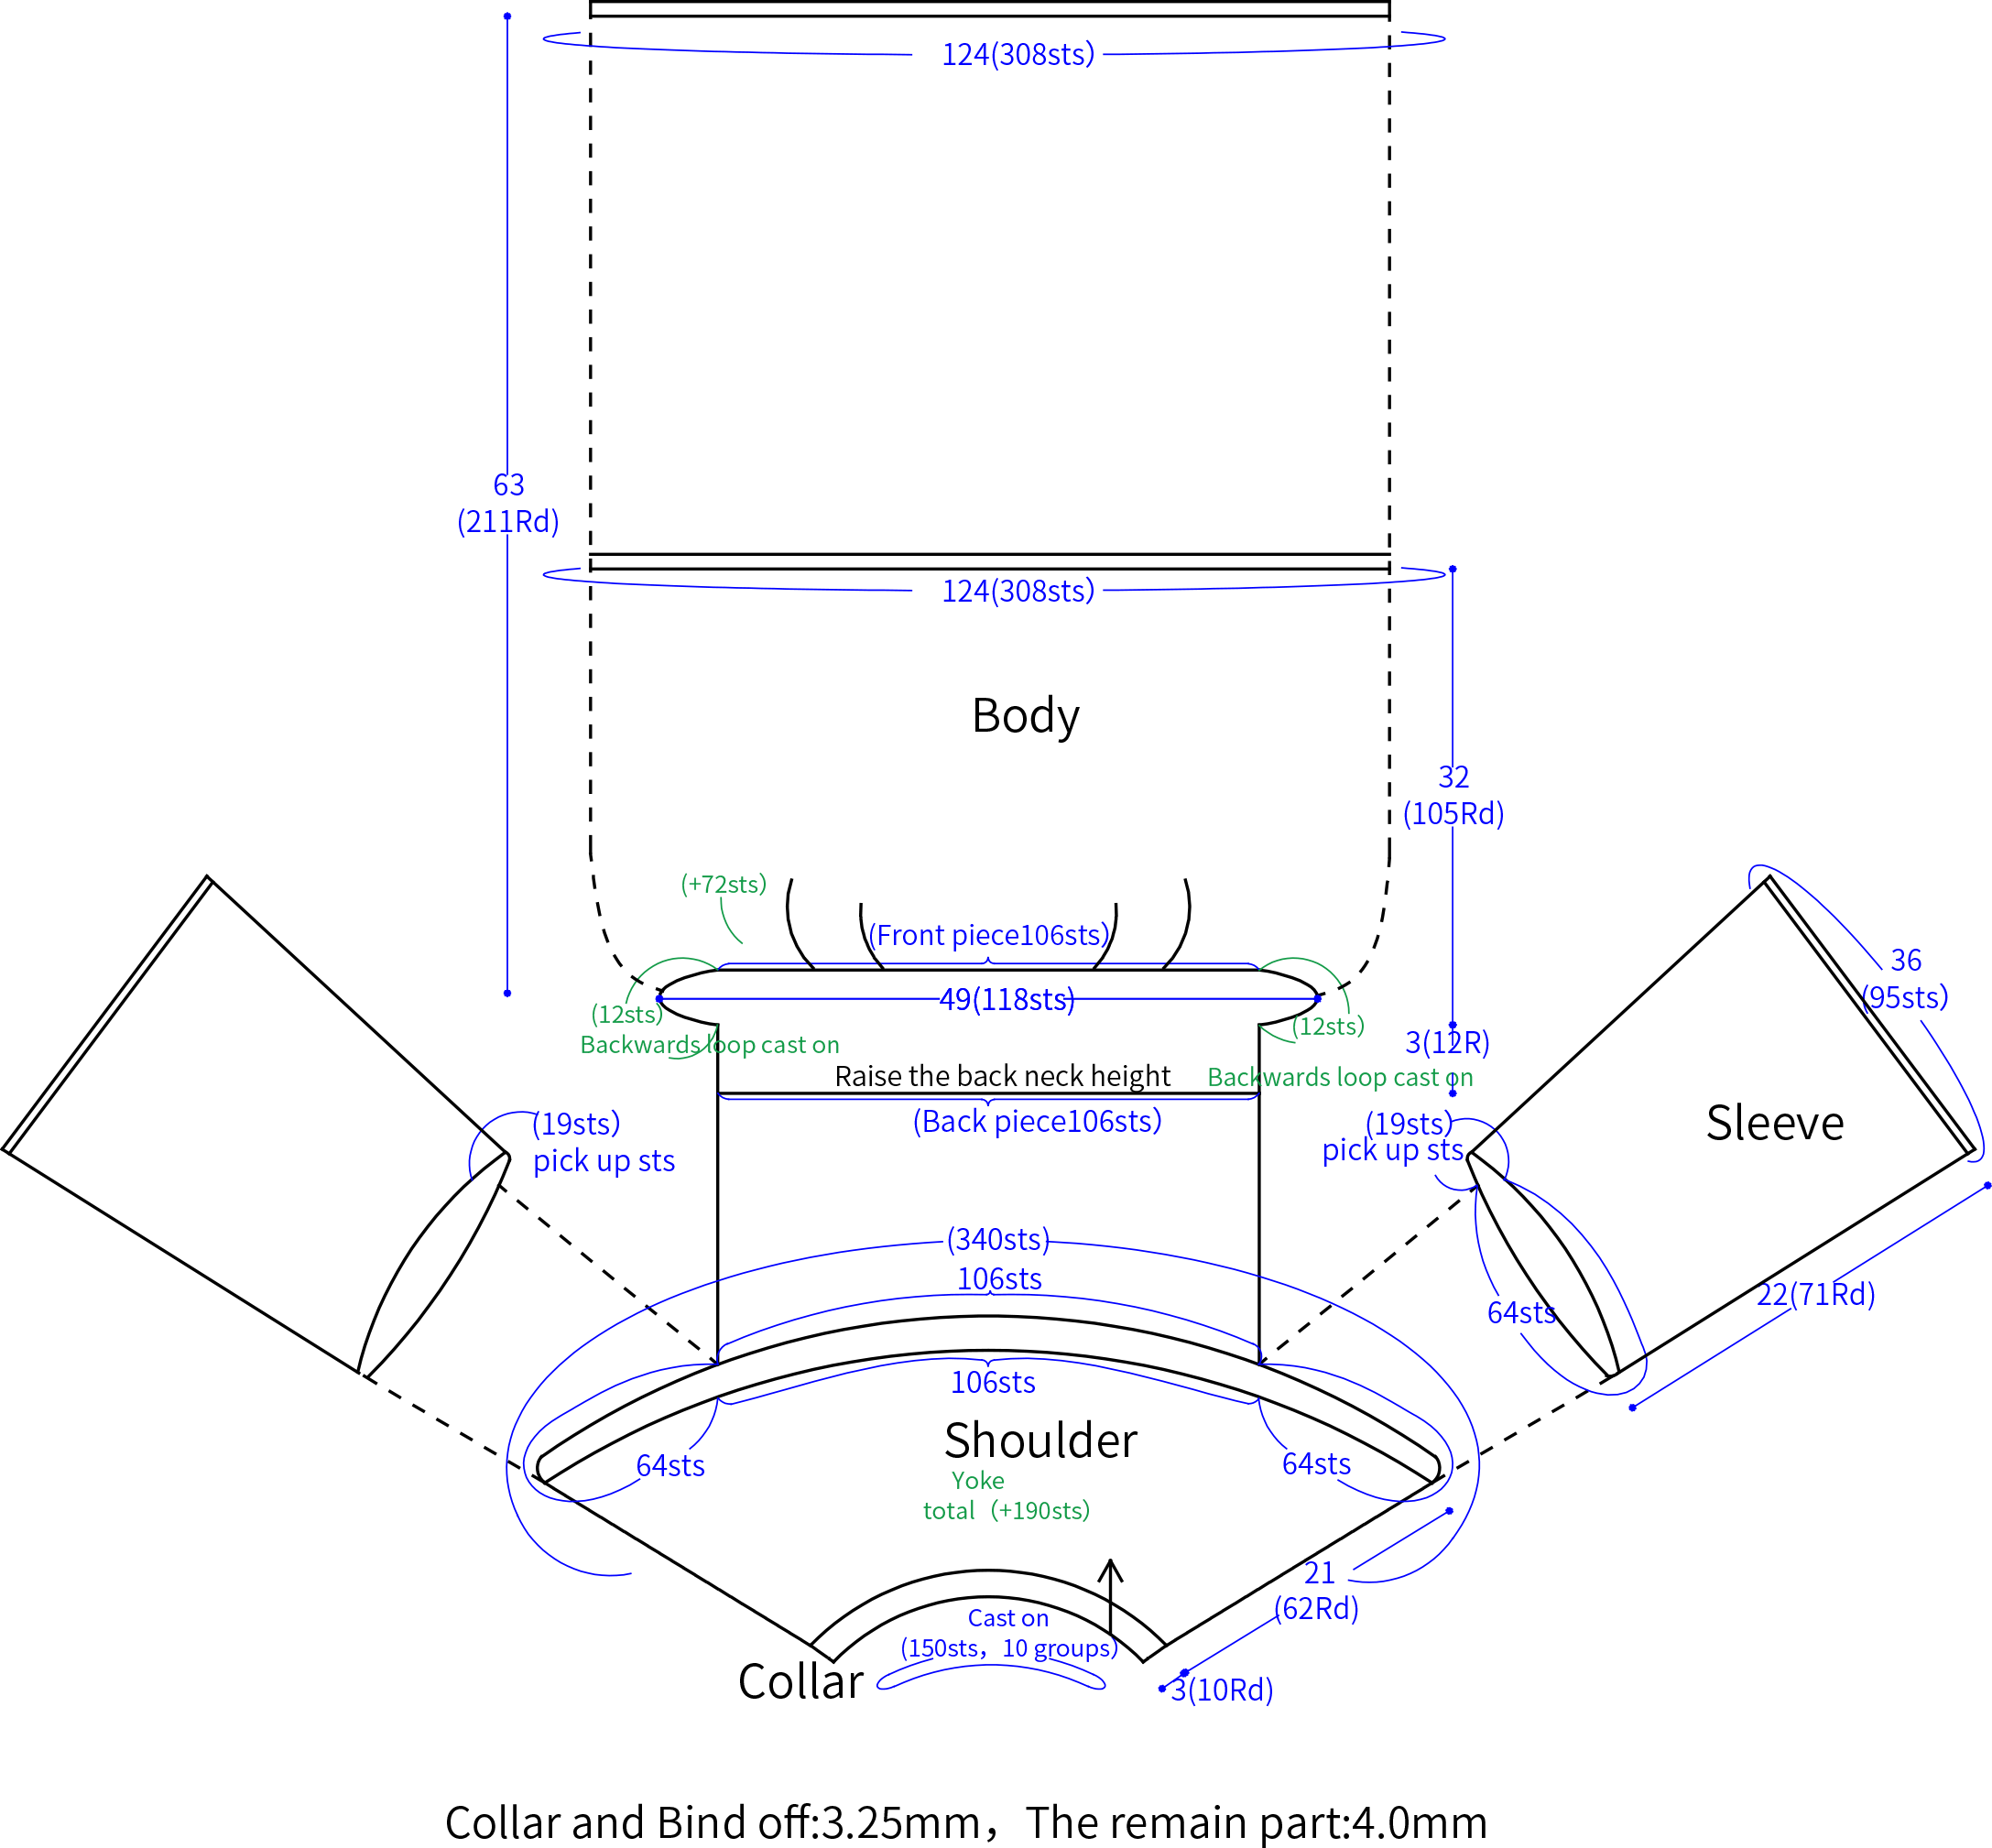
Start with the Italian cast on to create the collar, then switch to a different needle size to knit the shoulder. If your tension is tight, consider using a larger needle size for the Intarsia part.

Part 2 BodyB 39' 14'' (Part 1)
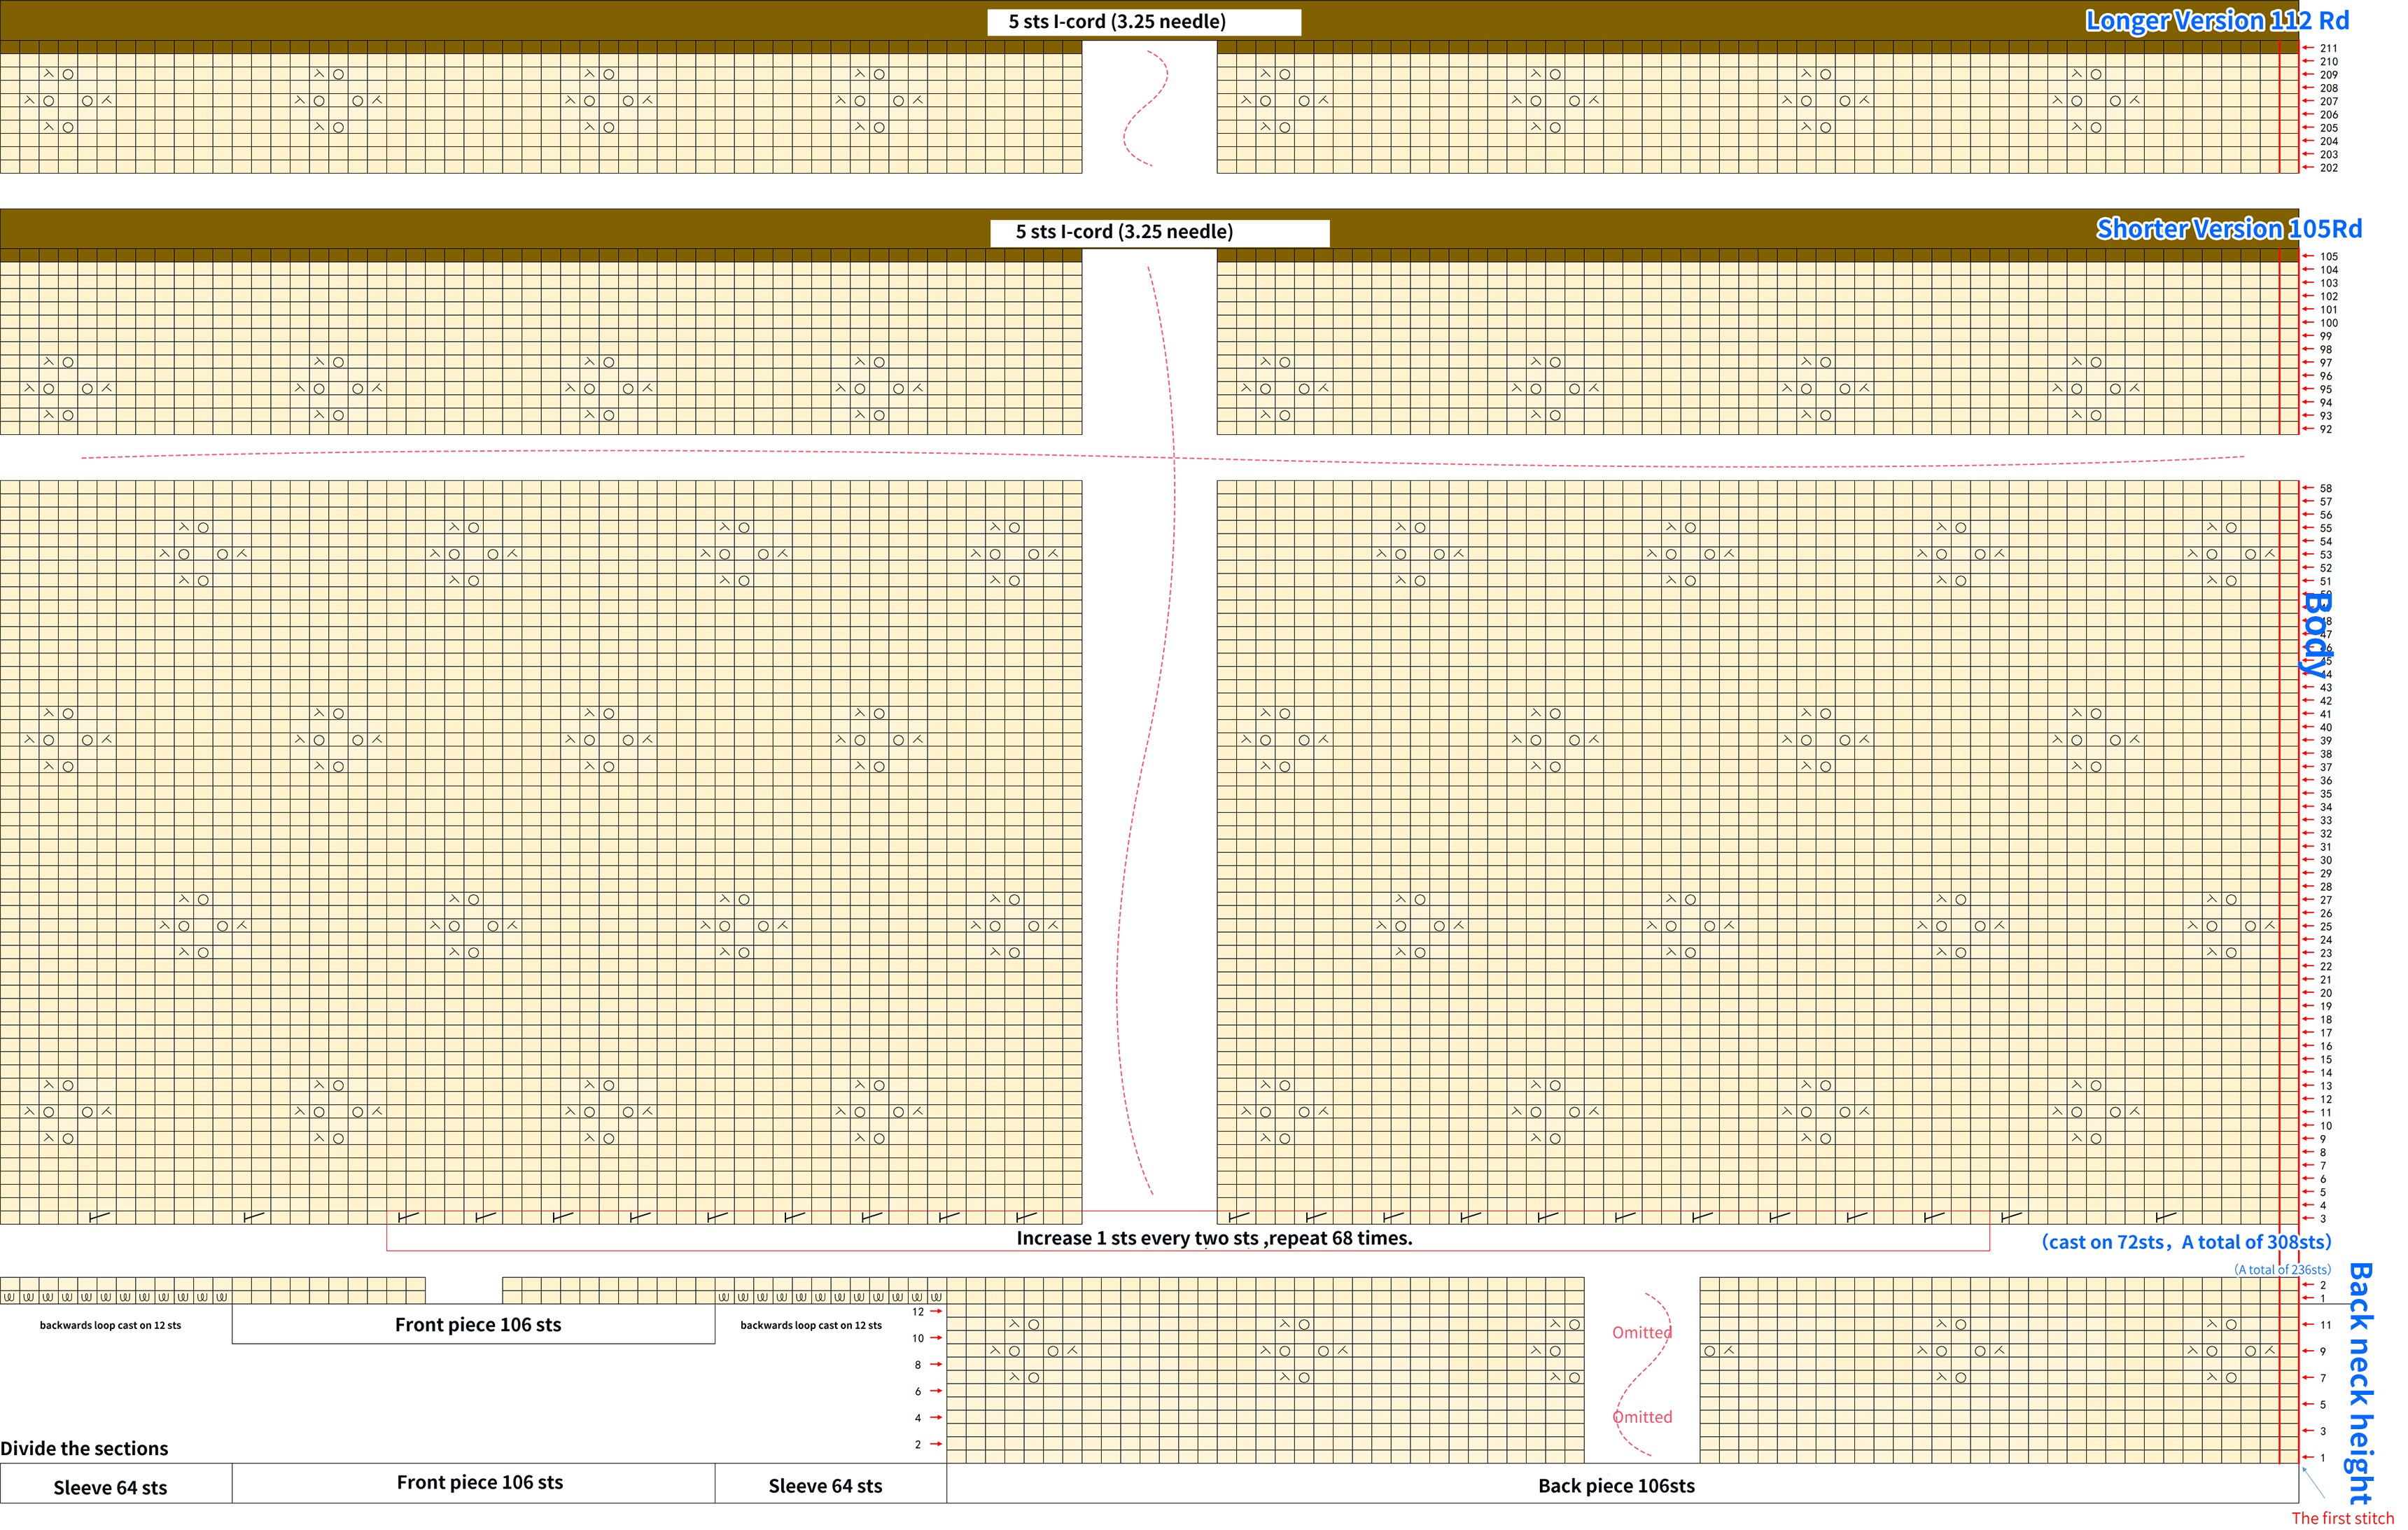
Note:
1. Working back and forth to raise back neck height.The chart represent the right side of fabric, so check the key to see how to work a certain symbol on the right side and on the wrong side.
2. The number of rounds for the long body is for reference only; you can adjust it according to your actual situation or preference.
Part 3 SleevesC 15' 08'' (Part 2)
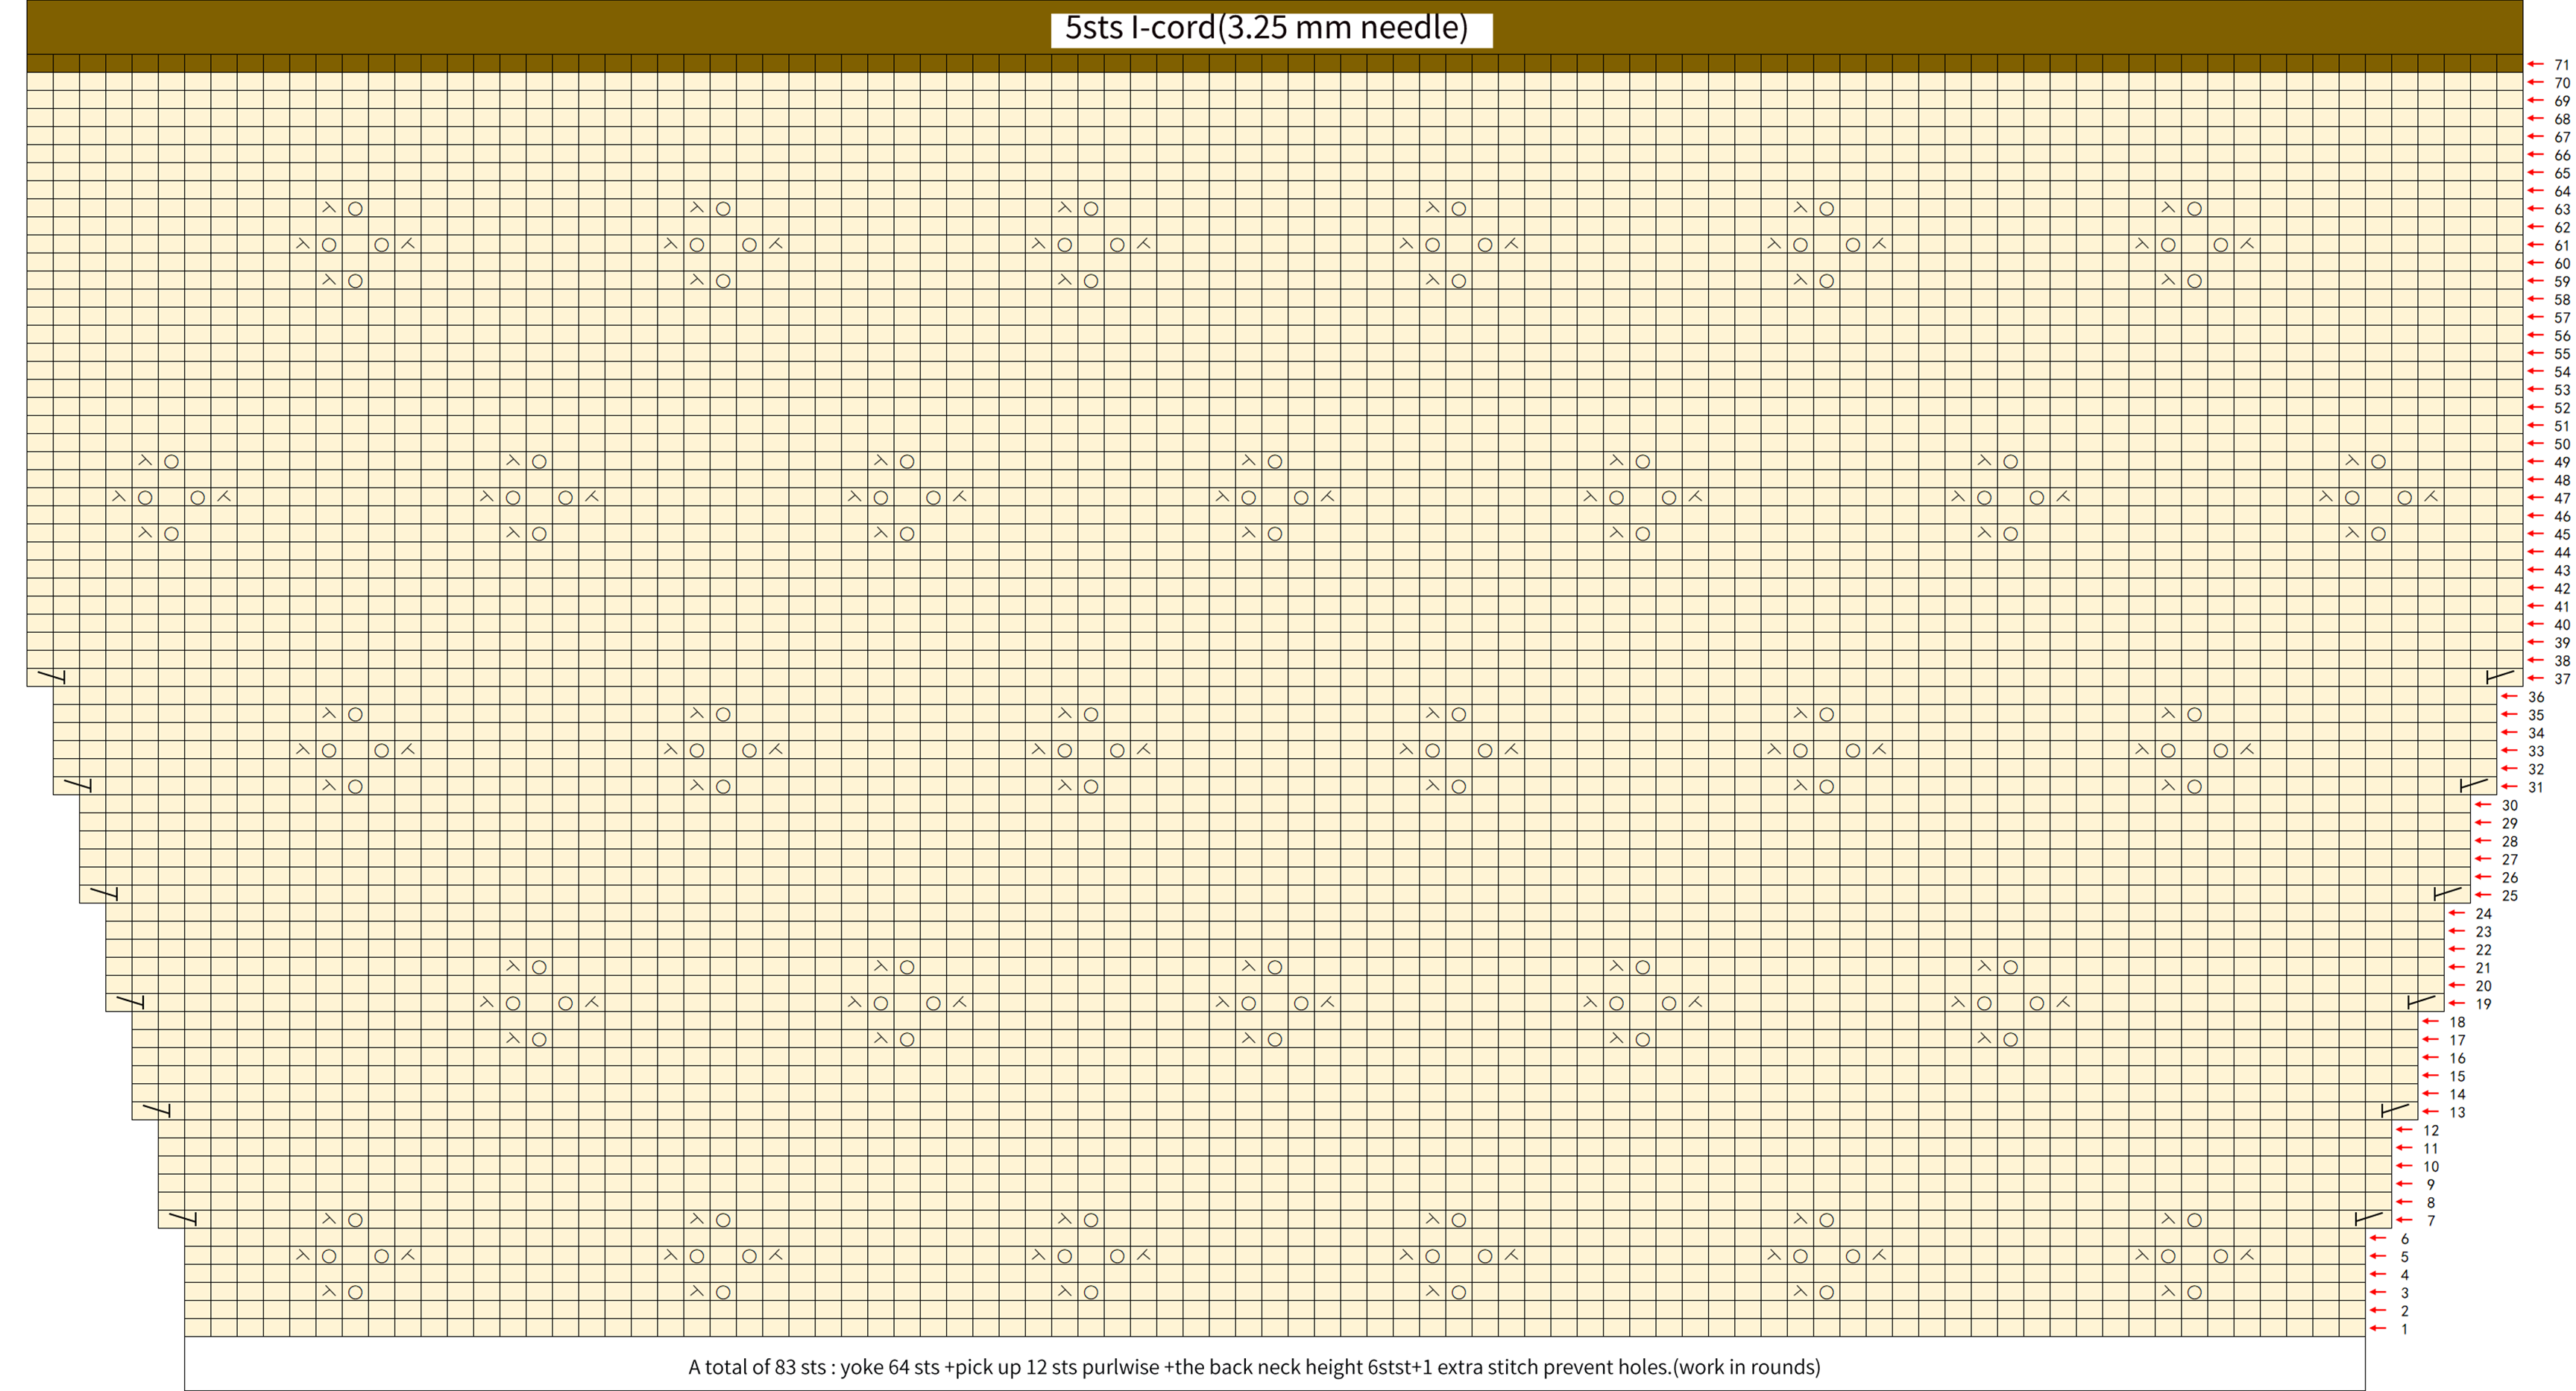
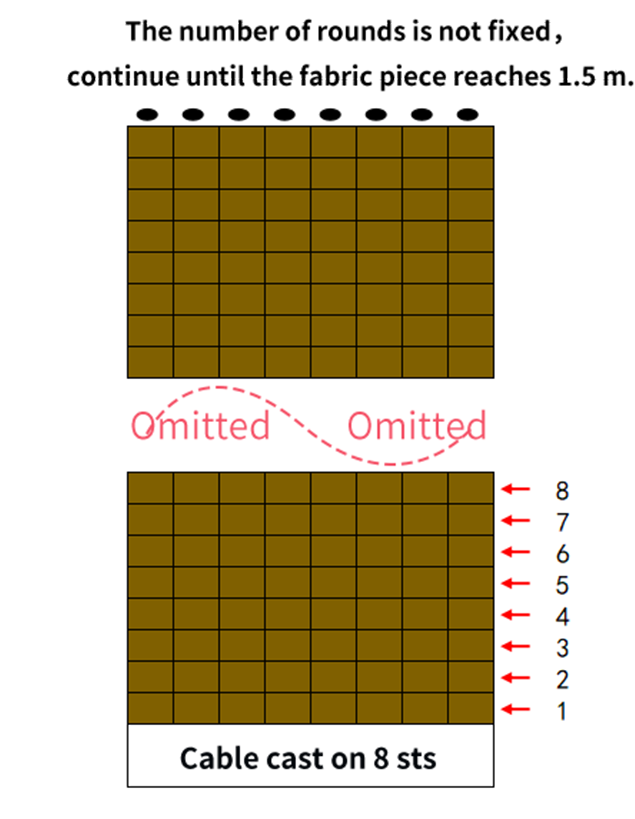
Part 4 BeltD 15' 27'' (Part 2)
Cable cast on and work in rounds.the number of rounds is not fixed; just keep going until you reach a length of 1.5 meters.
Made by the community