Home / Decoration
Blossoms on Frame
Project preview
See the finished project
Pattern format
Instructions


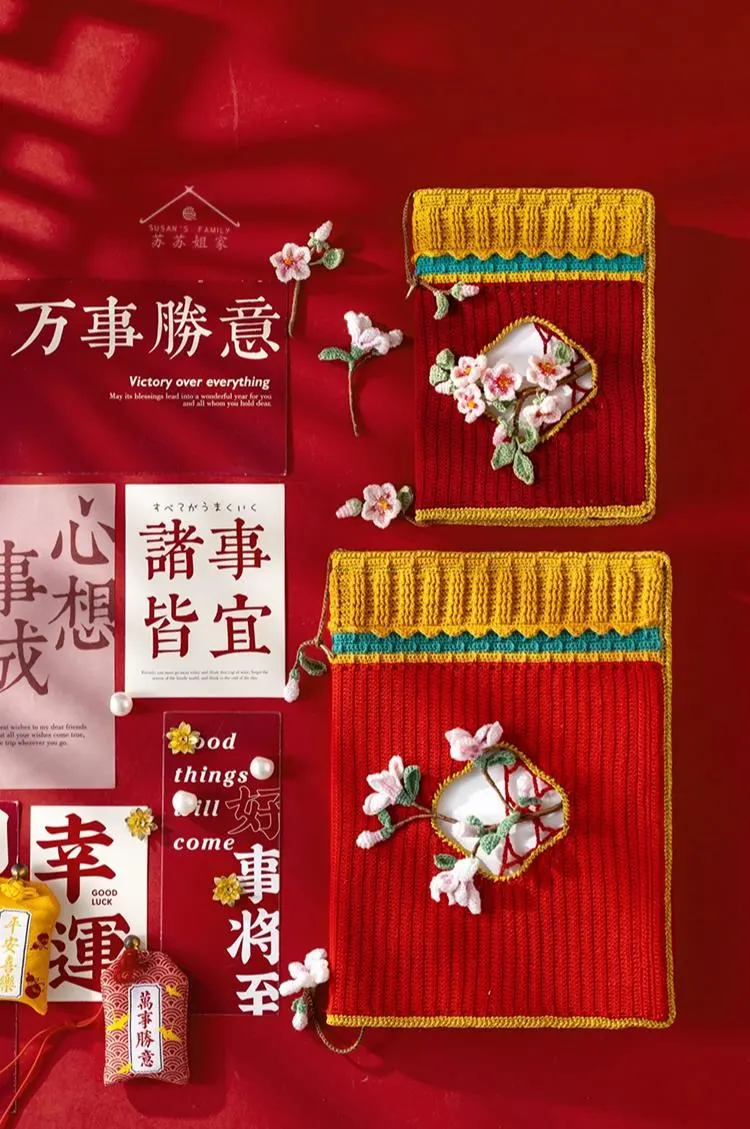
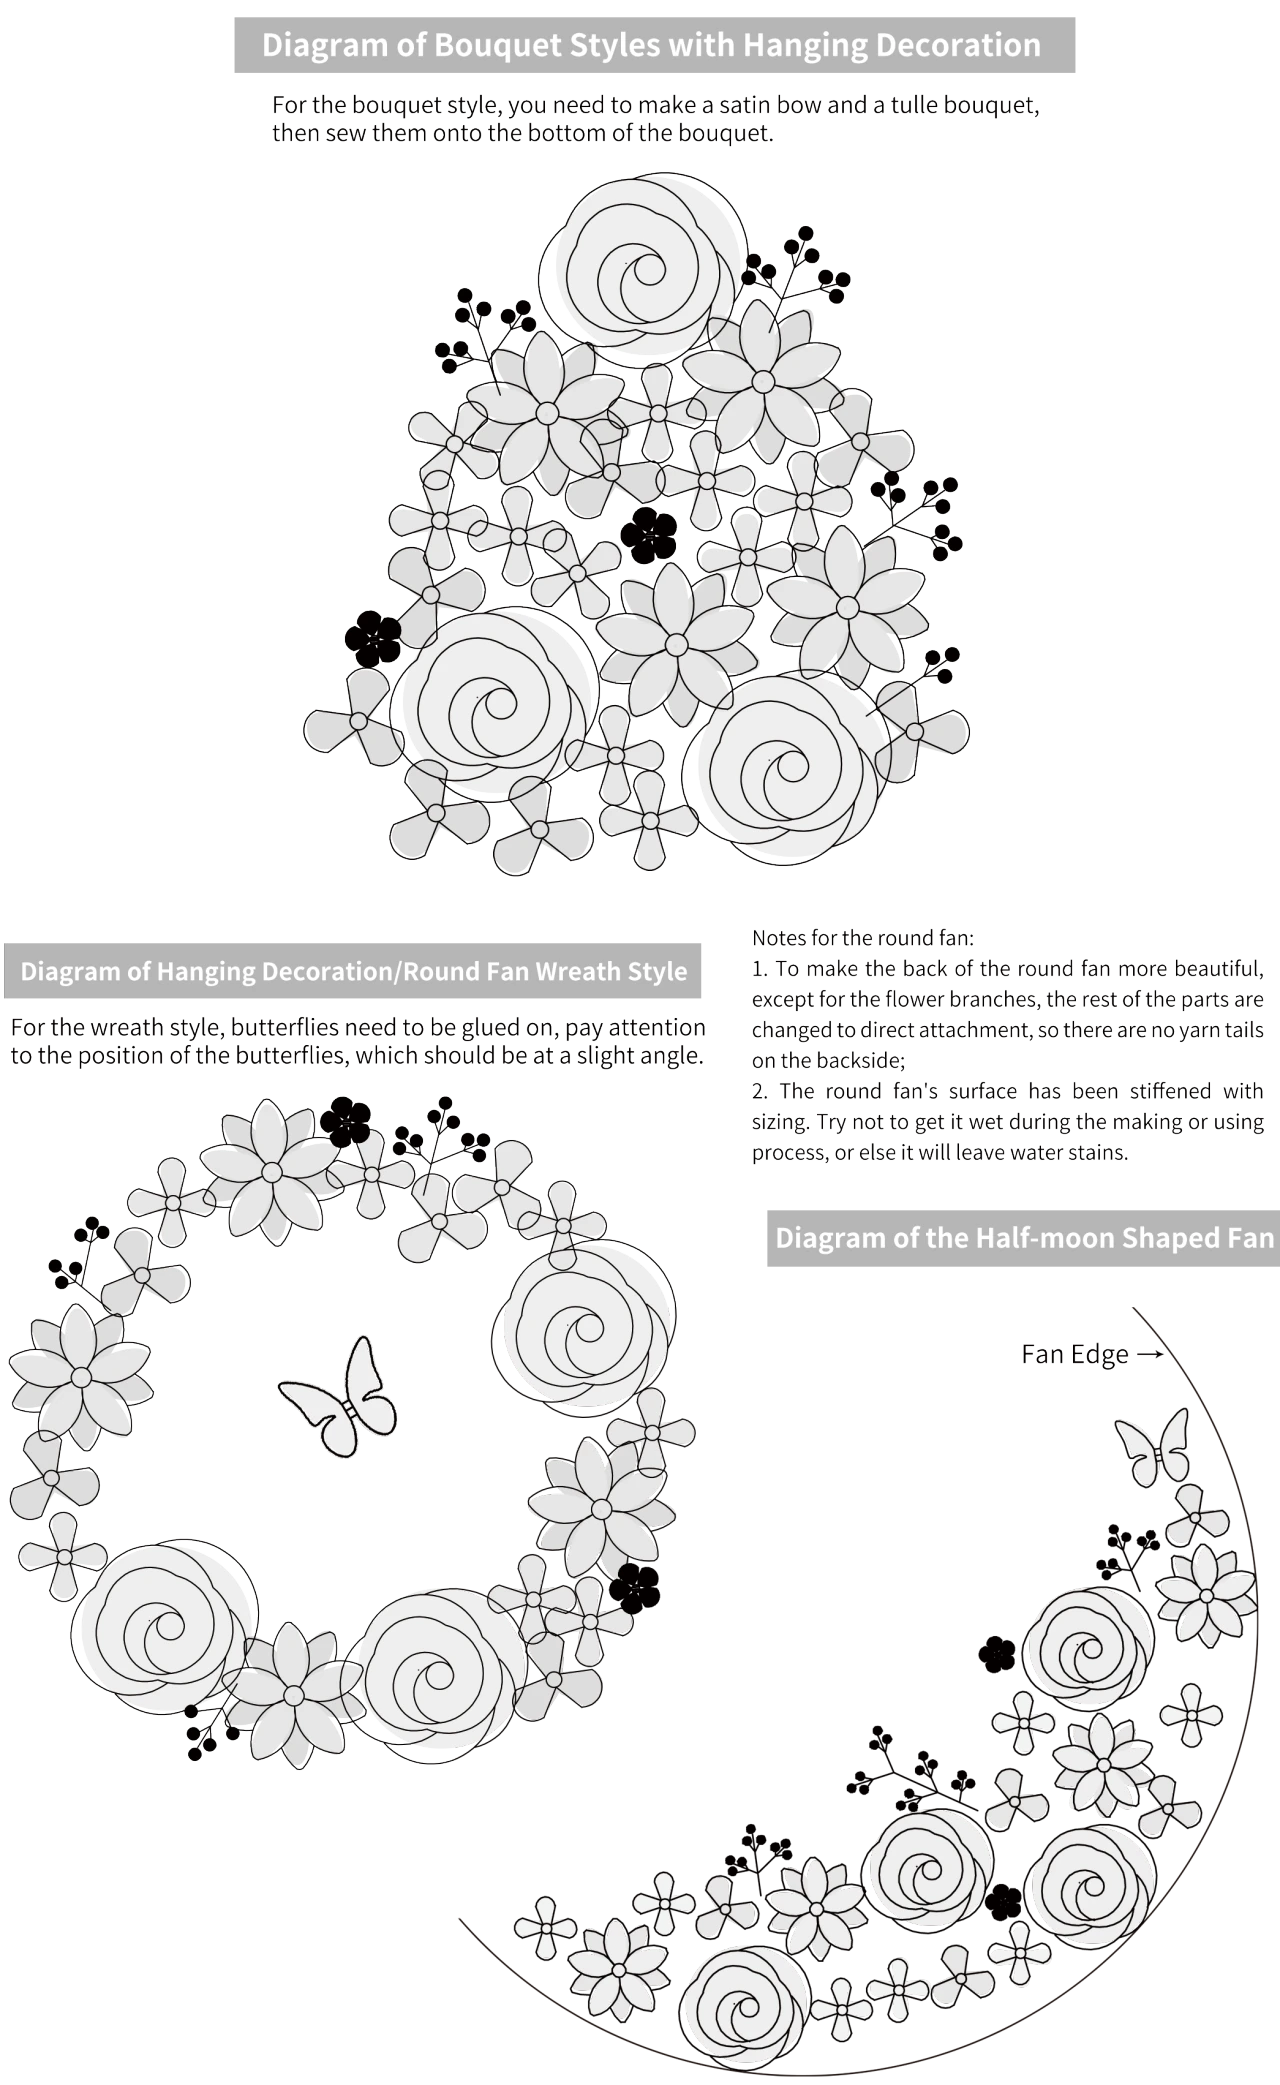
This product comes in two types: hanging decorations and round fans. The hanging decorations are further divided into bouquet styles and wreath styles, and all hanging decorations consist of three parts: embroidery hoops, embroidery fabric, flowers, and accessories. The embroidery hoops, embroidery fabric, and accessories are pre-made, while the flowers need to be crocheted.
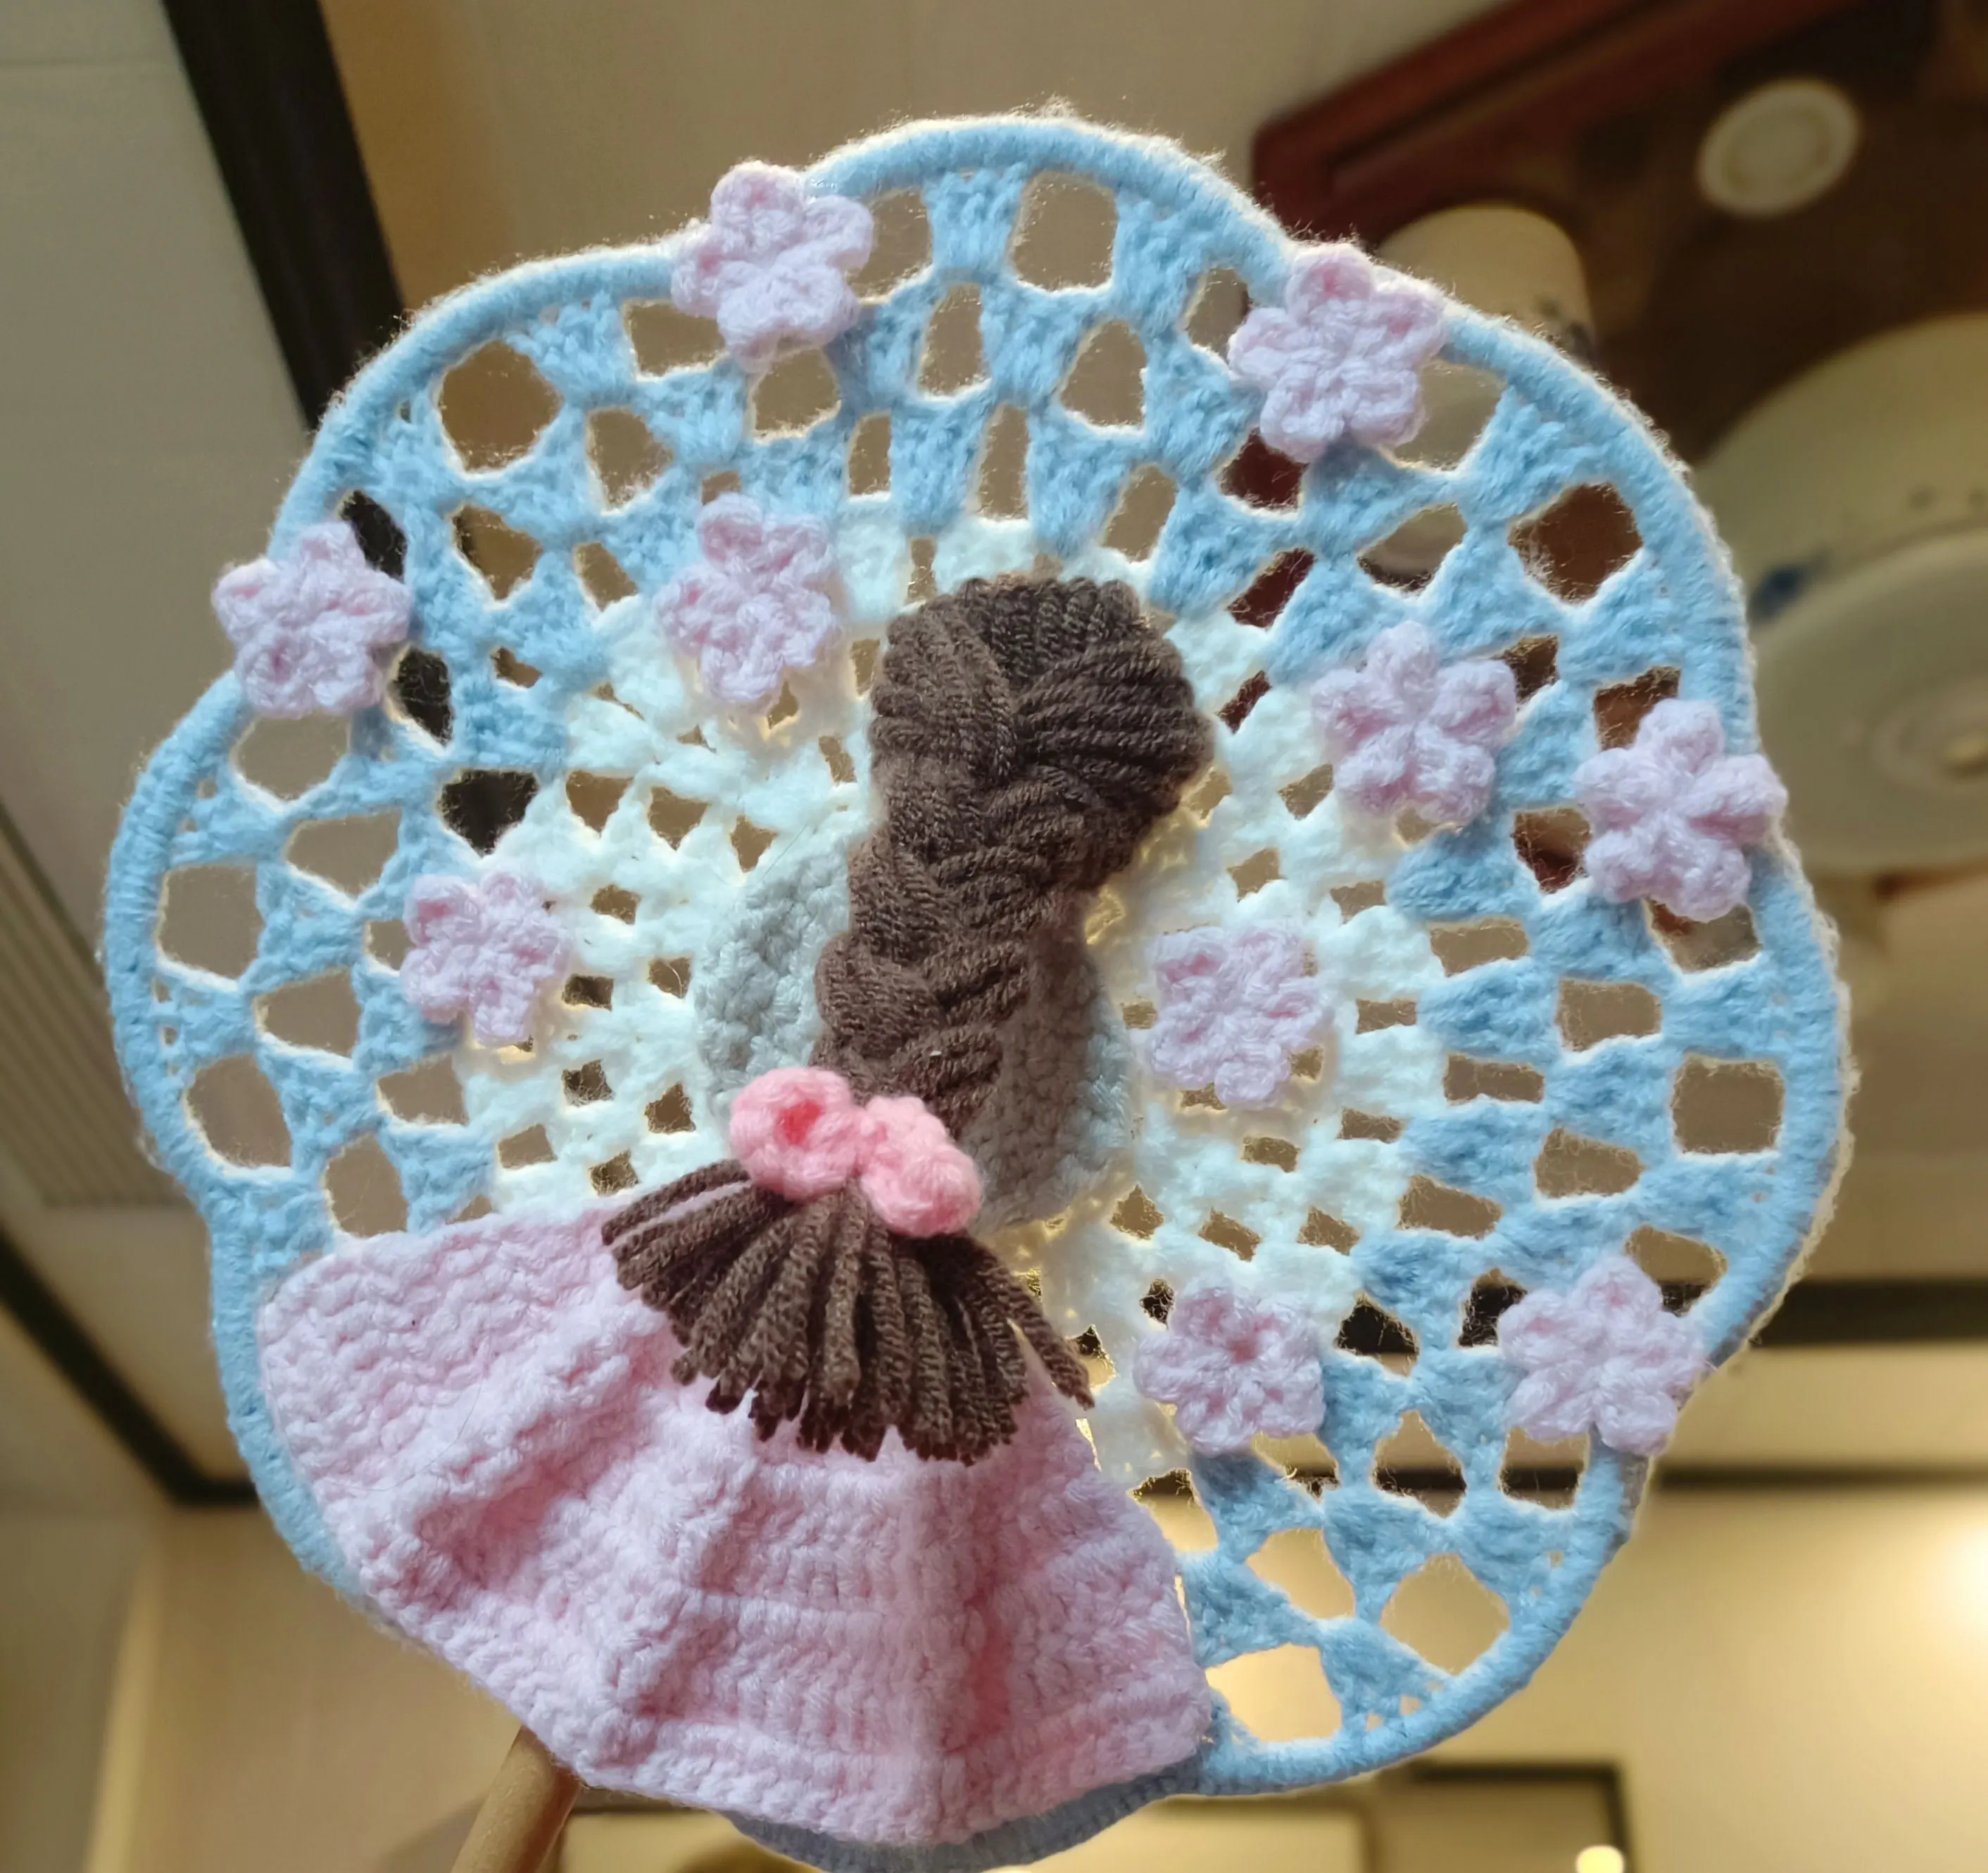
The round fans can be made into wreath styles or half-moon styles, and all round fans consist of three parts: the fan body, flowers, and accessories. The fan body and accessories are pre-made, while the flowers need to be crocheted.
The crochet technique for the flowers on both the hanging decorations and round fans is identical, but the quantity differs. First, crochet the flowers separately to completion, then attach them to the corresponding positions on the embroidery fabric or fan, and finally add the appropriate accessories.
Due to variations in individual tension, the size of the sample is for reference only.
Materials: Combed 3# Lace & Fancy Dyed Lace
Hook: 1.75 mm crochet hook
Note: Since the color of the yarn tail at the starting position differs in Fancy Dyed Lace, the final product color will vary. You can refer to the finished product or choose your favorite color to start crocheting.

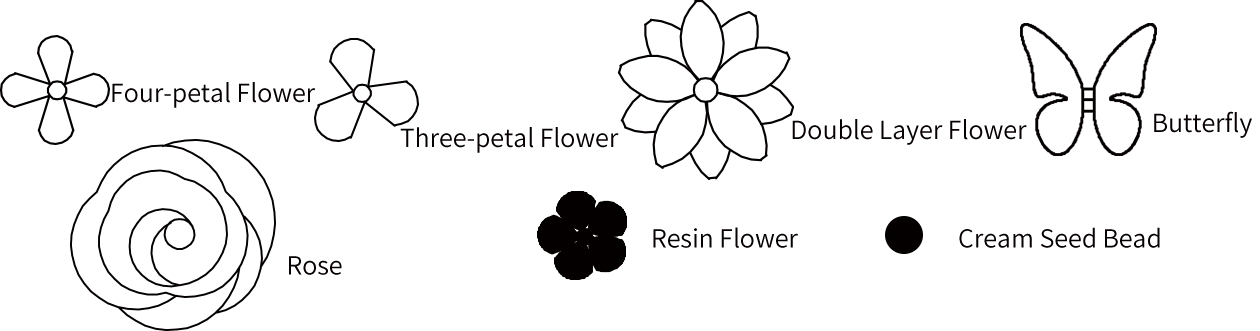
Chart Key





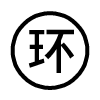
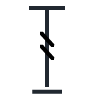

Note: This pattern is making in Chinese crochet pattern terms, and the stitch name is written using American terminology. All measurements in charts are in cm.
Part 1 Flowers
The flowers are divided into four different types of flower shapes for crocheting, namely the four-petaled flower, three-petaled flower, double-layered flower, and rose. The quantity and arrangement of flowers vary depending on the colorway, but the types of flower shapes remain identical.
Step 1 Four-petal Flower (Fancy Dyed Lace: 10 for bouquet style; 7 for wreath style; 7 for half-moon style) 01' 52''
Use the magic ring technique, crochet in a circle counterclockwise from the center to complete 1 round, then attach the flower core after completion. Leave about 20 centimeters of yarn tail before breaking yarn, except for the hand fan style which should leave 5 centimeters of yarn tail. Weave in ends.
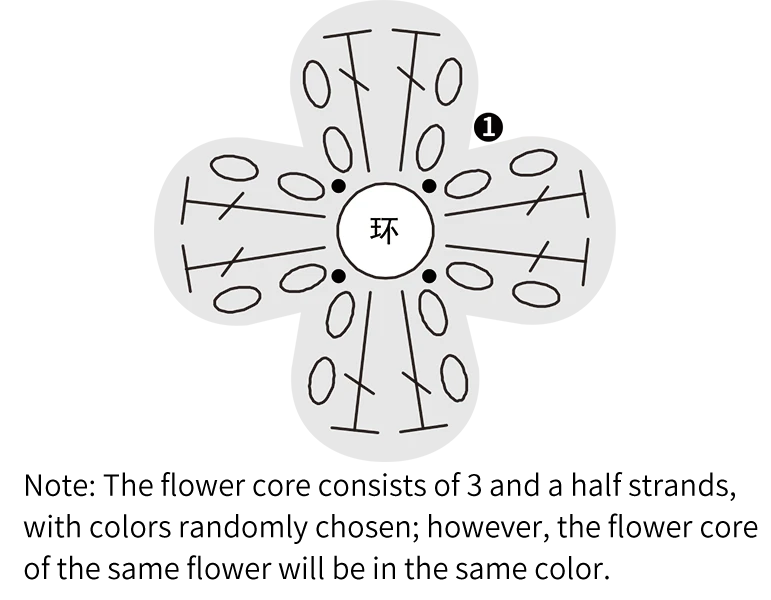
Step 2 Three-petal Flower (Fancy Dyed Lace: 7 for bouquet style; 5 for wreath style; 5 for half-moon style) 14' 29''
Start with a double magic ring, and crochet in rounds counterclockwise from the center outward for 1 round. After completing the motif, attach the flower core. Leave about 20 centimeters of yarn tail before breaking yarn for most styles, while the fan style should leave about 5 centimeters of yarn tail. Weave in ends afterward.
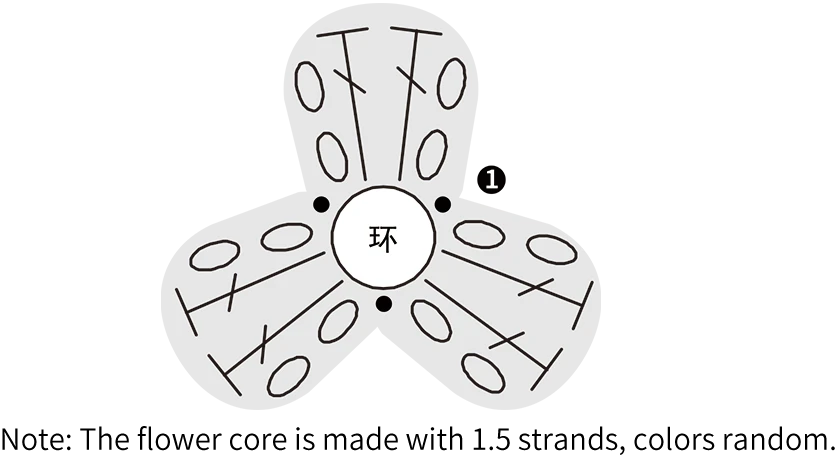
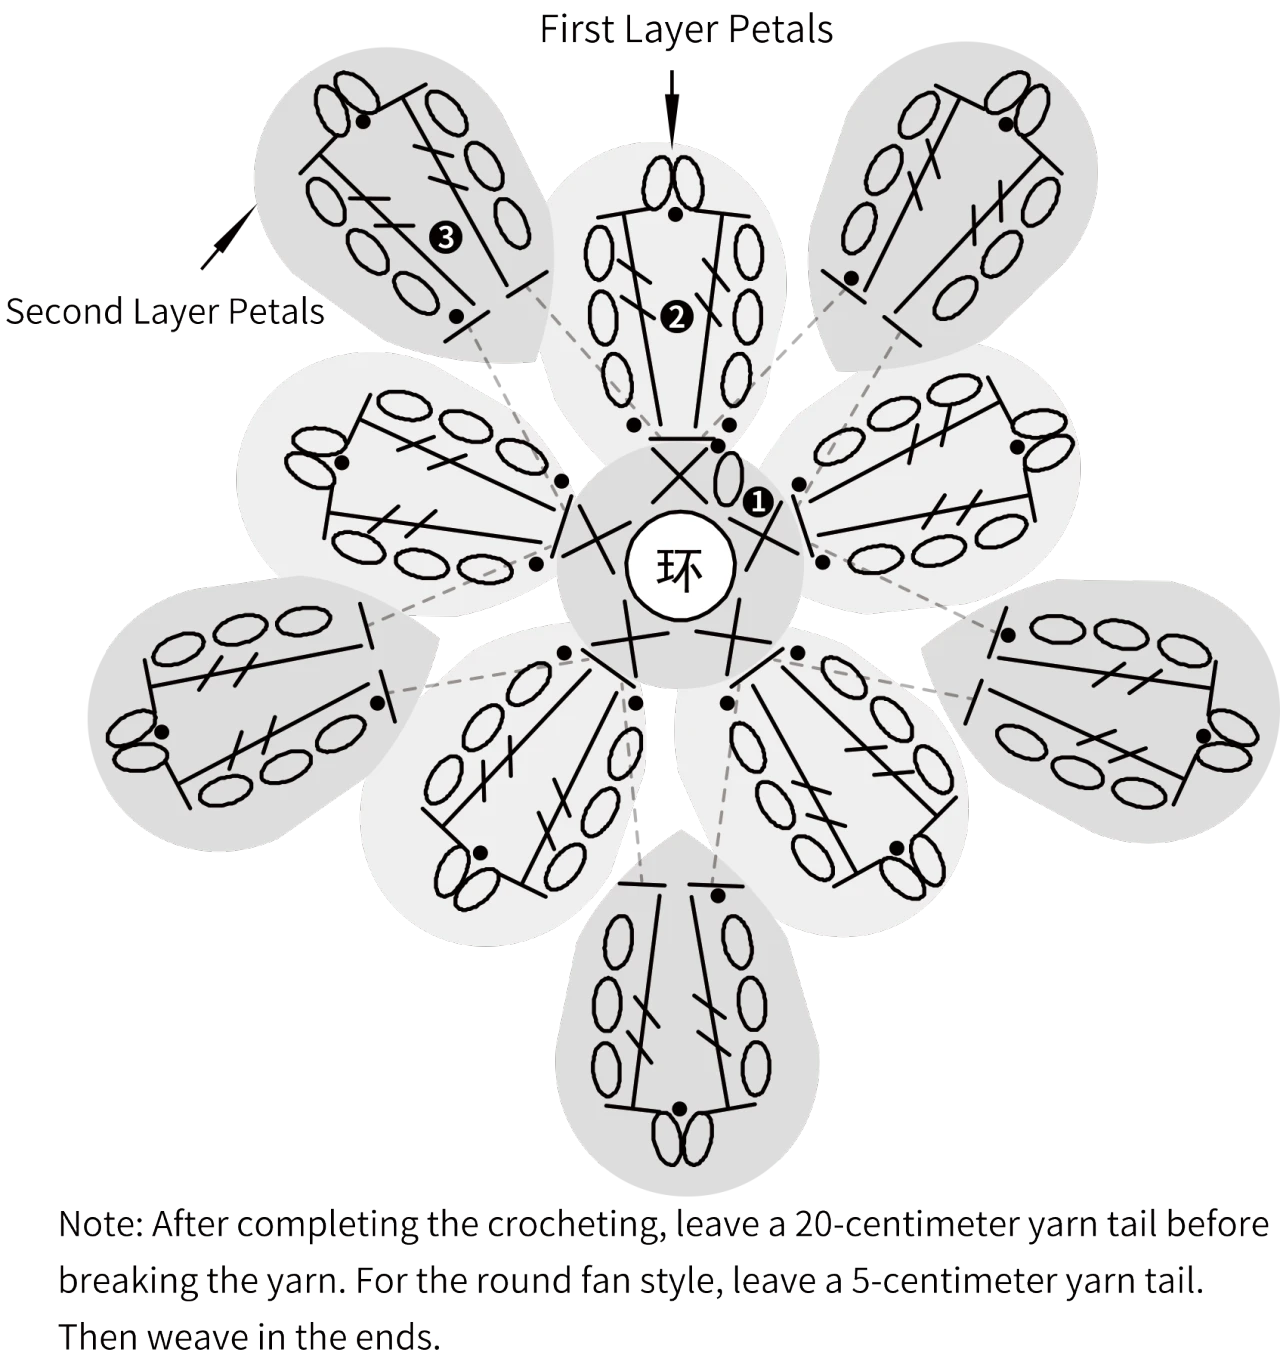
Step 3 Double Layer Flower (01#Brilliant White: Crochet 4 each) 15' 14''
Use the magic ring method to crochet in rounds, working counterclockwise from the center outward, and then attach the flower core after completing it. Pay attention to stagger the second layer petals with the first layer petals. Choose the crocheting color based on the finished product or your own preference.
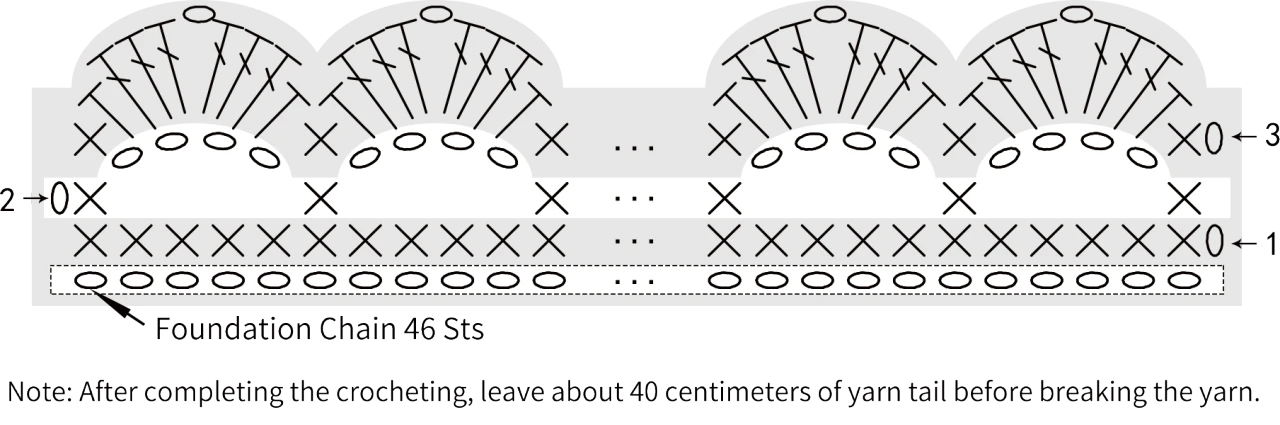
Step 4 Rose (Fancy Dyed Lace: 3 for bouquet style; 3 for wreath style; 4 for half-moon style)
We will start from foundation chain, work back and forth along this starting row. After completing it, roll it up and sew together to form a rose. When crocheting, choose an appropriate color ofFancy Dyed Lace to start from the starting position, paying attention to ensure the selected color contrasts well with the four-petaled flower.
Part 2 Assembly 54' 20''
For the hanging decoration, first install the embroidery hoop and embroidery fabric. For the round fan, assemble directly on the fan. According to the flower distribution diagram, sew each individual flower separately. After completion, sew on the resin flowers according to the distribution diagram and embroider the seed bead flower branches. Finally, refer to the finished product to add the remaining accessories. When sewing, the flower distribution can be relatively tight, specifically refer to the finished product pictures and video demonstrations.
Image unavailable
Made by the community