Clothes
Breezy Hooded Cardigan
Project preview
See the finished project
Pattern format
Instructions
Watch and follow
Video tutorial
| Style | Yarn | Color |
|---|---|---|
| Qingfeng hooded cardigan - Whitecap Gray Version | Morandi flax Lace yarn |  06#Violet Ice x 1 06#Violet Ice x 1 09#Whitecap Gray x 10 09#Whitecap Gray x 10 |
| Qingfeng hooded cardigan - Light Blue Version | Morandi flax Lace yarn |  07#Majolica Blue x 1 07#Majolica Blue x 1 12#Light Blue x 10 12#Light Blue x 10 |
| Qingfeng hooded cardigan - Soft Pink Version | Morandi flax Lace yarn |  13#Dusty Coral x 1 13#Dusty Coral x 1 15#Soft Pink x 10 15#Soft Pink x 10 |
| Qingfeng hooded cardigan - Montana Grape Version | Morandi flax Lace yarn |  05#Silver Pink x 1 05#Silver Pink x 1 10#Montana Grape x 10 10#Montana Grape x 10 |
Qingfeng hooded cardigan - Whitecap Gray Version
Qingfeng hooded cardigan - Light Blue Version
Qingfeng hooded cardigan - Soft Pink Version
Qingfeng hooded cardigan - Montana Grape Version
This sweater is first knitted in rows for the body, then separately knit each part of the front piece and connect at the shoulders. After completing, pick up stitches to knit the hat, then make the front band and sew on the buttons. Finally, knit and attach the sleeves.
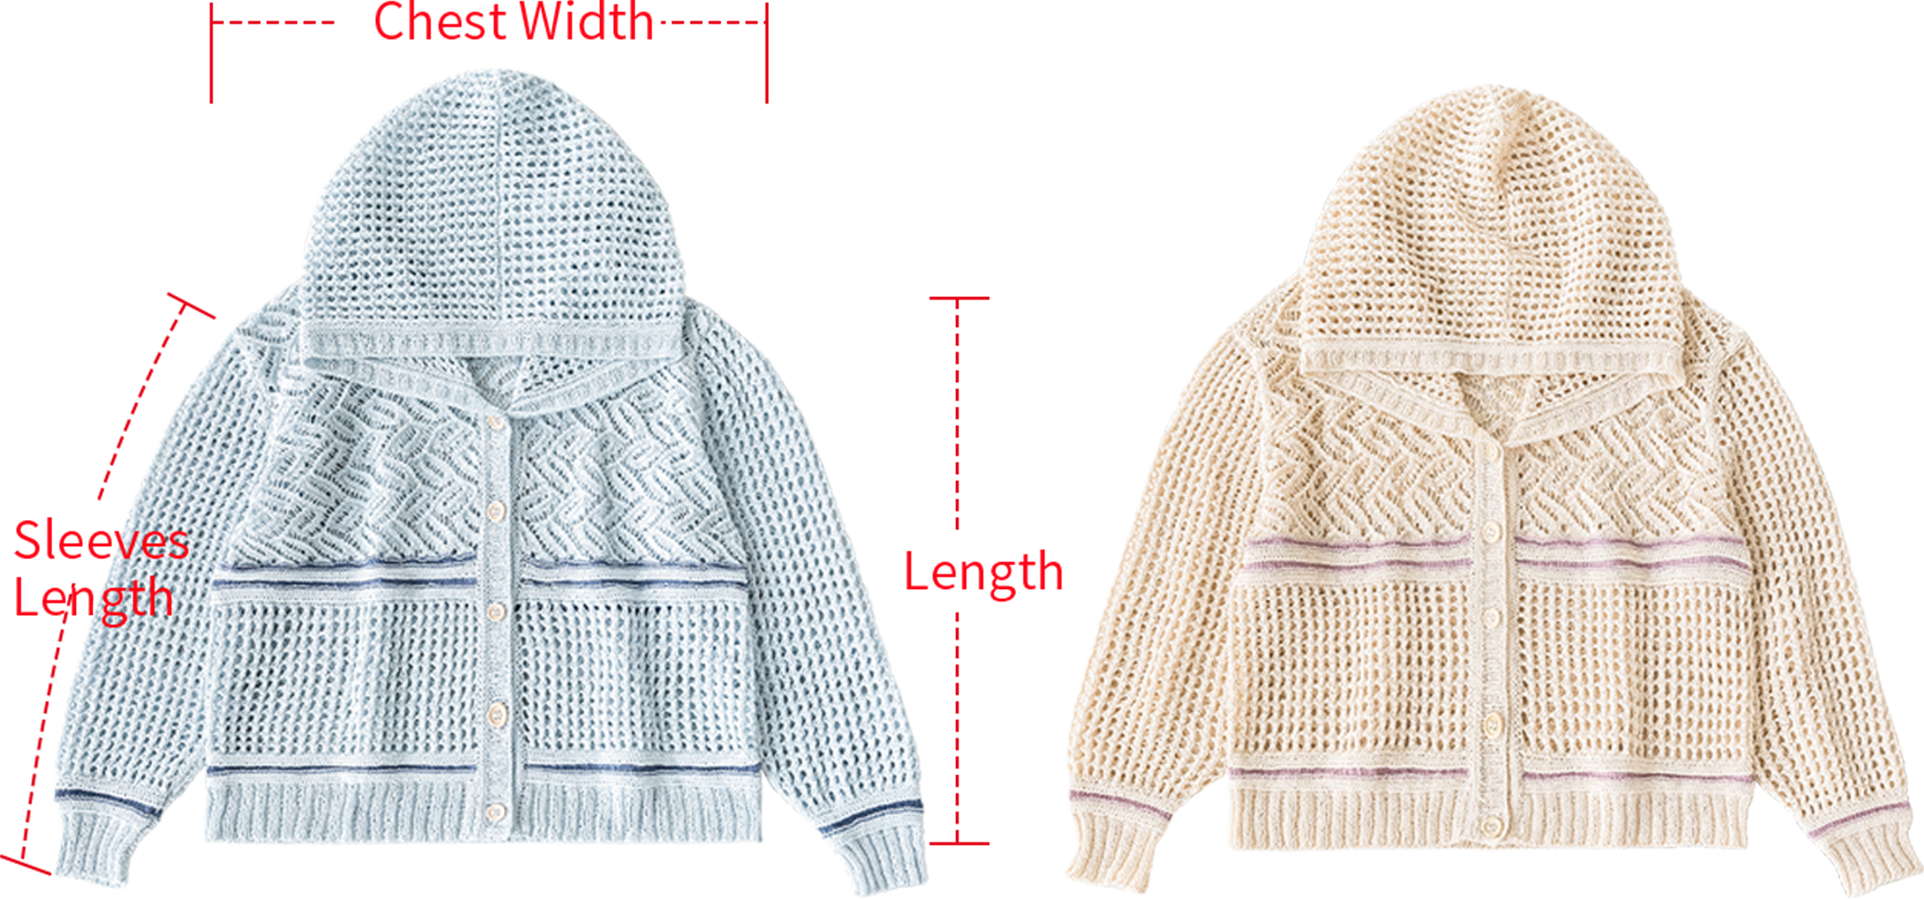
| Size | Chest Width | Length | Sleeves Length |
| Small | 53 cm | 51 cm | 52 cm |
The handcrafted measurements may have an error, the size of the sample is for reference only.
Materials:Morandi flax Lace yarn
Tool:10# - 3.25 mm Circular Needle & Short Straight Needle
| Version | Whitecap Gray Version | Light Blue Version | Soft Pink Version | Montana Grape Version |
| Main Color Yarn | 09#Whitecap Gray | 12#Light Blue | 15#Soft Pink | 10#Montana Grape |
| Contrasting Color Yarn | 06#Violet Ice | 07#Majolica Blue | 13#Dusty Coral | 05#Silver Pink |
Note: Use contrasting color yarn only at the marked positions. Use main color yarn for all other sections.
Pattern A gauge: 10×10 cm = 27 stitches × 40 rows,
Pattern B gauge: 10×10 cm = 26 stitches × 36 rows.
Note: 1. When knitting back and forth, on the wrong side you need to work the stitches opposite to the chart, with left and right based on how the garment will look when worn.
2. After completing the garment, if you need to adjust the dropped shoulder, you can reinforce the shoulders and back neck using the backstitch method to maintain a proper shoulder fit.


Chart Key



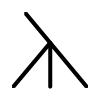

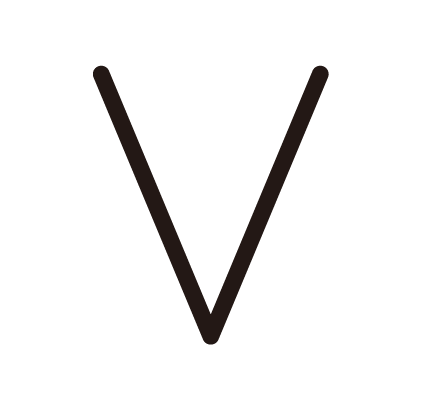
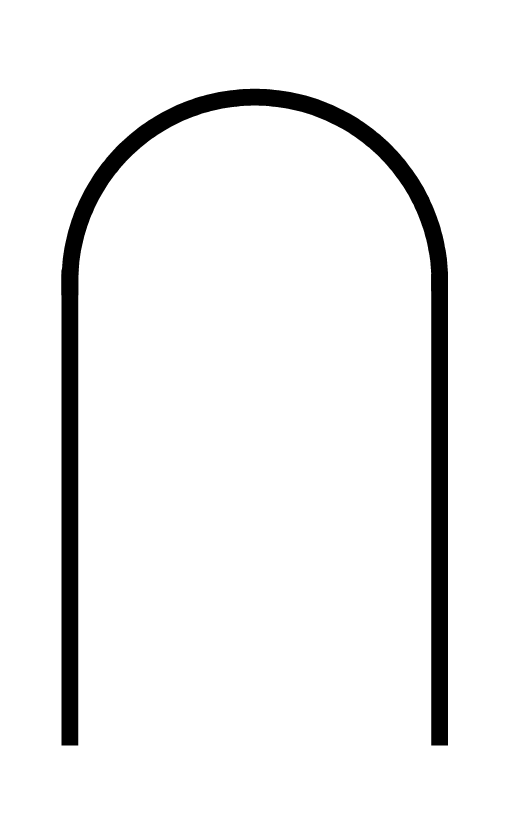


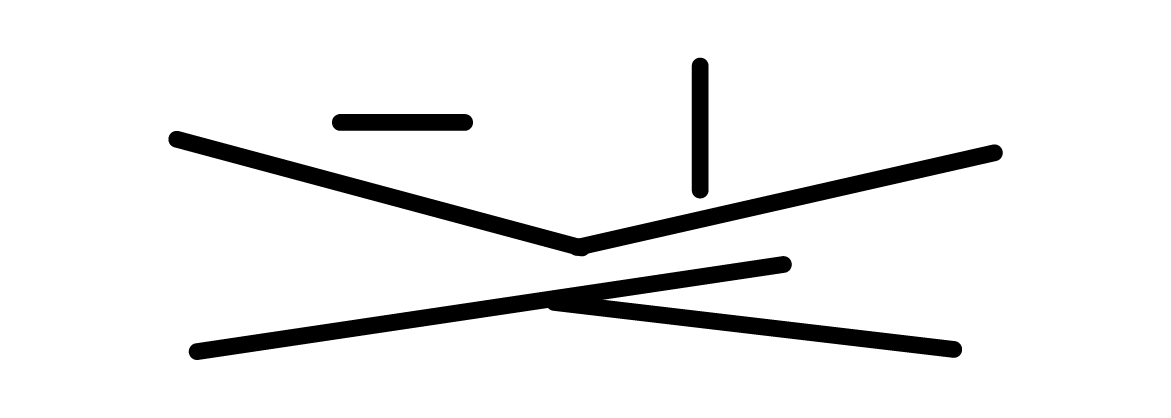

Note:
1. This pattern is making in Chinese crochet pattern terms, and the stitch name is written using American terminology. All measurements in charts are in cm.
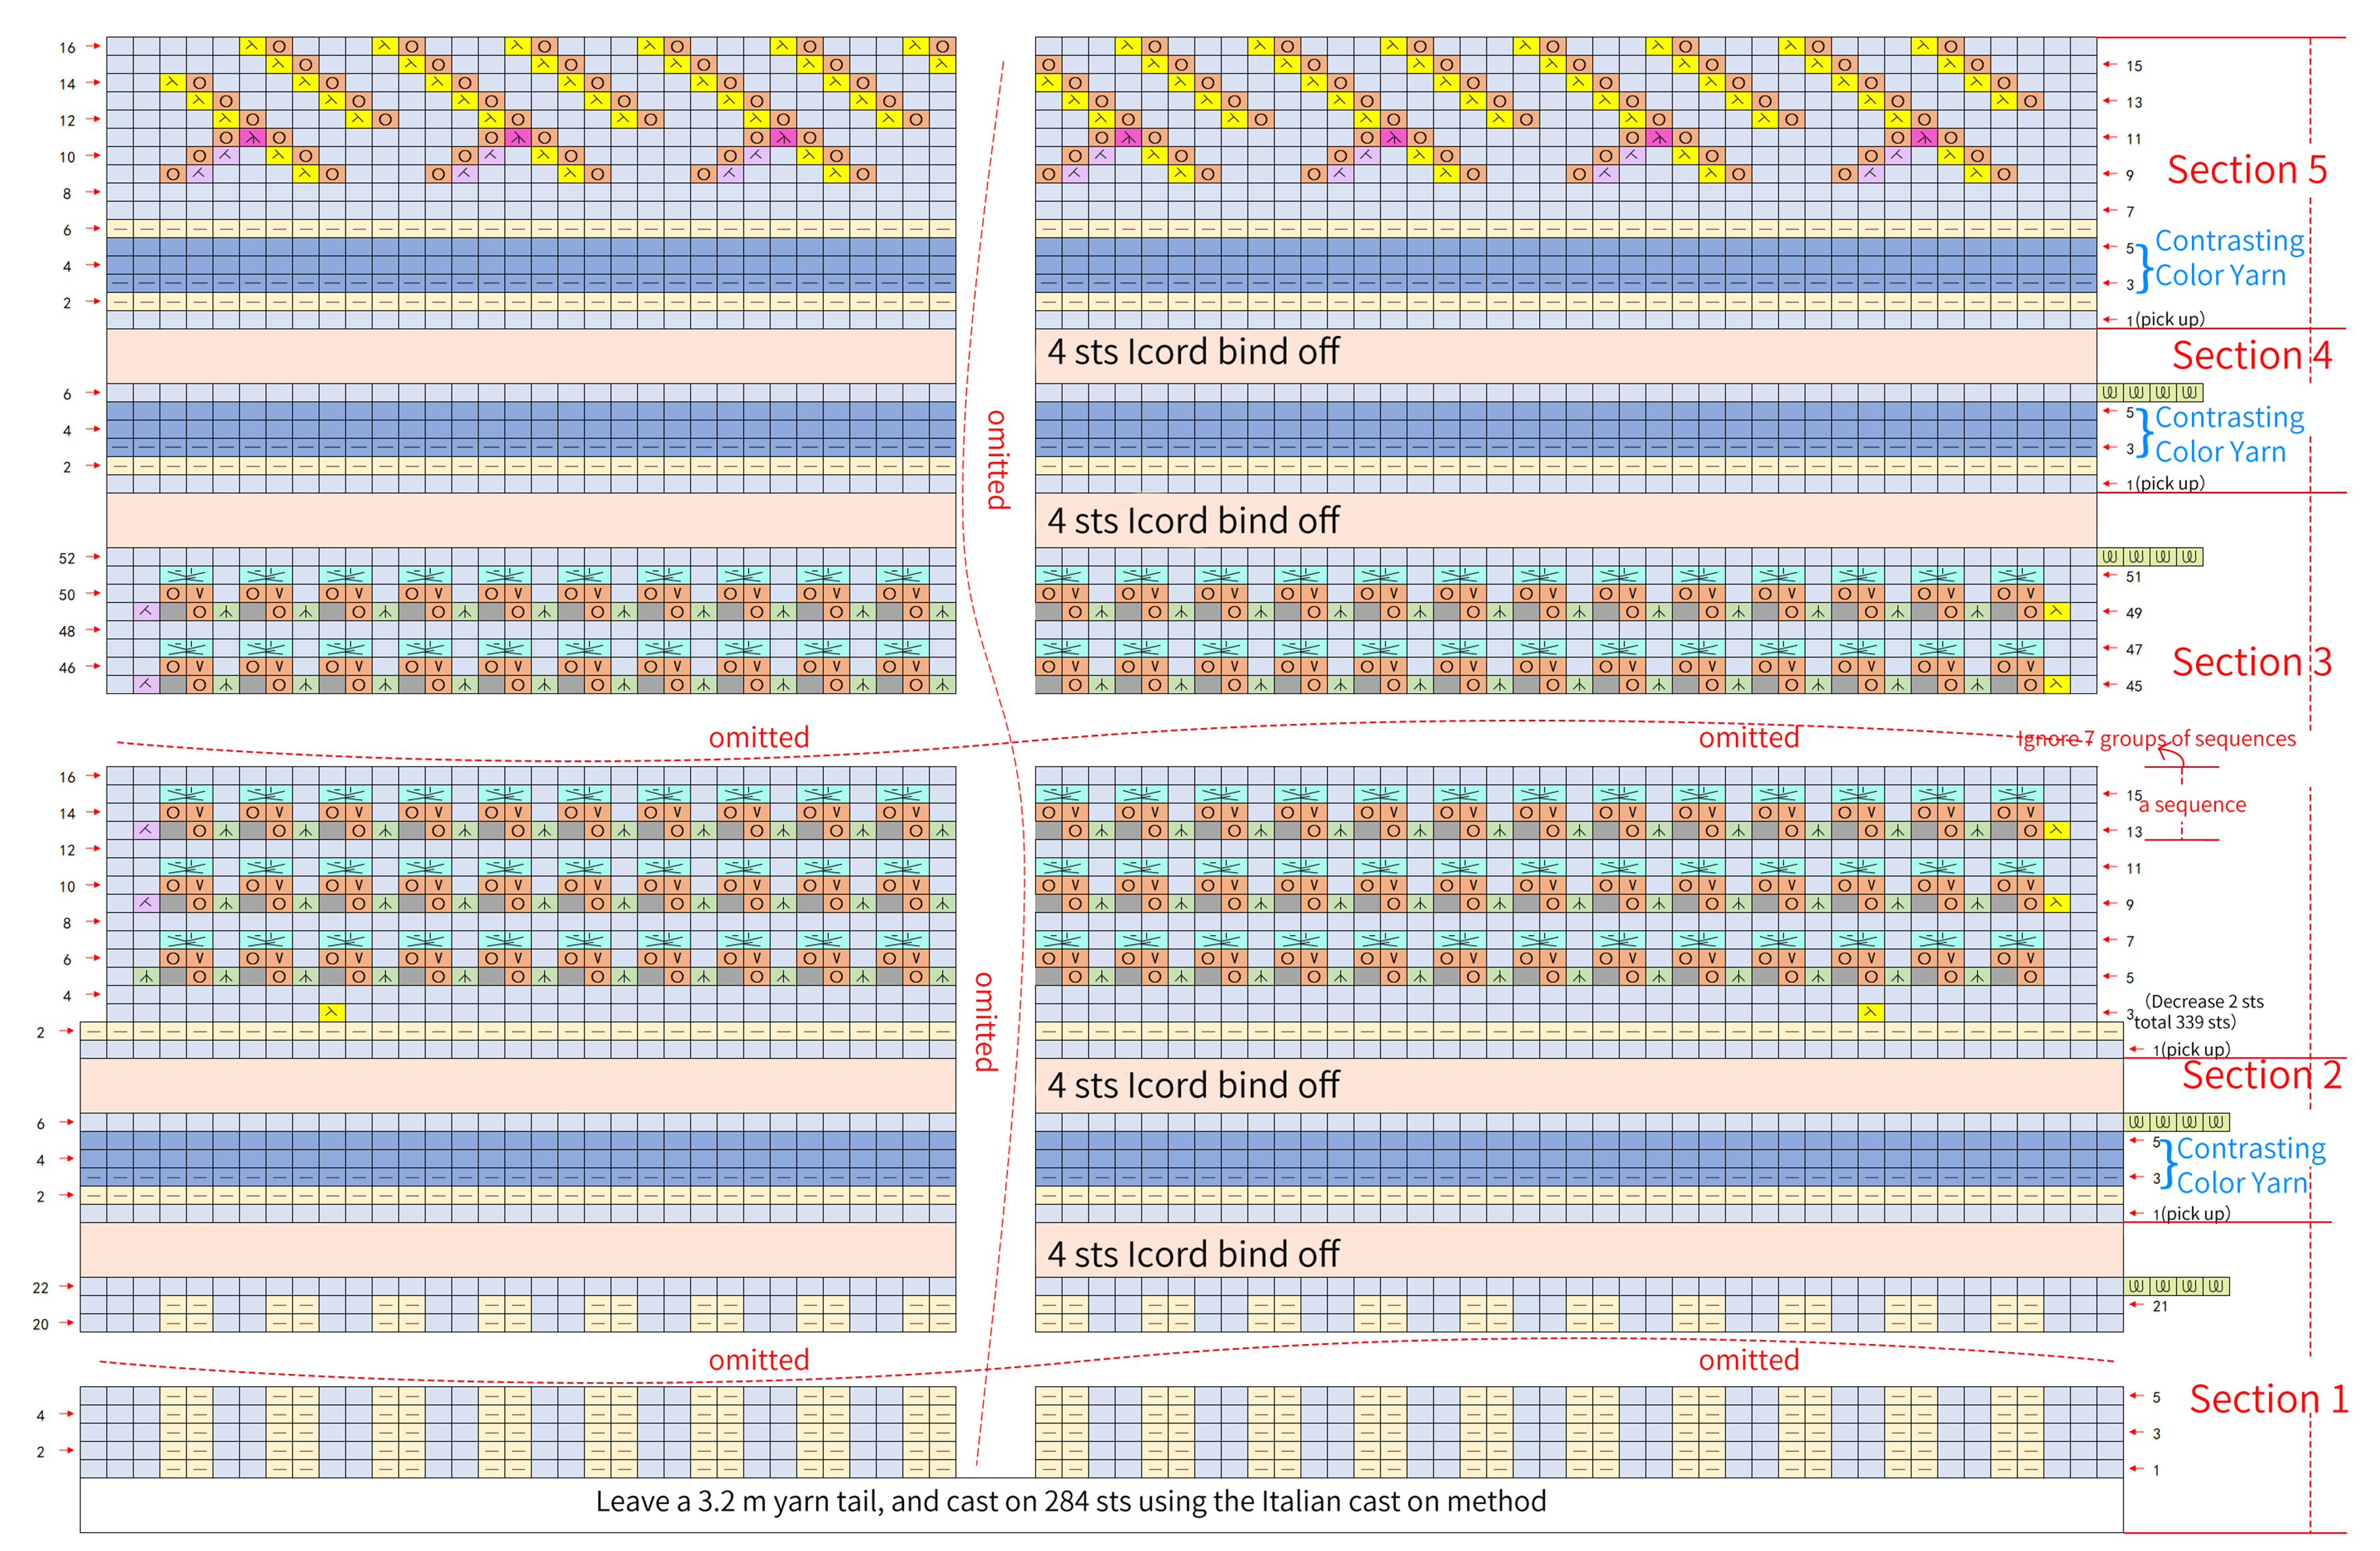
Part 1 BodyA 01' 11'' (Part 1)
Use the Italian cast on method to cast on, knit back and forth in rows, bottom-up divide into five areas, and pay attention to color changes during the knitting process.
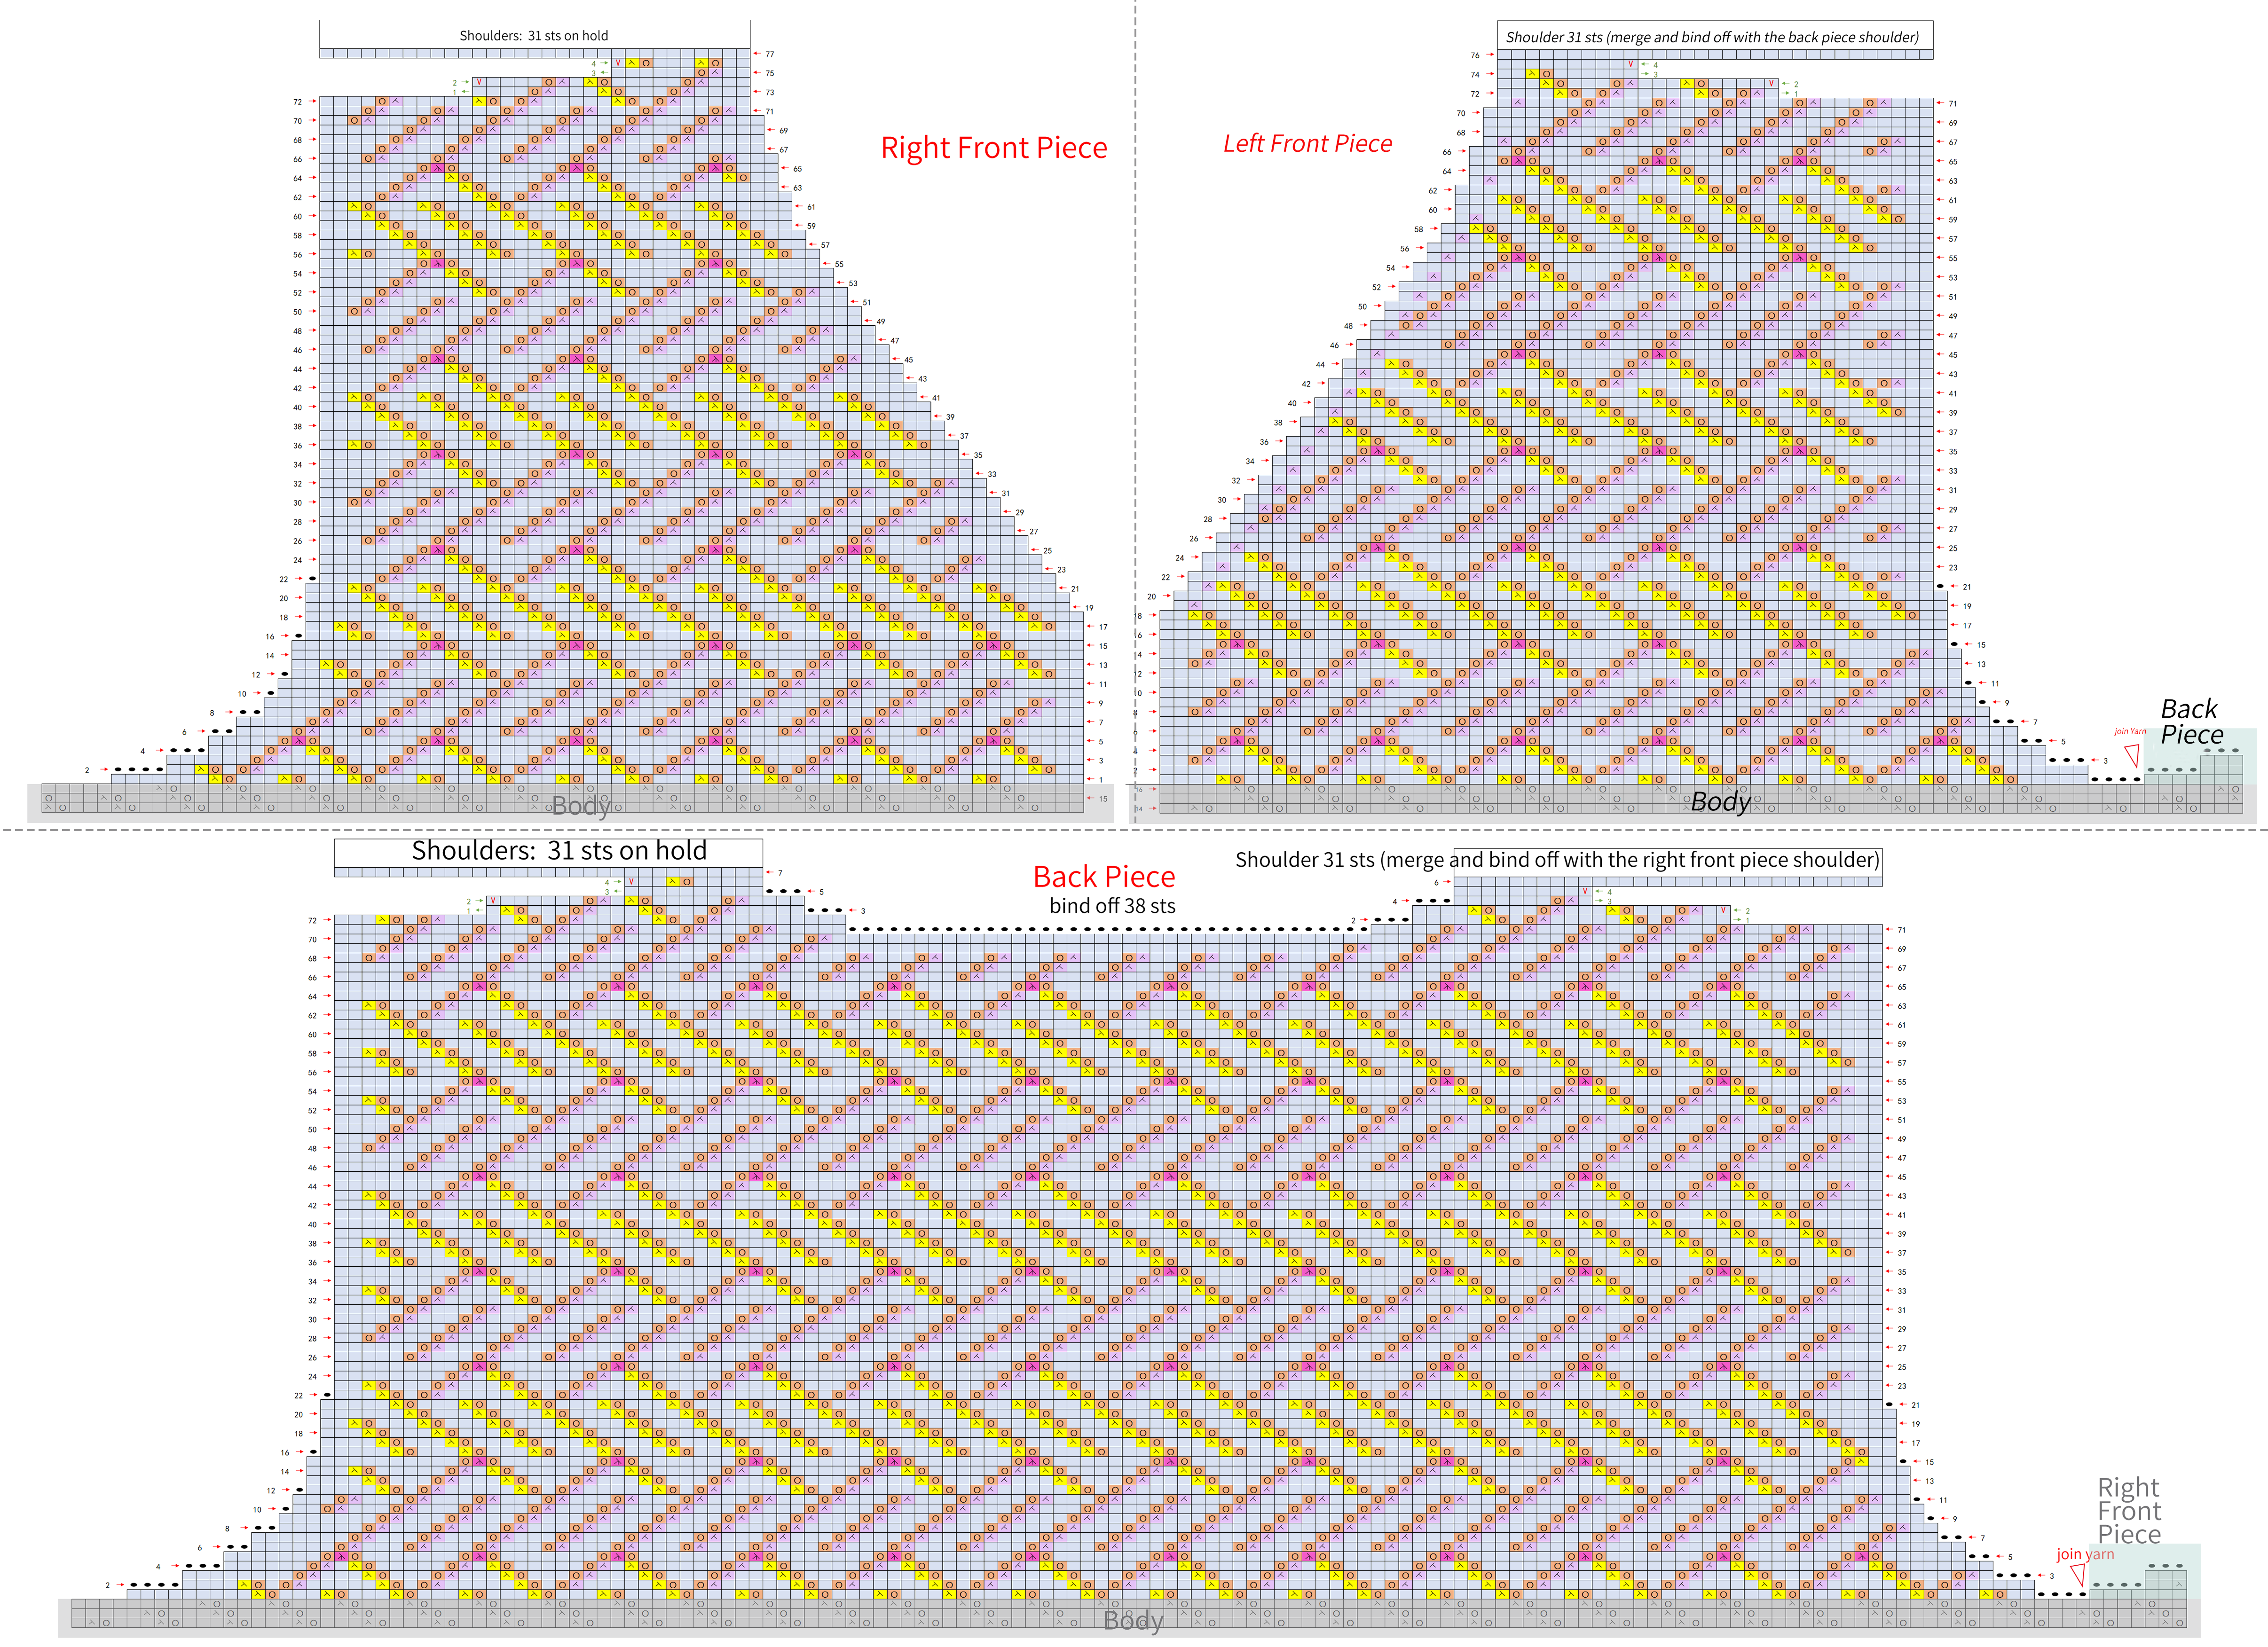
Part 2 Chest Piece B 41' 39'' (Part 1)
Divide into three sections: the right front piece, back piece, and left front piece. Start with the right front piece, then join yarn at corresponding positions to knit the back piece and left front piece separately. Finally, connect the shoulders.
Part 3 Hat C 00' 08'' (Part 2 )
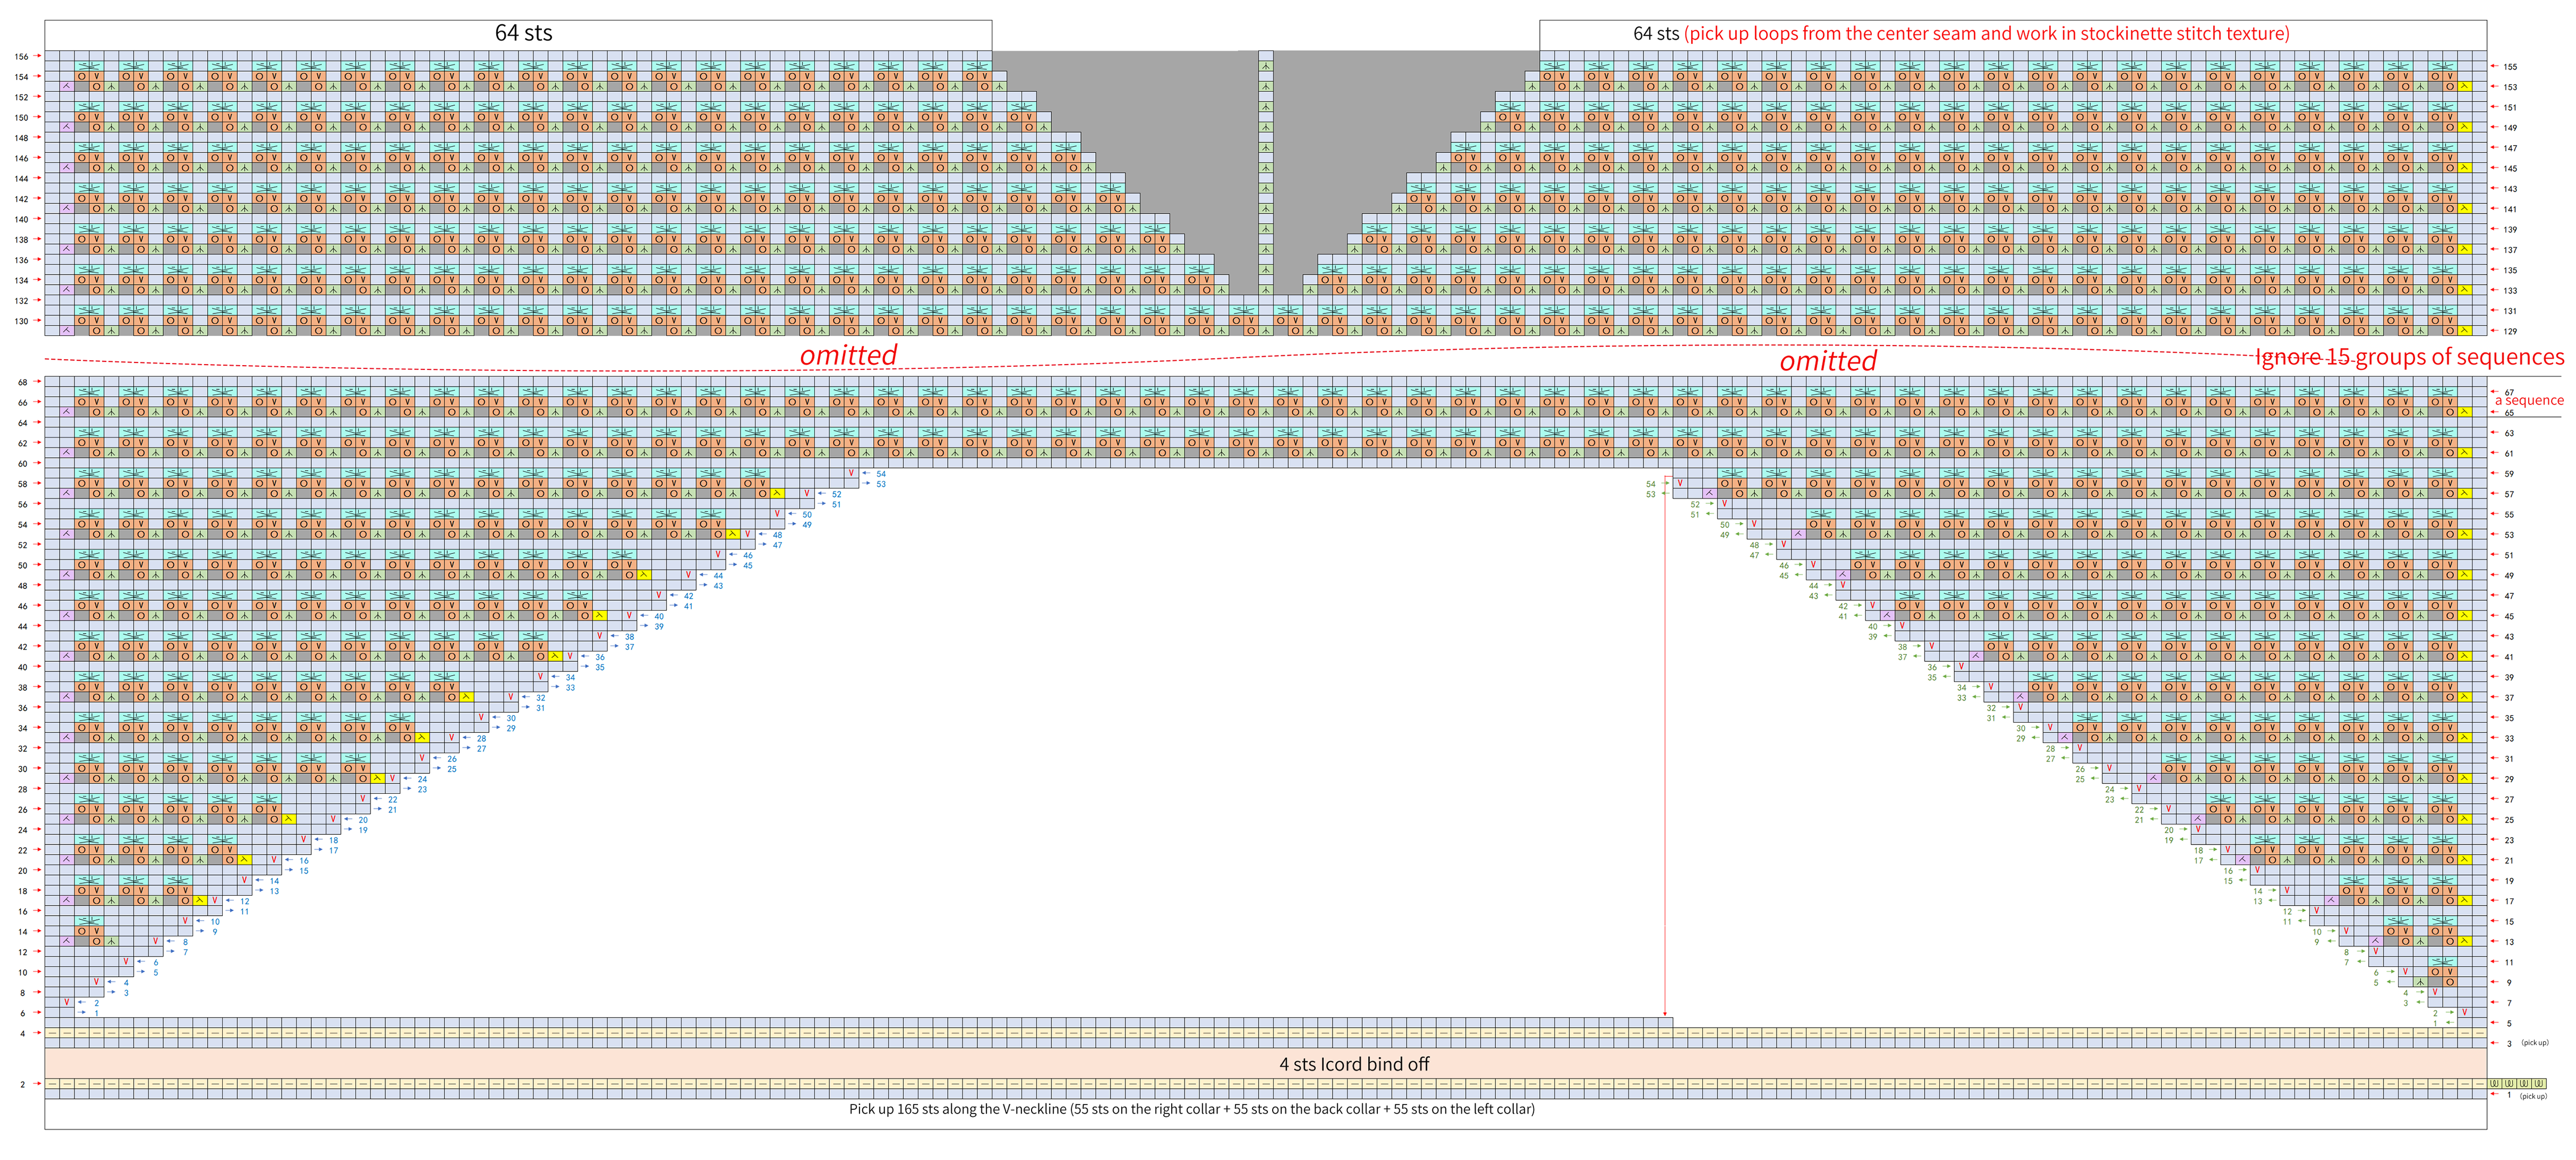
Pick up stitches along the top edge of the V-neck and knit in rows. After completing, sew together the top.
Part 4 Front Band D 16' 22'' (Part 2)
Pick up and knit along the front band and the hat edge. Pay attention to make buttonholes at the corresponding position on the right front piece. After completing, sew on the buttons.Please refer to the video demonstration for more details.

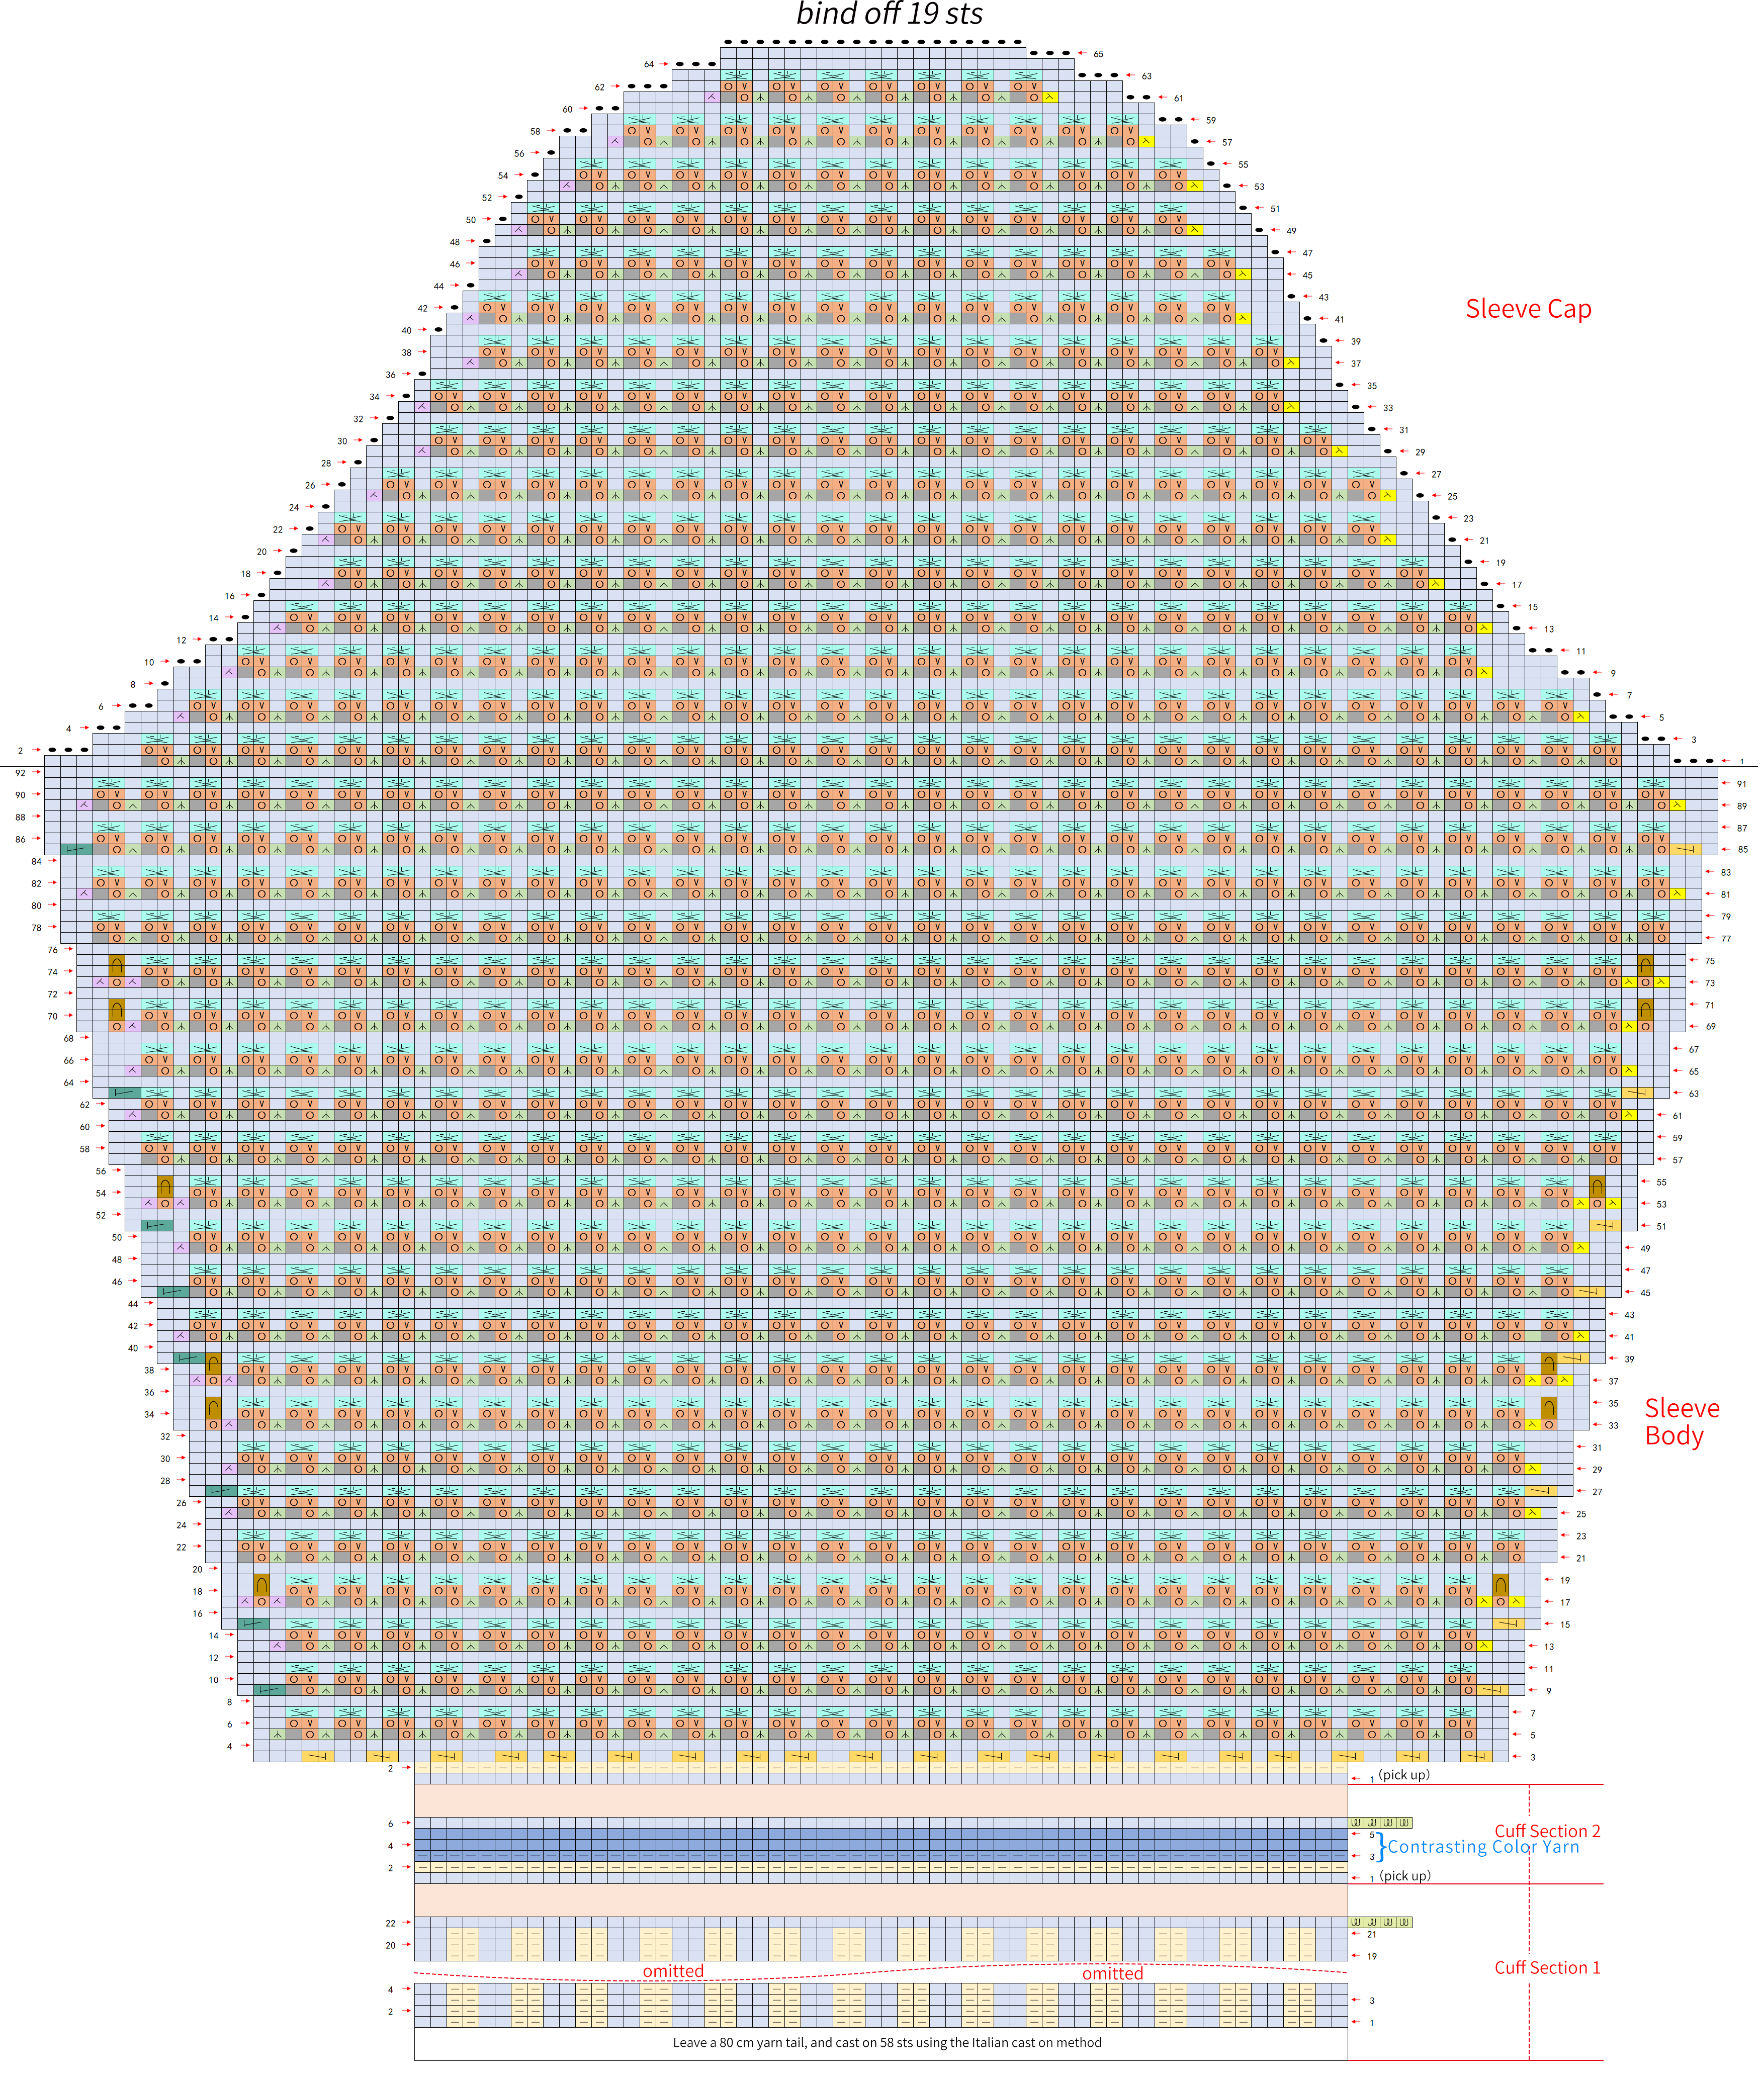
Part 5 Sleeves E 20' 50'' (Part 2)
Bottom-up knitting, divide into three parts: cuff, sleeve body and sleeve cap. After completion, sew together the sides and attach to the armhole position.