Home / Blanket
Camellia Butterfly Pillow Blanket
Project preview
See the finished project
Pattern format
Instructions
Watch and follow
Video tutorial
Camellia Butterfly Pillow Blanket
from The South of Colorful Clouds series
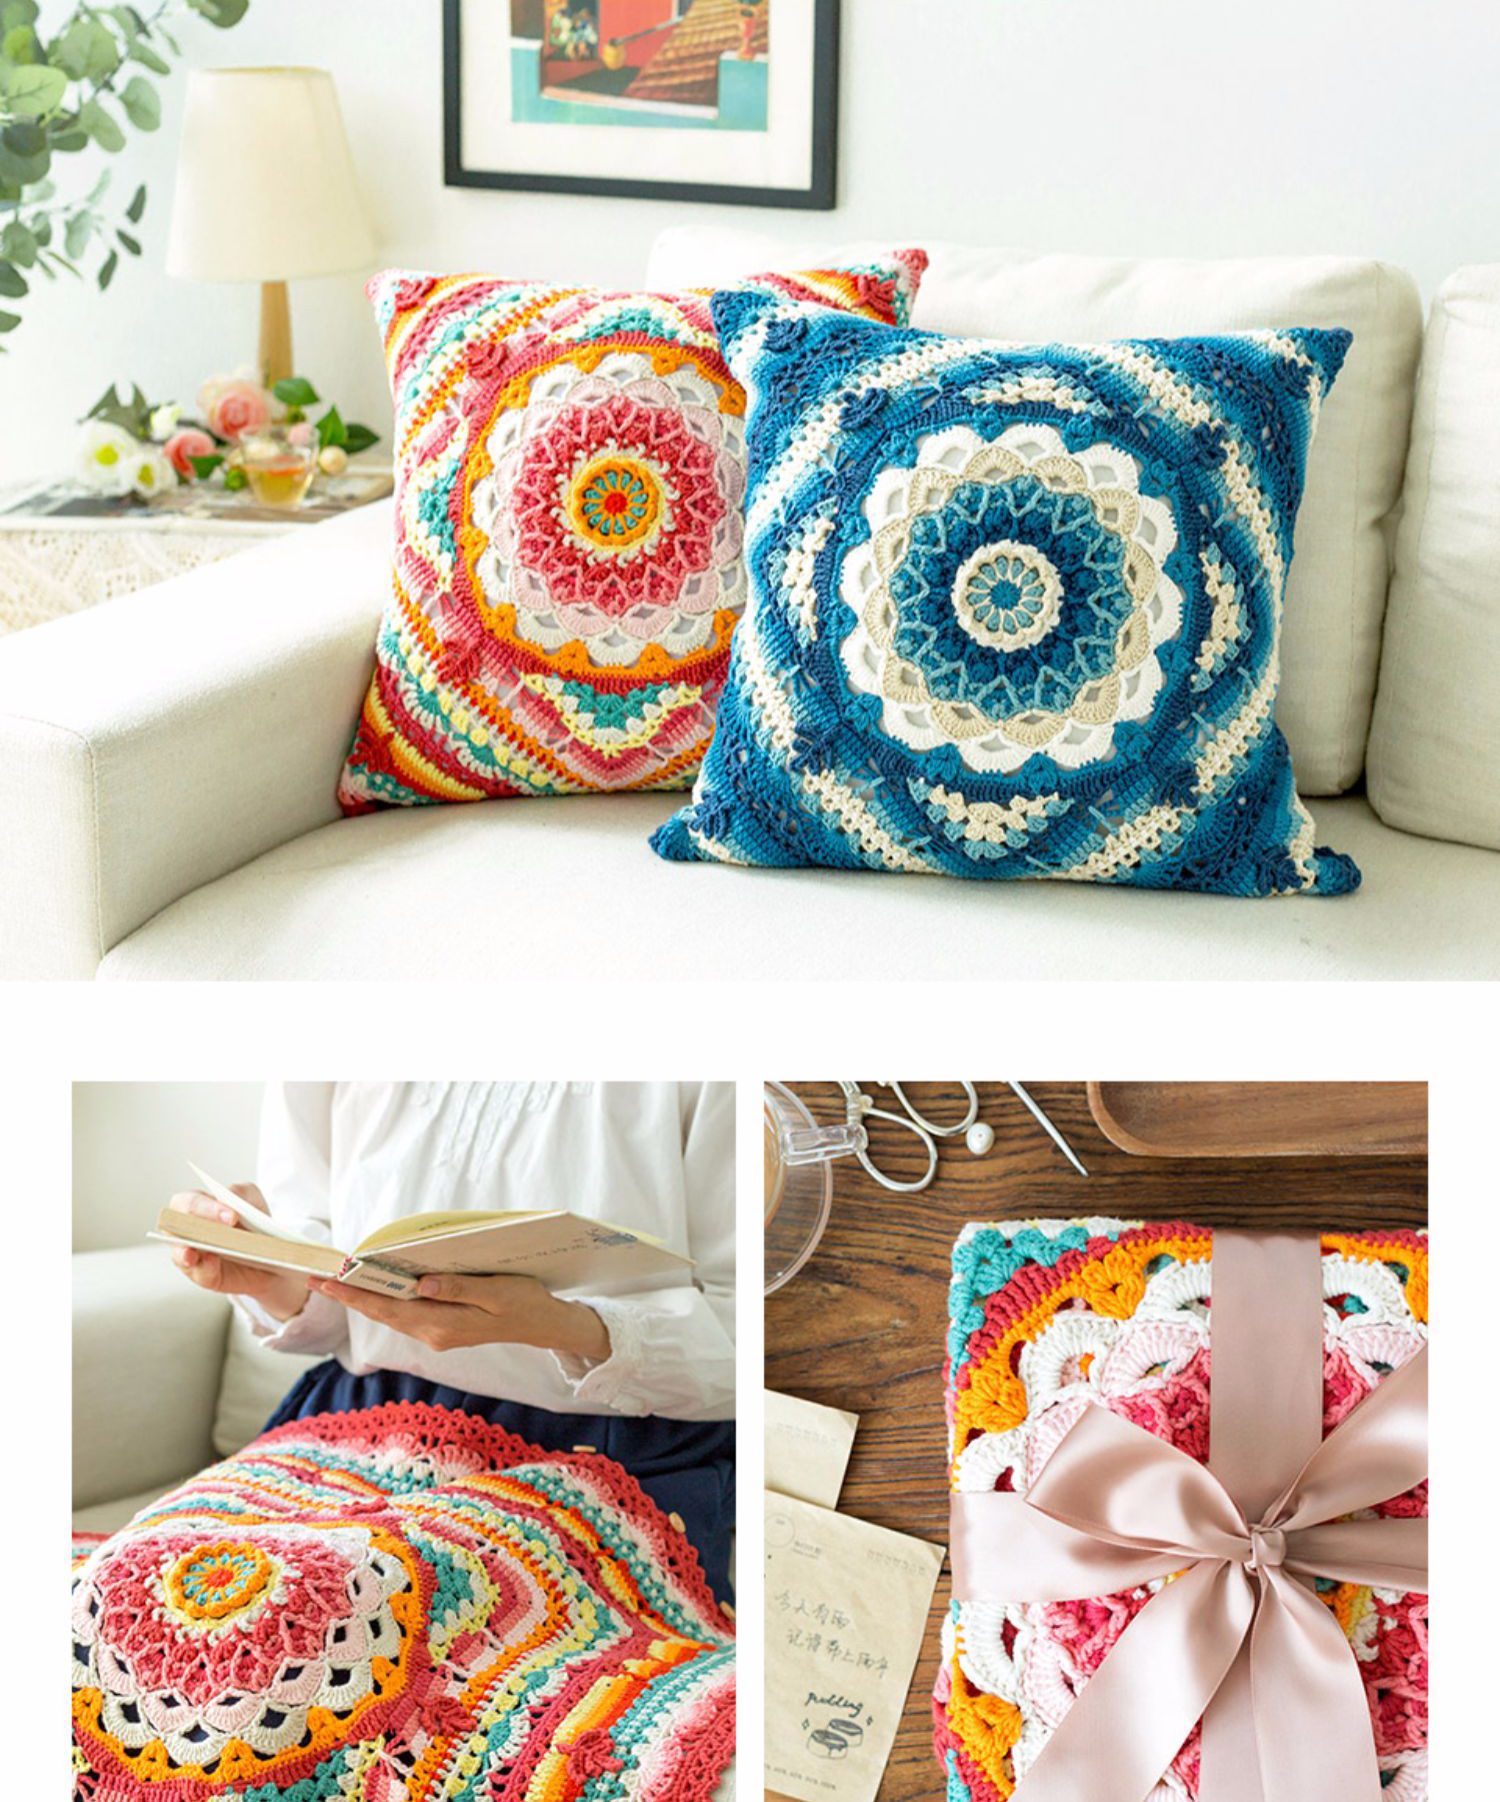
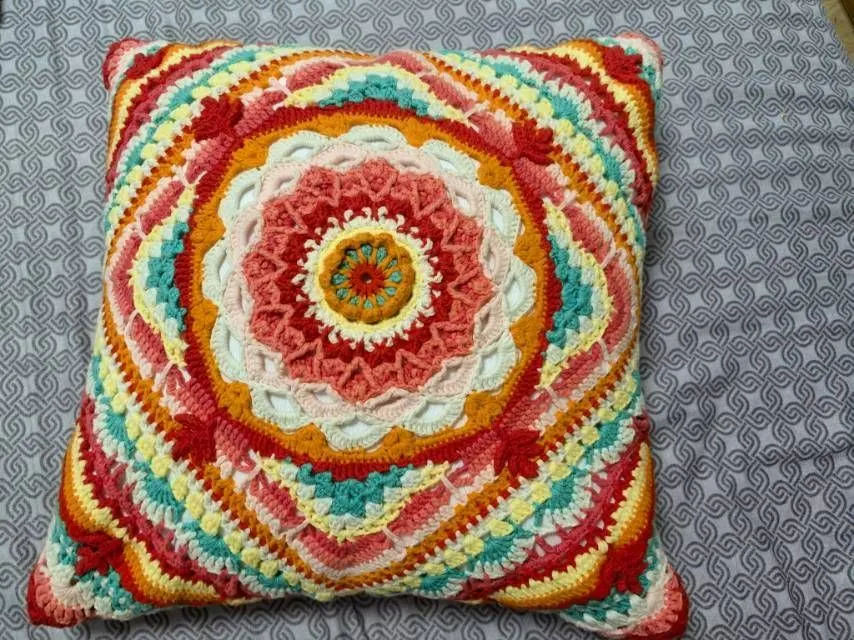
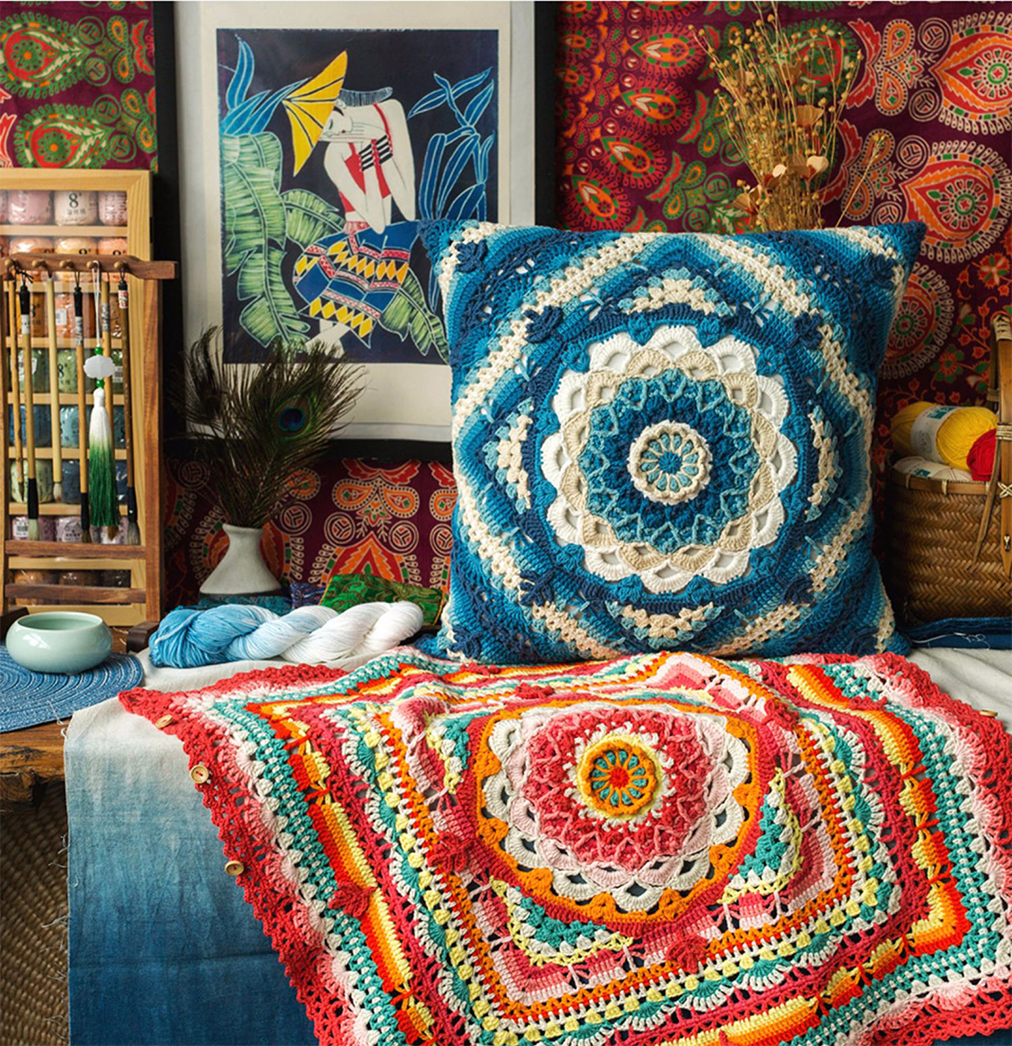
The main thing to do for this blanket is completing the main part and then adding buttons in place,so it can also be used as a pillow with a pillow core buttoned inside.
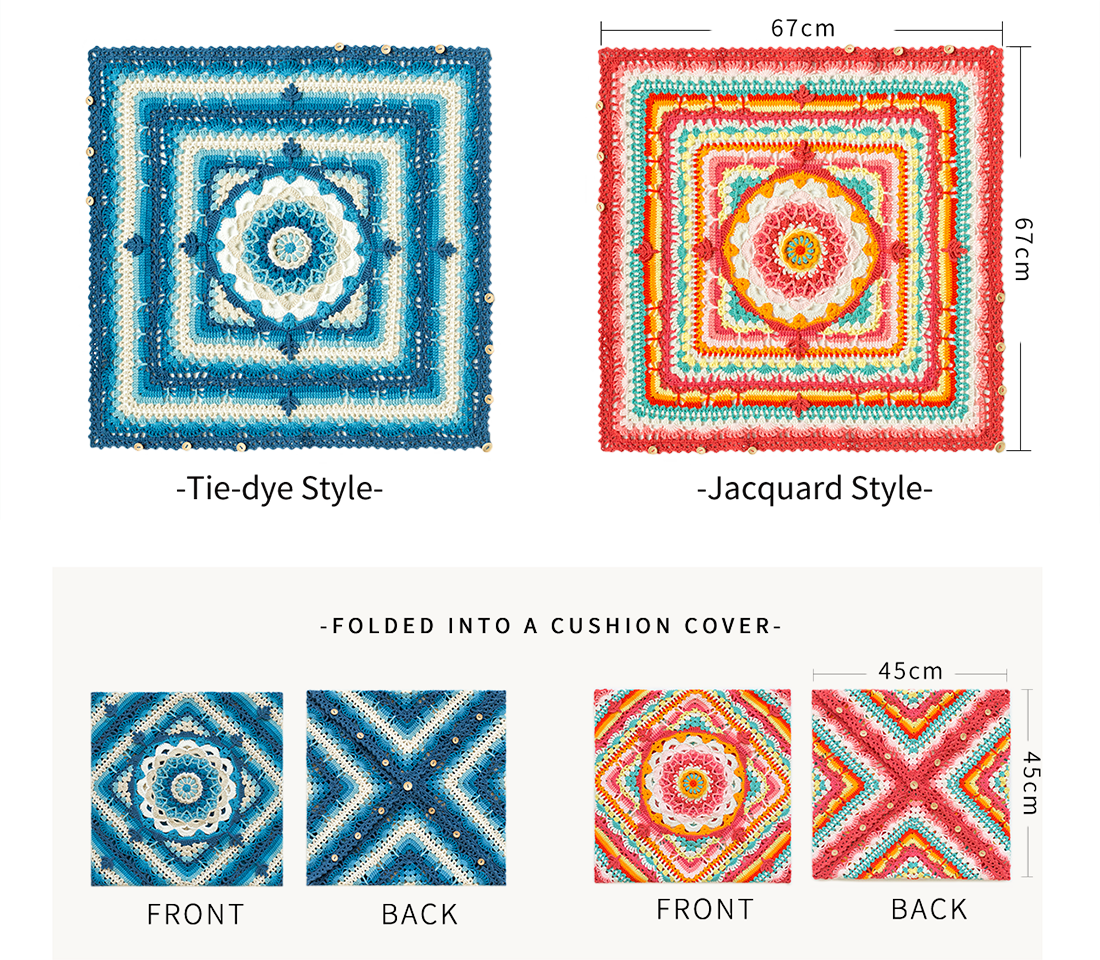
The handcrafted measurements may have an error of 1 to 2cm. Due to variations in individual tension, the size of the sample is for reference only.
Note: This pattern is making in Chinese crochet pattern terms, and the stitch name is written using American terminology. All measurements in charts are in cm.
Materials:4-Ply Combed Cotton & Acrylic Fibre Hand Knitting Yarn
Hook:3.0mm crochet hook
Chart Key












PART1 Main part
The main part can be divided into Area 1 and Area 2,which required to work from the center out.
STEP1 Area 1A1 00' 48''
Area 1 start with a double magic ring,crocheting in rounds counter clockwise.You'll need to change yarns during the process,please refer to the video demonstration for more details.
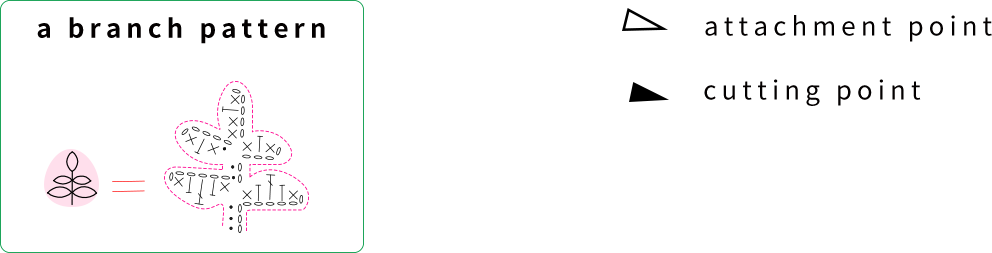
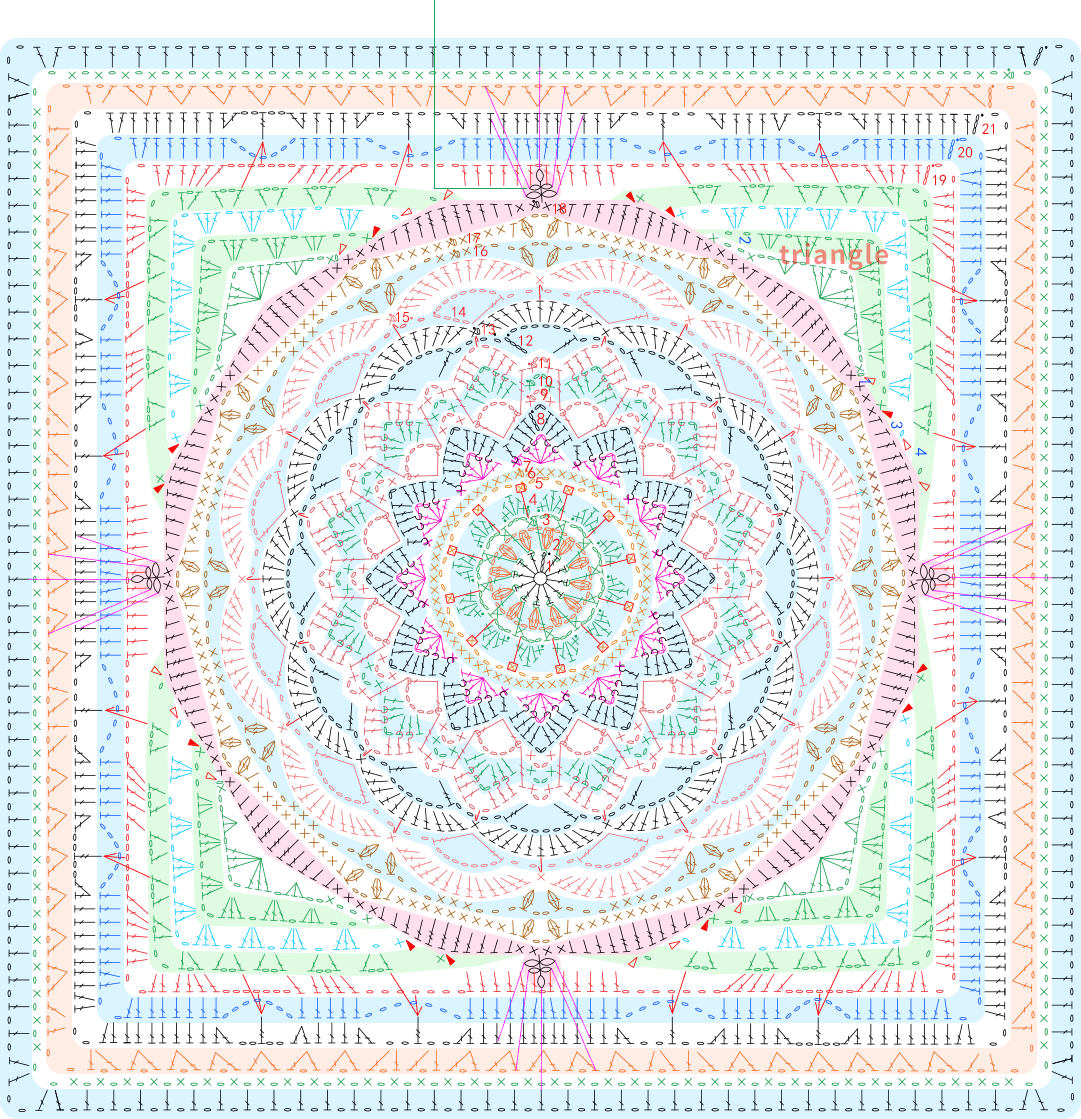
Note: The stitch placement in the red box is quite unique,refer to the video demonstration for details.
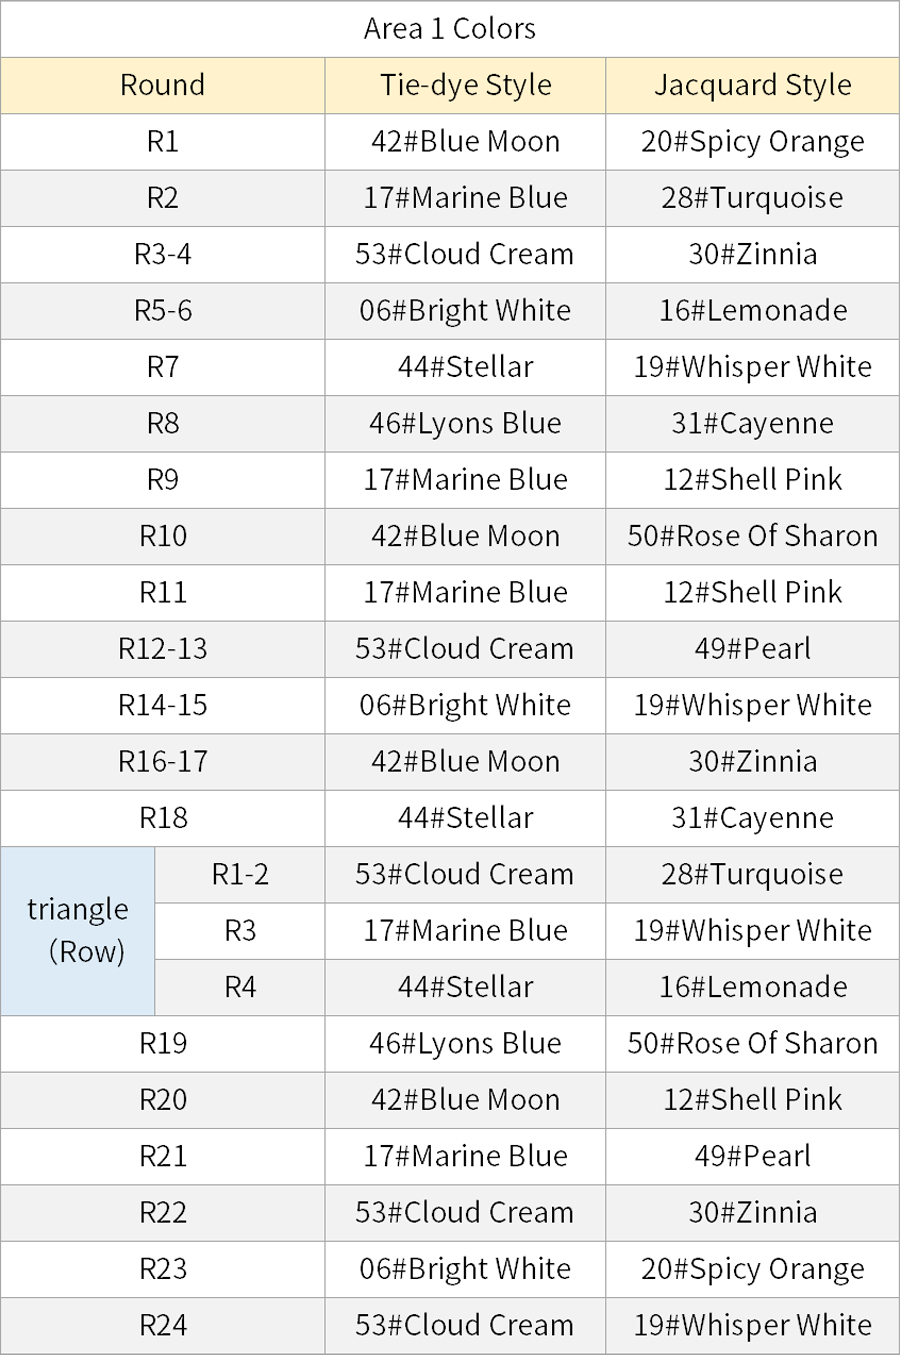
STEP2 Area 2A2 70' 49''
Area 2 is start from the last round of area 1.Please refer to the video demonstration for more details.
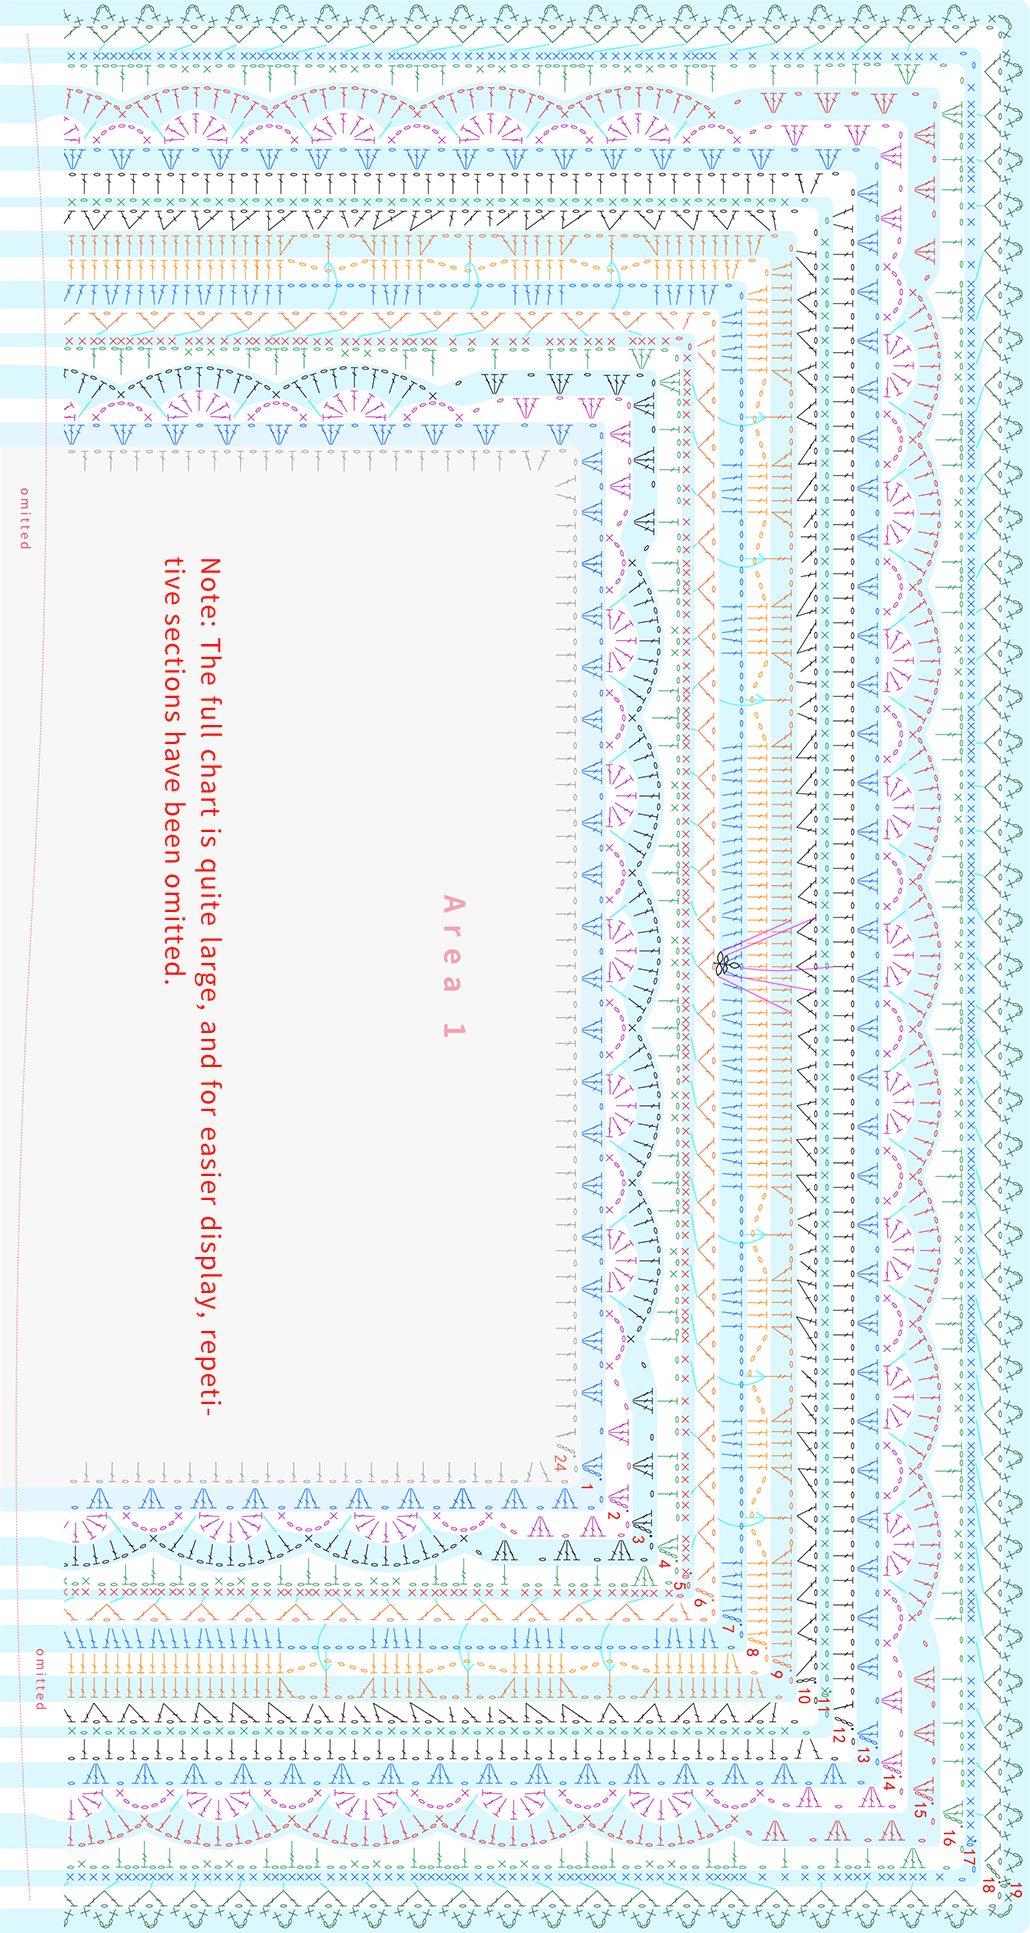
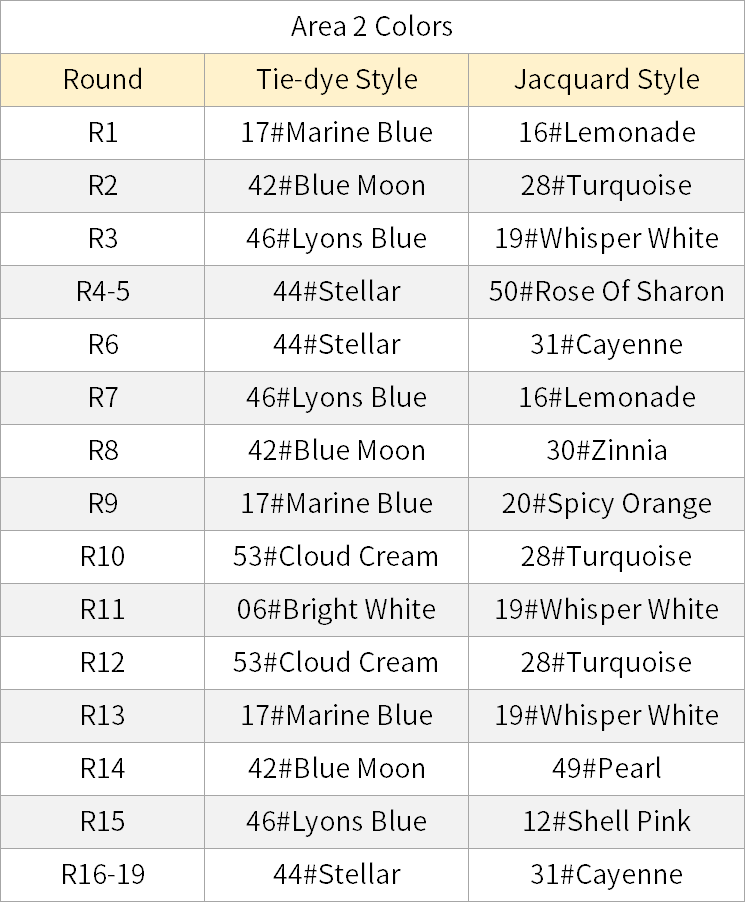
PART2 ButtonsB 72' 12''
Sew large buttons and small buttons onto the right side of the blanket according to the placement, then attach the cushion following the image as a guide. Please refer to the video demonstration for more details.
【Color:Tie-dye Style 44#Stellar】
【Color:Jacquard Style 31#Cayenne】
Combining a blanket with pillow core
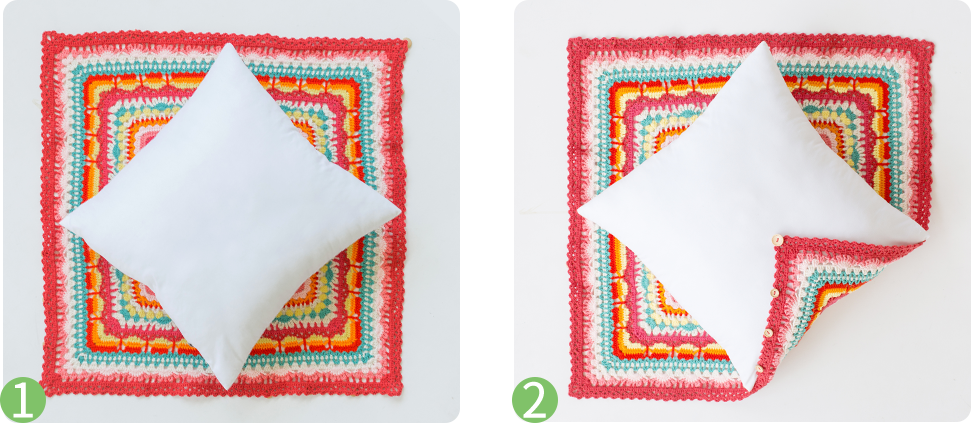
1.Place the cushion insert in the center of the blanket on the wrong side, with its edges aligned with the corners of the blanket, but not overlapping.
2.Fold the corner with the large button up.
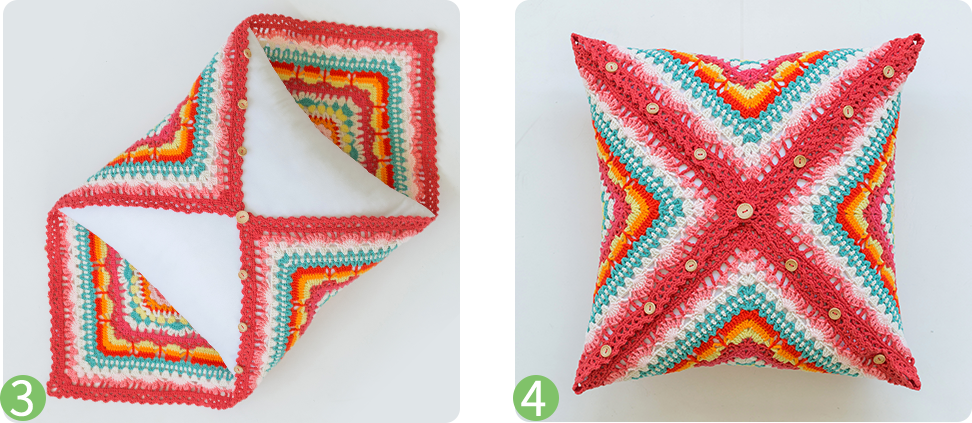
3.Fold one corner down relative to the other, with the corner of the large button facing downward. Sew the button onto the third round from the corresponding corner, counting backwards.
4.Fold each of the remaining corners up separately, and start by fastening the larger button first. Then, attach the smaller buttons one by one, buttonholes can be placed freely—just aim for an overall even appearance.

Made by the community