Accessories / Shawl
Camellia Caisson
Project preview
See the finished project
Pattern format
Instructions
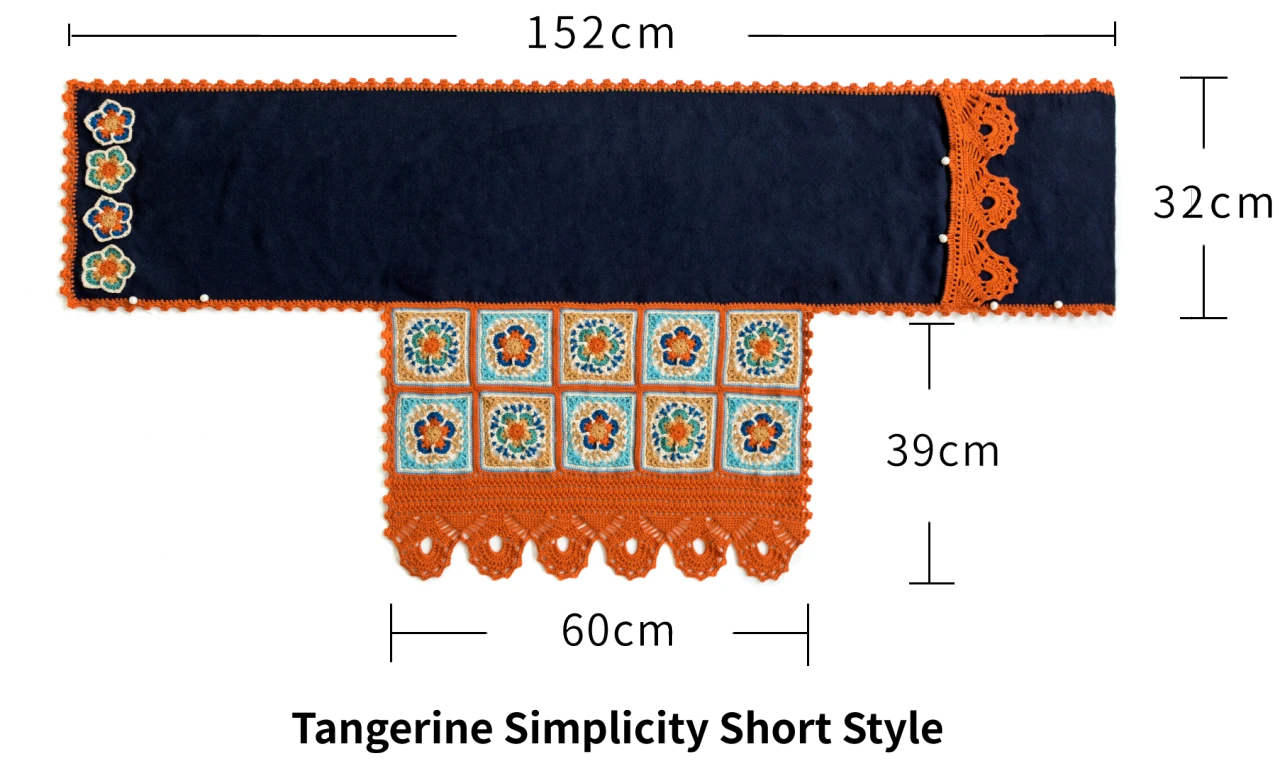
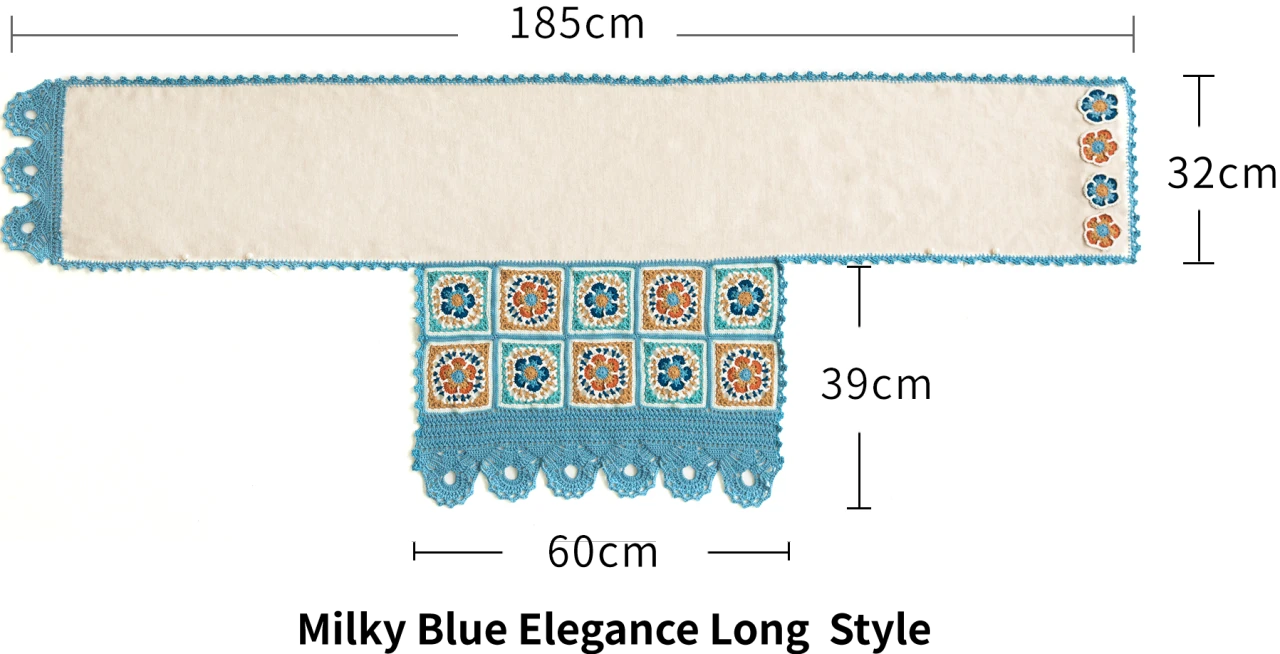
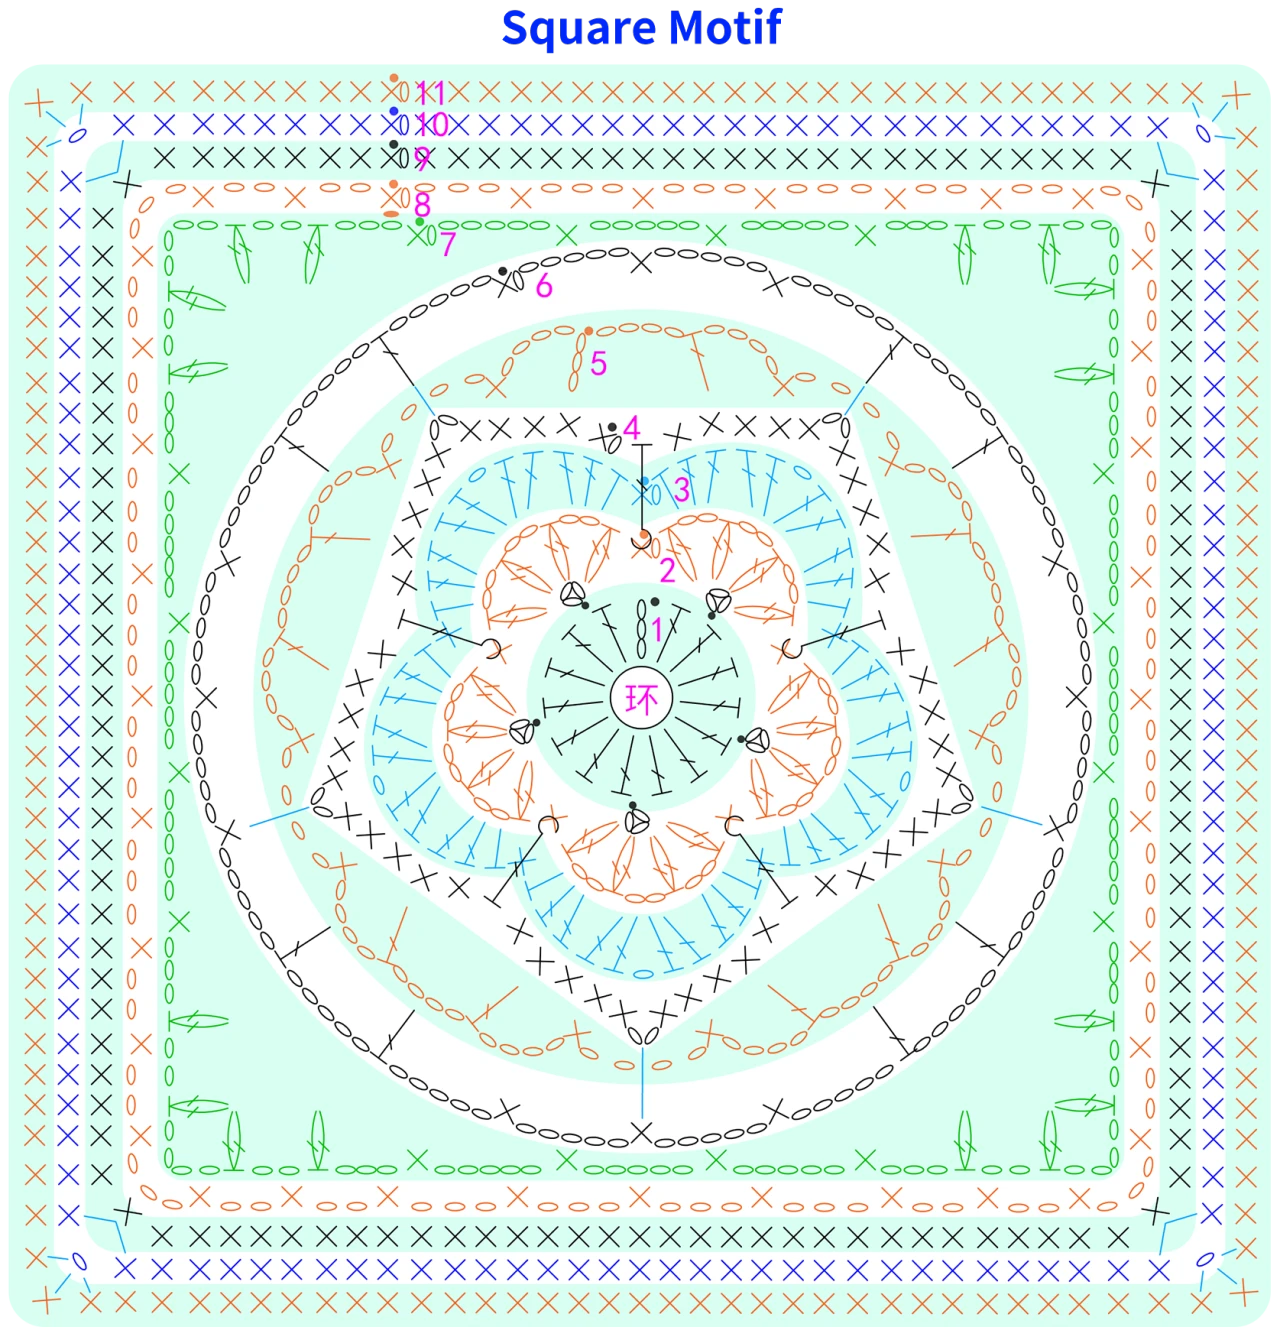
Note: The edge of a single square motif is approximately 12cm. Due to variations in individual tension, the size of the sample is for reference only.
Materials: Susan`s Family 4-Ply Combed Merino
Hook: 3.00 mm crochet hook

Chart Key





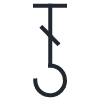

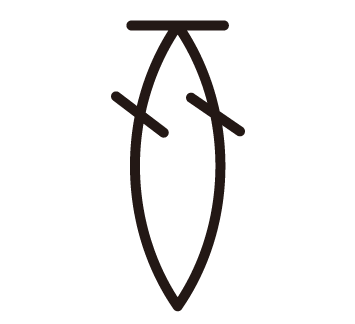



Note: This pattern is making in Chinese crochet pattern terms, and the stitch name is written using American terminology. All measurements in charts are in cm.
Part 1 Motifs
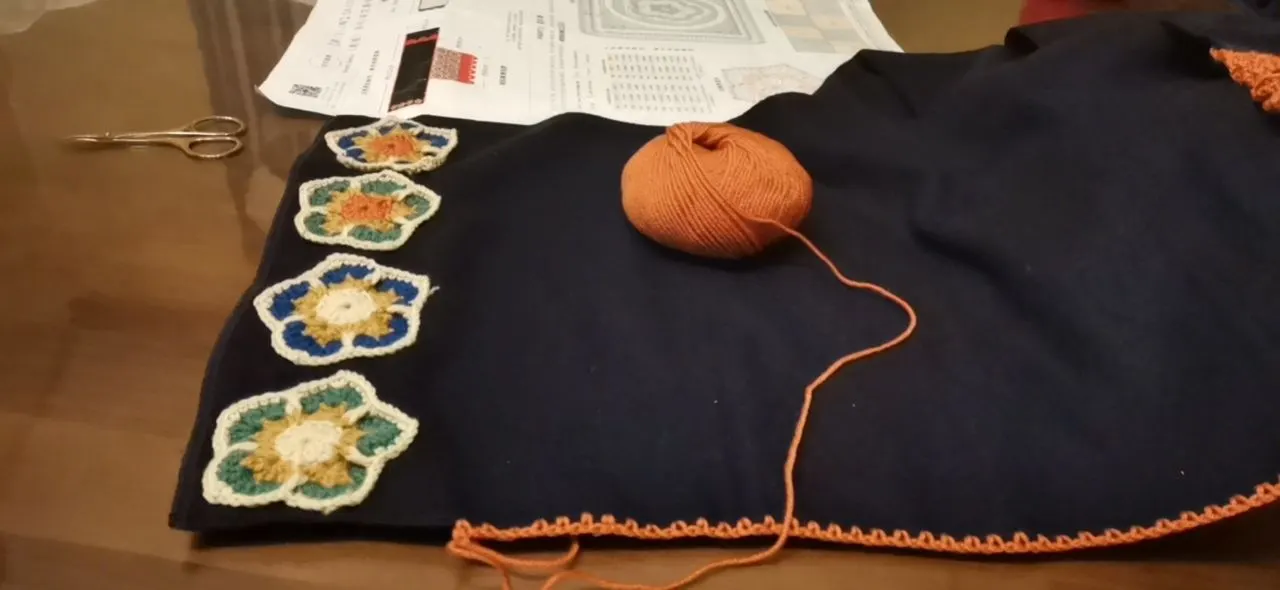
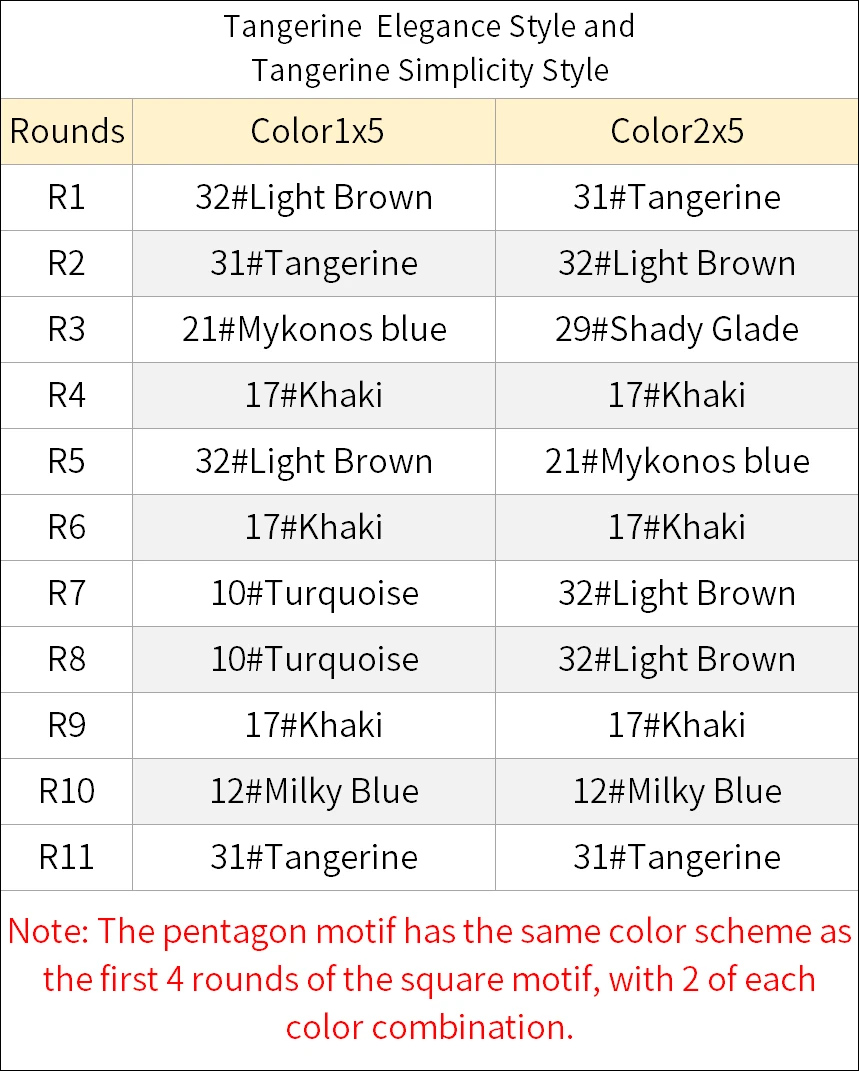
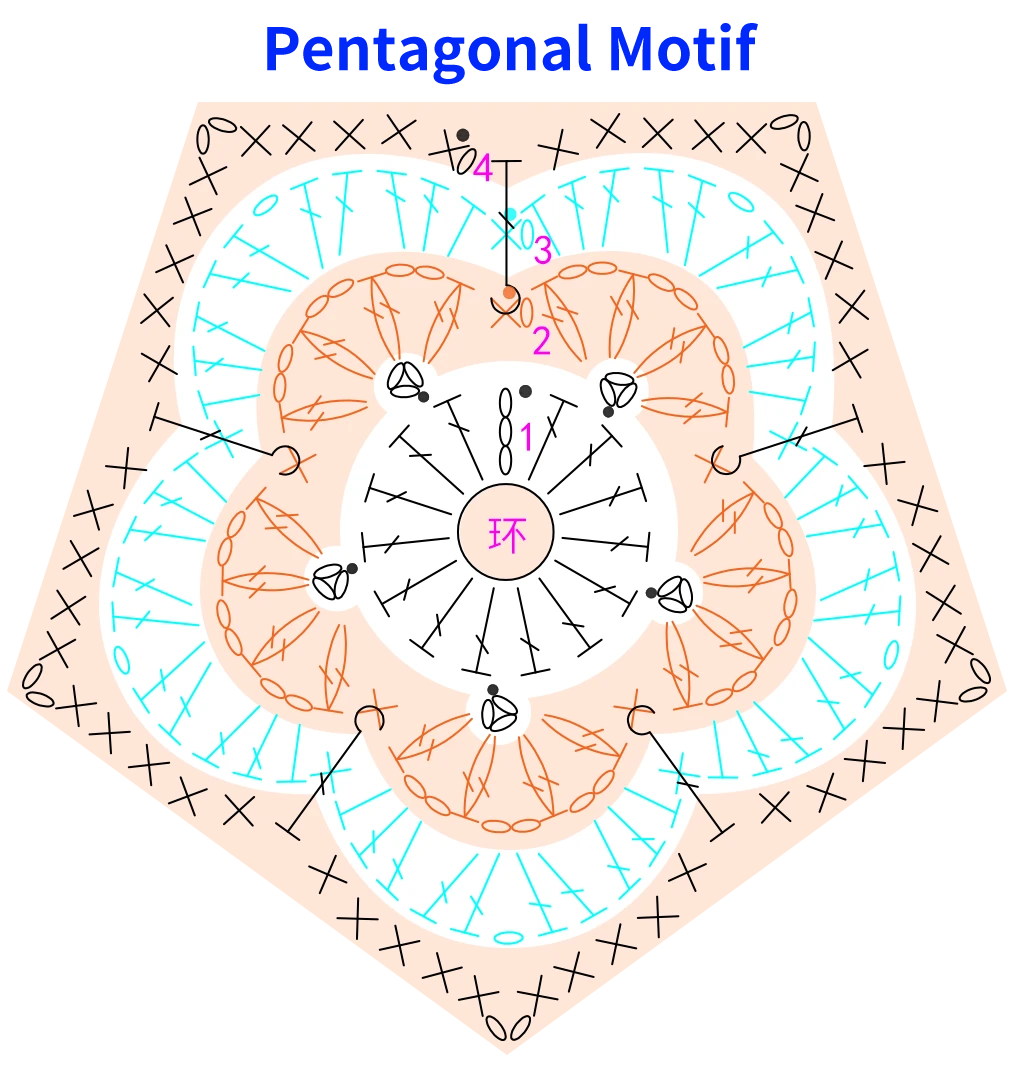
There are two types of motifs: square motifs and pentagonal motifs. Each motif has two color schemes and is worked in the same way, starting with a magic ring and crocheting in rounds counterclockwise. The first four rounds of the pentagonal motif are identical to those of the square motif.
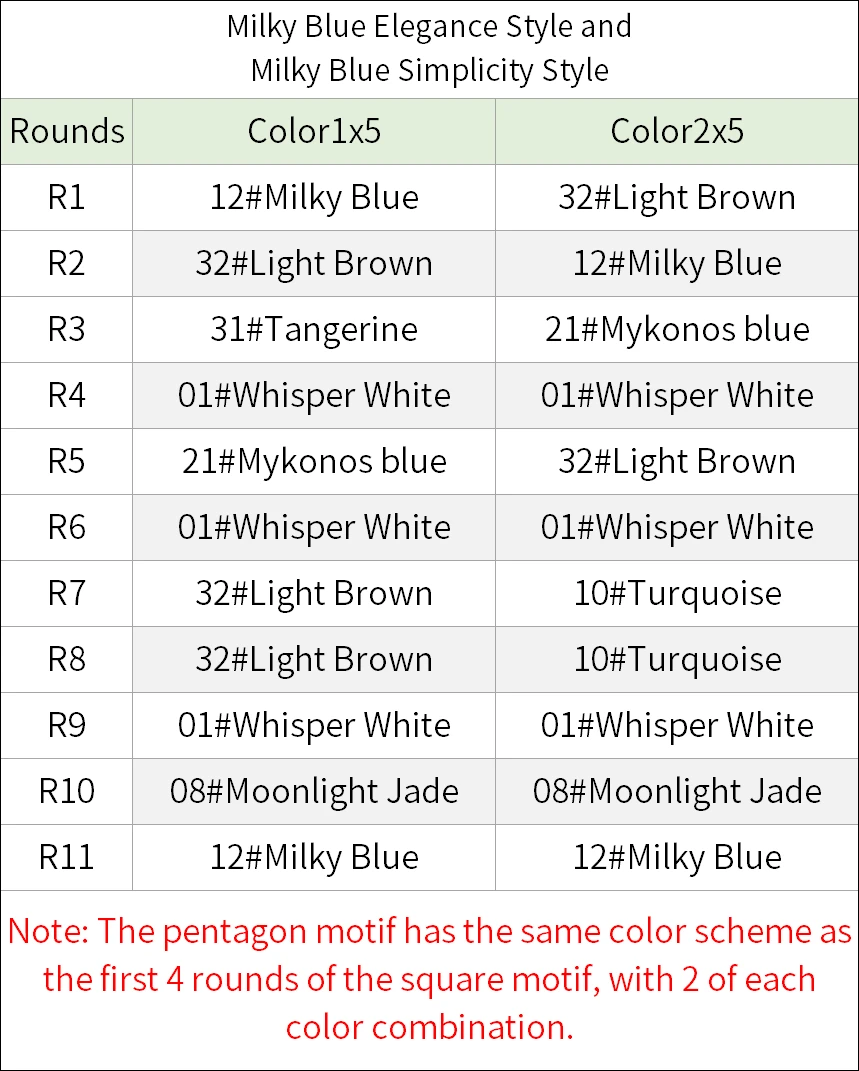
Part 2 Join
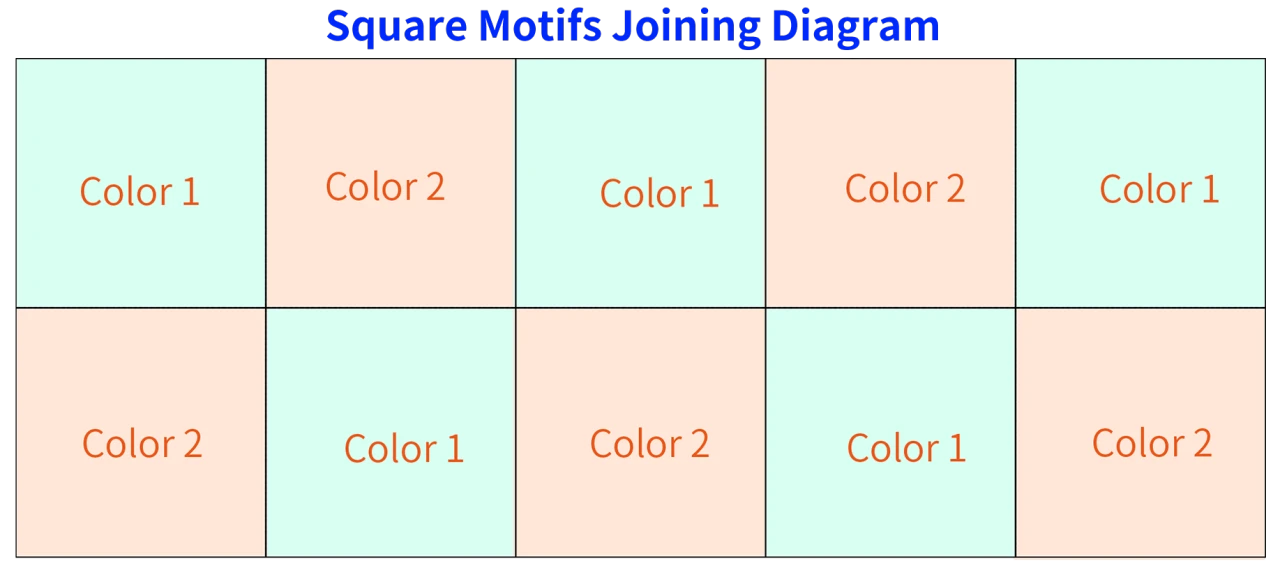
First, join the square motifs together according to the schematic. Then sew the pentagonal motif onto one end of the shawl main piece.
Part 3 Pattern
Includes the side pattern on the shawl side edges and the motif pattern on the square-shaped motifs.
Step 1 Side Pattern
Work up along one short side of the shawl main part, back and forth.
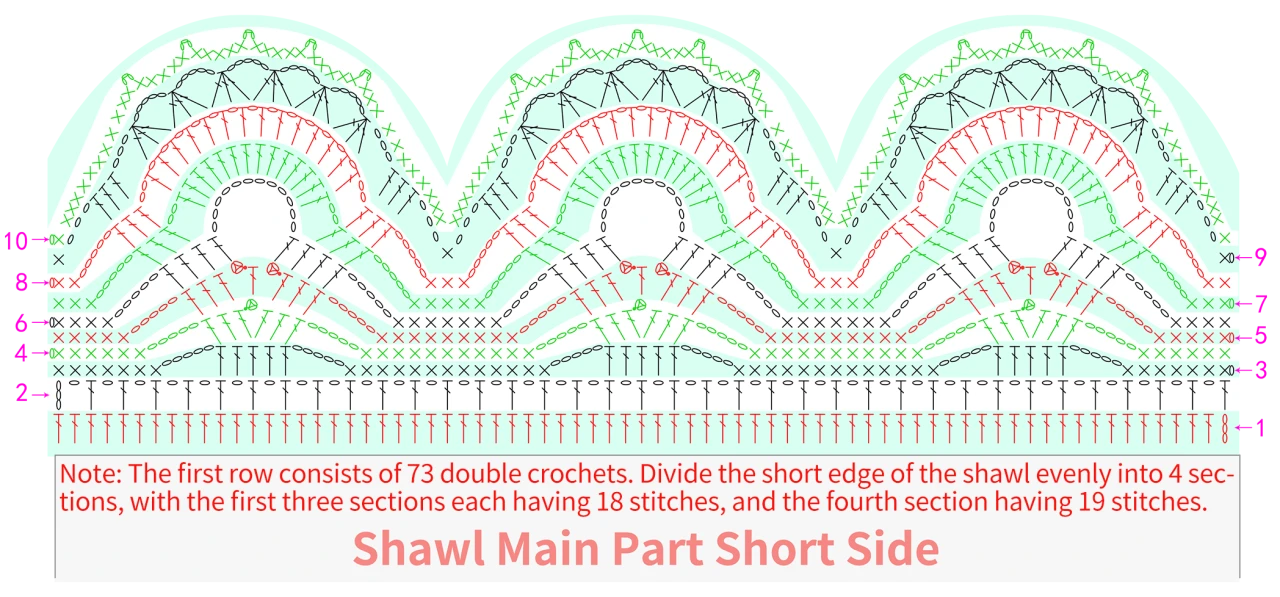
Step 2 Motif Pattern
Work back and forth up along the long edge of the joined square-shaped motif.
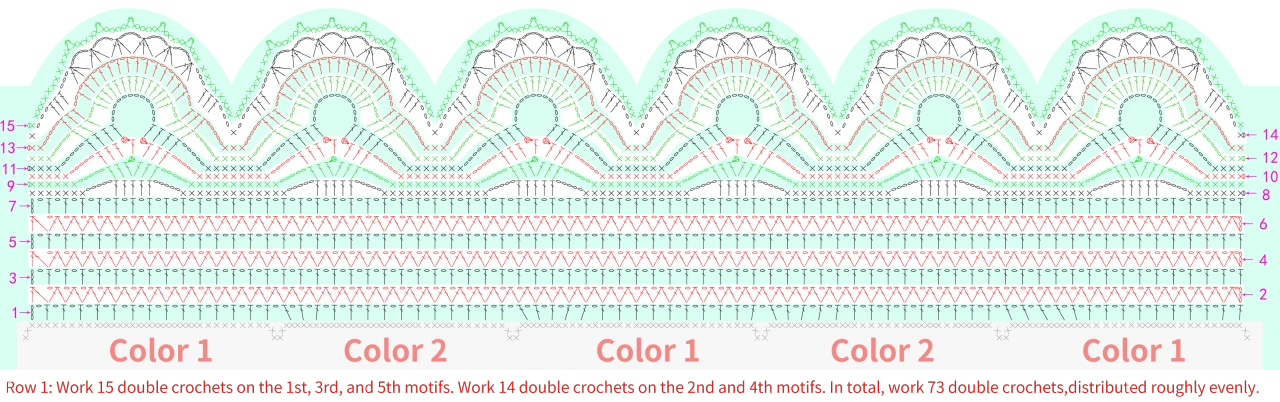
Part 4 Edging
Includes crocheting the edging for the main part and the overall edging, then sew buttons in the corresponding positions after completion.
Step 1 Edging On The Main Piece
Work a round of single crochets and chains along the remaining 3 edges of the shawl main body. Note that there are two cases here: the first is to crochet directly, and the second is for a slightly shorter effect, you can fold the end with the pattern on the shawl side before crocheting.
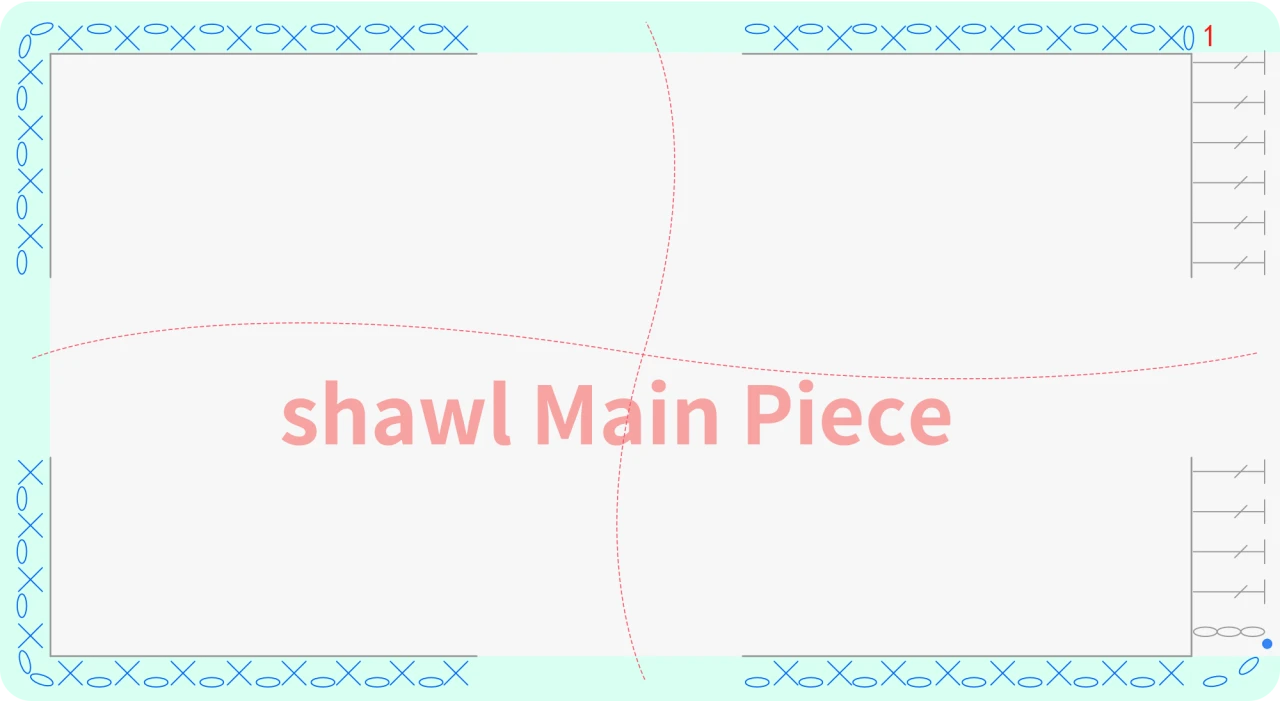
Step 2 The Entire Edging
First, you need to connect the well-made square motif to the centered position of the main piece. One side of the motif can be on the left or right, depending on your preference. Then, crochet the edging around it as a whole. There are 2 scenarios for this, with identical stitch techniques but different placement of stitches.
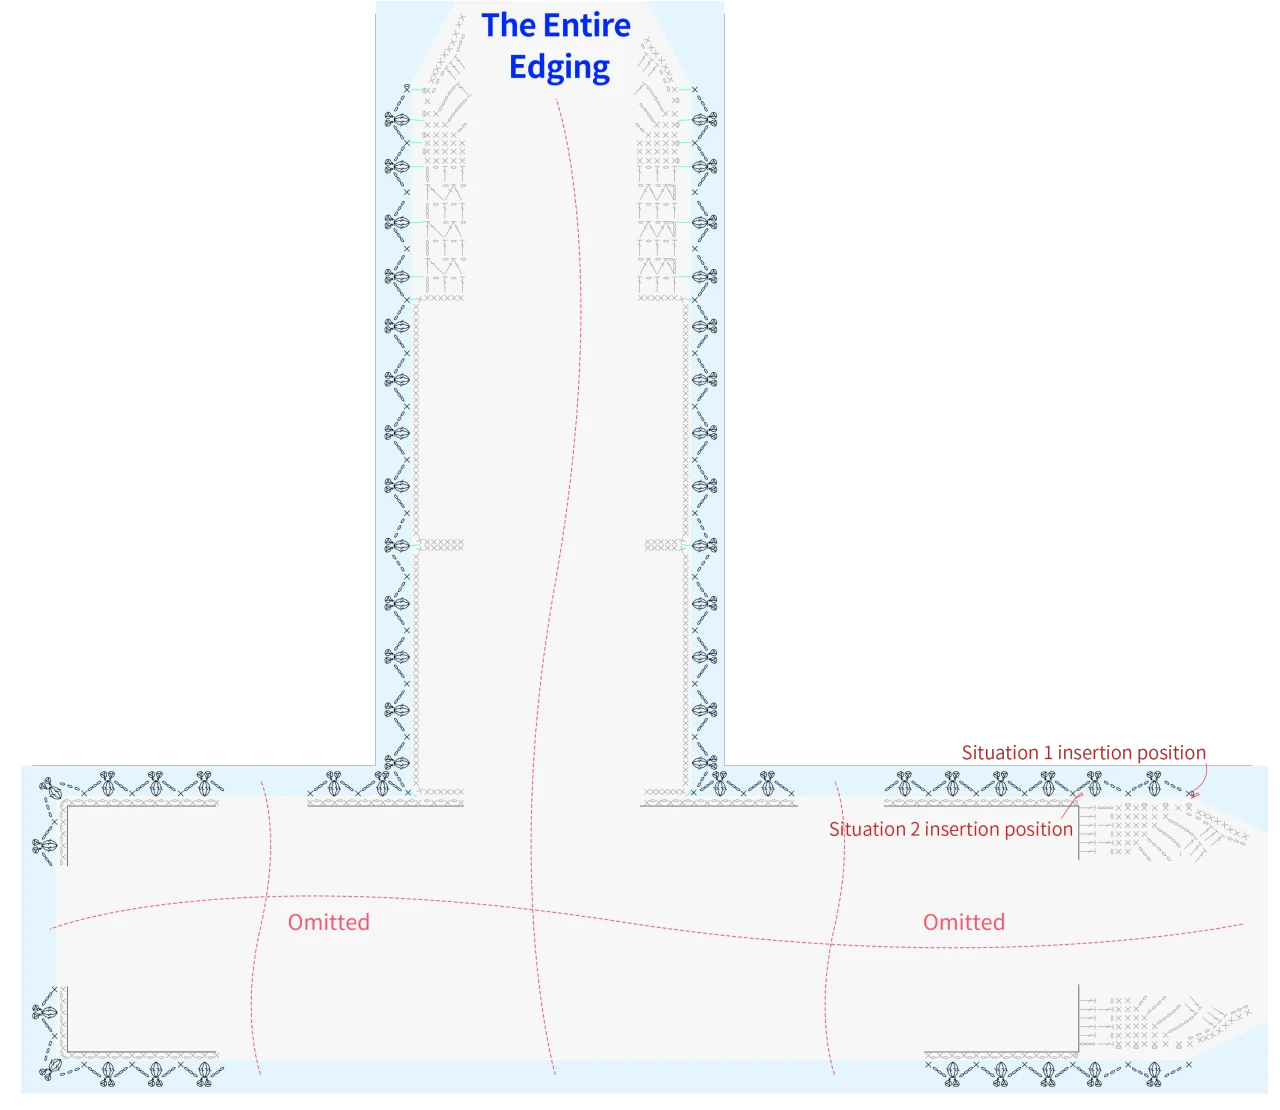
Step 3 Buttons
First, sew 2 pearl buttons on each side of the square motif. The first button should be about 26 cm away from the edge of the square motif, and the second button should be about 10 cm away from the first one. If you are working with a folded piece, sew another 2 buttons at the folding point. On the folded edge, about 10 cm away from both side edges, sew one pearl button. After completing this, sew two buttonholes that correspond to these 2 buttons.
Made by the community