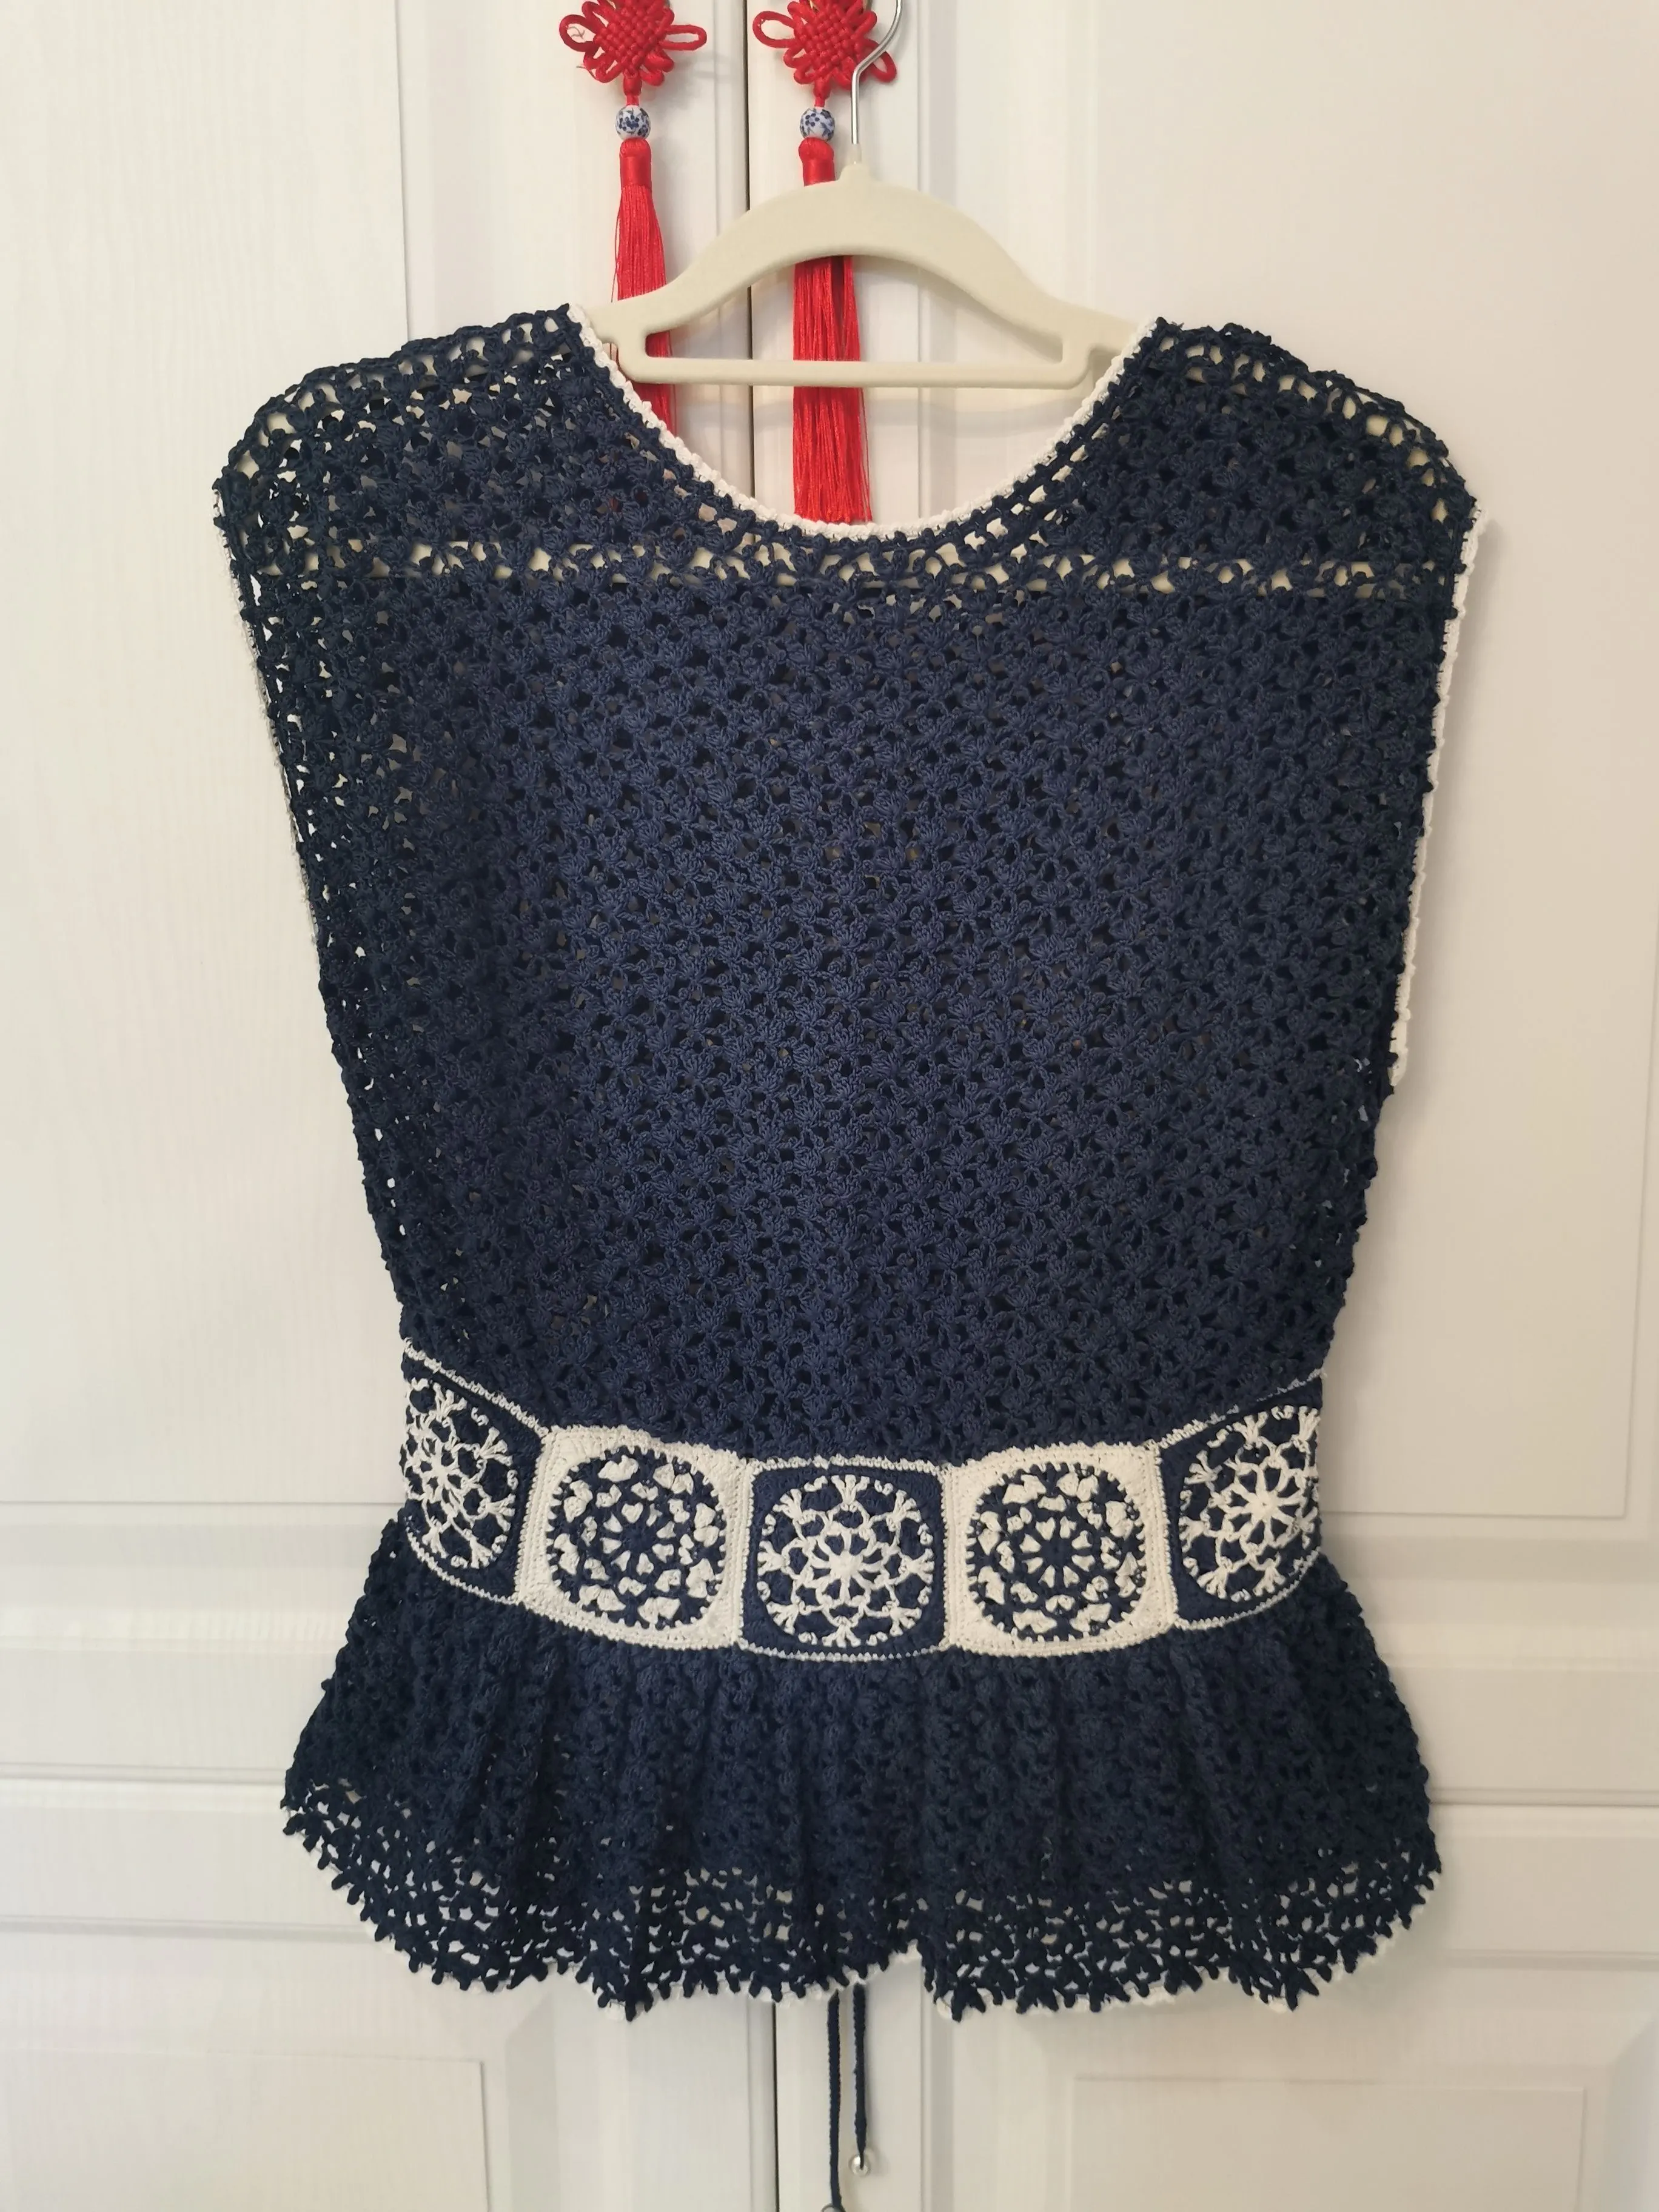
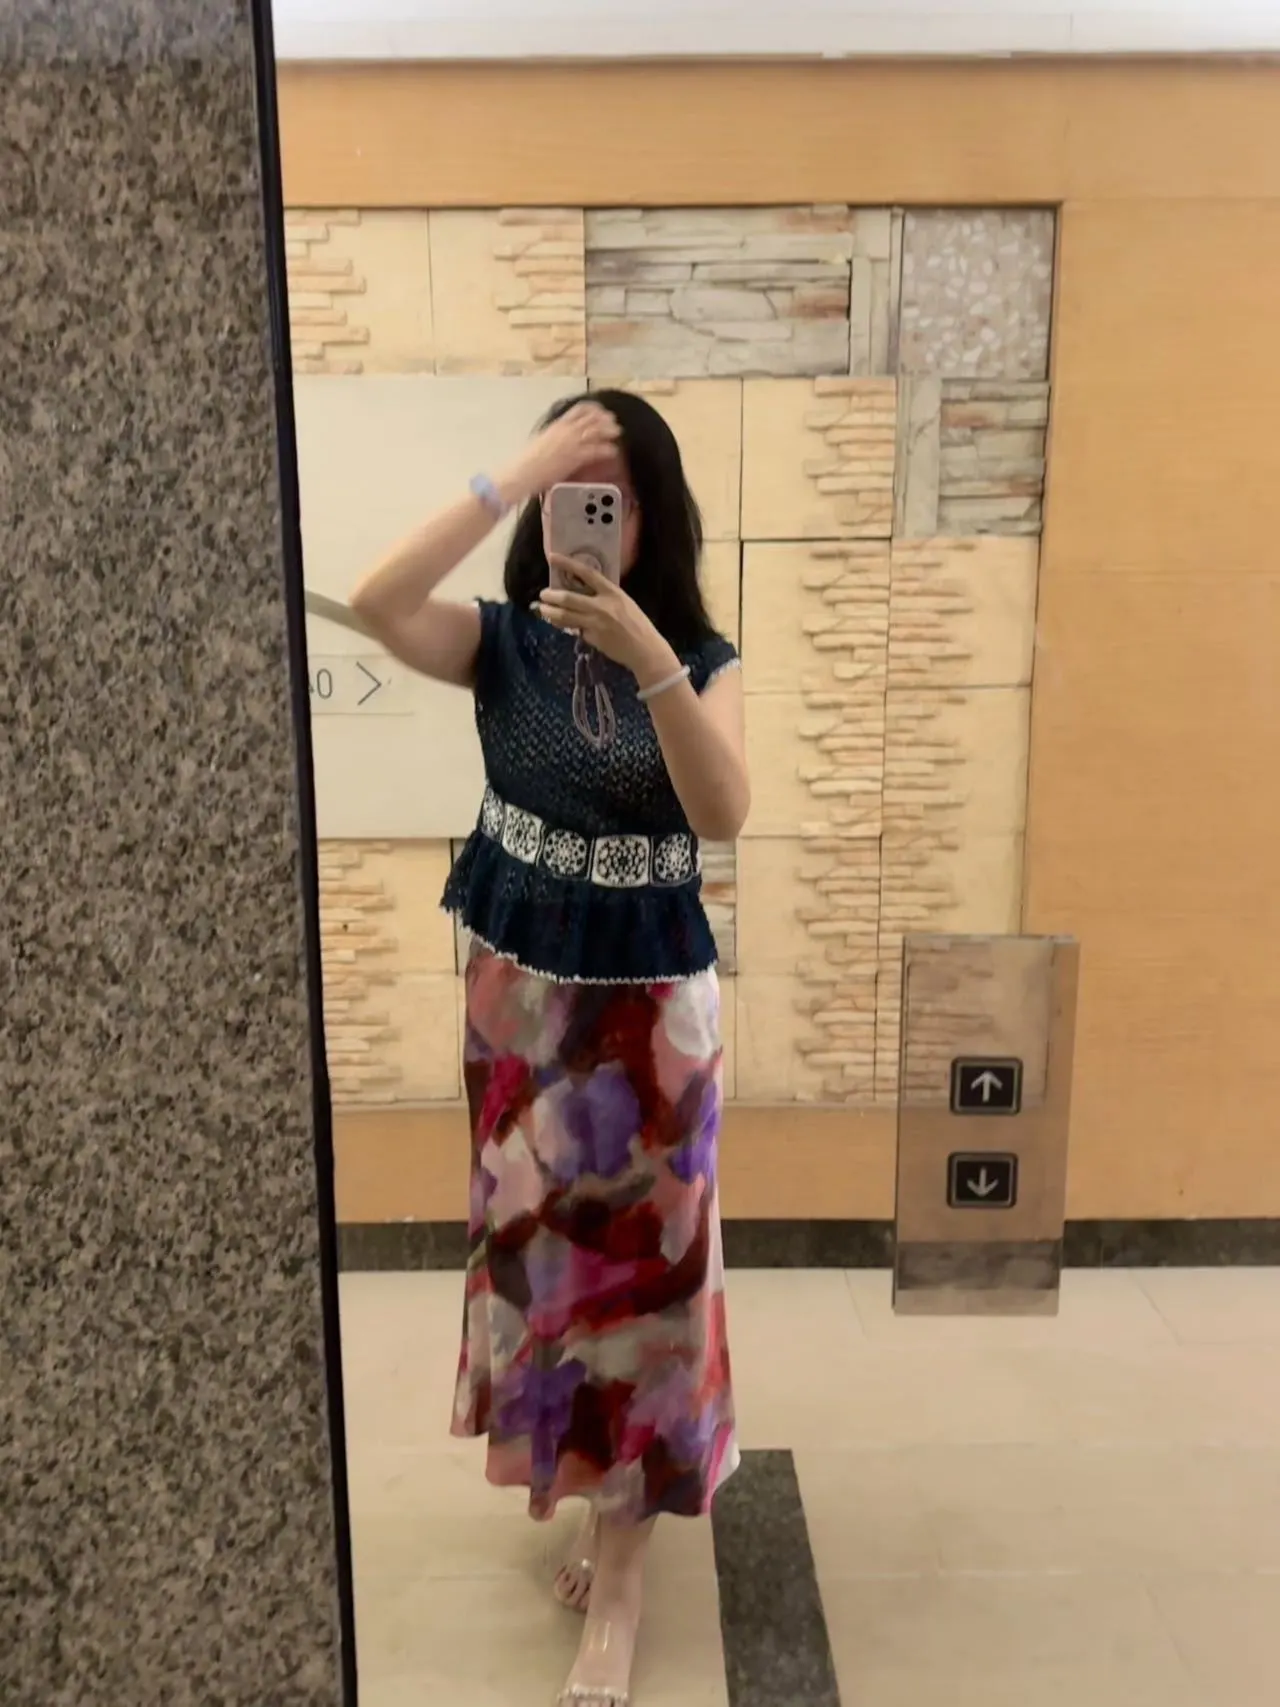
Clothes
Celadon Lace Top
Project preview
See the finished project
Pattern format
Instructions
Watch and follow
Video tutorial
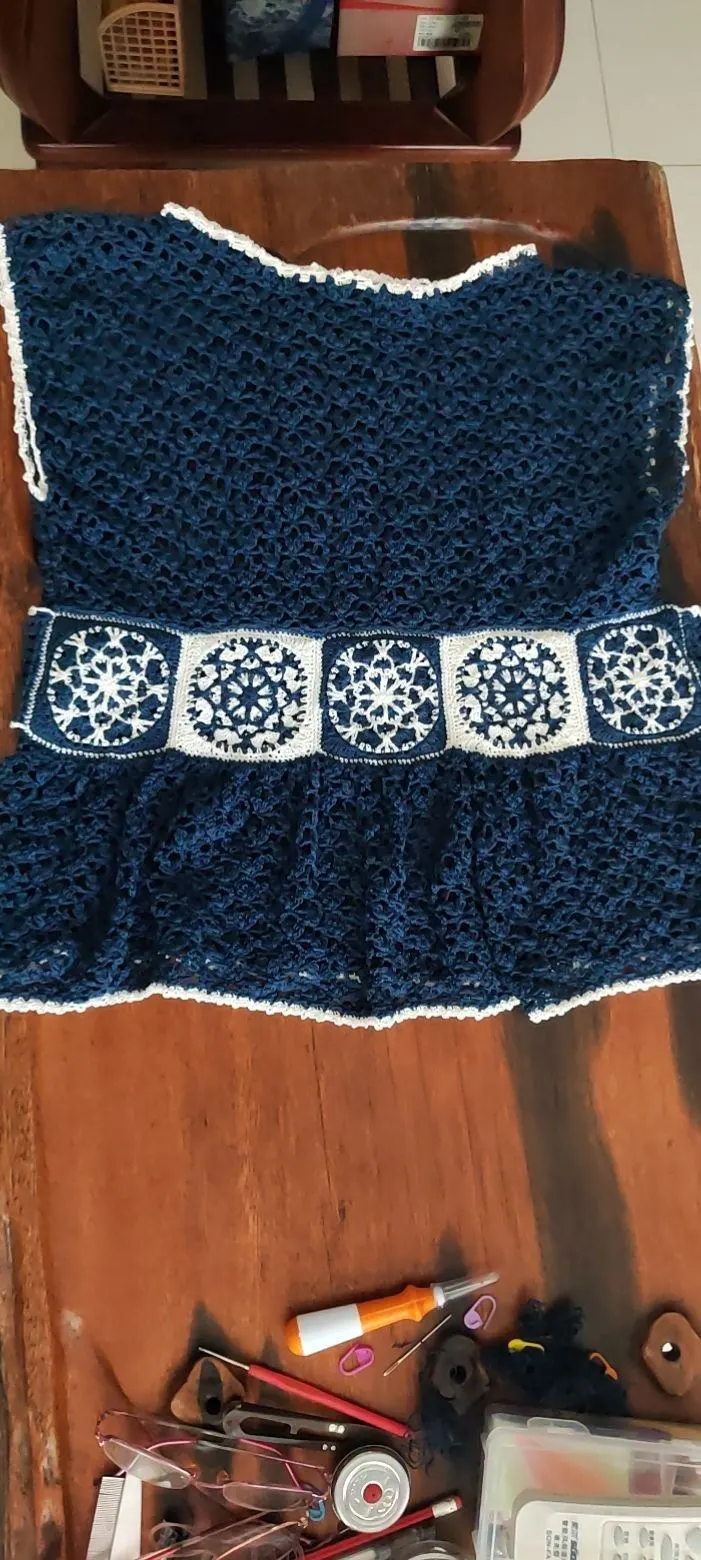
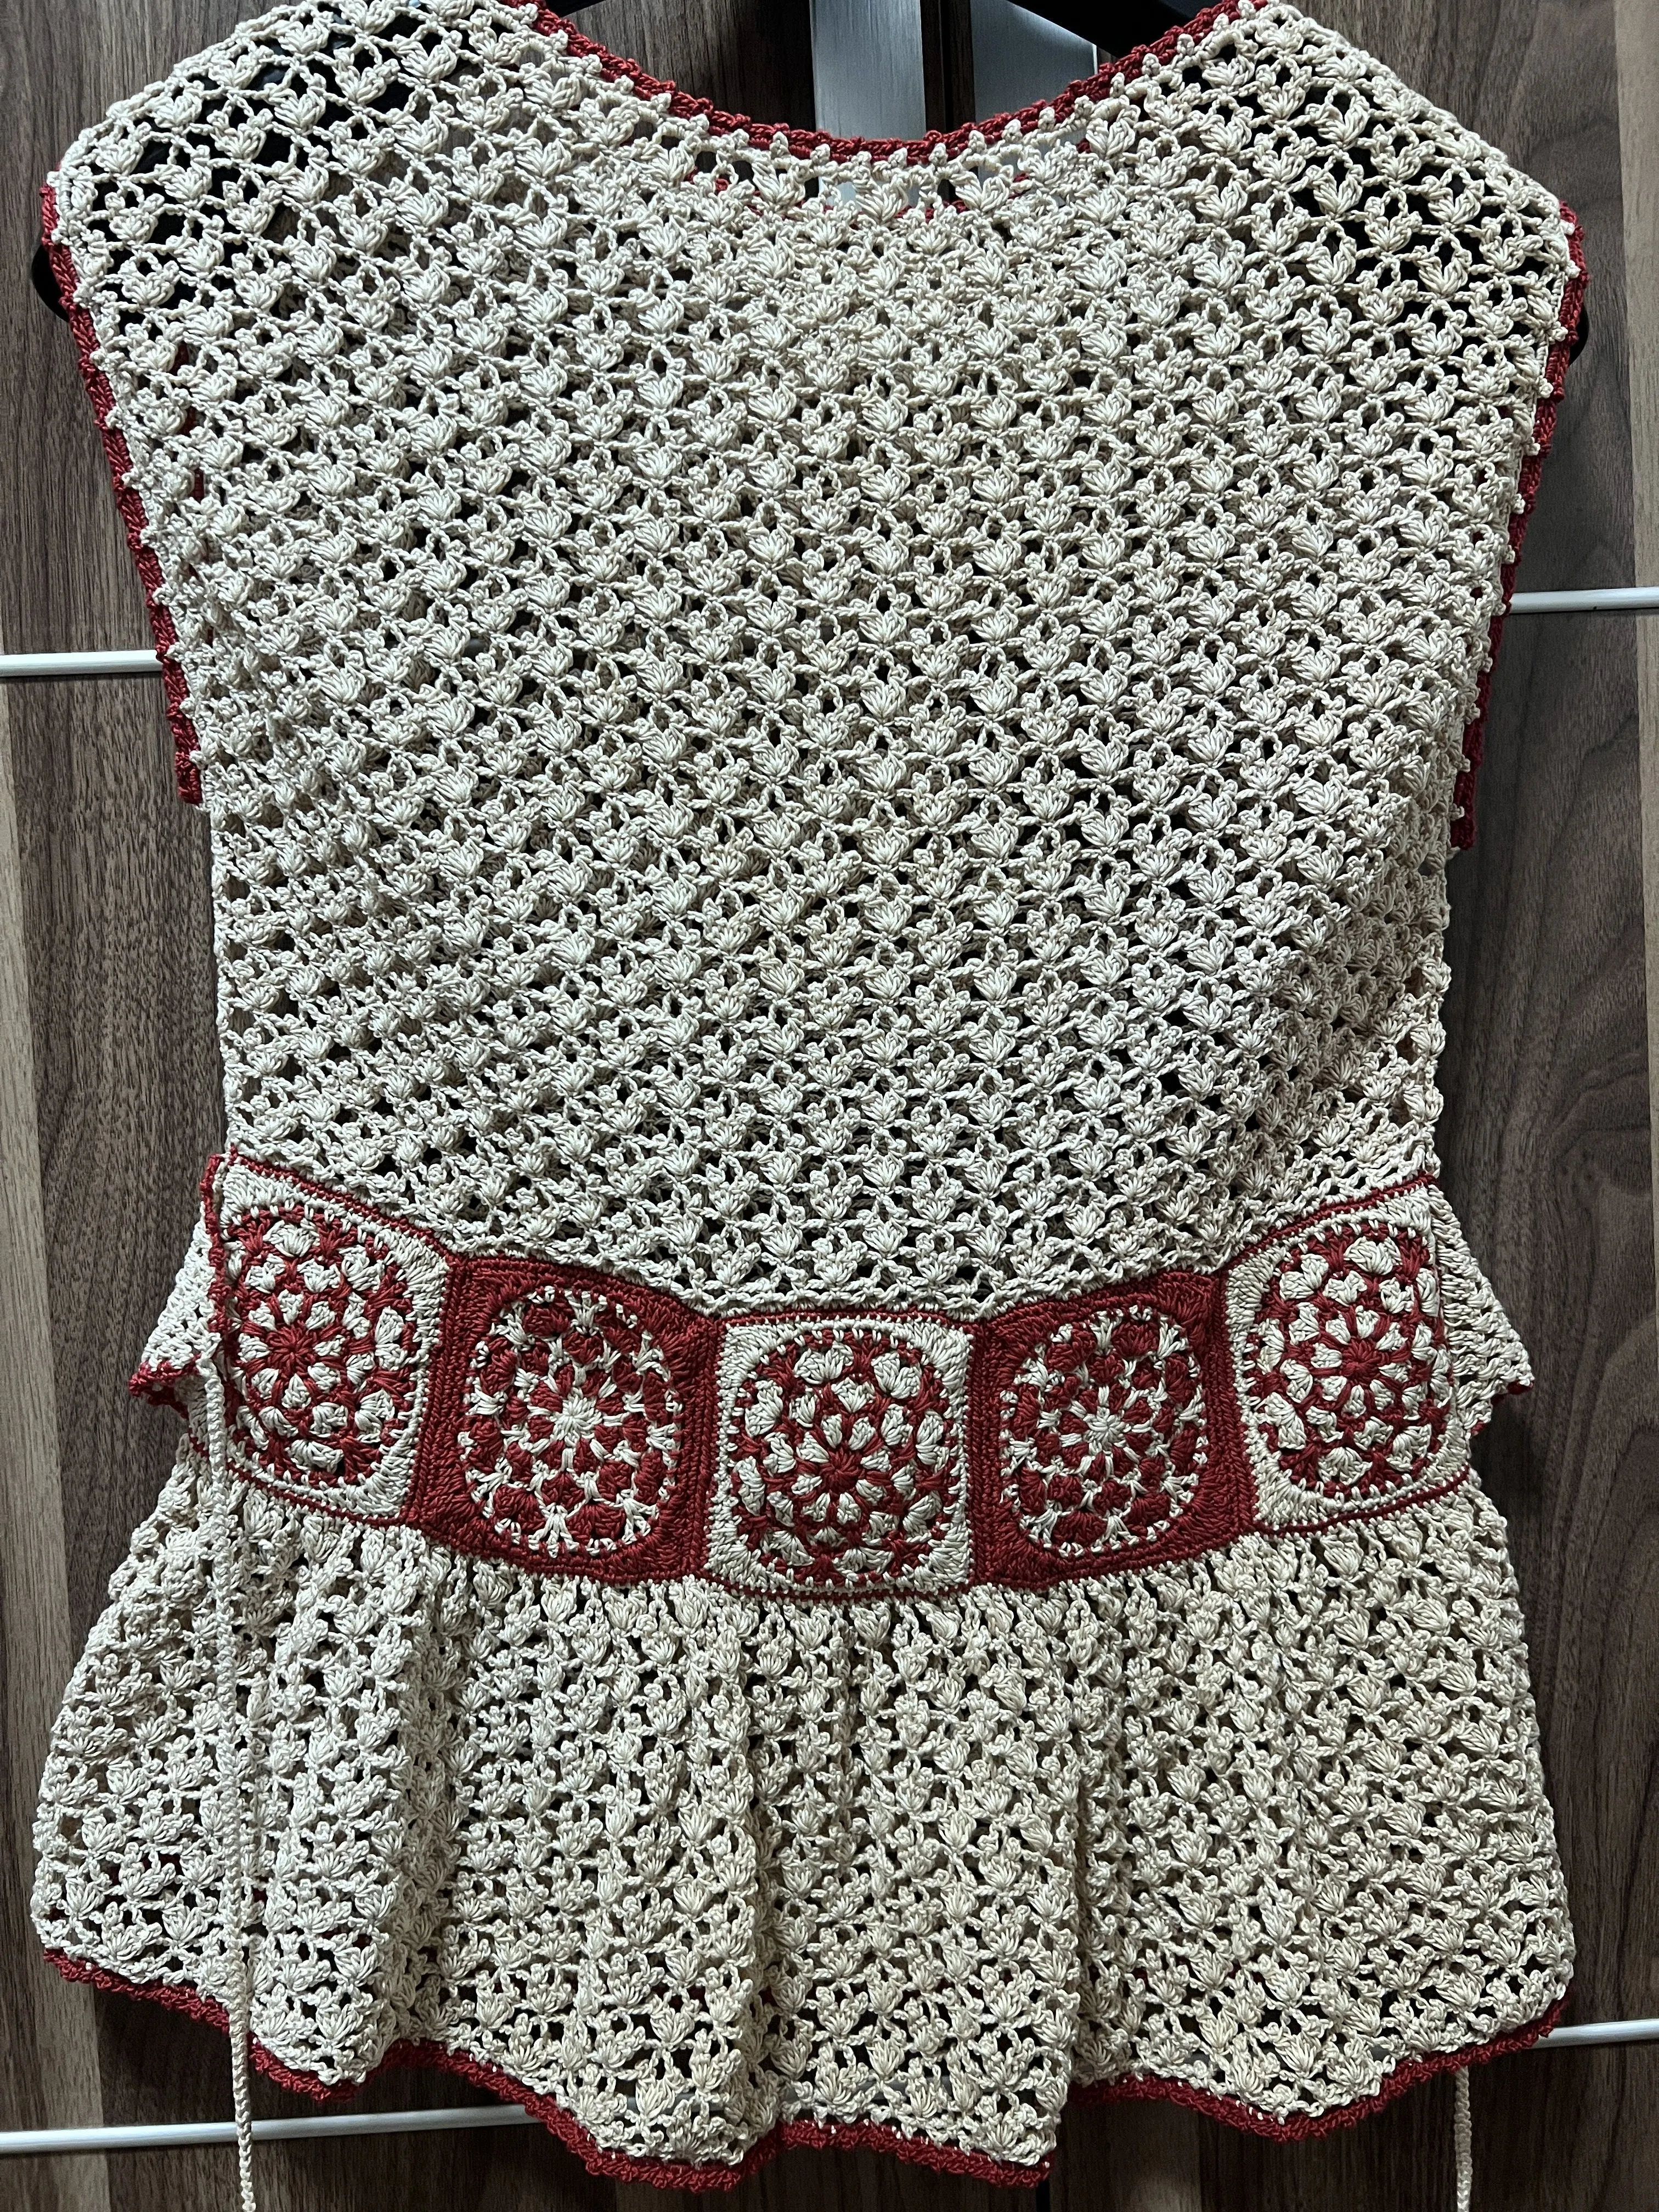
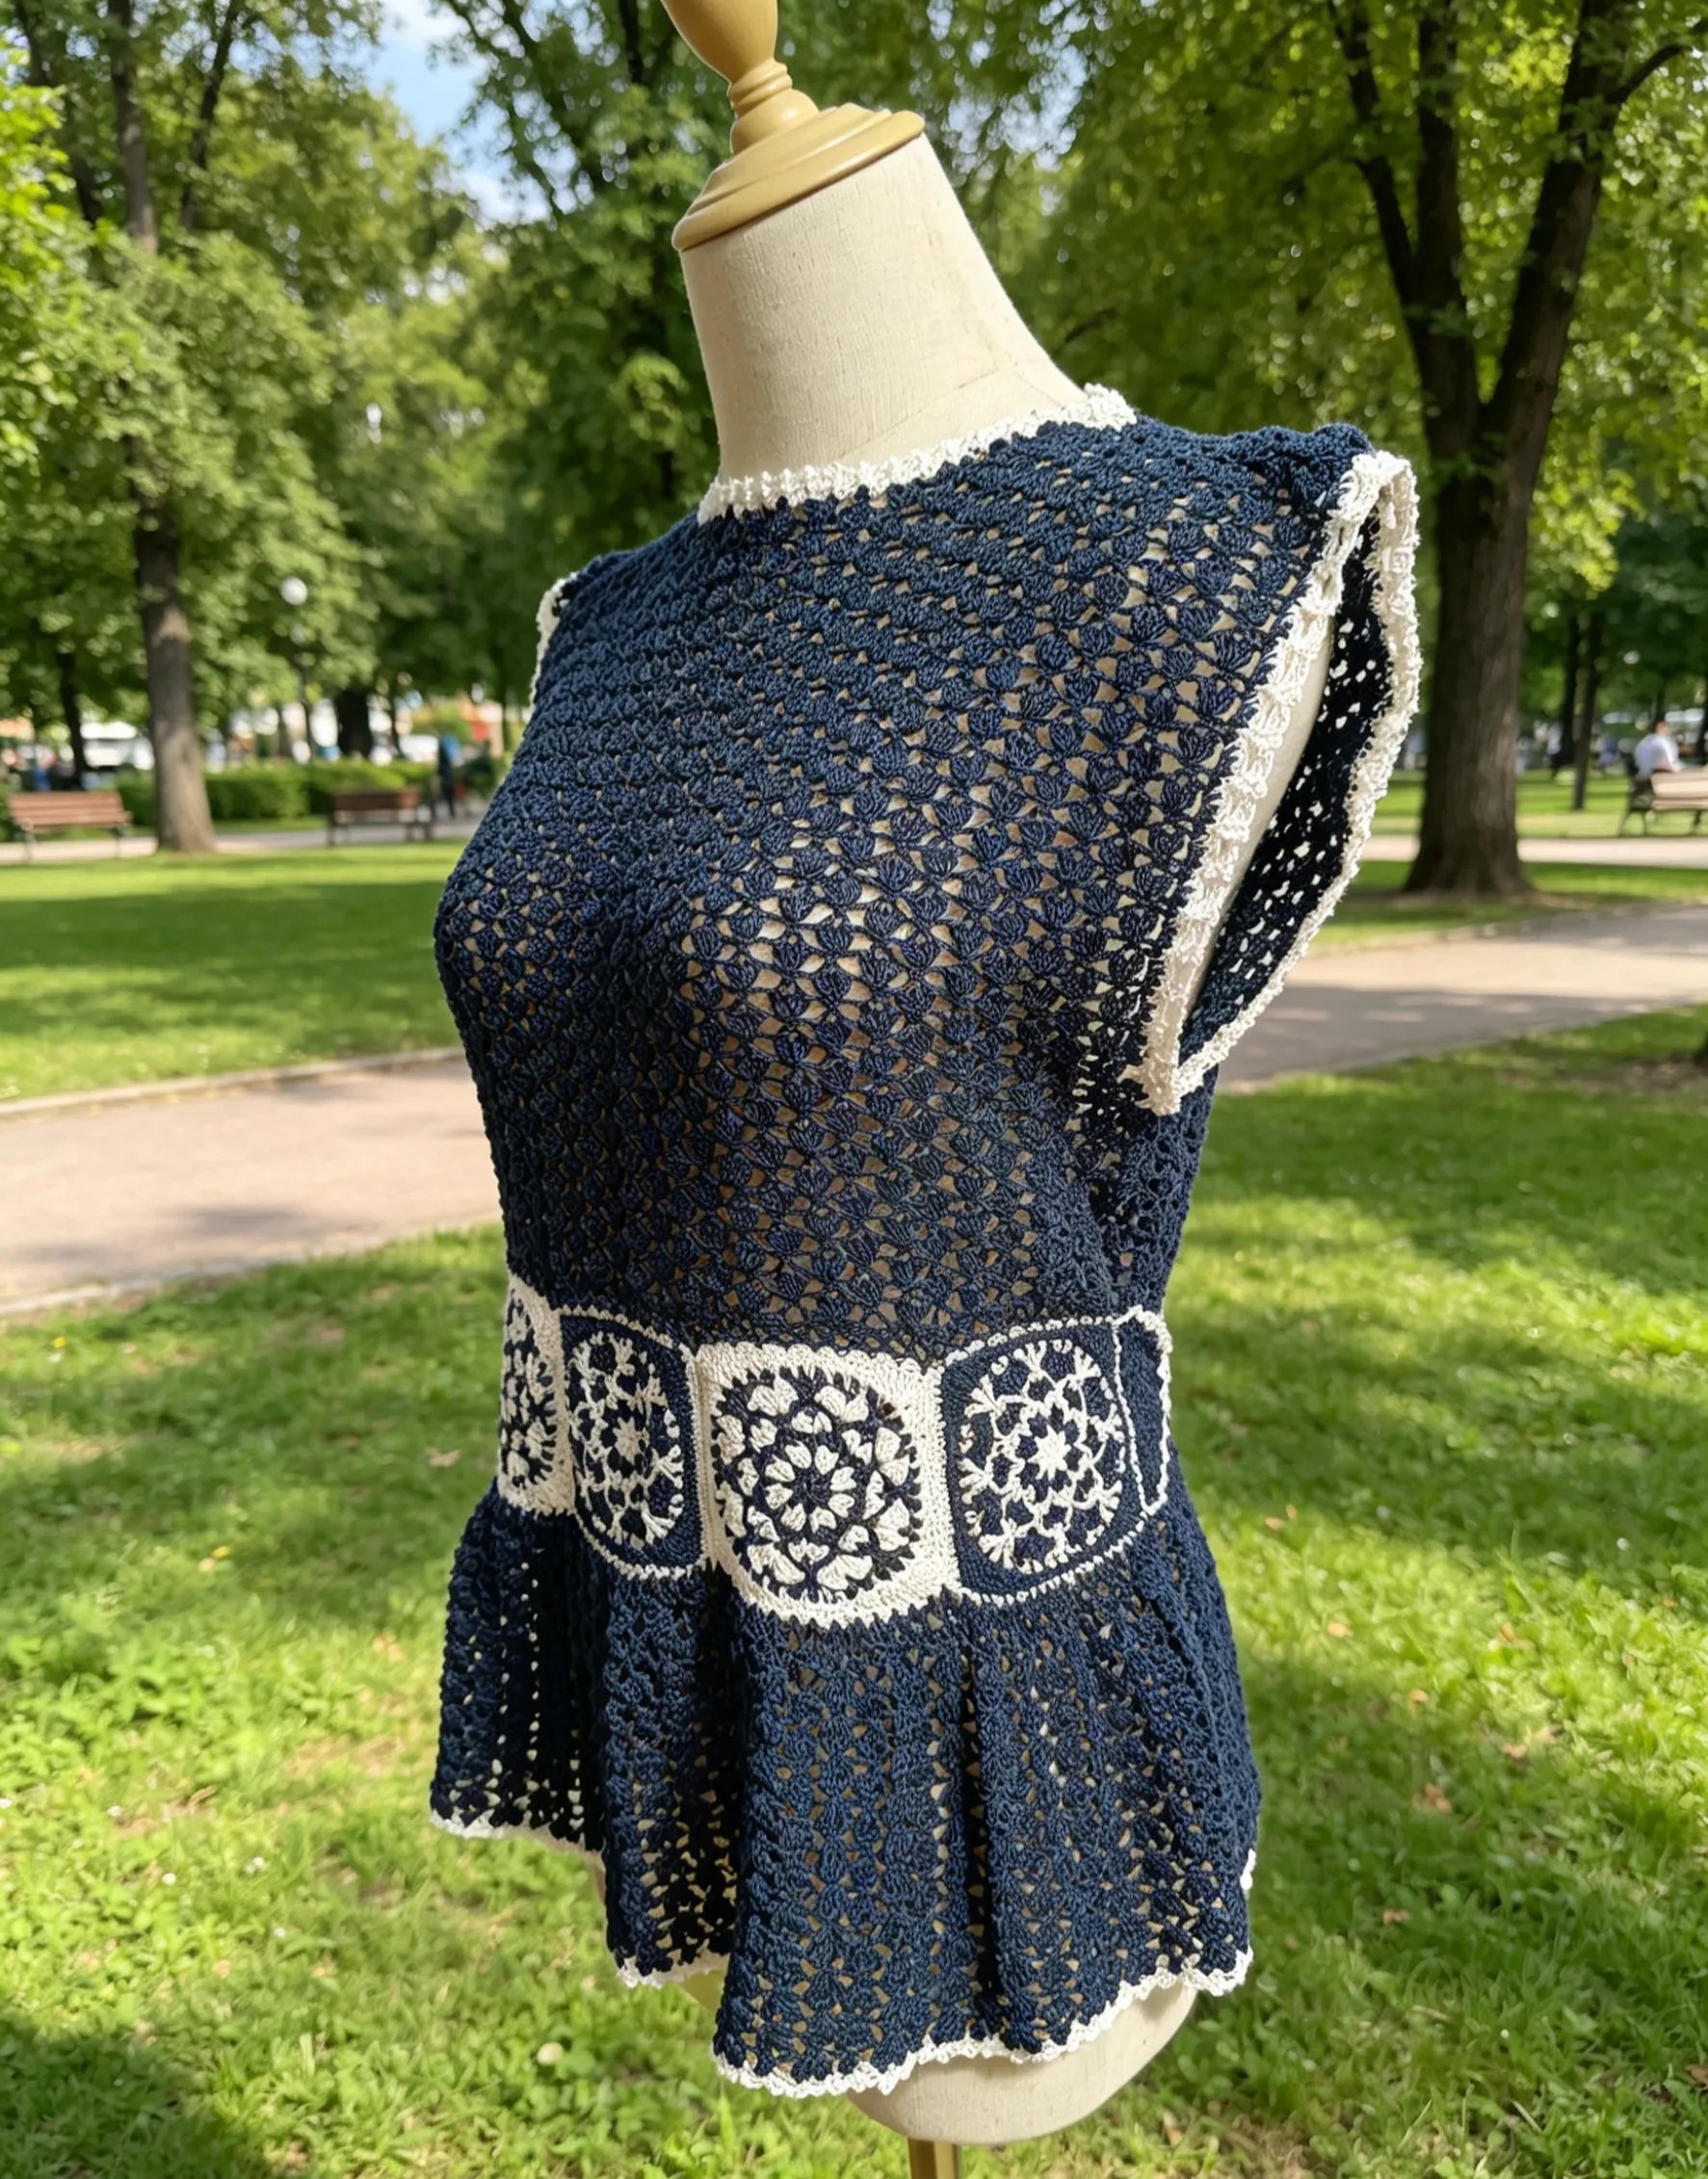
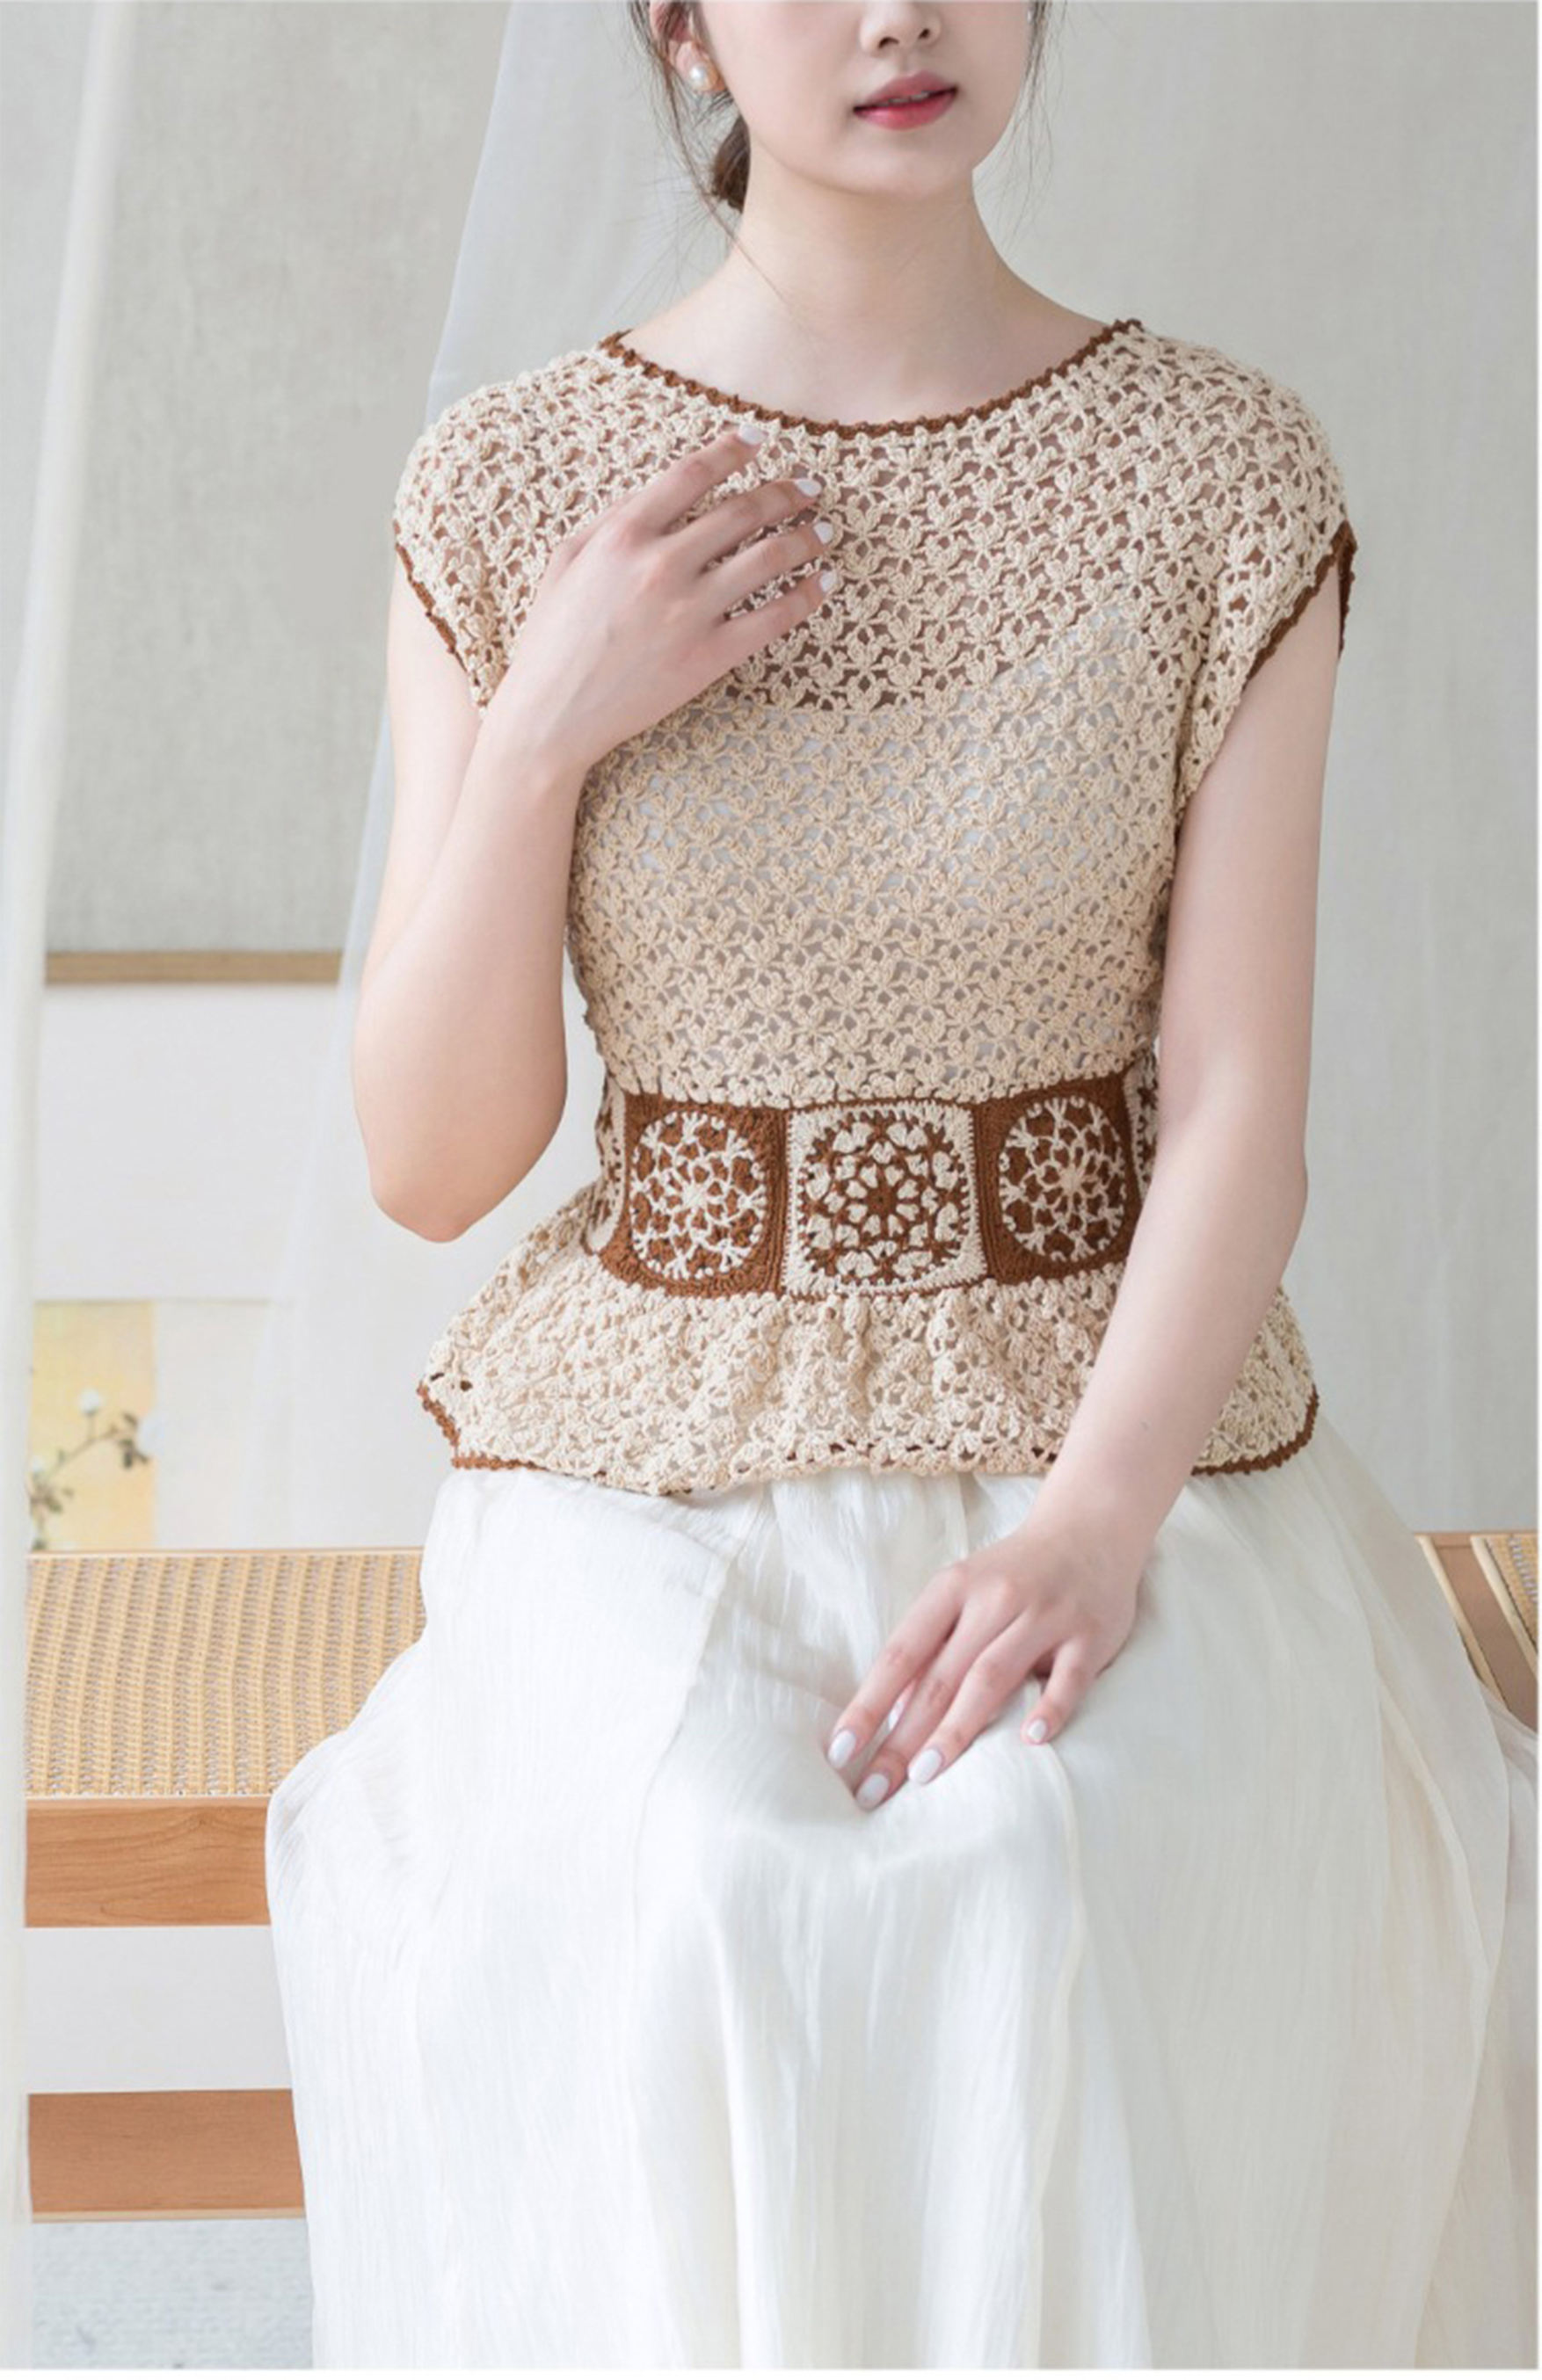
The top consists of the front body, the back body, join the front and back body pieces together, the edging, and the belt decoration. First, crochet the front and back bodies separately. Then, join them and crochet the edging. Finally, create the belt decoration by crocheting along both ends of the motifs.
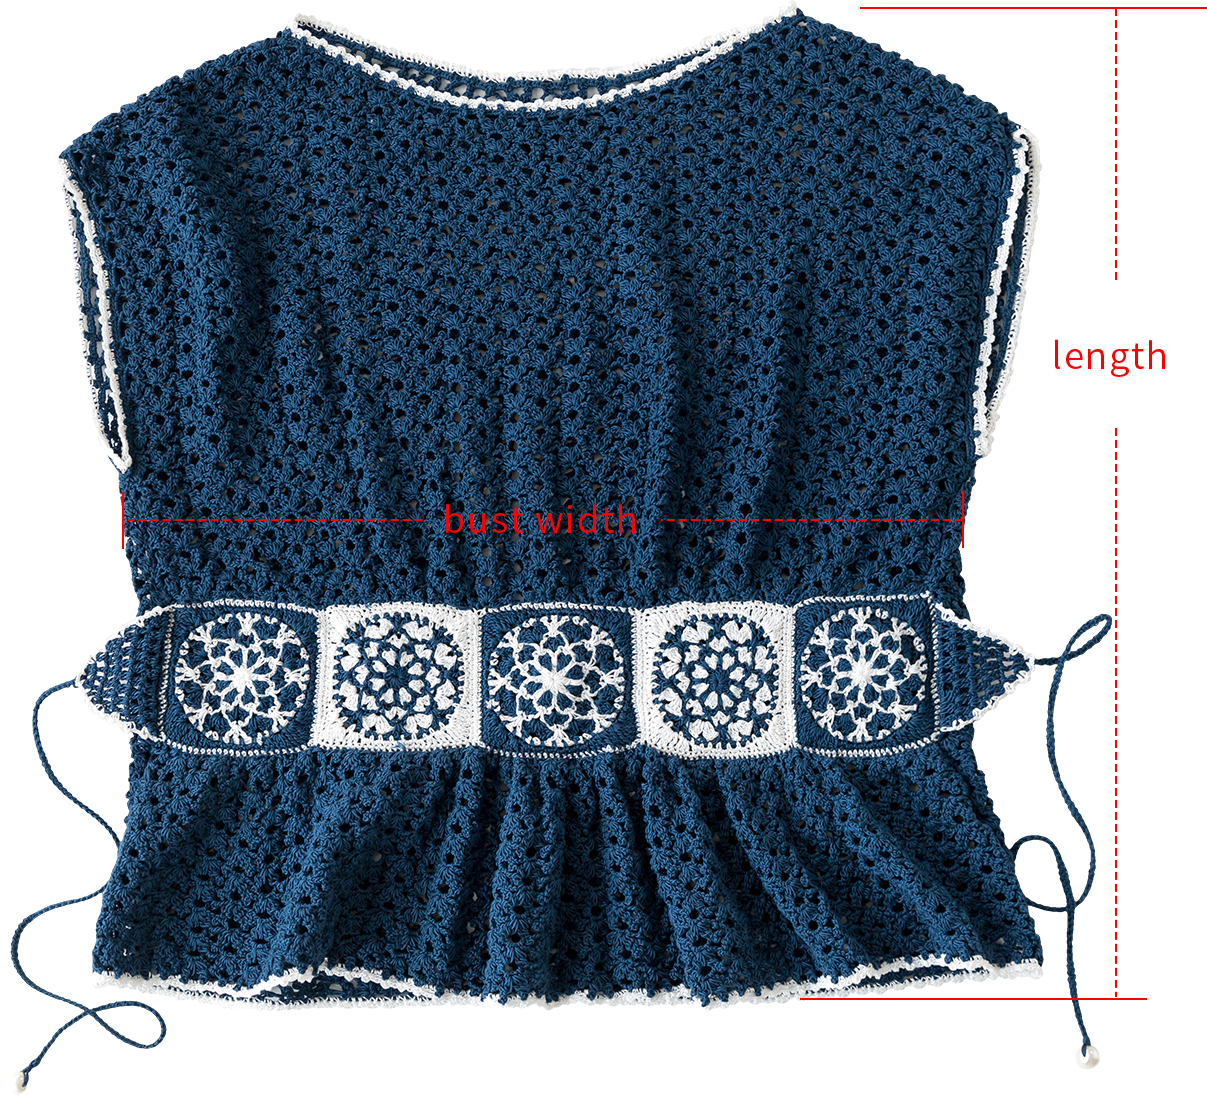
The handcrafted measurements may have an error of 1 to 2cm. Due to variations in individual tension, the size of the sample is for reference only.

Material: Susan's Family Combed 5 ply lace
Hook: 1.75mm crochet hook
Note:
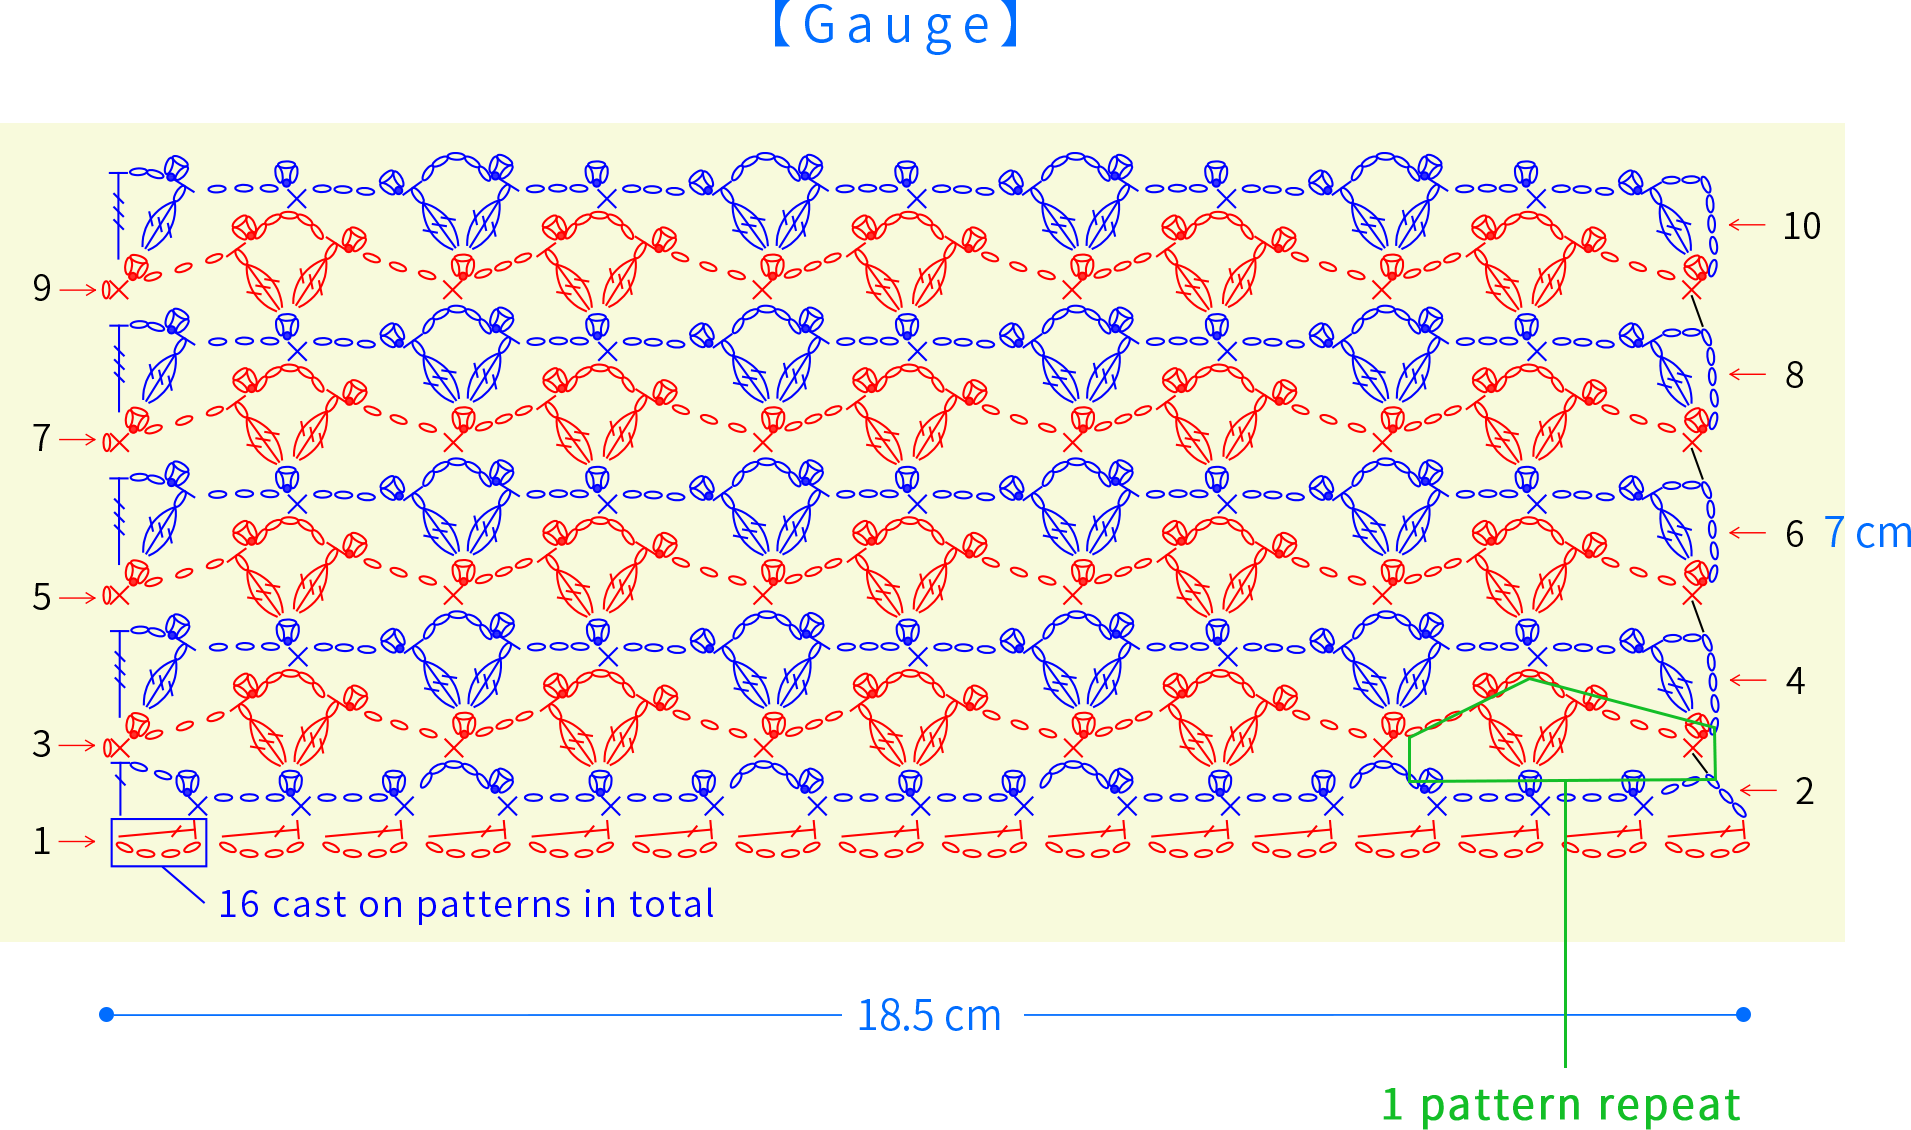
This pattern is making in Chinese crochet pattern terms, and the stitch name is written using American terminology. All measurements in charts are in cm.

Chart Key












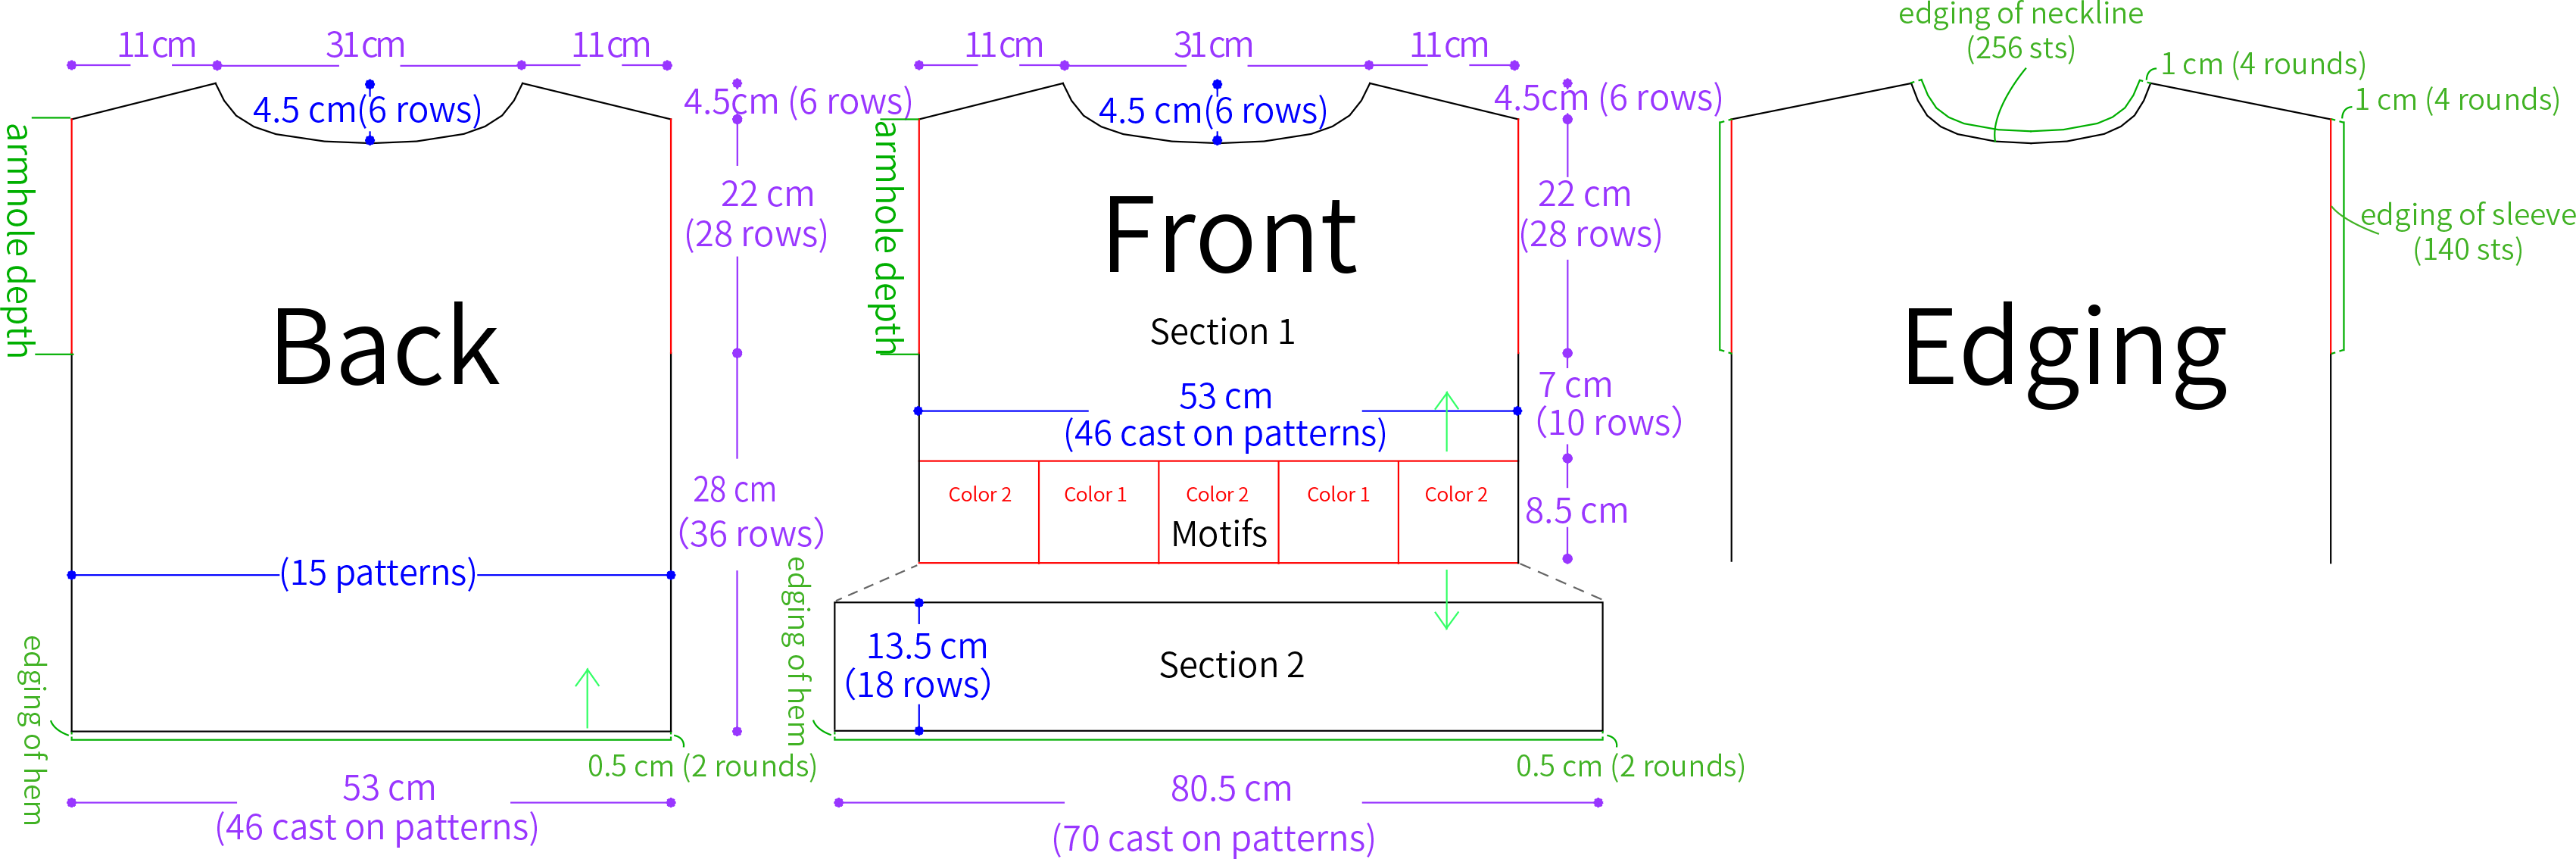
Part 1 Front bodyA
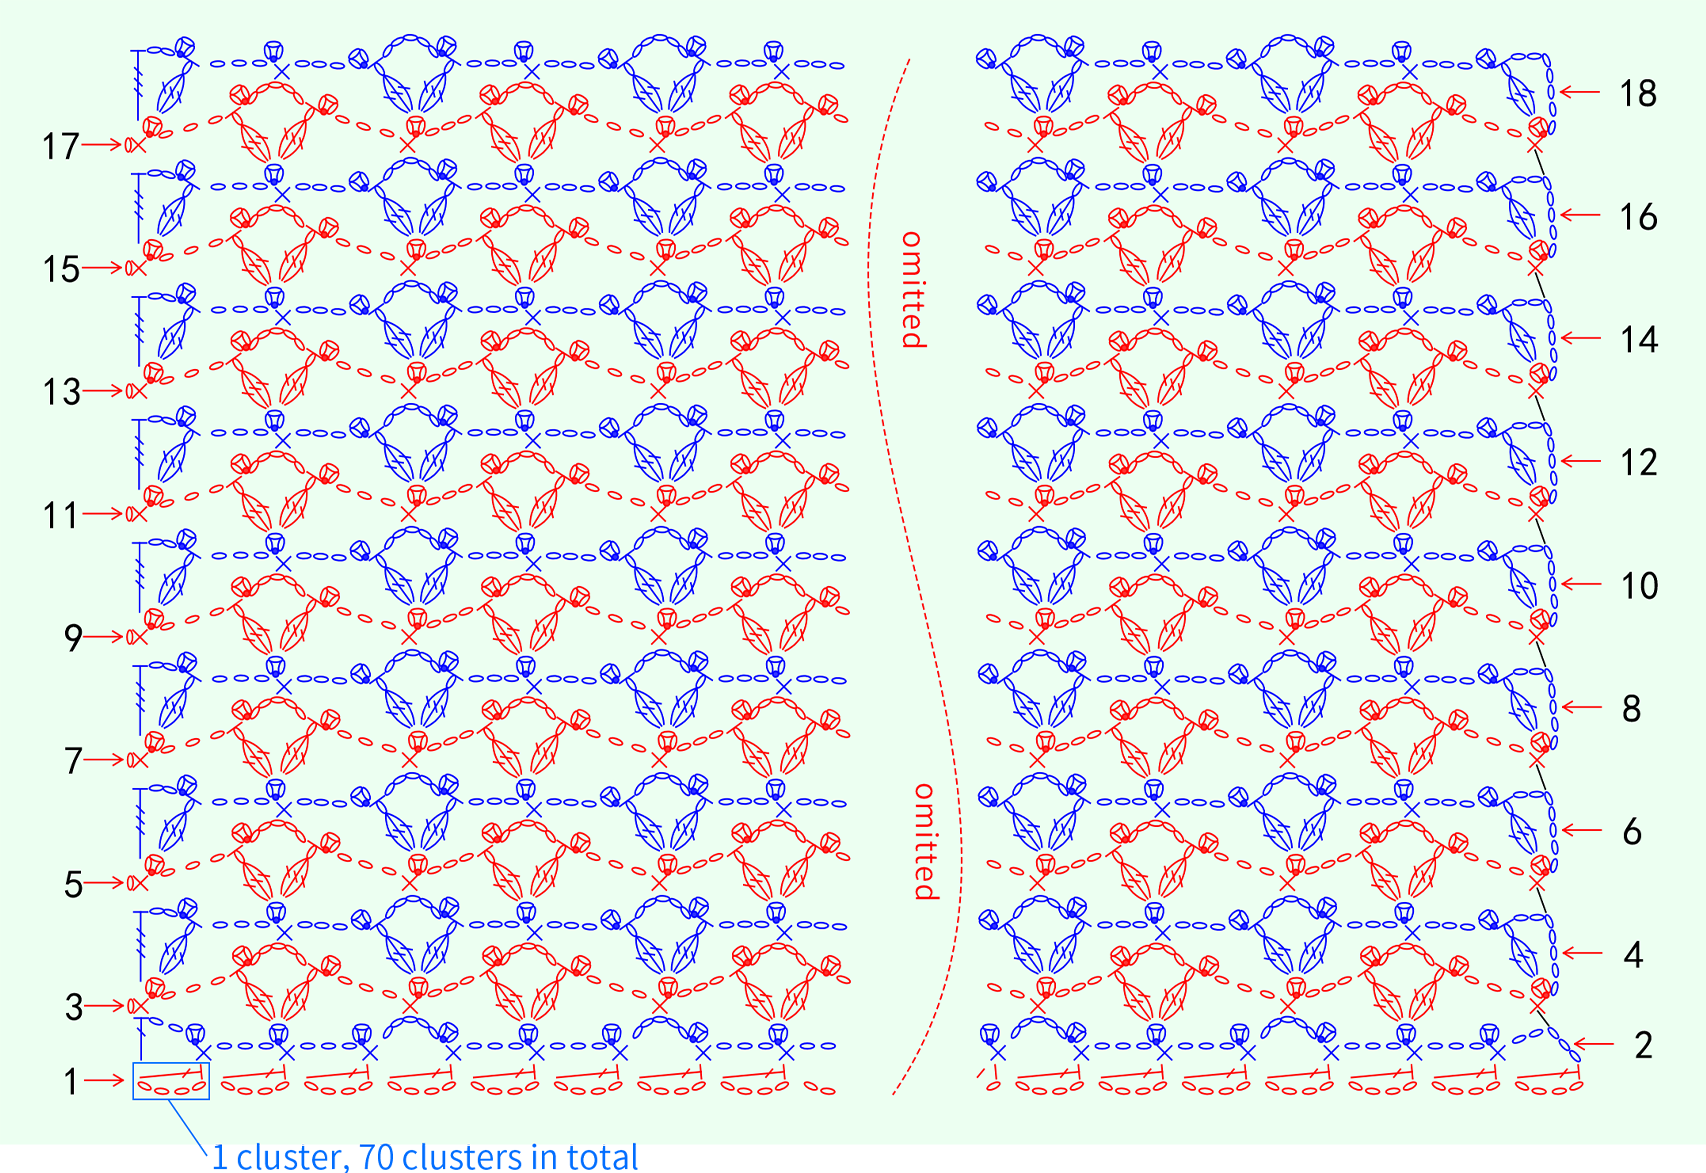
The front body is divided into three parts: the Motifs, Section 1, and Section 2. Start by crocheting and joining all of the motifs. After that, work Section 1 and Section 2. The three parts are then sewn together. Please refer to the video demonstration for more details.
Step 1 MotifsA1 01' 14''
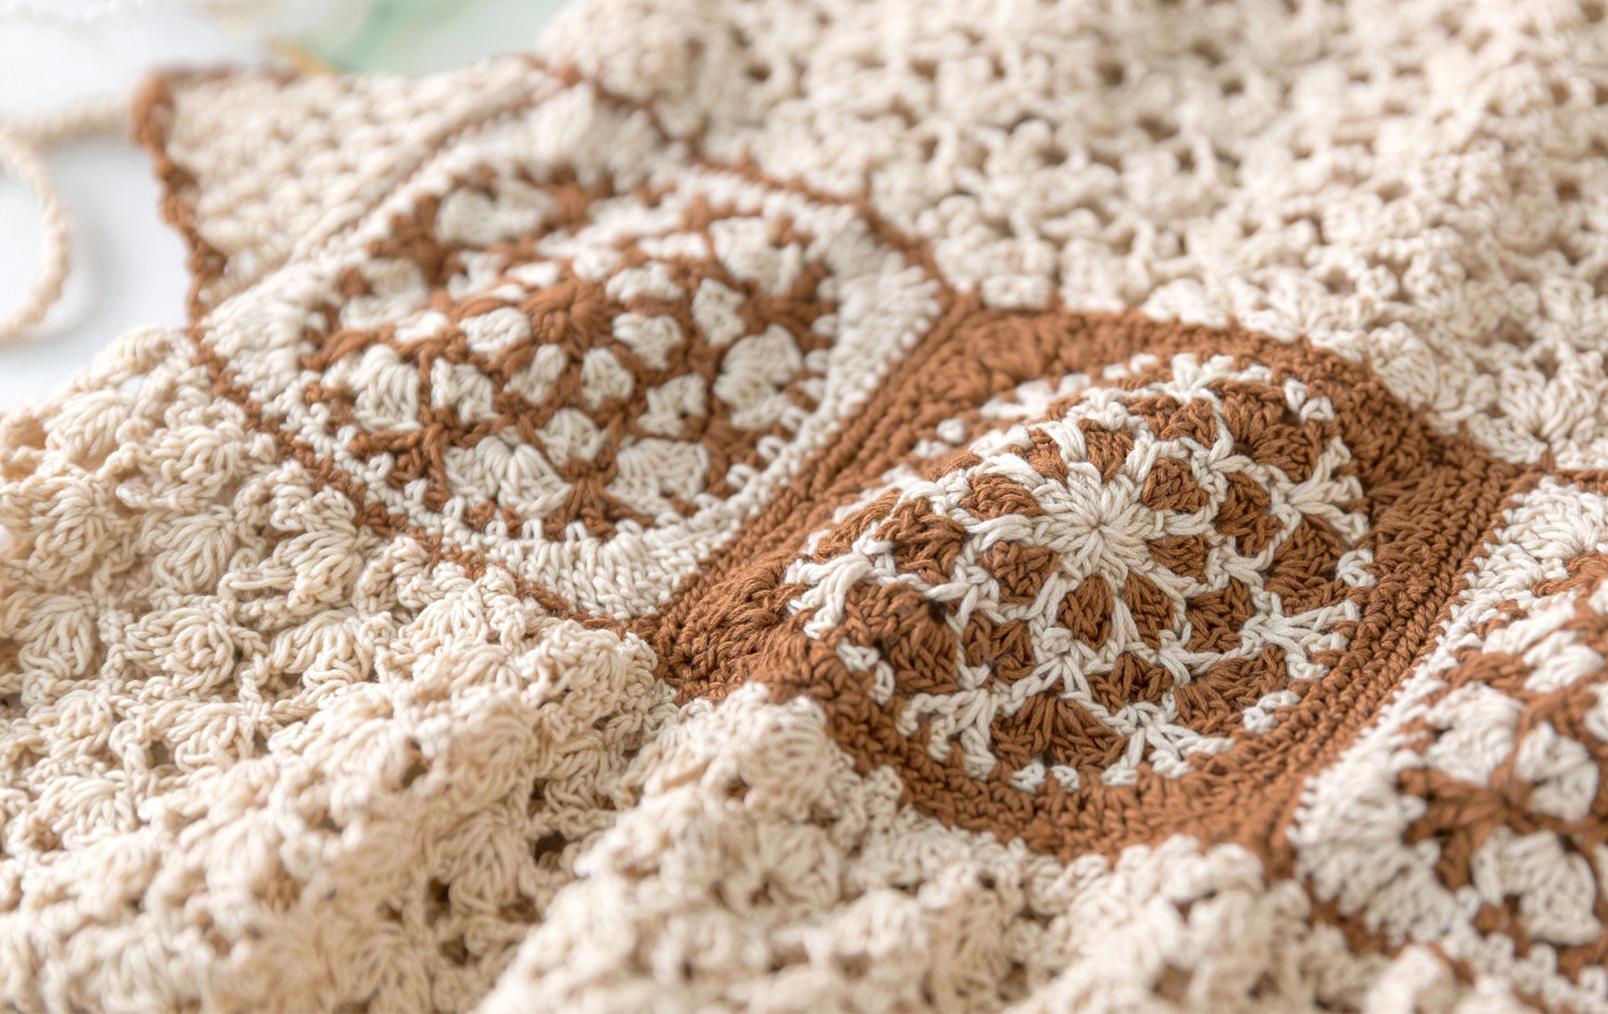
The motifs start with a double magic ring. Crochet each round counter-clockwise and join the motifs using whip stitch. Please refer to the video demonstration for more details.
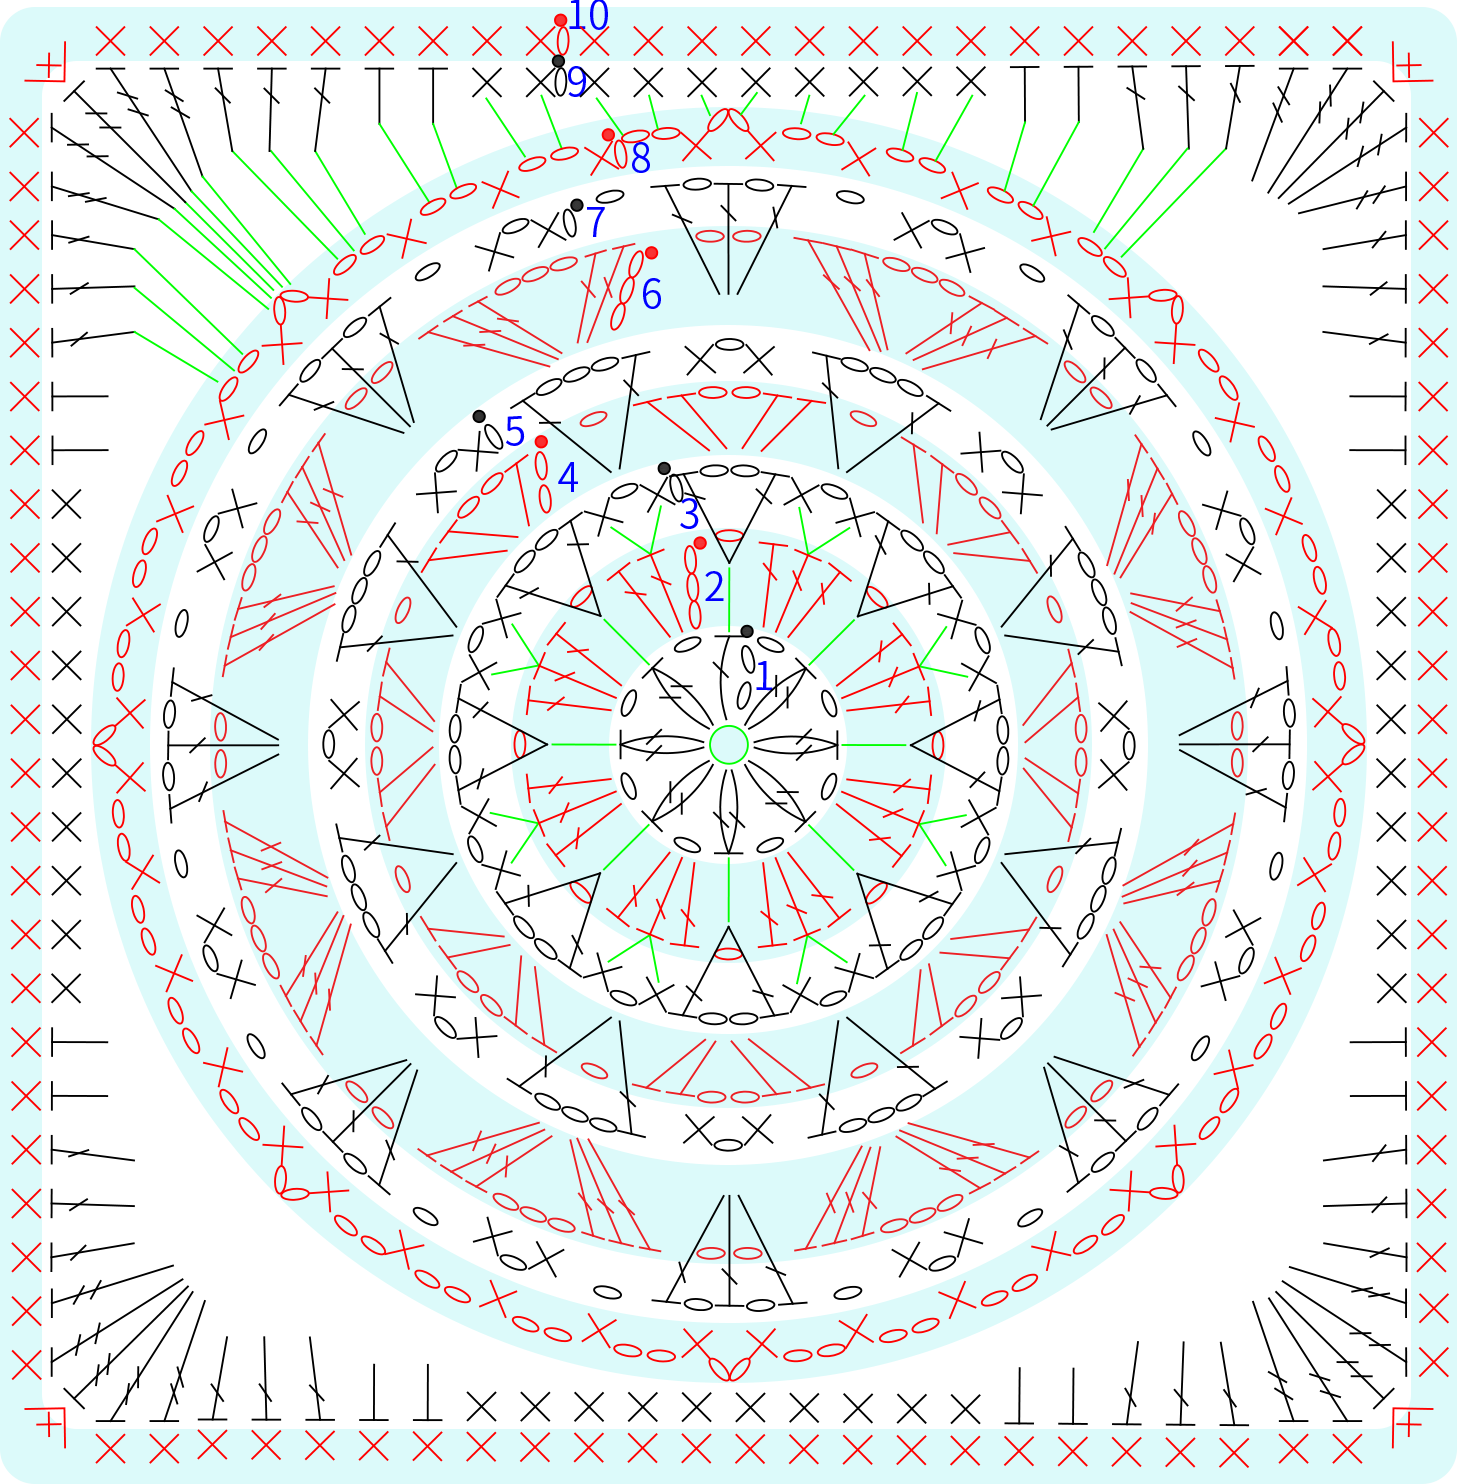
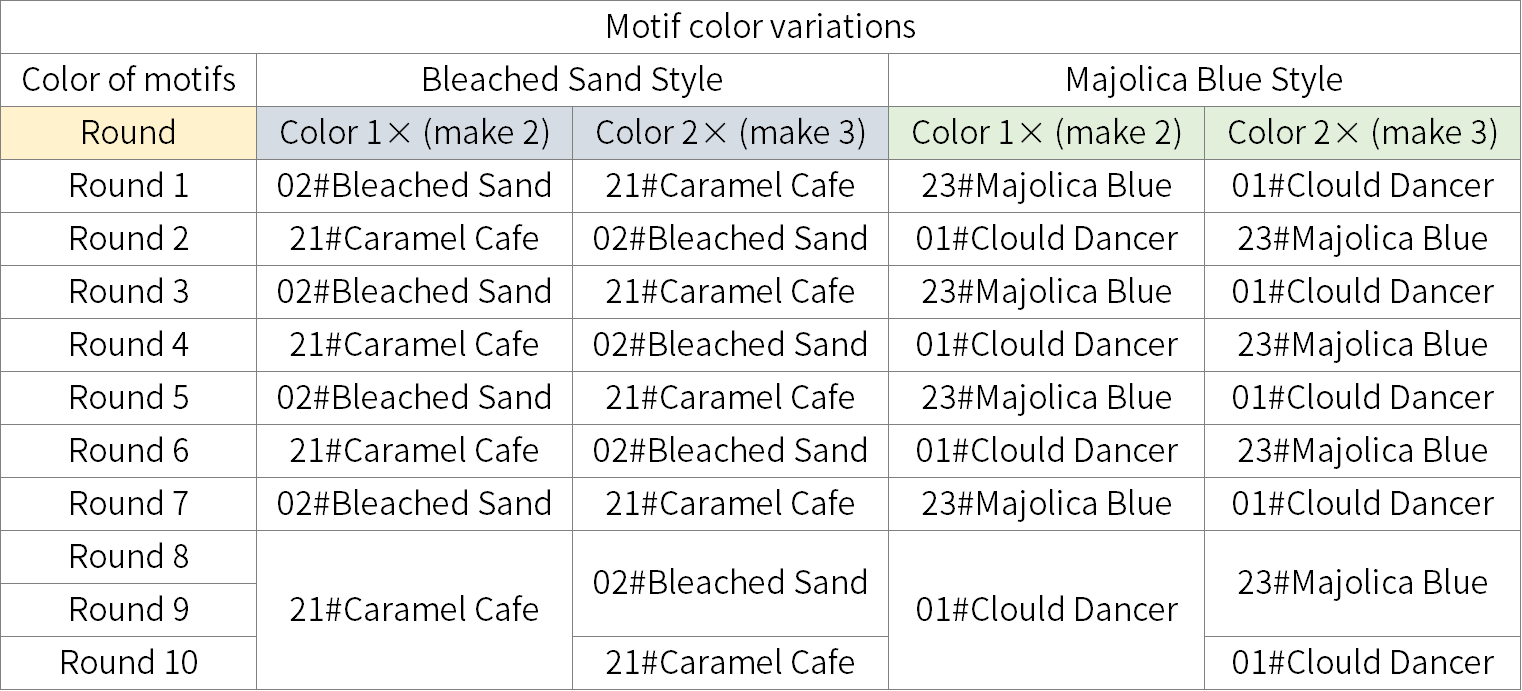
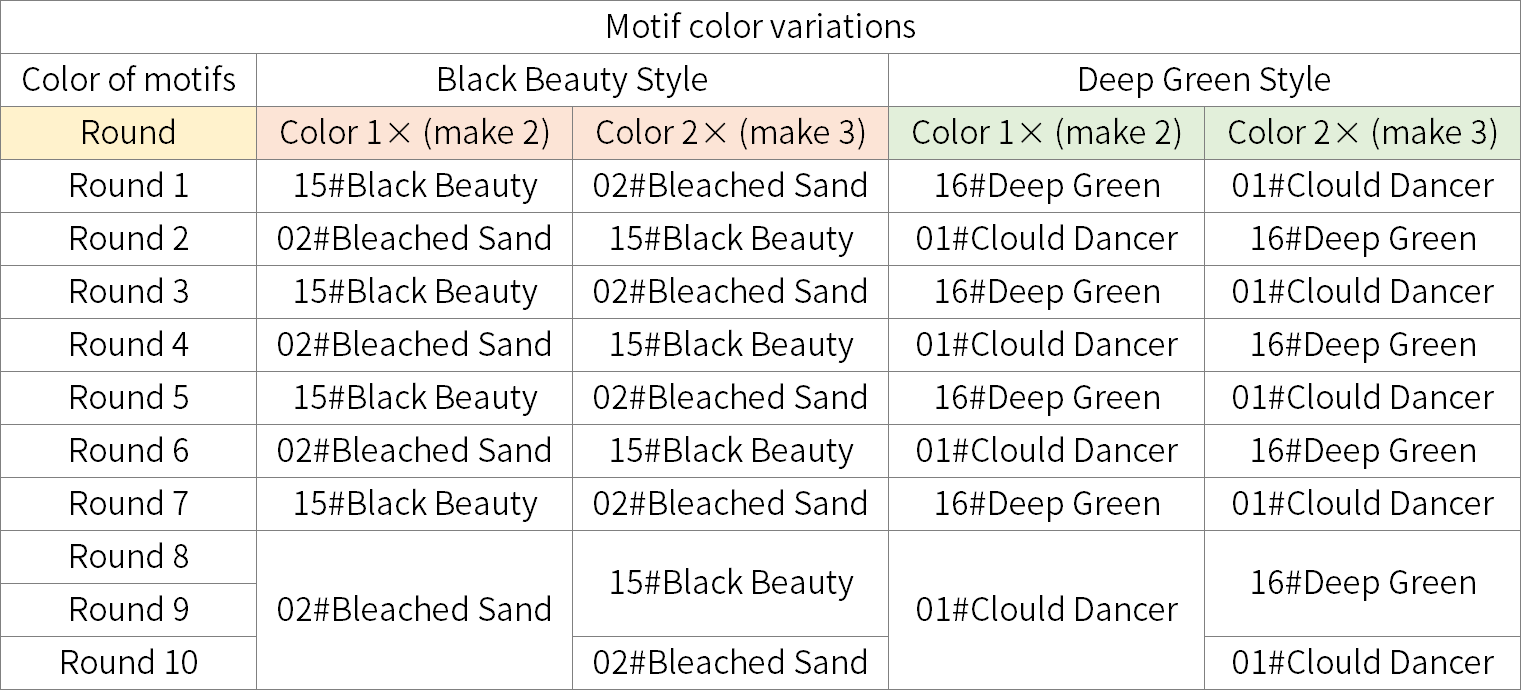
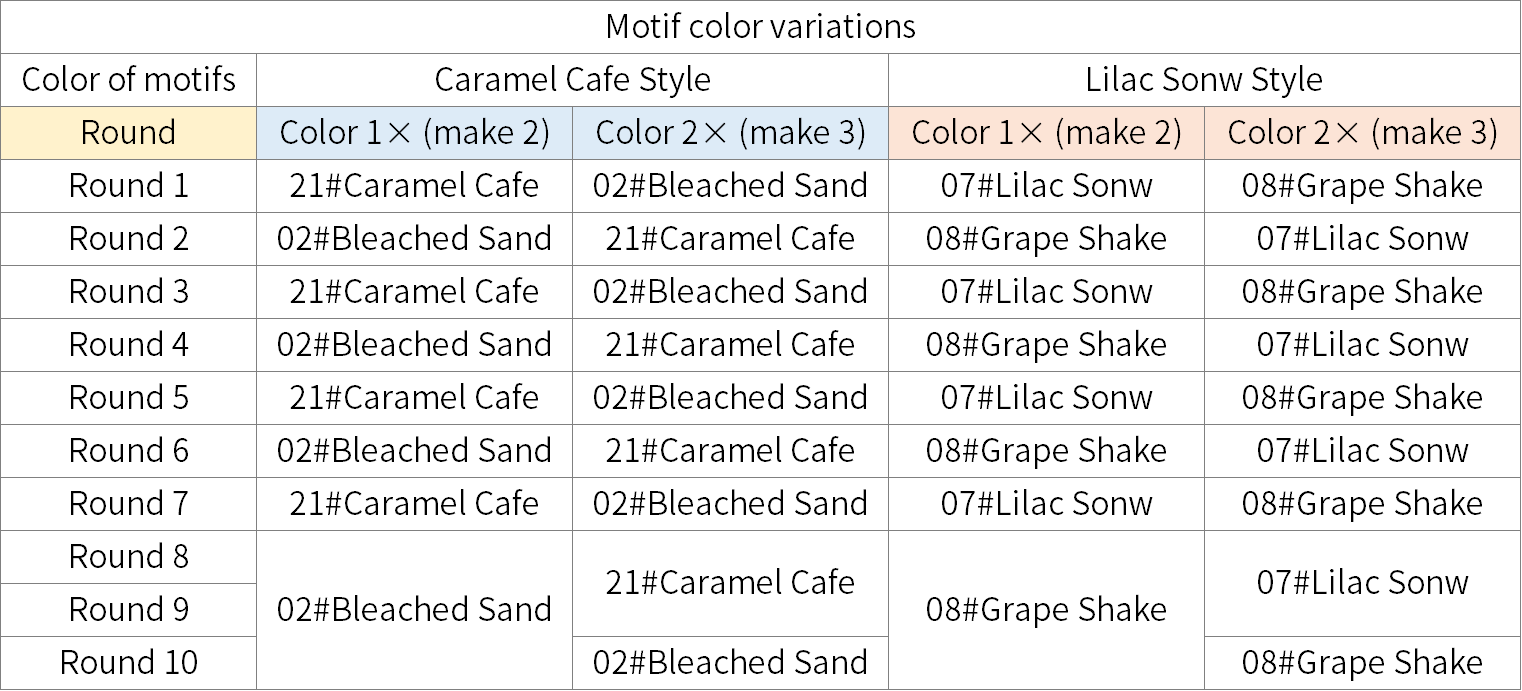
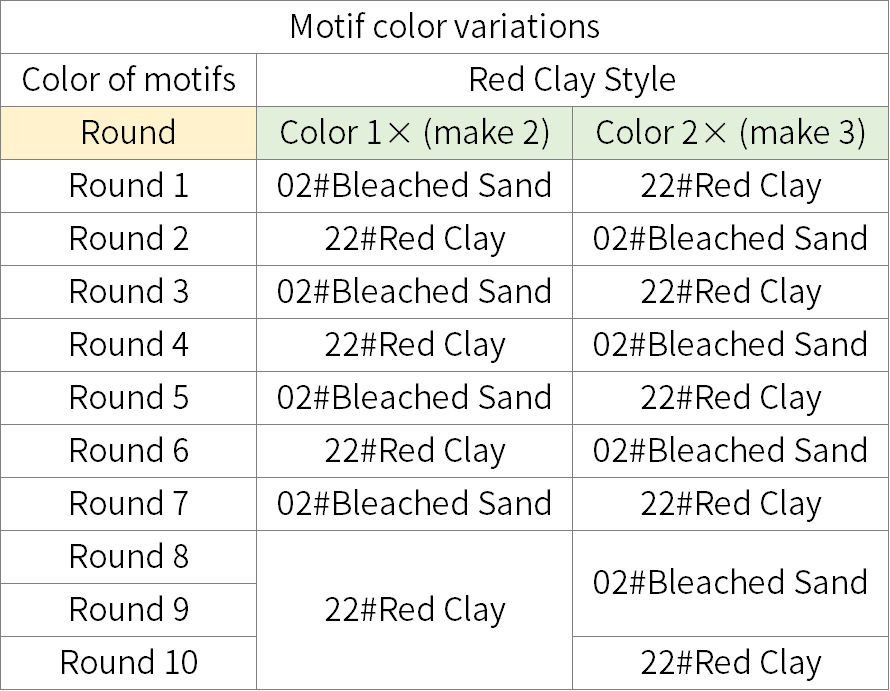
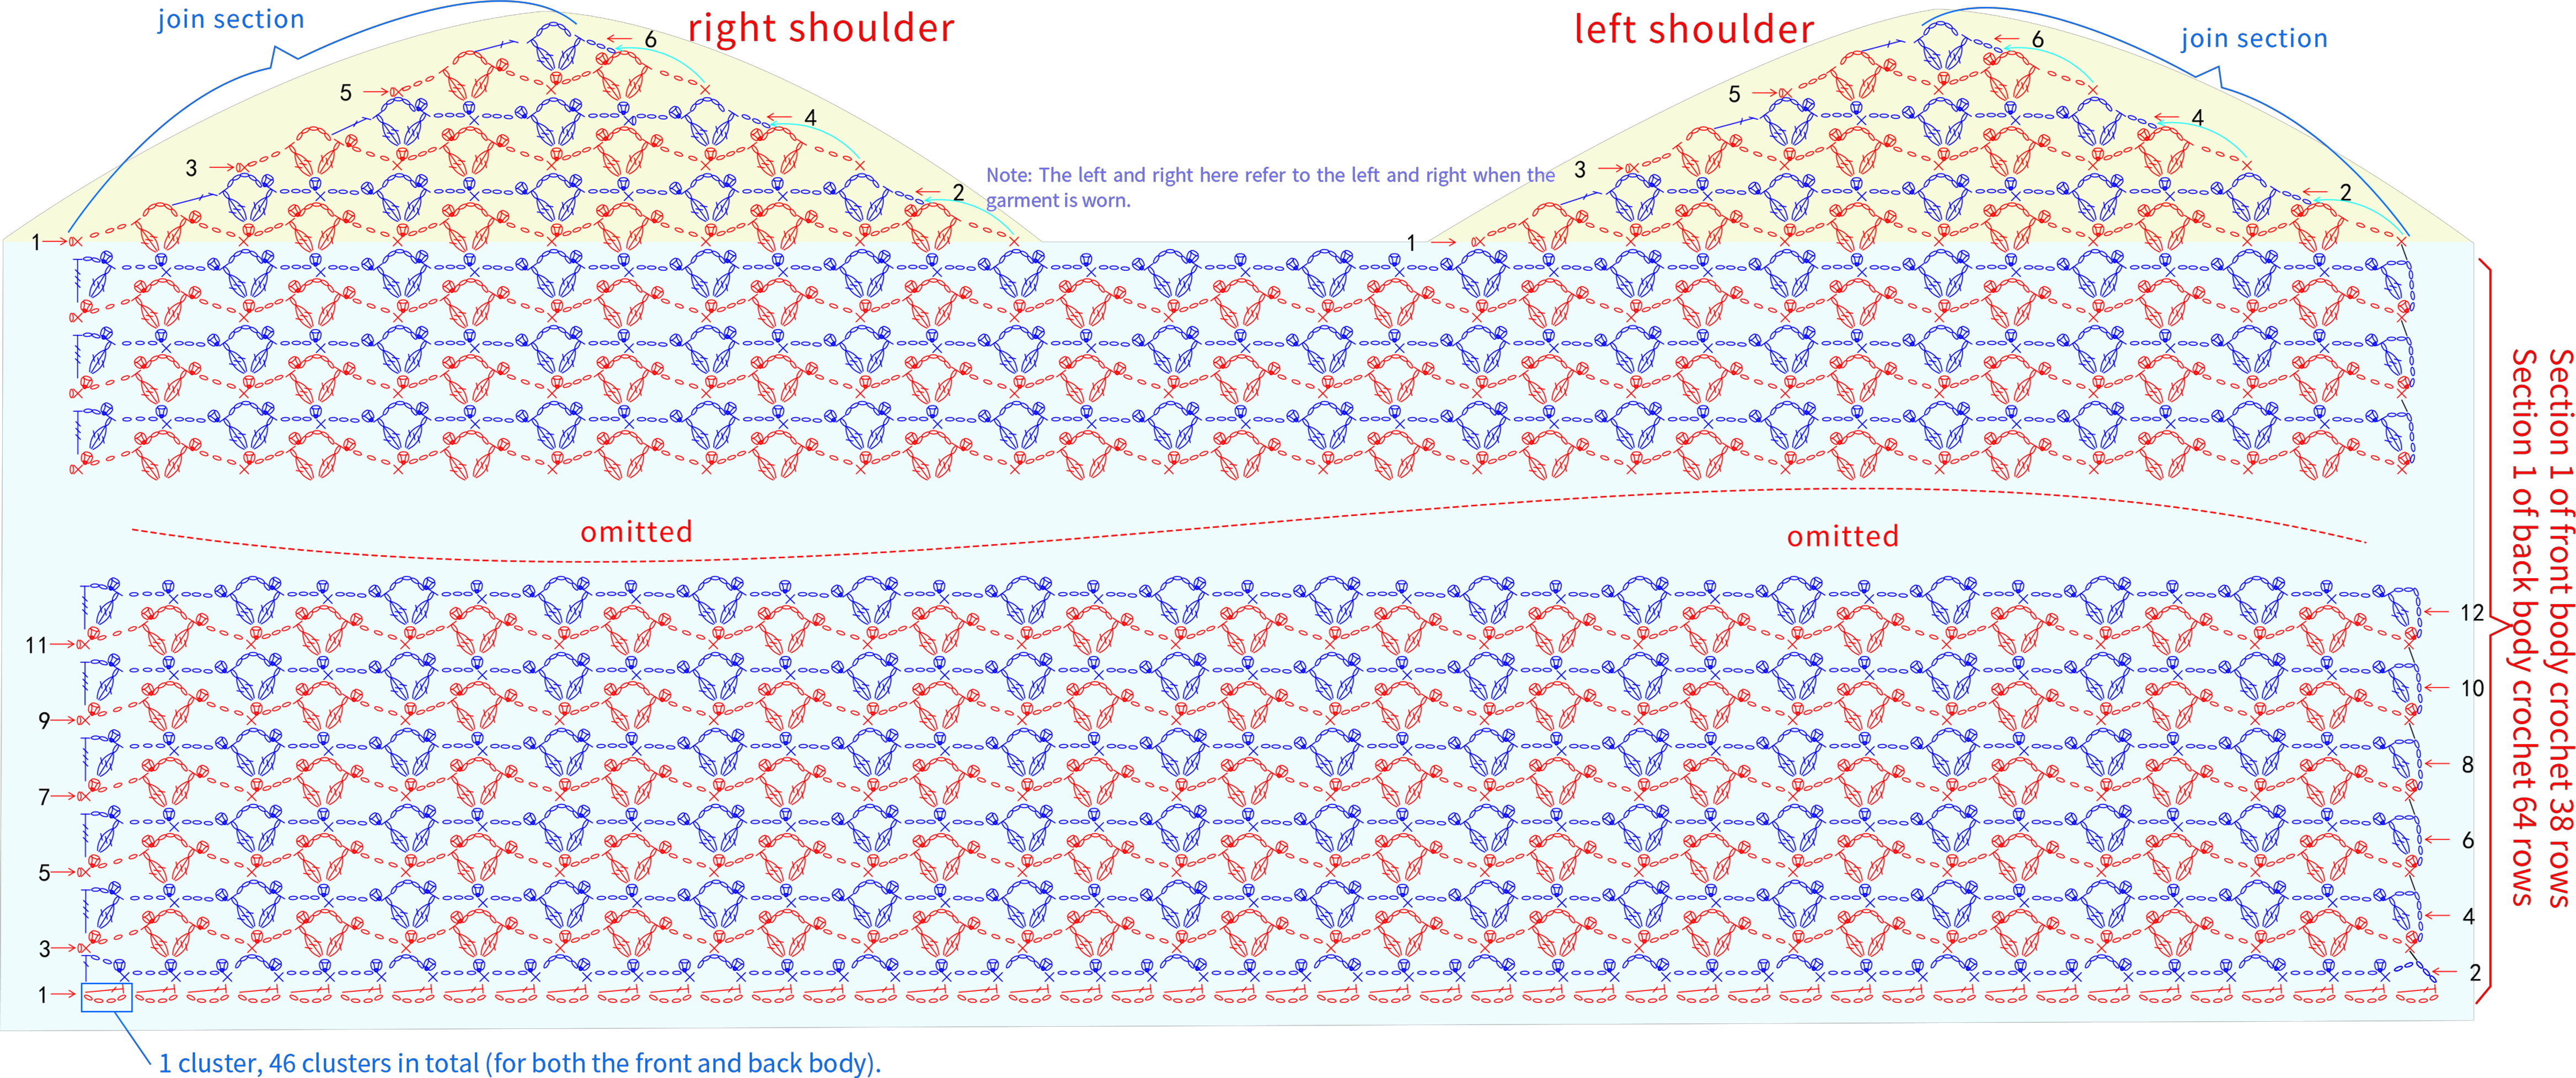
Step 2 Section 1A2 24' 36''
Section 1 consists of two parts:the body and the shoulder. Casting on is performed as a cluster stitch (see diagram). This piece should be worked back and forth, crocheting upwards. Please refer to the video demonstration for more details.

Step 3 Section 2A3 45' 34''
Step 4 JoinA4 45' 51''
The join consists of joining between Section 1 and motifs, and between Section 2 and motifs. Both are joined using the same method. Please refer to the video demonstration for more details.
PART2 Back bodyB 50' 18''
The back body is crocheted as the main body and the shoulder. Follow the same chart as section 1 for the front body, but crochet 60 rows instead of 34 rows. Please refer to the video demonstration for more details.
PART3 Join the front
and back body pieces togetherC 50' 29''
Join the front and back bodies at the shoulders and side seams. With the right sides facing each other, work single crochets through the edges of both bodies along each of the seams. Please refer to the video demonstration for more details.
PART4 EdgingD 54' 37''
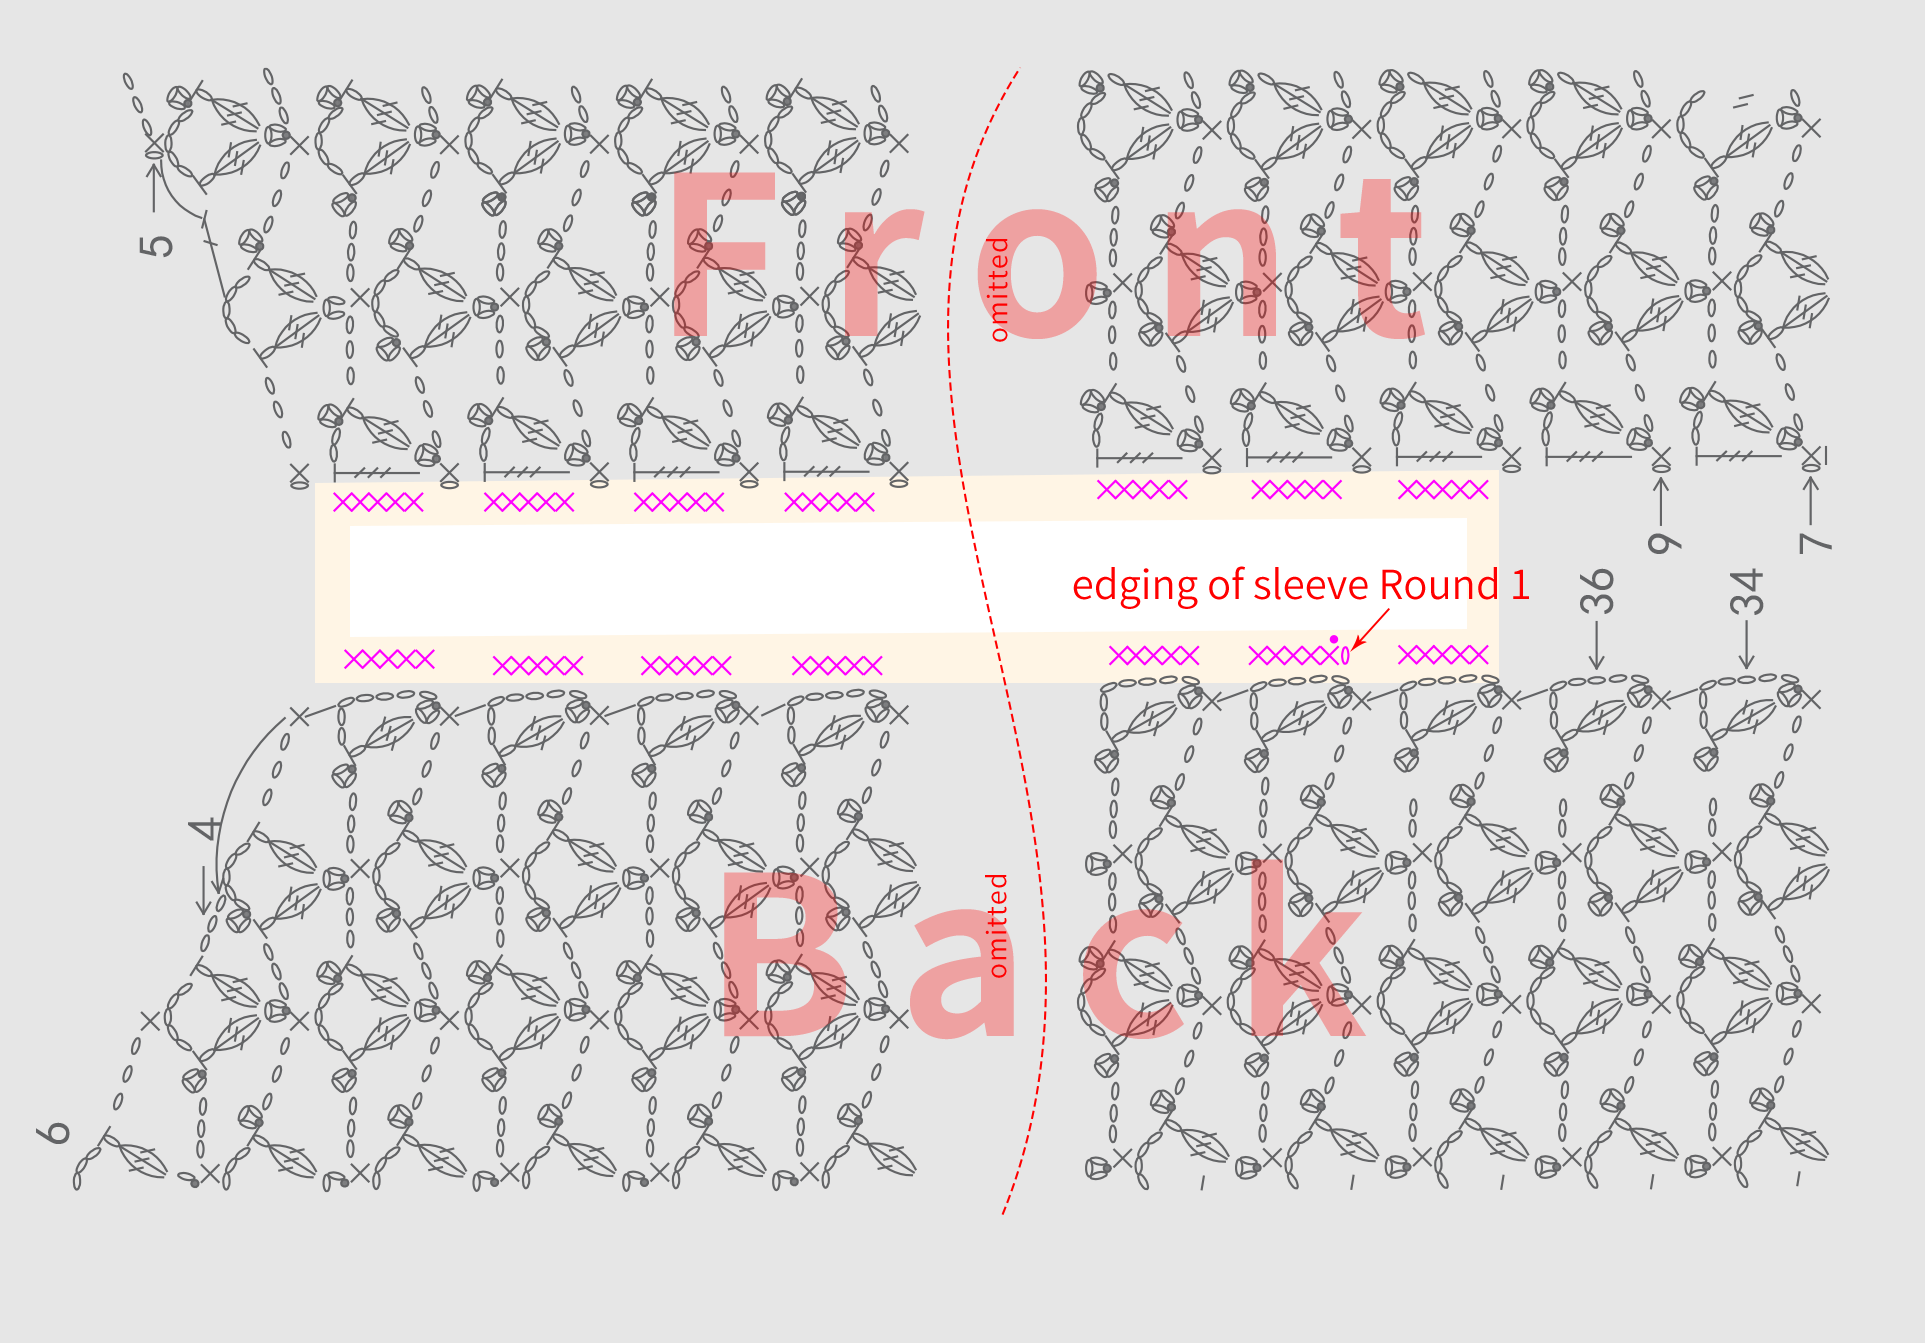
There are three parts: the neckline, the sleeve and the hem. All in the same way, just different stitch numbers and rounds. Please refer to the video demonstration for more details.
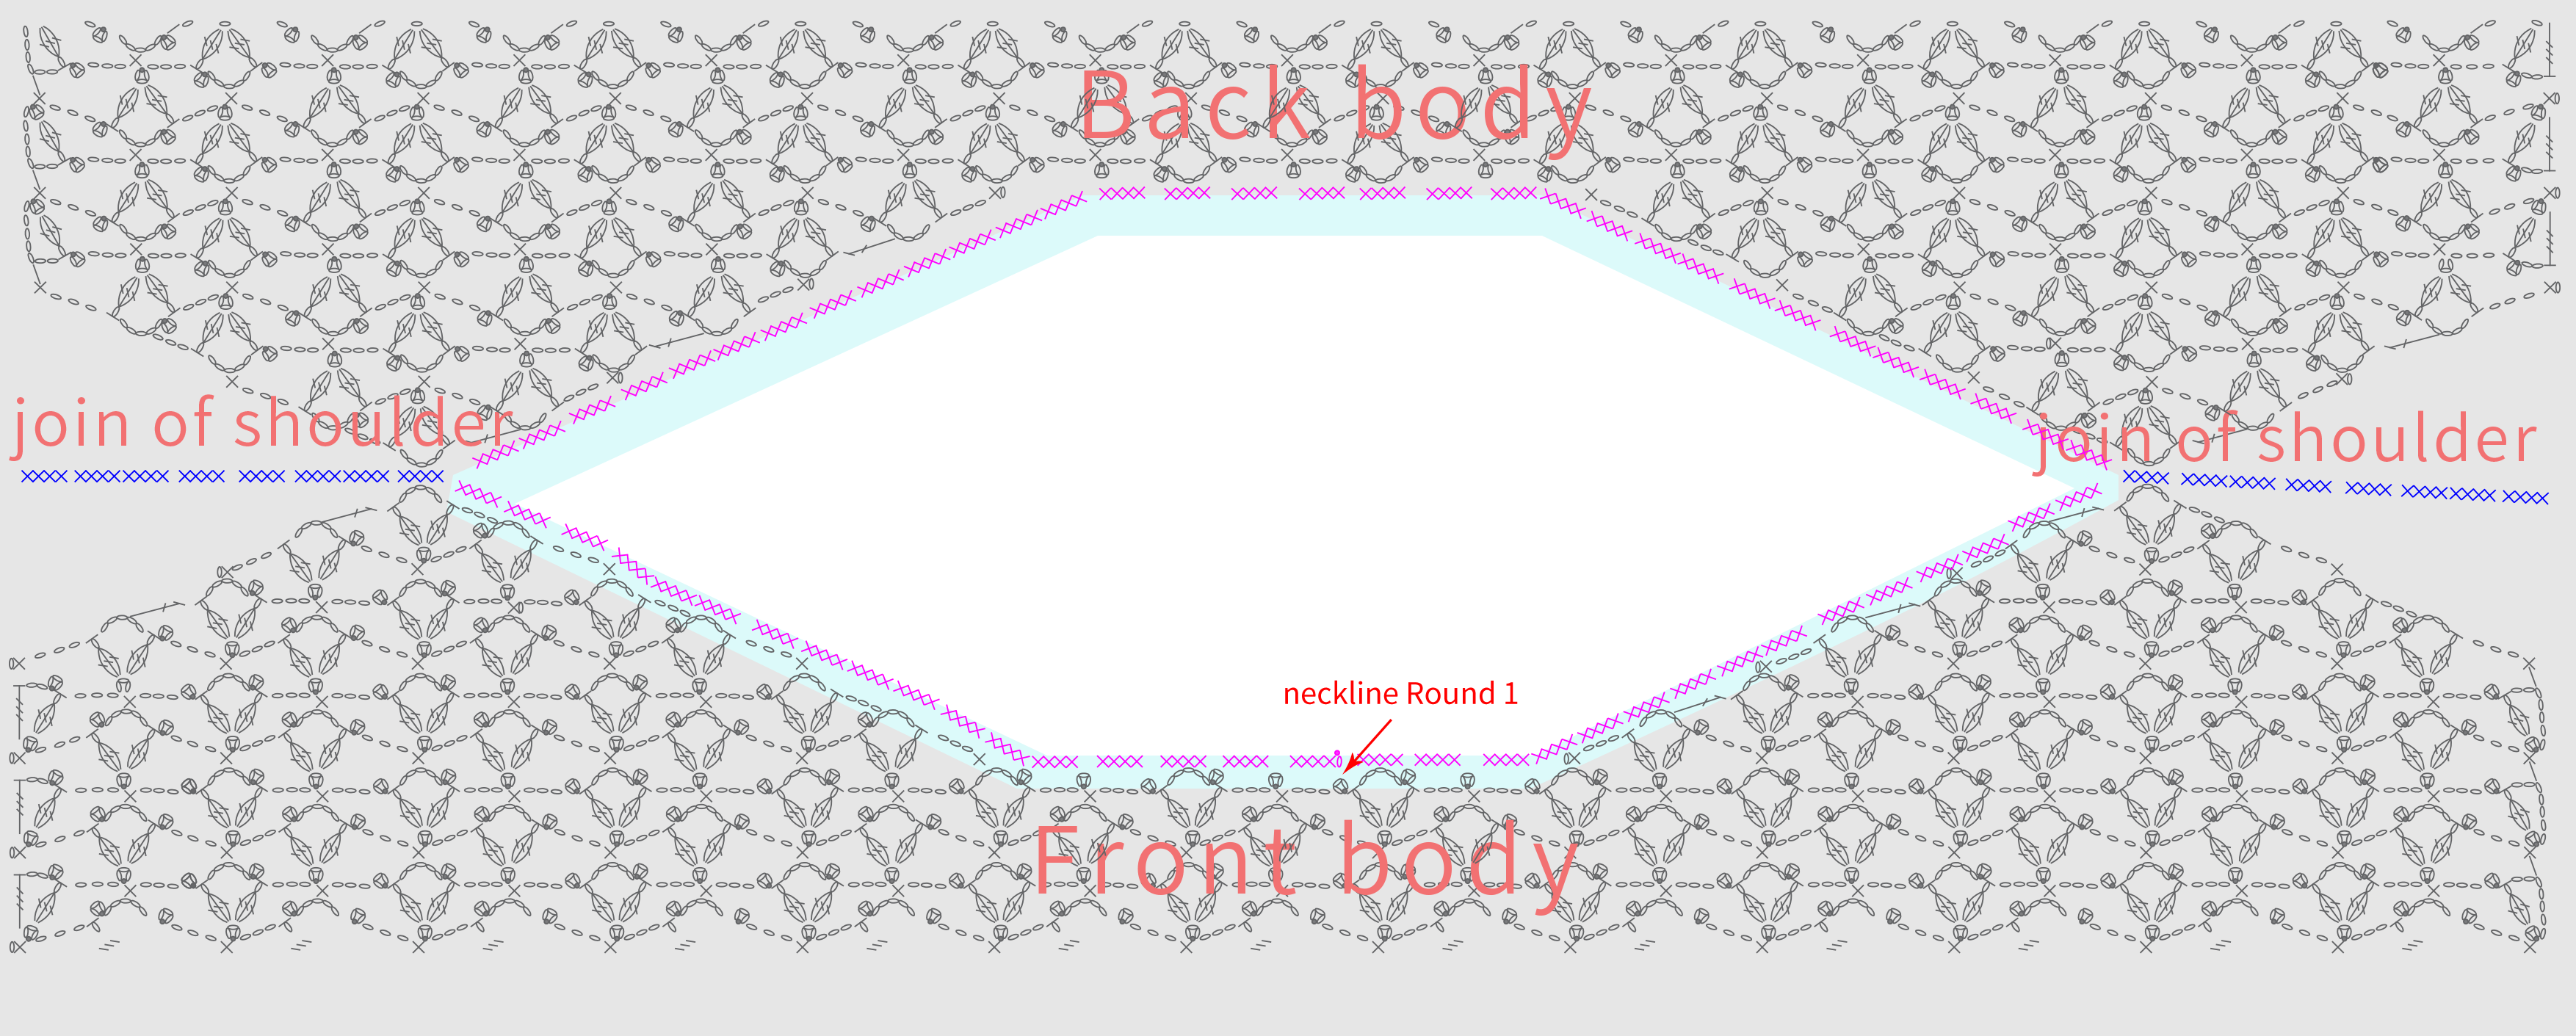

Edging of neckline

Edging of sleeves

Edging of hem
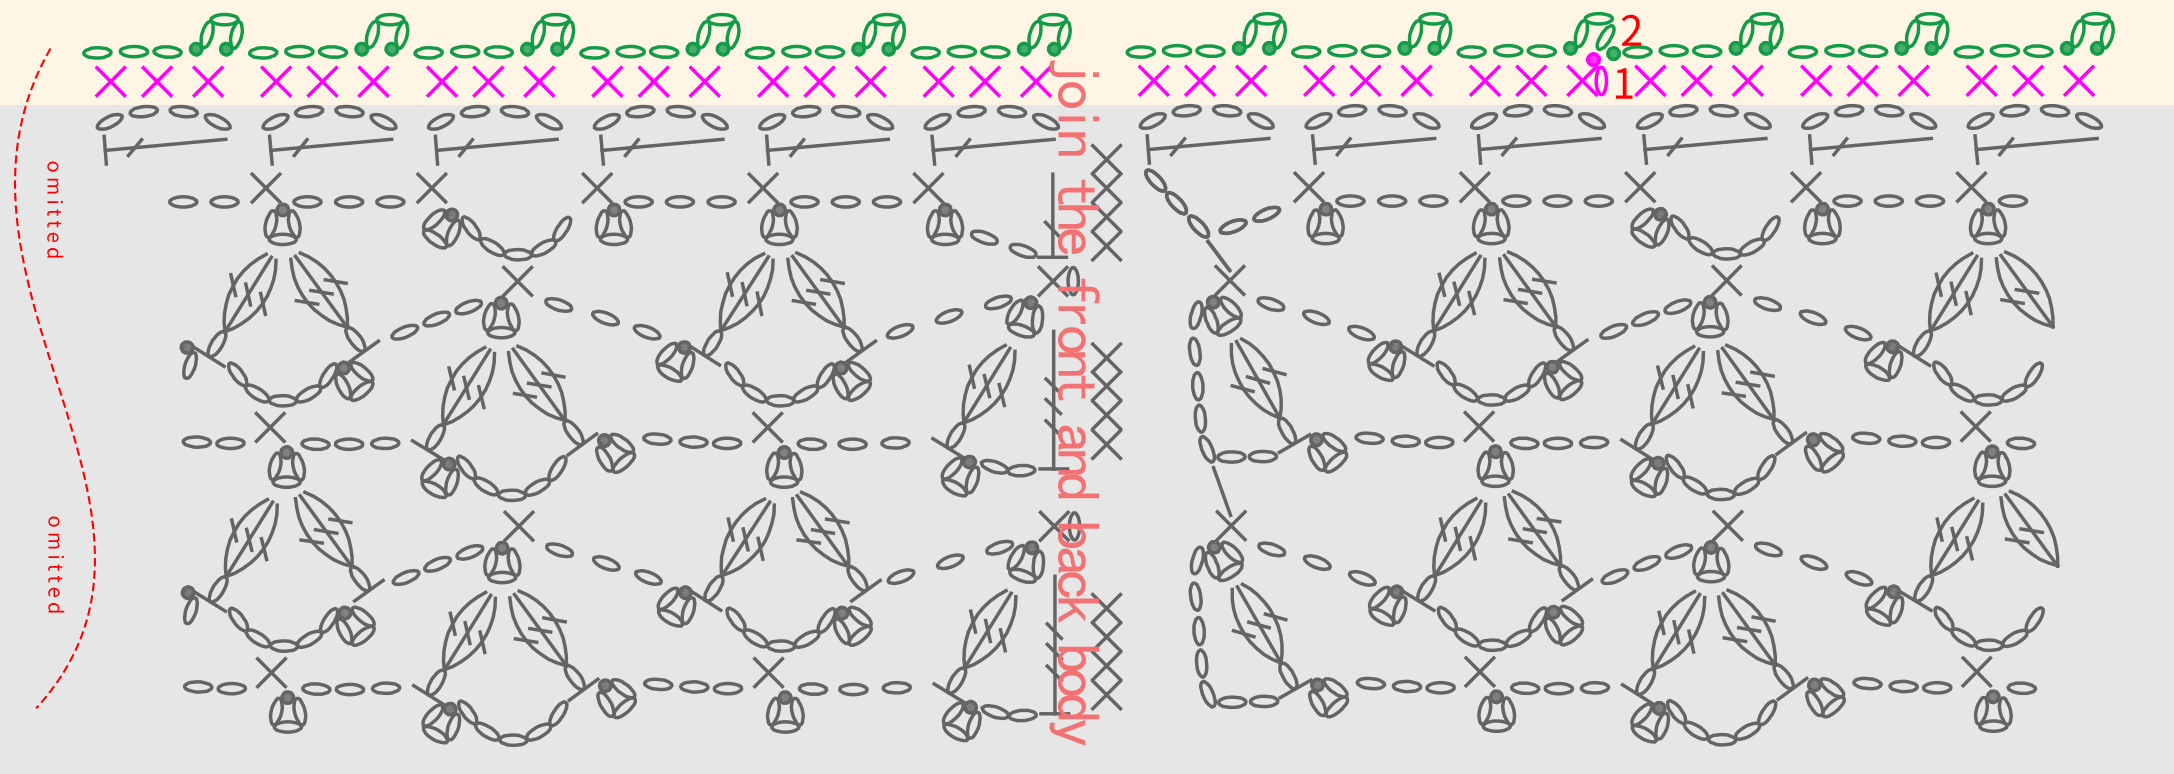
PART5 Belt decorationE 60' 17''
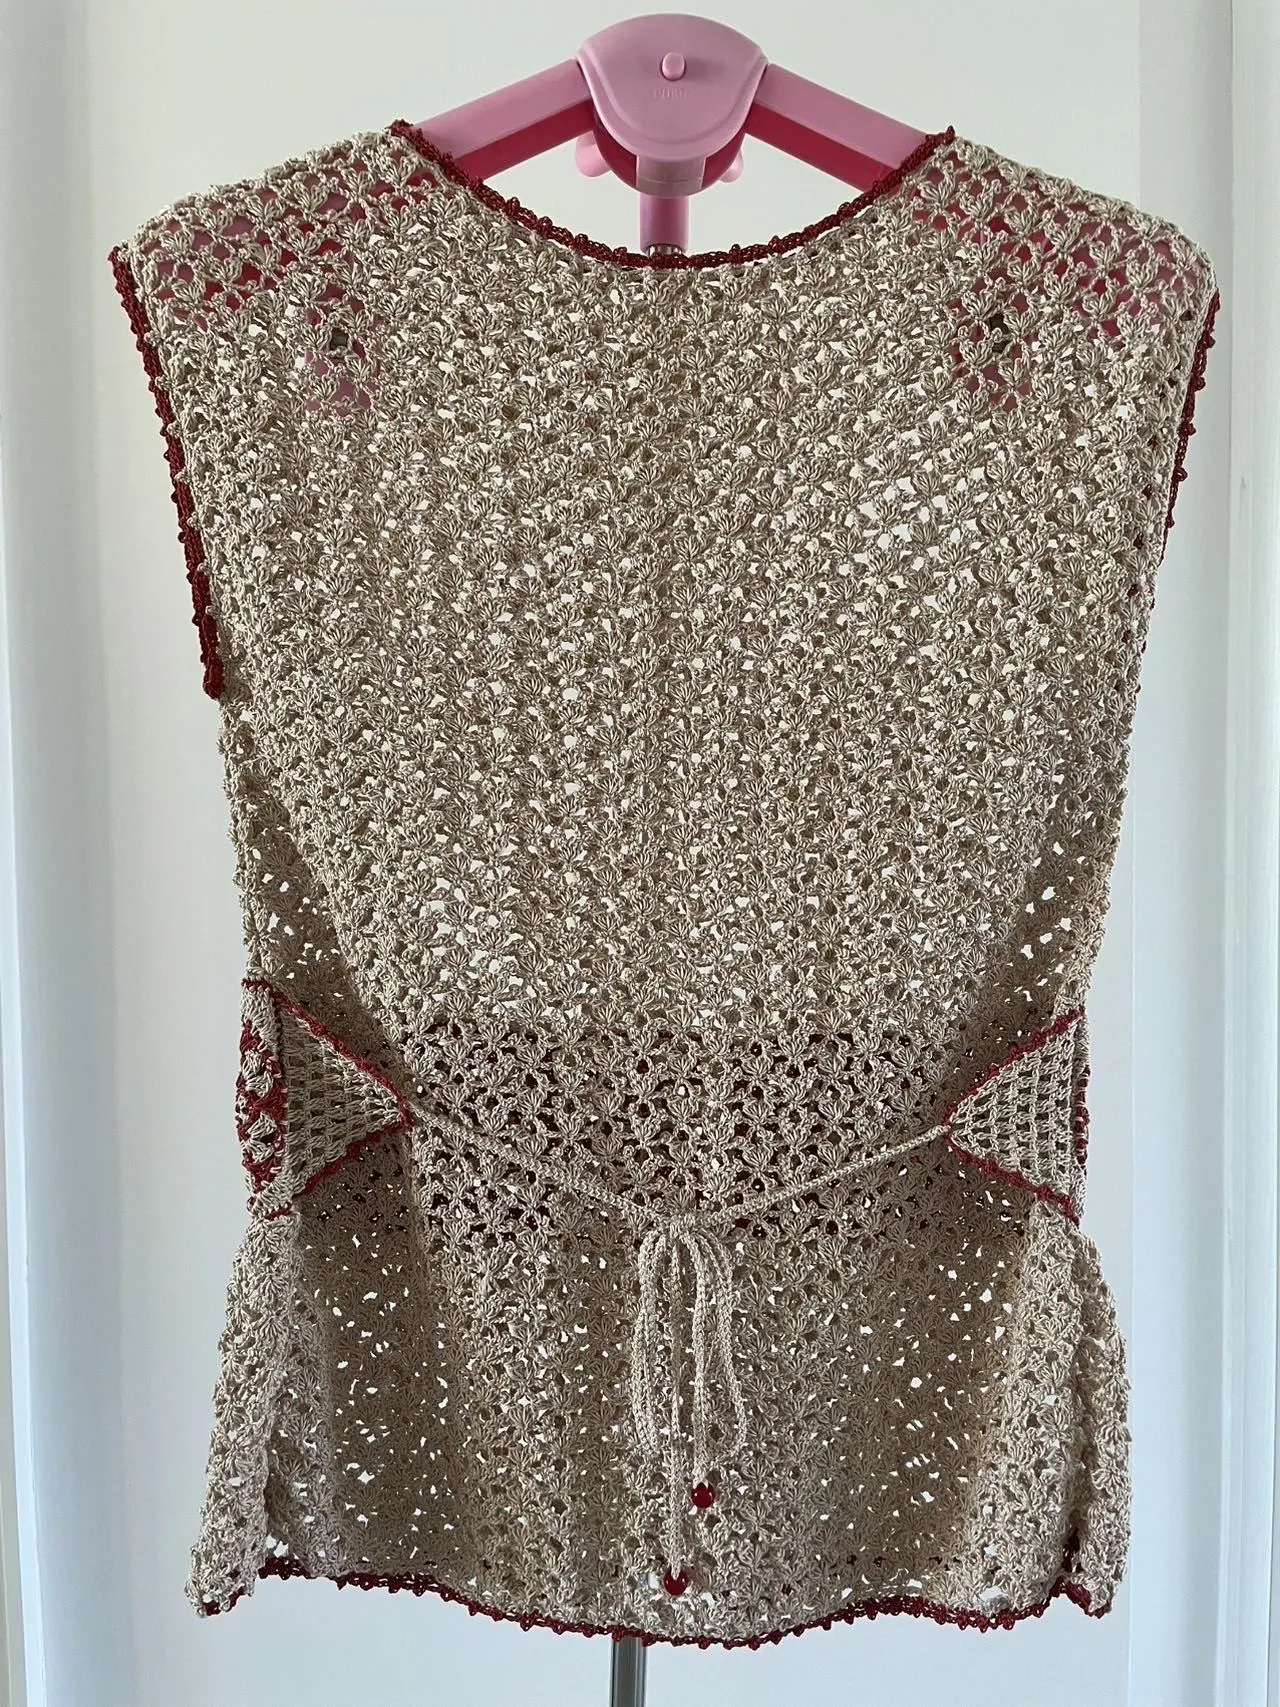
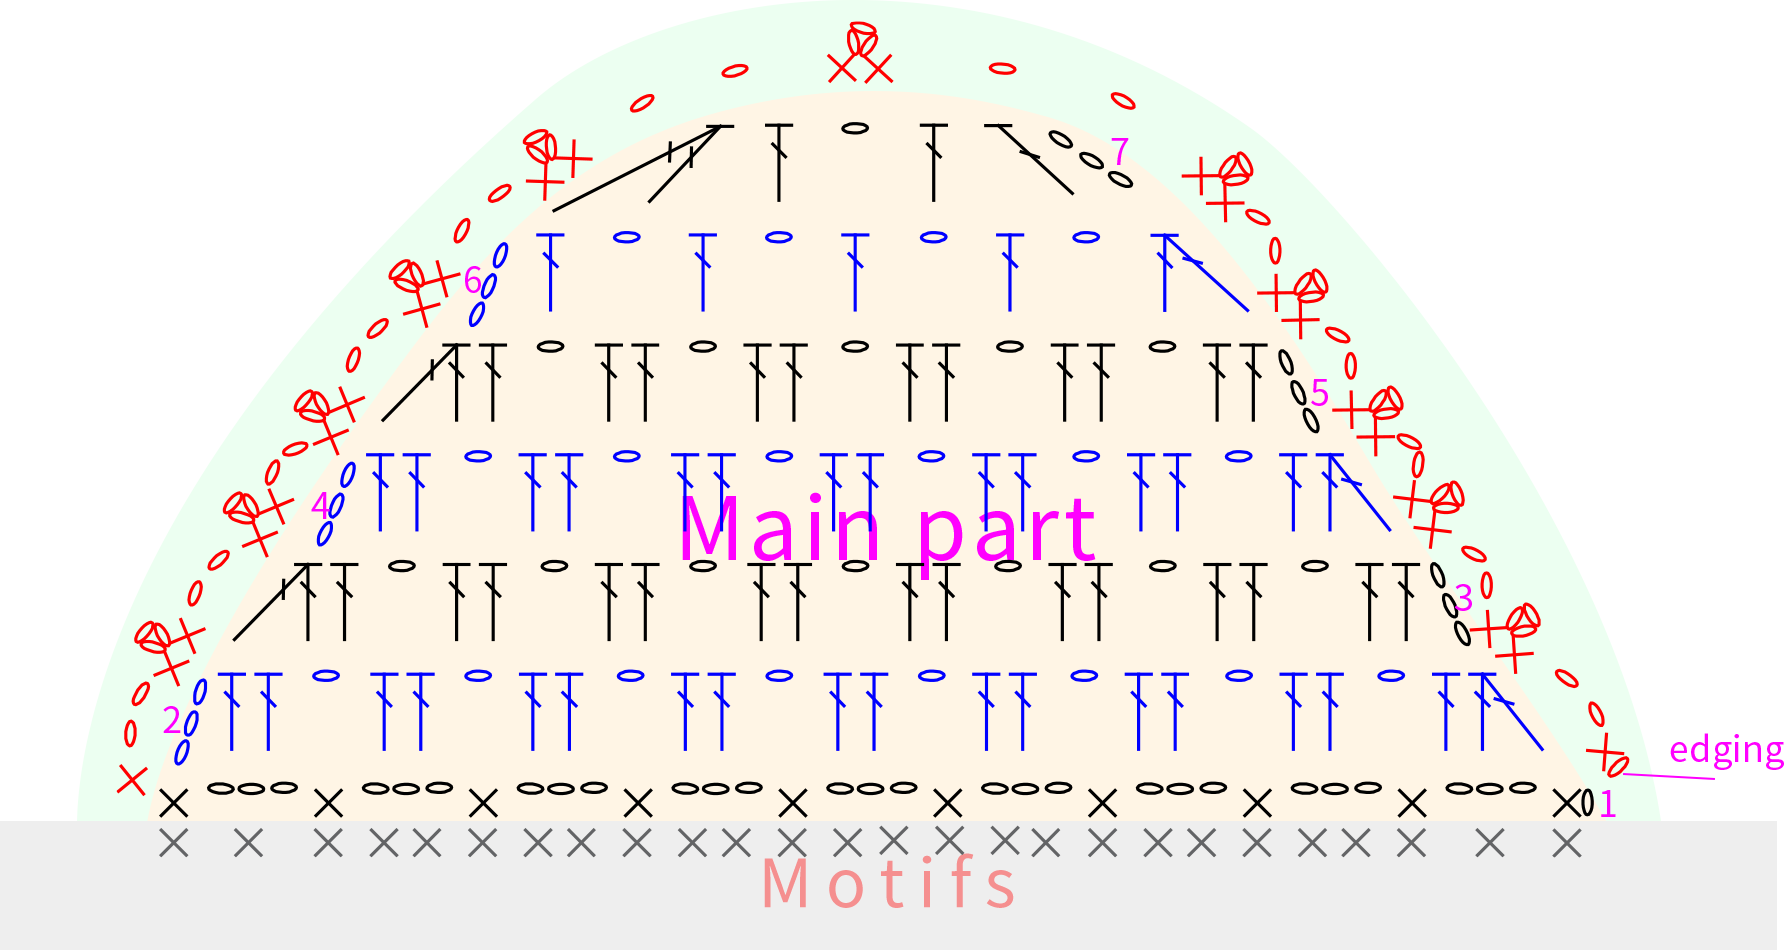
The belt consists of the main part, the edging, and the ties. Start by crocheting the main part at the right position. Once that's done, add the edging. Lastly, we'll make the ties. Please refer to the video demonstration for more details.
Note:
The tie is a Romanian cord crocheted to a length of about 45 cm, and when crocheting, leave a yarn tail of about 15 cm at both the start and end for sewing.


Made by the community