Home / Blanket
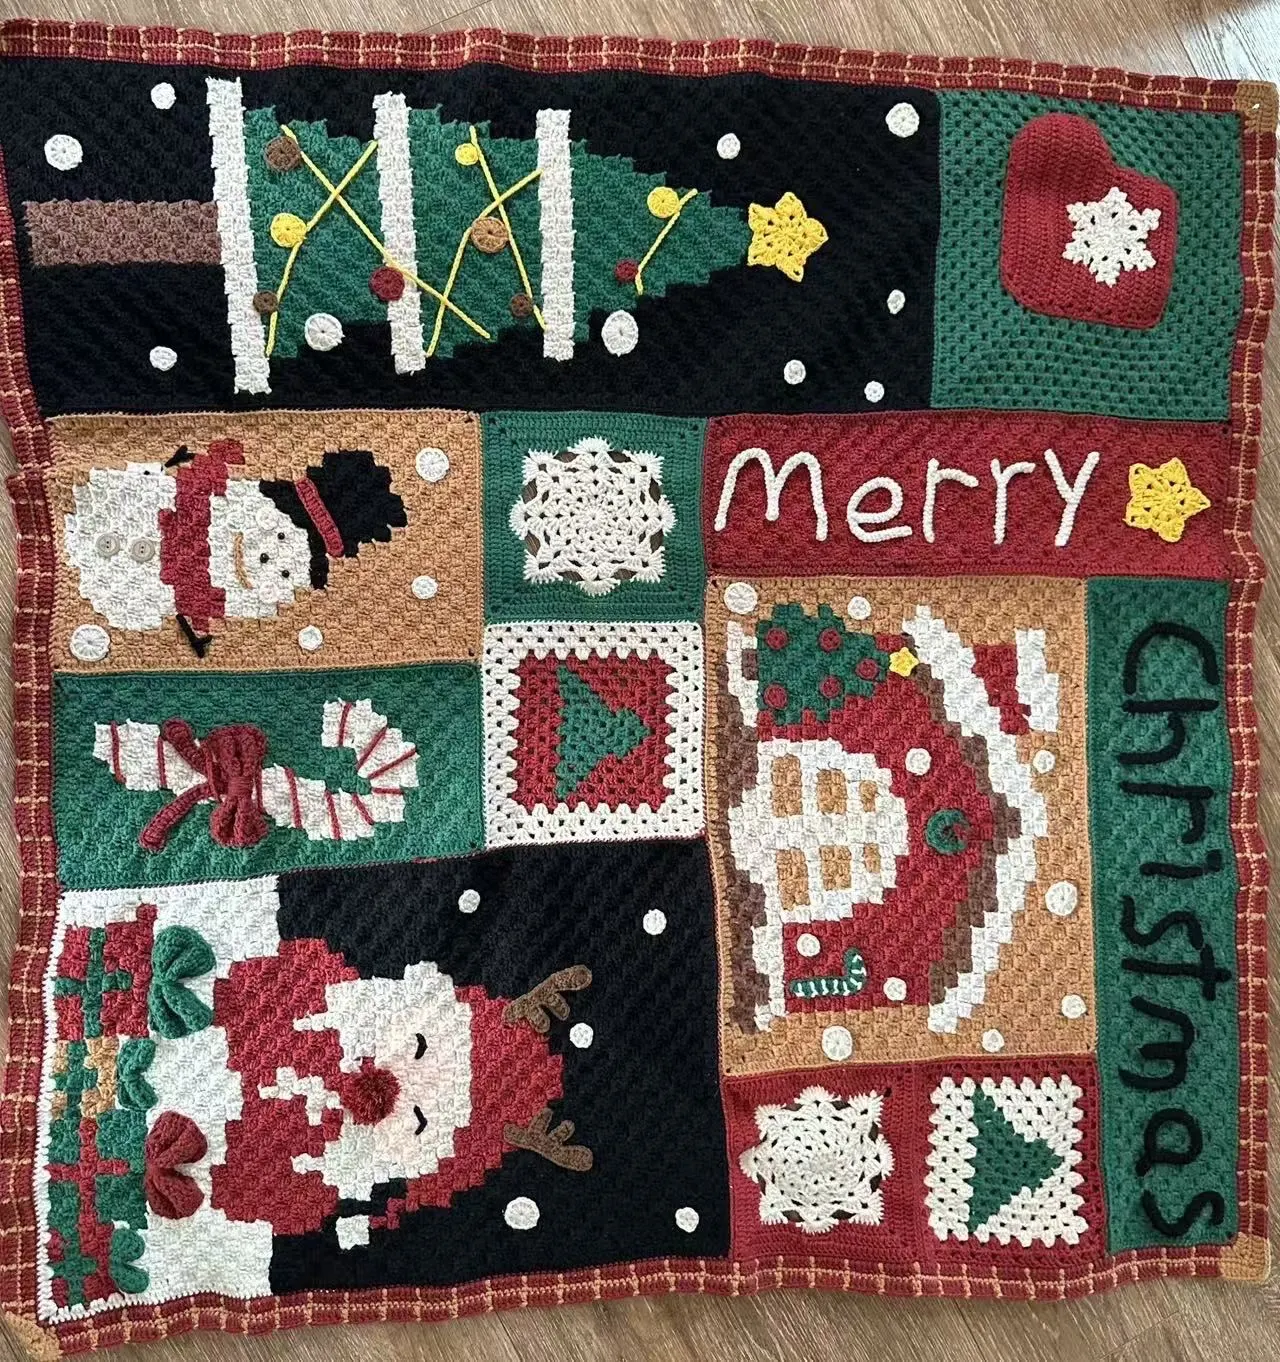
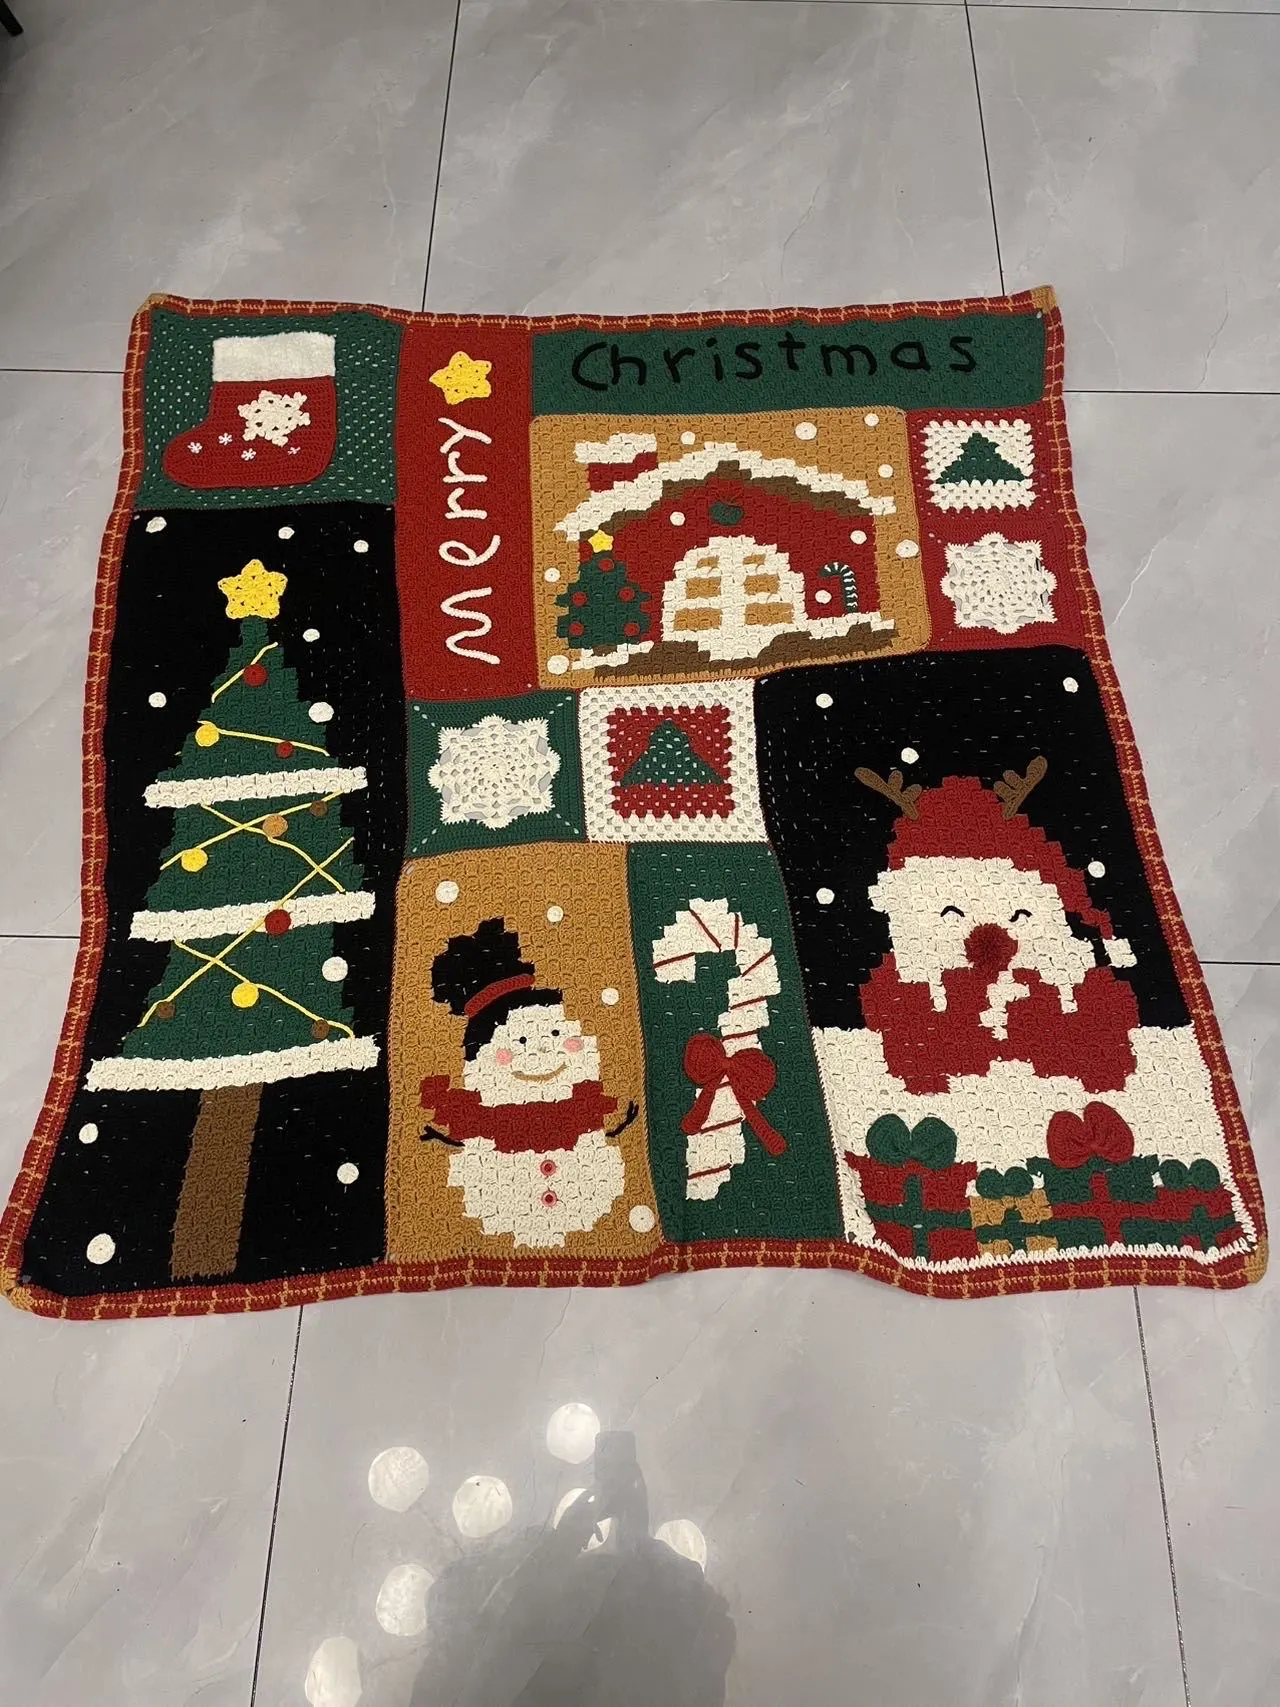
Christmas Snowy Night Blanket
Project preview
See the finished project
Pattern format
Instructions
Watch and follow
Video tutorial
| Style | Yarn | Color |
|---|---|---|
| Style #1 | 4-Ply Combed Cotton & Acrylic Fibre Hand Knitting Yarn |  02#Quartz Pink x 1 02#Quartz Pink x 1 07#Sheer Pink x 1 07#Sheer Pink x 1 09#Aspen Gold x 1 09#Aspen Gold x 1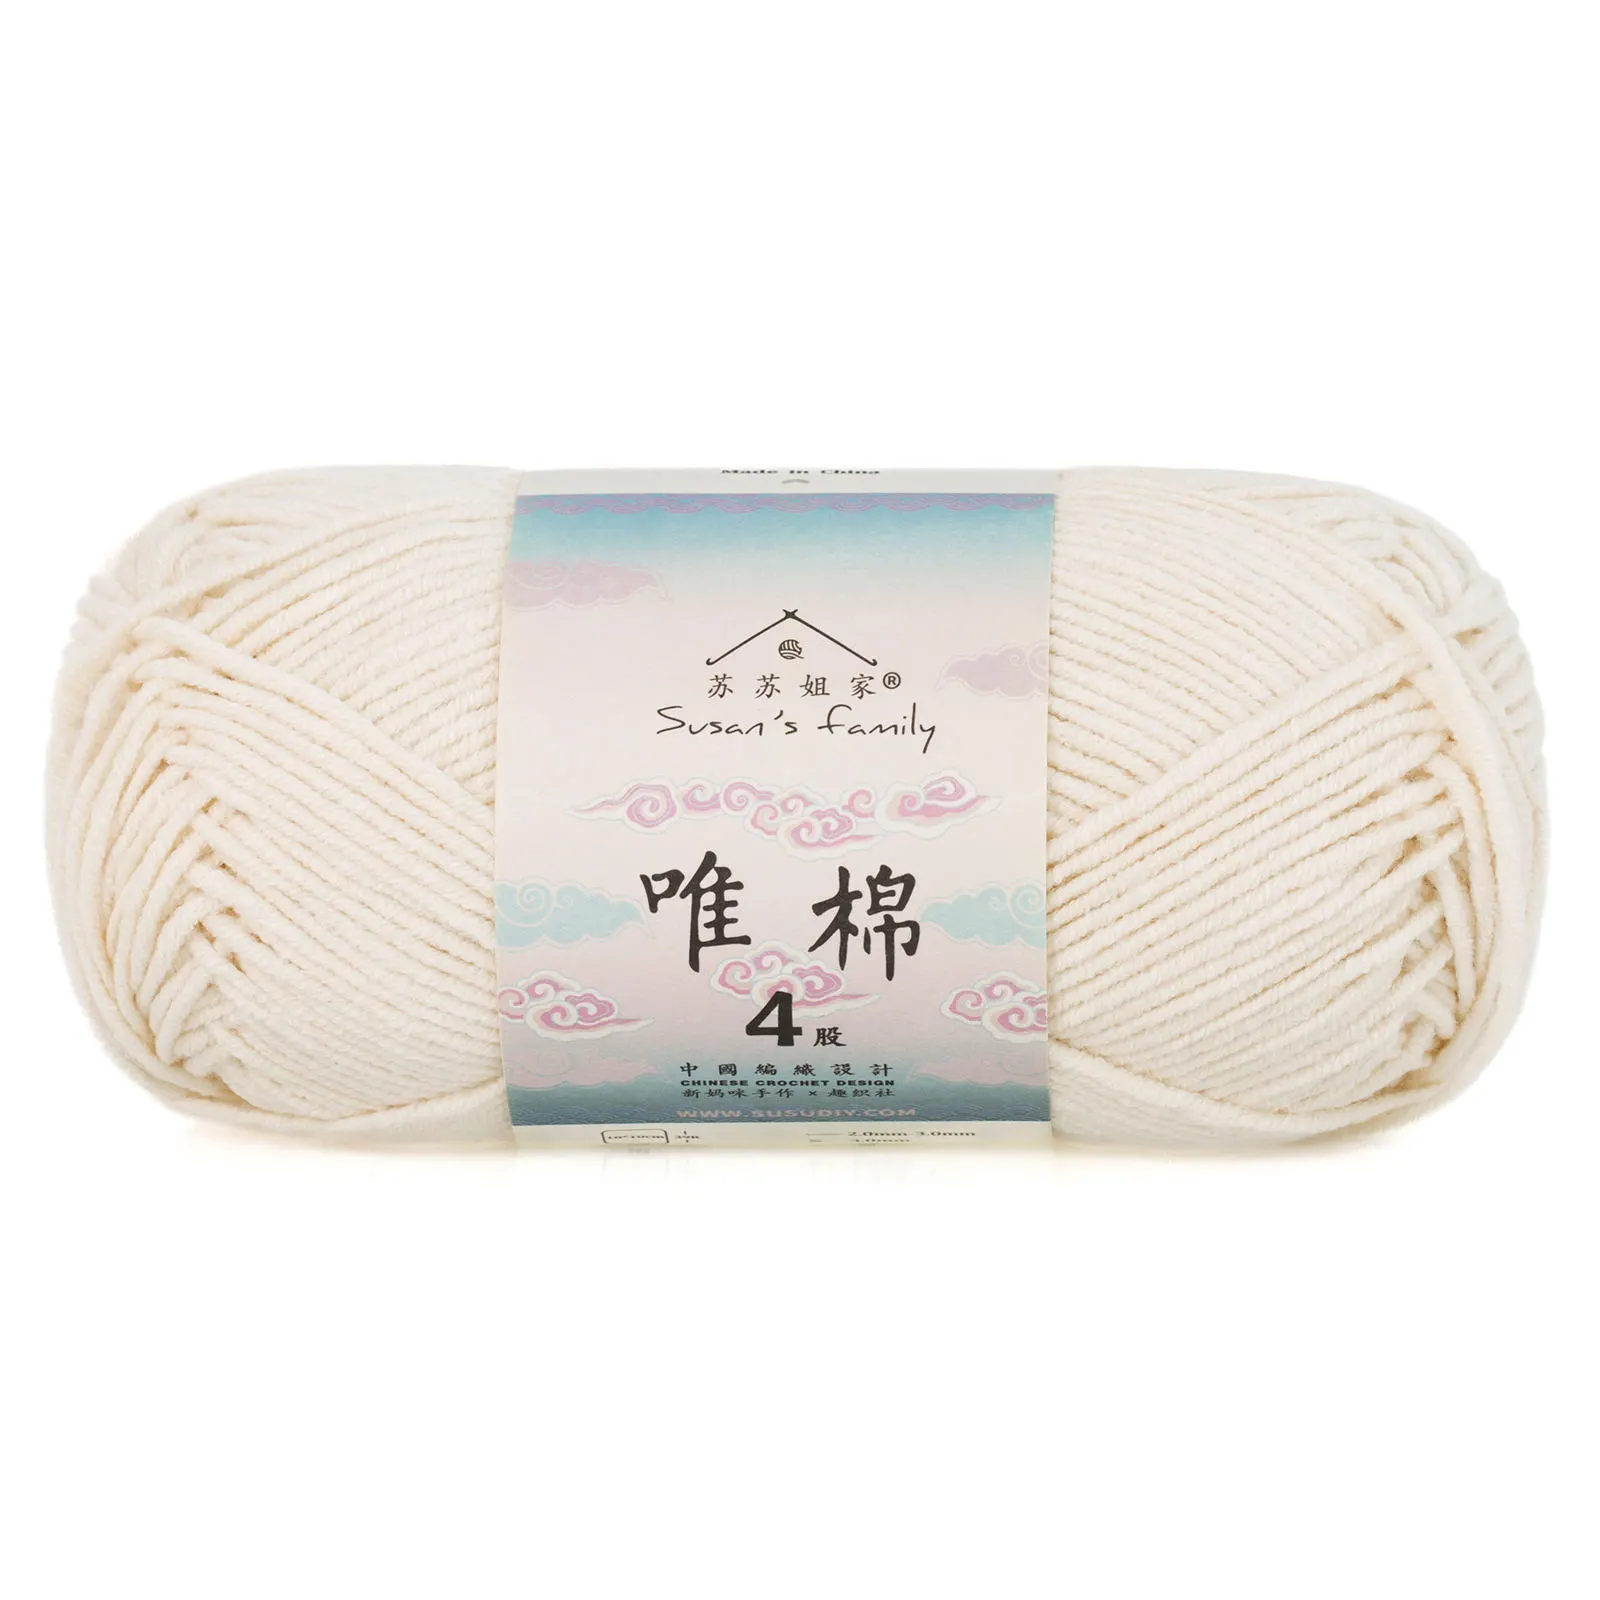 19#Whisper White x 4 19#Whisper White x 4 21#Black Beauty x 4 21#Black Beauty x 4 23#Spruce Yellow x 3 23#Spruce Yellow x 3 29#Aurora Red x 6 29#Aurora Red x 6 34#Toffee x 1 34#Toffee x 1 41#Foliage Green x 5 41#Foliage Green x 5 |
This blanket consists of the main part and decorations. We'll start by making the main part. Once that's done, we'll make and attach the decorations.
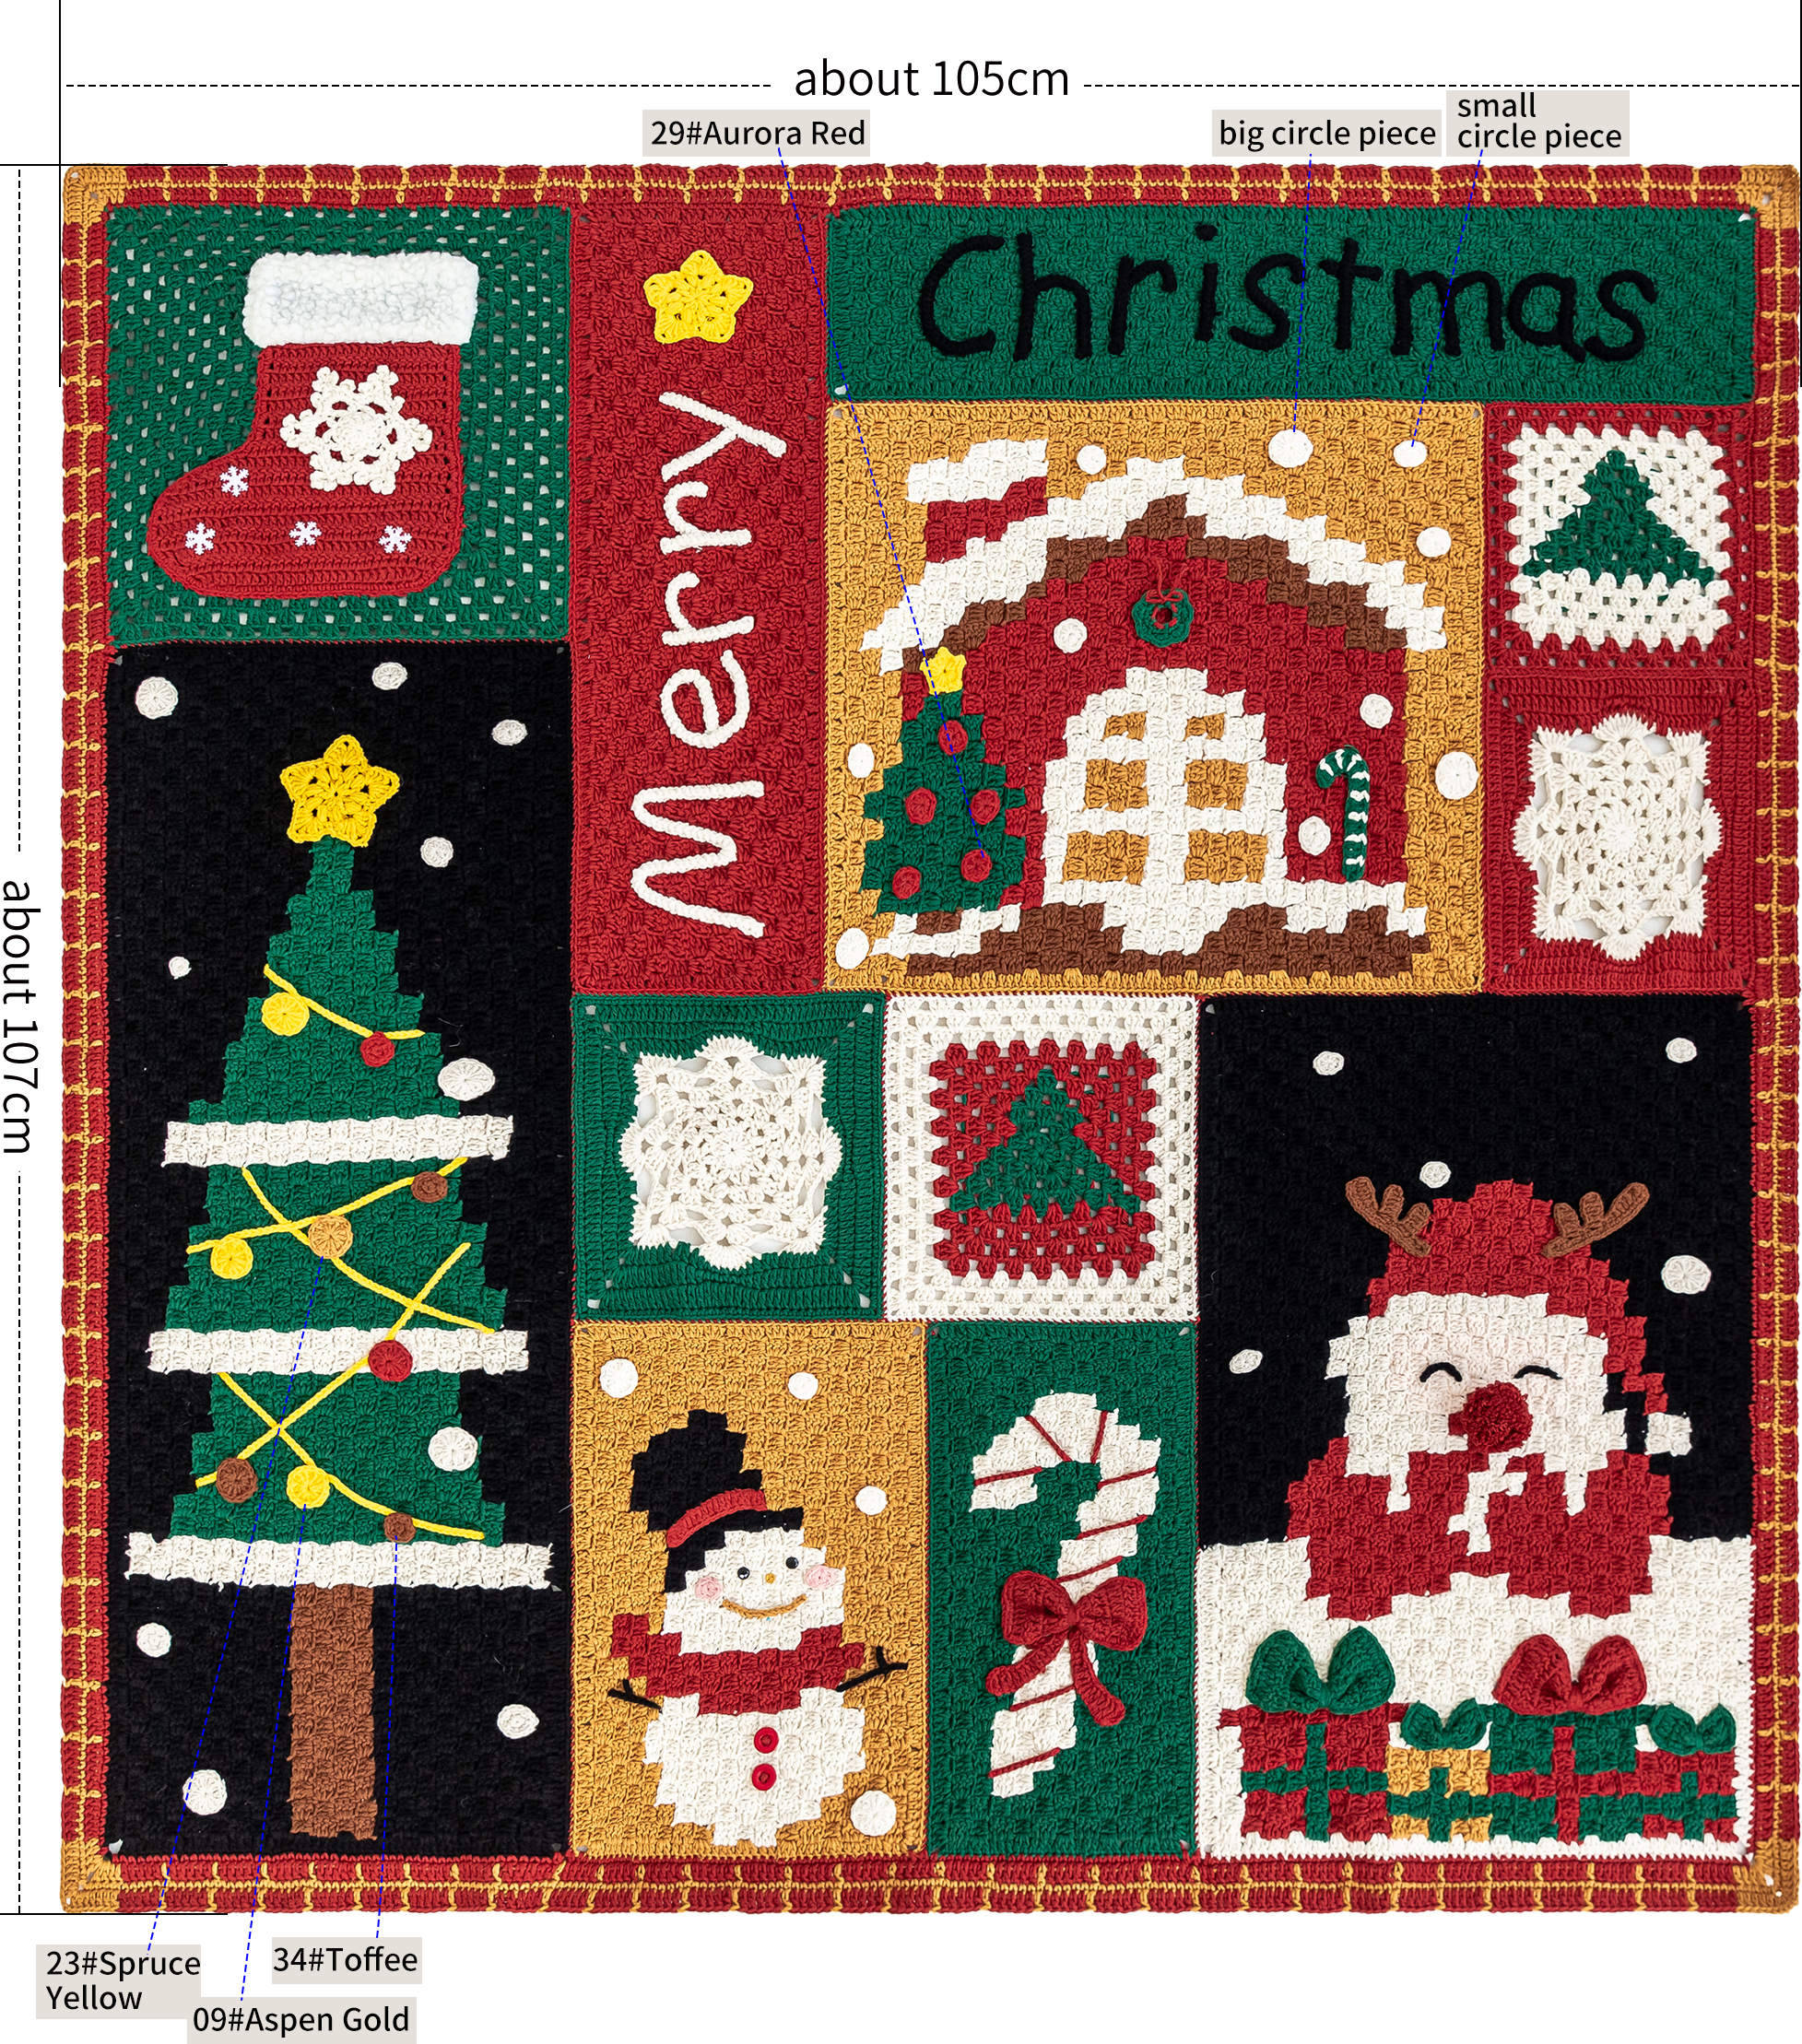
The handcrafted measurements may have an error of 1 to 2 cm. Due to variations in individual tension, the size of the sample is for reference only.
Material : 4-Ply Combed Cotton & Acrylic Fibre Hand Knitting Yarn
Hook : 3.00 mm crochet hook

Chart Key











Note: This pattern is making in Chinese crochet pattern terms, and the stitch name is written using American terminology. All measurements in charts are in cm. 
Part 1 Main partA
The main part is made up of different motifs, fabric pieces. Crochet the edging for the fabric piece. Connect the motif fabric pieces. And the overall edging. First, crochet the motifs and fabric pieces. Then crochet the edging. Once all the motifs and fabric pieces are completed, sew them together. Finally, crochet along the edge.
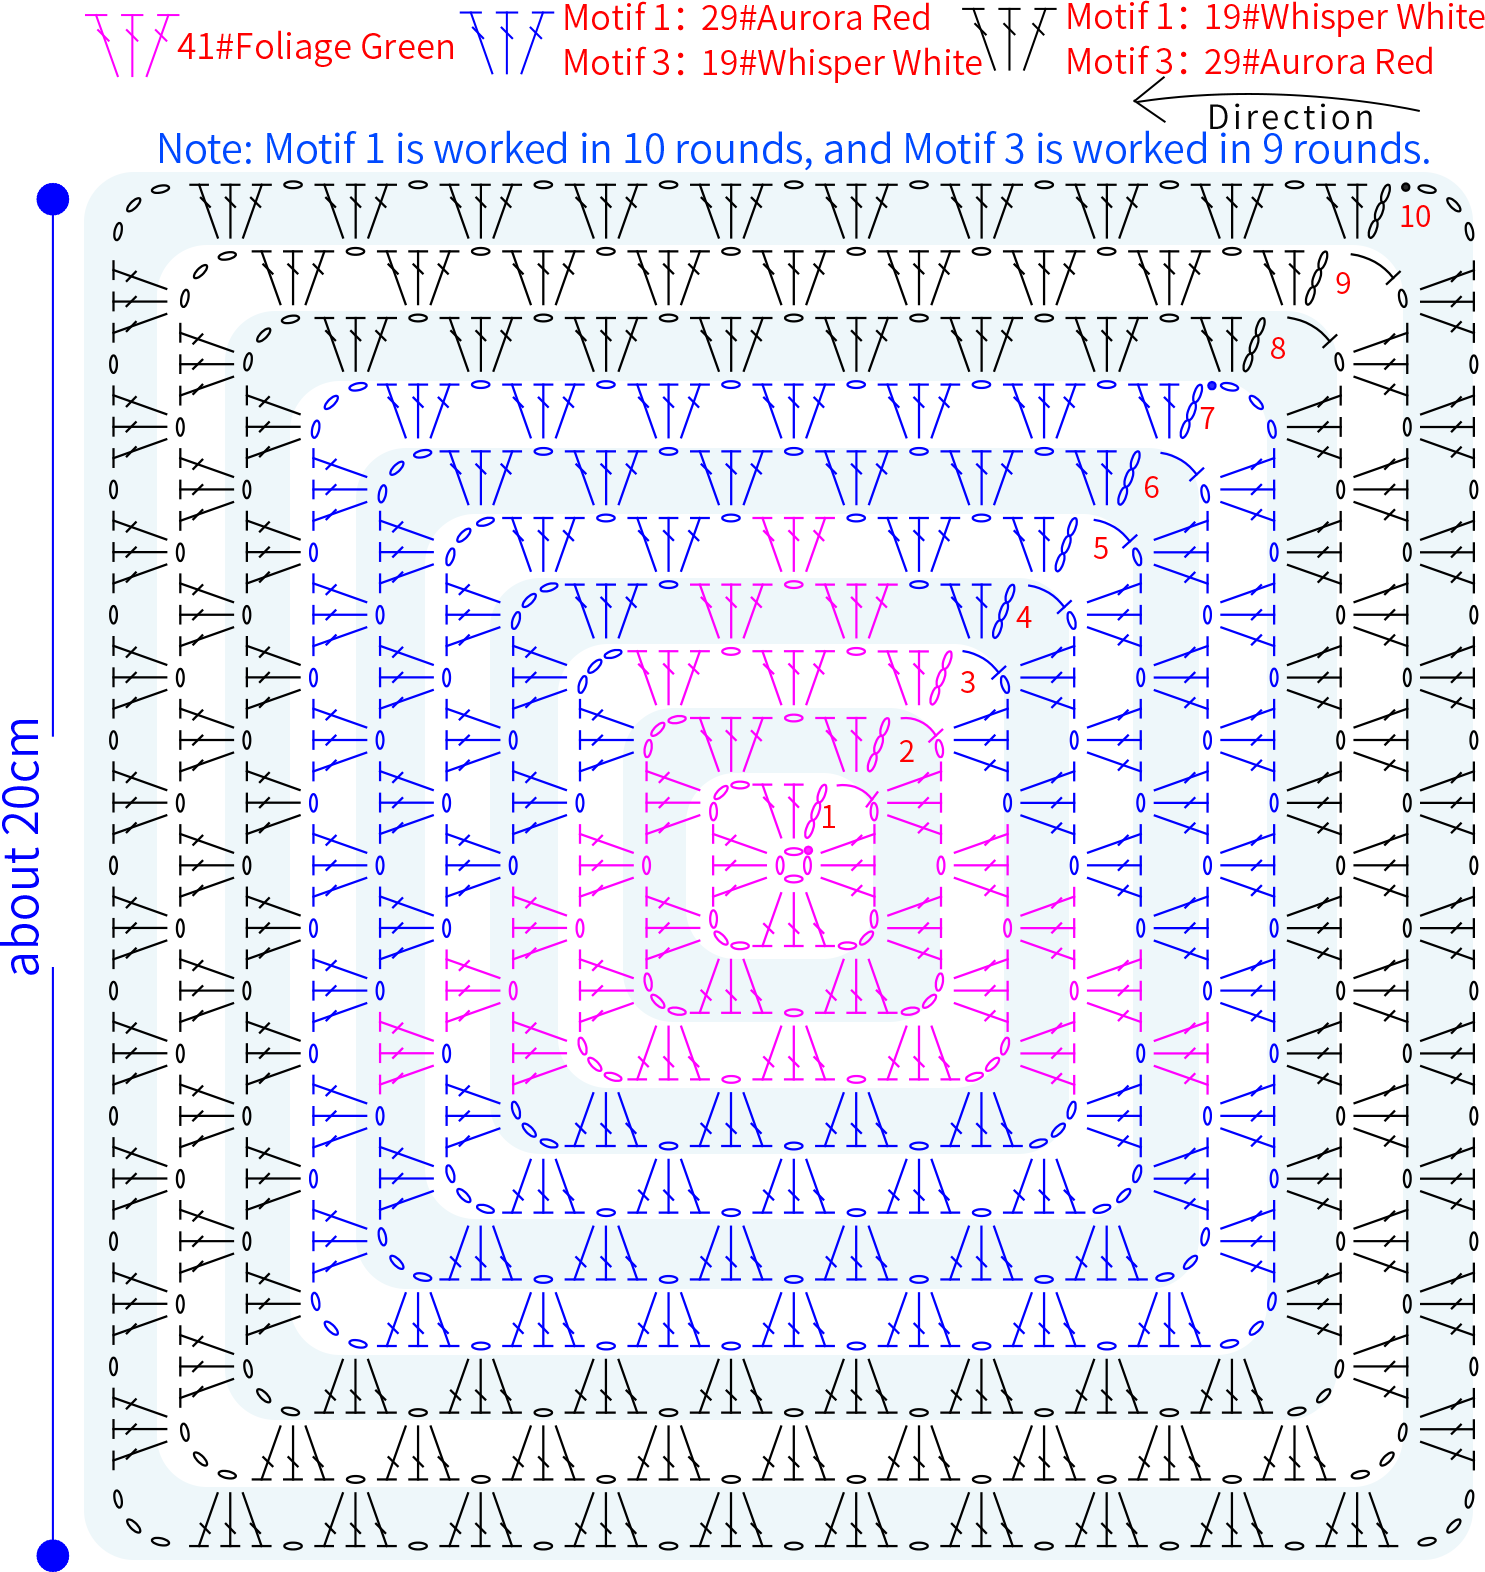
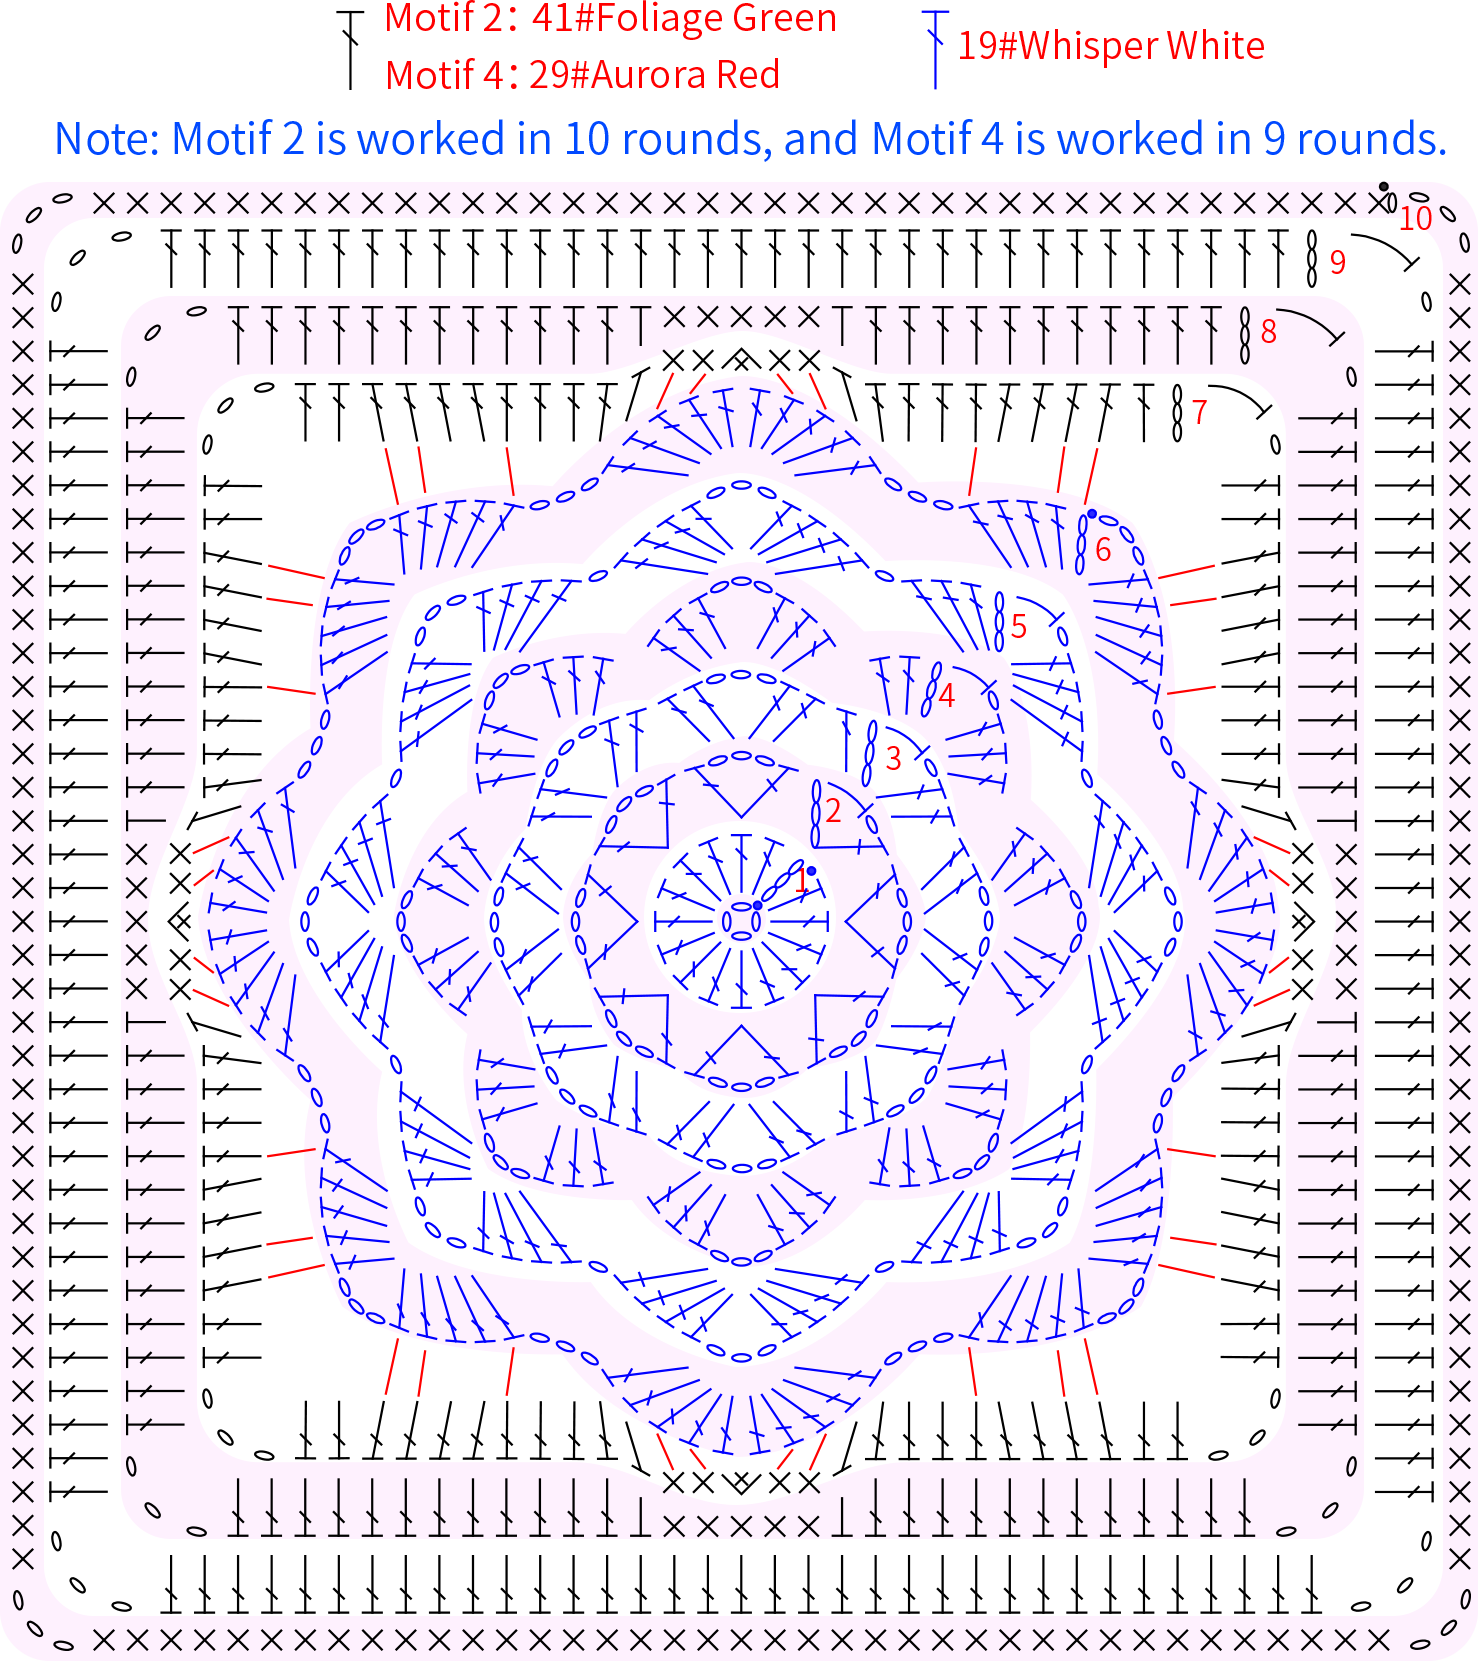
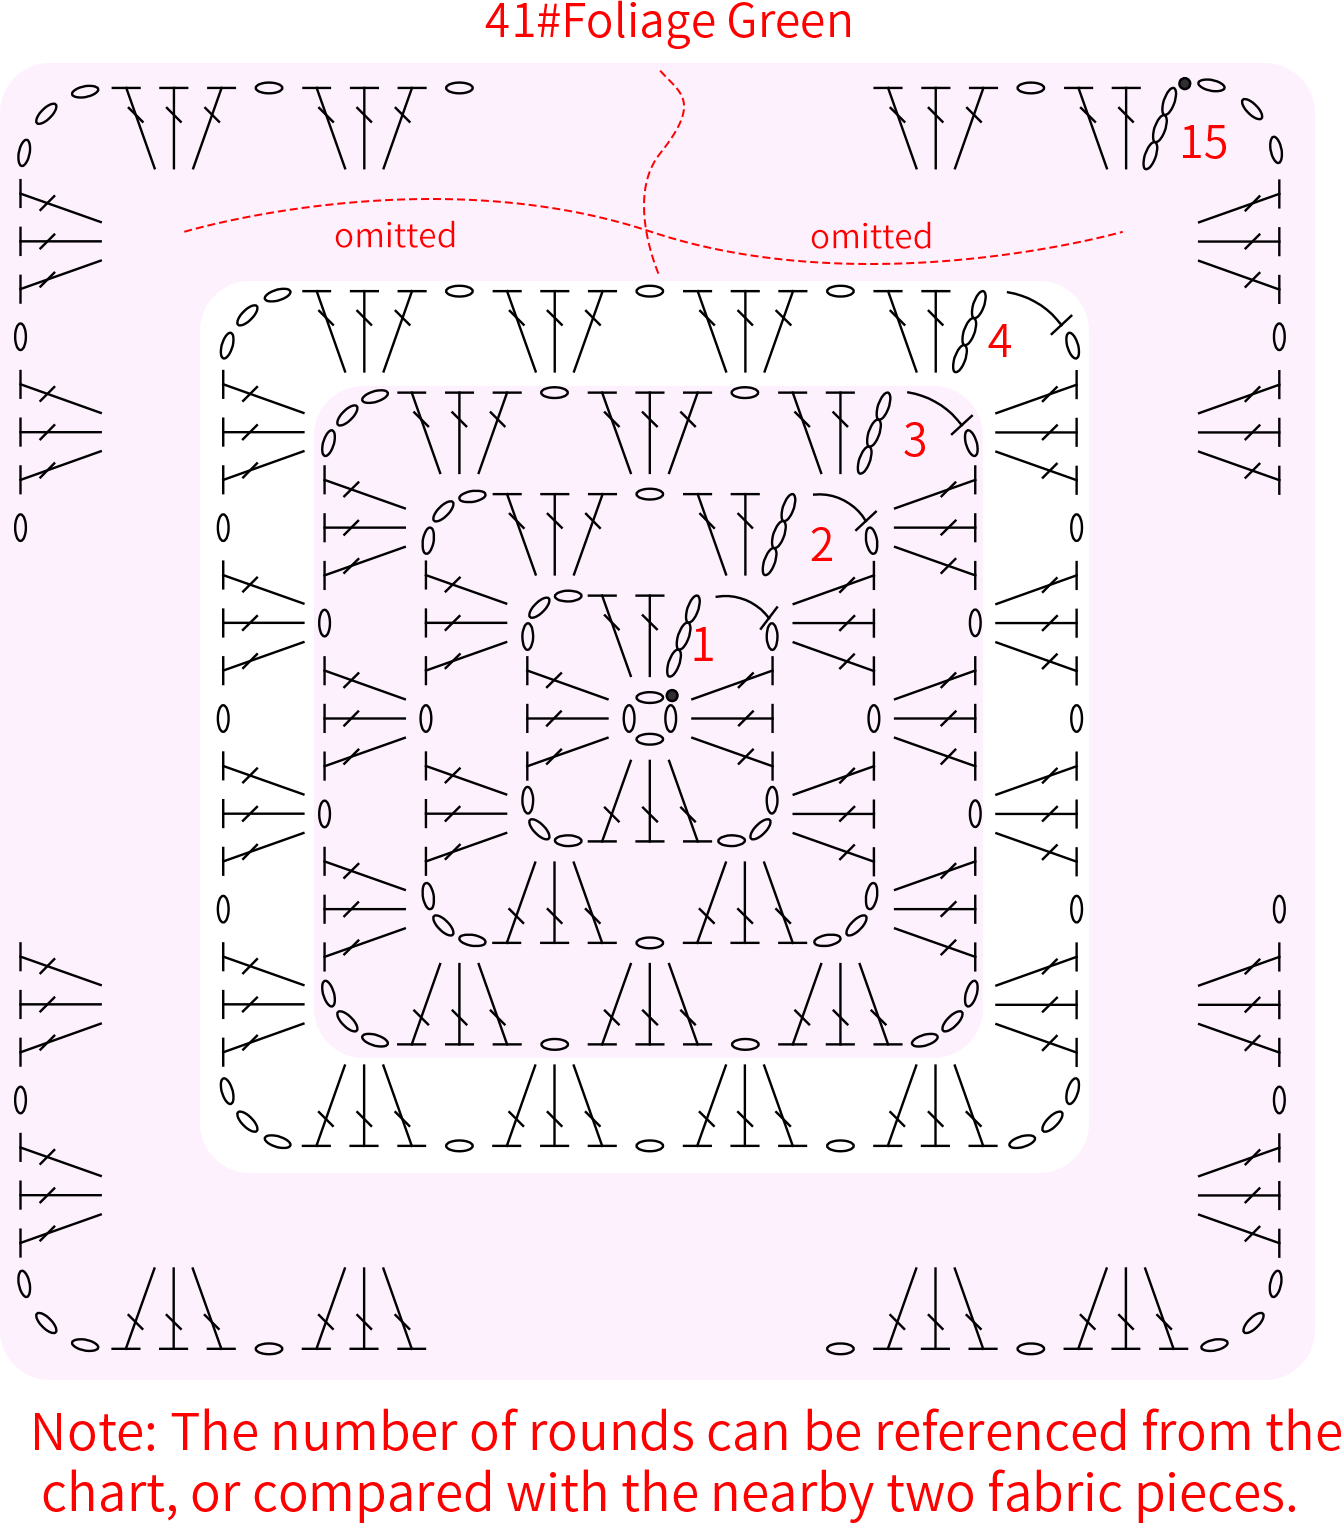
There are four motifs in total. Motif 1 and Motif 3 are almost identical, and Motif 2 and Motif 4 are also almost identical. All of them use the chain ring method to start, working in rounds counterclockwise. Please refer to the video demonstration for more details.
Step 1 Motif 1 A1 01' 40'' (Part 1)
Motif 3A3 26' 56'' (Part 1)
Step 2 Motif 2 A2 17' 18'' (Part 1)
Motif 4A3
Step 3 The fabric pieceA4 27' 52'' (Part 1)
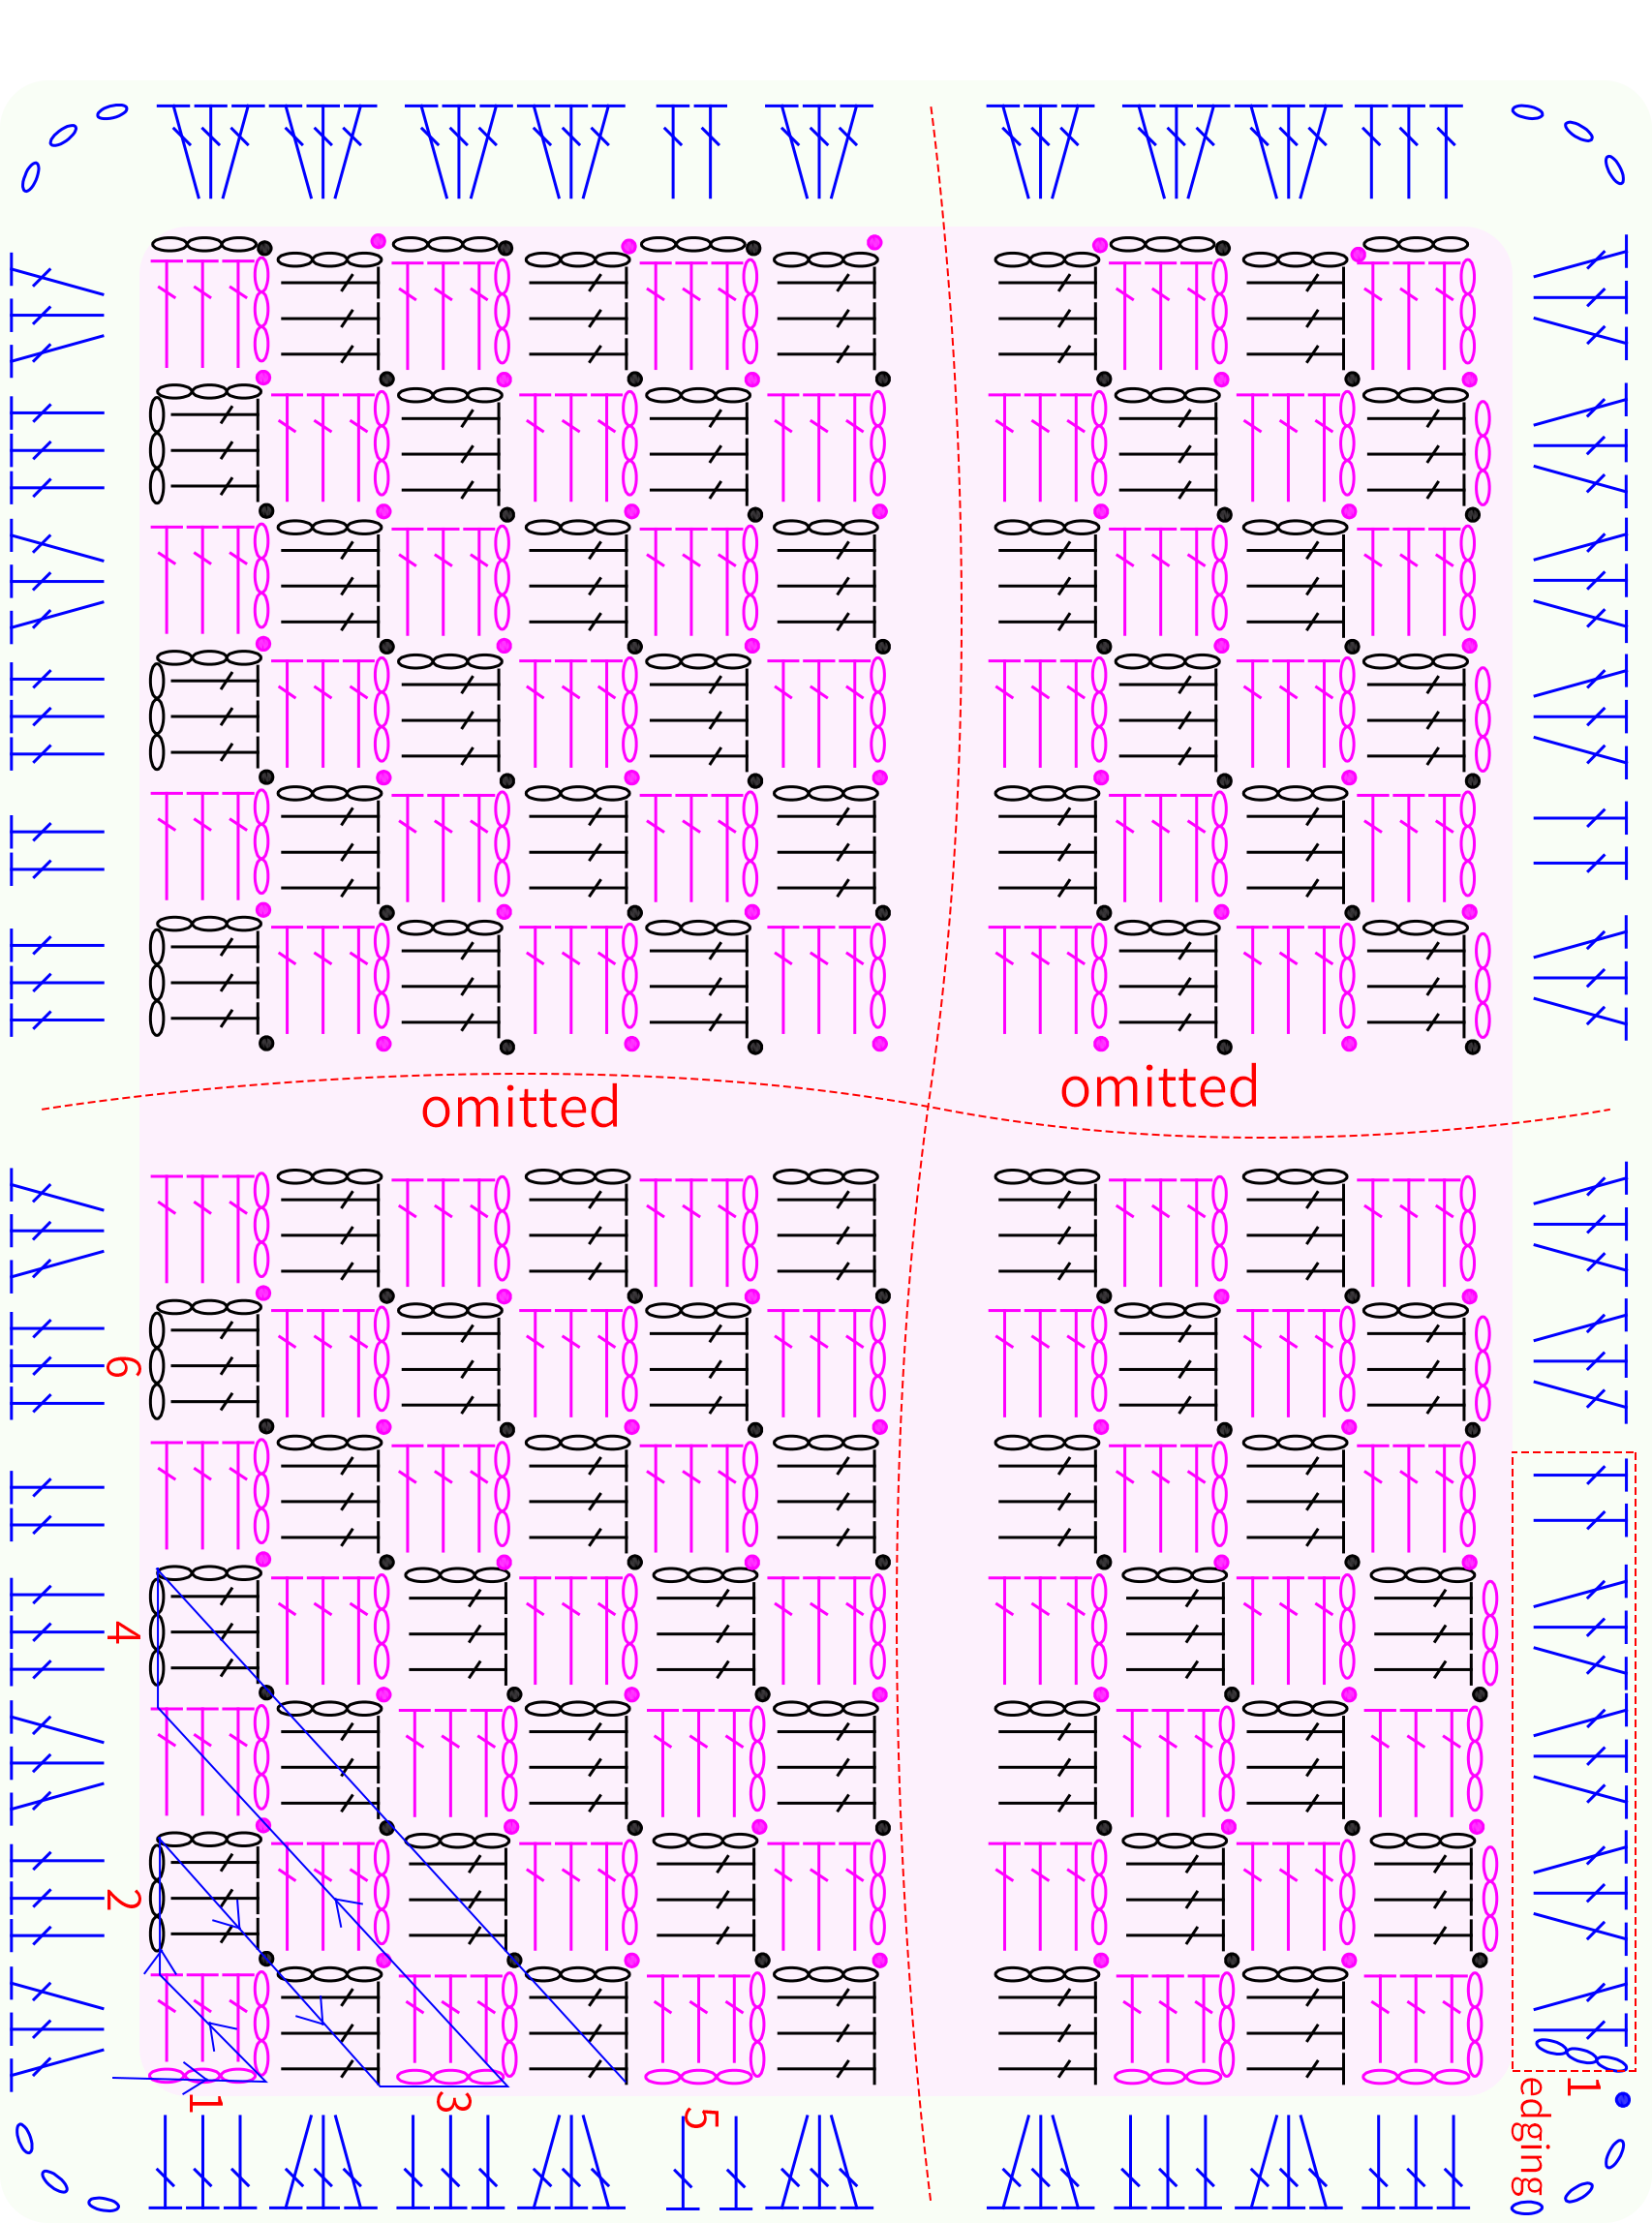
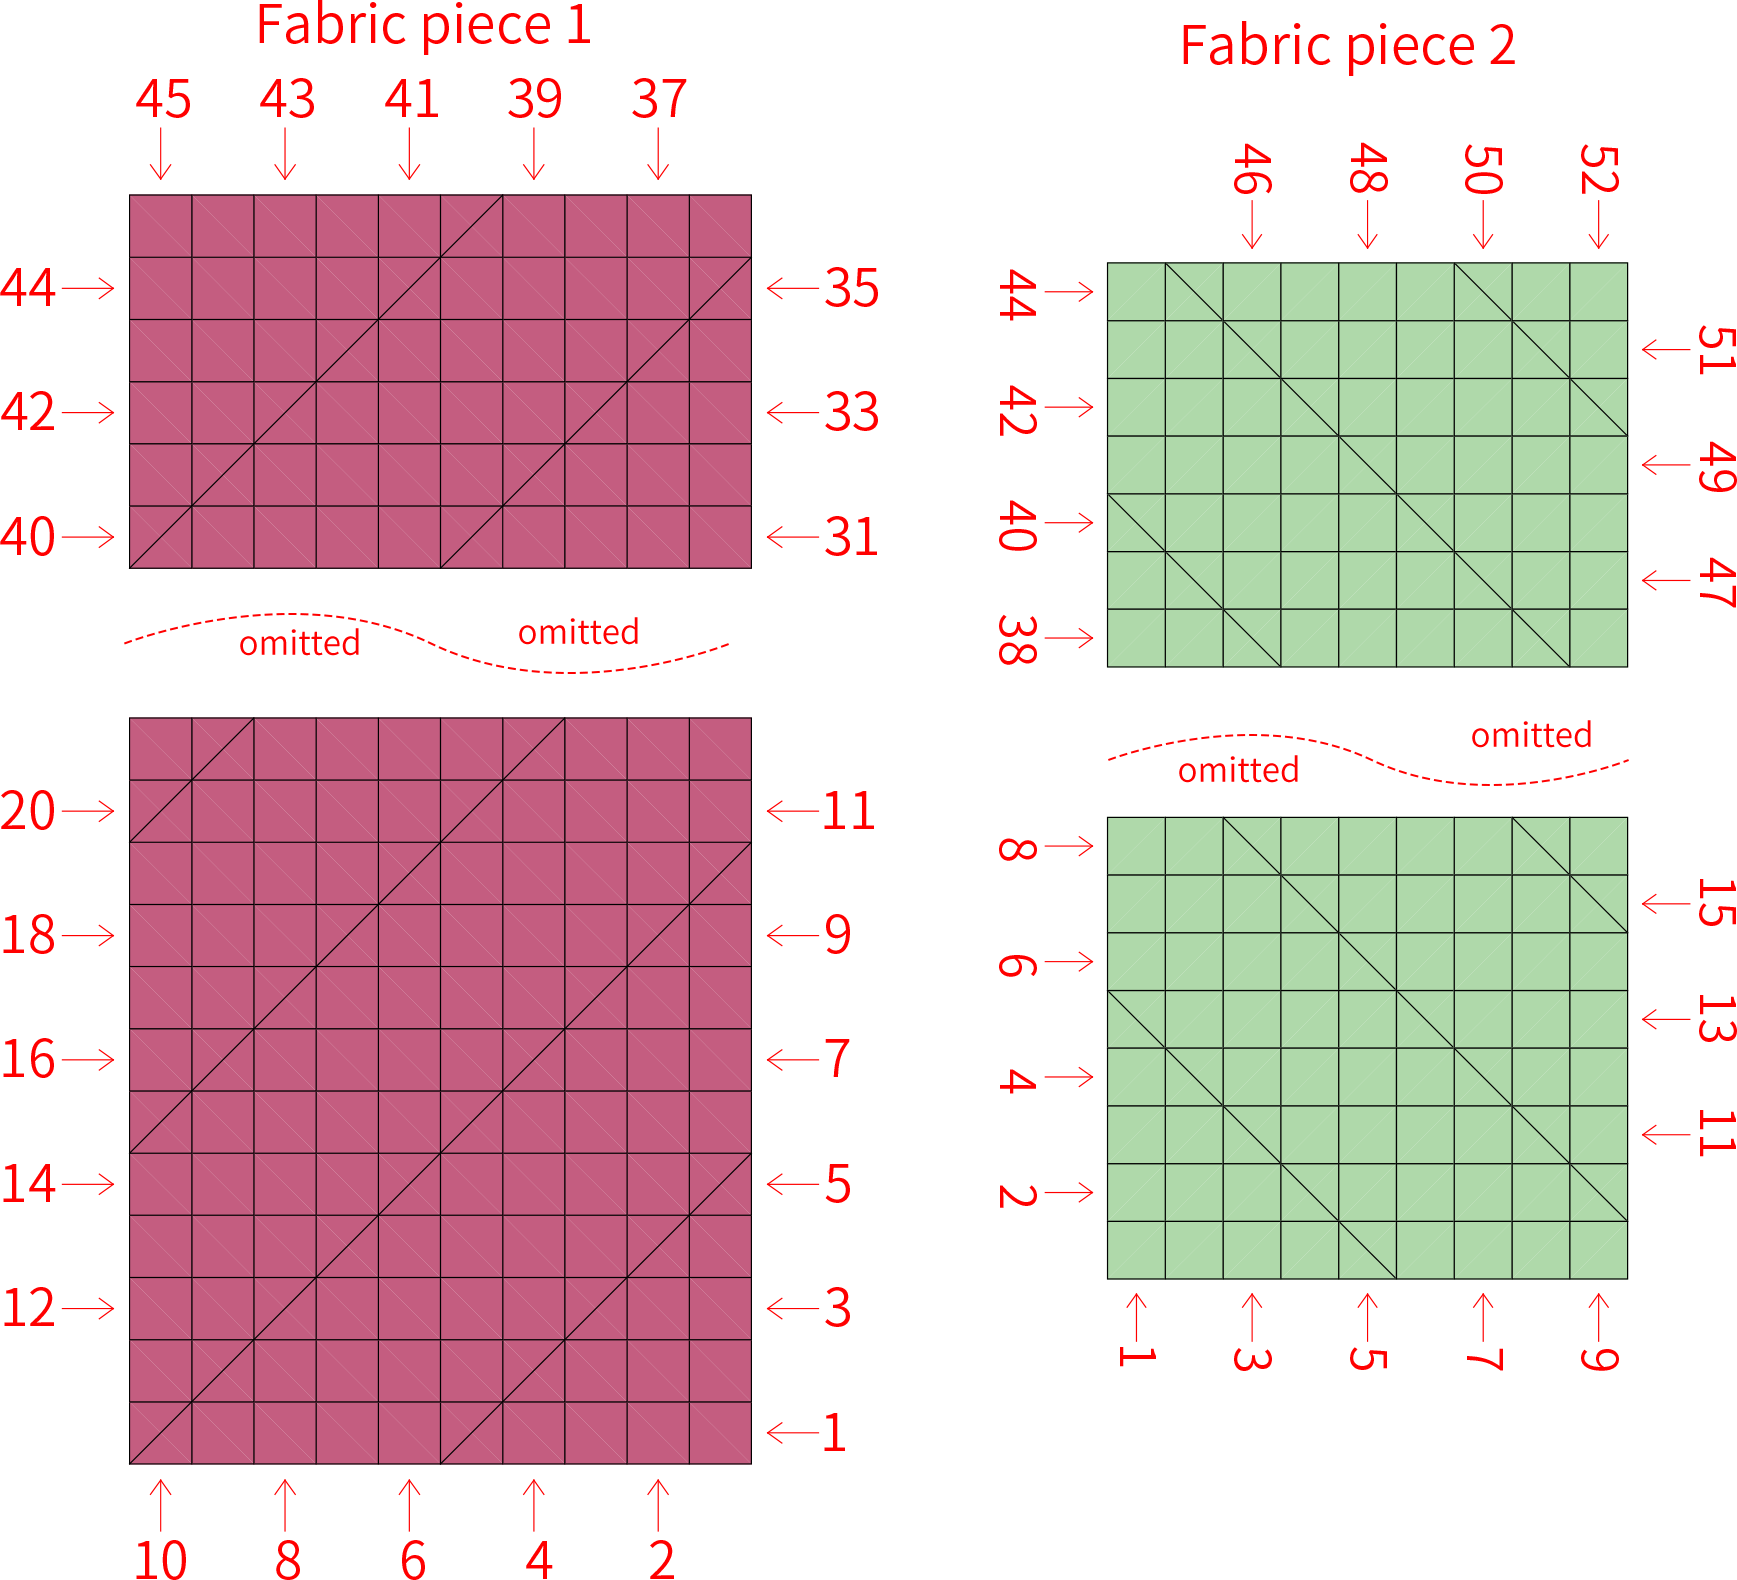
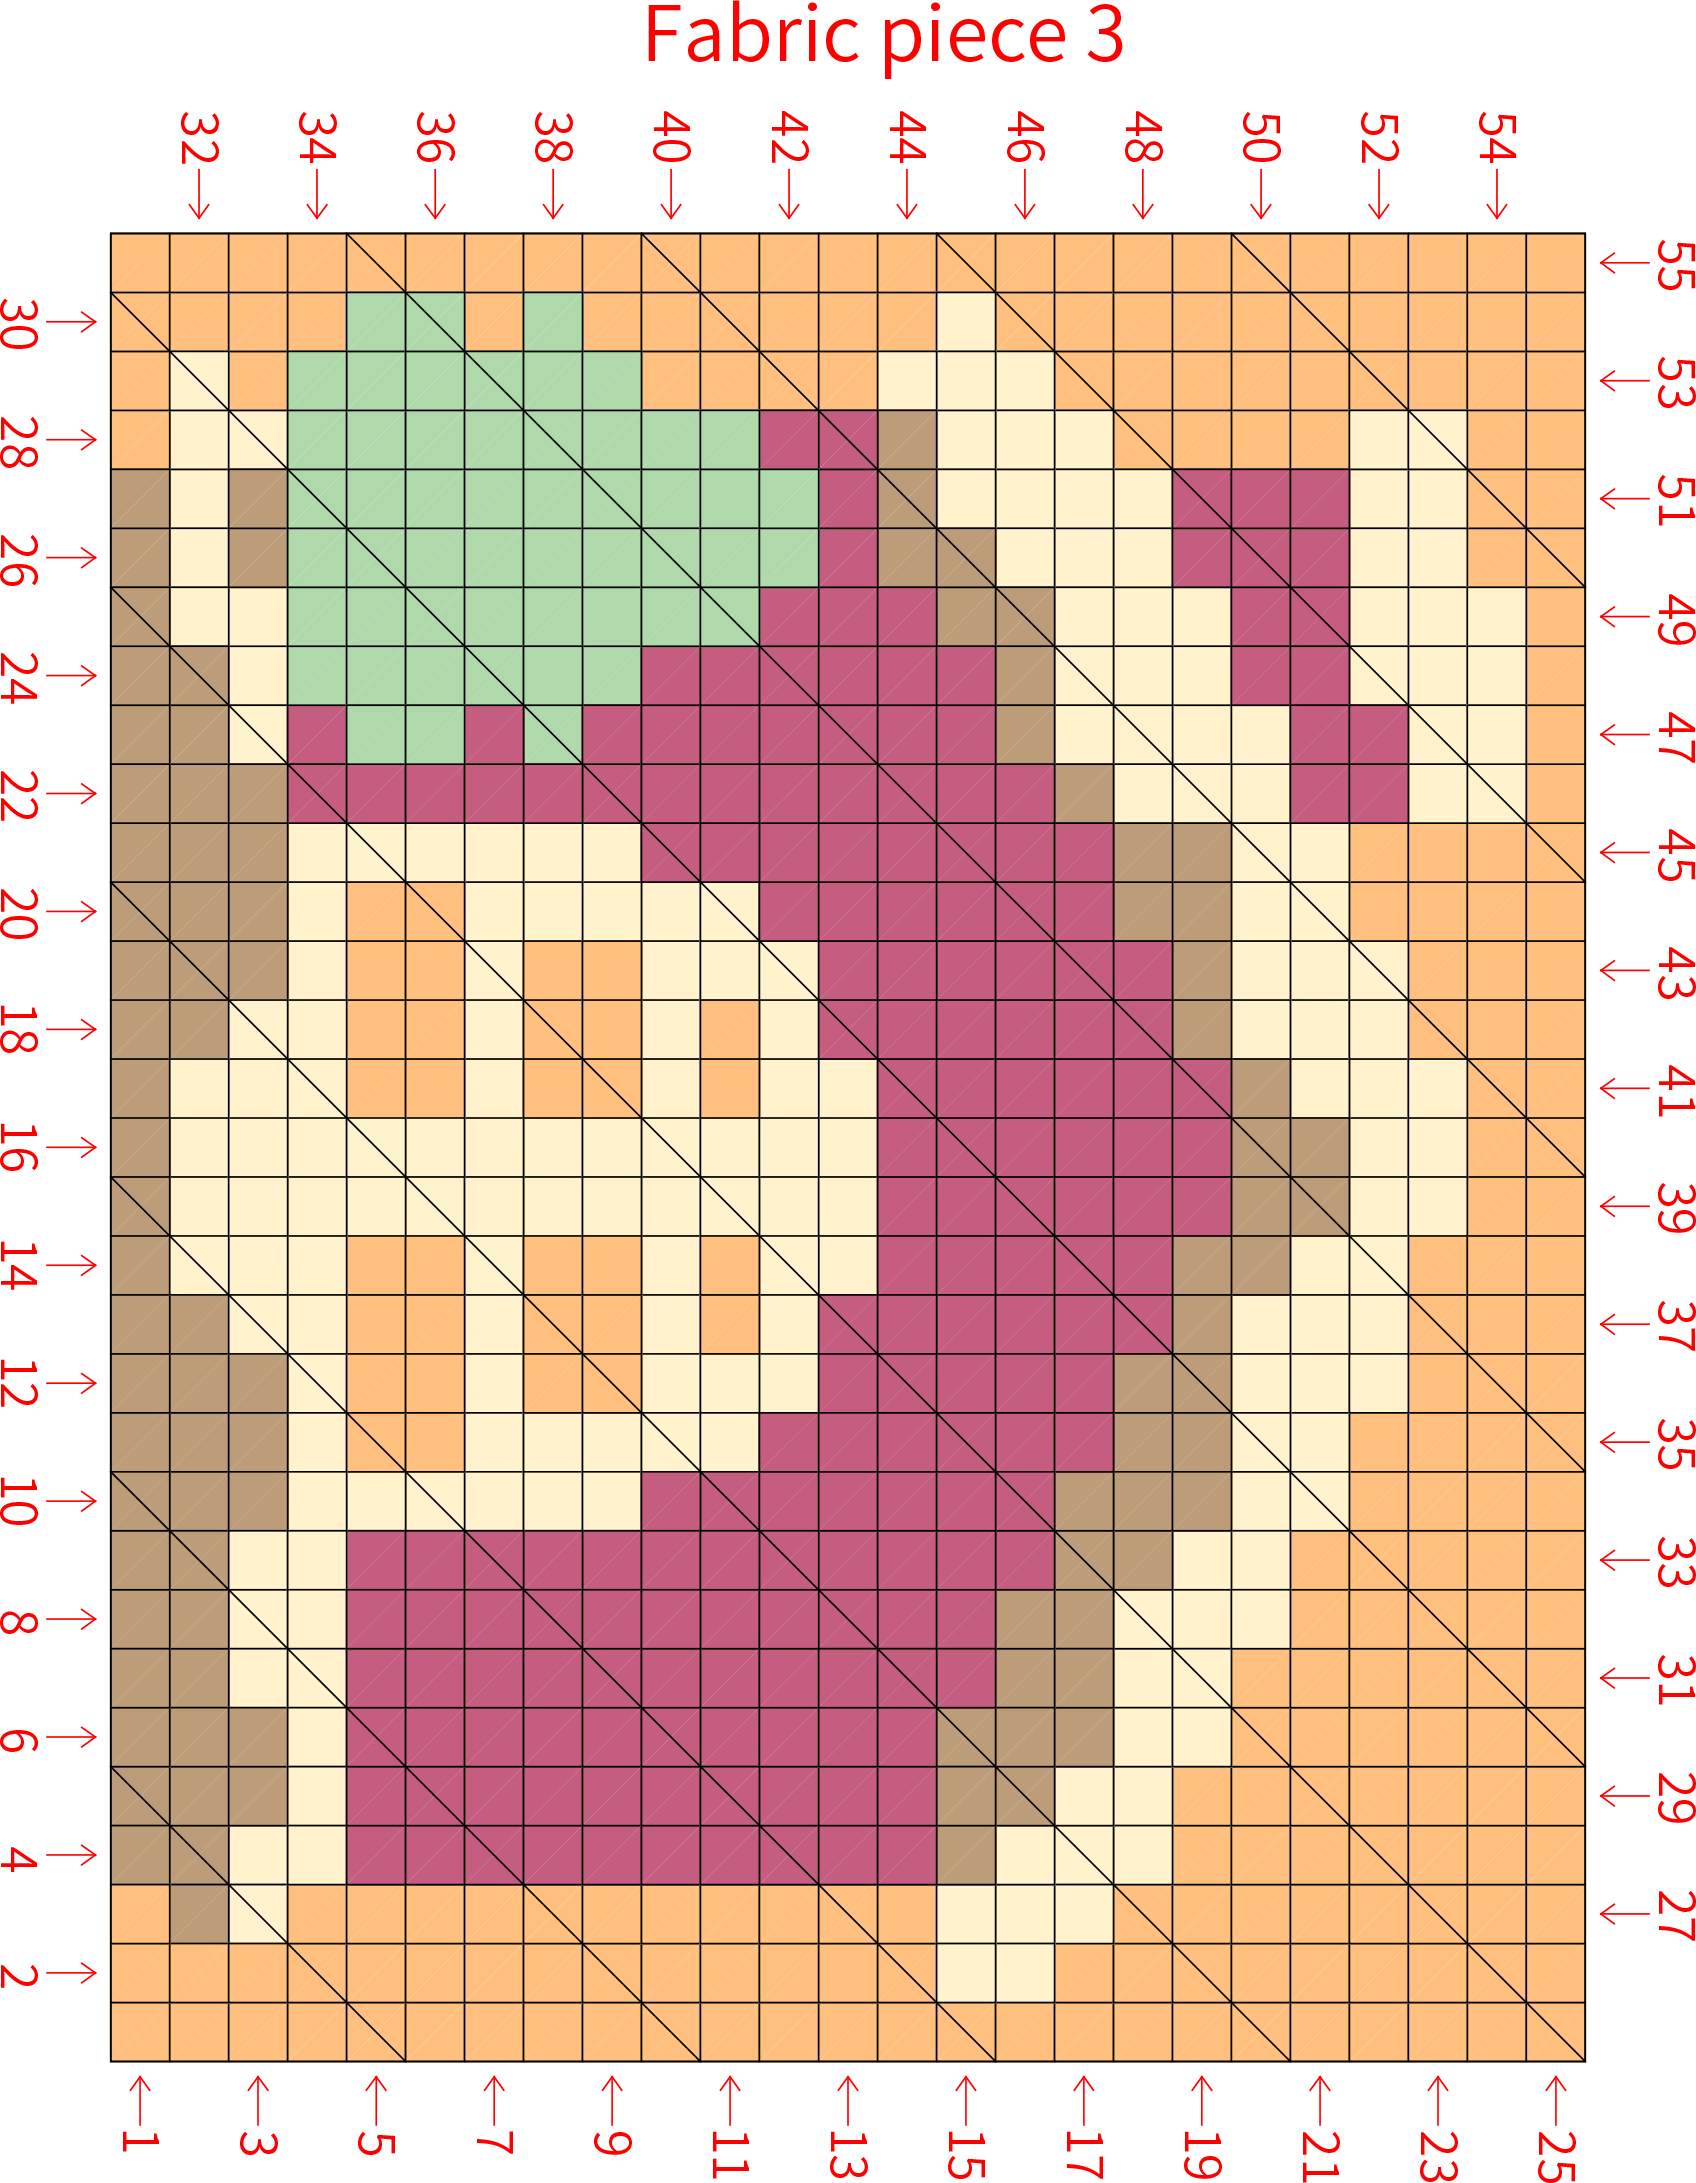
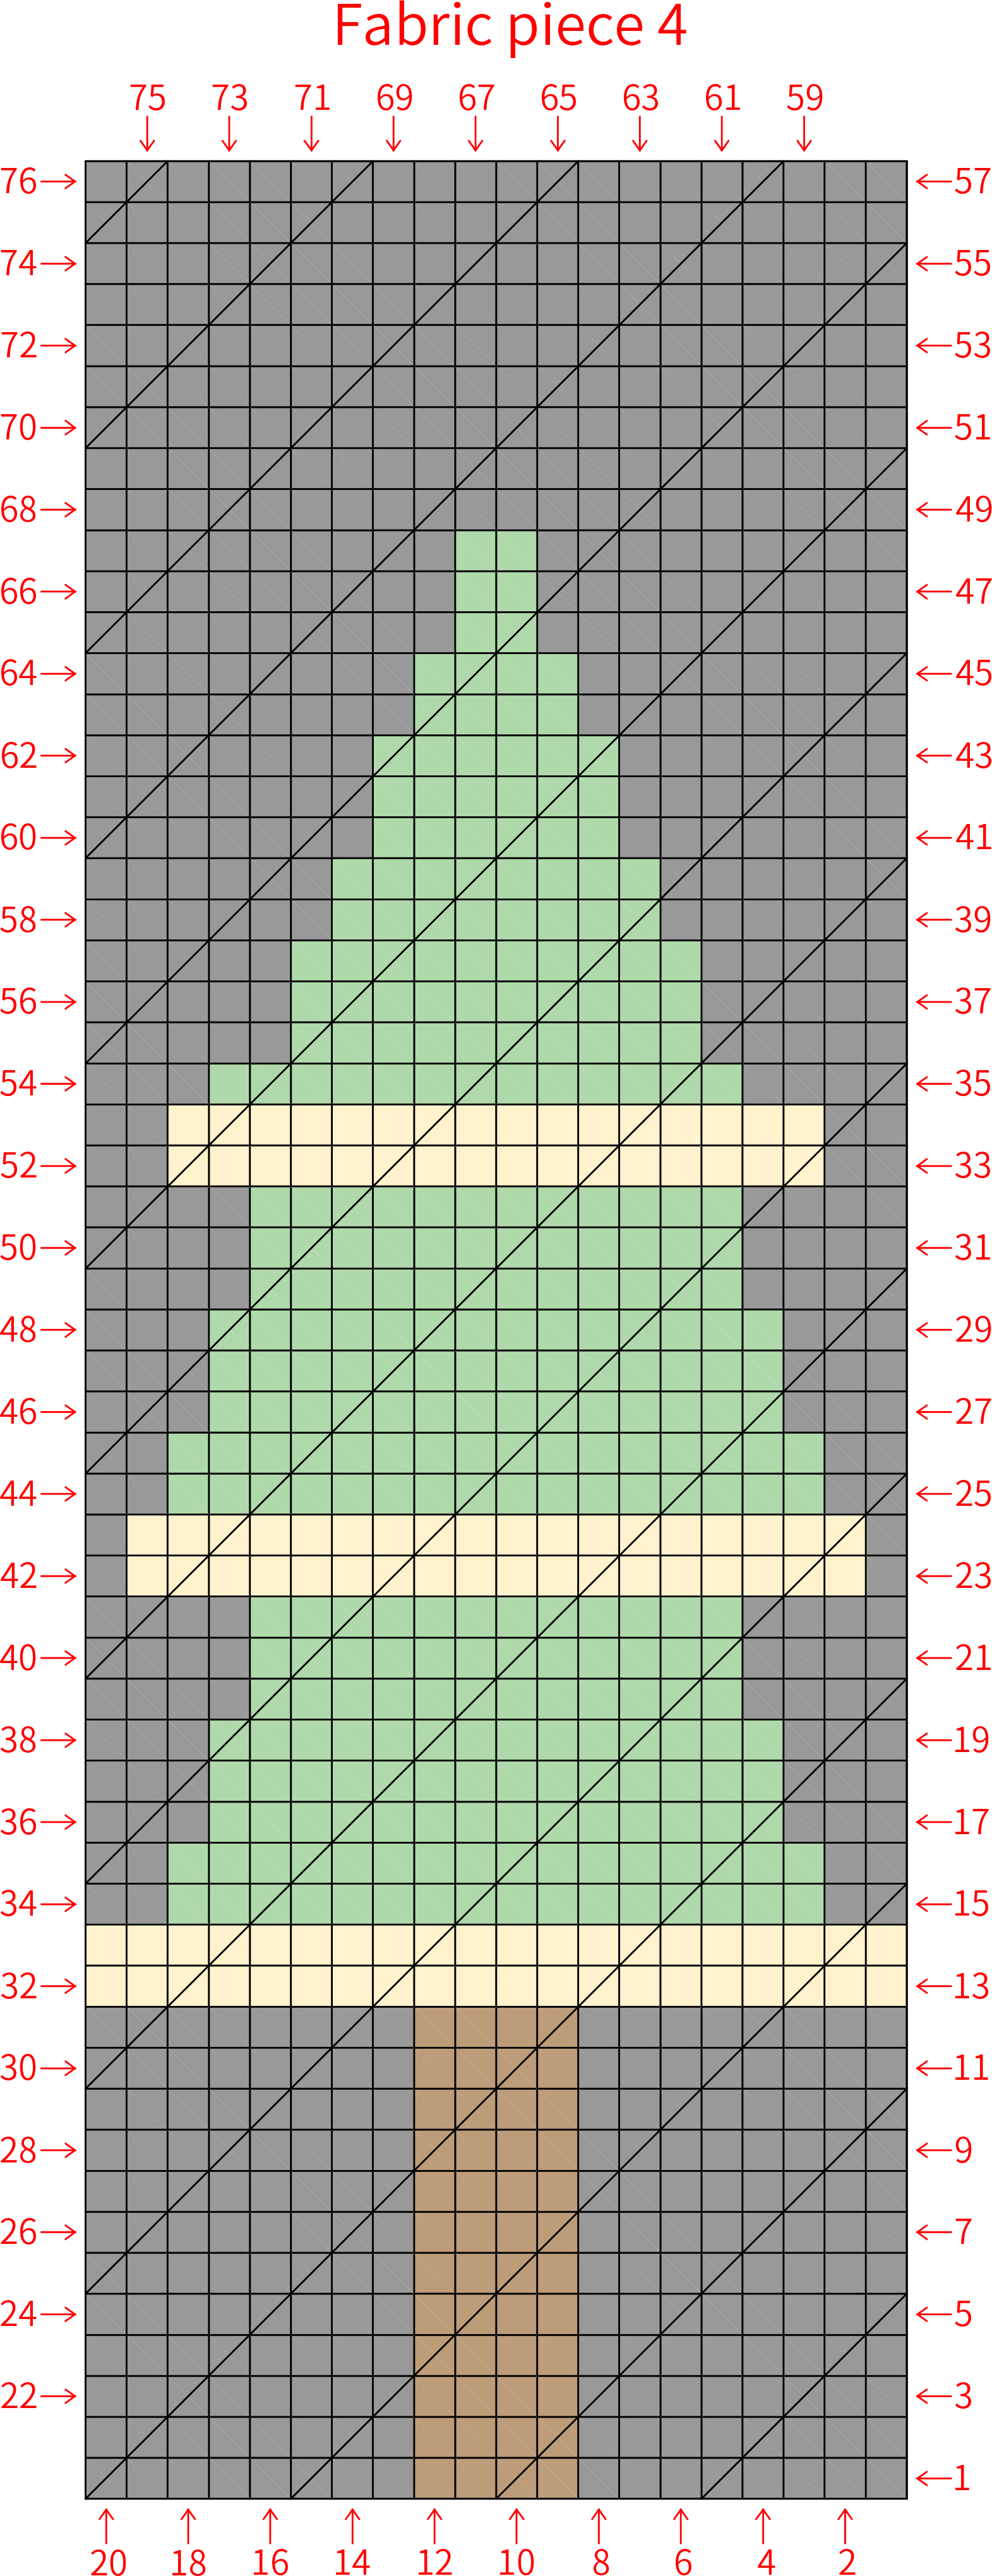
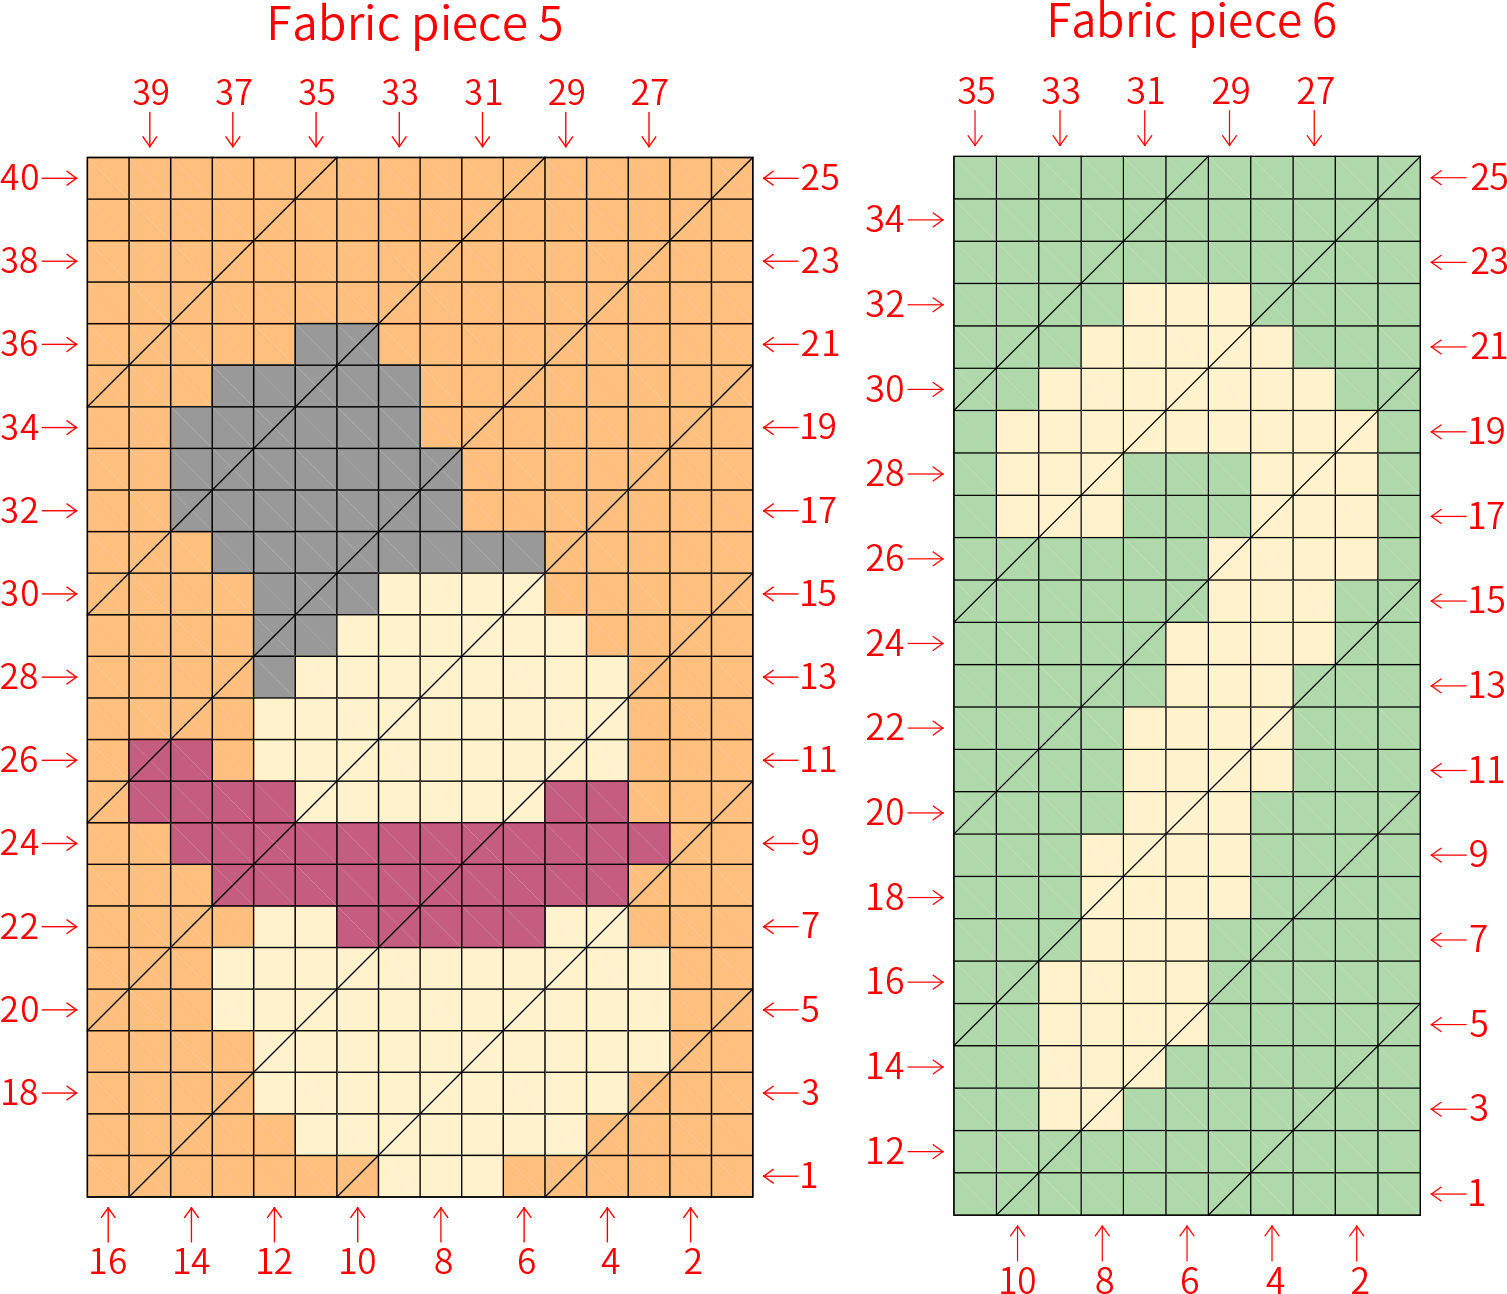
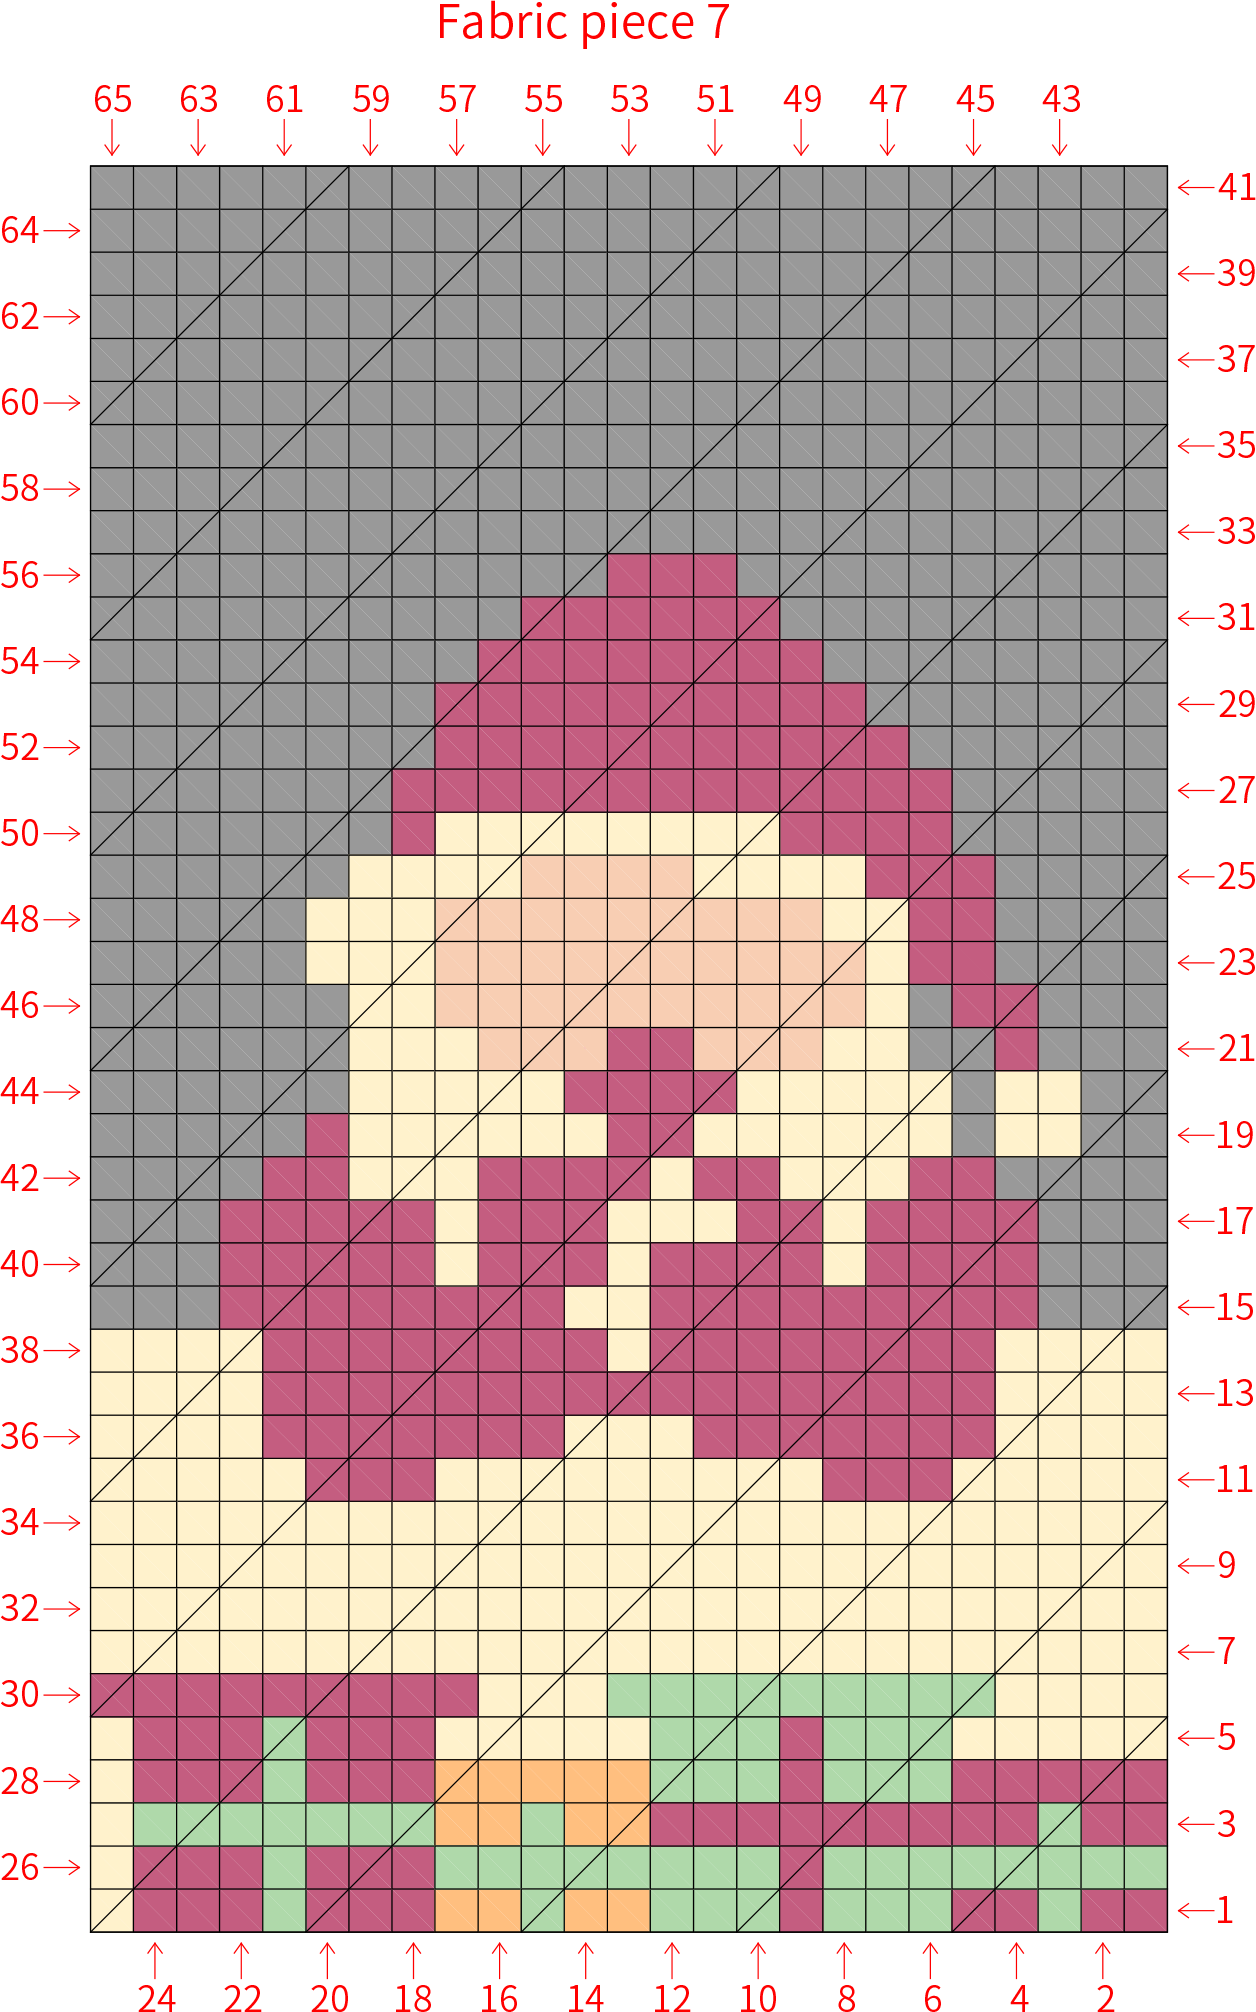
There are a total of 7 fabric pieces, each of which needs to be crocheted according to the pixel chart. Some pieces are solid colors, while others require color changes to crochet the corresponding patterns. After completing each piece, you need to crochet an edging around the outer edge. For more details, refer to the video demonstration.
Note: Each side is crocheted with four groups of three double crochets, and the fifth group has two double crochets. Follow the pattern, and if the fifth group falls at a corner, crochet two double crochets. For the edging, use color 21 (black) for the black areas of piece 7, and color 19#Whisper White for all other areas. For all other pieces, use the same color yarn as the last row of the piece for the edging.

Step 4 Motif 5A5 60' 00'' (Part 1)
Step 5 Sew the fabric pieces and motifs togetherA6 60' 50'' (Part 1)
Referring to the diagram, position the pieces correctly, then pick up the half loops close to each edge and sew them together using the whip stitch method (with 29#Aurora Red). For more details, you can refer to the video demonstration.
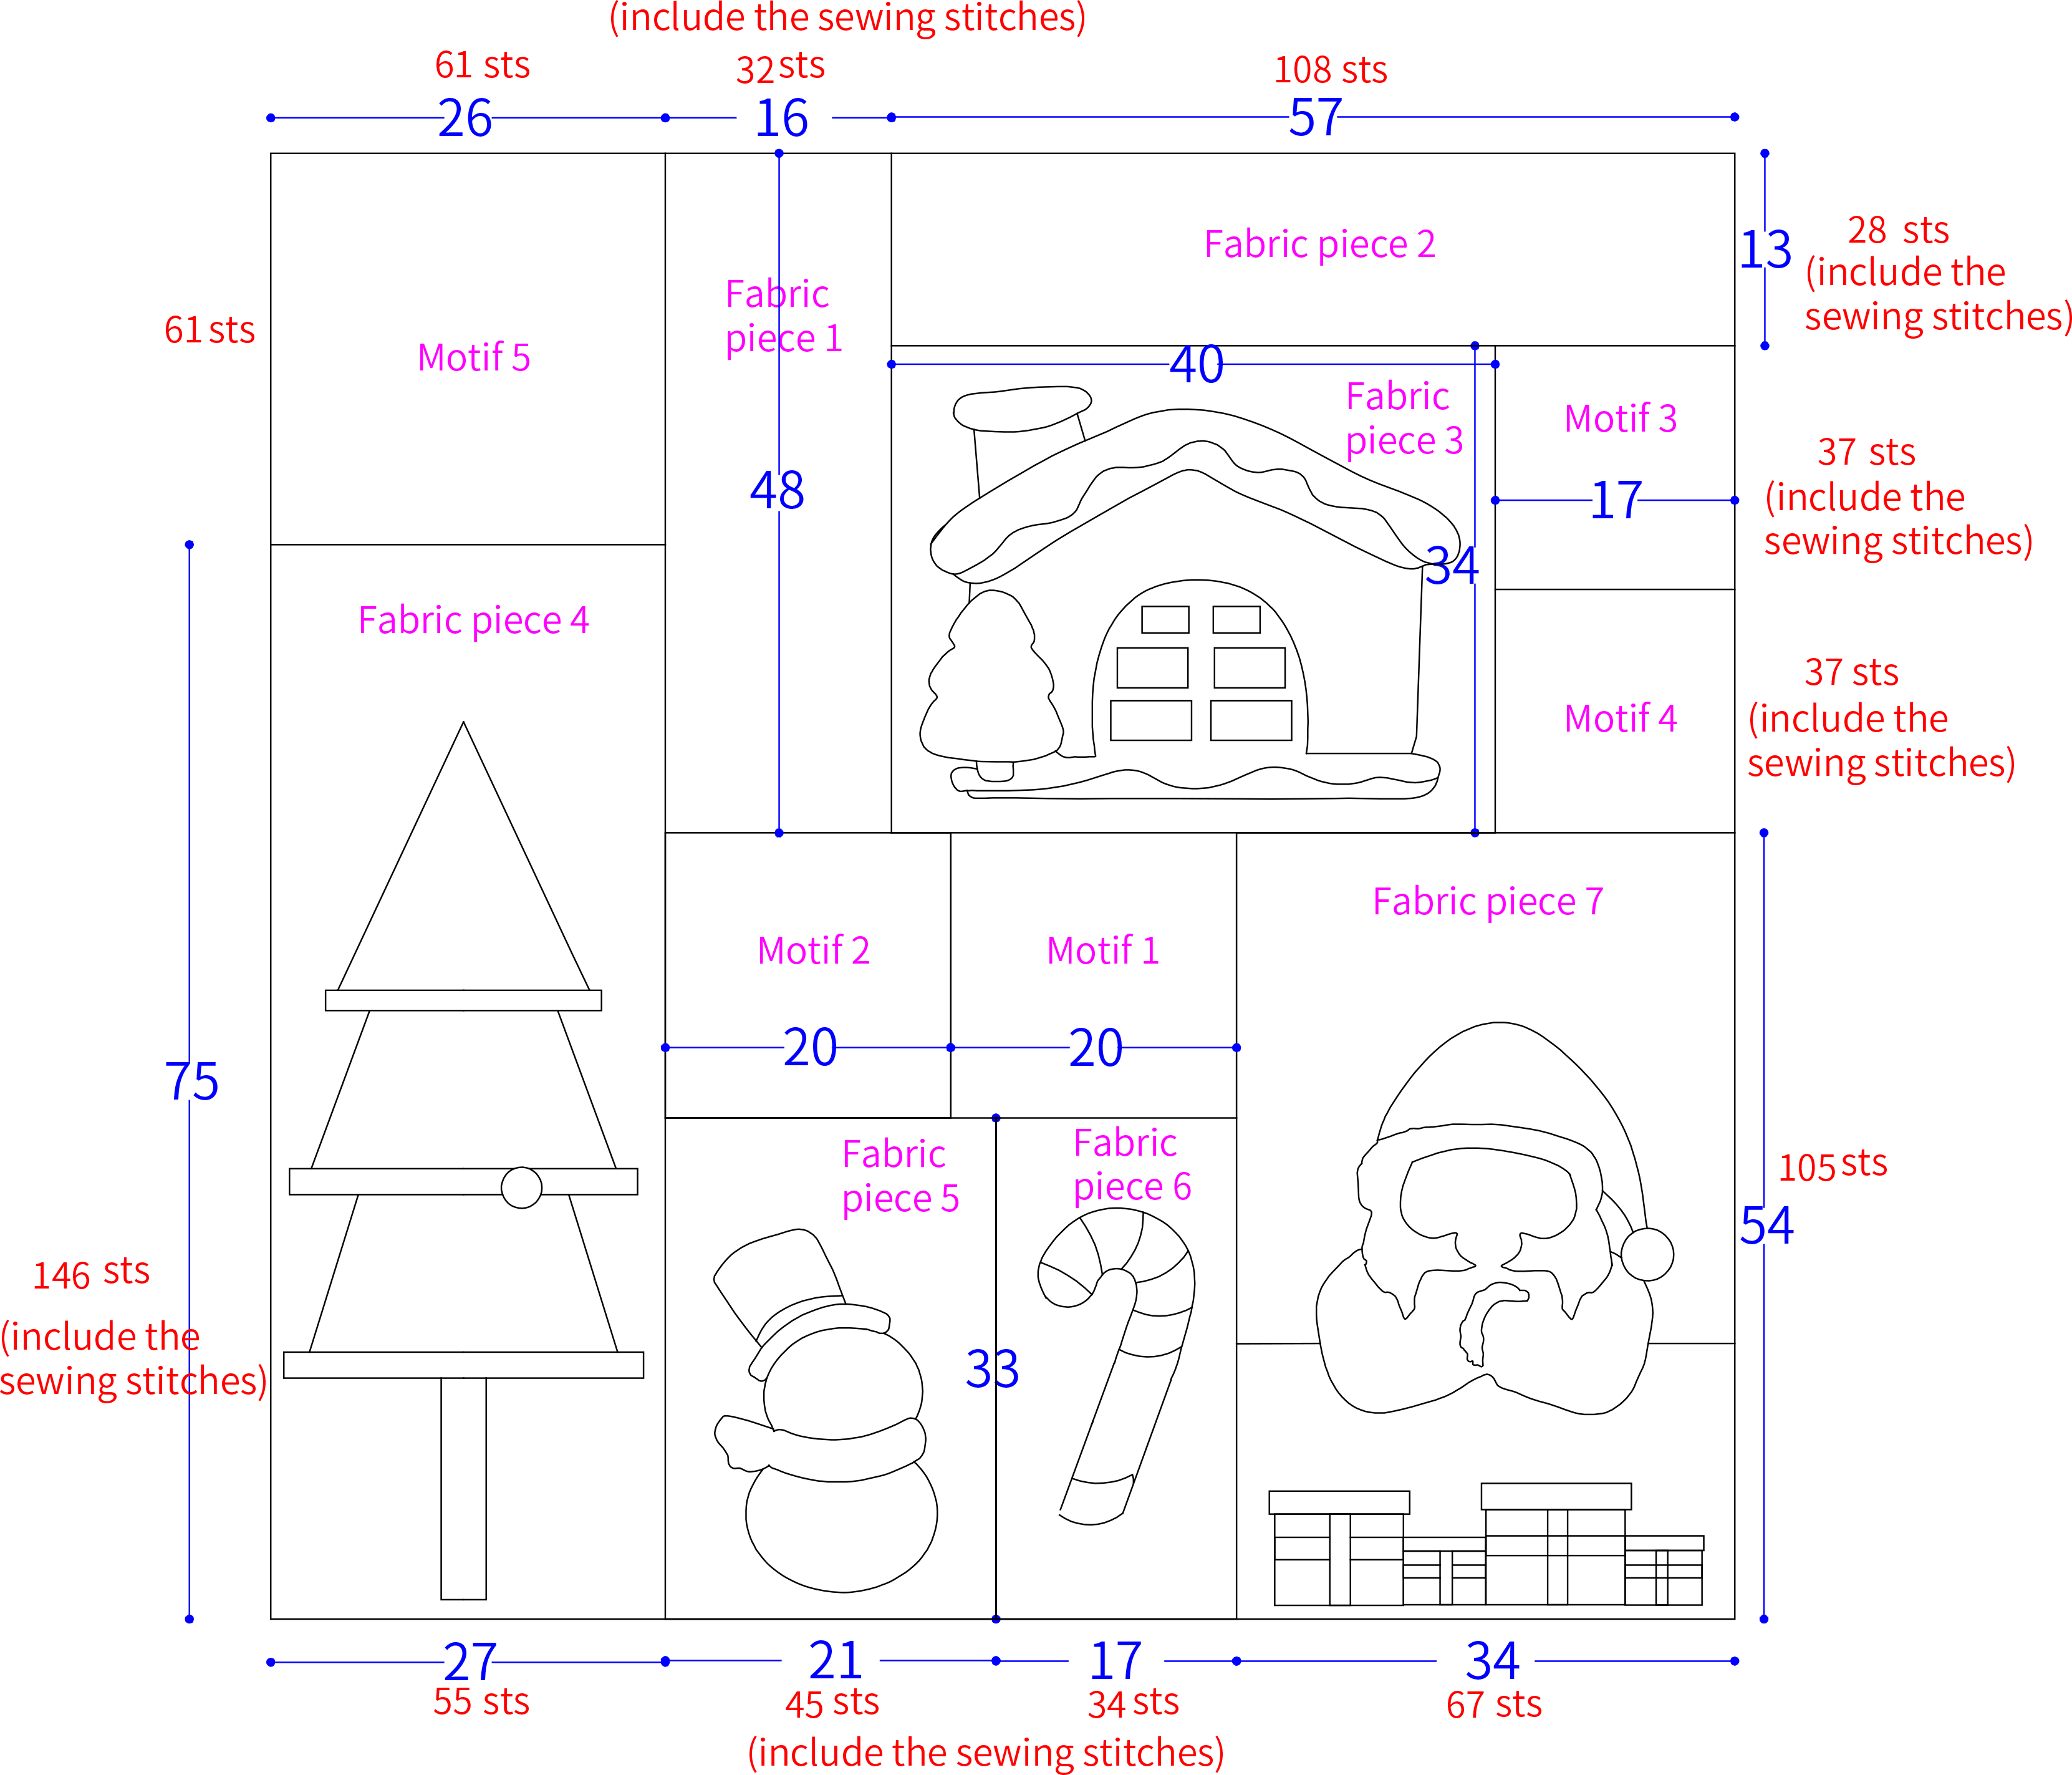
Note: The red font indicates the number of stitches picked up for the first round of the edging, while the blue font shows the dimensions of the piece. The dimensions are for reference only.
Step 6 The overall edgingA7 69' 00'' (Part 1)
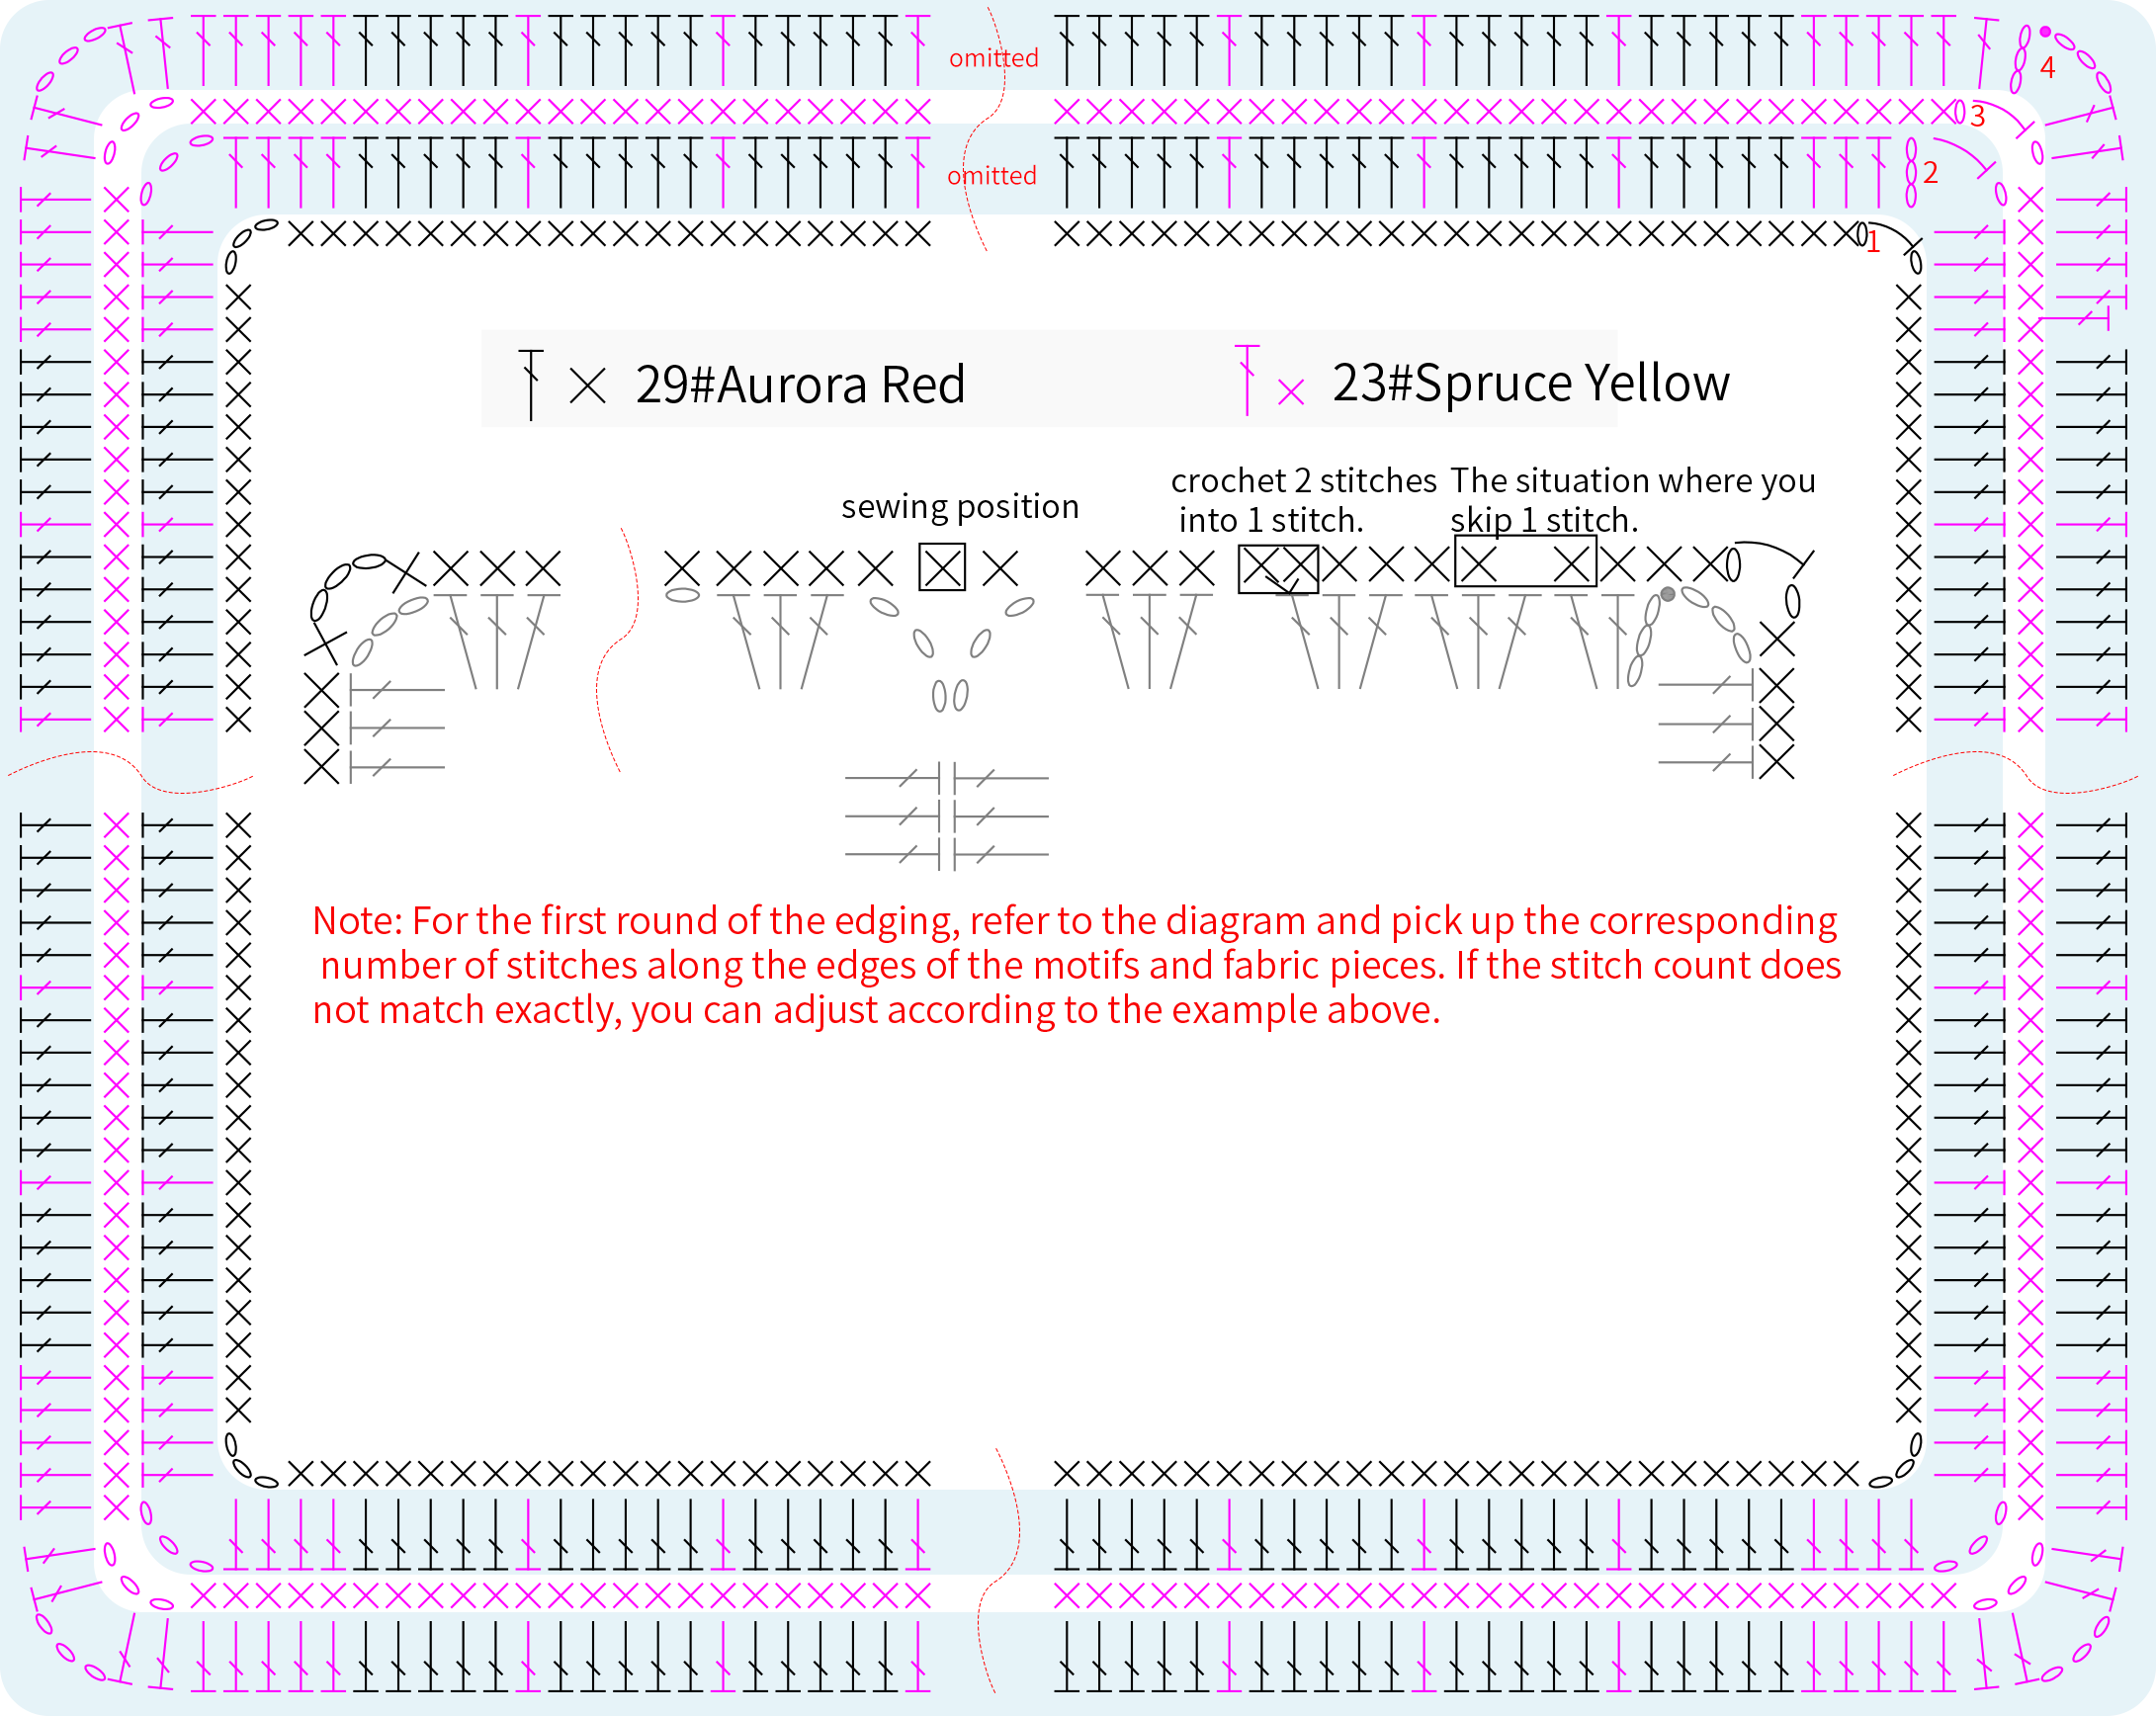
Part 2 DecorationsB
Step 1 The decorations of Motif 5B1 00' 51'' (Part 2)
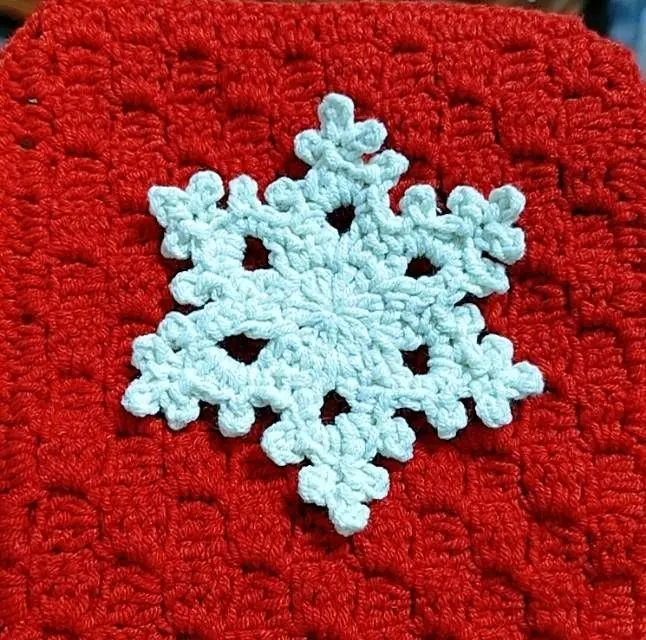
It includes socks, large snowflakes, small snowflakes, and sock cuffs.
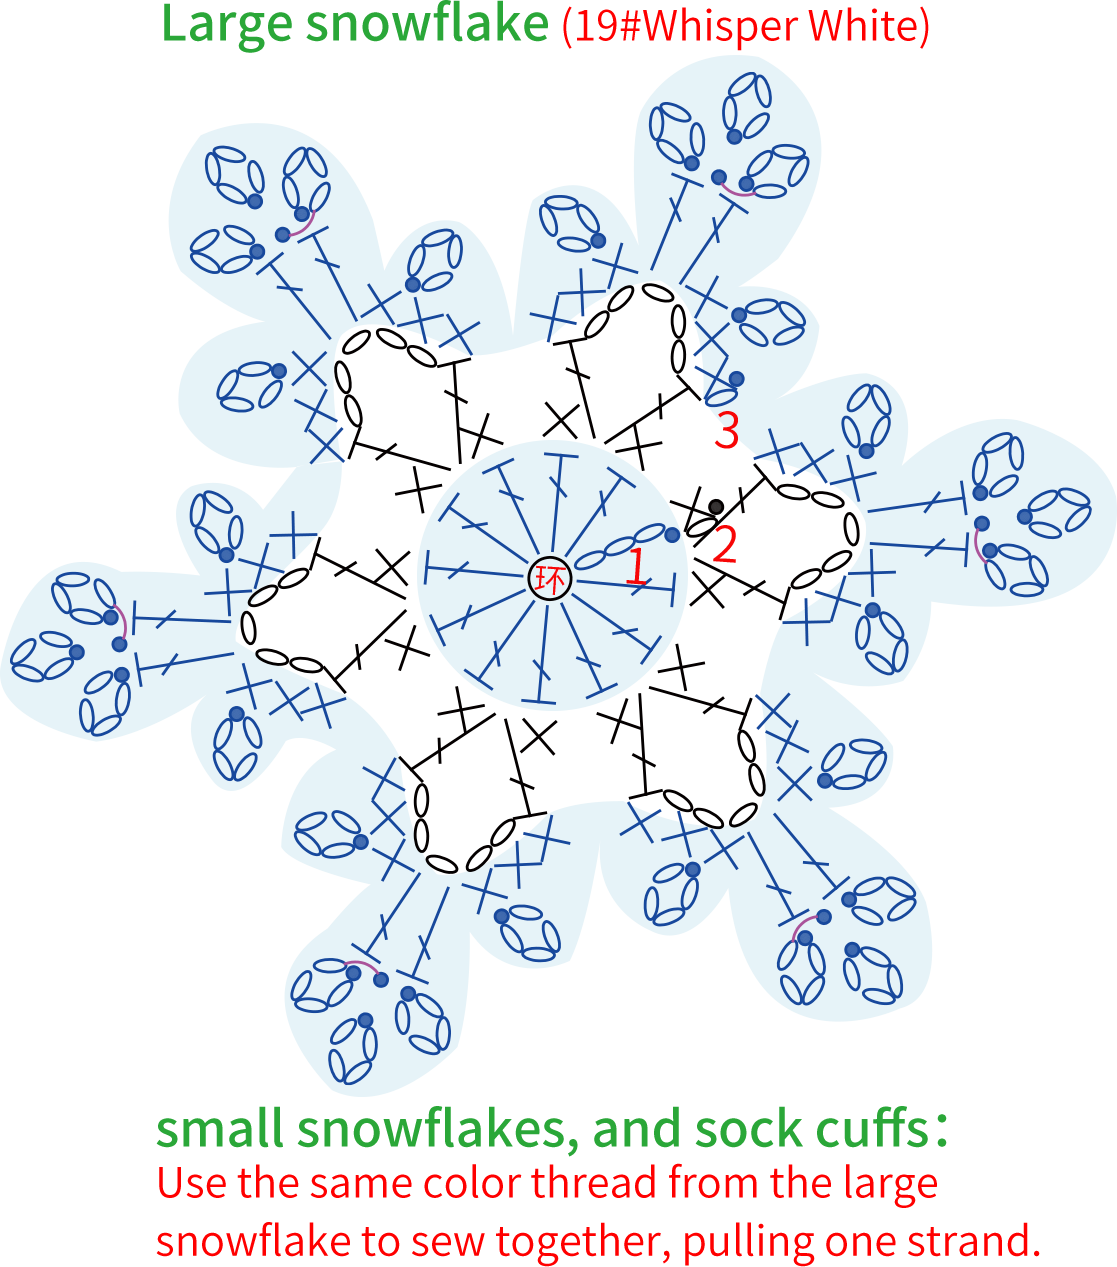
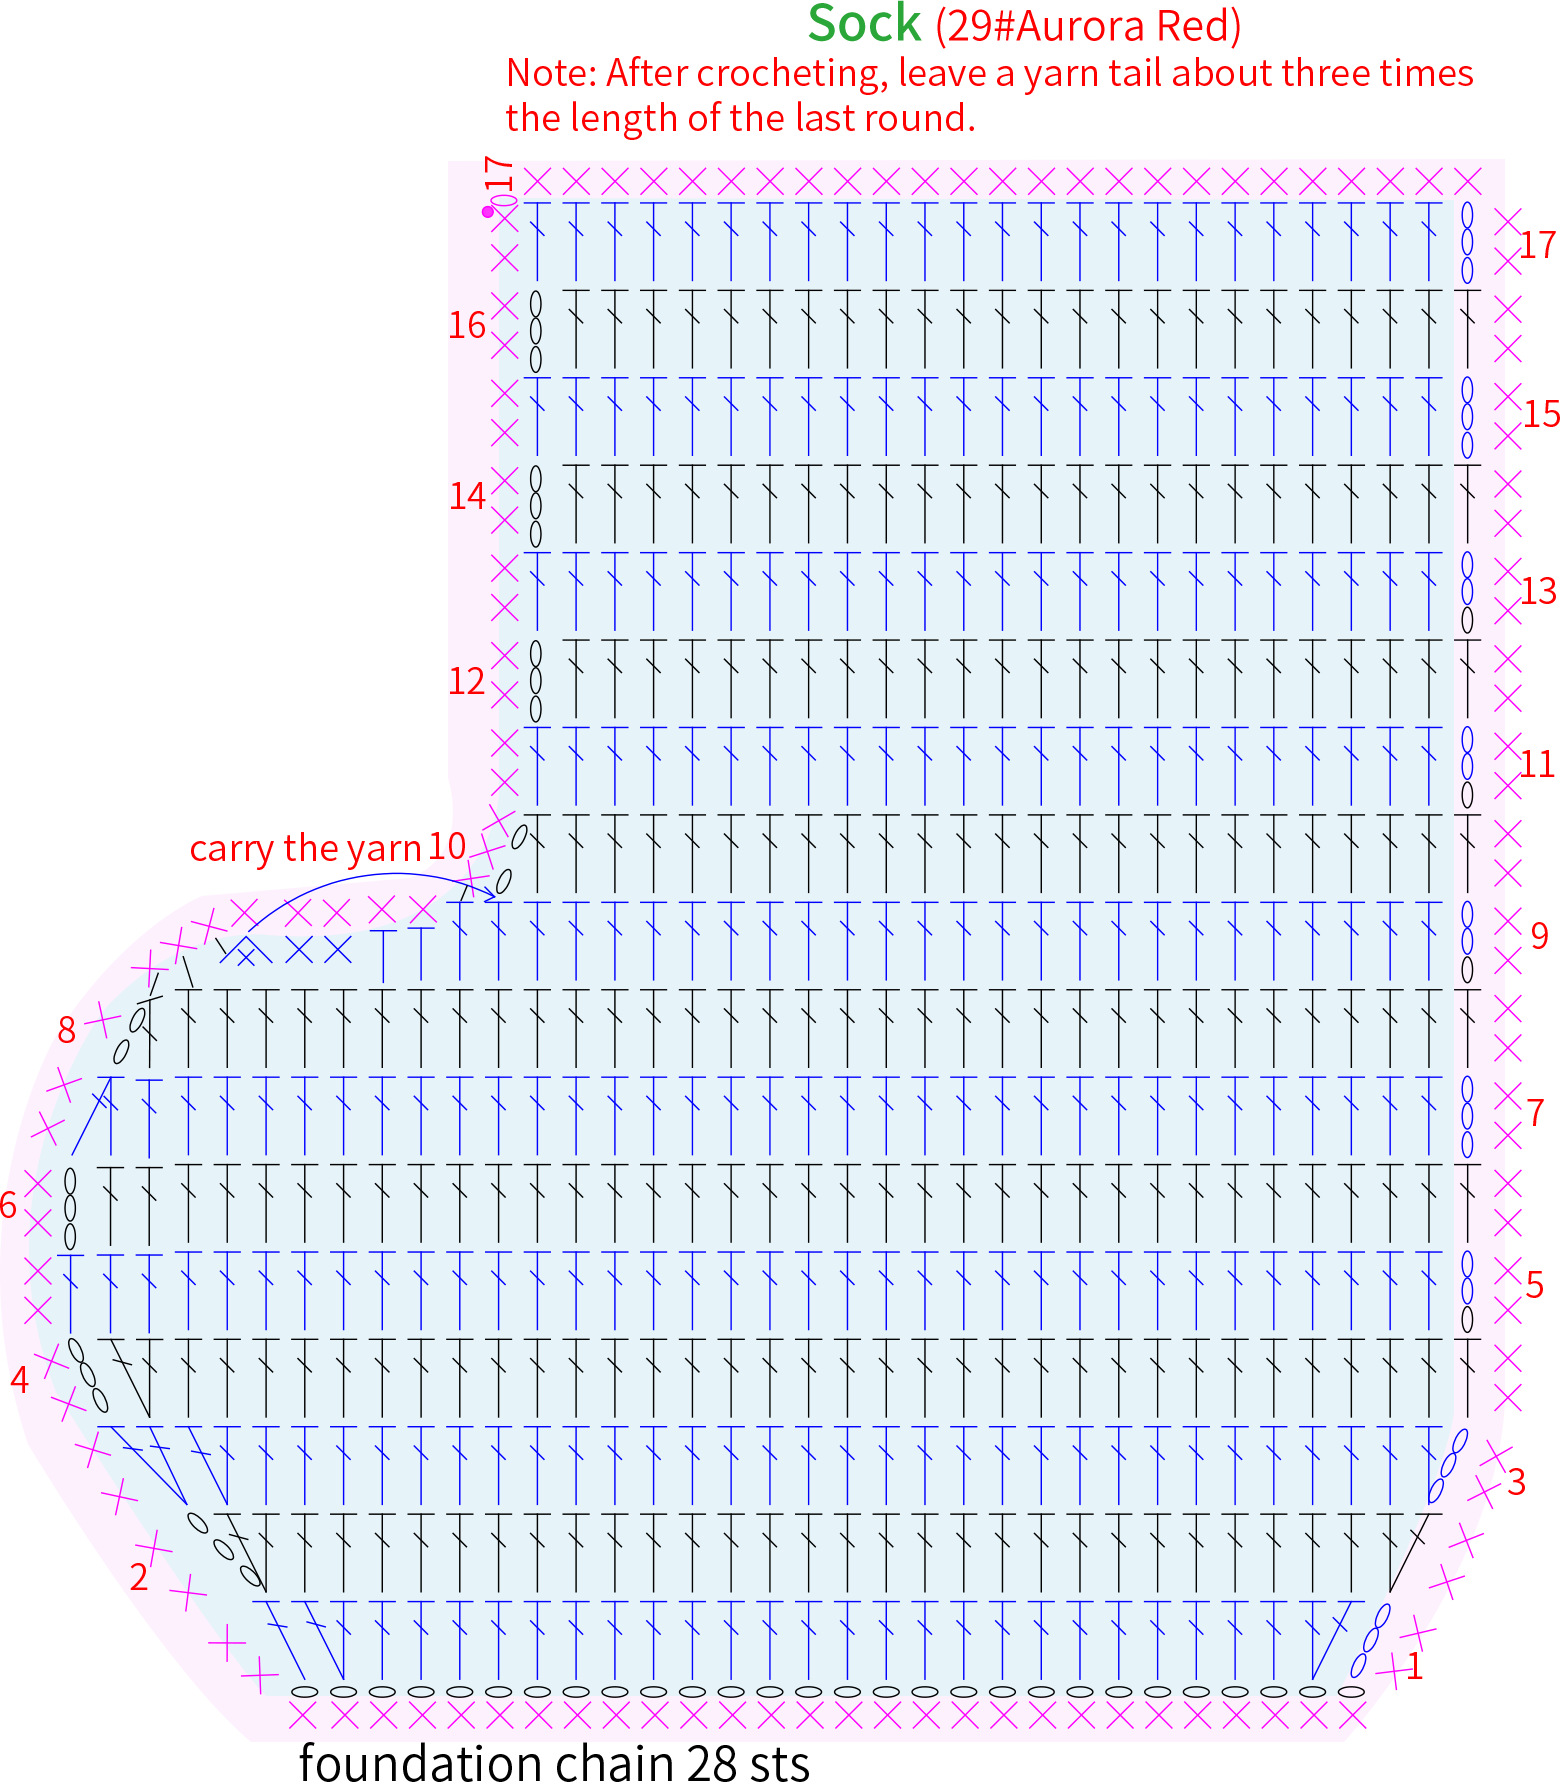
Step 2 The decorations of Fabric piece 1, 2B2 26' 21'' (Part 2)
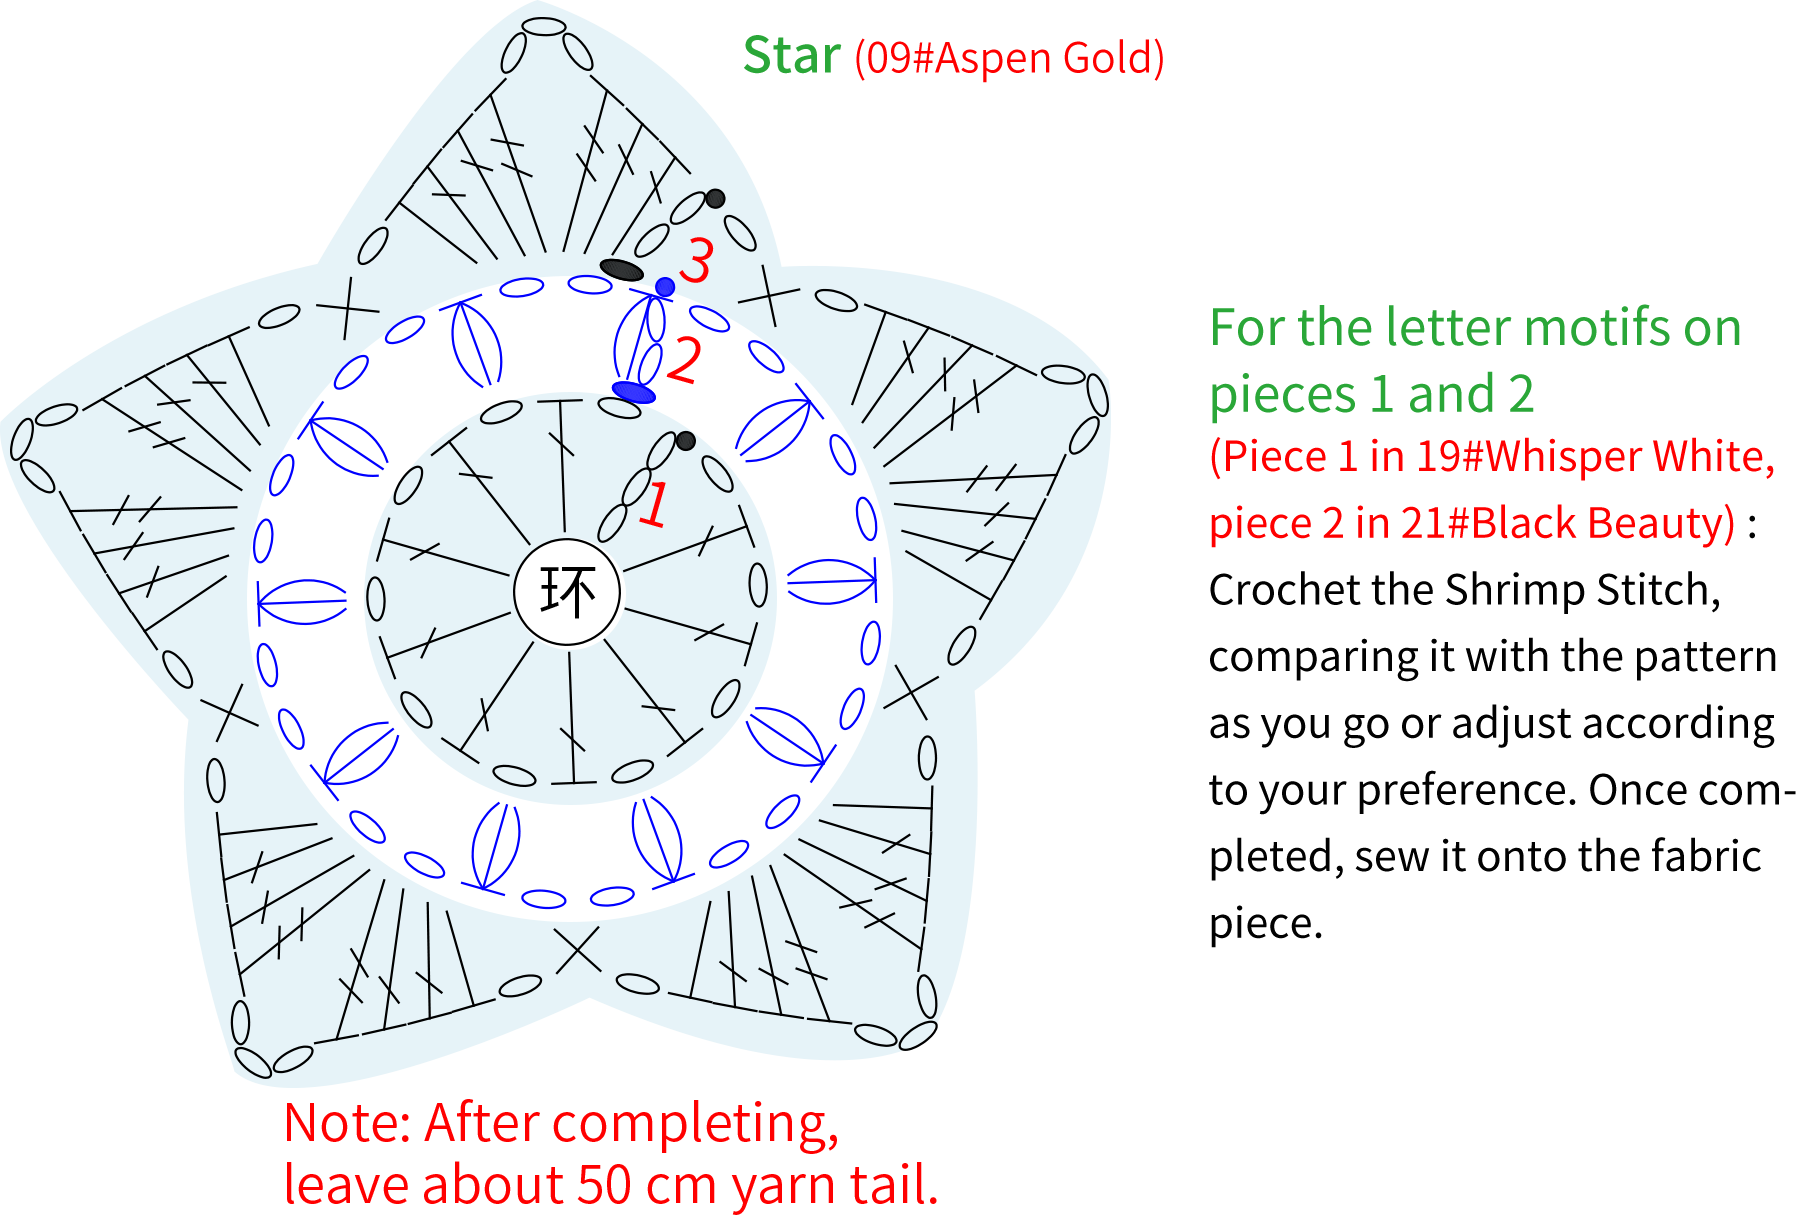
Step 3 The decorations of Fabric piece 3B3 38' 16'' (Part 2)
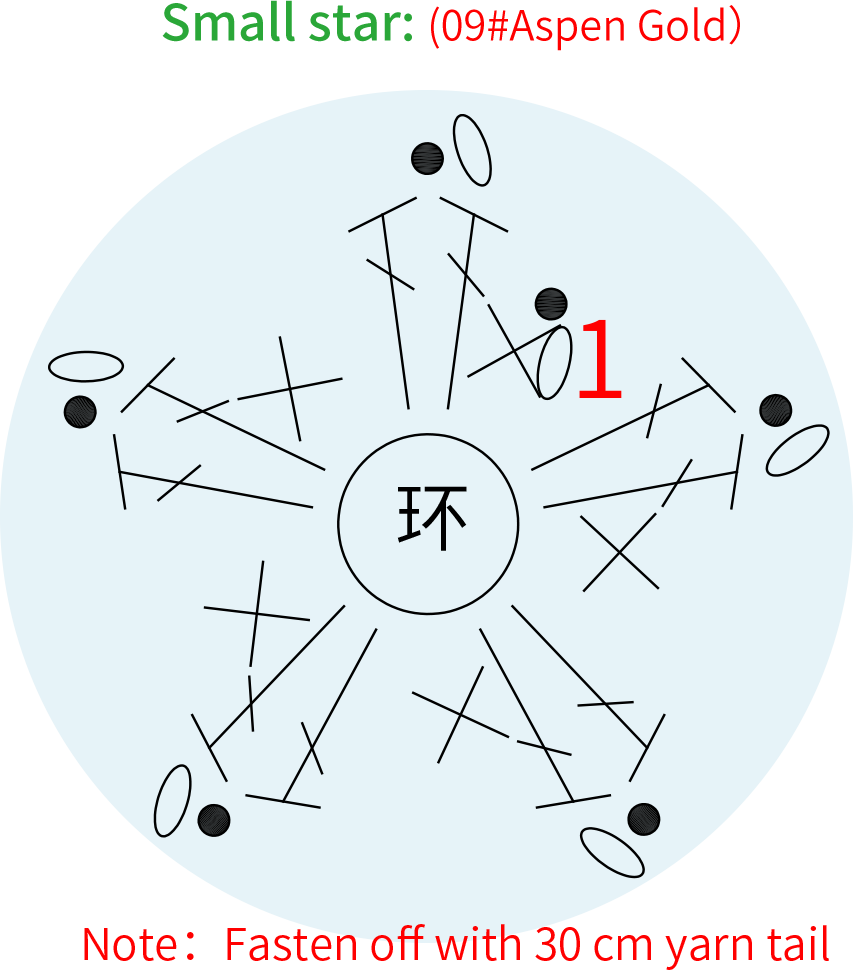
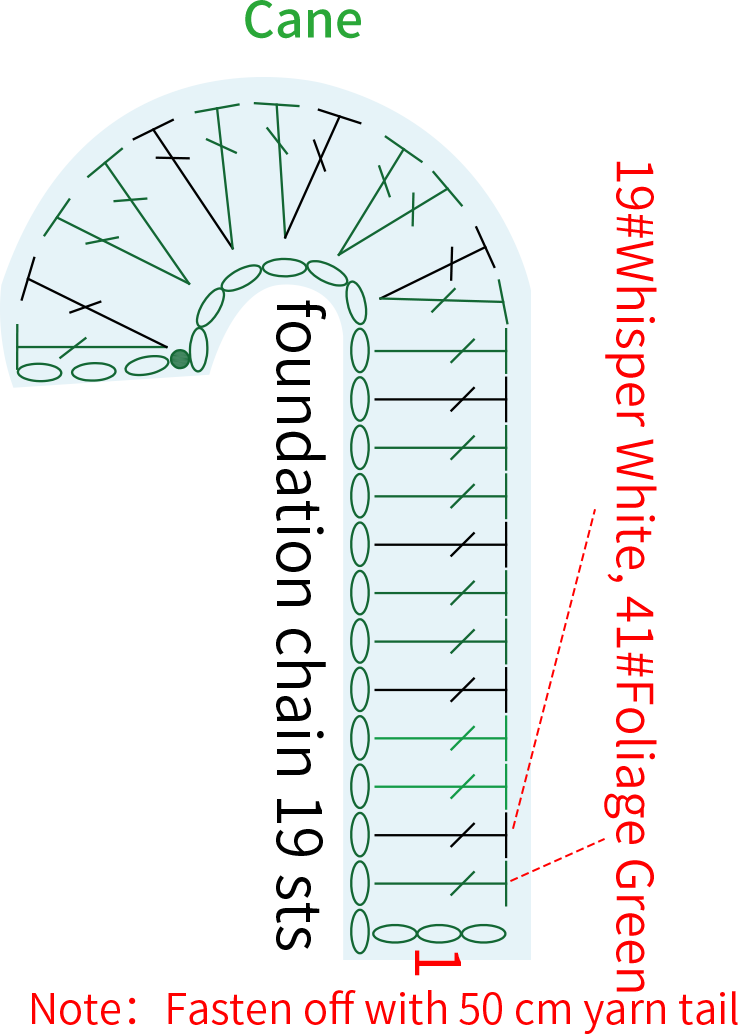
Step 4 The decorations of Fabric piece 4B4 49' 10'' (Part 2)
(09#Aspen Gold)
Five-pointed star: Identical to the five-pointed star on piece 1.
Chain braid: A total of 5, when crocheting, refer to the finished position, and compare with the Christmas tree as you crochet, aligning both ends roughly with the sides of the Christmas tree. Leave about 15 cm of yarn tail for sewing at both ends before and after crocheting.
Step 5 The decorations of Fabric piece 5B5 52' 25'' (Part 2)
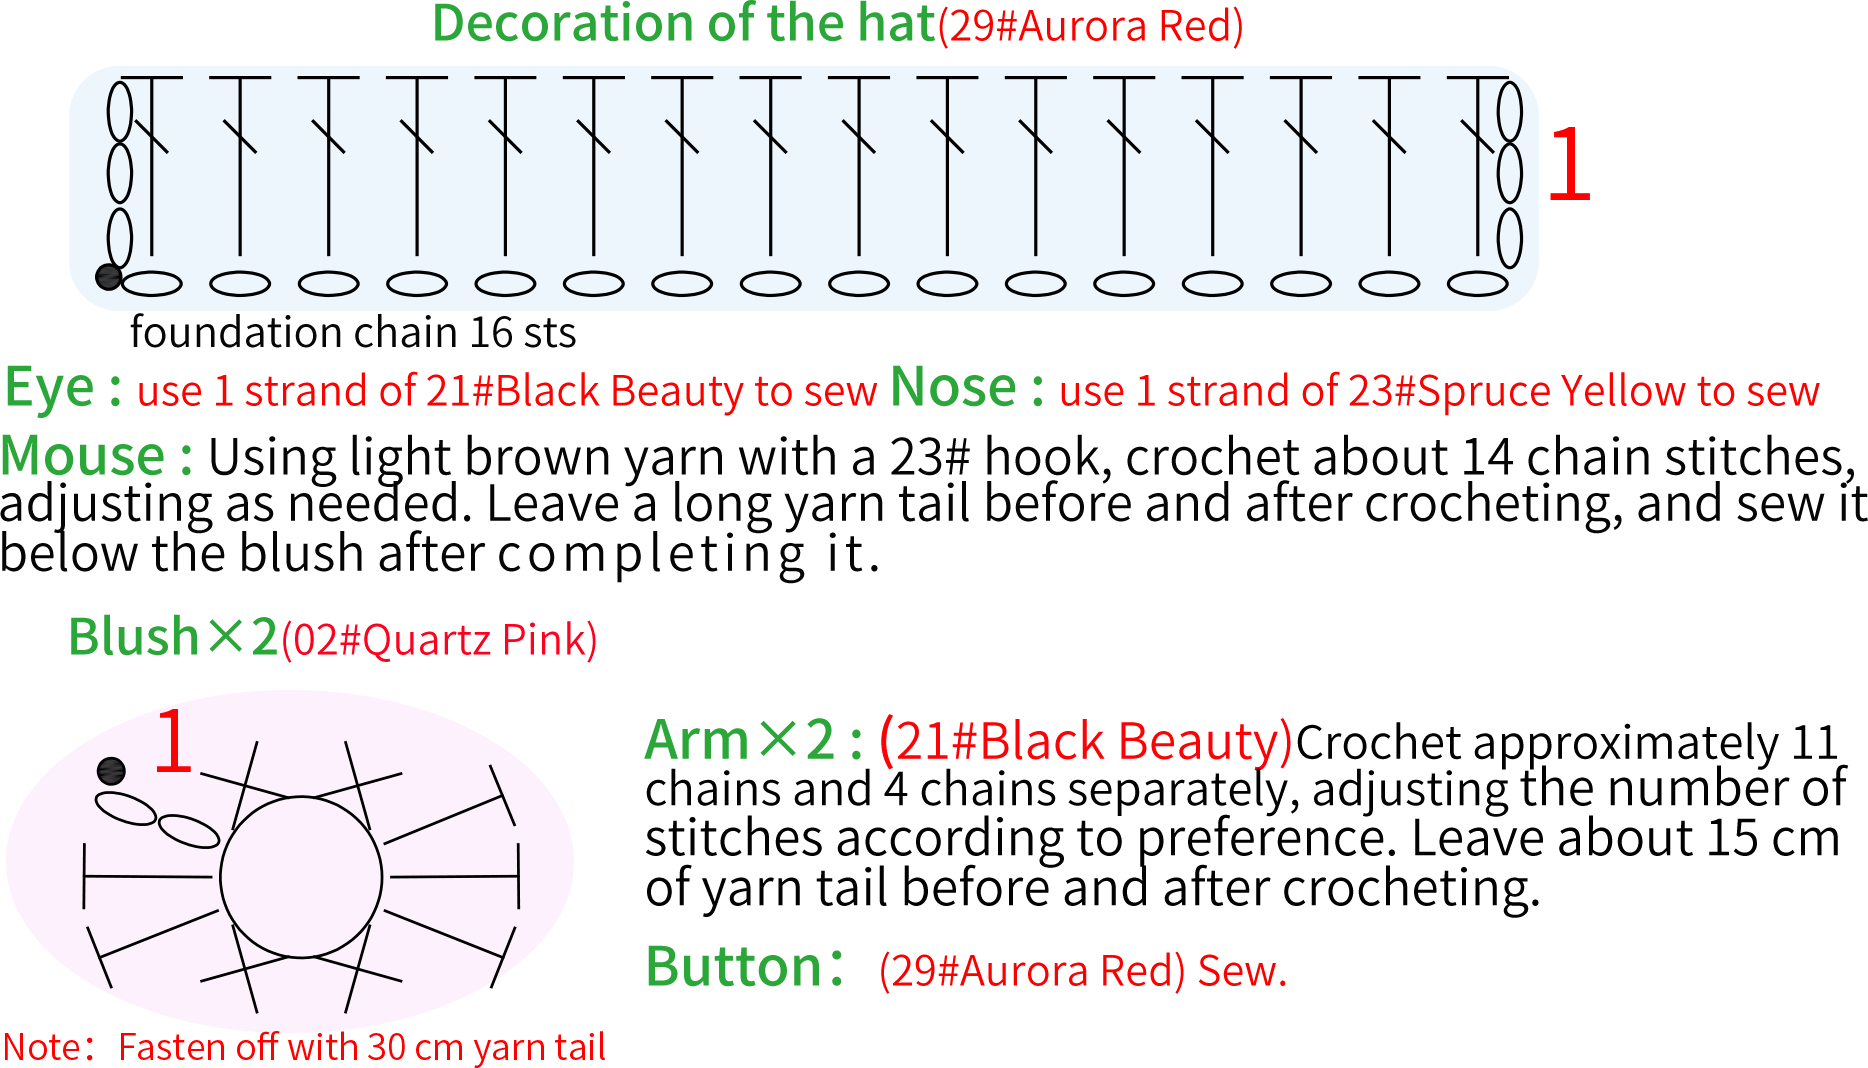
Step 6 The decorations of Fabric piece 6B6 59' 12'' (Part 2)
(29#Aurora Red)
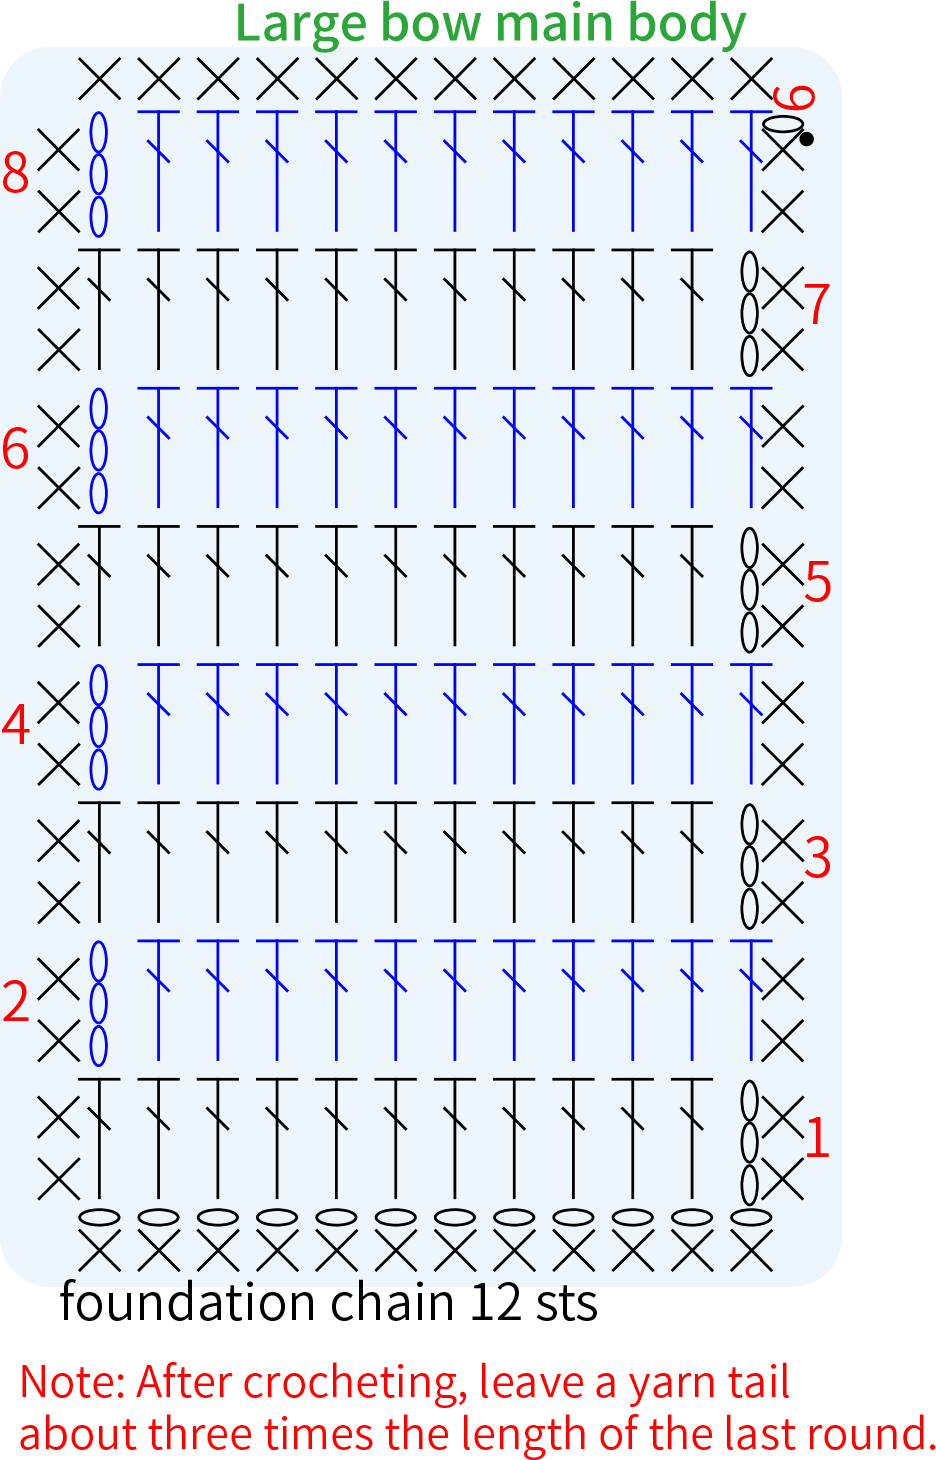

Step 7 The decorations of Fabric piece 7B7 60' 03'' (Part 2)
Eyes × 2: (21#Black Beauty) Crochet about 8 chain stitches, the exact number of stitches can also be adjusted according to preference. Leave about 15 cm of yarn tail before and after crocheting, then sew them onto the fabric piece.
Nose: (29#Aurora Red) Use the smallest pom-pom maker, or a cardboard about 5 cm in diameter. Wrap the yarn around the pom-pom maker about 75 times, or 150 times around the cardboard, or wrap to your preferred number of rounds.
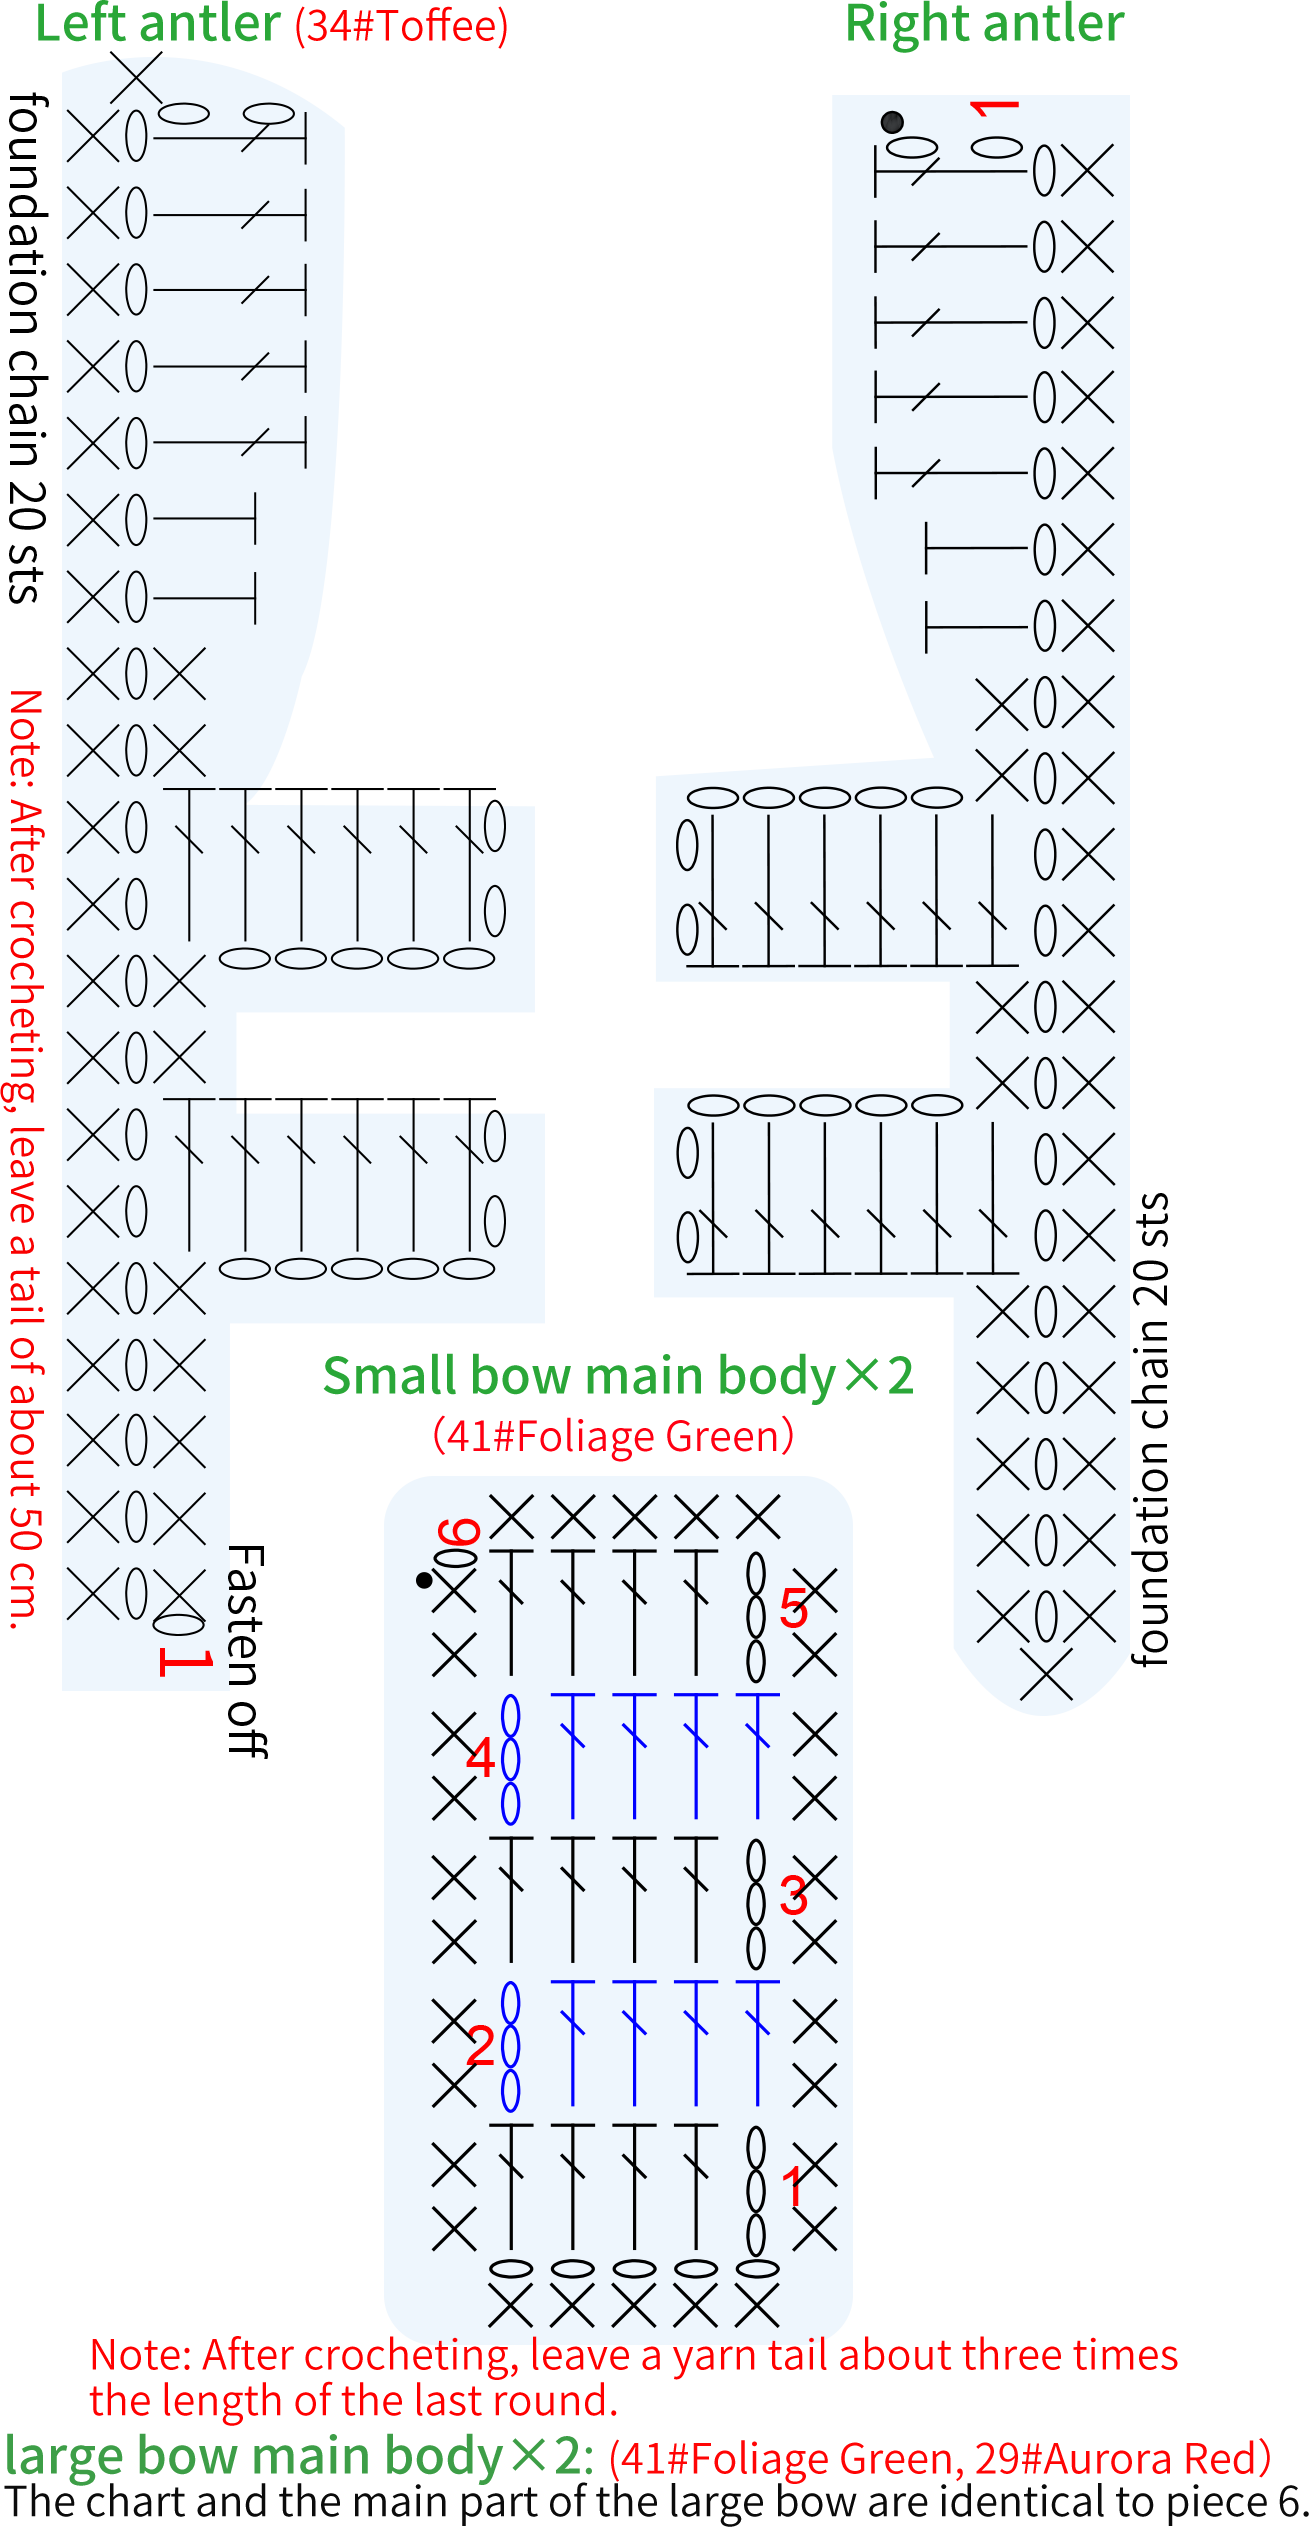
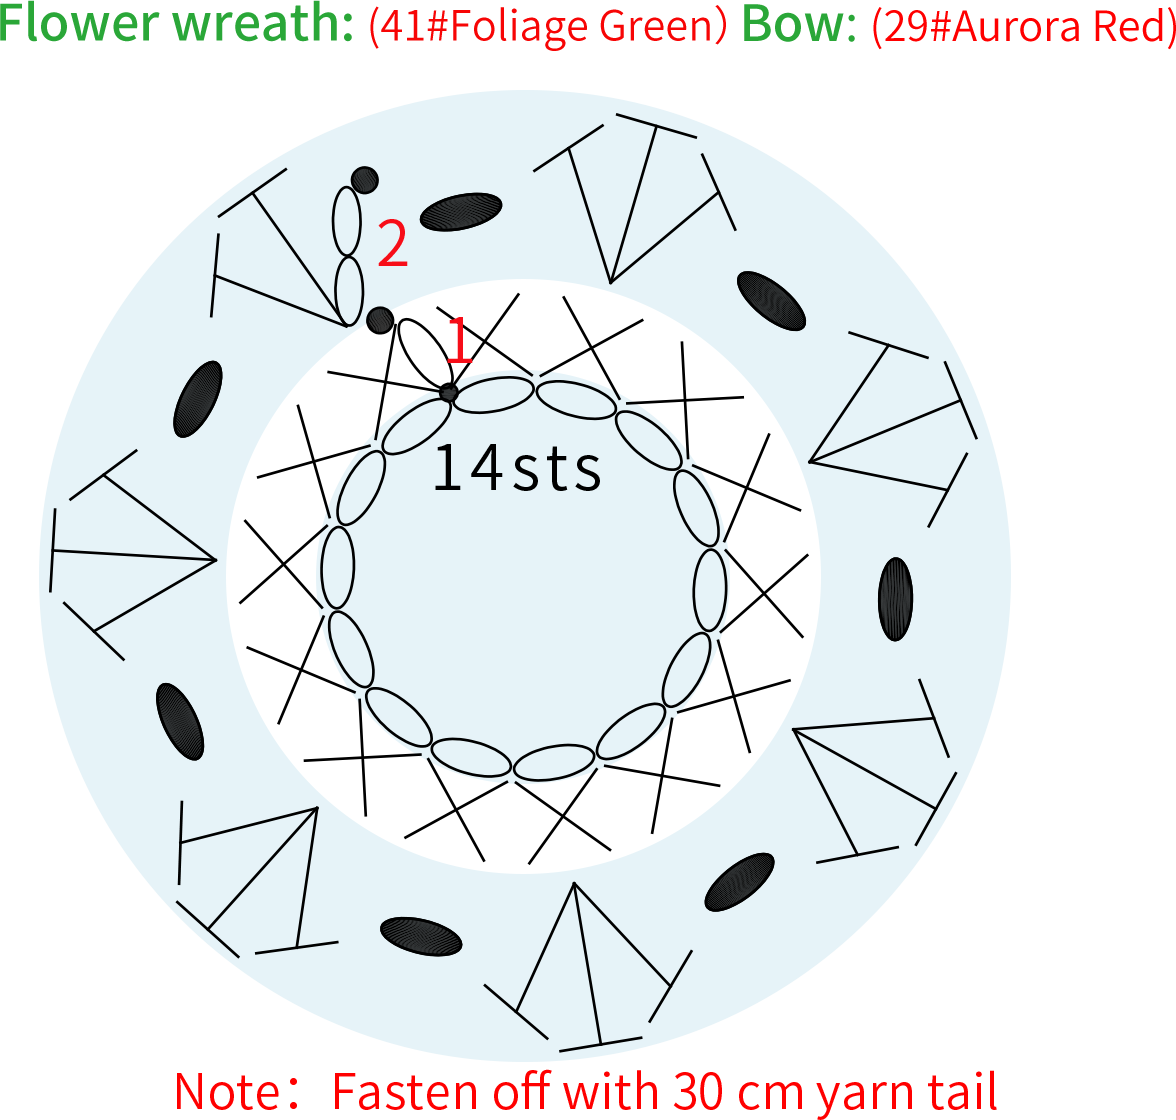
Step 8 The circular decorations
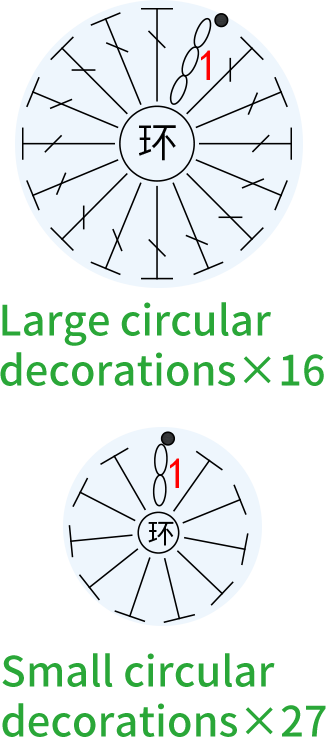
Note: The specific quantity, color scheme, and sewing position can be referenced from the finished product image or arranged according to your preference, with no strict requirements.
Made by the community