Clothes
Corn Poppy Cardigan
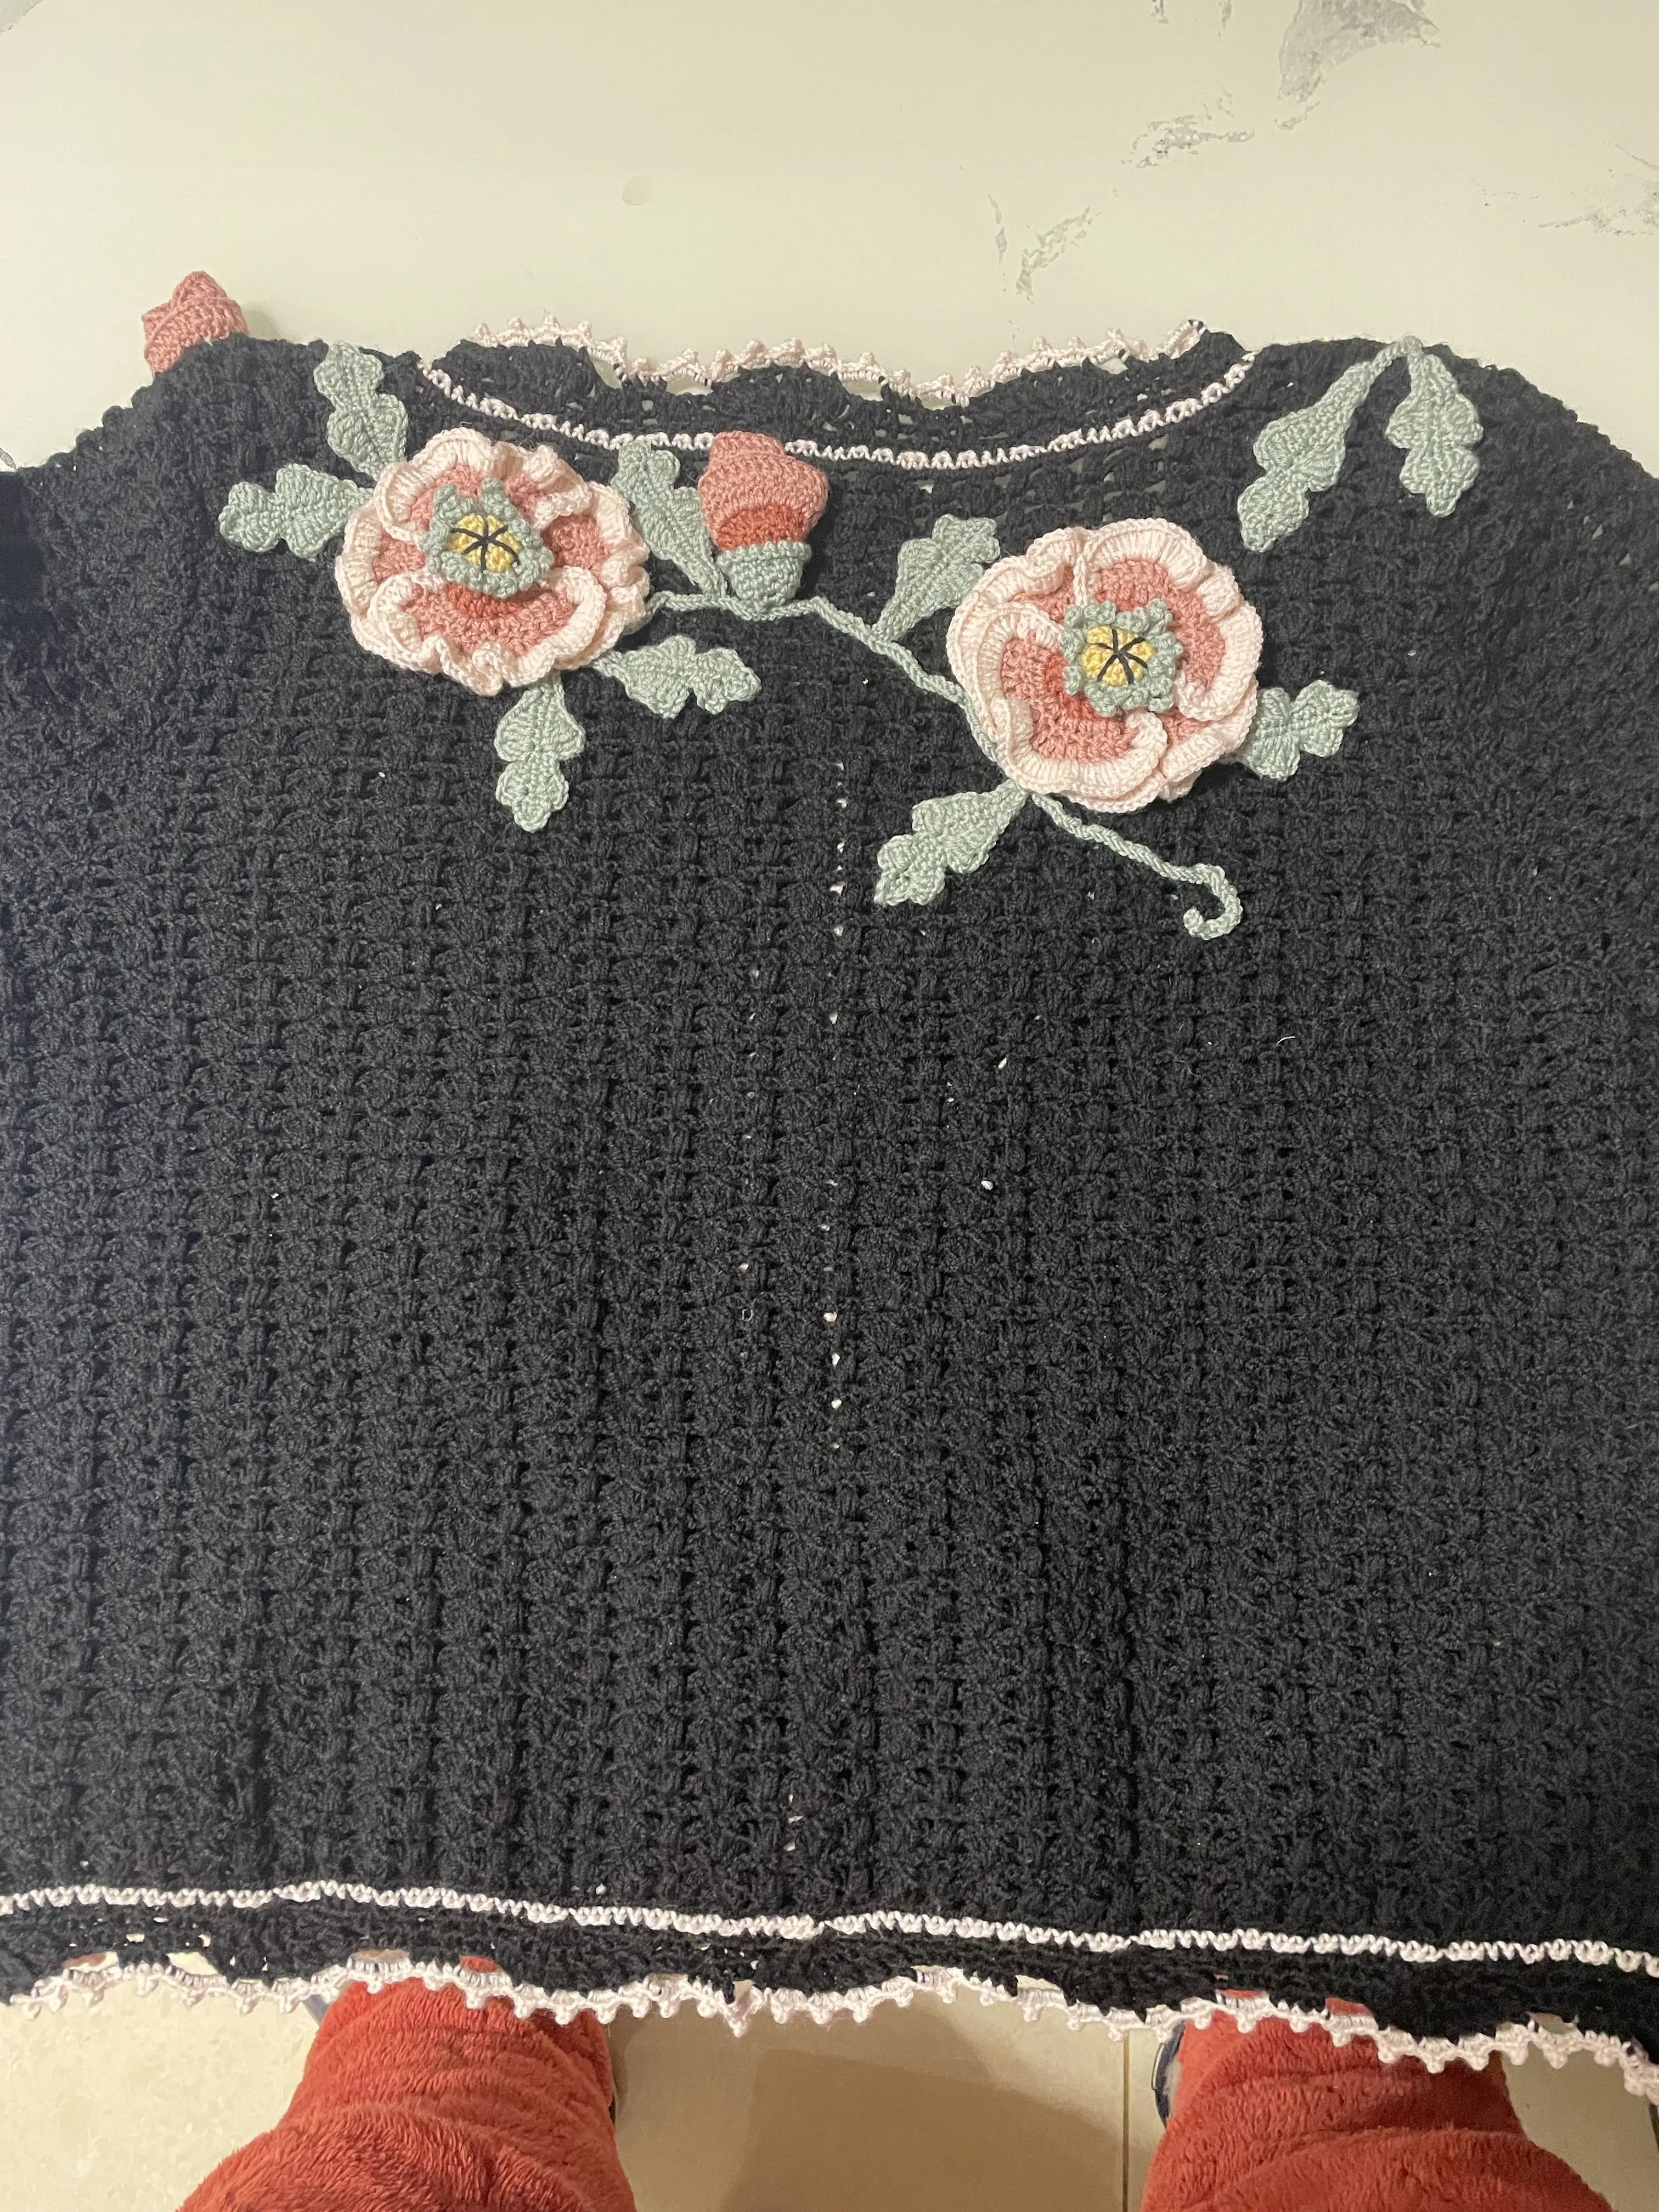
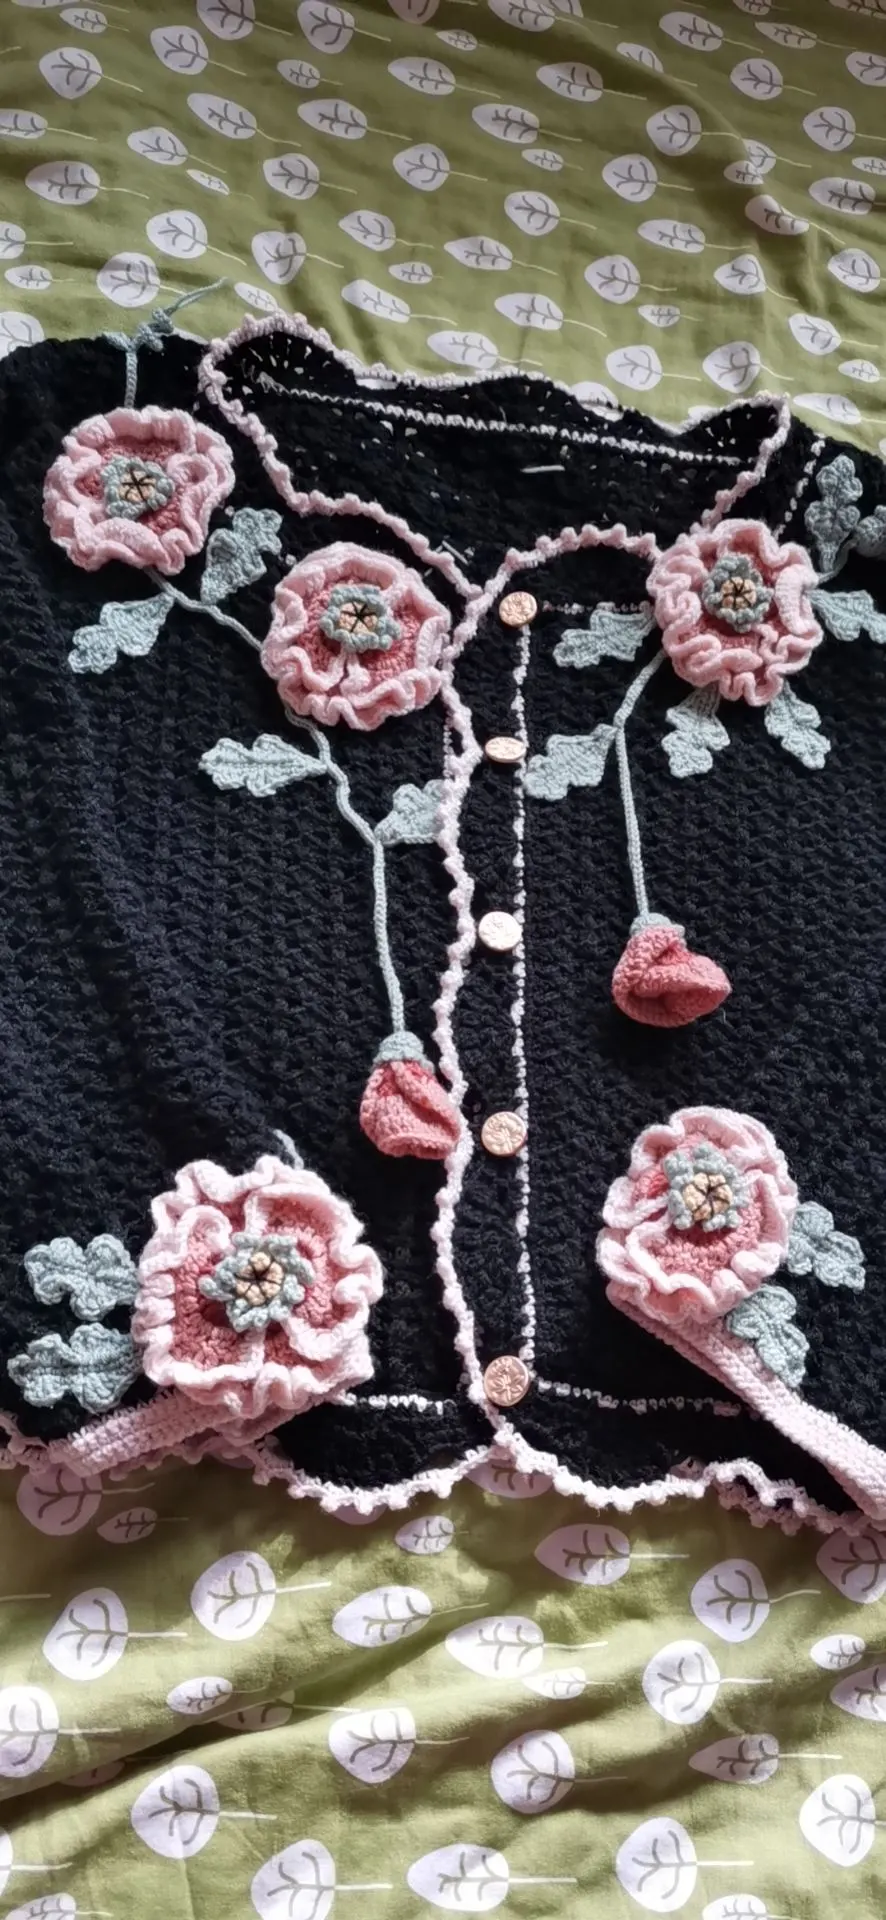
Project preview
See the finished project
Pattern format
Instructions
Watch and follow
Video tutorial
This cardigan consists of the body, bust piece, edging, sleeves, and accessories. First, crochet the body back and forth, then work the front pieces separately, join the shoulders, and crochet the edging. Next, make and attach the sleeves, and finally, create and attach the accessories.
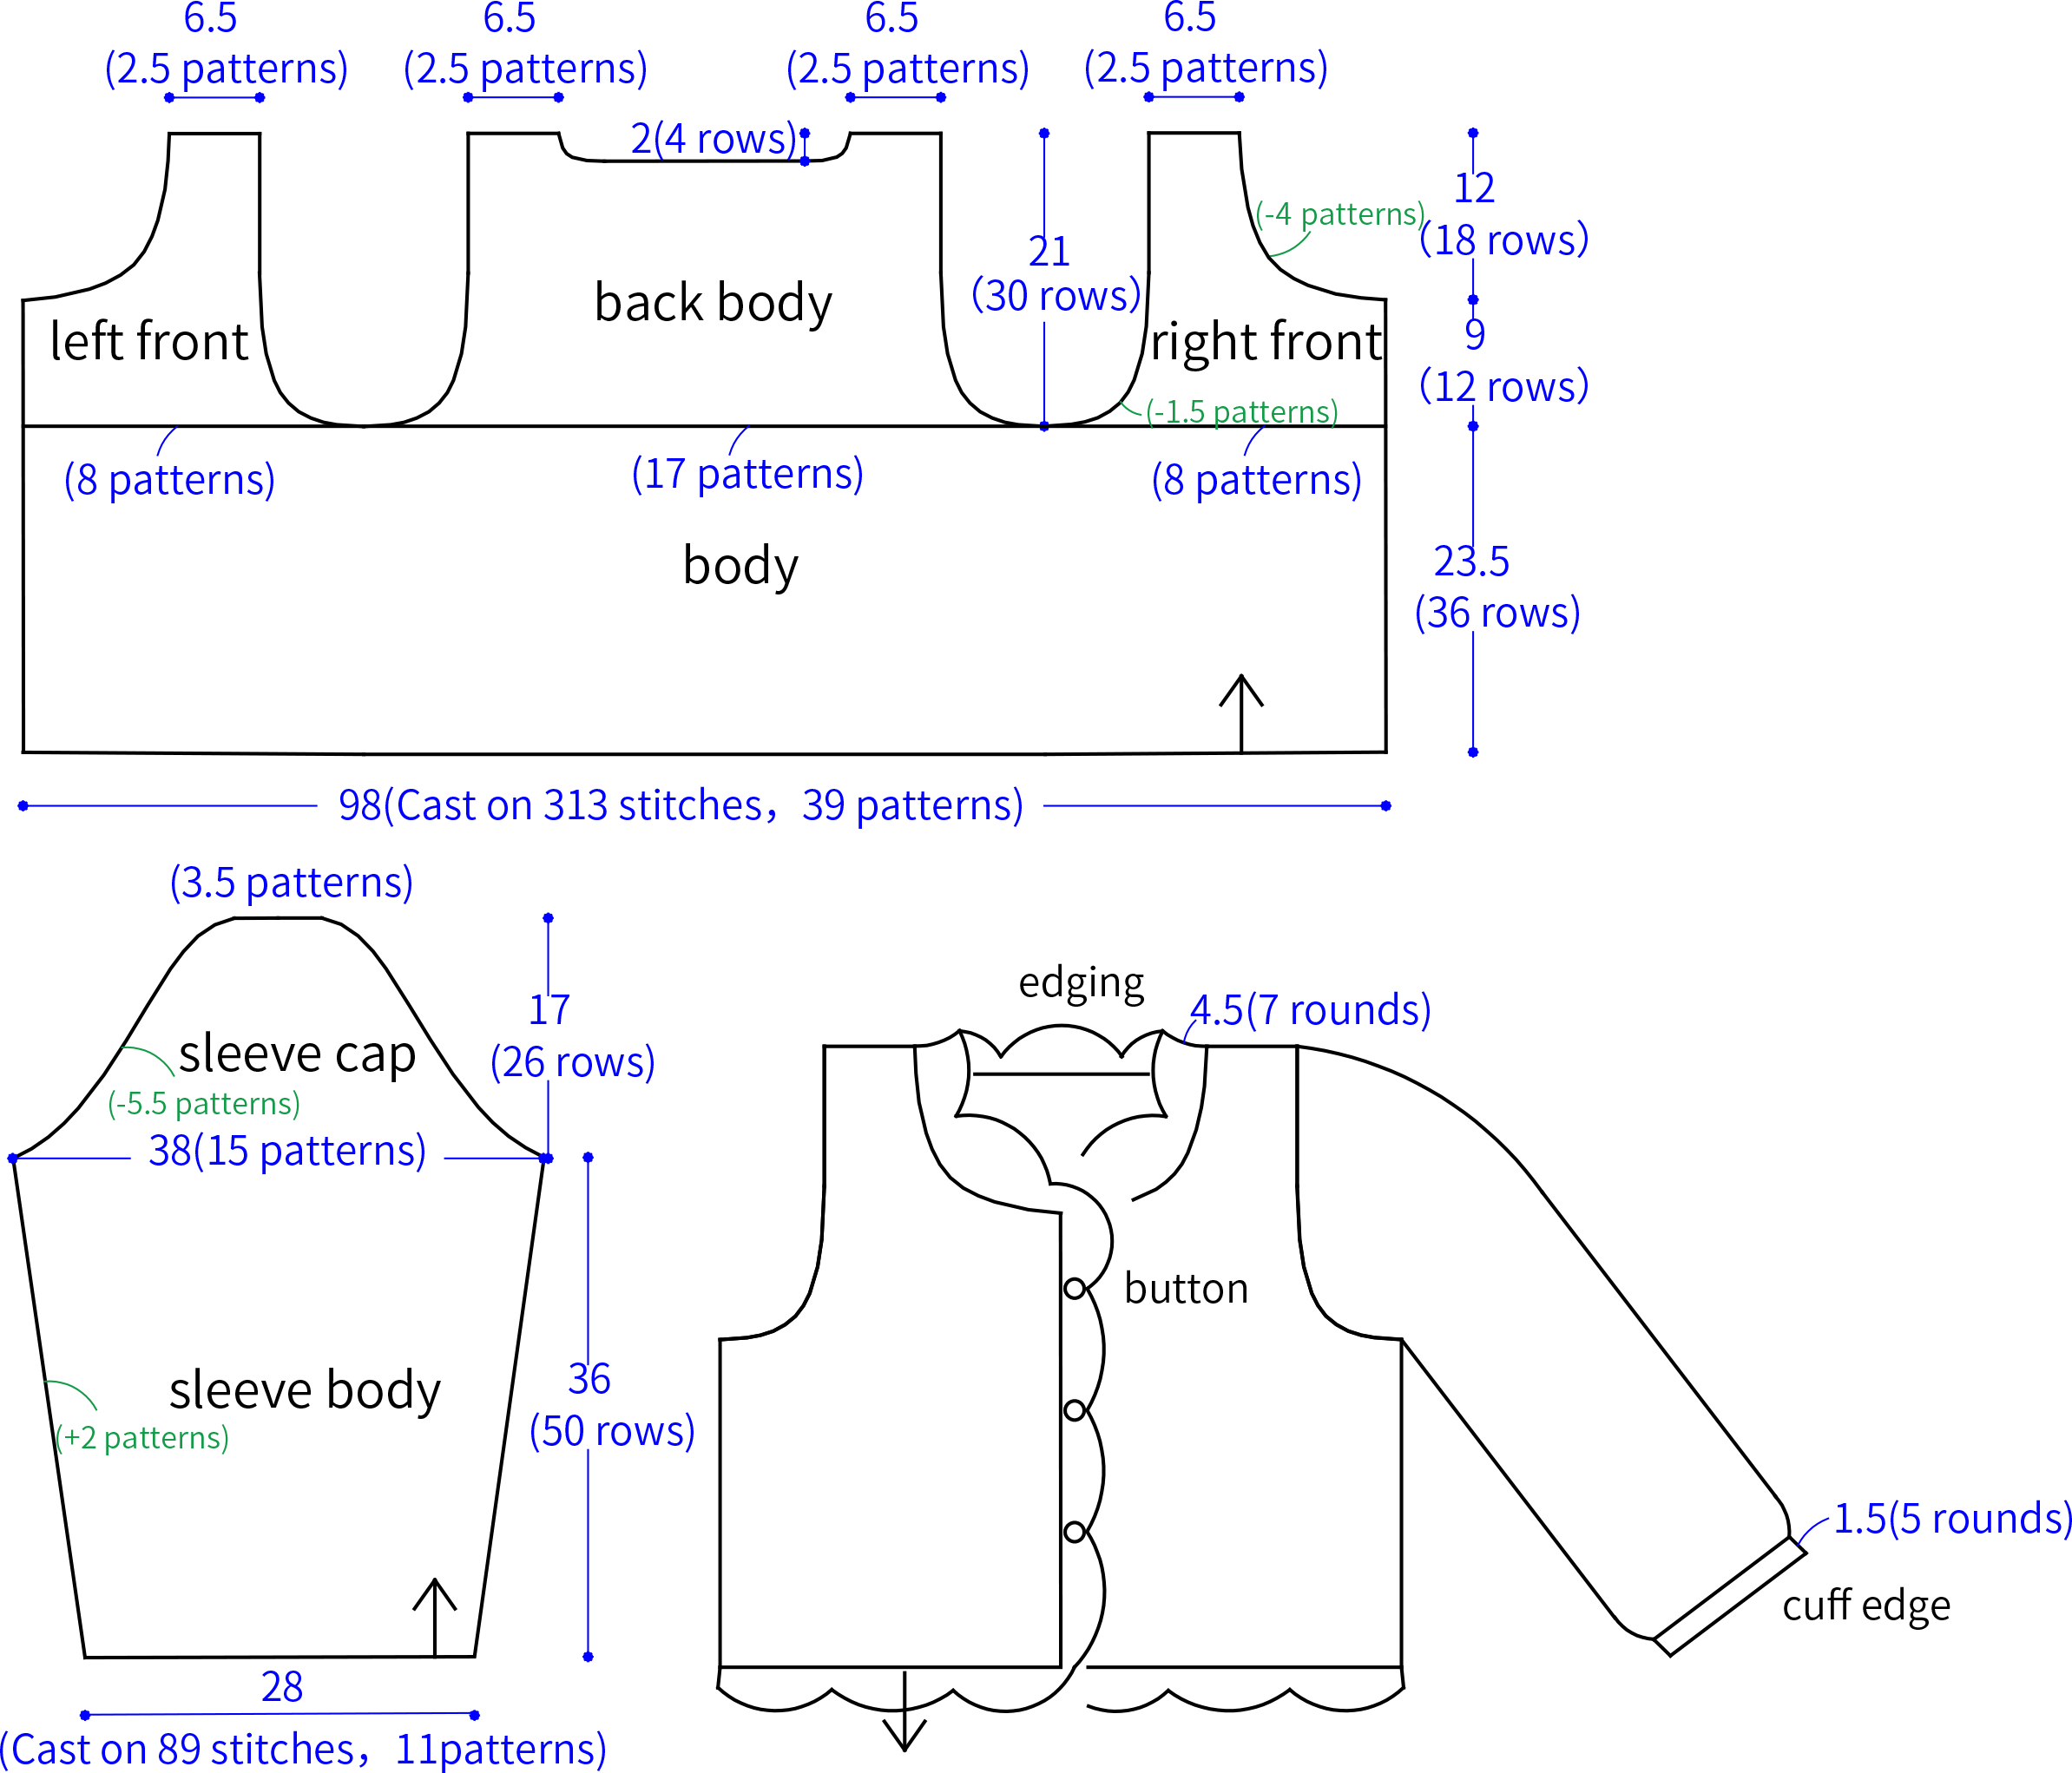
Note: Here, "left and right" refers to the left and right when the clothes are being worn.
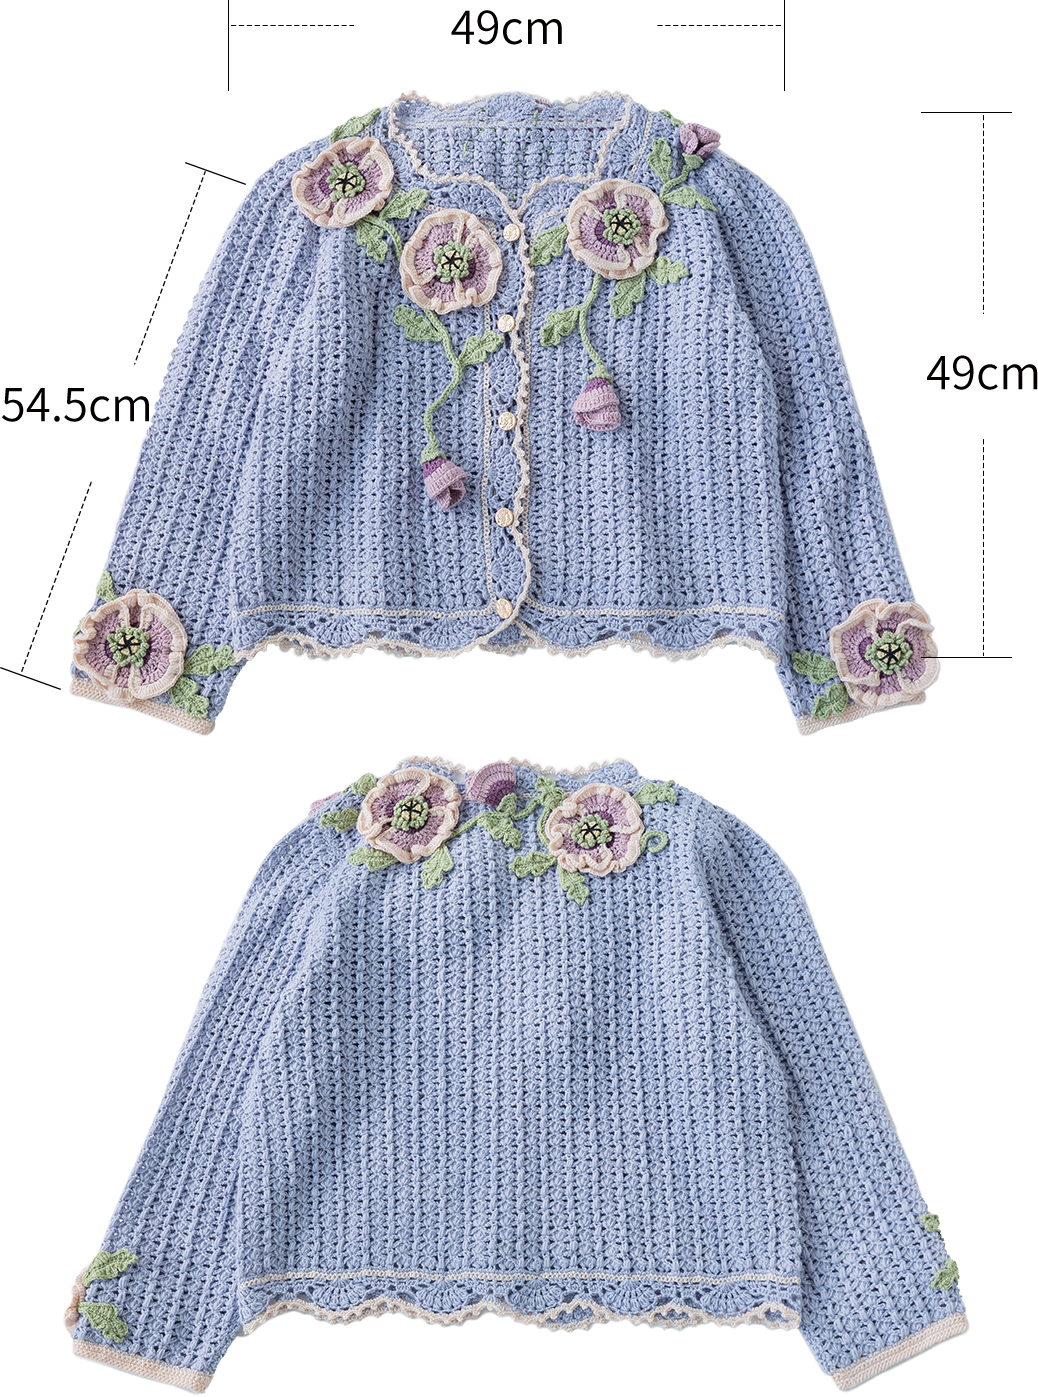
Size:Chest circumference 49cm,Garment length 49cm, Sleeve Length 54.5cm.
The handcrafted measurements may have an error of 1 to 2 cm. Due to variations in individual tension, the size of the sample is for reference only.
Materials: Susan's Family Morandi 4#
Hook: 3.00 mm crochet hook

Note: This pattern is making in Chinese crochet pattern terms, and the stitch name is written using American terminology. All measurements in charts are in cm. 
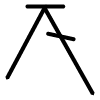
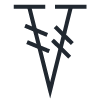
Chart Key















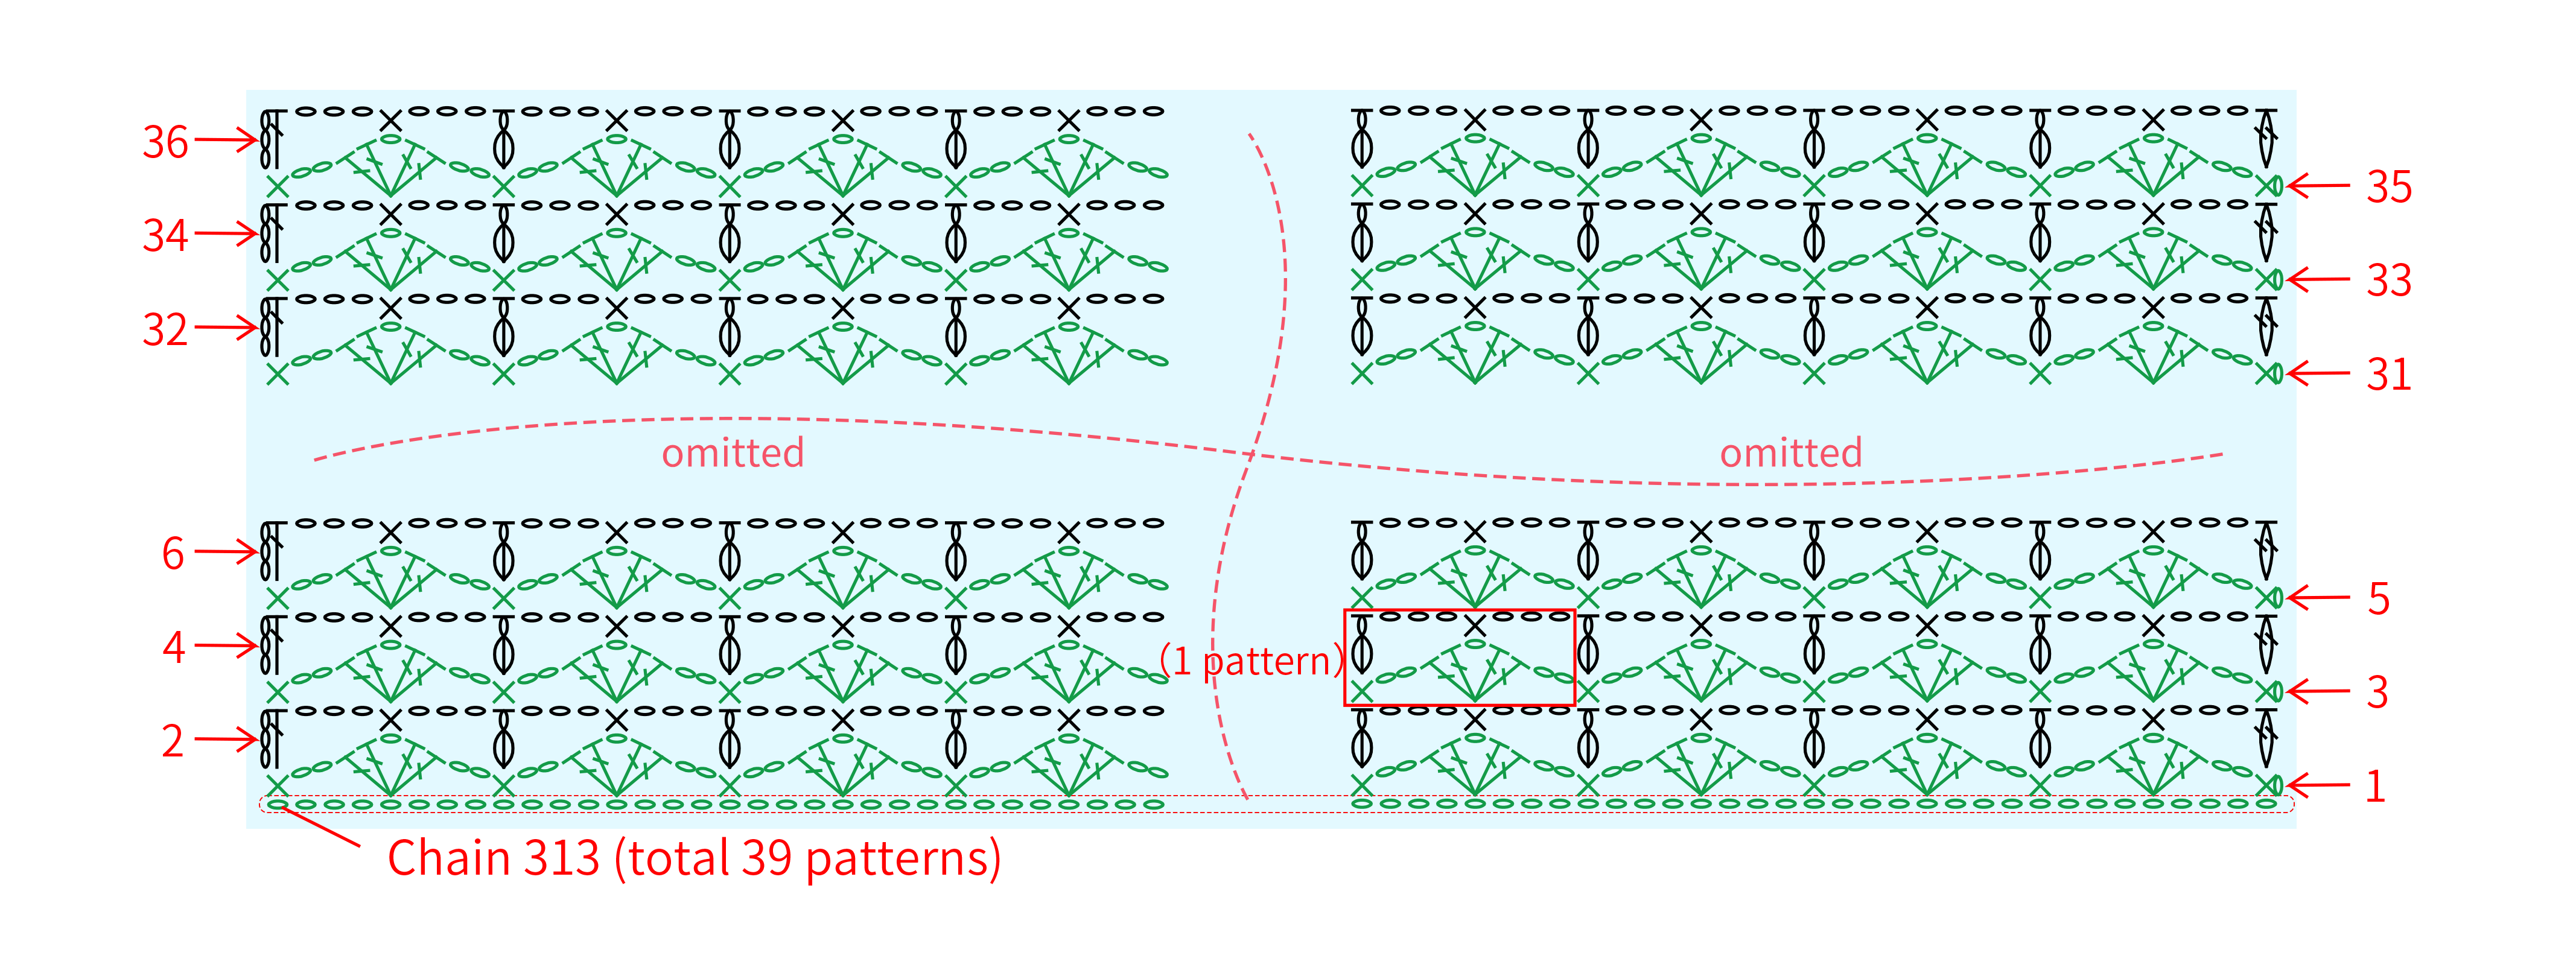
Part 1 BodyA 01' 01''
We will use the foundation chain method to cast on and work back and forth. Please refer to the video demonstration for details.

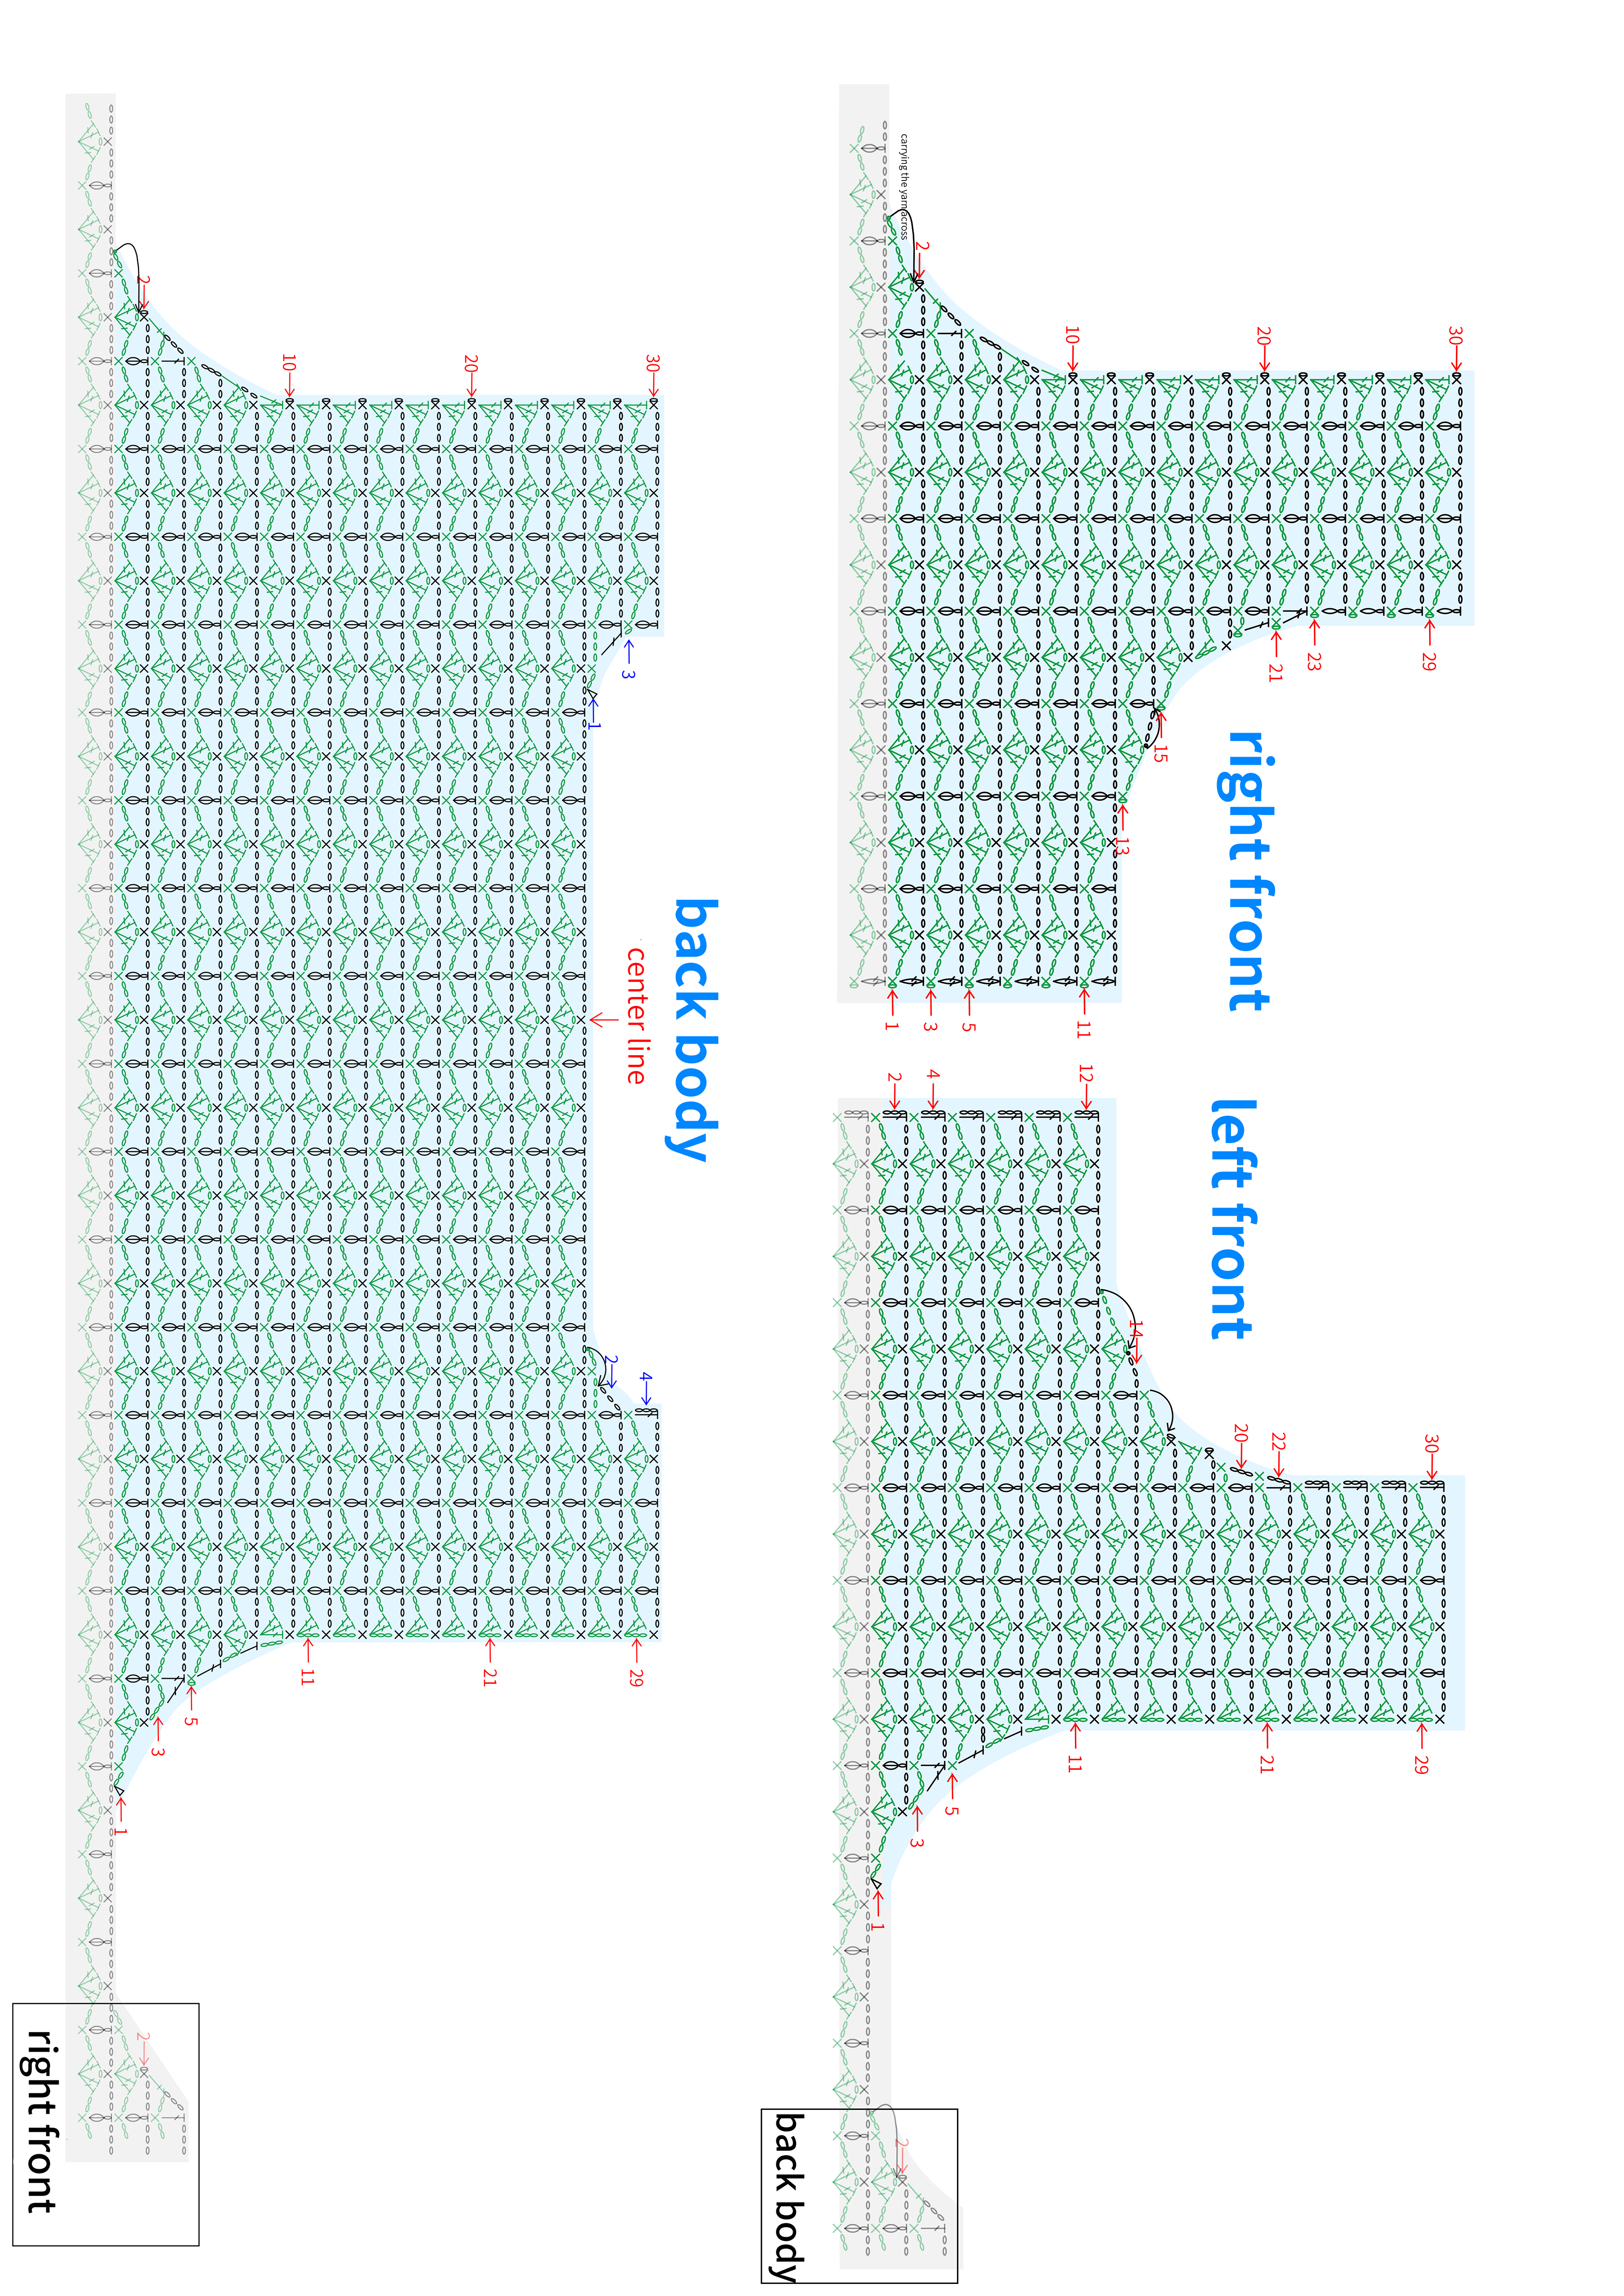
Part2 Bust pieceB 13' 22''
Divide into the right front, back body, and left front pieces, and crochet back and forth in the corresponding positions. Please refer to the video demonstration for specifics.
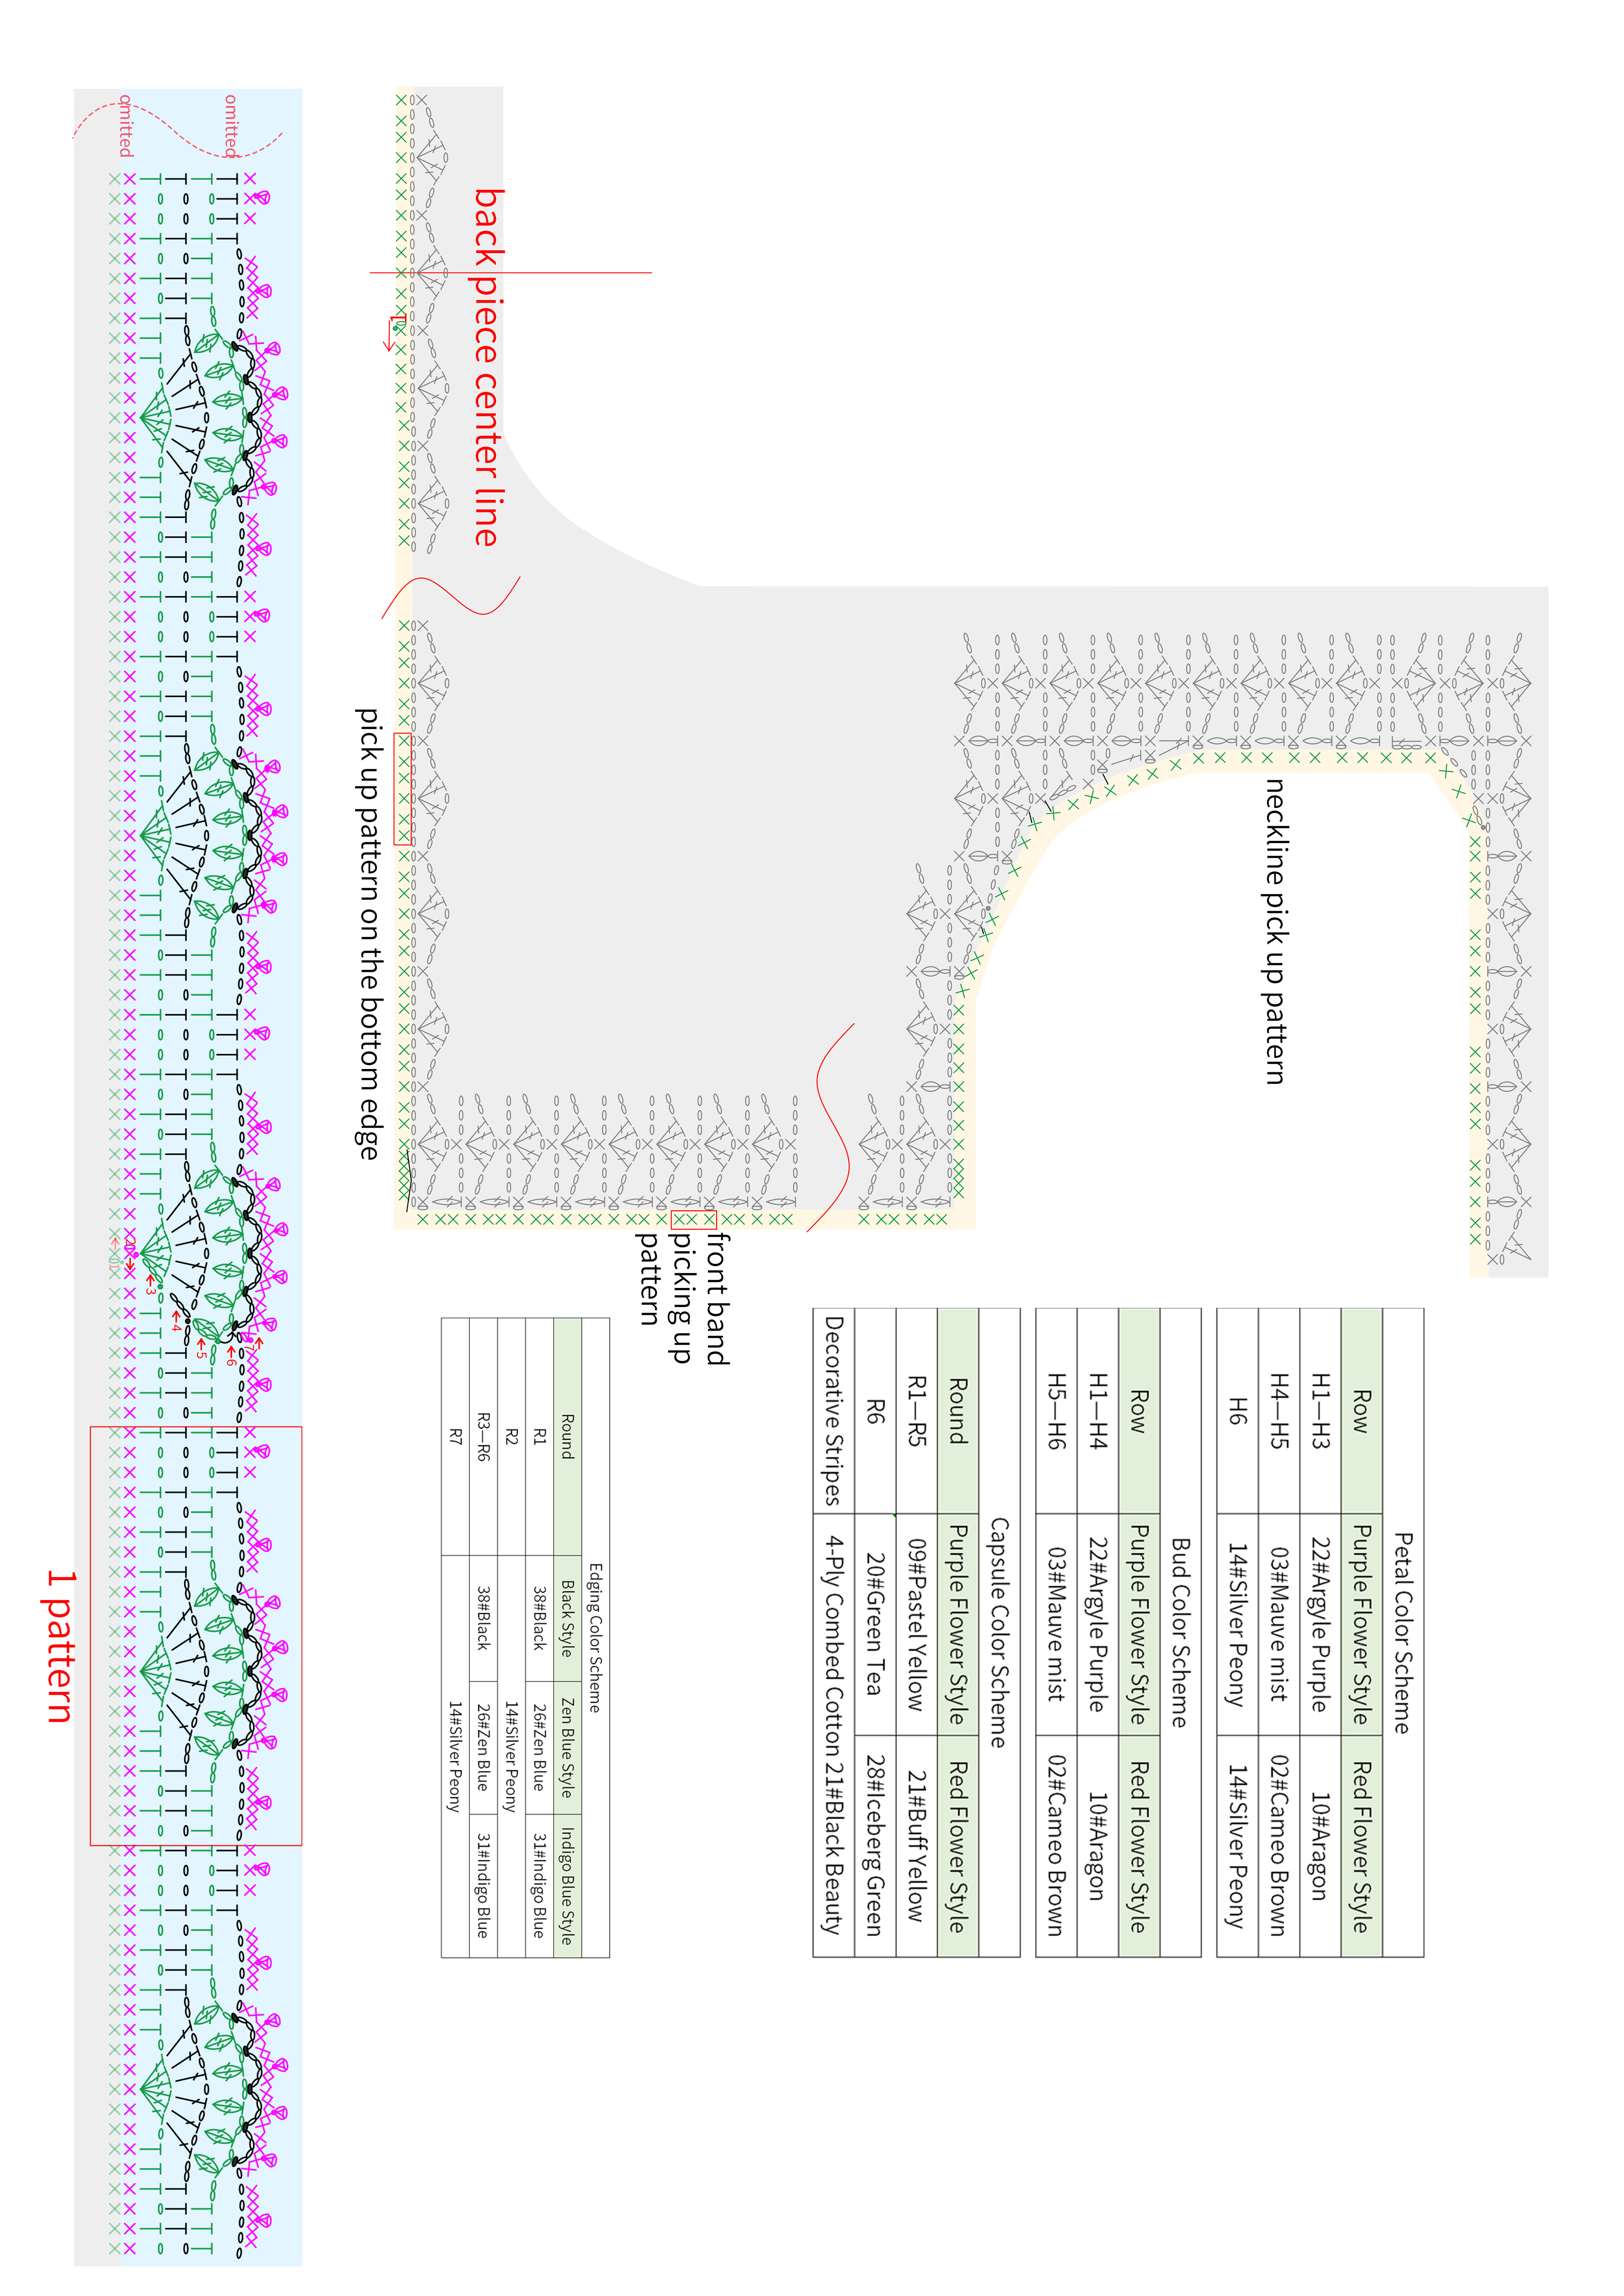
Part3 EdgingC 23' 44''
Crochet in rounds along the bottom edge, front band, and collar. While crocheting, pay attention to switching colors, and crochet the second round on the wrong side. Please refer to the video demonstration for specifics.
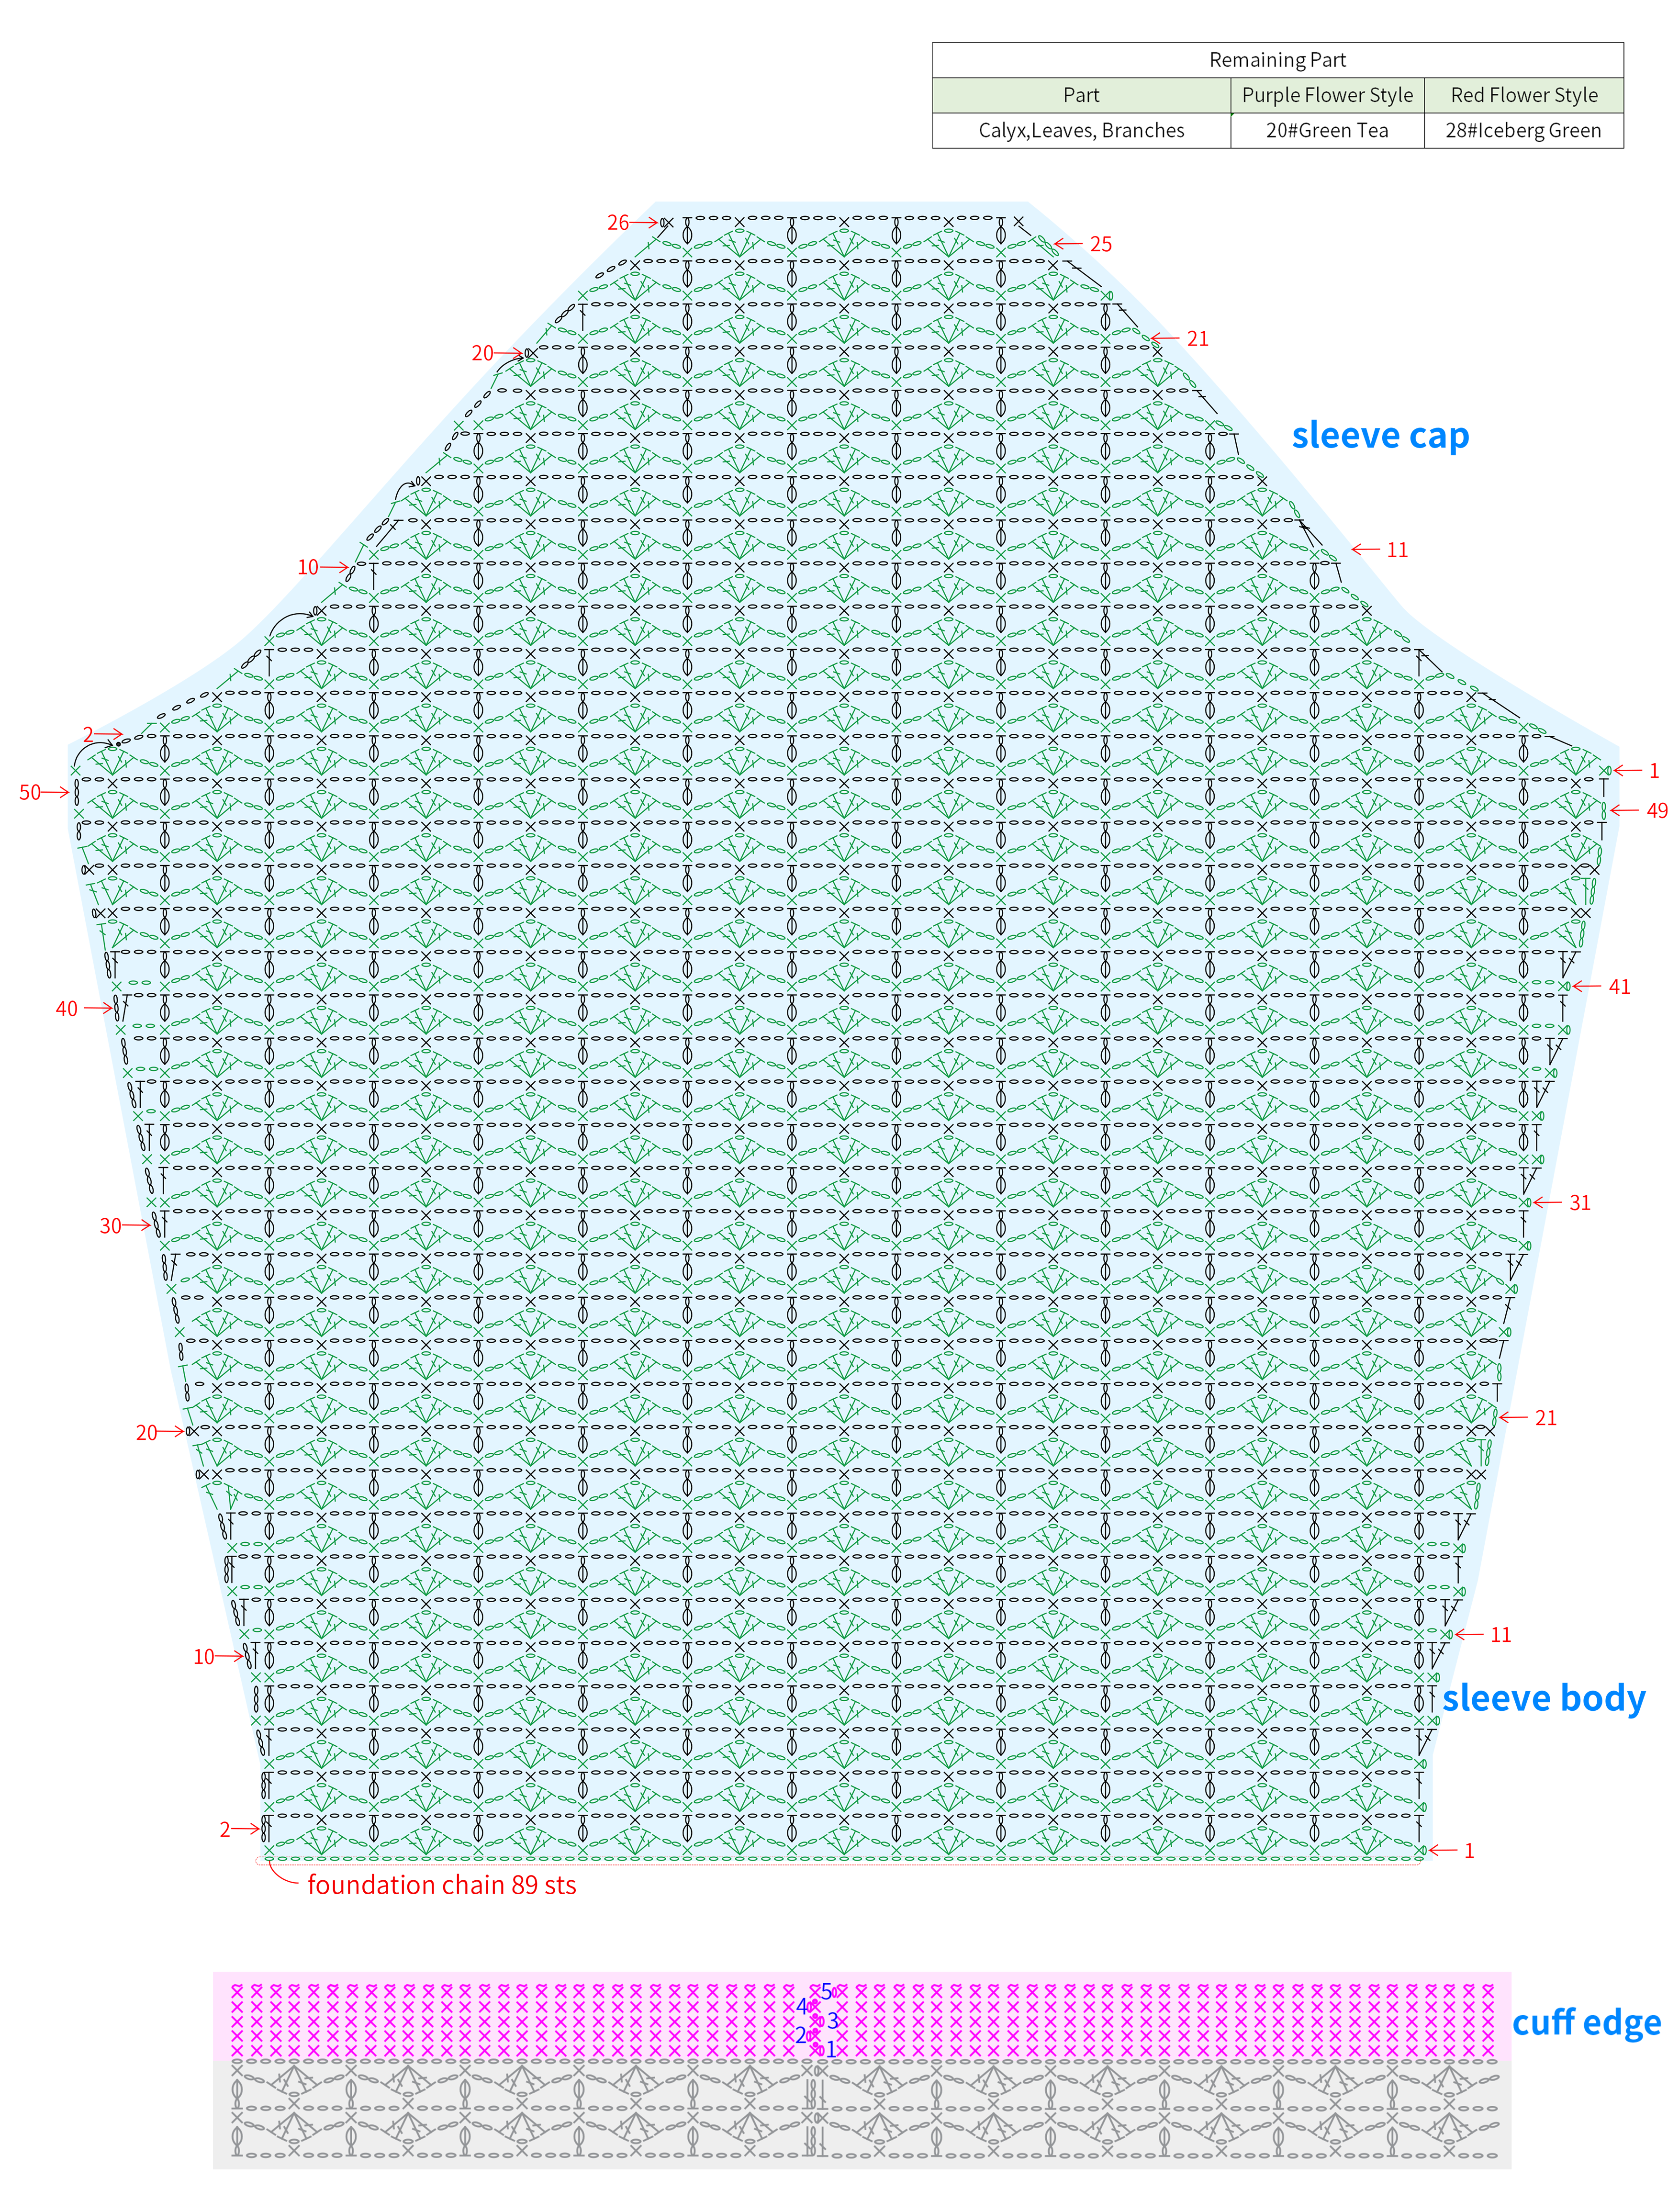
Part4 SleevesD 34' 02''
Divide into three parts: the sleeve body, sleeve cap, and cuff. First, work back and forth for the sleeve body and sleeve cap. After sewing the sides together, crochet in rounds for the cuff. Finally, attach it to the corresponding armhole position. Please refer to the video demonstration for details.
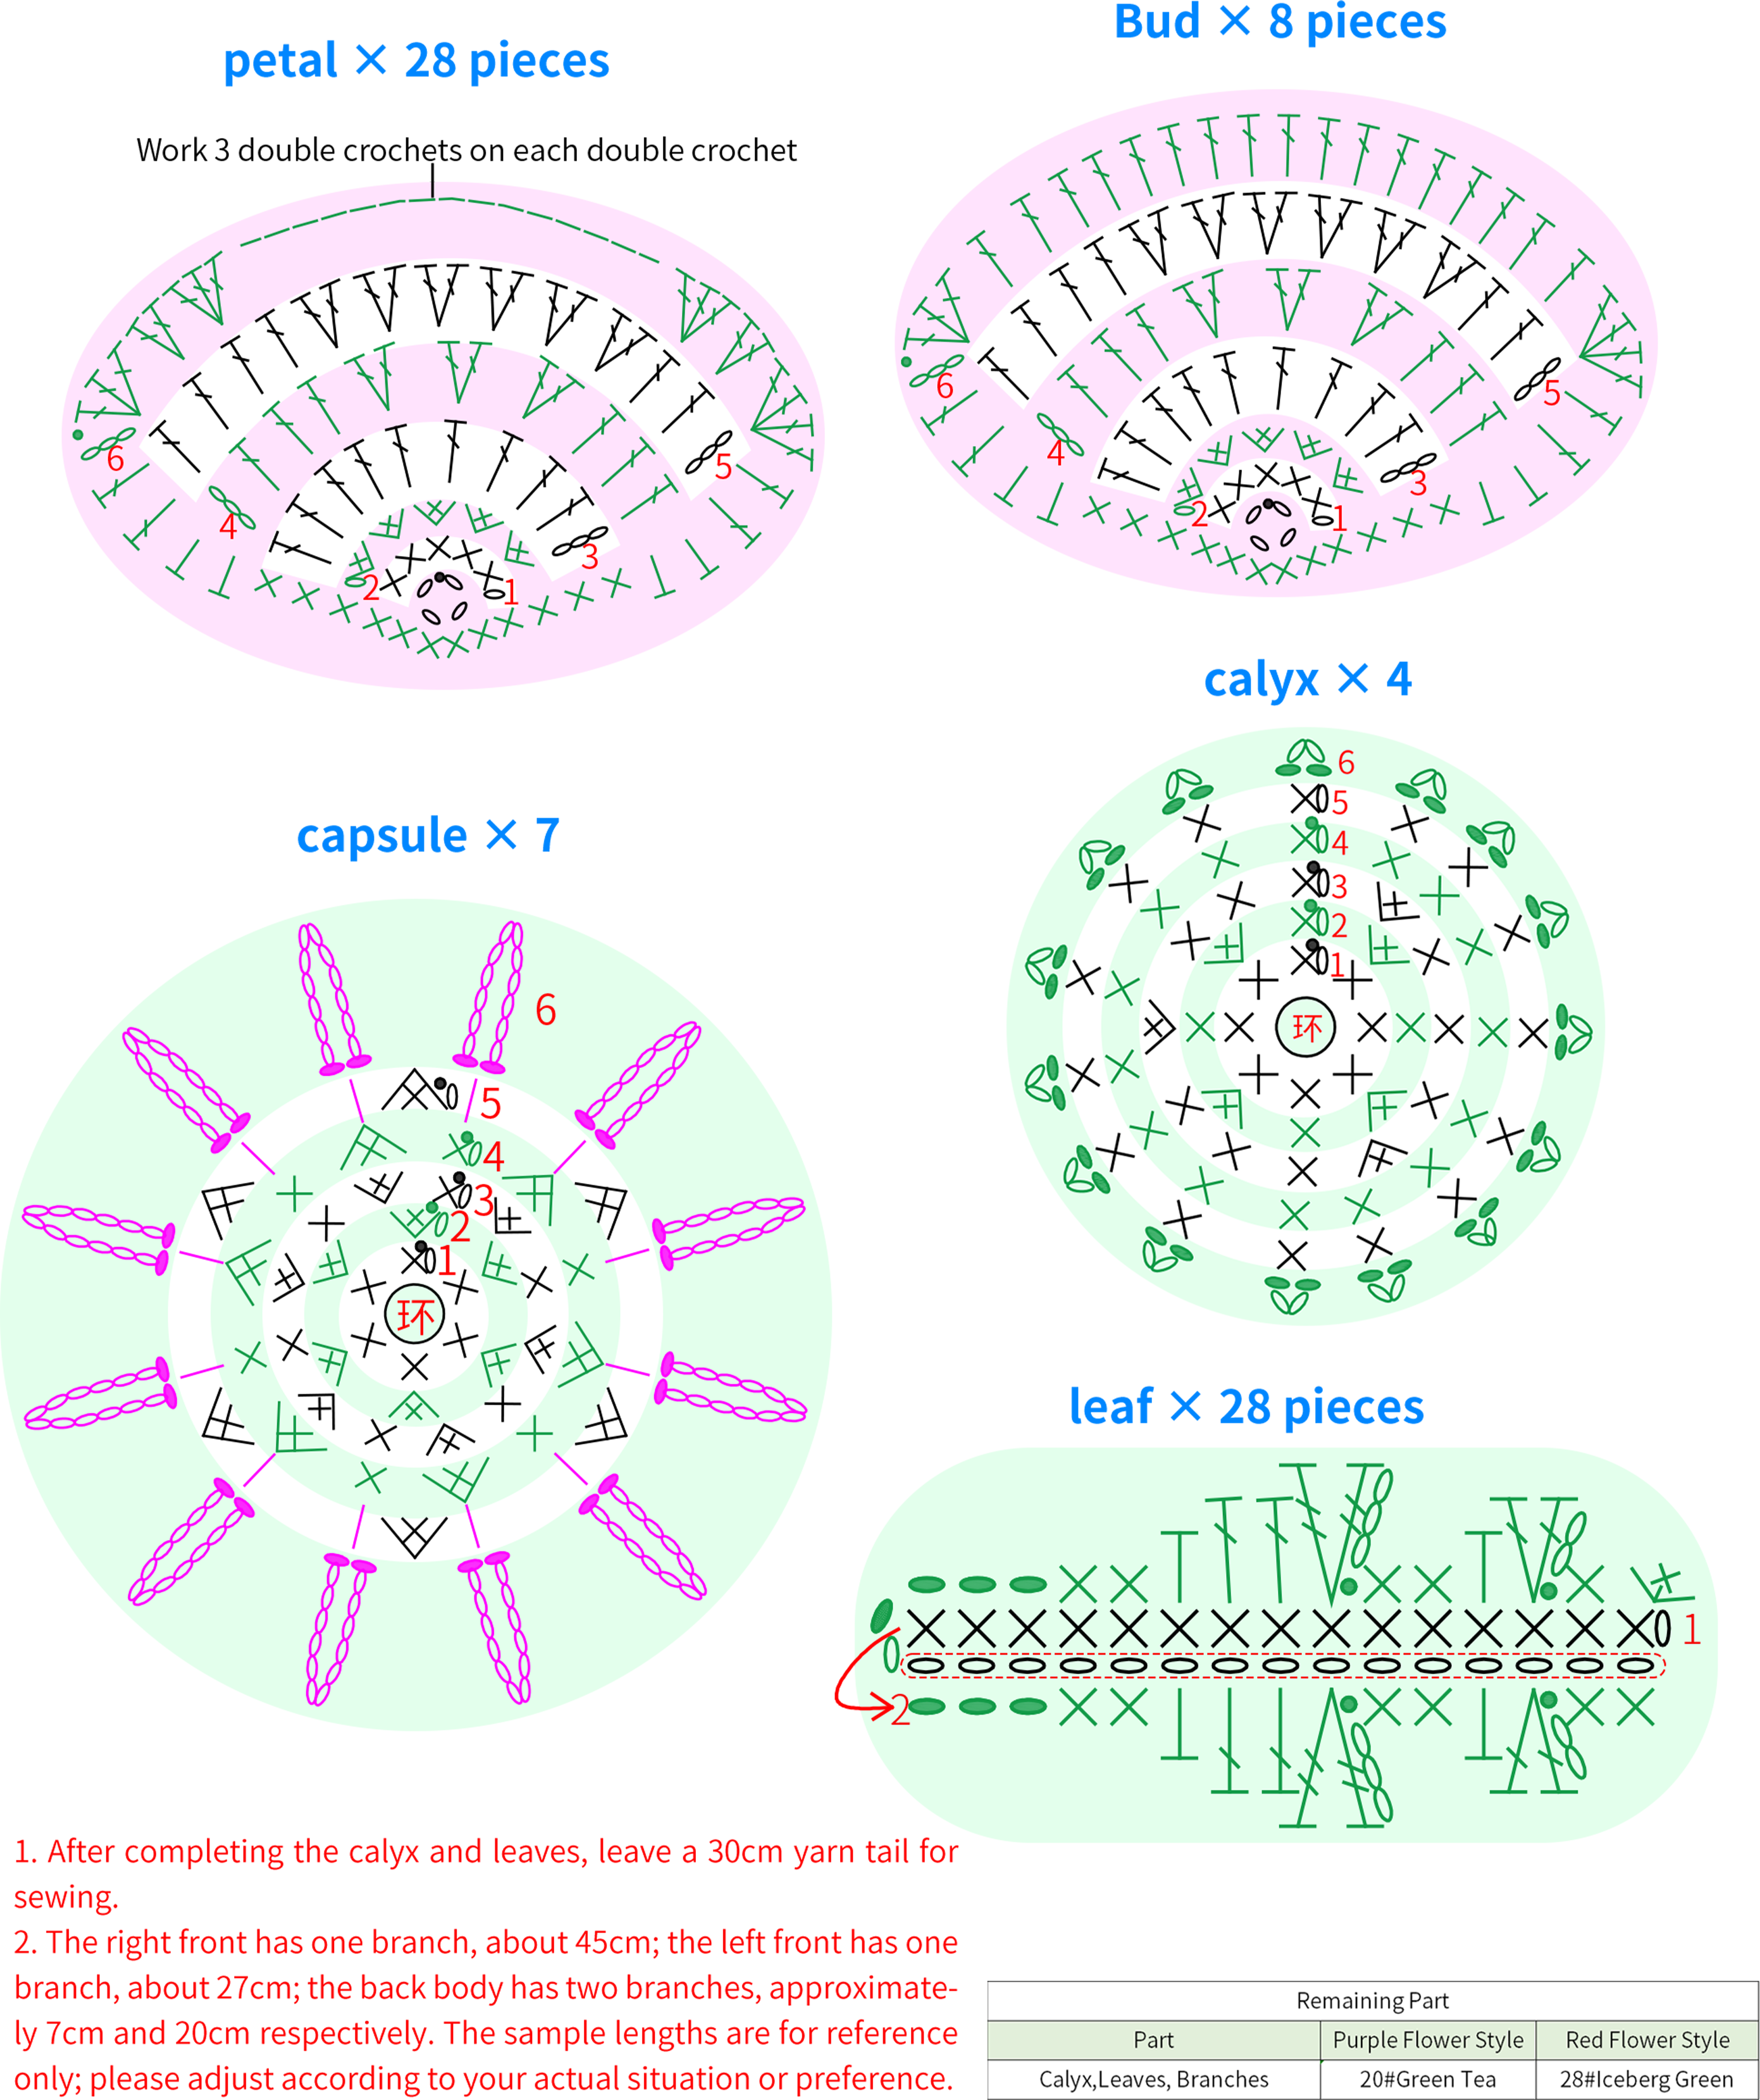
Part5 AccessoriesE 35' 48''
Including flowers, buds, leaves, branches, and buttons. Crochet each part separately, then assemble and sew them onto the corresponding positions on the garment. Please refer to the video demonstration for details.
Made by the community