Home / Blanket
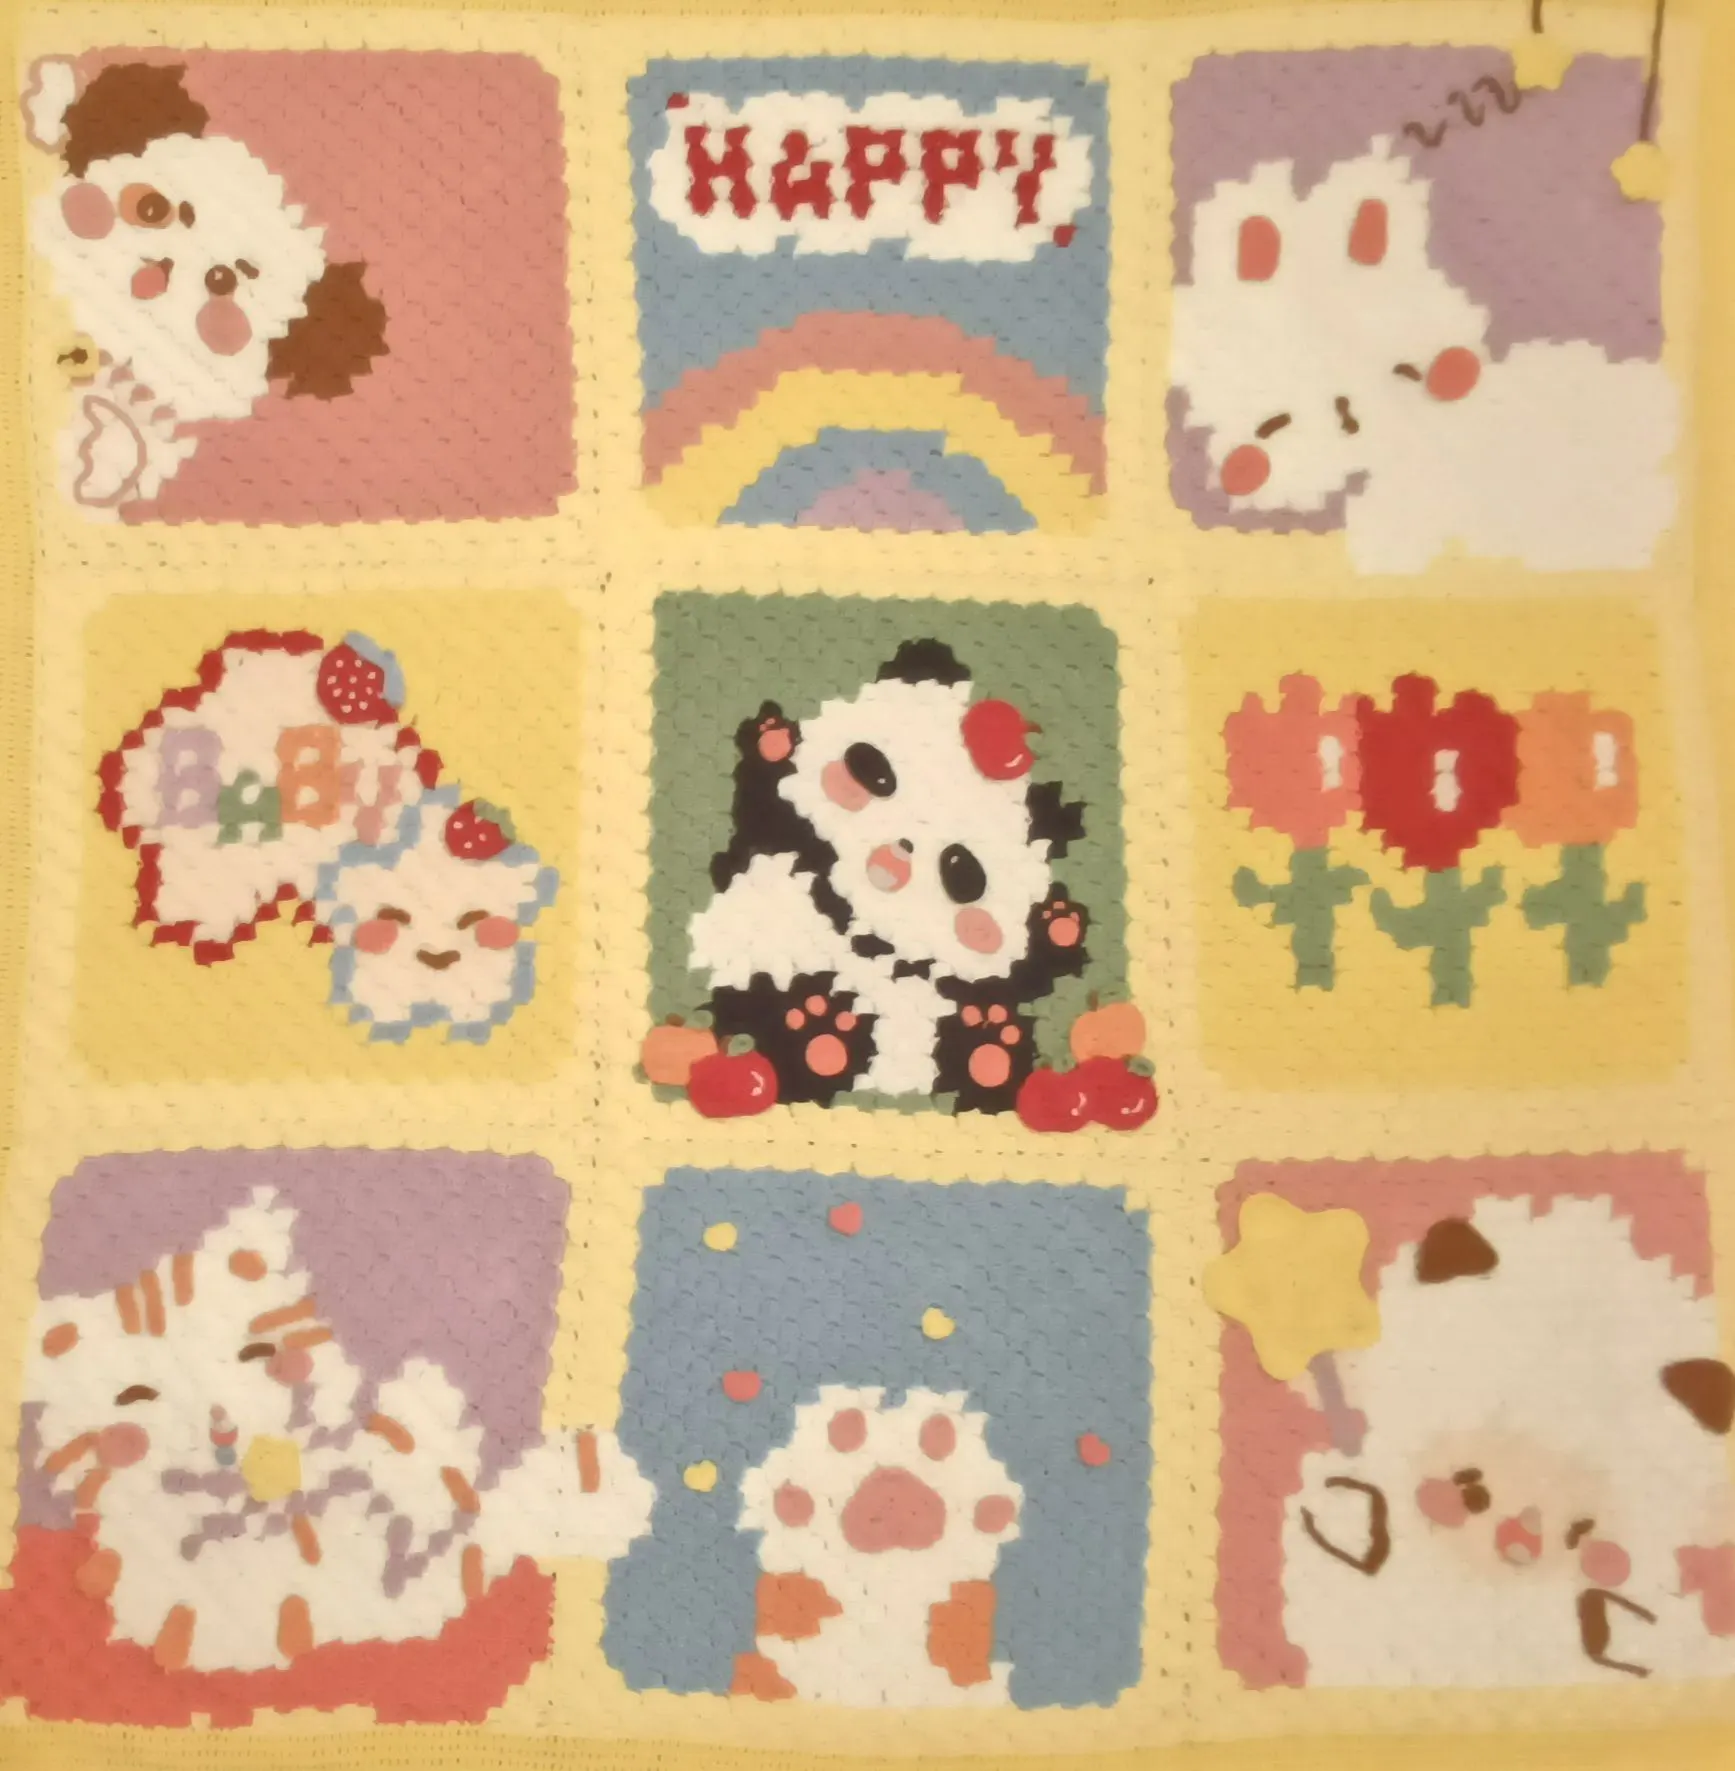
Cutie Blanket
Project preview
See the finished project
Pattern format
Instructions
Watch and follow
Video tutorial
The blanket consists of the main part and decorations. We start by making the main part. After completing, make the decorations.
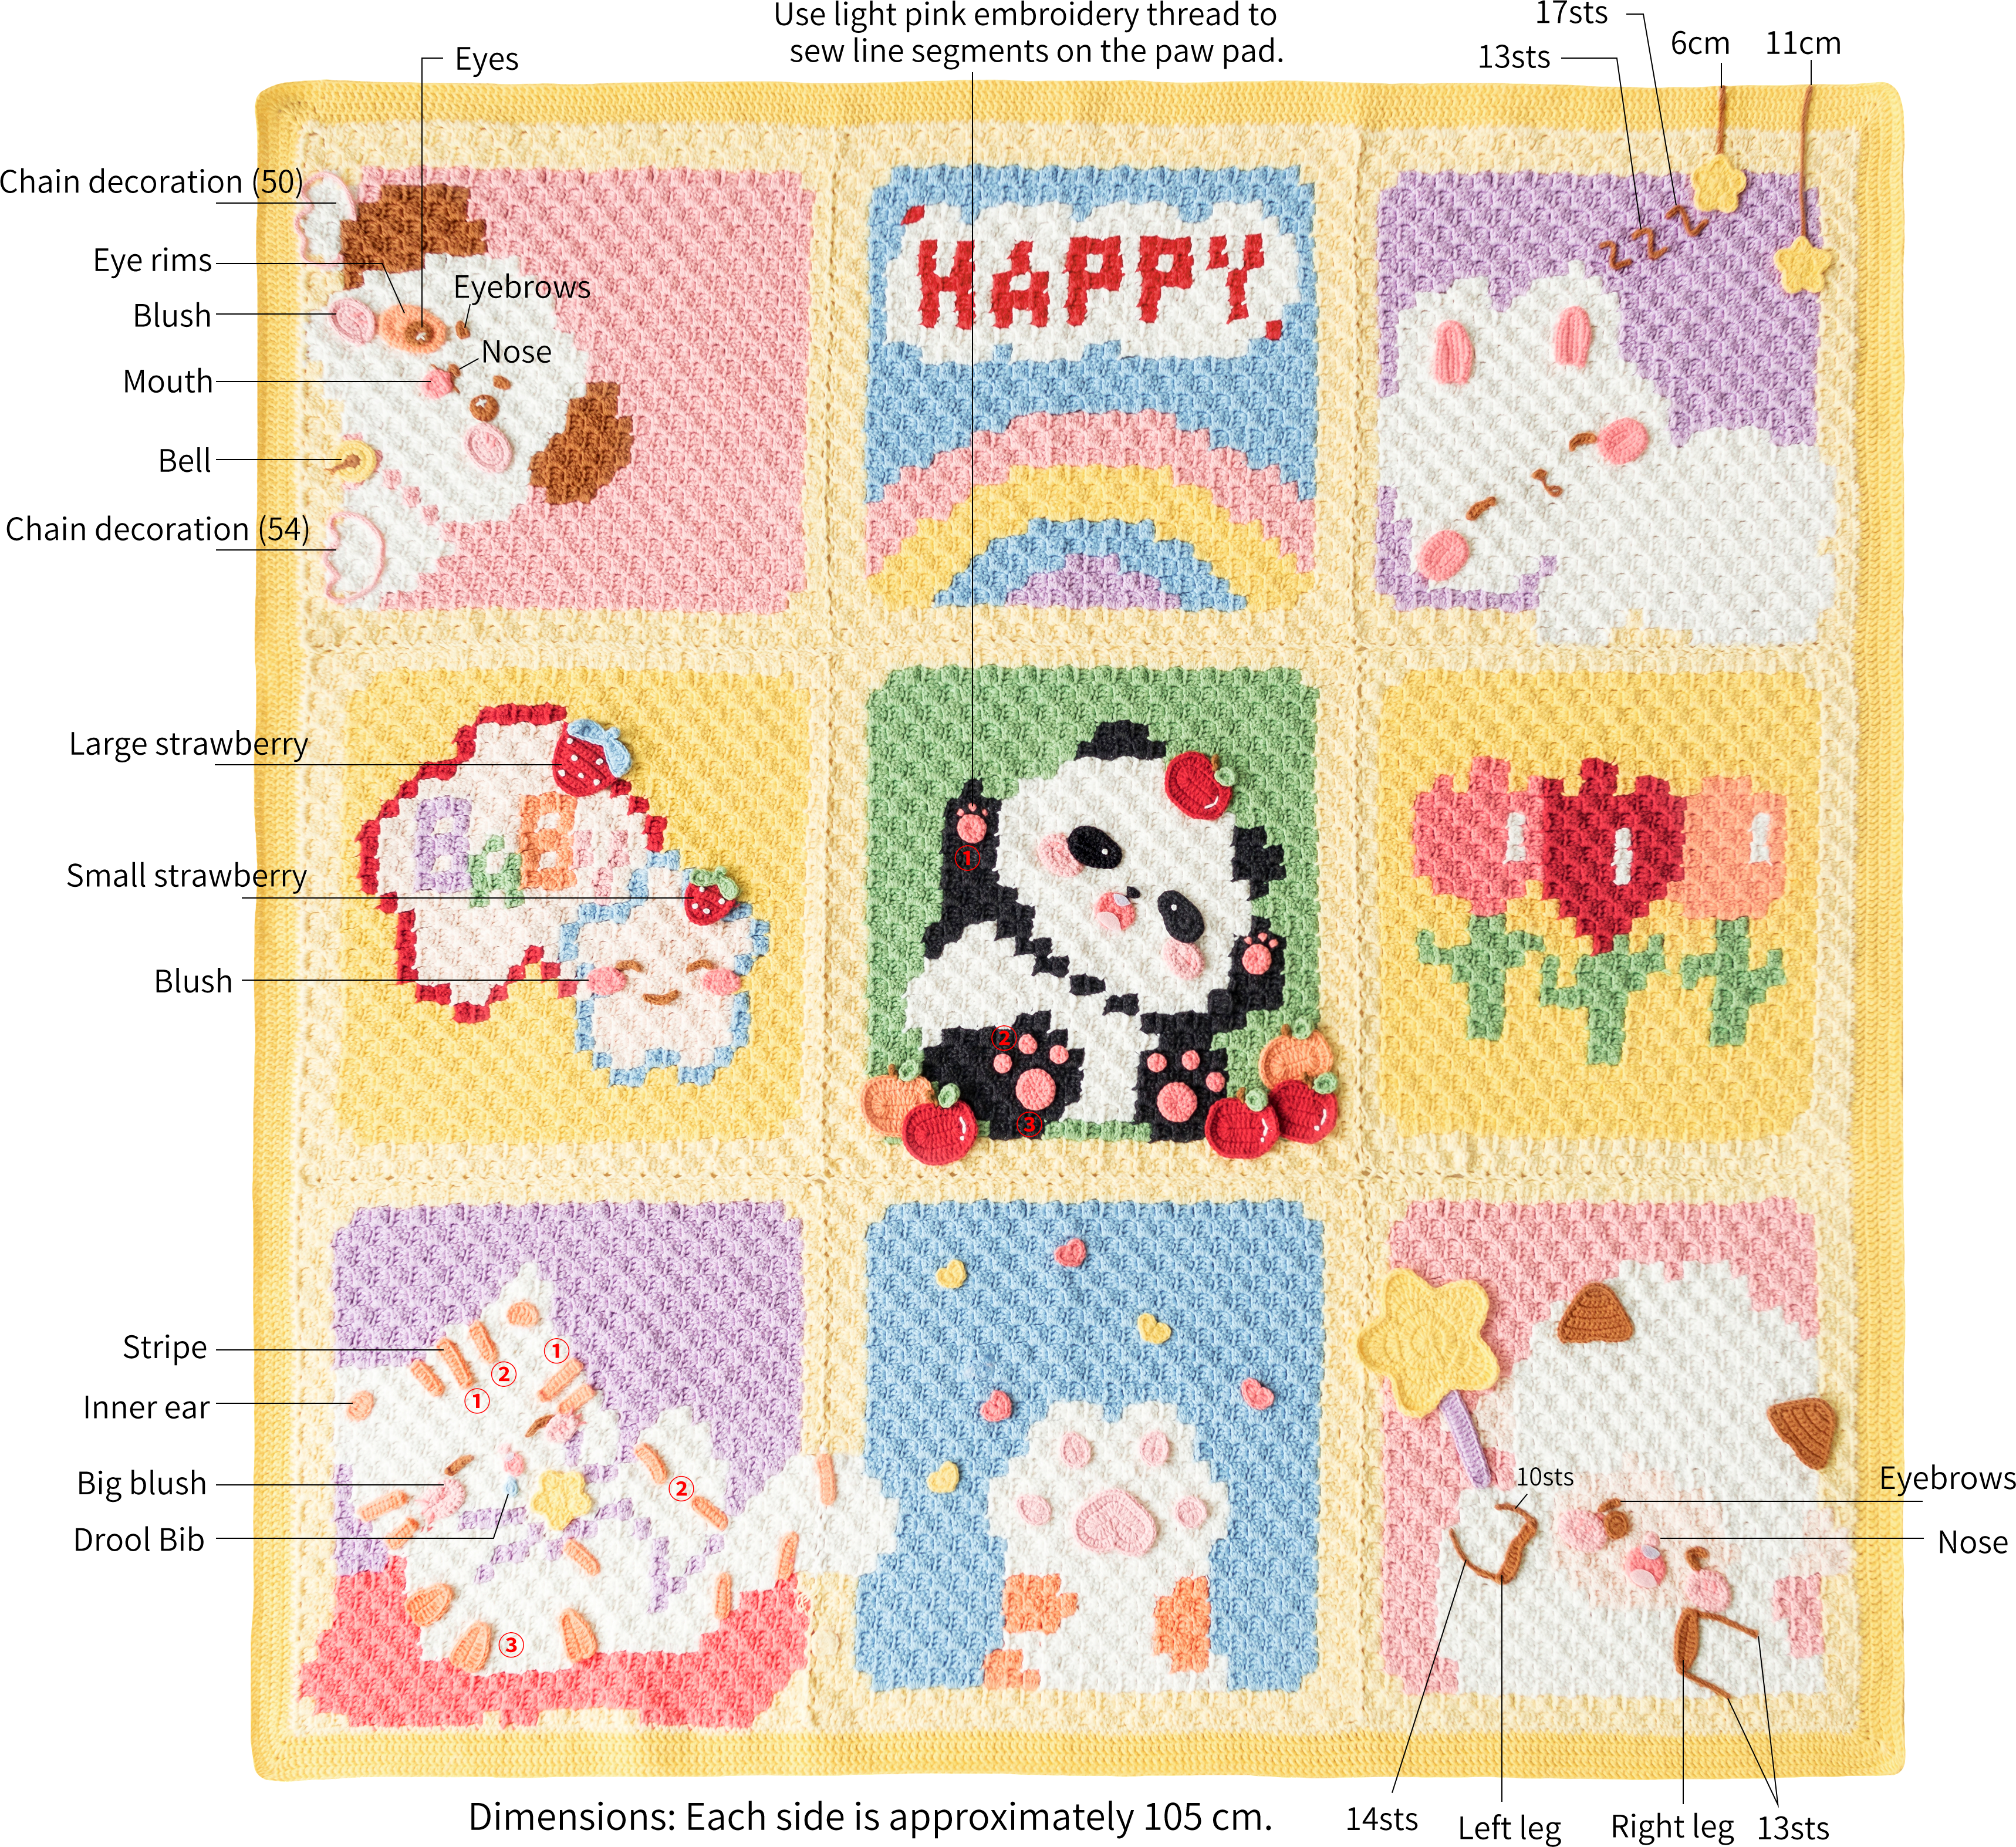
The handcrafted measurements may have an error of 1 to 2 cm. Due to variations in individual tension, the size of the sample is for reference only.
Materials: Susan's Family 4-Ply Combed Cotton & Acrylic Fibre Hand Knitting Yarn
Hook: 3.00 mm crochet hook (For the main part)
2.00 mm crochet hook (For the accessories)
Note: When the yarns intertwine during the color change process, make sure to smooth them out promptly to avoid tangling and knotting, which can affect your crocheting.

Chart Key











Note: This pattern is making in Chinese crochet pattern terms, and the stitch name is written using American terminology. All measurements in charts are in cm.

Part 1 Main partA
The main part includes some pieces in various sizes, pieces joining and edging. Start by making the pieces. After those pieces finished, Join them together. Finally, crochet along the edges.
Step 1 PiecesA1 01' 15''
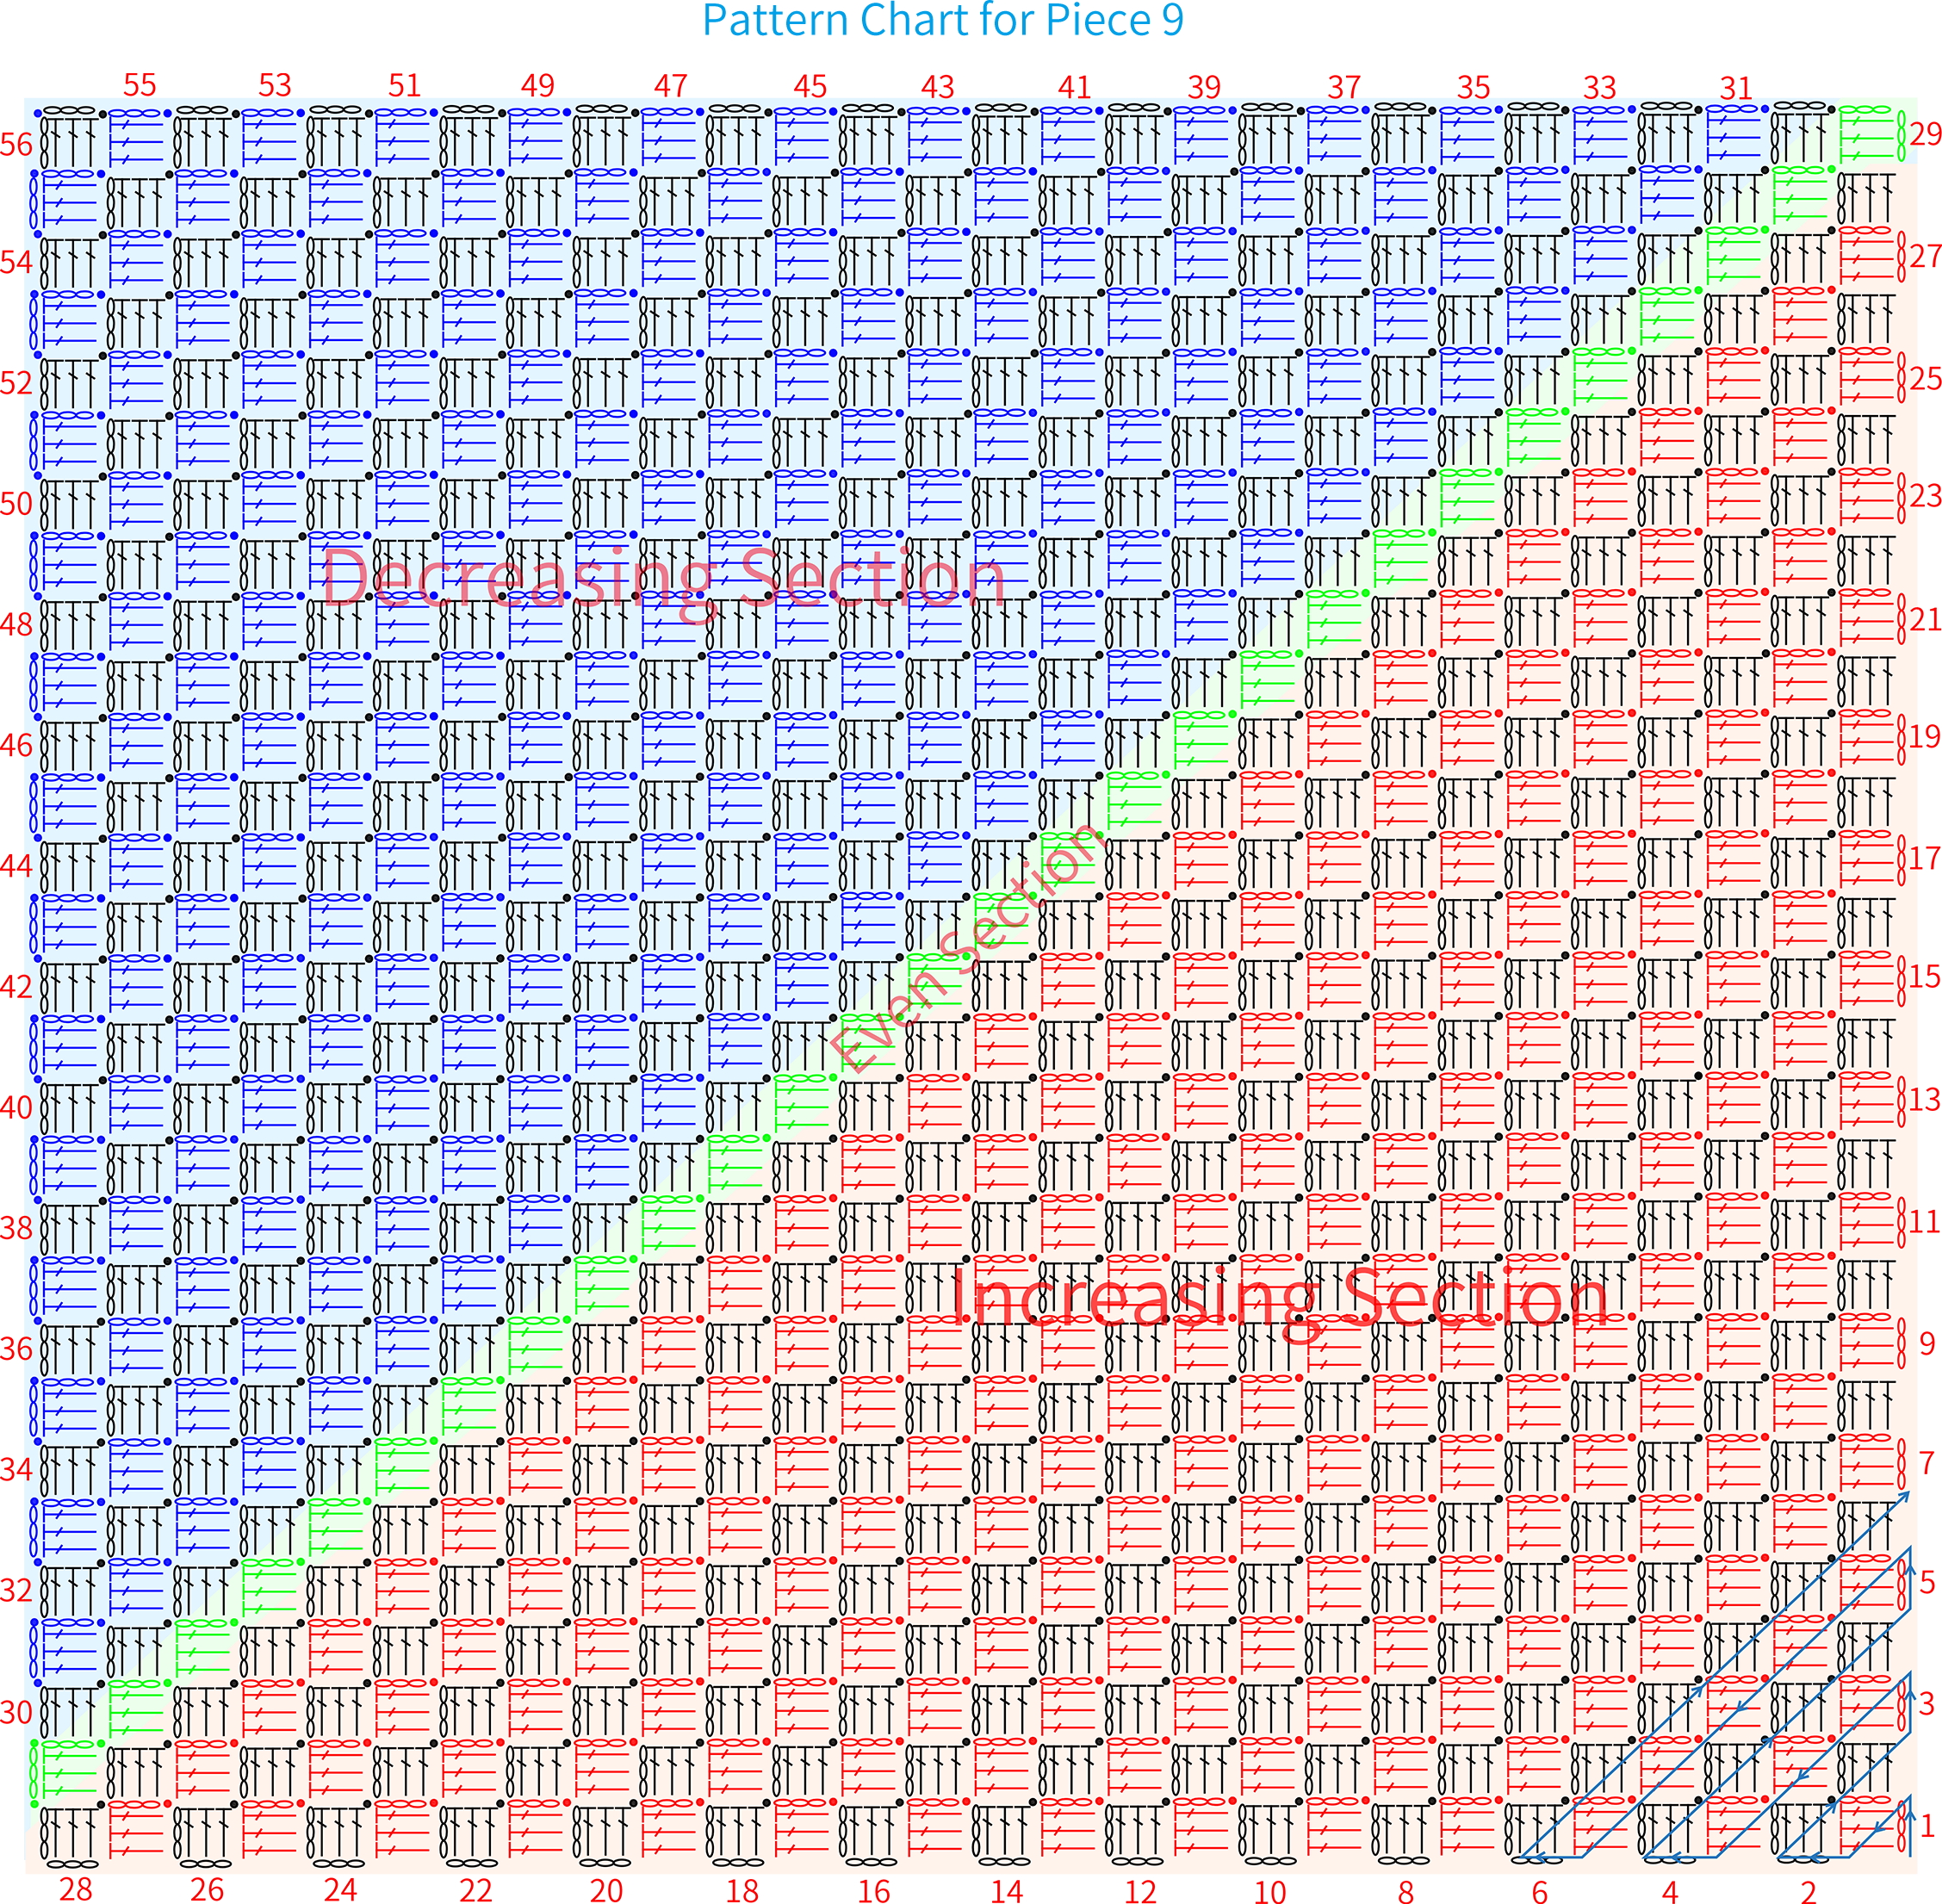
Crochet these pieces with diagonal method, working back and forth in rows. During the process, we will continuously adding new yarn and changing colors to crochet the corresponding images. All the pieces use the same crocheting method. The difference is in the number of rows and corresponding pattern repeats. Please refer to the video demonstration for more details.
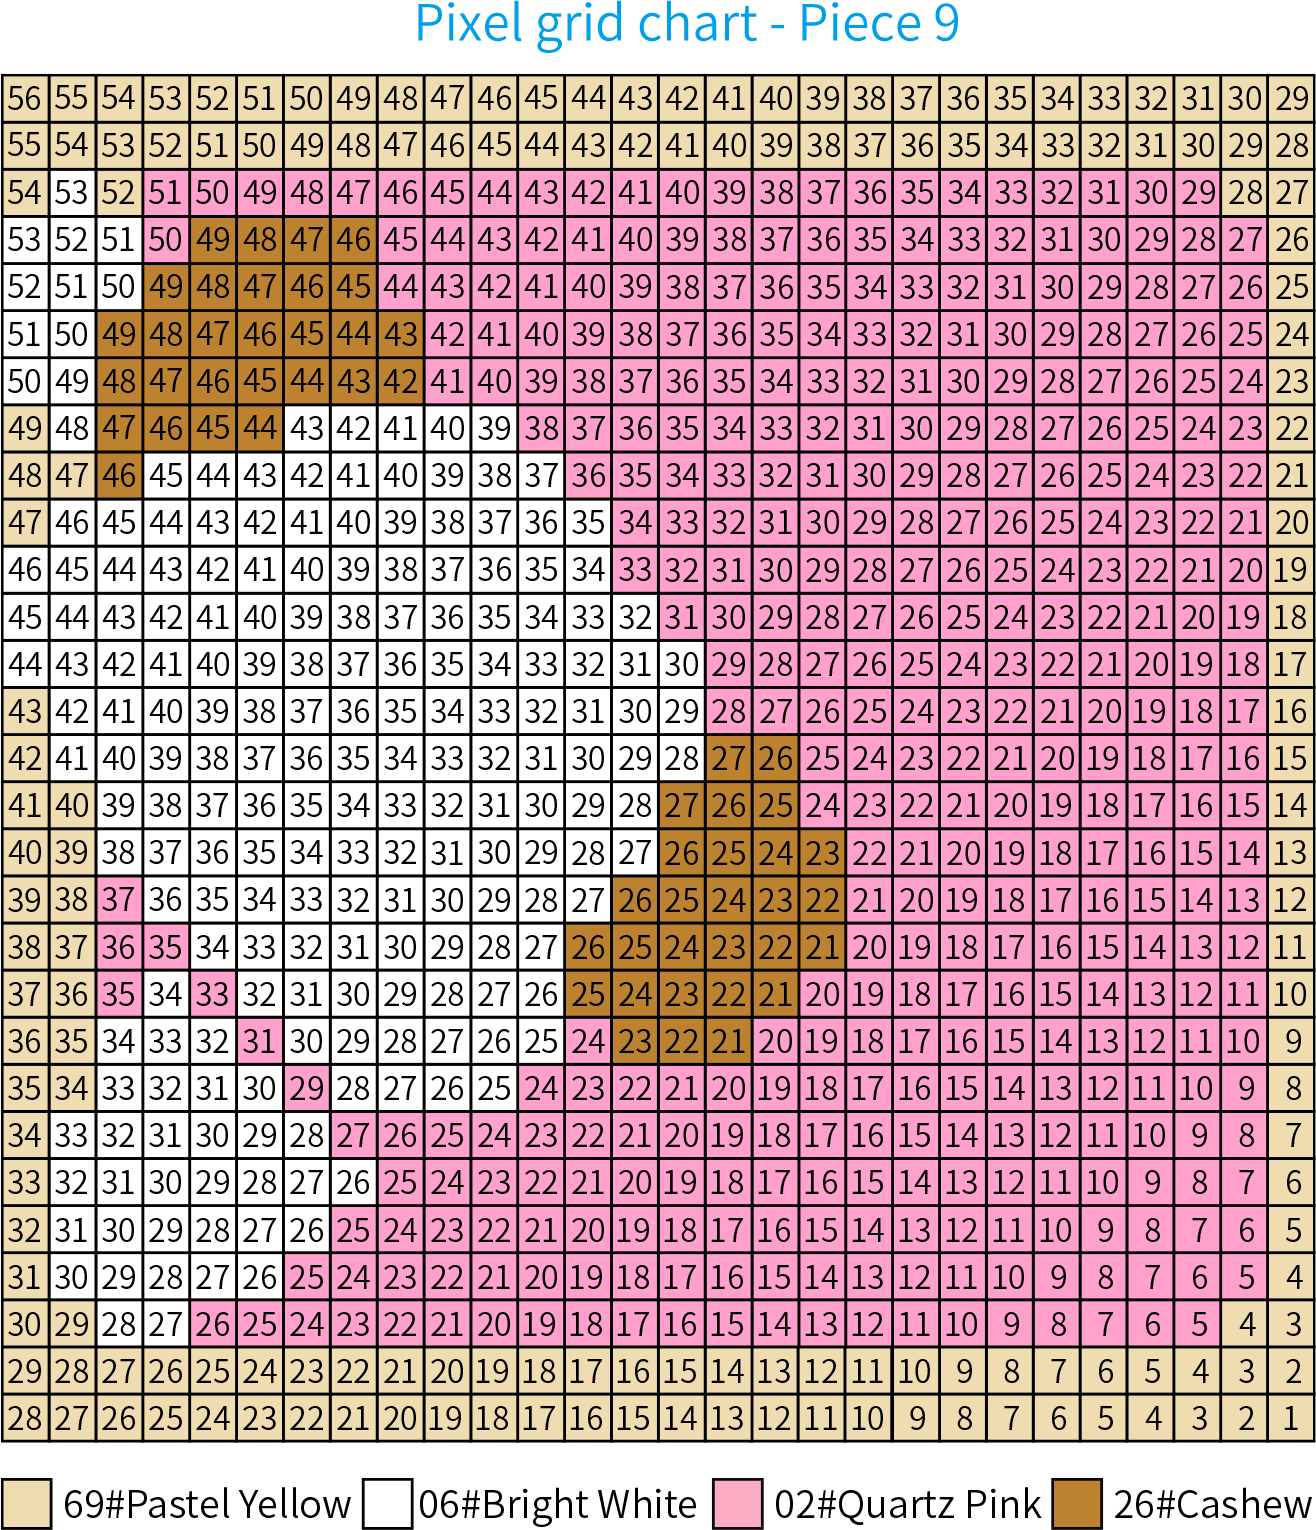
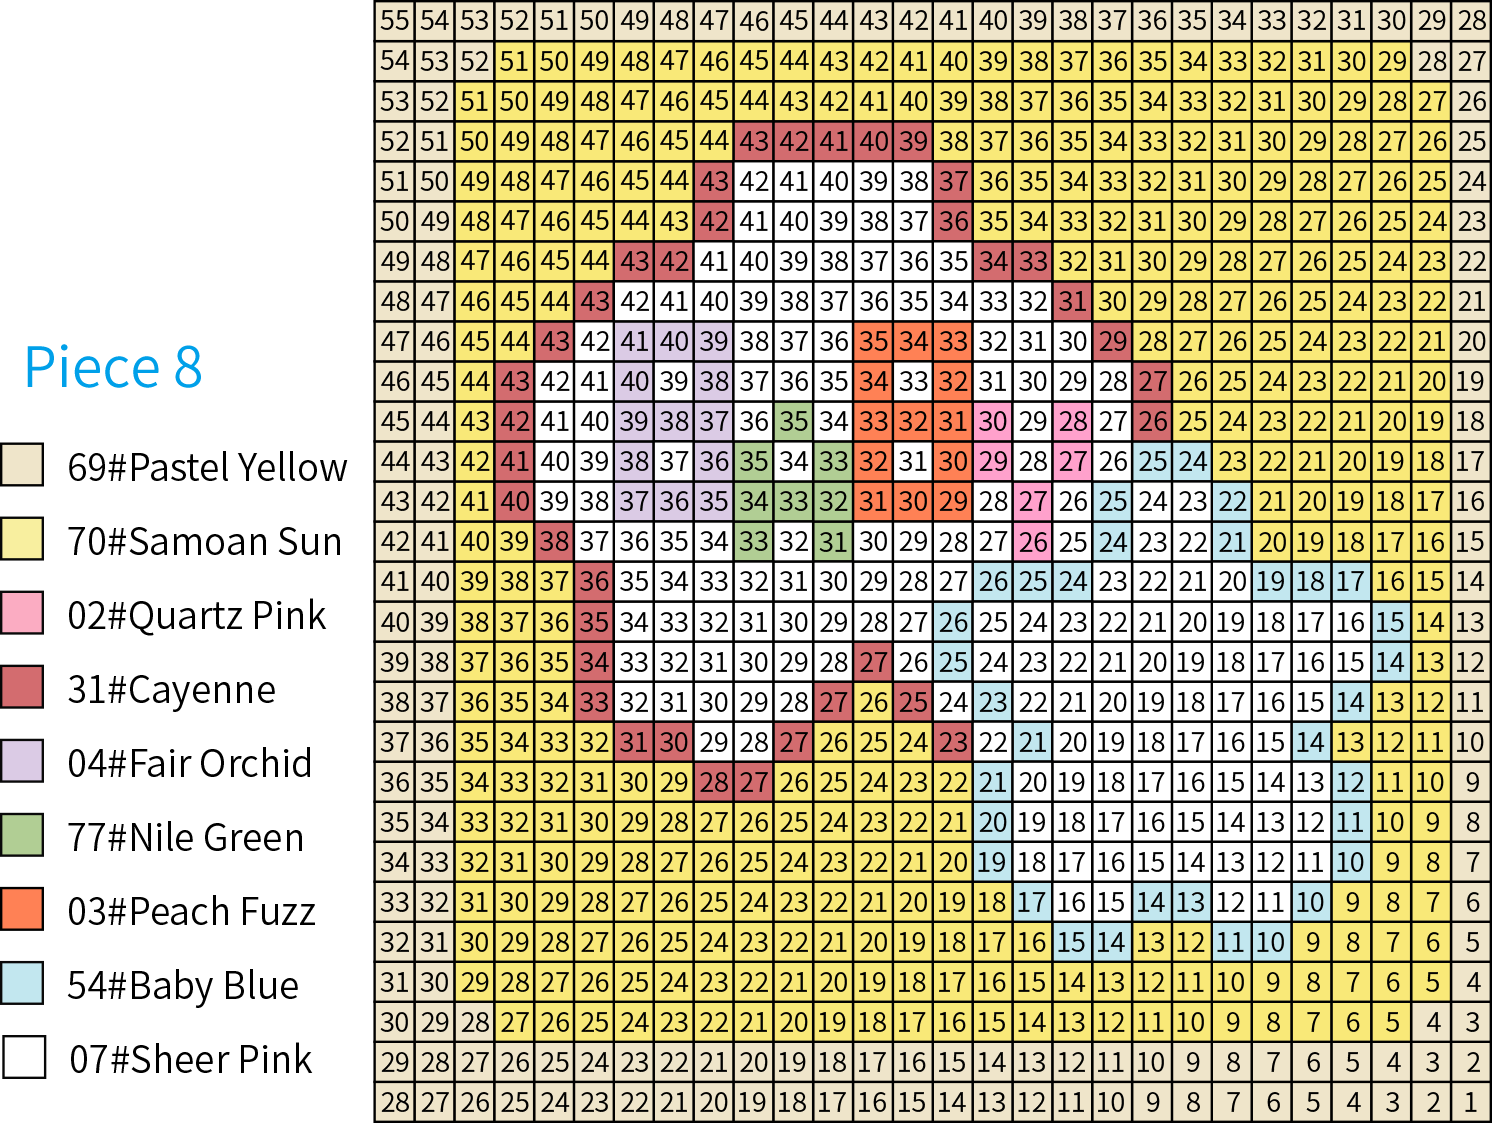
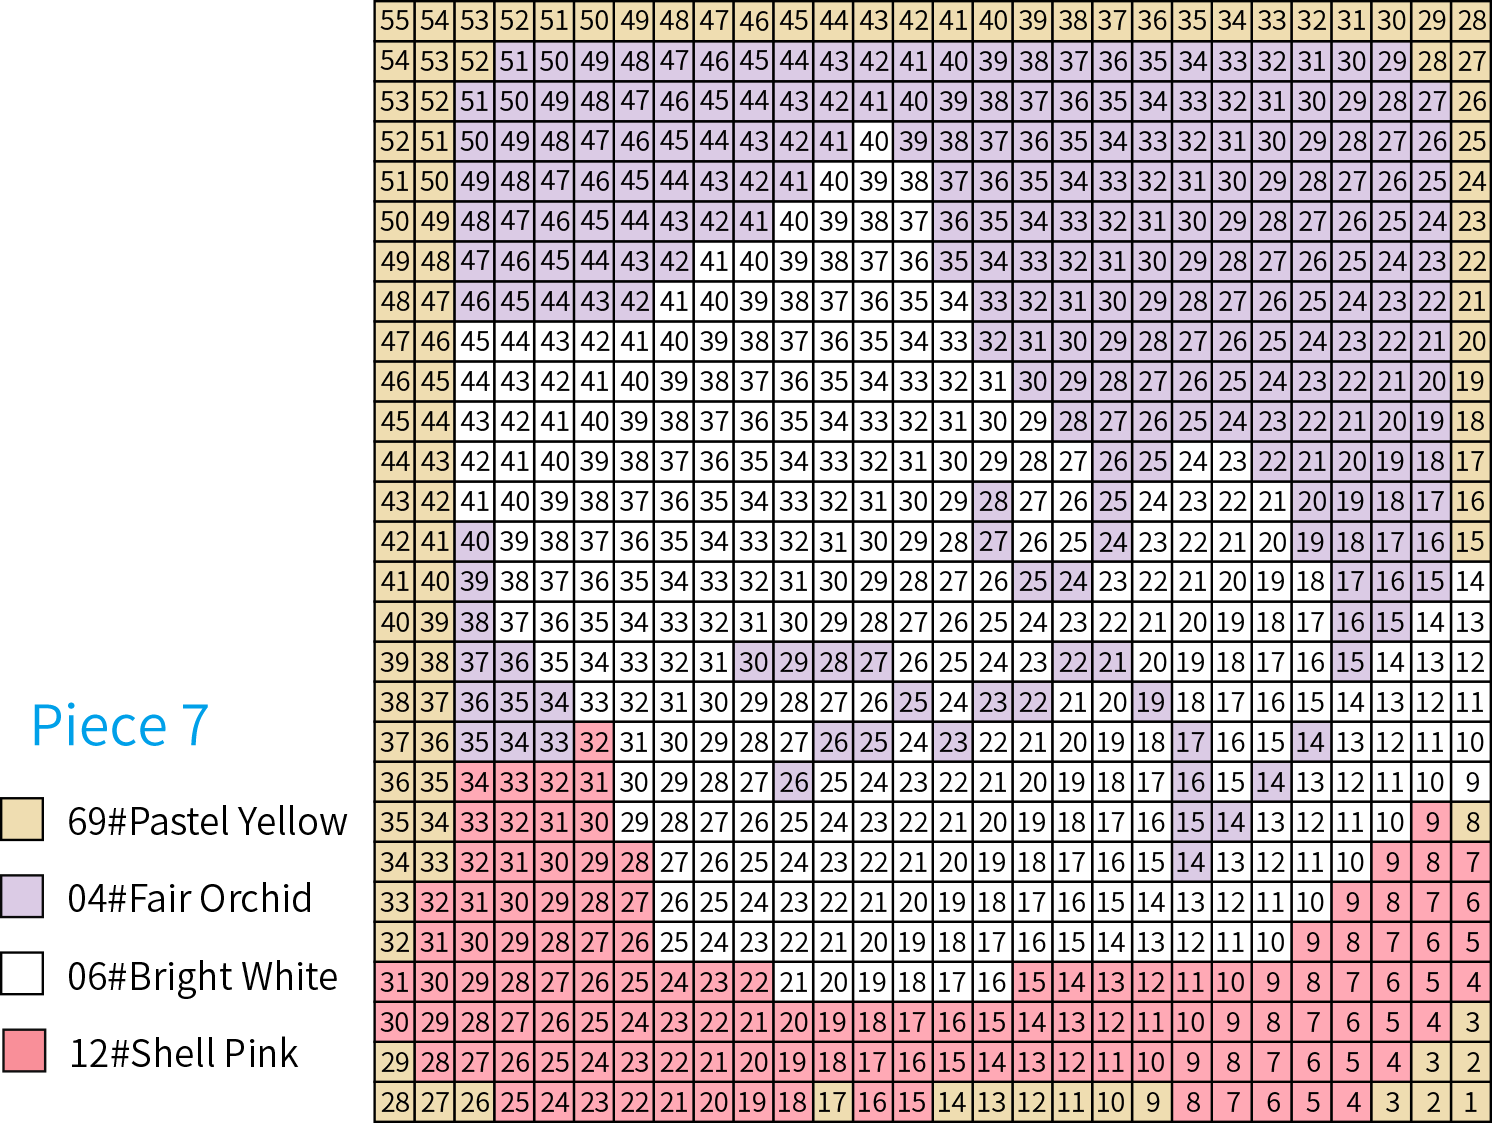
Note: The pattern chart is demonstrated using Piece 9. It is divided into an increasing section, an even section, and a decreasing section. For the color schemes and grid counts of other pieces, please refer to the corresponding pixel grid charts.
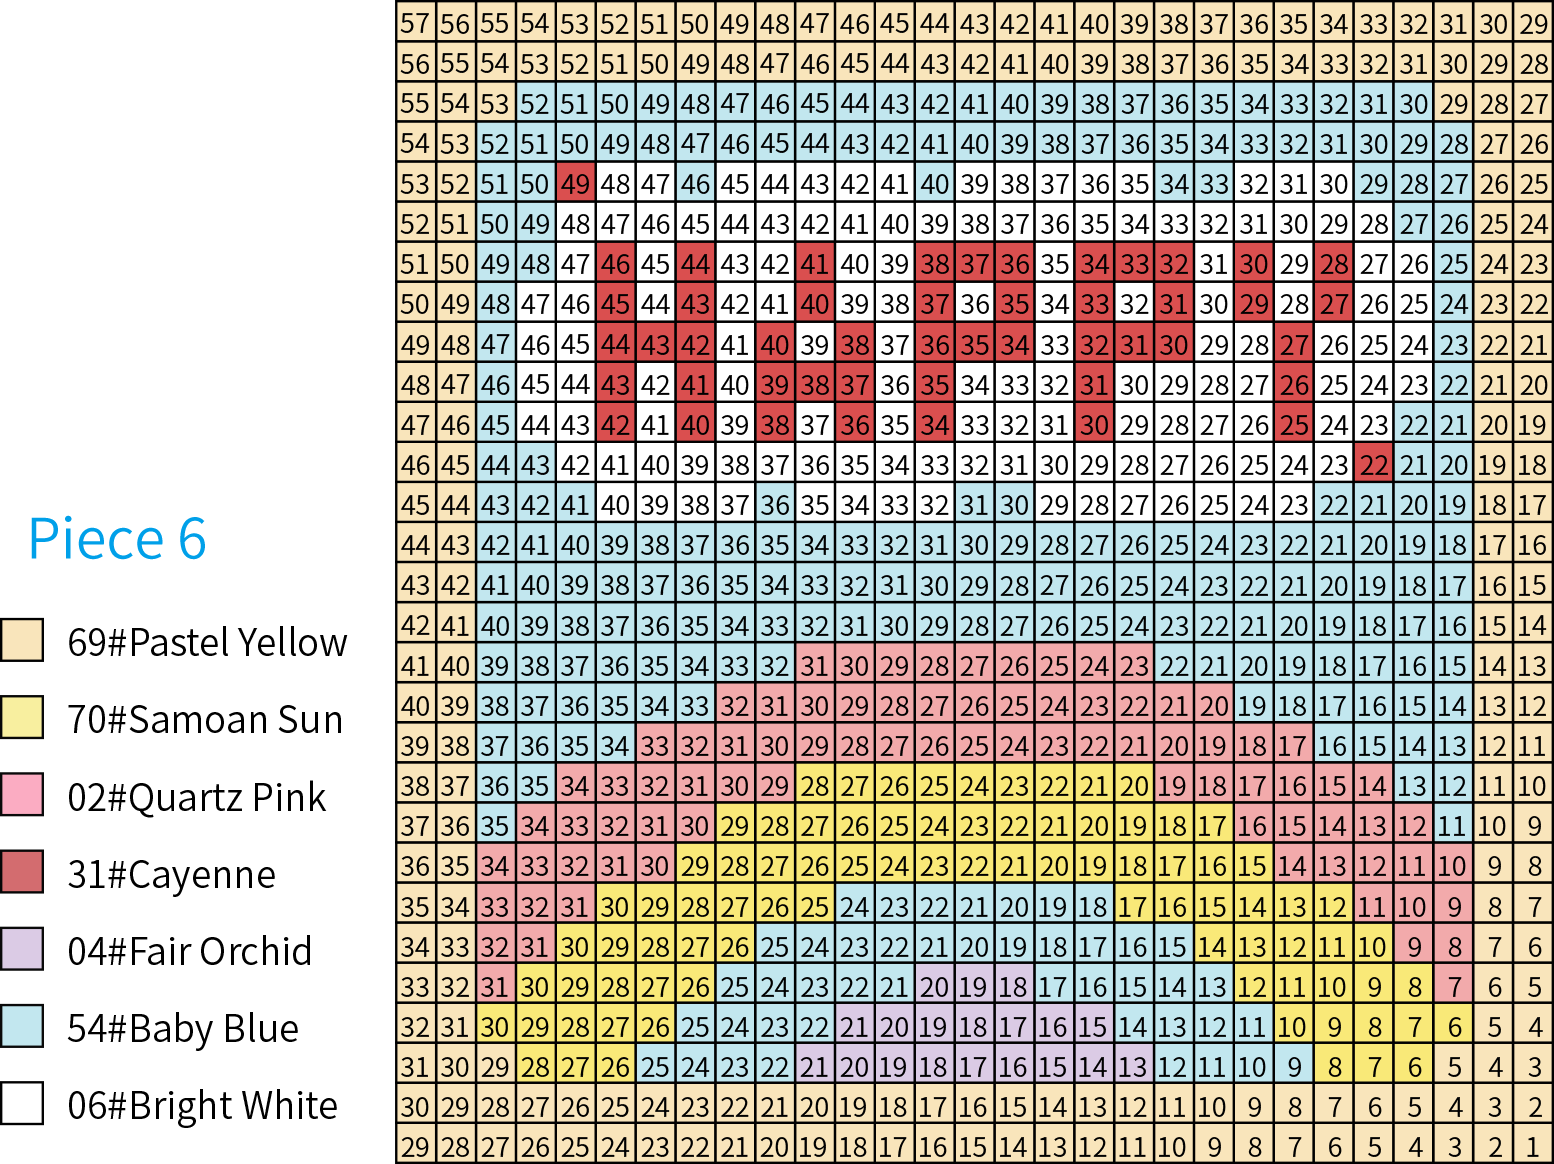
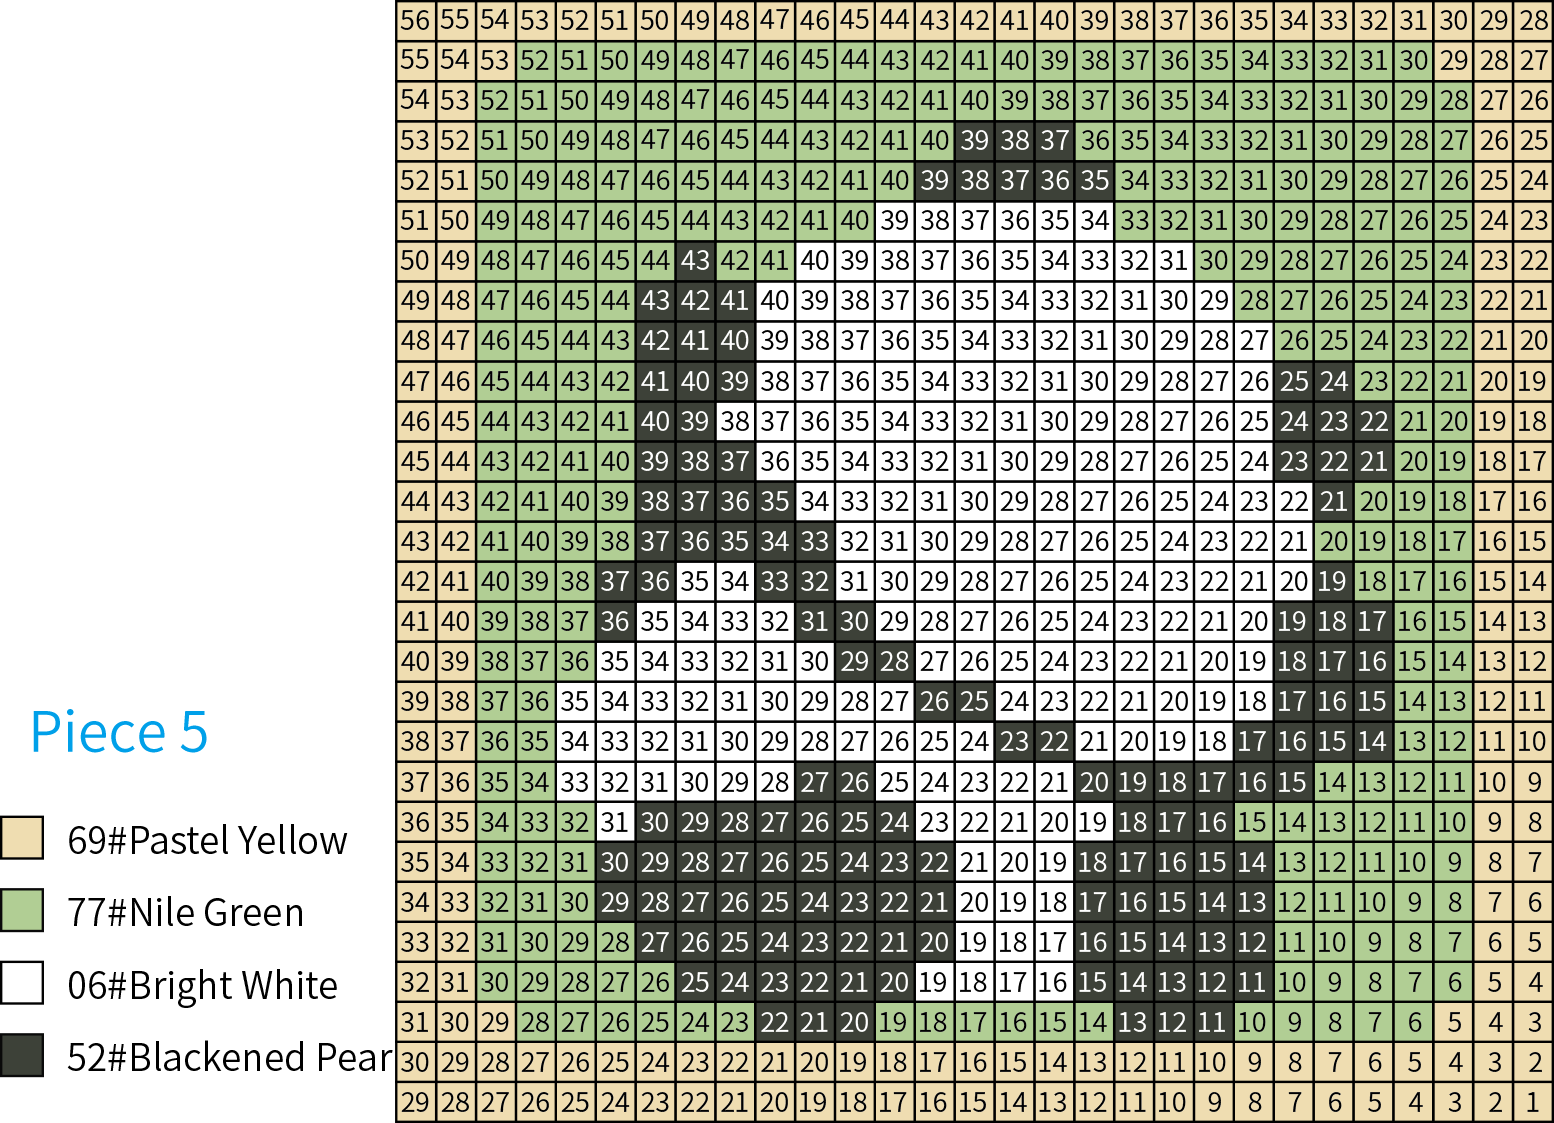
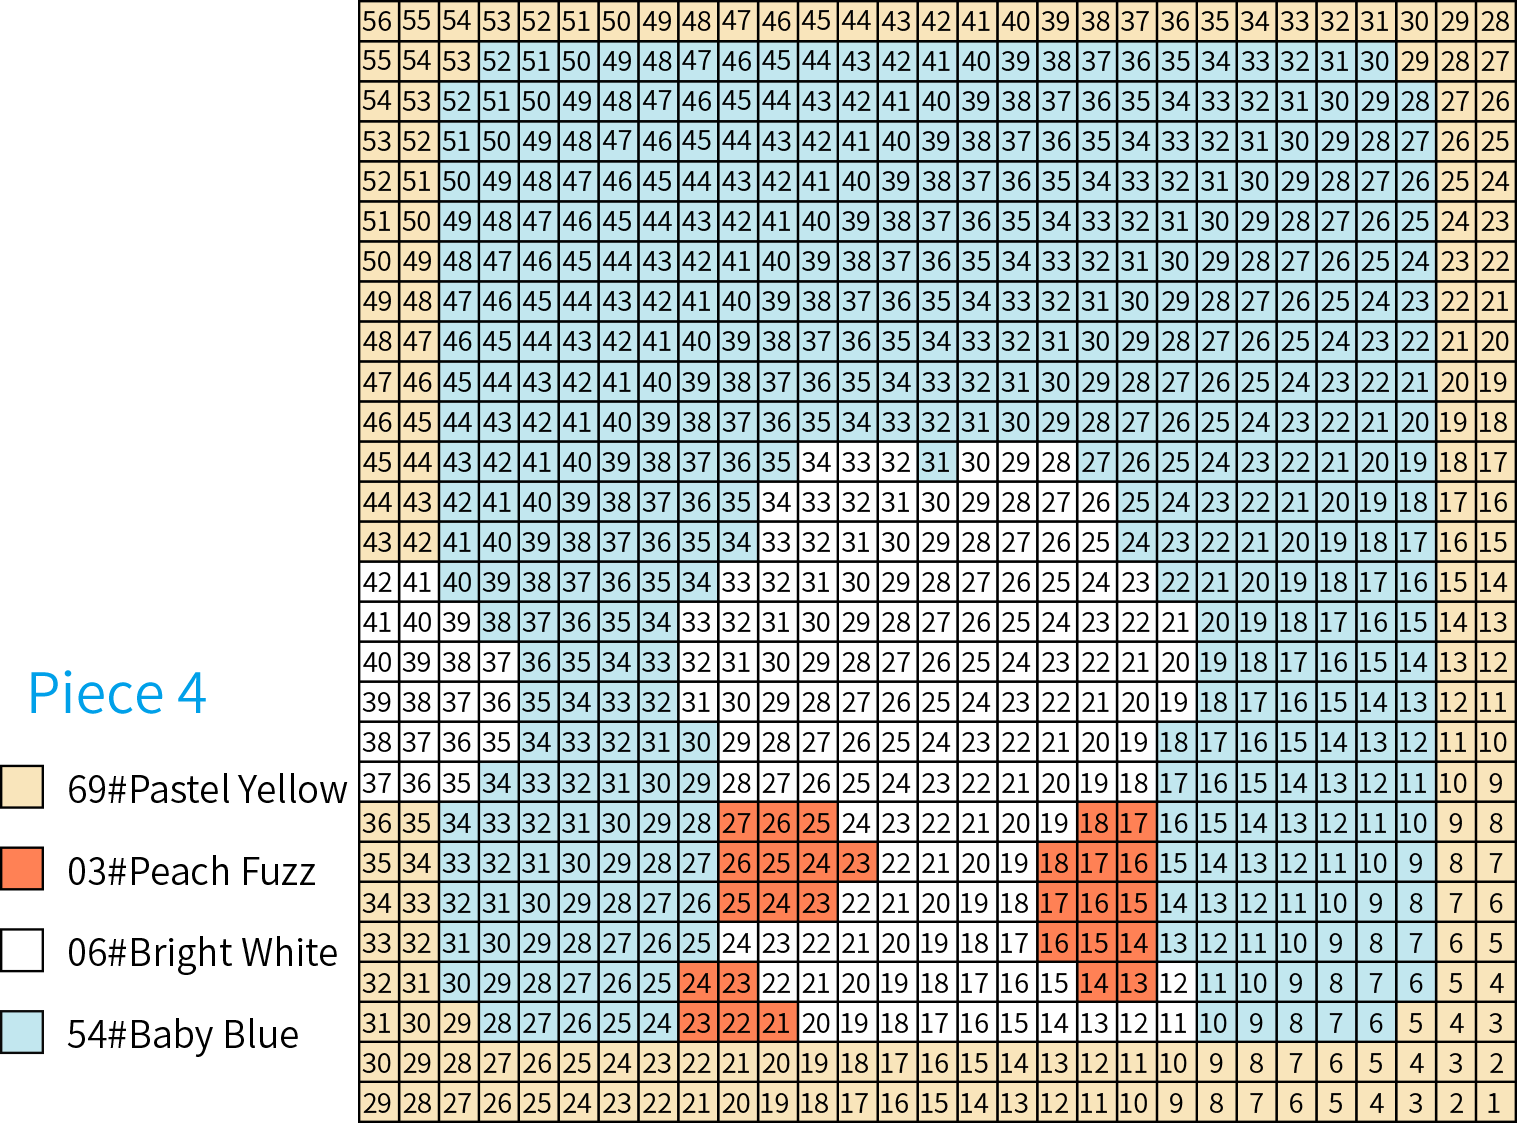
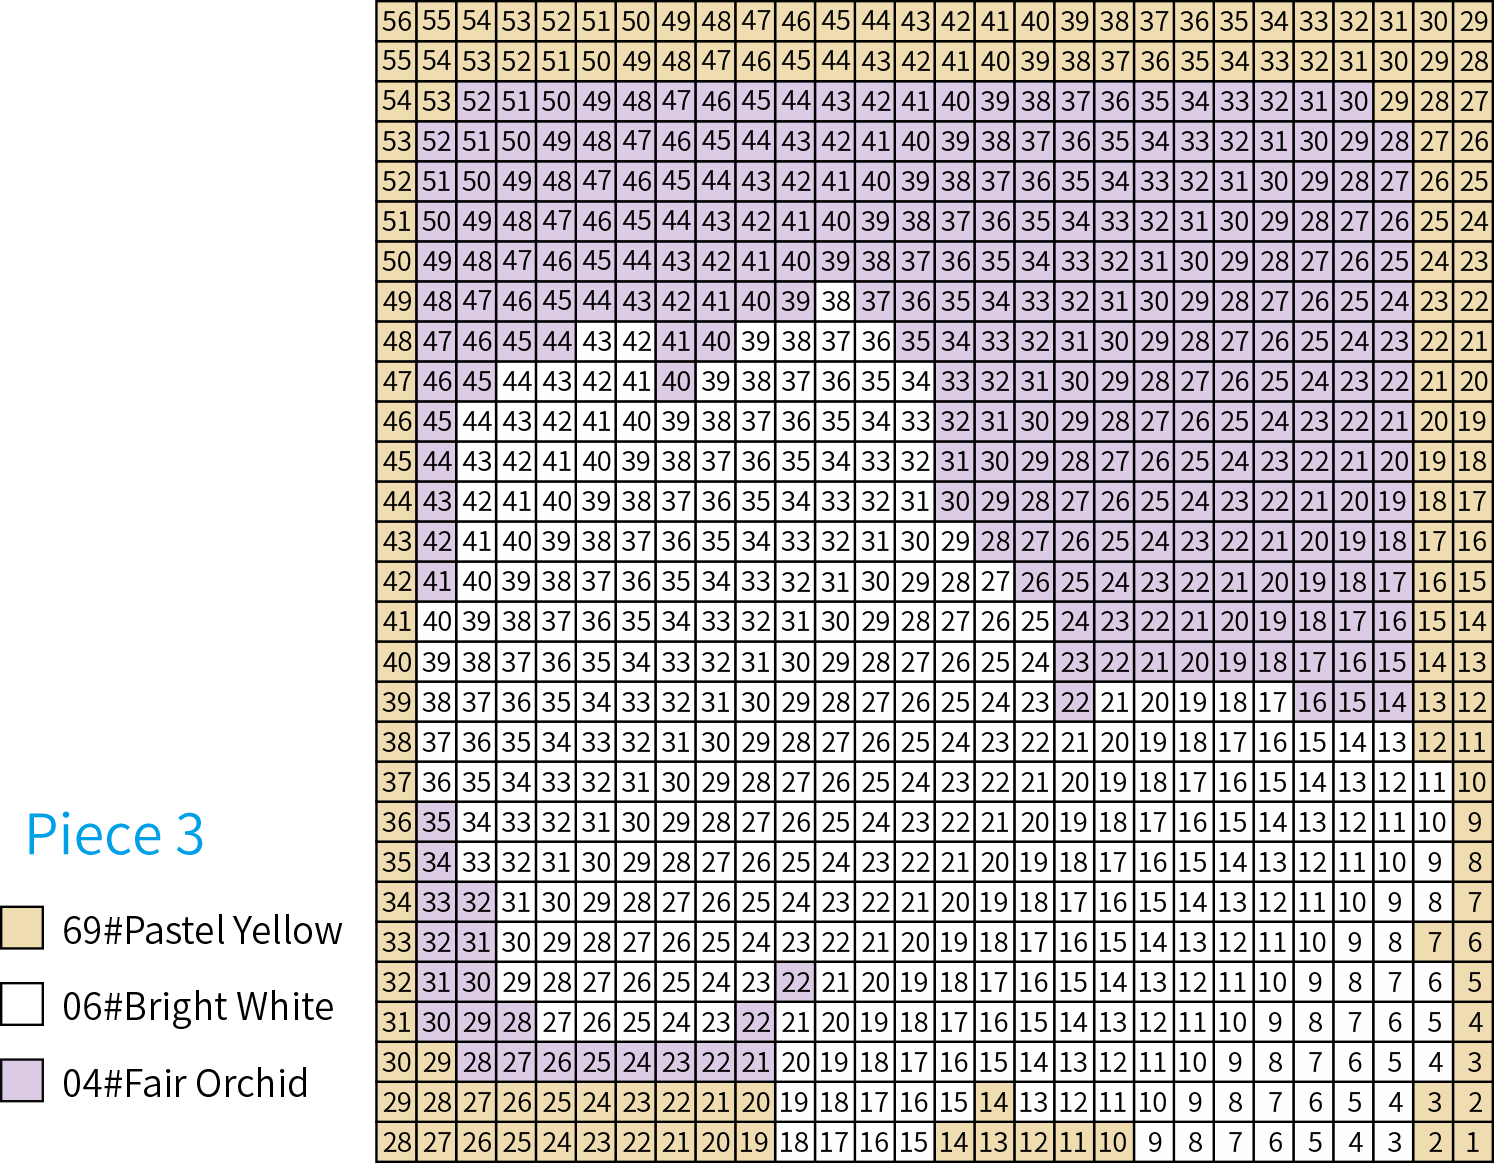
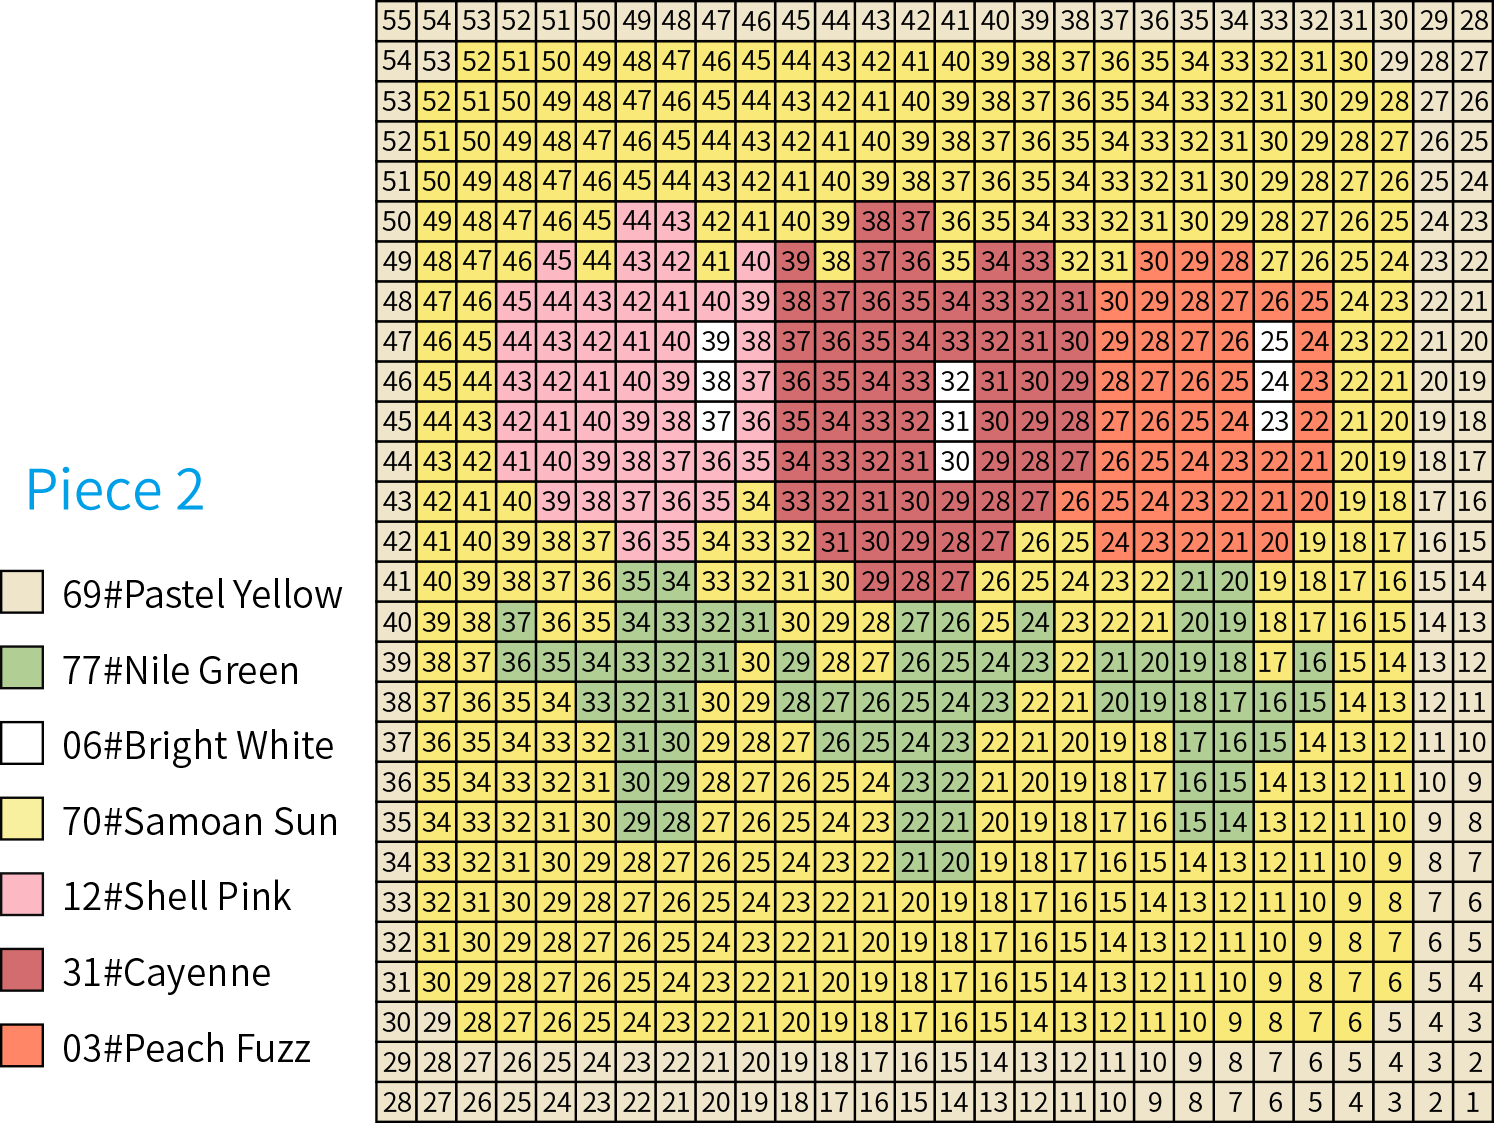
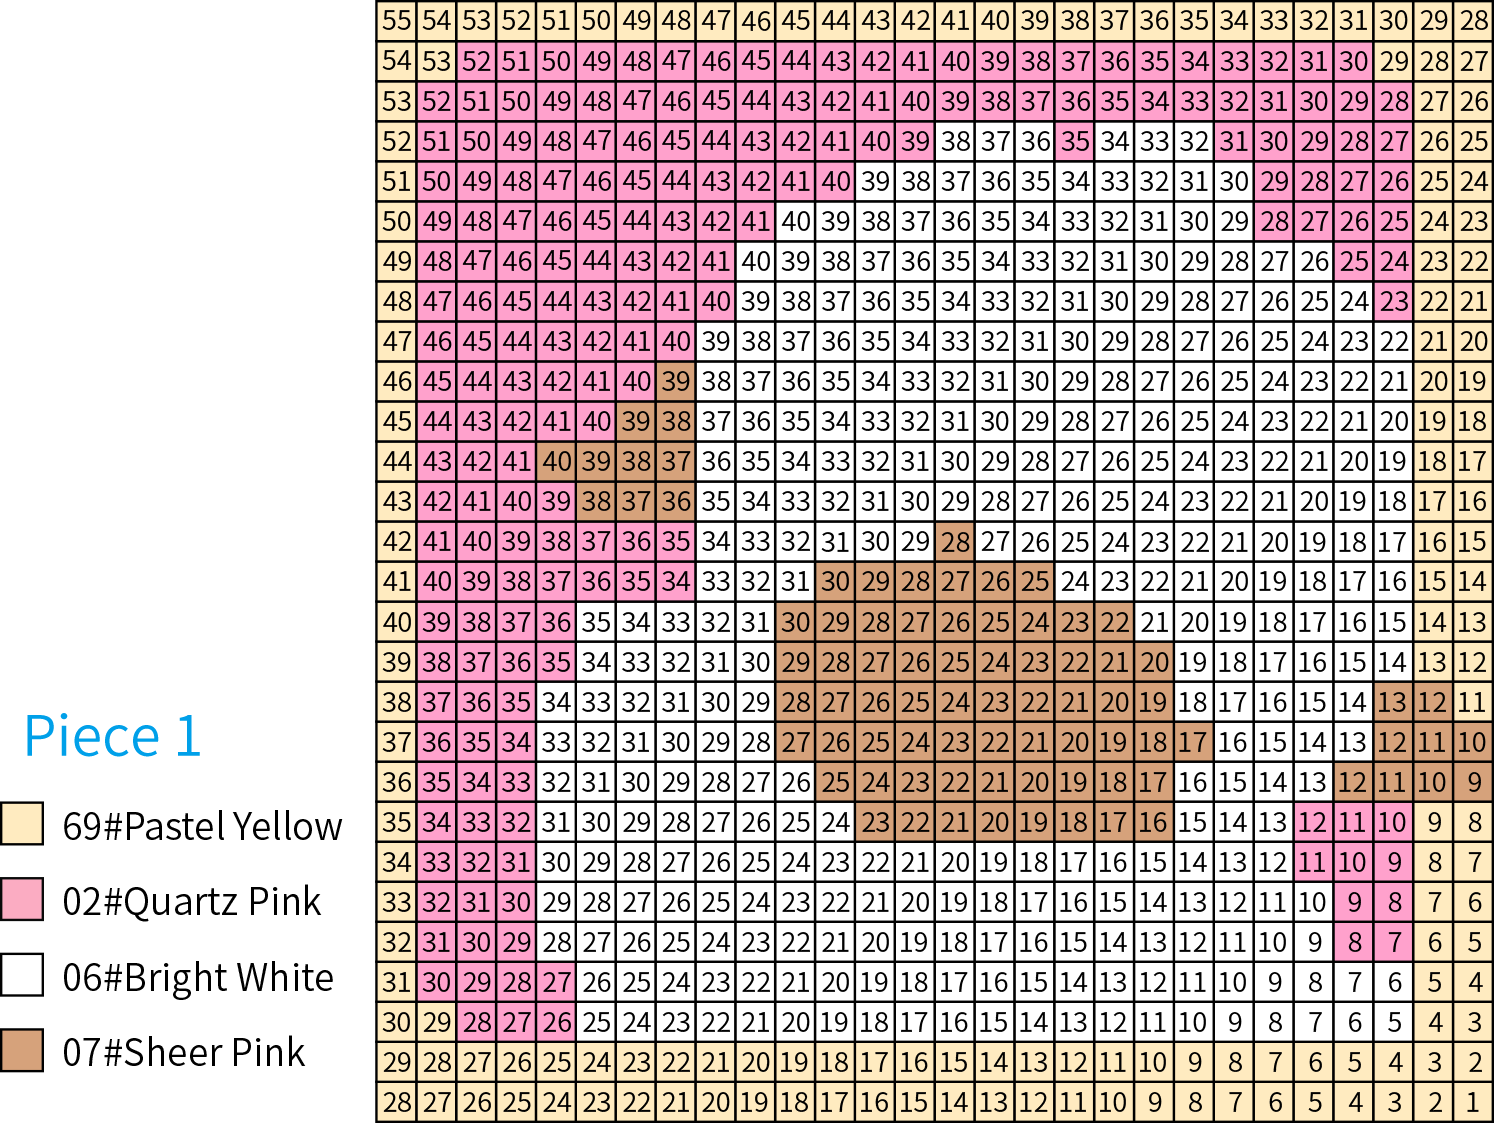
Step 2 Pieces joiningA2 28' 15''
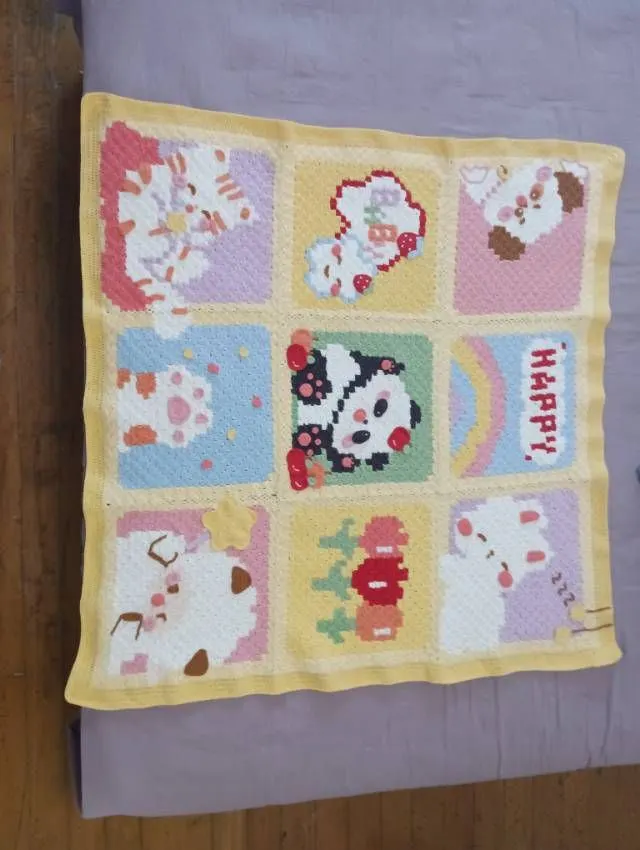
After all the pieces are completed, first, refer to the finished product and the joining schematic, positioning the pieces correctly. Number them from the bottom to top, and then from right to left in sequence, joining them in numerical order. Please refer to the video demonstration for more details.
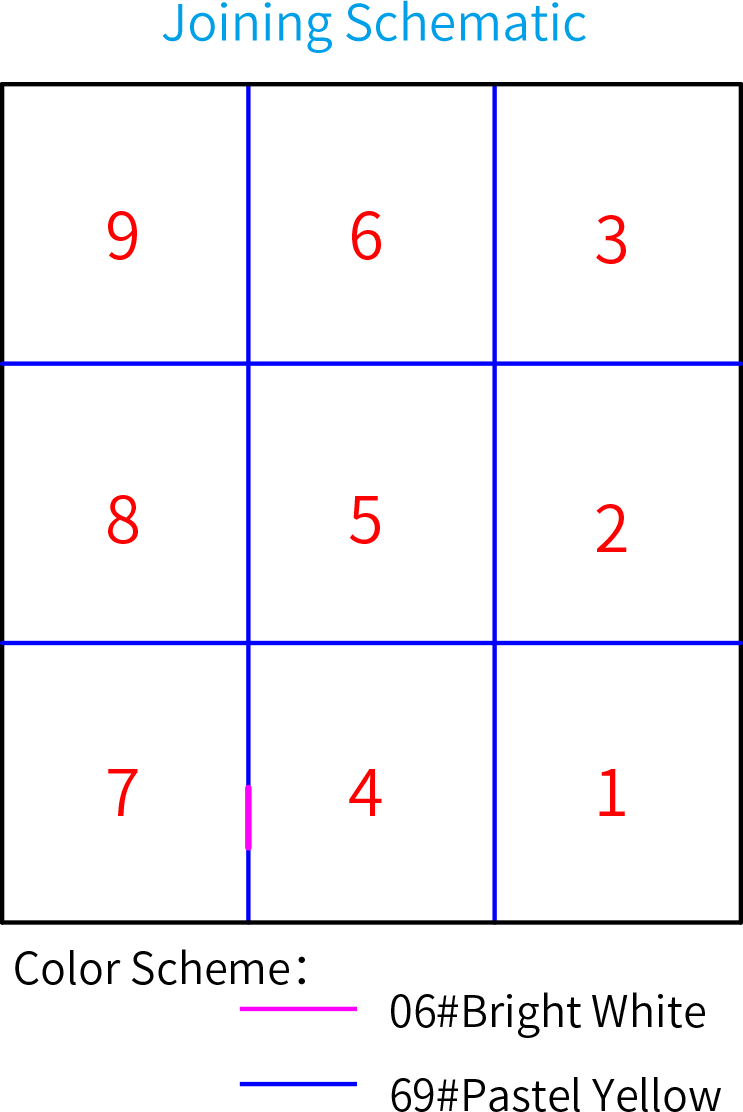
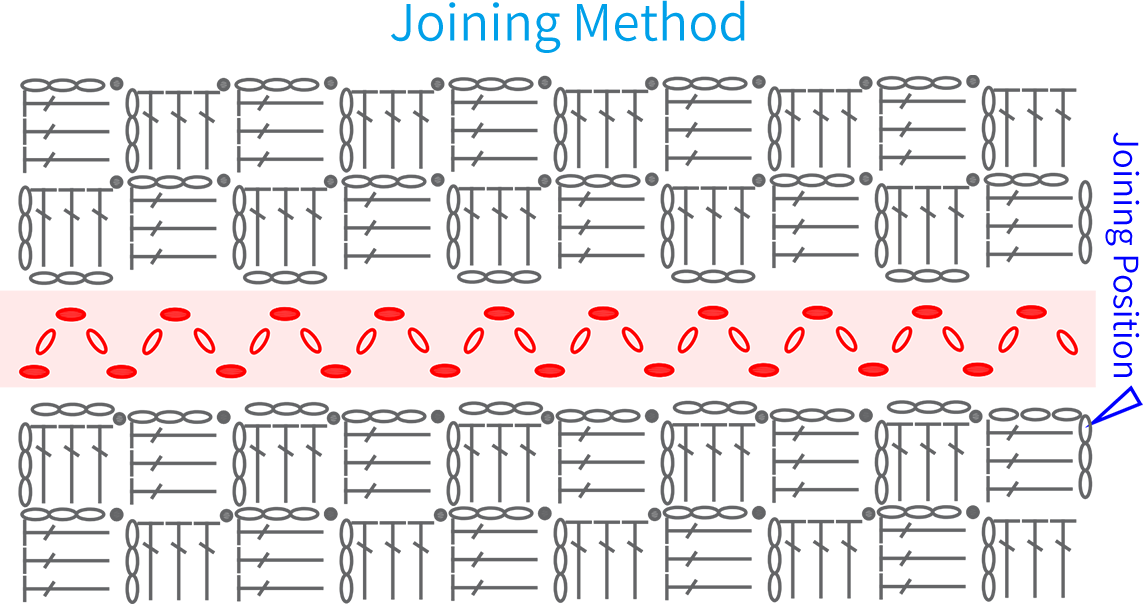
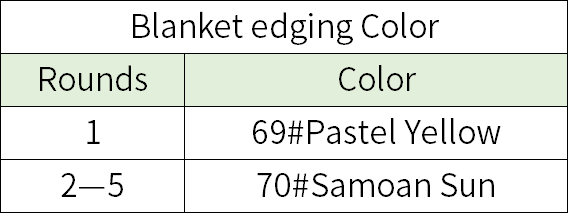
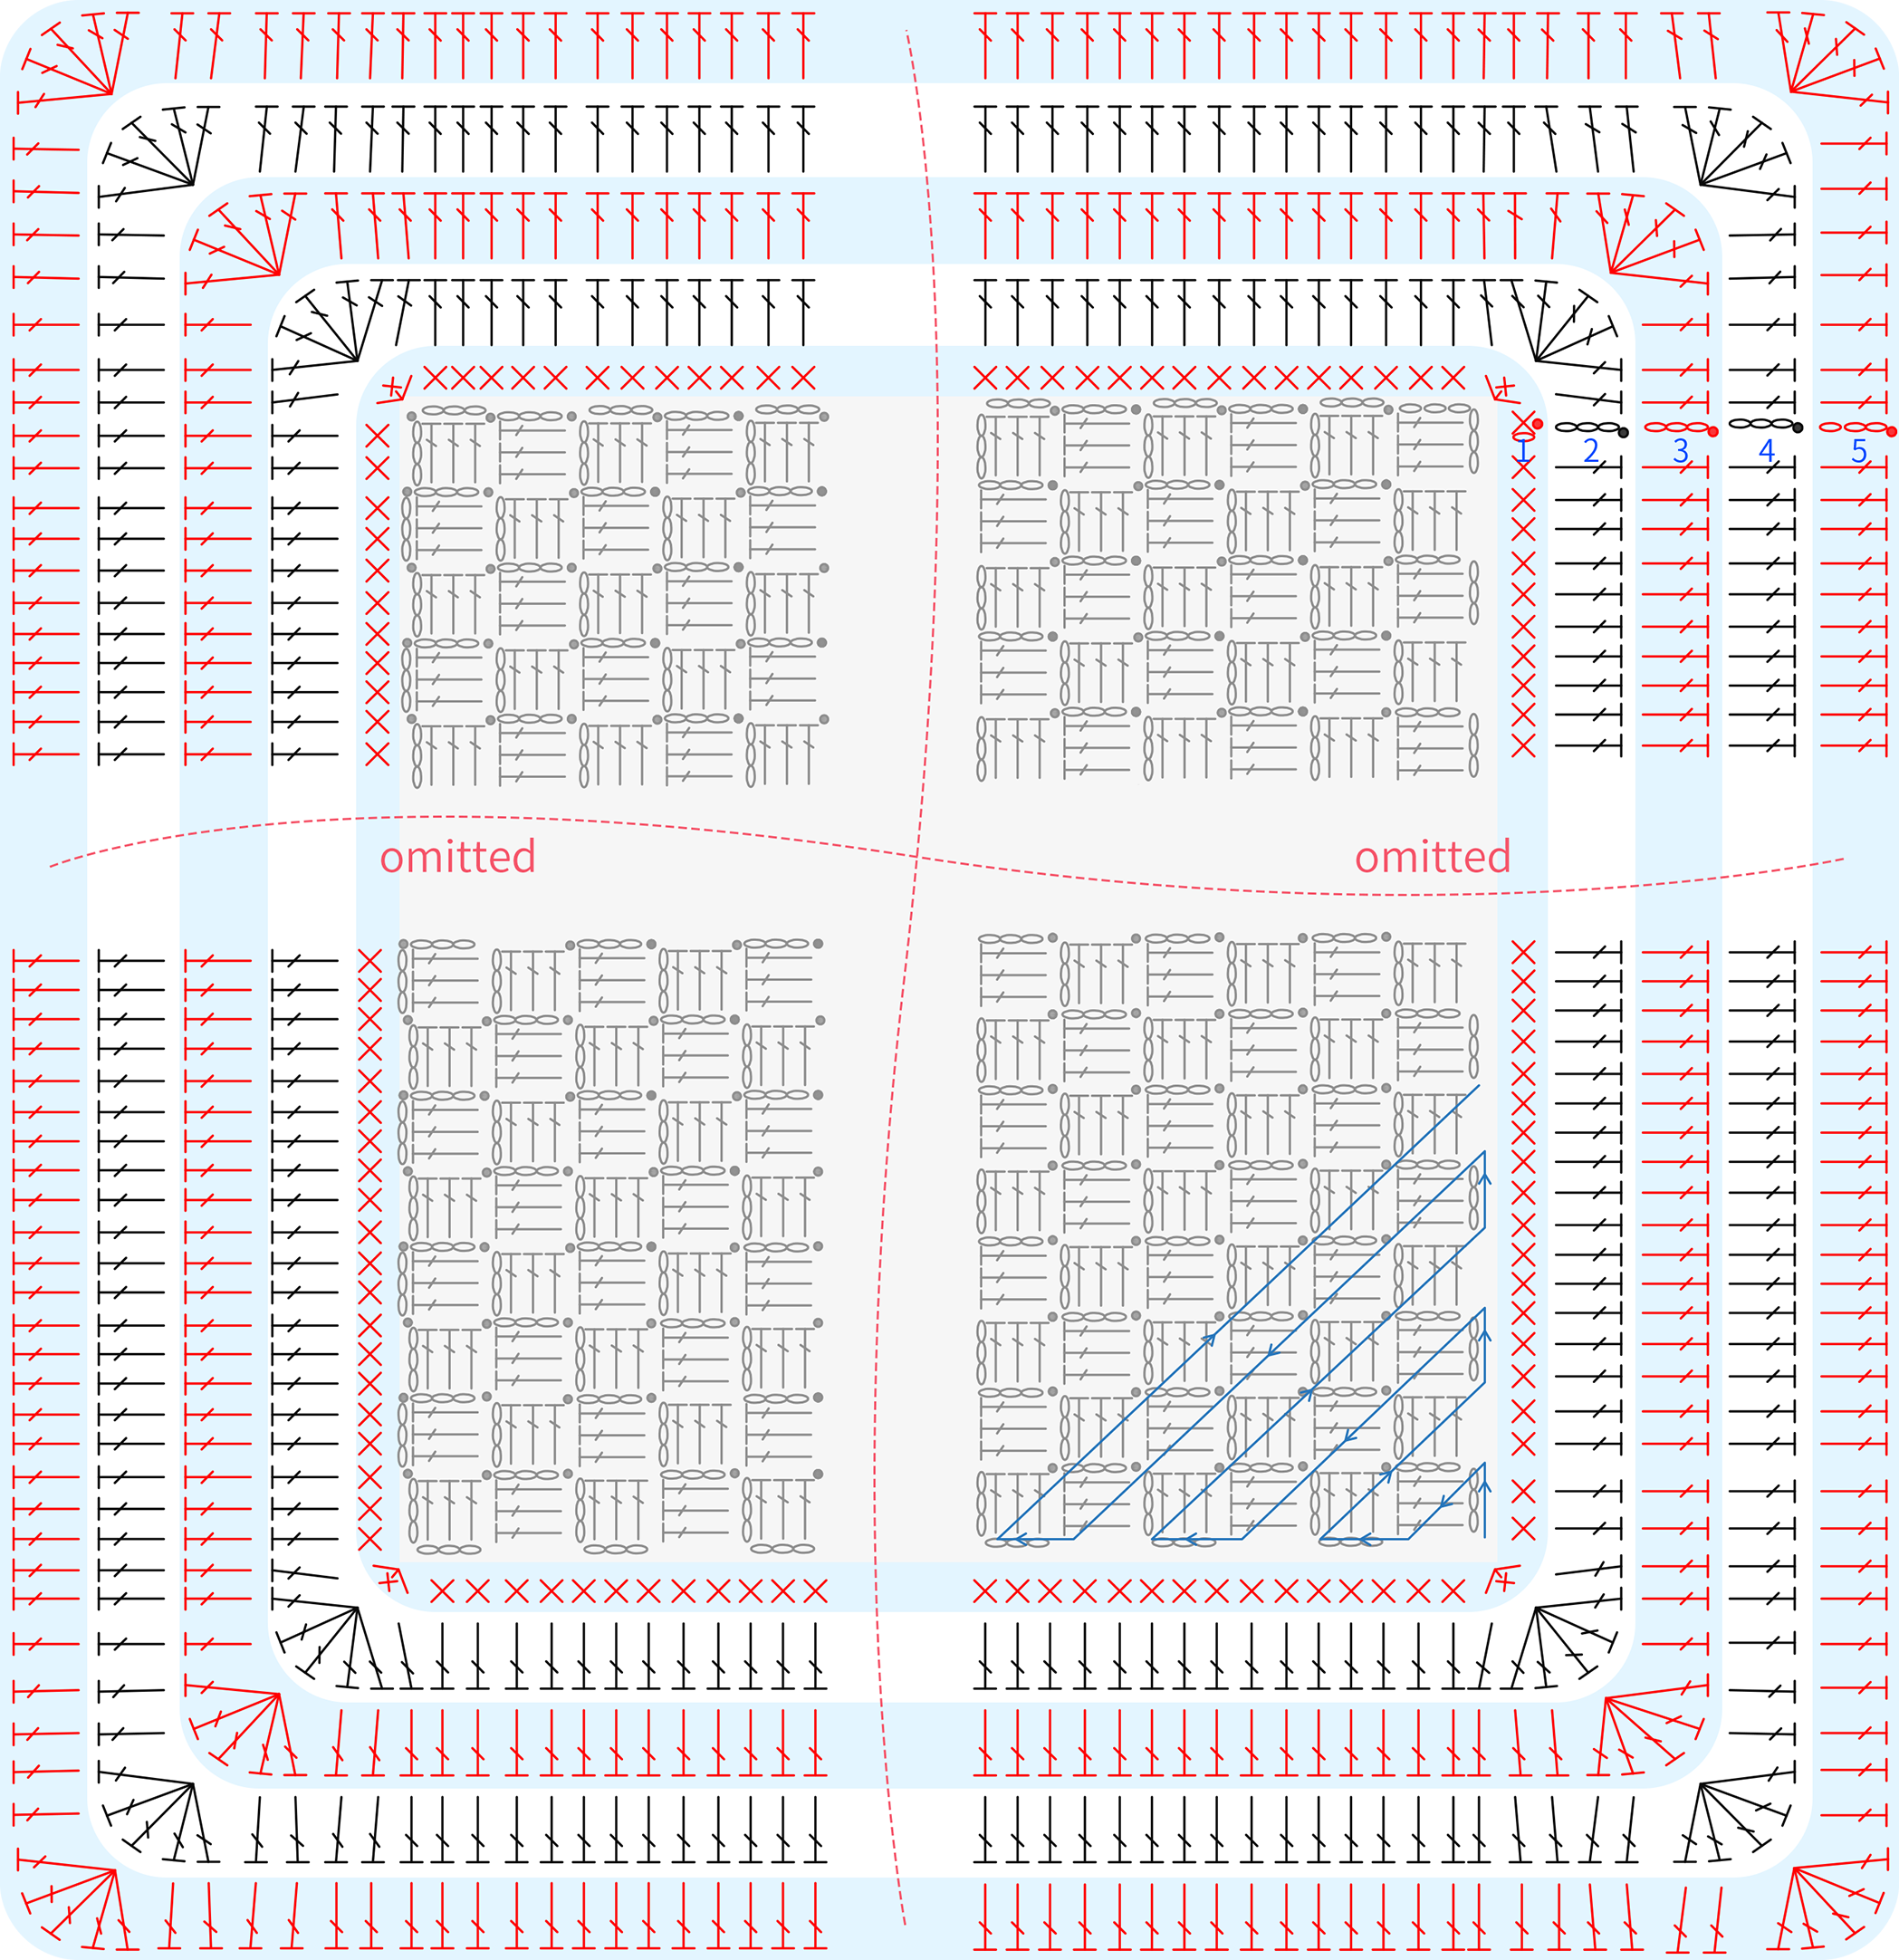
Step 3 Blanket edgingA3 36' 07''
After connecting the pieces, crochet the edging for the blanket, working around the outer edge in rounds. Please refer to the video demonstration for more details.
Part 2 DecorationsB
The decorations on each piece are slightly different. Piece 6, Piece 2 - No Decorations. Please refer to the actual project for the sewing position.
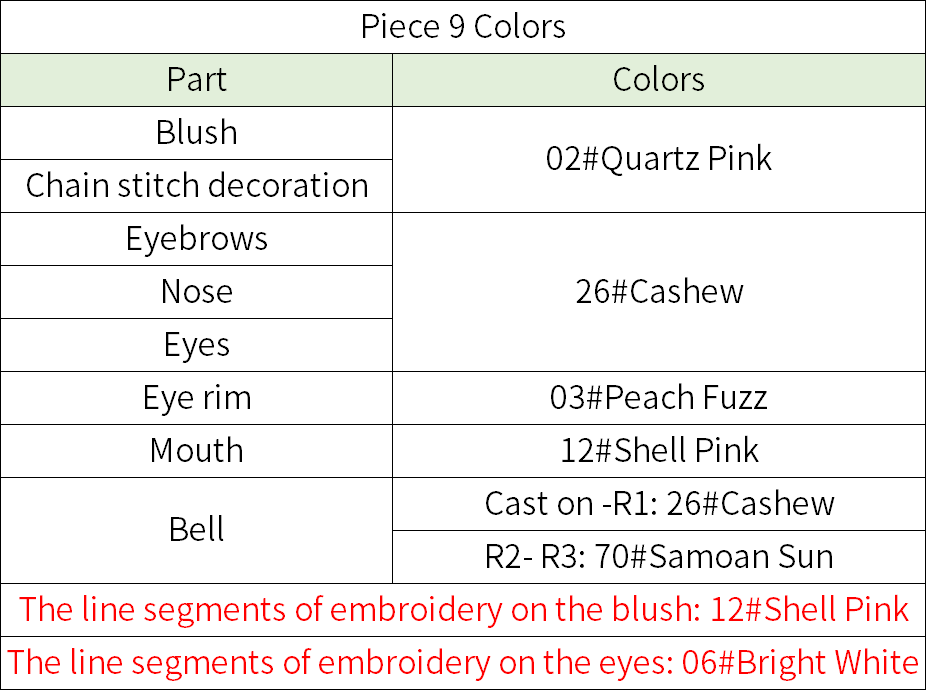
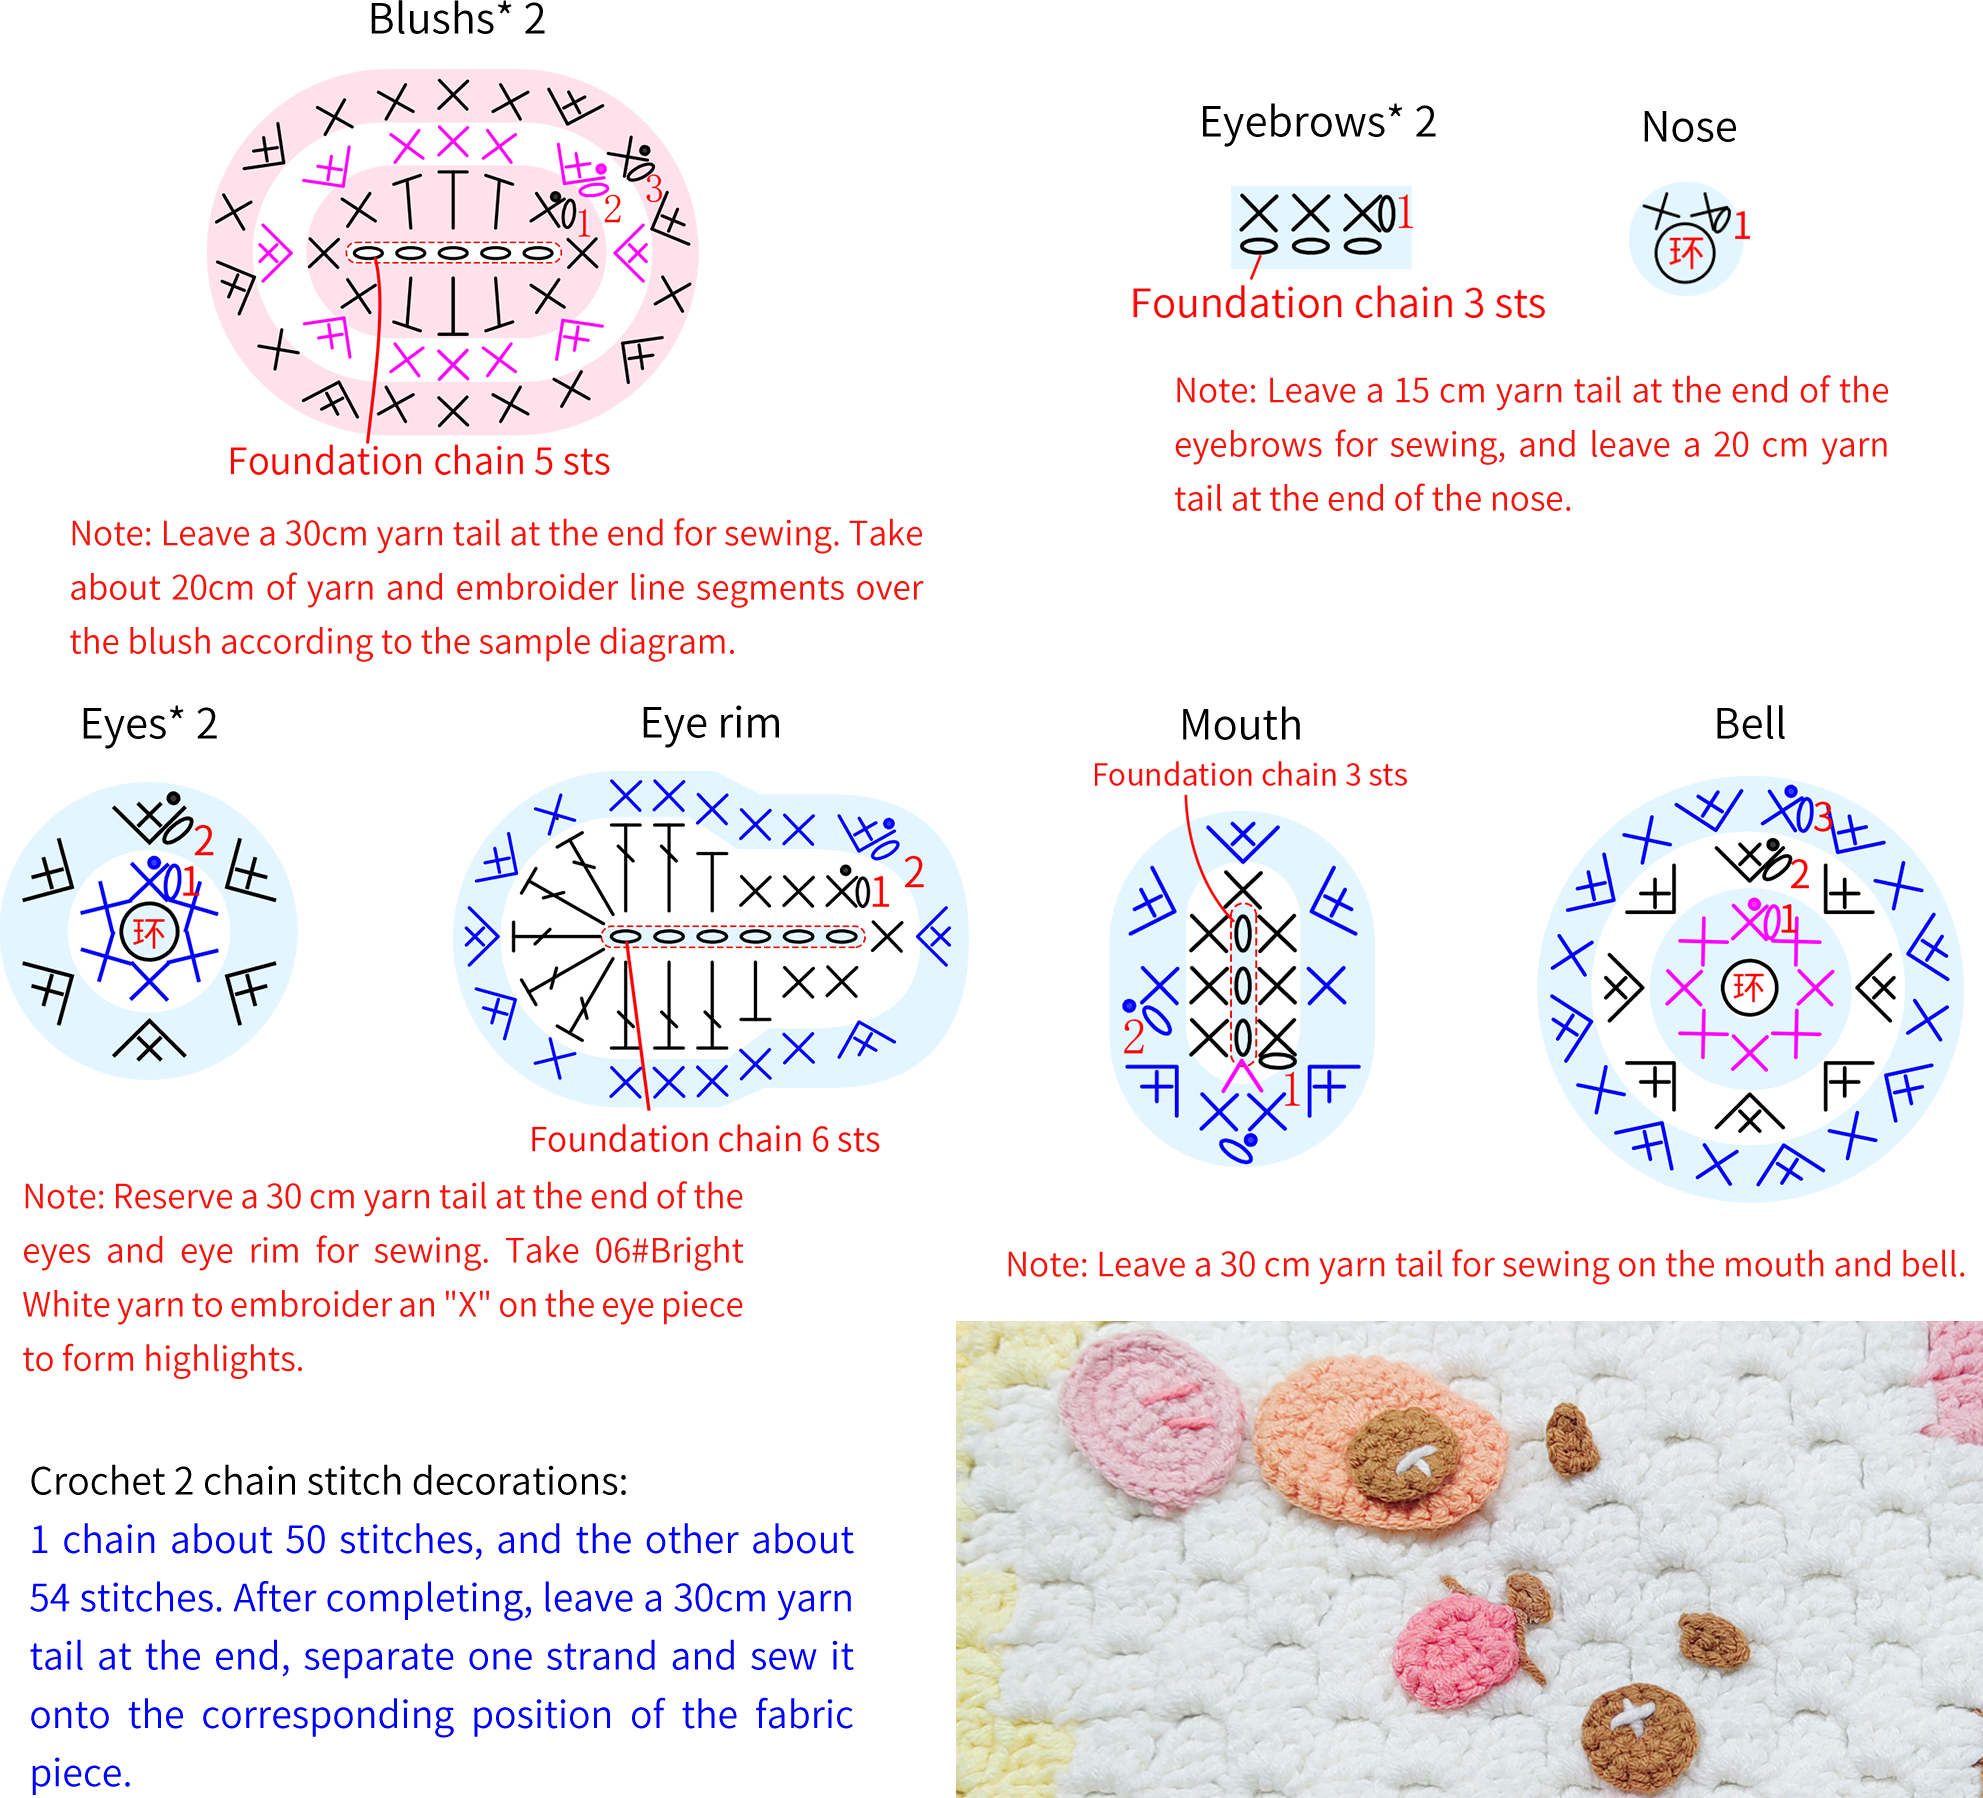
Step 1 Piece 9B1 43' 22''
Piece 9 includes blush, eyebrows, nose, mouth, eyes, and eye rim. Jingle bell and chain decorations,
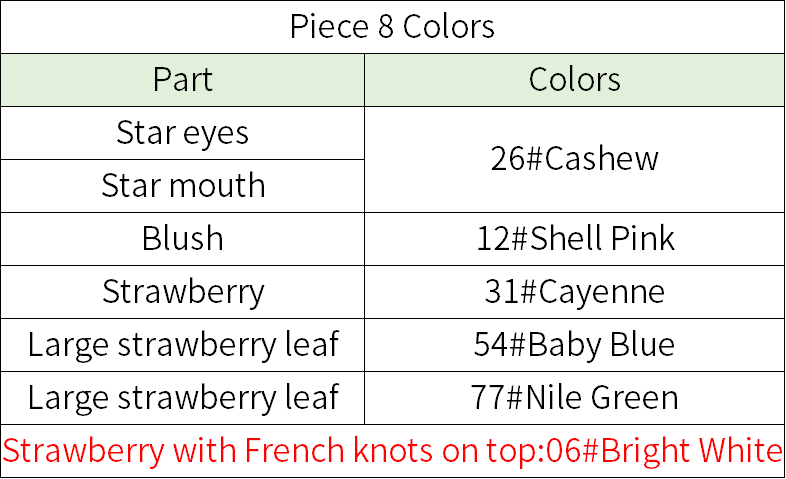
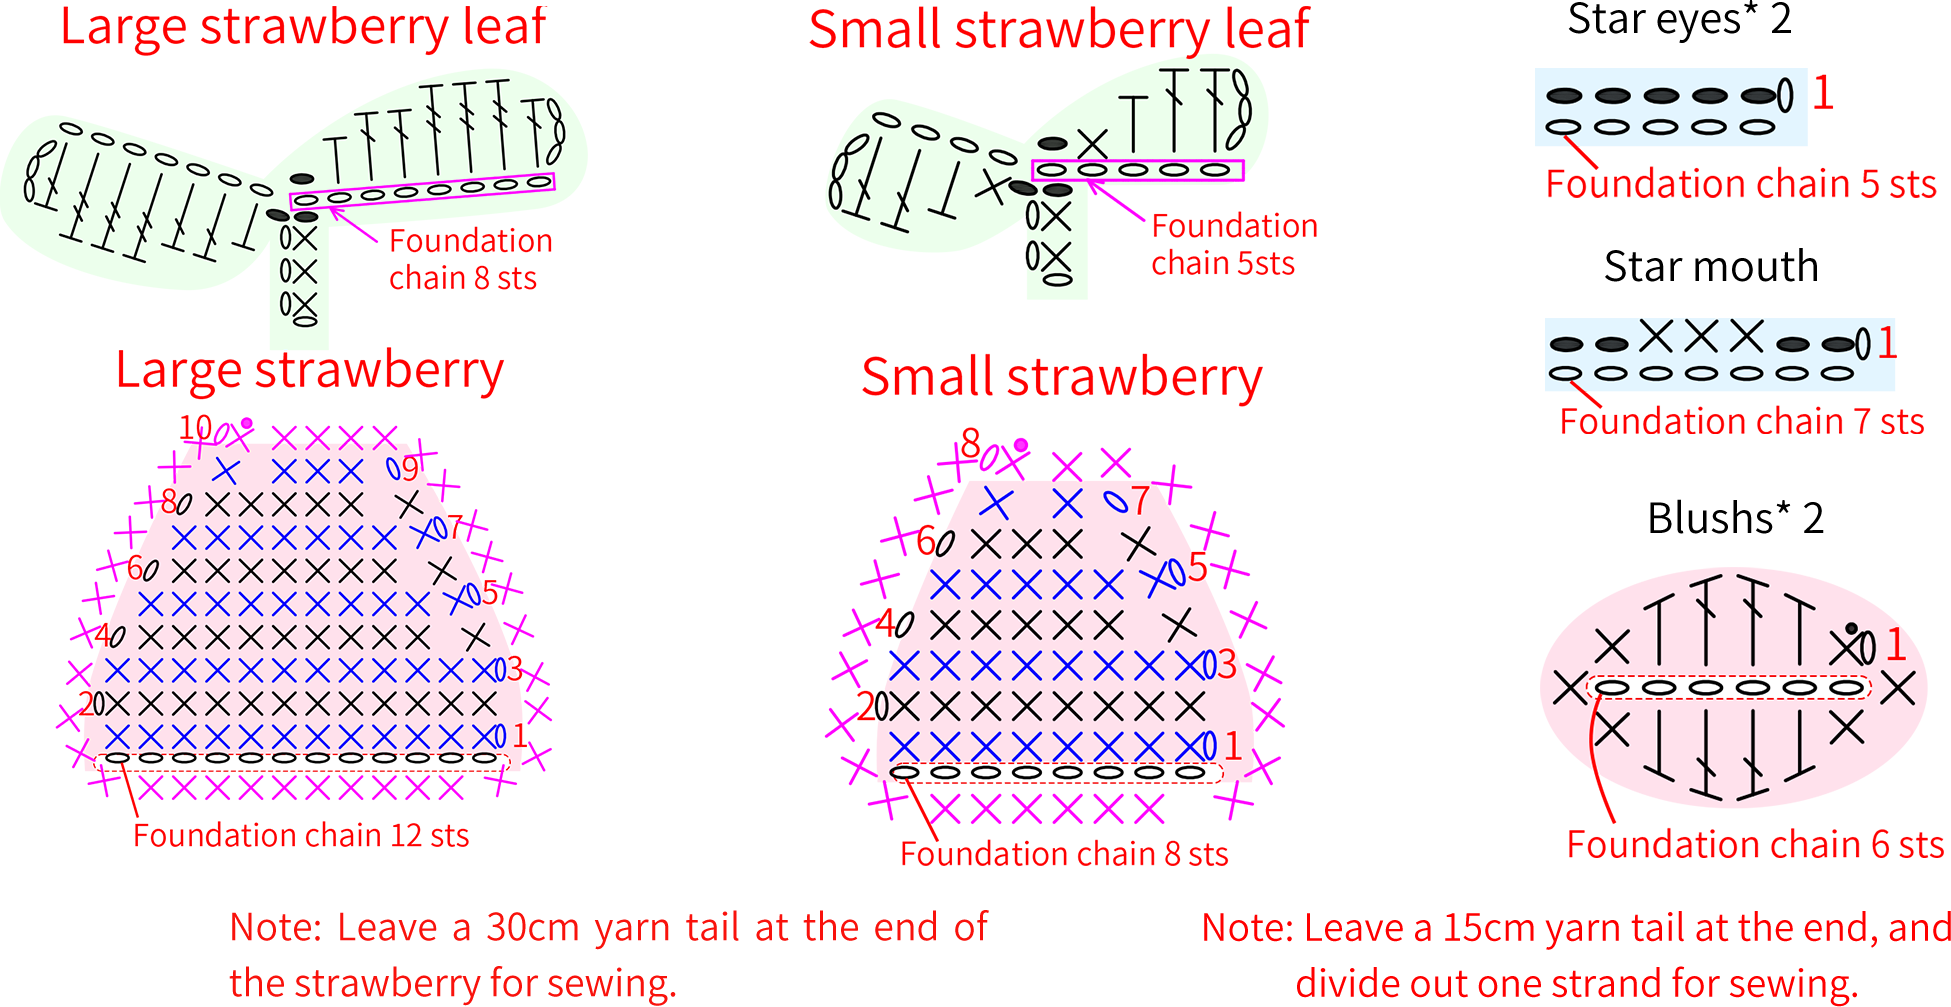
Step 2 Piece 8B2 73' 31''
Piece 8 includes Star’s eyes, Star’s mouth, and blush, the large strawberry and the small strawberry,
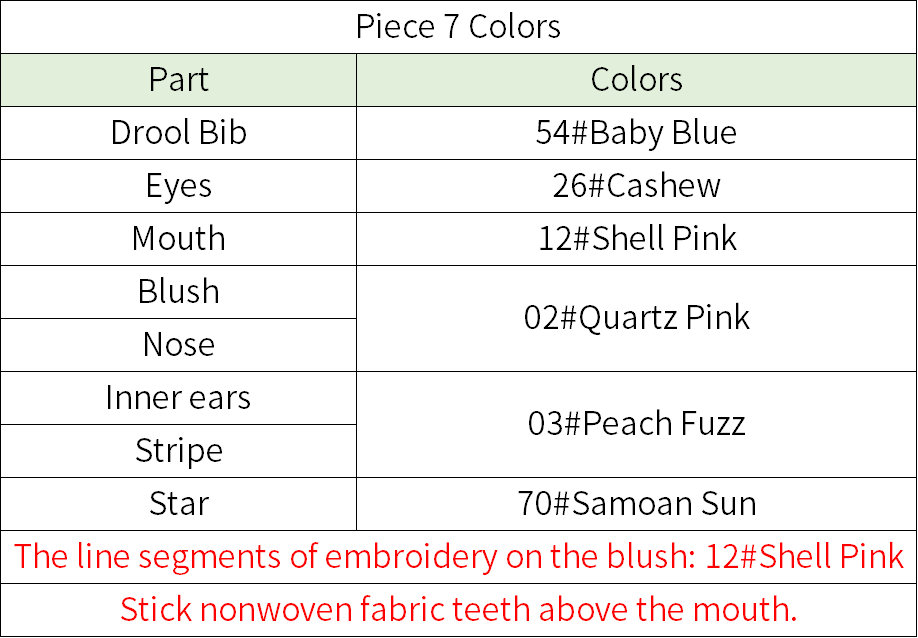
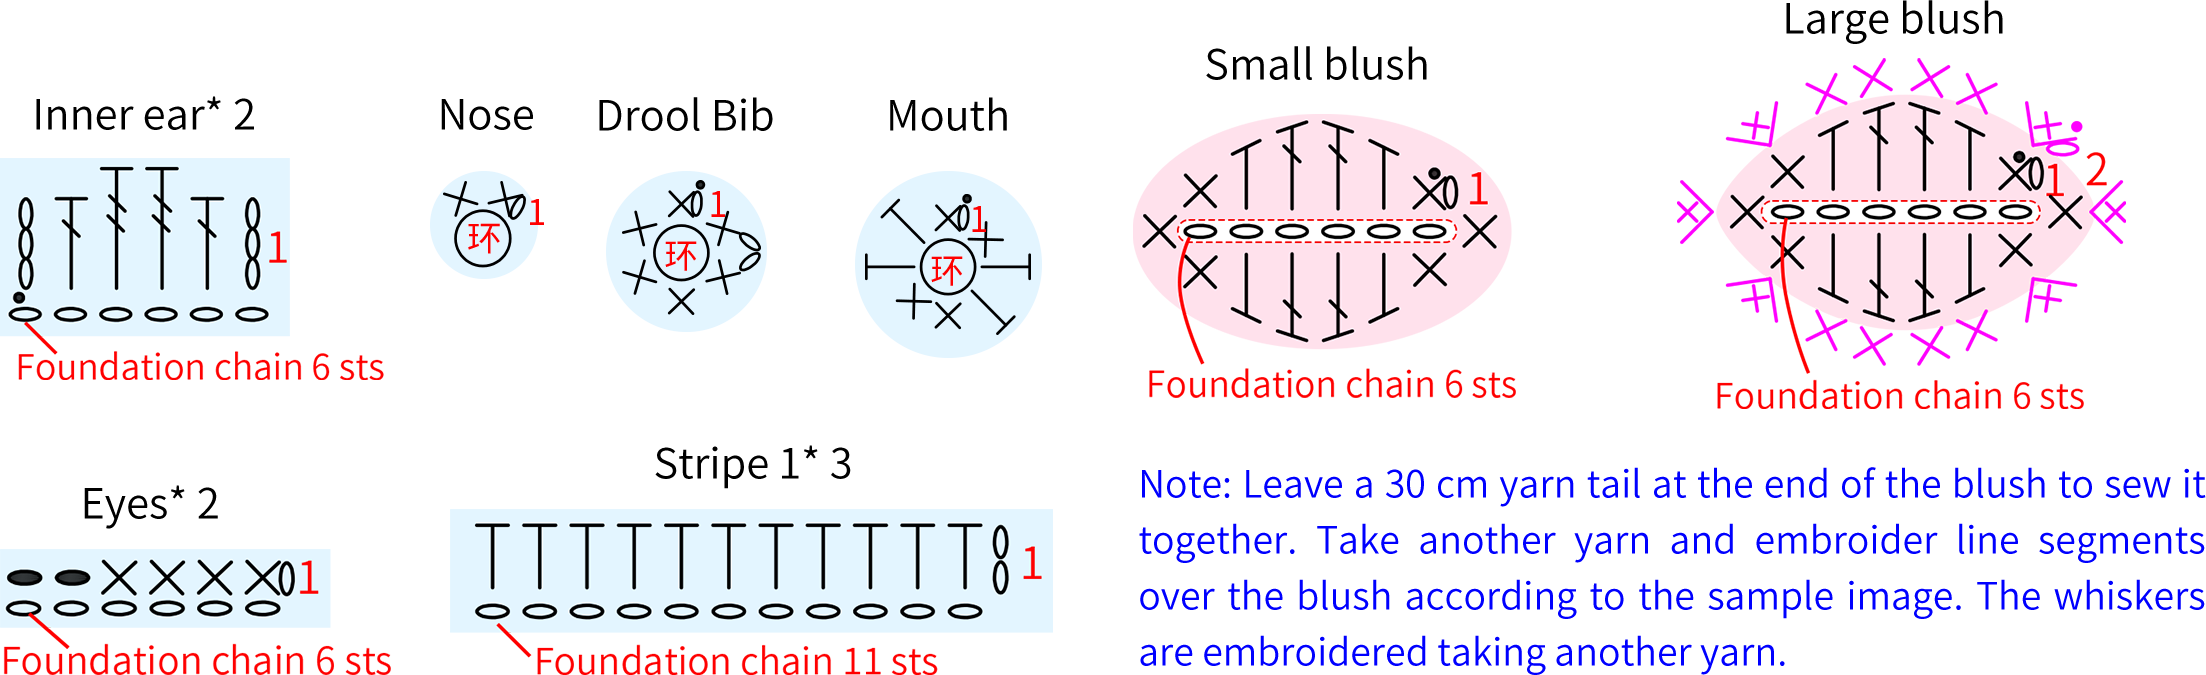
Step 3 Piece 7B3 85' 46''
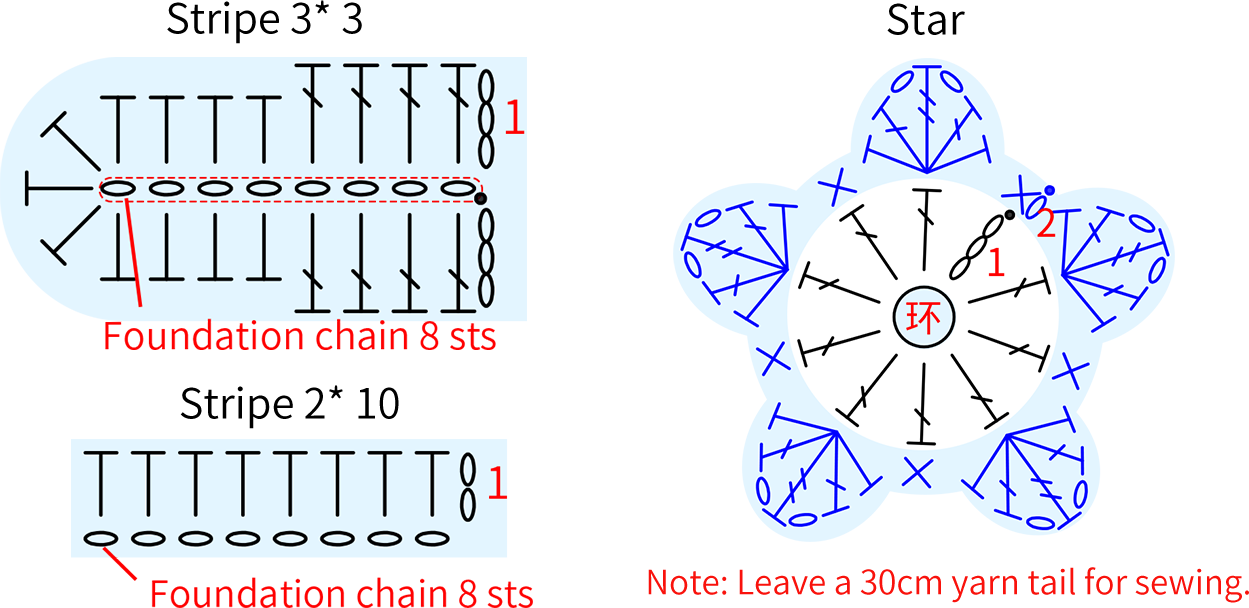
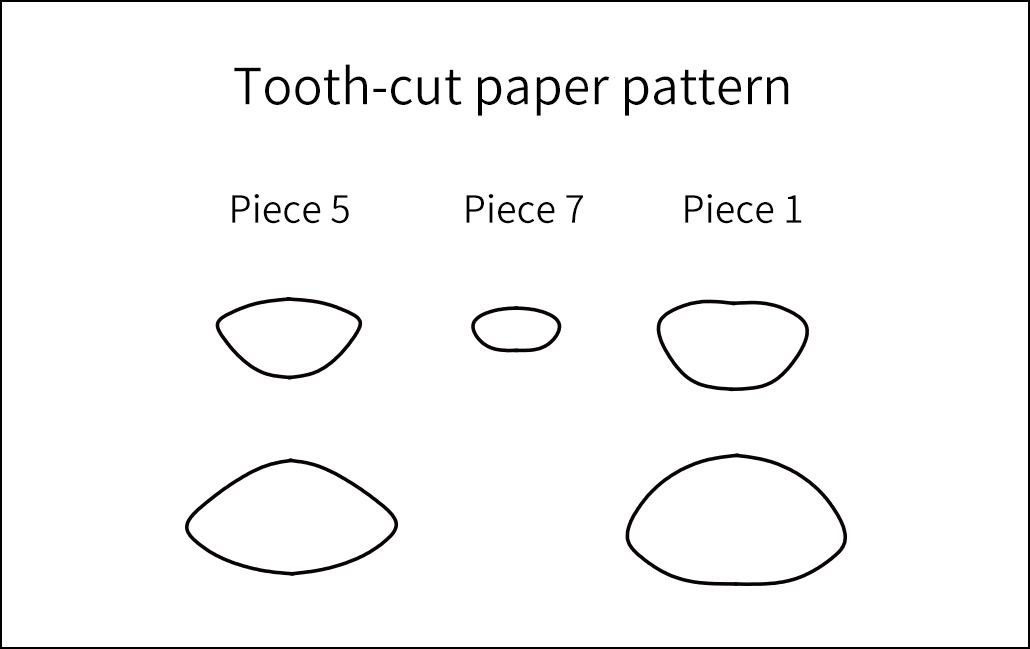
Piece 7 includes inner ears, eyes, nose, Drool Bib, mouth, small blush, large blush, Stripe 1, Stripe 2, Stripe 3, and star.
Step 4 Piece 5
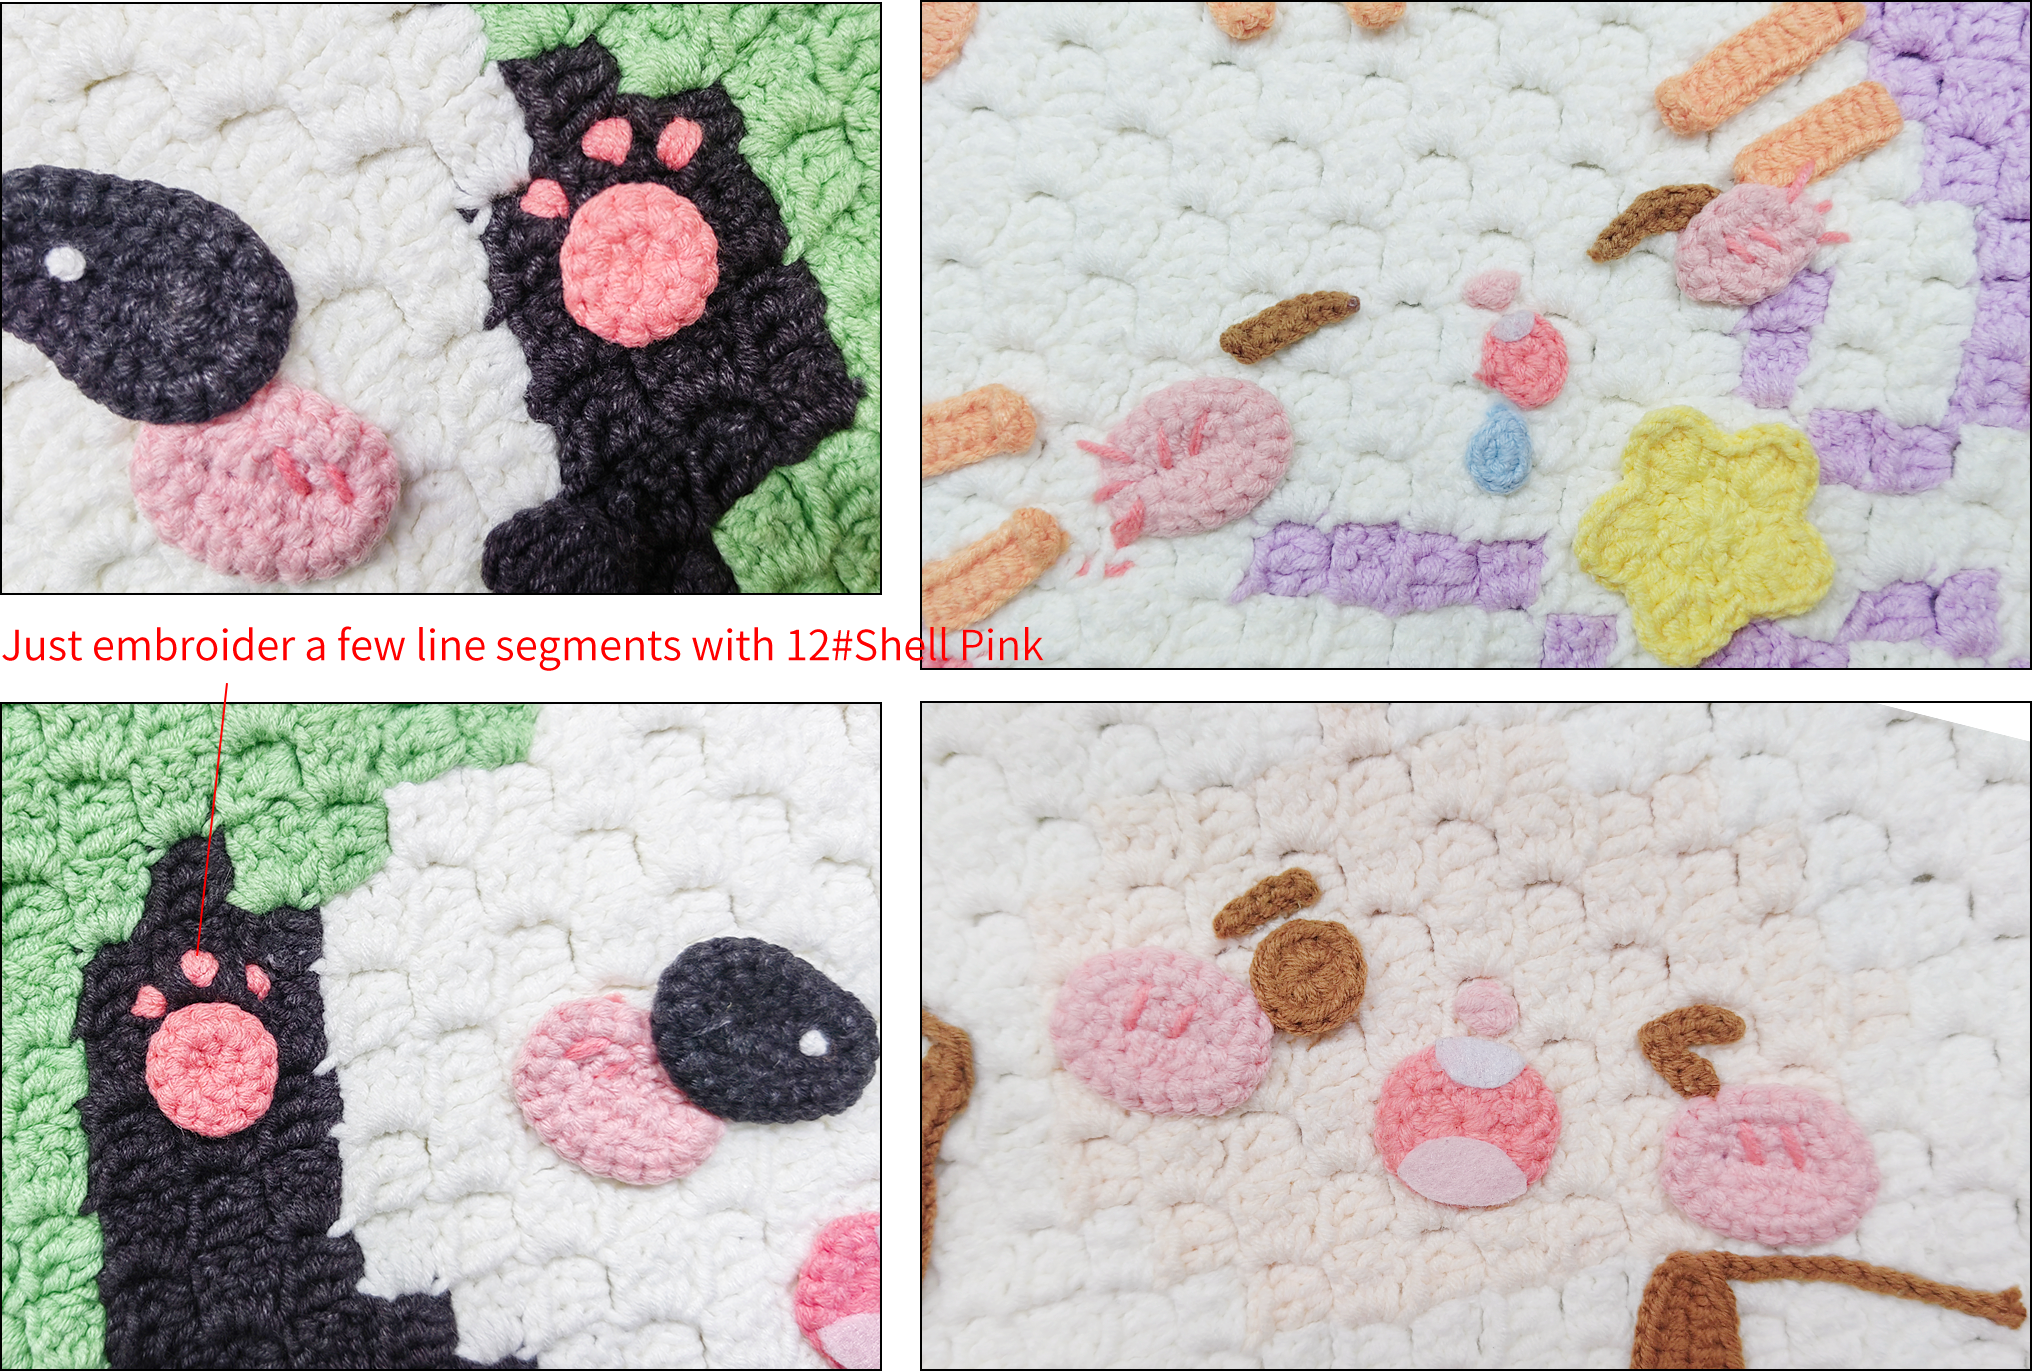
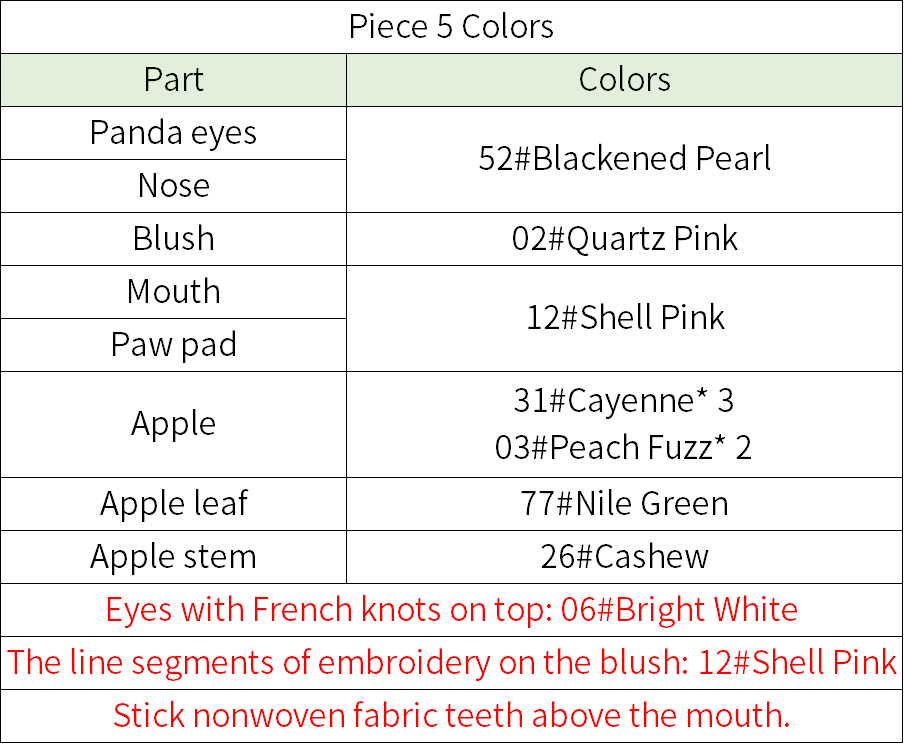
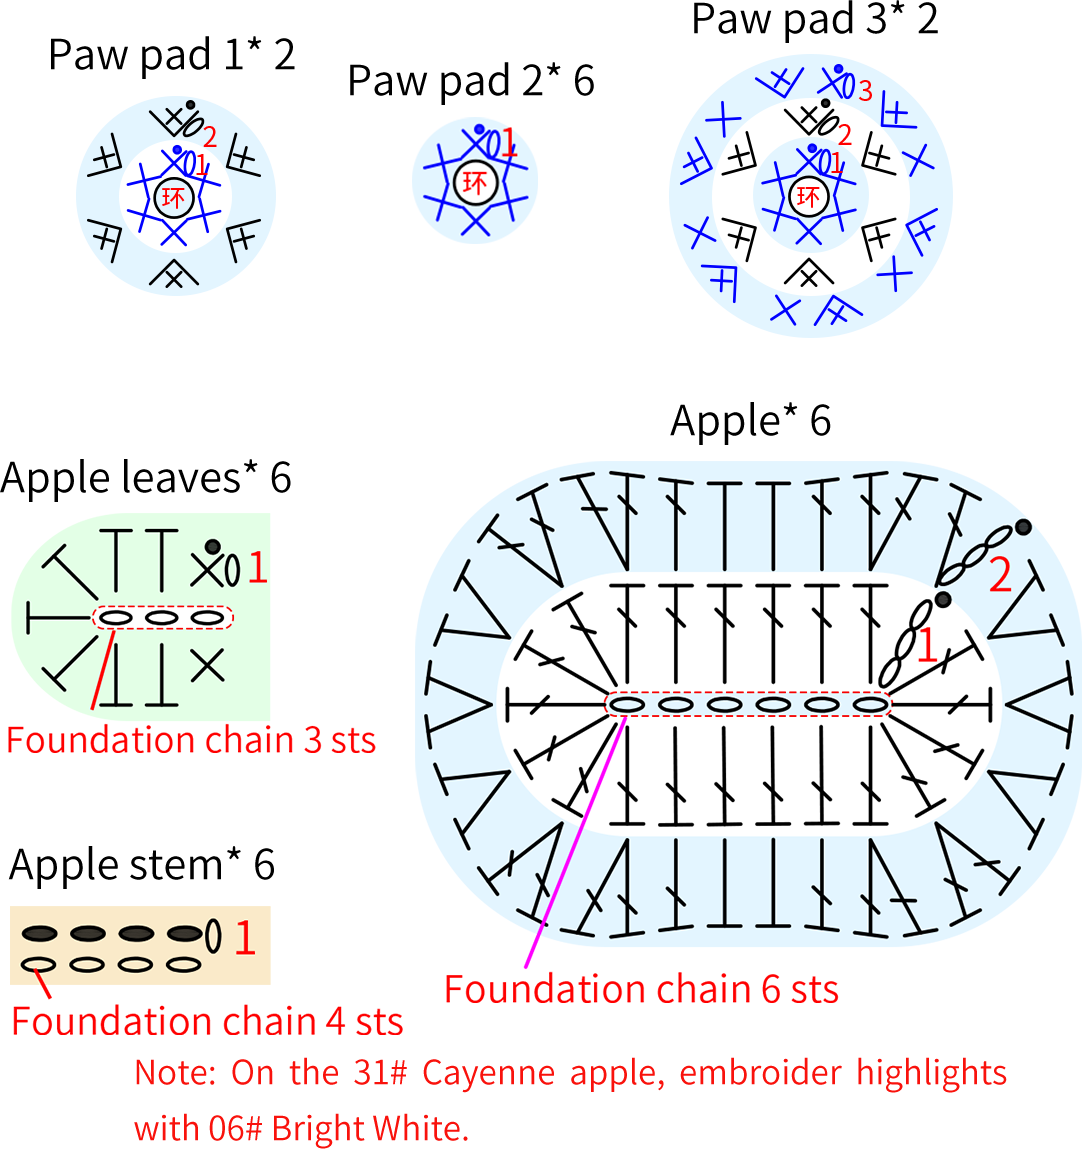
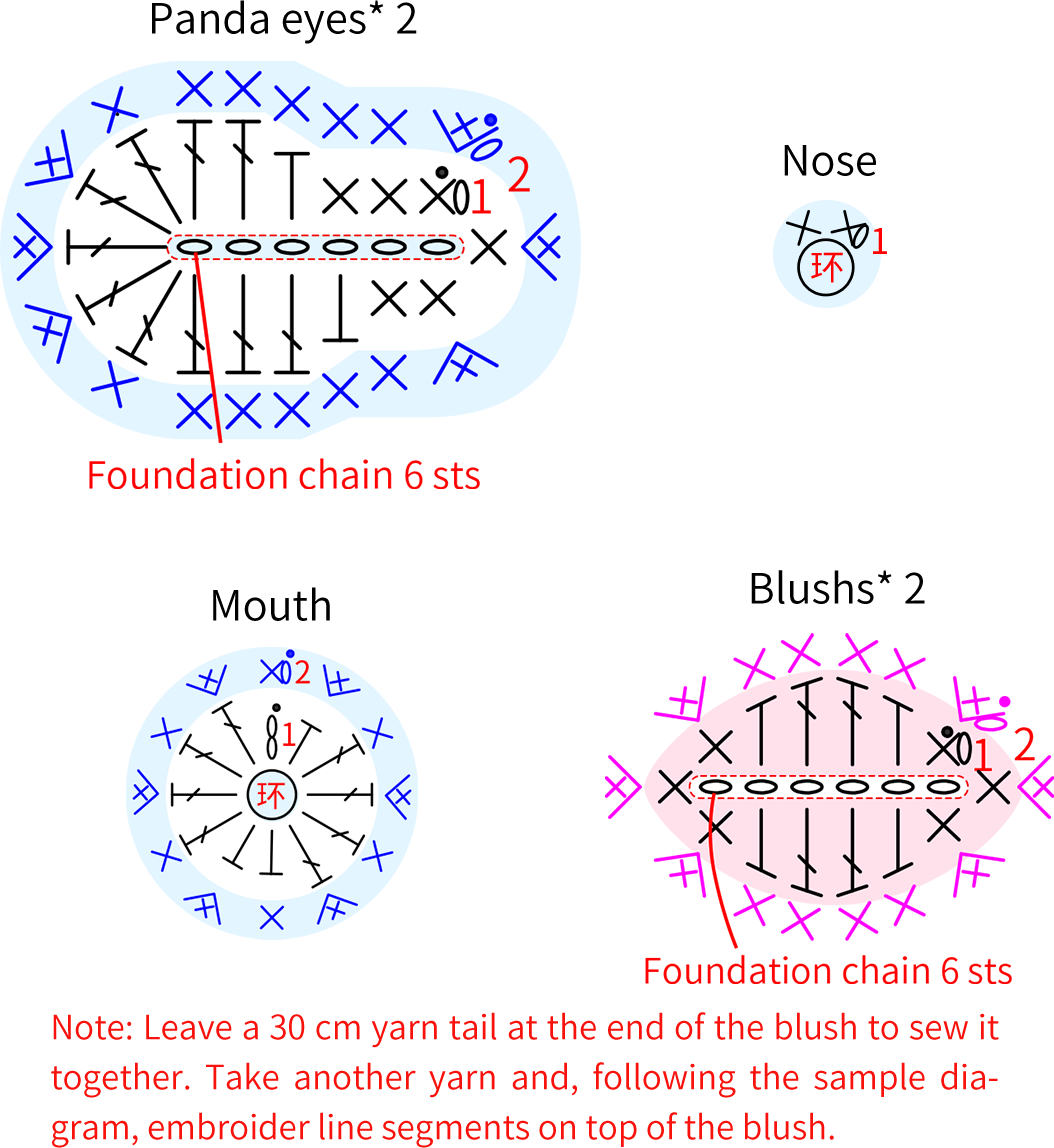
The decorations on Piece 5 include panda eyes, nose, mouth, blush, paw pad 1, paw pad 2, paw pad 3, apple, apple leaf, and apple stem.
Step 4 Piece 4B4 88' 30''
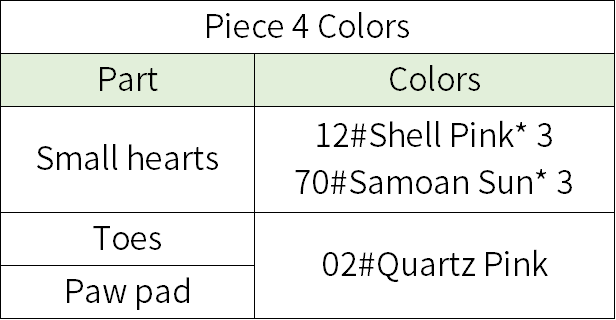
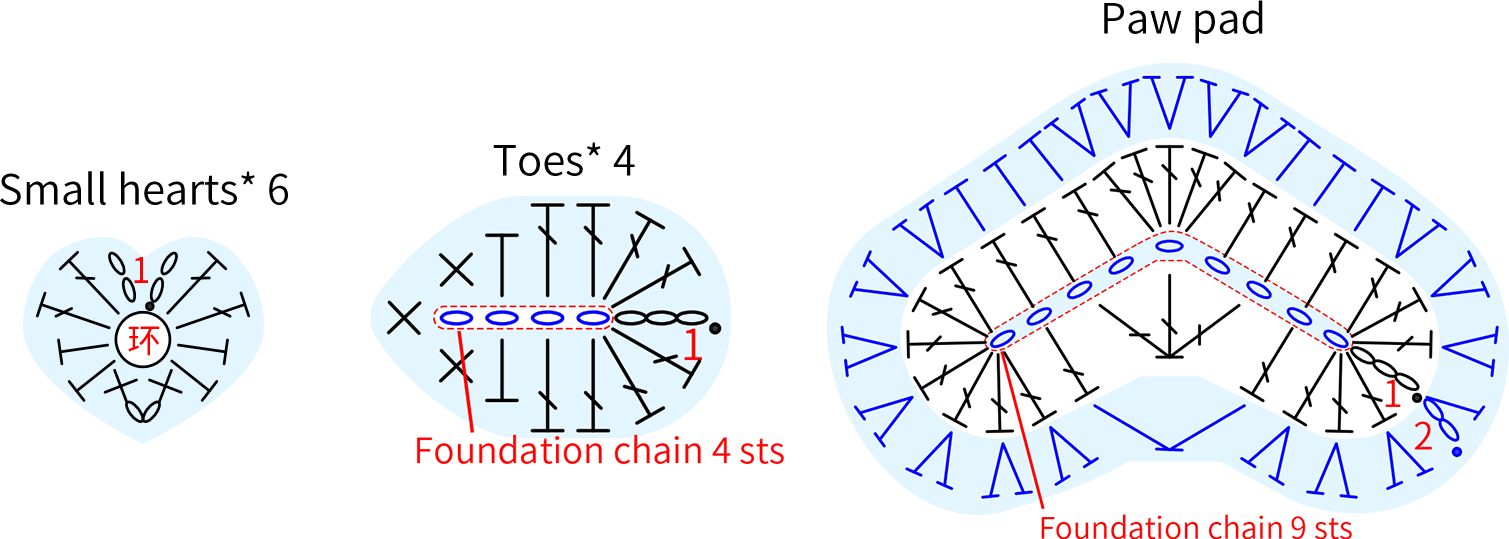
The piece 4 includes small hearts, toes and paw pad.
Step 5 Piece 3B5 84' 38''
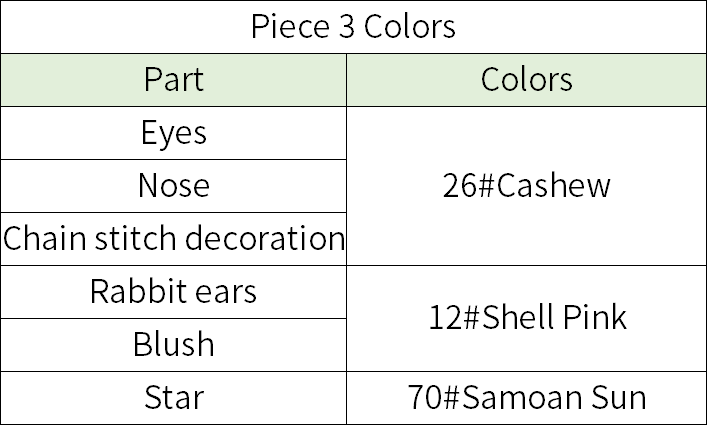
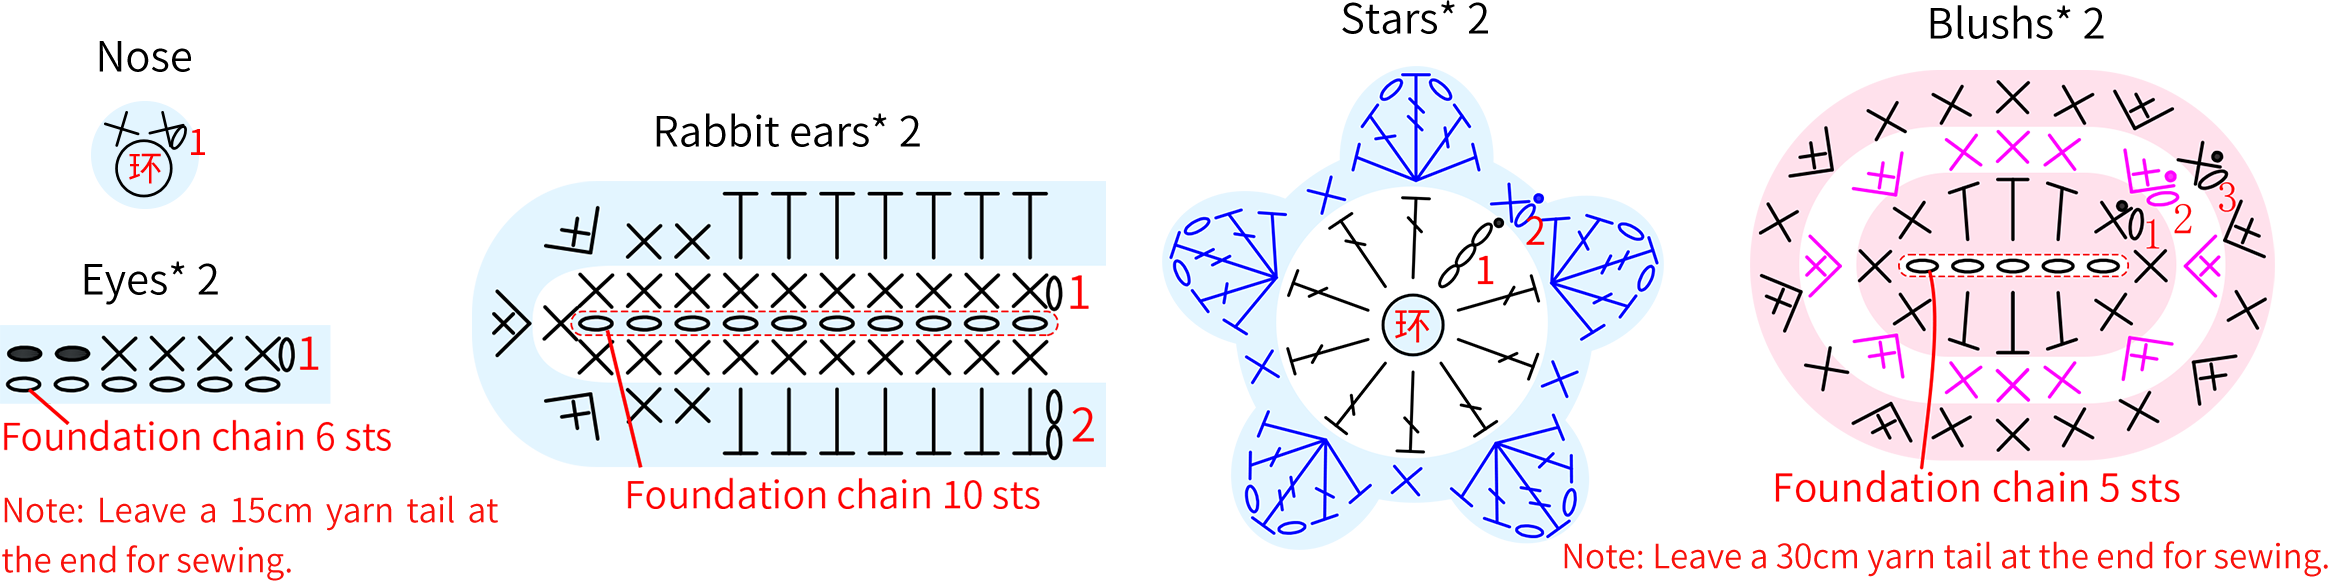
The decorations on piece 3 include blush, eyes, nose, rabbit ears, stars, and chain stitch decorations.
Chain decorations: one 6 cm, one 11 cm, and three 4-5 cm. All are formed with chain stitches, leaving a 30 cm yarn tail at the end, and divide one strand for sewing.
Step 6 Piece 1
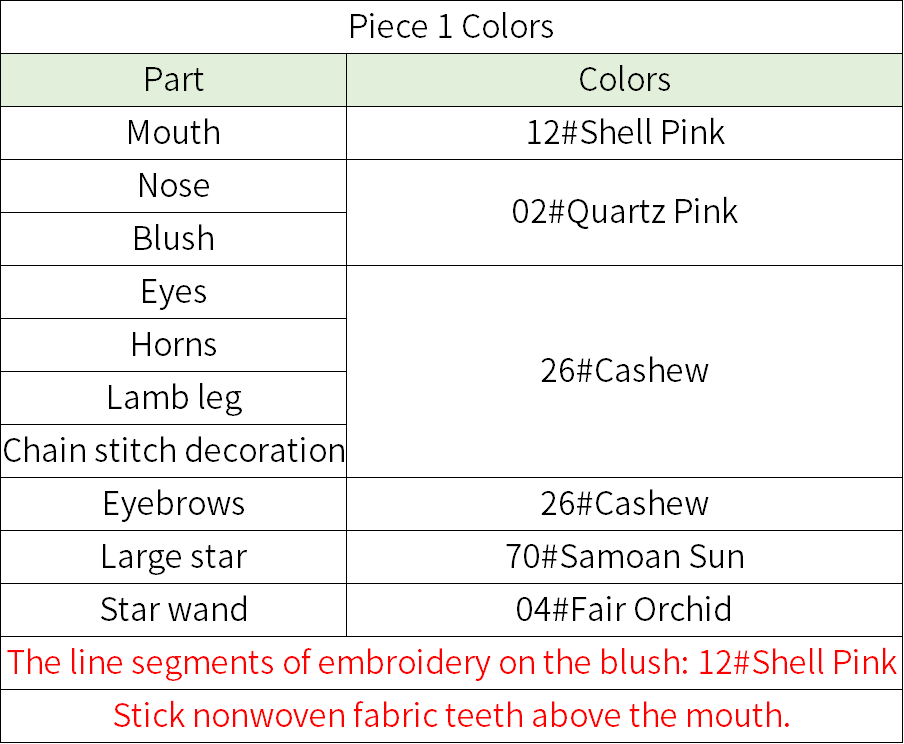
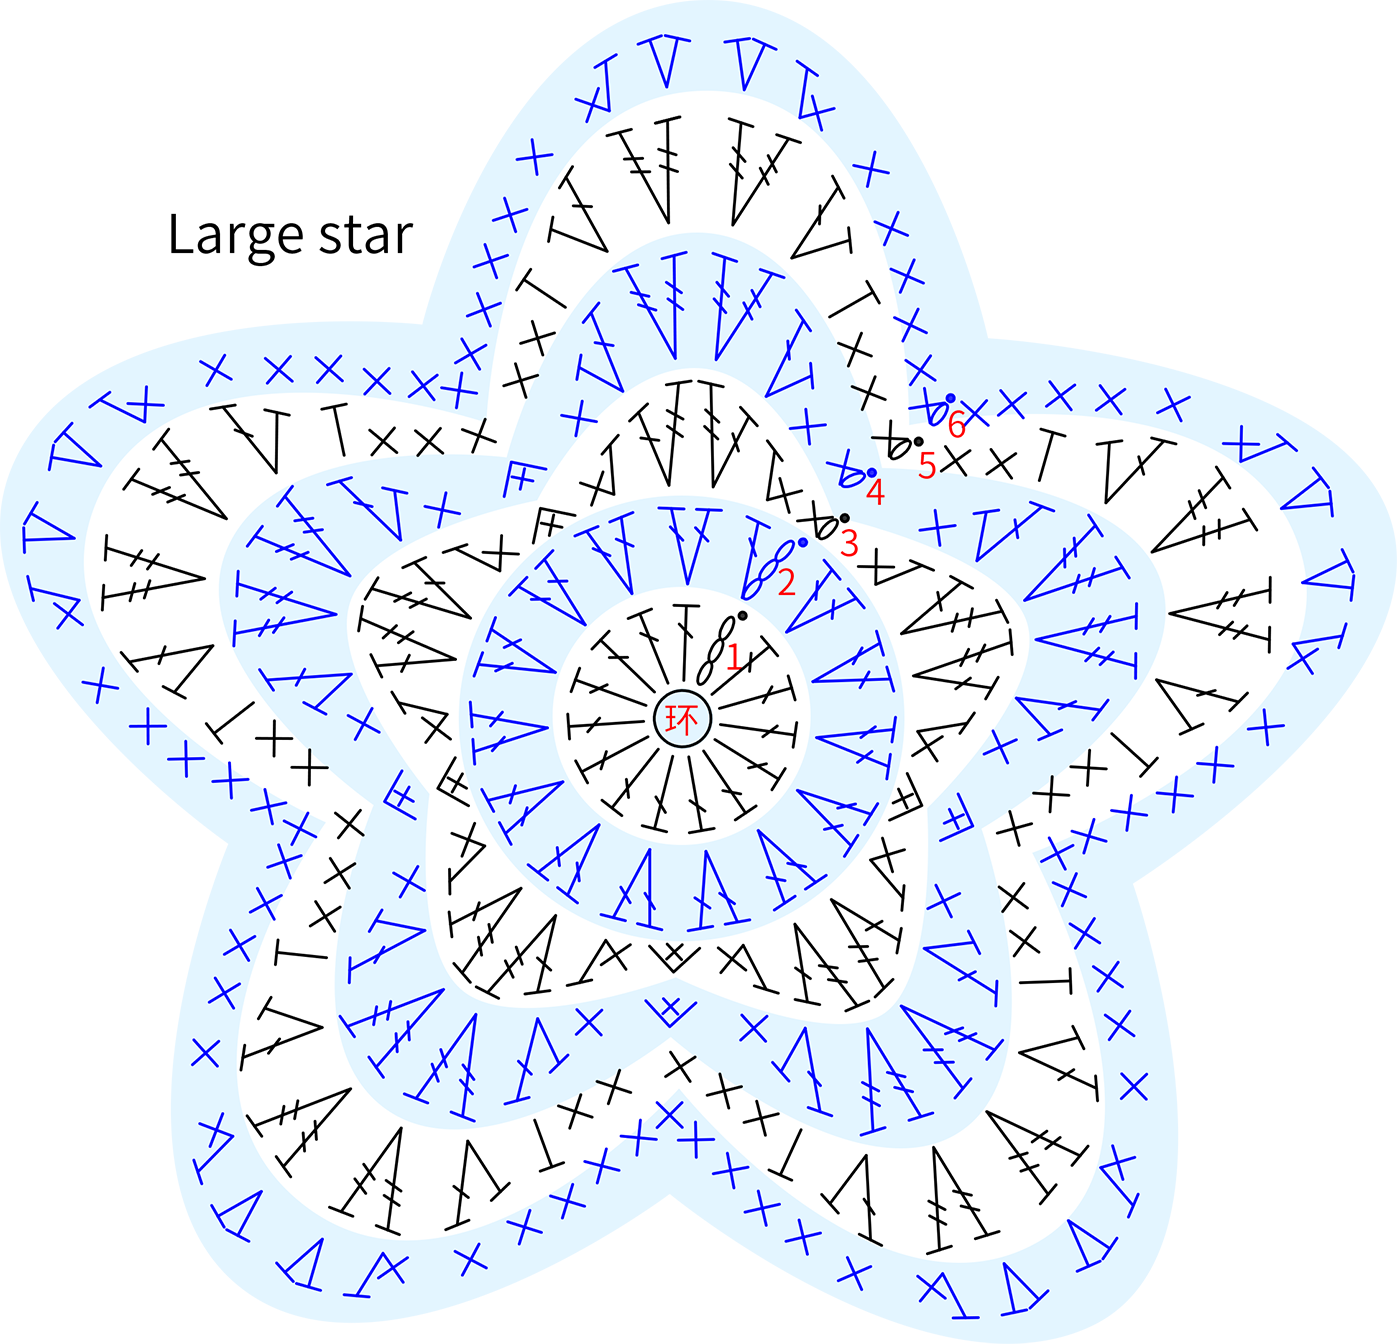
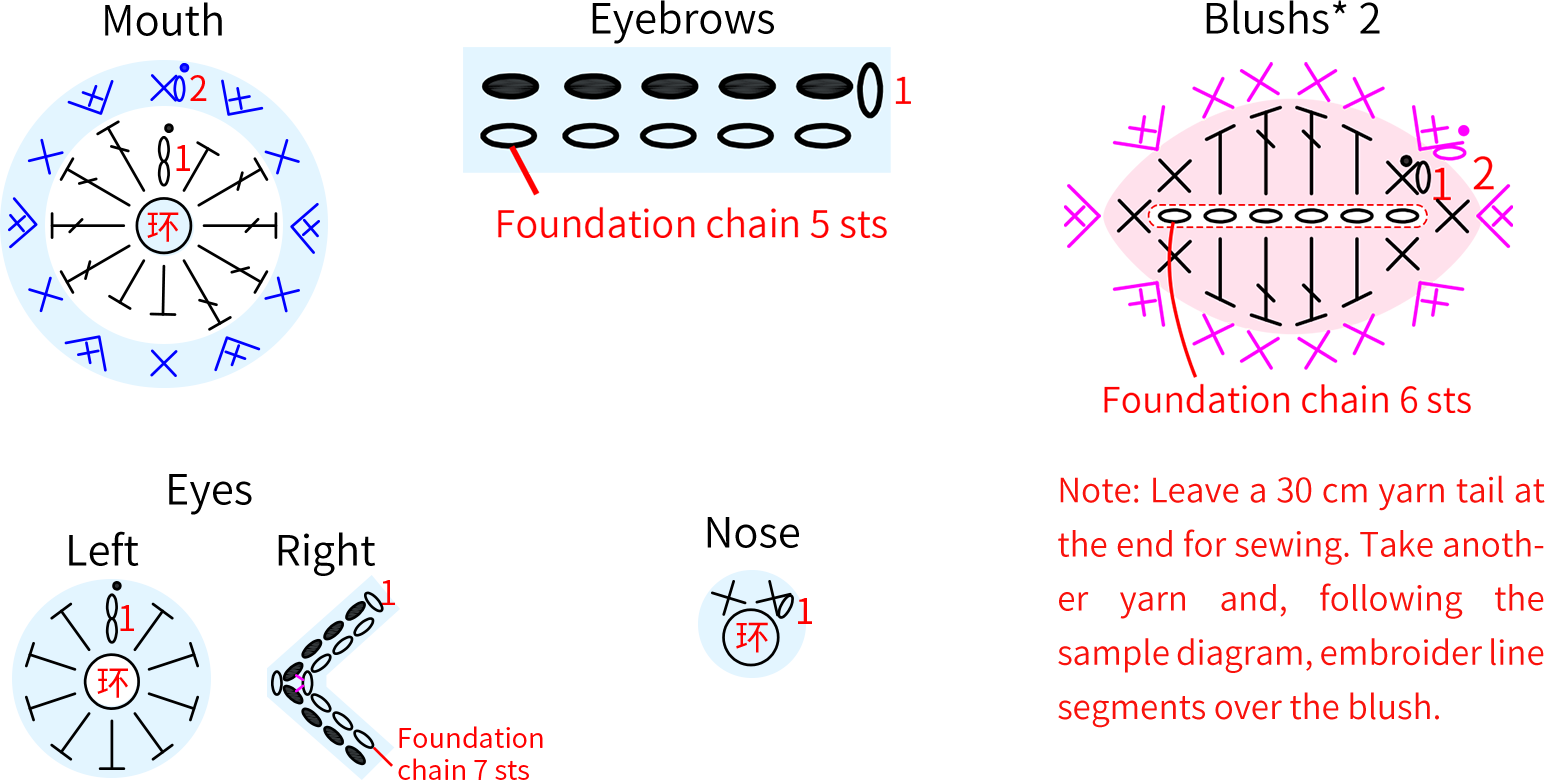
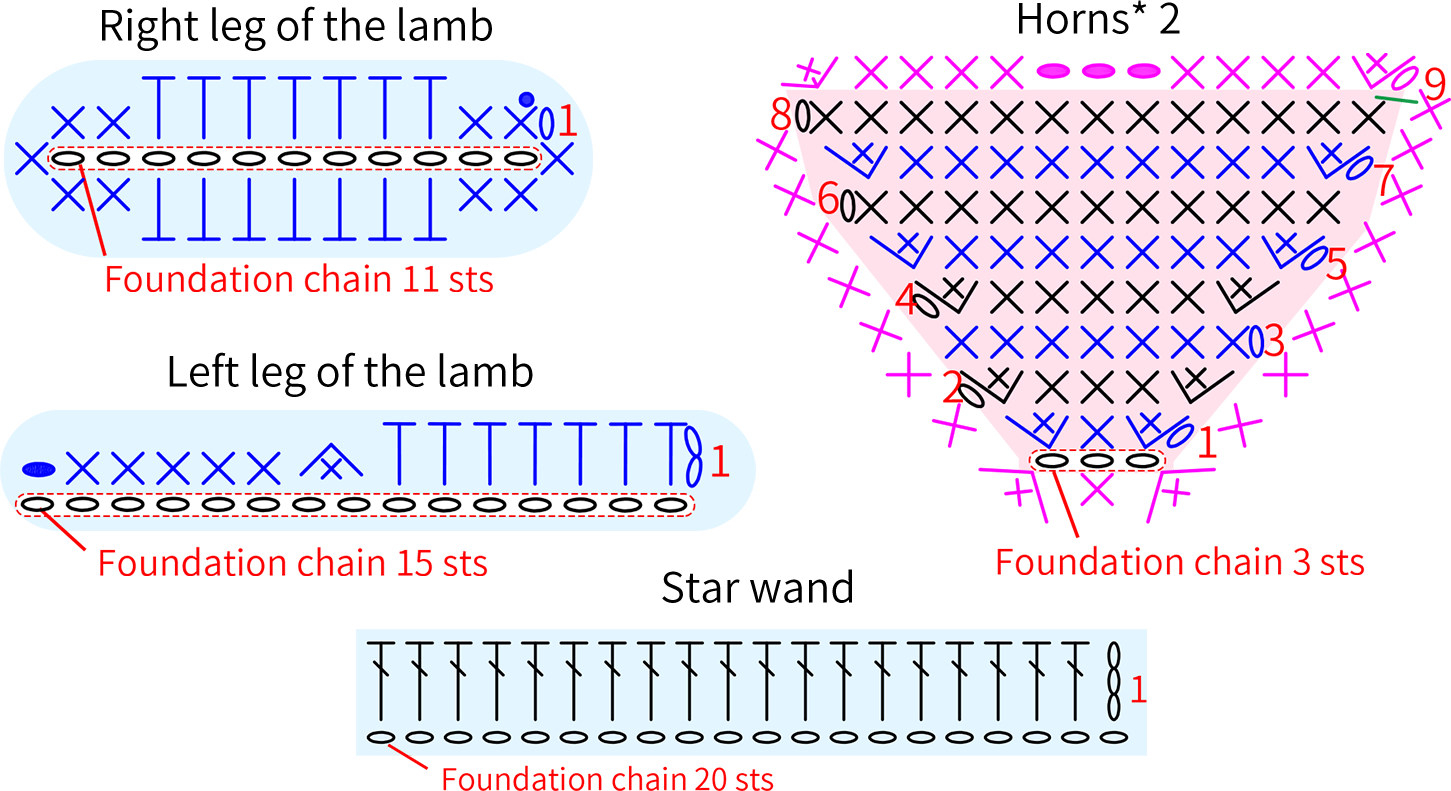
Piece 1 Includes the mouth, eyebrows, nose, blush, eyes, horns, right leg of the lamb, left leg of the lamb, chain stitch decorations, large star, and star wand.
Crochet 4 chain stitch decorations: 1 chain of 14, 1 chain of 10, and 2 chains of 13. After completing, leave a 30cm yarn tail and divide out one strand to sew onto the corresponding position of the piece.
Made by the community