Clothes
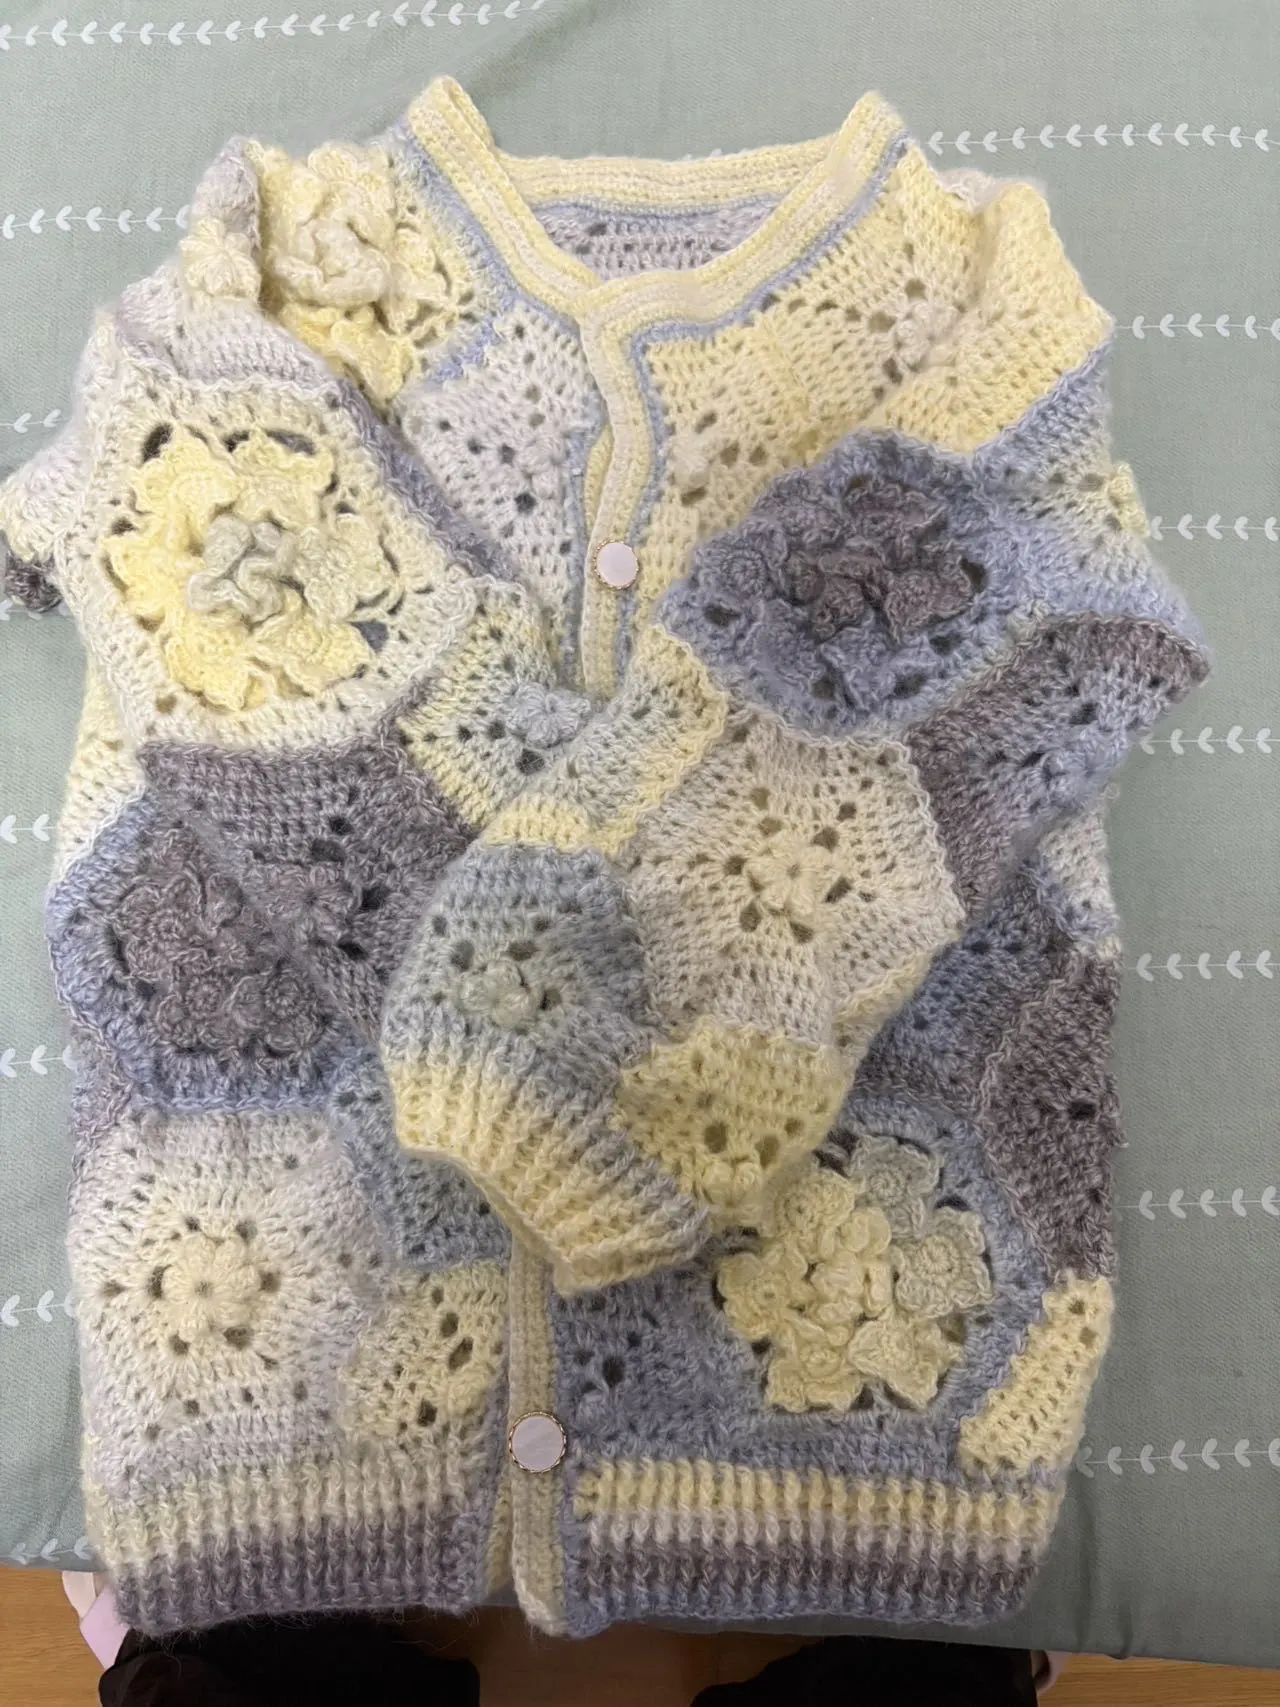
Dawn Blossom Cardigan
Project preview
See the finished project
Pattern format
Instructions
Watch and follow
Video tutorial
This cardigan consists of three parts: the body, the sleeves, and the edging. We'll start by making the body. Then make the sleeves. After completing them, we will work the hem and attach the buttons.
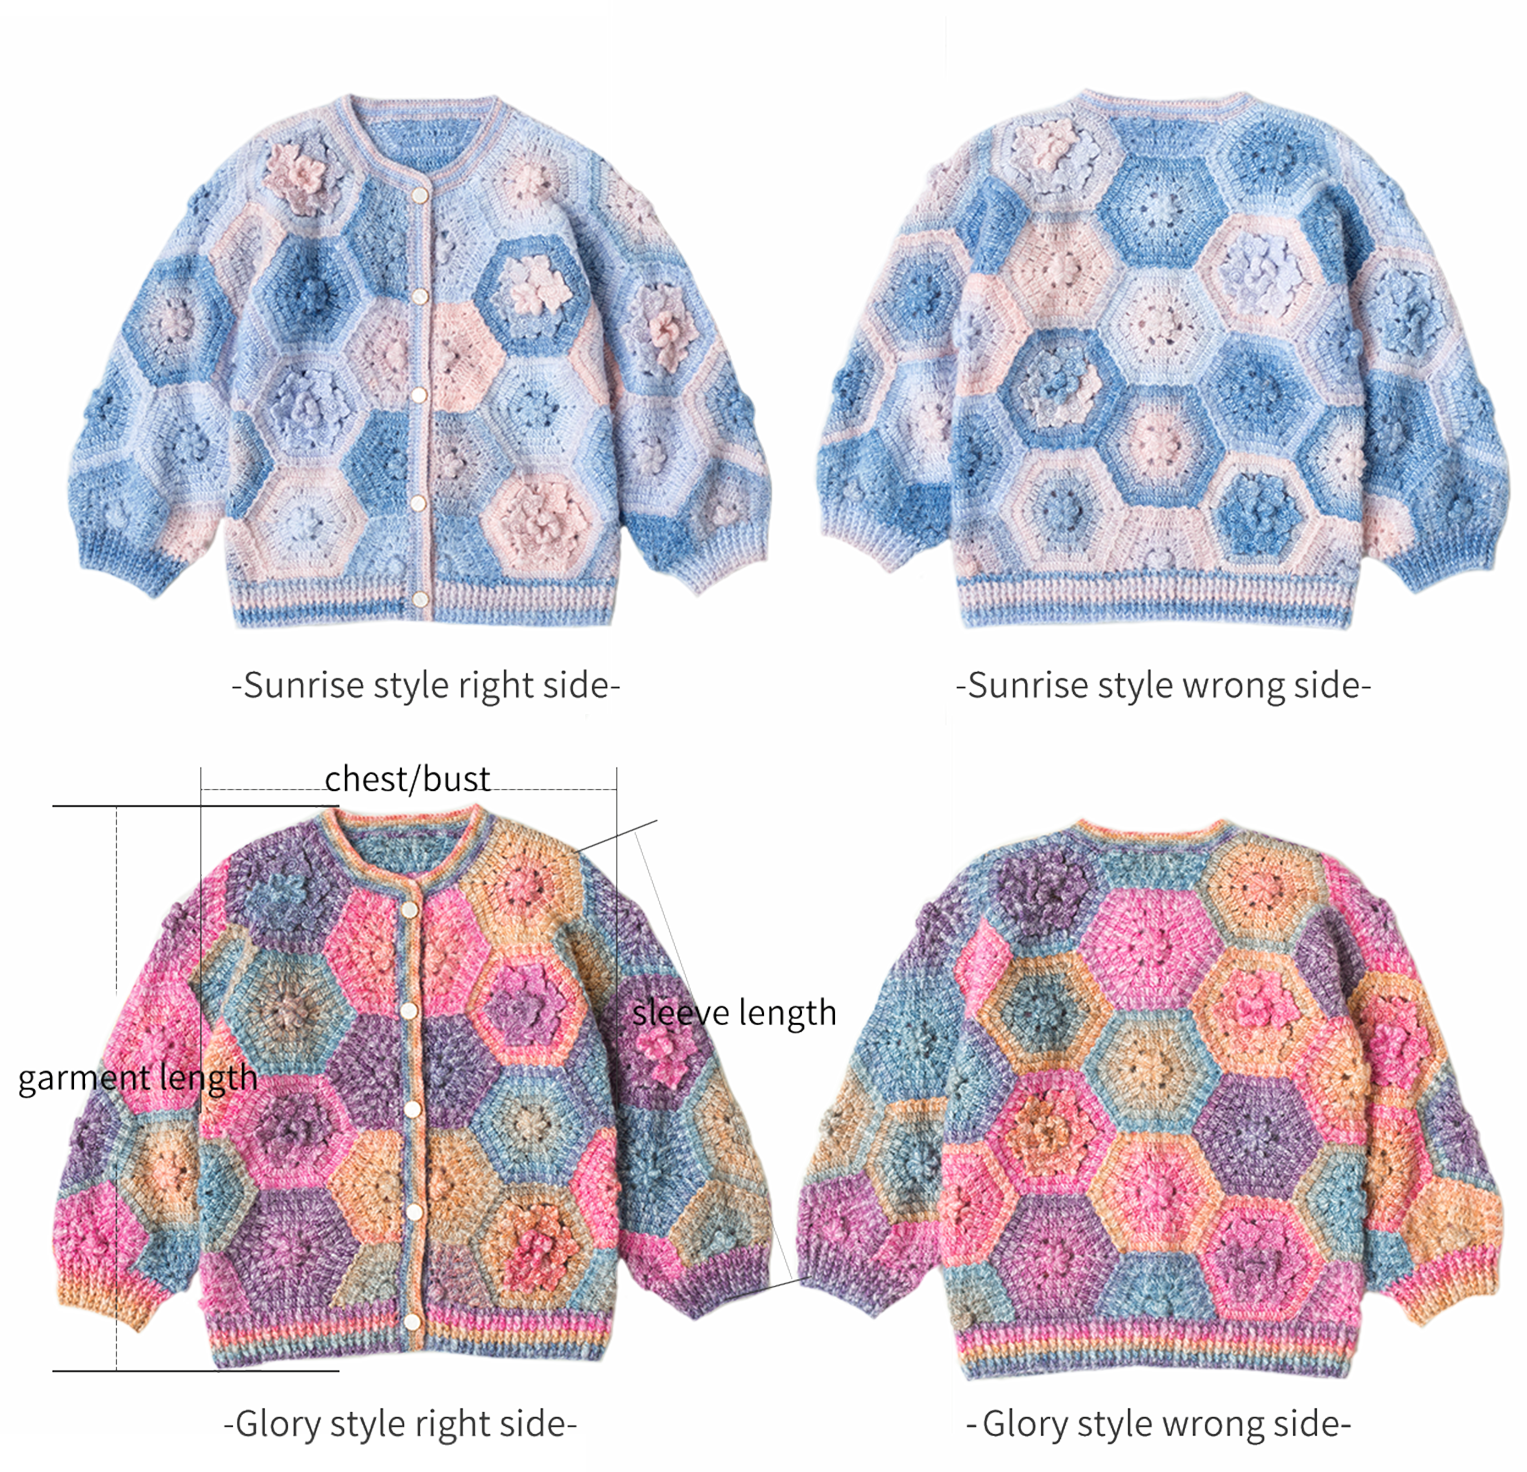
Finished measurement:The garment is about 62 cm long; the flatten chest circumference is approximately 50 cm; the sleeve length is about 53 cm.
The handcrafted measurements may have an error of 1 to 2 cm. Due to variations in individual tension, the size of the sample is for reference only.
Materials: Susan's Family Dawn Impression
Hook: 3.50 mm crochet hook

Note: This pattern is making in Chinese crochet pattern terms, and the stitch name is written using American terminology. All measurements in charts are in cm. 
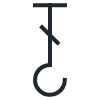
Chart Key











Part 1 BodyA
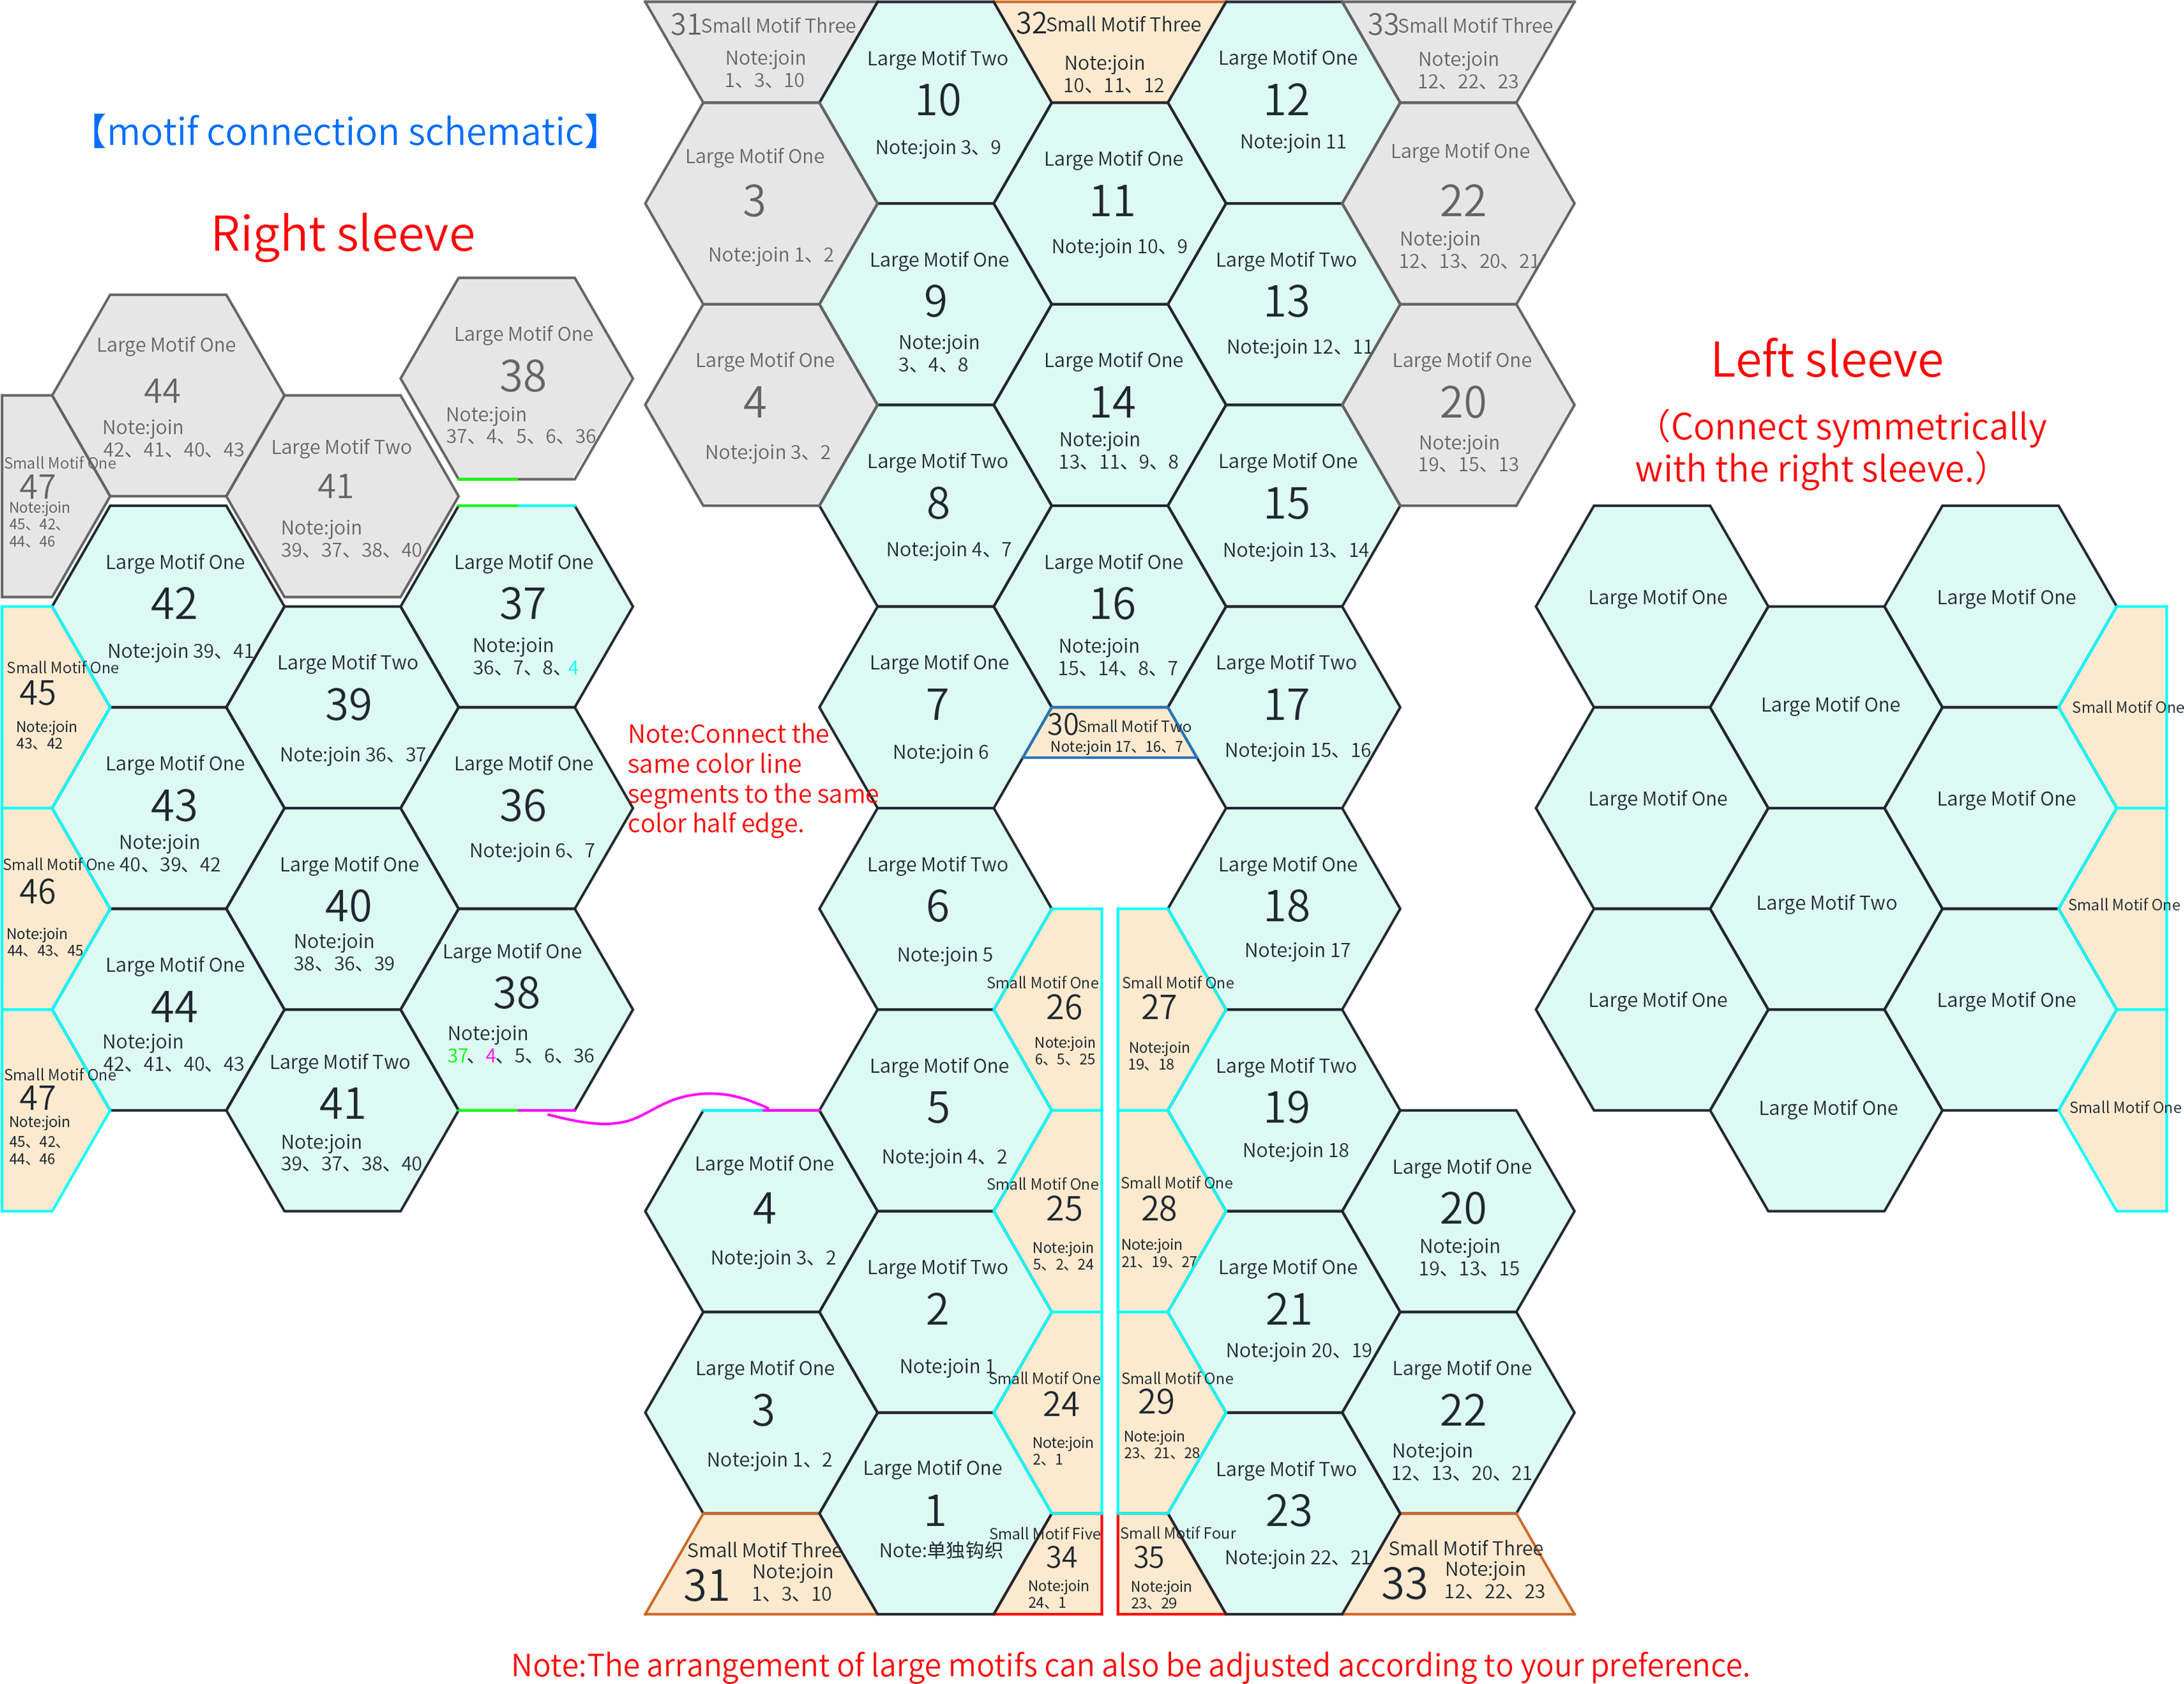
Let's look at the body first. It's made up of several different motifs.First, crochet the first individual Large Motif One. Then crochet the remaining Large Motif Ones and Large Motif Two. When crocheting the last round of the remaining large motifs, you need to refer to the pattern. Connect them to the corresponding motifs. After all the large motifs are completed, add the small motifs along the edges.
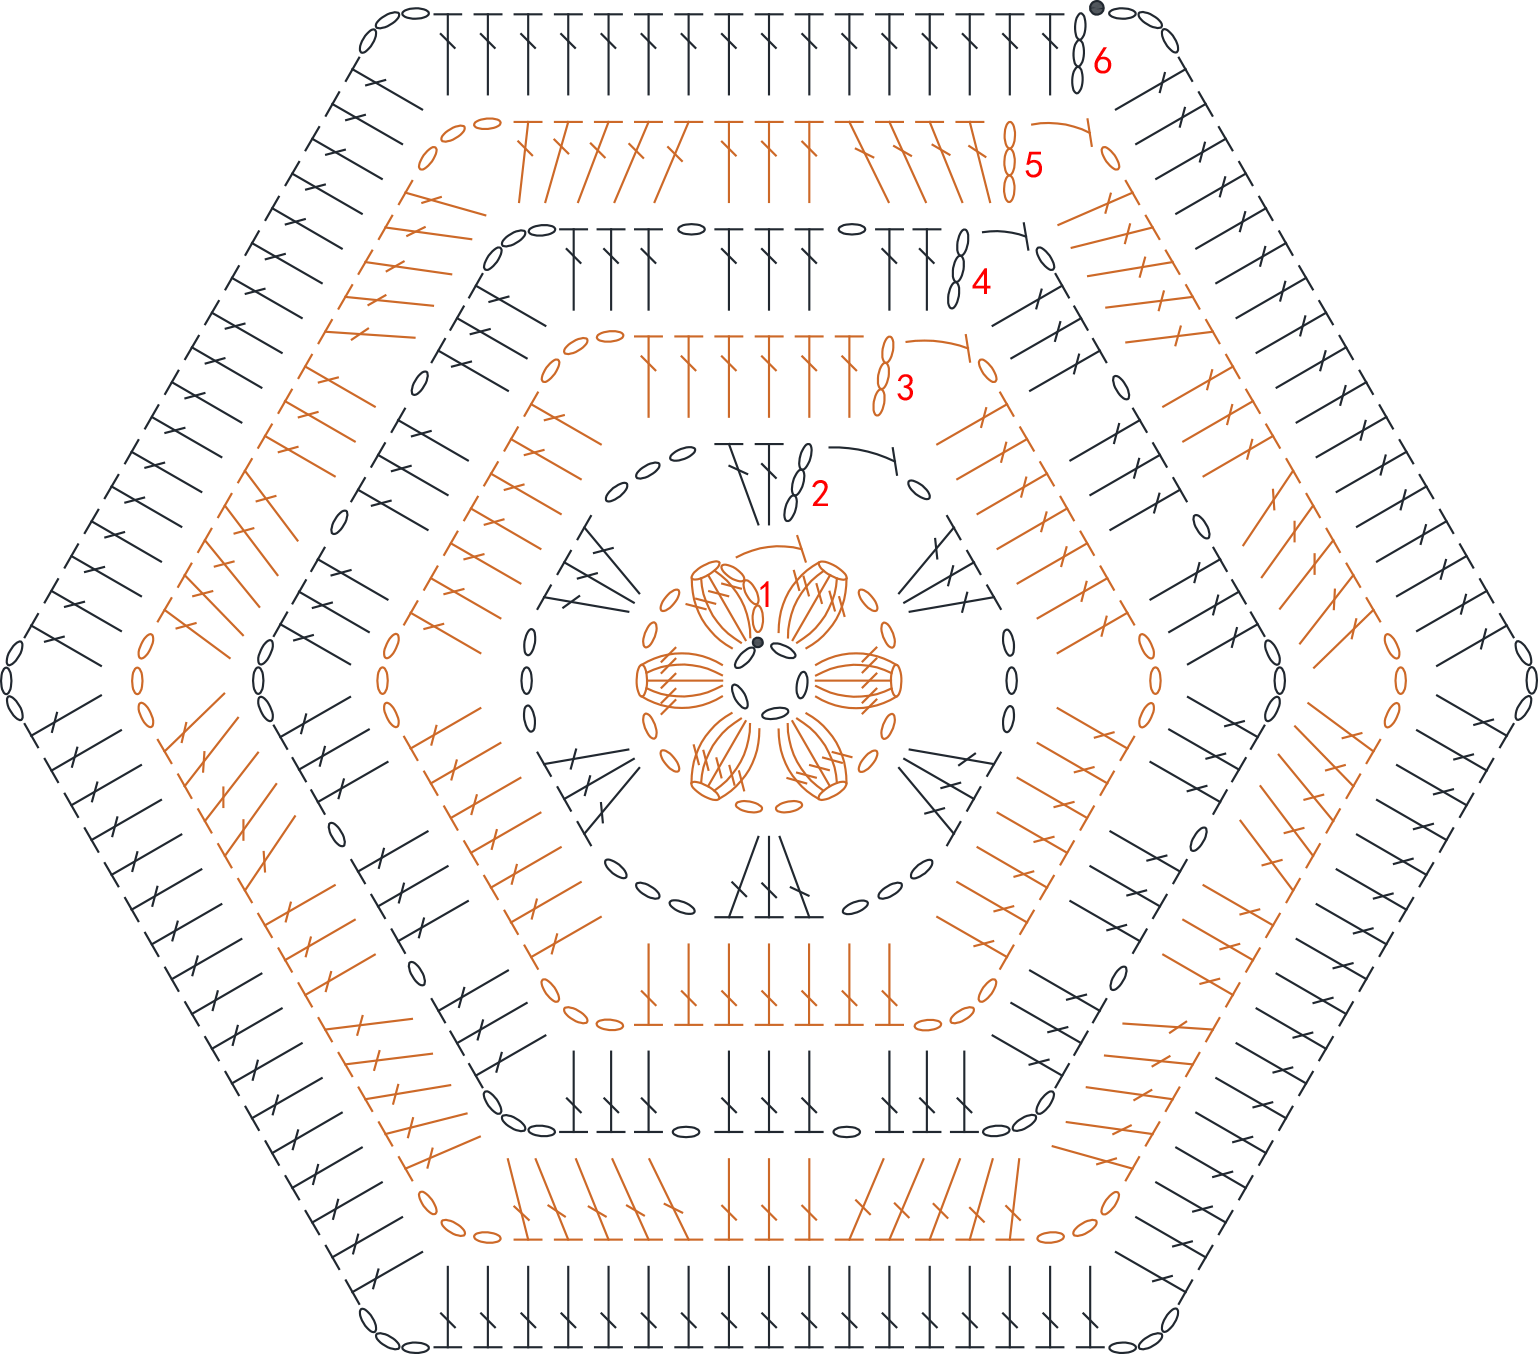
Step 1 The first individual Large Motif OneA1 01' 41''
The Large Motif One starts with a chain ring. Crochet in rounds counterclockwise. Please refer to the video demonstration for more details.
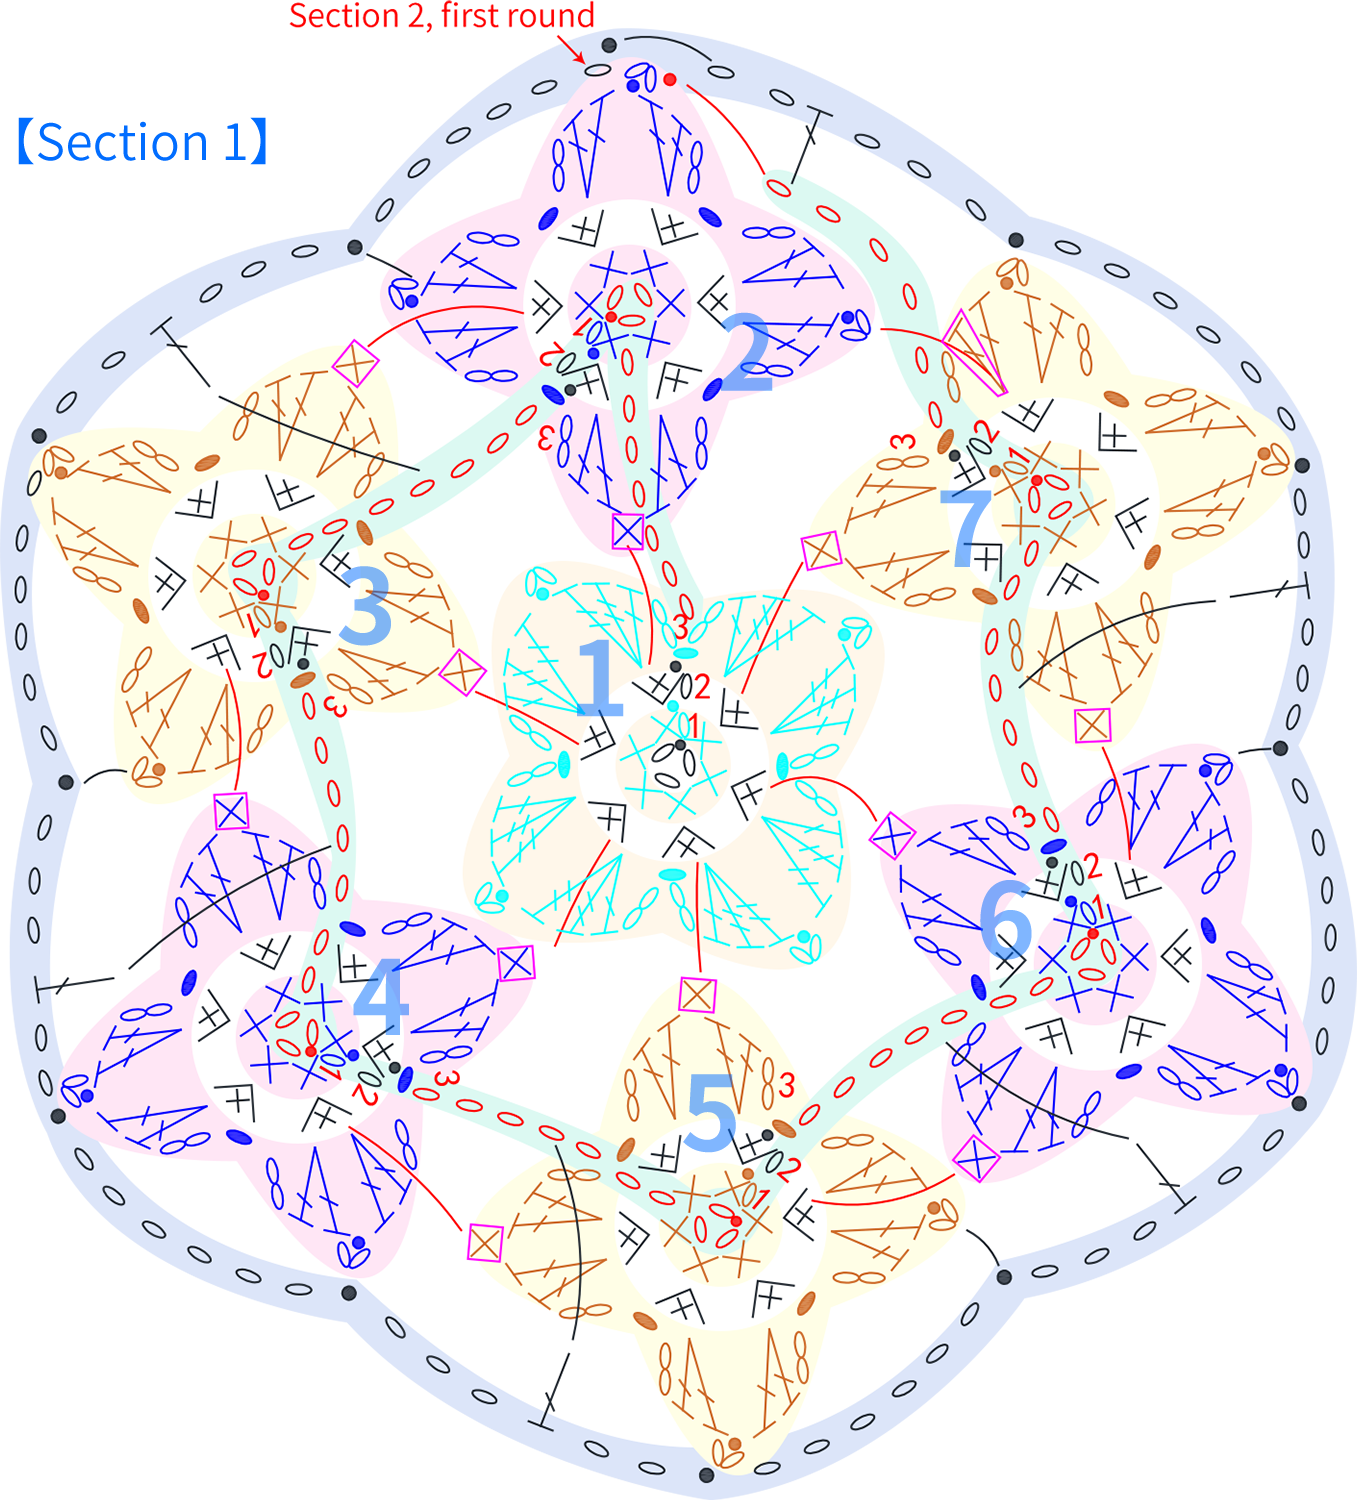
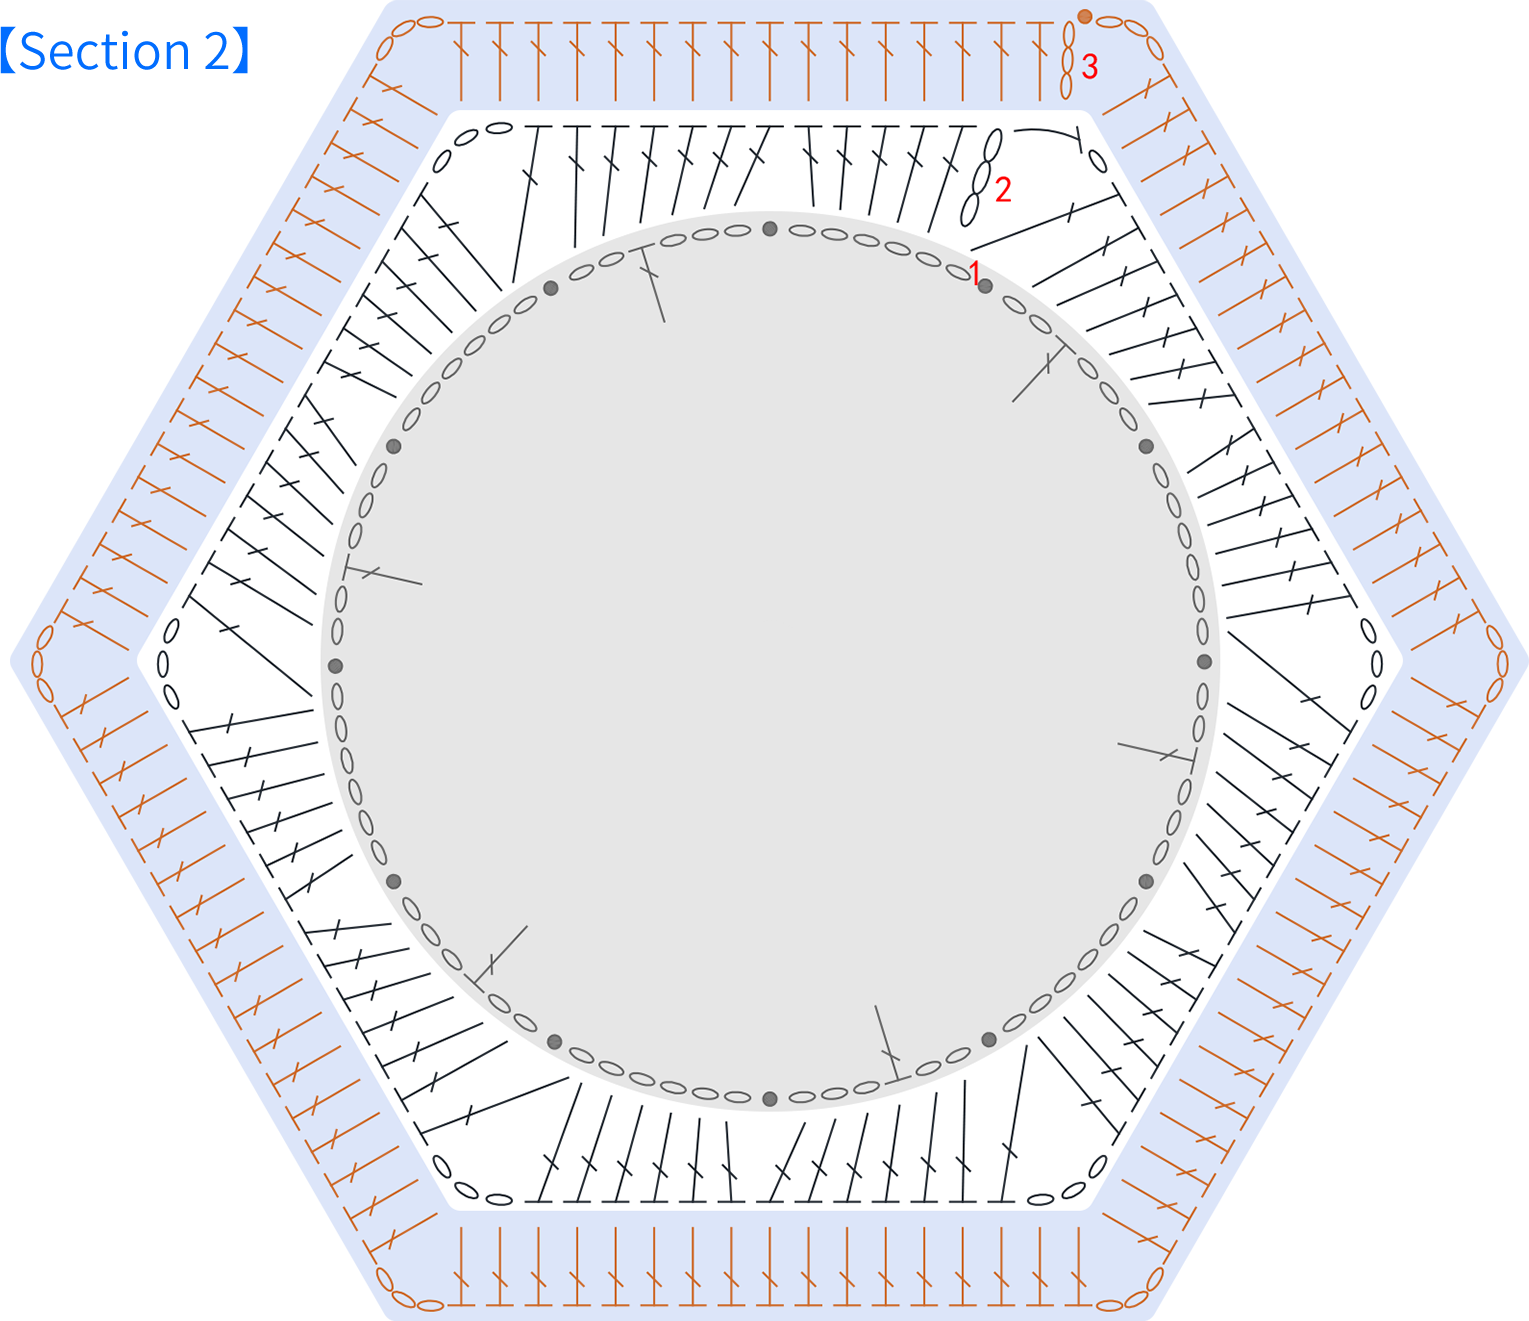
Step 2 The first Large Motif TwoA2 17' 43''
Large Motif Two is divided into Section 1 and Section 2. Please refer to the video demonstration for more details.
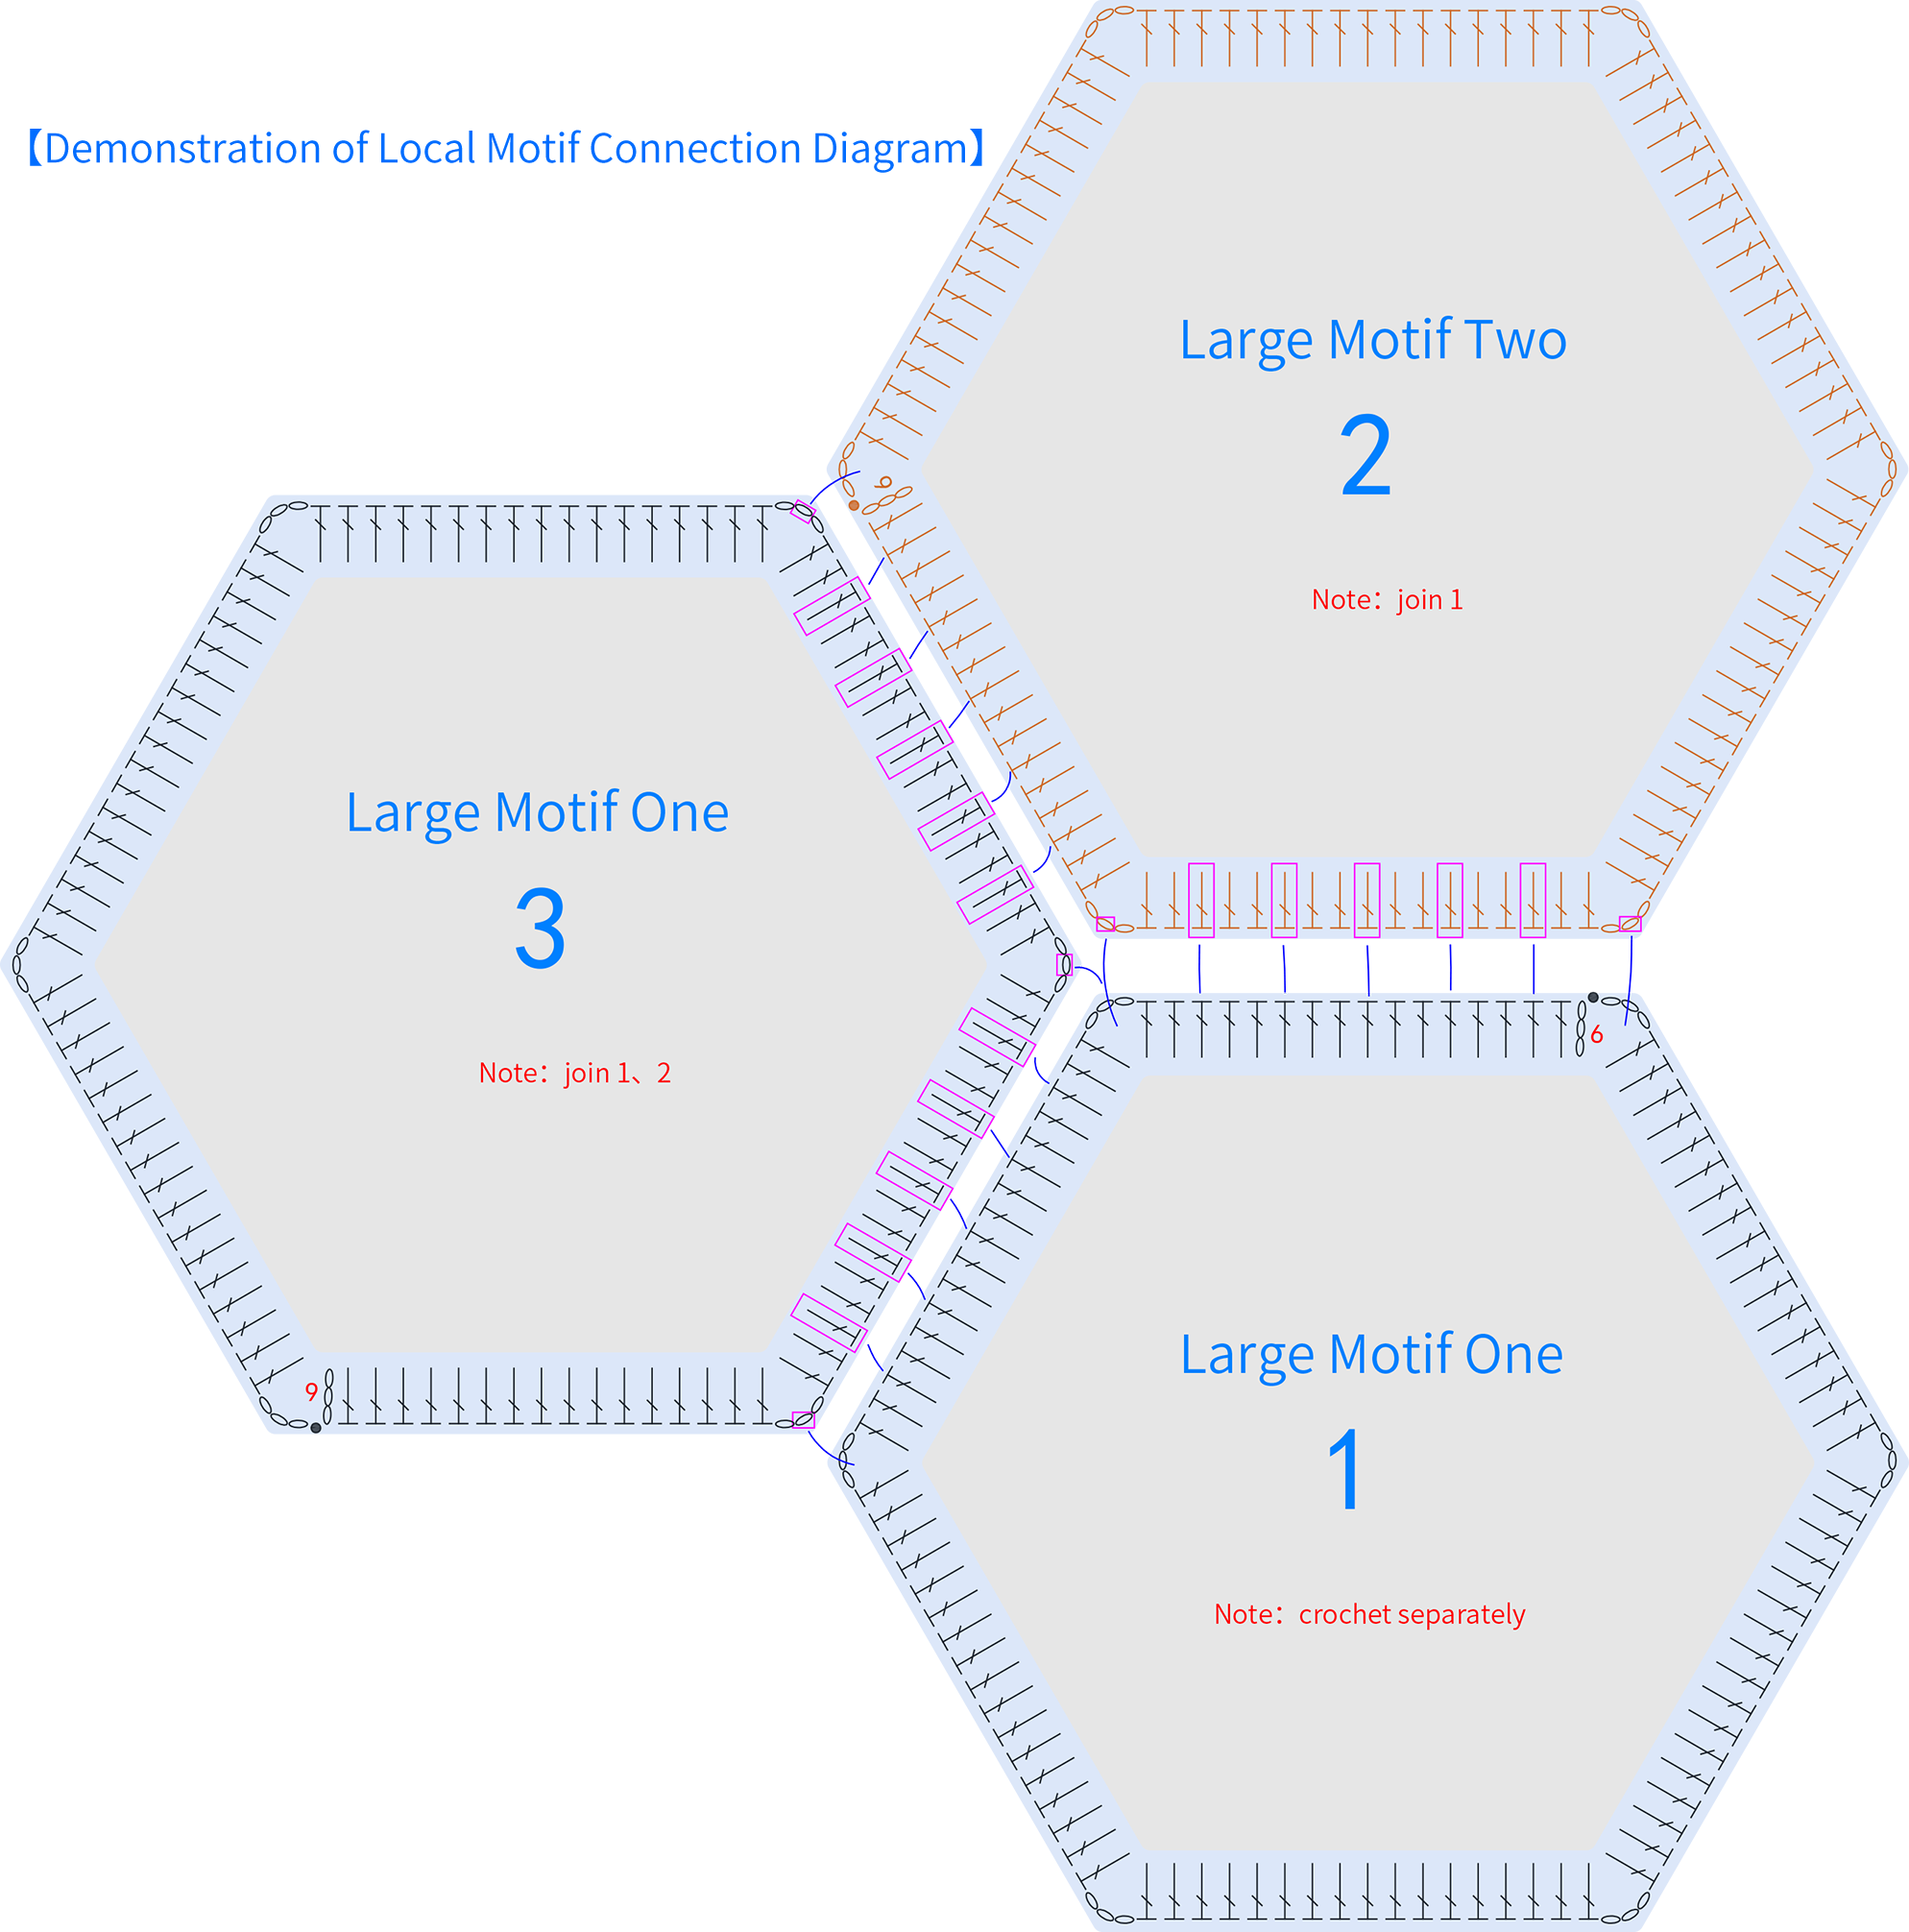
Step 3 The remaining Large MotifsA3 51' 48''
Follow the joining order on the pattern chart, and complete all the remaining large motifs by yourself. Please refer to the video demonstration for more details.
Step 4 Small Motifs 56' 11''
After all the large motifs of the body section are connected, complete the remaining small flowers.Please refer to the video demonstration for more details.
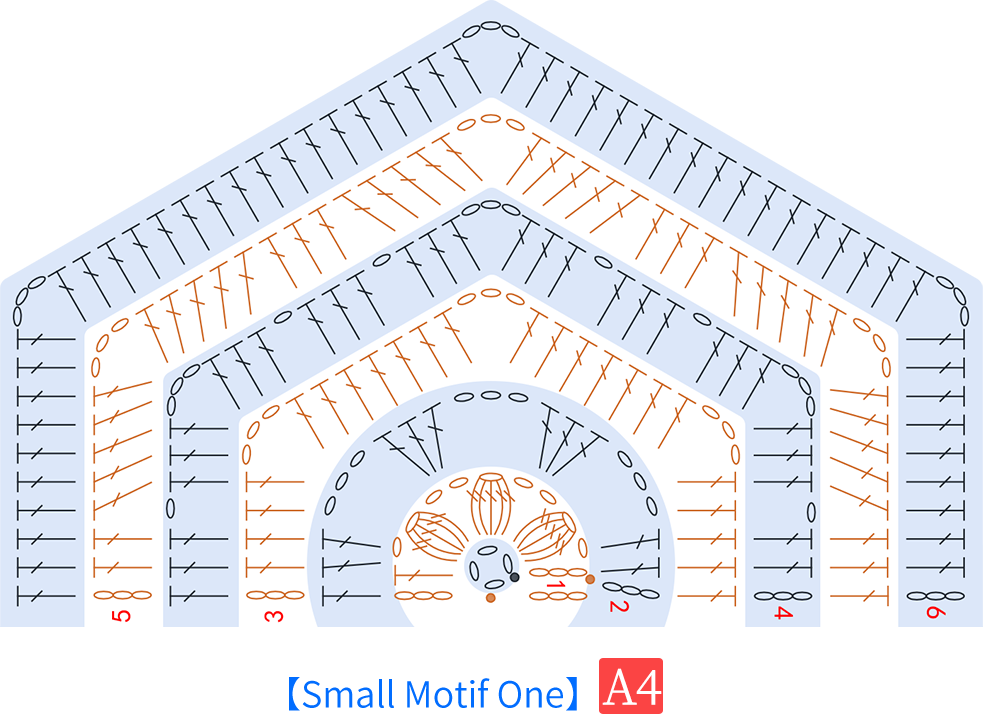
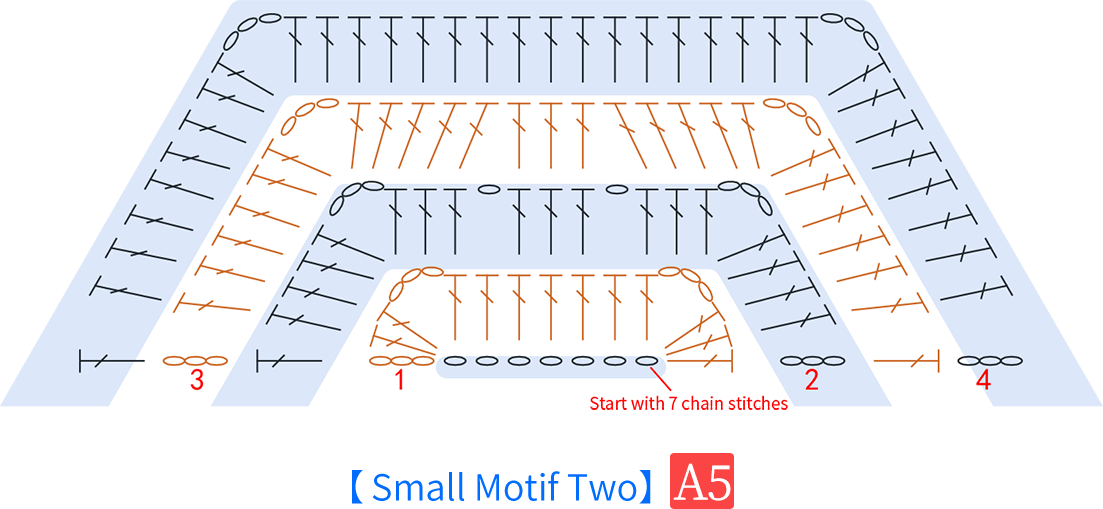
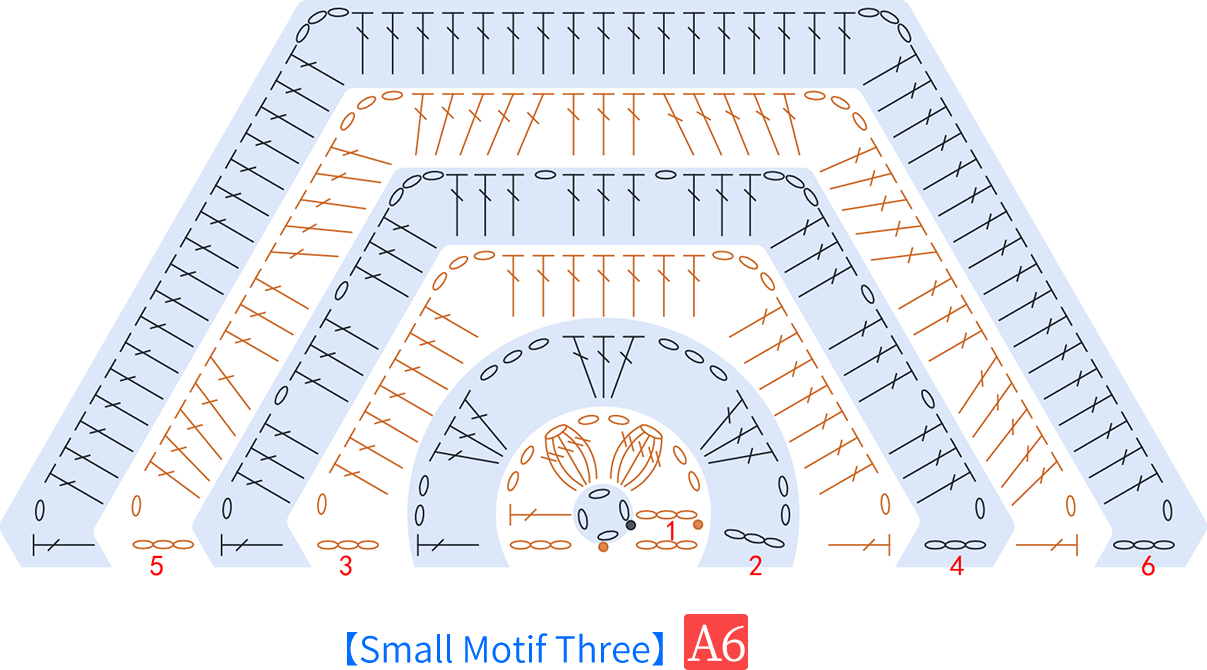
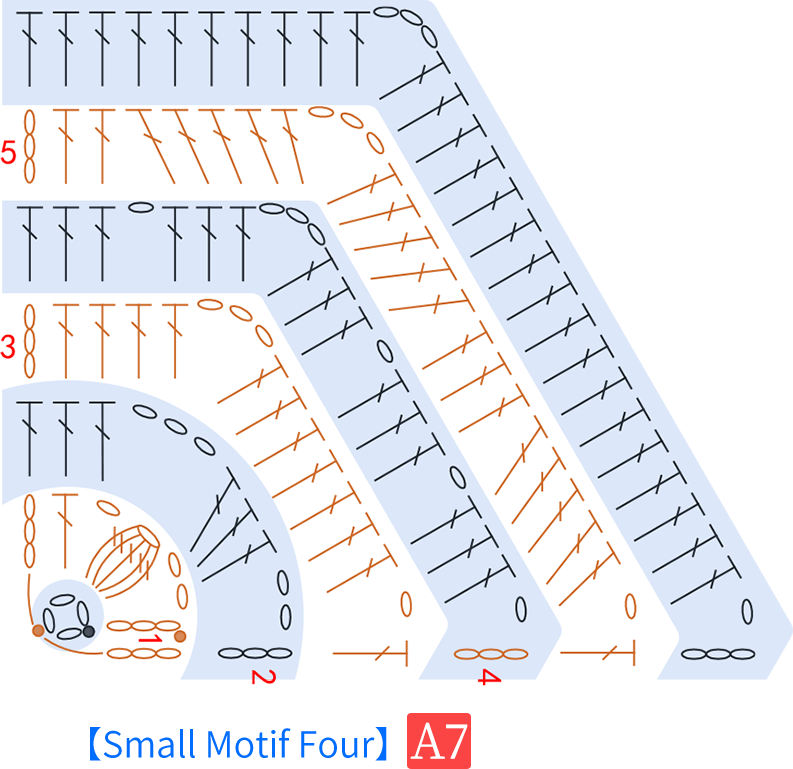
Part 2 SleevesB 72' 02''
The sleeve section which is also made by joining motifs.The joining method is same as the body section.Pay attention to the sides under the arms,where one edge of some motifs needs to be joined with two motifs.Refer to the charts,and complete the connection for the sleeve section as well.
Part 3 EdgingC
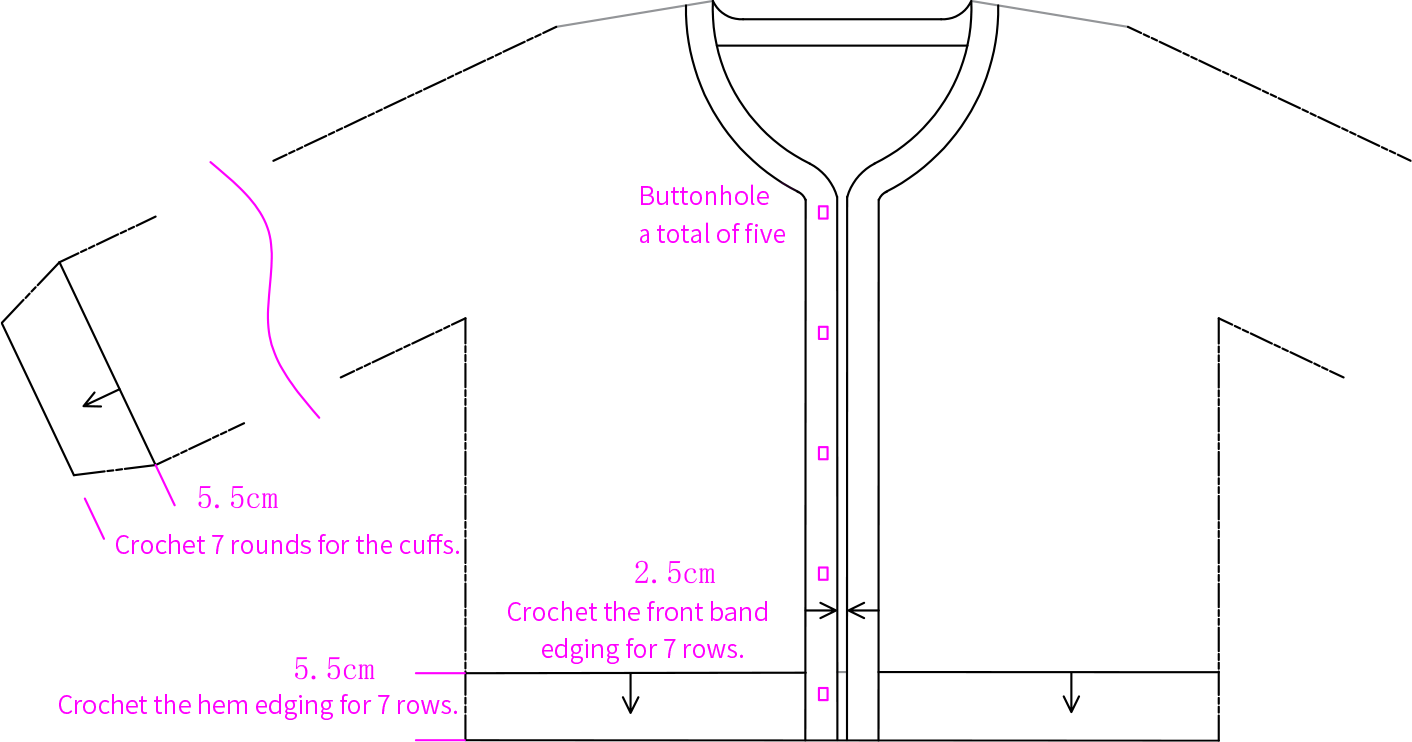
The edging including the cuff edging,the hem edging,and the front band edging.
Step 1 Cuff edgingC1 72' 51''
The cuff edging is crocheted in rounds by picking up stitches at the cuff position.Please refer to the video demonstration for more details.
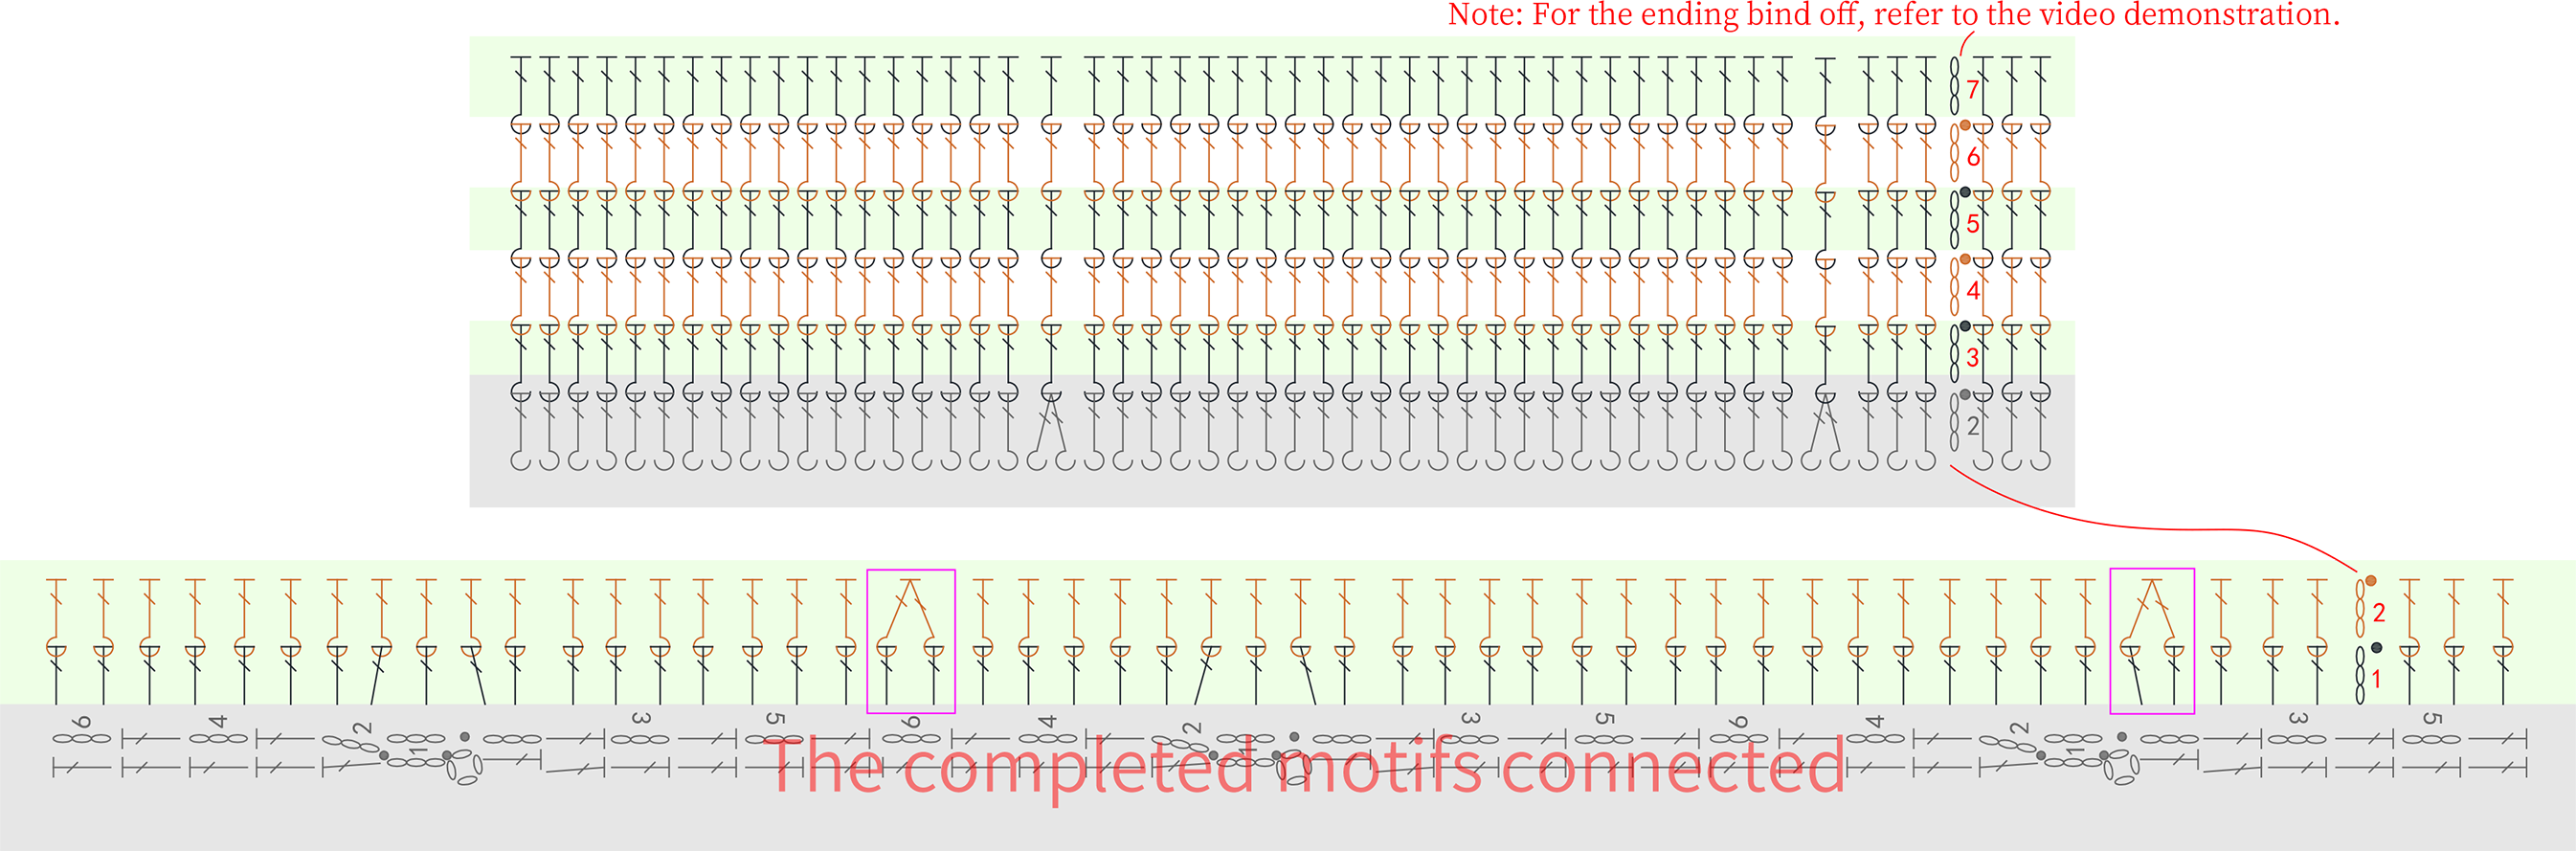
Step 2 Hem edgingC2 82' 58''
The hem is worked back and forth along the bottom of the body.Please refer to the video demonstration for more details.
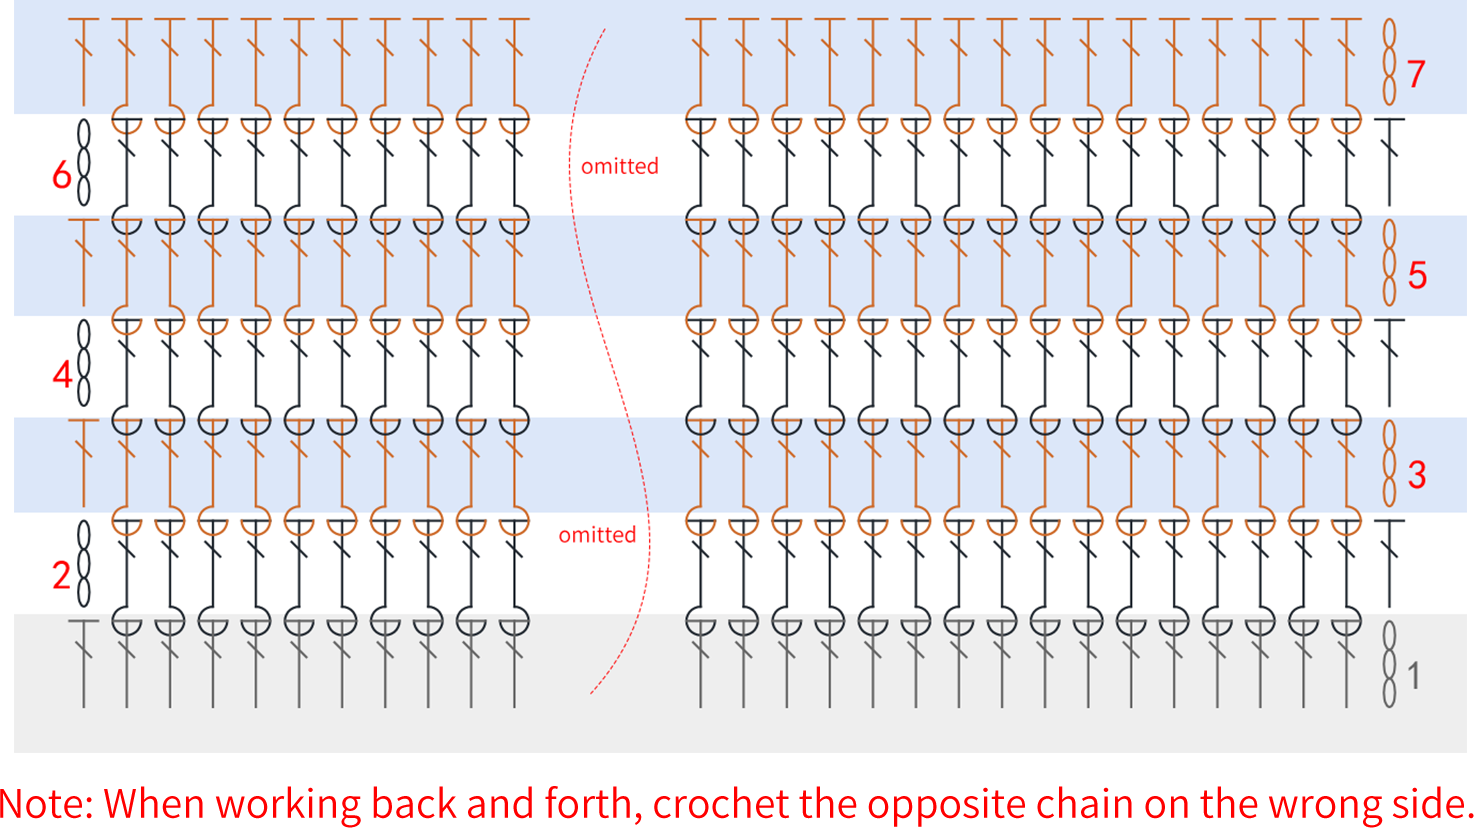

Step 3 The front band edgingC3 88' 55''
Start from the hem on the right front piece,all the way down to the hem on the left front piece.Work back and forth in rows.You will work buttonholes in the process.Please refer to the video demonstration for more details.

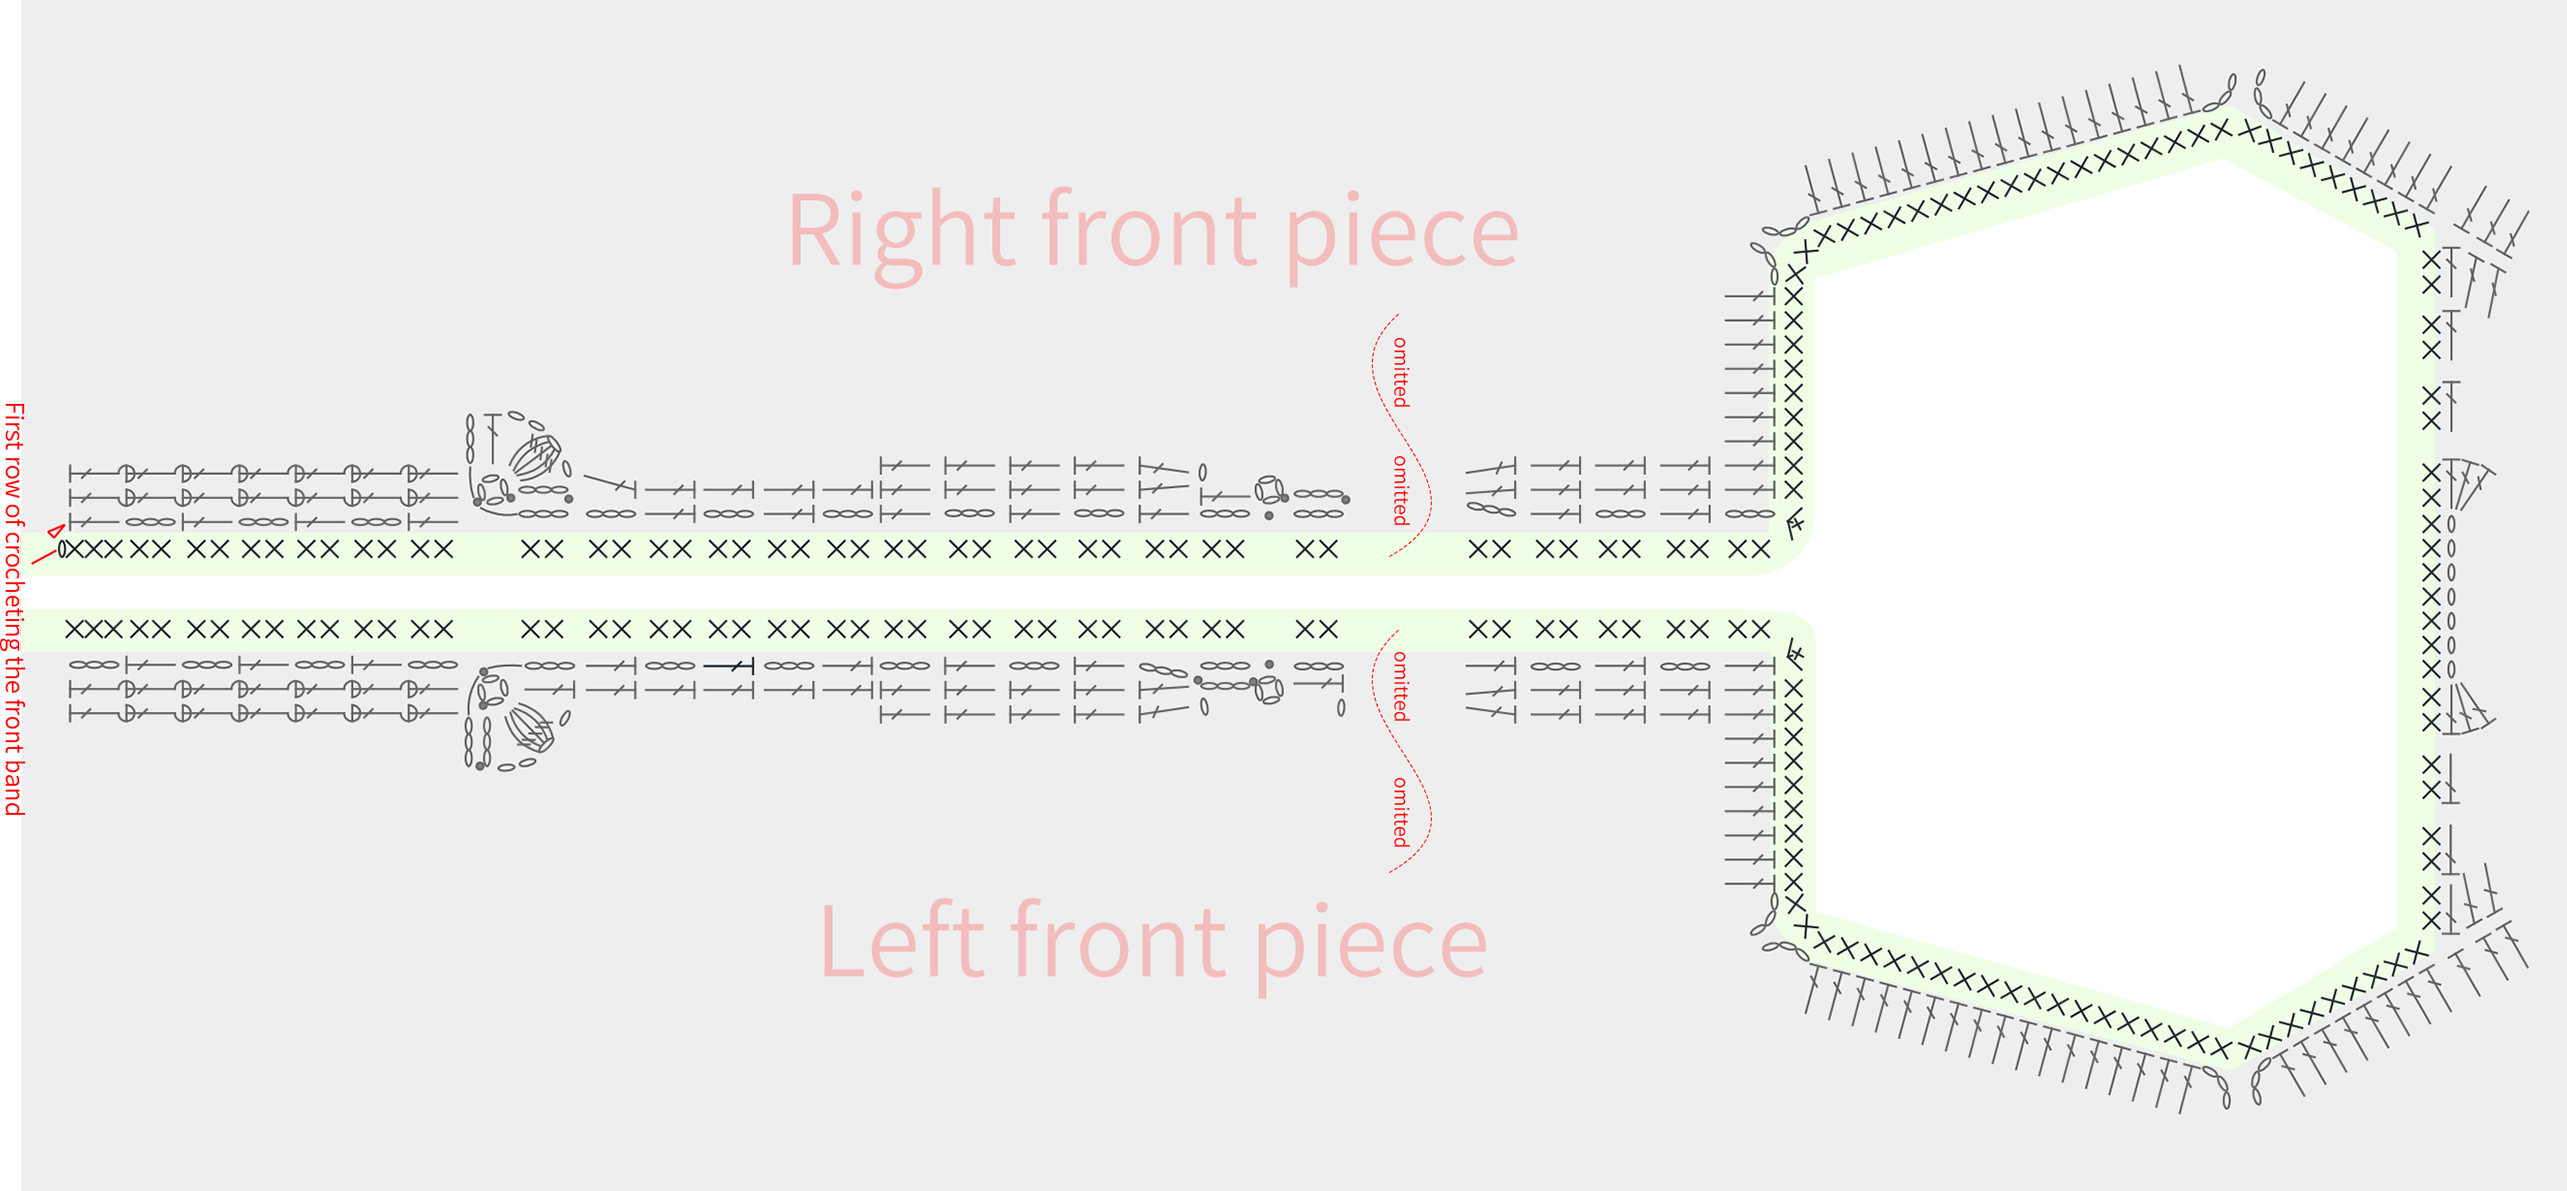
Part 4 ButtonsD 95' 24''
Attach them to the positions of Row 3 and Row 4 at the edging of the front band from the left front piece.Align with the corresponding buttonhole position on the right.
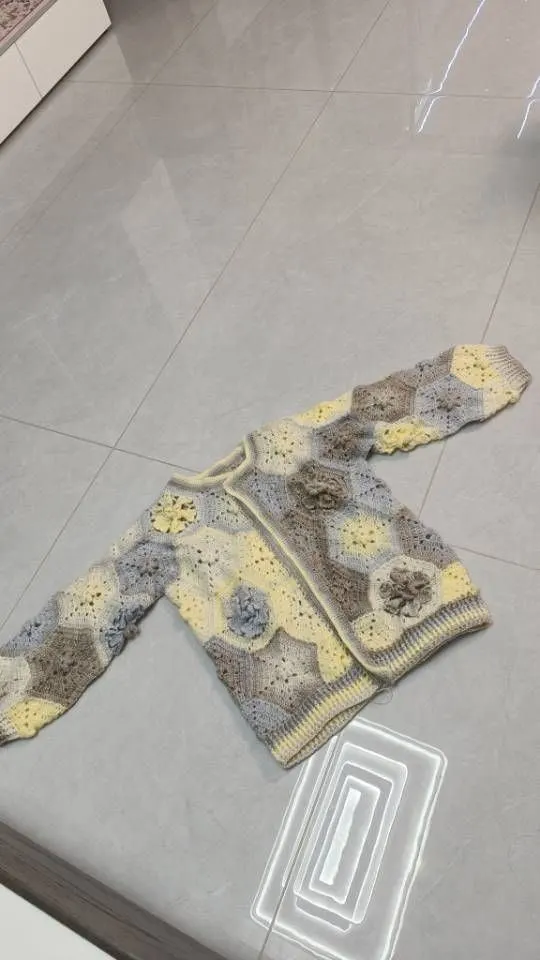
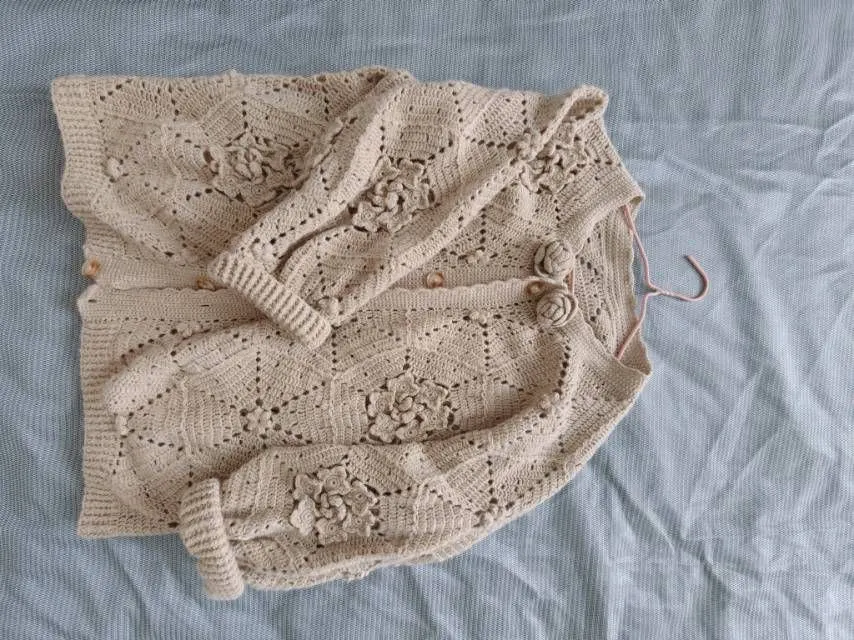
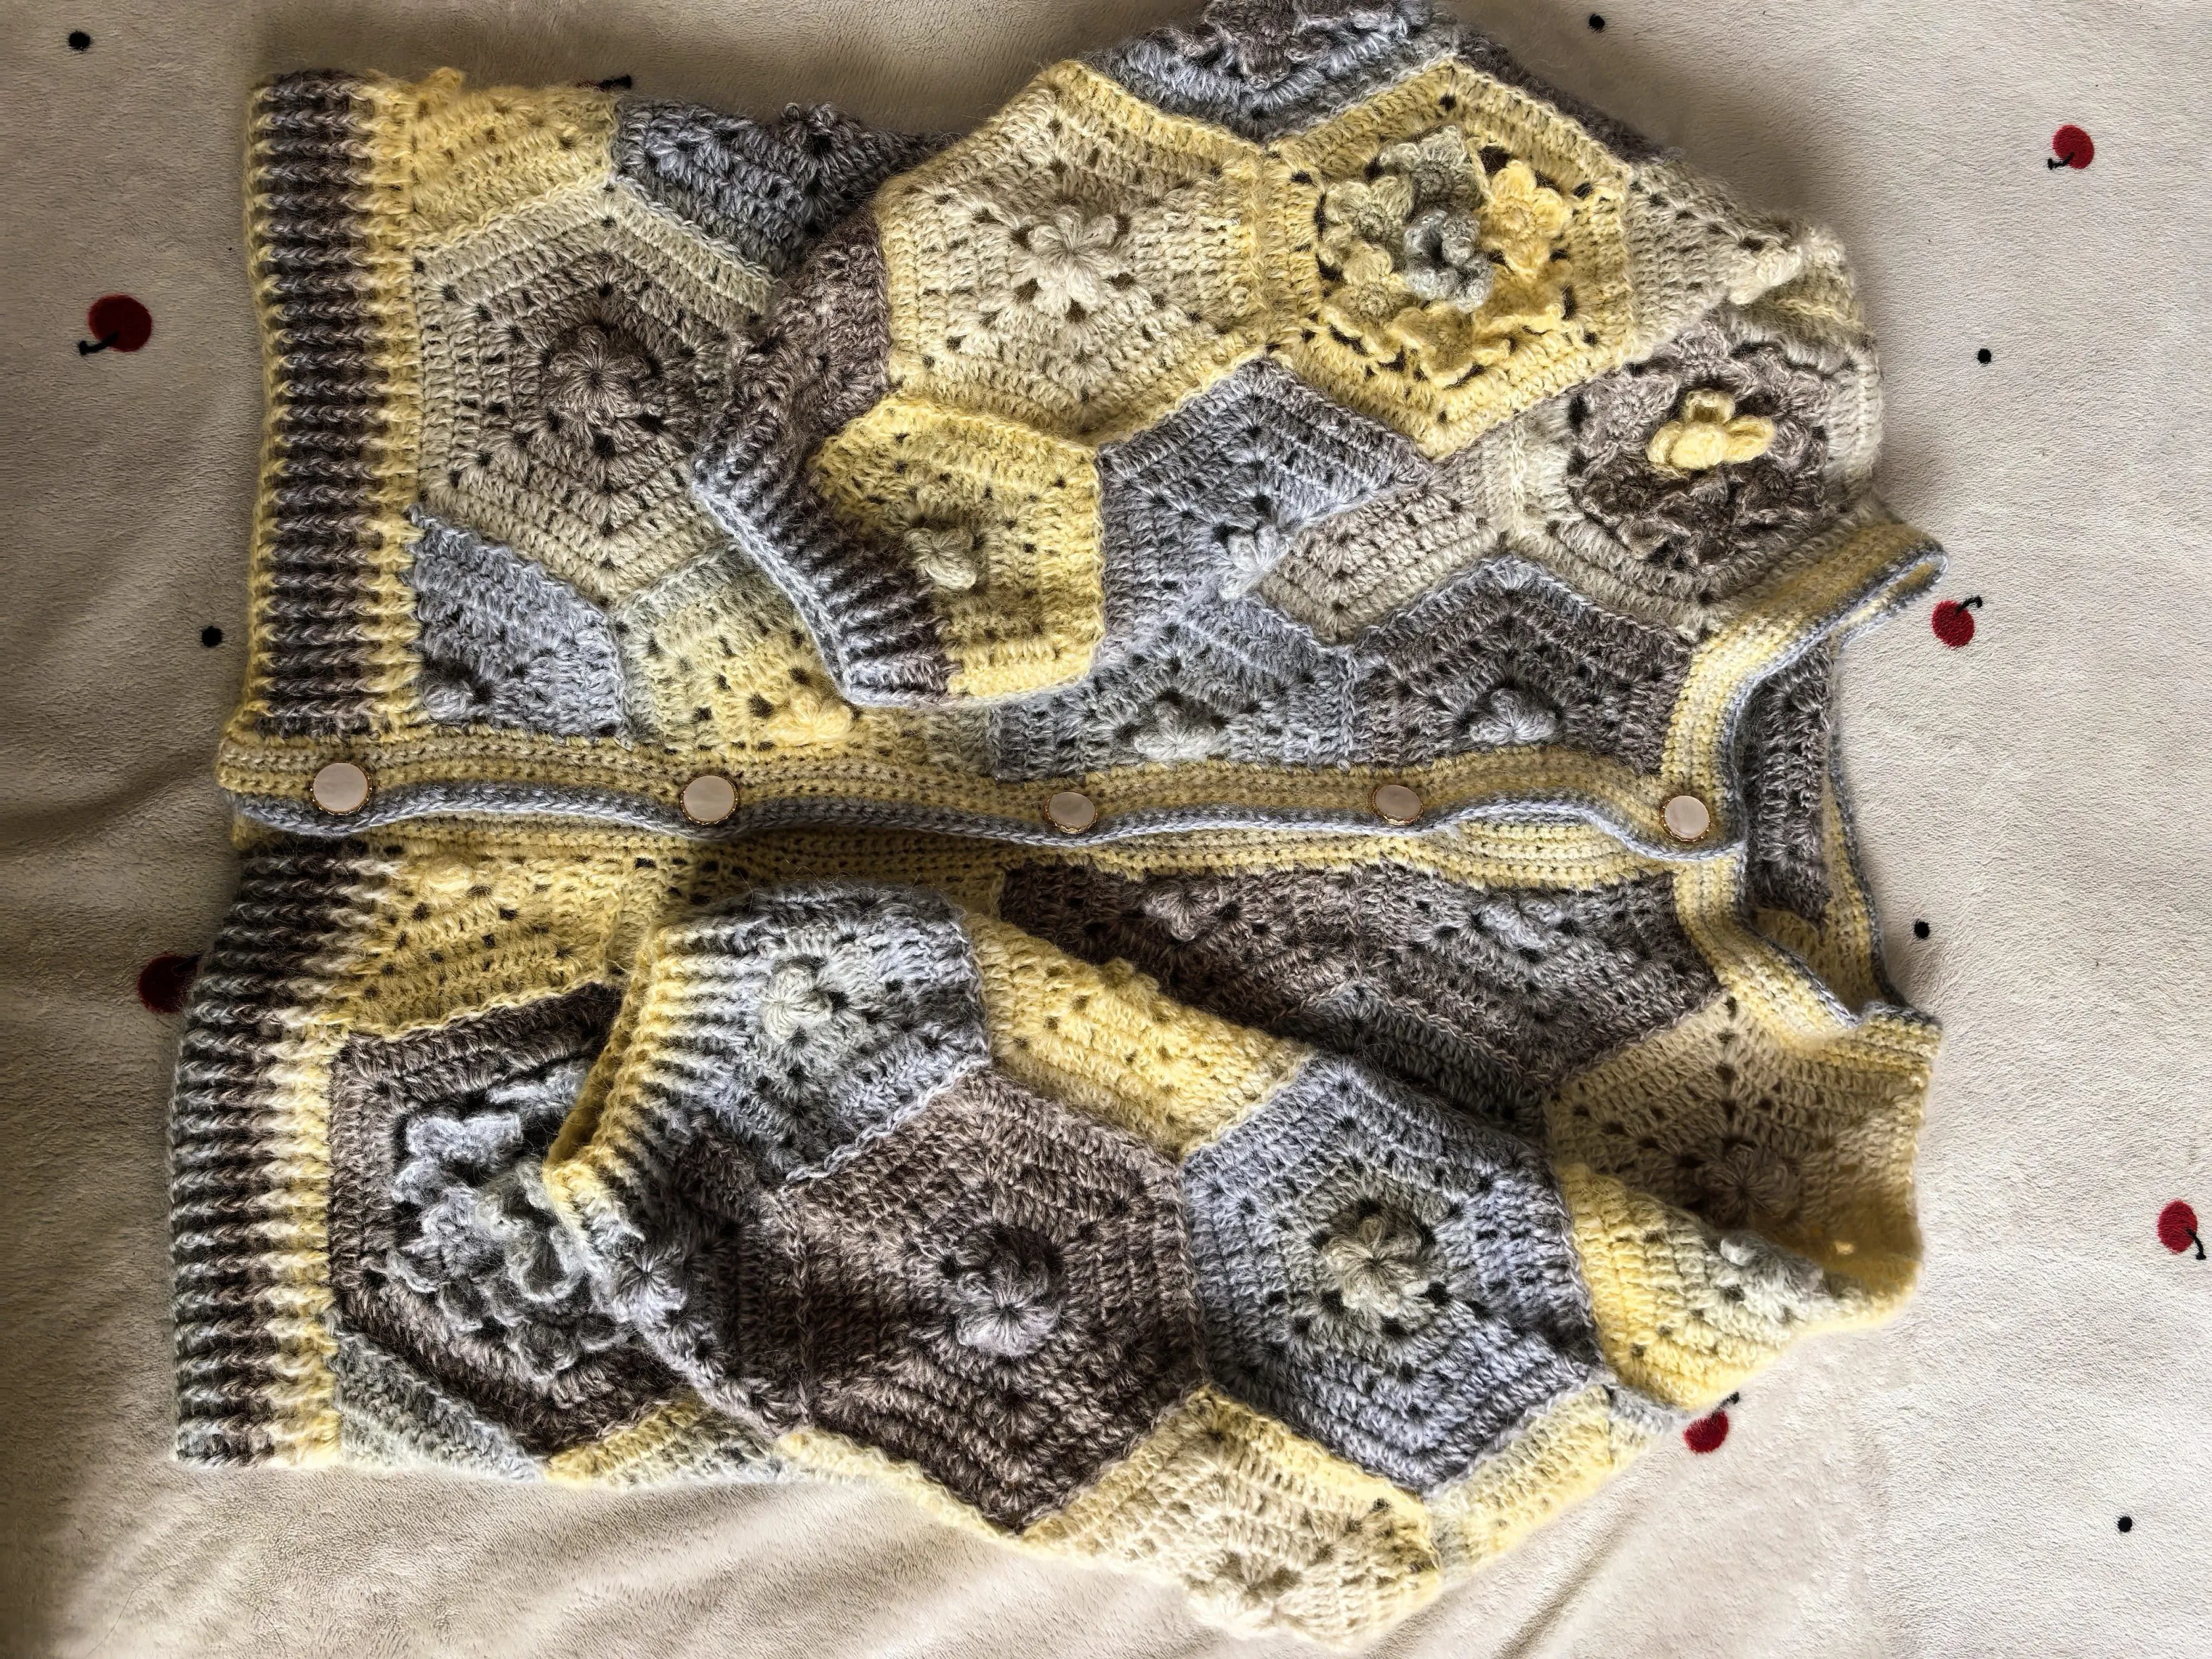
Made by the community