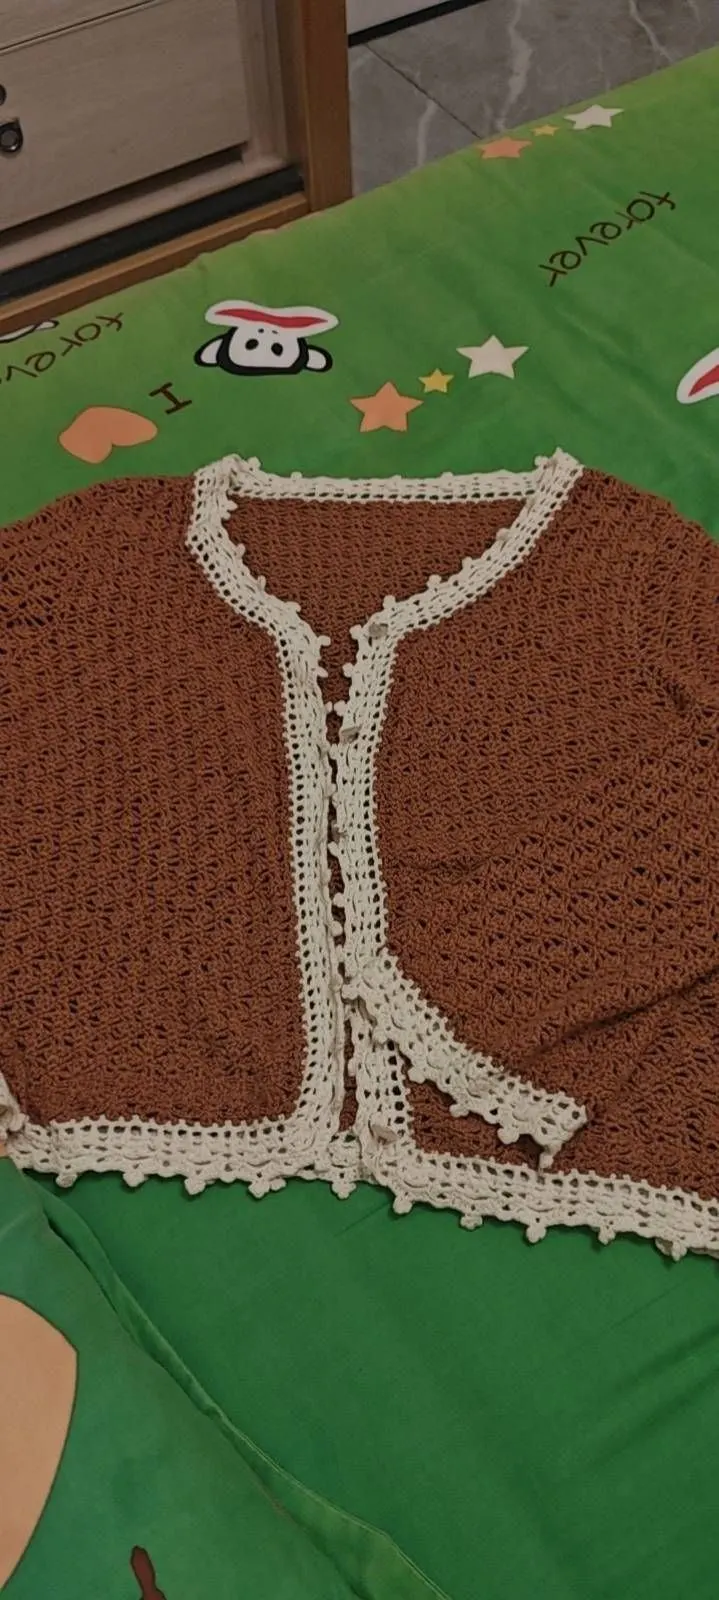
Clothes
Drizzle & Mist
Project preview
See the finished project
Pattern format
Instructions
Watch and follow
Video tutorial
| Style | Yarn | Color |
|---|---|---|
| Burnt Coral - small size middle sleeve | Gem Twist |  08#Bronze x 1 08#Bronze x 1 |
| Alpaca | 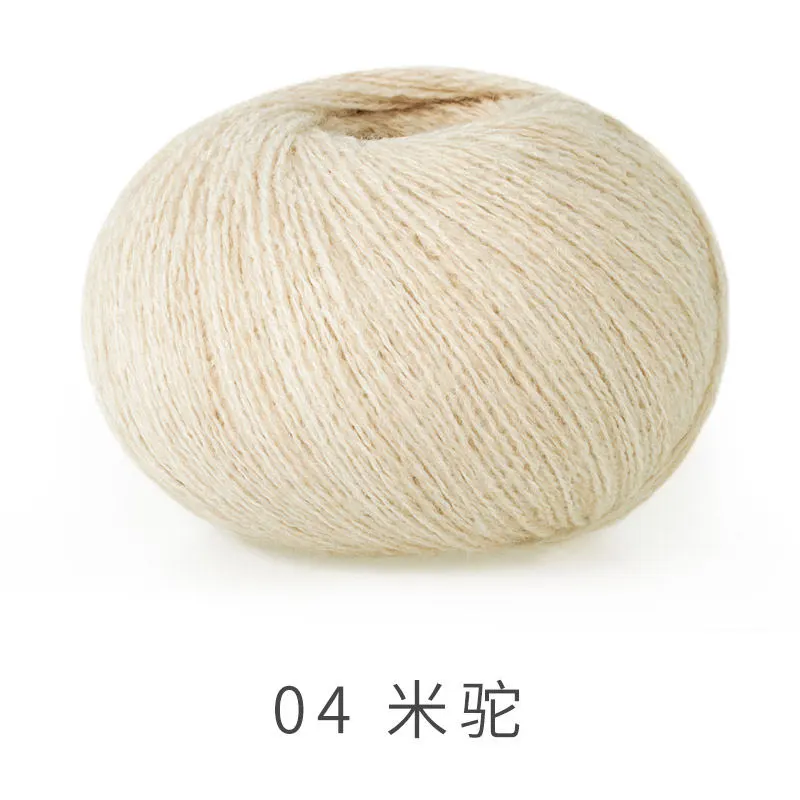 04#Sandshell x 1 04#Sandshell x 1 10#Burnt Coral x 3 10#Burnt Coral x 3 | |
| Burnt Coral - small size long sleeve | Gem Twist | 08#Bronze x 1 |
| Alpaca | 04#Sandshell x 110#Burnt Coral x 4 | |
| Subtle Green - small size middle sleeve | Gem Twist |  06#Silver x 1 06#Silver x 1 |
| Alpaca | 04#Sandshell x 1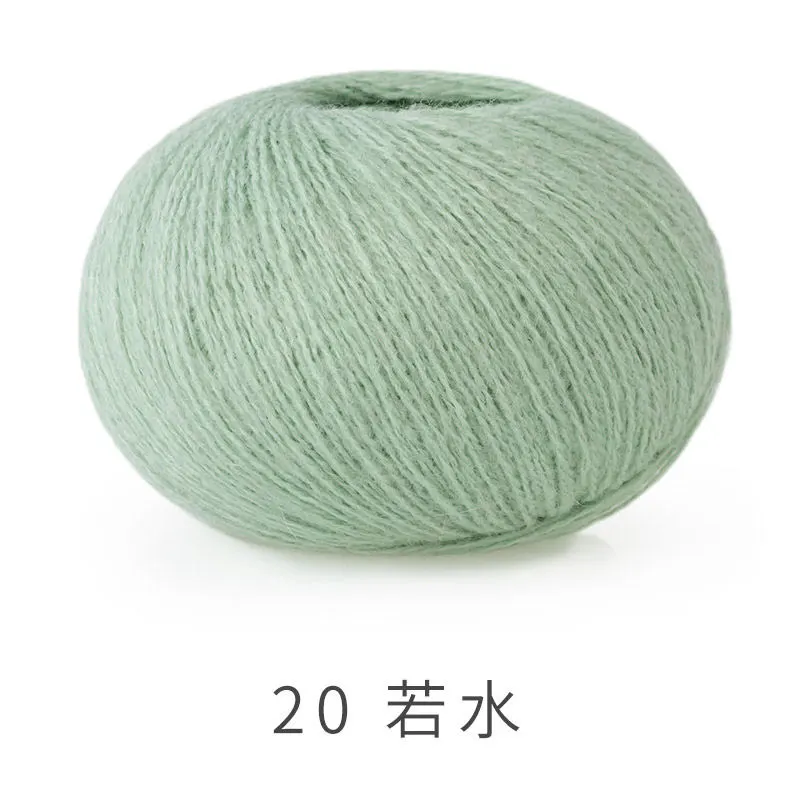 20#Subtle Green x 3 20#Subtle Green x 3 | |
| Subtle Green - small size long sleeve | Gem Twist | 06#Silver x 1 |
| Alpaca | 04#Sandshell x 120#Subtle Green x 4 | |
| Colony Blue - small size middle sleeve | Gem Twist | 06#Silver x 1 |
| Alpaca | 04#Sandshell x 1 26#Colony Blue x 3 26#Colony Blue x 3 | |
| Colony Blue - small size long sleeve | Gem Twist | 06#Silver x 1 |
| Alpaca | 04#Sandshell x 126#Colony Blue x 4 |
Burnt Coral - small size middle sleeve
08#Bronze x 1Burnt Coral - small size long sleeve
08#Bronze x 1Subtle Green - small size middle sleeve
06#Silver x 1Subtle Green - small size long sleeve
06#Silver x 1Colony Blue - small size middle sleeve
06#Silver x 1Colony Blue - small size long sleeve
06#Silver x 1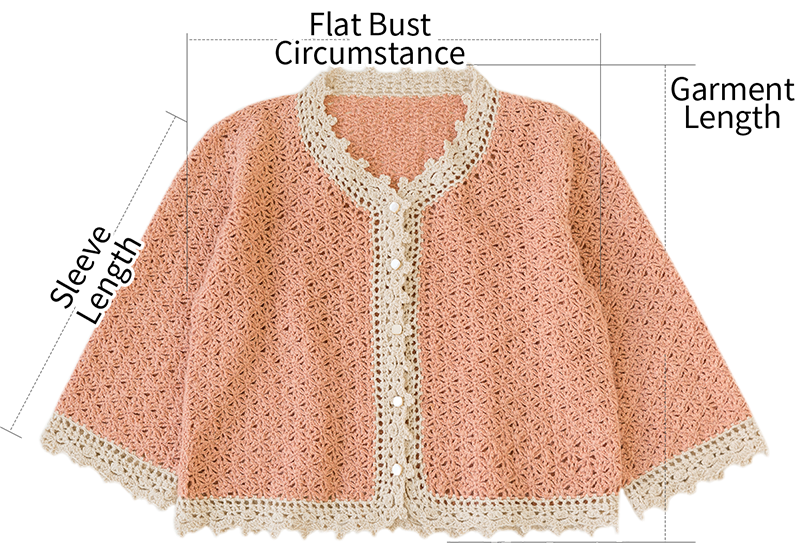
| Unit:cm | Garment Length | Flat Bust Circumstance | Middle Sleeve | Longer Sleeve |
| Small Size | 46 | 47 | 37 | 50 |
| Largre Size | 53 | 50 | ||
Note: There might be some error in manual measurement; the dimensions of the sample are for reference only. | ||||
Materials: Gem Twist & Alpaca
Tool: 2.00 mm Crochet Hook
Use the main color yarn for all parts except the edging, which should be crocheted with the contrasting color yarn.






Note: This pattern is making in Chinese crochet pattern terms, and the stitch name is written using American terminology. All measurements in charts are in cm.

Part 1 Back Piece A 01' 02''
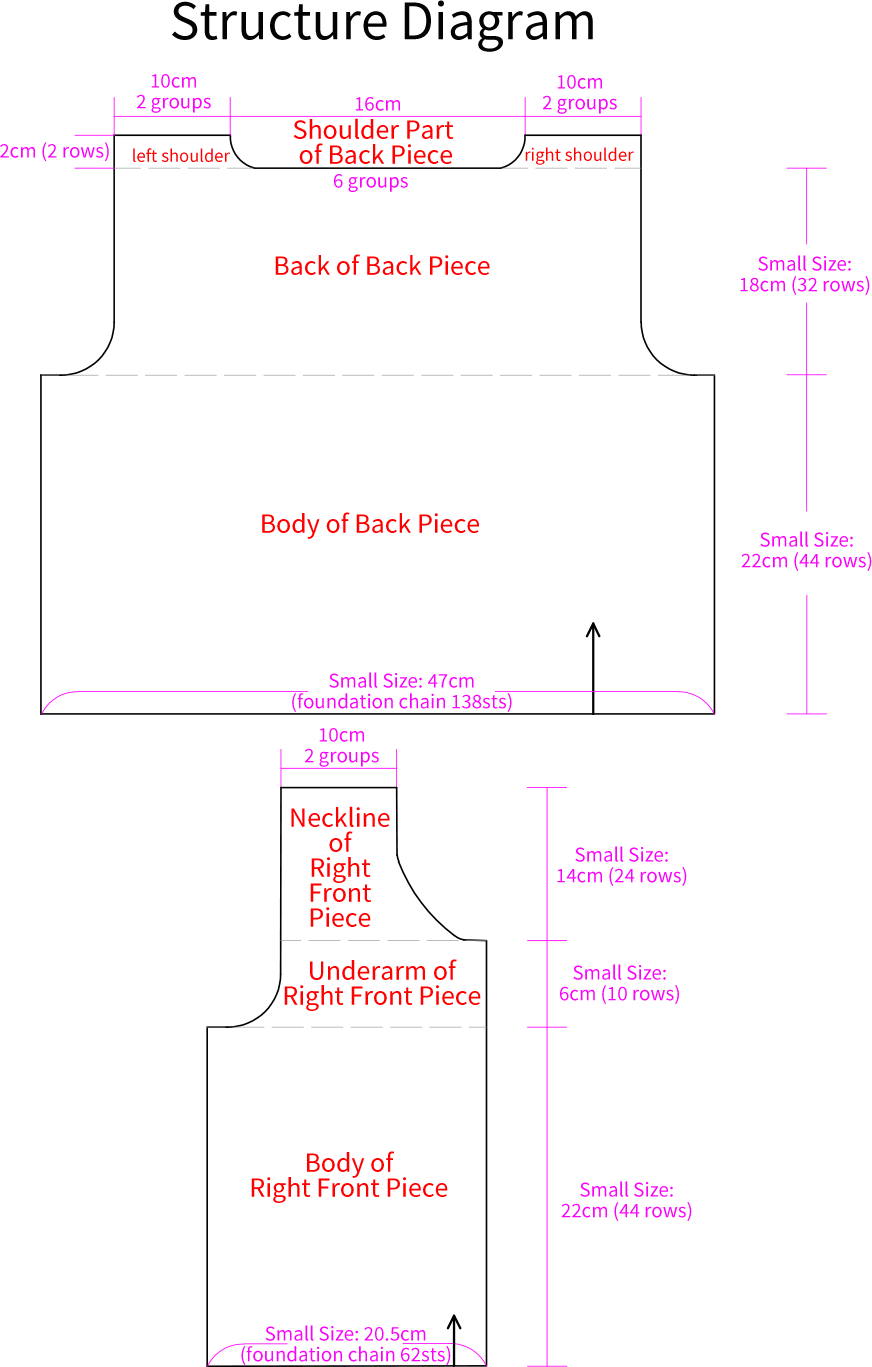
The back piece is divided into three sections: the body, the back, and the shoulder-neck area. Start by crocheting the body section using the foundation chain, then work back and forth along that foundation row to build upward. For details, please refer to the video demonstration.
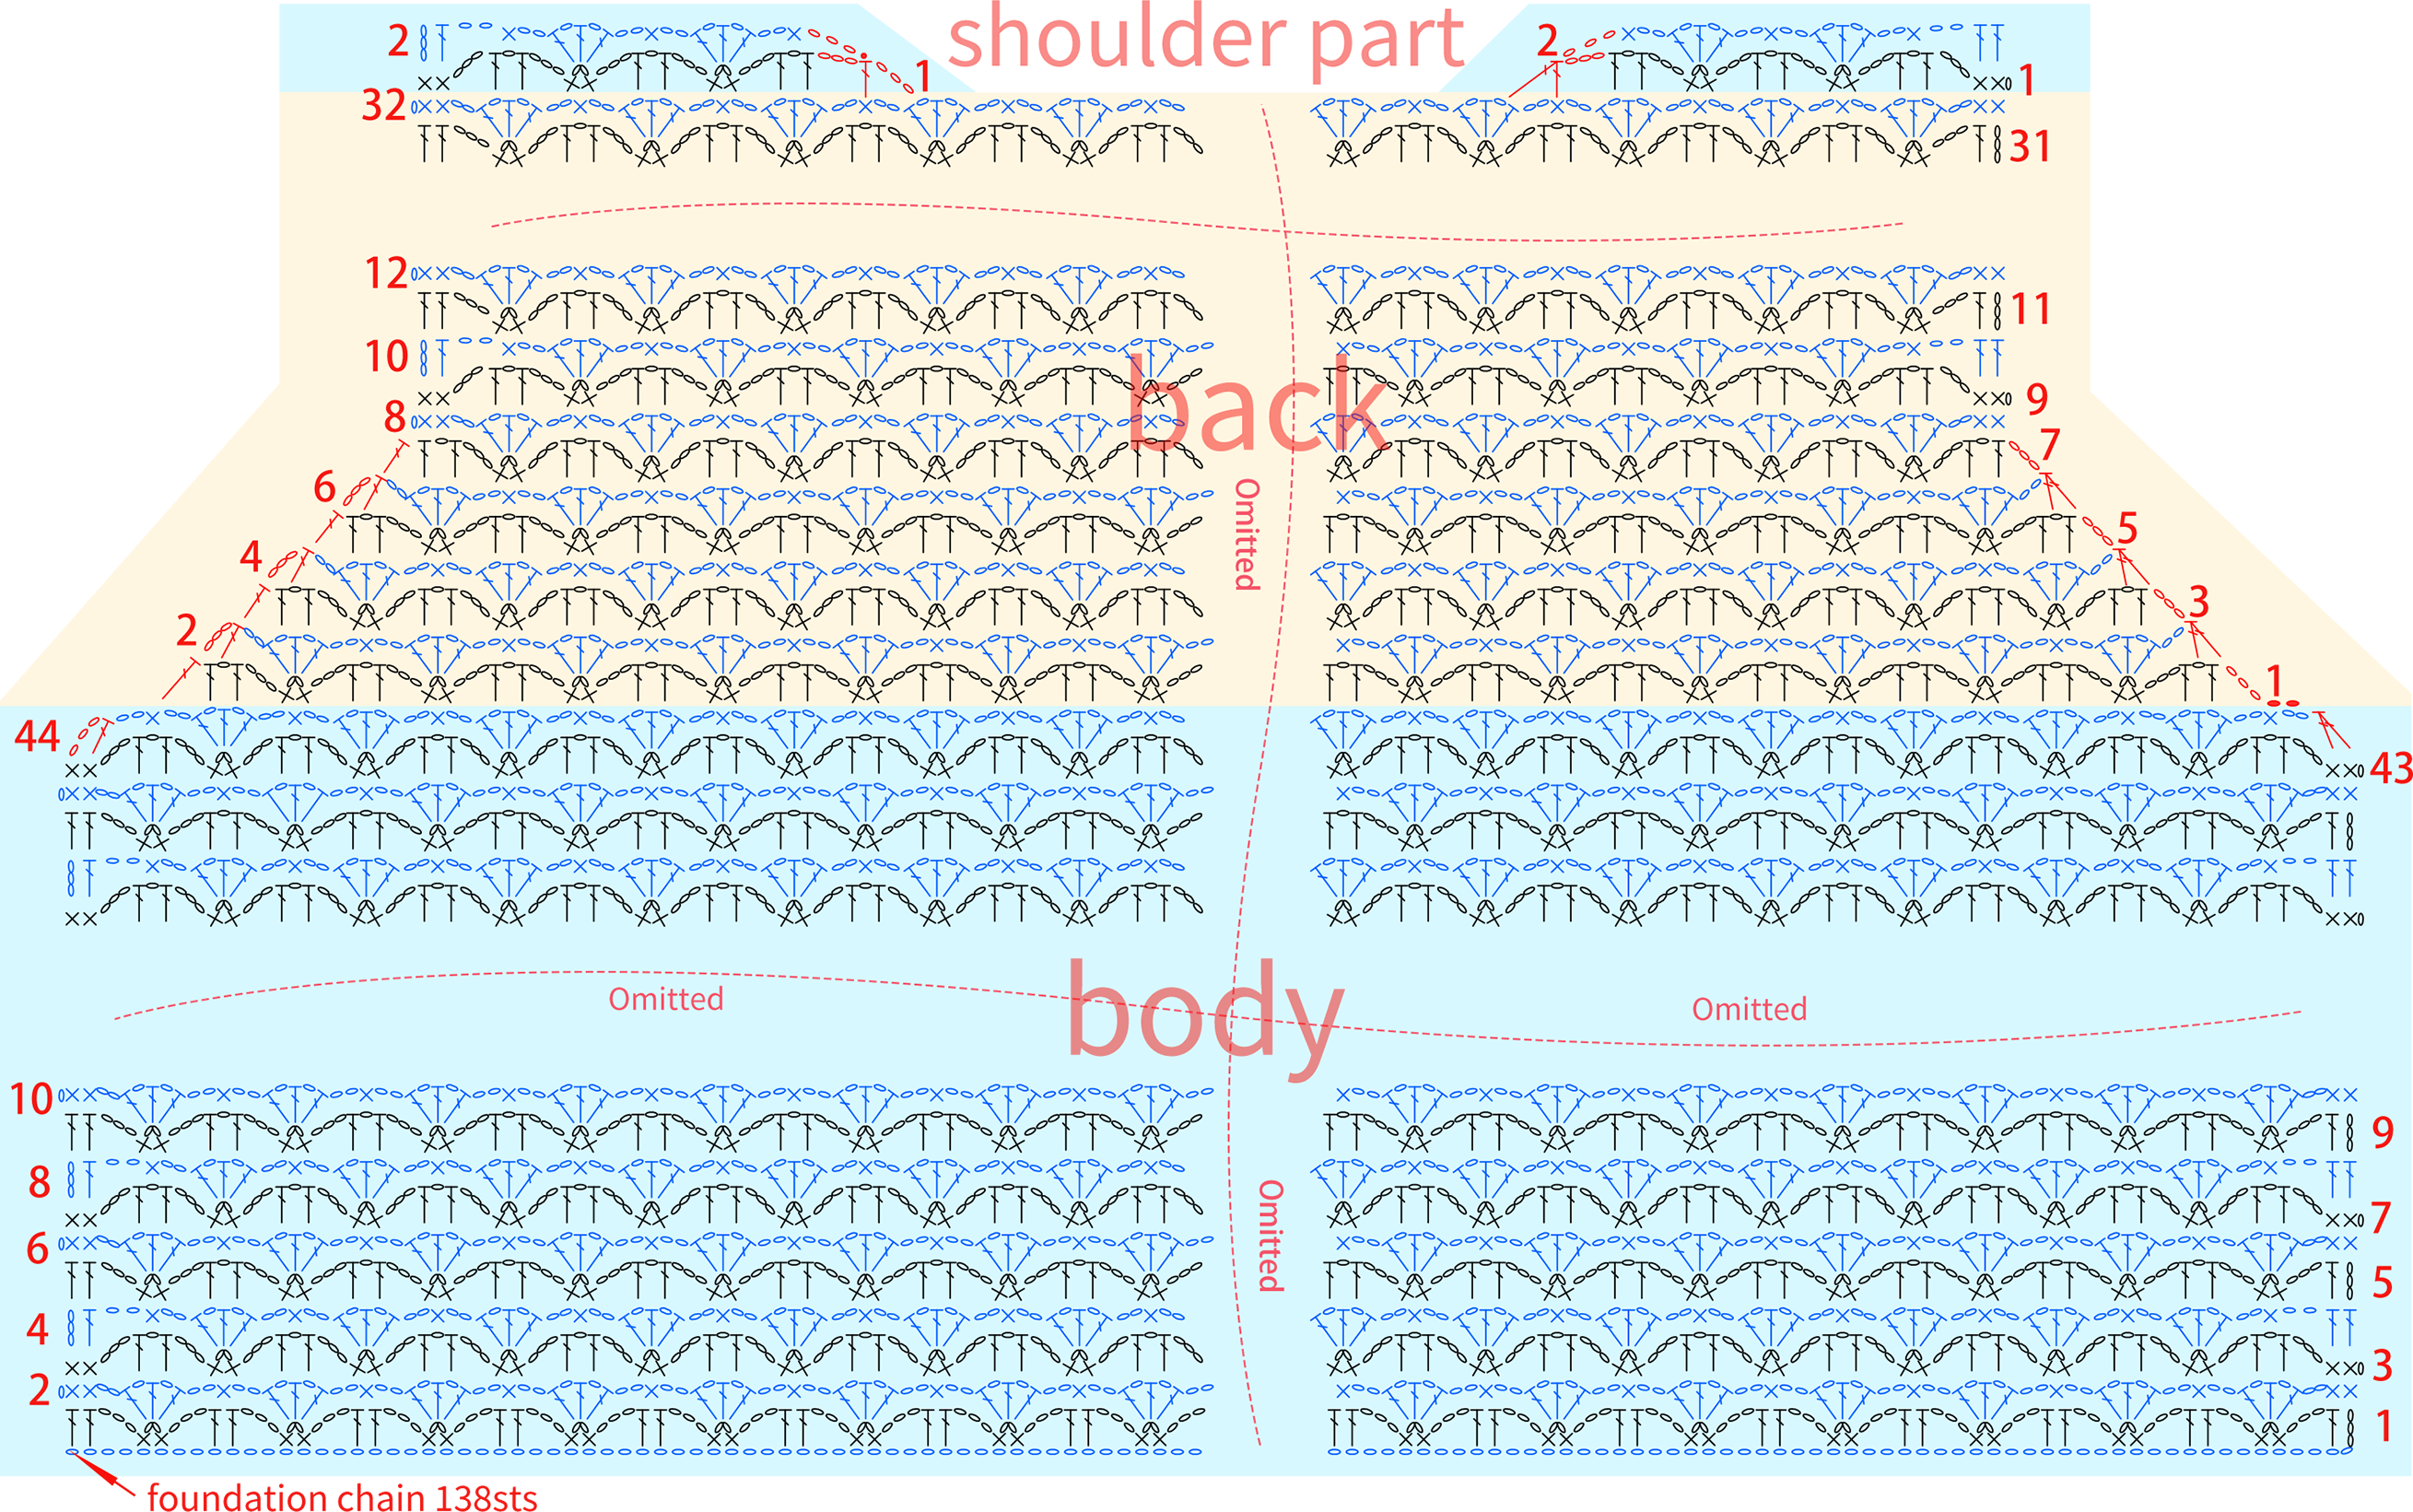
Note:
The body part of the back piece has a total of 44 rows. From Row 6 to Row 41, repeat the stitch pattern of Rows 2 to 5 for 9 times.
The back part of the back piece has a total of 32 rows. From Row 12 to Row 31, repeat the stitch pattern of Rows 8 to 11 for 5 times.
Part 2 Front Piece B 28' 56''
The front piece includes the left front piece and right front piece, each divided into three parts: body, underarm, and neckline. It also starts with the foundation chain and is crocheted back and forth in rows. For details, please refer to the video demonstration.
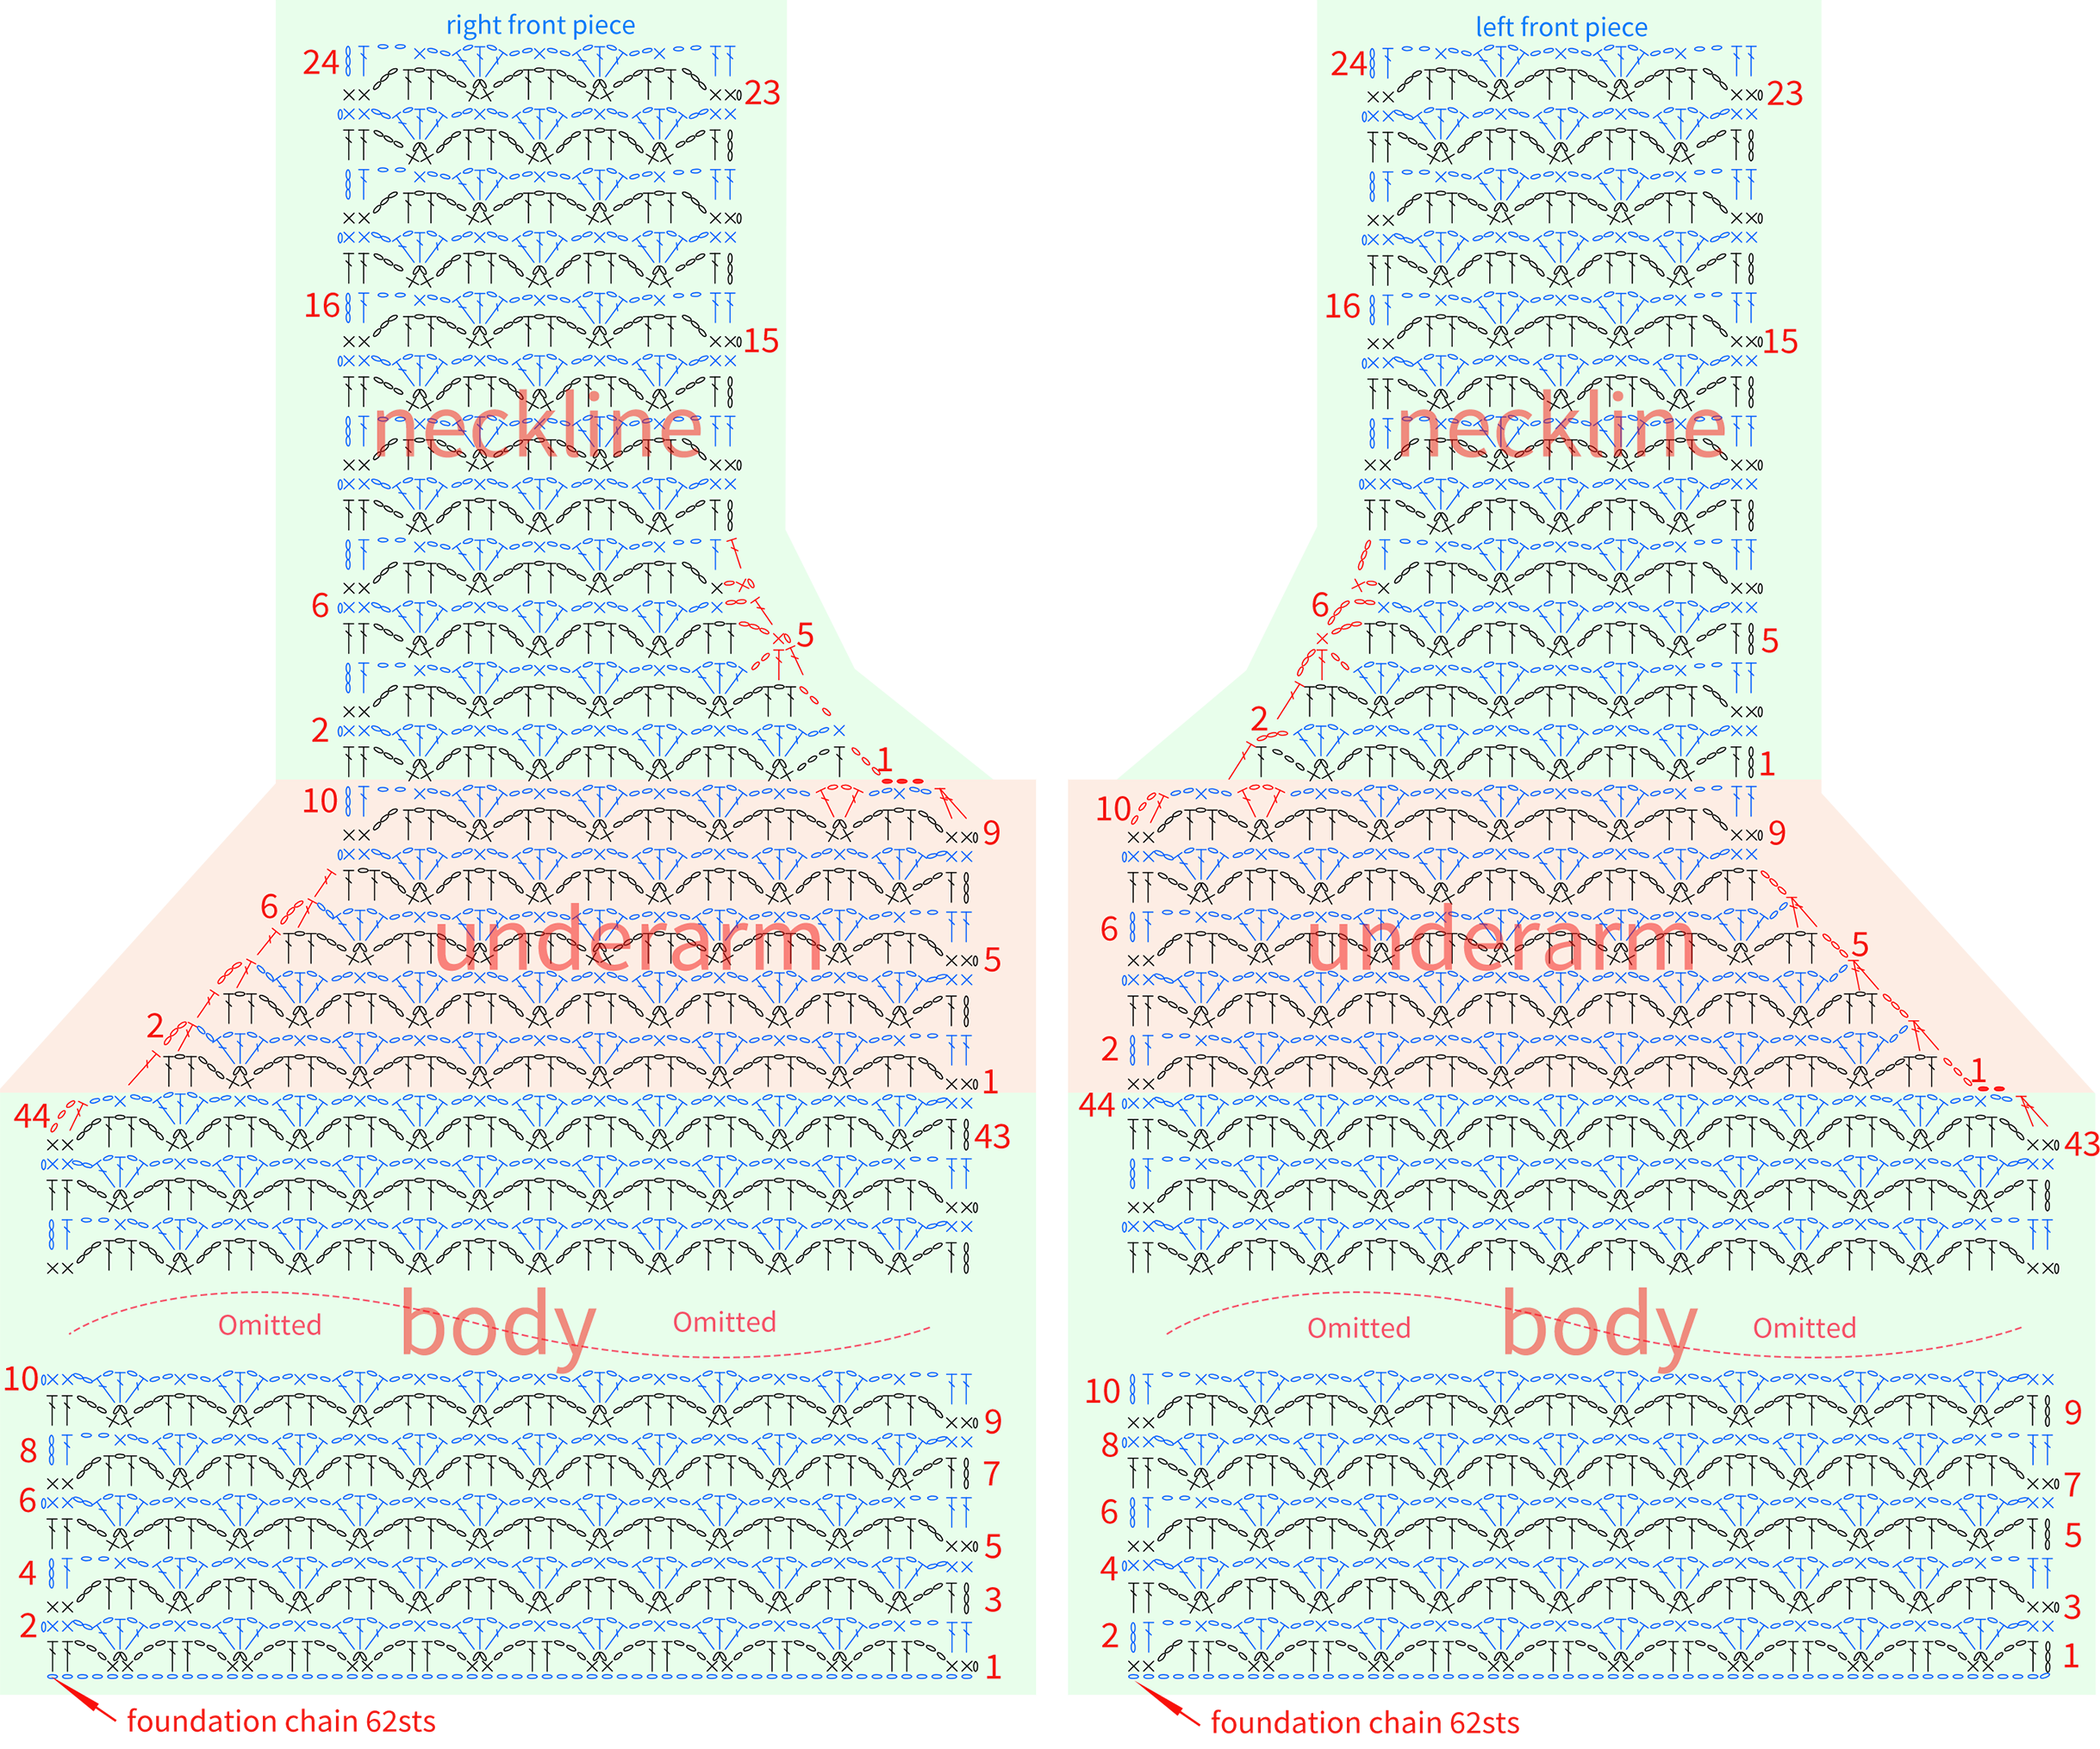
Note:
The piece that will be on the left side when worn is called the left front piece, and the other one is called the right front piece.
For the larger sizes, the body part of the front piece consists of 44 rows in total. Rows 6–41 repeat the stitch pattern from Rows 2–5 a total of 9 times.
Part 3 Sleeve *2 C 30' 04''
The crochet method for both sleeve pieces is the same. Start with the foundation chain and crochet back and forth. For details, please refer to the video demonstration.
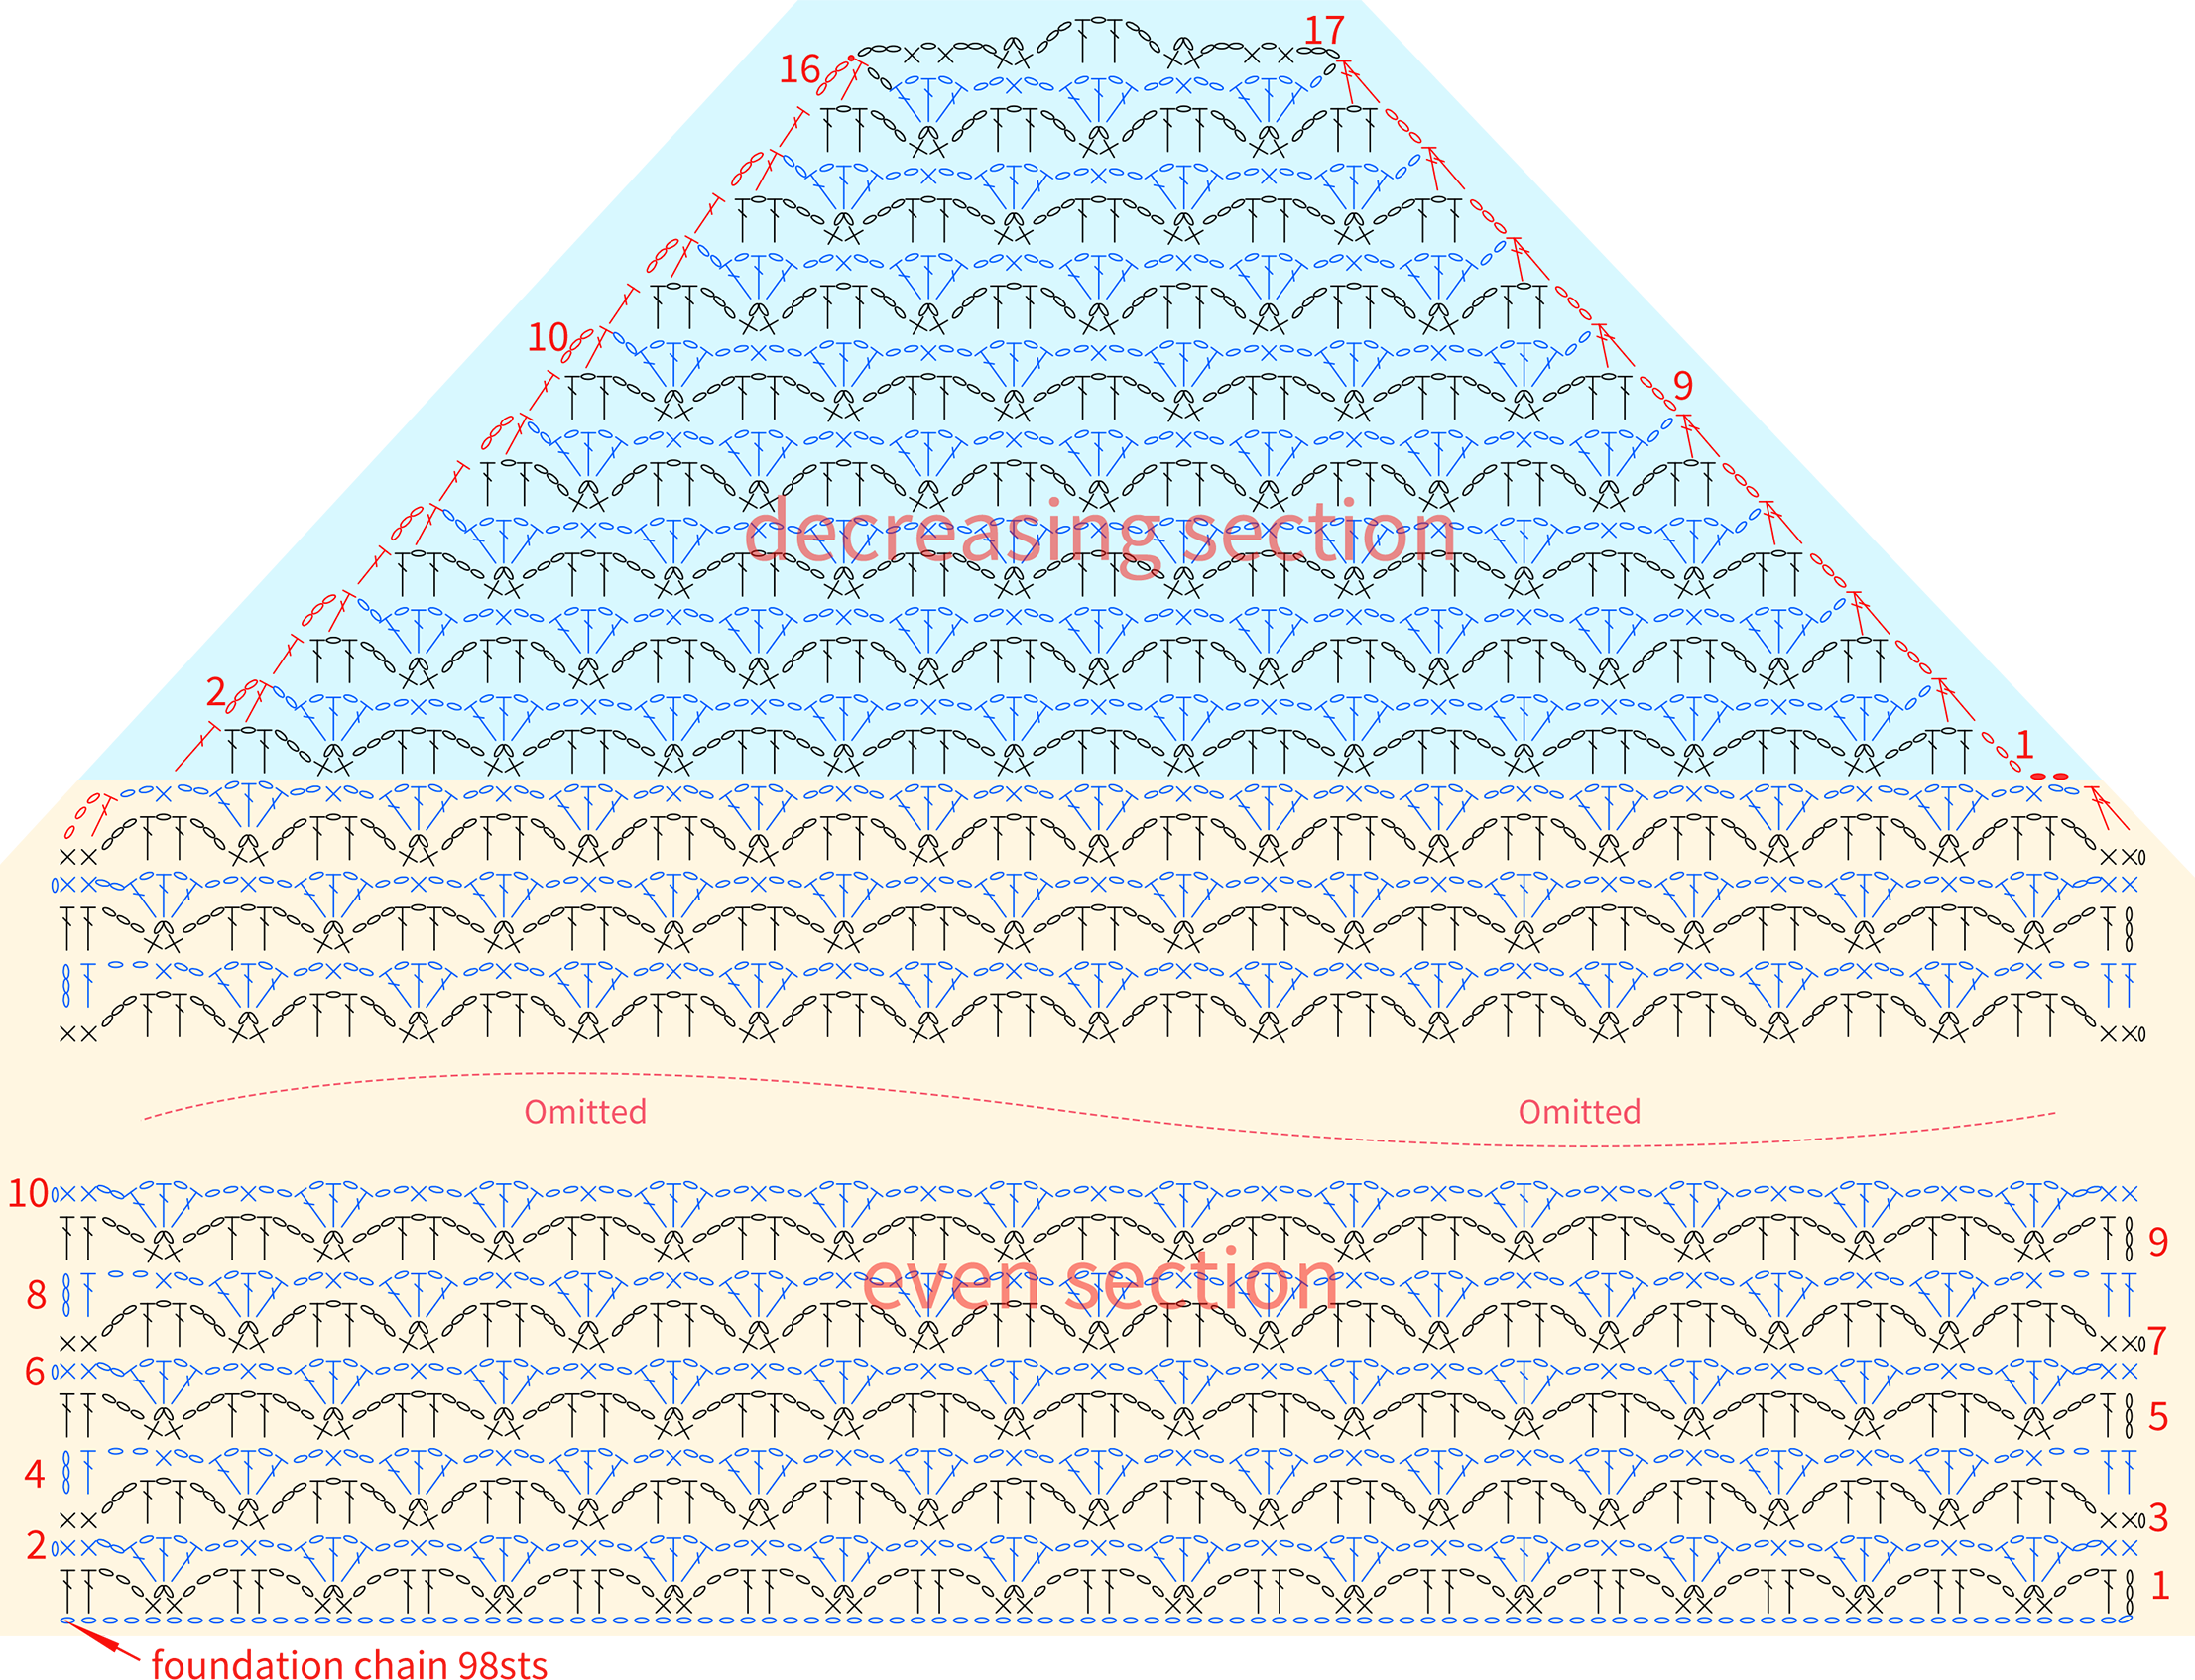
Even section of Sleeve: For long sleeves, work 72 rows total. From Row 6 to Row 69, repeat the stitch pattern from Rows 2–5 a total of 16 times. For short sleeves, work 44 rows total. From Row 6 to Row 41, repeat the stitch pattern from Rows 2–5 a total of 9 times.
Part 4 Joining D
All joining are made on the wrong side of the fabric. First, join the left and right front pieces to the back piece, then join the sleeves to the underarm. All joining are made by repeating 1 slip stitch and 3 chains.
Step 1 Front and Back Pieces Joining D1 30' 54''
Joining the front and back pieces includes joining the body parts and the shoulder parts. For details, please refer to the video demonstration.
Step 2 Sleeve Joining D2 39' 40''
First, refer to the sleeve joining diagram to join the sleeve pieces into a sleeve tube shape. Then, join it to the underarm areas of the front and back pieces. Both joining are made using slip stitches and chains. For details, please refer to the video demonstration.
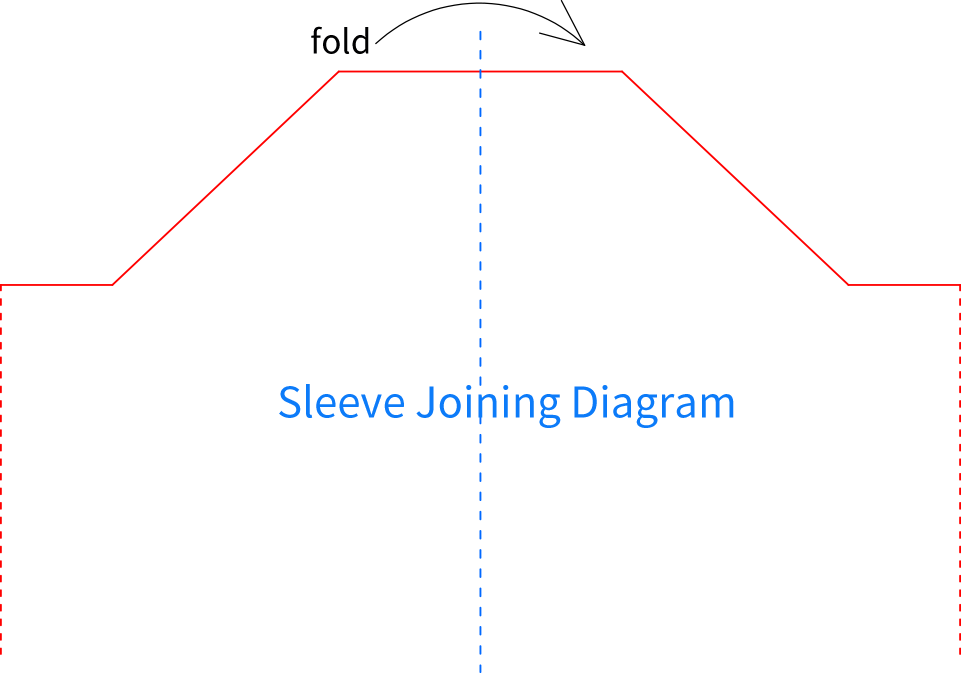
Note:
After folding in half, first join the dotted line section.
Then join the solid line section to the underarm area of the garment.
Part 5 Edging E
Including the body edging and cuff edging.
Step 1 Body Edging E1 46' 01''
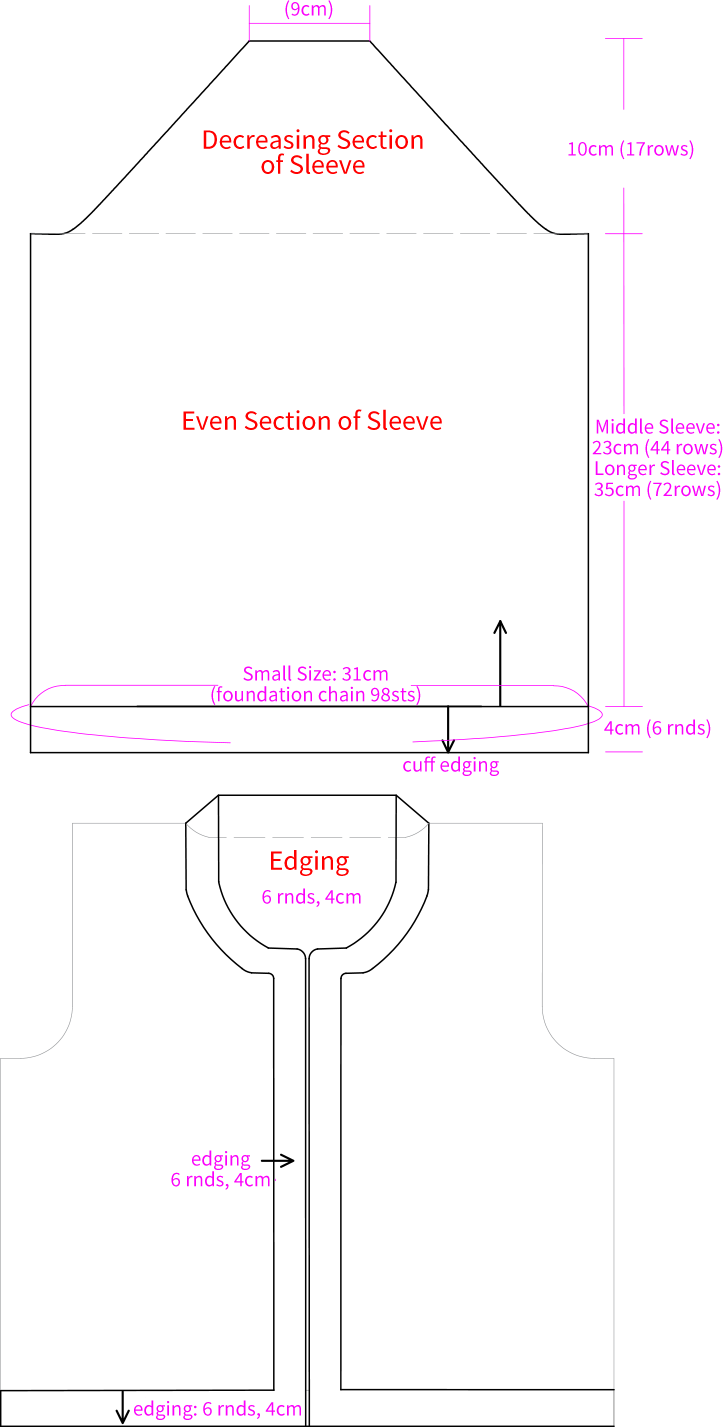
Insert the hook at the bottom of the left front piece, and crochet along the left front hem, back hem, right front hem, right front band, neckline, and left front band, all the way back to the starting position at the bottom of the left front piece. Crochet in rounds for 6 rounds. Please refer to the video demonstration for details.

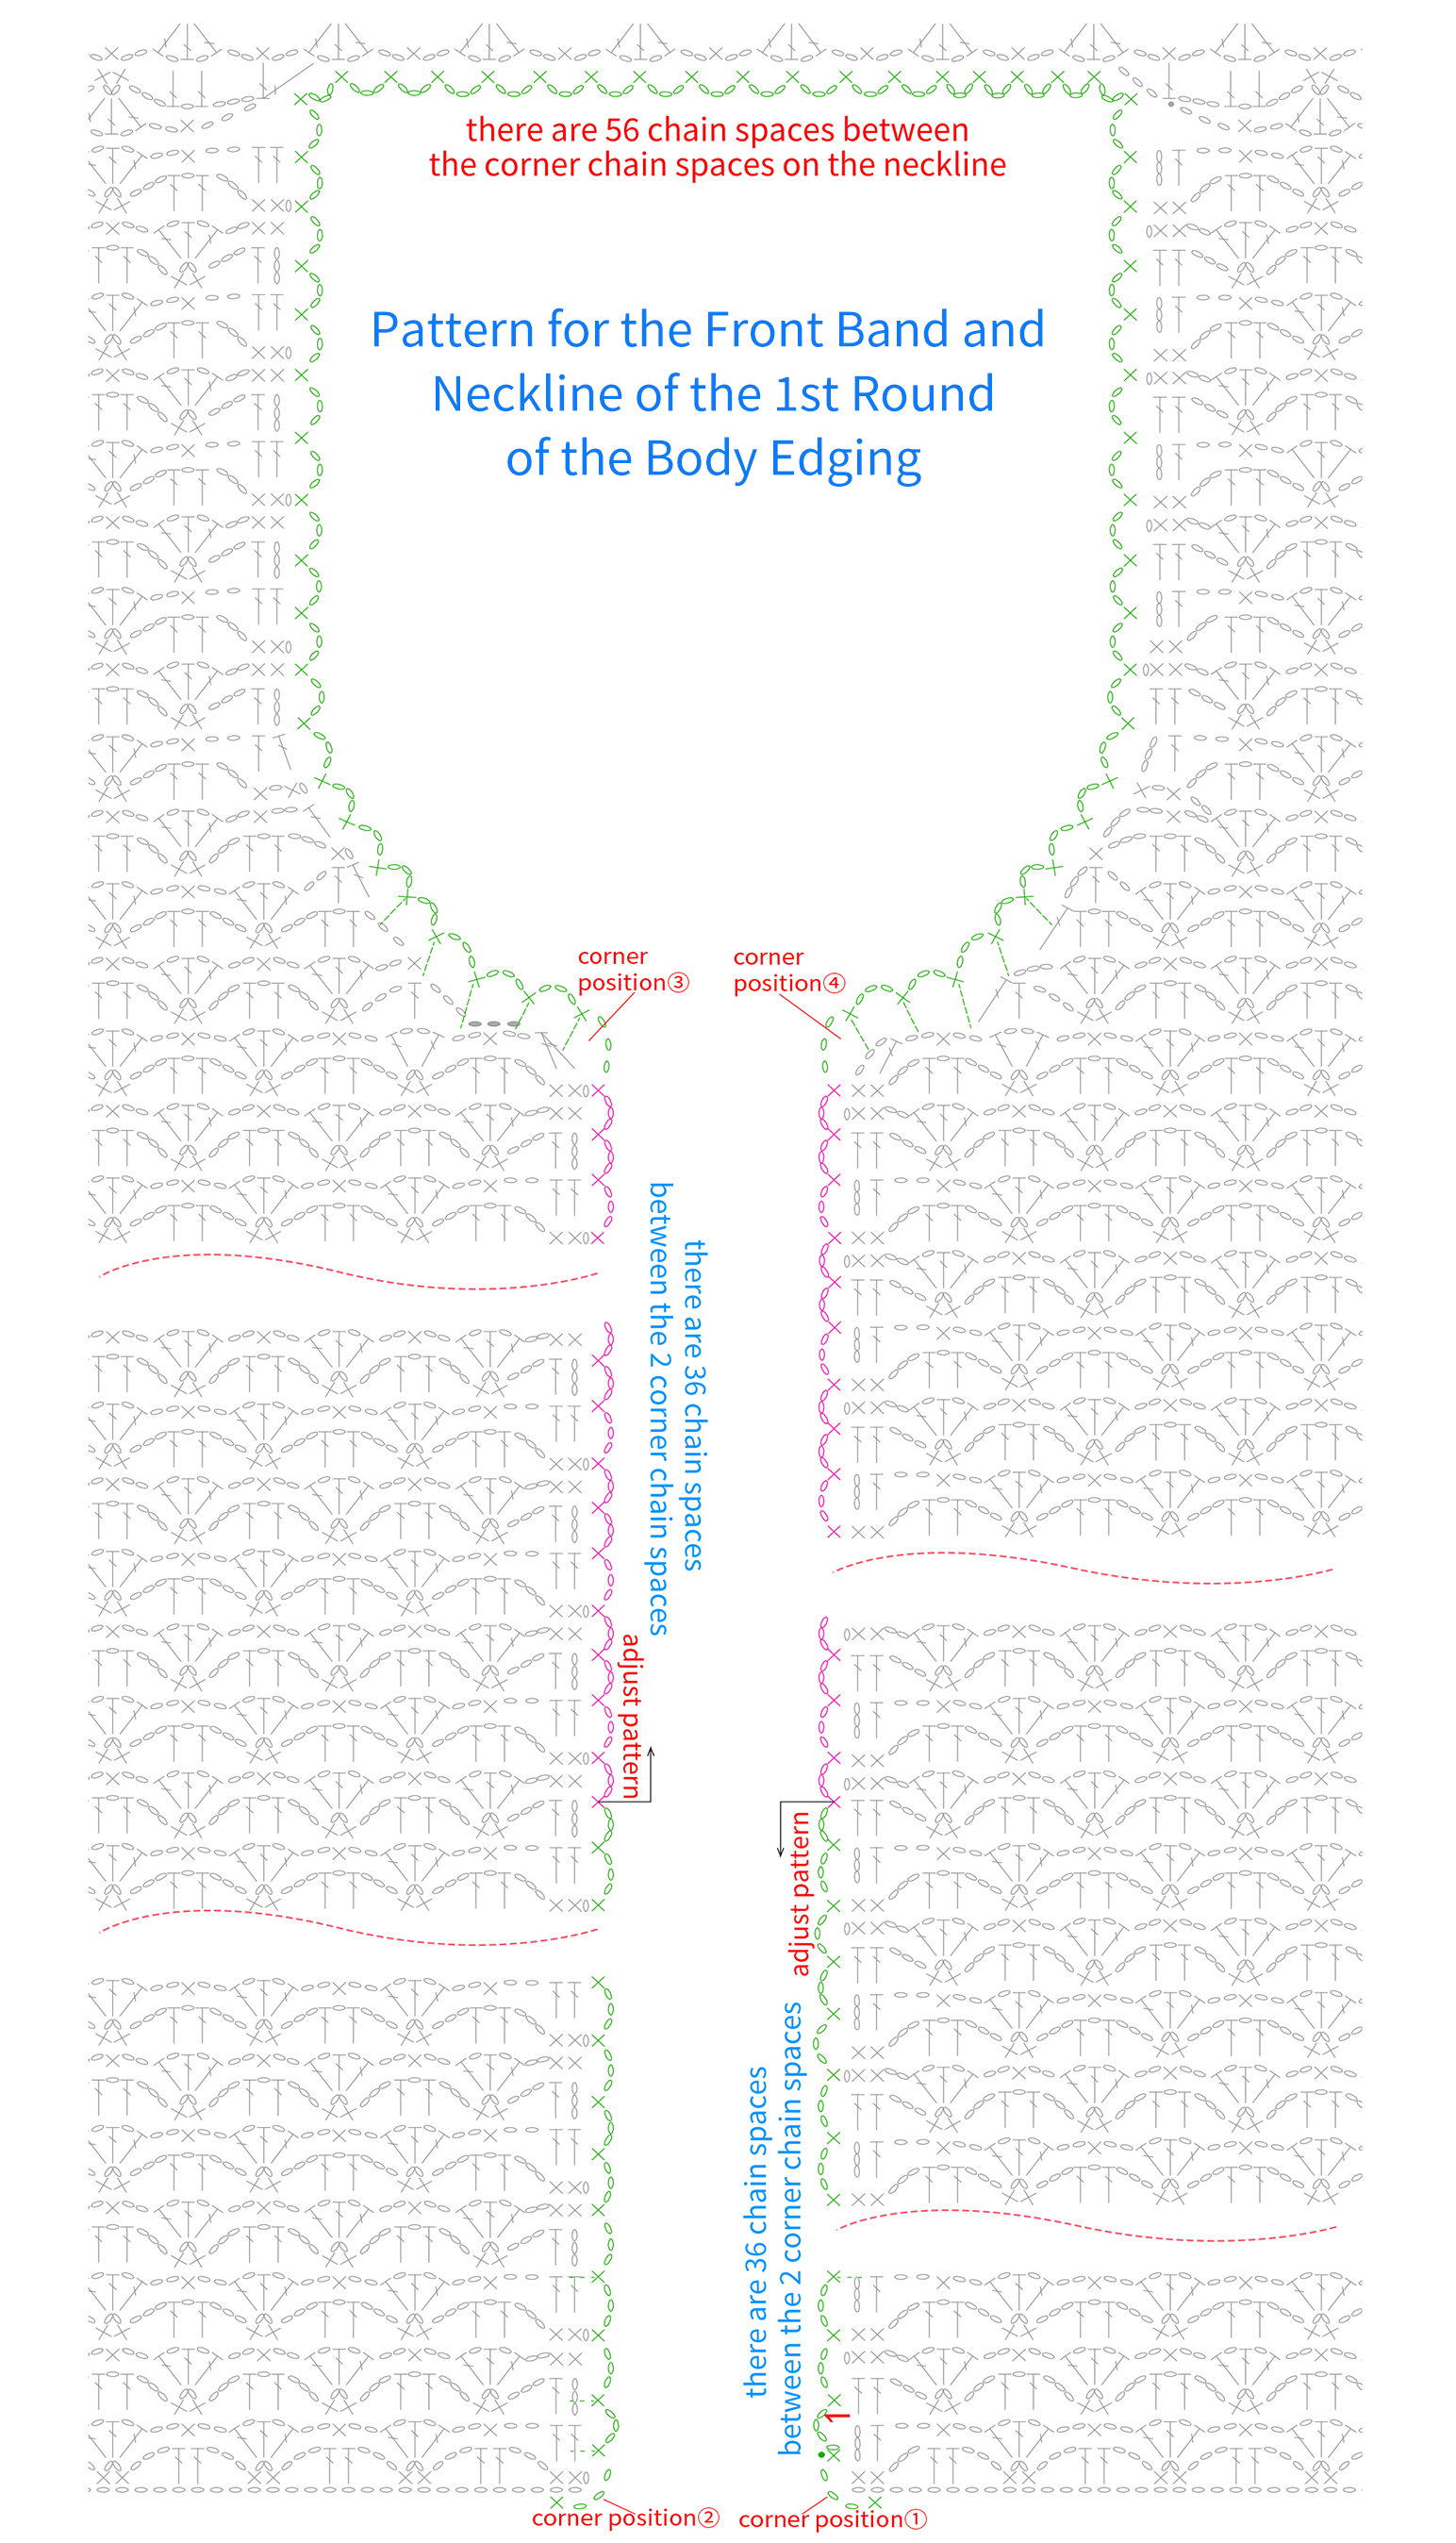
Note: For the 1st round of edging, refer to the chart to crochet. There are 4 corner positions in total. The number of chain spaces between each corner is fixed, so you need to check and match as you crochet.
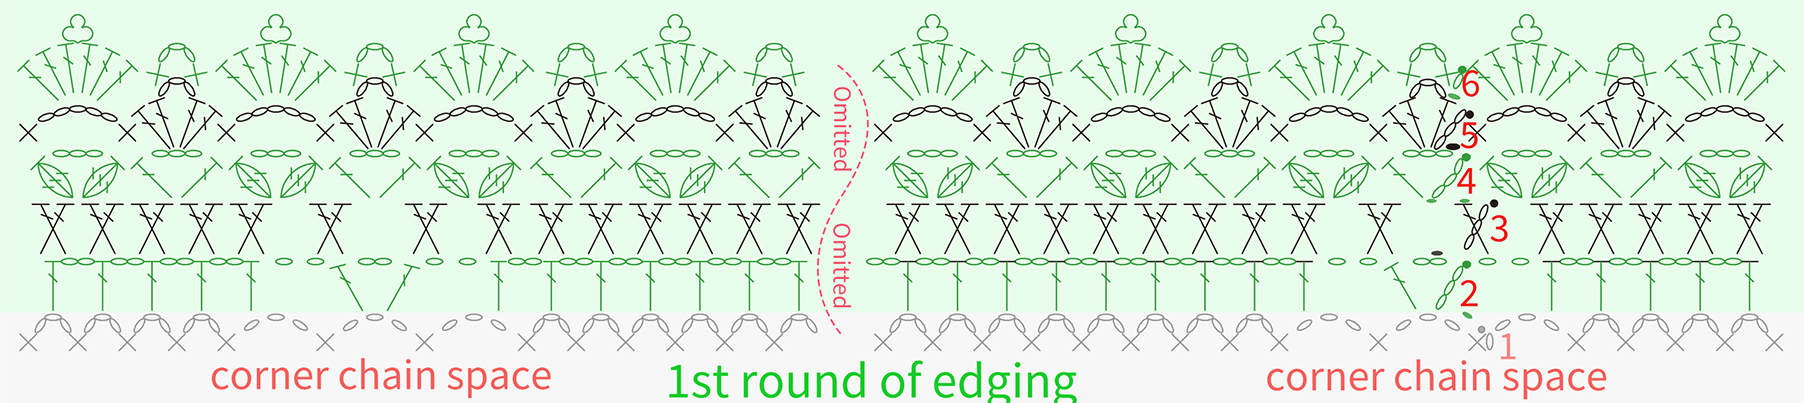

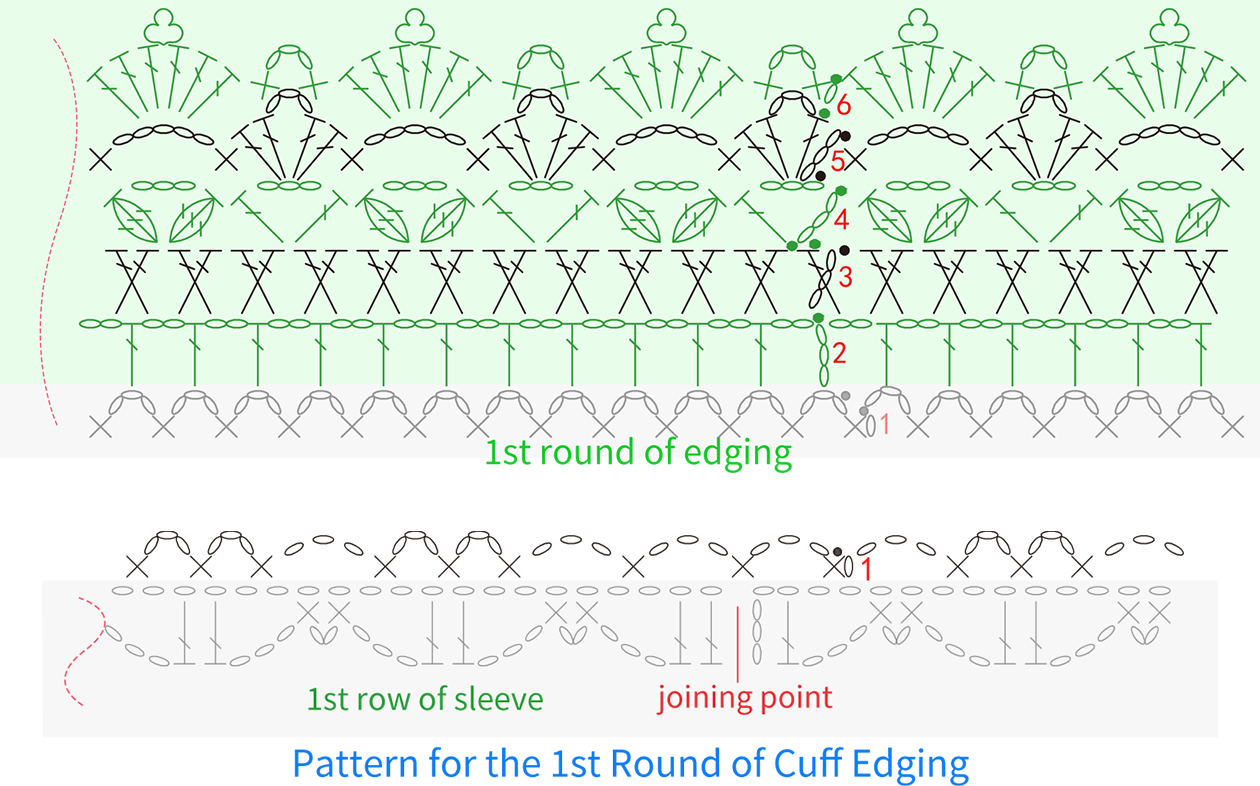
Step 2 Cuff Edging E2 65' 53''
The edging is done in the same way as the body edging. Just follow the chart for crocheting.
Step 3 Button Sewing E3 66' 02'' (use Alpaca)
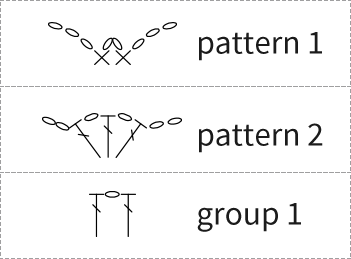
The buttons are sewn onto the left front piece. The first button is placed at the corner position of the front band on the left front piece, specifically on the double crochet stitch to the left of the first group 2. For the remaining four buttons, each should be sewn with an interval of one group 2 in between. They are attached on the double crochet stitches to the left of the second group 2 on the left side. Please refer to the video demonstration for details.
Made by the community