Home / Blanket
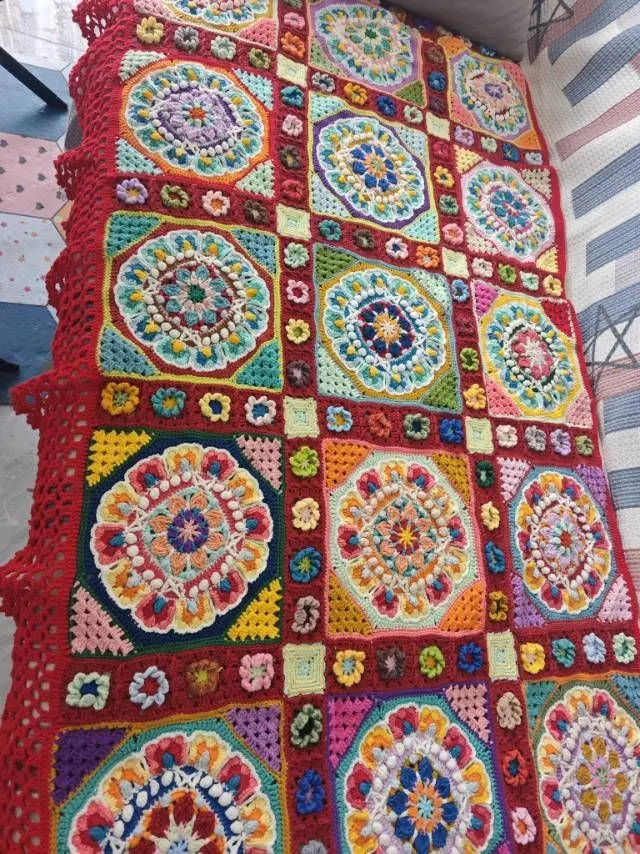
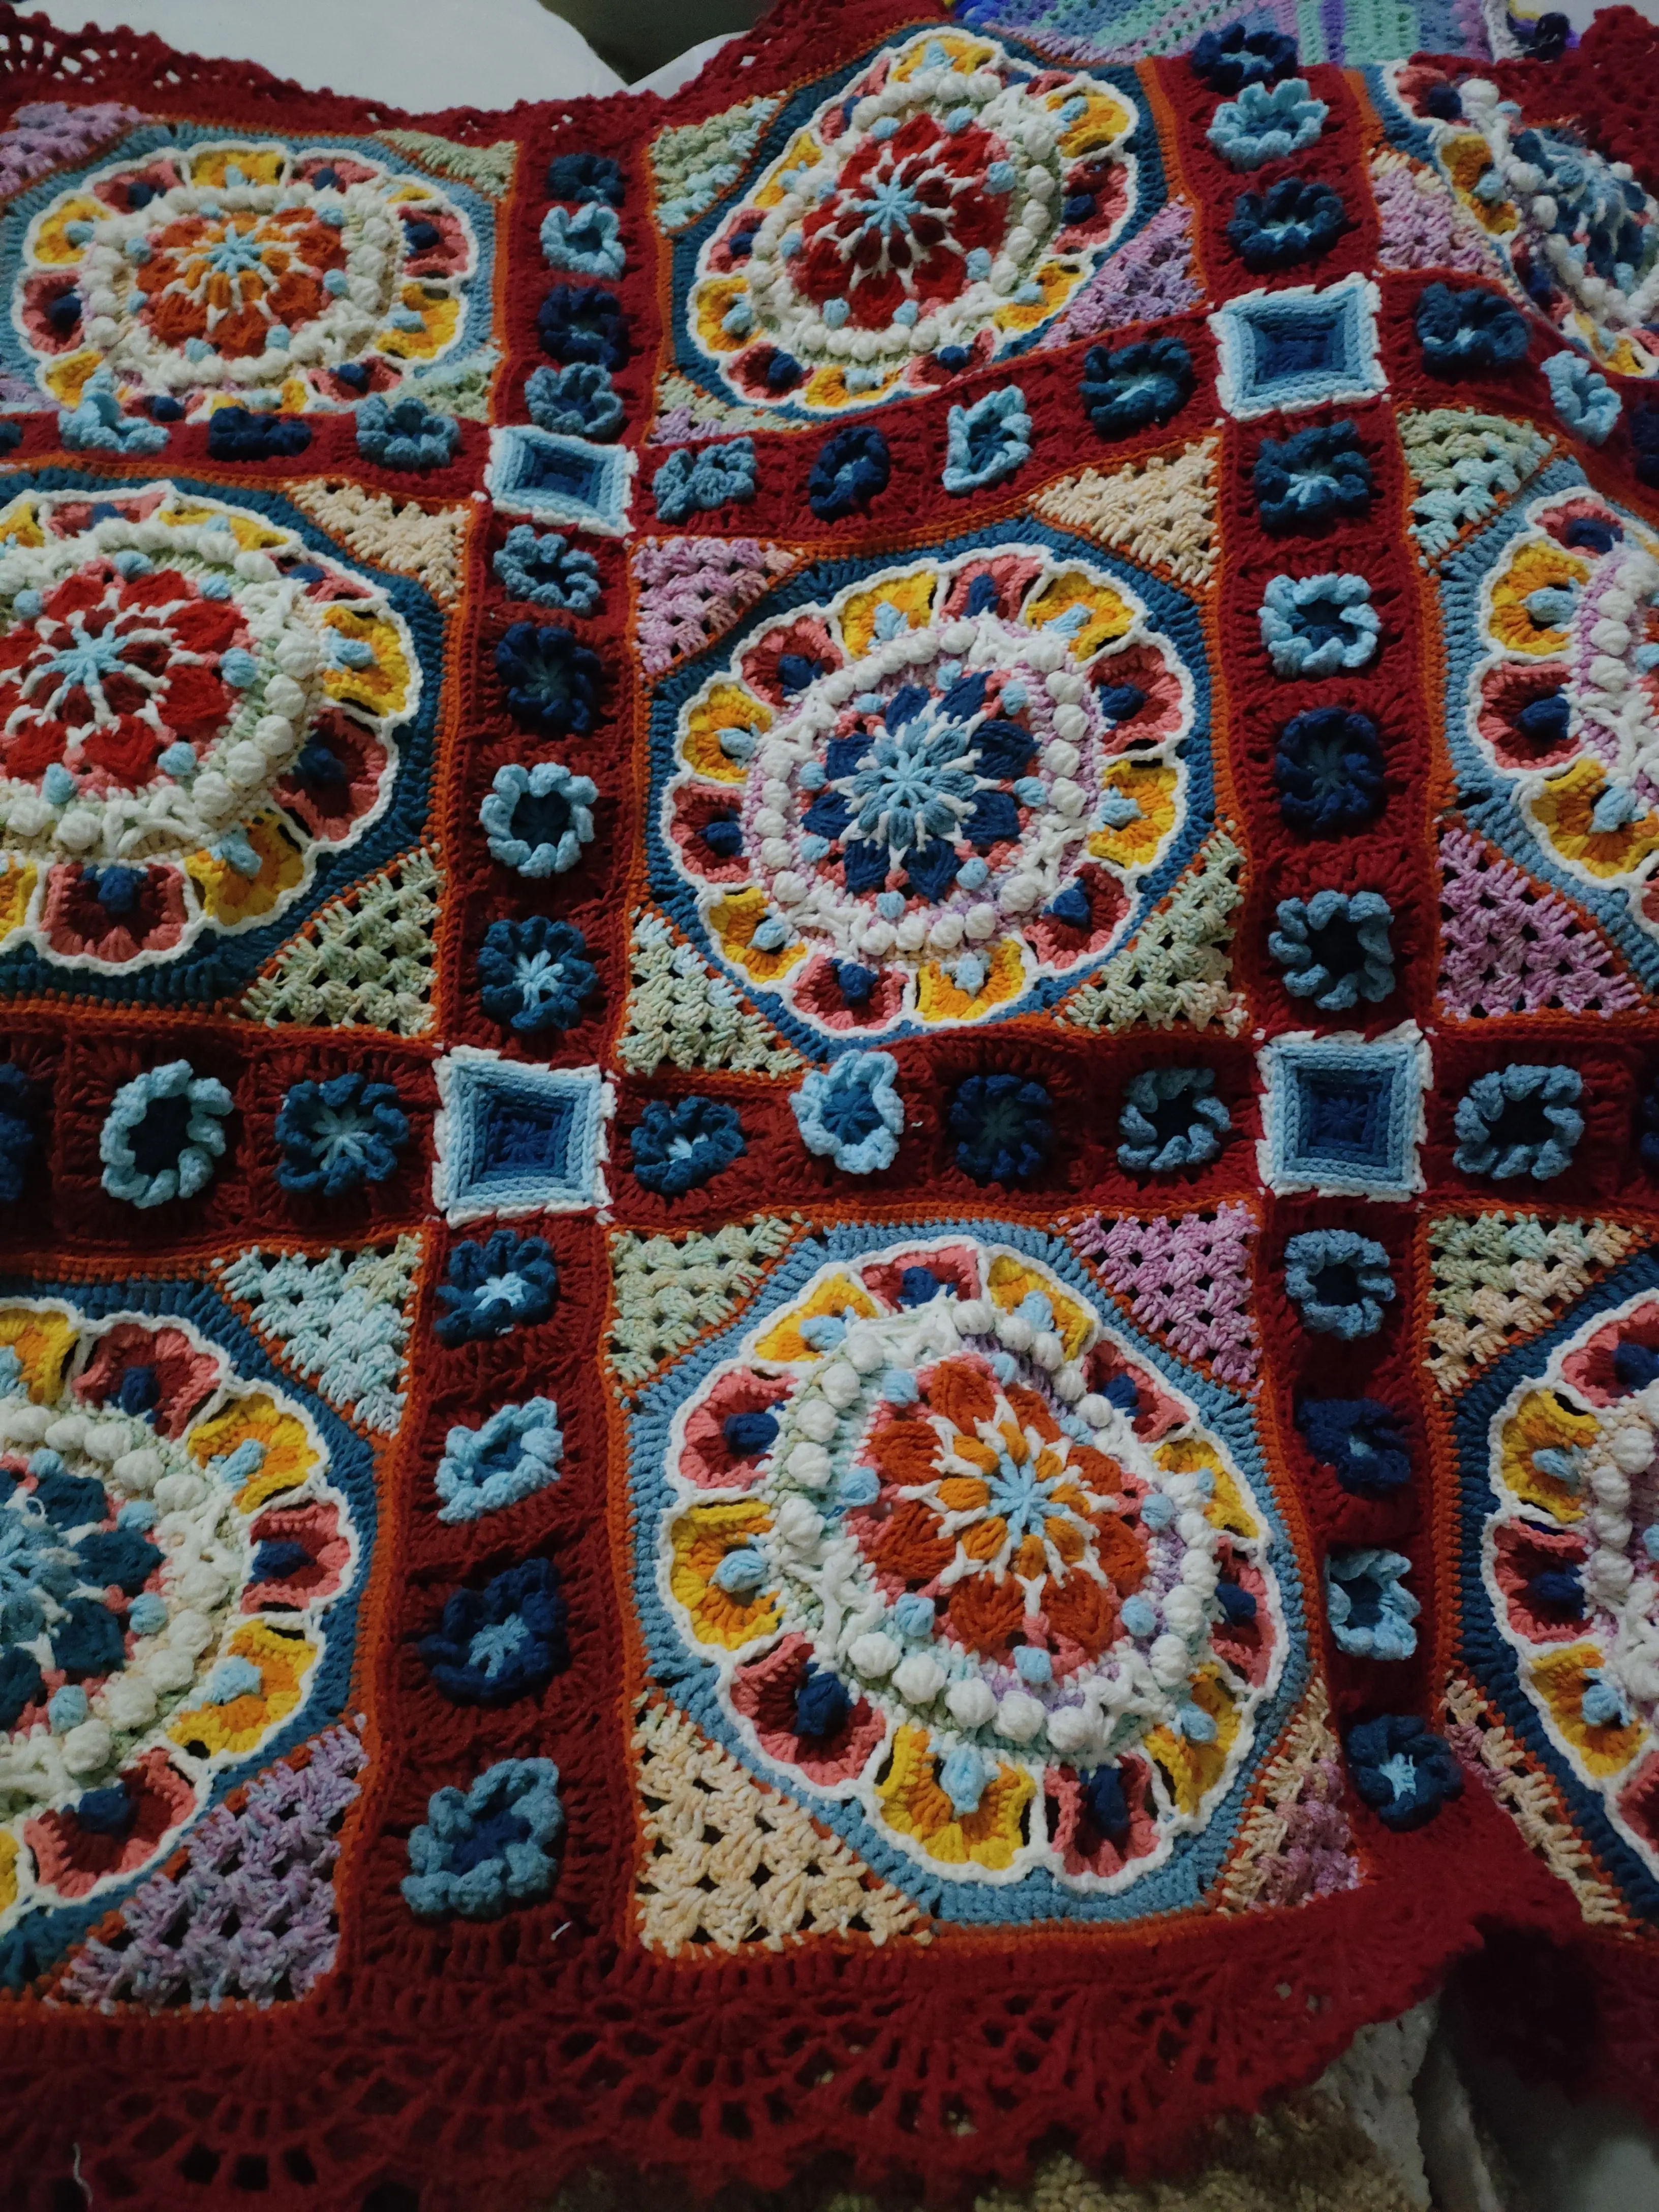
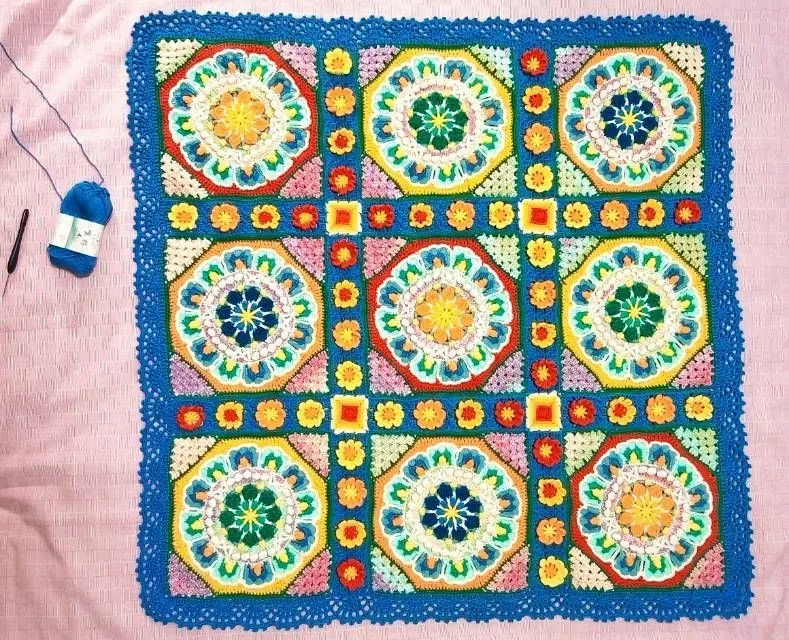
Dunhuang Lotus Caisson Blanket
Project preview
See the finished project
Pattern format
Instructions
Watch and follow
Video tutorial
This blanket consists of pieces, sewing and edging.There are three types of pieces, they are referred to as Piece A, Piece B and Piece C. First complete the crocheting and joining of Piece A and Piece B, then complete the crocheting of Piece C, next sew all of them together, finally crochet the edging around the outer edge.
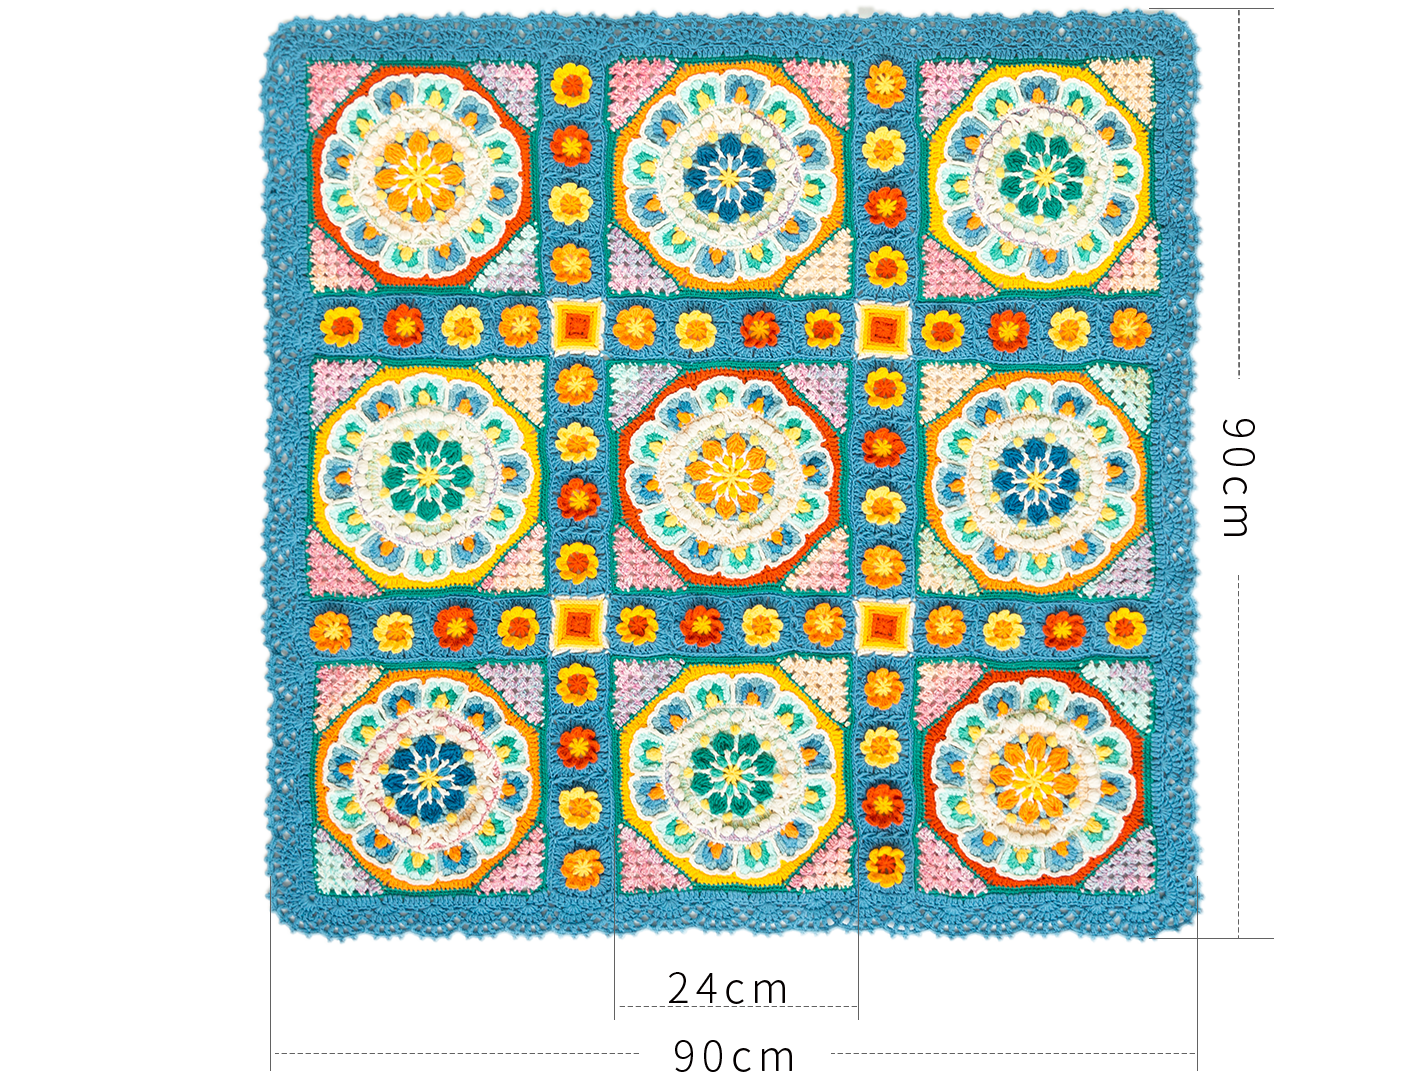
The handcrafted measurements may have an error of 1 to 2 cm. Due to variations in individual tension, the size of the sample is for reference only.
Materials: Susan's Family4-Ply Combed Cotton & Acrylic Fibre Hand Knitting Yarn
Hook: 3.00 mm crochet hook
Chart Key










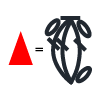



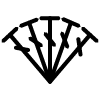


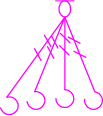


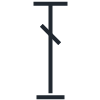


Note: This pattern is making in Chinese crochet pattern terms, and the stitch name is written using American terminology. All measurements in charts are in cm.
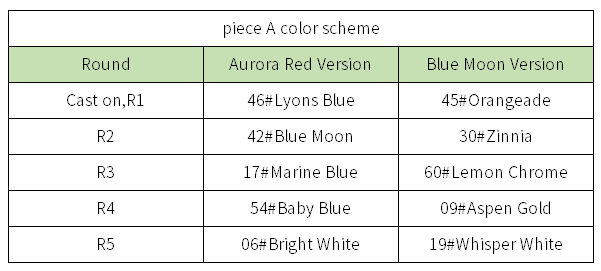
STEP1 Piece A 01' 42'' (Part 1)
There are a total of 4 Piece A and they all use the same color scheme and crocheting method. They are all started with a double magic ring and Crochet in rounds counterclockwise.Please refer to the video demonstration for more details.
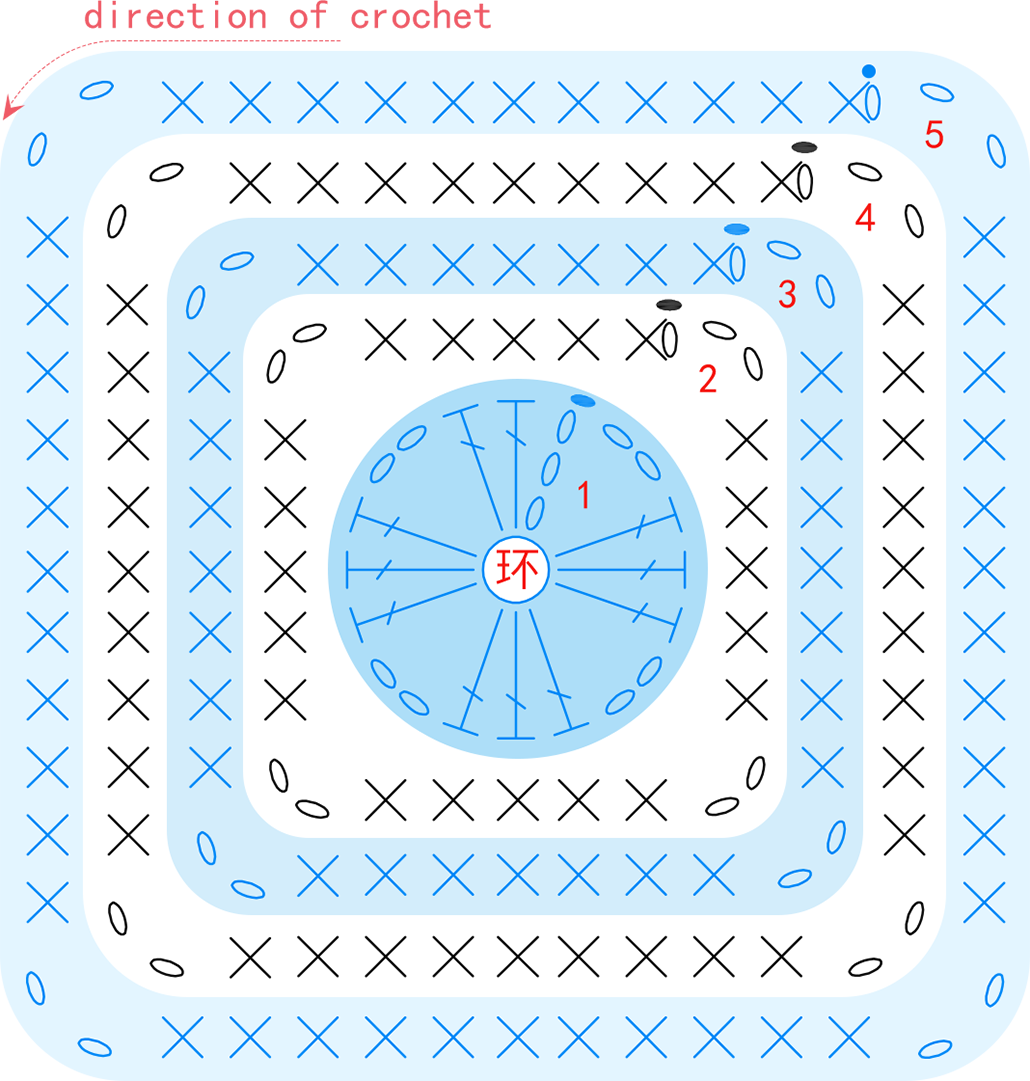
Note: After finishing, the edge should measure about 5.5cm.
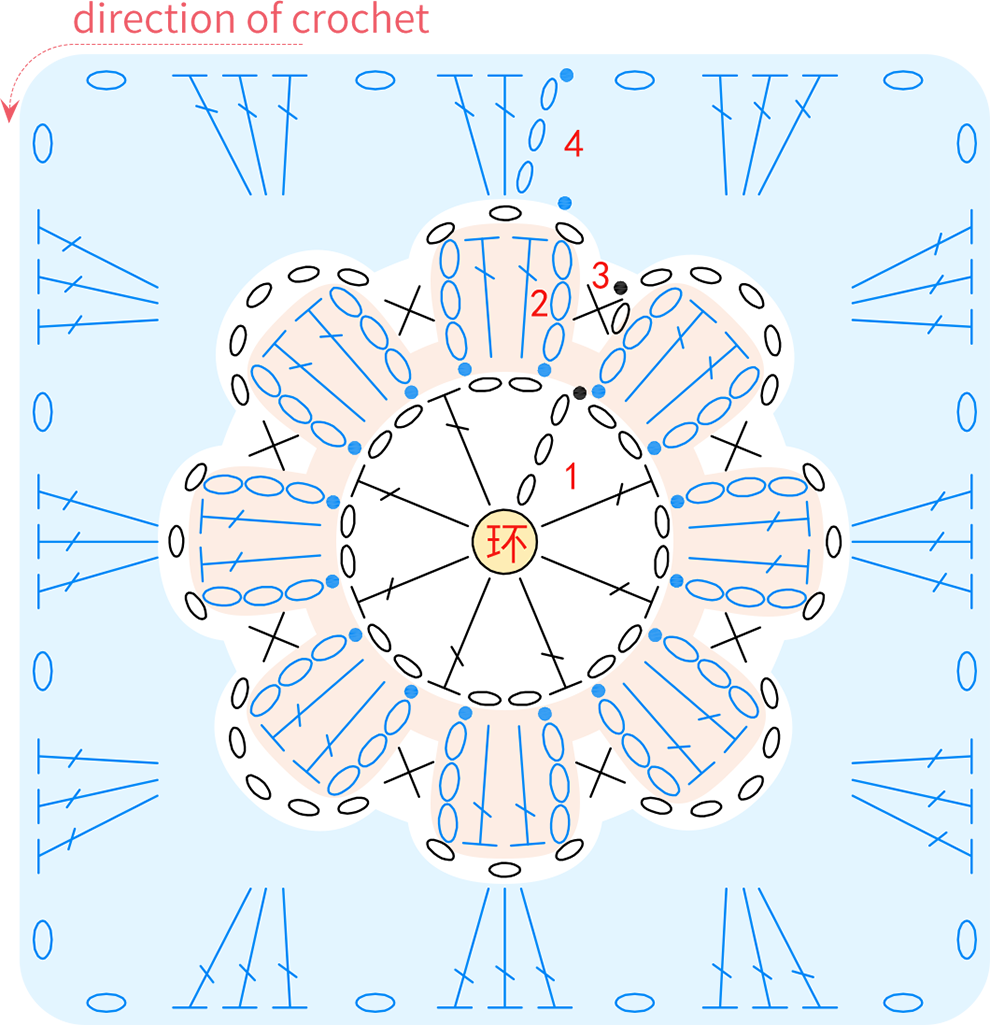
STEP2 Piece B 29' 24'' (Part 1)
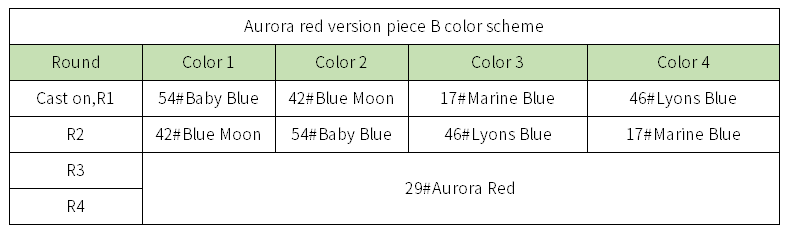
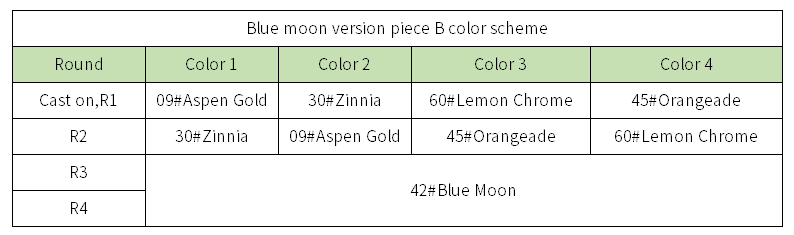
Piece B has four color schemes, with 12 of each. They are all started with a double magic ring and Crochet in rounds counterclockwise. Please refer to the video demonstration for more details.
Note:
①After finishing, the edge should measure about 6cm.
②The four long sides of the same piece A can be worked in four different contrasting colors, as shown in the diagram, or choose based on your preference.
③For the four long sides in the middle with color 4, you need to work and join along two sides as you crochet.
STEP3 Piece C 00' 12'' (Part 2)
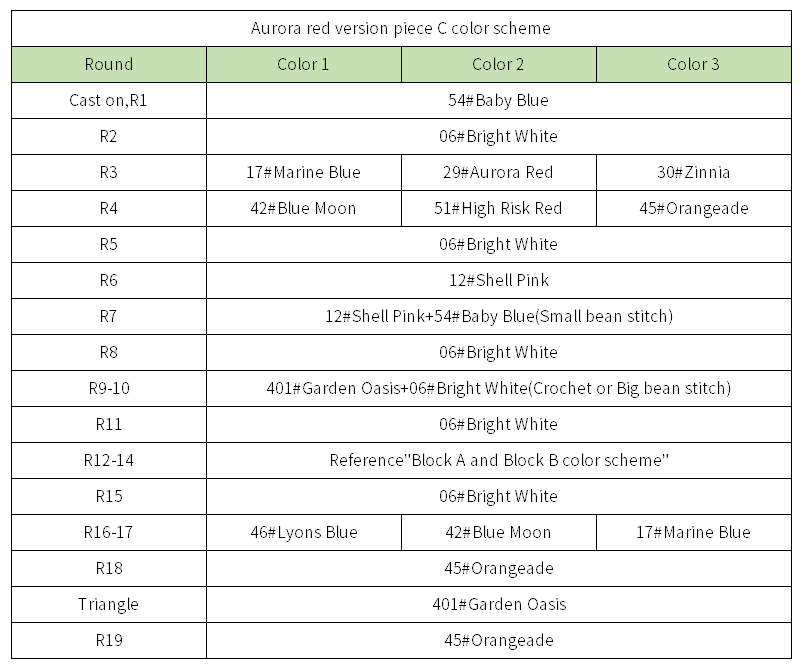
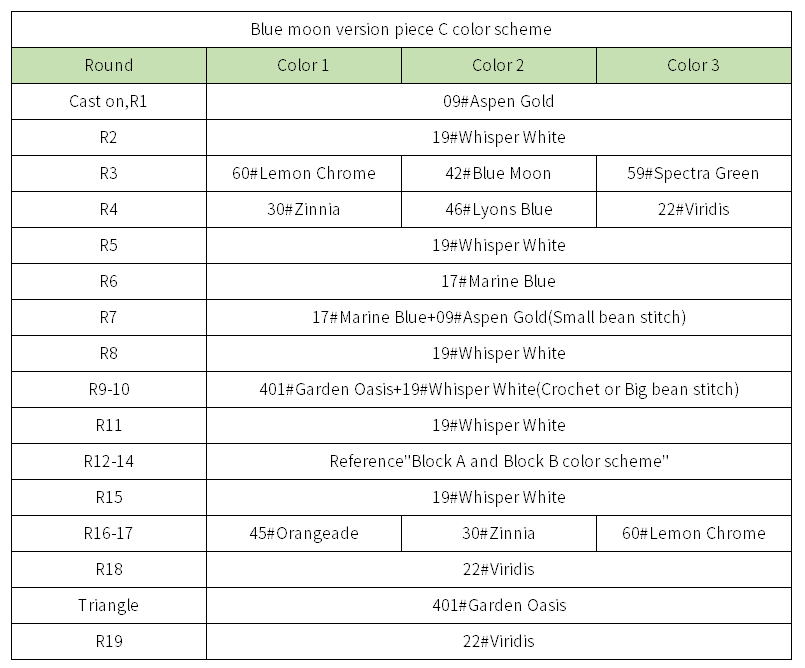
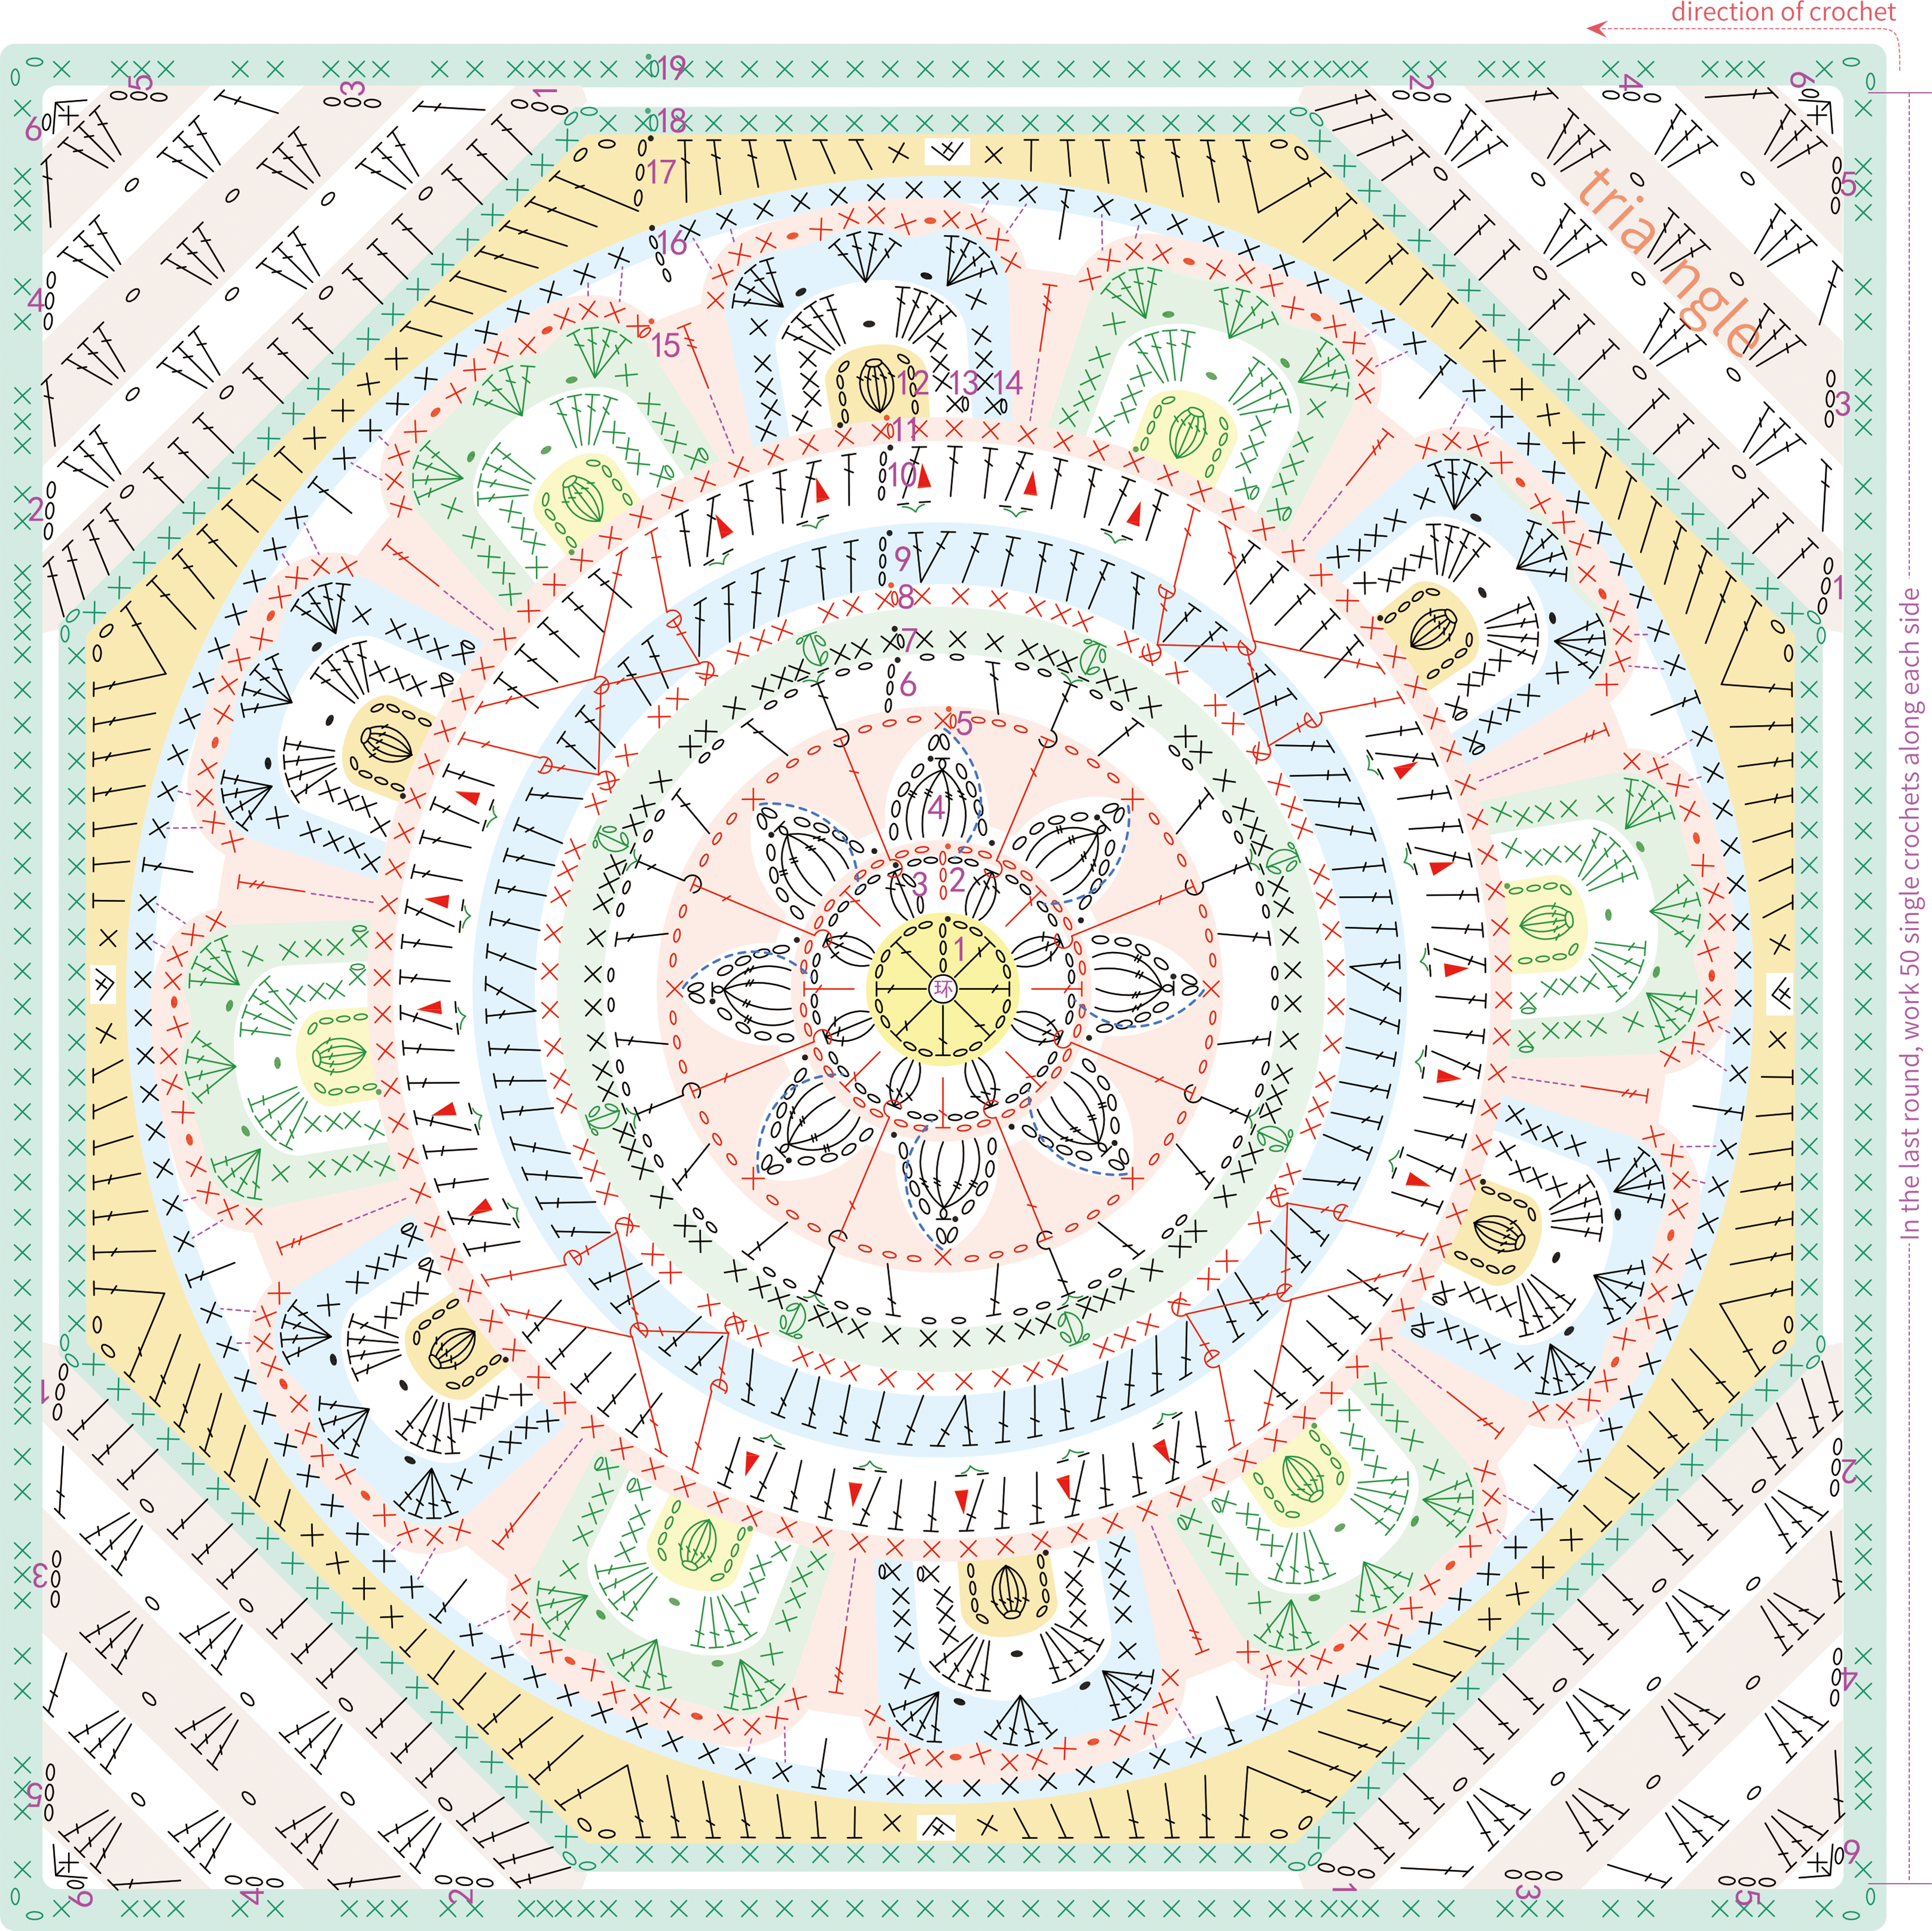
Piece C has three color schemes, with 3 of each. They are all started with a double magic ring and Crochet in rounds counterclockwise. Please refer to the video demonstration for more details.
Note:
①The part of round 8 single crochets should also pick up round 4 one top strand of the cluster and crochet.
②The round 9, round 10 and triangle use special yarn, the color of the starting tail of each skein is different, the effect of the crocheting will also be different.
③After finishing the round 10, the diameter is about 14cm.
④Round 11 has 96 stitches.
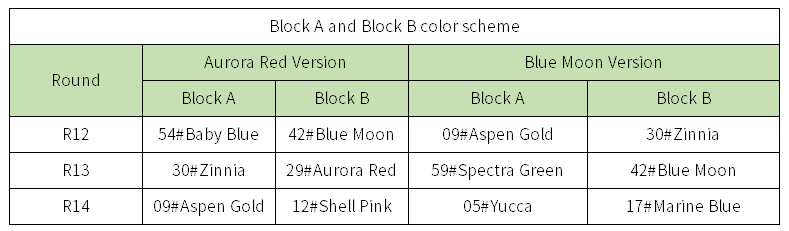
⑤The order of block A and block B doesn’t matter, as long as you crochet according to the corresponding color combinations.
⑥The insertion position for round 16 is special and identical to piece A.
⑦After Piece C finishing, the edge should measure about 24cm.
STEP4 Sewing 12' 14'' (Part 3)
Aurora red version: 29#Aurora Red / Blue moon version: 42#Blue Moon
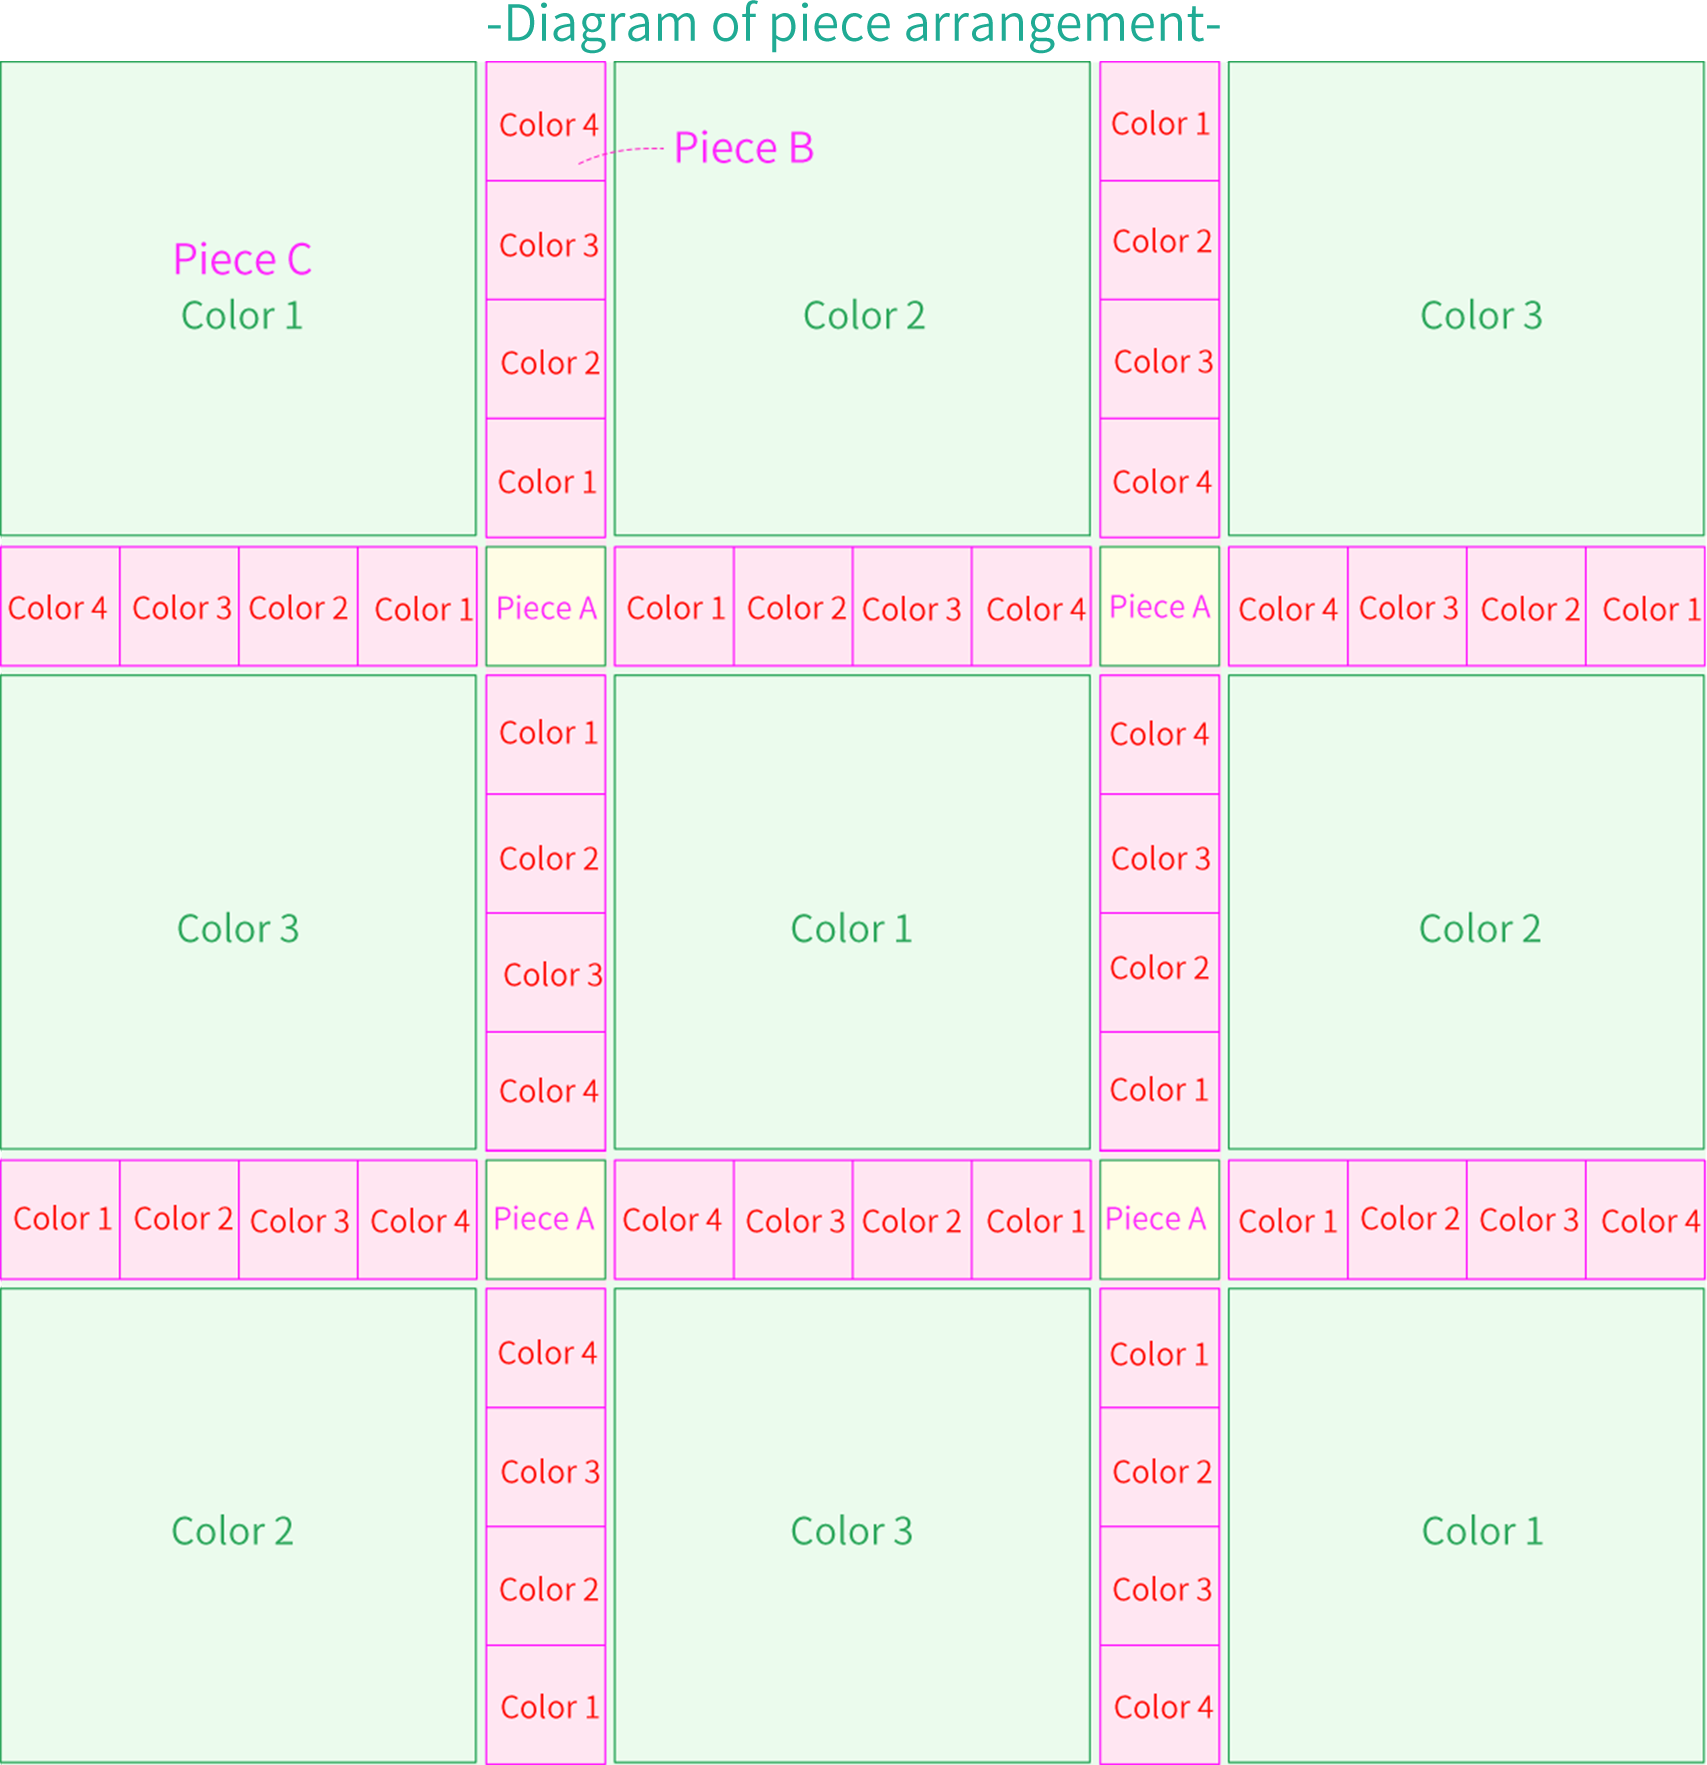
After completing all the crochet pieces, you'll need to refer to the diagram above to sew them together. Please refer to the video demonstration for more details.
Note:You can refer to the diagram for the color arrangement or choose based on your preference.
STEP5 Edging 19' 34'' (Part 3)
Sewing: Aurora red version 29#Aurora Red / Blue moon version 42#Blue Moon
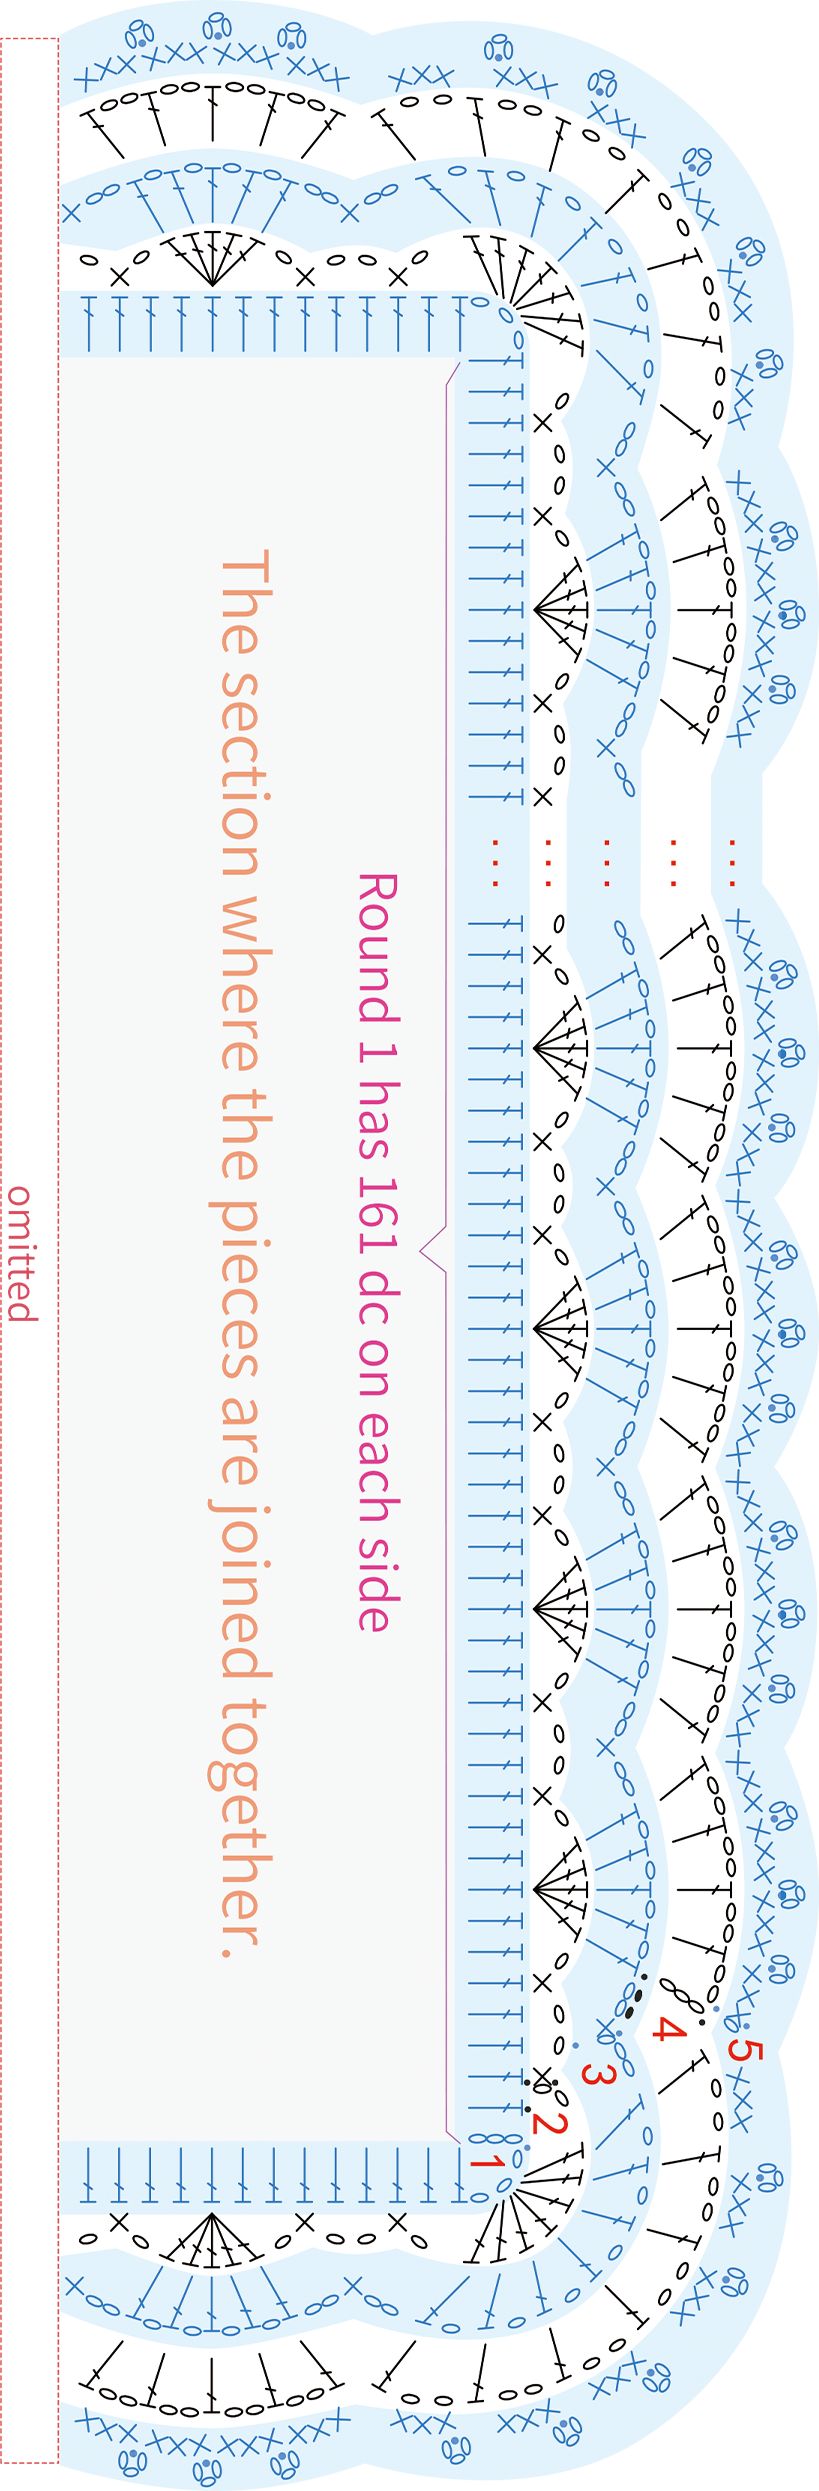
After completing the sewing of the pieces, next crochet the edging. The edging is crocheted around the outer edge in rounds, crochet 5 rounds.Please refer to the video demonstration for more details.
Made by the community