Home / Pillow
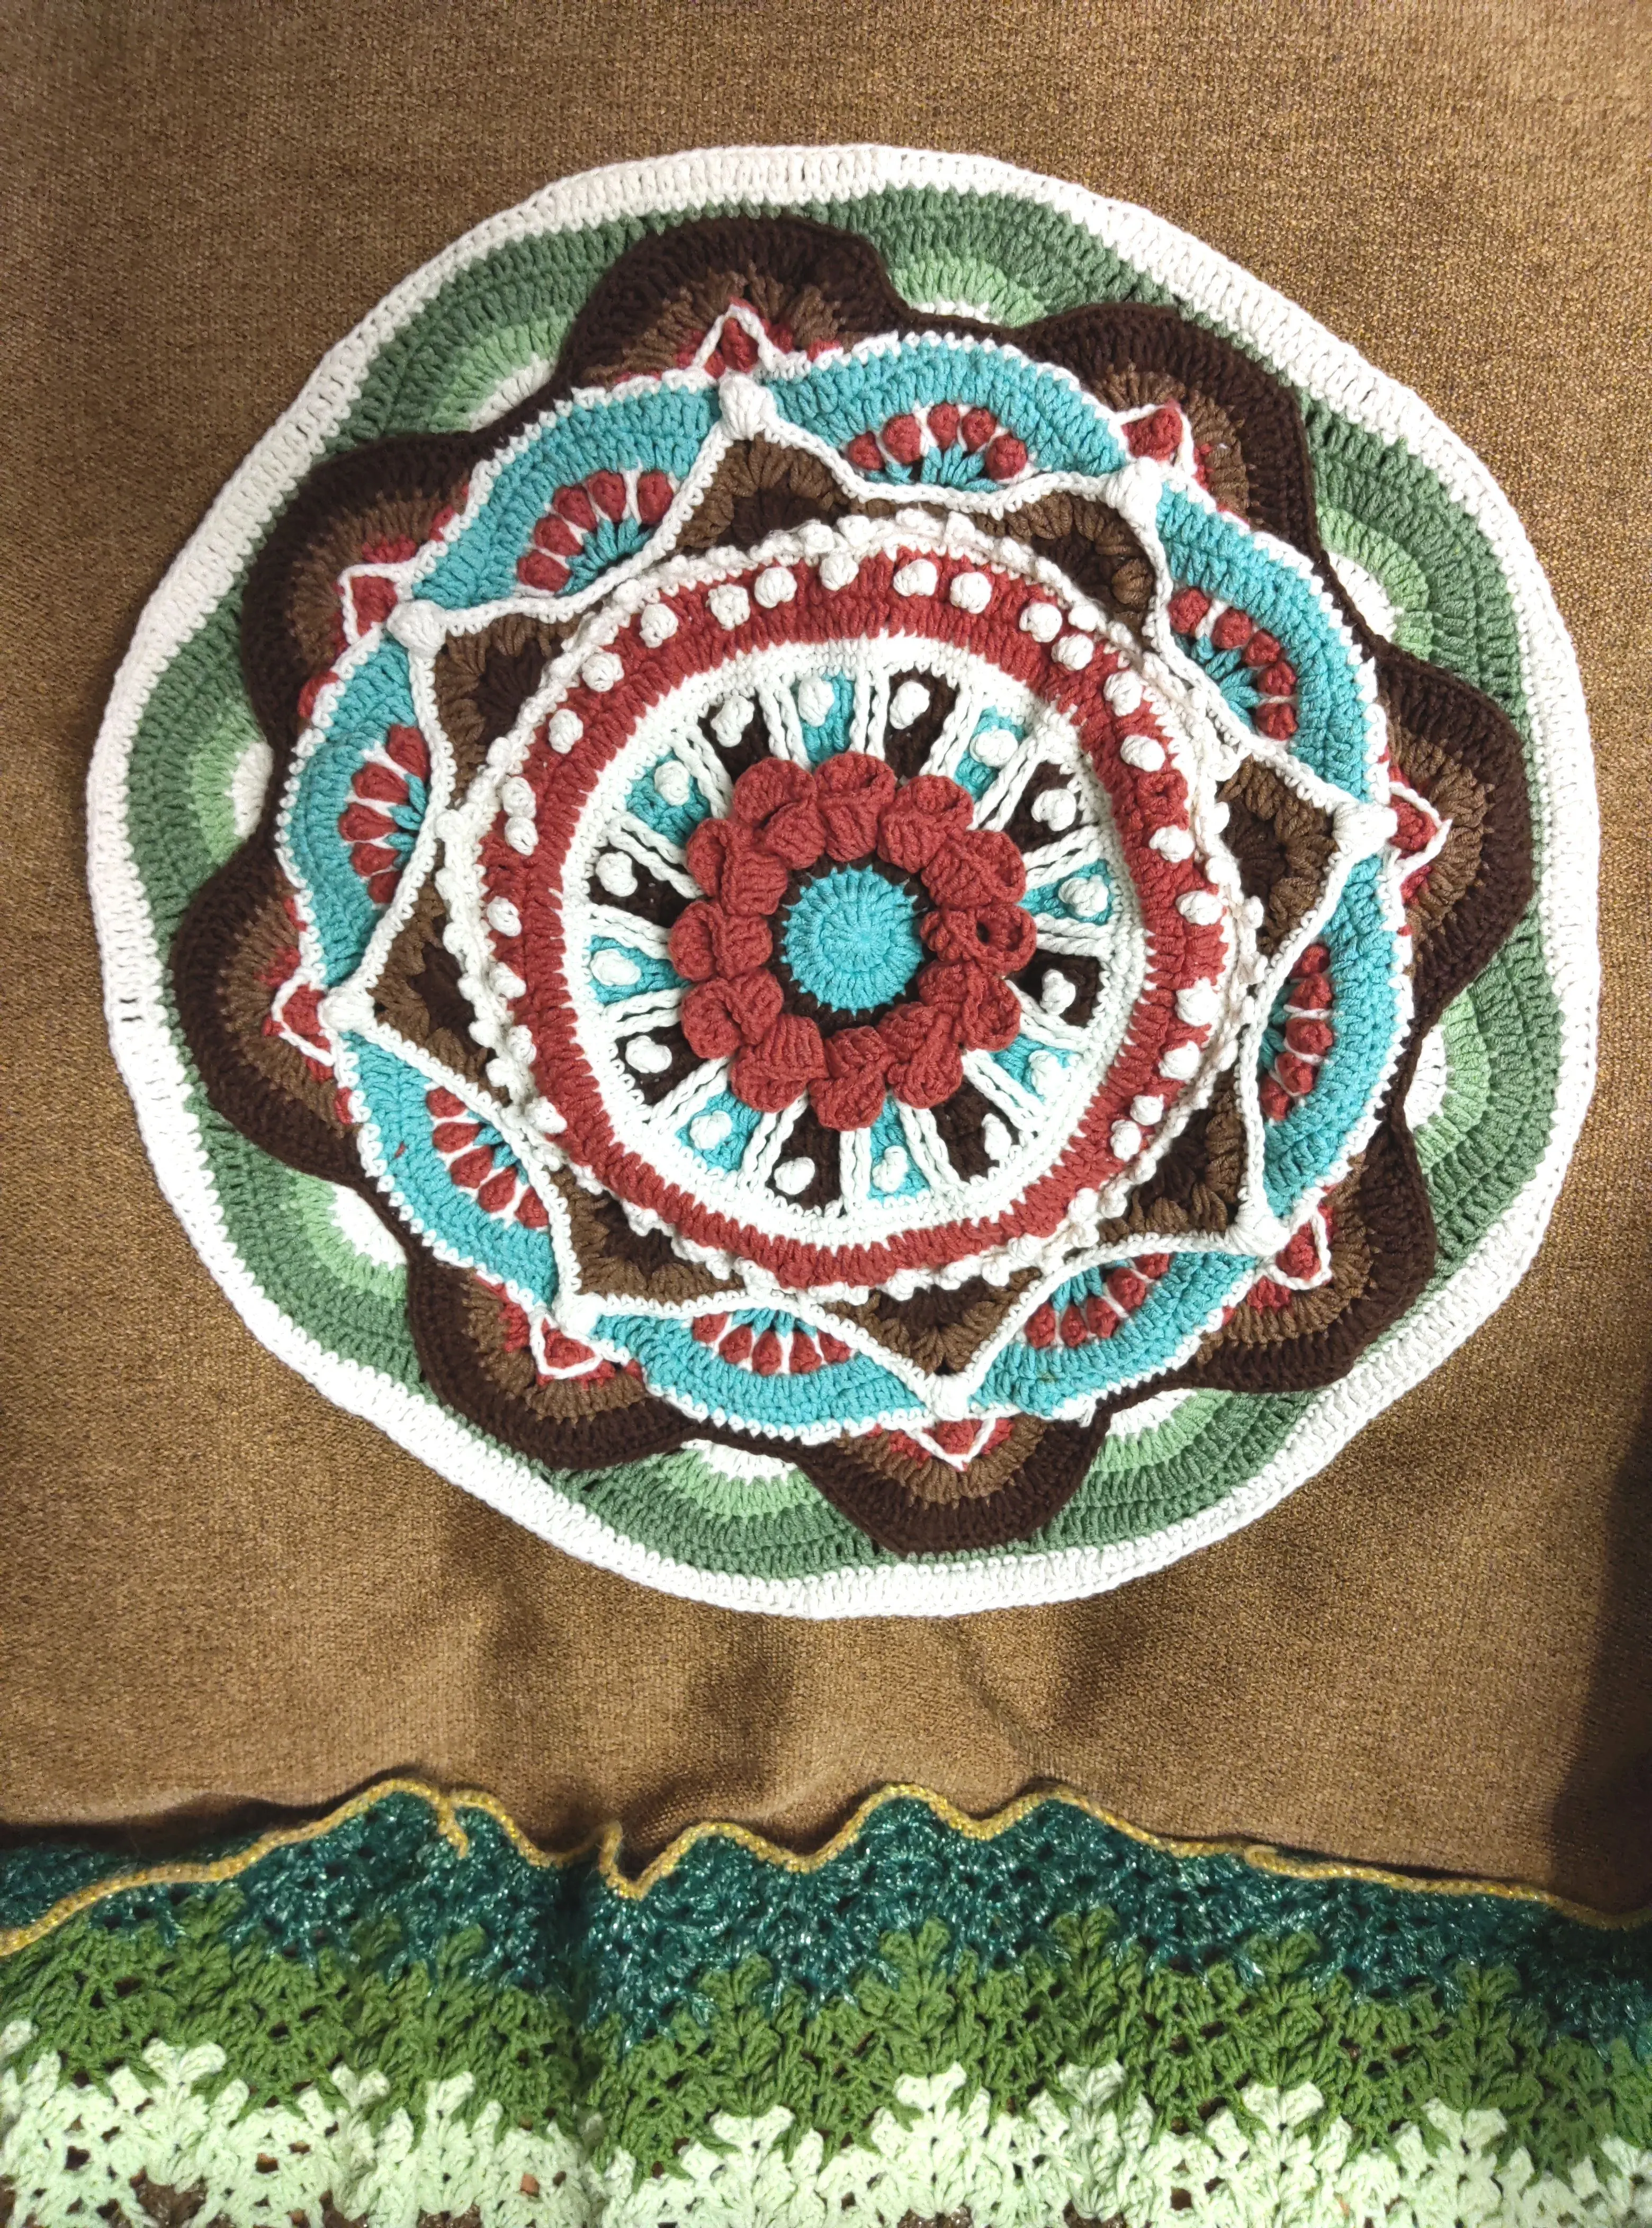
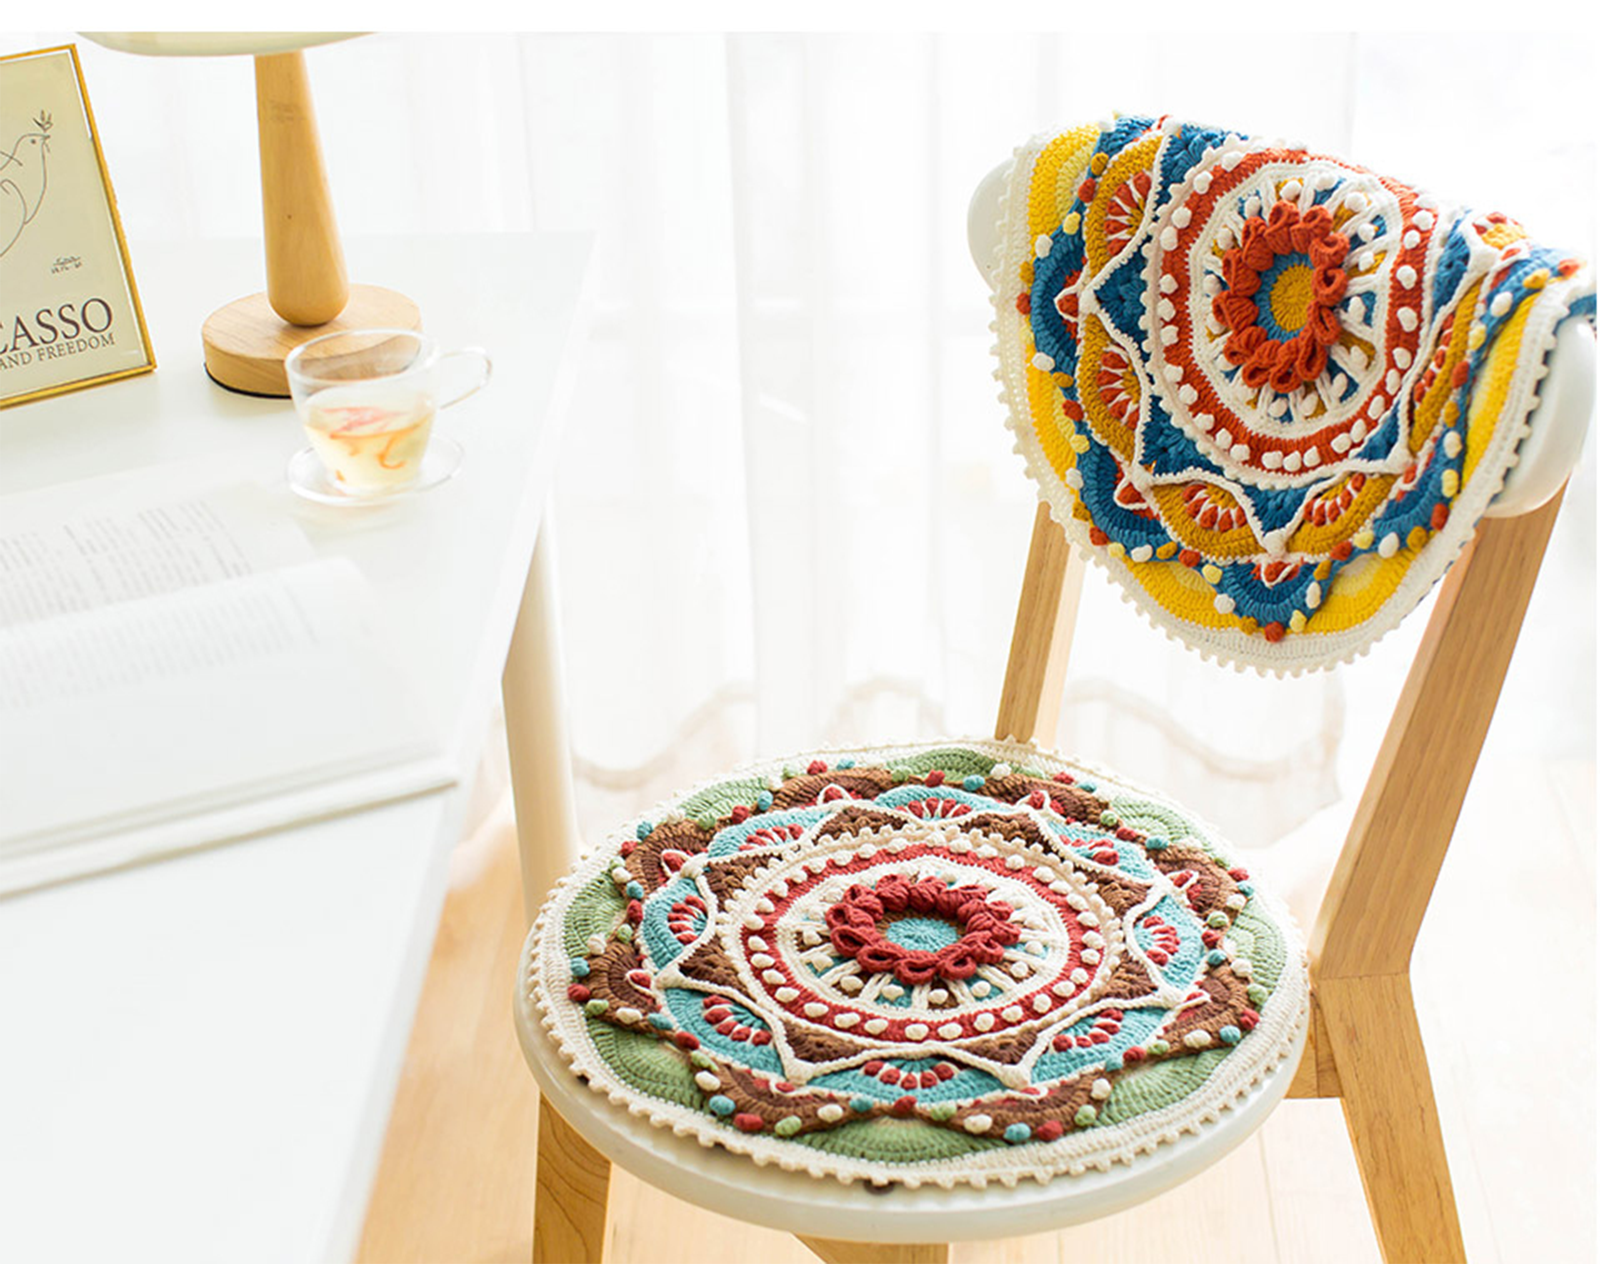
Dunhuang Scroll Lotus Flower Pillow Cover
Project preview
See the finished project
Pattern format
Instructions
Watch and follow
Video tutorial
Dunhuang Scroll Lotus Flower Pillow Cover
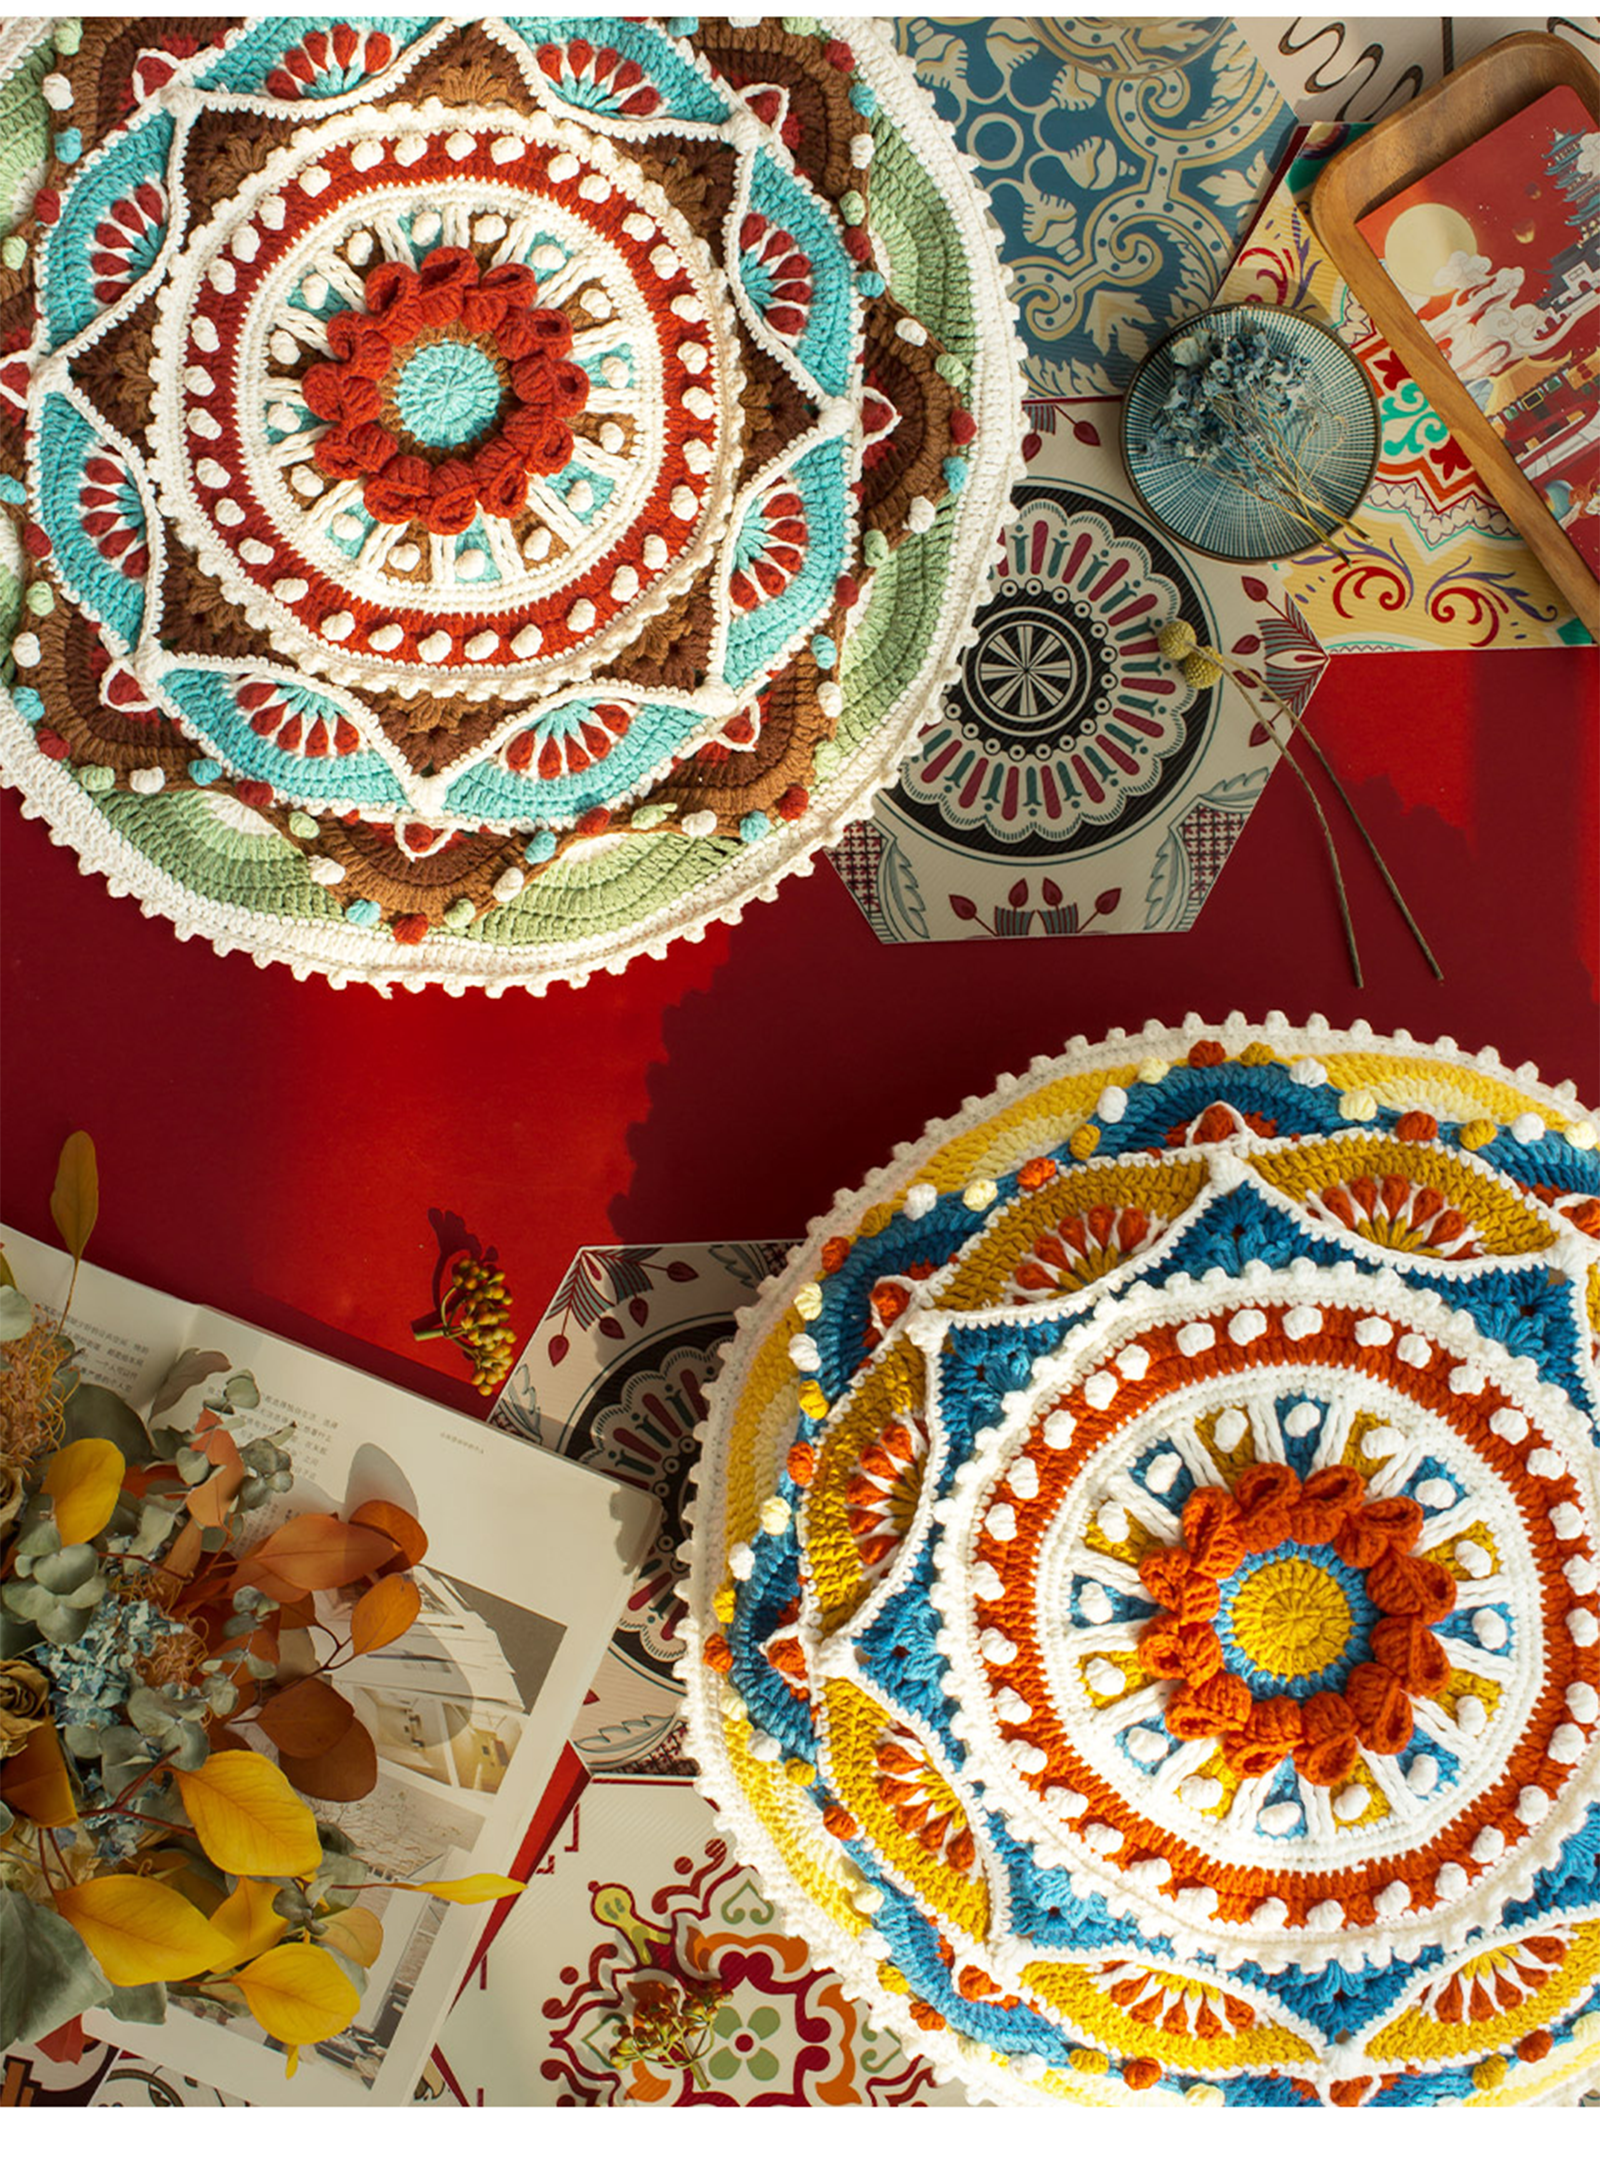
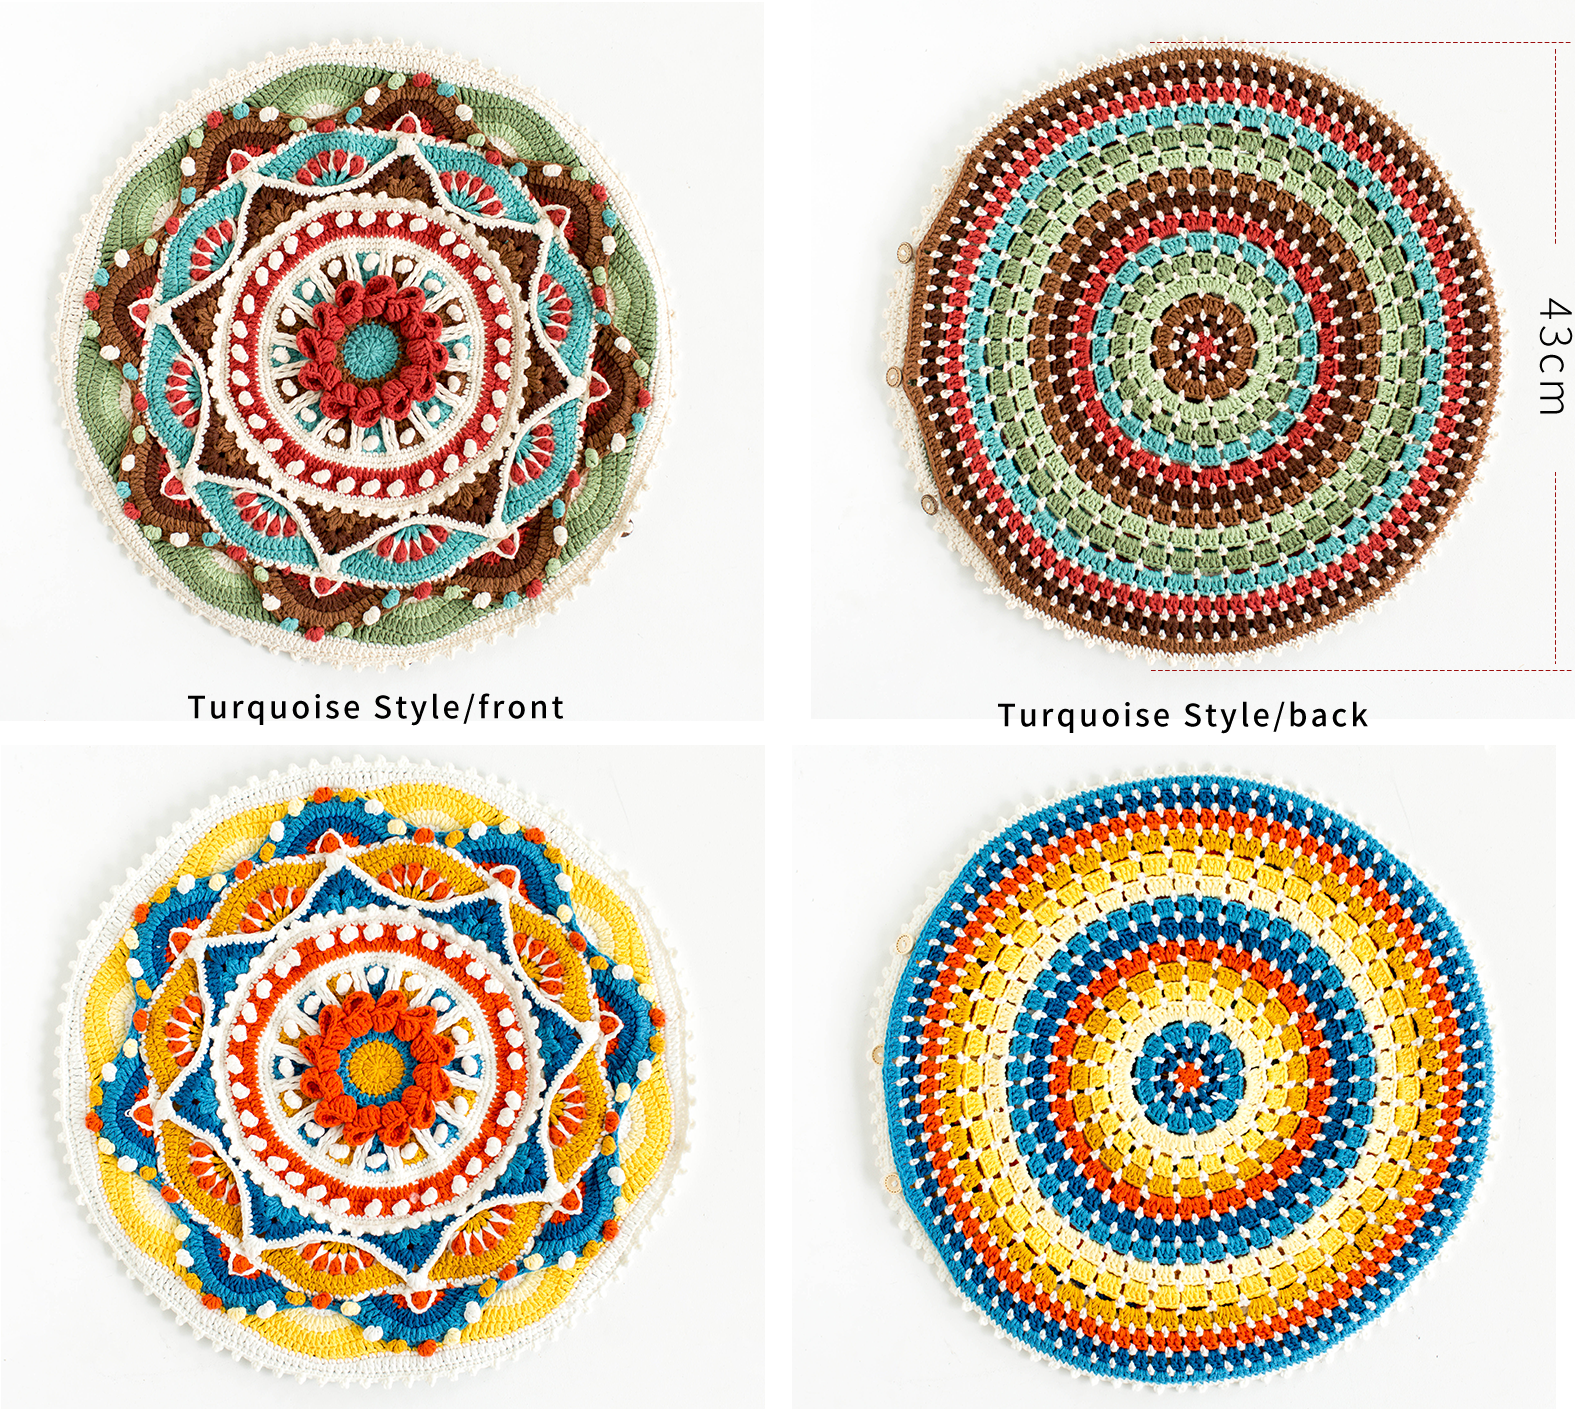
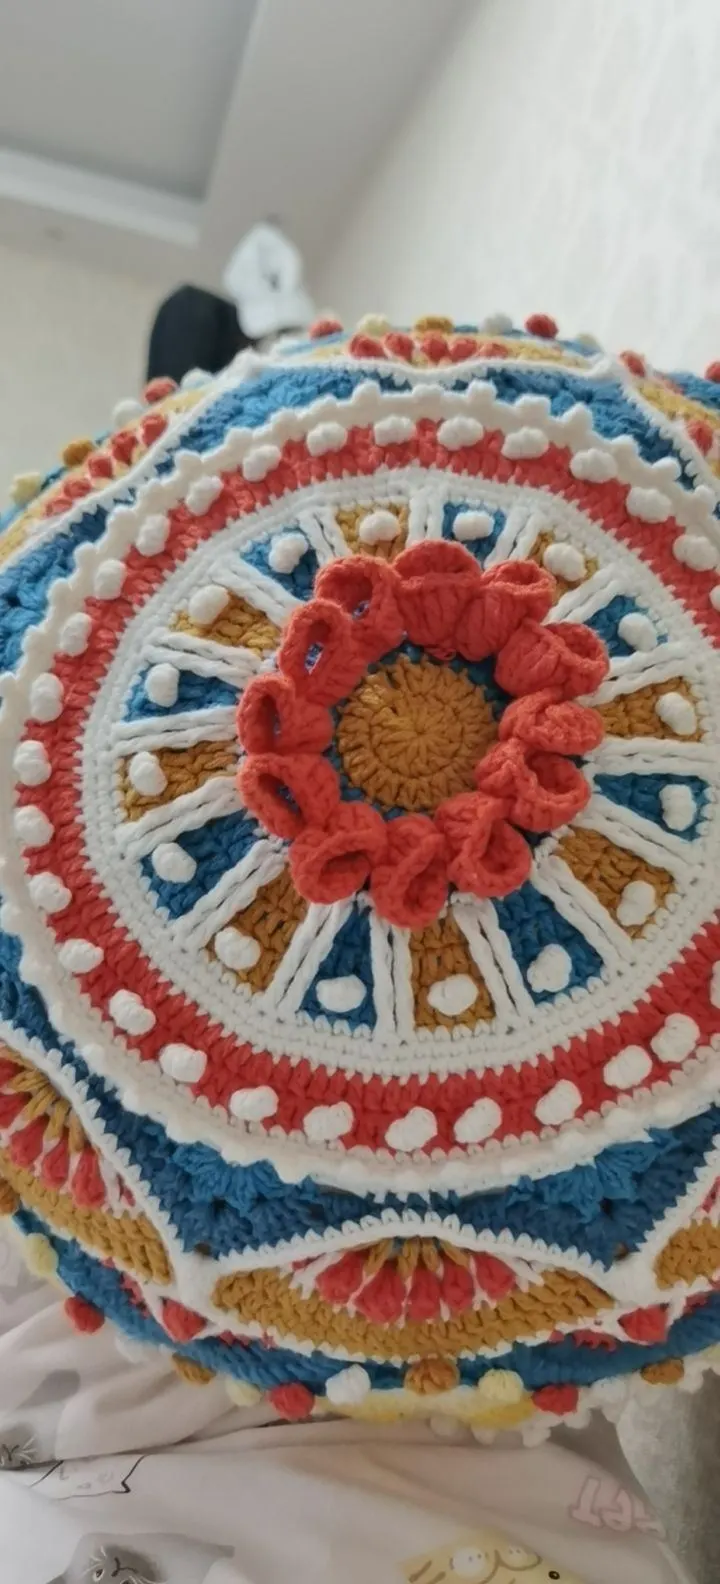
Pillowcase diameter is 43cm, suitable for a 45cm diameter pillowcase insert.
The handcrafted measurements may have an error of 1 to 2 cm. Due to variations in individual tension, the size of the sample is for reference only.
Materials: Susan's Family 4-Ply Combed Cotton & Acrylic Fibre Hand Knitting Yarn
Hook: 3.00 mm crochet hook

Chart Key


















Note: This pattern is making in Chinese crochet pattern terms, and the stitch name is written using American terminology. All measurements in charts are in cm.
PART1 Back piece 01' 33'' (Part 1)
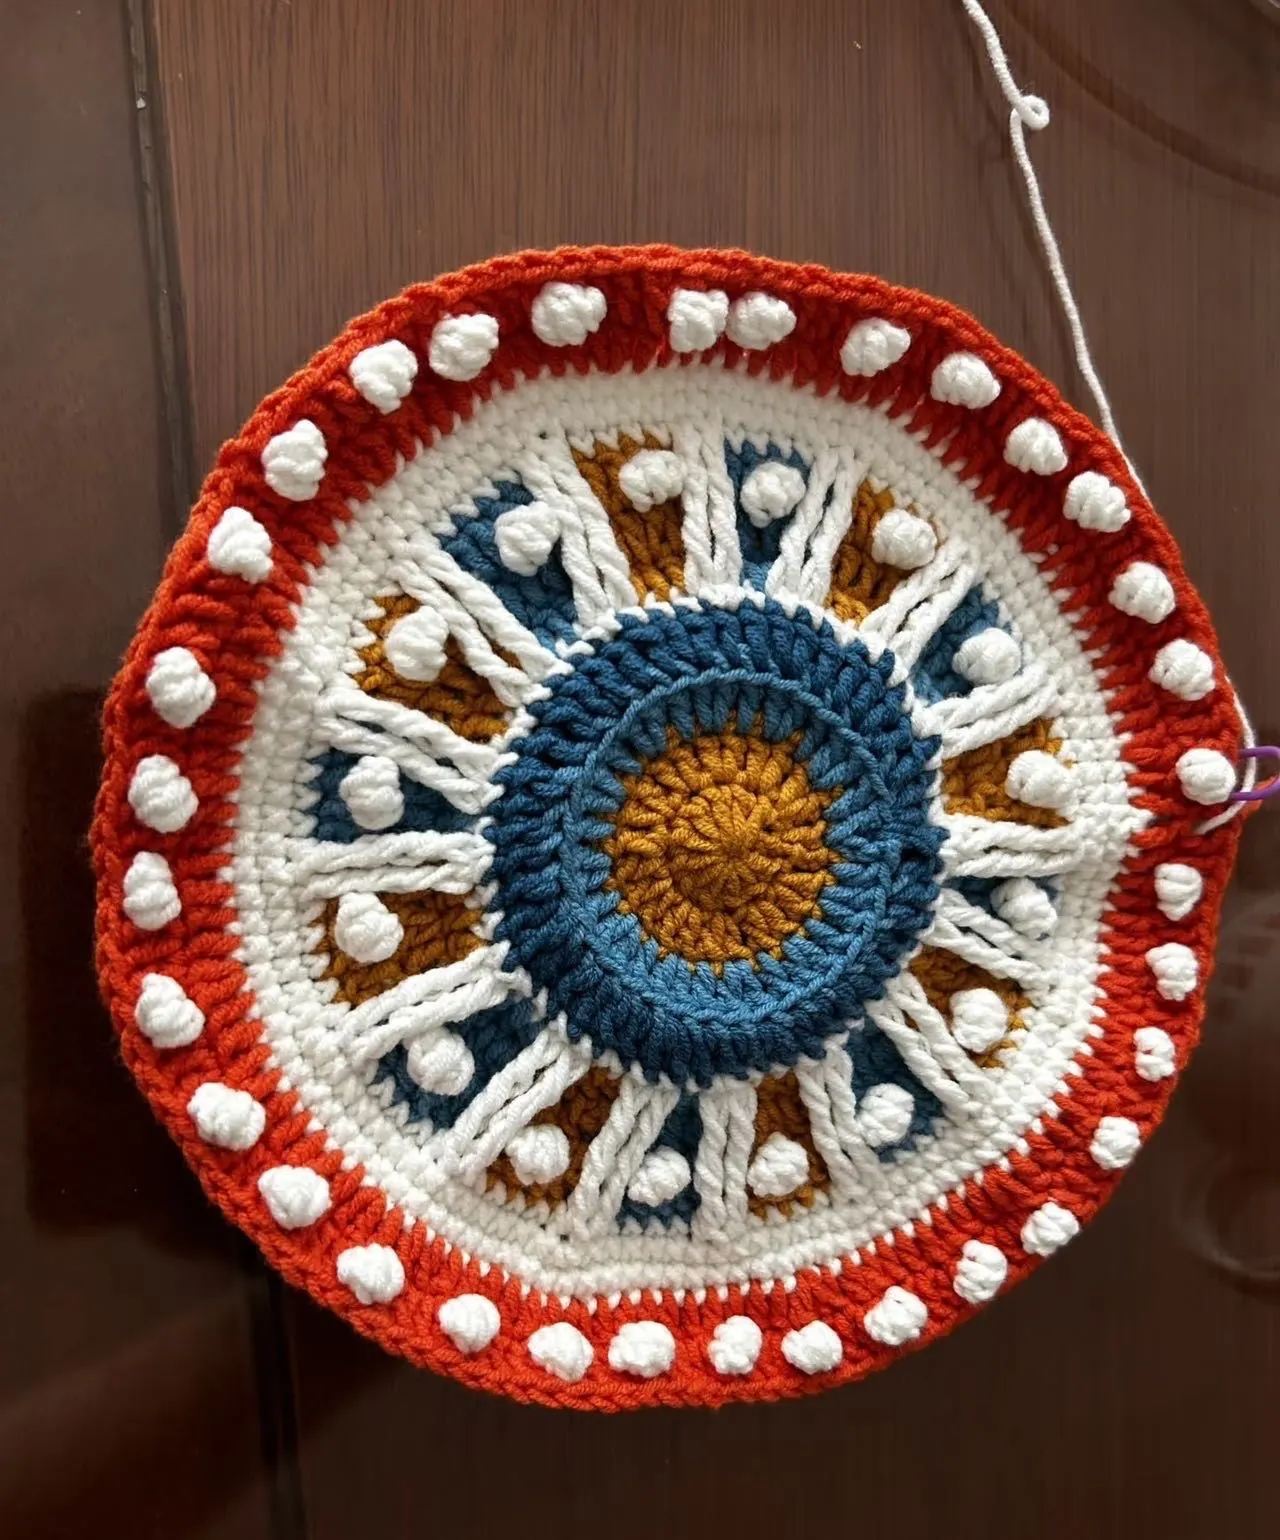
Begin the back piece with a adjustable magic ring.Crocheting around the center,crochet in a counter clockwise direction to expand outward.Throughout the process,change colors every round.This creates a pattern of concentric circles with different colors.Please refer to the video demonstration for more details.
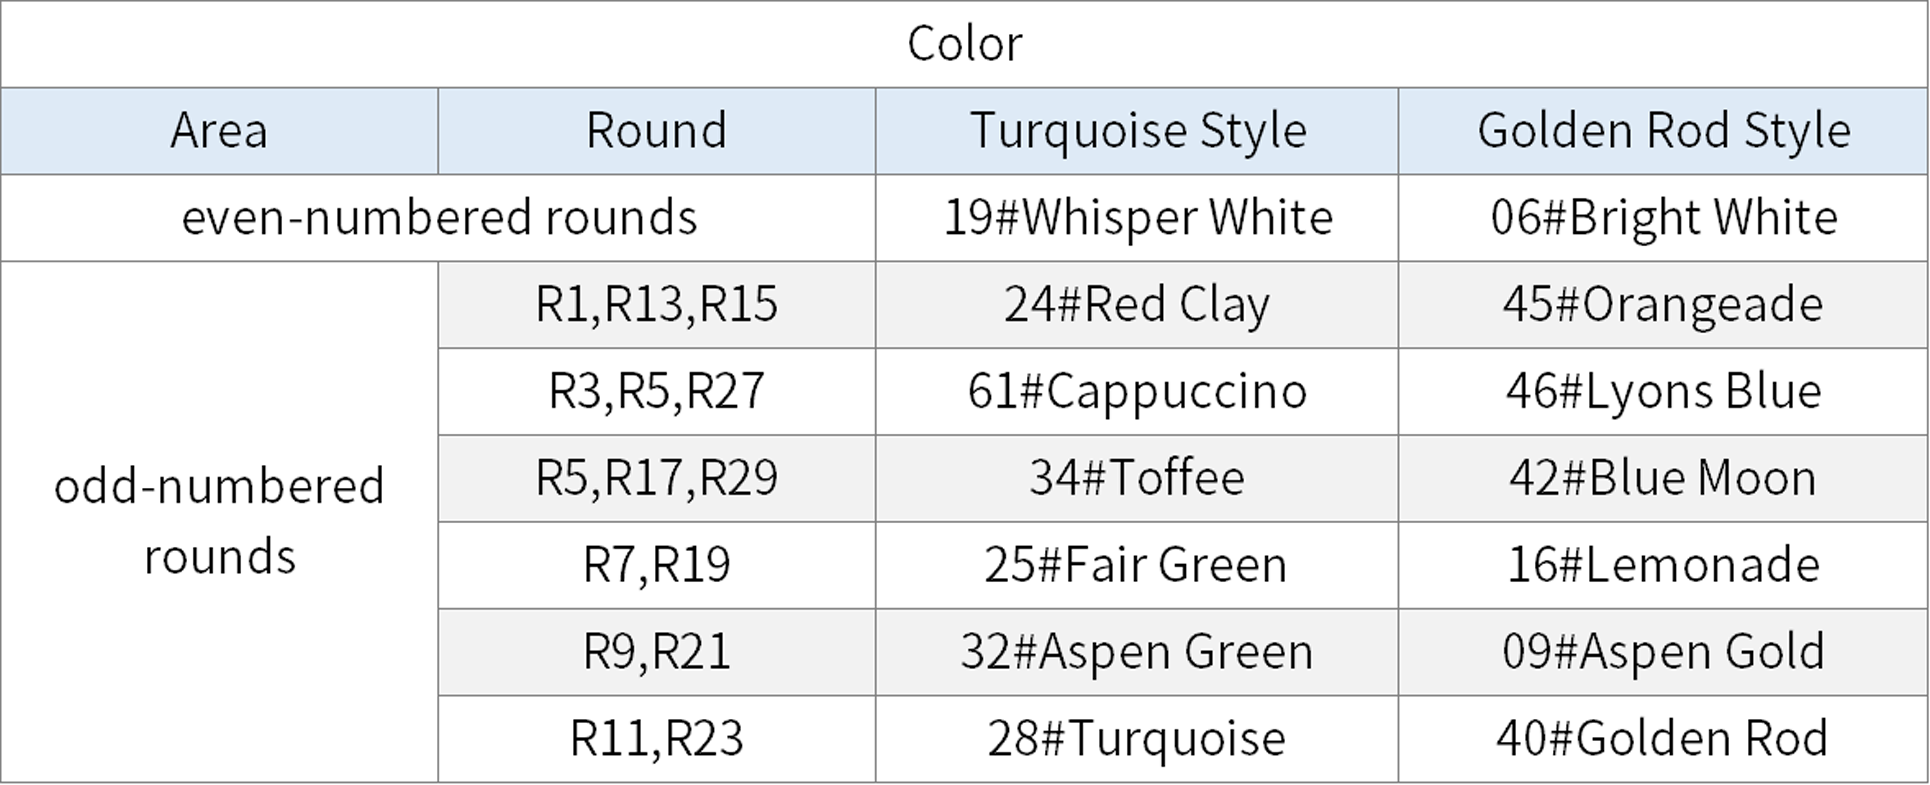
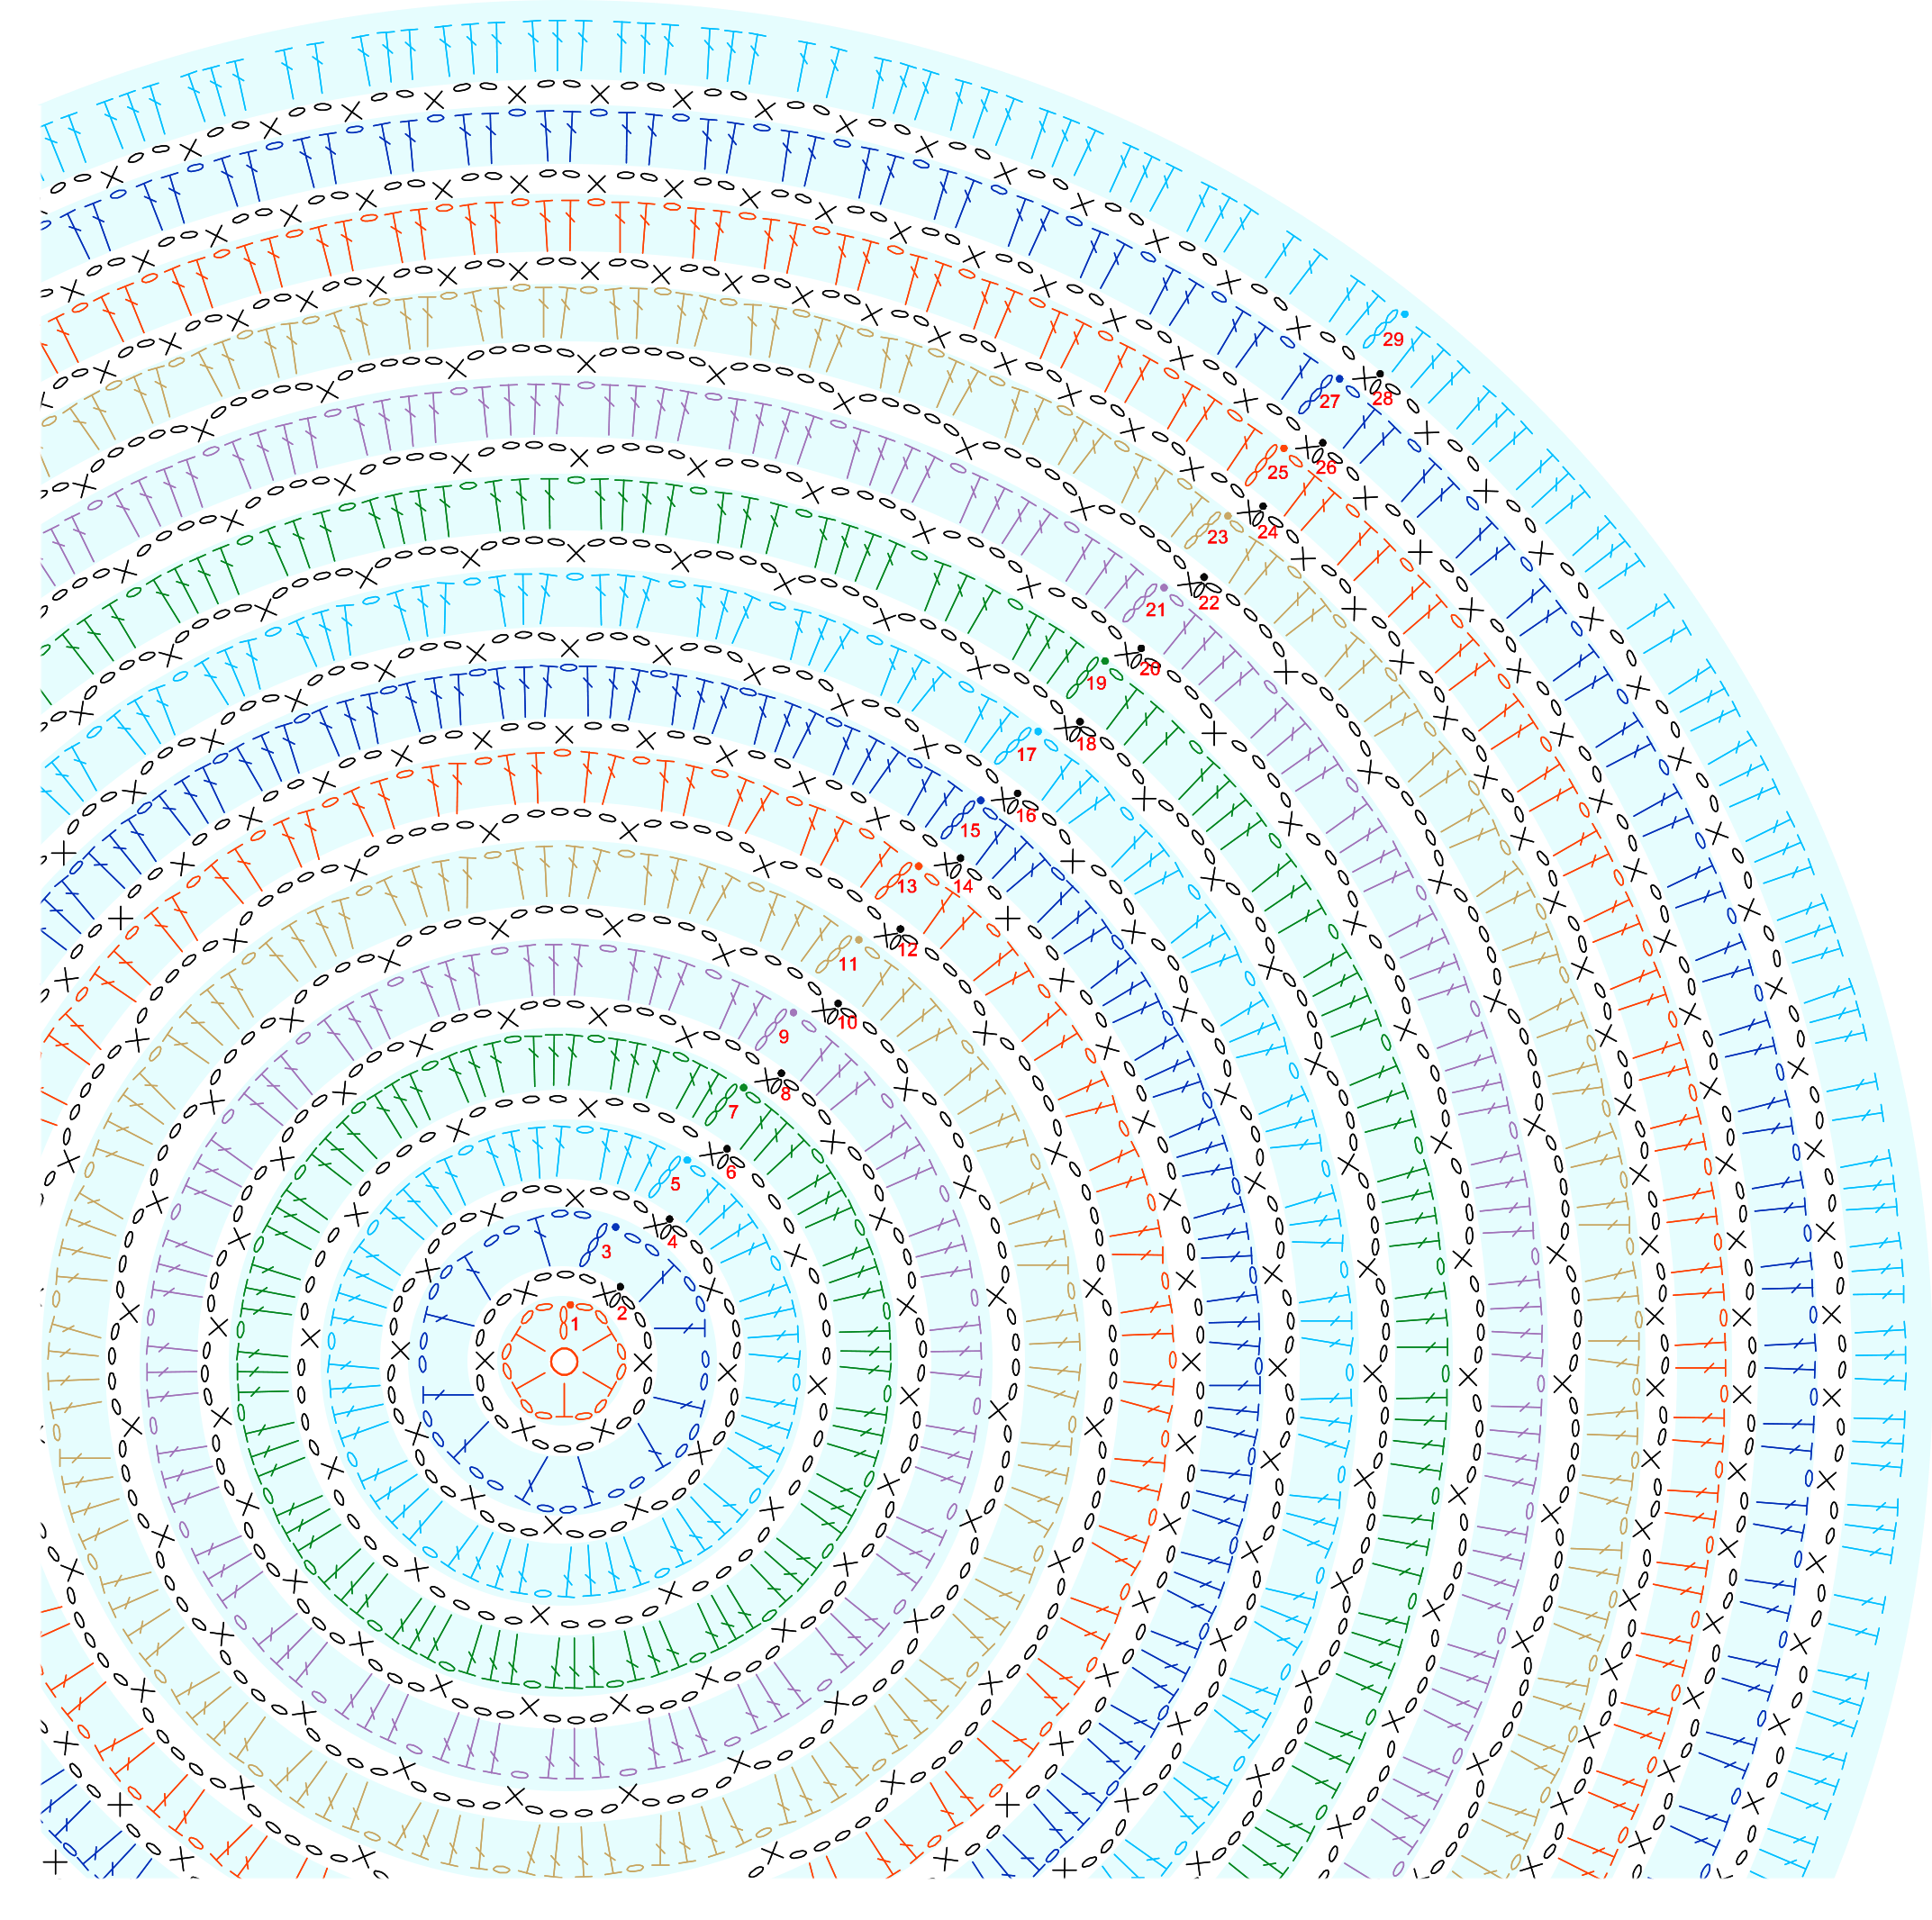
Note: The number of double crochets in Rounds 19 and 29 varies.Be careful not to mix them up.
PART2 The first section of the front piece 24' 17'' (Part 1)
Use the double magic ring,start by working along the center,crocheting in a counterclockwise direction to form the main body.While crocheting,make a bobble at corresponding position.Then, make the ruffle petals onto the piece.Finally,finish with an edging around the main body.Please refer to the video demonstration for more details.
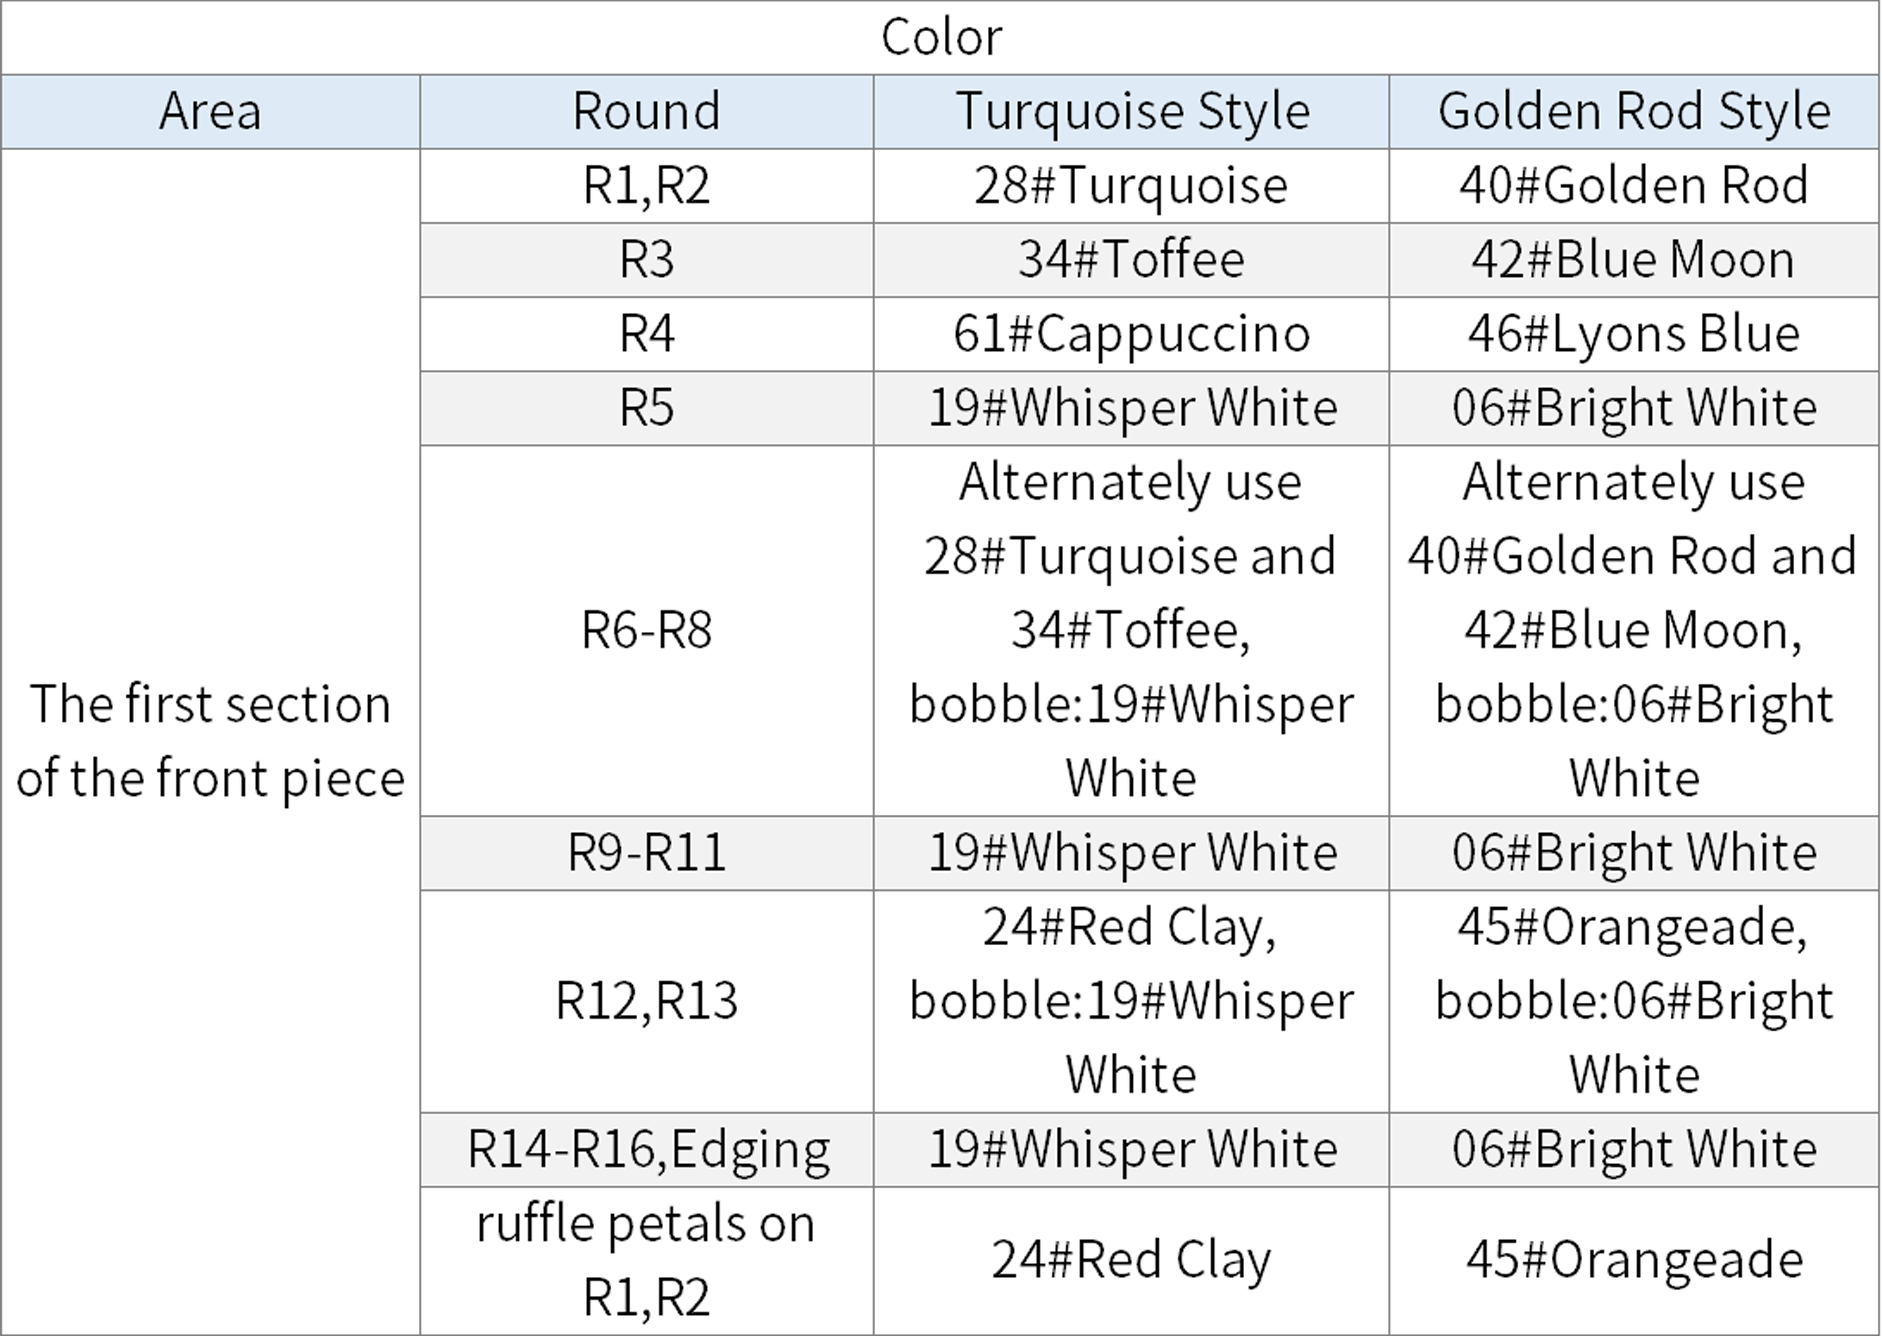
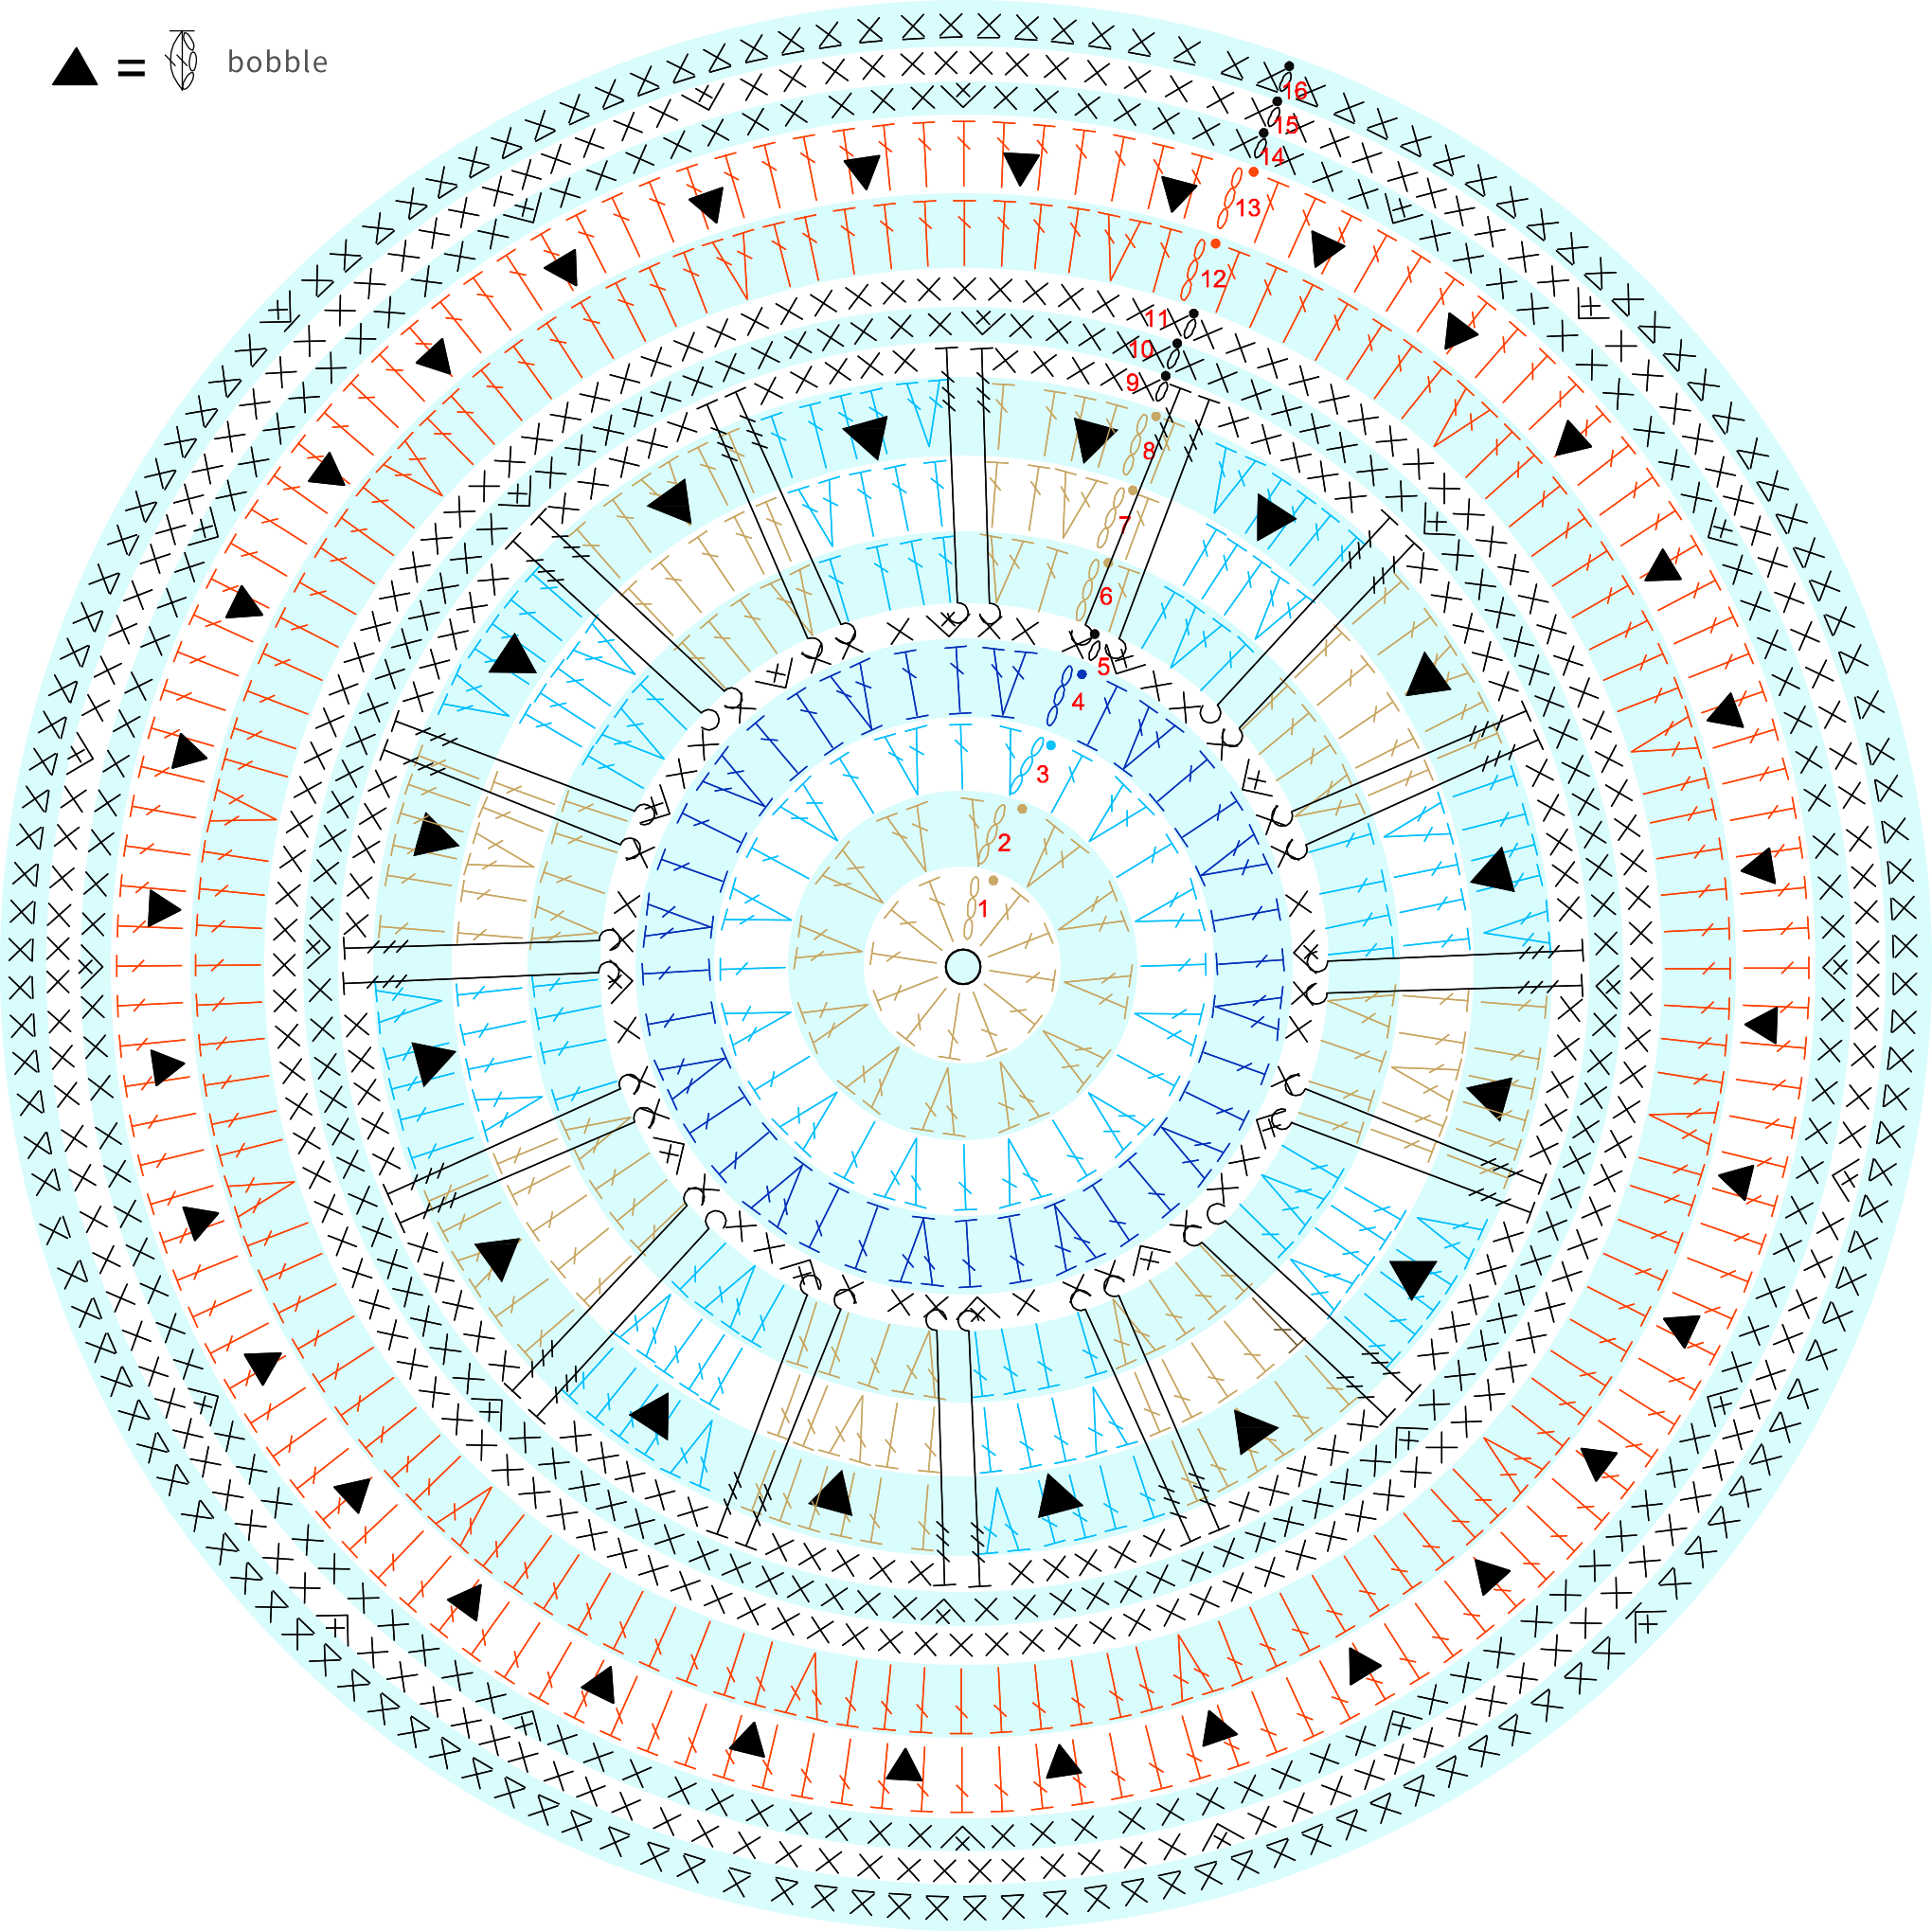
Note: When crocheting rounds 4 and 16, insert the hook into the back loop only.
【Ruffle petals】 70' 57'' (Part 1)
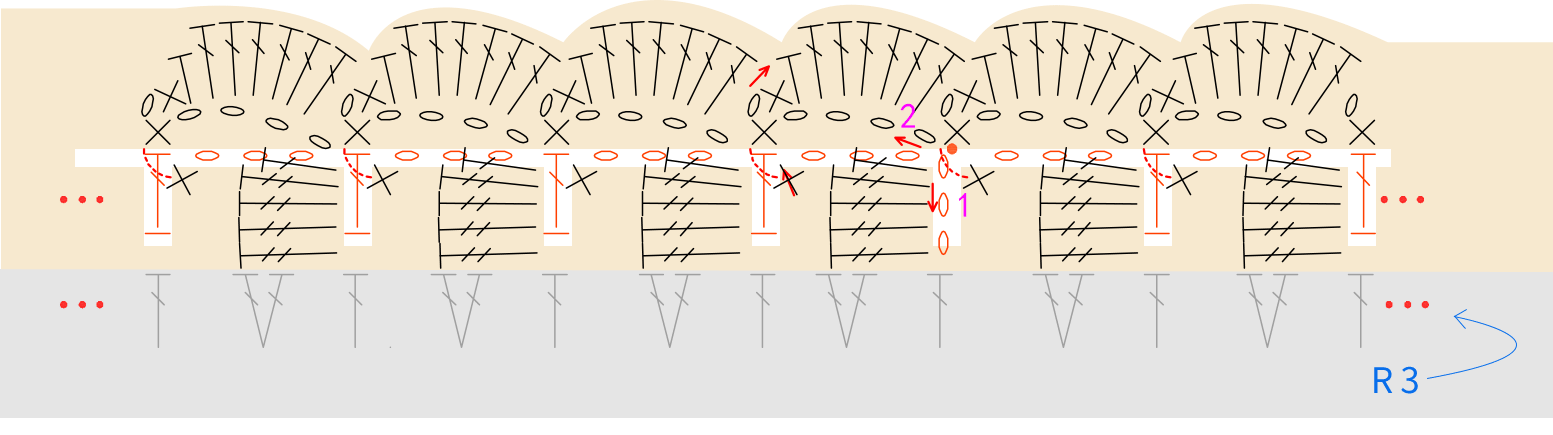
Note: The two rounds of the ruffle petals are worked with the same color yarn, but they are depicted in different colors in the chart for better visibility.
【Edging for main body】 81' 21'' (Part 1)

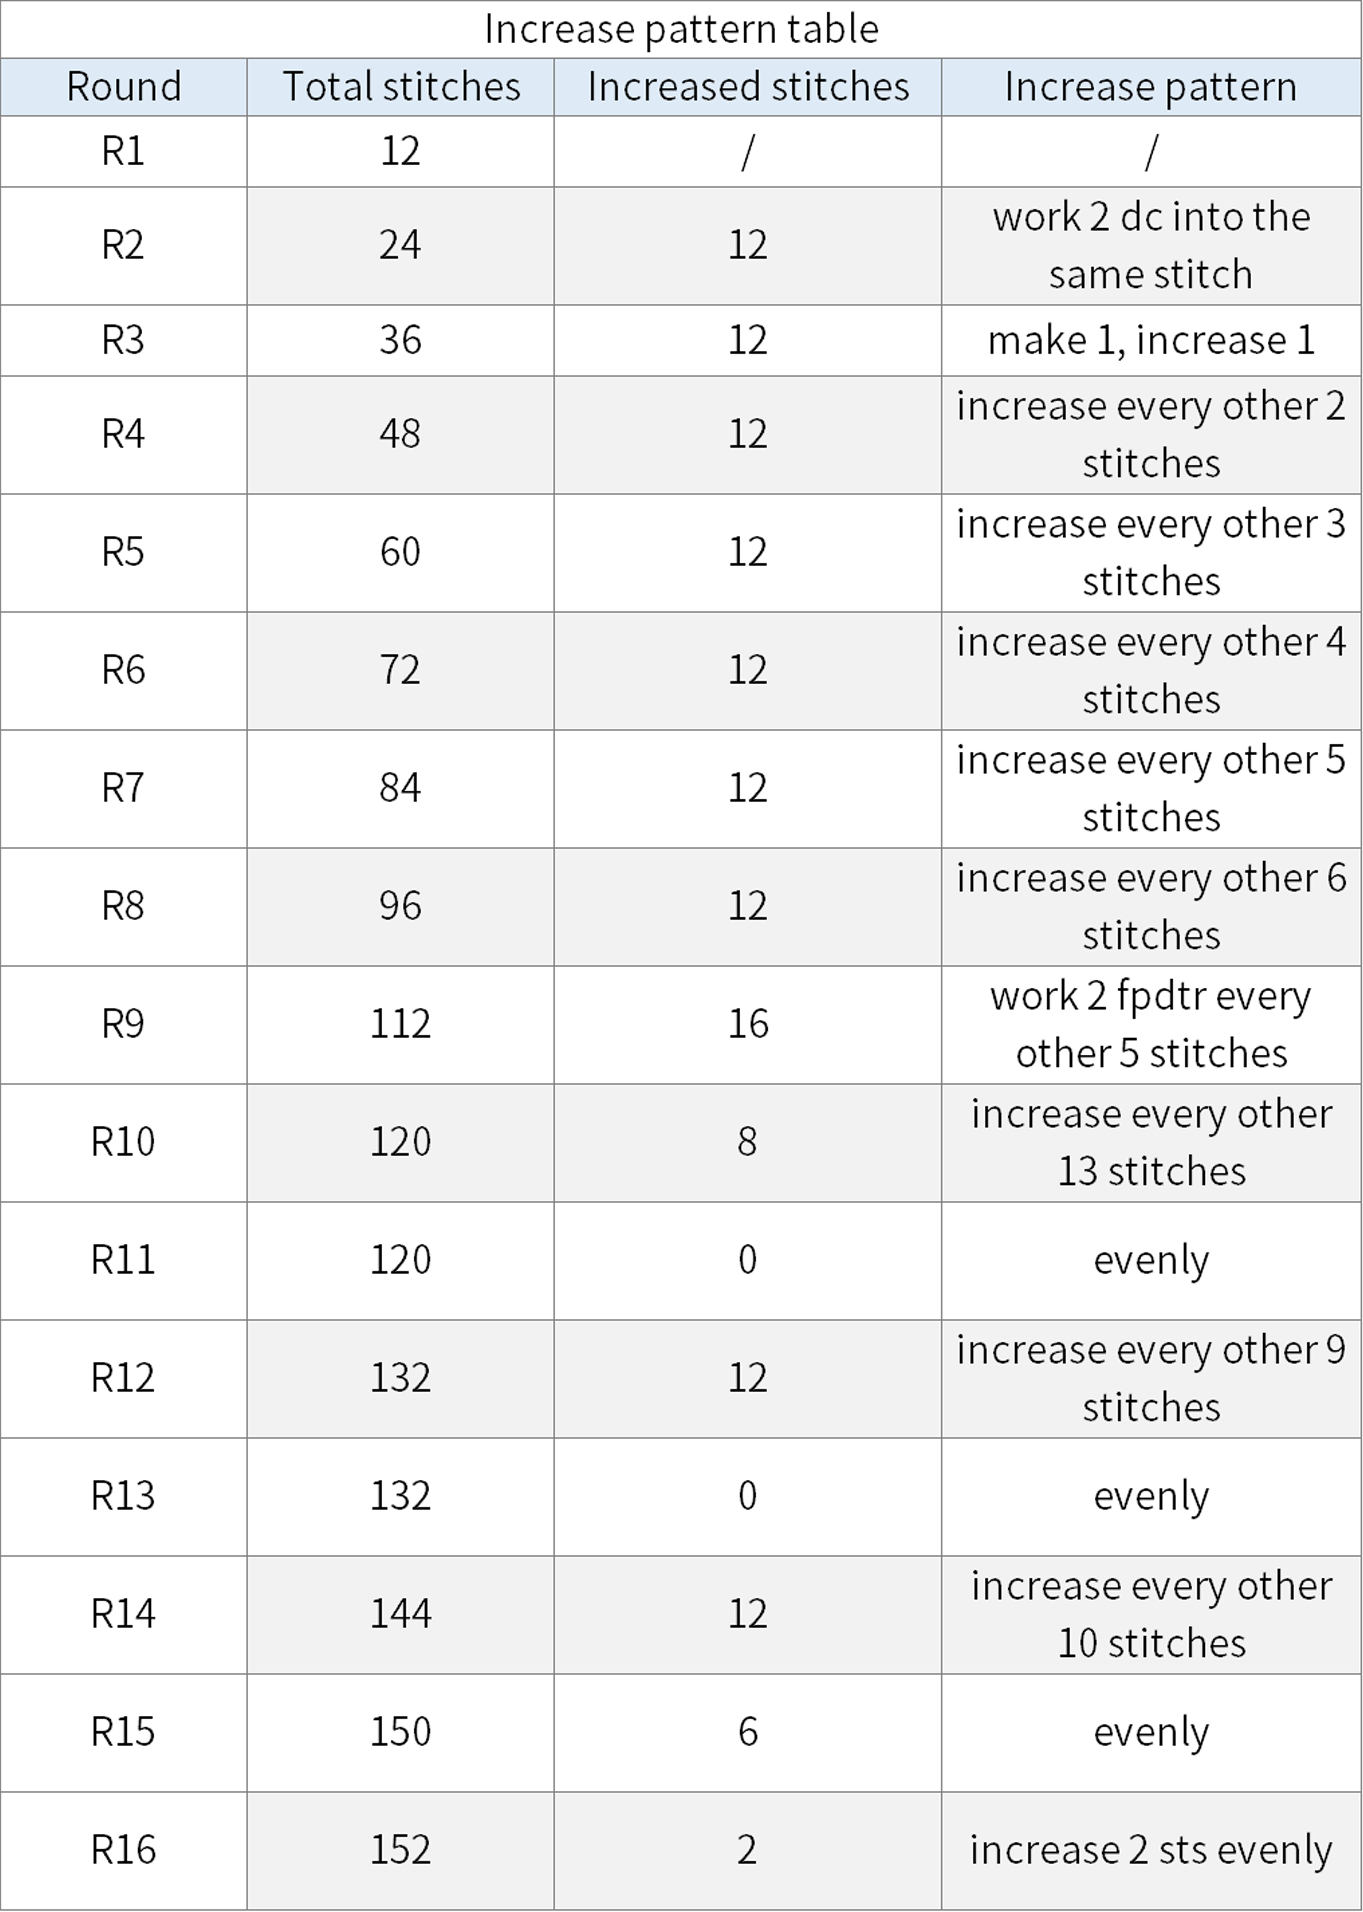
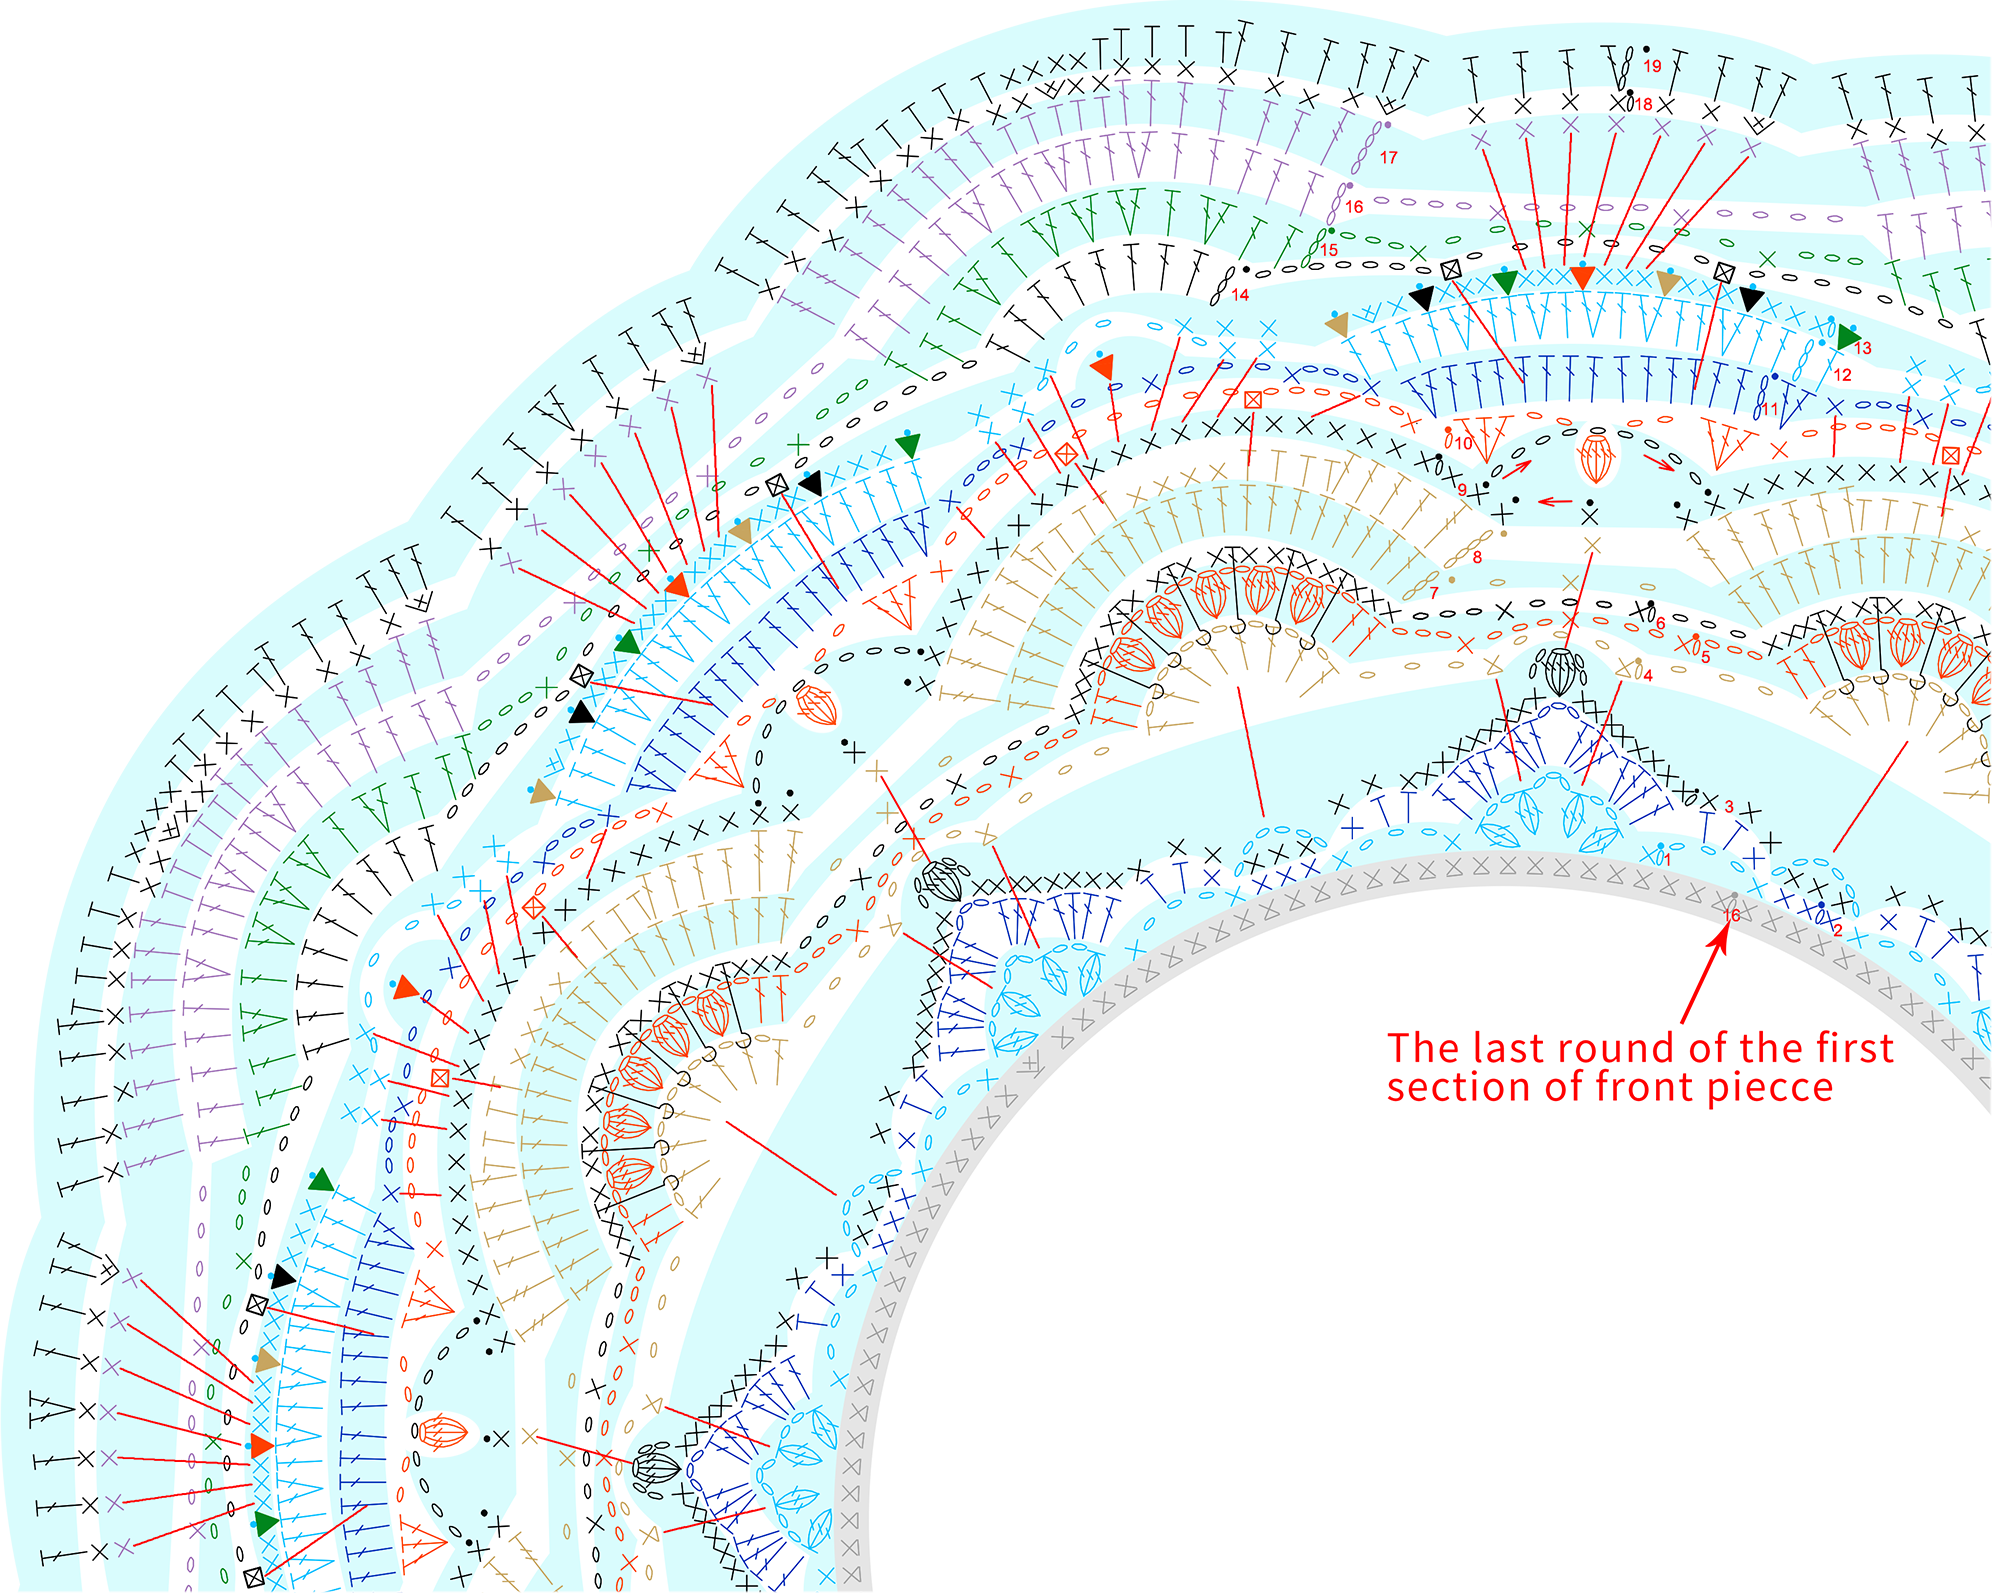
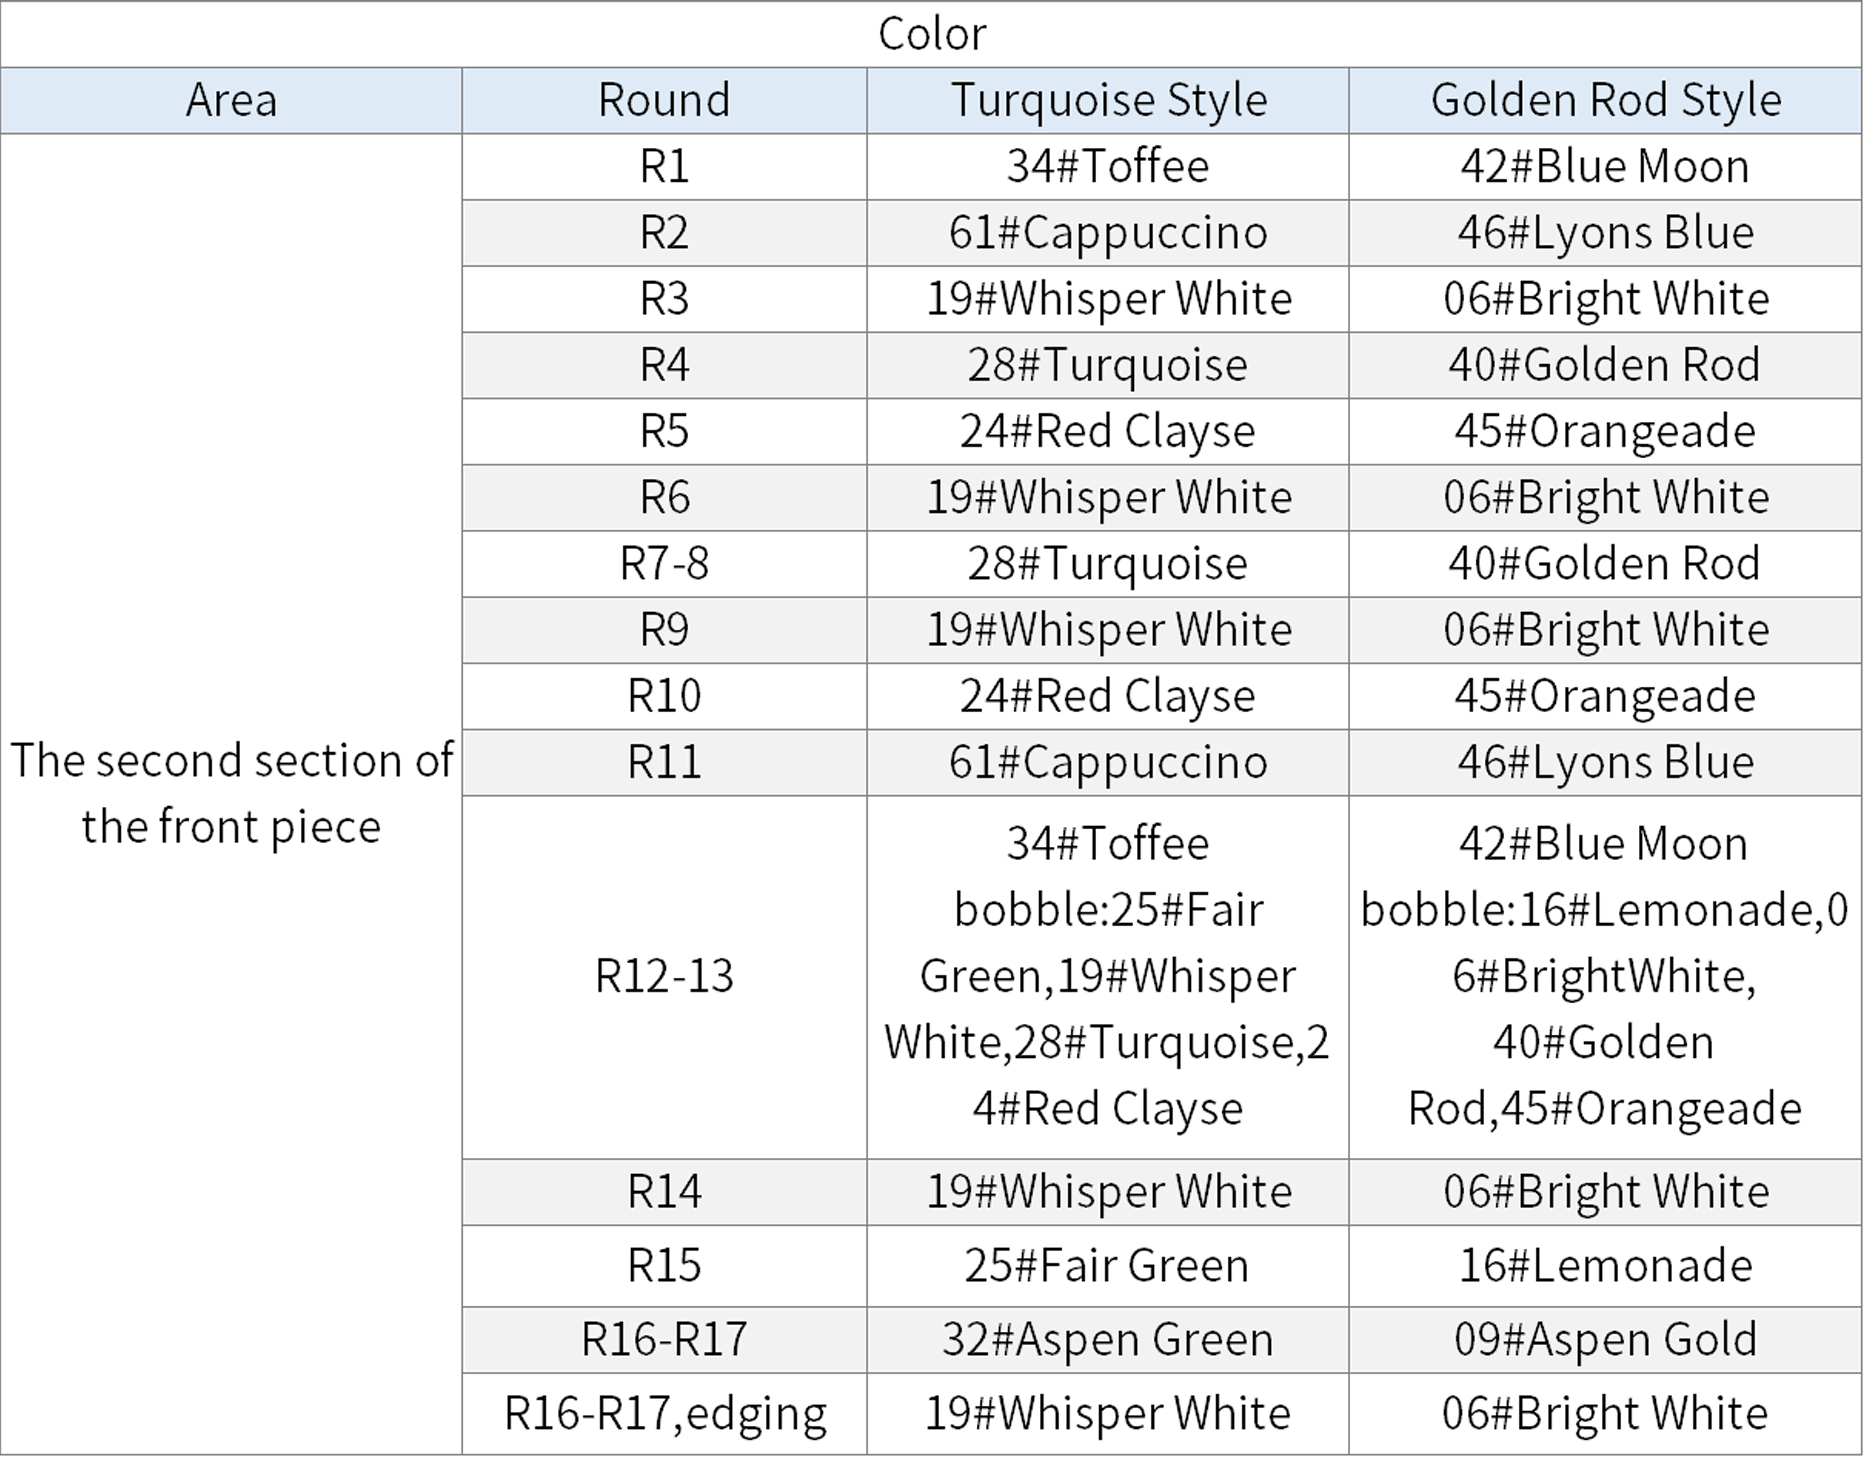
PART3 The second section of the front piece
The second section continues from the first section, with color changes throughout the work.Please refer to the video demonstration for more details.
PART4 Edging and joining 85' 10'' (Part 2)
Once both the front and back pieces are finished,joining the two pieces as you go.Leave the opening of the pillowcase while joining.Please refer to the video demonstration for more details.

Note: When starting the opening for the pillowcase from the top point of a fan stitch on the edge, count over to the second fan-shaped pattern on the right, skipping a fan stitch pattern in between.
PART5 Sew the buttons 90' 20'' (Part 2)
There are three buttons in total,sewn evenly along the opening of the pillowcase.at the edge of the front piece on the wrong side.Please refer to the video demonstration for more details.

Made by the community