Bag
Dyed Flower
Project preview
See the finished project
Pattern format
Instructions
Watch and follow
Video tutorial
| Style | Yarn | Color |
|---|---|---|
| Toffee Version | Morandi 8# |  02#Linen x 4 02#Linen x 4 06#Toffee x 7 06#Toffee x 7 53#Elm Green x 4 53#Elm Green x 4 |
| Pompeiian Red Version | Morandi 8# |  25#Rugby Tan x 4 25#Rugby Tan x 4 39#Whisper White x 4 39#Whisper White x 4 42#Pompeiian Red x 7 42#Pompeiian Red x 7 |
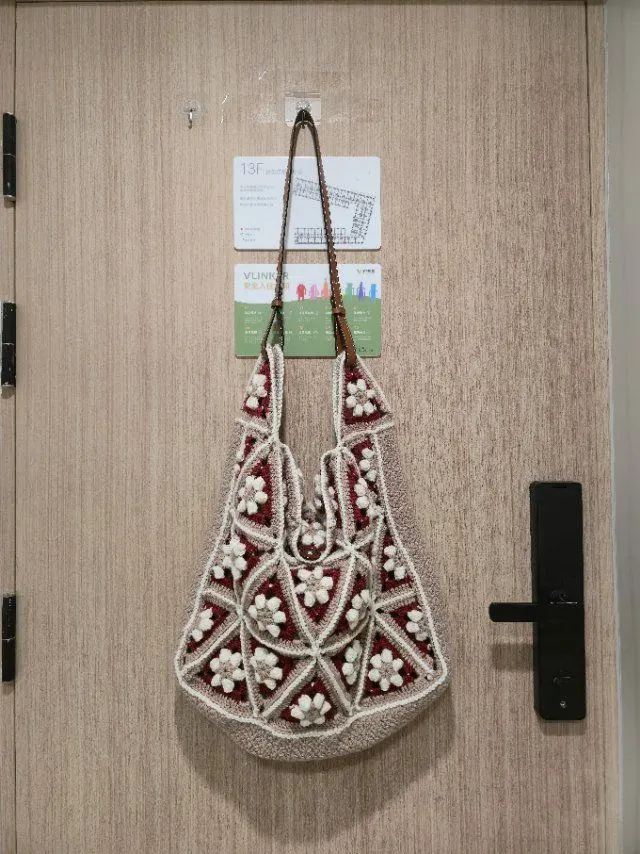
This bag consists of the body, pieces, flap, strap buckle, overall edging, buttons, and shoulder strap. The body is made by joining together motifs. First, crochet and join the corresponding motifs, then crochet the piece. After that, sew together the front and back bodies with the piece. Next, crochet and join the flap and strap buckle. Once completed, add the border around the entire piece. Then sew the buttons onto the front body, and finally attach the pre-made shoulder strap.
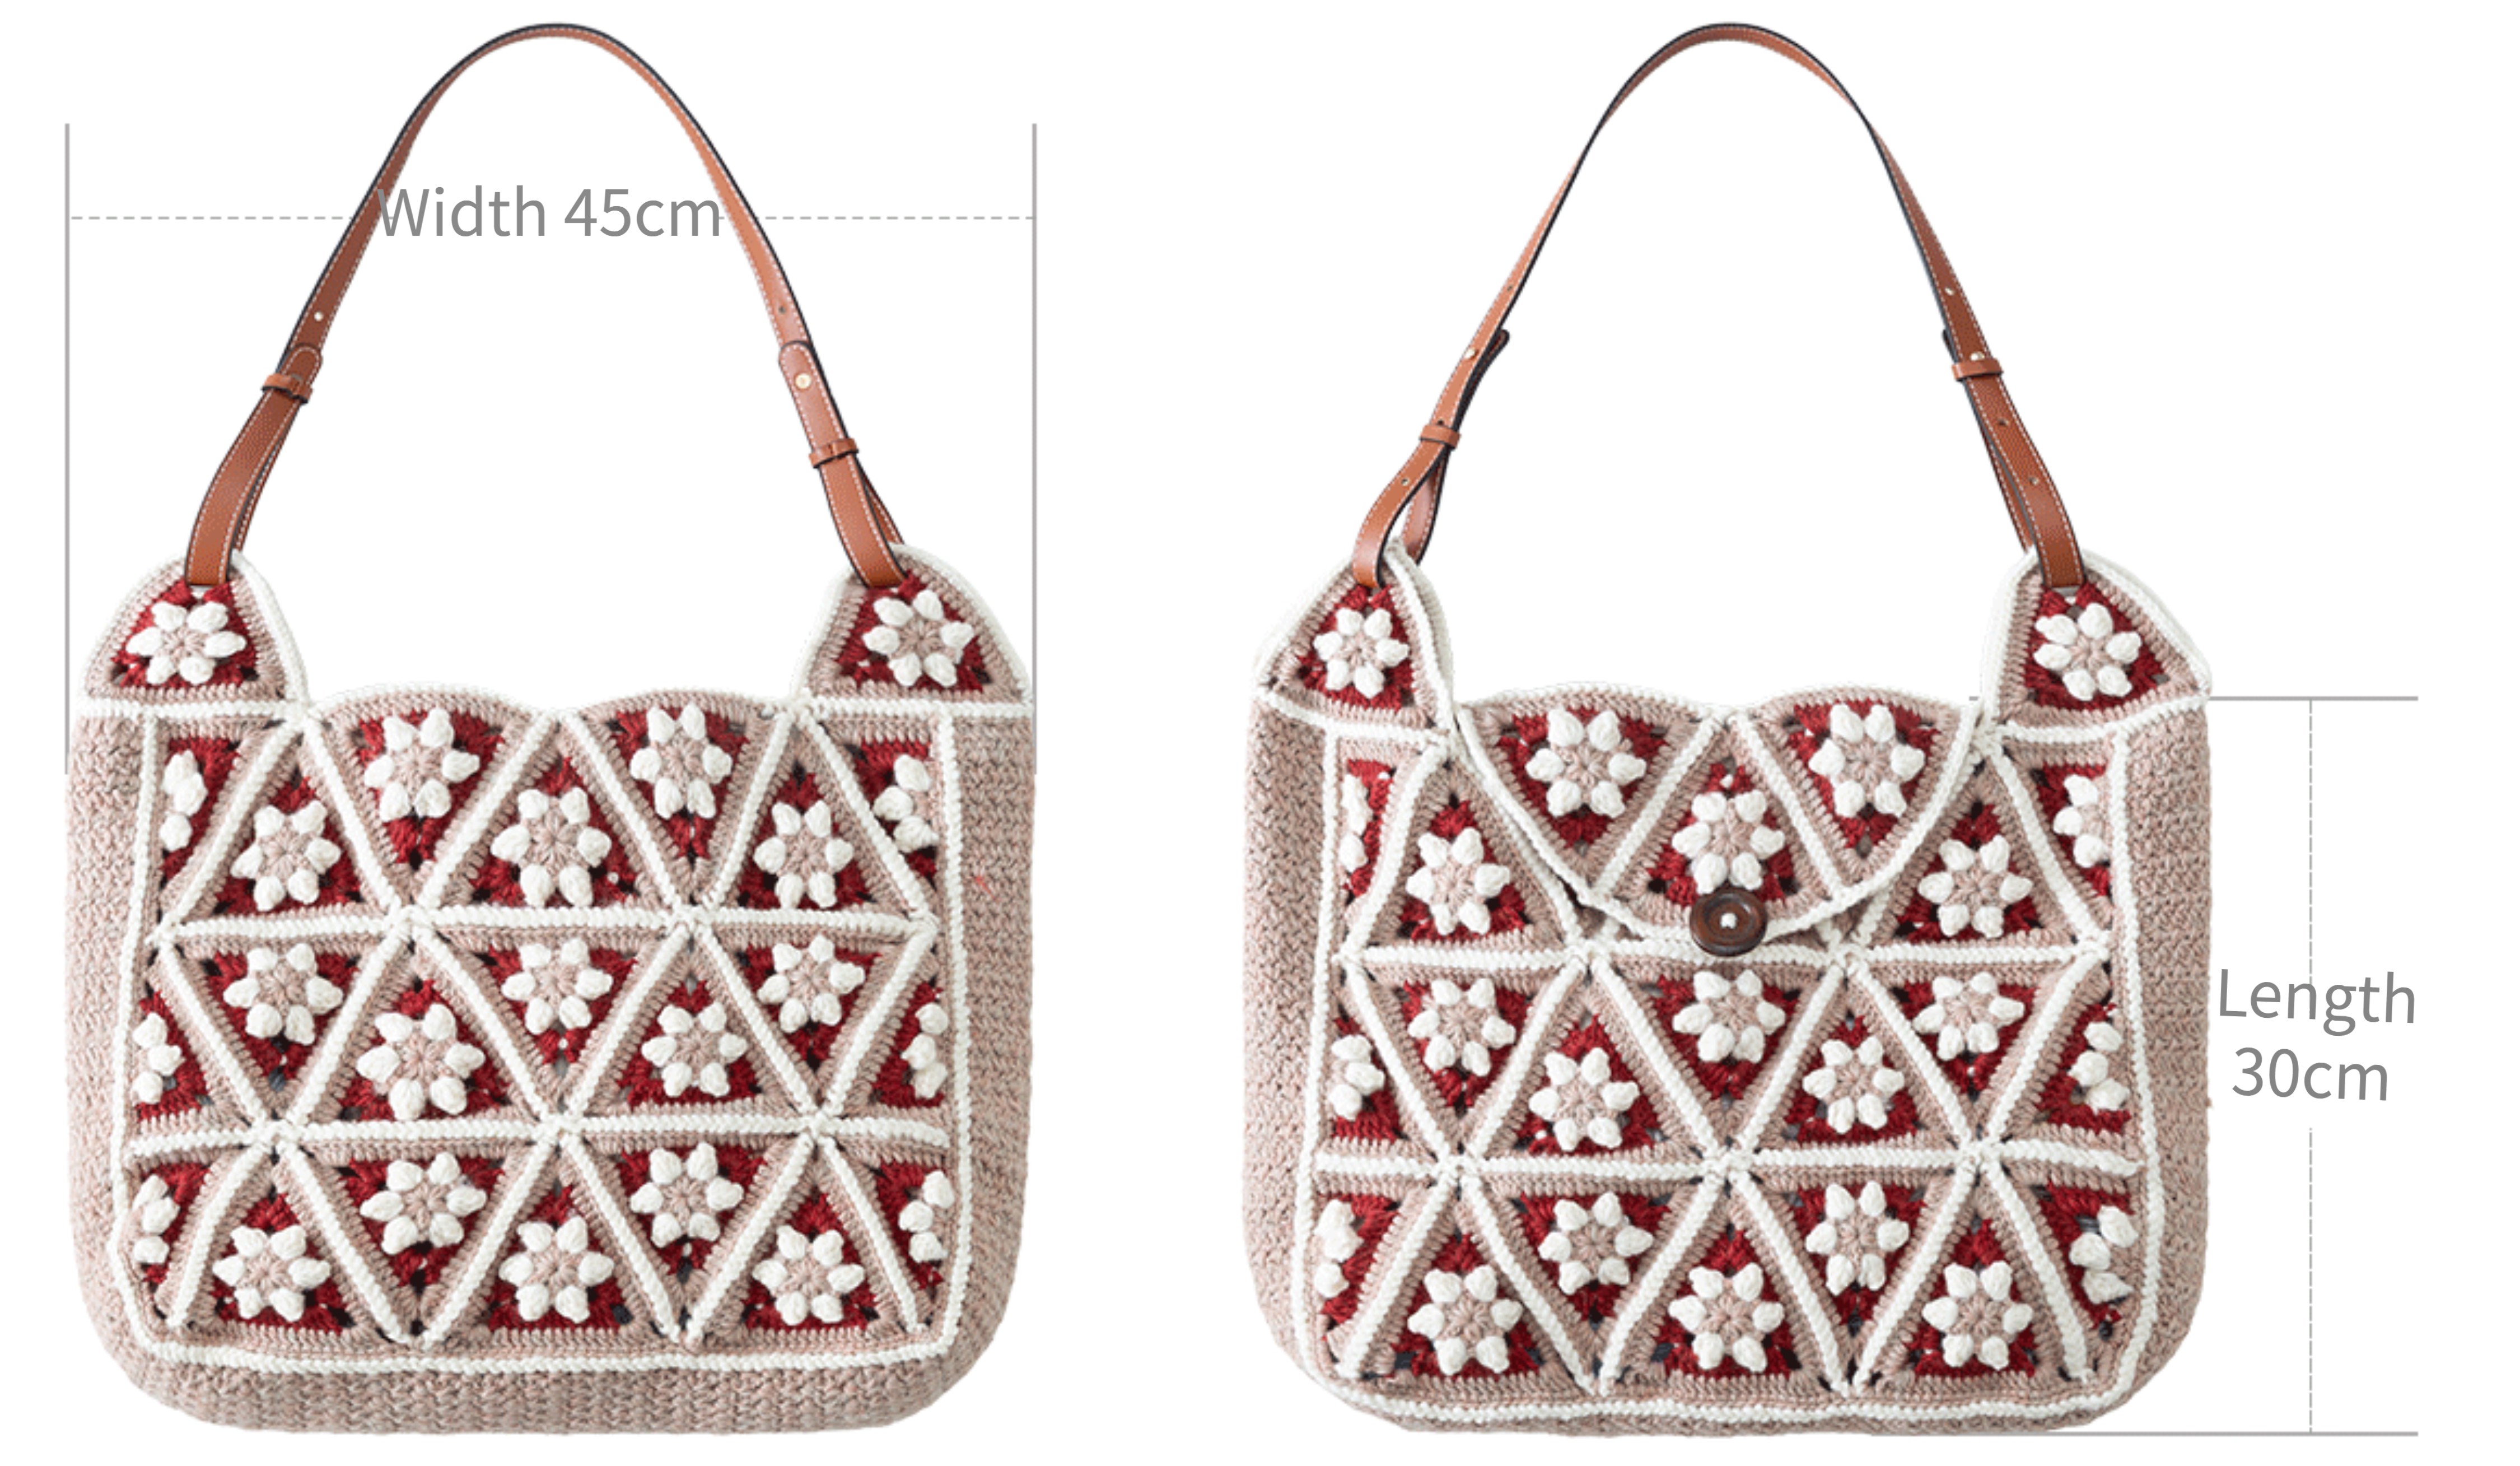
Note: Hand-measured, with a possible error of 1-2 cm. Since everyone's tension varies, the sample size is for reference only.
Yarn : Morandi 8#. Tools : Standard 3.5 mm crochet hook, or Susu's 3.6 mm crochet hook.

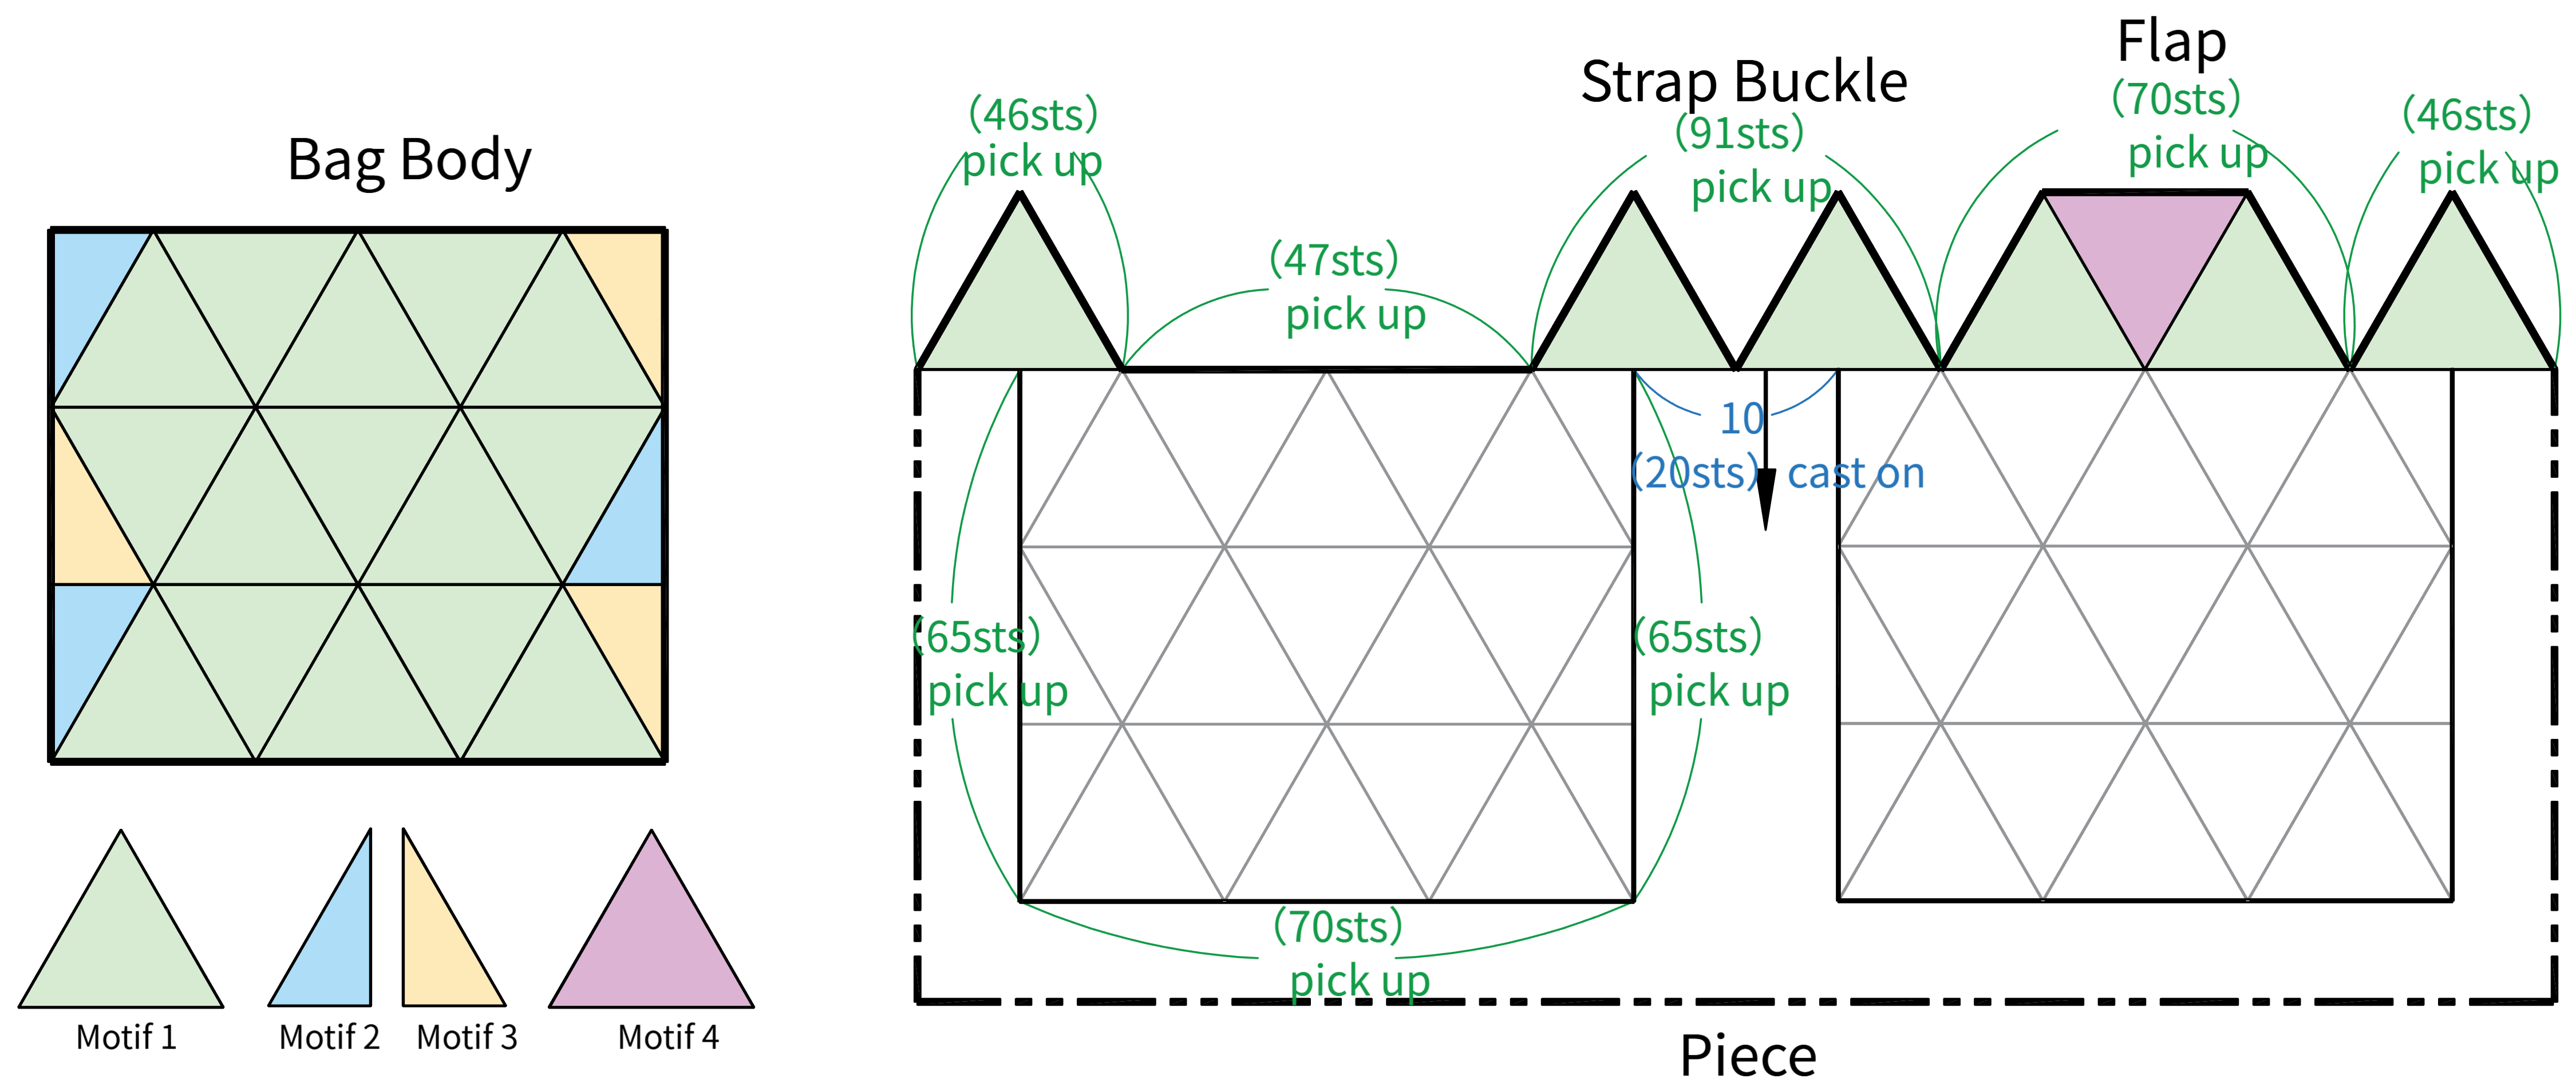
Motif Layout Diagram - Structural Diagram






Note:
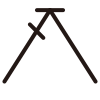
1. This pattern is making in Chinese crochet pattern terms, and the stitch name is written using American terminology. All measurements in charts are in cm.

PART 1 Bag Body A 01' 14''
The bag body consists of two identical pieces, each made up of motifs, joining, and edging. First, crochet the corresponding motifs, then join them together using slip stitch seam on the right side. Finally, crochet the edging around the joined motifs. Please refer to the video demonstration for more details.
| Motif 1, Motif 4 Color Chart | ||
| Rounds | Toffee Version | Pompeiian Red Version |
| Cast on - R 1 | 06#Toffee | 25#Rugby Tan |
| R 2 | 53#Elm Green | 39#Whisper White |
| R 3 | 02#Linen | 42#Pompeiian Red |
| R 4 | 06#Toffee | 25#Rugby Tan |
| Motif 2, Motif 3 Color Chart | ||
| Rows | Toffee Version | Pompeiian Red Version |
| Cast on - R 1 | 06#Toffee | 25#Rugby Tan |
| R 2 | 53#Elm Green | 39#Whisper White |
| R 3 | 02#Linen | 42#Pompeiian Red |
| R 4 | 06#Toffee | 25#Rugby Tan |
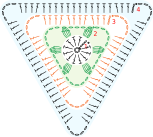
Motif 1
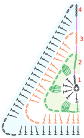
Motif 2
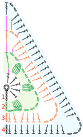
Motif 3
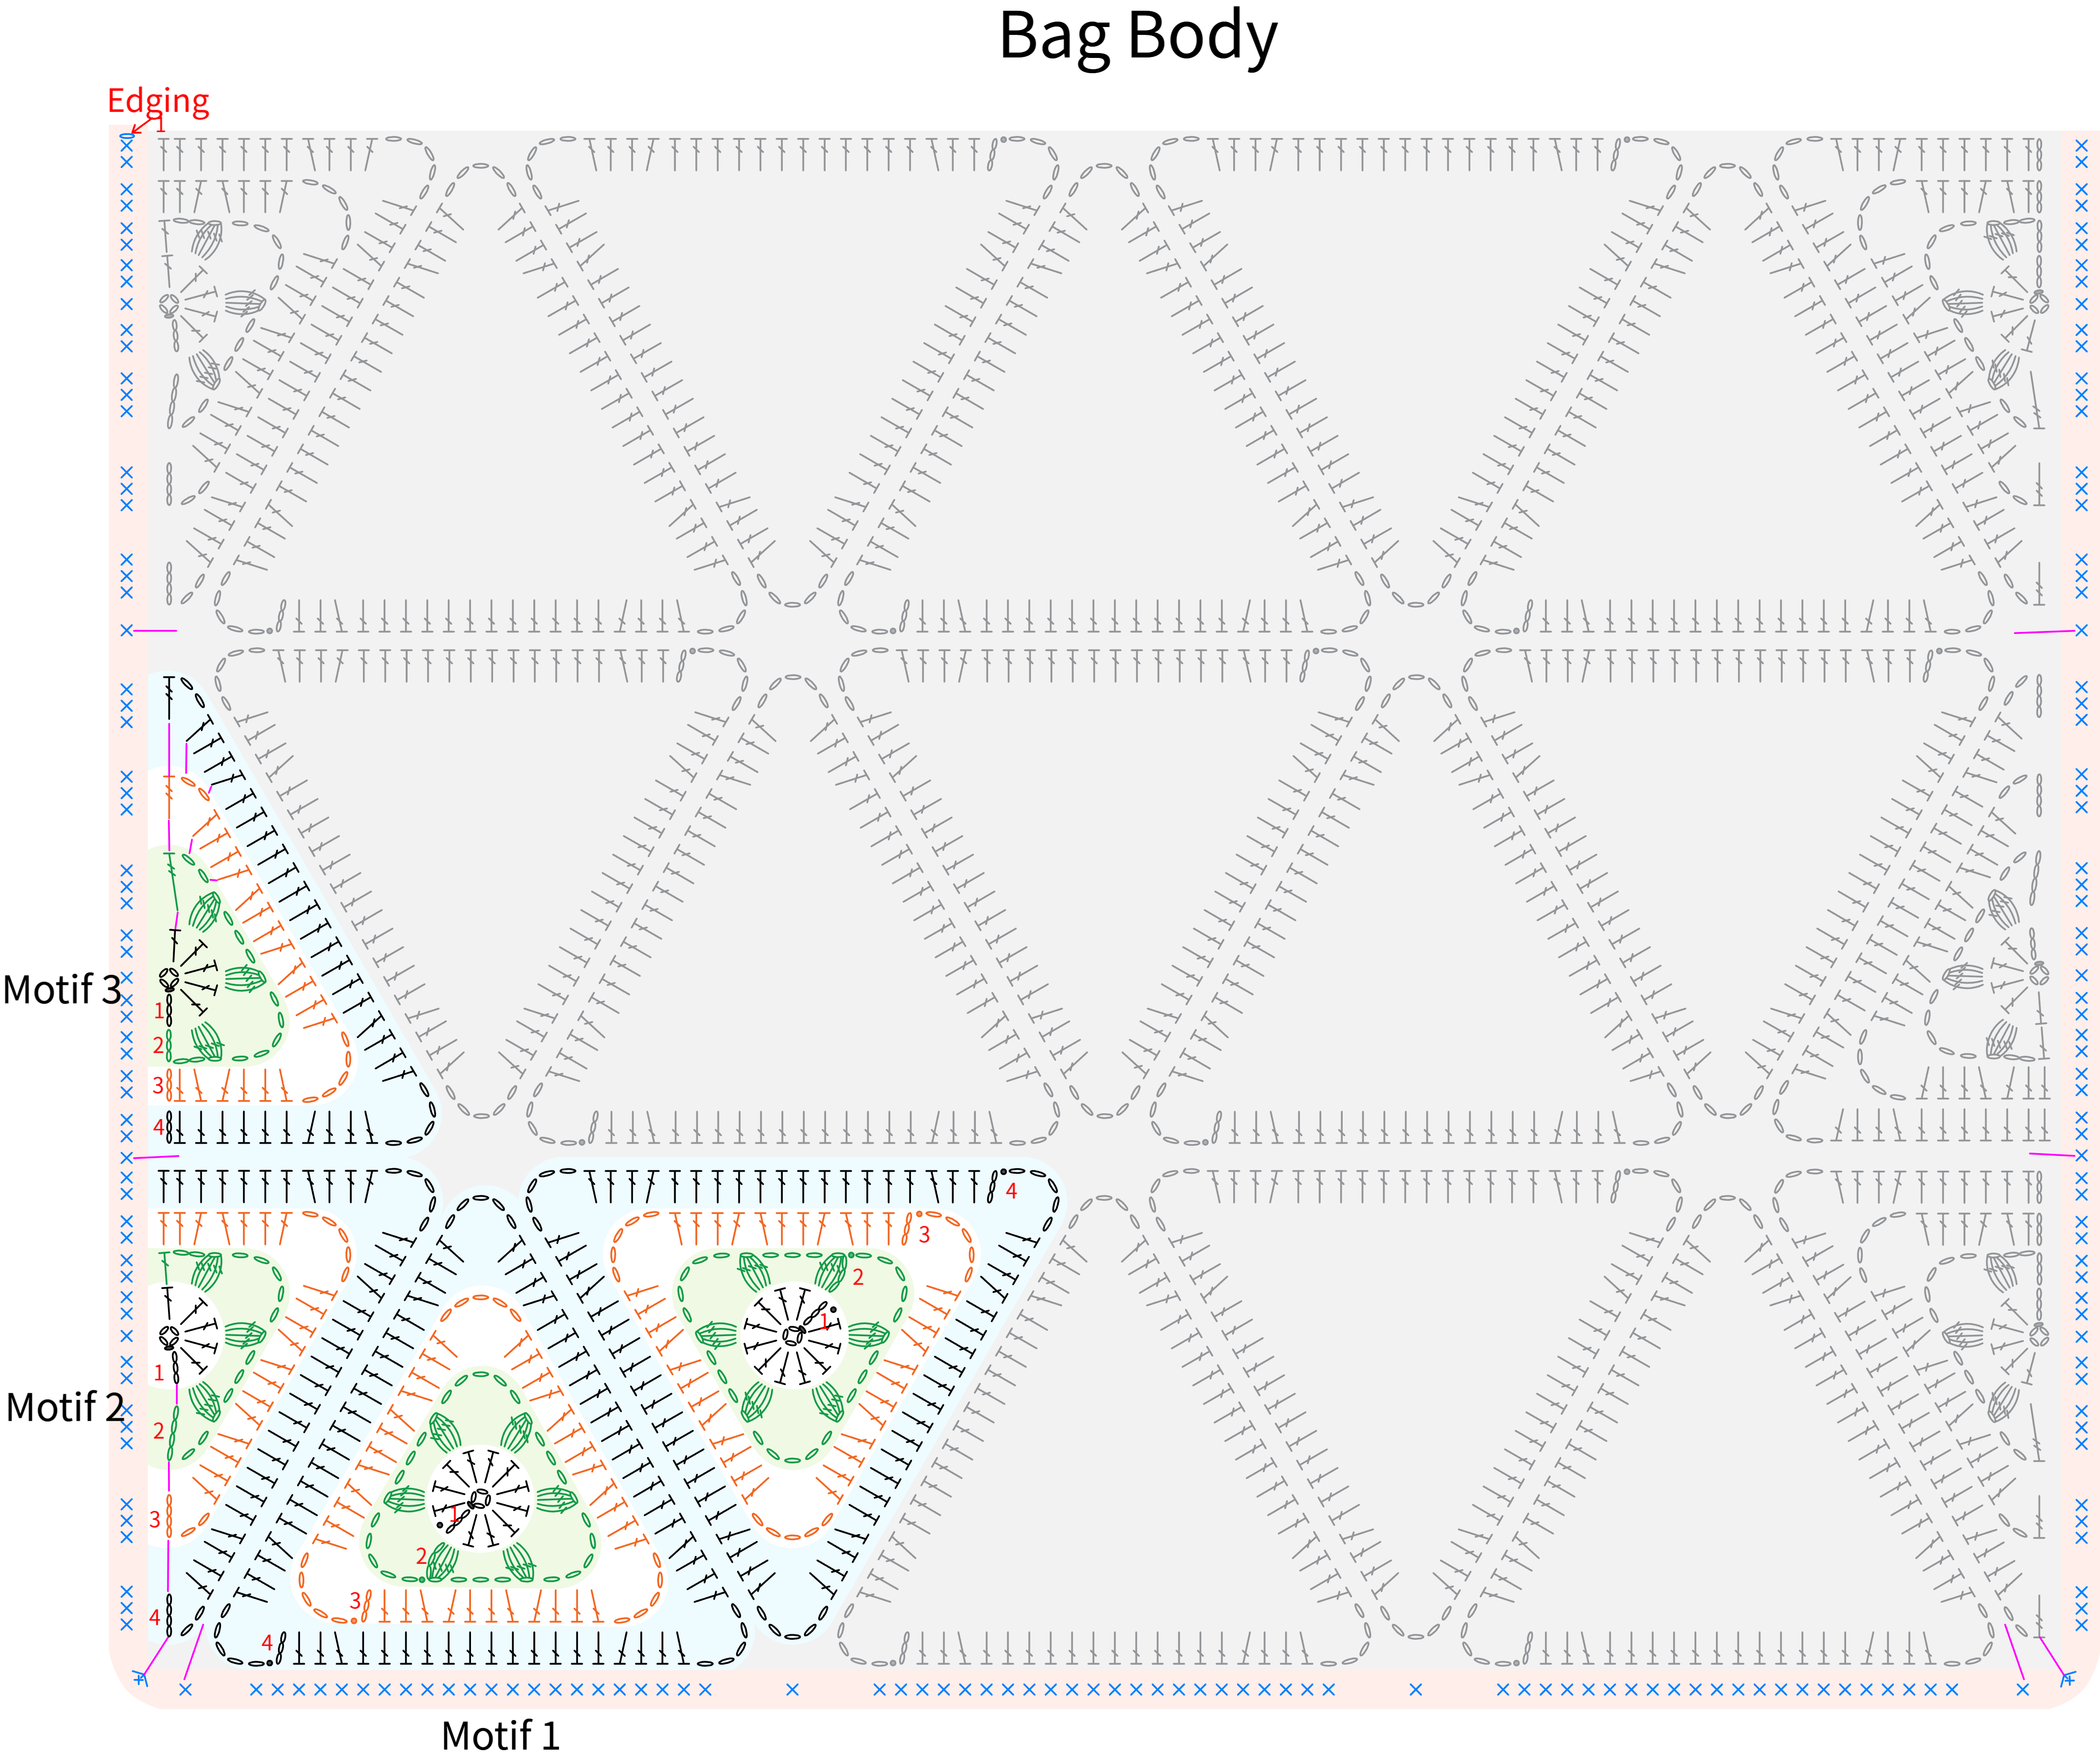
| Part | Toffee Version | Pompeiian Red Version |
| Piece | 06#Toffee | 25#Rugby Tan |
| Motifs Joining Together | 53#Elm Green | 39#Whisper White |
| Bag Body Edging | 06#Toffee | 25#Rugby Tan |
| Piece and Bag Body assembly | 53#Elm Green | 39#Whisper White |
| Overall Edging |
PART 2 Piece B 56' 46''
The piece is started with foundation chain method , worked in rows, and then joined to the front and back bodies after completion. Please refer to the video demonstration for more details.
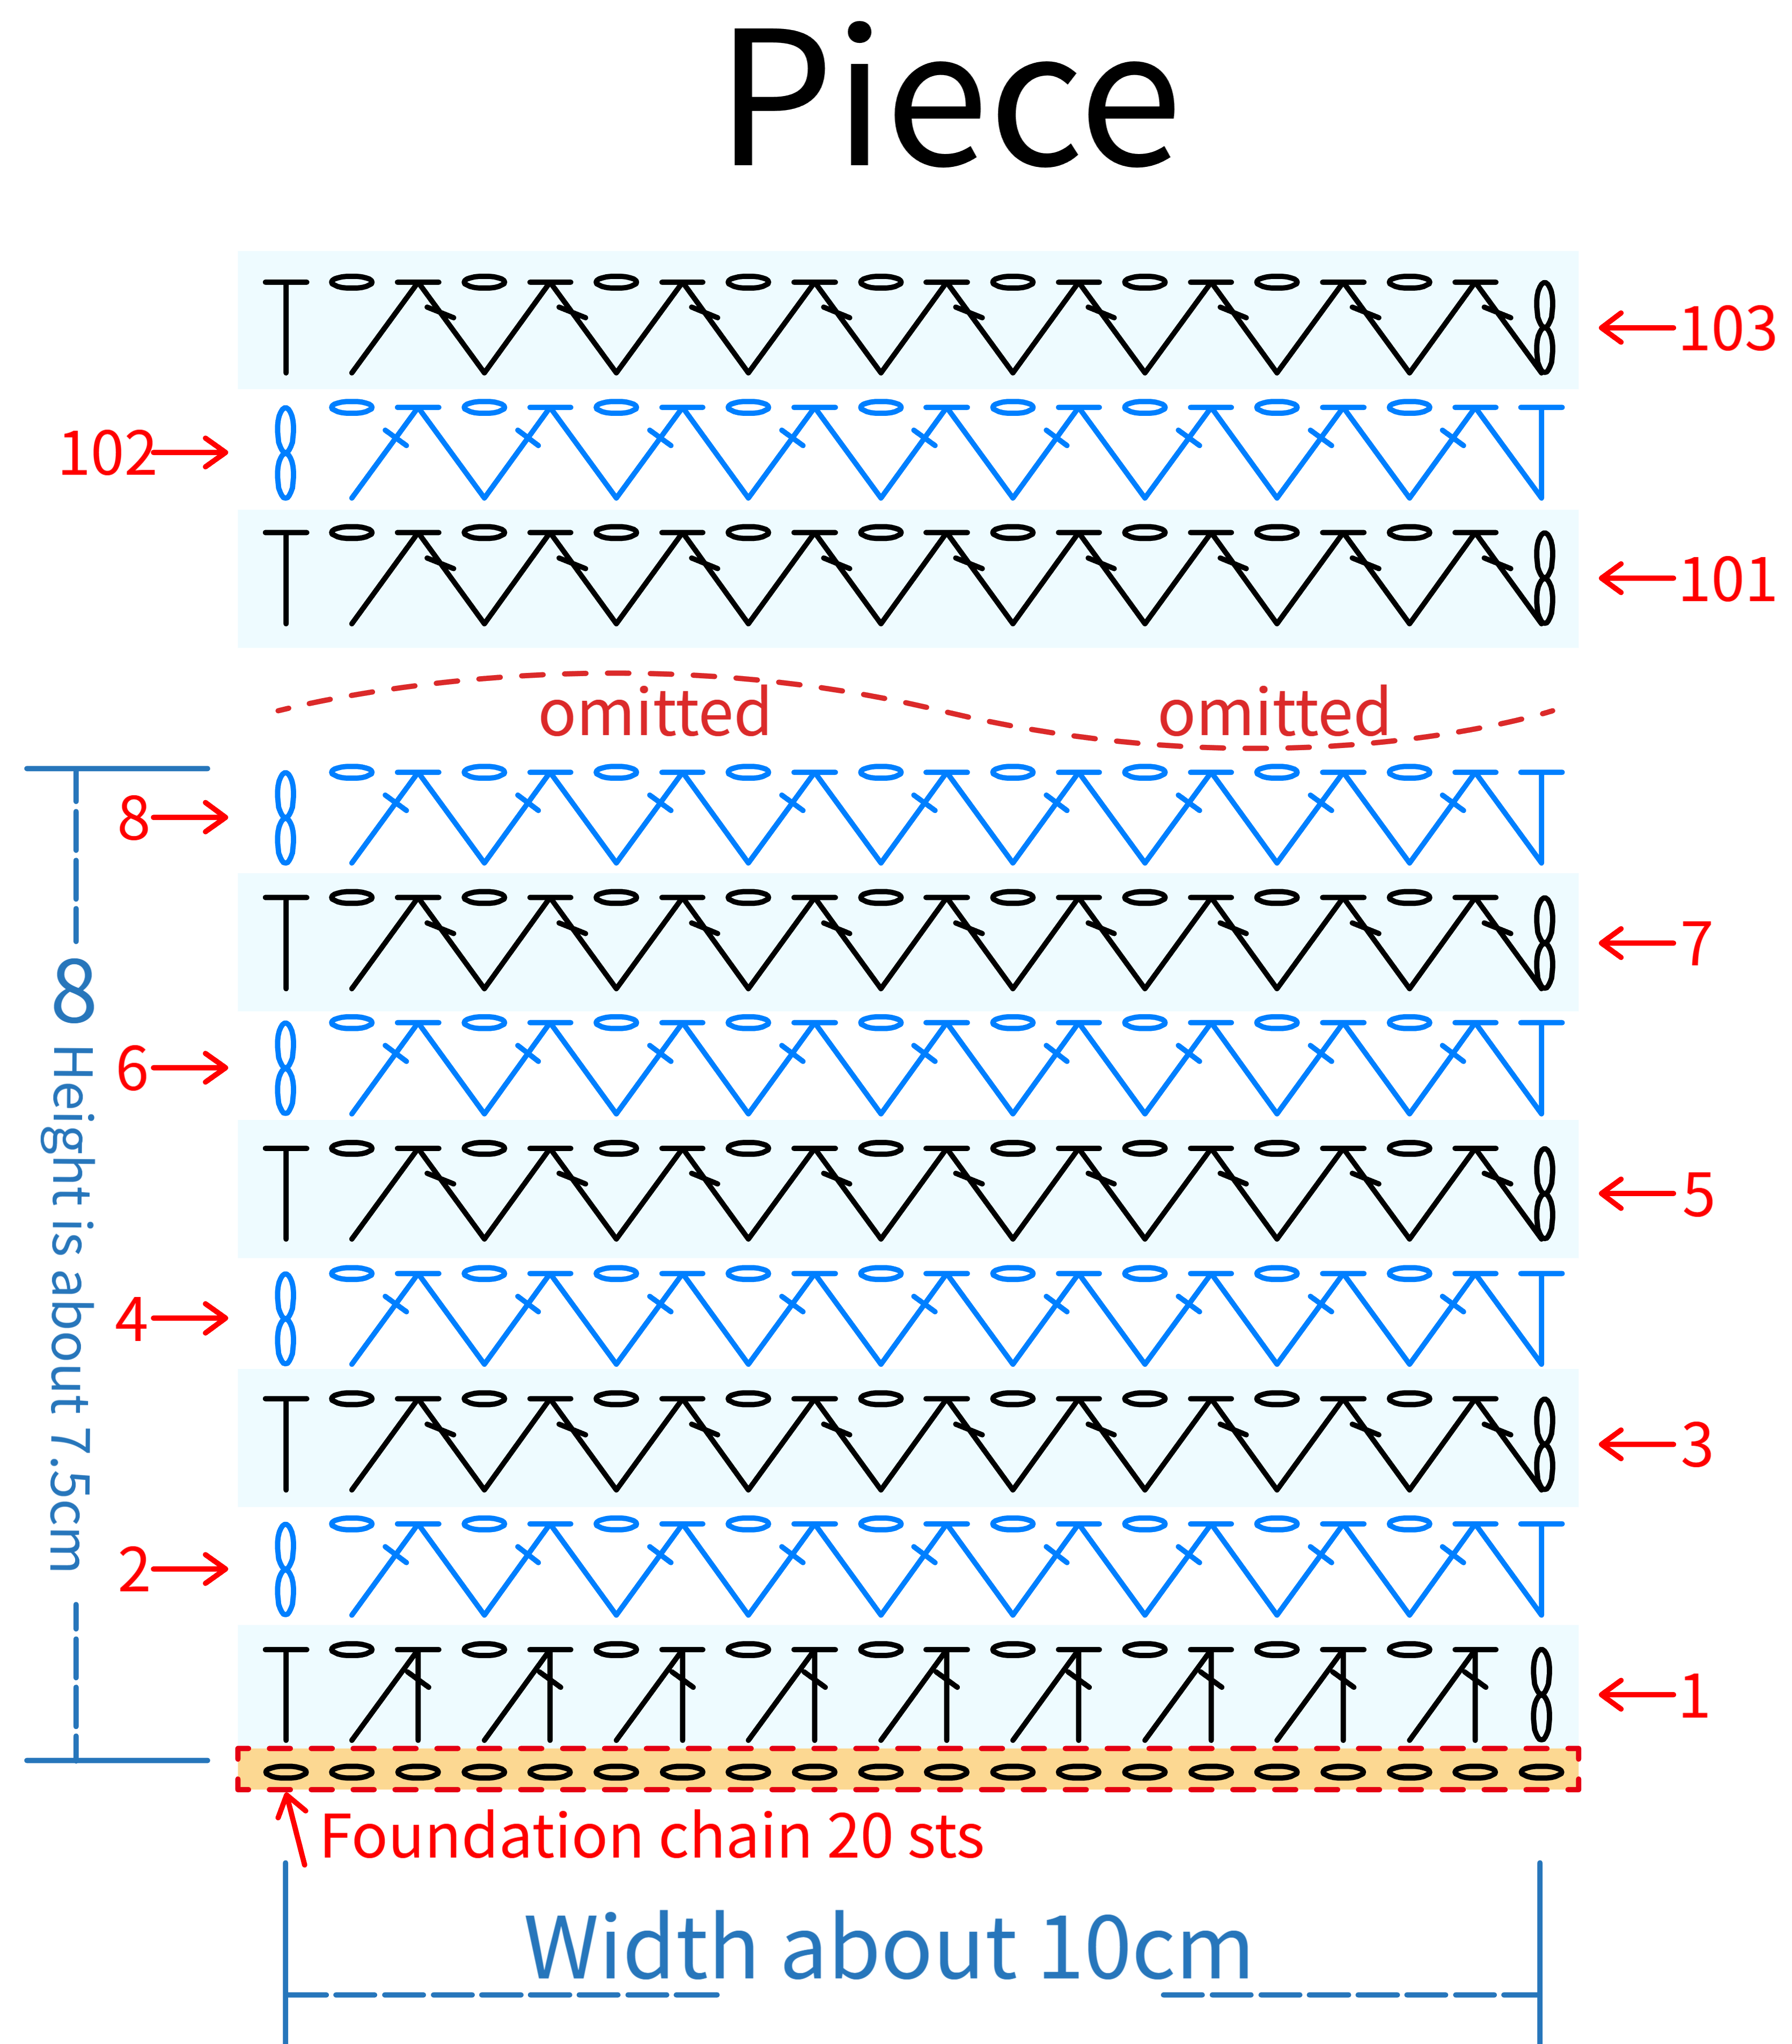
Note: 1. After crocheting 8 rows, measure the size. If the size differs significantly, adjust your tension and re-crochet.
2. You can also compare with the bag body edging as you crochet.
PART 3 Flap, Strap Buckle C 73' 00''
The flap is made by joining two motif 1s and one motif 4 to the edge of the back body. The strap buckle consists of 4 motif 1s attached horizontally along the edges of the front and back bodies with the fabric piece. Please refer to the video demonstration for more details.
PART 4 Overall Edging D 74' 35''
Overall edging around the front body, strap buckle, and flap in counterclockwise rounds. Please refer to the video demonstration for more details.
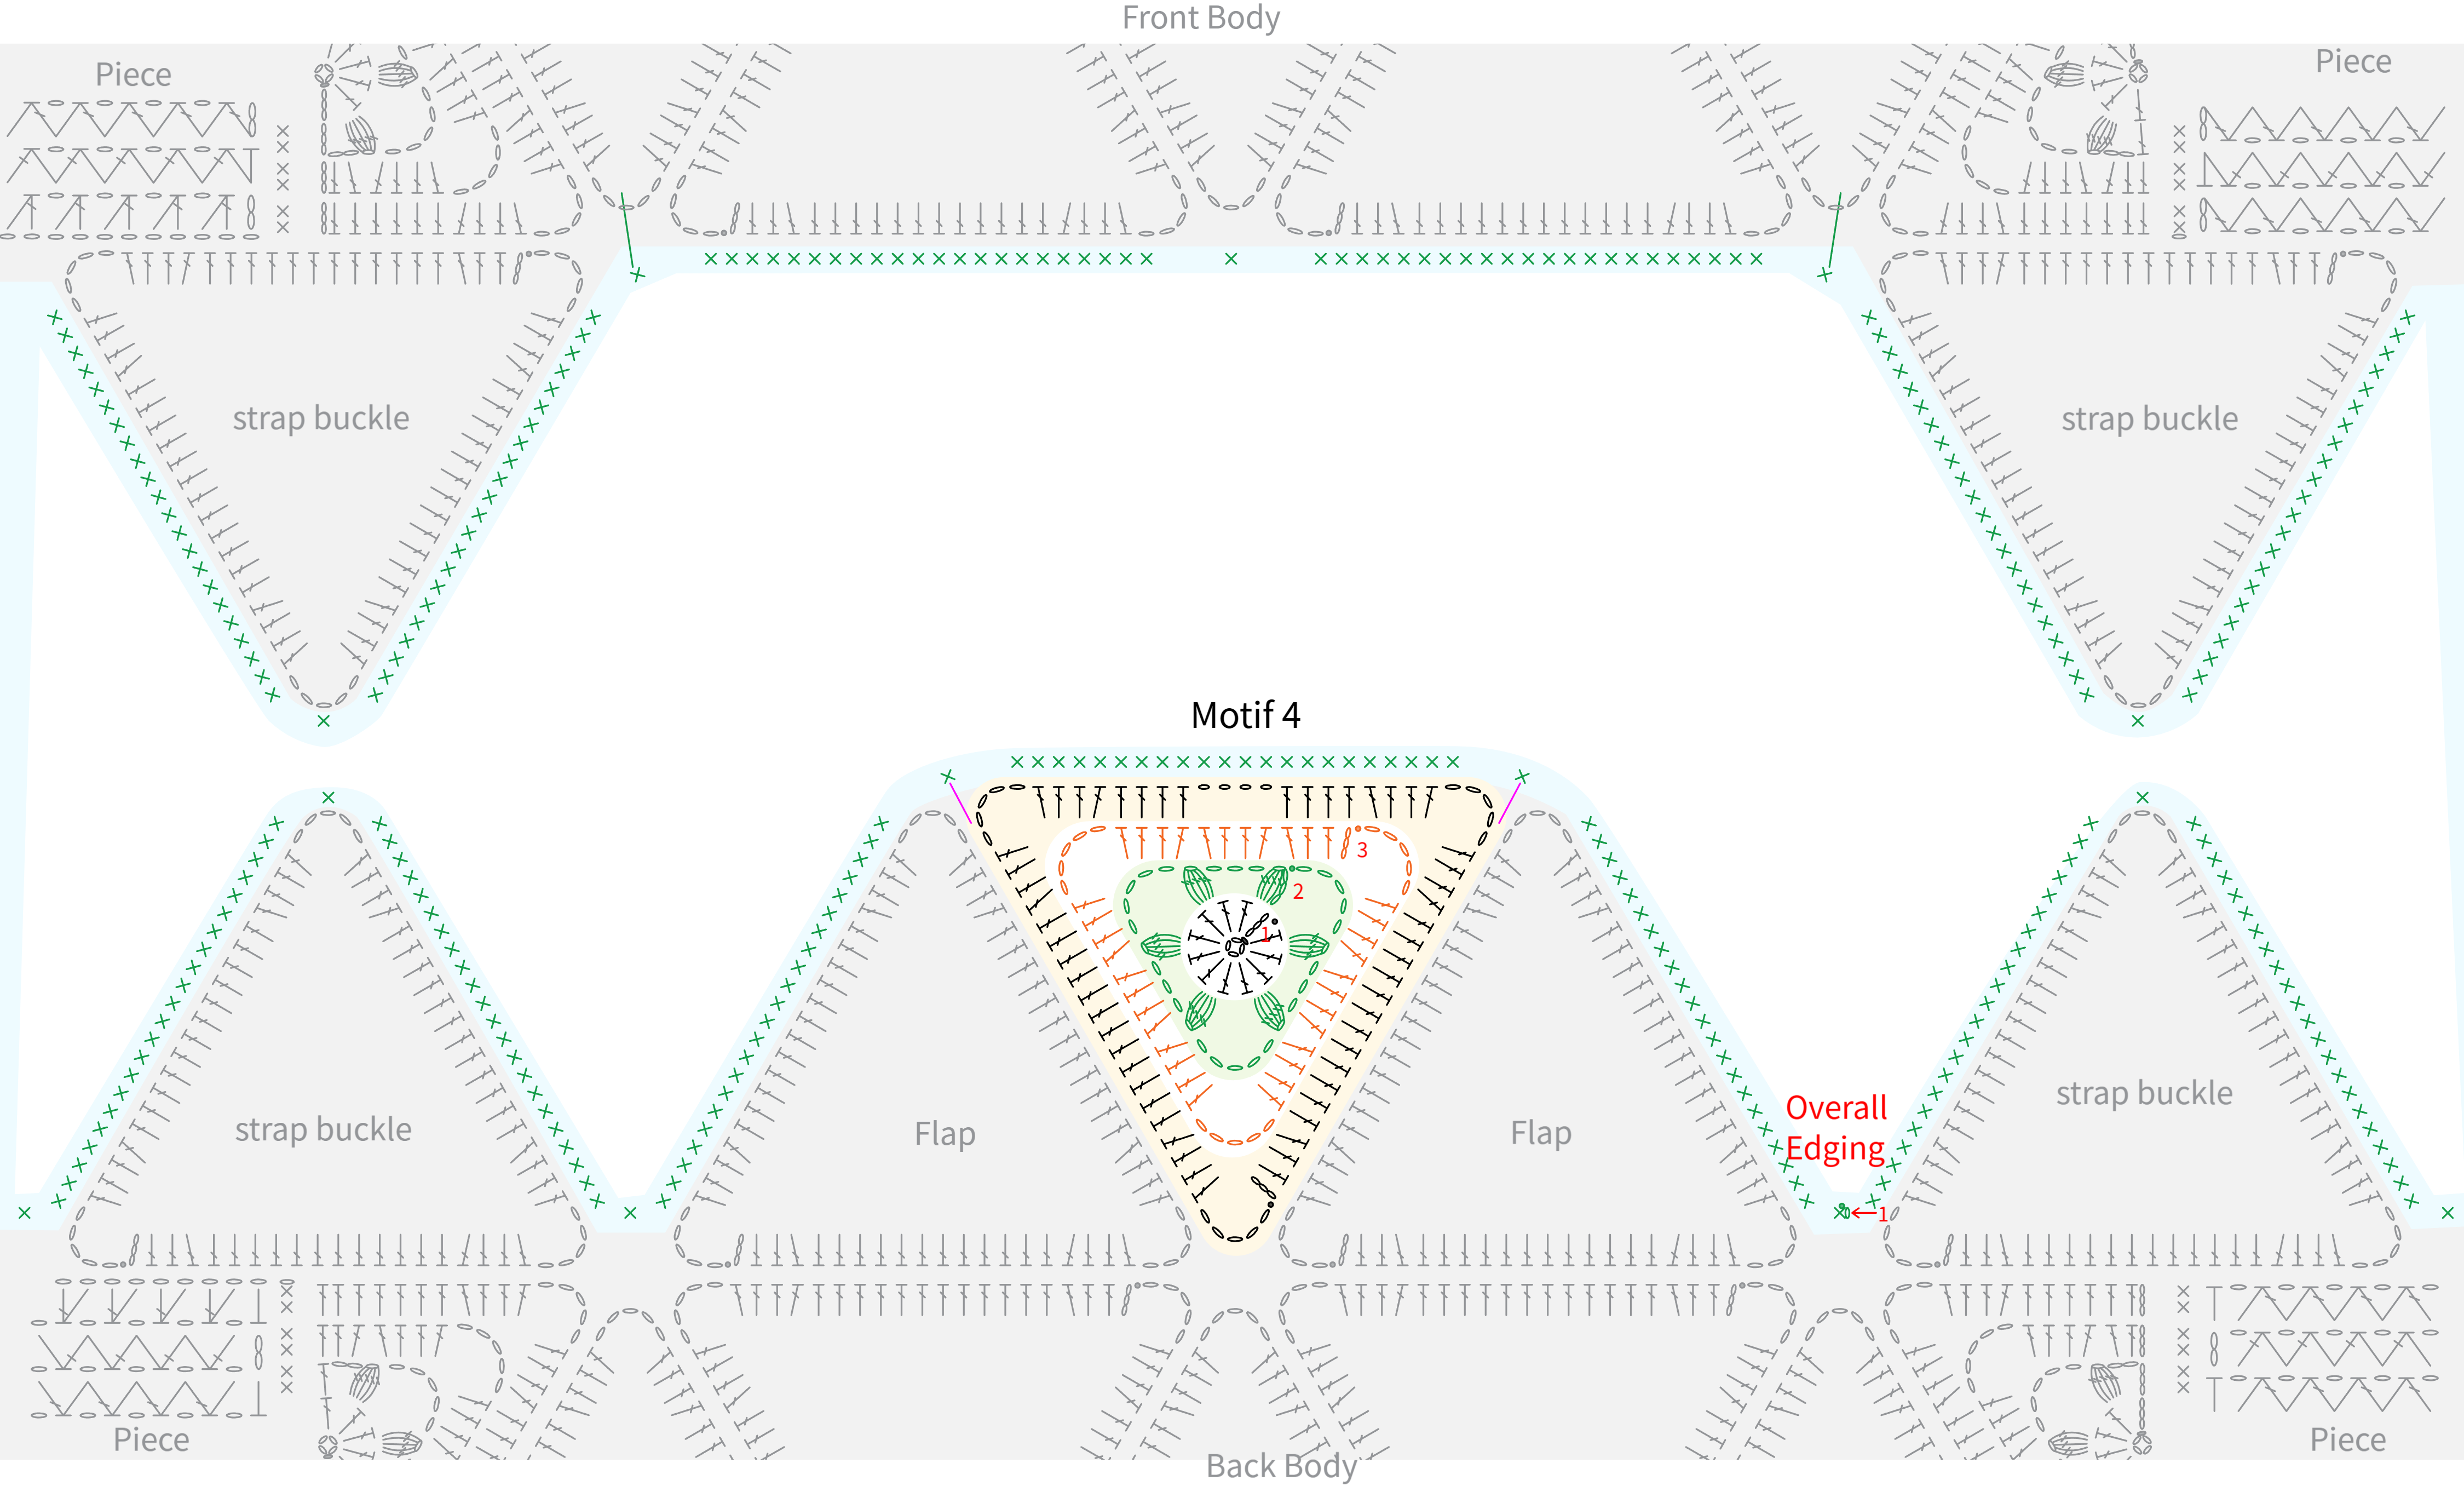
PART 5 Buttons, Shoulder Straps E 75' 23''
Sew the buttons onto the front body of the bag corresponding to the flap, then attach the shoulder strap to the strap buckle. Please refer to the video demonstration for more details.
Note: Cut a 30 cm piece of yarn in the same color as the edging, and sew the button onto the side of the bag body corresponding to motif 4 on the flap.
Made by the community