Clothes
Echo
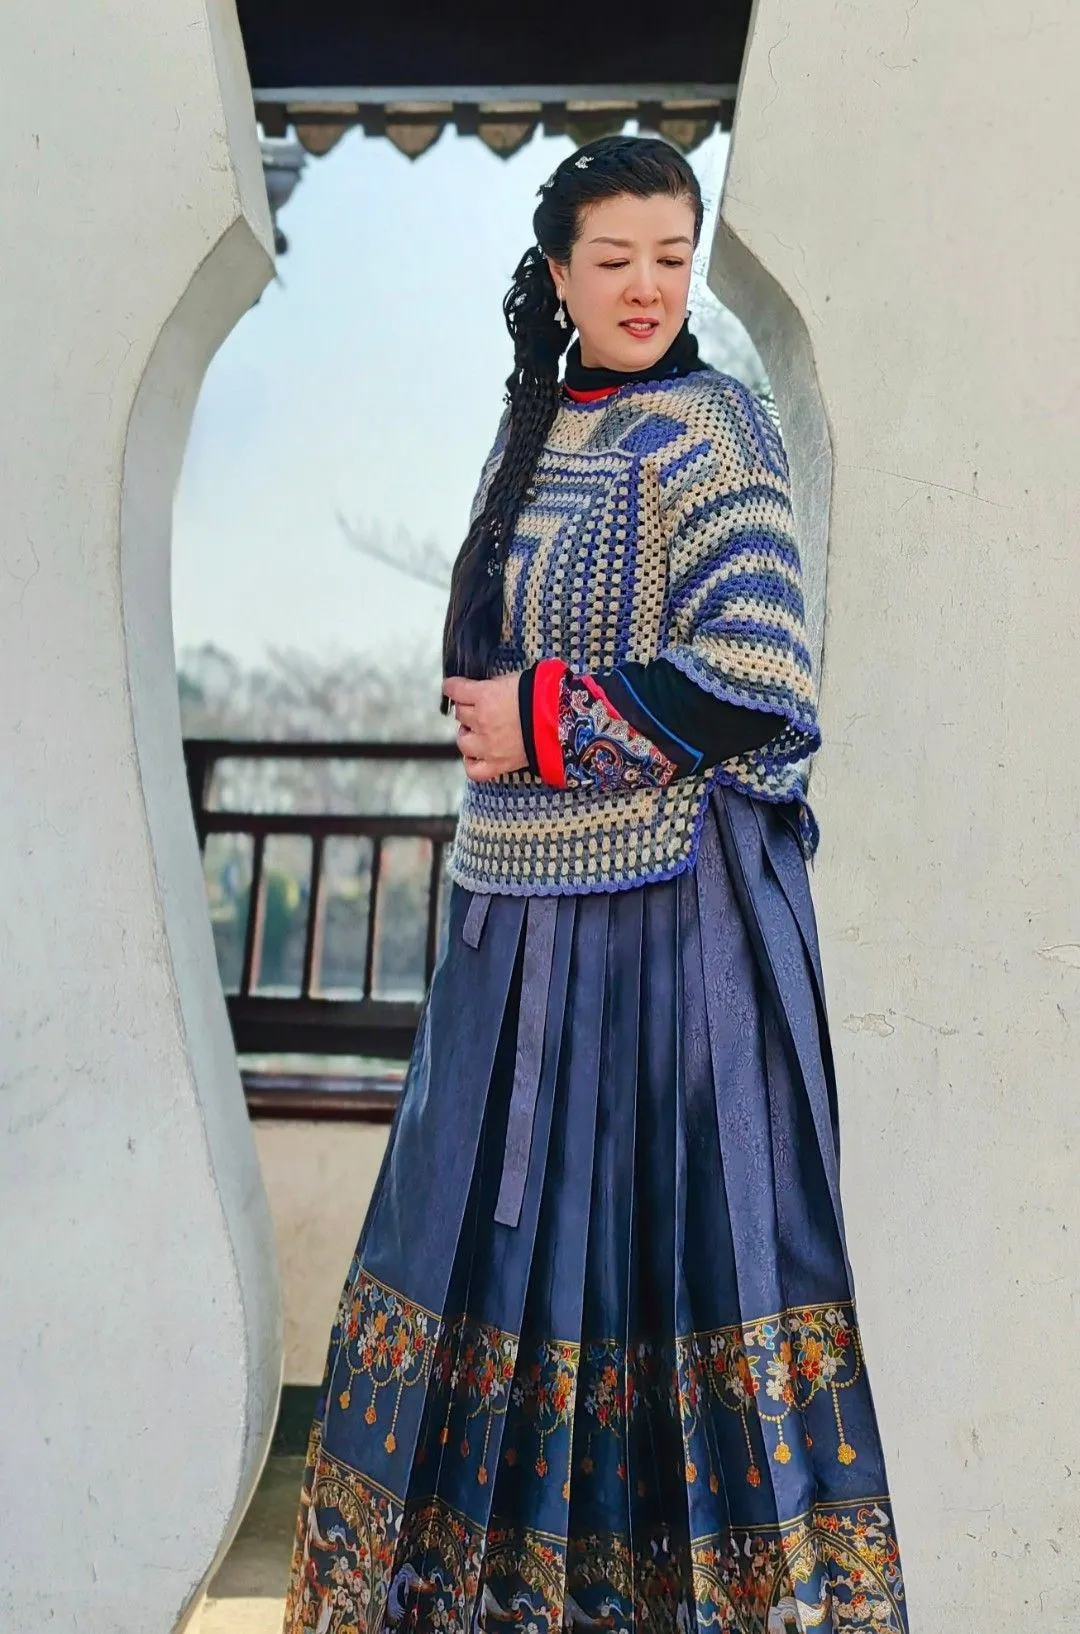
Project preview
See the finished project
Pattern format
Instructions
Watch and follow
Video tutorial
| Style | Yarn | Color |
|---|---|---|
| Pinetree Moon | Morandi 4# |  01#Whisper White x 4 01#Whisper White x 4 |
| Monet Impression |  22#Pinetree Moon x 6 22#Pinetree Moon x 6 | |
| Blossom | Morandi 4# | 01#Whisper White x 4 |
| Monet Impression | 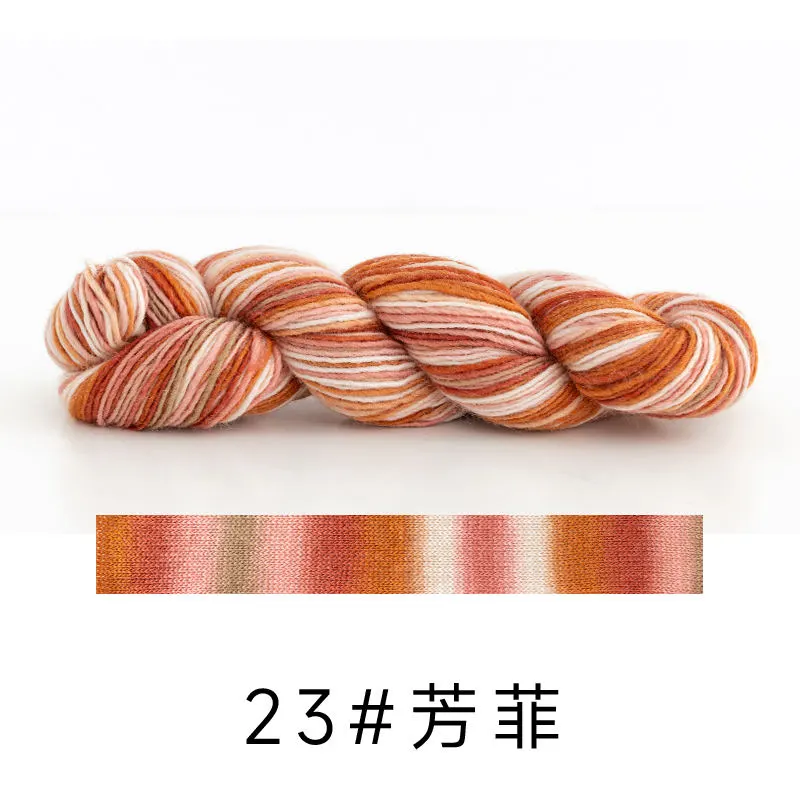 23#Blossom x 6 23#Blossom x 6 | |
| Mount Everest | Morandi 4# | 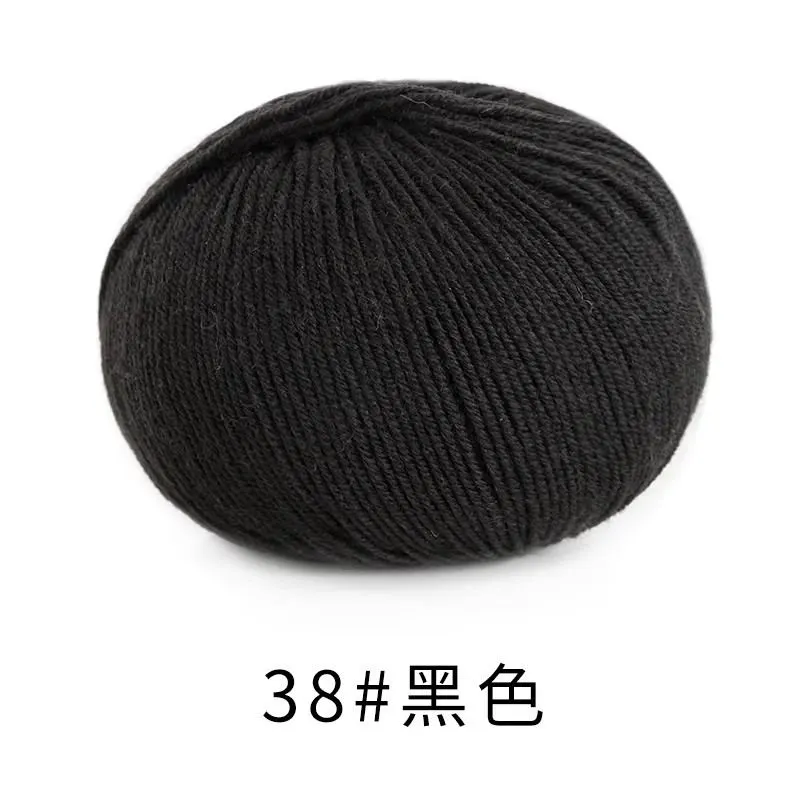 38#Black x 4 38#Black x 4 |
| Monet Impression |  28#Mount Everest x 6 28#Mount Everest x 6 | |
| Florescence | Morandi 4# |  42#Vaporous Gray x 4 42#Vaporous Gray x 4 |
| Monet Impression |  13#Florescence x 6 13#Florescence x 6 |
This vest is divided into front body, back body, bottom edge, cuffs, and collar.
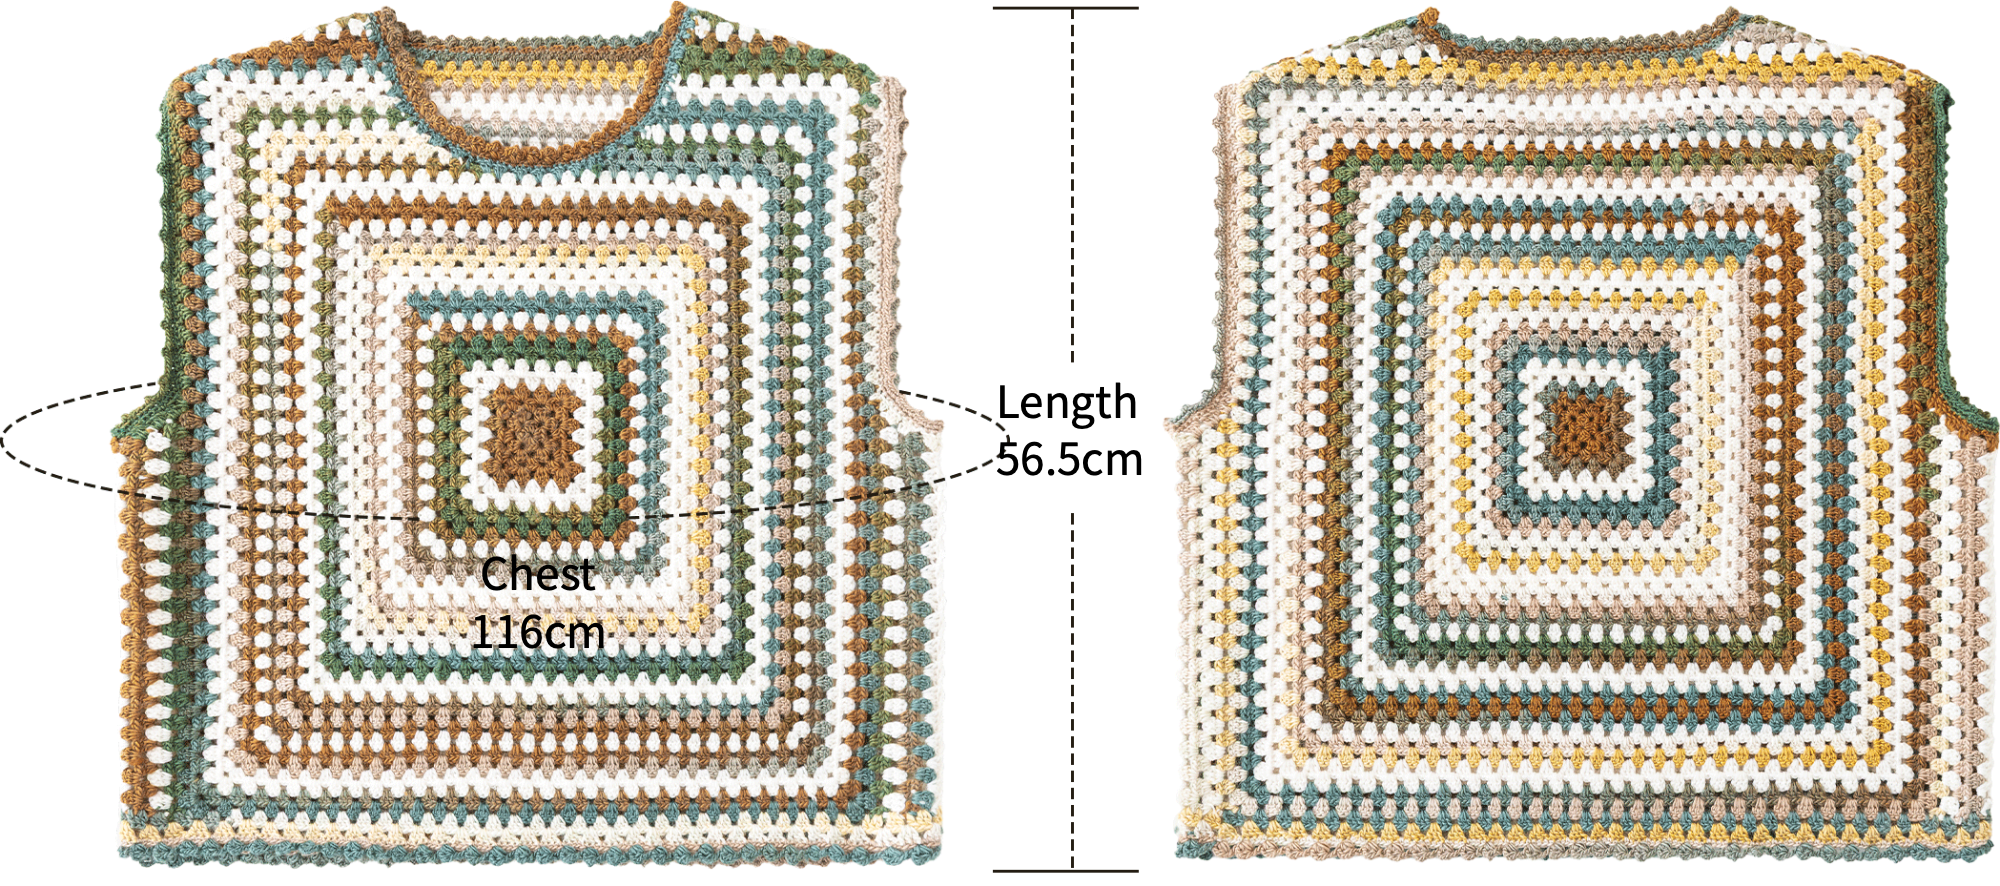
Note: Hand-measured, with a possible error of 1-2 cm. Since everyone's tension is different, the sample size is for reference only.
Yarn: Susan's Family Monet Impression, Morandi 4#.
Tools: 3.00 mm crochet hook.
Note:
For certain sections, use a variegated yarn. Since the starting color may vary, the final look will differ accordingly. Feel free to choose your preferred color segment to begin with.
Structure Diagram
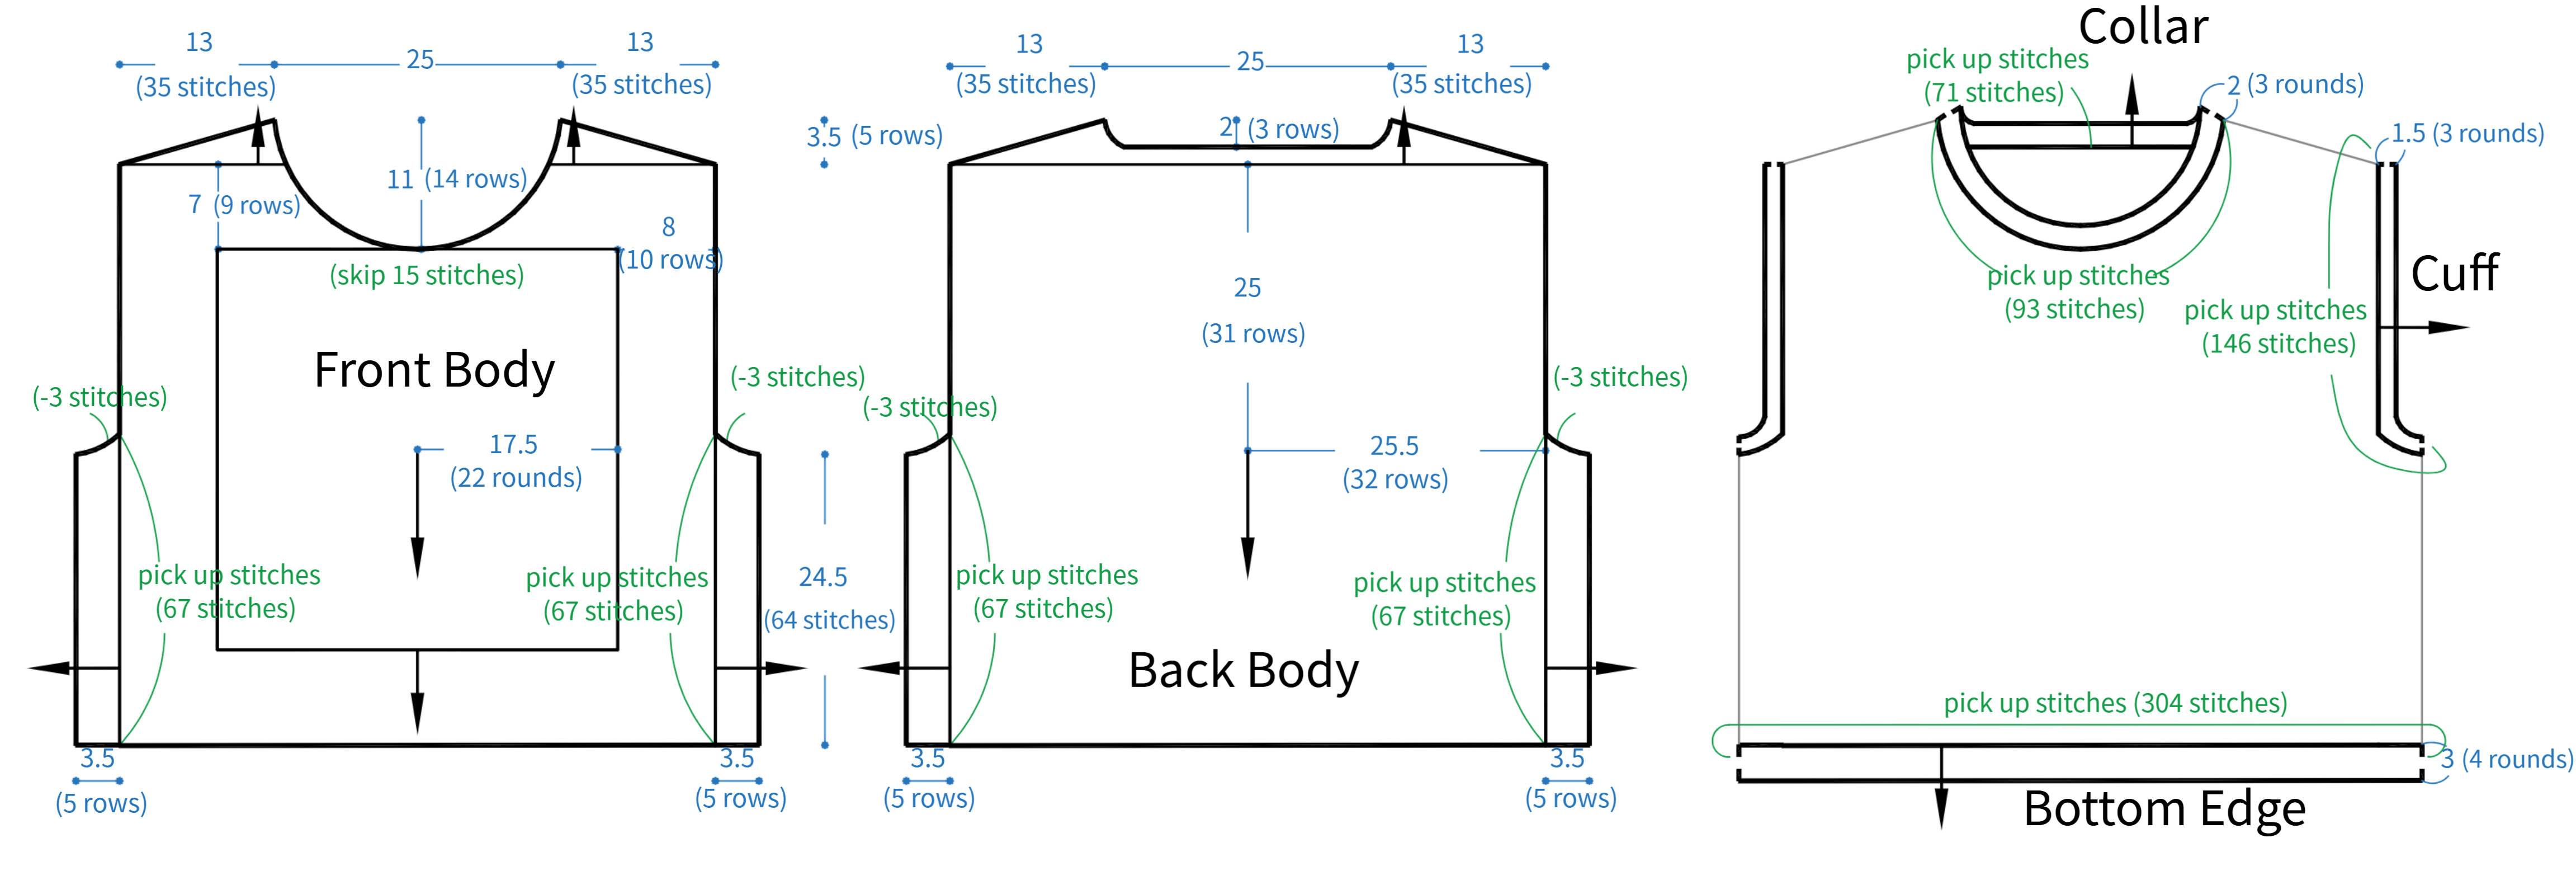

Chart Key










Note: 1. This pattern is making in Chinese crochet pattern terms, and the stitch name is written using American terminology. All measurements in charts are in cm.

| Front Body | Color Scheme | |
| Section 1 of the body | Cast on and Rounds 1–4 | Monet Impression |
| Rounds 5–6 | Morandi - 4# | |
| Rounds 7–9 | Monet Impression | |
| Round 10 | Morandi - 4# | |
| Rounds 11–12 | Monet Impression | |
| Rounds 13–14 | Morandi - 4# | |
| Rounds 15–17 | Monet Impression | |
| Round 18 | Morandi - 4# | |
| Rounds 19–20 | Monet Impression | |
| Rounds 21–22 | Morandi - 4# | |
| Section 2 of the body | Rows 1–3 | Monet Impression |
| Row 4 | Morandi - 4# | |
| Rows 5–6 | Monet Impression | |
| Rows 7–8 | Morandi - 4# | |
| Rows 9–10 | Monet Impression | |
| Neck Shoulder | Rows 1-2 | Monet Impression |
| Row 3 | Morandi - 4# | |
| Rows 4–5 | Monet Impression | |
| Side Panel | Row 1 | Monet Impression |
| Row 2 | Morandi - 4# | |
| Rows 3–4 | Monet Impression | |
| Row 5 | Morandi - 4# | |
| Back Body | Color Scheme | |
| Body | Cast on and Rounds 1–4 | Monet Impression |
| Rounds 5–6 | Morandi - 4# | |
| Rounds 7–9 | Monet Impression | |
| Round 10 | Morandi - 4# | |
| Rounds 11–12 | Monet Impression | |
| Rounds 13–14 | Morandi - 4# | |
| Rounds 15–17 | Monet Impression | |
| Round 18 | Morandi - 4# | |
| Rounds 19–20 | Monet Impression | |
| Rounds 21–22 | Morandi - 4# | |
| Rows 23–25 | Monet Impression | |
| Row 26 | Morandi - 4# | |
| Rows 27–28 | Monet Impression | |
| Rows 29–30 | Morandi - 4# | |
| Round 31 | Monet Impression | |
| Row 32 | Monet Impression | |
| Neck Shoulder | Rows 1-2 | Monet Impression |
| Row 3 | Morandi - 4# | |
| Rows 4–5 | Monet Impression | |
| Side Panel | Row 1 | Monet Impression |
| Row 2 | Morandi - 4# | |
| Rows 3–4 | Monet Impression | |
| Row 5 | Morandi - 4# | |
| Shoulder Seam | Choose one of the 2 yarns | |
| Section | Color Scheme |
| Bottom Edge | Monet Impression |
| Cuff | |
| Collar |
PART1 Front BodyA 00' 50''
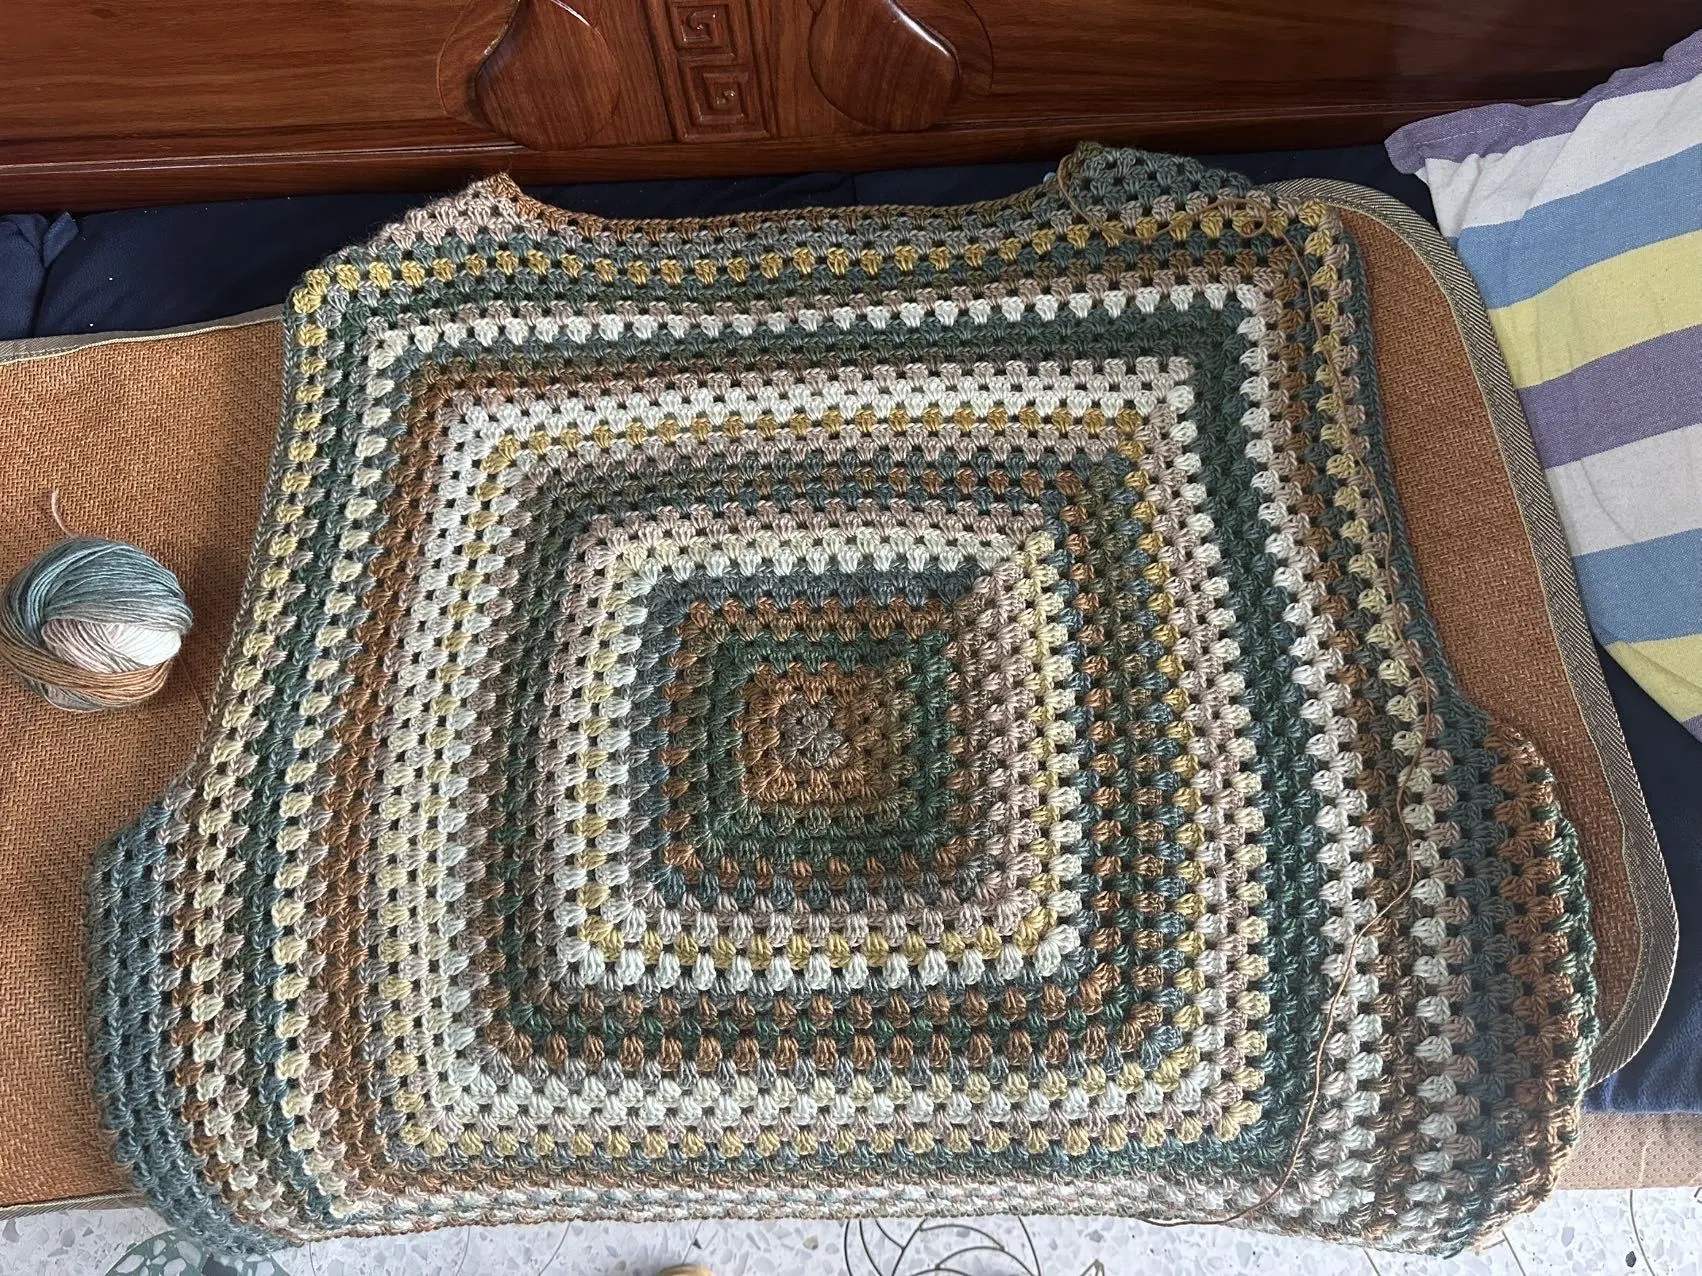
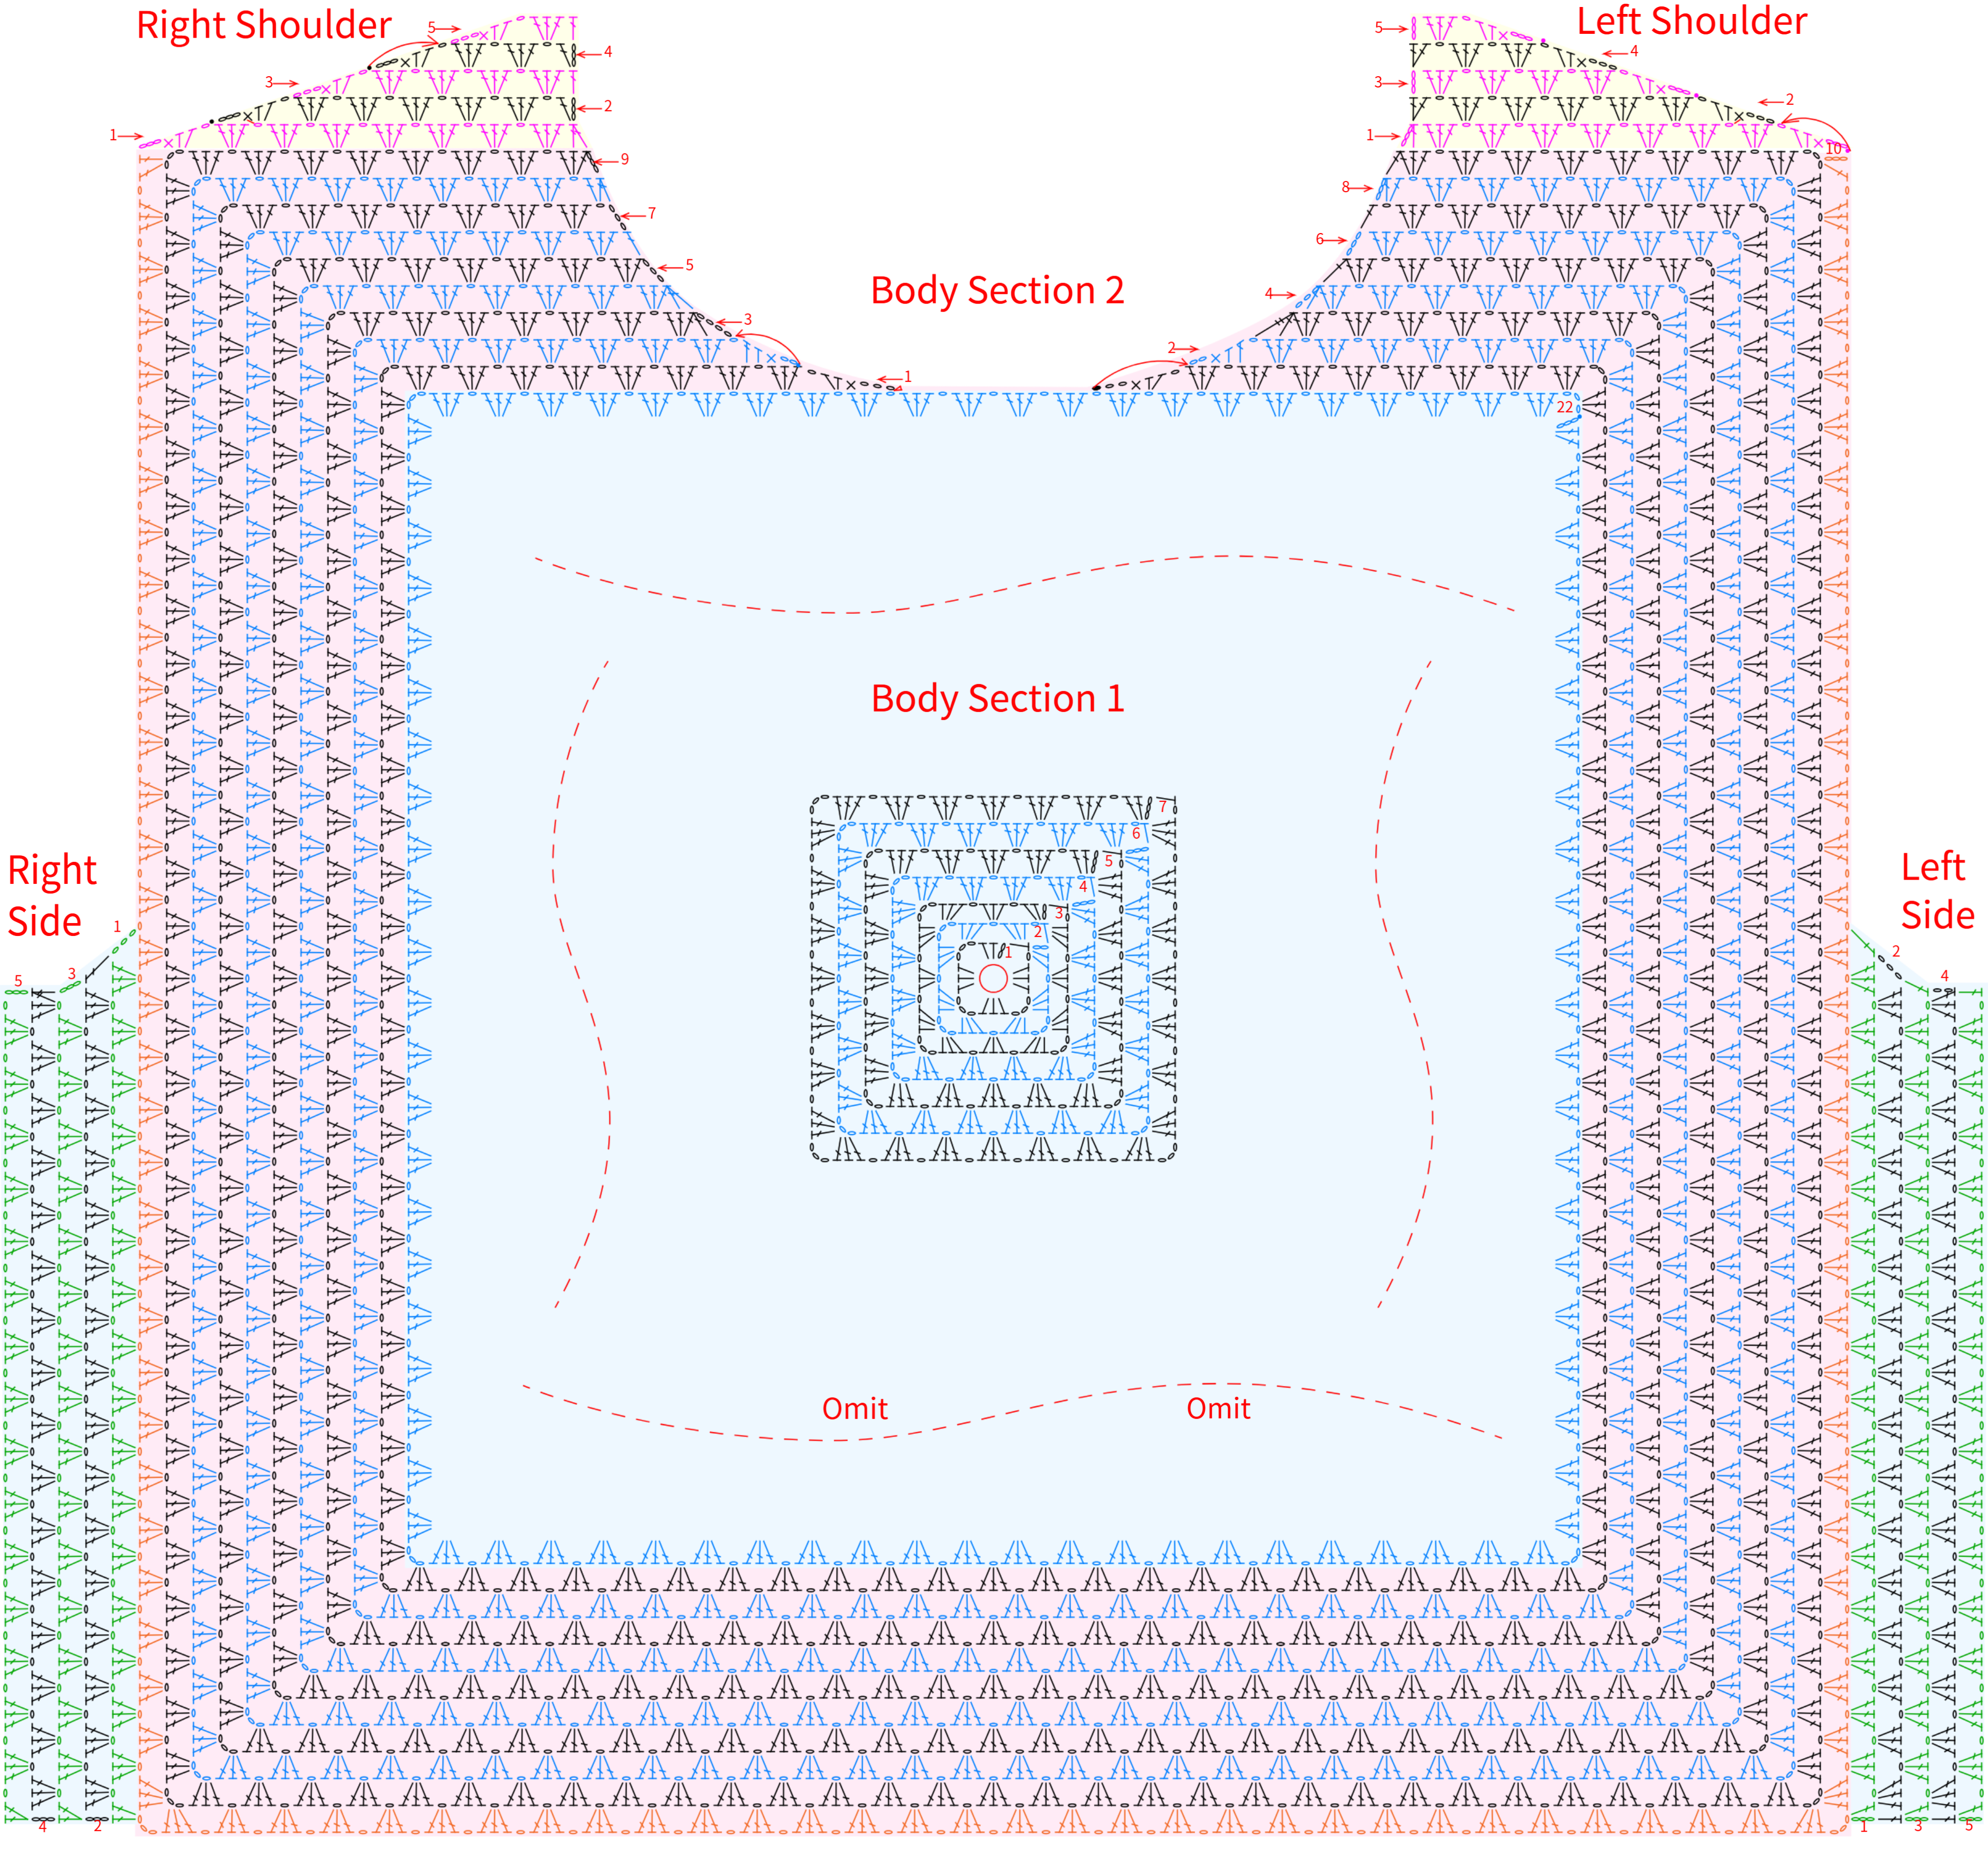
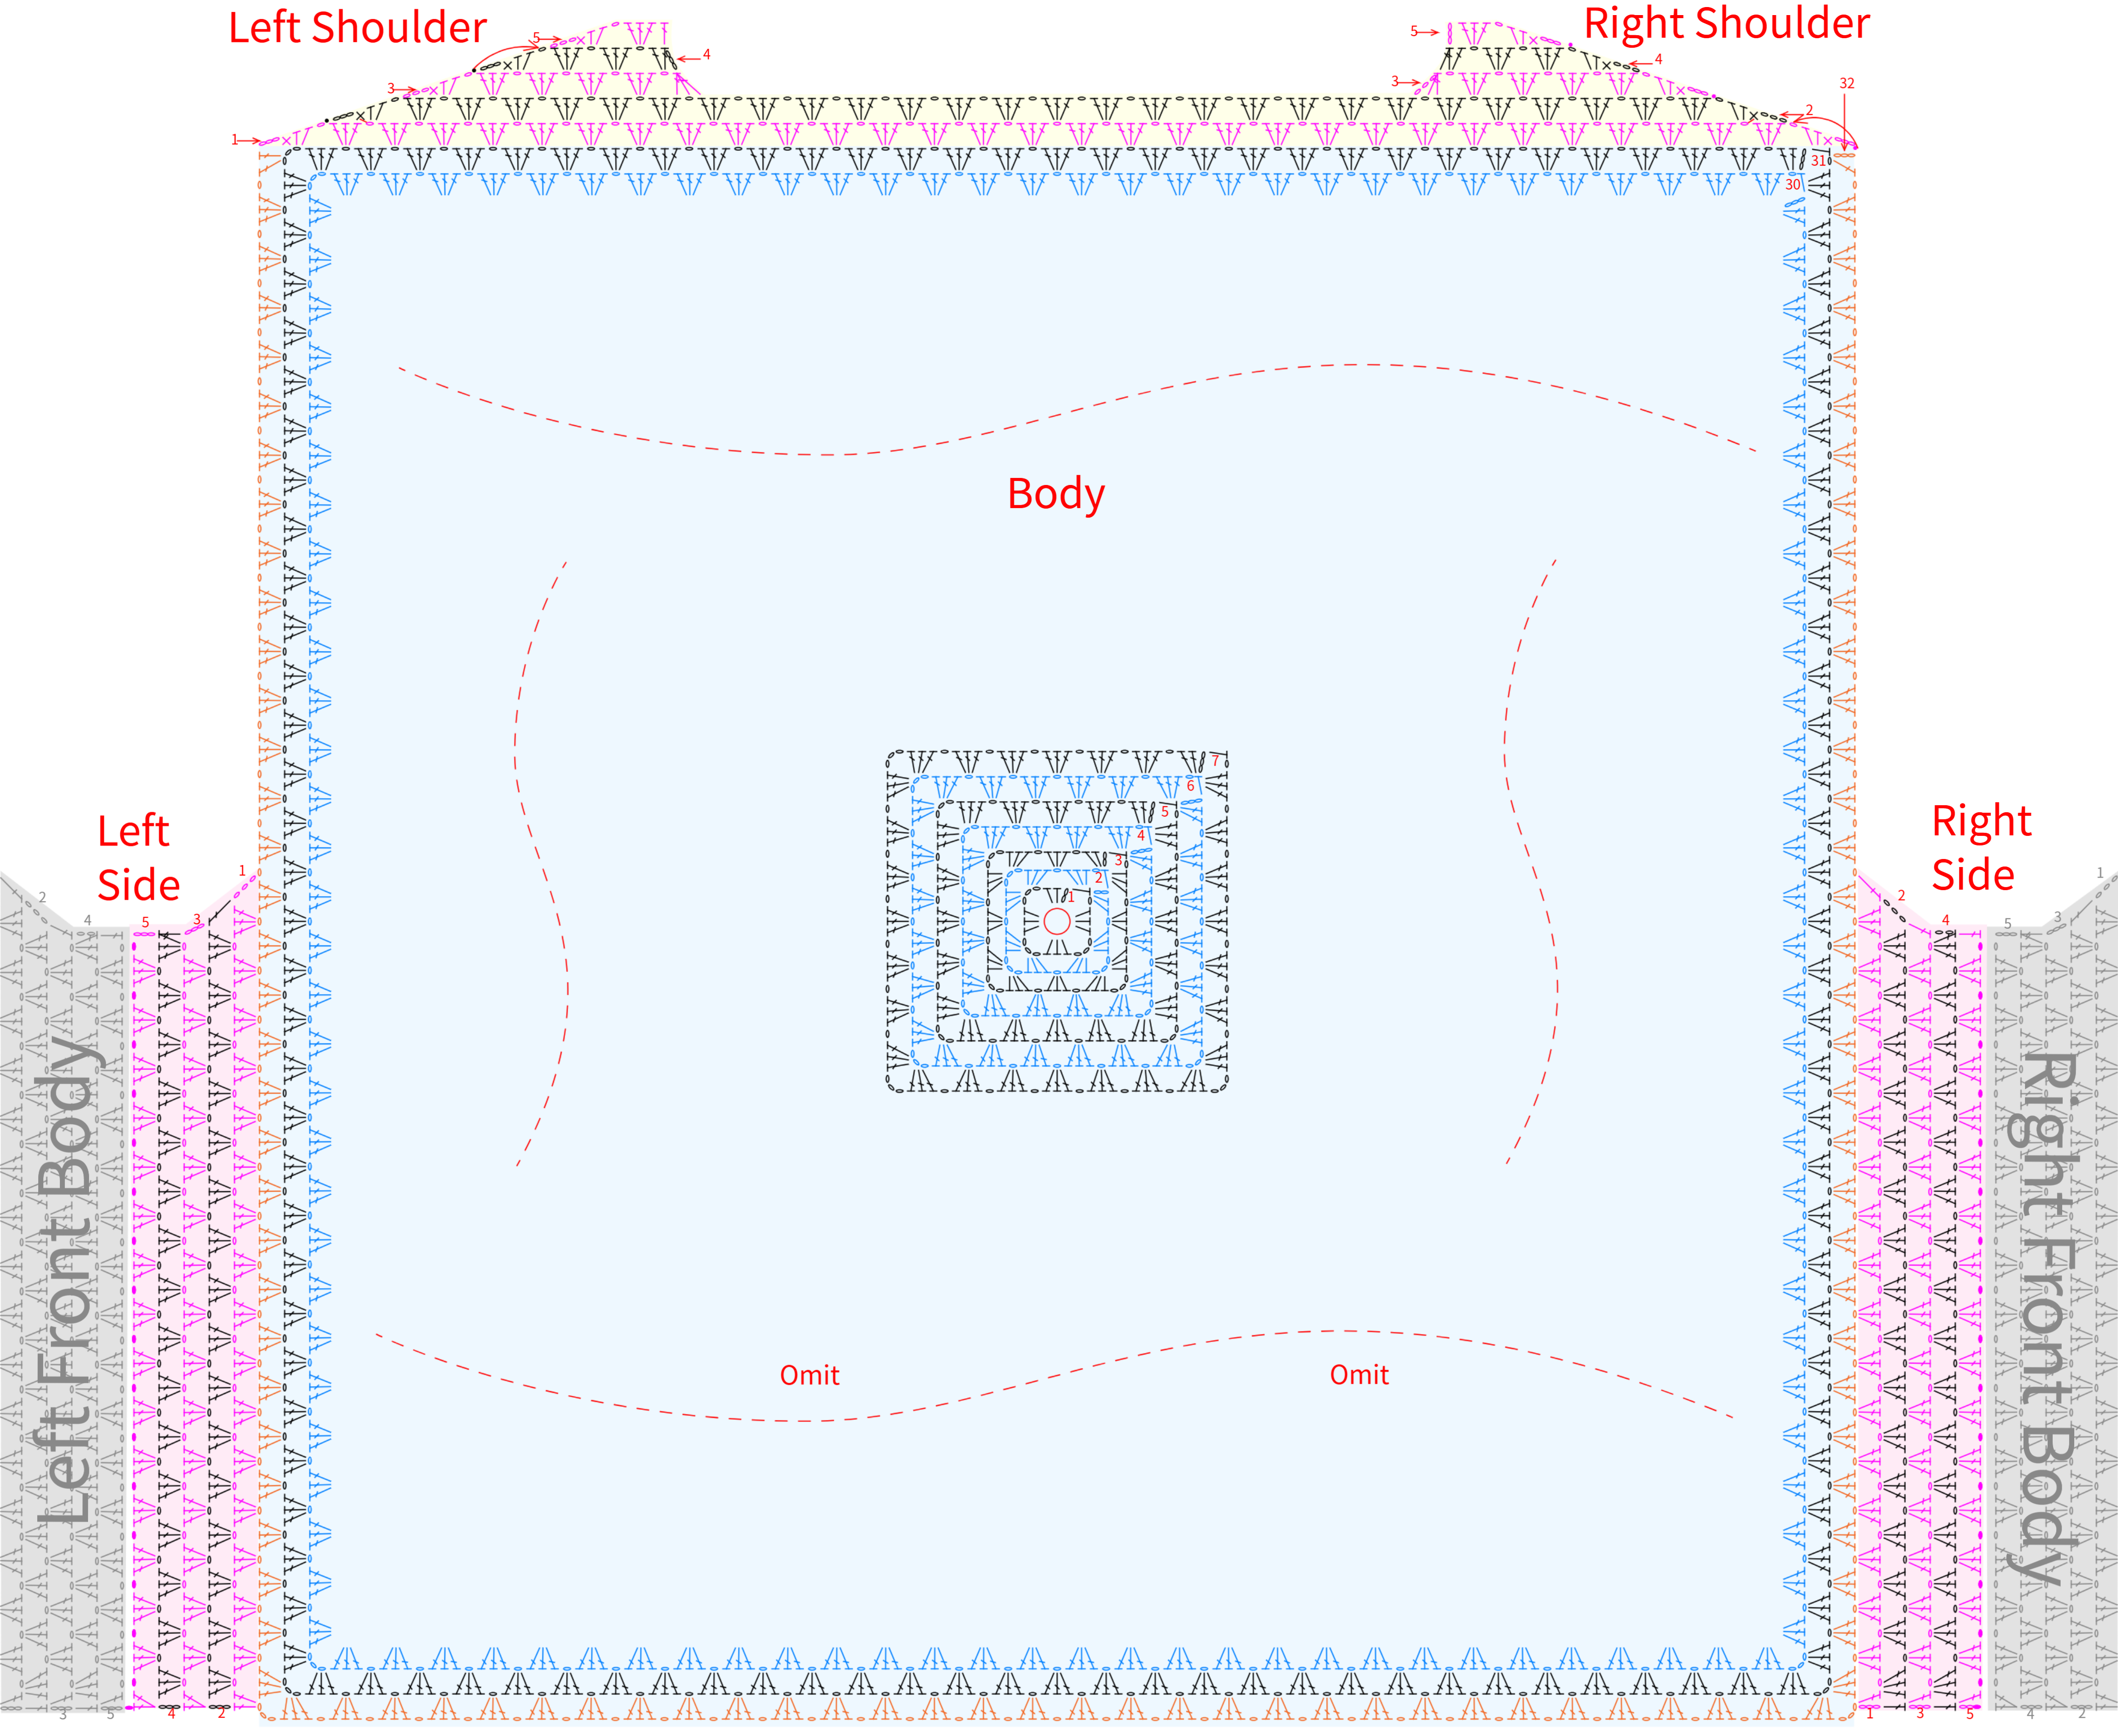
The front body is divided into several sections: the body, the neck-shoulder part, and the side panels. The body itself is split into Section 1 and Section 2. Section 1 starts with a circular foundation and is worked back and forth in rounds. Section 2 is then worked back and forth directly on top of Section 1. The neck-shoulder and side panels are worked back and forth at their corresponding positions on the body, with yarn changes required during the process. For details, please refer to the video tutorial.
Note:
After completing round 4 of body Section 1, the side length of the piece should measure approximately 6.5 cm. If there's a significant difference, adjust your tension and re-crochet to avoid affecting the final garment size. Keep consistent hand tension throughout the following rounds. The terms "left" and "right" here refer to the left and right sides when the garment is worn.
PART2 Back BodyB 57' 56''
The back body is divided into the following sections: body, neck-shoulder, side panel, and shoulder seam. The body is started with a circular foundation, worked in joined rounds back and forth, then turned and worked in rows. The neck-shoulder and side panel are worked back and forth at their corresponding positions on the body, with yarn changes during the process. The last row of the side panel is joined to the front body's side panel. Finally, the shoulders are joined from the wrong side. Please refer to the video tutorial for details.
Note:
1. After completing the back body, it should match approximately in size with the front body.
2. You can also choose your preferred method for connecting the side pieces, just make sure to keep the fabric joined evenly and neatly.
PART3 Bottom EdgeC, CuffsD, and CollarE 78' 34''
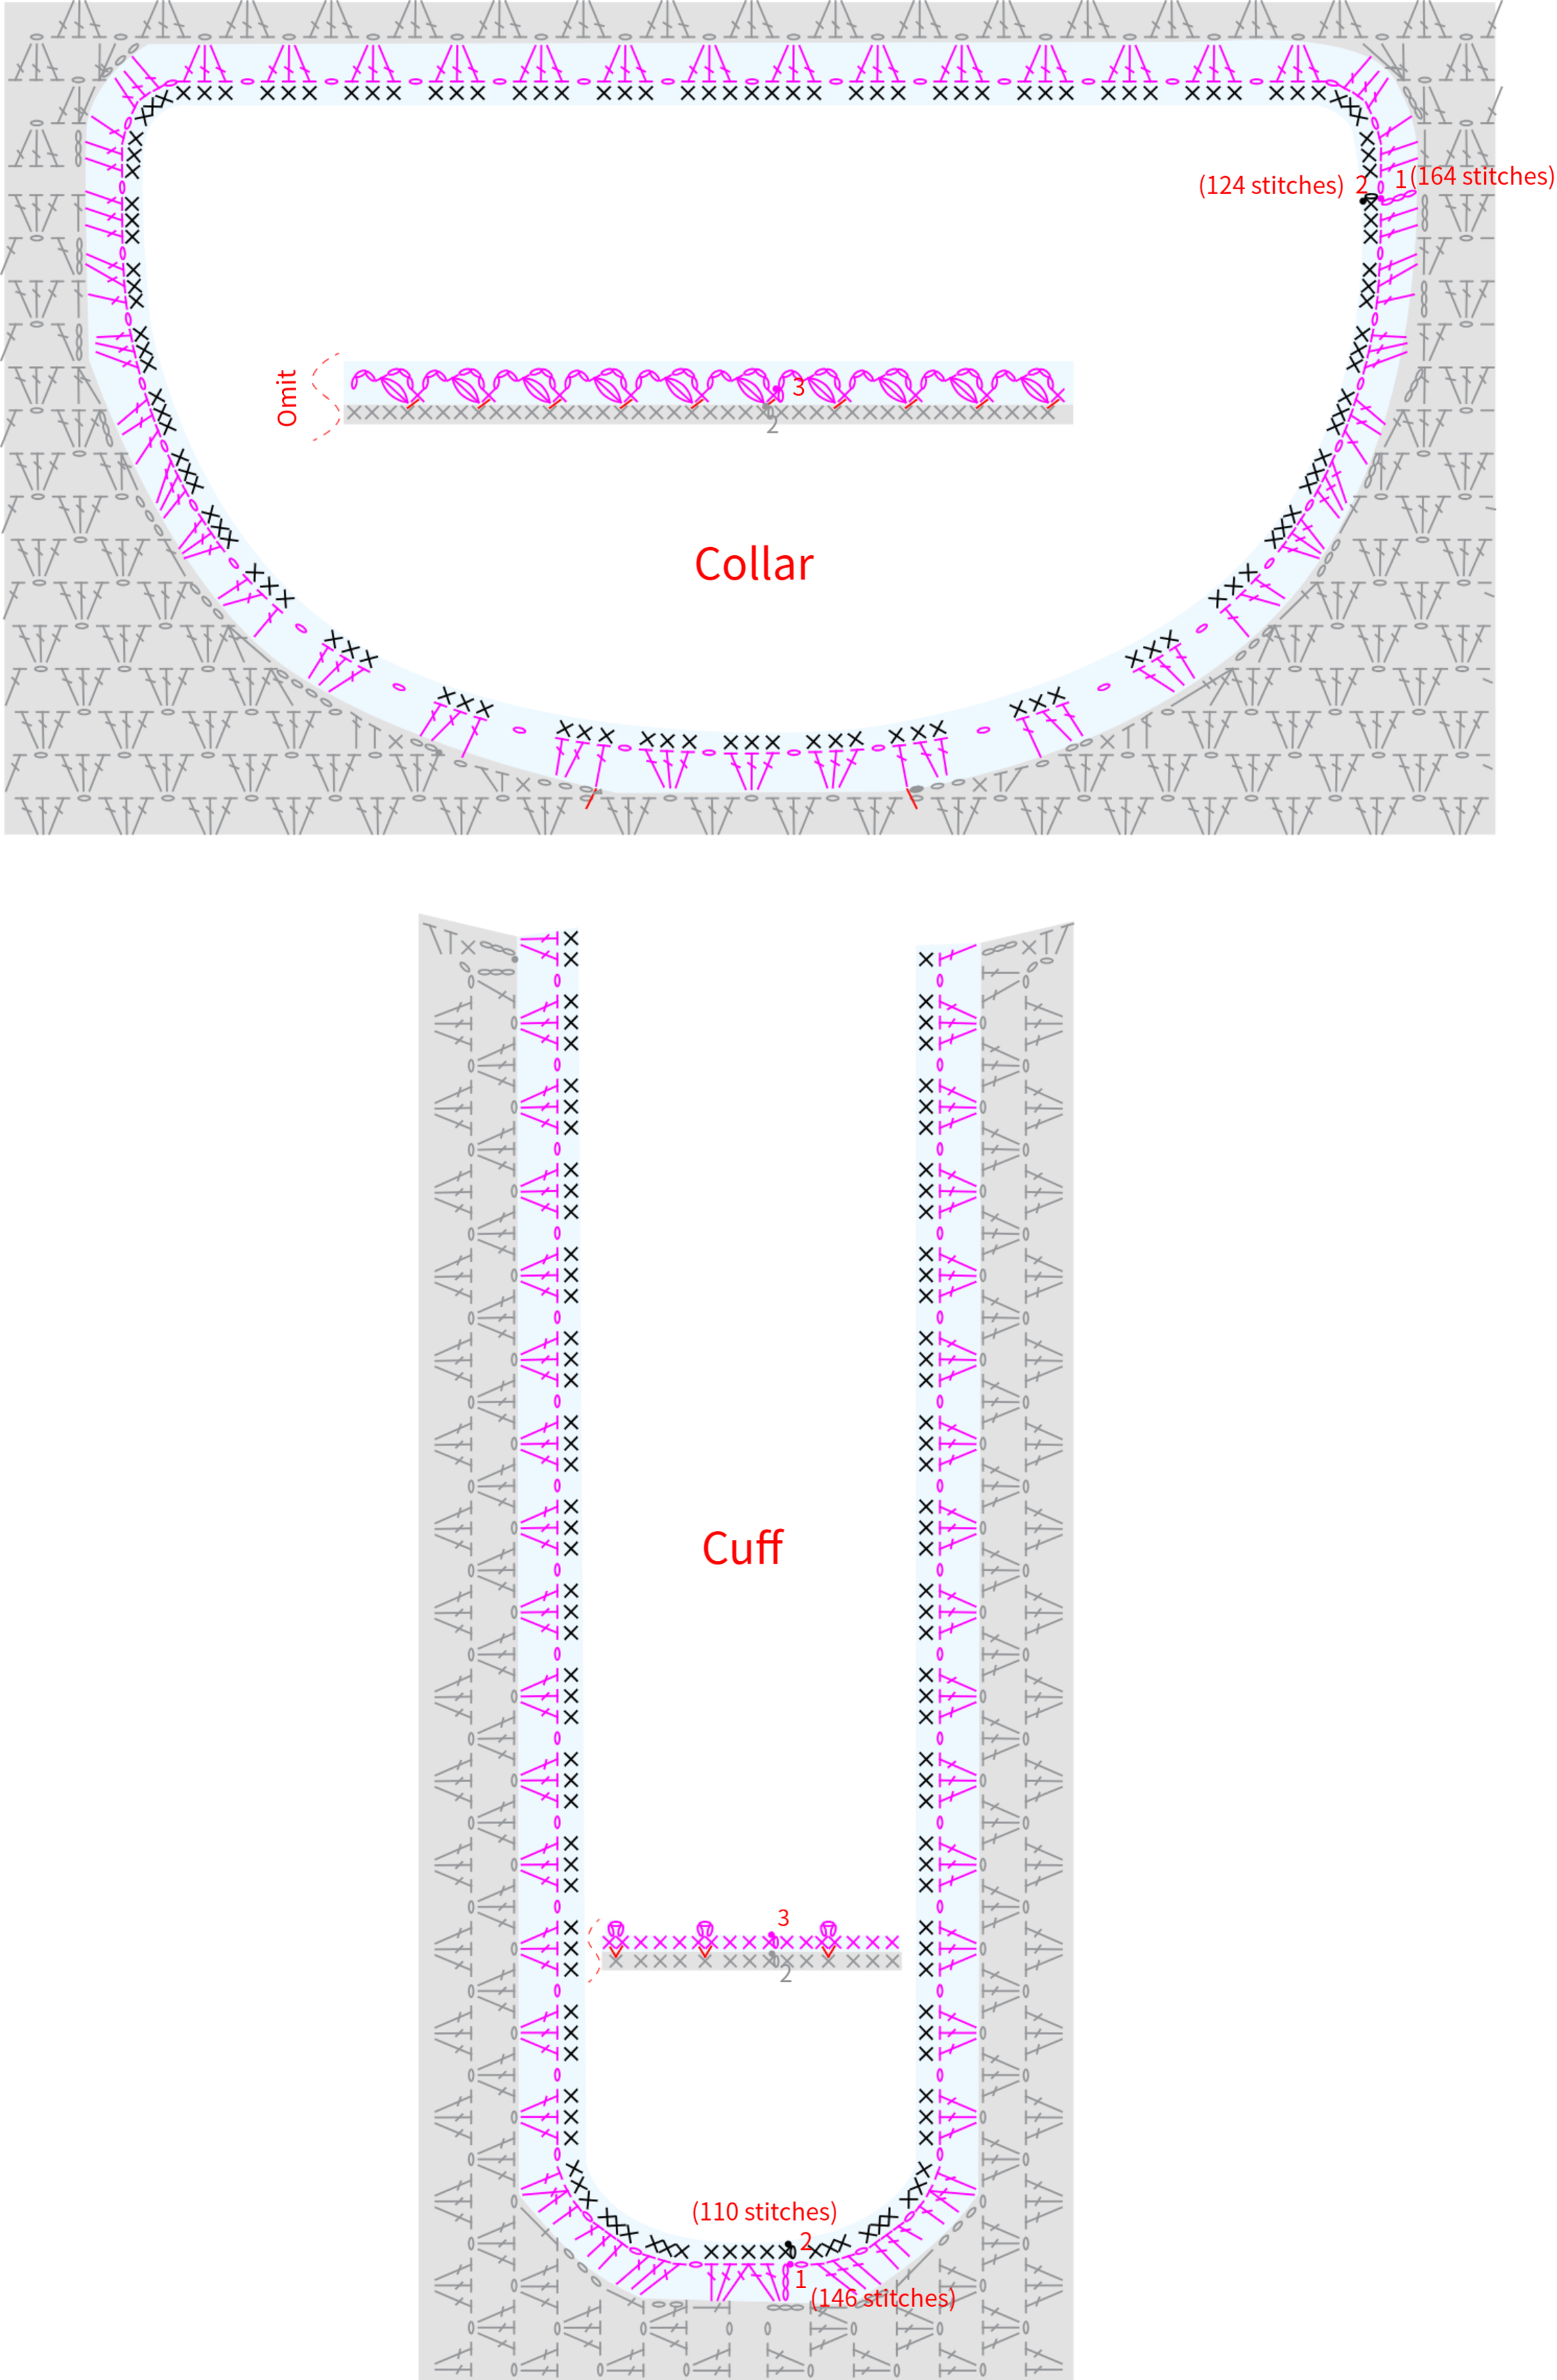
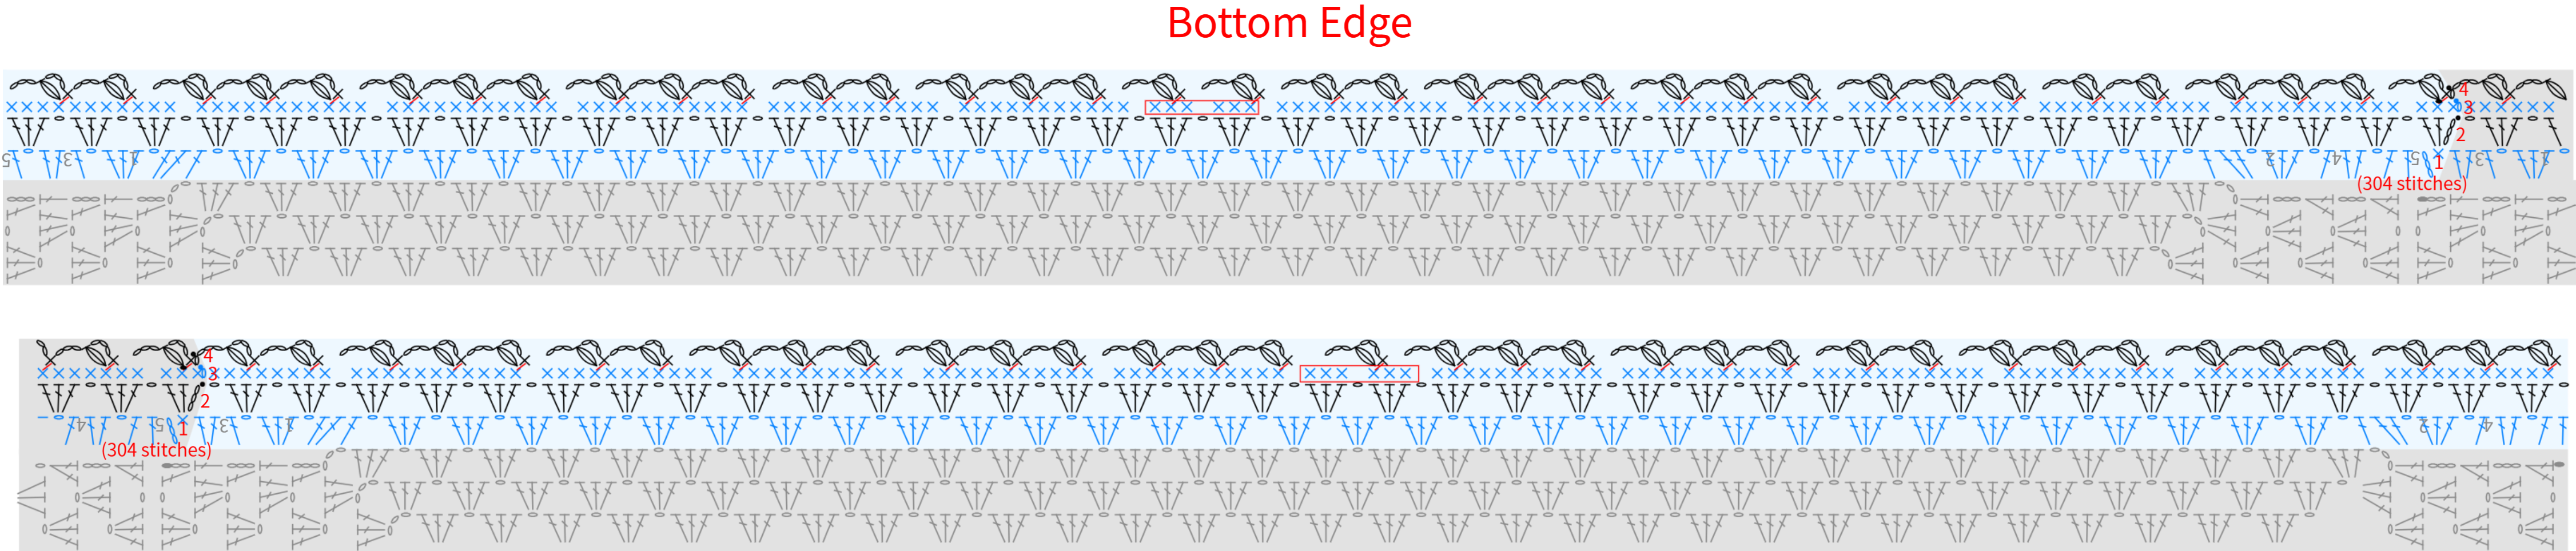
Then, work the bottom edge by crocheting in a counterclockwise round along the front and back body. Next, at the armhole openings formed by the front and back pieces, crochet the cuffs in a counterclockwise round. Finally, work the collar edge by crocheting in a counterclockwise round around the neckline. For details, please refer to the video demonstration.
Made by the community