Clothes
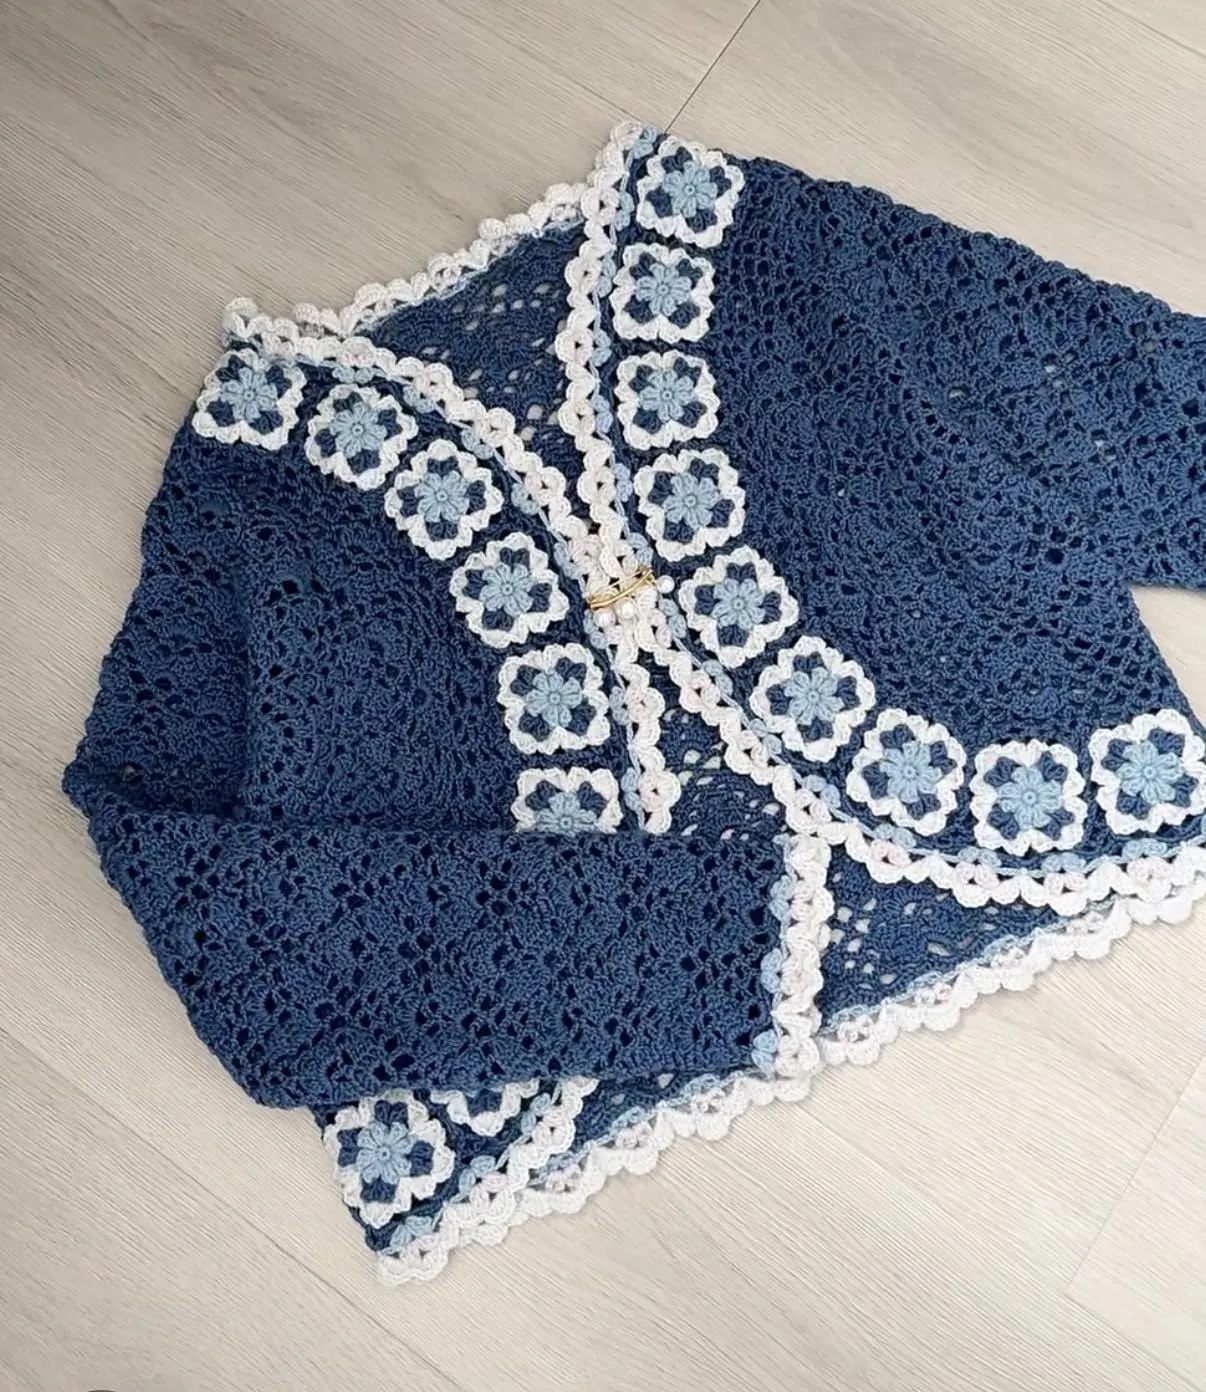
Elegant Crystal Cardigan
Project preview
See the finished project
Pattern format
Instructions
Watch and follow
Video tutorial
| Style | Yarn | Color |
|---|---|---|
| Linen Style - S size | Morandi 4# |  04#Praline x 2 04#Praline x 2 08#Linen x 8 08#Linen x 8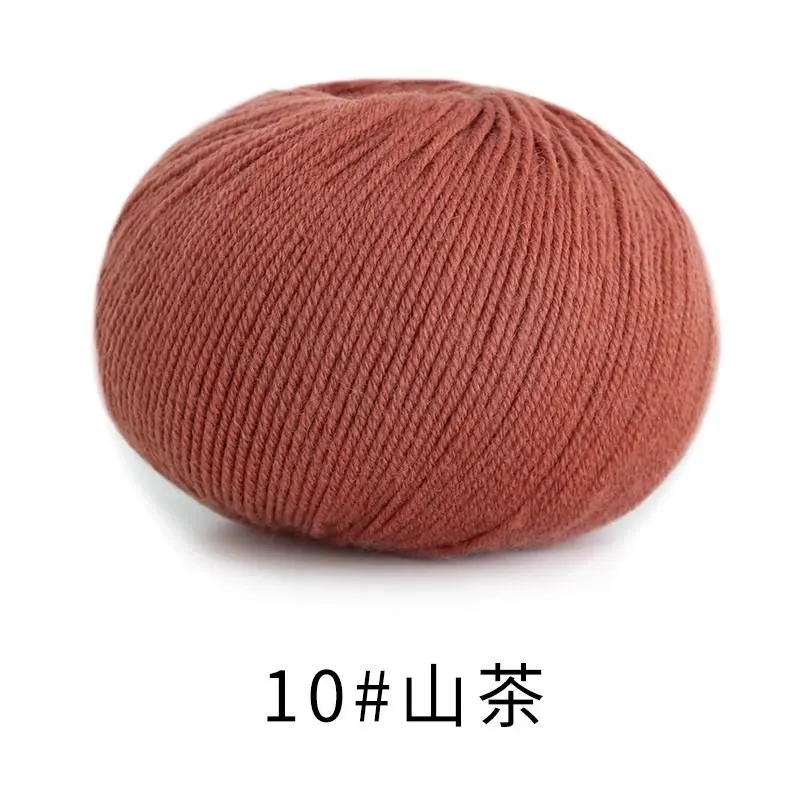 10#Aragon x 1 10#Aragon x 1 29#Warm Taupe x 1 29#Warm Taupe x 1 |
| Indigo Blue Style - S size | Morandi 4# |  06#Milky Blue x 1 06#Milky Blue x 1 31#Indigo Blue x 8 31#Indigo Blue x 8 39#Ice Flow x 2 39#Ice Flow x 2 44#Glacier Gray x 1 44#Glacier Gray x 1 |
| Antique White Style - S size | Morandi 4# |  02#Cameo Brown x 1 02#Cameo Brown x 1 11#Lavender Mist x 2 11#Lavender Mist x 2 14#Silver Peony x 1 14#Silver Peony x 1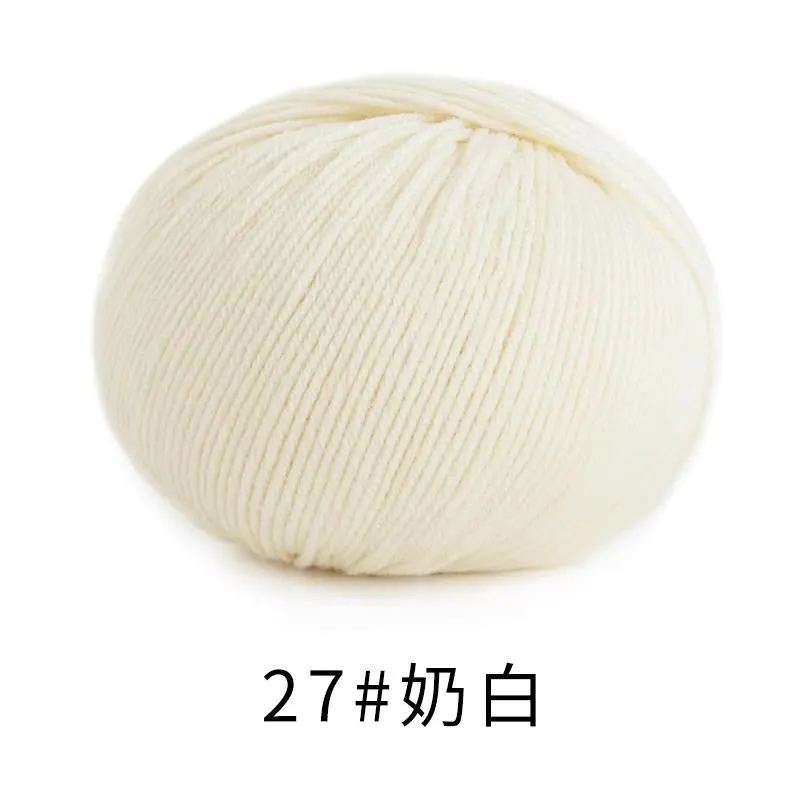 27#Antique White x 8 27#Antique White x 8 |
| Black Style - S size | Morandi 4# |  01#Whisper White x 1 01#Whisper White x 1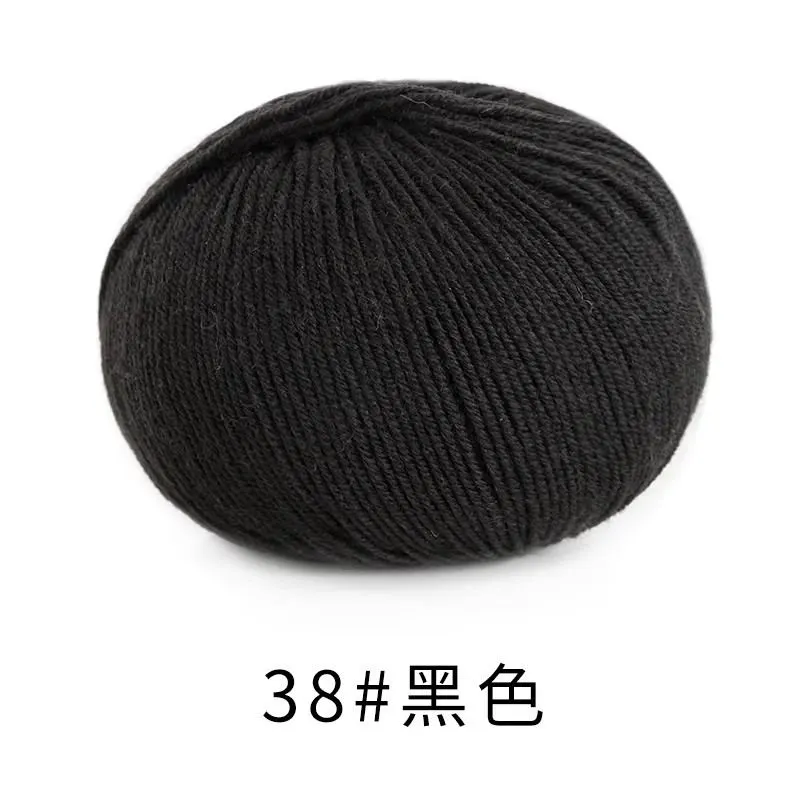 38#Black x 8 38#Black x 8 43#Frost Gray x 144#Glacier Gray x 2 43#Frost Gray x 144#Glacier Gray x 2 |
Linen Style - S size
Indigo Blue Style - S size
Antique White Style - S size
Black Style - S size
This garment consists of the back piece, right and left front pieces, sleeves, front bands, lace trim, and a brooch.
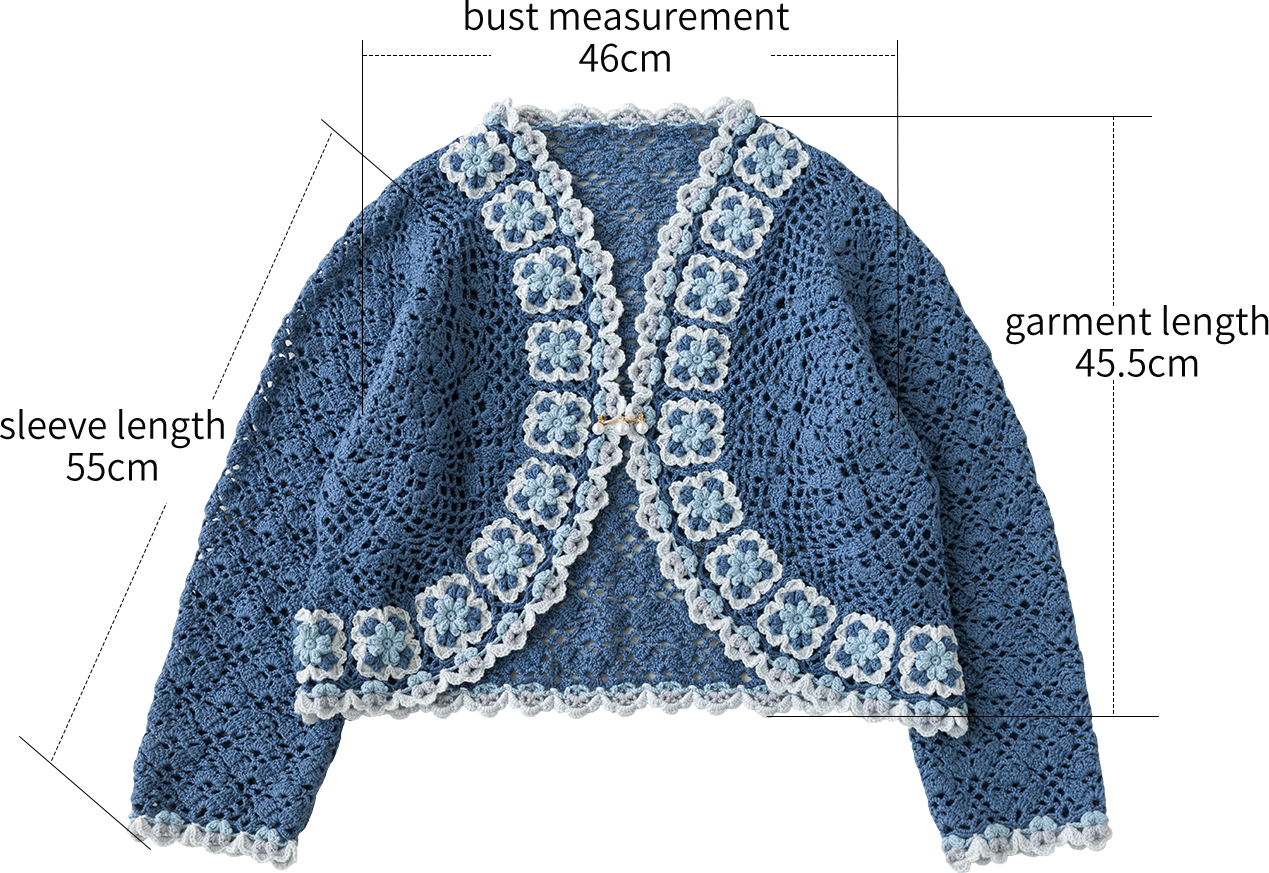
The handcrafted measurements may have an error of 1 to 2 cm. Due to variations in individual tension, the size of the sample is for reference only.
Materials: Susan's Family Morandi 4#
Hook: 3.00 mm crochet hook

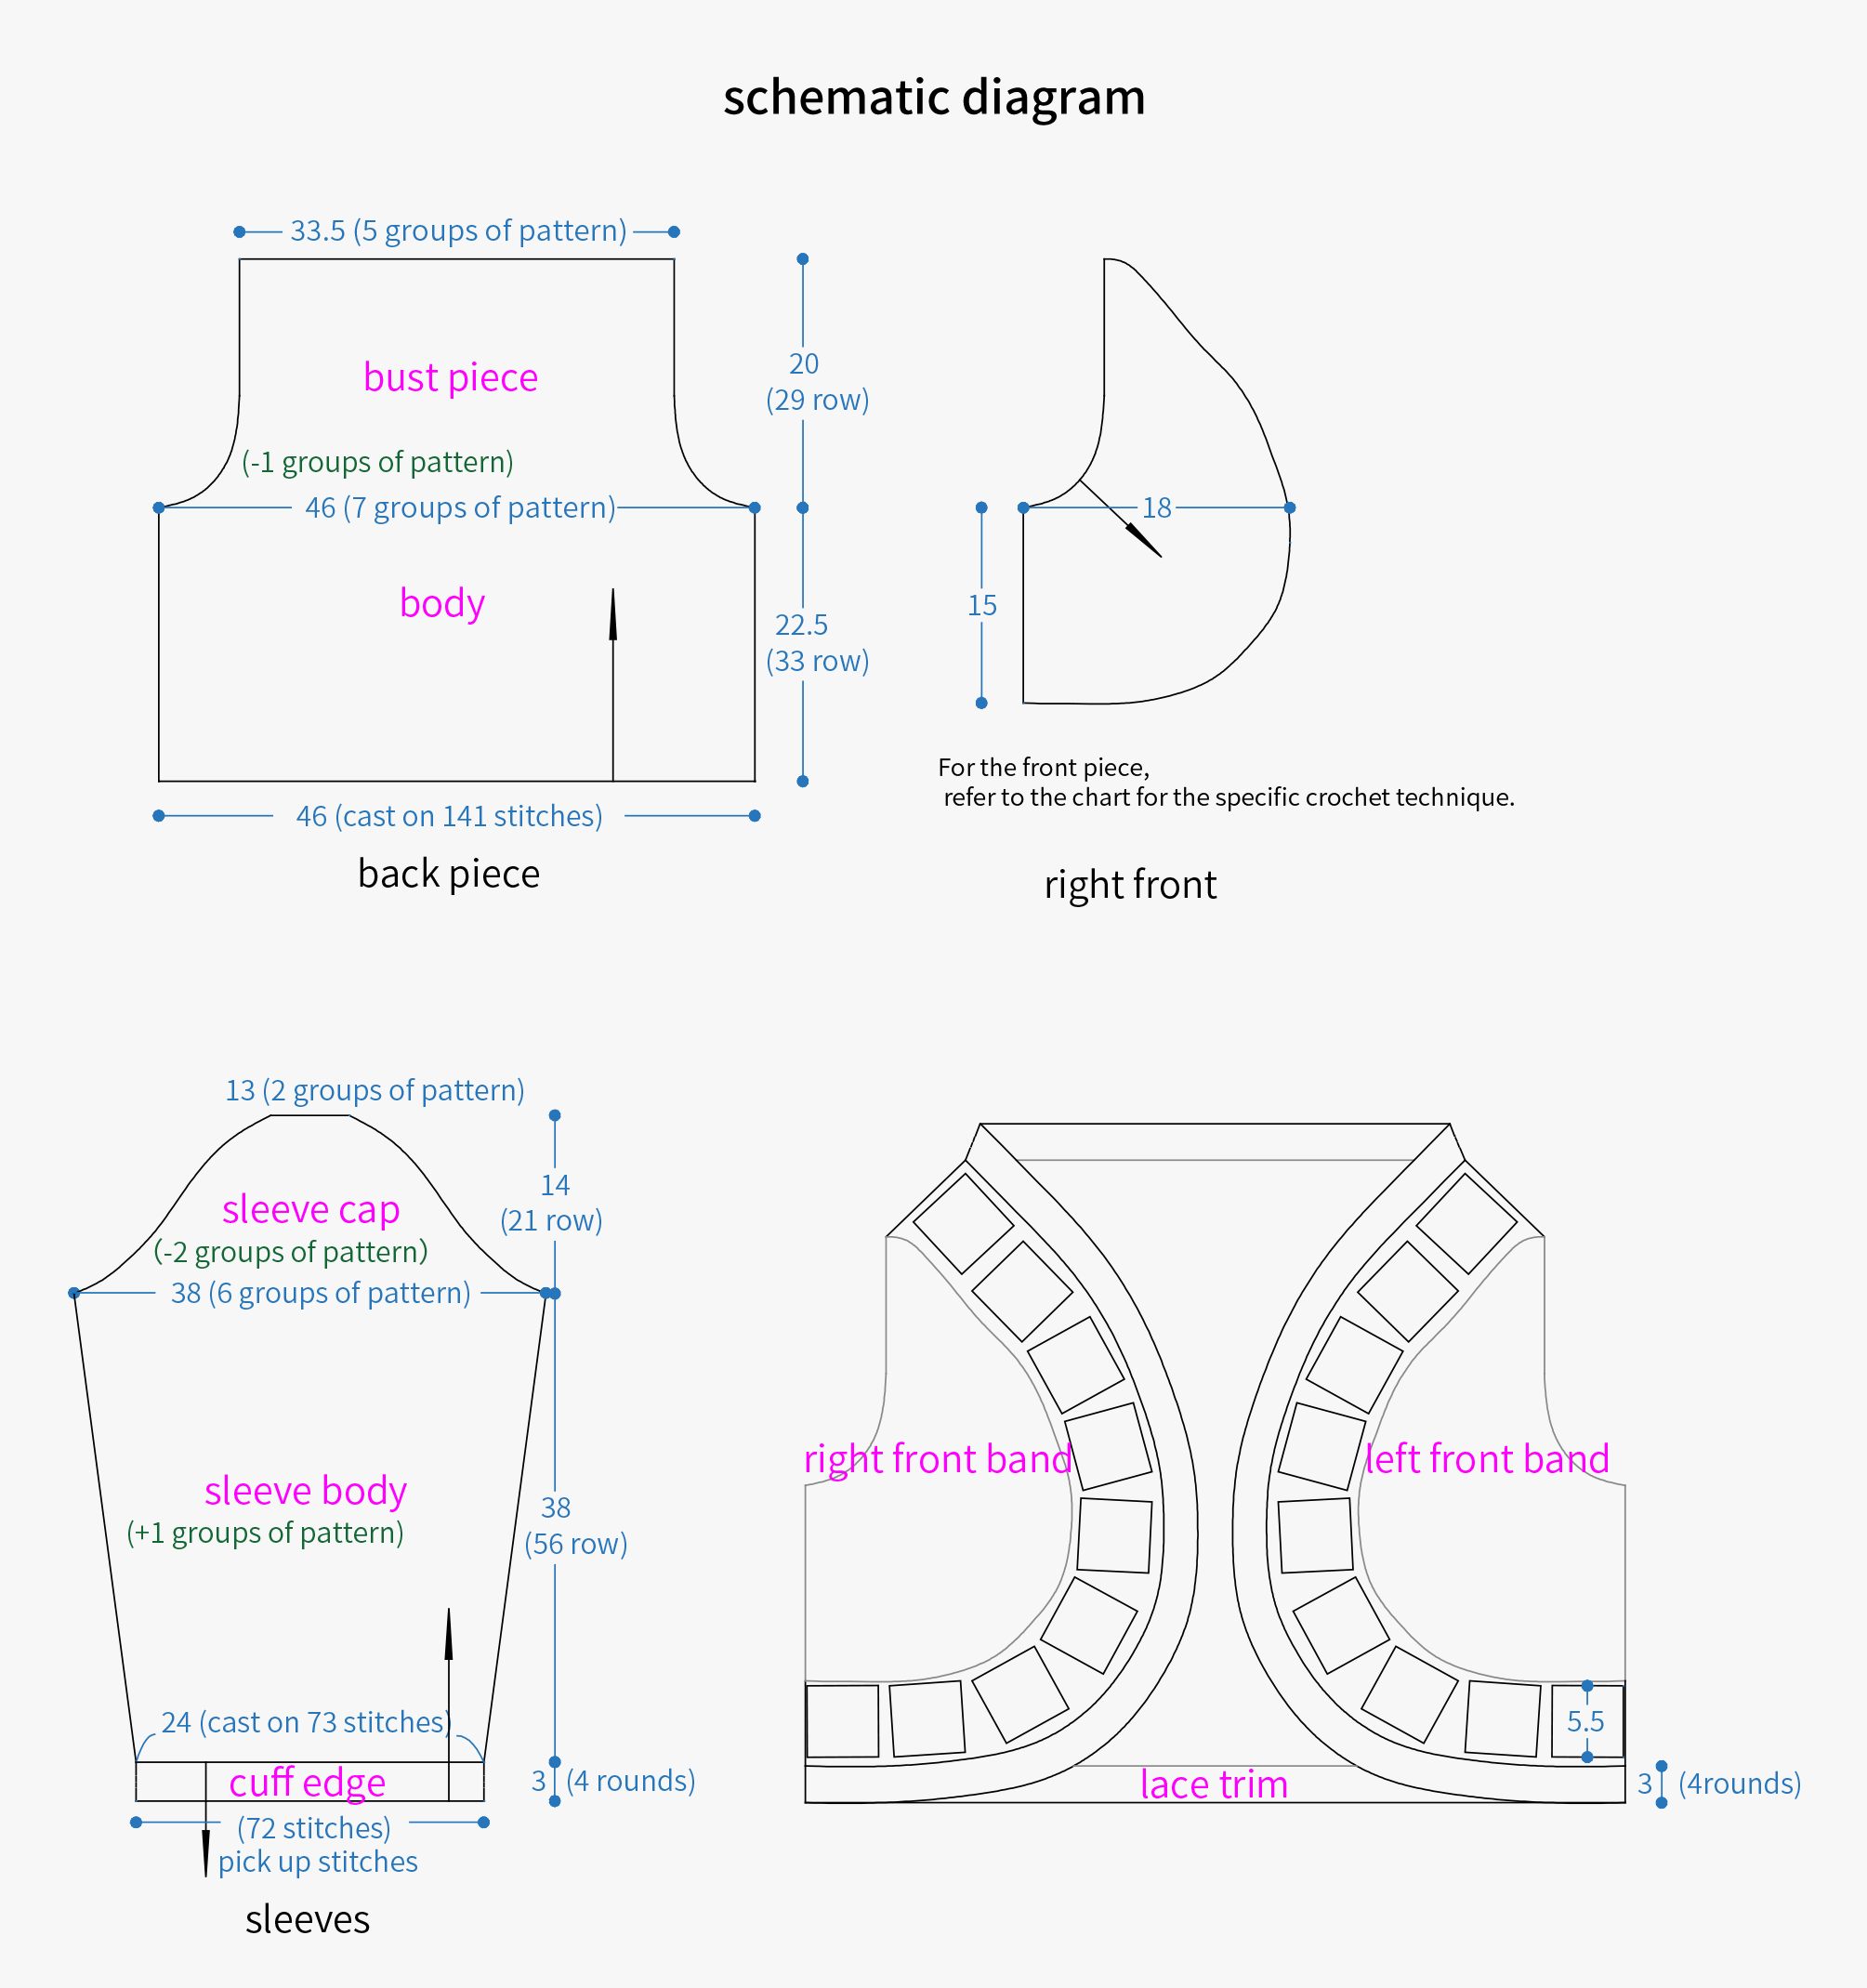
Chart Key






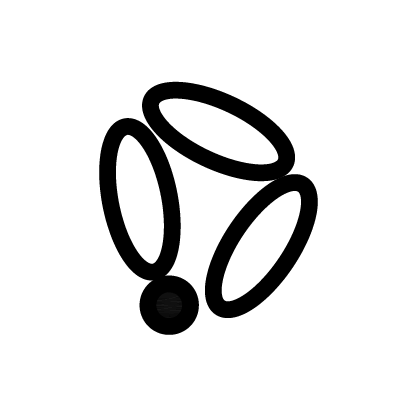


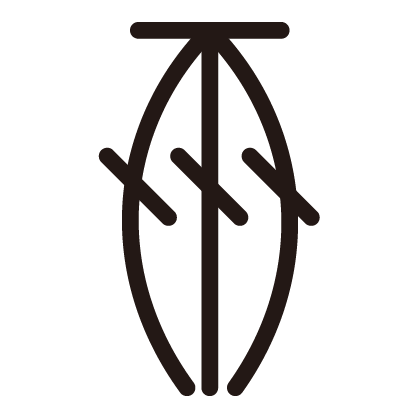

Note: This pattern is making in Chinese crochet pattern terms, and the stitch name is written using American terminology. All measurements in charts are in cm.

Part 1 Back pieceA 00' 42''
The back piece is worked back and forth using the foundation chain method, divided into the body and bust sections. Please refer to the video demonstration for more details.

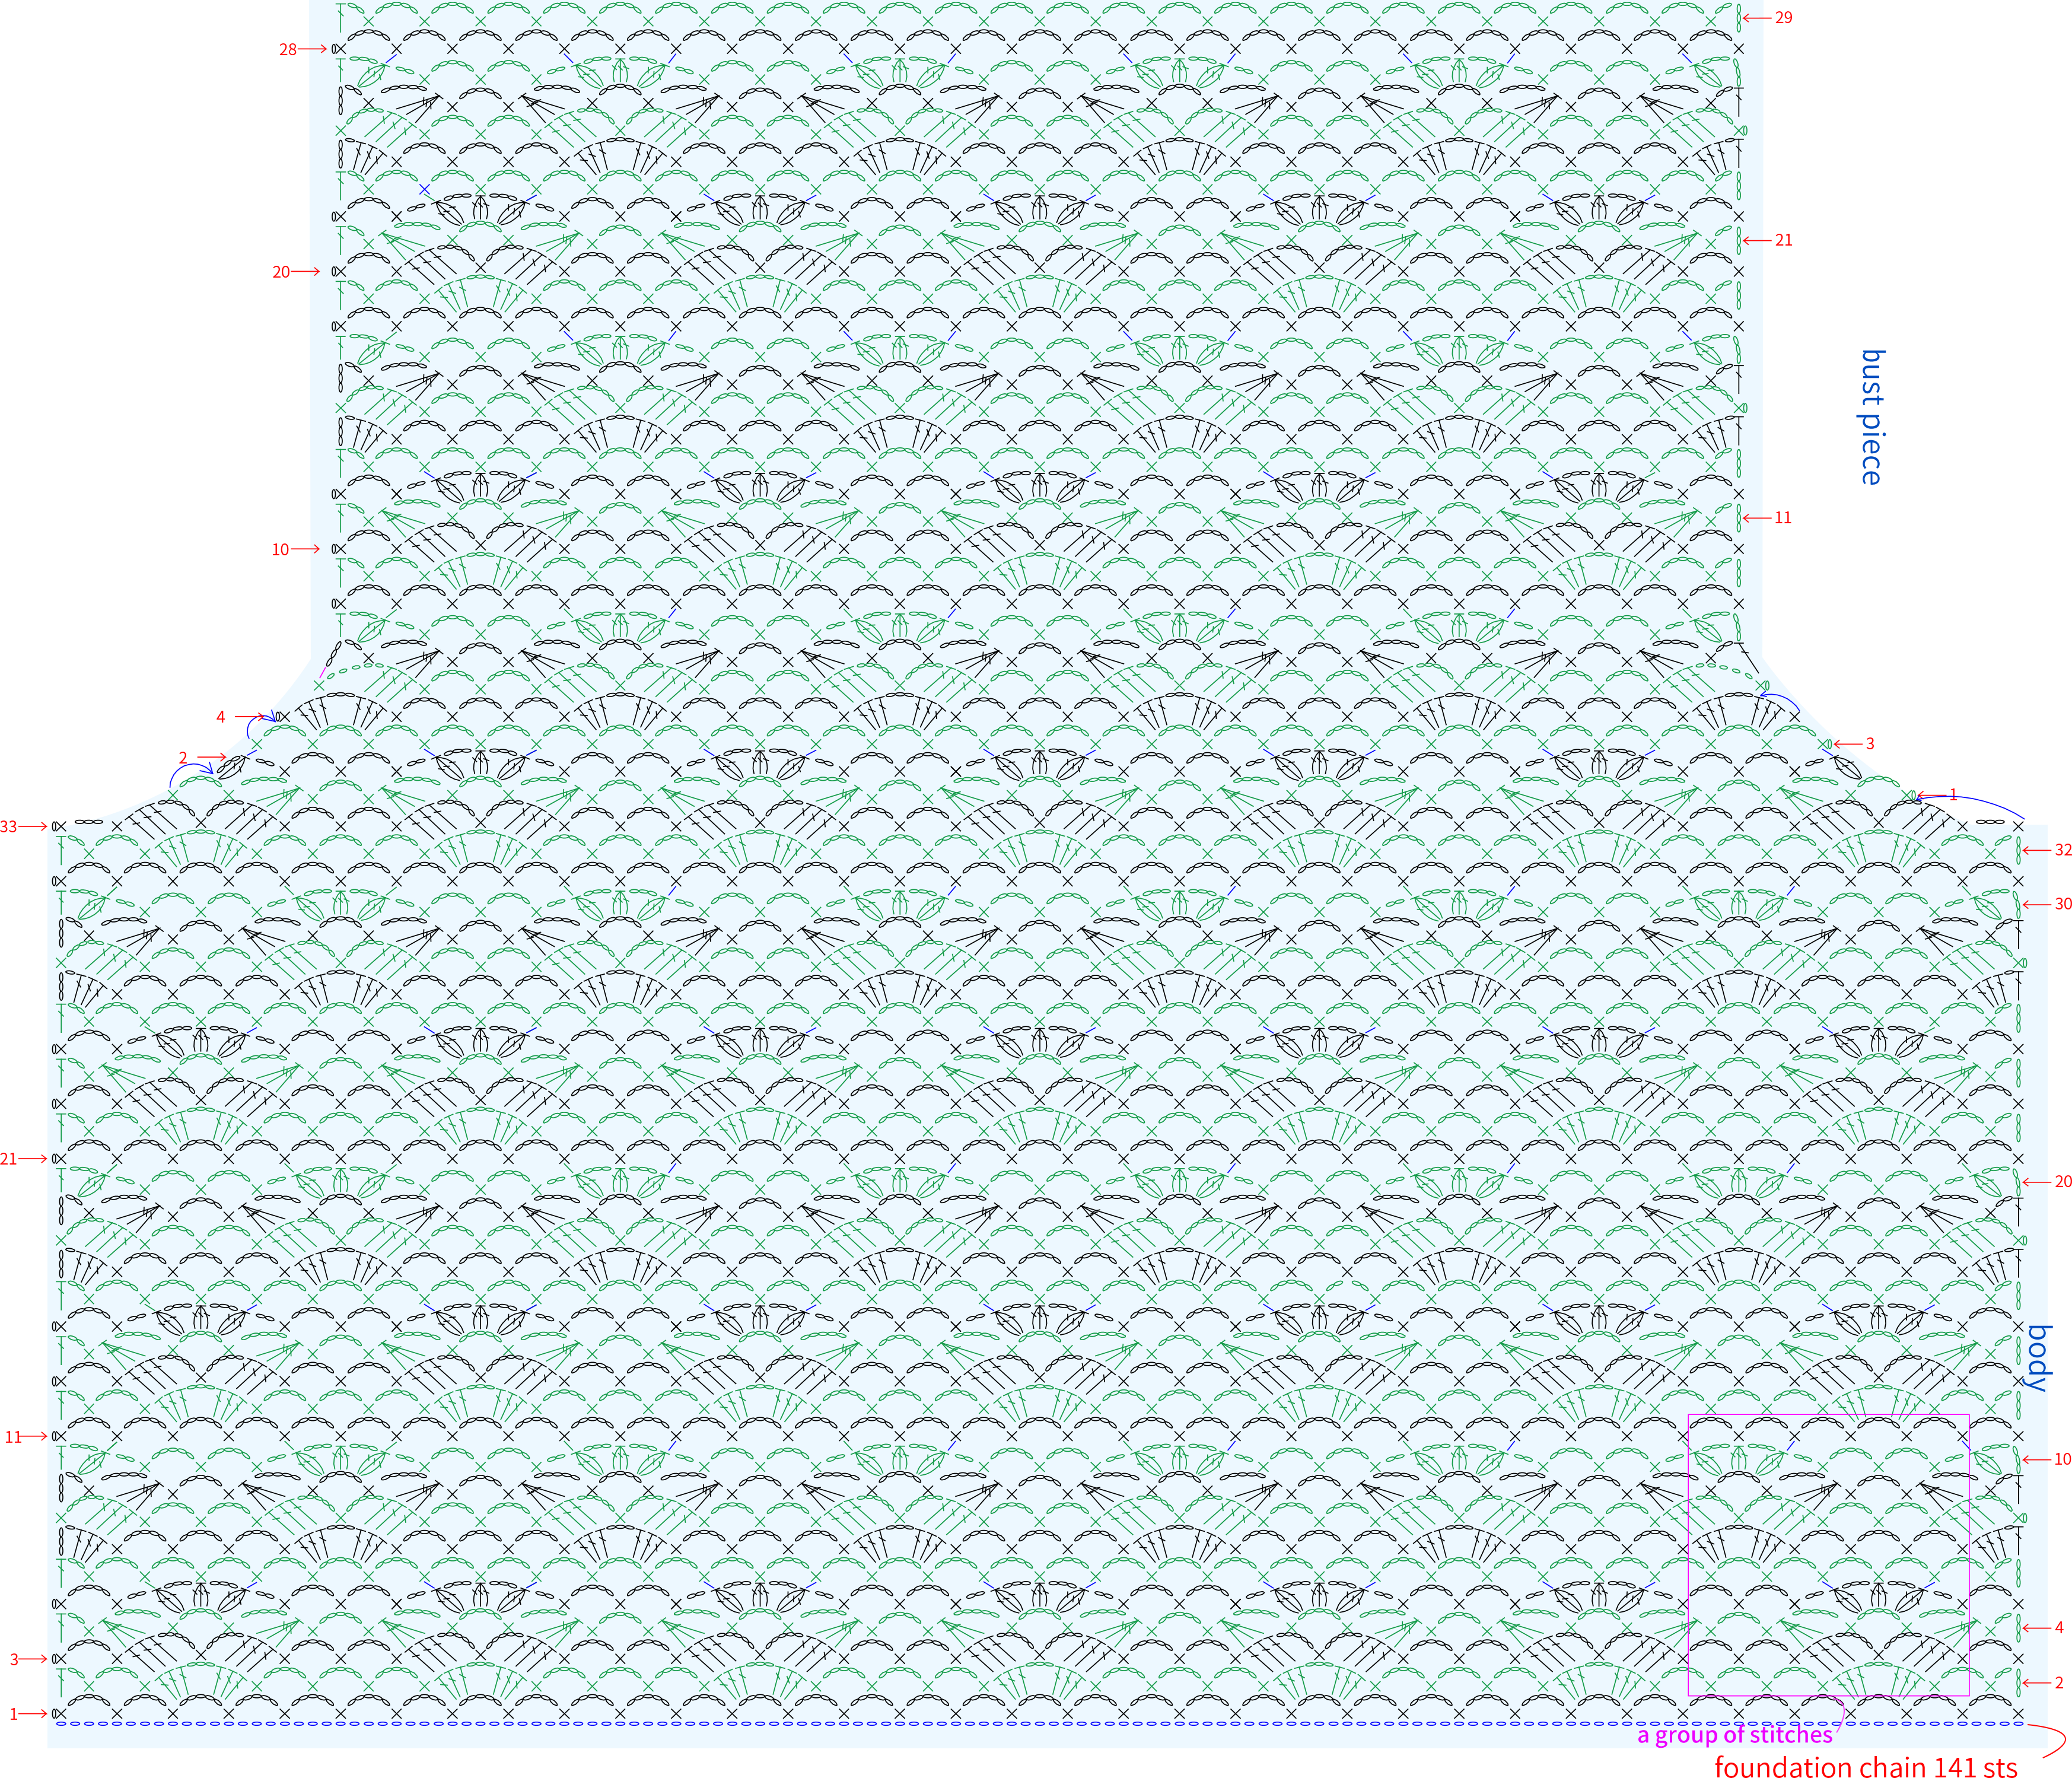
Note: After completing the 6th row of the body, the width should be about 46 cm and the height about 4.5 cm (measured from the starting chain to the highest point of the 6th row).
If there is a significant difference, adjust your tension and re-crochet to ensure the finished product meets the required dimensions.
Part 2 Front piecesB 18' 43''
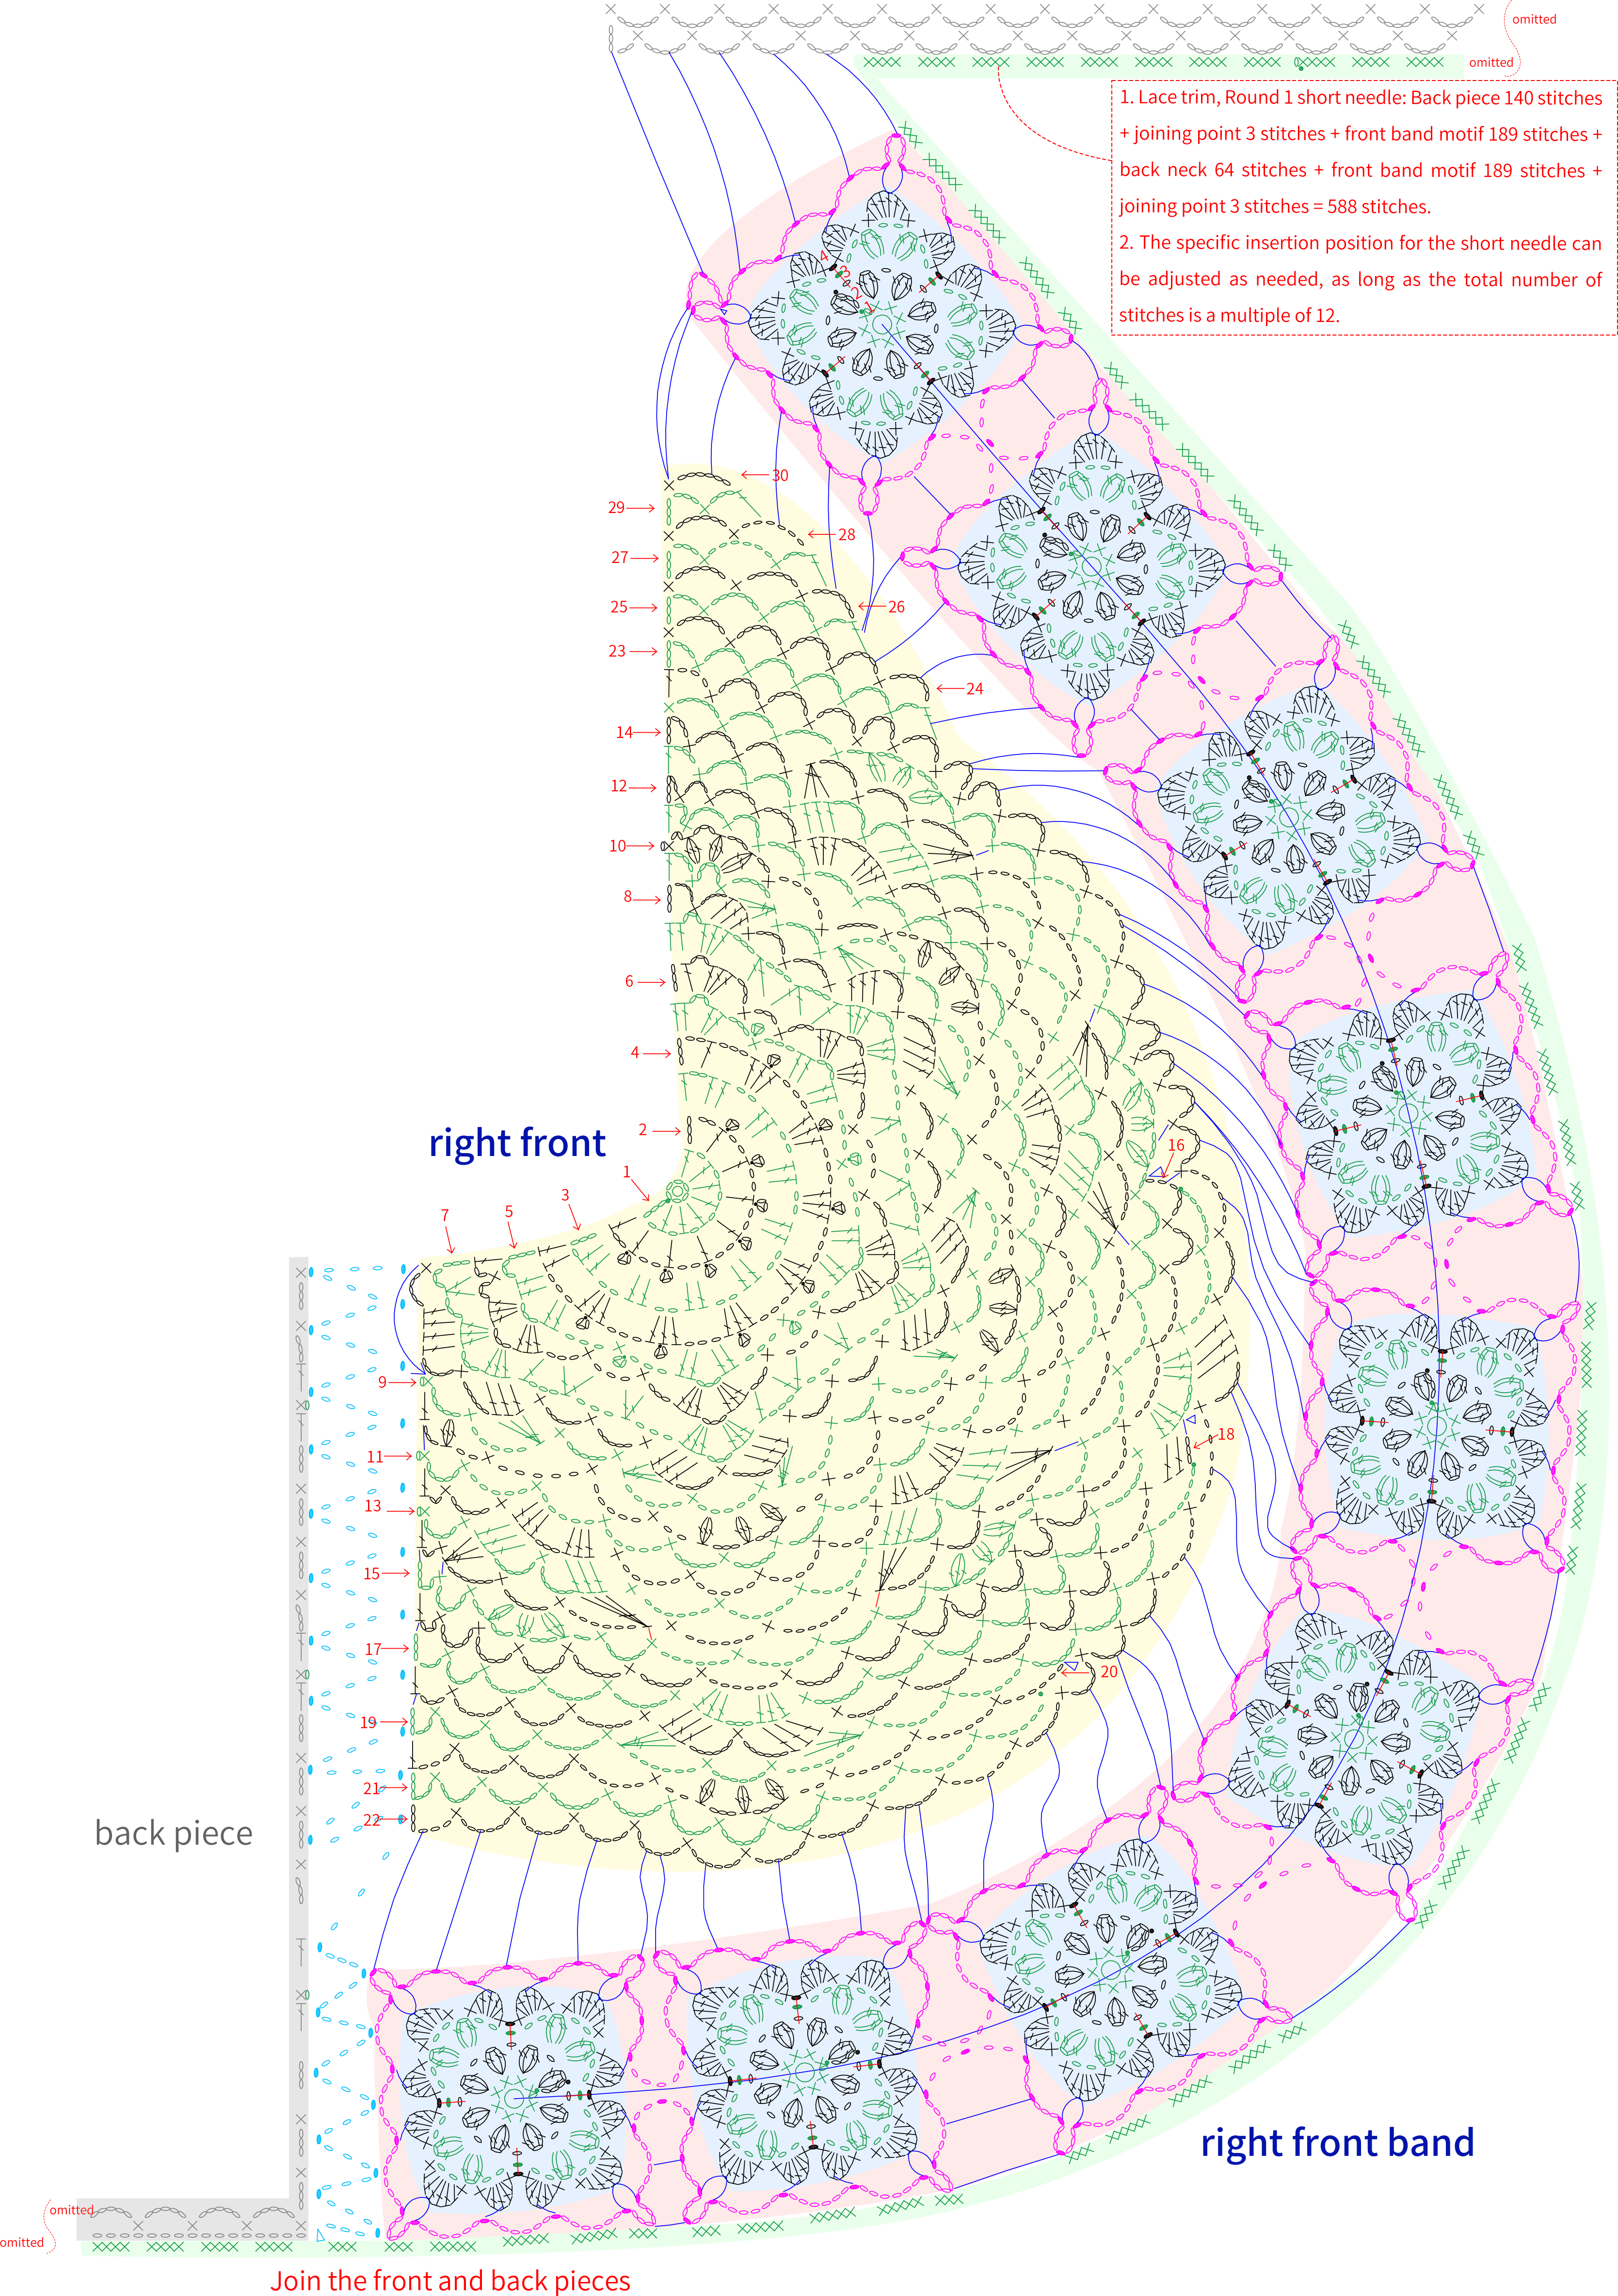
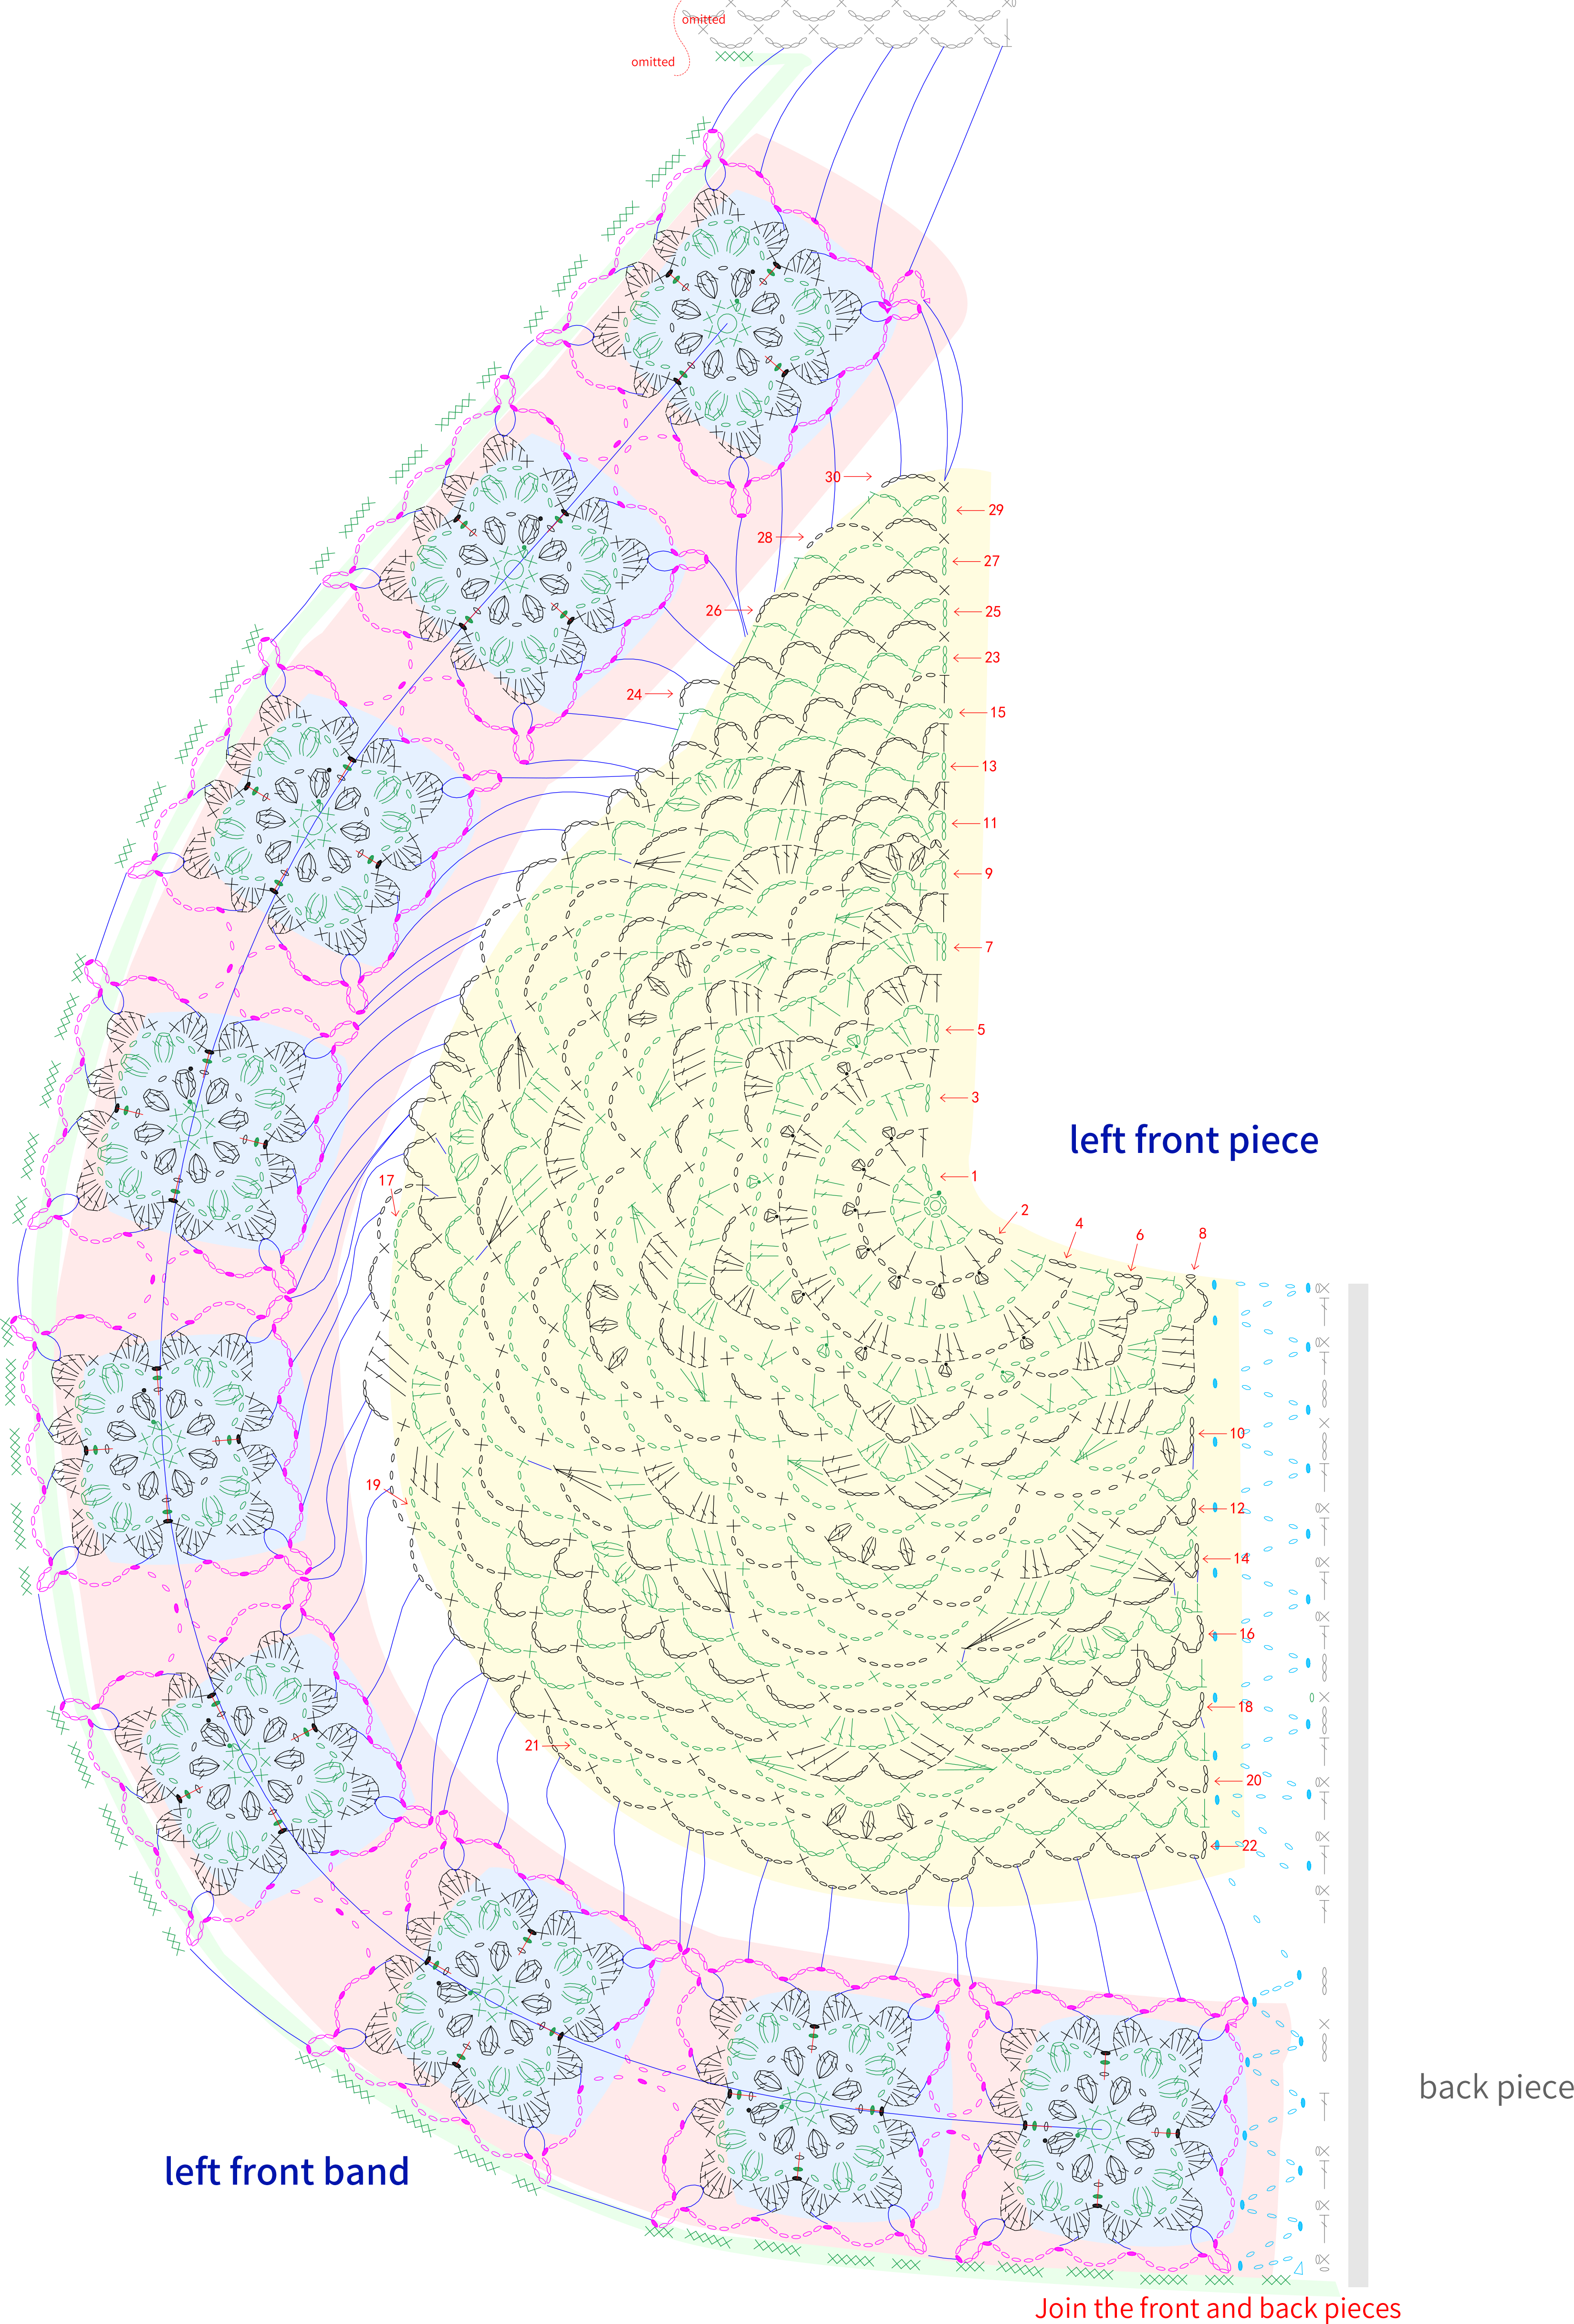
Both the left and right front pieces are worked using the magic ring method, crocheting back and forth. Please refer to the video demonstration for more details.
Note: Here, "left and right" refers to the left and right sides of the garment when worn.
Part 3 SleevesC 26' 09''
The sleeve is divided into the sleeve body, sleeve cap, and cuff. First, crochet the sleeve body and sleeve cap. After completing them, join the side seam of the sleeve body. Finally, crochet the cuff in rounds. Please refer to the video demonstration for more details.

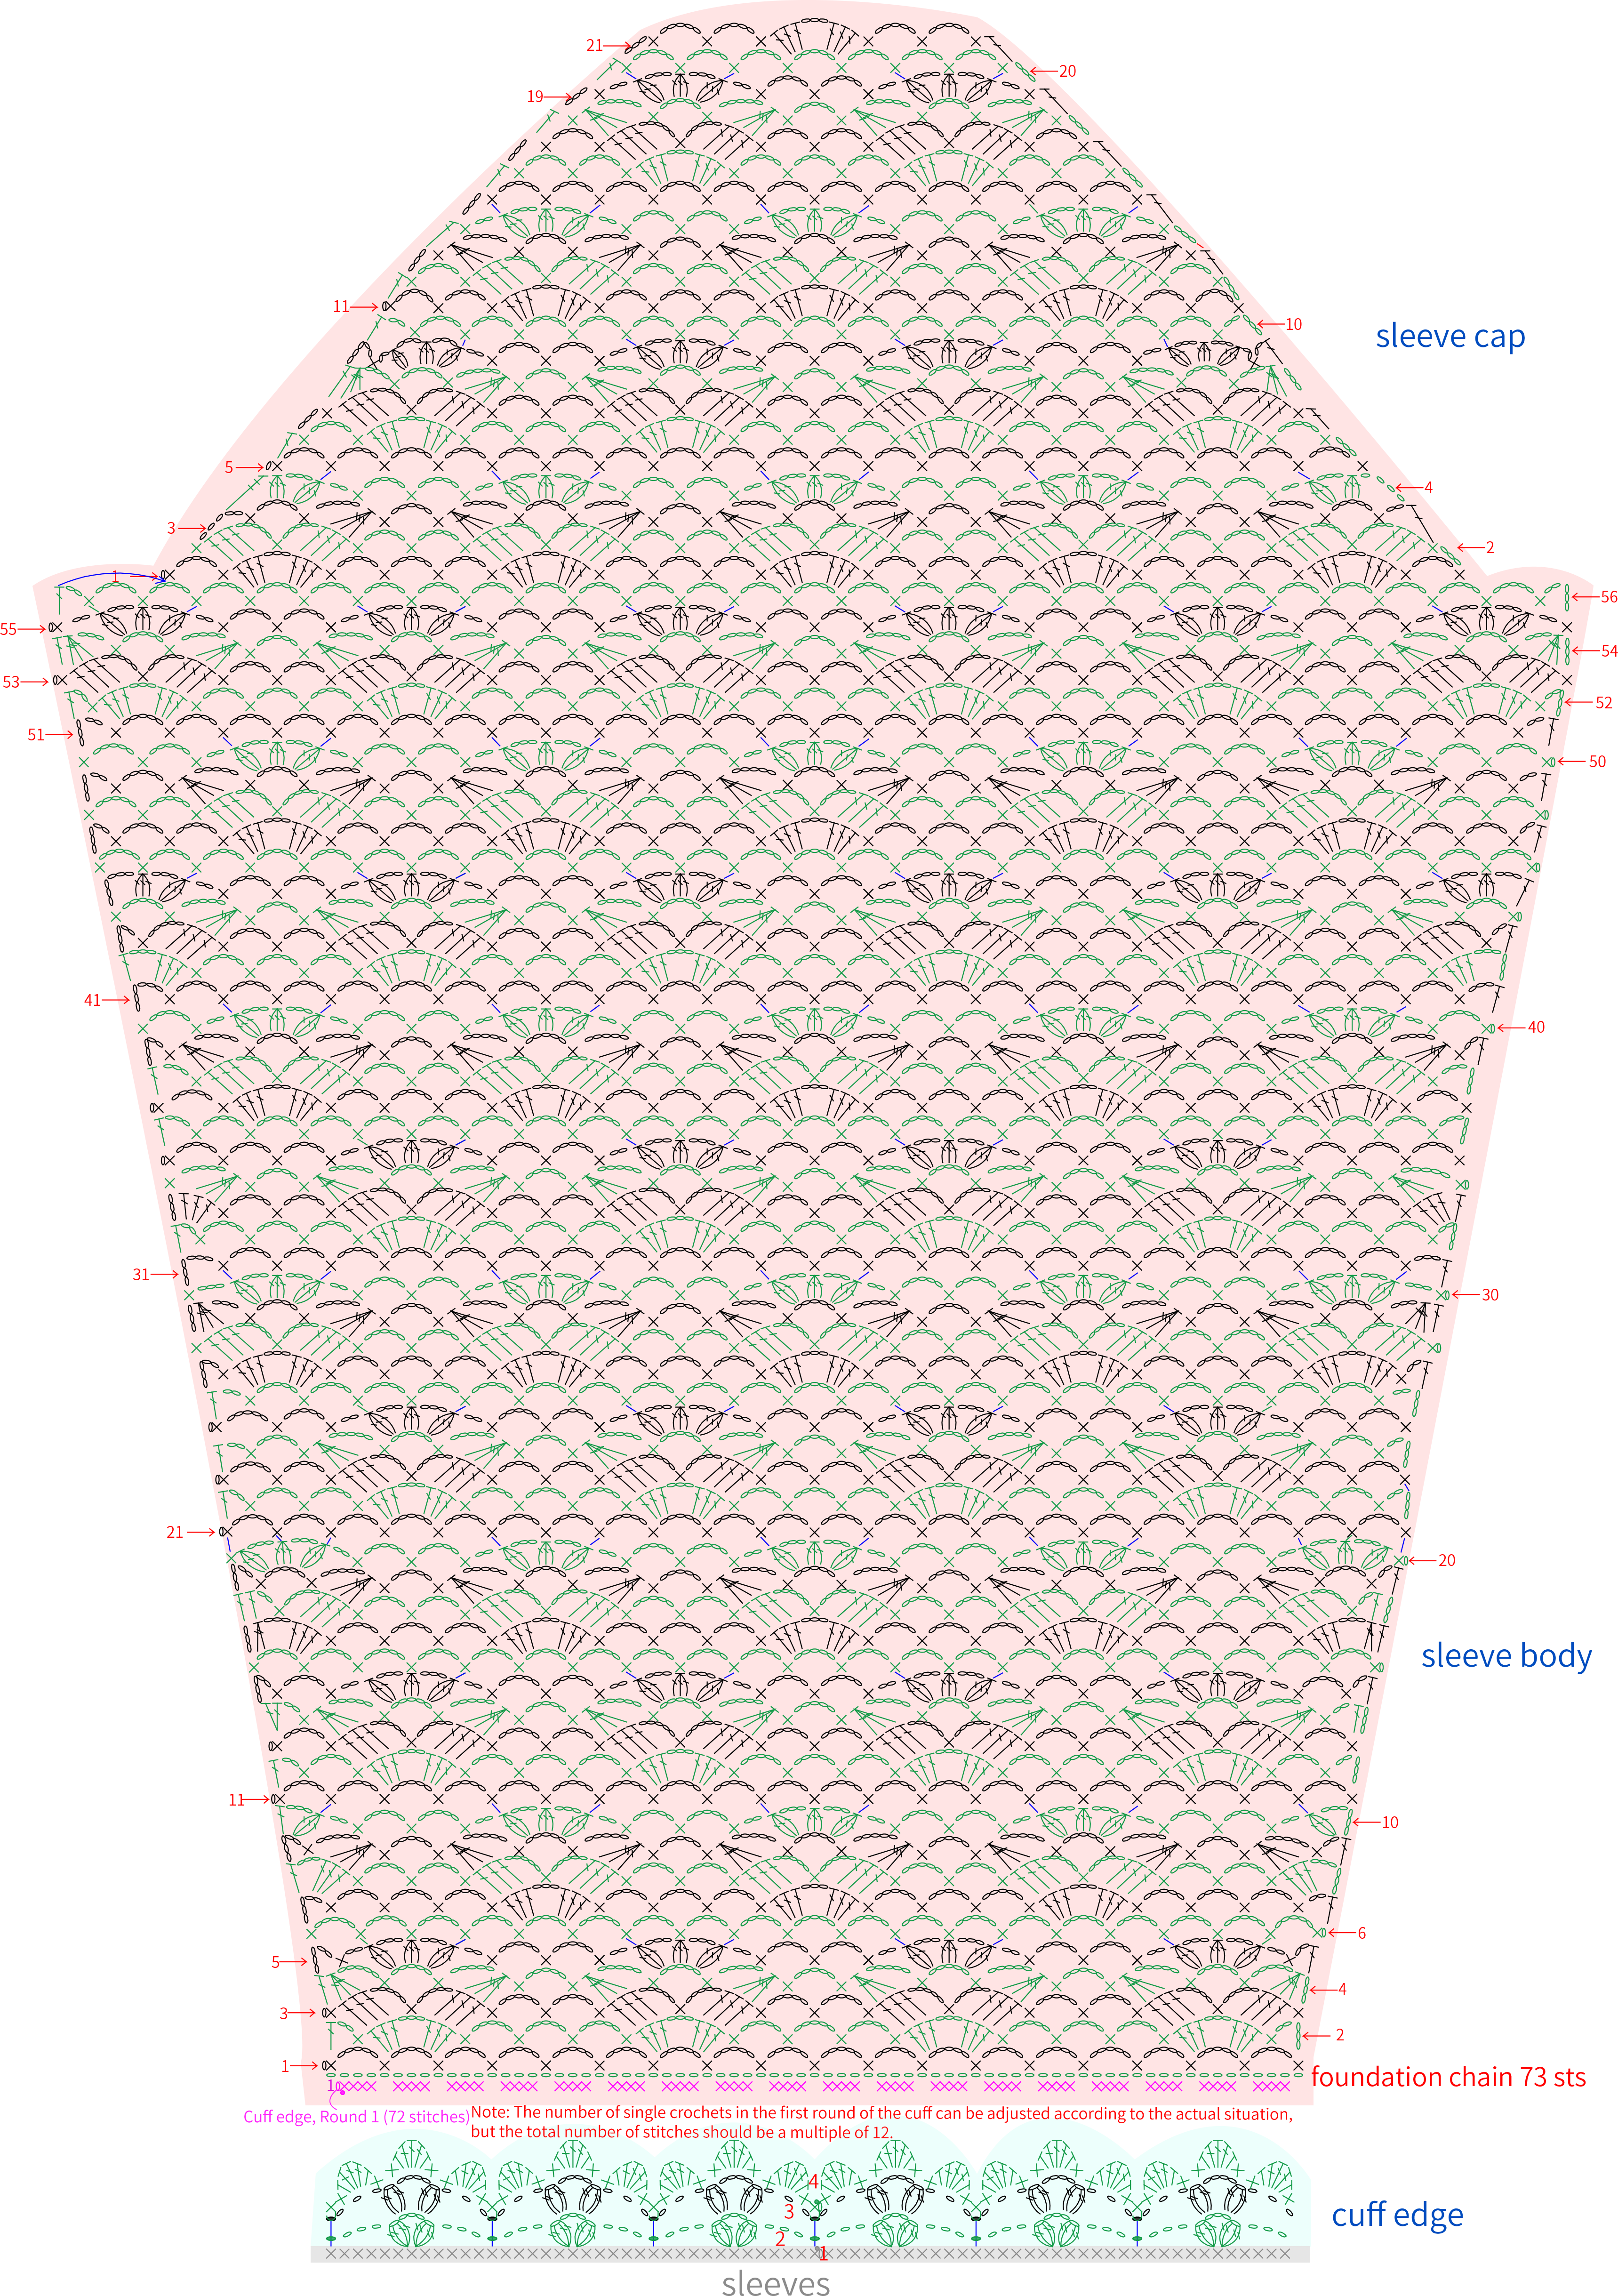
Note: The sleeves are crocheted on the wrong side using single crochets and chains for joining.
You can also join them according to your own preference, as long as the final fabric looks neat and flat. Refer to the video tutorial for more details.
Part 4 Front bandD 39' 27''
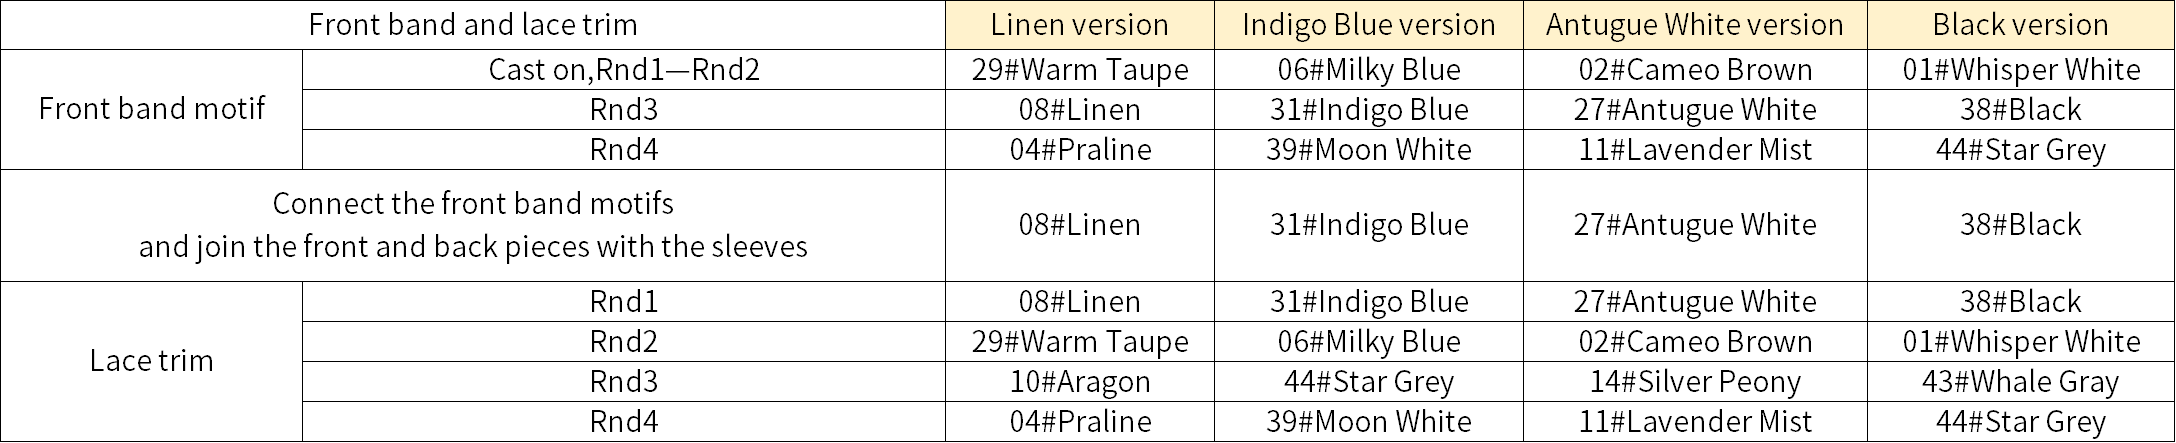
The front bands are divided into the right and left front bands. Both are first crocheted as motifs, then connected separately to the edges of the right and left front pieces and the back piece. Finally, connect the front and back pieces with the sleeves. Please refer to the video demonstration for more details.
Note: See the chart in Part 2 for the front pieces.
Part 5 Lace trimE and broochF 75' 10''
Finally, crochet a lace trim around the cast-on edge of the back body, the side edges of the button bands, and the back neck. Use the same crochet technique as for the sleeve cuffs. For the first round of single crochets, refer to the placement of stitches in the charts for the right and left front pieces. Lastly, wear a brooch according to your preference. Please refer to the video demonstration for more details.
Made by the community