Clothes
Emerald City
Project preview
See the finished project
Pattern format
Instructions


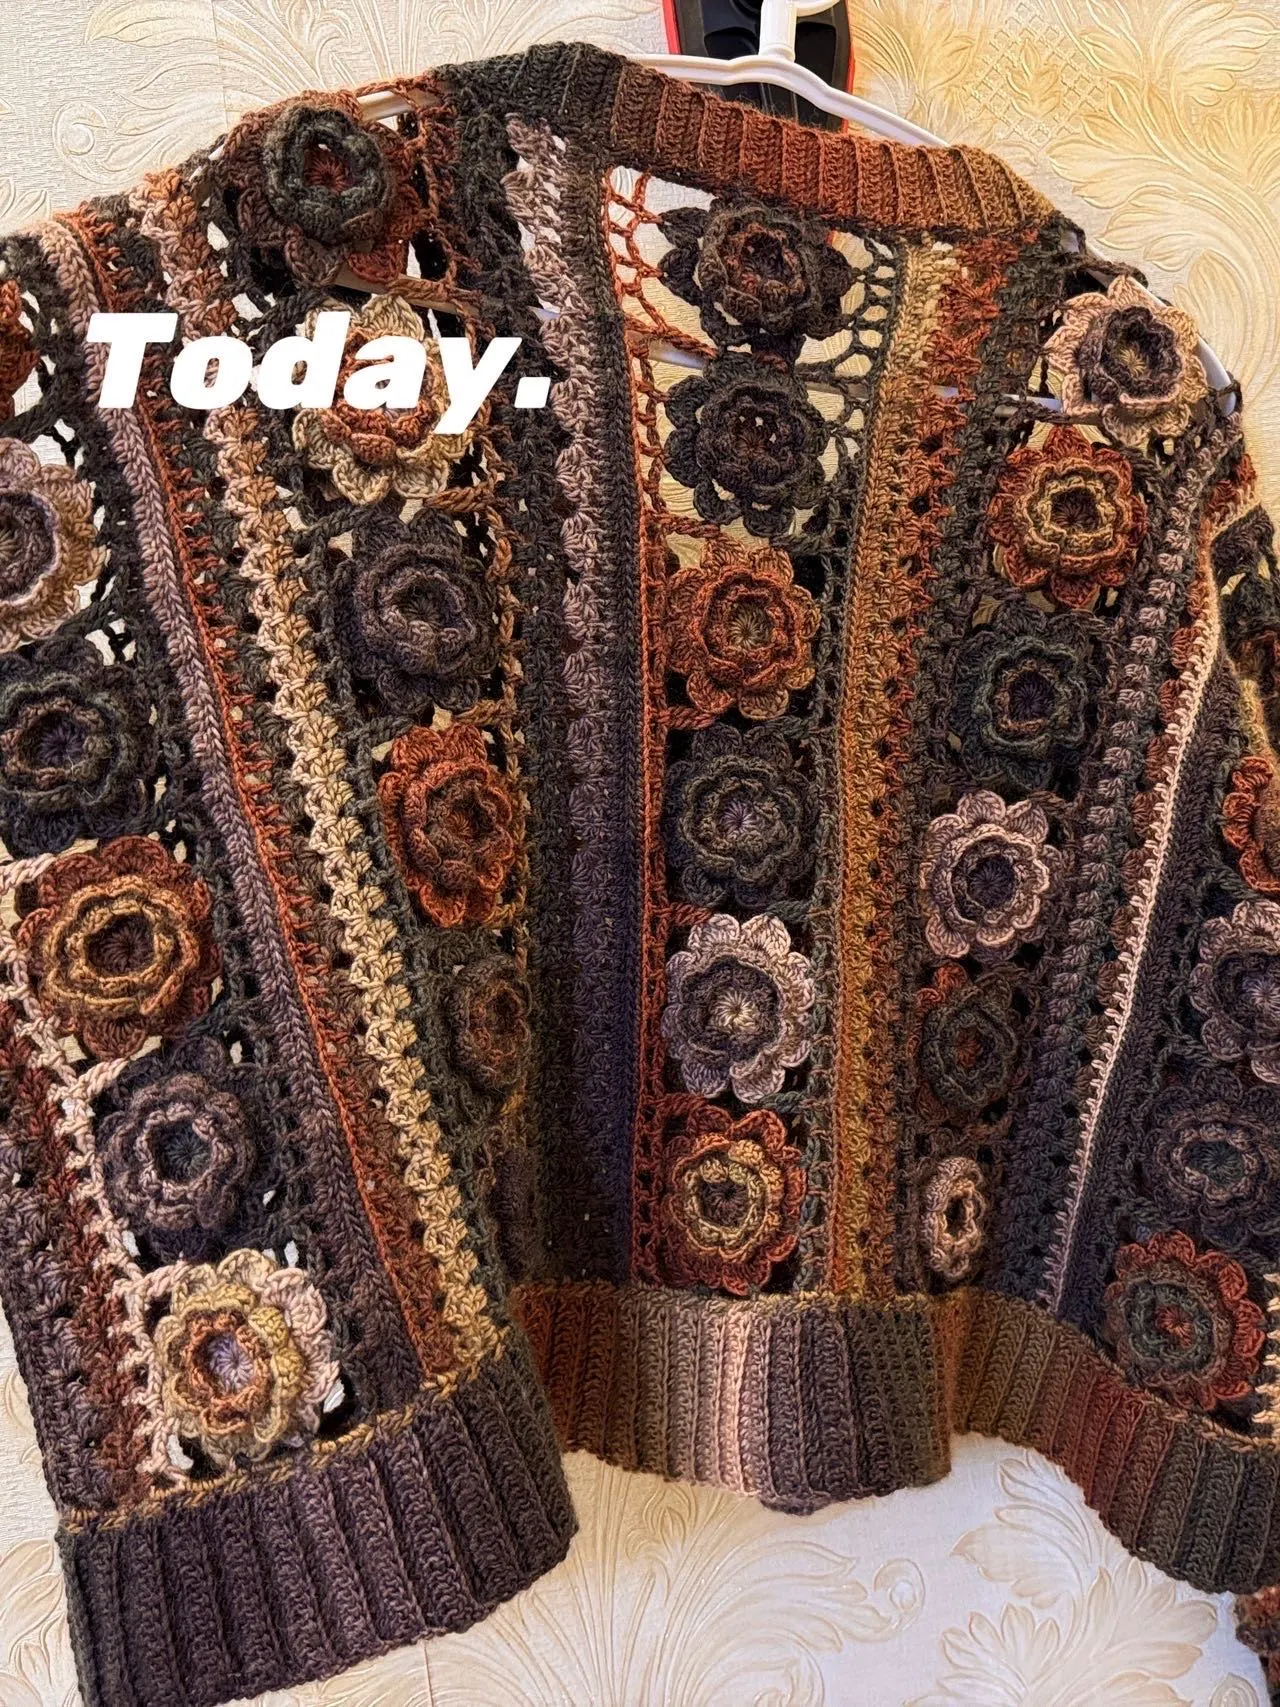
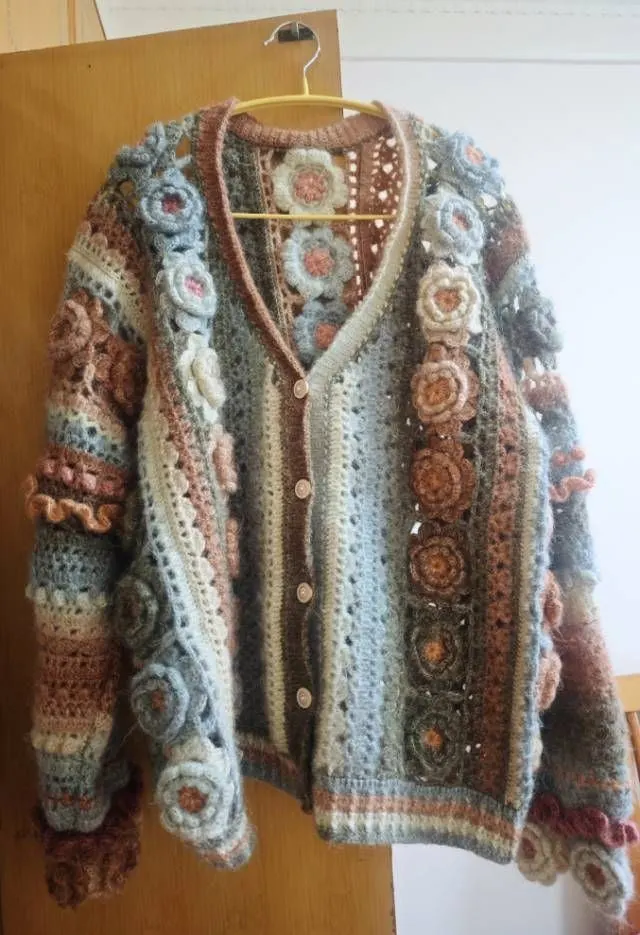
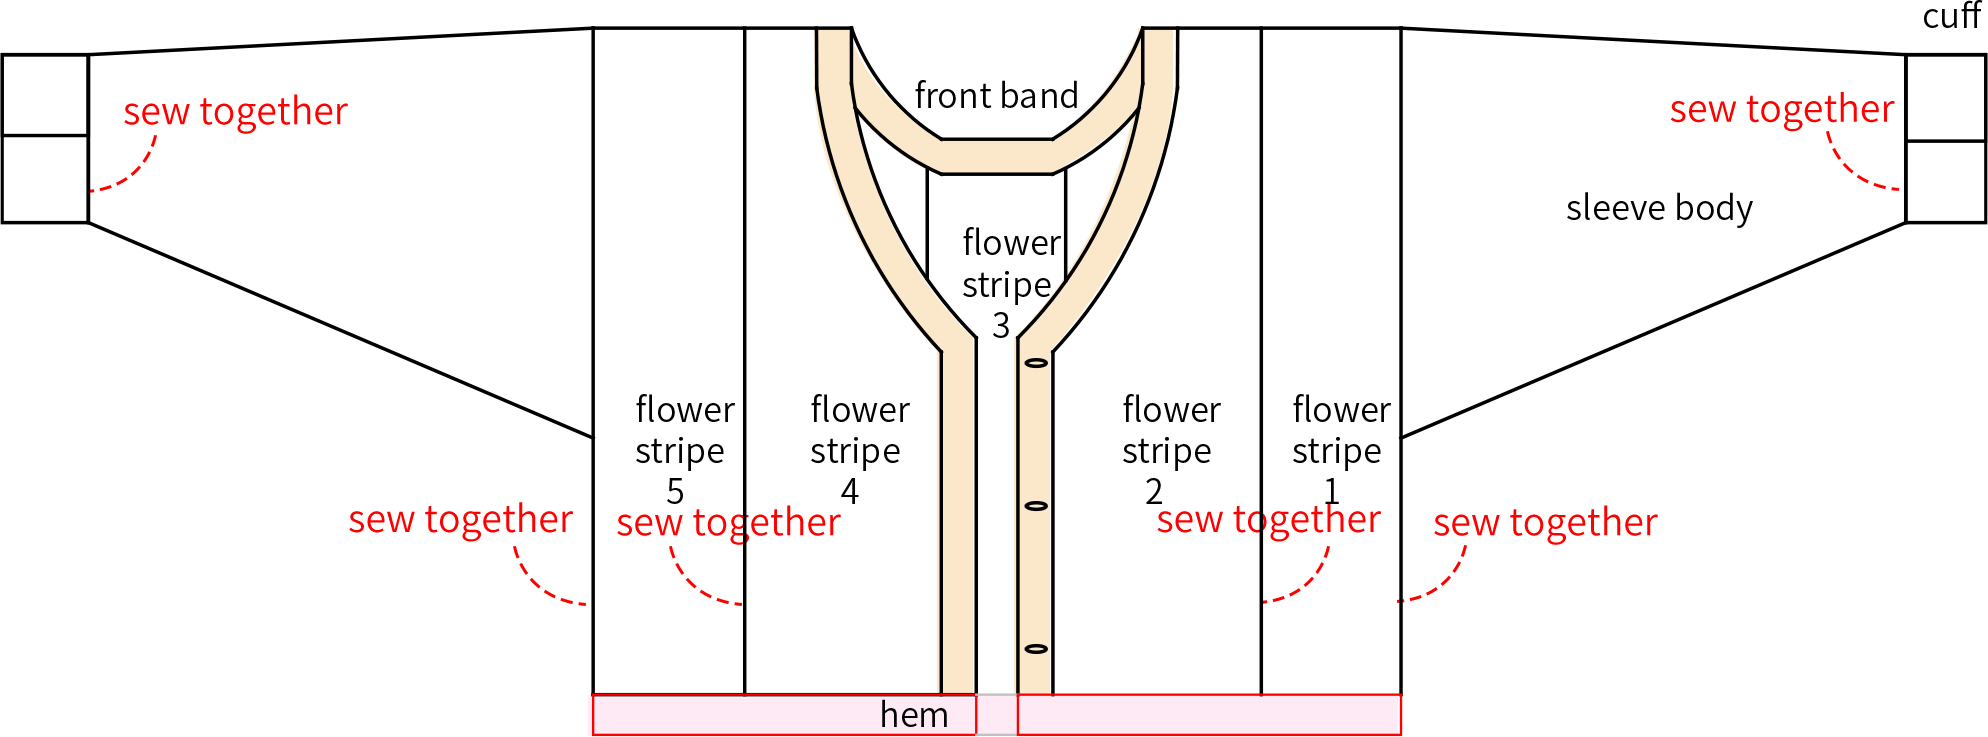
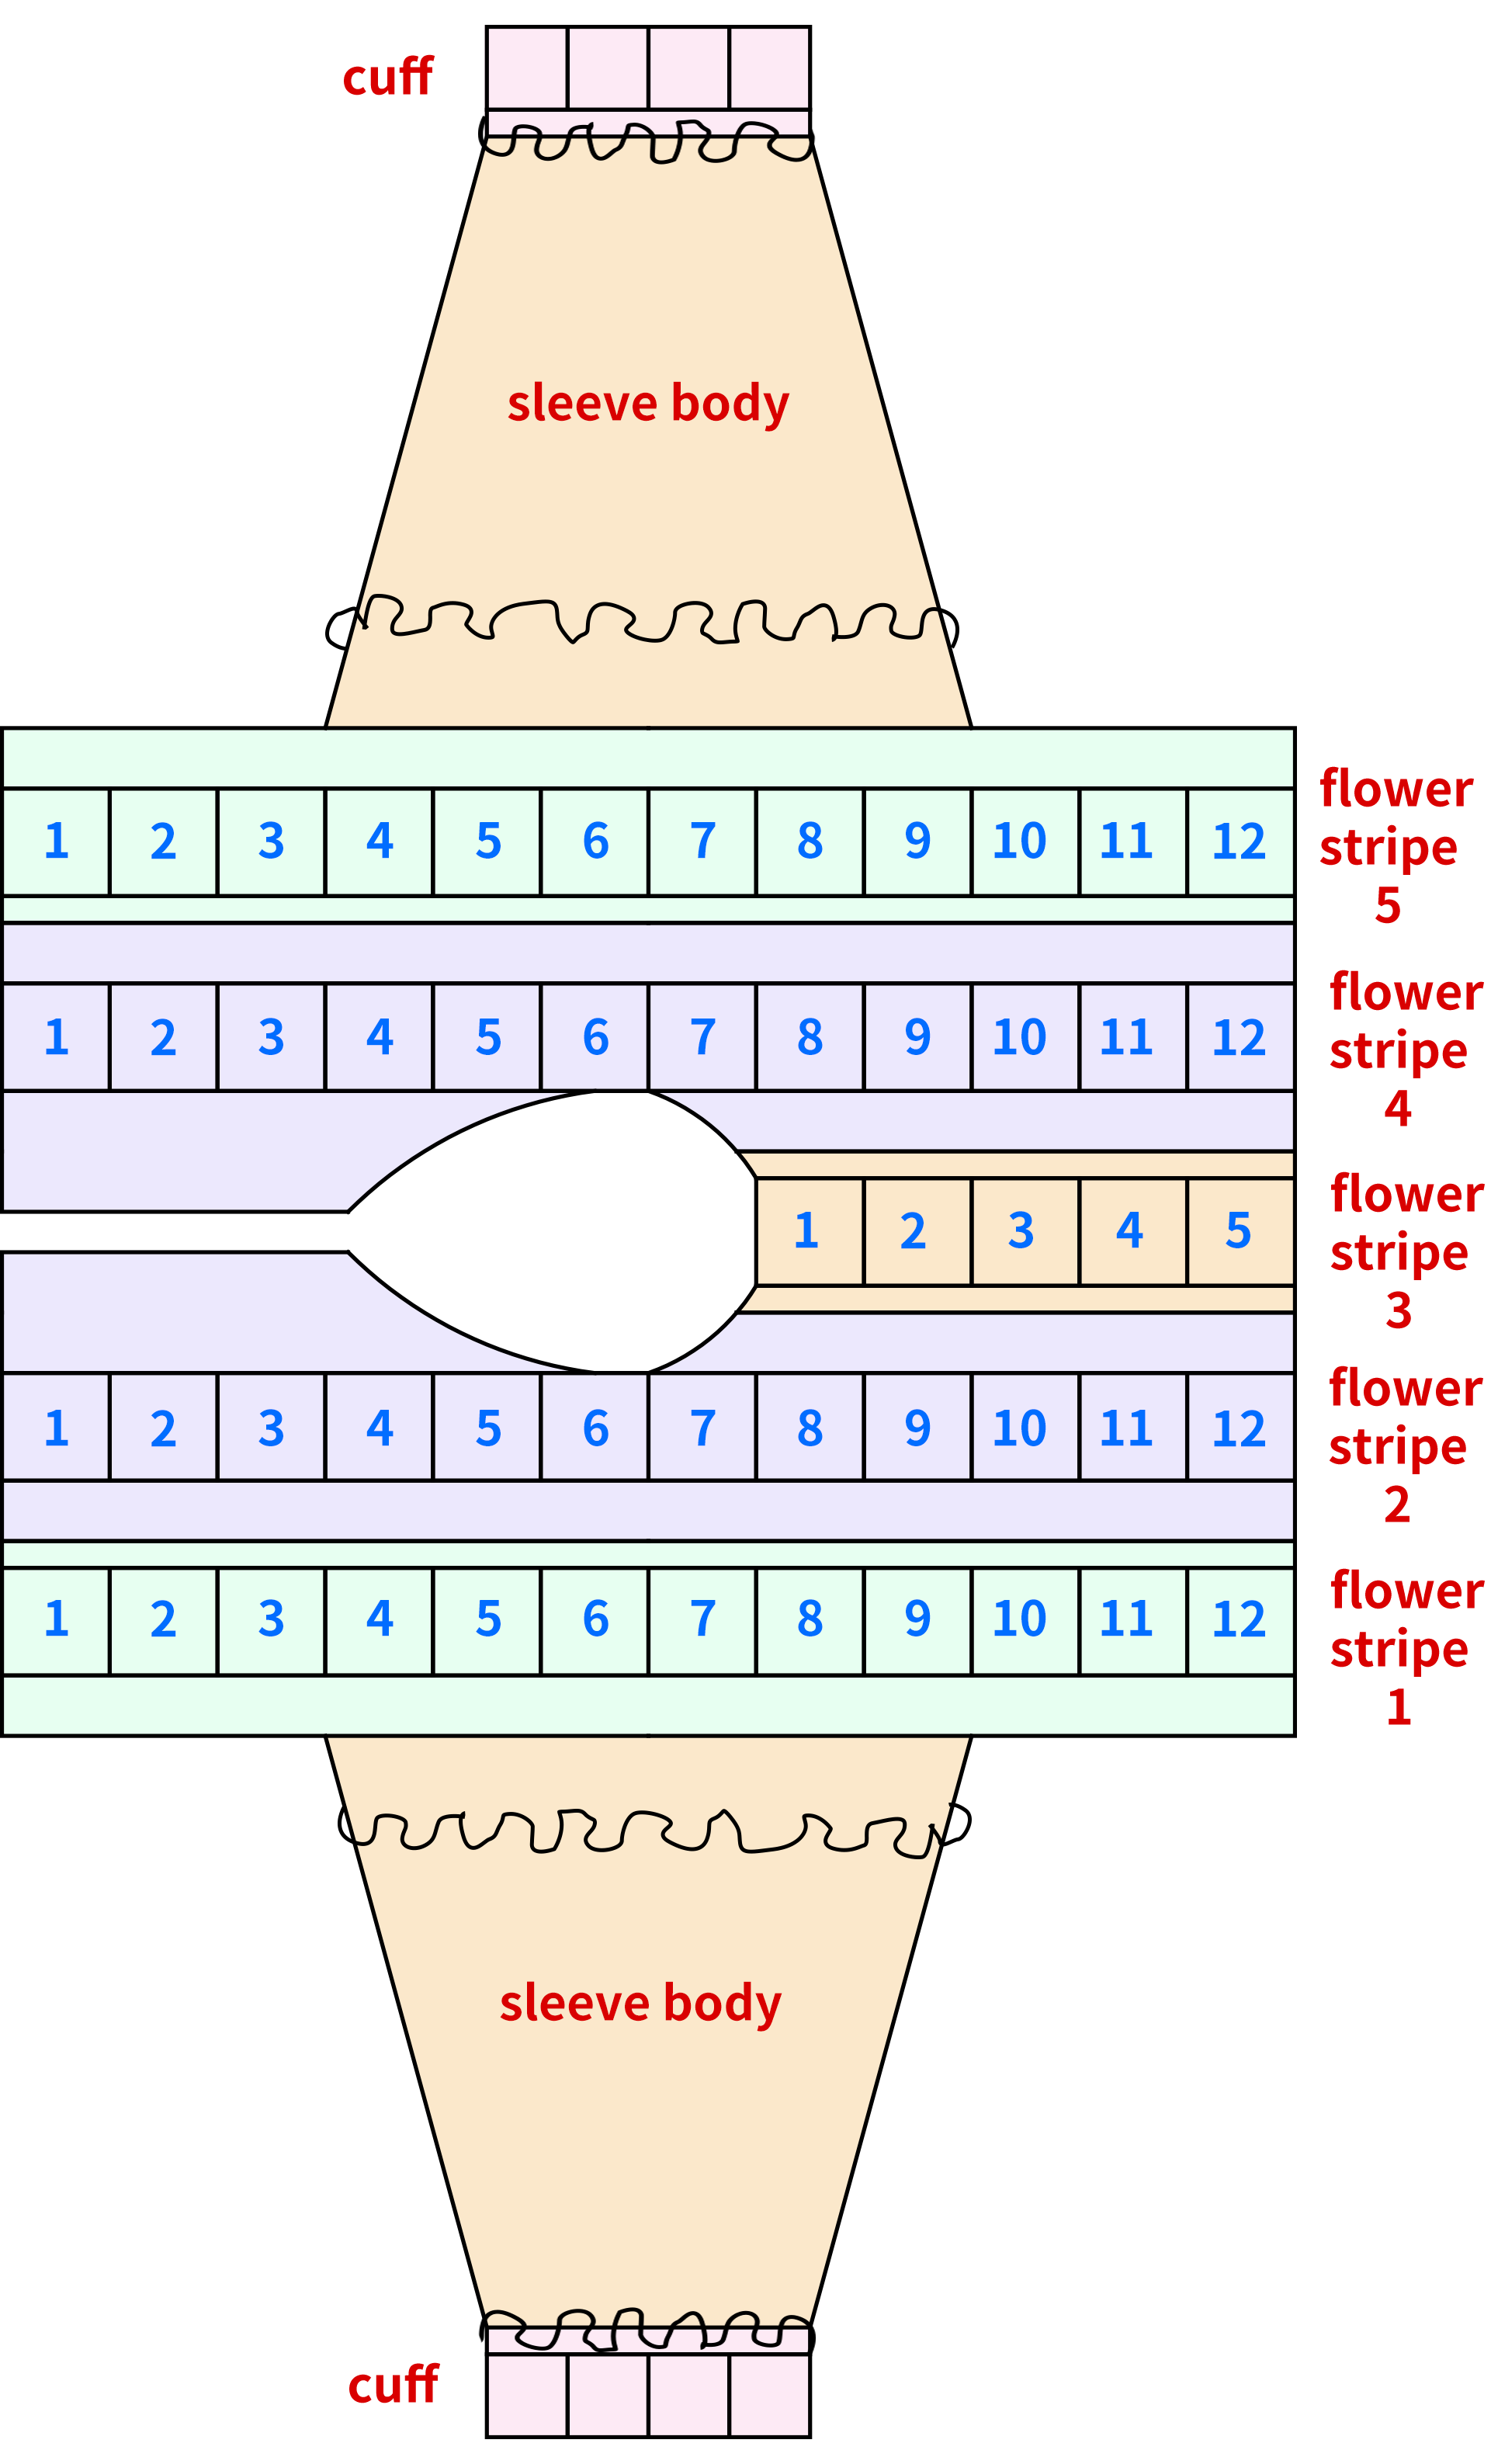
This garment is divided into flower strips 1 to 5, sleeves, front band, and hem. The flower strips are first crocheted and joined along the side to create the required number of flowers, then the flower strips are crocheted. After separately crocheting all five flower strips, sew them together. Then crochet the sleeves in the reserved armhole areas. The sleeves are further divided into the sleeve body, cuff lace trim, and sleeve body lace trim.
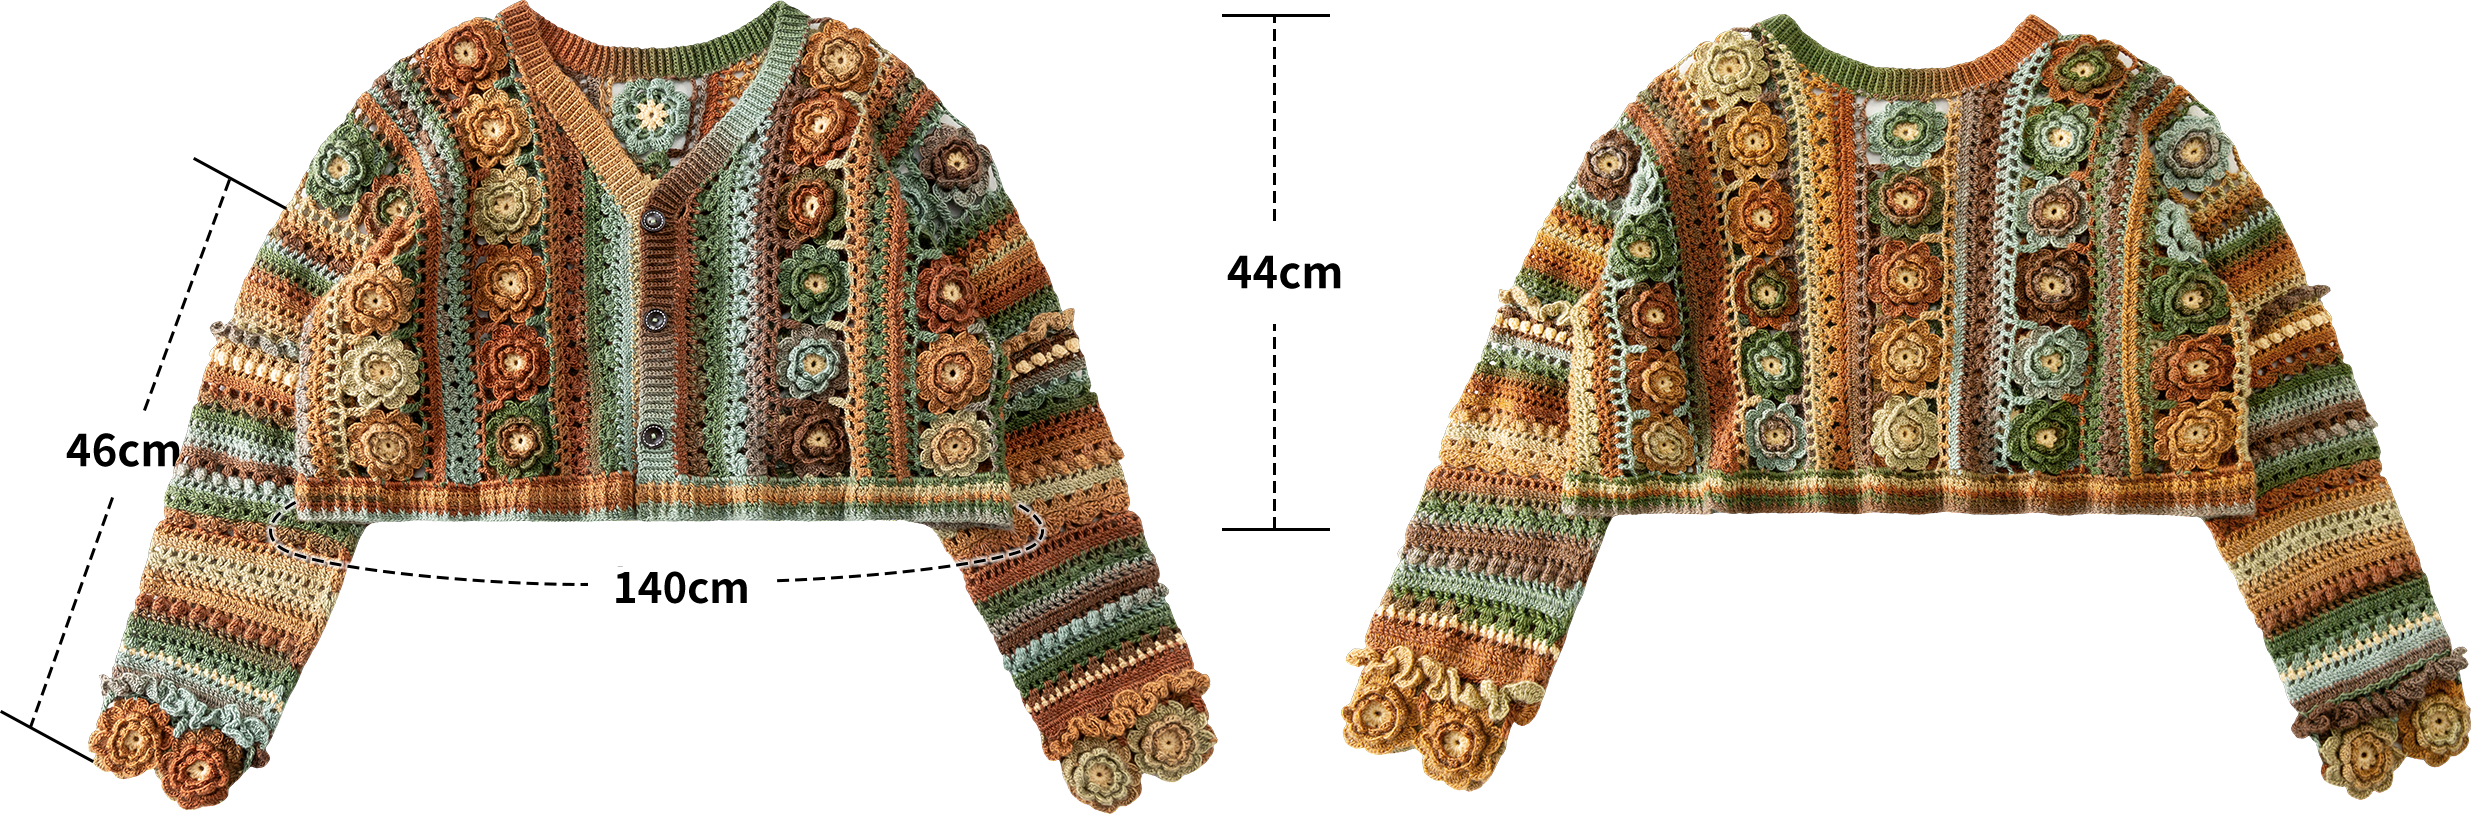
The Handcrafted measurements may have an error of 1 to 2 cm. Due to variations in individual tension, the size of the sample is for reference only.
Materials: Monet Impression & Morandi 4#
Crochet Hook: 3.00 mm Crochet Hook

Note:
This pattern is making in Chinese crochet pattern terms, and the stitch name is written using American terminology. All measurements in charts are in cm.
Chart Key





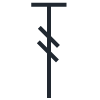
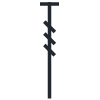
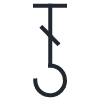


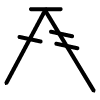



| Part | Round | Color Scheme |
| Flower | Cast on, R1 | Morandi 4# |
| R2—R6 | Monet Impression | |
| Flower Stripe | Monet Impression | |
| Front Band、Hem | Monet Impression | |
Part 1 Flowers and flower connections
The flowers start with a magic ring method and are crocheted in rounds counterclockwise. Note, in each flower strip, except for the first flower which needs to be crocheted separately, all remaining flowers should be worked and joined simultaneously. Refer to the video demonstration for specifics.
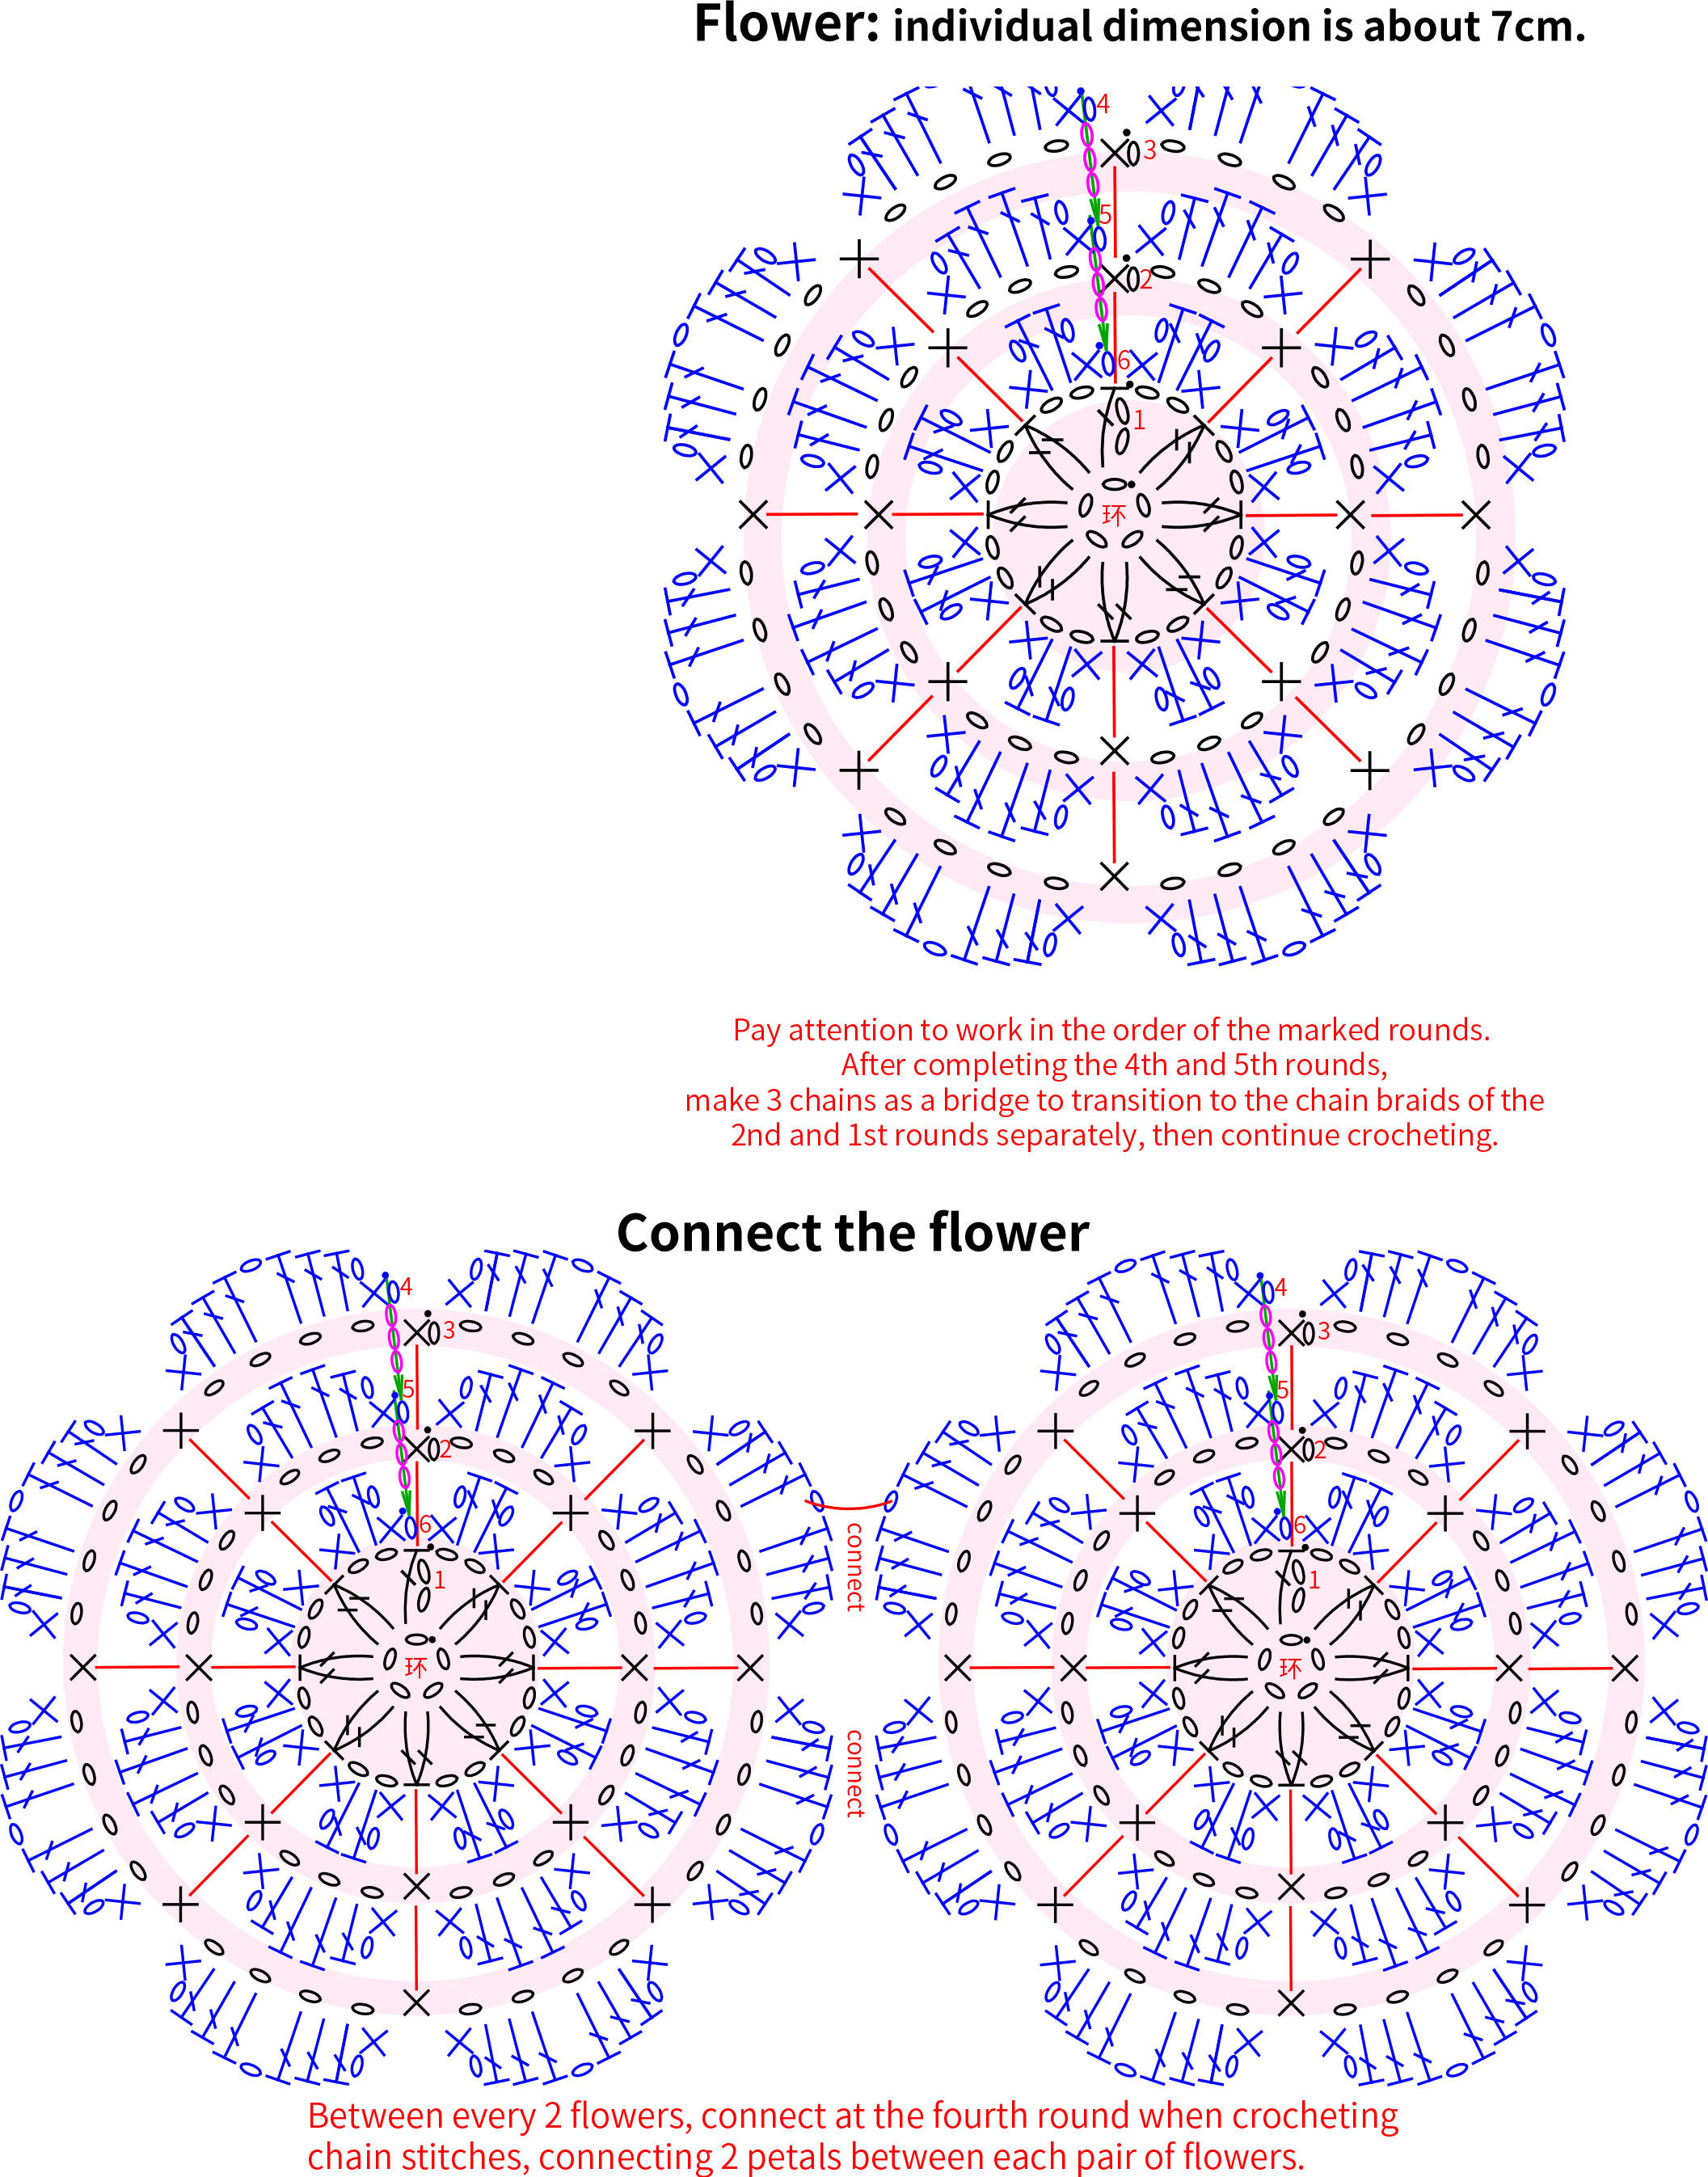
Part 2 Flower stripe 1 -5
Referring to the joining diagram, crochet the required number of flowers for each stripe, then work each stripe. After completing them, continue to refer to the joining diagram and sew together by picking up the back loop only at the corresponding positions.
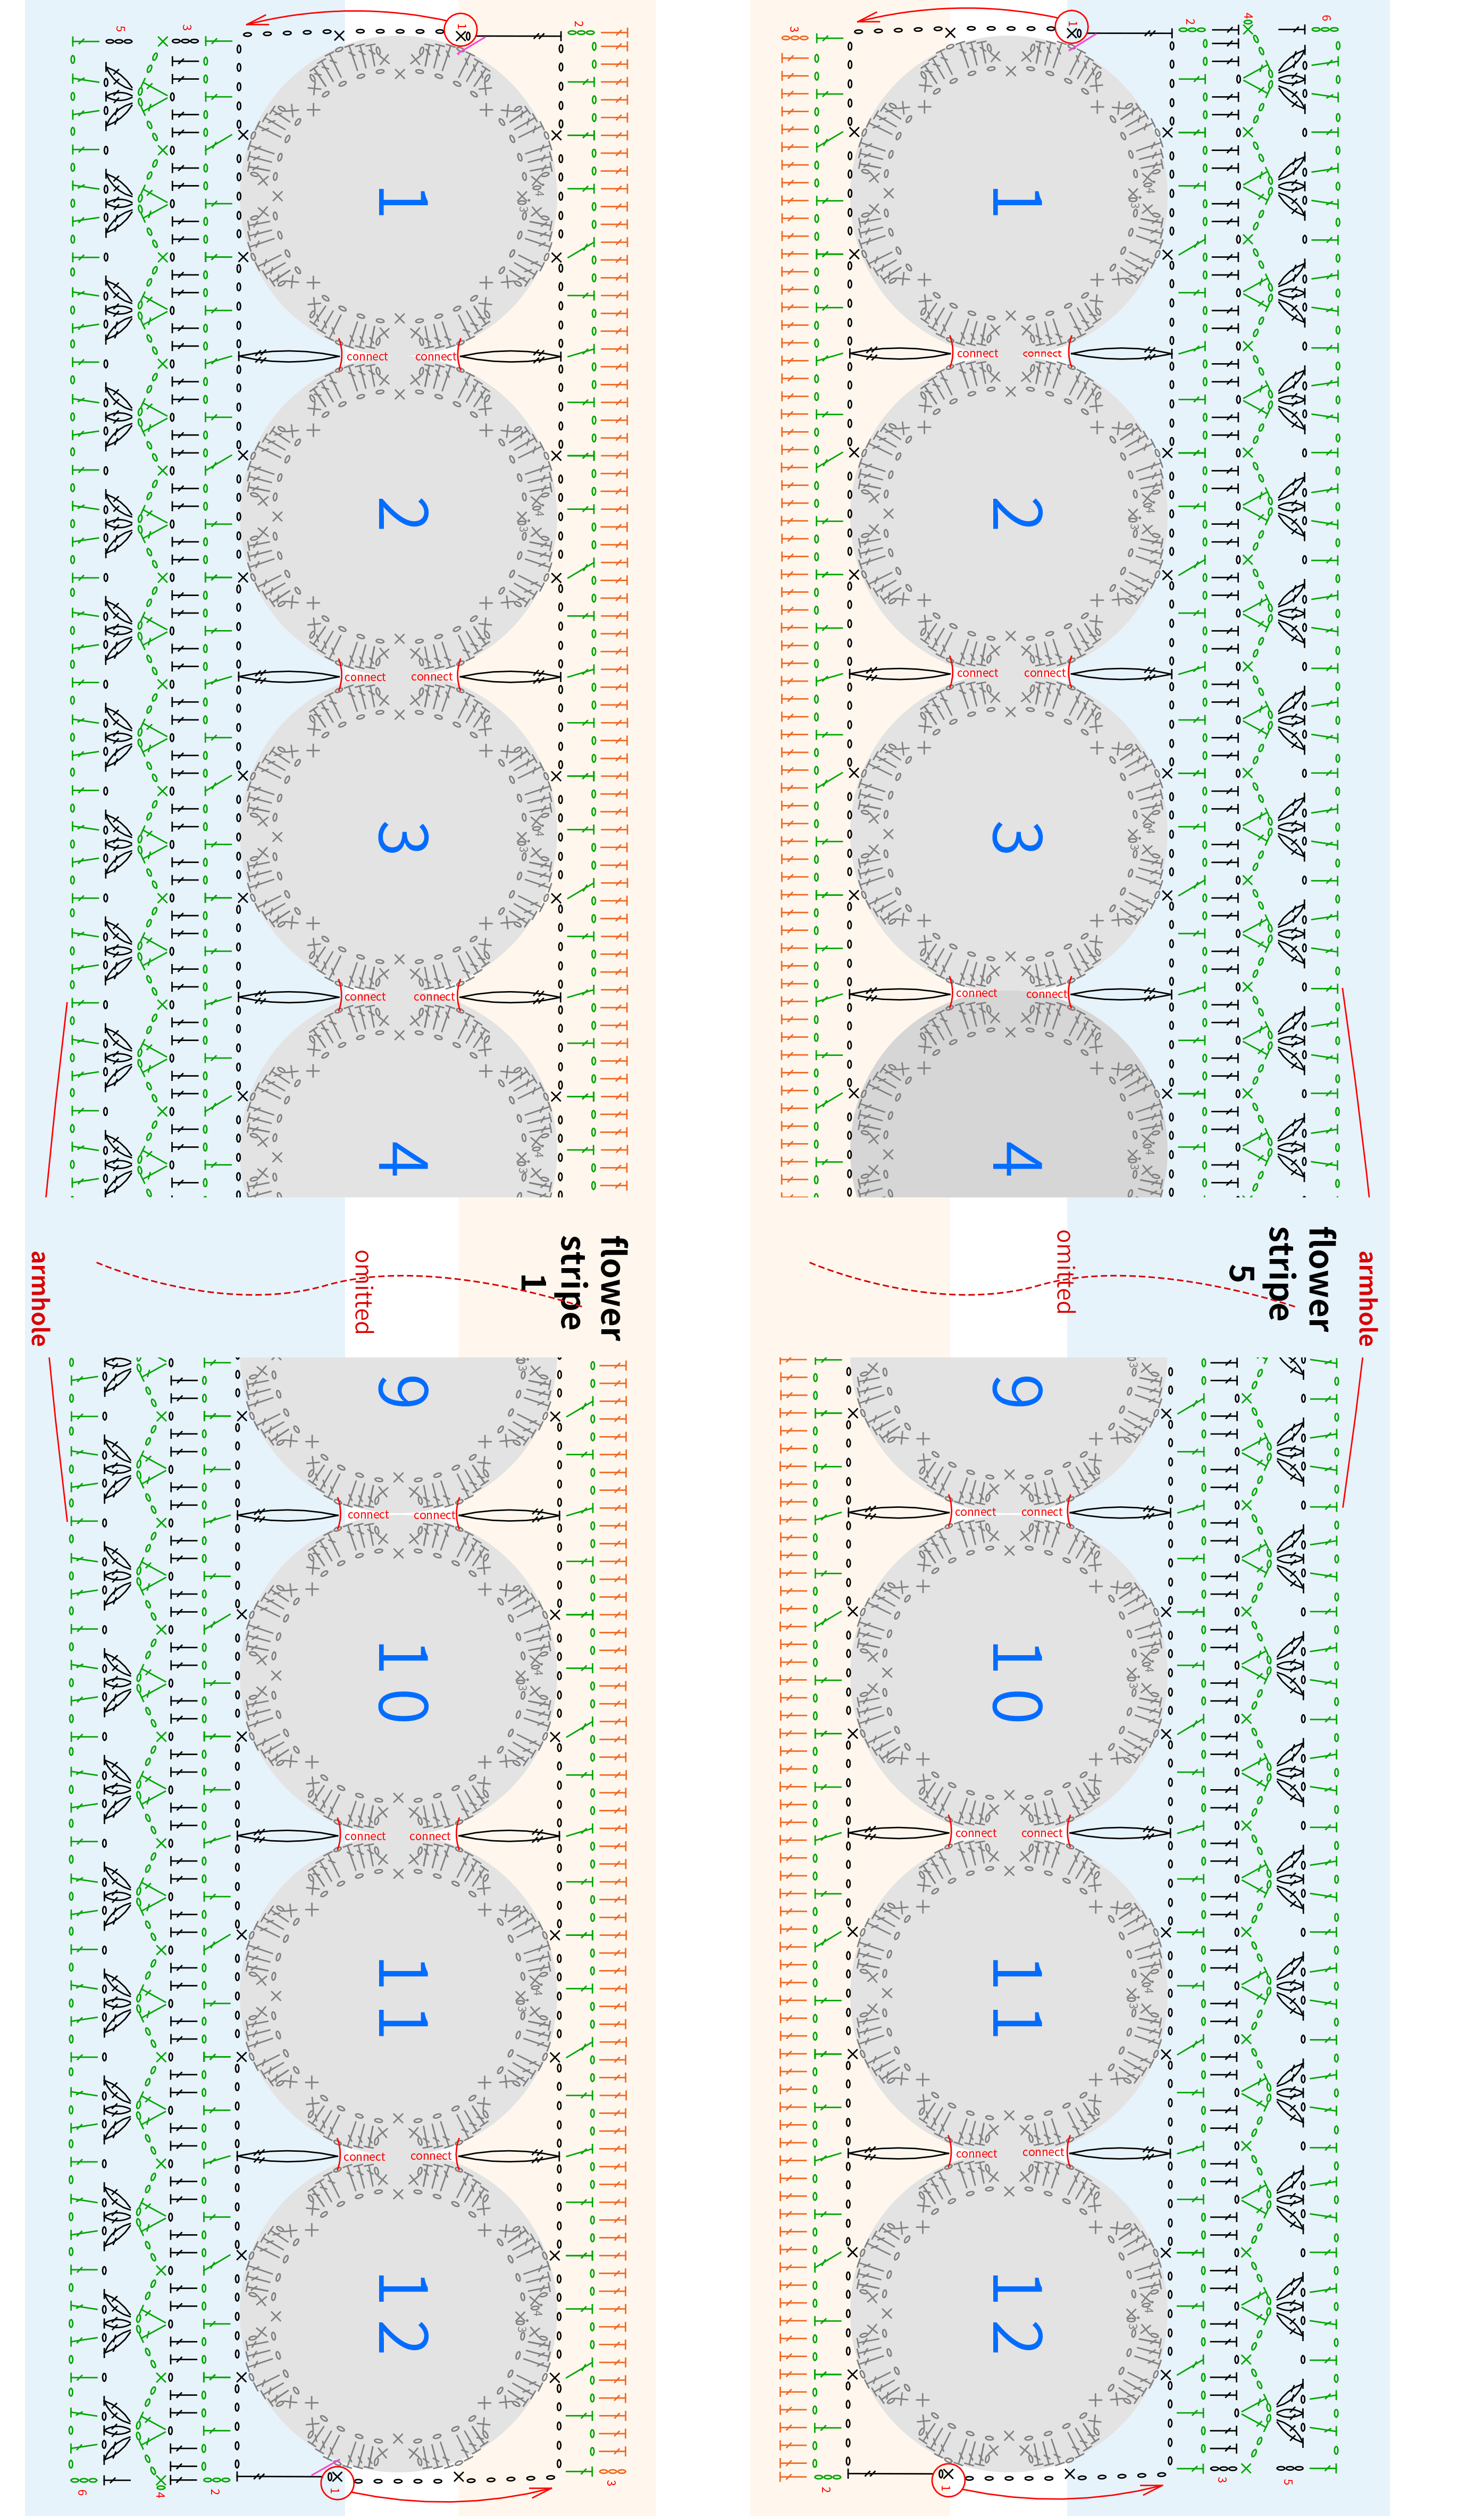
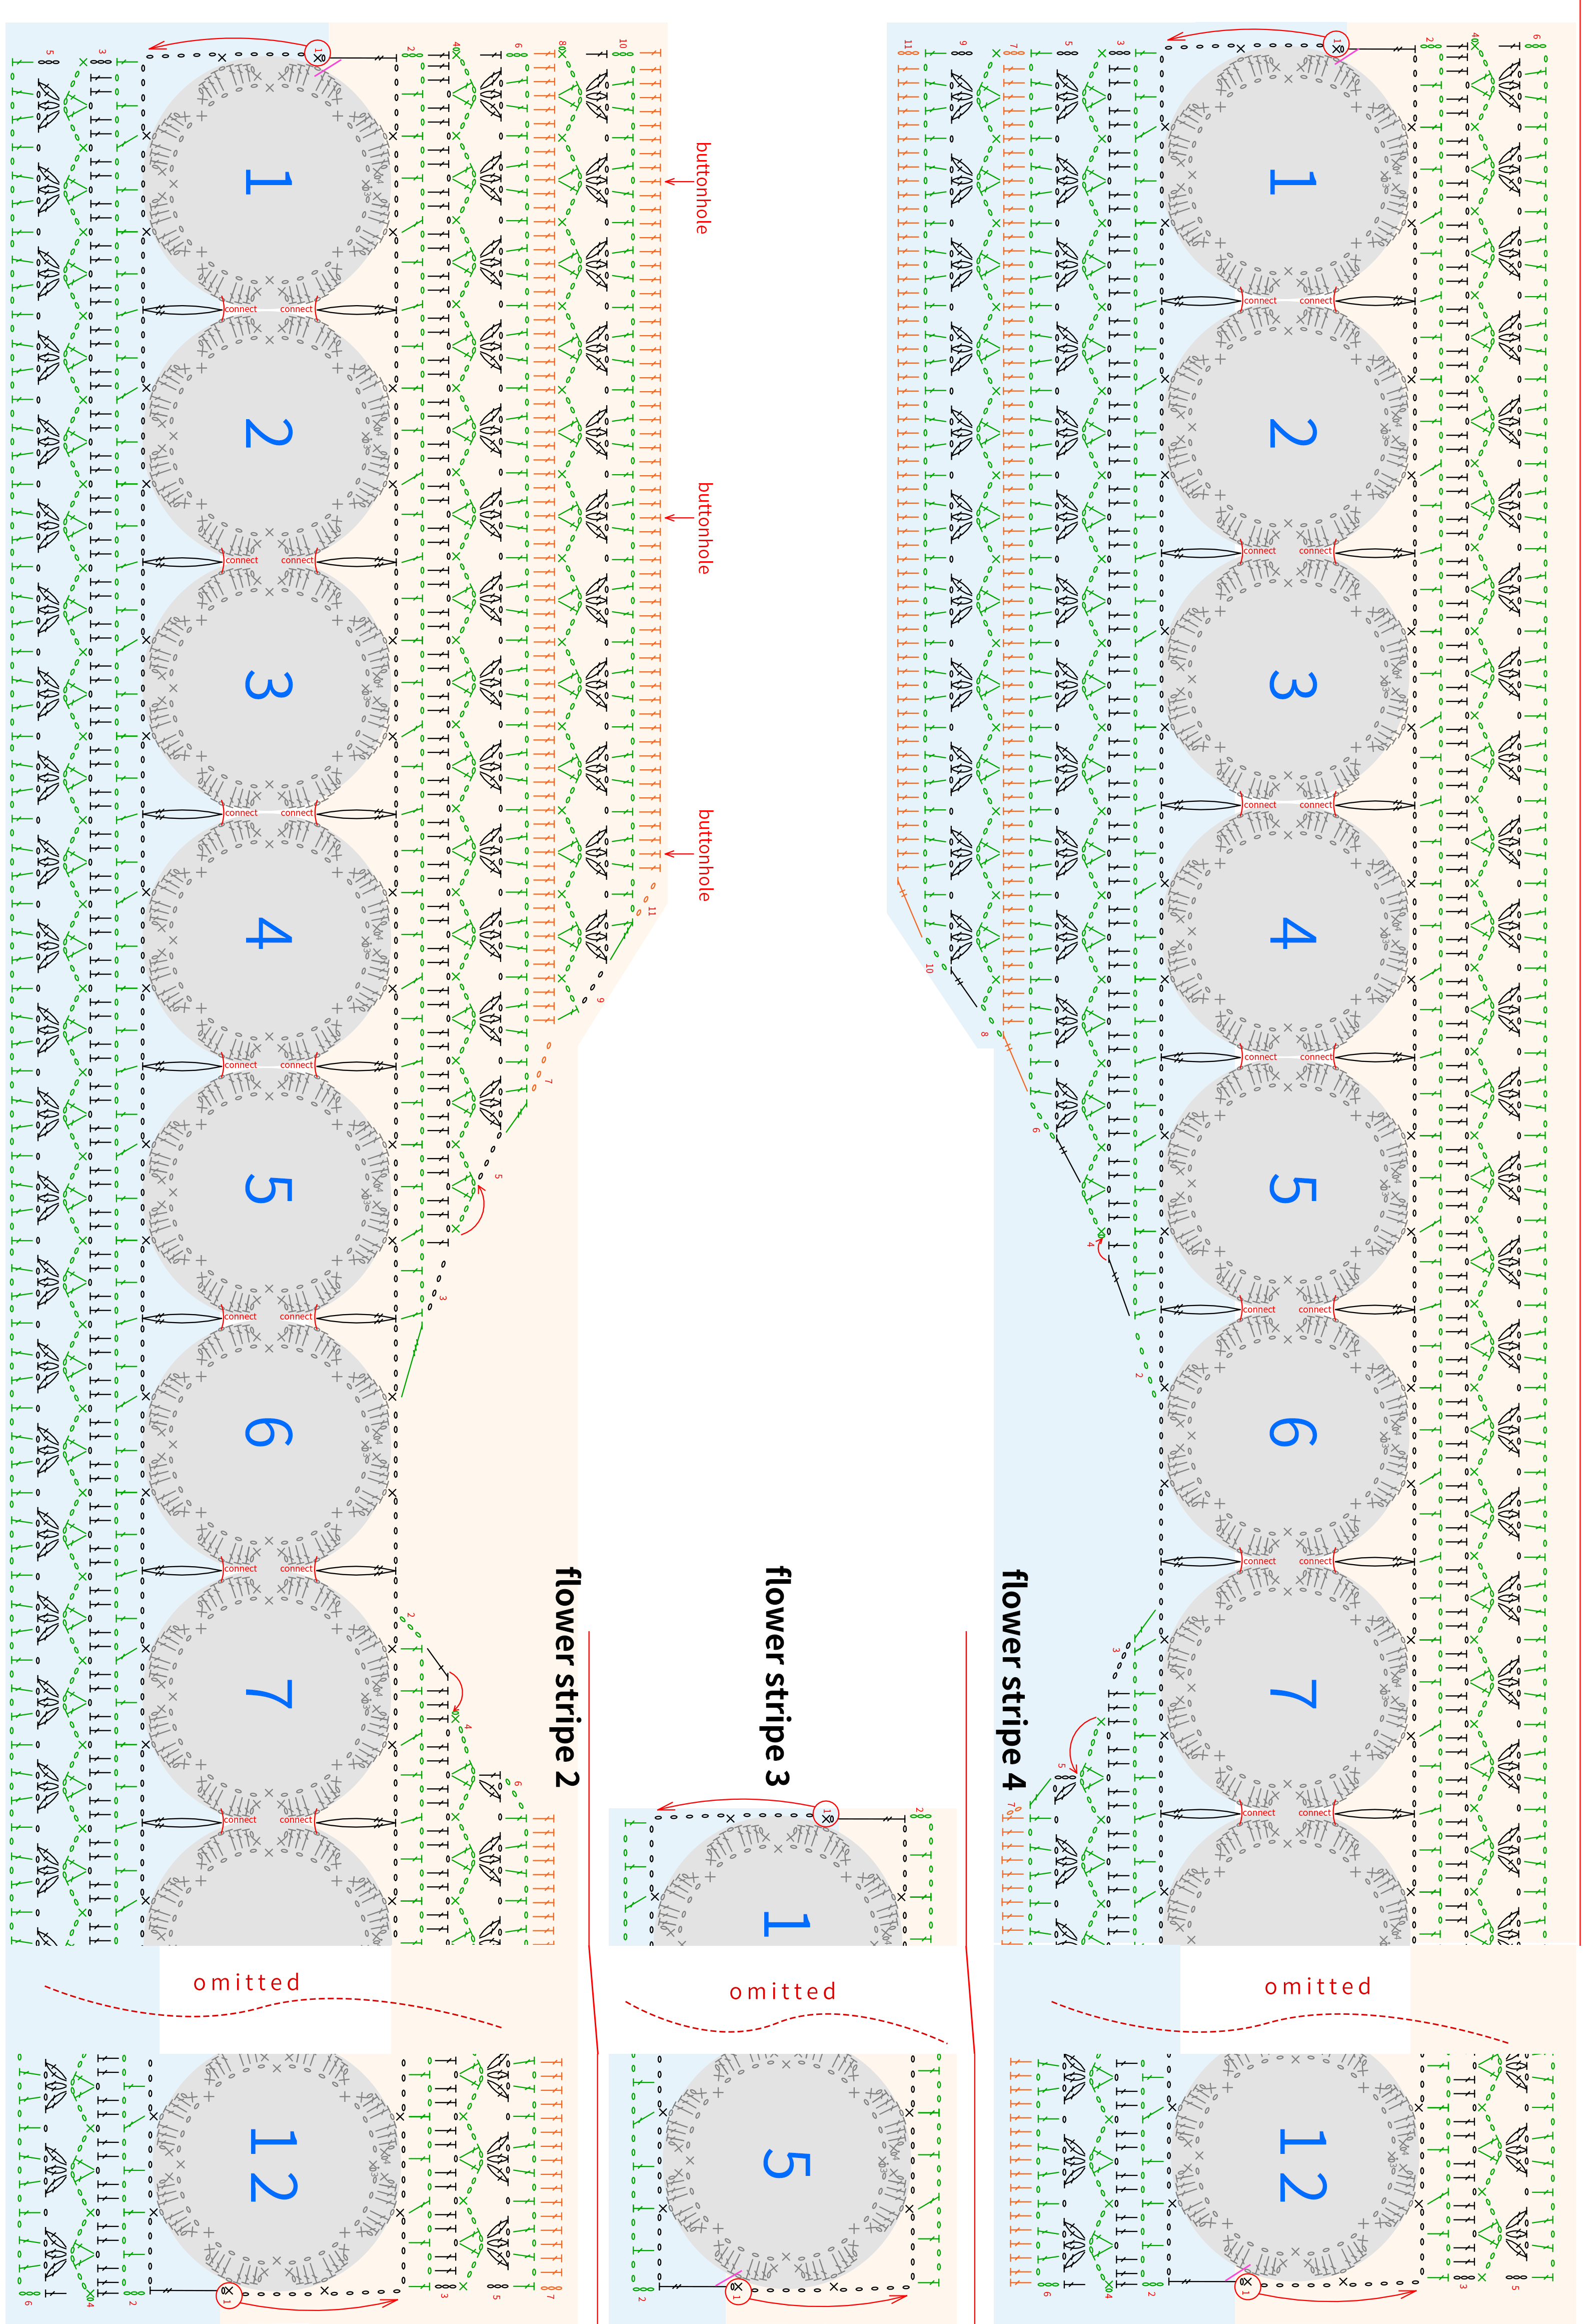
Note: 1. The crocheting method for stripe 1 and stripe 5 is identical, just in opposite directions. Pay attention to the direction when sewing together.
2. The armhole does not need to be sewn, as it will be used later for crocheting the sleeves.
Part 3 Front band
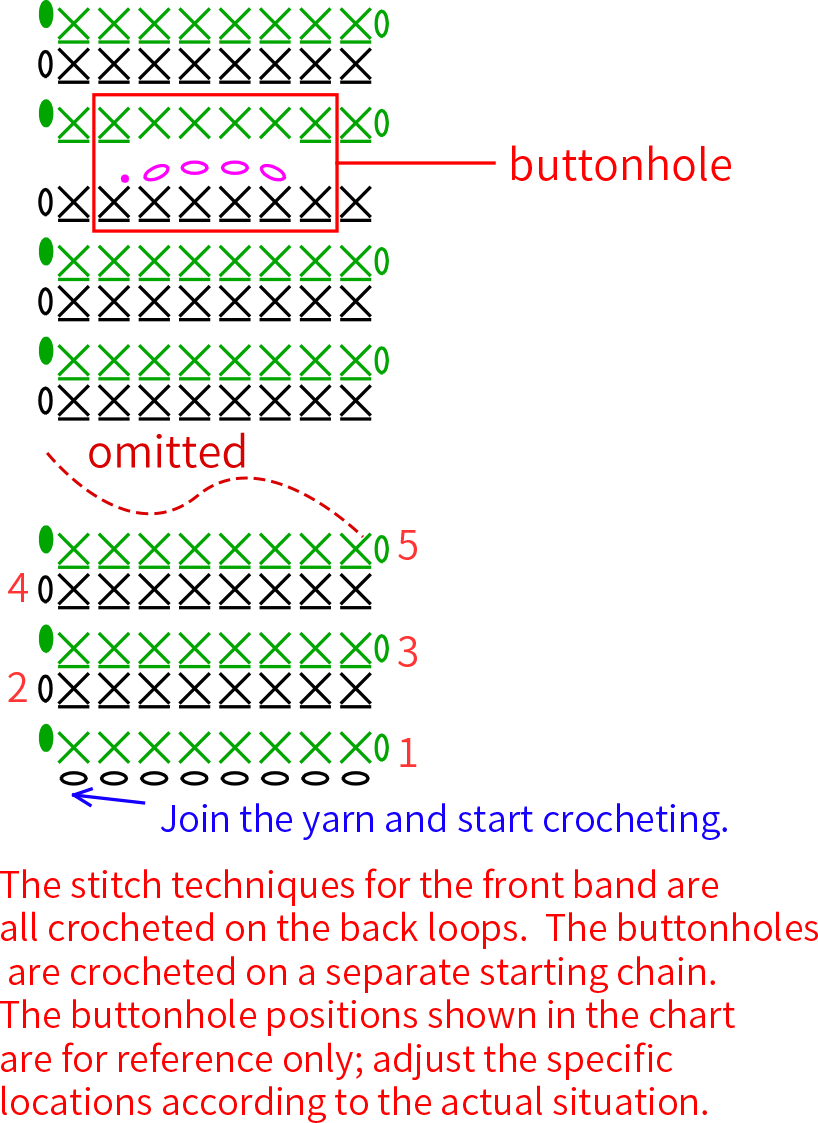
Crochet on stripes 2-4 of the front band after joining together, and after completing the crocheting, align the front band and secure the buttons at the corresponding buttonhole positions.
Part 4 Sleeves
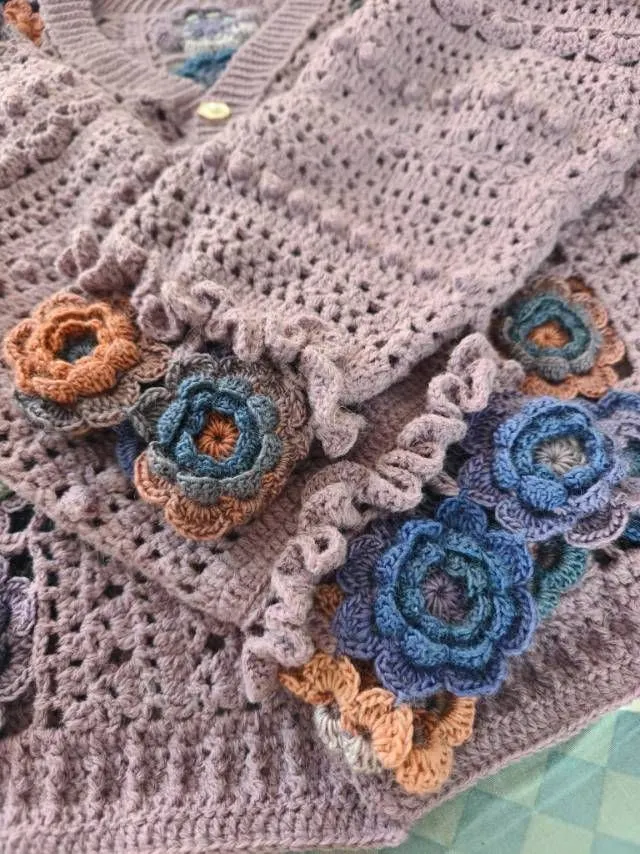
The sleeve includes the sleeve body and the cuff. The sleeve body is crocheted in rounds back and forth at the reserved armhole position. The cuff is made by joining together 4 flowers in a circle, meaning both ends of the 4th flower need to be joined. After completing the joining, continue crocheting in rounds, then sew it to the sleeve body once finished. Lastly, crochet lace trim at the corresponding positions of the cuff and sleeve body. Refer to the video demonstration for the specific lace trim crochet method.
| Part | Round | Color Scheme |
| Sleeve Body | R13、R45 | Morandi 4# |
| Remaining Rounds | Monet Impression | |
| Lace Trim | Monet Impression | |
| Cuff | The flowers are the same as before. | |
| R1—R2 | Monet Impression | |
| Lace Trim | Monet Impression | |
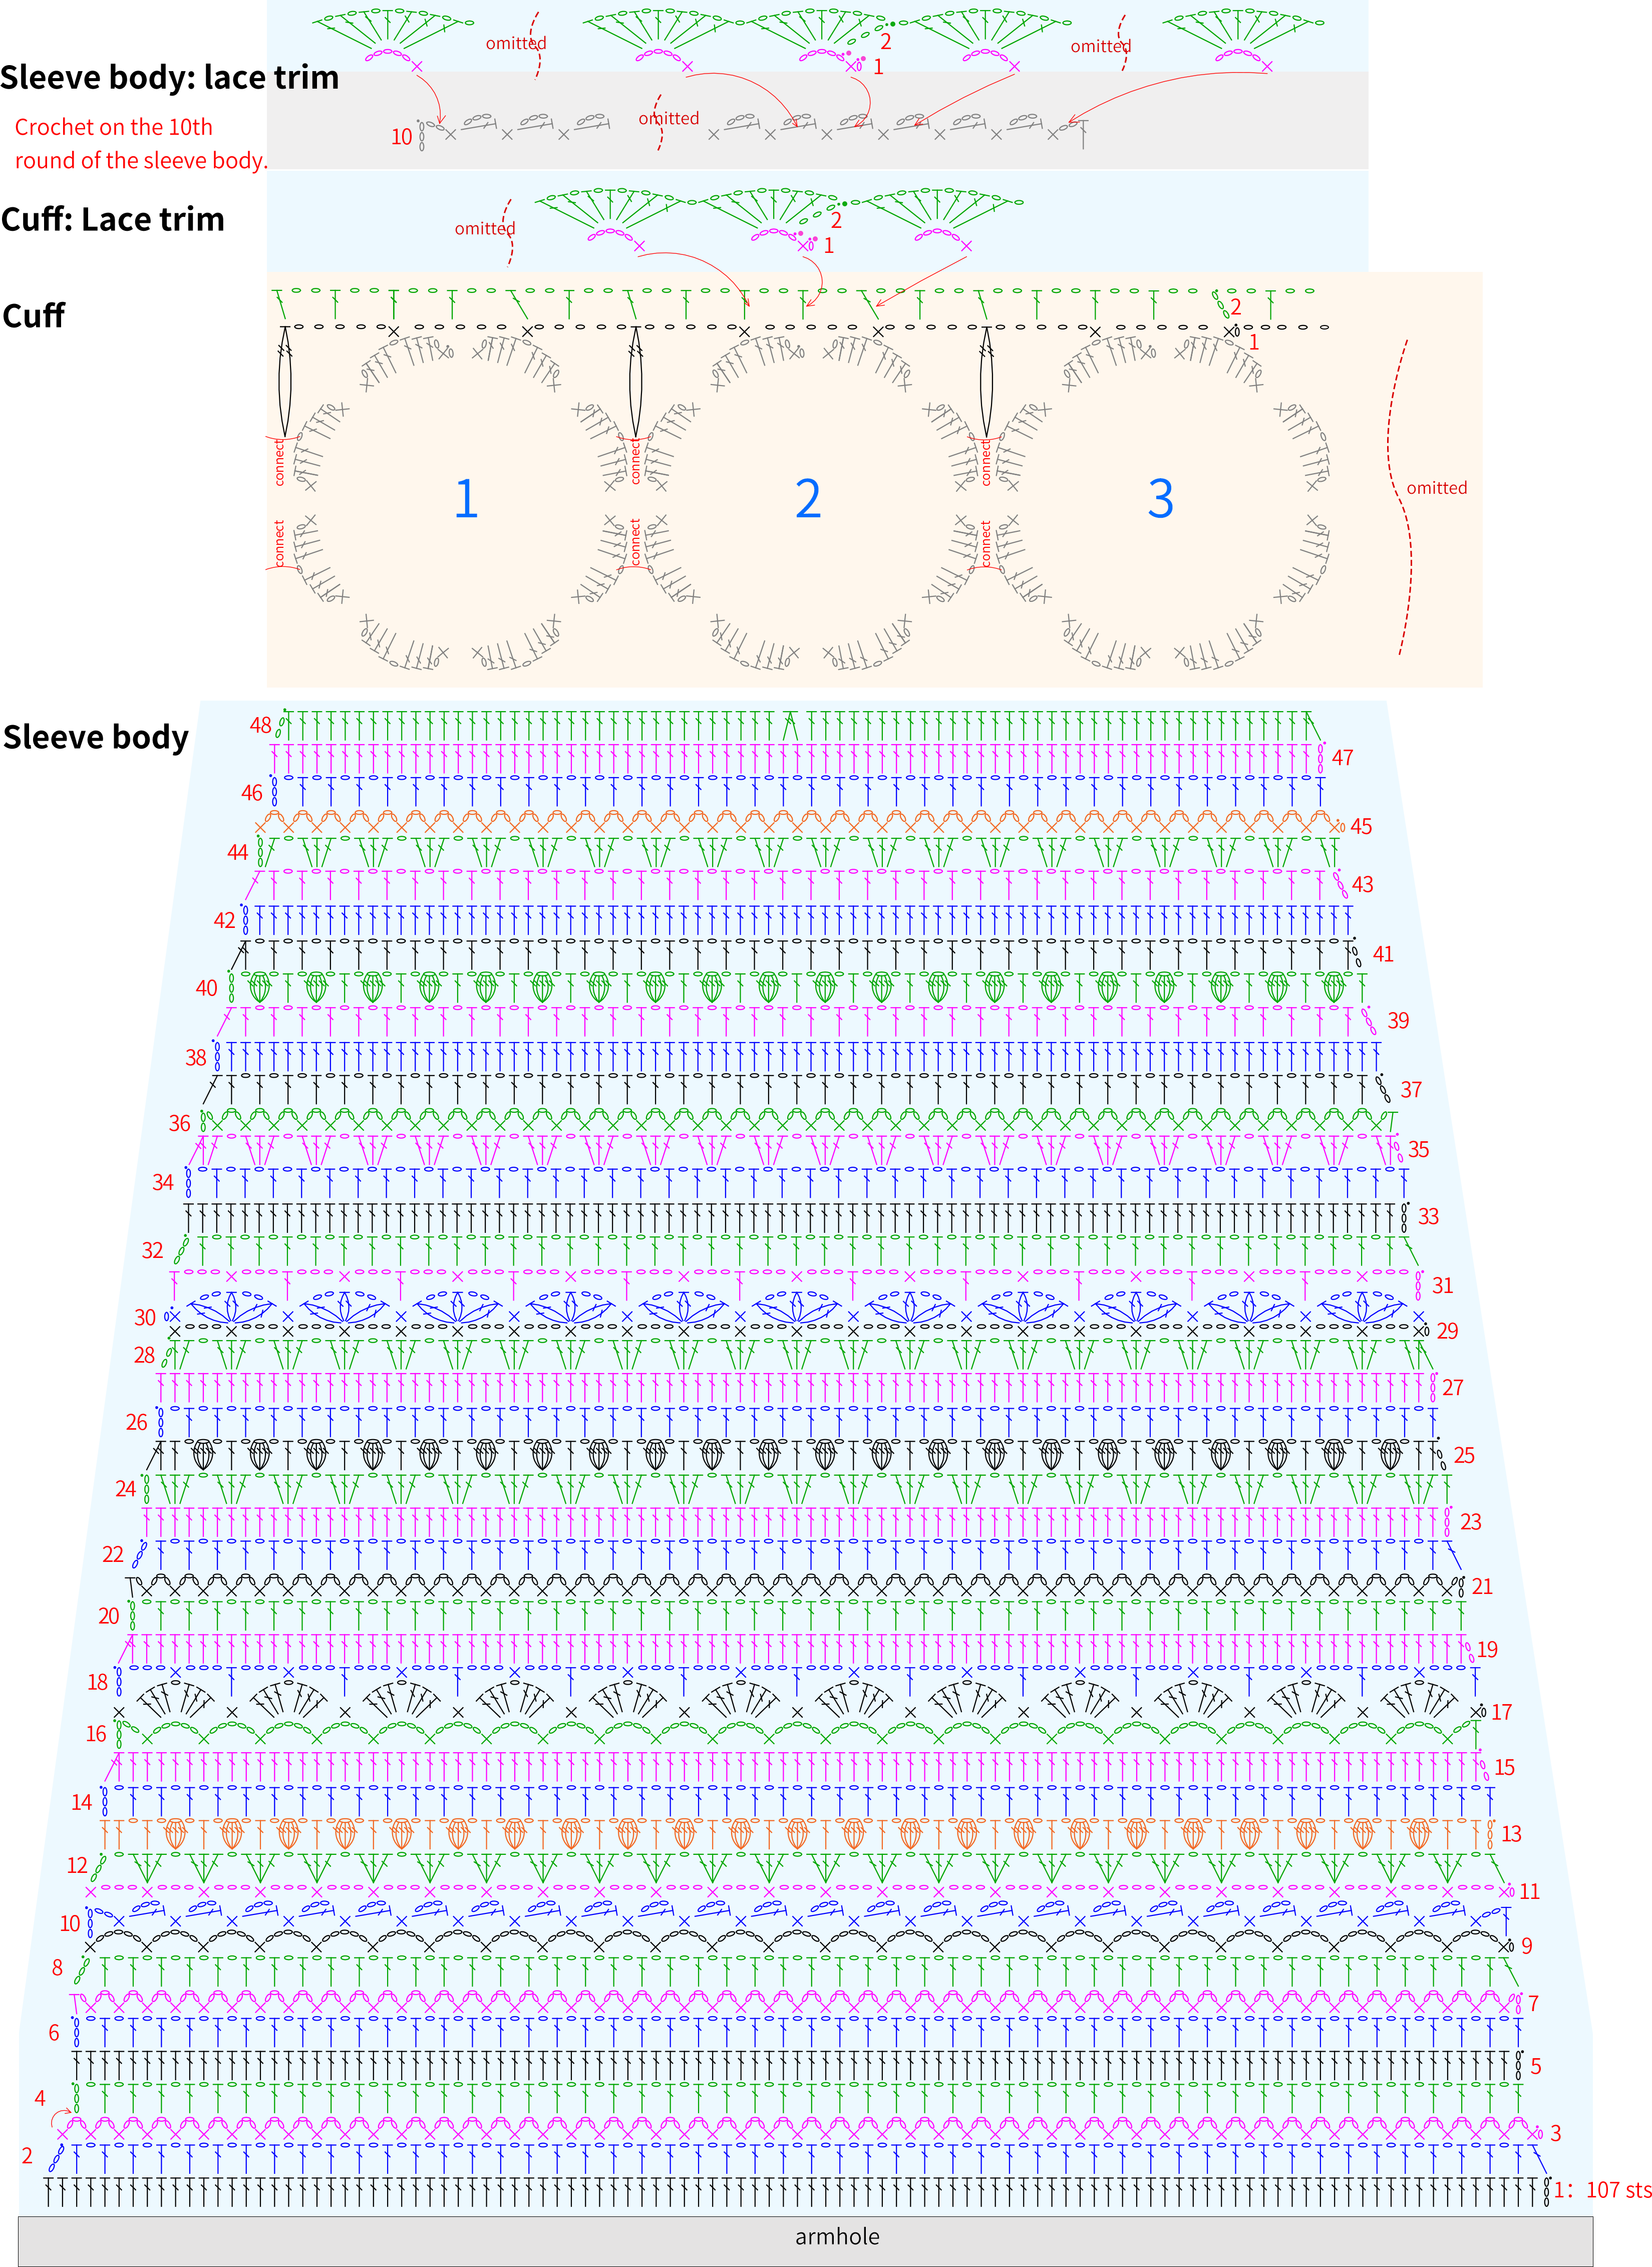
Note that the popcorn stitch in round 40 is crocheted on the wrong side, and the direction of crocheting needs to be reversed. Refer to the video for details.
The original sleeve length is longer (covering the back of hand). If you need to adjust, you can refer to the following method:
When sewing the side seam of the body, sew 3 more stitches. This will make the number of double crochets in the first row of the armhole be 101 stitches.
Start the second row from the 12th row, and the original lace trim on the sleeve body can be adjusted to be crocheted at the position of the 14th row.
Part 5 Hem
After completing the front band, don't cut the yarn, continue crocheting the hem. The hem is on the bottom edge formed by the front band and the patterned stripes, working back and forth.
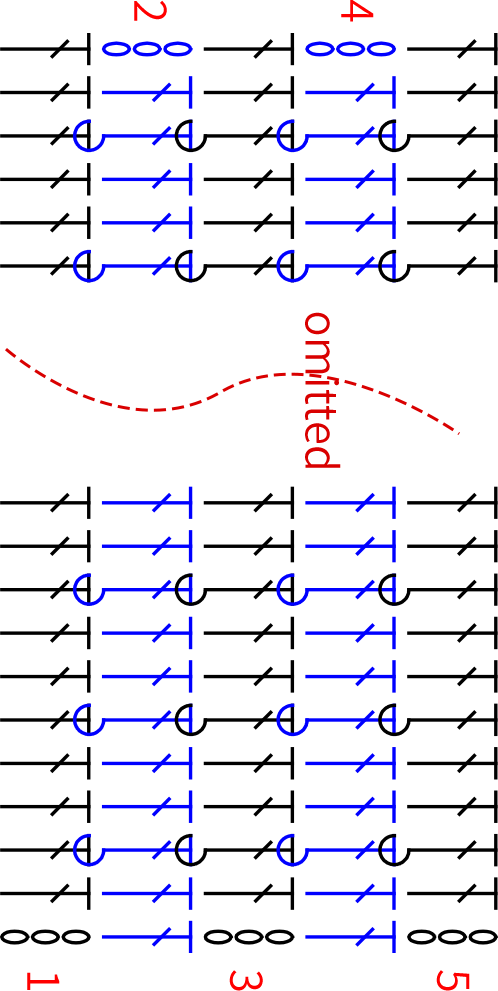
Note: The total number of stitches for the hem is 398, but this can be adjusted according to actual conditions. The total number of stitches should be a multiple of three plus two stitches. For front post double crochet on the wrong side, work the opposite stitch.
Made by the community