Clothes
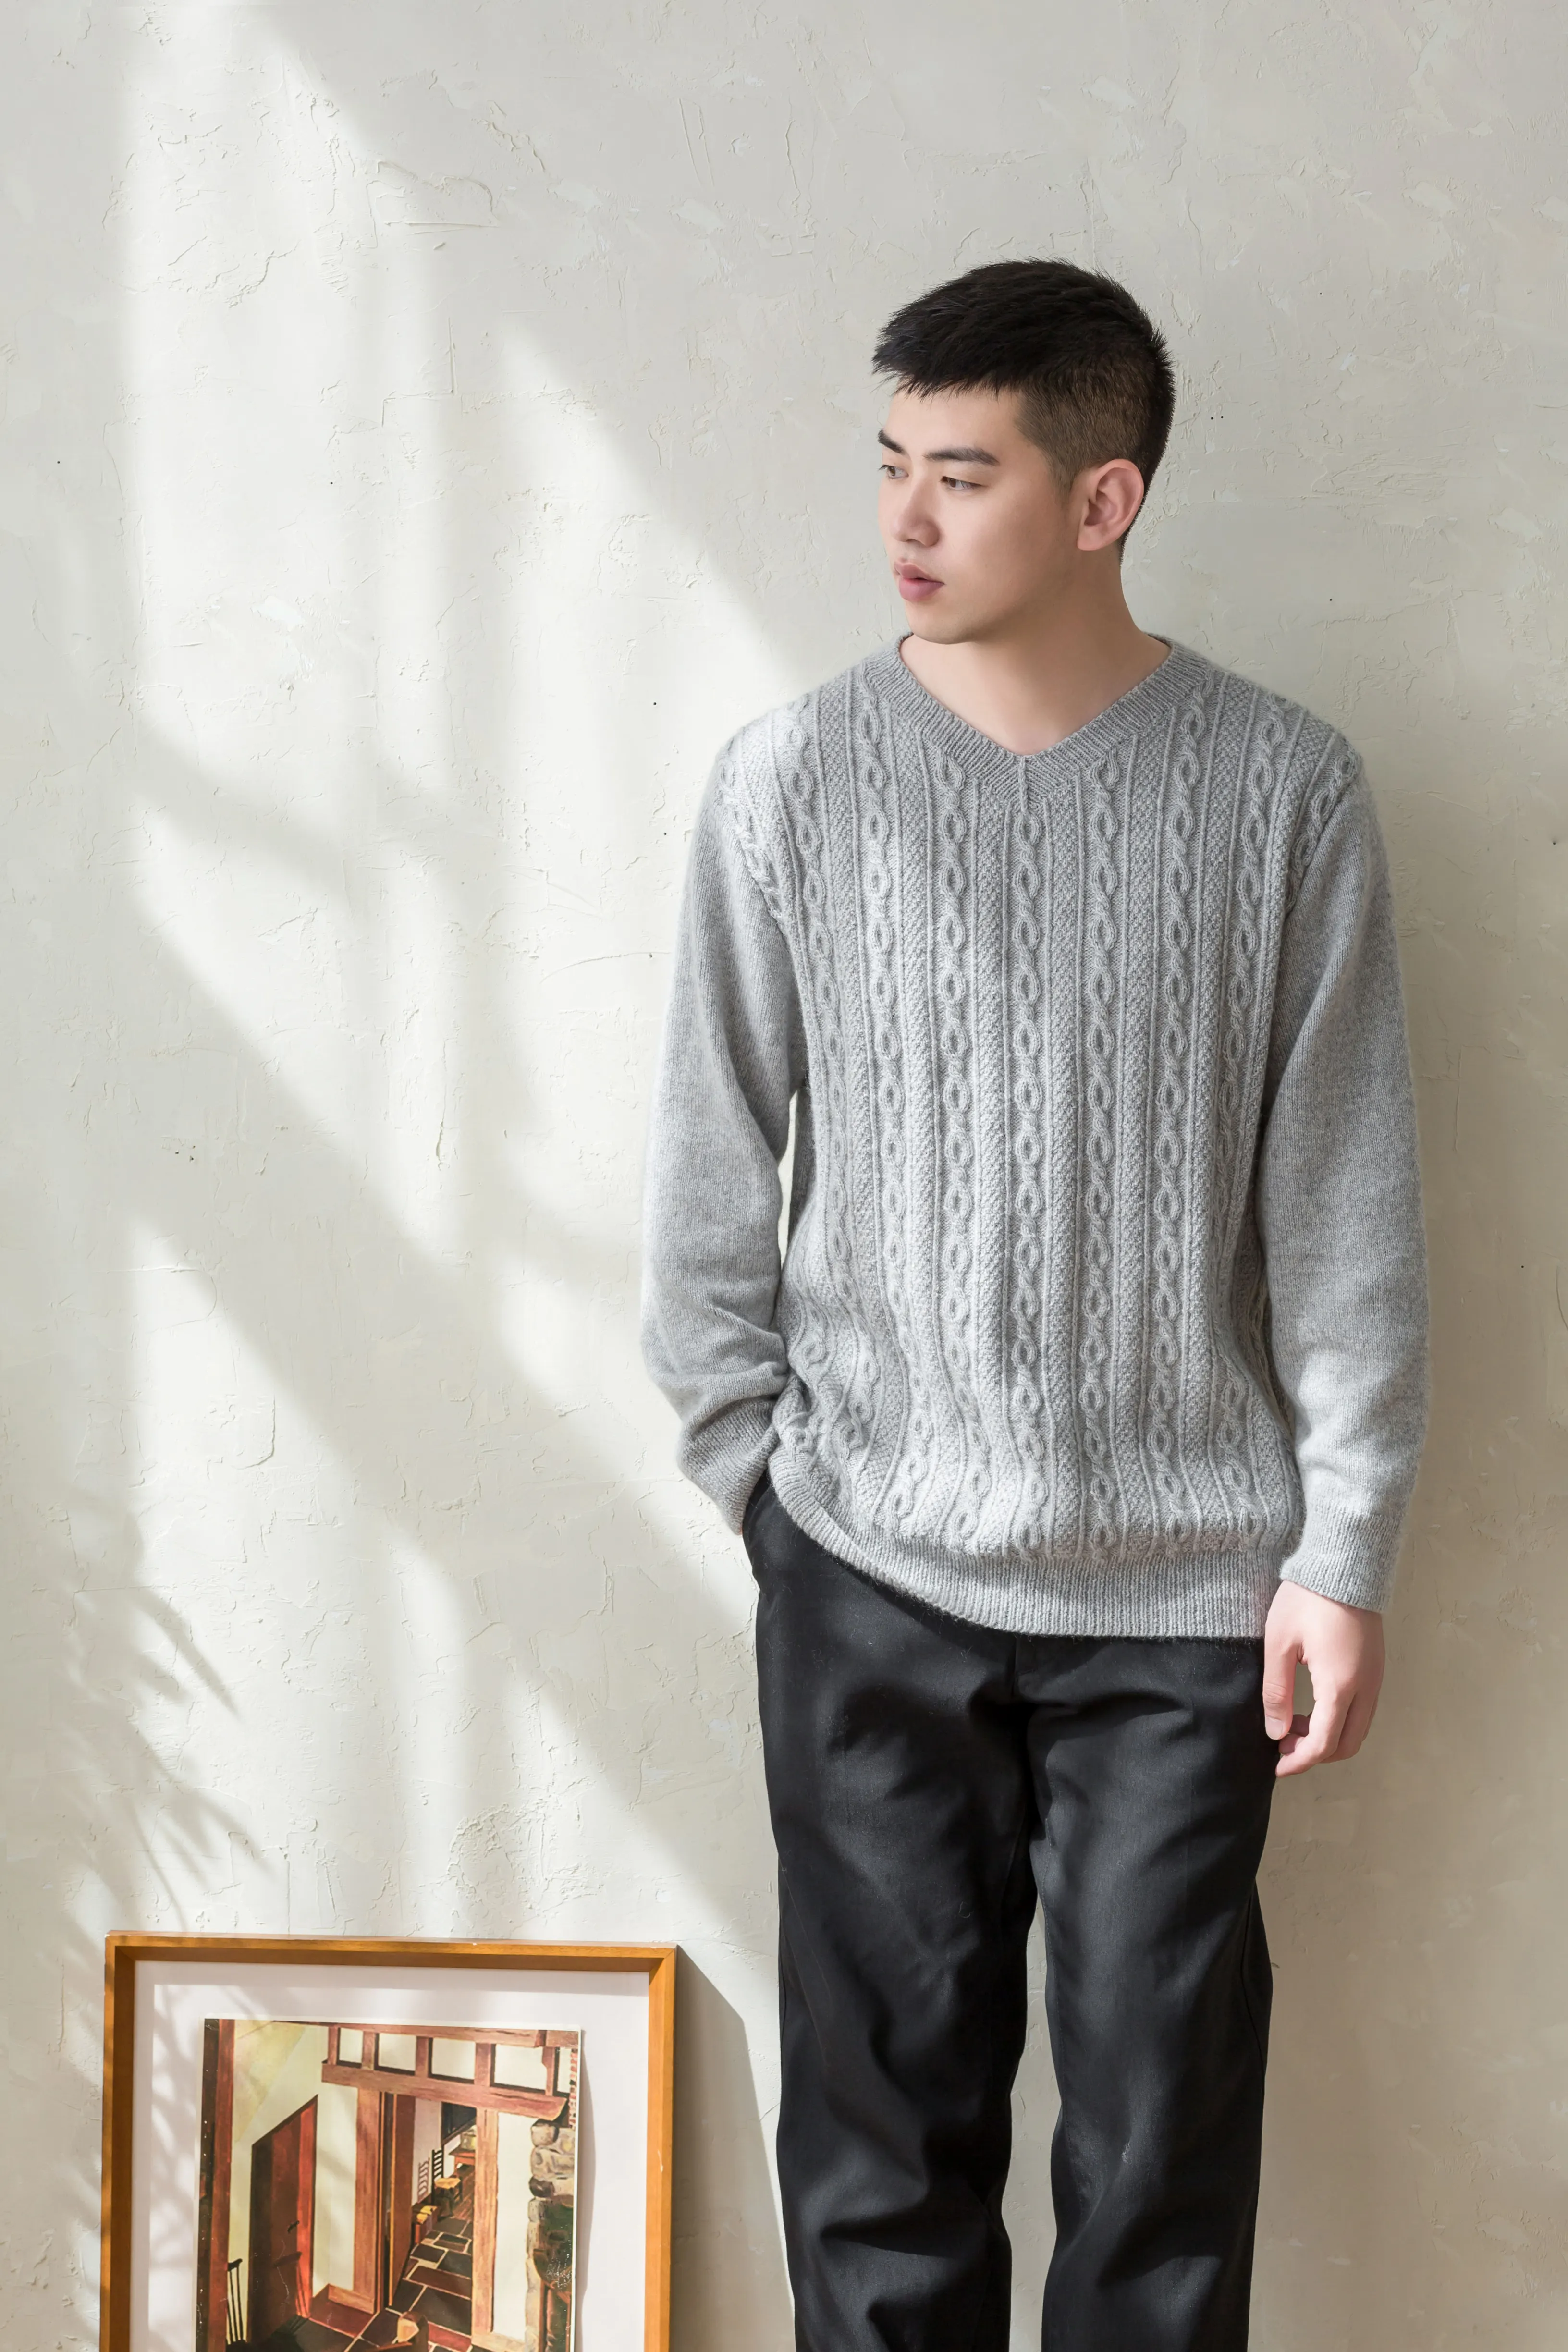
Essential Cashmere Sweater No. 6
Project preview
See the finished project
Pattern format
Instructions
Watch and follow
Video tutorial
| Style | Yarn | Color |
|---|---|---|
| Textured Basic Cashmere Sweater No. 6 - Neutral Gray Version - S | 3-Ply 30% Cashmere Hand Knitting Yarn |  31#Neutral Gray x 8 |
| Textured Basic Cashmere Sweater No. 6 - Whisper White Version - S | 3-Ply 30% Cashmere Hand Knitting Yarn |  01#Whisper White x 8 |
| Textured Basic Cashmere Sweater No. 6 - Ethereal Blue Version - S | 3-Ply 30% Cashmere Hand Knitting Yarn |  12#Ethereal Blue x 8 |
Textured Basic Cashmere Sweater No. 6 - Neutral Gray Version - S
31#Neutral Gray x 8Textured Basic Cashmere Sweater No. 6 - Whisper White Version - S
01#Whisper White x 8Textured Basic Cashmere Sweater No. 6 - Ethereal Blue Version - S
12#Ethereal Blue x 8This sweater is divided into the front piece, back piece, sleeves, and collar.
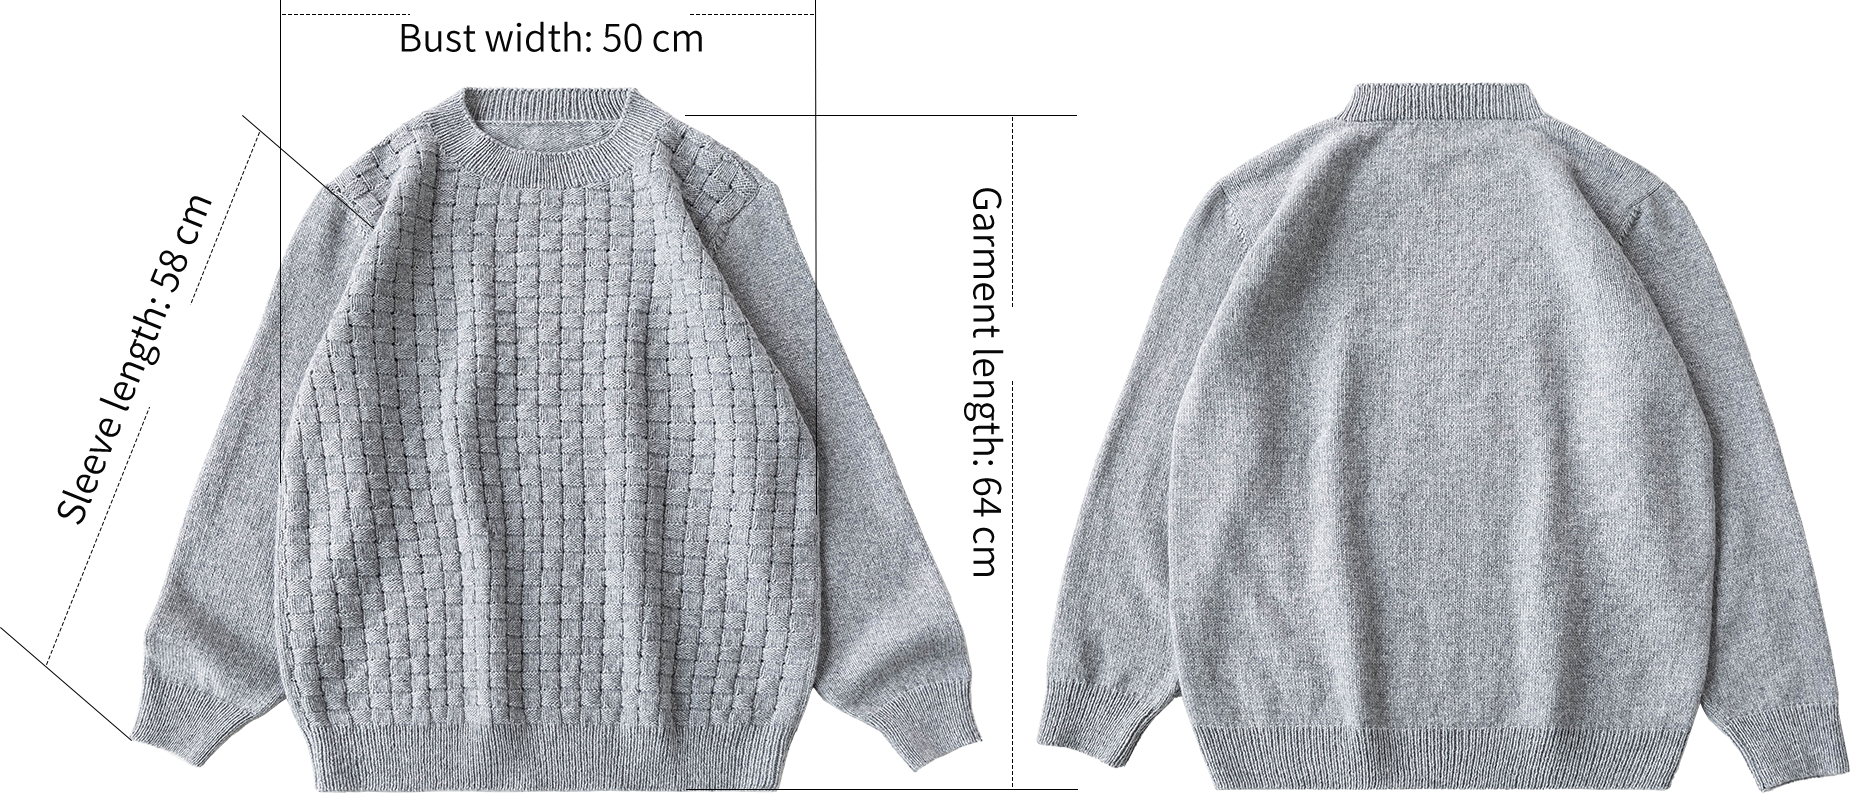
The handcrafted measurements may have an error of 1 to 2 cm. Due to variations in individual tension, the size of the sample is for reference only.
Materials: 3-Ply 30% Cashmere Hand Knitting Yarn
Needles: 2.75 mm short straight needle (collar)
2.75 mm circular needle (hem and cuff)
3.00 mm circular needle (for remaining parts)
Stockinette stitch Gauge: 10 × 10 cm = 31 sts × 42 rows (3.00 mm needle)
Front piece Pattern Gauge: 10 × 10 cm = 32 sts × 42 rows (3.00 mm needle)
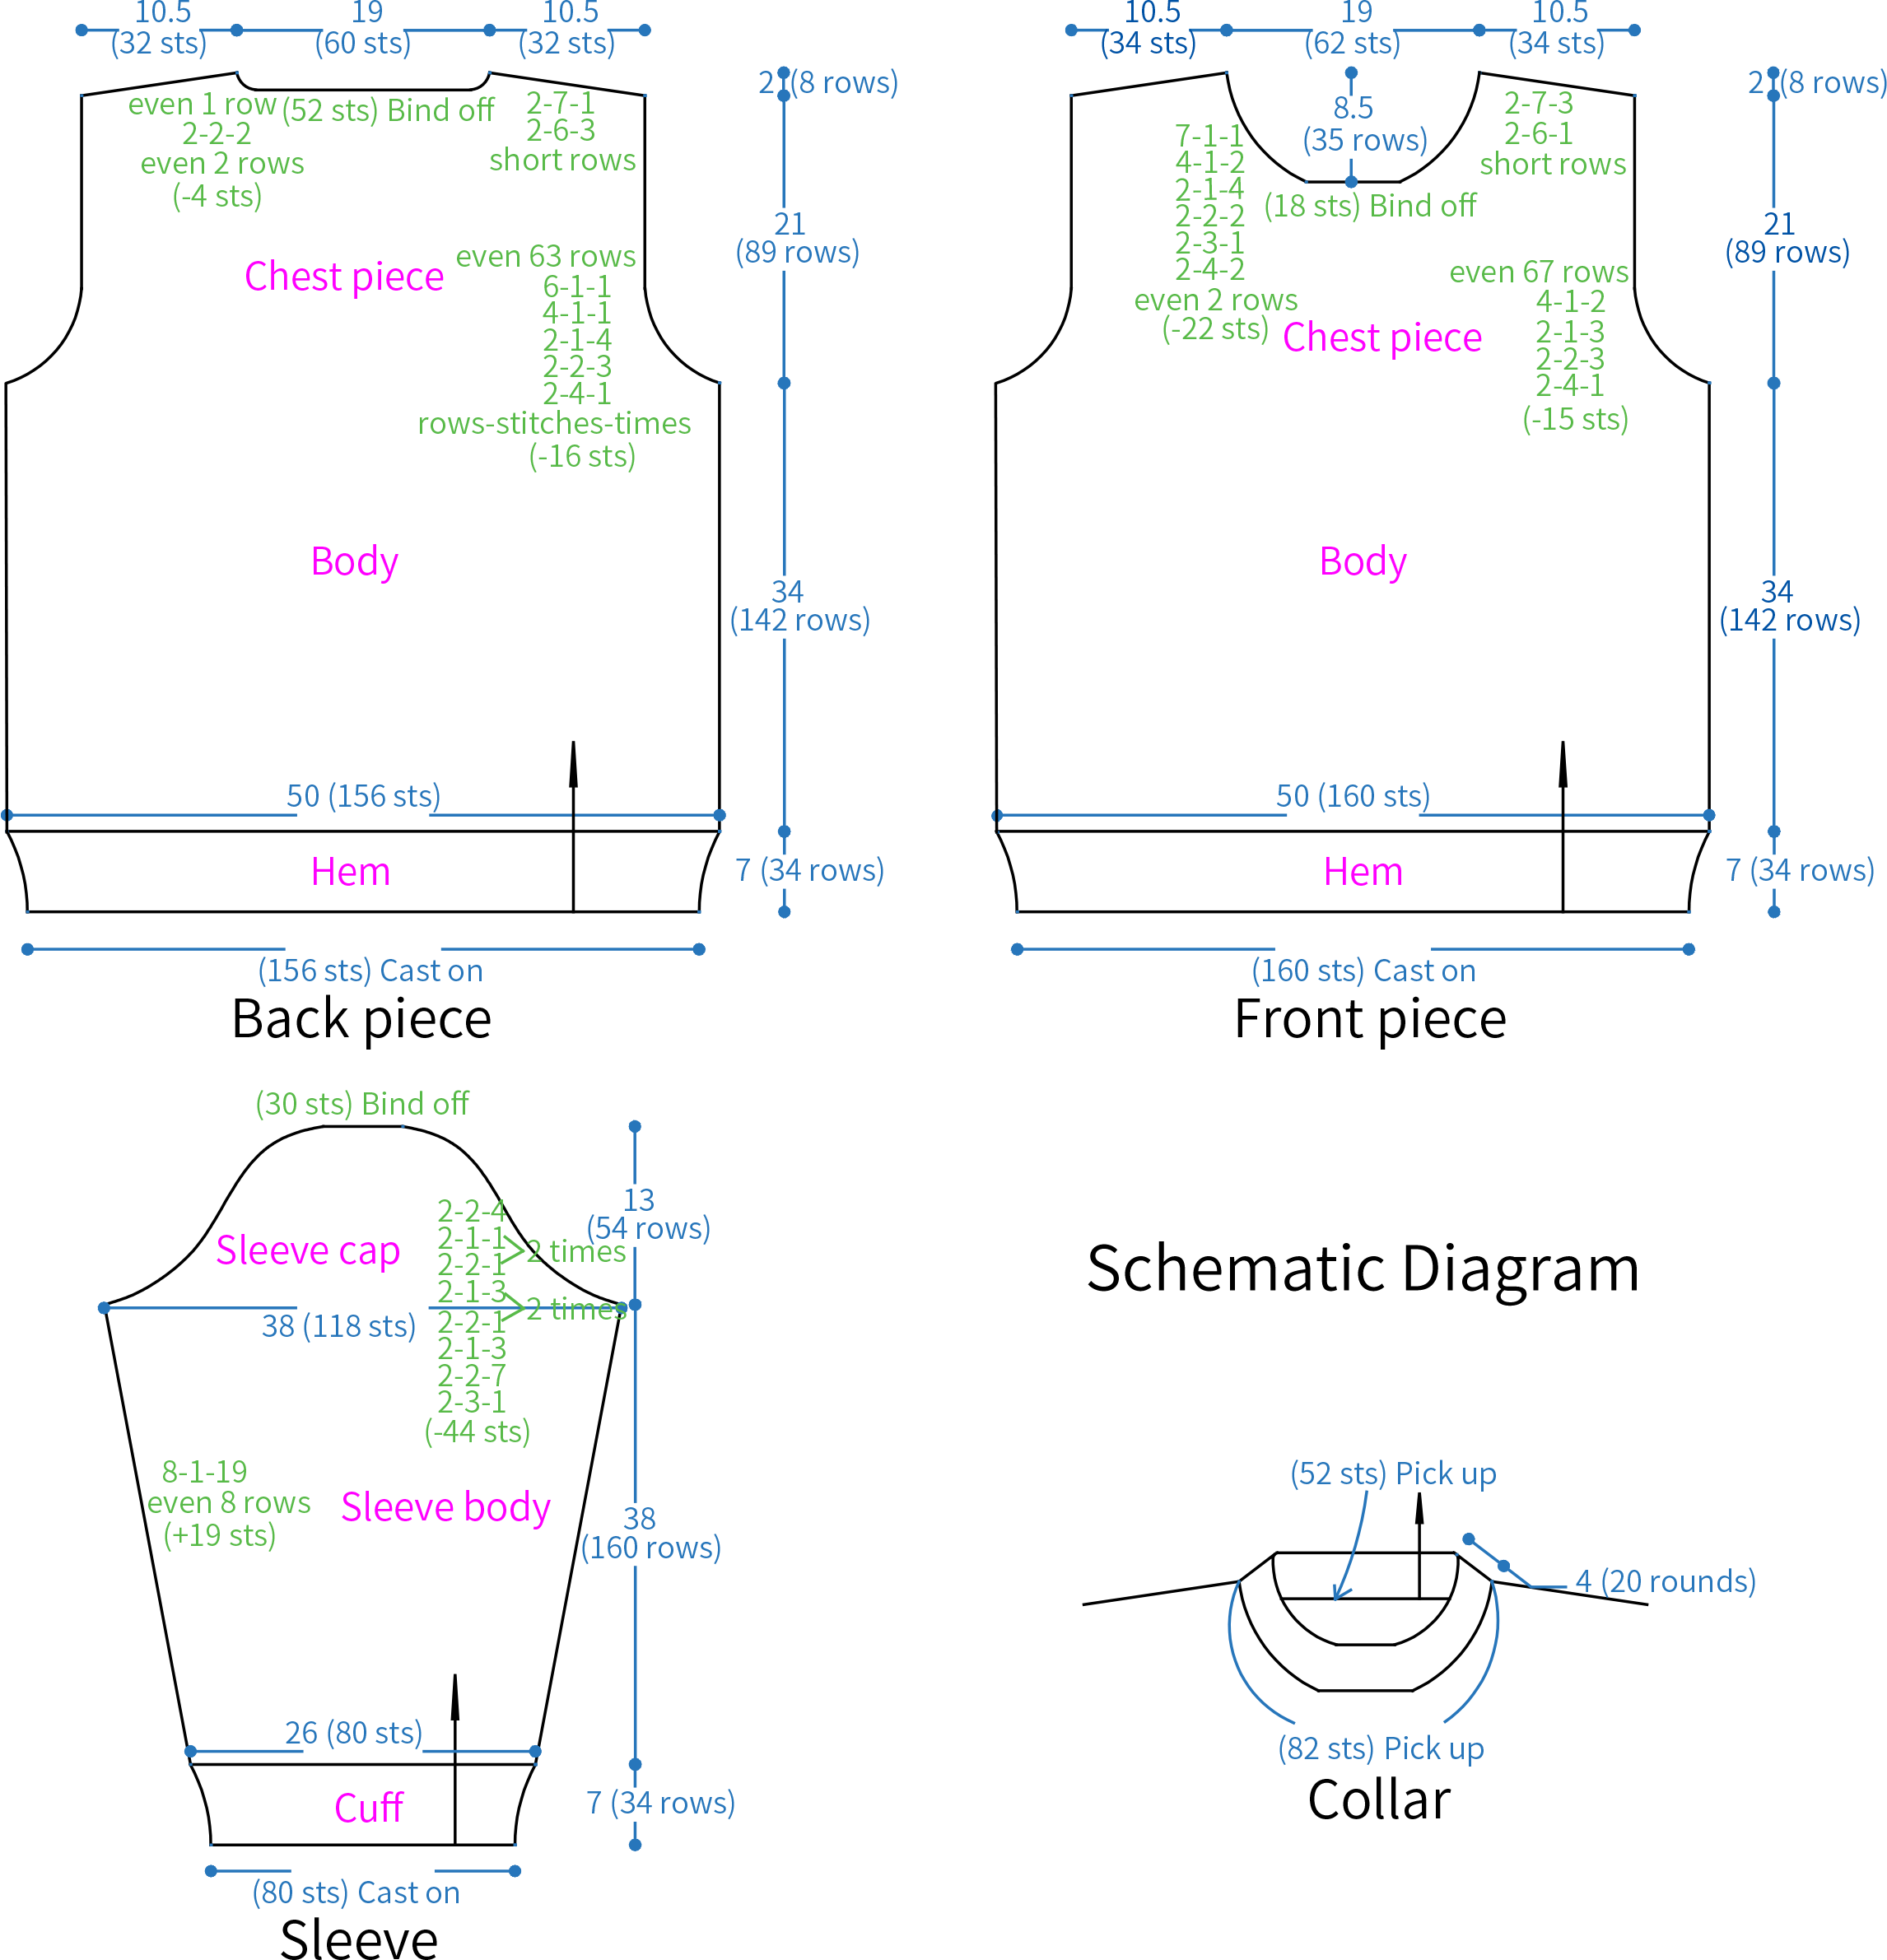
Chart Key



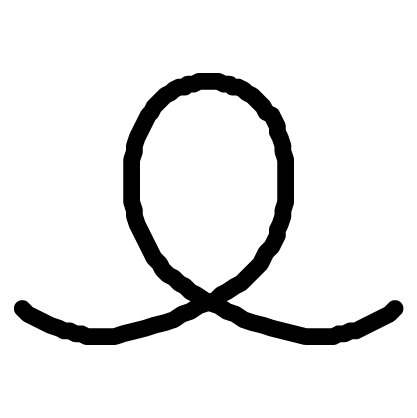


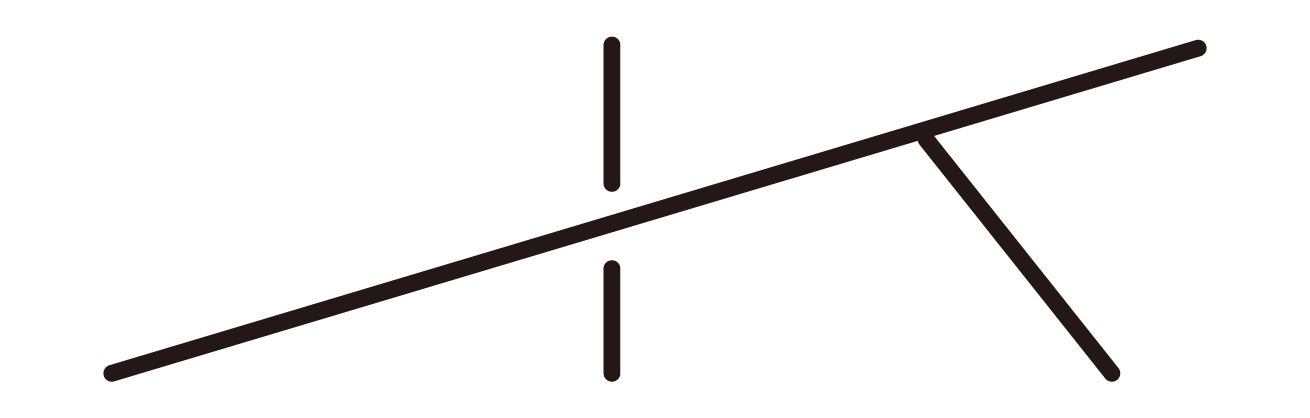
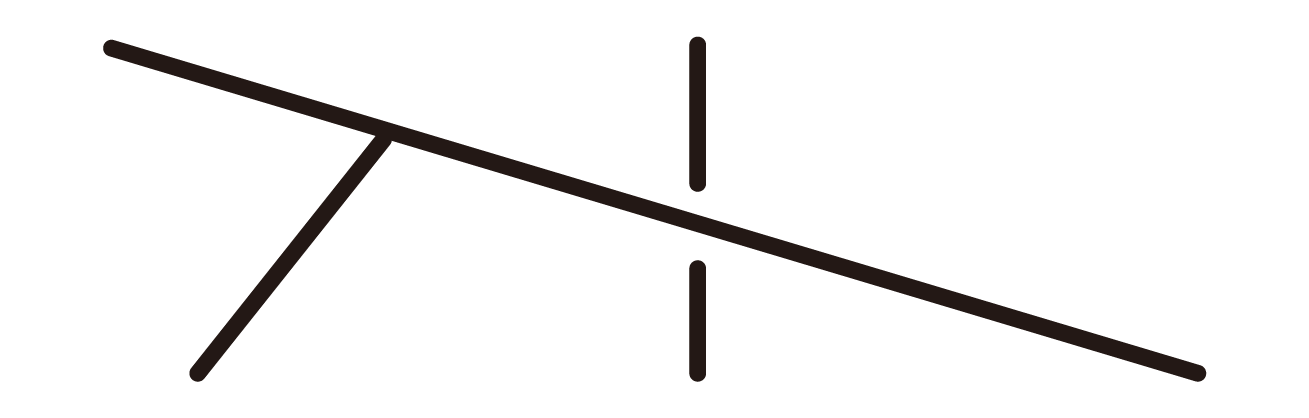
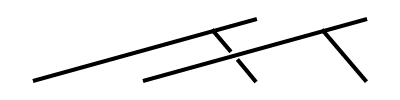
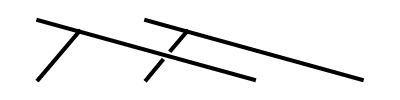


Note: 1. This pattern is making in Chinese crochet pattern terms, and the stitch name is written using American terminology. All measurements in charts are in cm.
2. The left and right on the charts refer to the actual wearing position.
3. The chart represent the right side of fabric, so check the key to see how to work a certain symbol on the right side and on the wrong side.


Part 1 Front pieceA 00' 41''
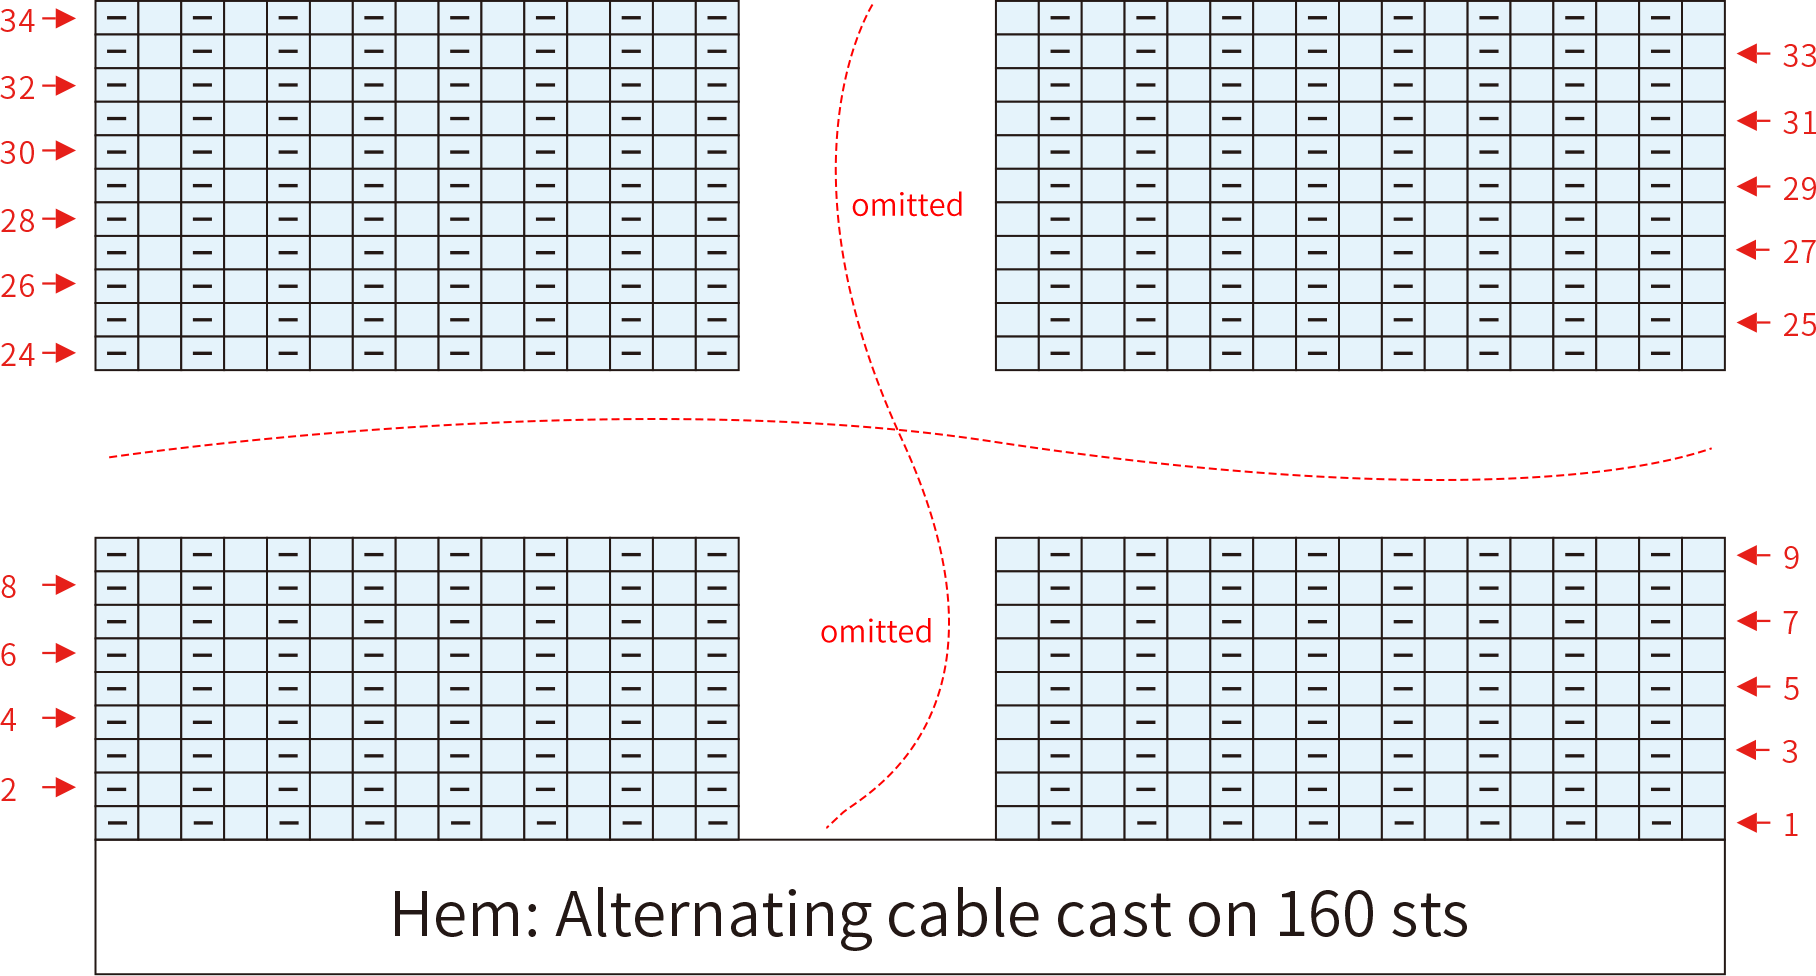
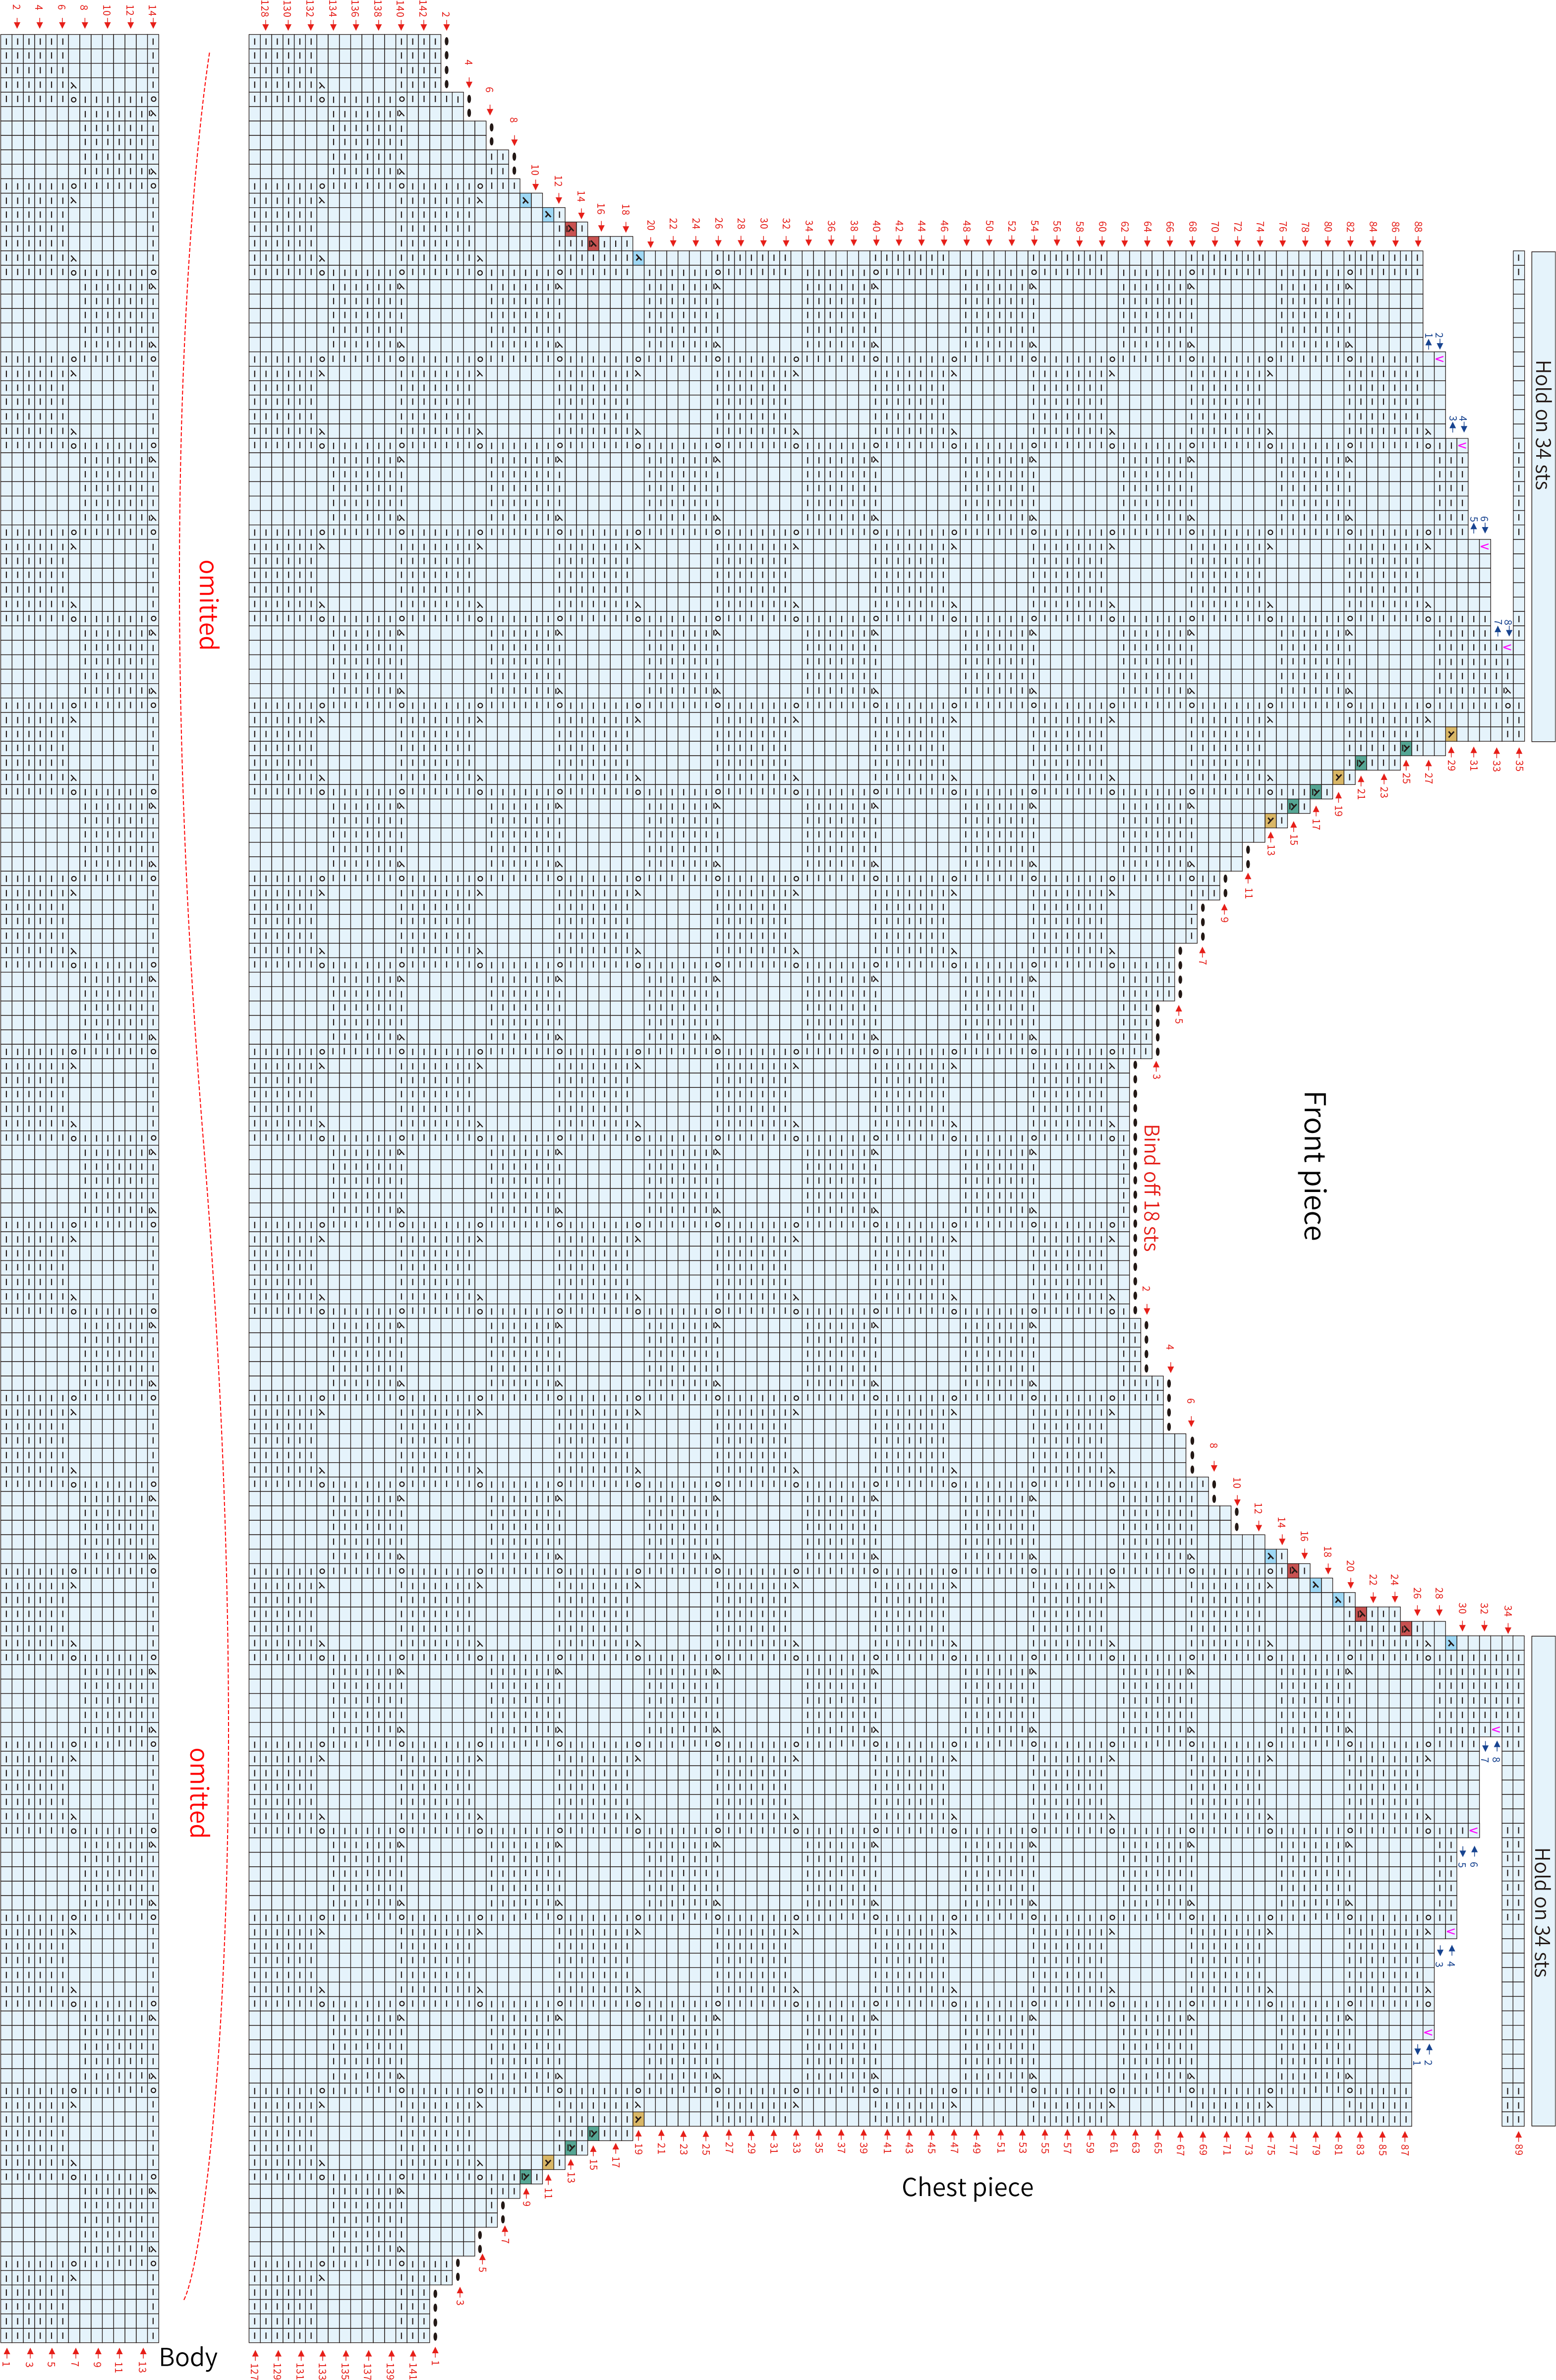
The front piece is started with the alternating cable cast on method, and knitted back and forth. It is divided into the hem, body, and chest piece sections. Please refer to the video demonstration for more details.
Part 2 Back pieceB 63' 18''
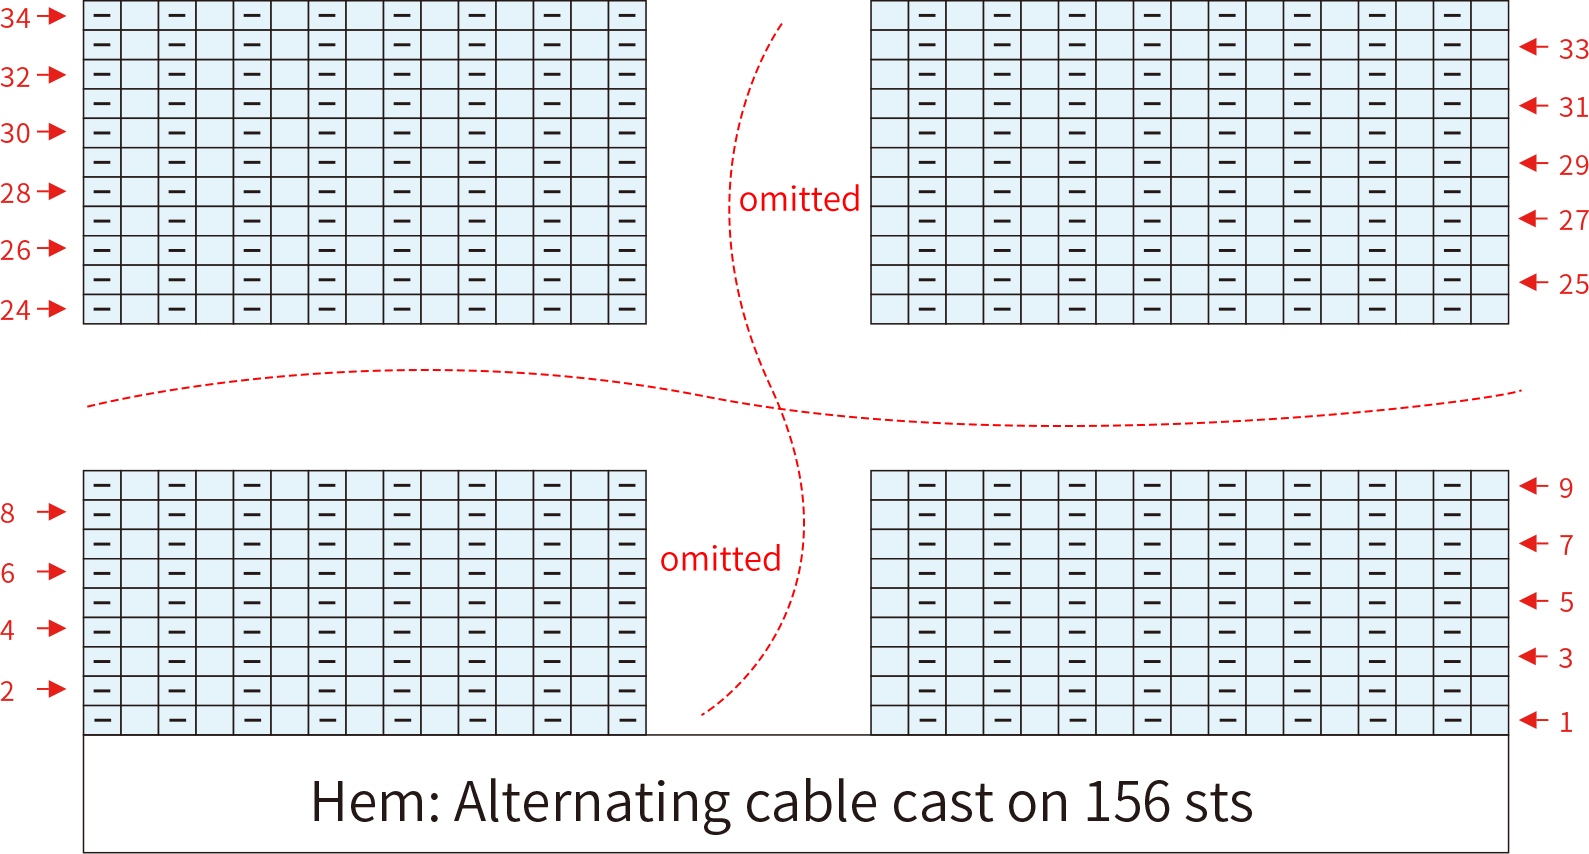
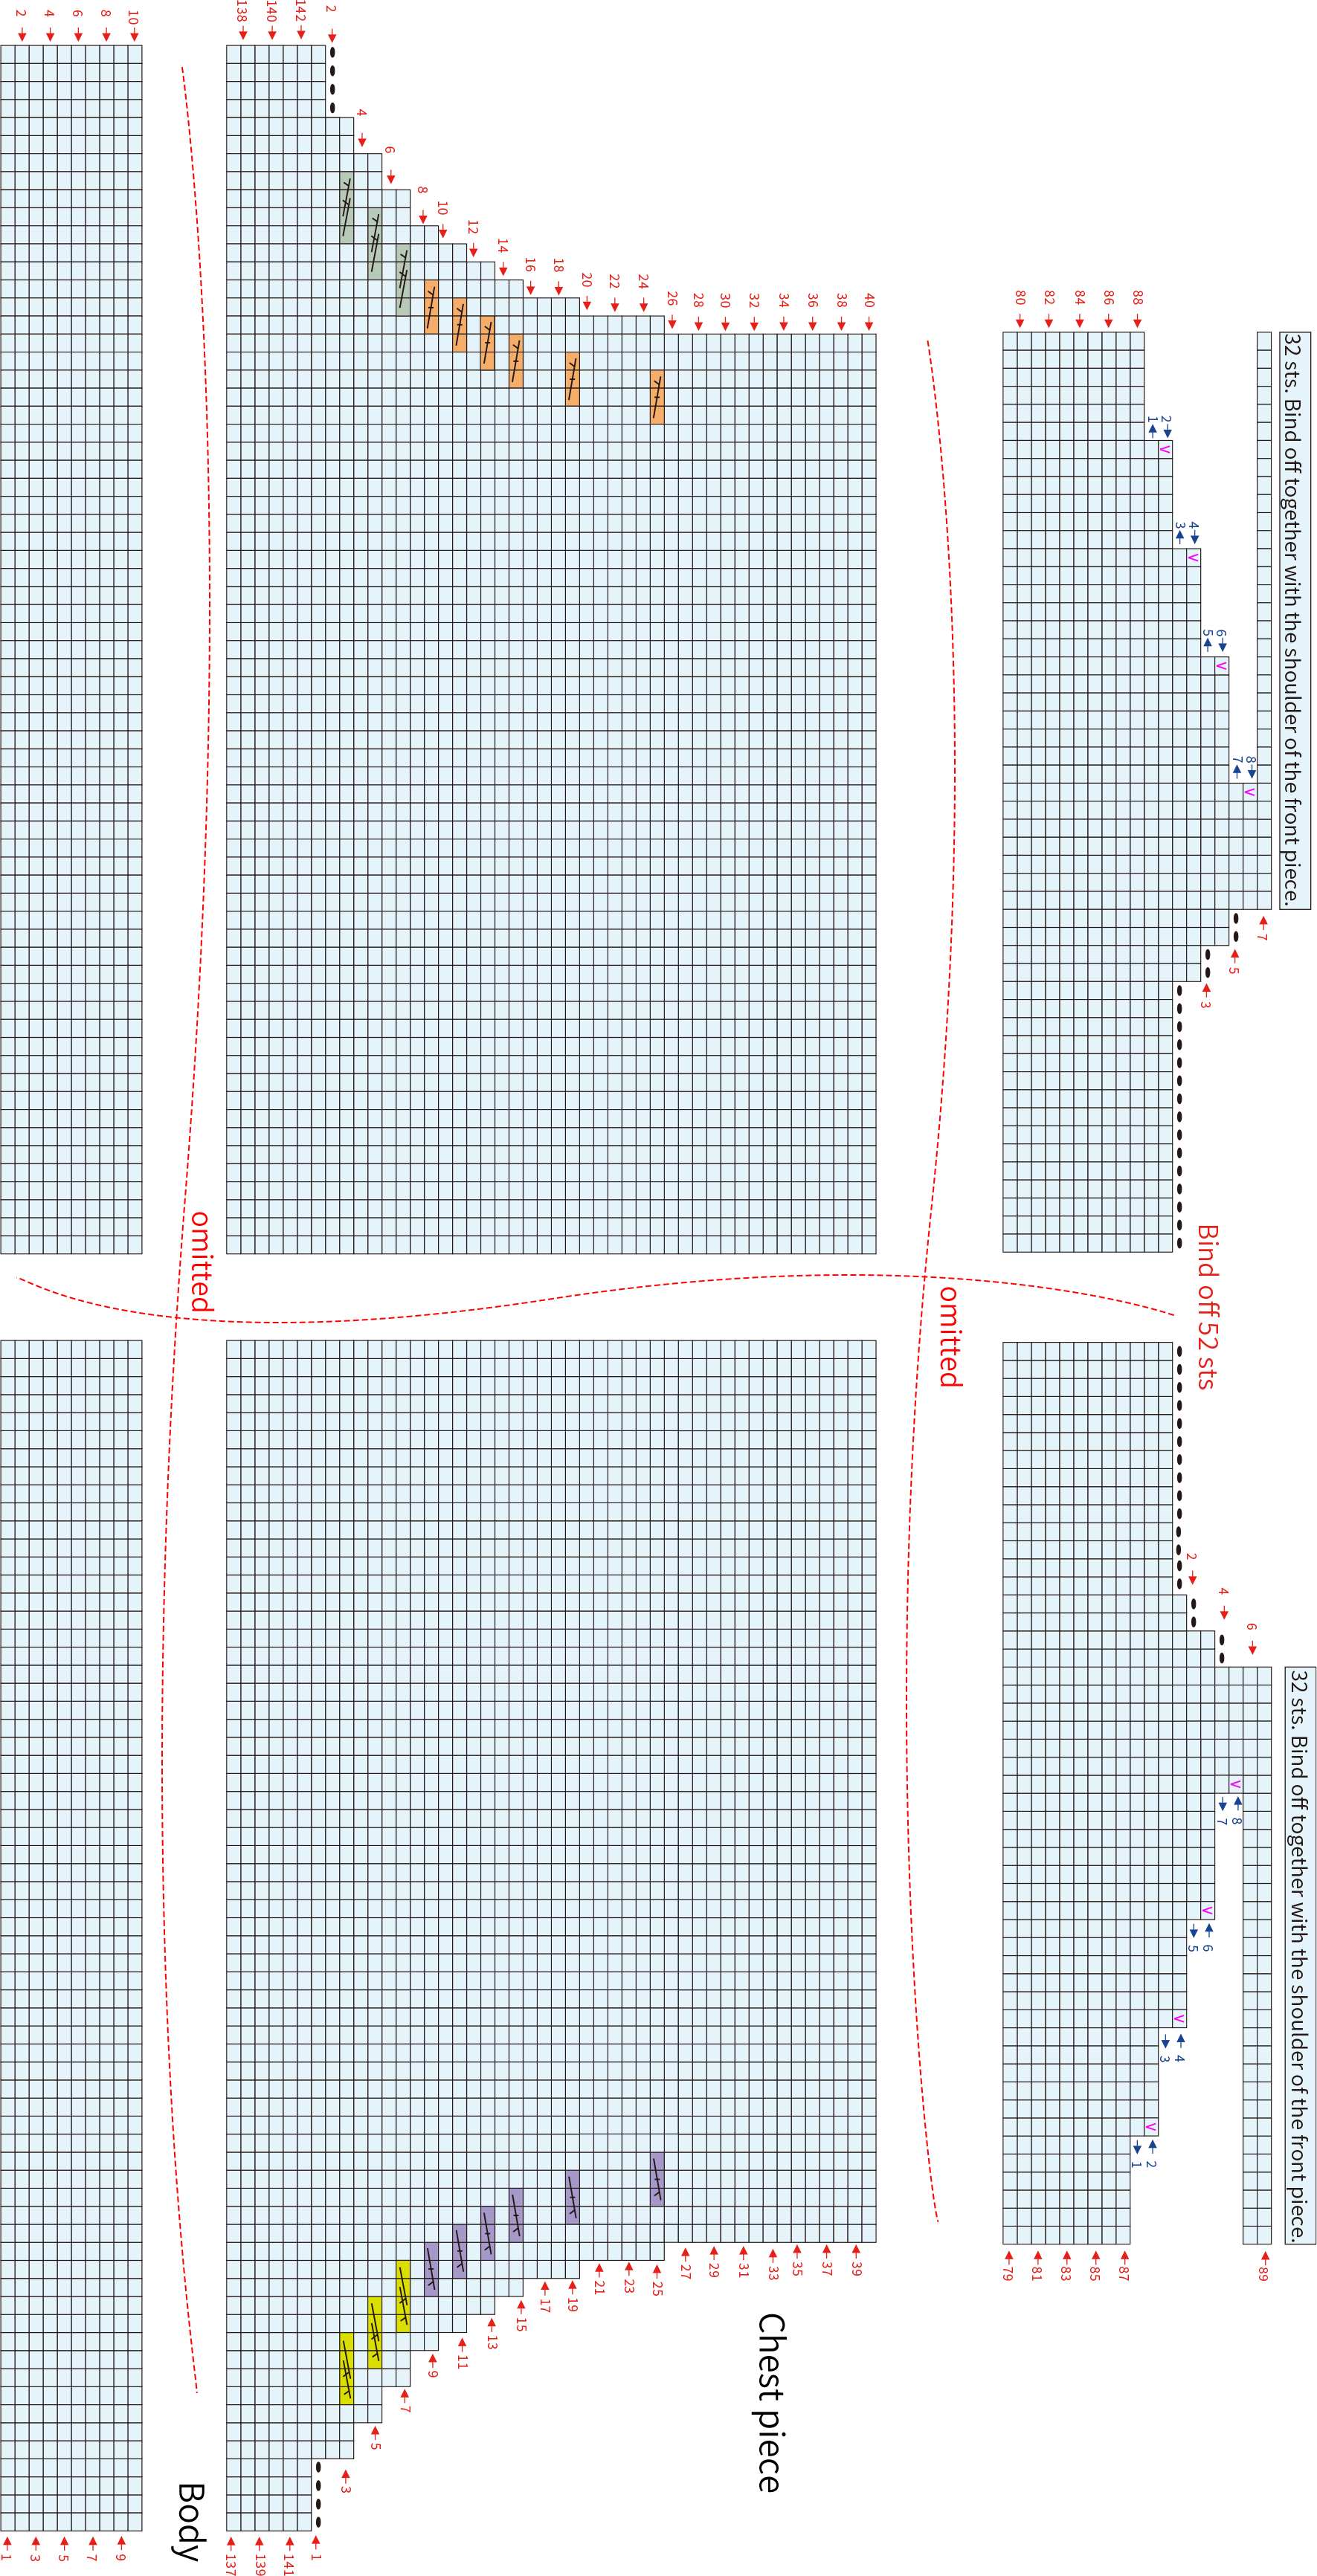
The back piece is started with the alternating cable cast on method, and knitted back and forth. It is similarly divided into the hem, body, and chest piece sections. Finally, the shoulders are bound off together with the front piece shoulders, and the sides of the body and hem of the front and back pieces are sewn together. Please refer to the video demonstration for more details.
Part 3 SleevesC 82' 53''
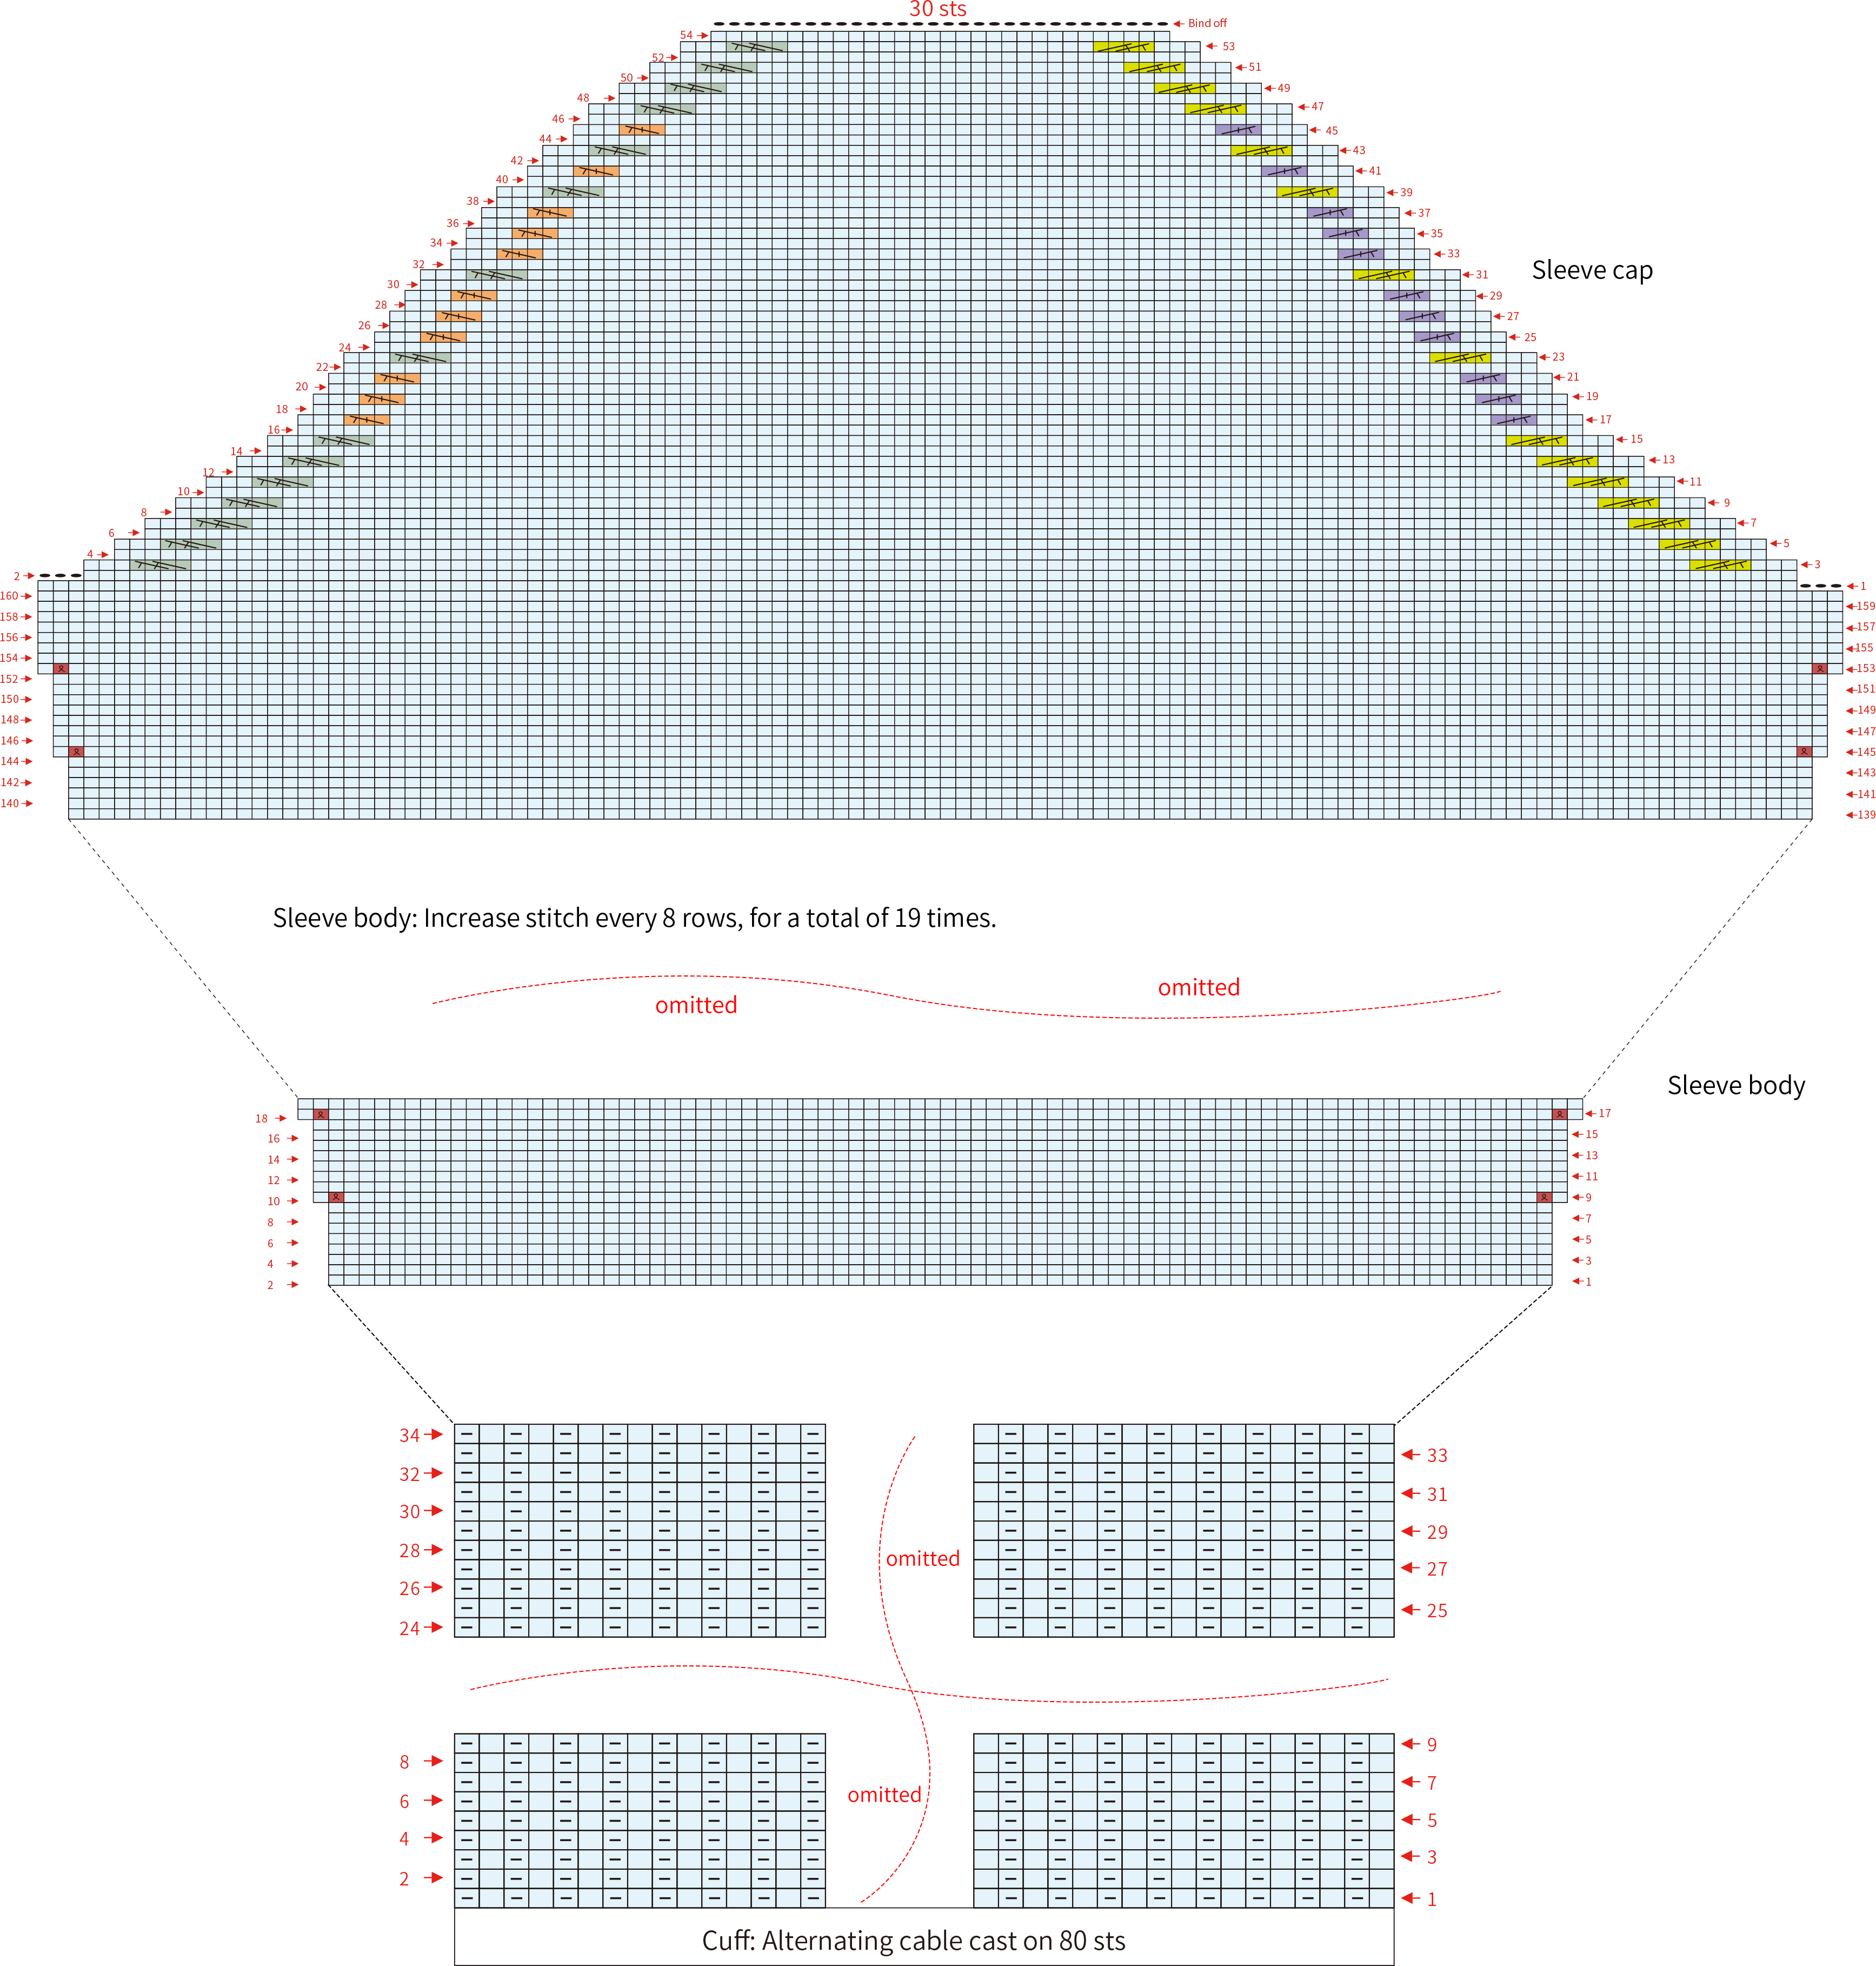
The sleeve is started with the alternating cable cast on method, and knitted back and forth. It is divided into the cuff, sleeve body, and sleeve cap. After finishing, sew together the side of the sleeve body and cuff, and finally join it to the armhole position of the front and back pieces. Please refer to the video demonstration for more details.
Part 4 CollarD 92' 23''
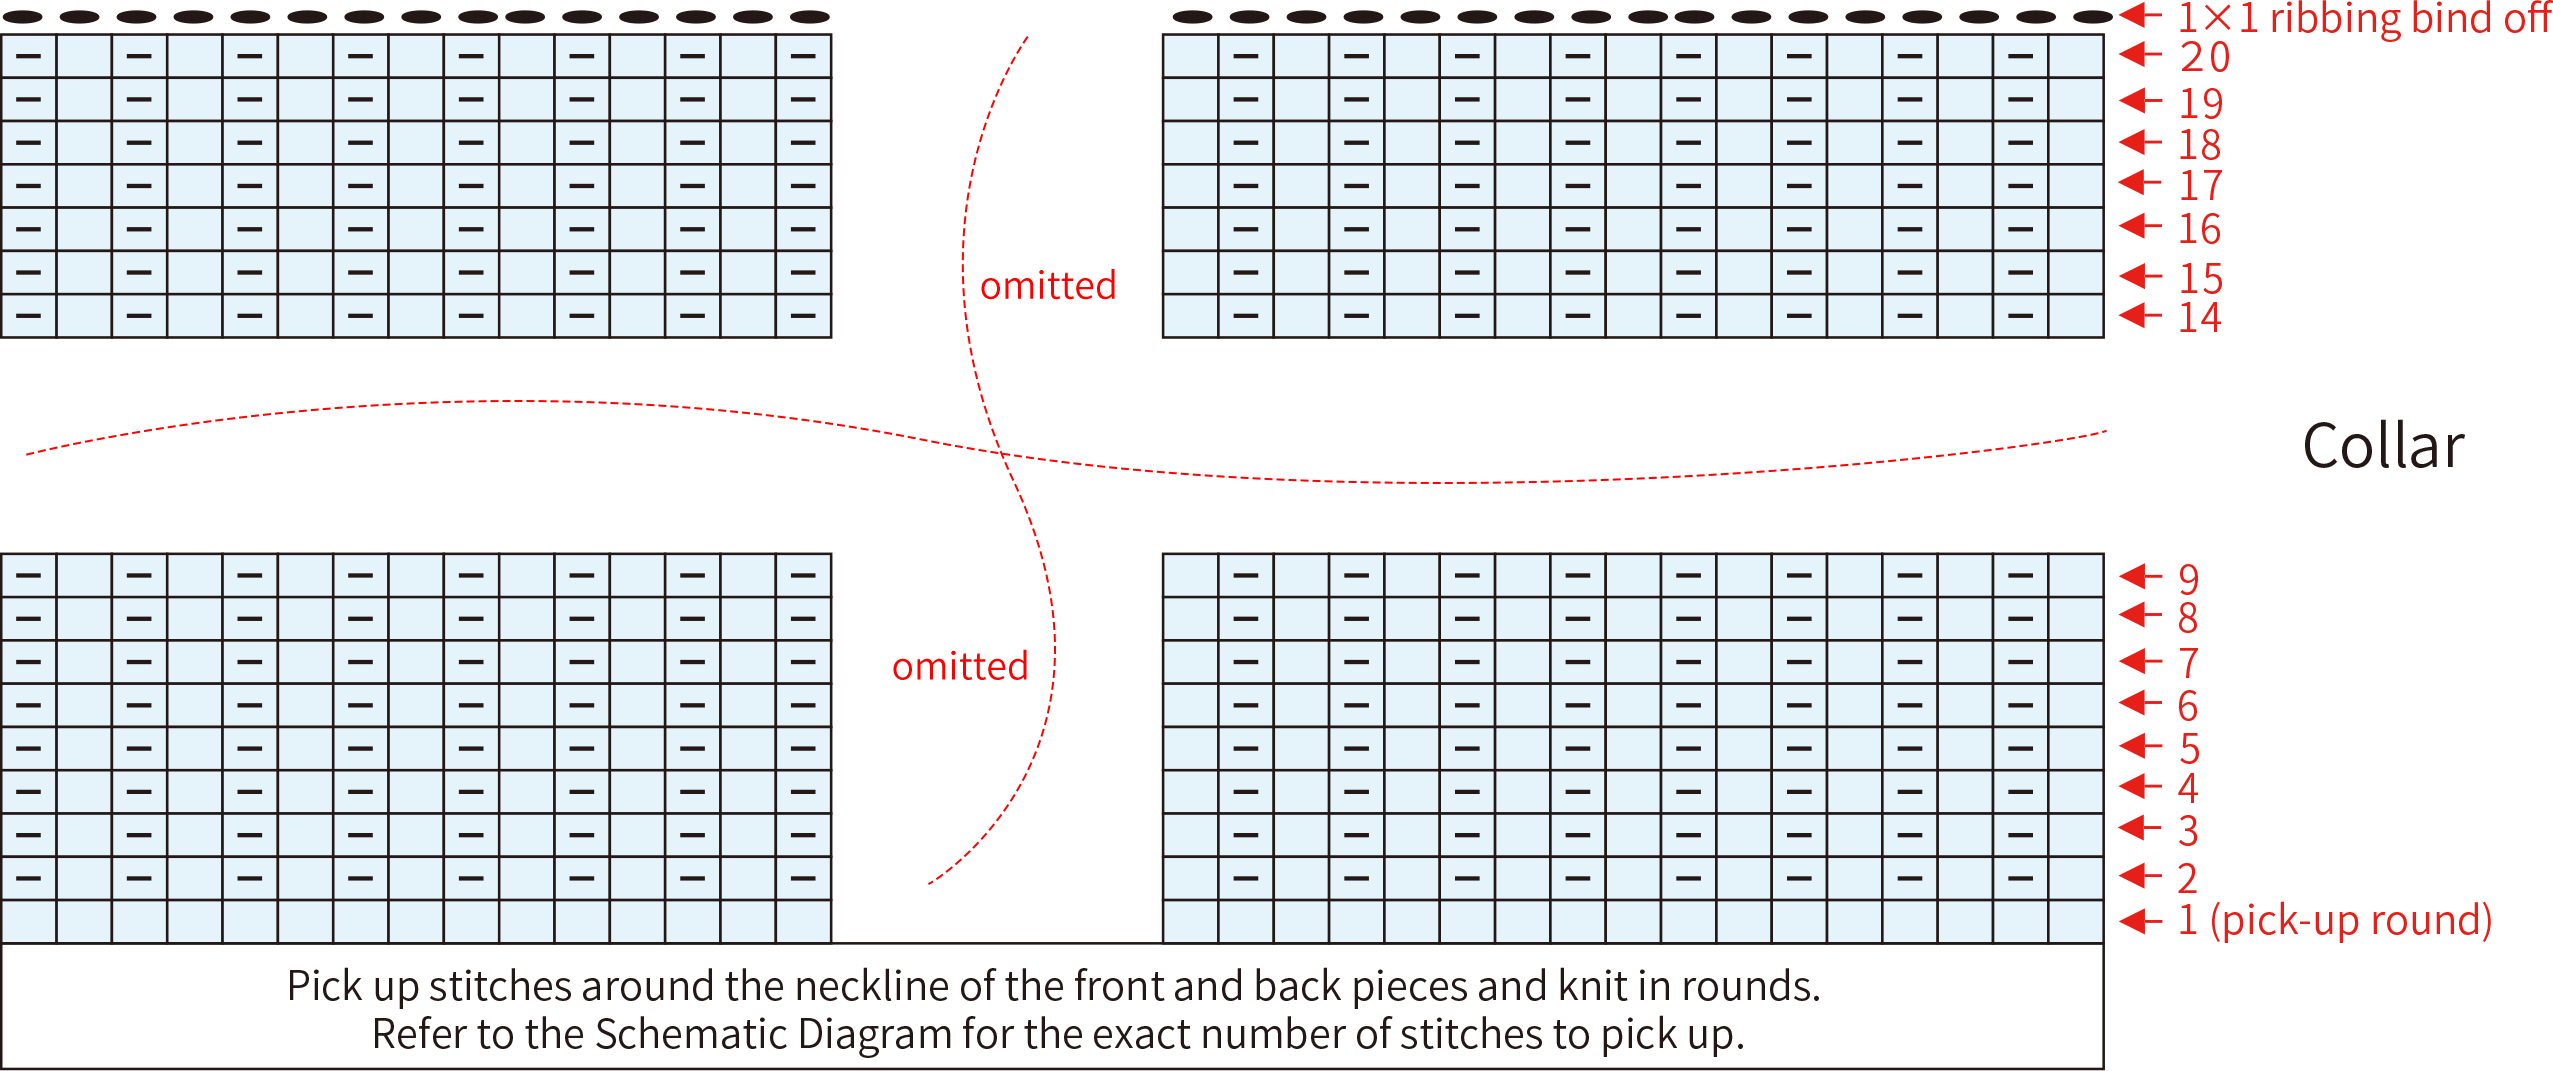
The collar is made by picking up stitches at the neckline of the front and back pieces, then knitting in rounds with 1×1 ribbing, and finally binding off with 1×1 ribbing. Please refer to the video demonstration for more details.
Note: The specific number of picked-up stitches and rounds for the collar can be adjusted as needed, and the number of picked-up stitches should be an even number.
Made by the community