
Clothes
Everlong Cardigan
Project preview
See the finished project
Pattern format
Instructions
Watch and follow
Video tutorial
| Style | Yarn | Color |
|---|---|---|
| Wild Winter - Small | Dawn Impression |  21#Wild Winter x 4 21#Wild Winter x 4 |
| Pomegranate - Small | Dawn Impression |  20#Pomegranate x 4 20#Pomegranate x 4 |
| Rosy Dreams - Small | Dawn Impression |  35#Rosy Dreams x 4 35#Rosy Dreams x 4 |
| Midsummer Night's | Dawn Impression |  41#Midsummer Night x 4 41#Midsummer Night x 4 |
This piece consists of the back body, front body, sleeves, overall edging, and buttons. First, crochet the front and back bodies separately. Once completed, join the shoulders and side seams, making sure to leave openings for the armholes. Then crochet the sleeves and attach them into the armhole spaces. Finally, work the edging evenly around the front borders and bottom edge, and sew the buttons onto the front opening.
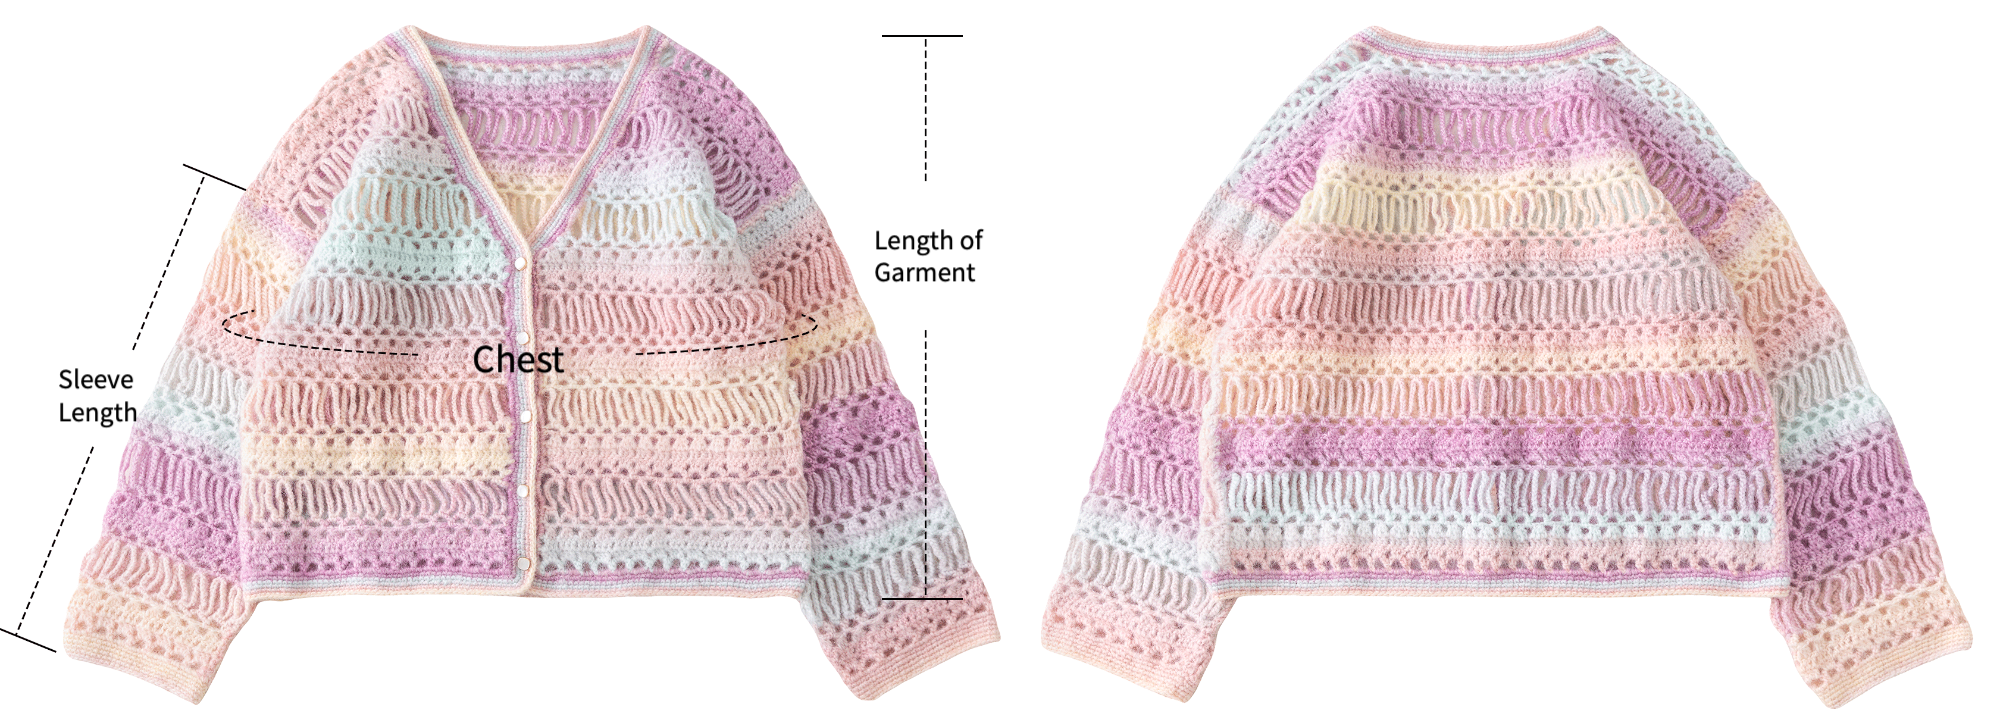
| Unit: cm | Chest | Length of Garment | Sleeve Length |
| Small size | 101 | 50 | 40.5 |
Note: Hand-measured, with a possible error of 1–2 cm. Due to differences in individual tension, the sample size is for reference only.
Yarn: Susan's Family Dawn Impression.
Tools: Susan's 3.60 mm crochet hook , or a regular 3.50 mm crochet hook.

Note:
1. This product is crocheted with variegated yarn. Variegated yarn has multiple color segments, and the color at the starting point of crocheting may vary, resulting in different finished effects. You can refer to the finished item or choose the desired color section of the variegated yarn according to your preference to begin crocheting.
2. The left and right are distinguished based on the actual wearing side.
The tutorial is demonstrated in size S as an example.
For other sizes, please refer to the corresponding charts.
Structure Diagram
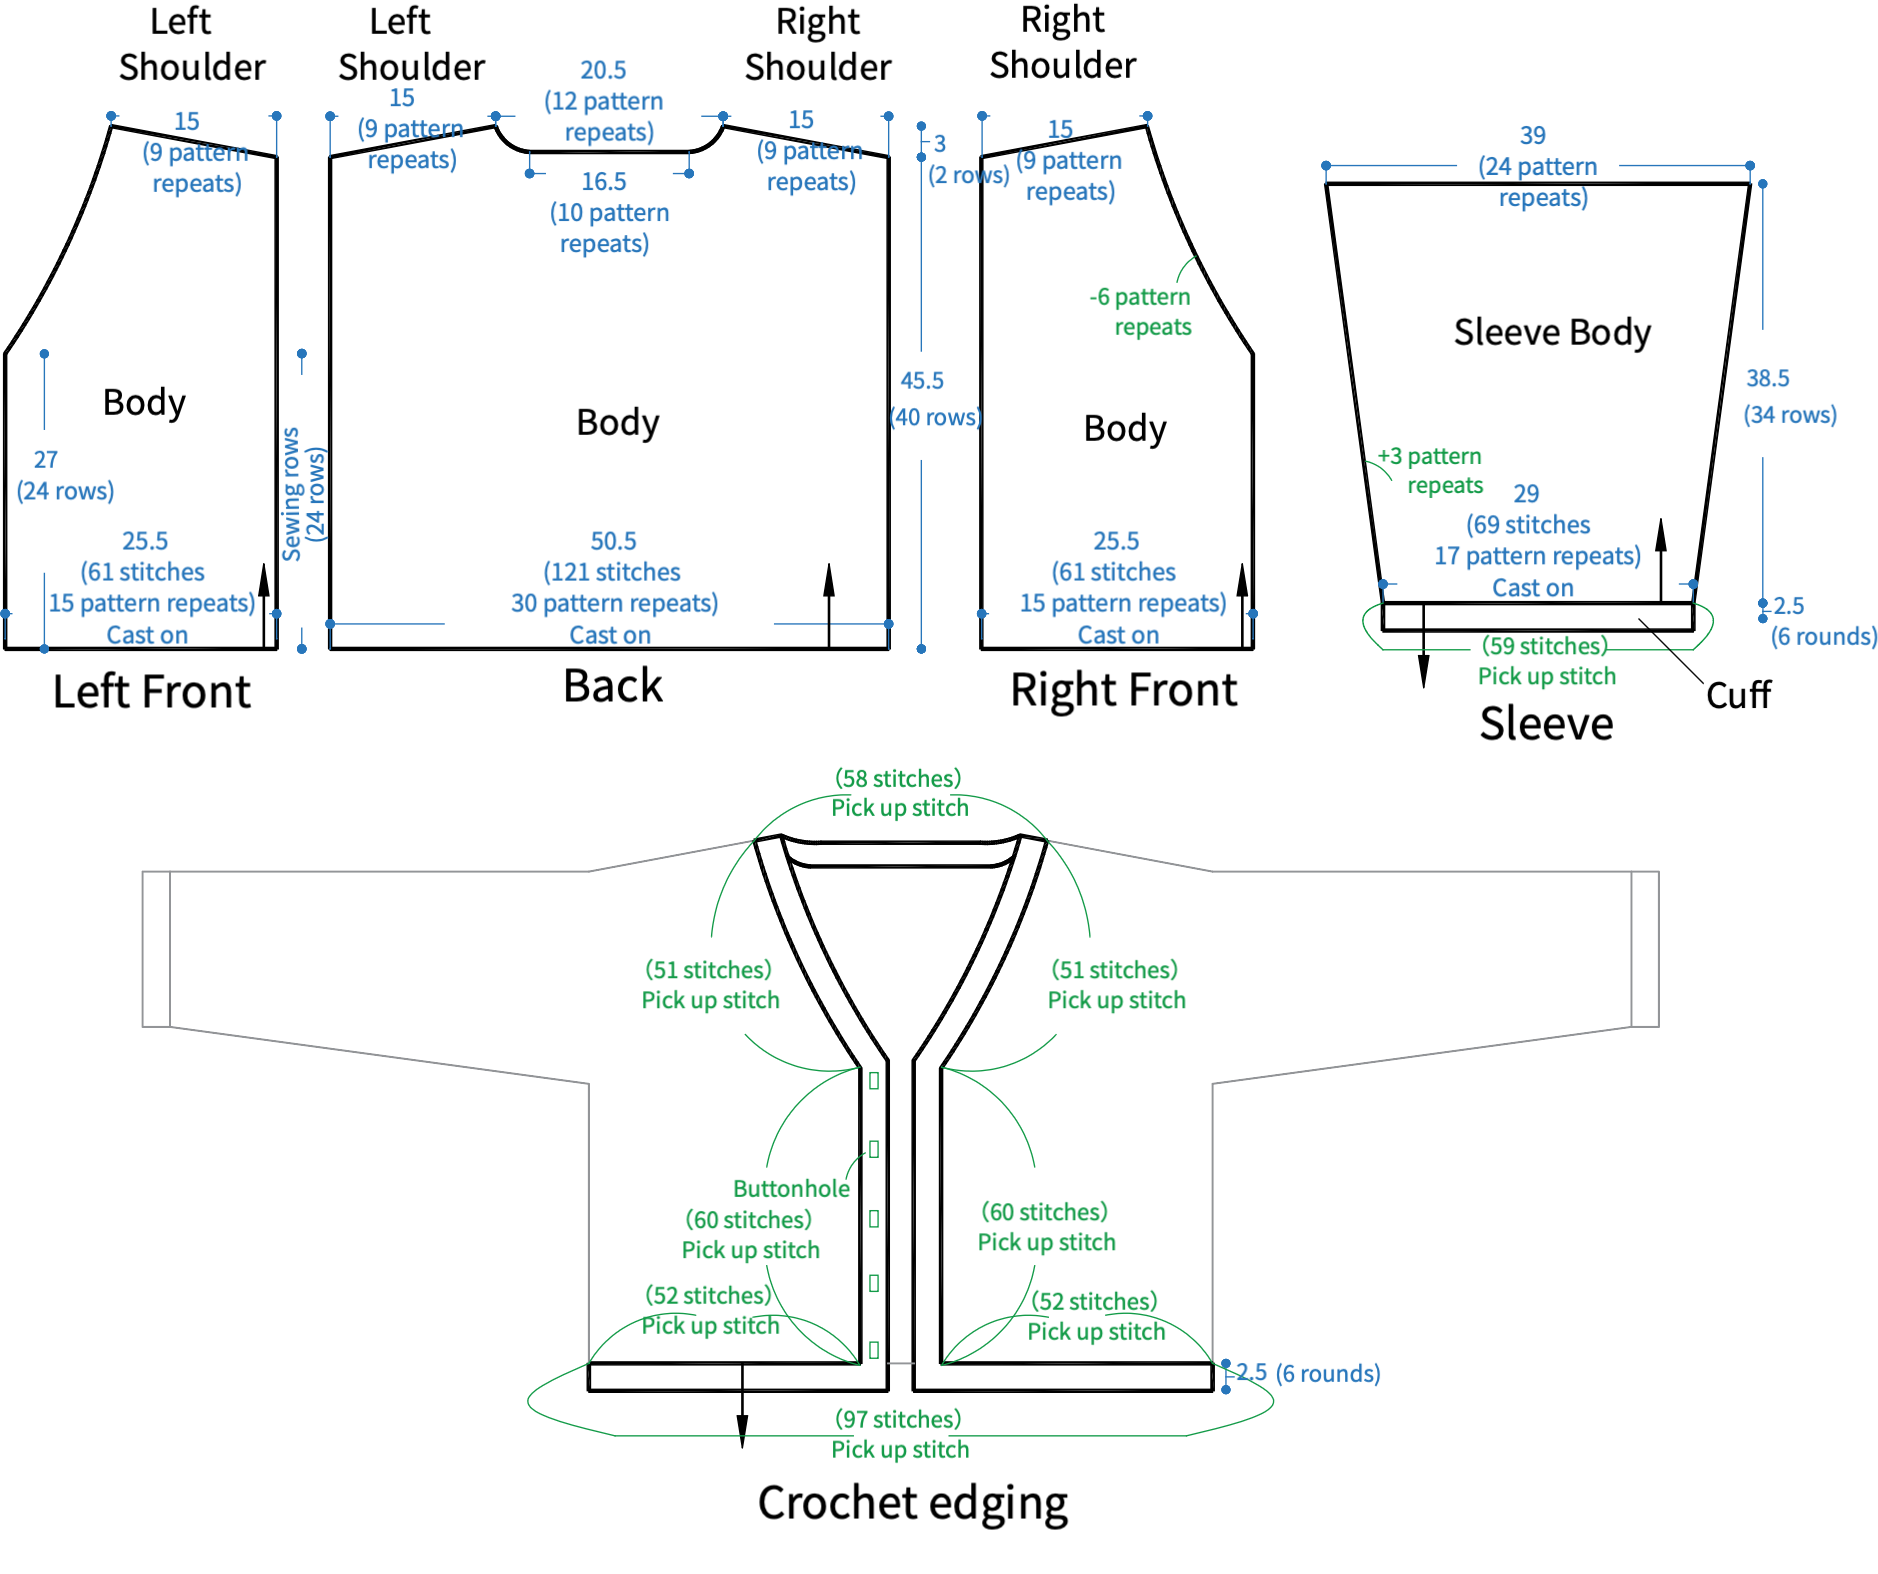
Gauge Swatch
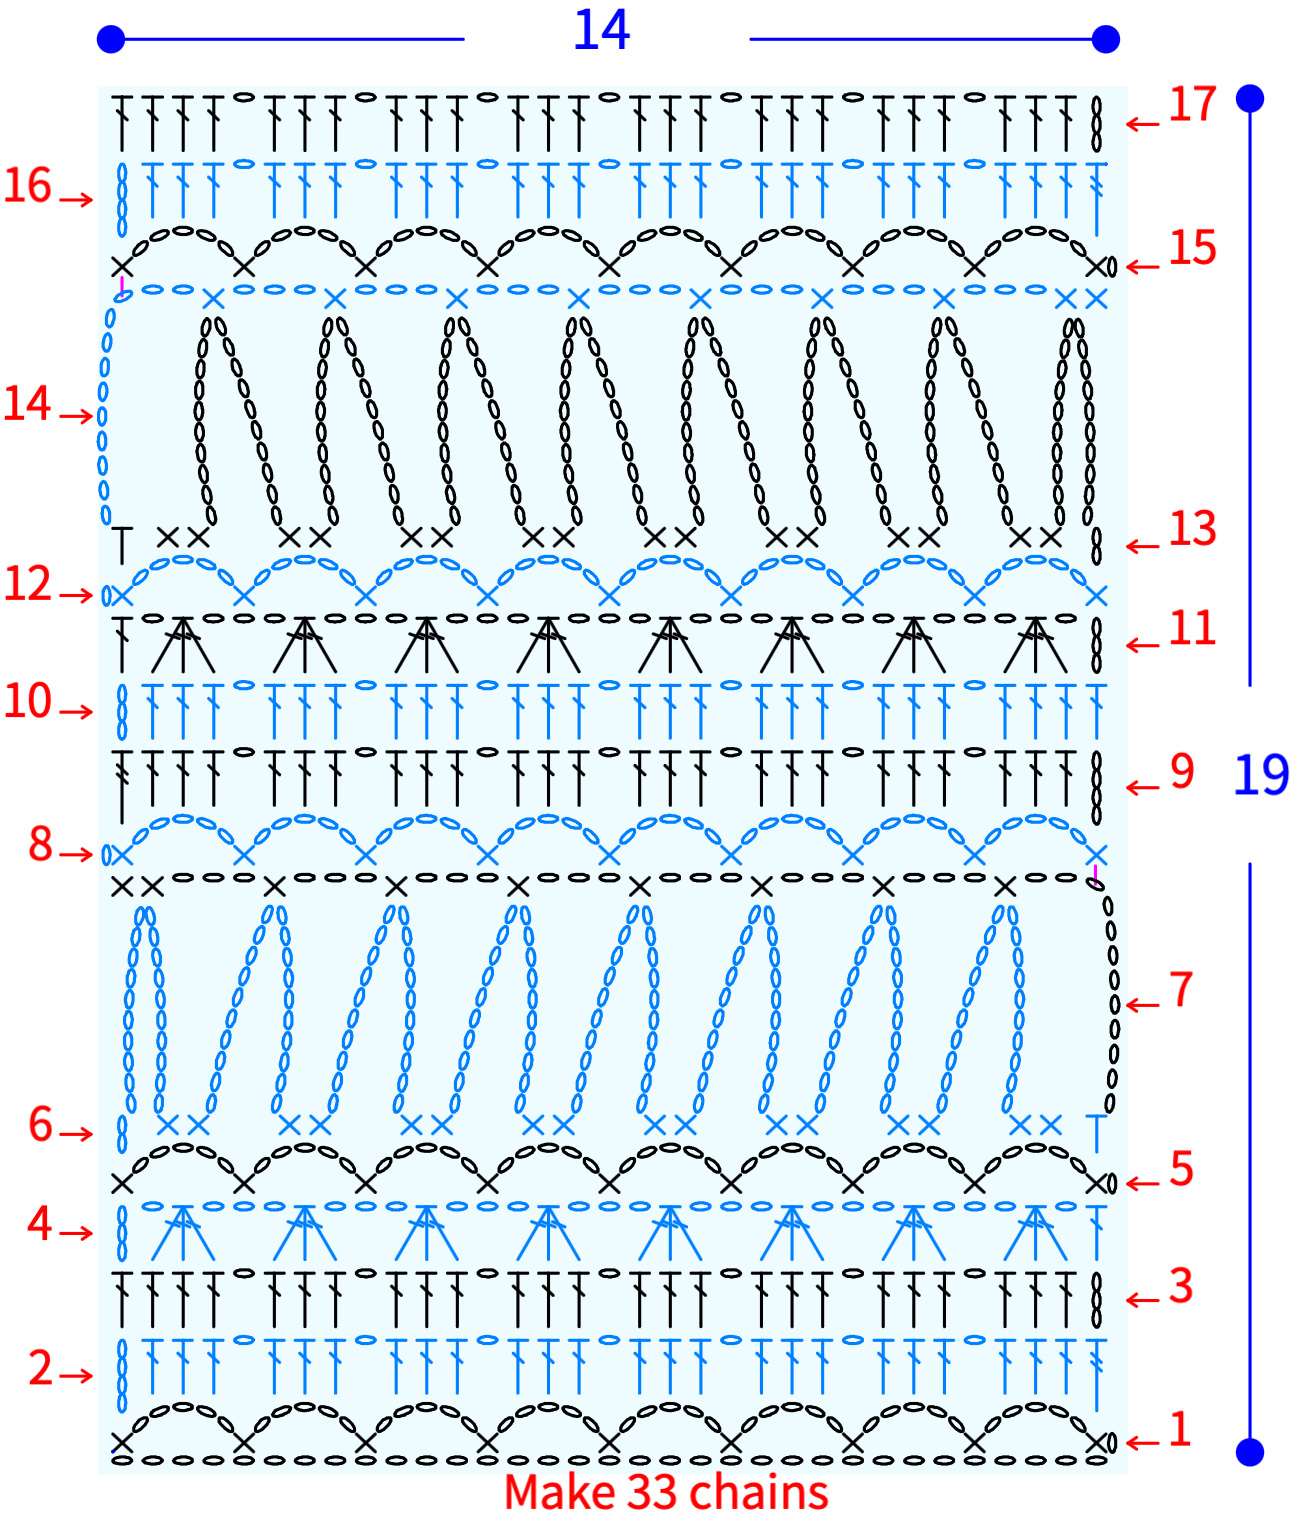
Chart Key








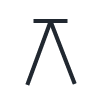
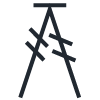


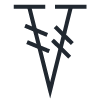


Note: This pattern is making in Chinese crochet pattern terms, and the stitch name is written using American terminology. All measurements in charts are in cm.

PART1 Back BodyA 01' 33''
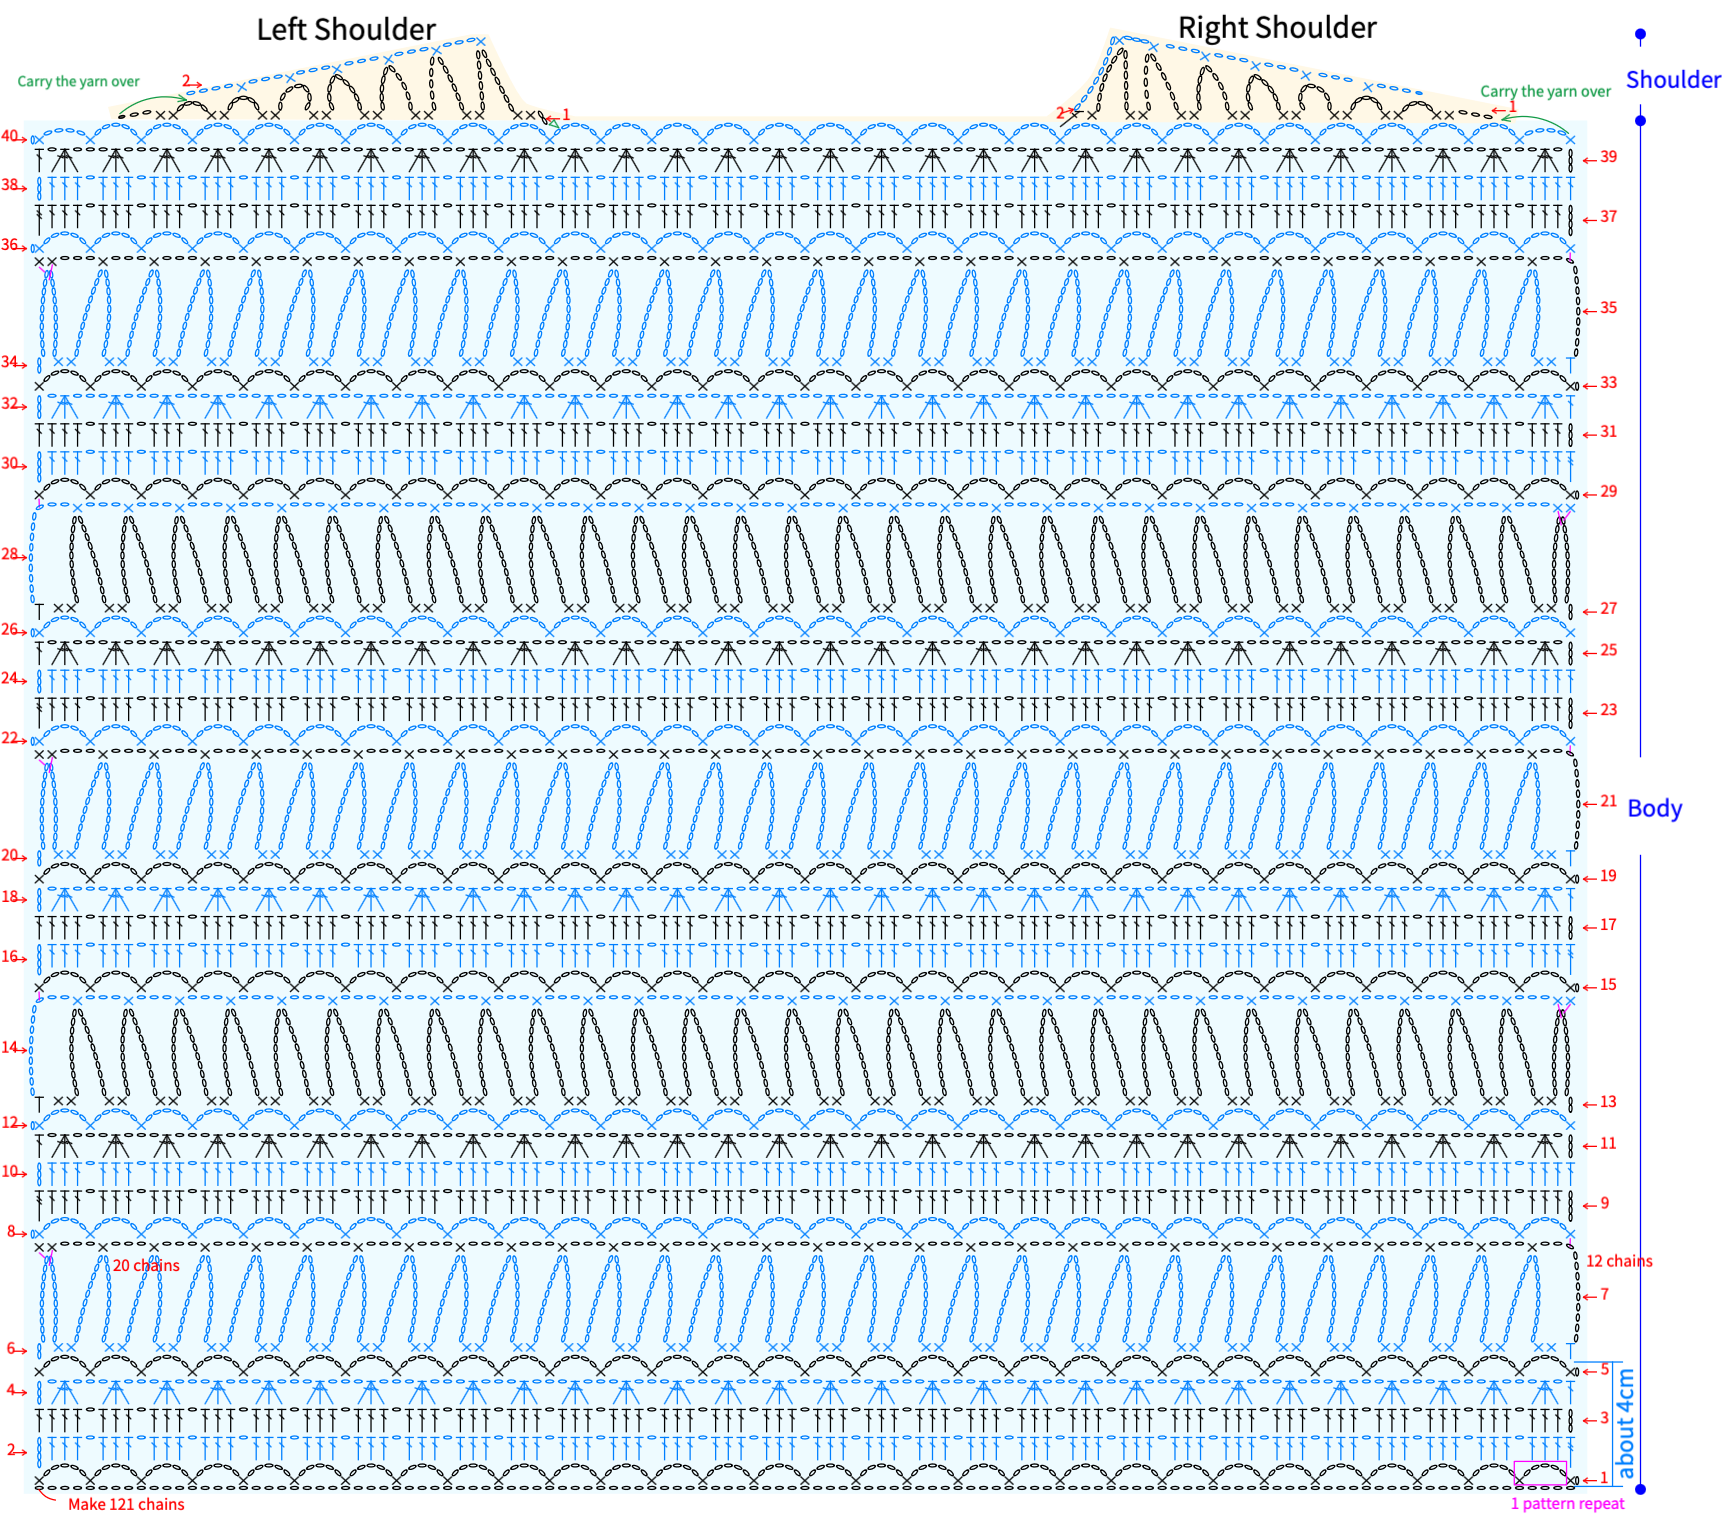
Note:
After completing the first 5 rows, you can measure the size of the piece. The width should be around 4cm. For the length, please refer to the measurements in the diagram. If there's a big difference, it's recommended to adjust your tension or change the hook size and crochet again.
PART 2 Front BodyB 30' 14''
After completing the front body, connect the shoulder areas and side seams. Please refer to the video demonstration for details.
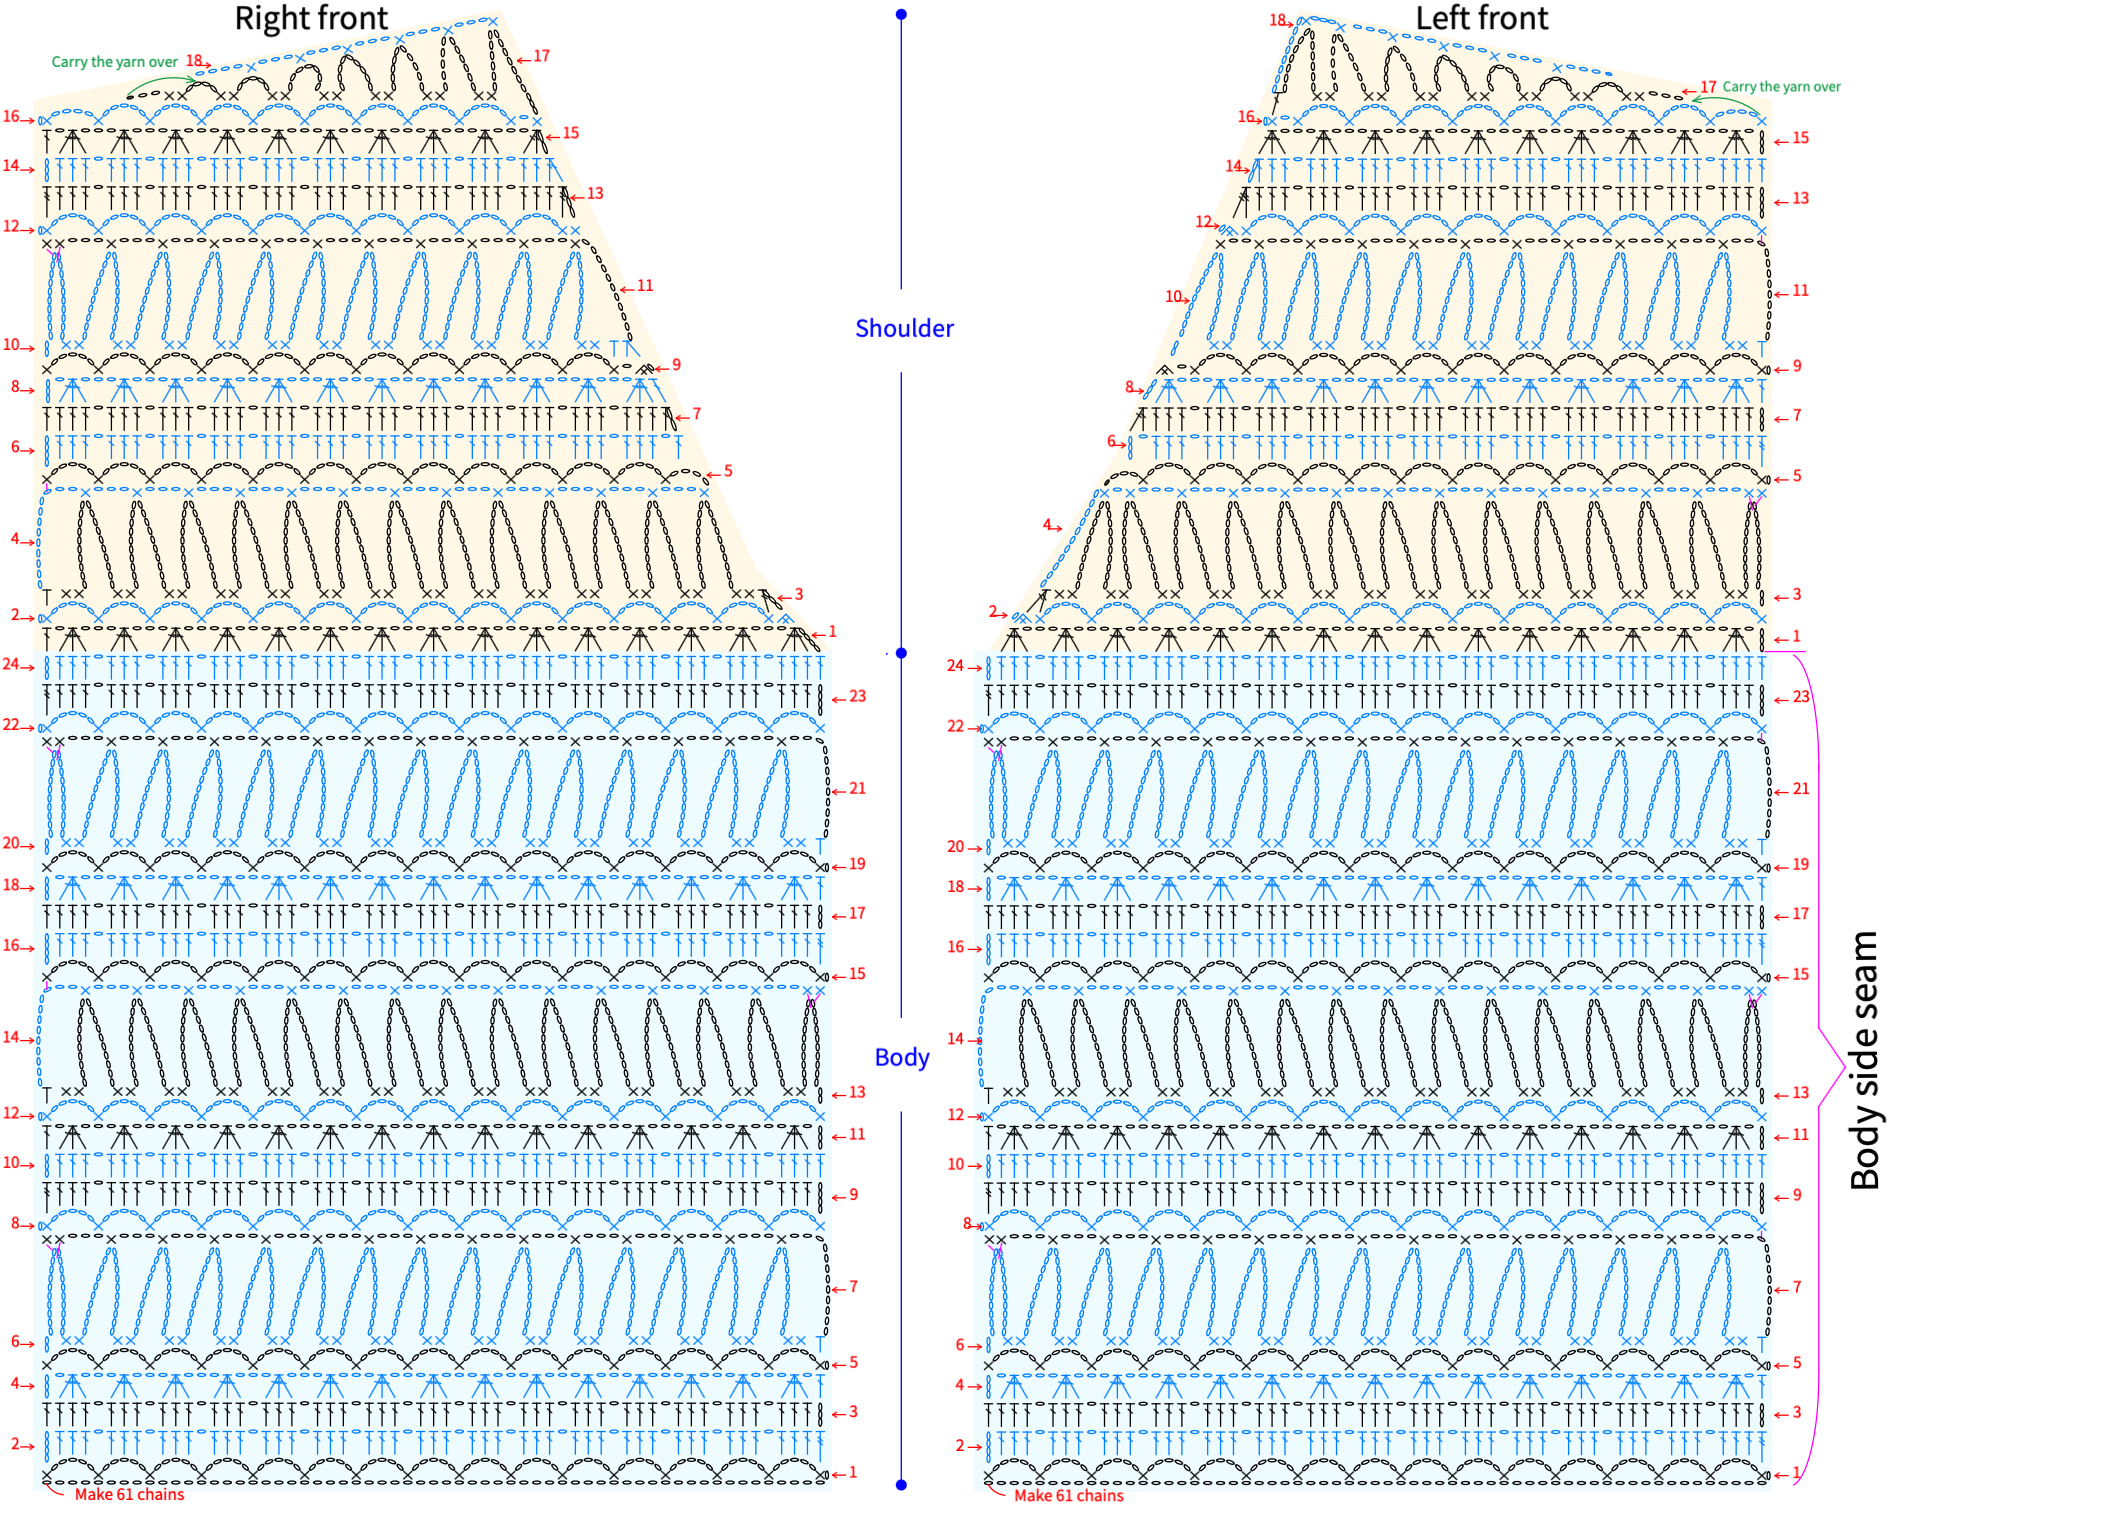
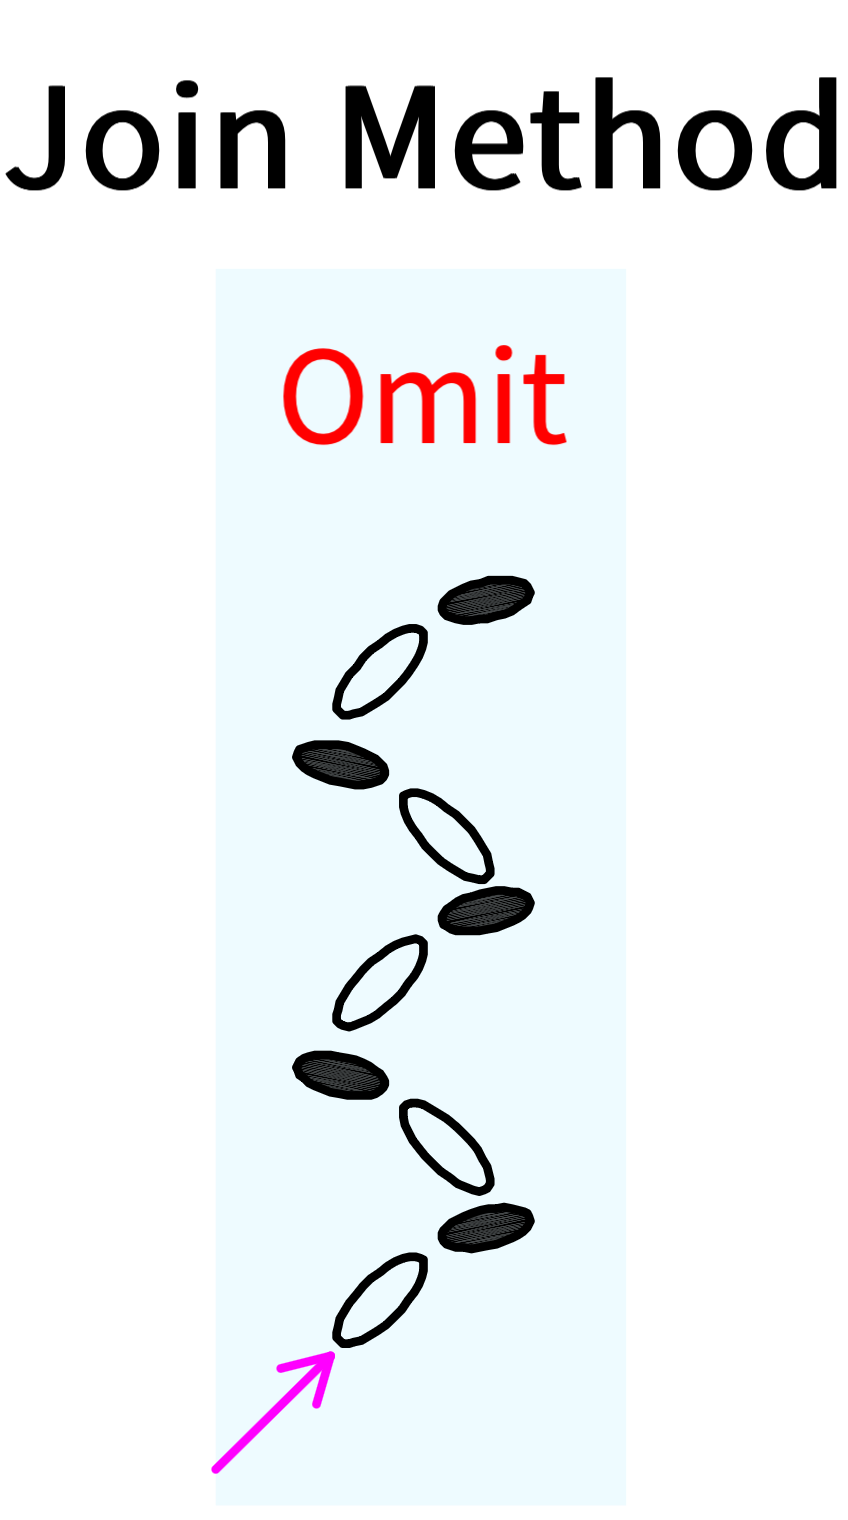
Note: You can refer to the video for the joining method, or connect according to your own preference.
PART 3 SleevesC 53' 52''
Once the sleeve body is done, you can connect the side seams without cutting the yarn. After that, continue crocheting the sleeve edging without cutting the yarn either. Finally, pick up the yarn at the underarm area and attach the last row of the sleeve to the armhole. For details, please watch the video demonstration.
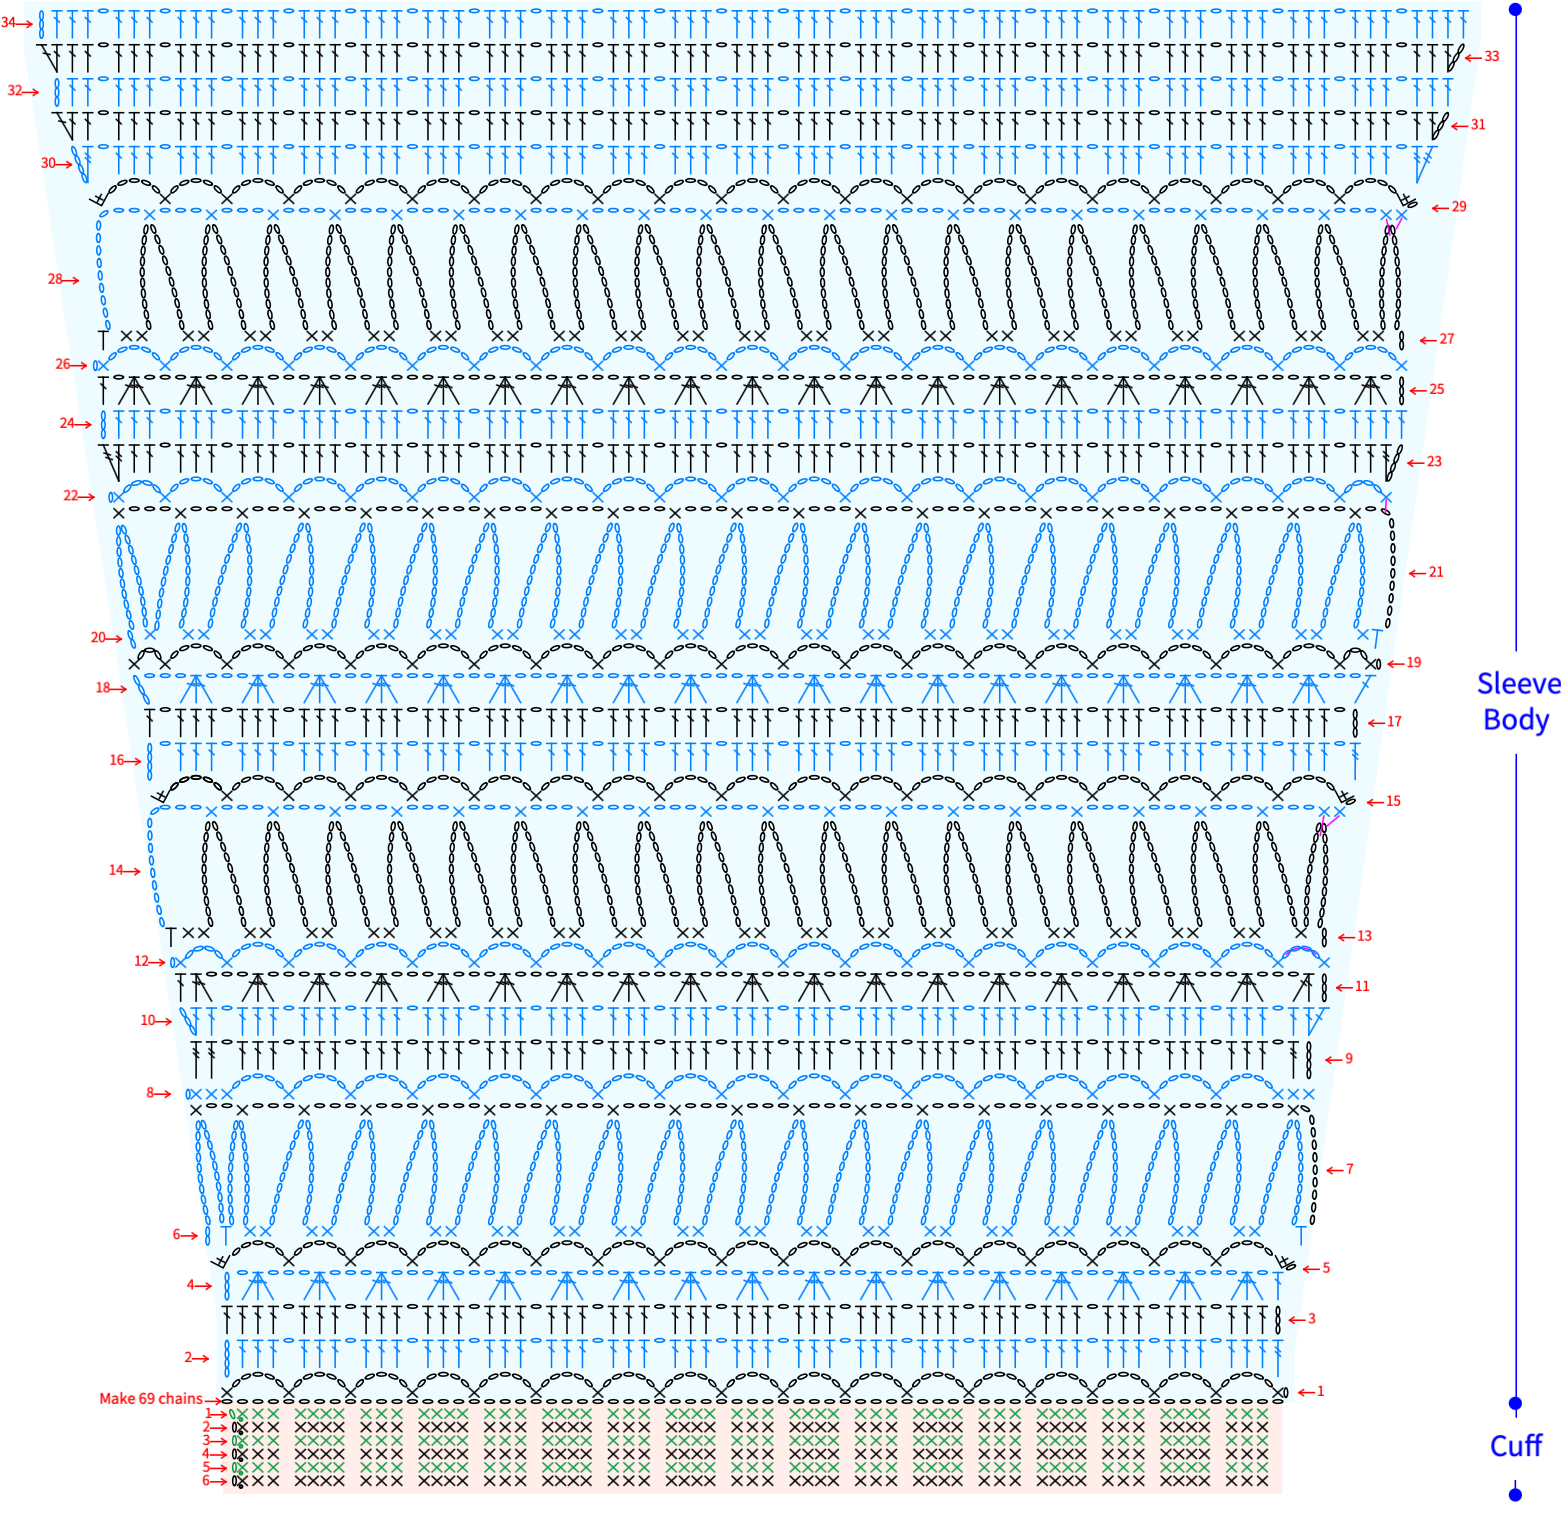
Note: The joining method is the same as the one used for joining the front and back pieces.
PART4 Crochet the edging and sew on buttonsD 59' 02''
The overall edging is crocheted in rounds along the front and back body edges, neckline, and bottom edge. Remember to leave buttonholes as you go, and sew the buttons onto the corresponding positions on the opposite side of the buttonholes. For details, please refer to the video demonstration.
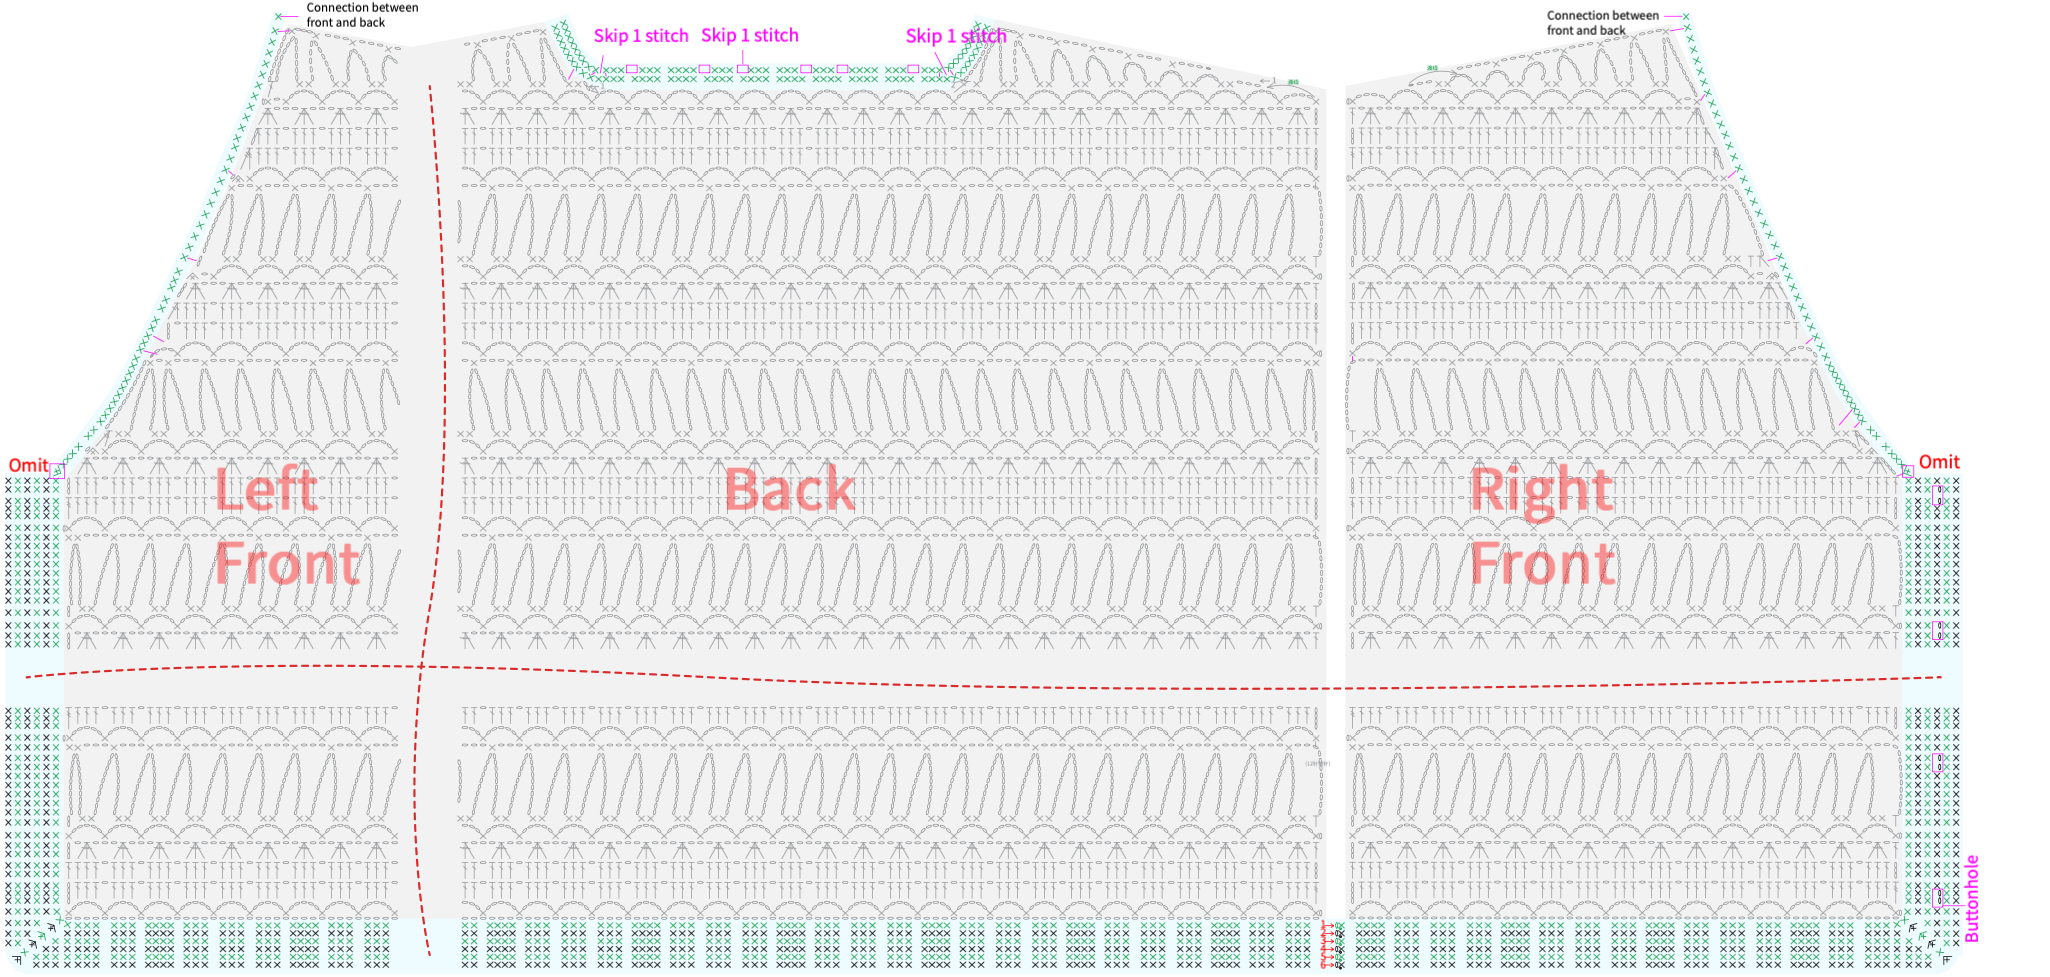
Note: You can adjust the stitch count for the first round of the edging. Just keep the fabric flat and even.
Made by the community





