Clothes
Fall Haze Cardigan
Project preview
See the finished project
Pattern format
Instructions
Watch and follow
Video tutorial
This cardigan consists of the left front piece, right front piece, back piece, sleeves, and front band. First, complete the knitting of the front and back pieces, then connect them at the corresponding positions, next pick up stitches and knit in the round for the sleeves, then pick up stitches to knit the front band, and make buttonholes on the right front band. The video tutorial is demonstrated using a large size as an example.
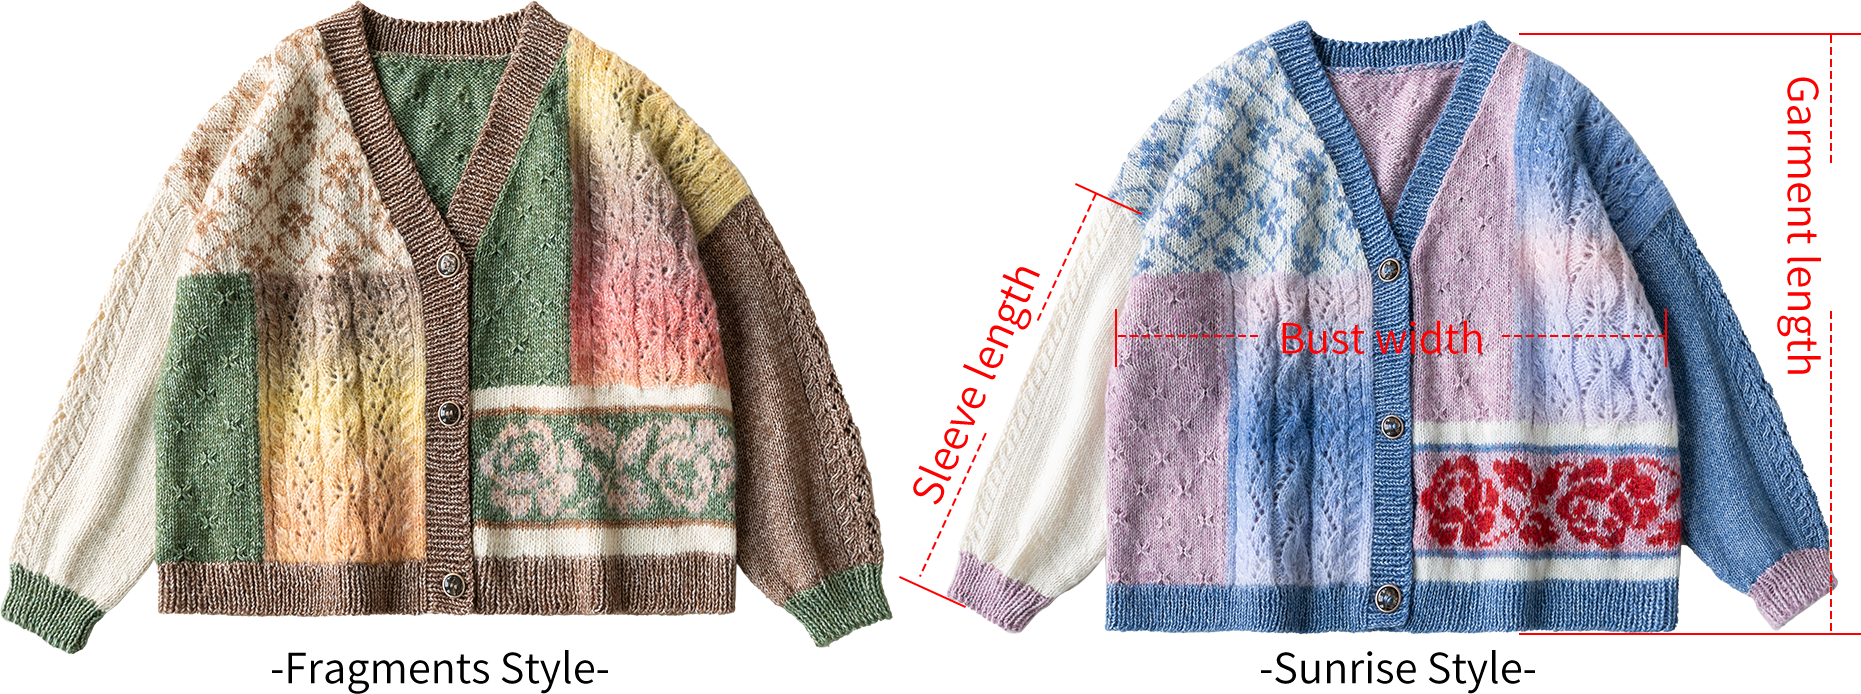

The handcrafted measurements may have an error of 1 to 2 cm. Due to variations in individual tension, the size of the sample is for reference only.
Materials: Susan's Family Impression Misty Feather & Dawn Impression & Dimond Thread Wool
Needles: 4.50 mm and 4.00 mm circular needles & short straight needles
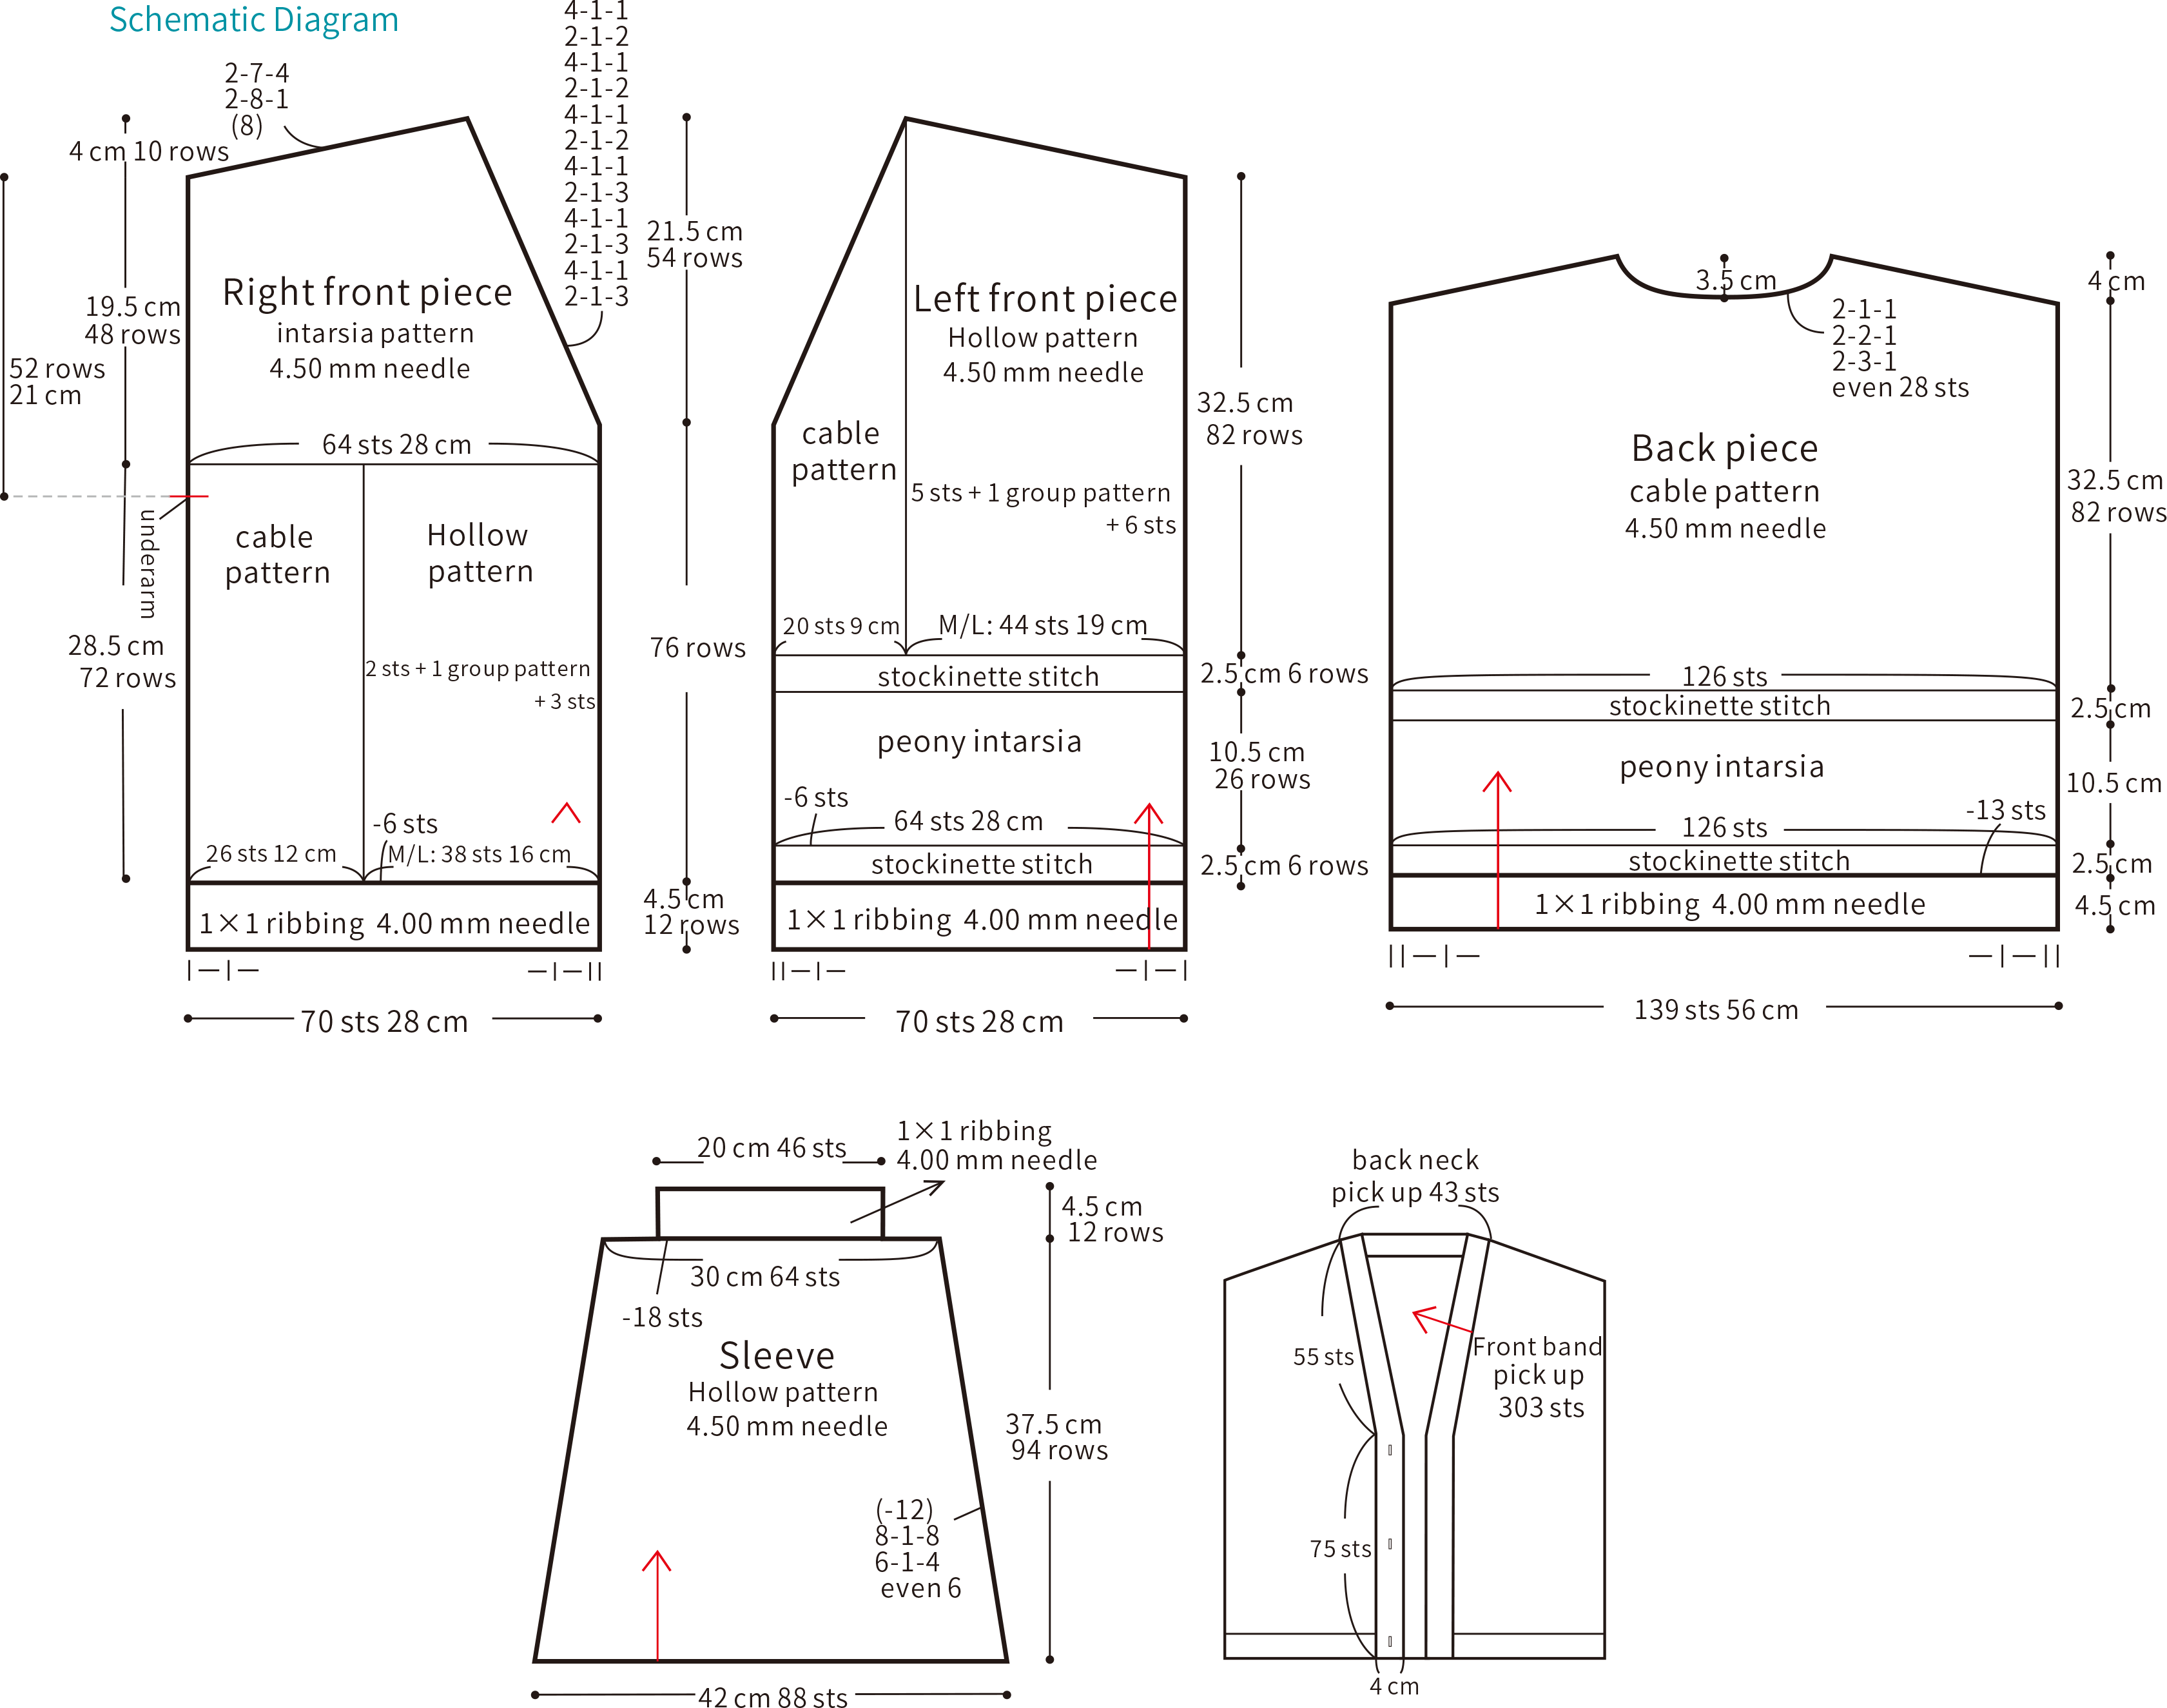
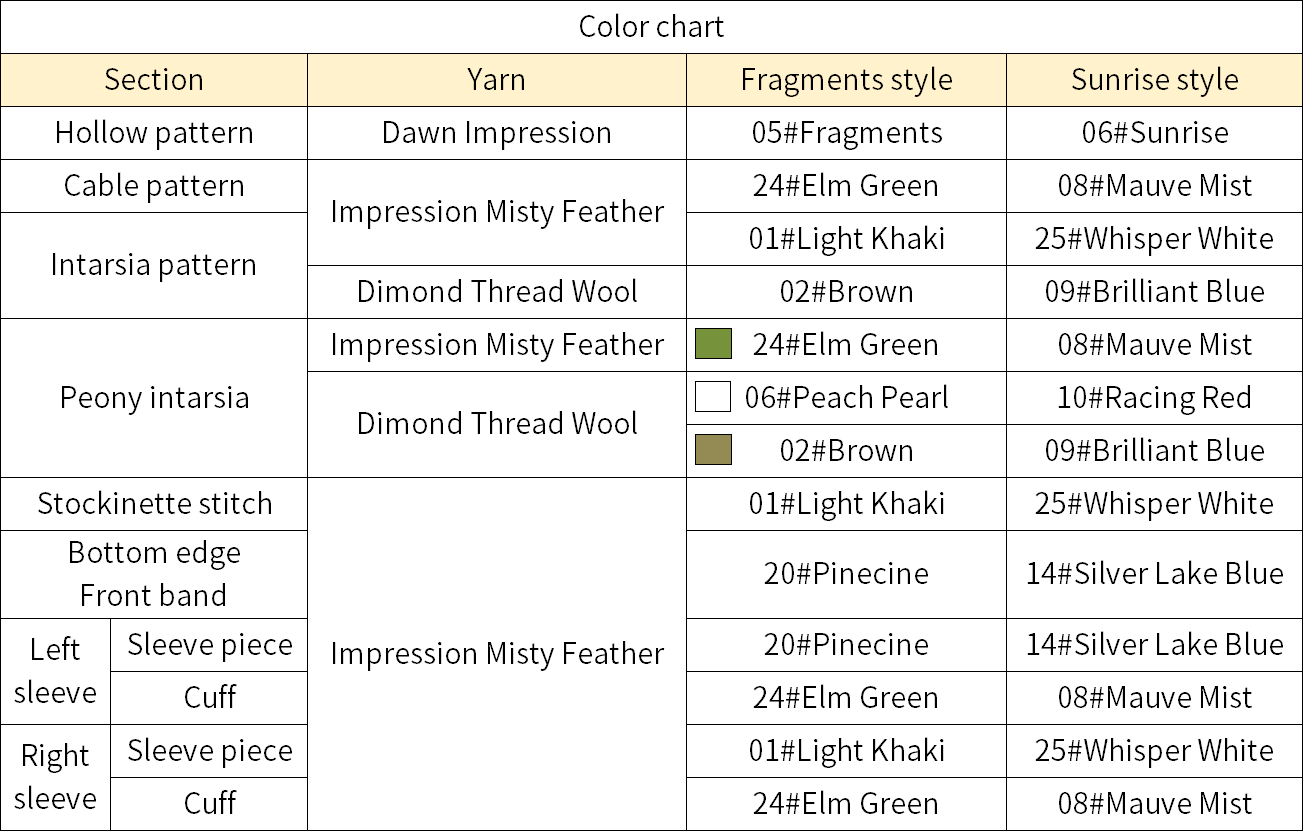
Chart Key




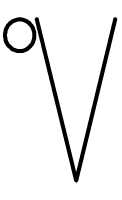
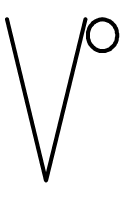

Note: 1. This pattern is using American terminology. All measurements in charts are in cm.
2. The chart represent the right side of fabric, so check the key to see how to work a certain symbol on the right side and on the wrong side.


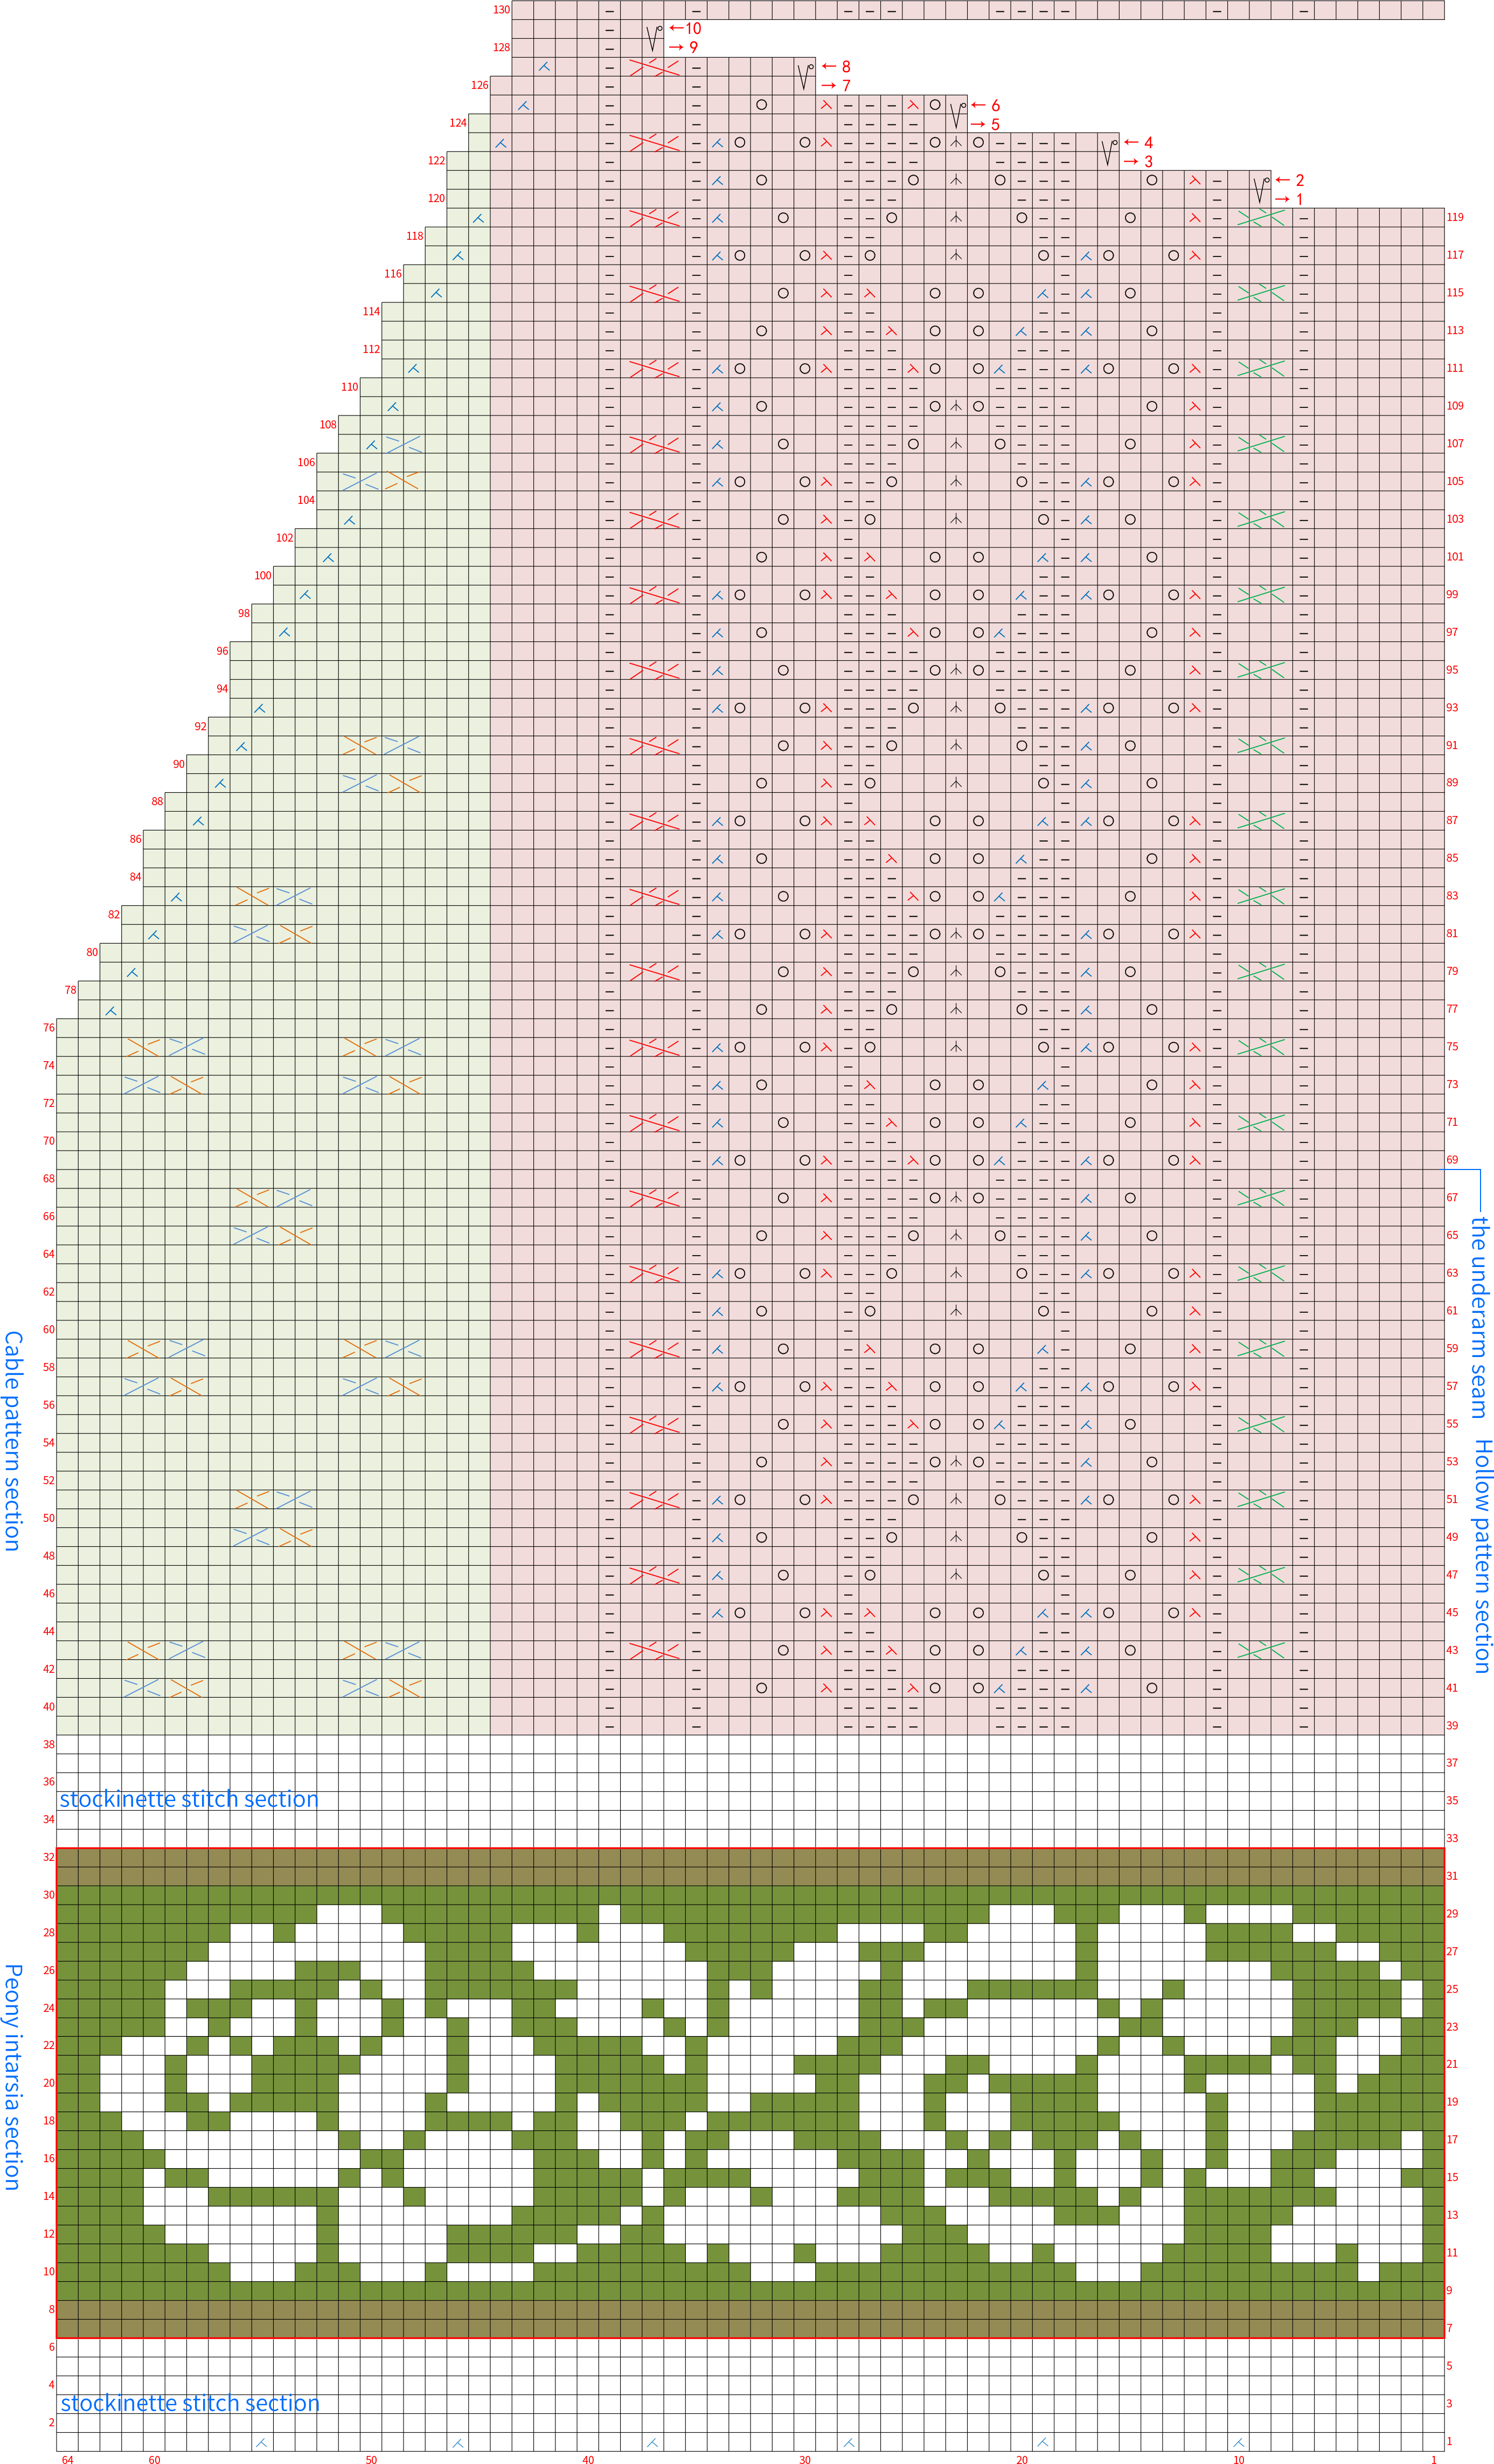
Part 1 Right front pieceA 06' 36''
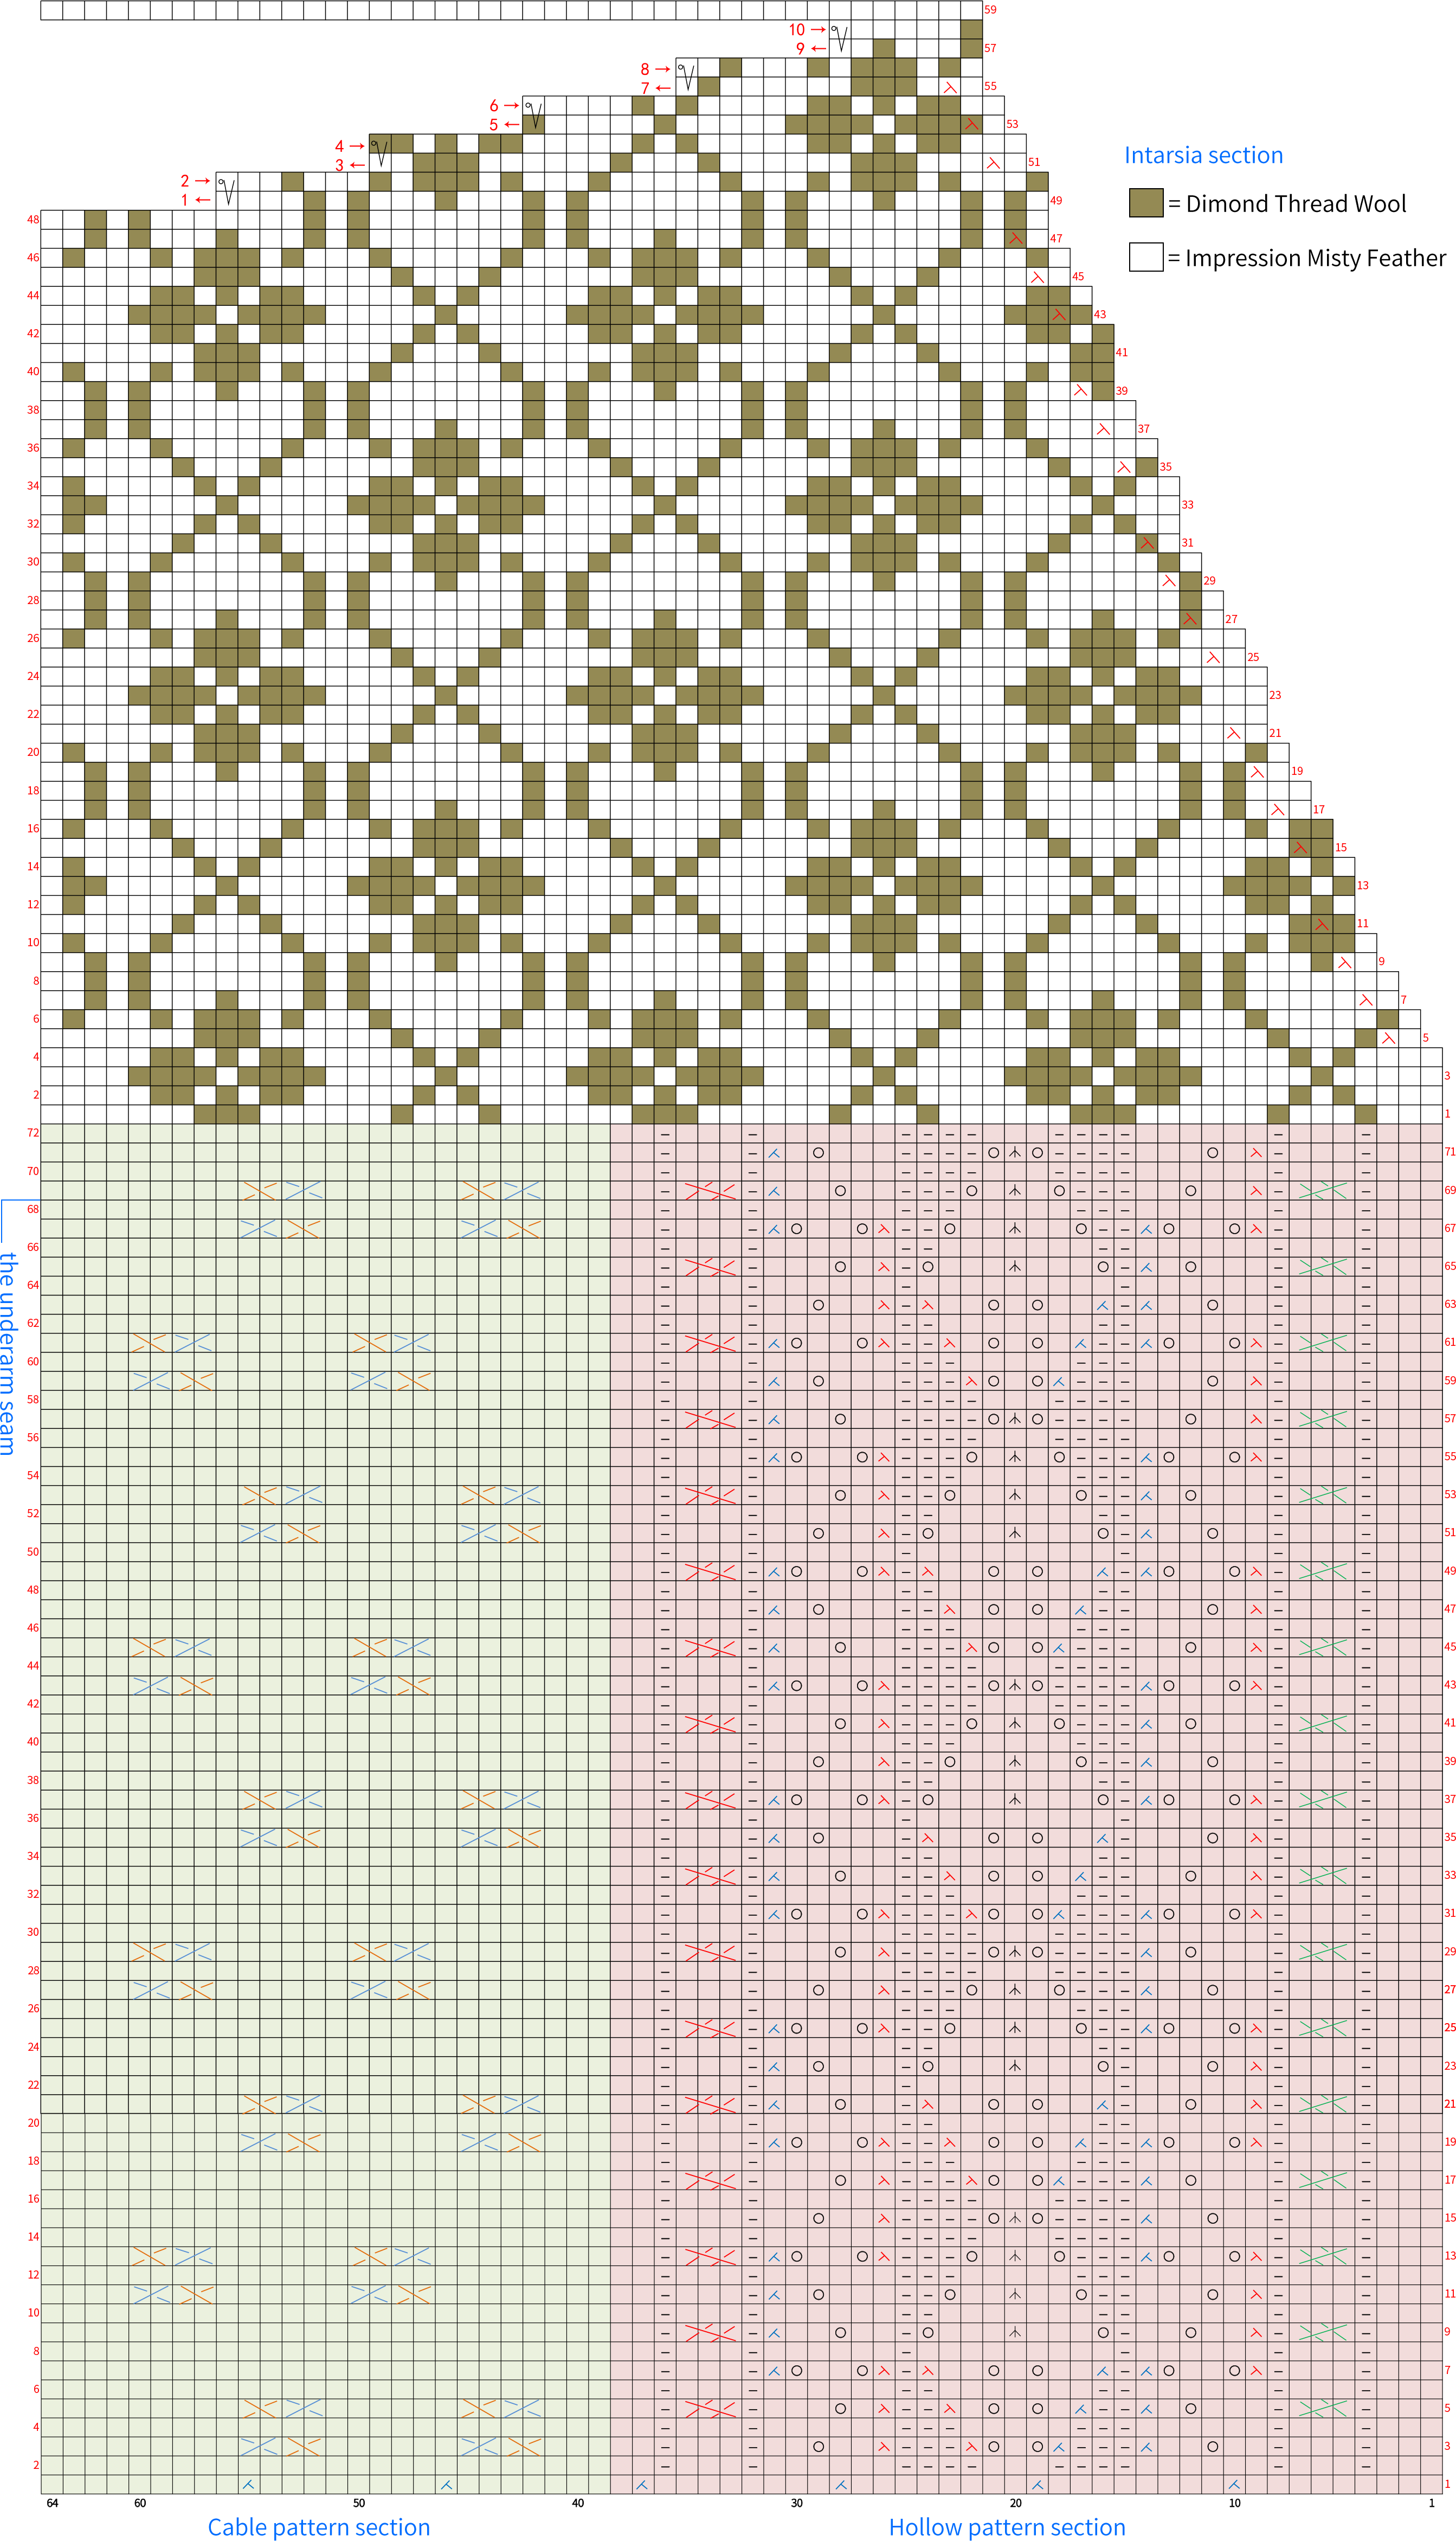
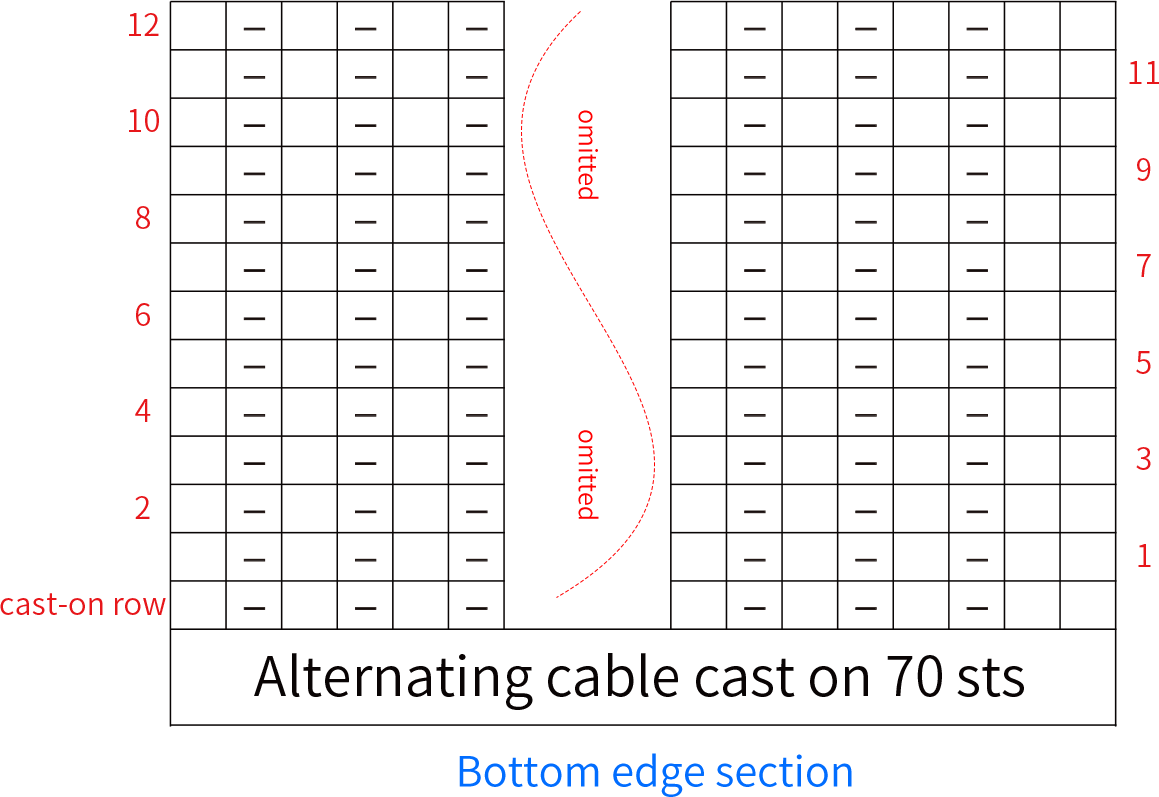
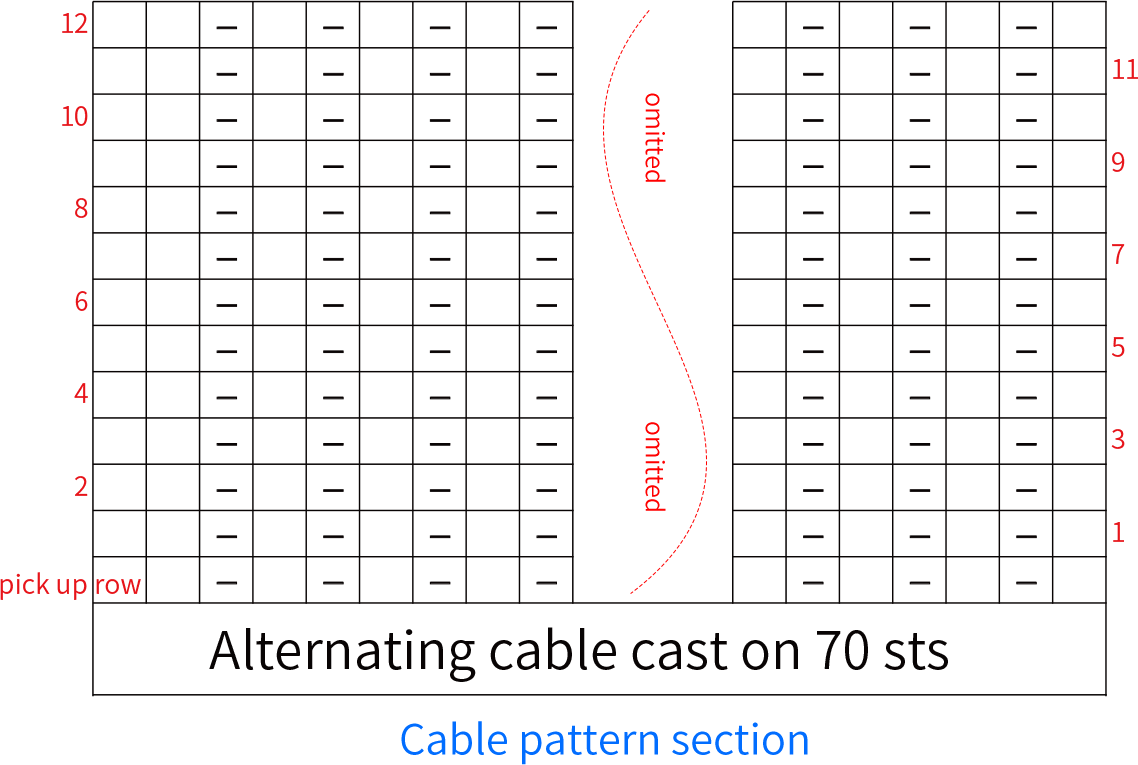
The right front piece is knitted from bottom-up, dividing into three parts: the bottom edge, the body, and the shoulder. Please refer to the video demonstration for more details.
Note:1. The chart represent the right side of fabric, so check the key to see how to work a certain symbol on the right side and on the wrong side.
2. The left and right on the charts refer to the actual wearing position.
3. After completing the front piece, do not bind off. Instead, place the stitch loops on a short straight needle, break yarn, and pause knitting.
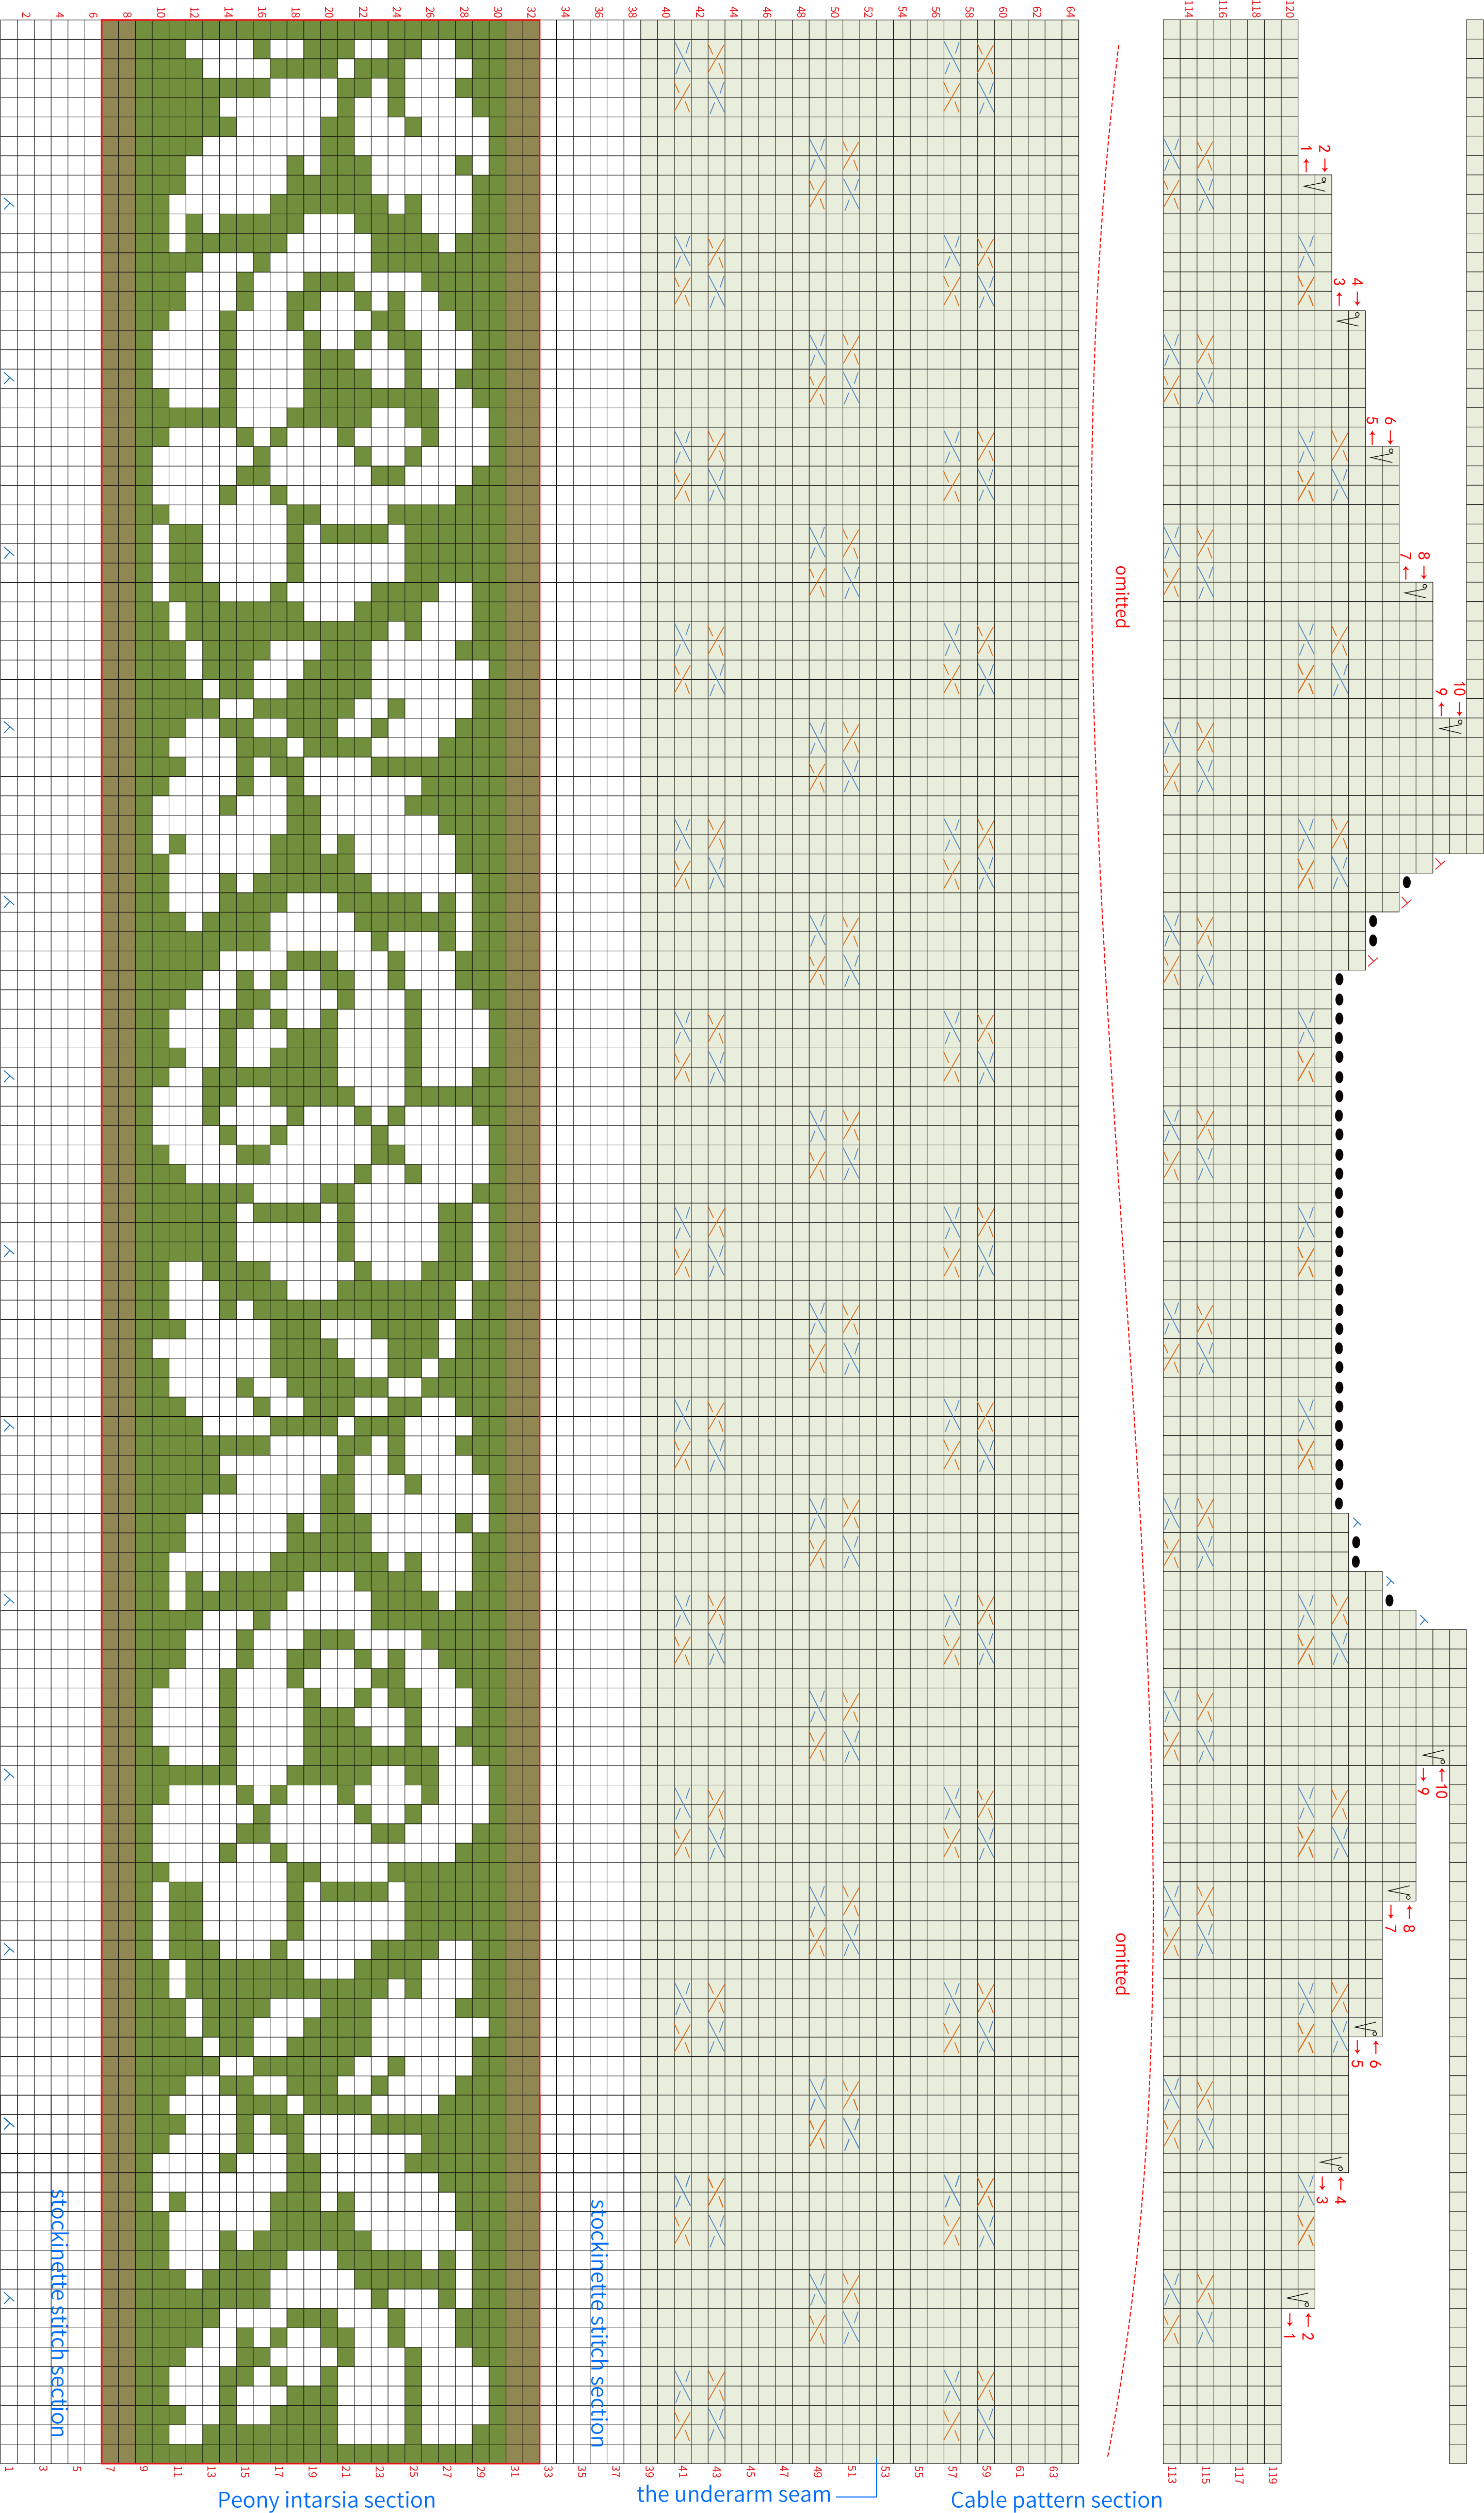
Part 2 Left front pieceB 51' 33''
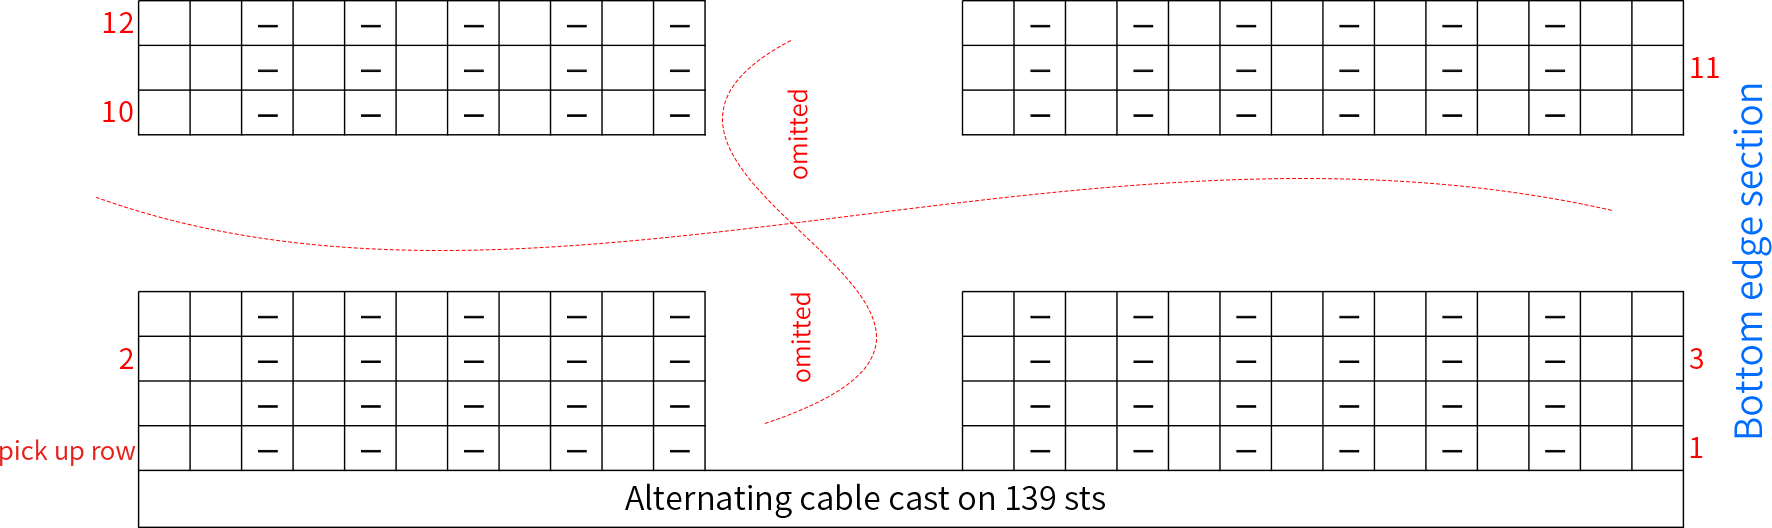
The left front piece and right front piece are knitted in the same order but in symmetrical direction. Both are divided into the bottom edge, body, and shoulder, but with different patterns. Please refer to the video demonstration for more details.
Part 3 Back piece and Sewing the ShouldersC 60' 18''
The back piece is knitted in the same sequence as the front piece. After completing one side of the shoulder, sew it to the corresponding shoulder of the front piece using the knit-as-you-sew method to join the shoulders. Please refer to the video demonstration for more details.
Part 4 Sew the body togetherD 71' 17''
After completing the front and back pieces, sew together the bottom edge to the underarm section. Please refer to the video demonstration for more details.
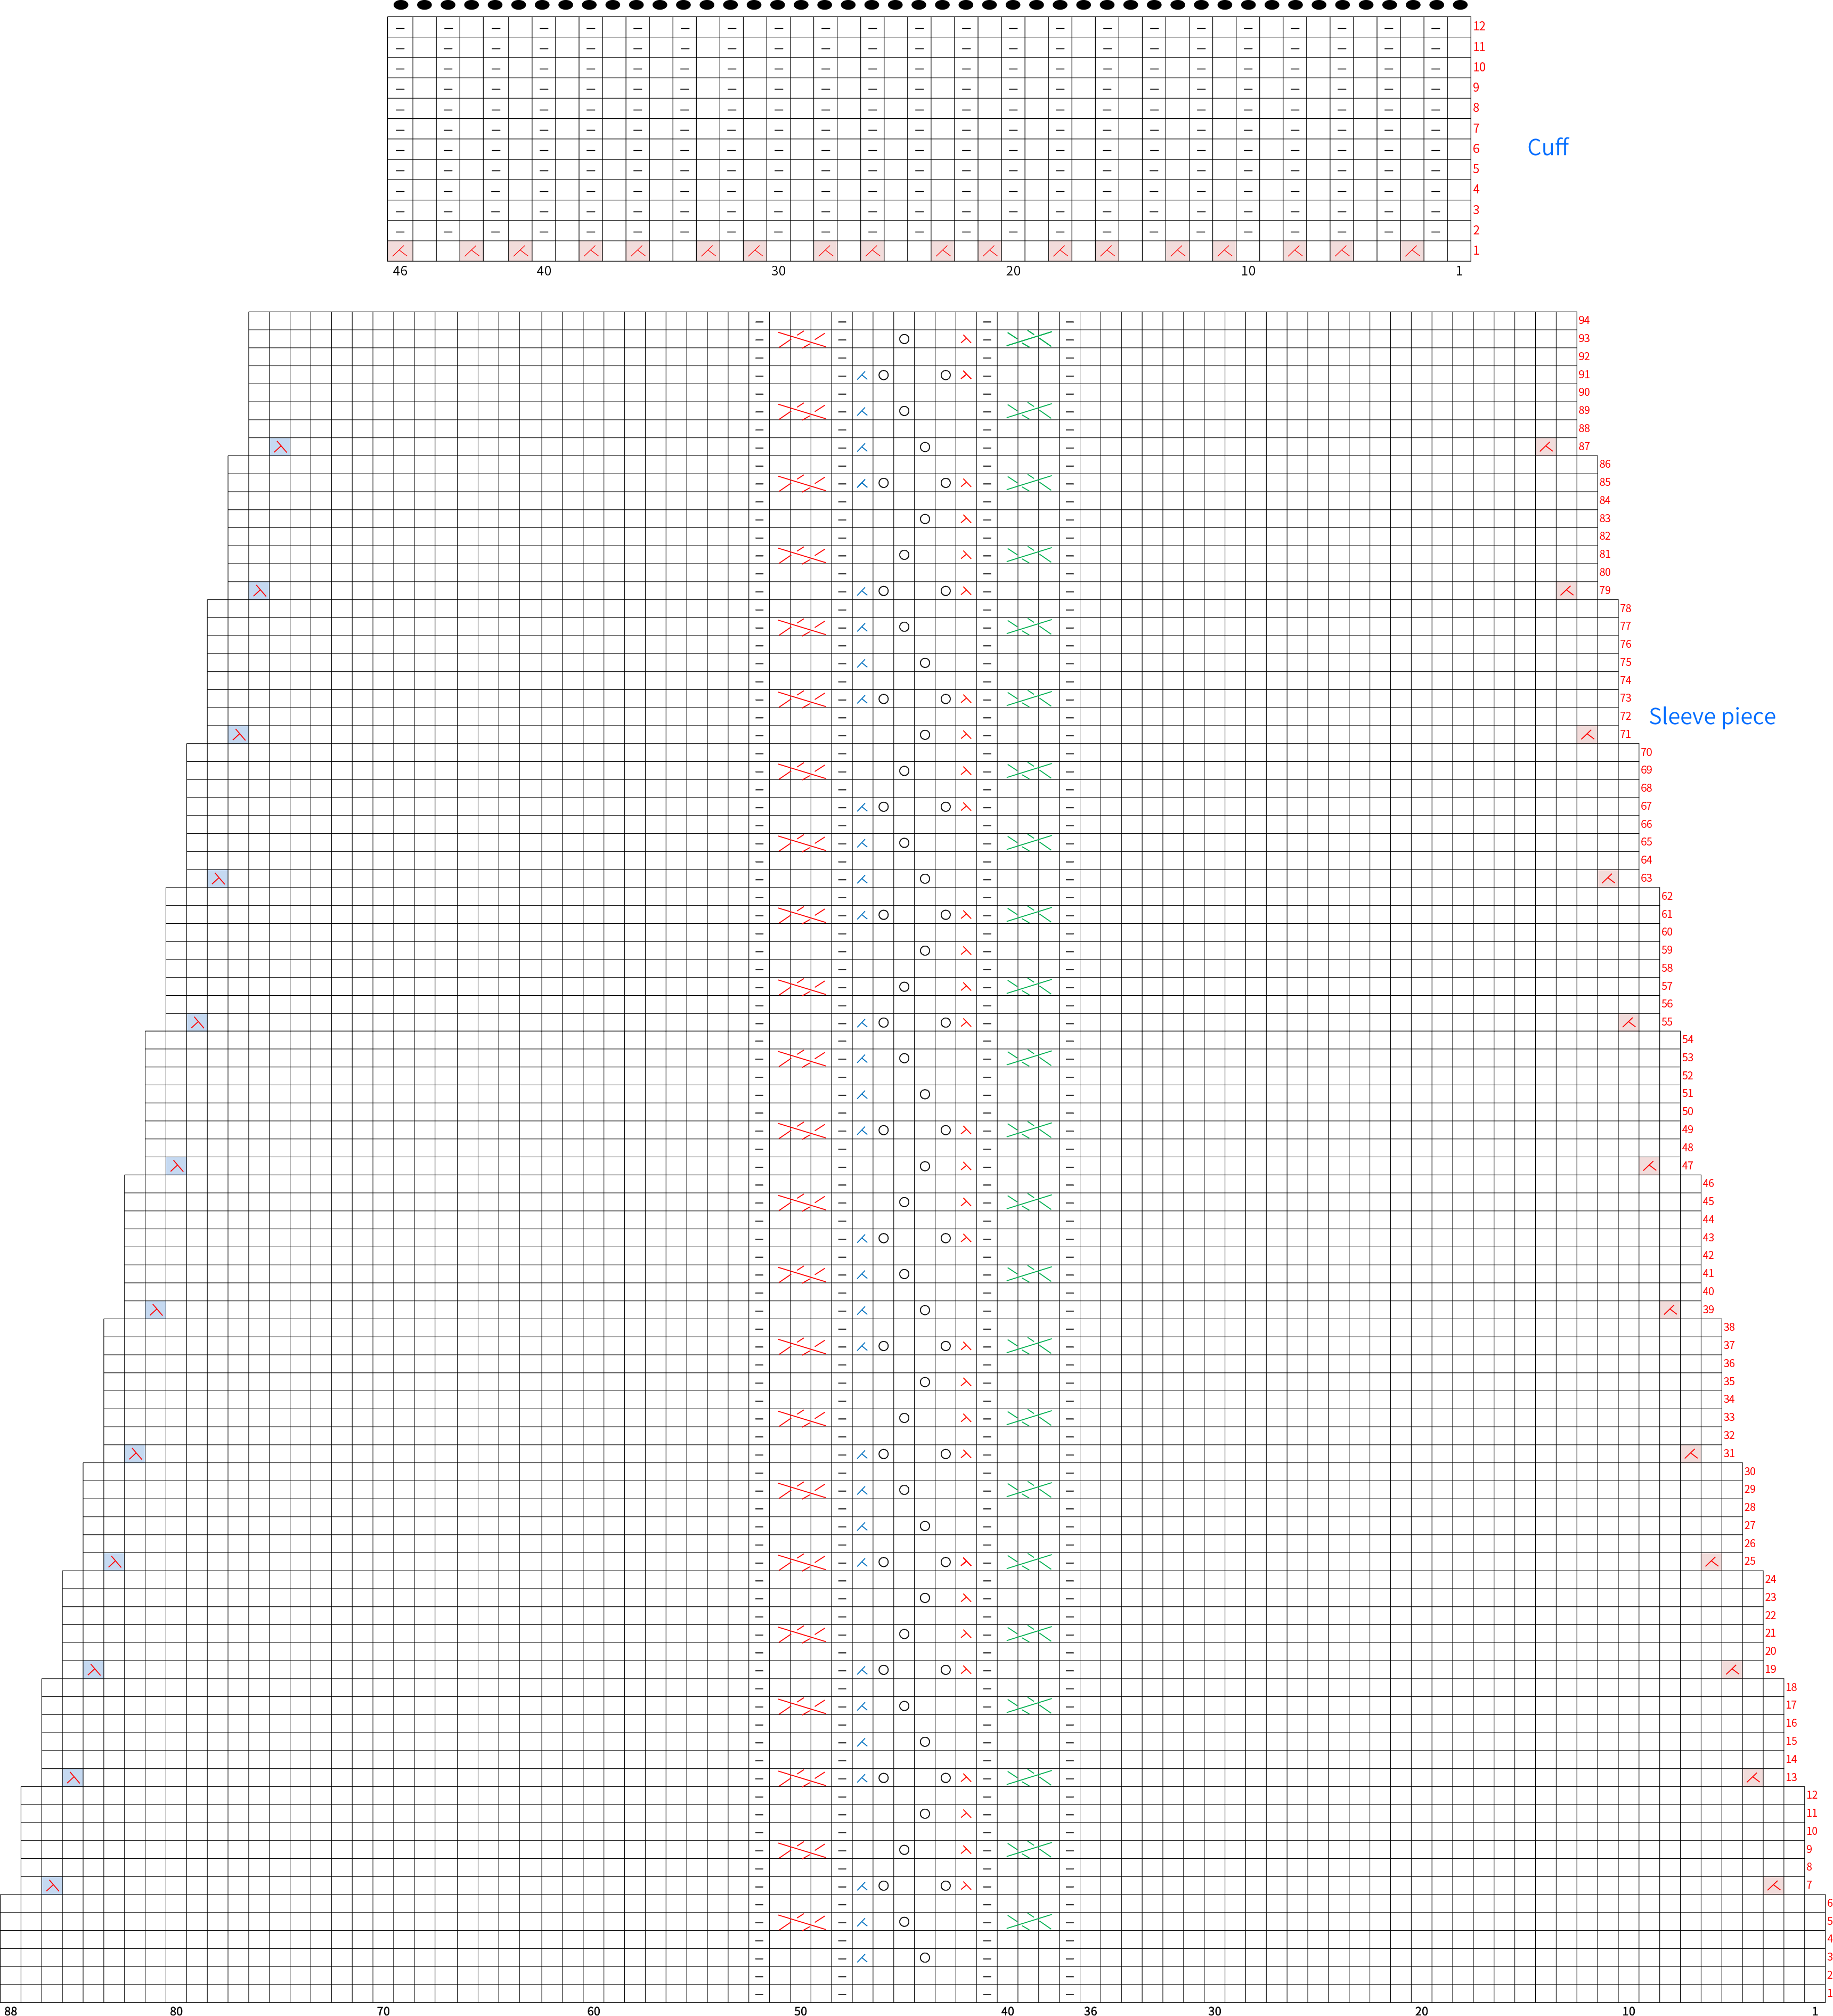
Part 5 SleevesE 77' 51''
Pick up stitches along the armhole and knit the sleeve. The sleeve is worked in the round. Please refer to the video demonstration for more details.
Part 6 Front bandF 88' 05''
Pick up stitches and knit the front band, and make buttonholes on the right front piece. After completing the front band, sew on the buttons at the corresponding positions. Please refer to the video demonstration for more details.

Made by the community