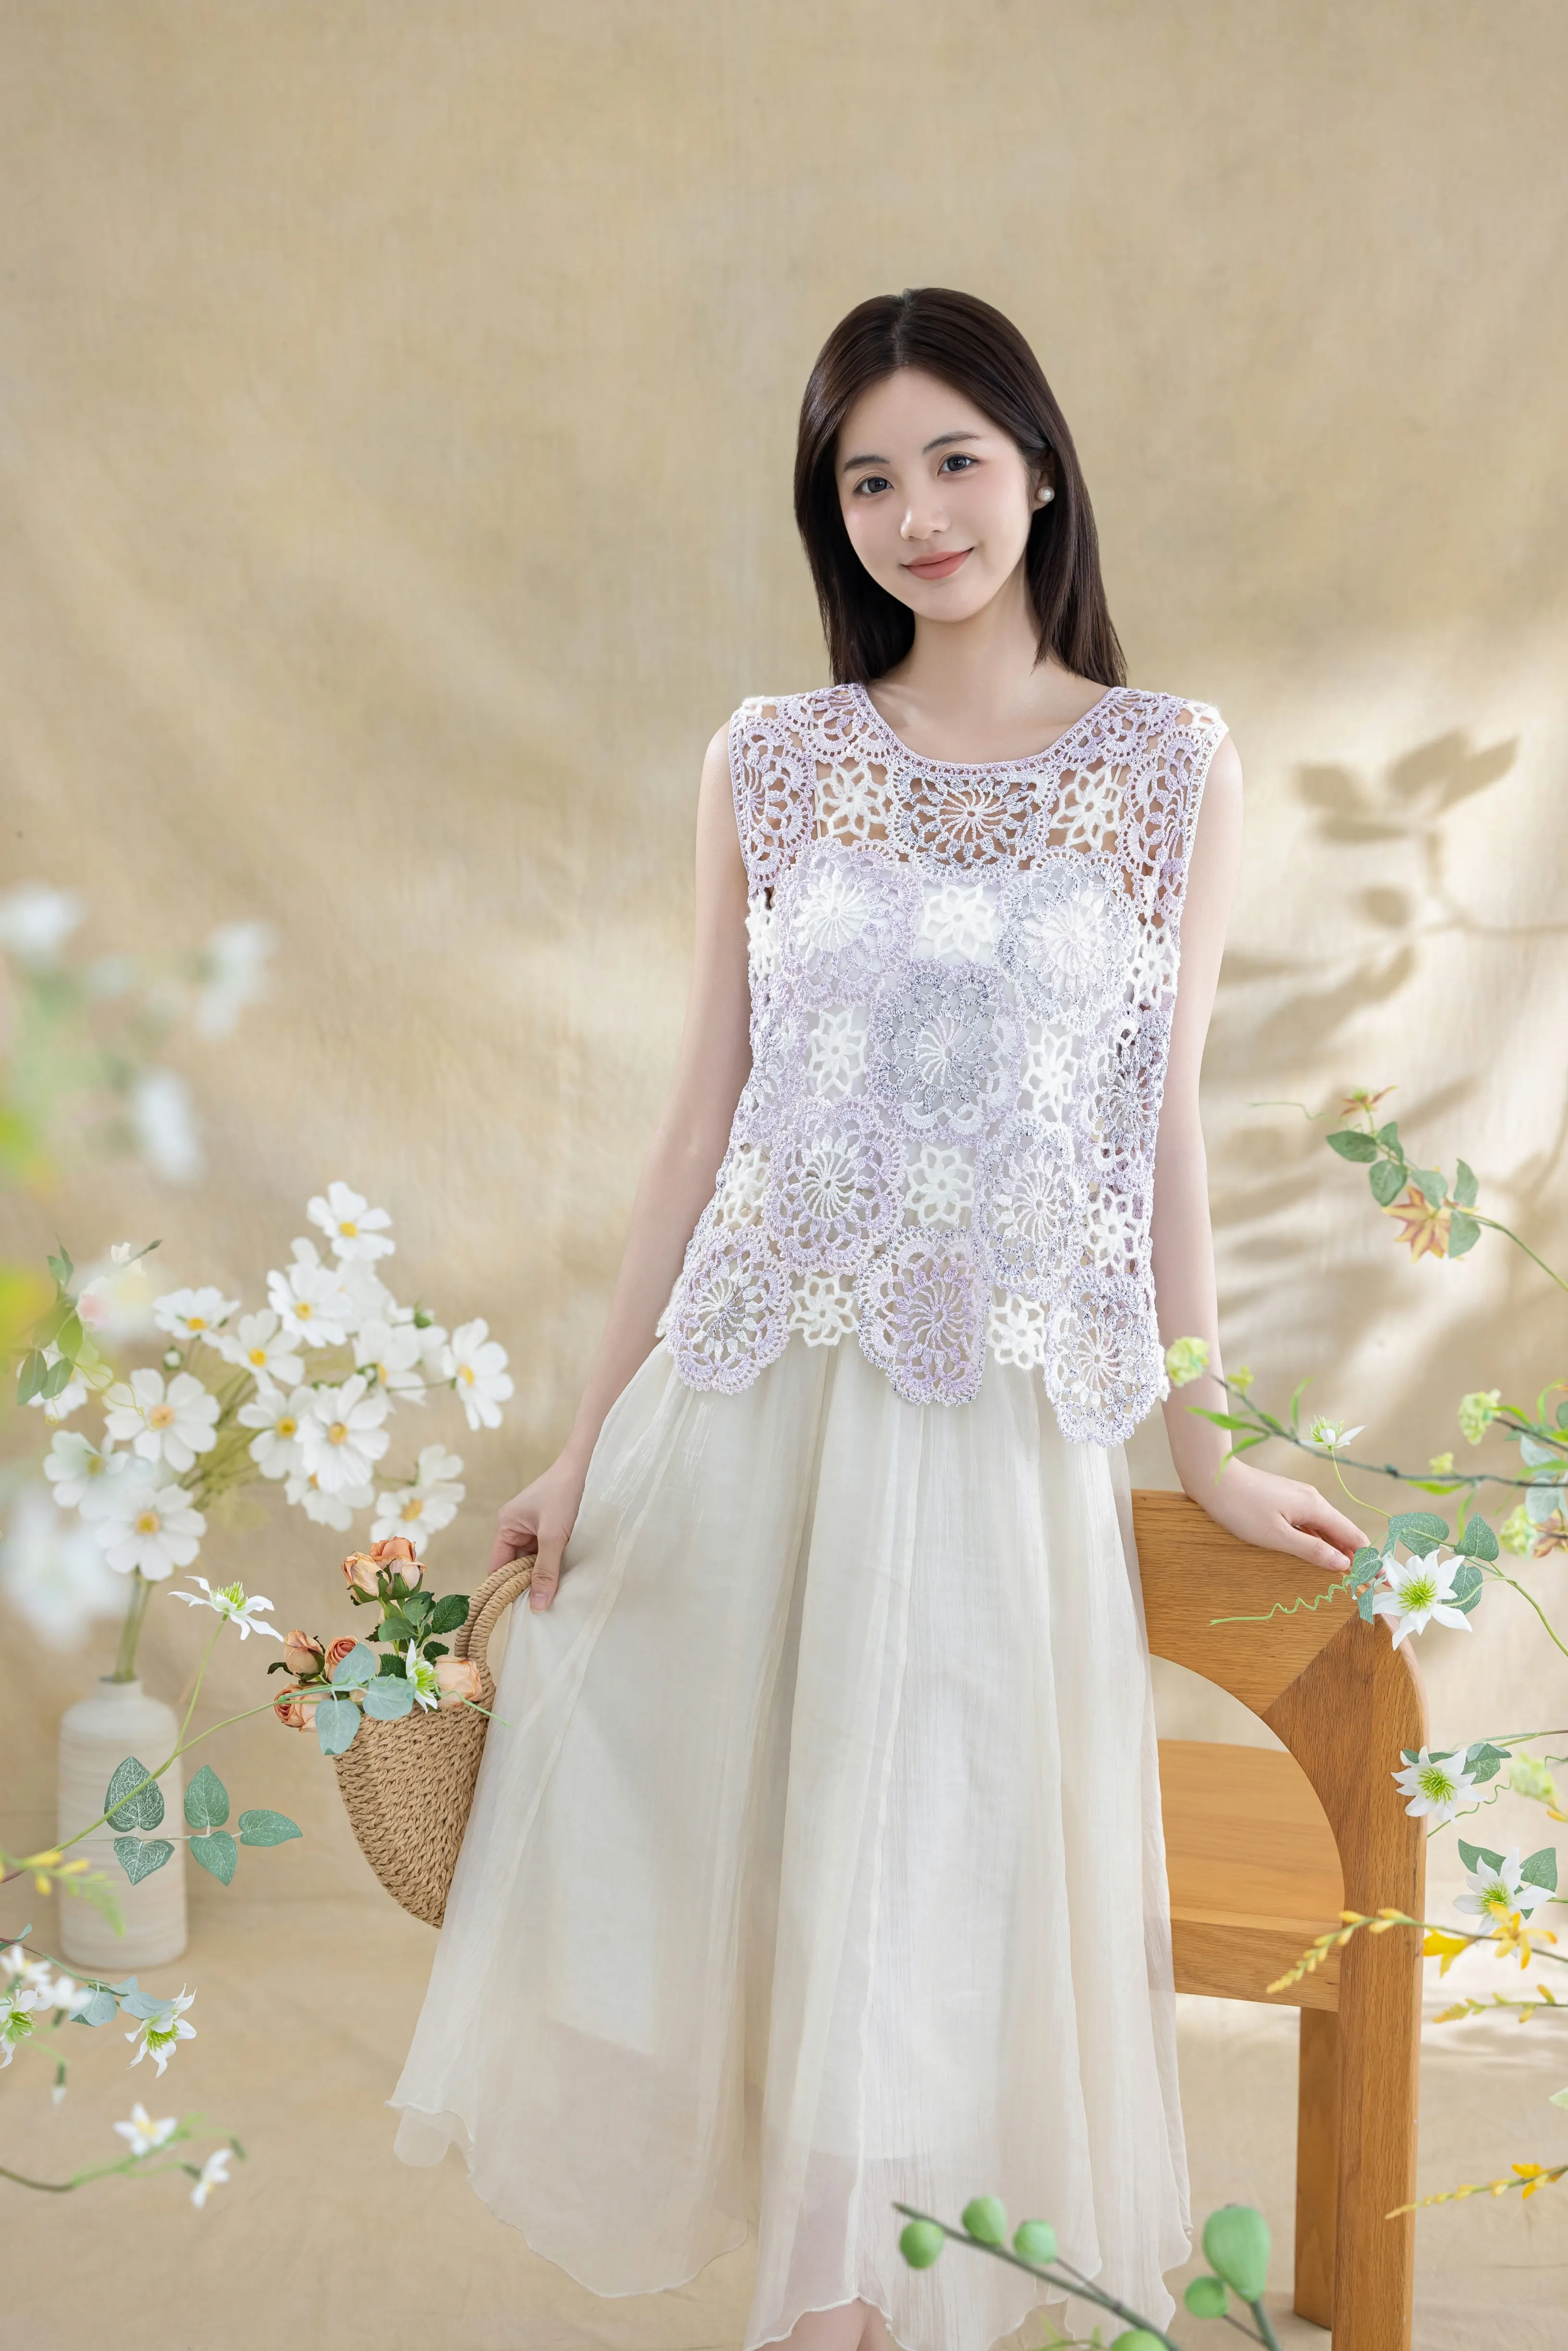
Clothes
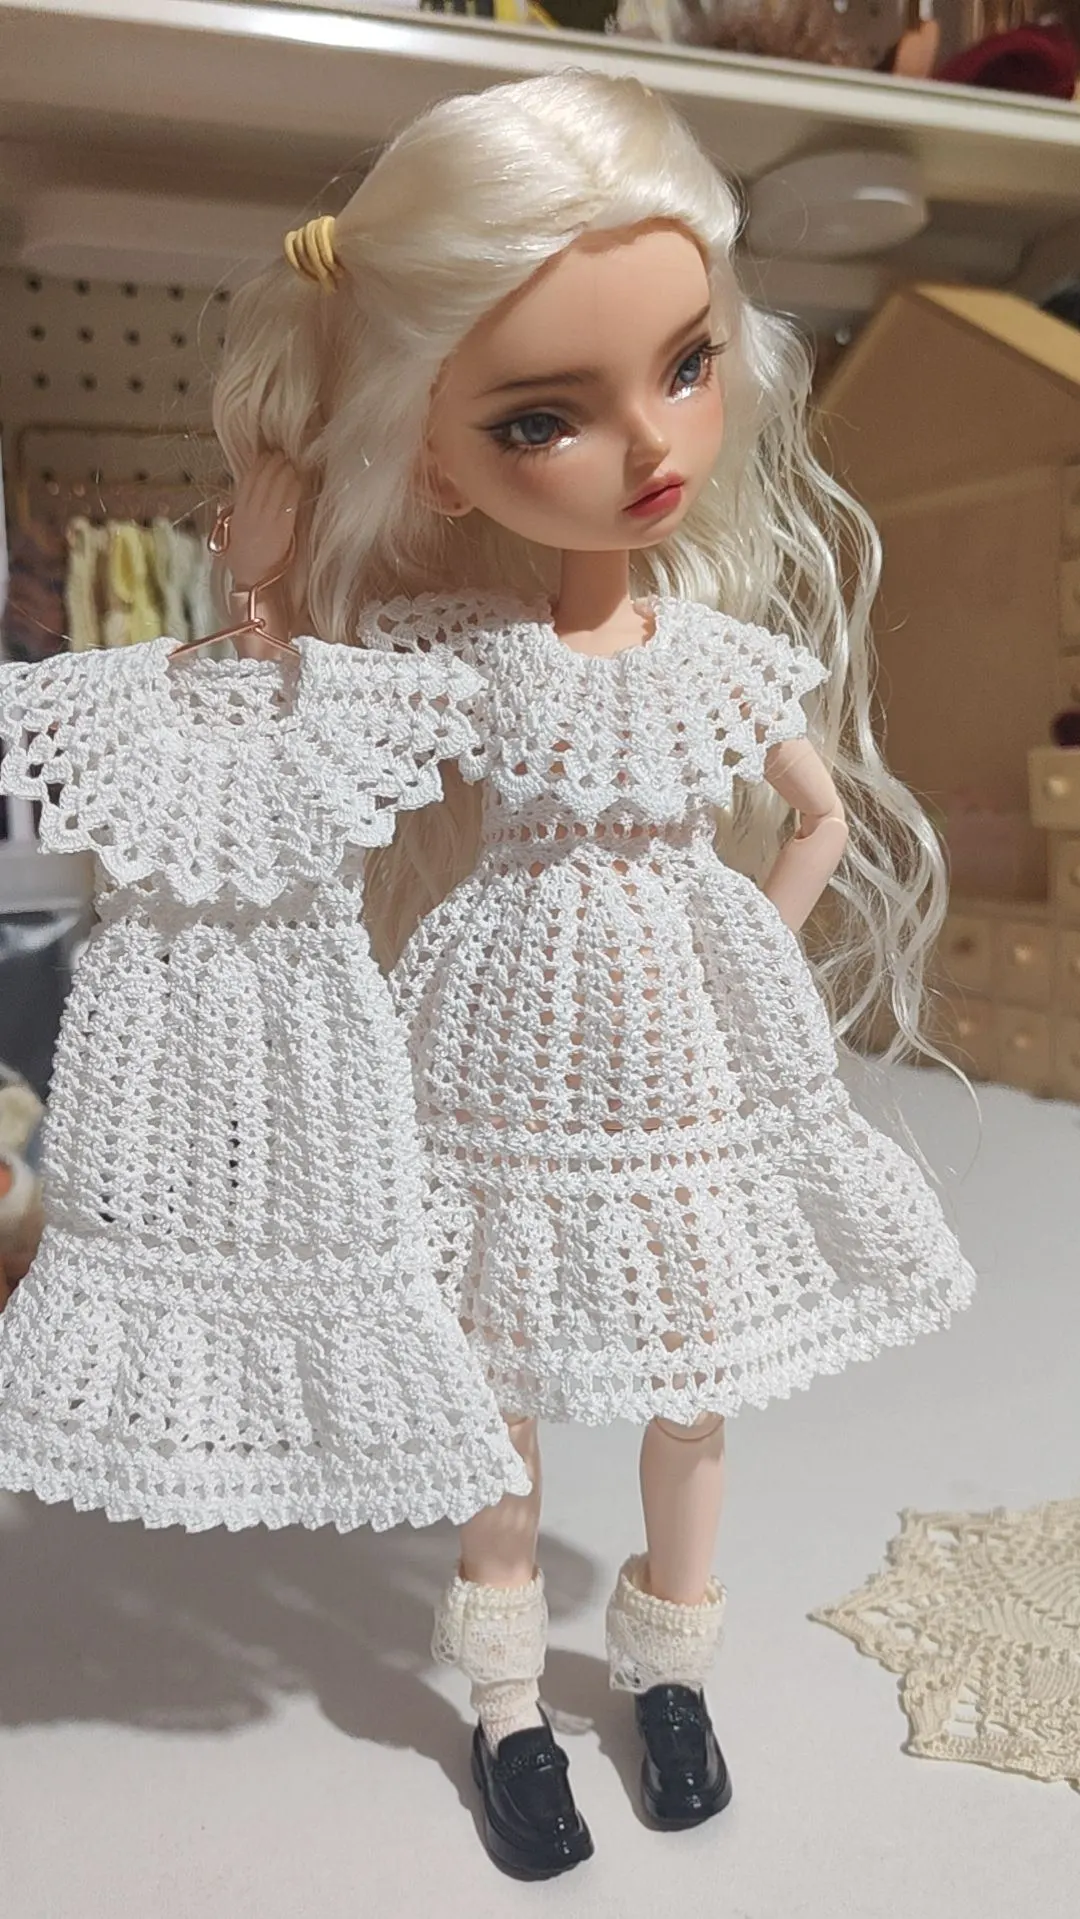
First Love Dress
Project preview
See the finished project
Pattern format
Instructions
Note: Do not copy the dimensions if you're not using the same yarn. The gauge for this pattern is 5 motifs in 5 rows measuring 11x6 cm (measured after wet blocking). Before working, make sure to crochet a swatch to check your dimensions and adjust according to the sample swatch and the yarn you are using.
Crocheting process: This dress starts with the waist pattern. The upper body is crocheted bottom-up, while the lower body is crocheted top-down. Except for the sections above the underarm of the main body which are divided into front and back pieces and crocheted separately, all other parts are crocheted in rounds. At the beginning of each row of all sections, the direction should be changed to maintain the uniformity of the pattern.
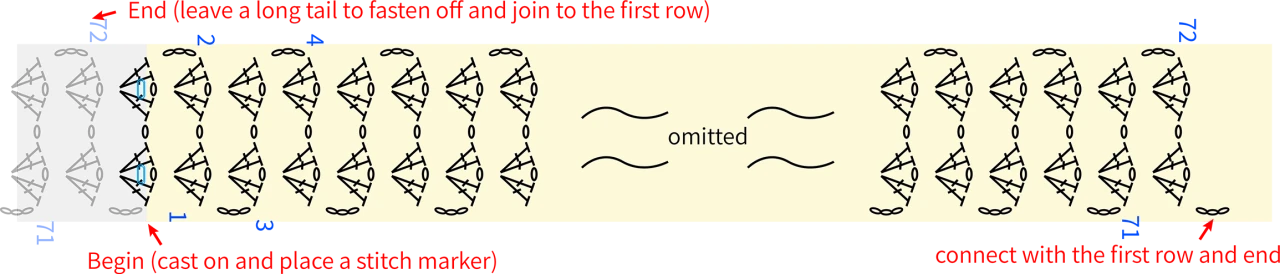
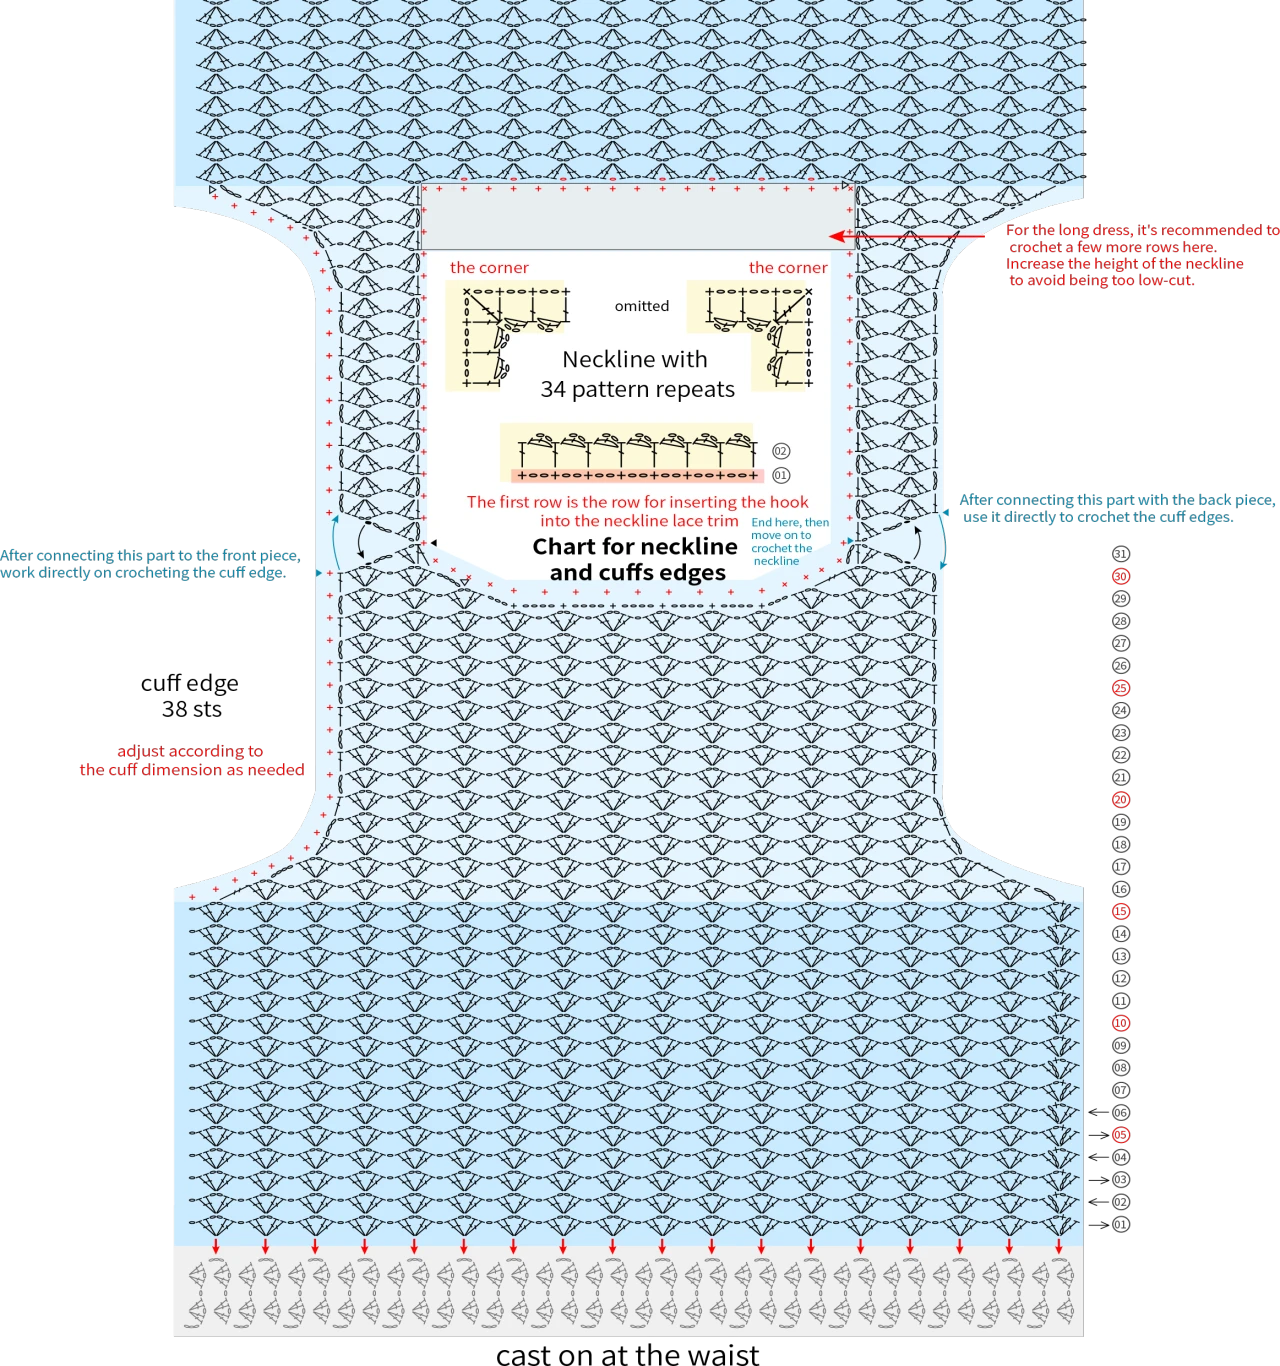
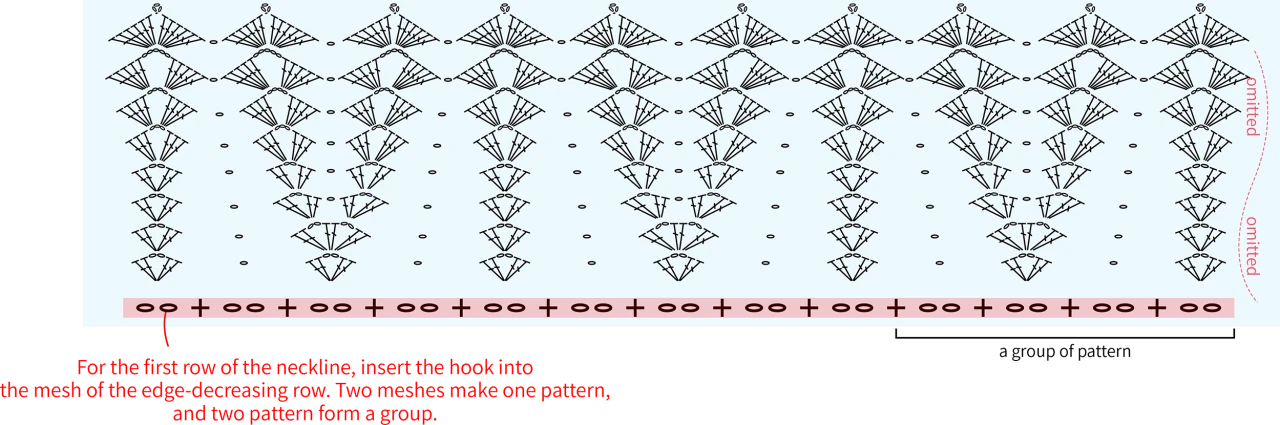
Upper Body: Work the waist pattern vertically for 72 rows, joining the beginning and end. Each pattern repeat corresponds to 2 rows, totaling 36 patterns. The vest portion of the garment should be crocheted according to the chart. The neckline and cuffs are edged with 2 rows (see chart). The lace trim for the neckline (see chart) is worked into the first row of edging, specifically into the spaces formed by one single crochet and two chains. The neckline lace trim consists of 34 patterns in 17 groups.
Skirt Flare: All increases for each section are made in the first row, adding one cluster after every existing cluster.
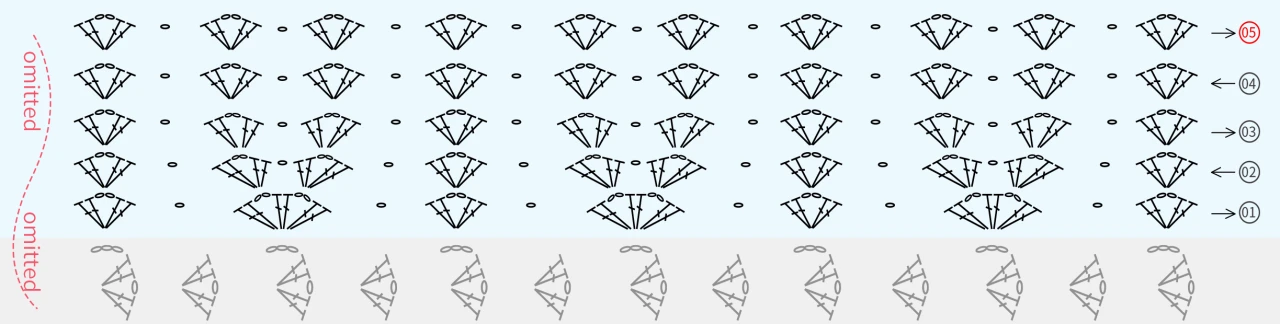
After increasing in Aera 1, you will have 54 clusters over 25 rows. For Area 2, increase clusters (note to add one less cluster on one side of the center seam), resulting in 80 clusters over 8 rows. For Area 3, after completing the increases, you will have 120 clusters over 8 rows. Follow the pattern chart to finish crocheting this section.
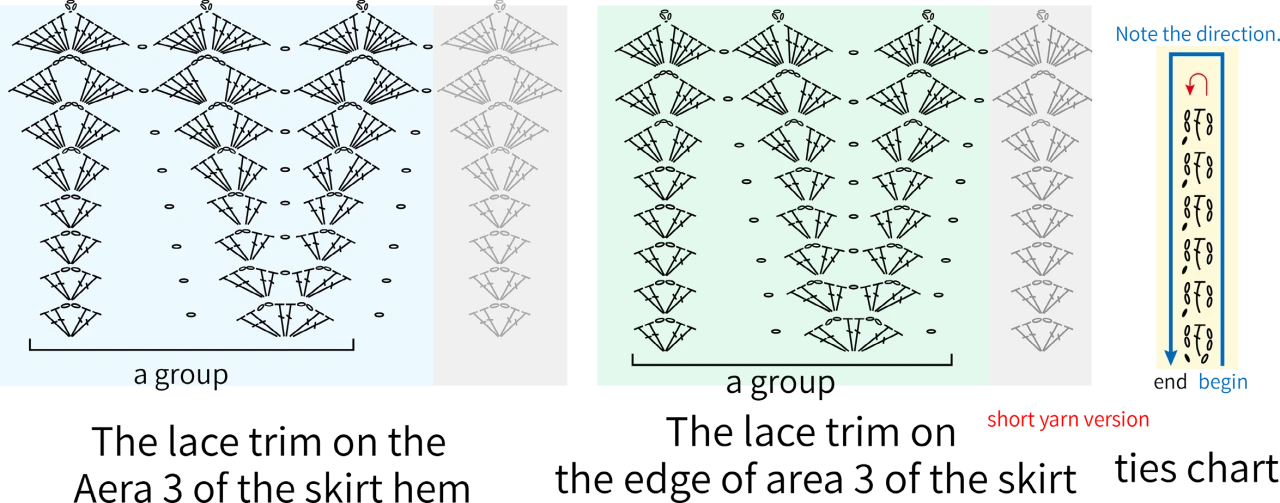
The cluster pattern for Area 3 matches the stitch count of the neckline. Remaining yarn can be used for a drawstring.
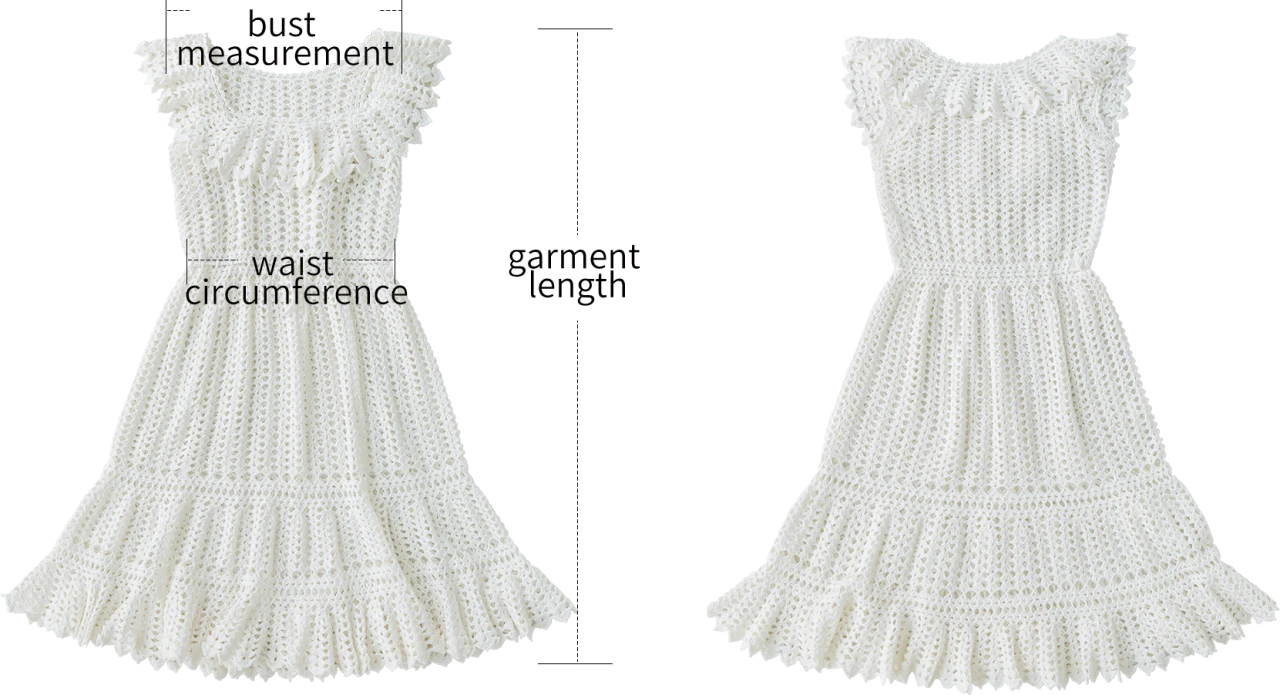

Note: Hand-measured, with an error margin of 1-2 cm.
Due to variations in individual tension, the size of the sample is for reference only.
Materials: Morandi flax Lace yarn
Hook: 3.00 mm crochet hook
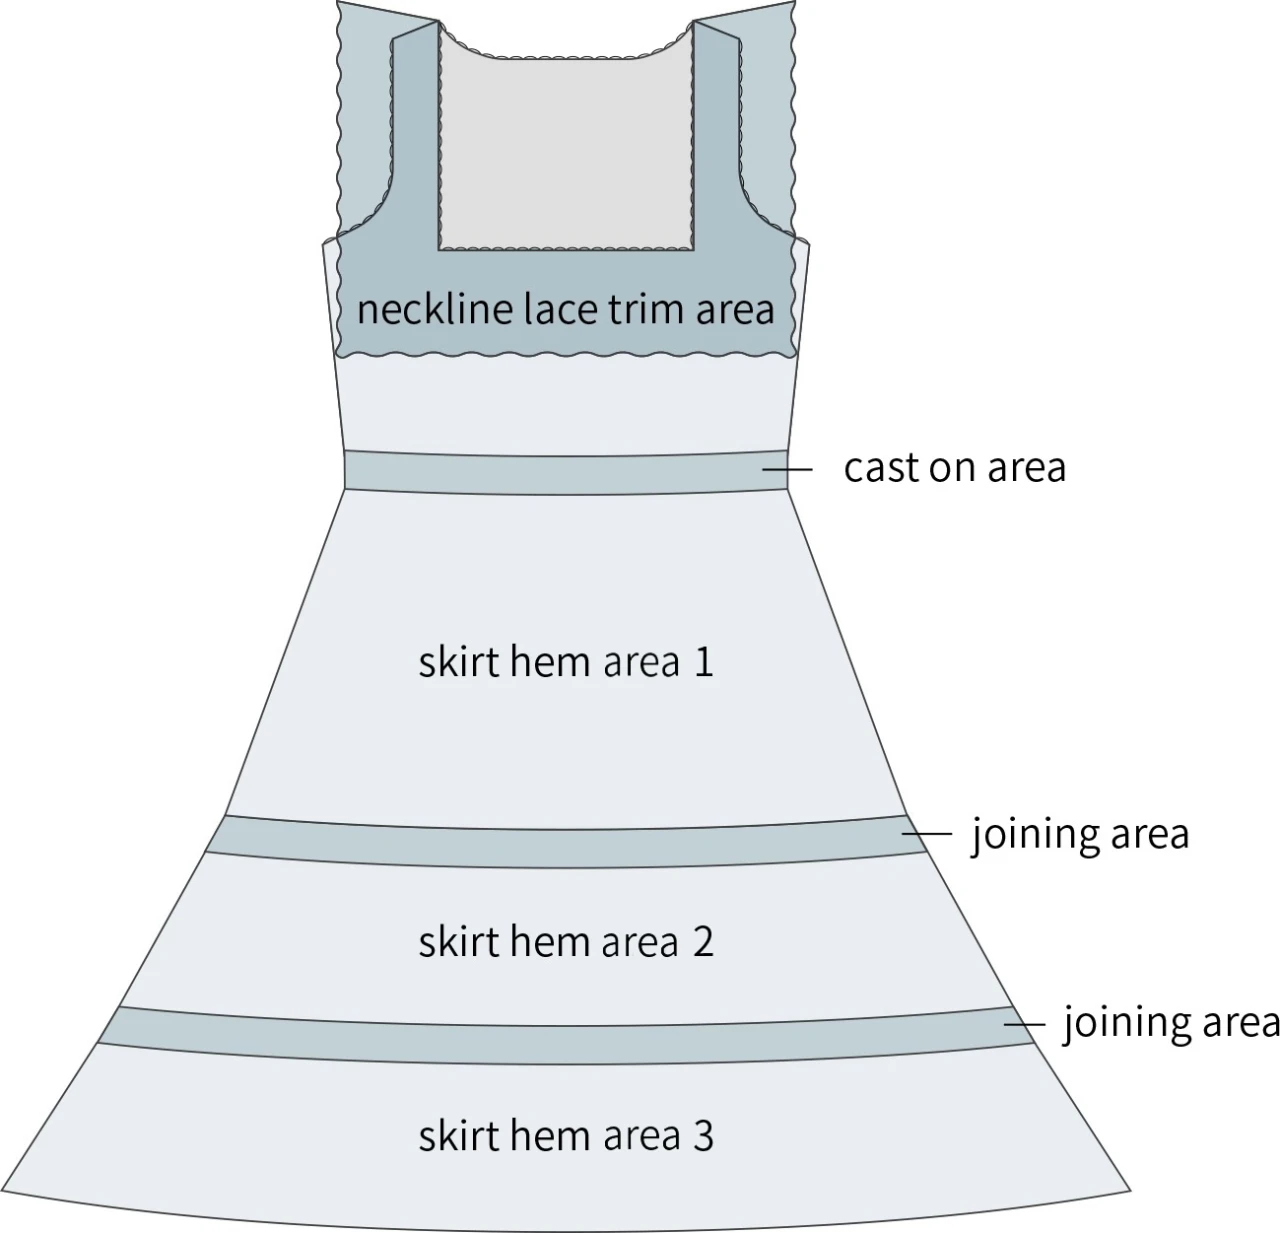
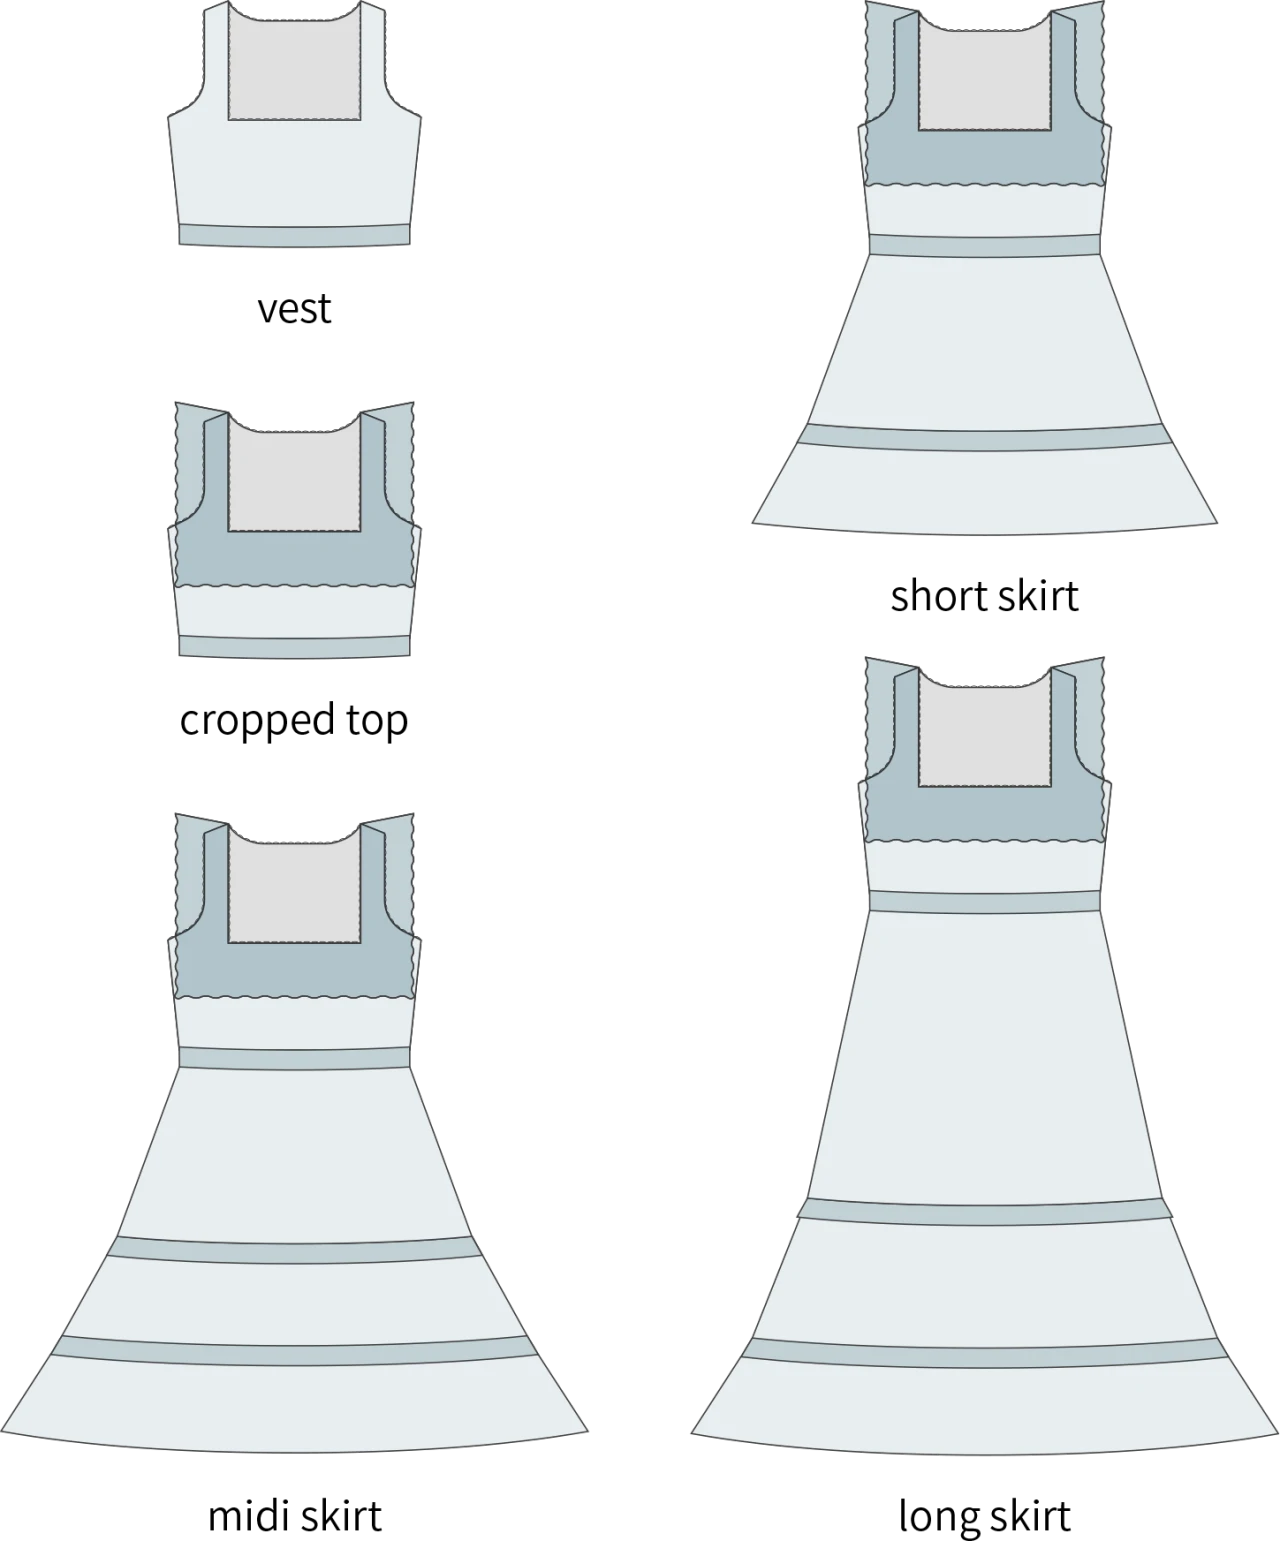
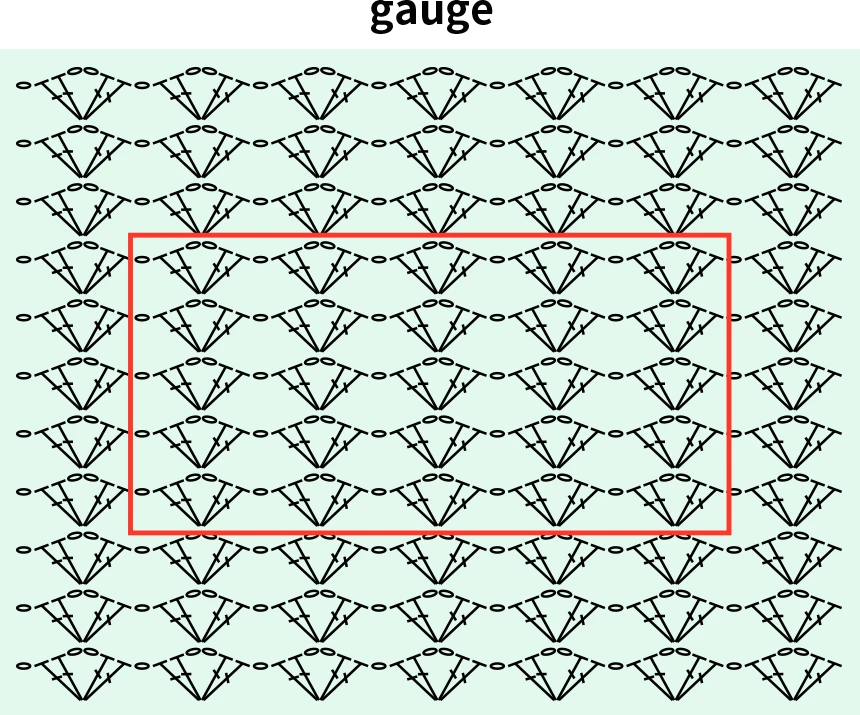
Chart Key


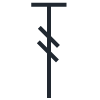


Note: This pattern is making in Chinese crochet pattern terms, and the stitch name is written using American terminology. All measurements in charts are in cm.
Part 1 Waist Cast On Area(For the small size, start with 72 rows)
Waist lace edging cast on:
1. Use two stitch markers to indicate the stitch placement for the first row. After completing the required number of rows, break the yarn and prepare to join the beginning and end of the first row.
2. Unravel the last row back to three chain stitches before two double crochets. Remove the left stitch marker (the second one at the start). Using a smaller crochet hook, thread the loop and working yarn through the loop hanging from the original stitch marker.
3. Pull tight and then work one chain and two double crochets twice until the next motif. Again, using a smaller crochet hook, thread the loop and working yarn through the loop on the right stitch marker (the first one at the start), pull tight and work one chain and two double crochets.
4. Complete by joining the top of the three-chain turning chain with a slip stitch to the first double crochet of the first row.
Part 2 Upper Body Pattern Chart
The body section is crocheted in rounds, working back and forth, while the shoulder-parts are worked back and forth in rows. The neckline and cuffs each have 2 rounds of edging crochet. The red stitches indicate the entry position for the first round.
Part 3 Neckline Lace Trim
The position of the starting chain can be crocheted according to the method for the body section, or you can crochet according to your own habit.
Part 4 Chart for increasing stitches in Area 1 and Area 2 of the skirt hem
For other rounds, work even.
Part 5 Joining Area

Part 6 Area 3 of the skirt, ties
Made by the community