Clothes
Flora Vest
Project preview
See the finished project
Pattern format
Instructions
Watch and follow
Video tutorial
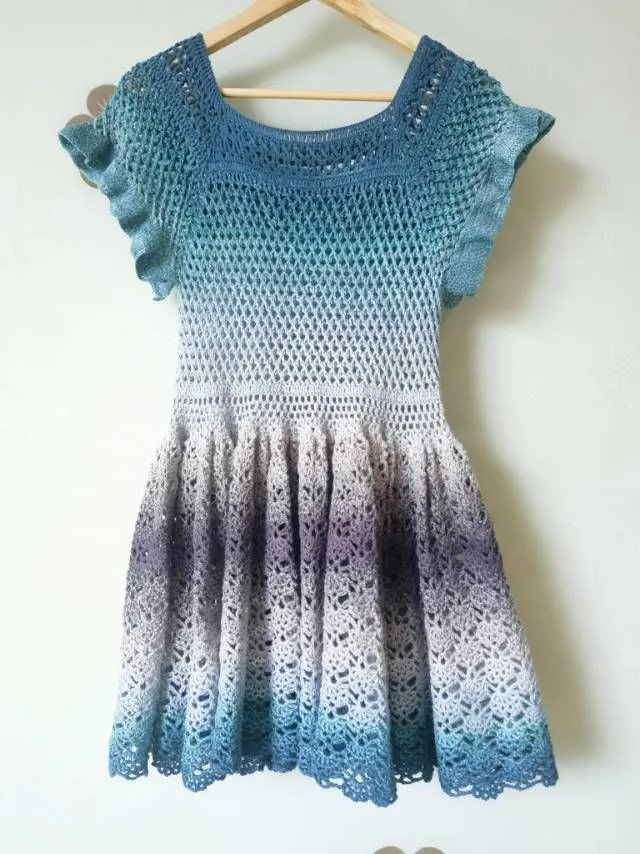
This vest is made up of the front body, back body, underarm motifs, shoulders, hems, neckline edging, and flutter sleeves. First, crochet the front and back bodies and the underarm motifs. Then, crochet the shoulders and join them together. Next, crochet the hems. After that, finish the neckline edging. Finally, crochet the flutter sleeves.
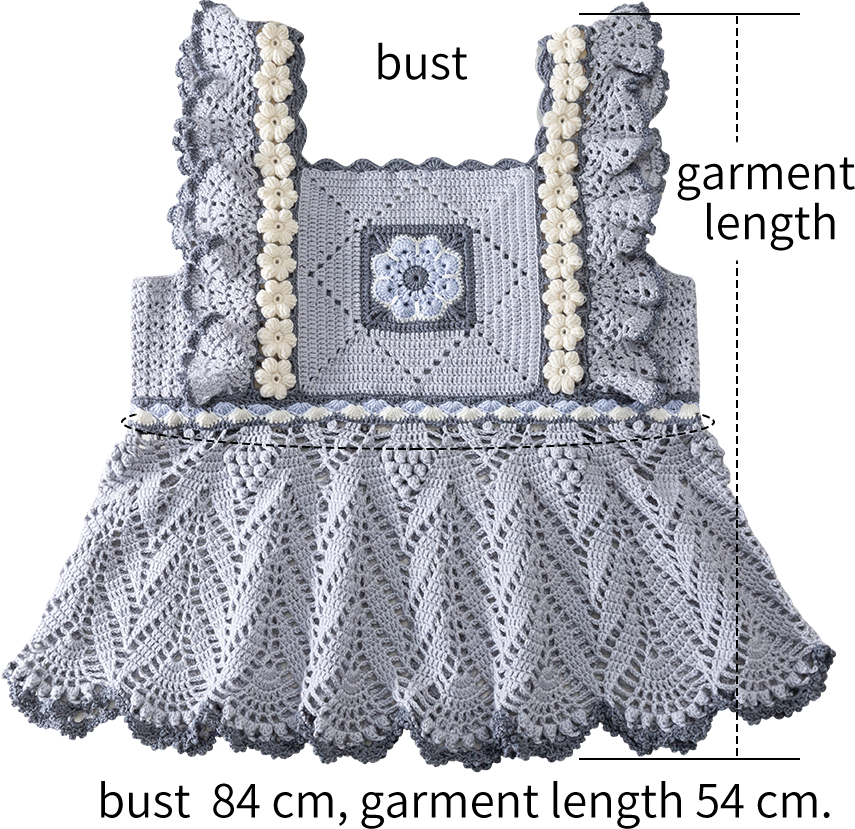
The handcrafted measurements may have an error of 1 to 2 cm. Due to variations in individual tension, the size of the sample is for reference only.
Materials: Susan's Family Morandi 4#
Hook: 3.00 mm crochet hook

Chart Key













Note: This pattern is making in Chinese crochet pattern terms, and the stitch name is written using American terminology. All measurements in charts are in cm. 
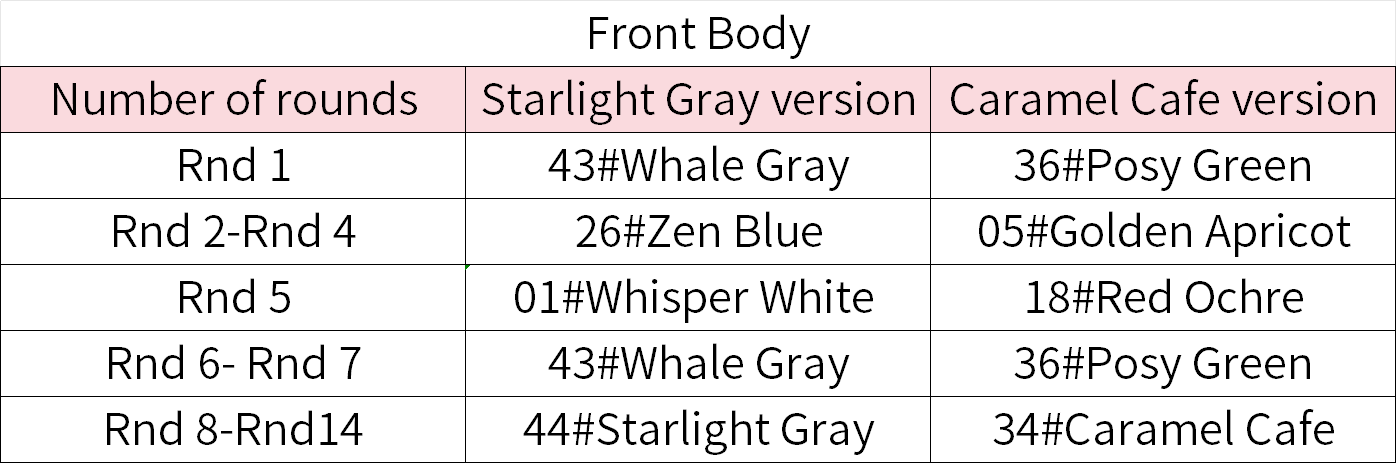
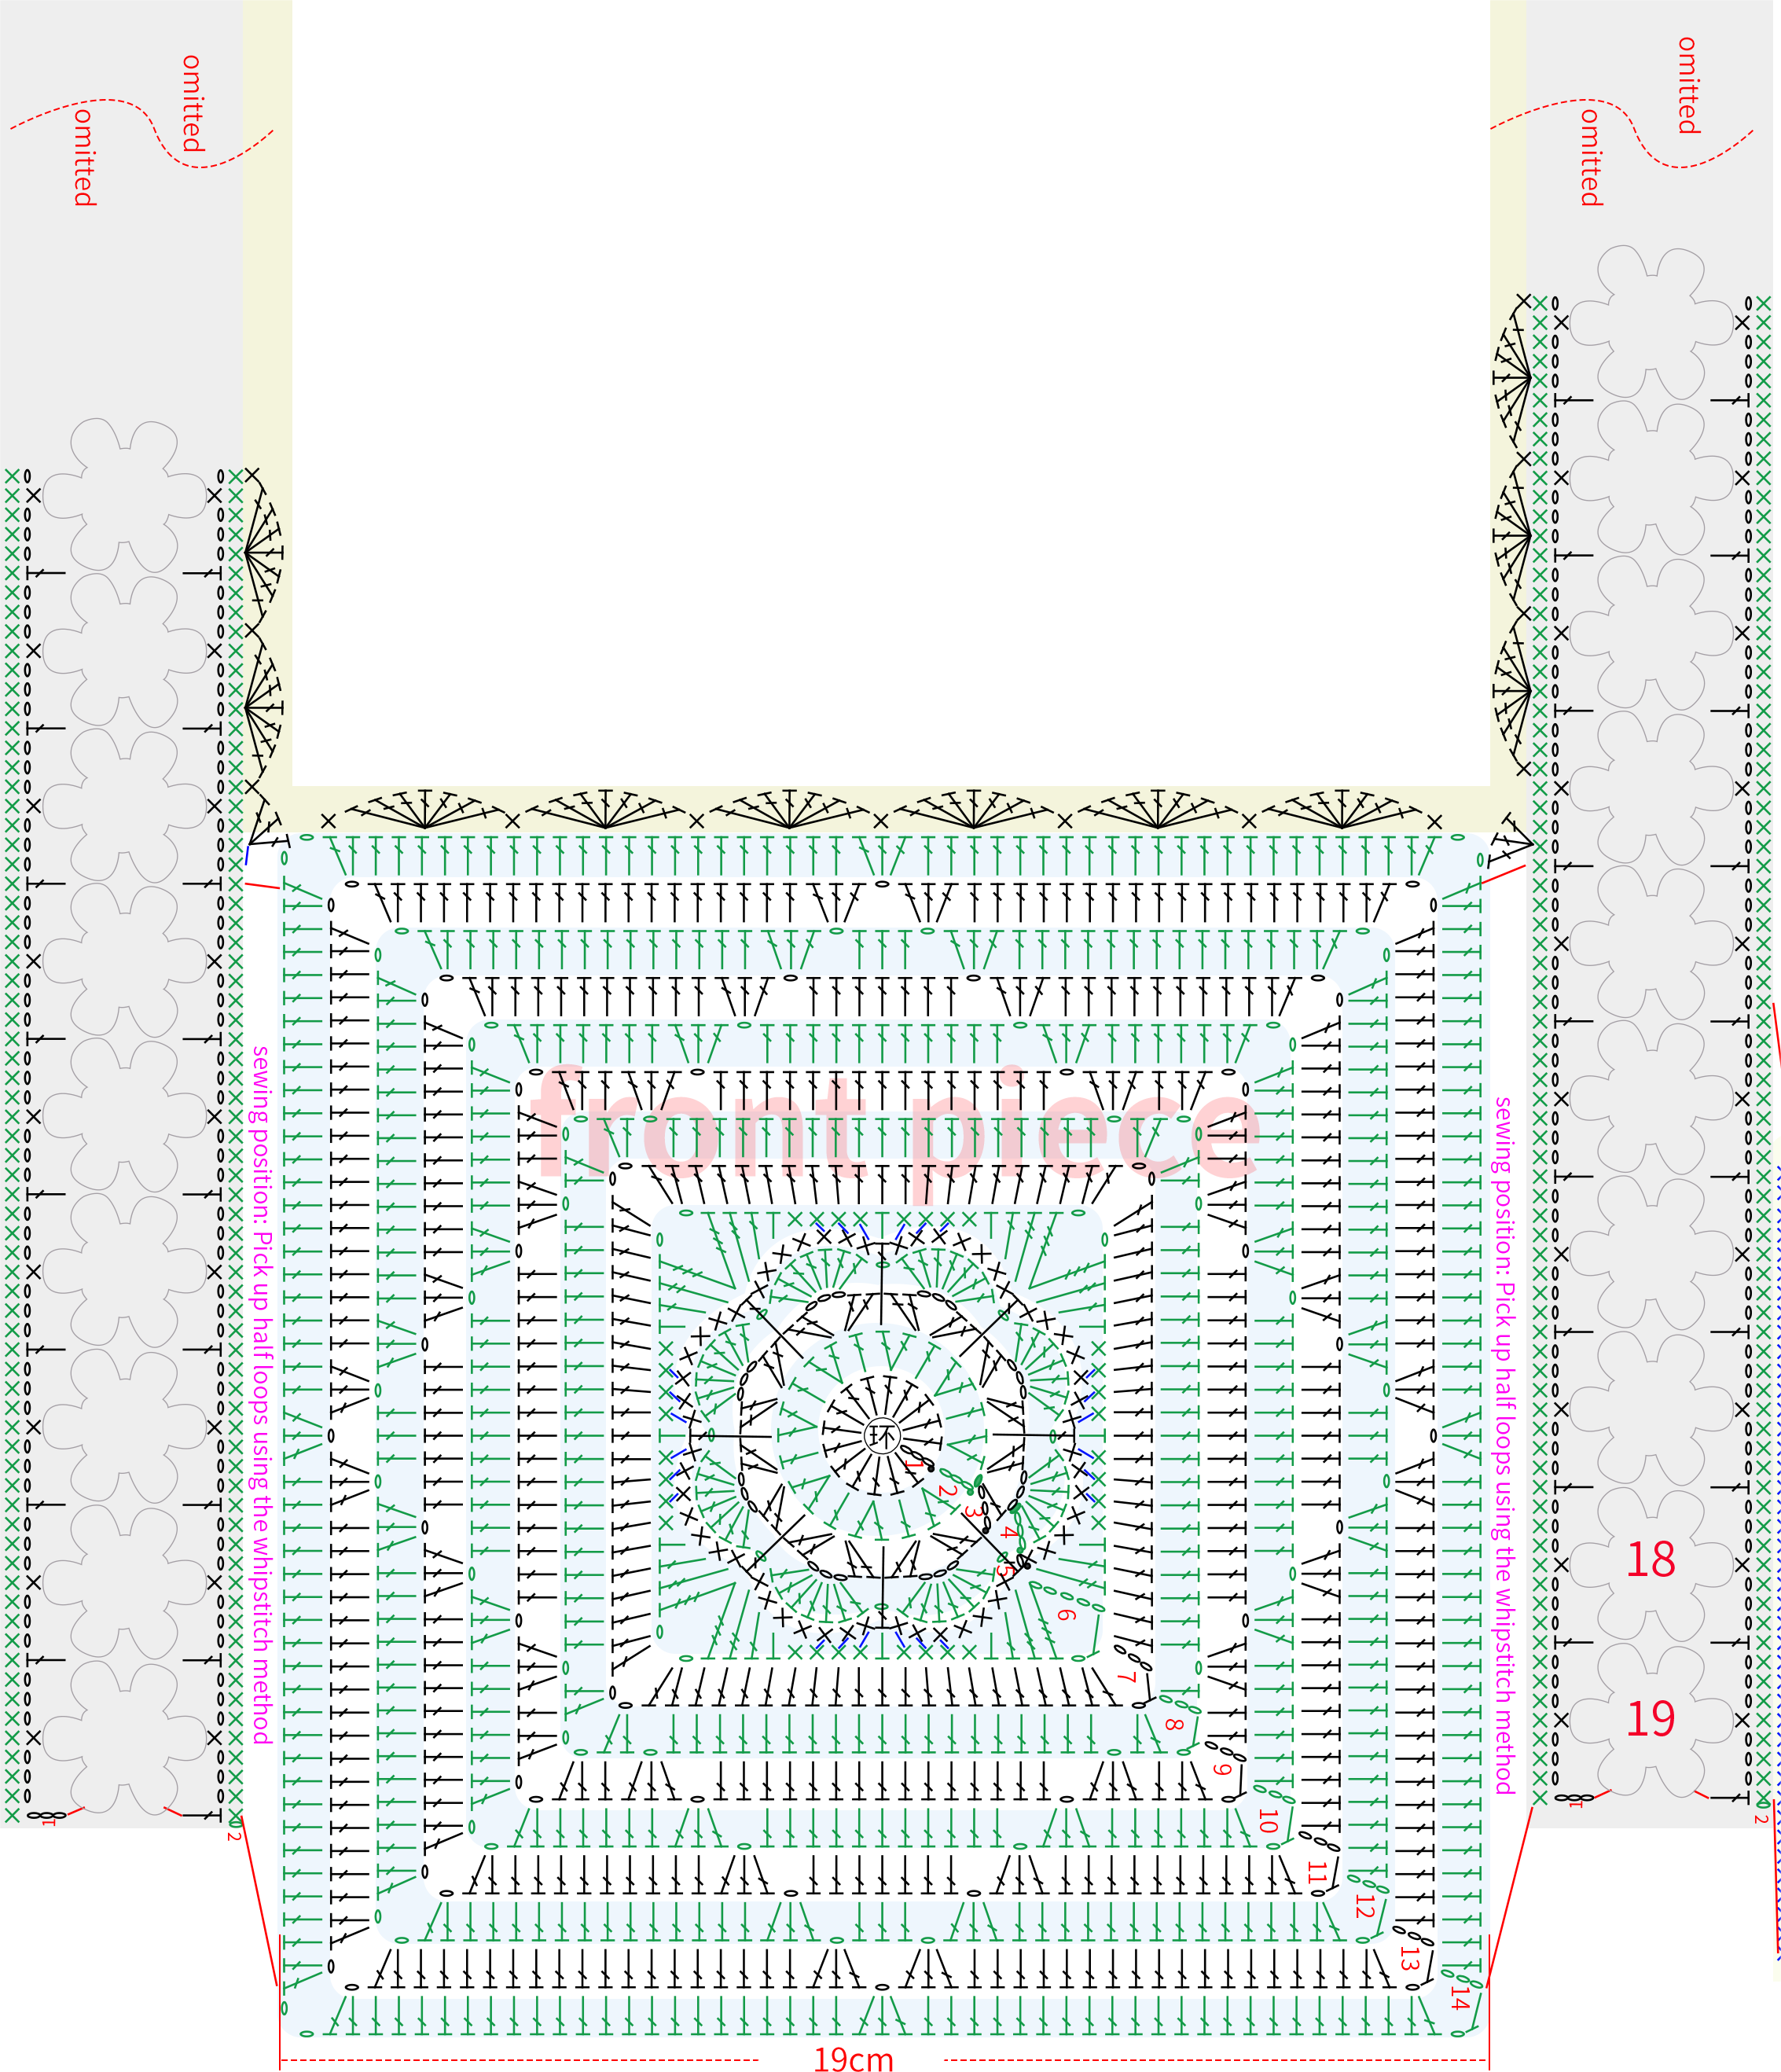
Part 1 Front BodyA 01' 09''
Starting with a magic ring, crochet in rounds counterclockwise along the starting chain. Please refer to the video demonstration for more details.

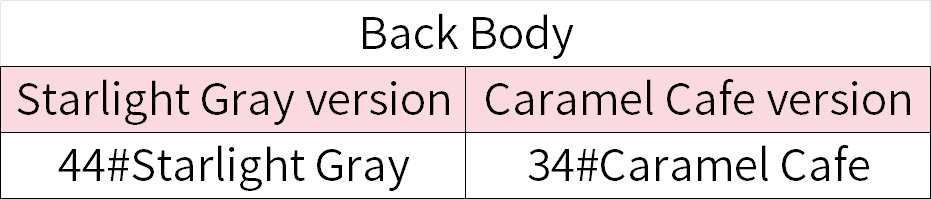
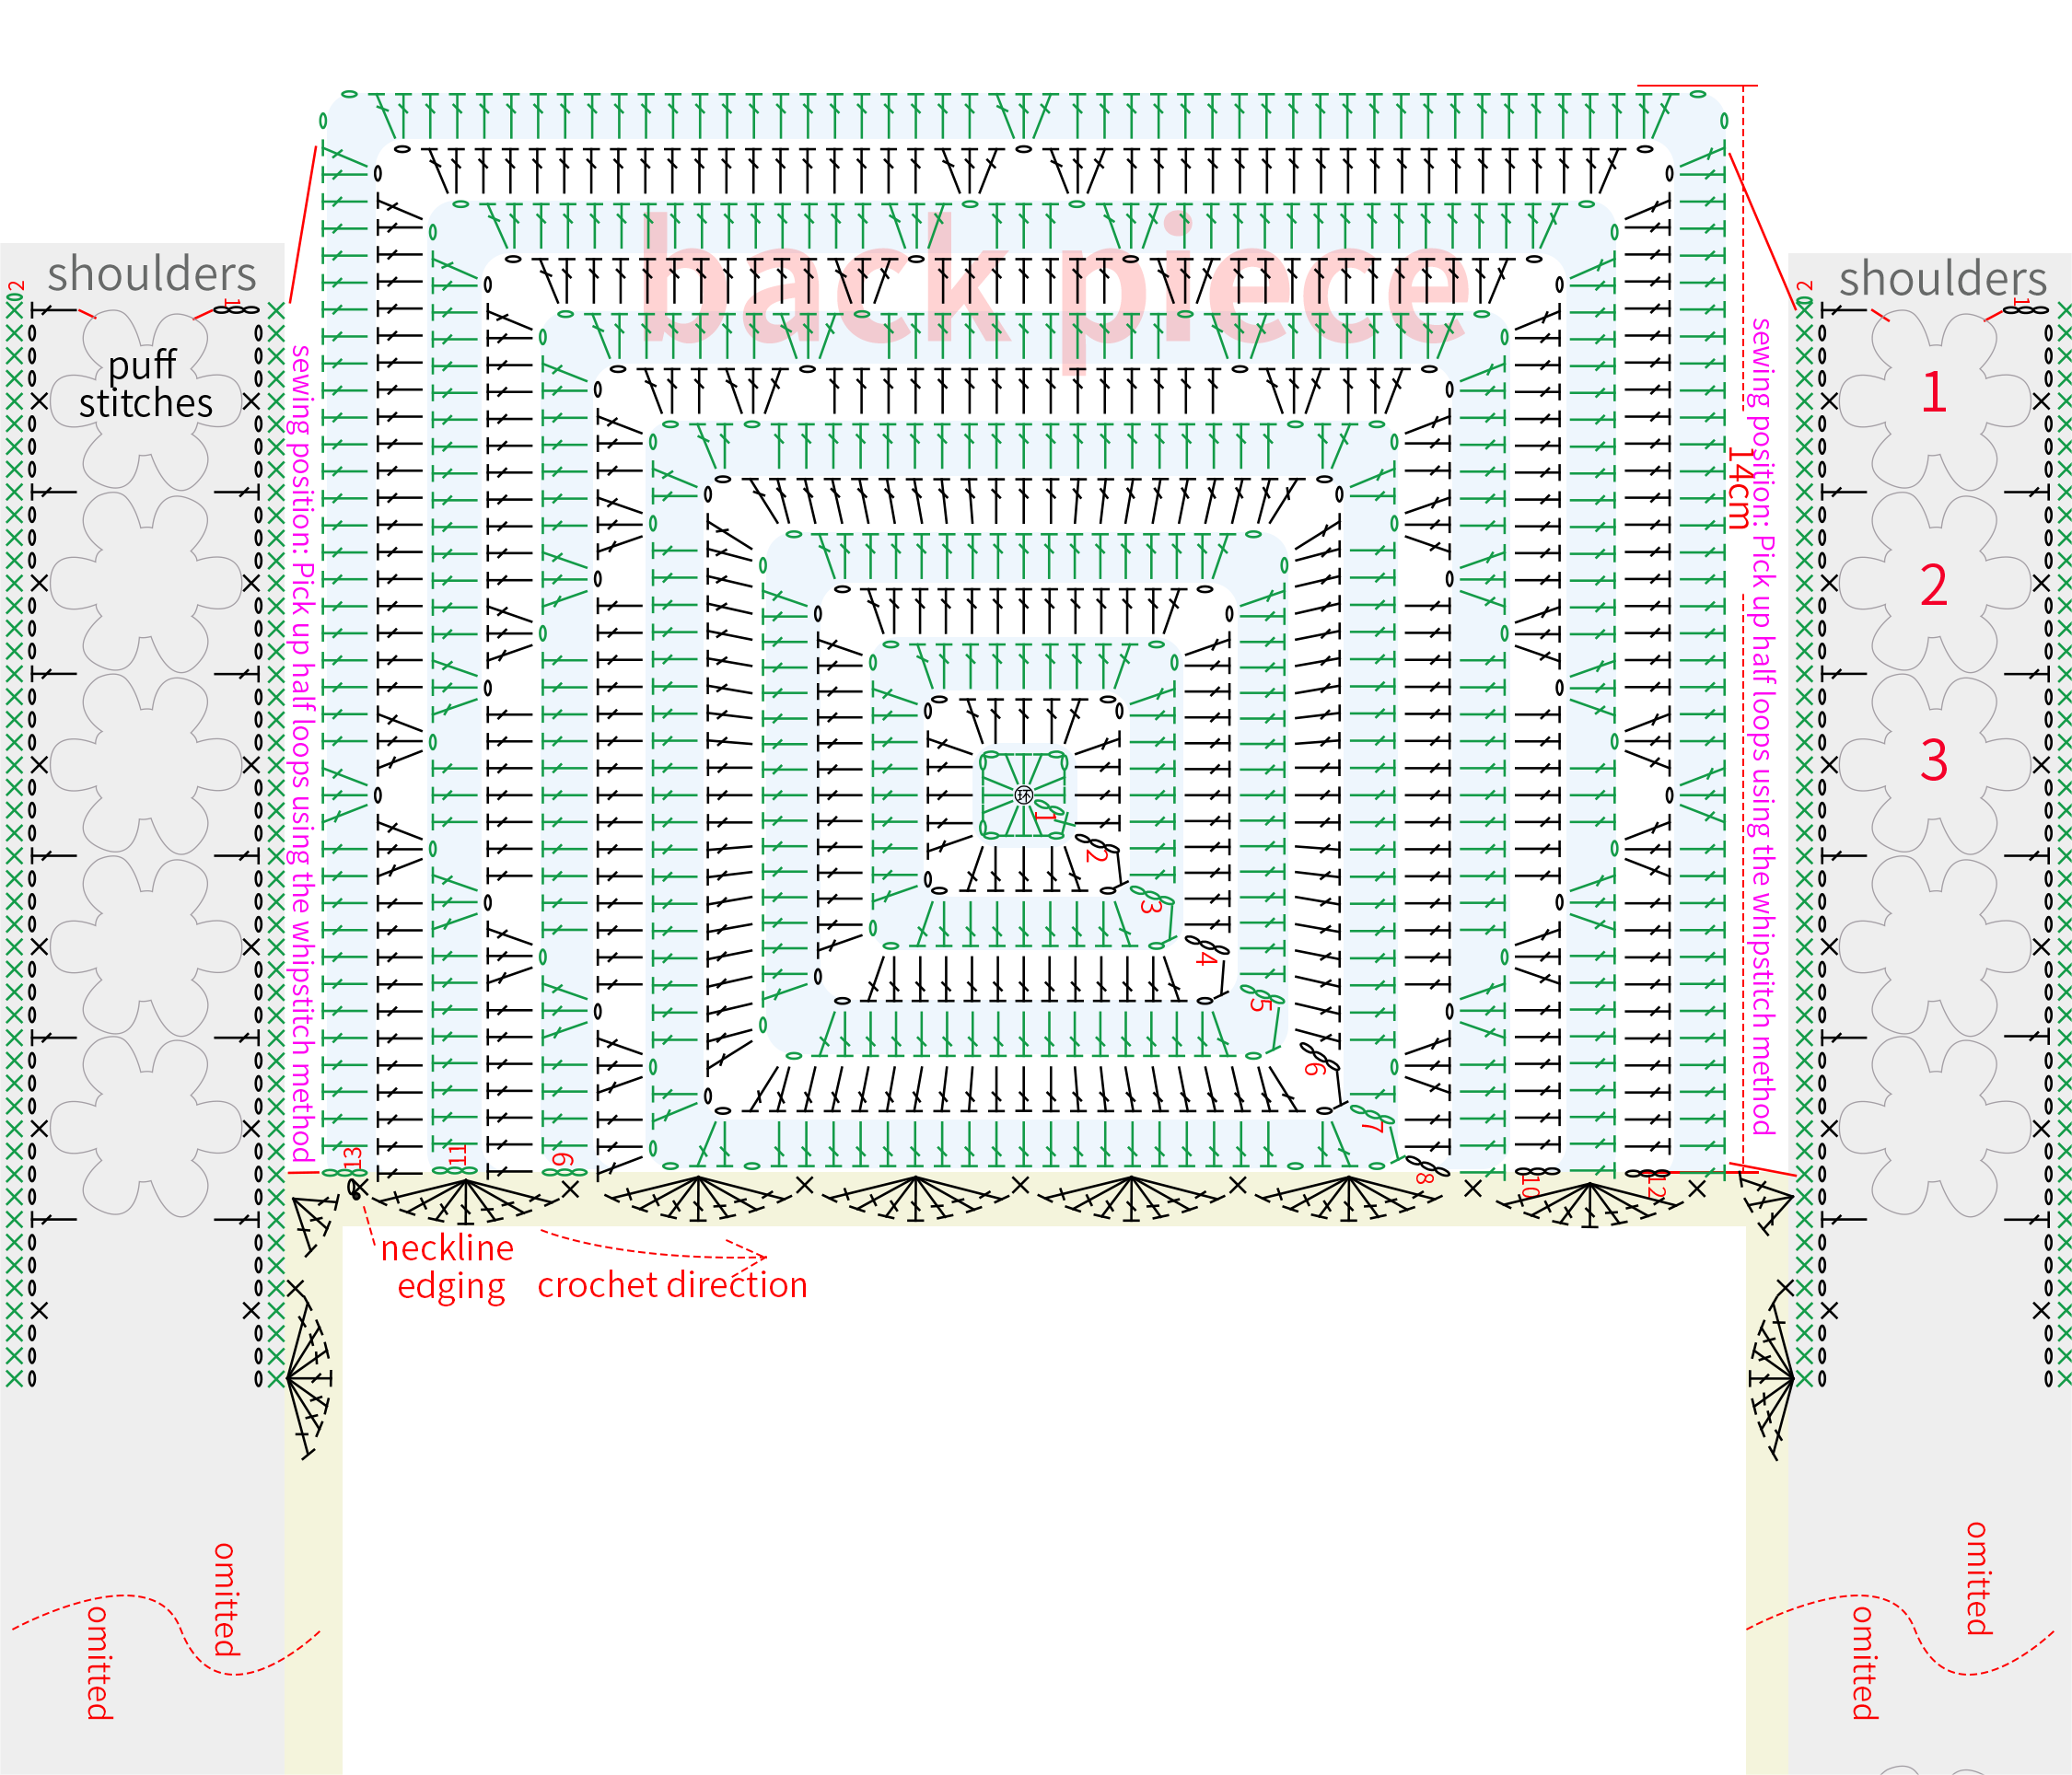
Part 2 Back BodyB 19' 59''
Starting with a magic ring, first crochet in rounds counterclockwise, then work back and forth.Please refer to the video demonstration for more details.
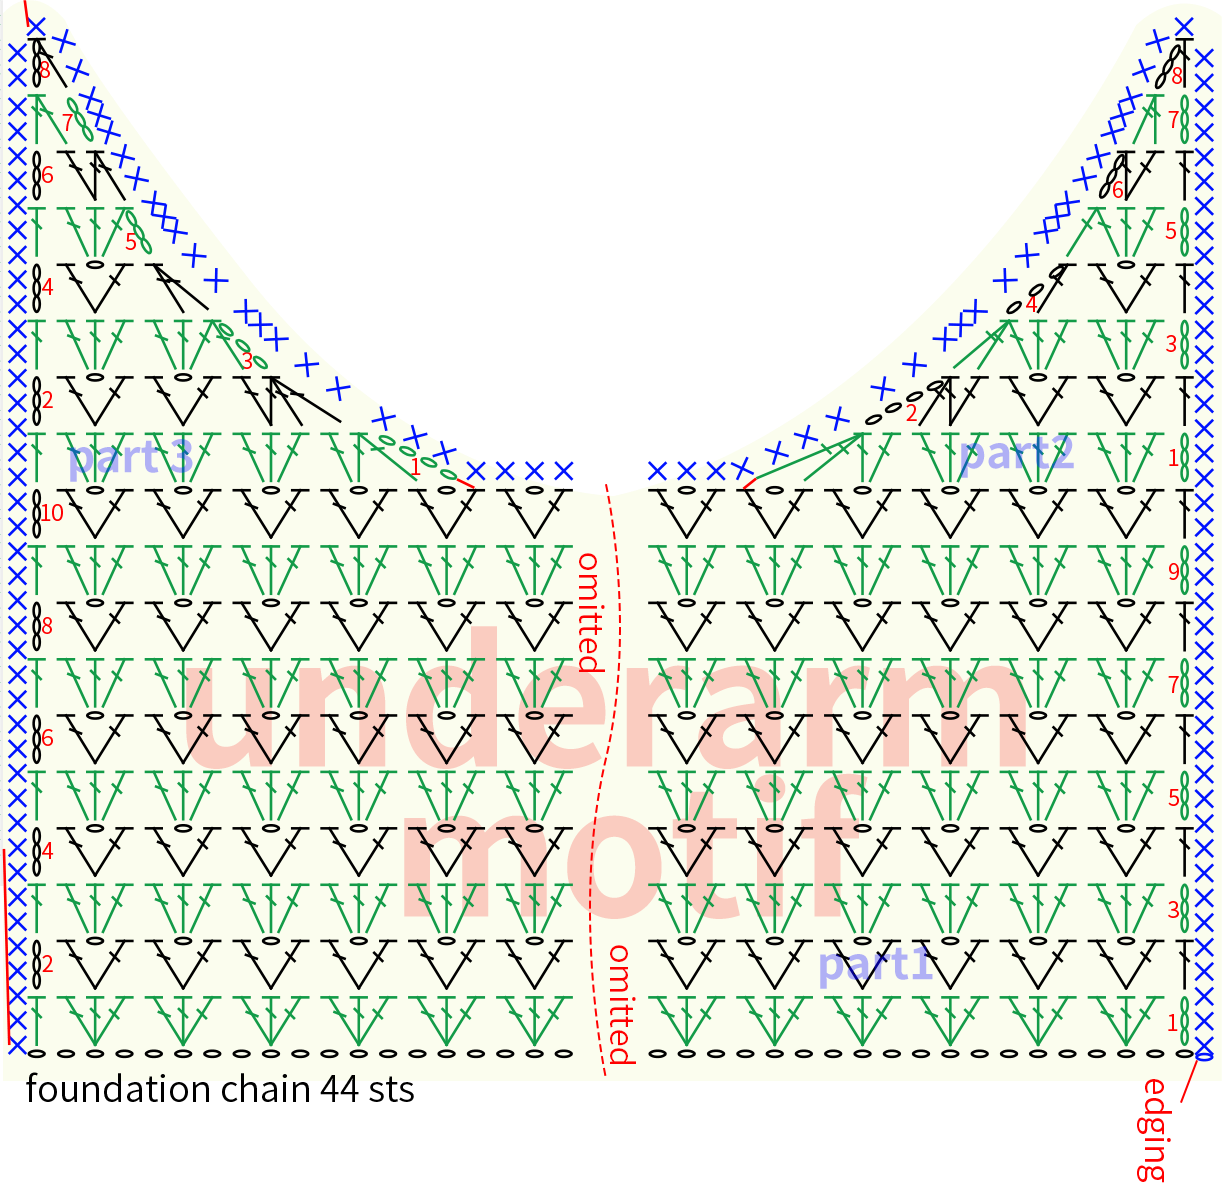
Part 3 Underarm Motifs×2C 25' 31''
There are two identical pieces, divided into three sections and adding the border. First, crochet the first section, then crochet the second and third sections along the first section. After finishing, crochet the border. Please refer to the video demonstration for more details.
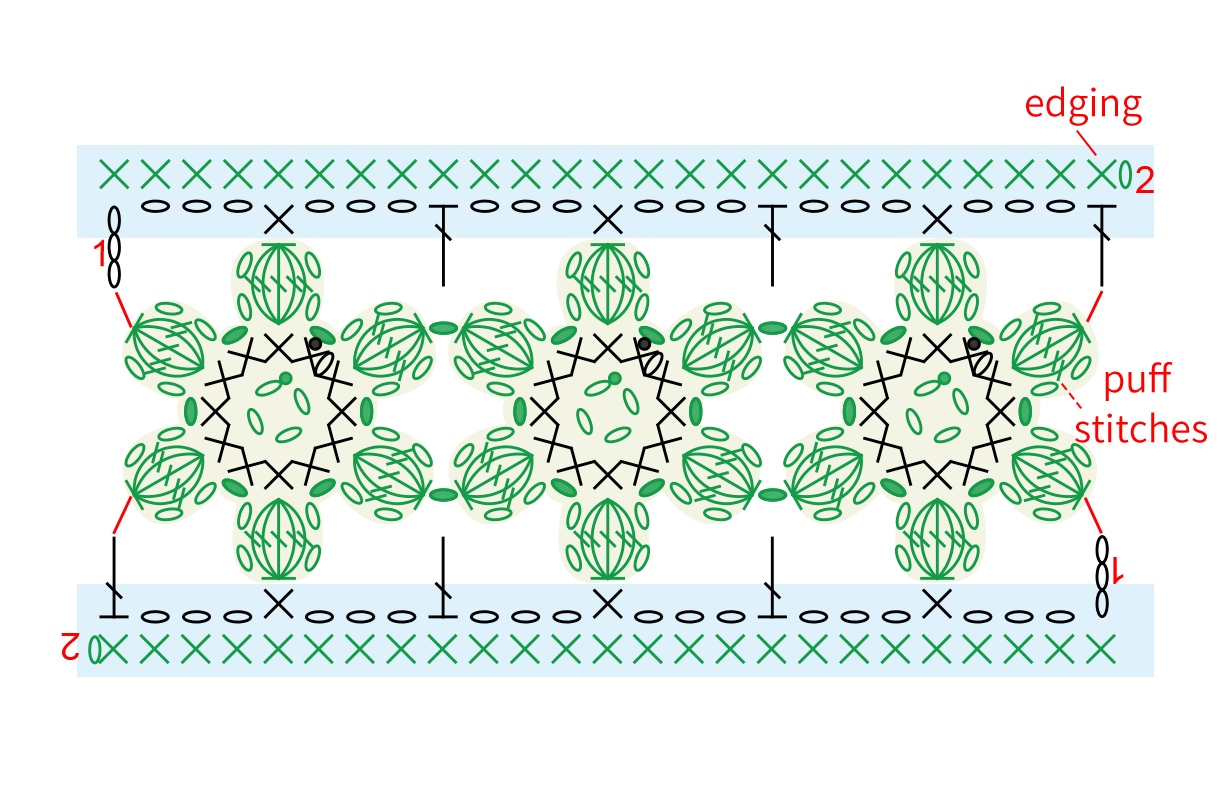
Part 4 ShouldersD 36' 48''
There are two identical pieces, both consisting of puff stitches and an edging. First, crochet the corresponding number of puff stitches. Except for the first one which is fully crocheted, all subsequent puff stitches need to be crocheted while connecting to the previous one. Once you finish the puff stitches, crochet the edging. Please refer to the video demonstration for more details.
Note: The shoulders are demonstrated with 3 puff stitches. Actually, crochet the corresponding number for the shoulders.
Part 5 JoinE 49' 06'' (crochet the edging with same color yarn)
Join together the front and back pieces, the underarm motifs, and the shoulders separately. First, sew the sides of the front and back pieces to the ends of the shoulders. After that, sew the underarm motifs between the sides. Please refer to the video demonstration for more details.
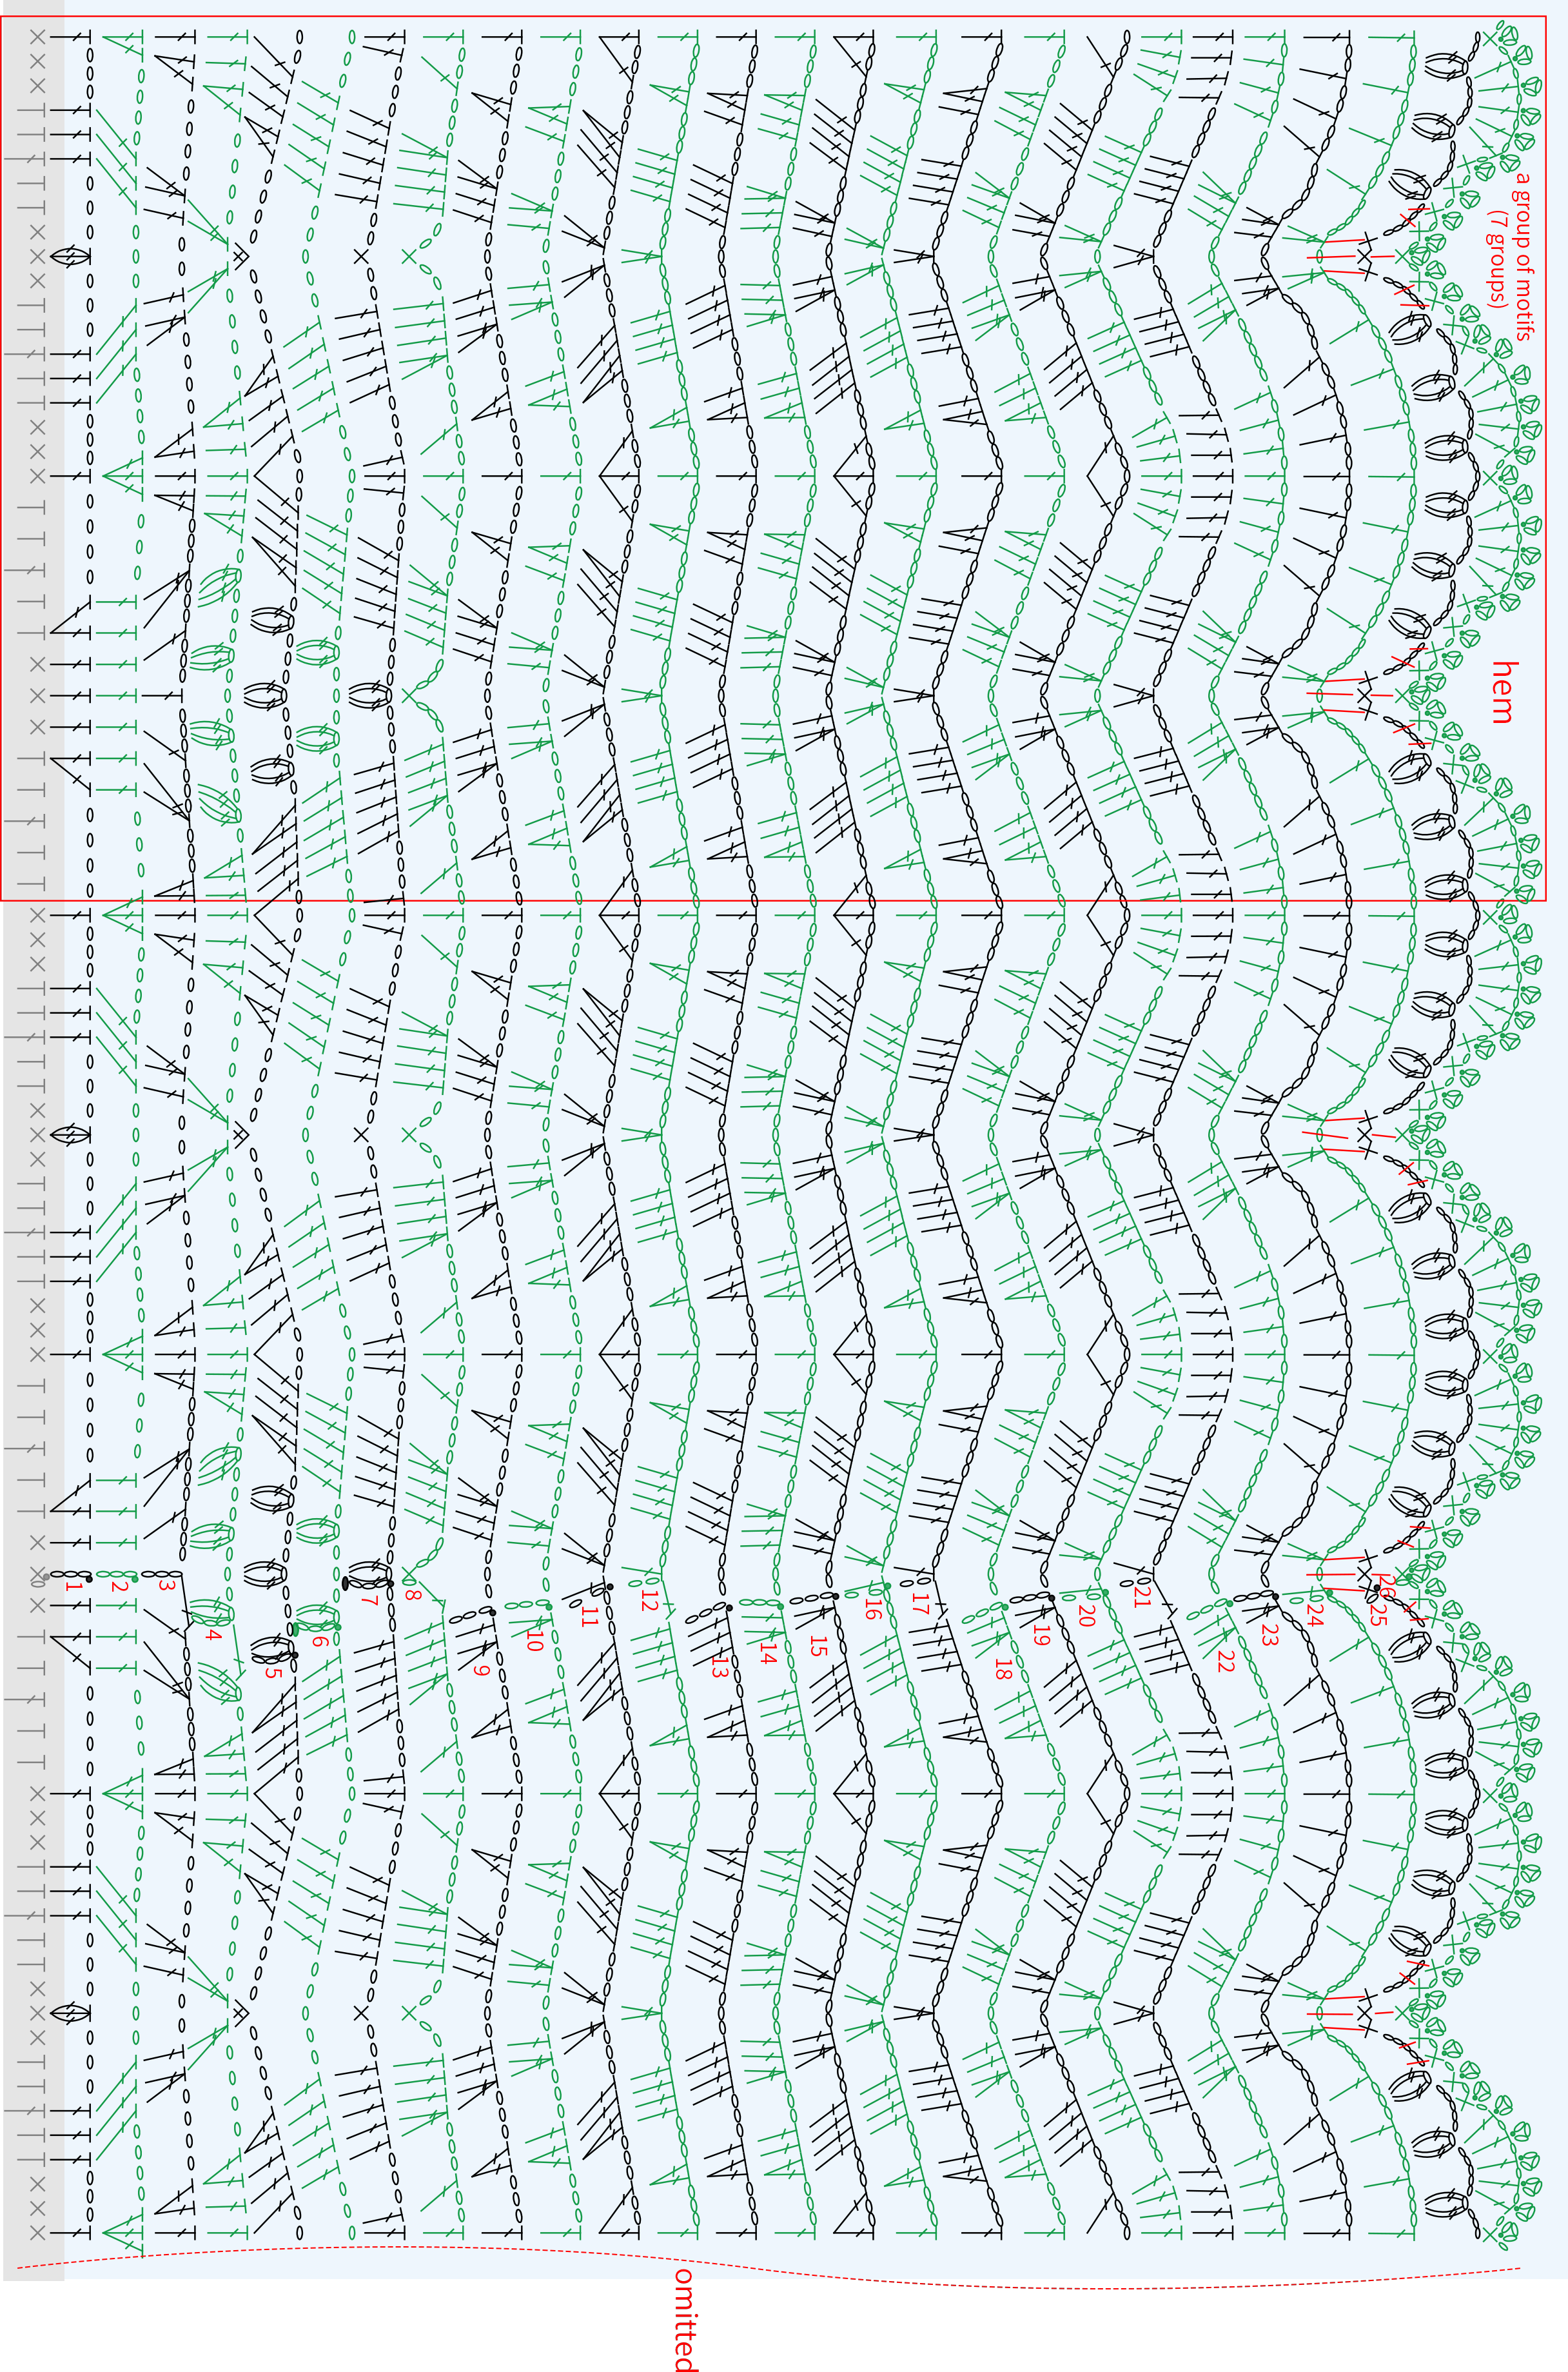
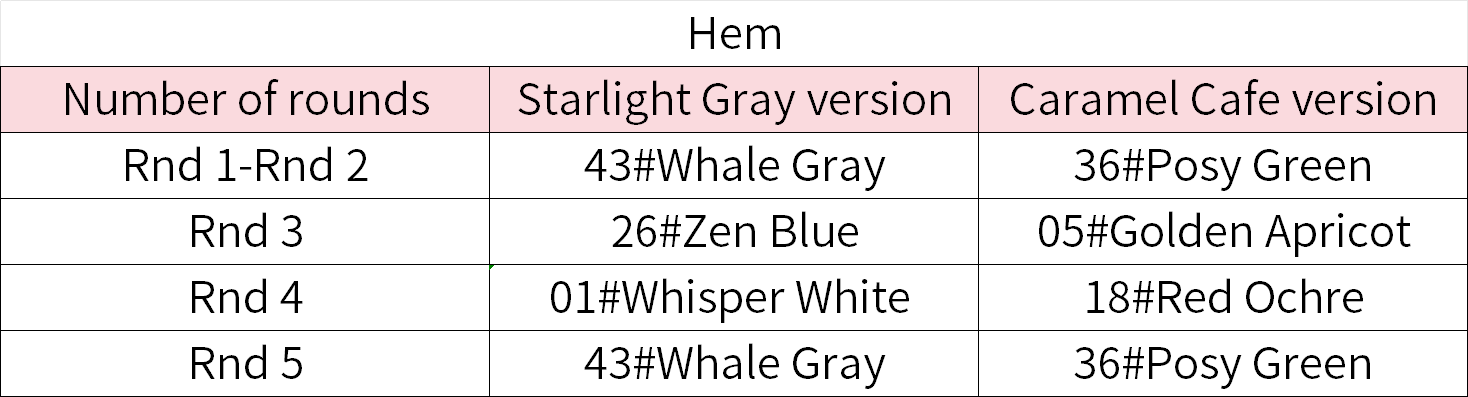
Part 6 HemF 56' 41''
Work in rounds down from the sewn shoulders, underarm motifs, and front and back pieces, dividing into the waist pattern and the hem. Start with the waist pattern, then work the hem. Please refer to the video demonstration for more details.



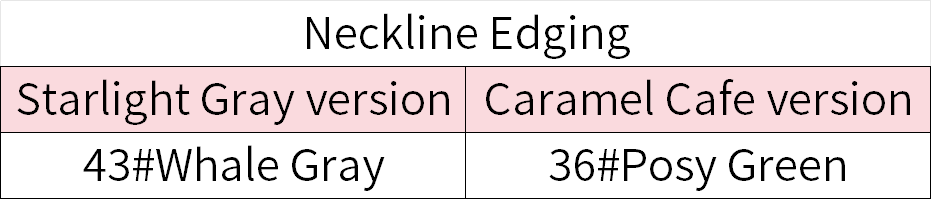
Part 7 Neckline EdgingG 60' 21''
Crochet around the neckline, referring to the chart instructions for the shoulder areas of the front and back pieces. Please refer to the video demonstration for more details.
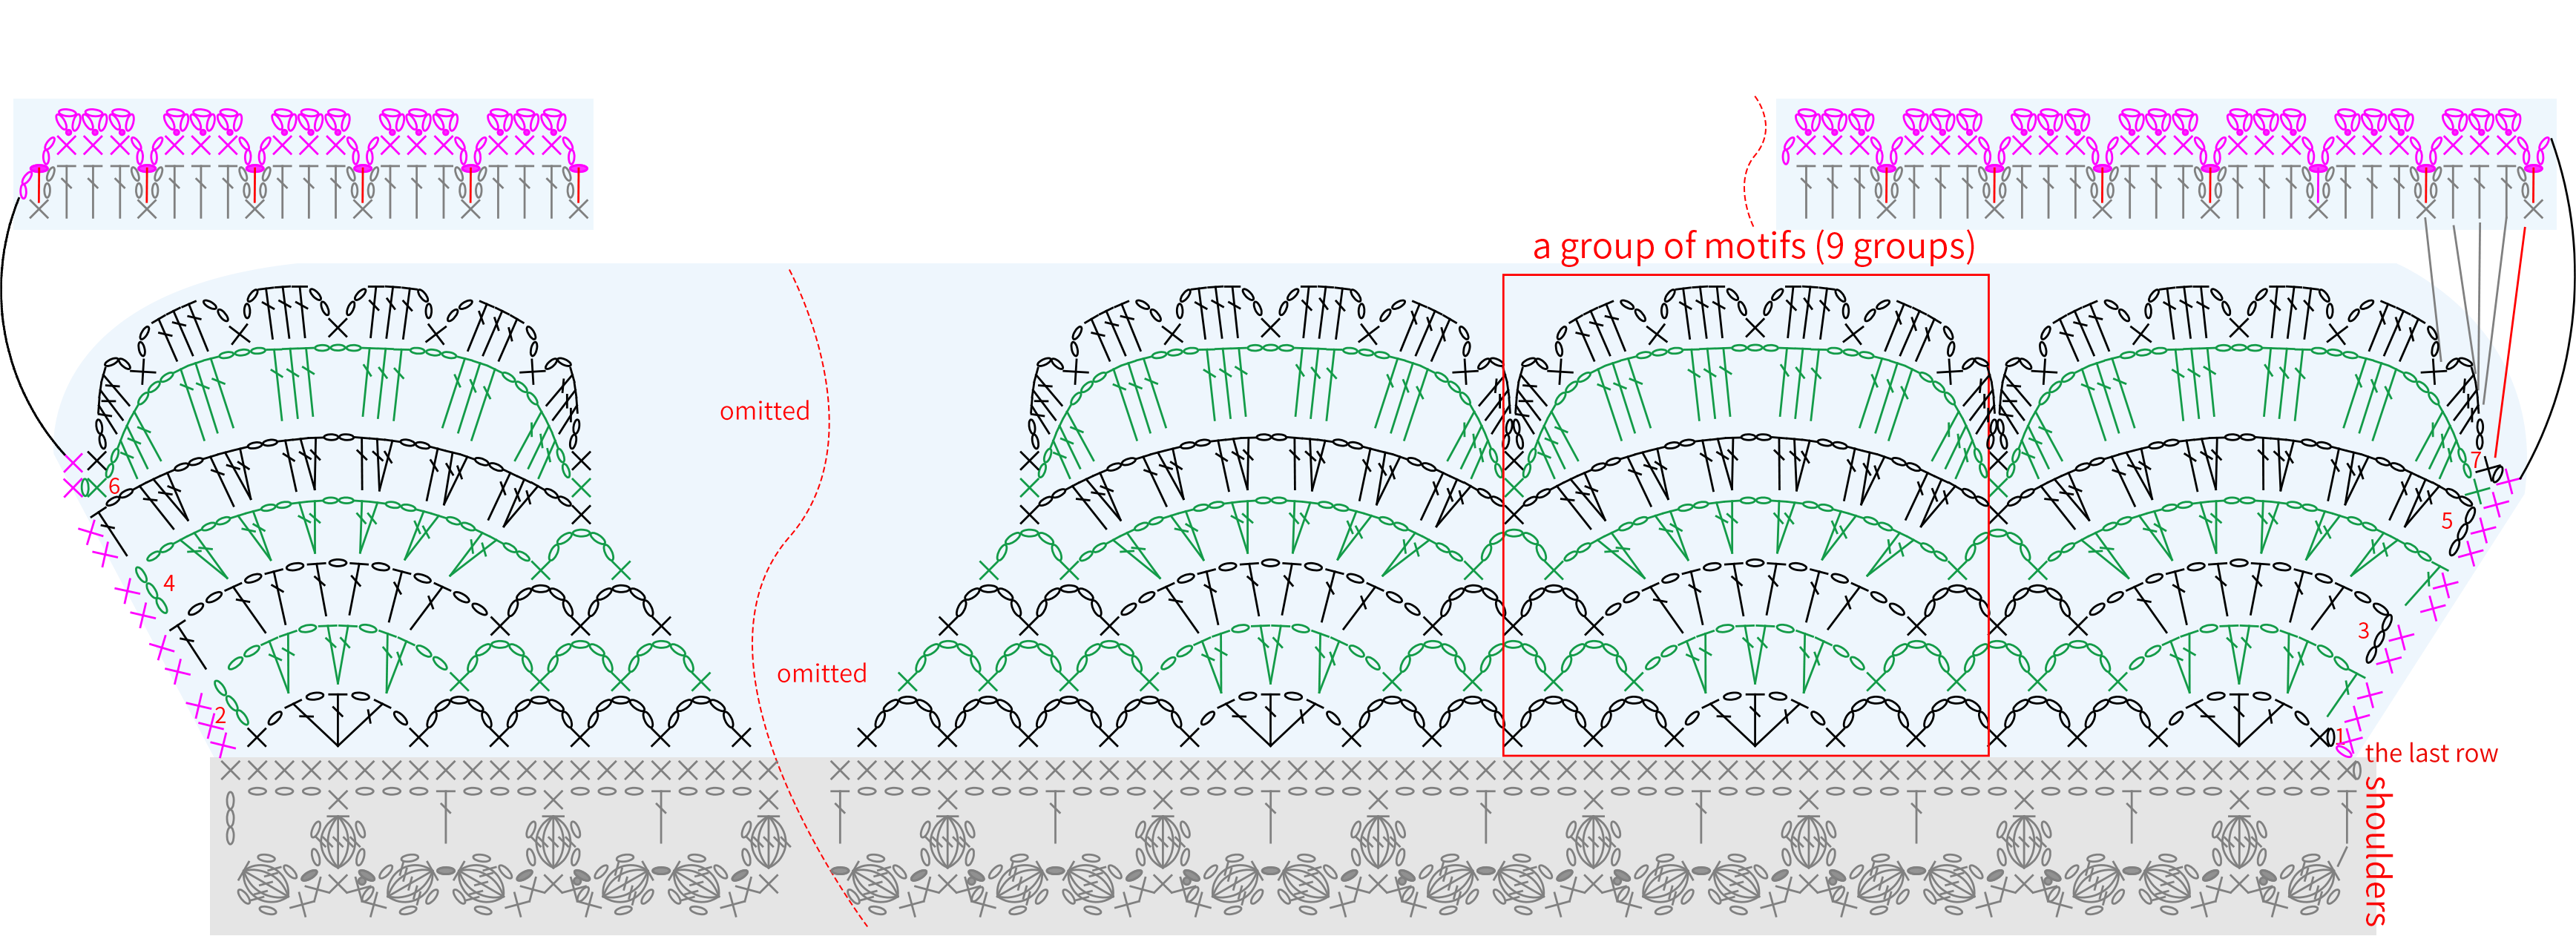
Part 8 Flutter SleevesH 60' 23''
Work along the remaining half stitches and live stitches on the shoulders, leaving a long tail at both the beginning and the end. After finishing, sew the sides to the waist pattern. Please refer to the video demonstration for more details.

Made by the community