Home / Decoration
Flower Branch
Project preview
See the finished project
Pattern format
Instructions
Watch and follow
Video tutorial
| Style | Yarn | Color |
|---|---|---|
| Peony | Combed 3# Lace |  06#Crystal Pink x 1 06#Crystal Pink x 1 12#Lilac Snow x 1 12#Lilac Snow x 1 19#Verdant Green x 1 19#Verdant Green x 1 |
| 4-Ply Combed Cotton & Acrylic Fibre Hand Knitting Yarn |  04#Fair Orchid x 1 04#Fair Orchid x 1 |
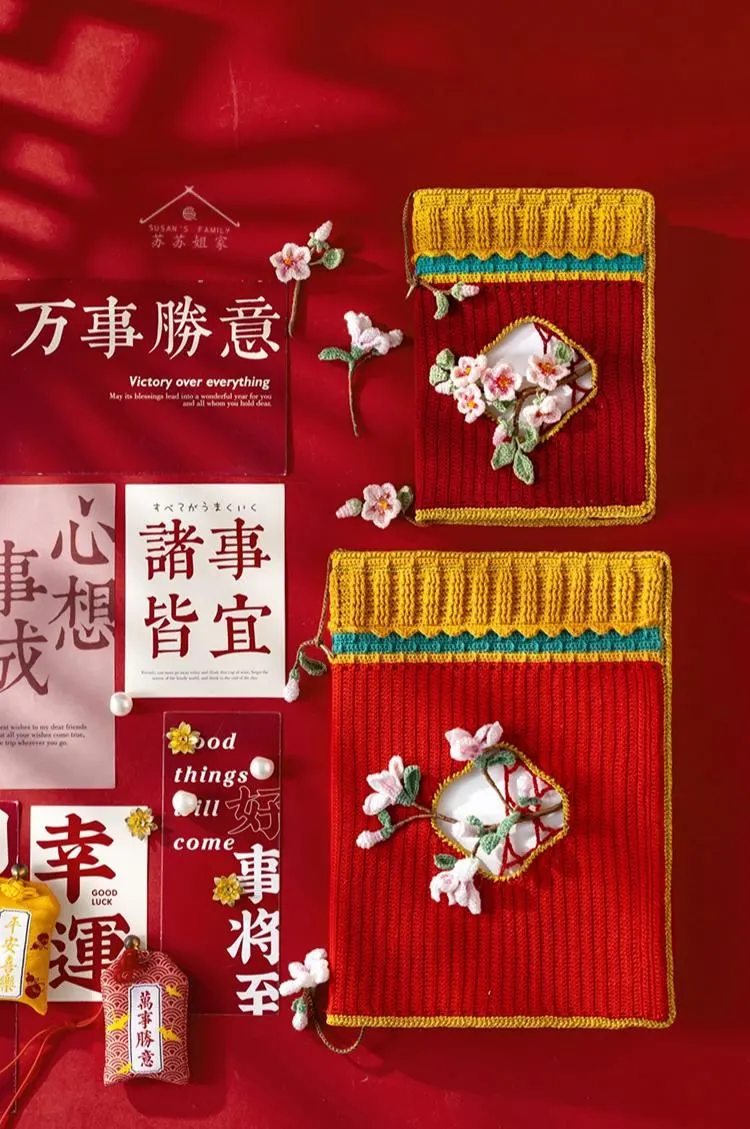
This tieback is divided into the base piece, the flower branches, and the accessories sections. Start by making the base piece. Finally, add the accessories.
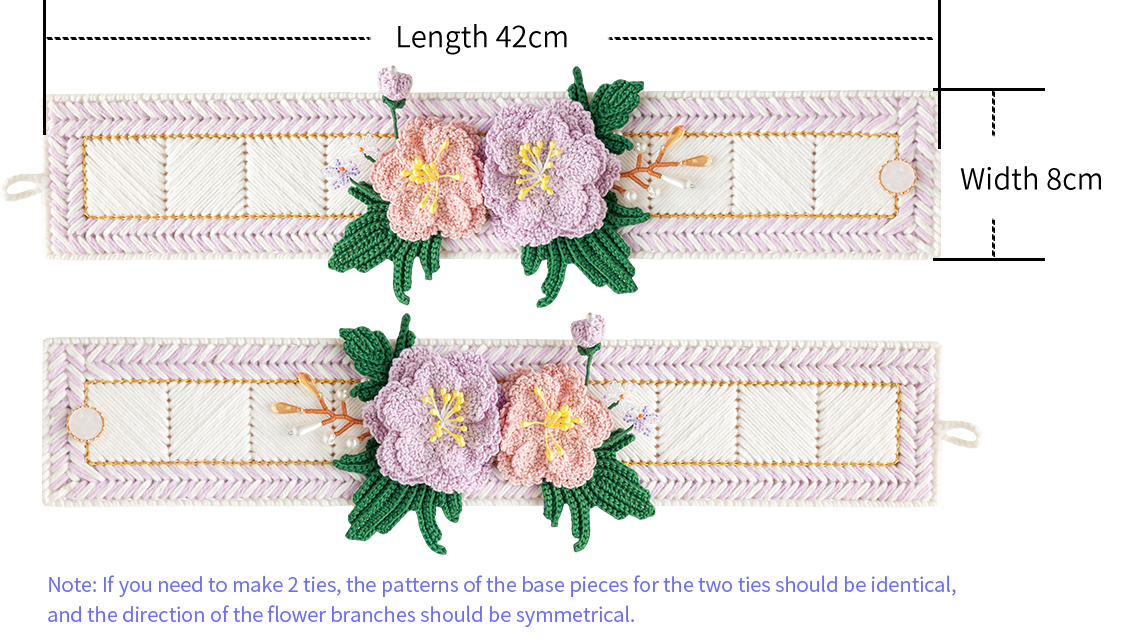
The handcrafted measurements may have an error of 1 to 2 cm.
Due to variations in individual tension, the size of the sample is for reference only.
Materials: Combed 3# Lace & 4-Ply Combed Cotton & Acrylic Fibre Hand Knitting Yarn
Tools: 1.75 mm Crochet Hook
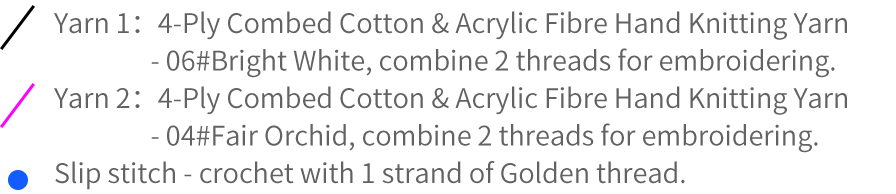
Chart Key









Note: 1. This pattern is making in Chinese crochet pattern terms, and the stitch name is written using American terminology. All measurements in charts are in cm.


Part 1 Base Piece A 00' 41''
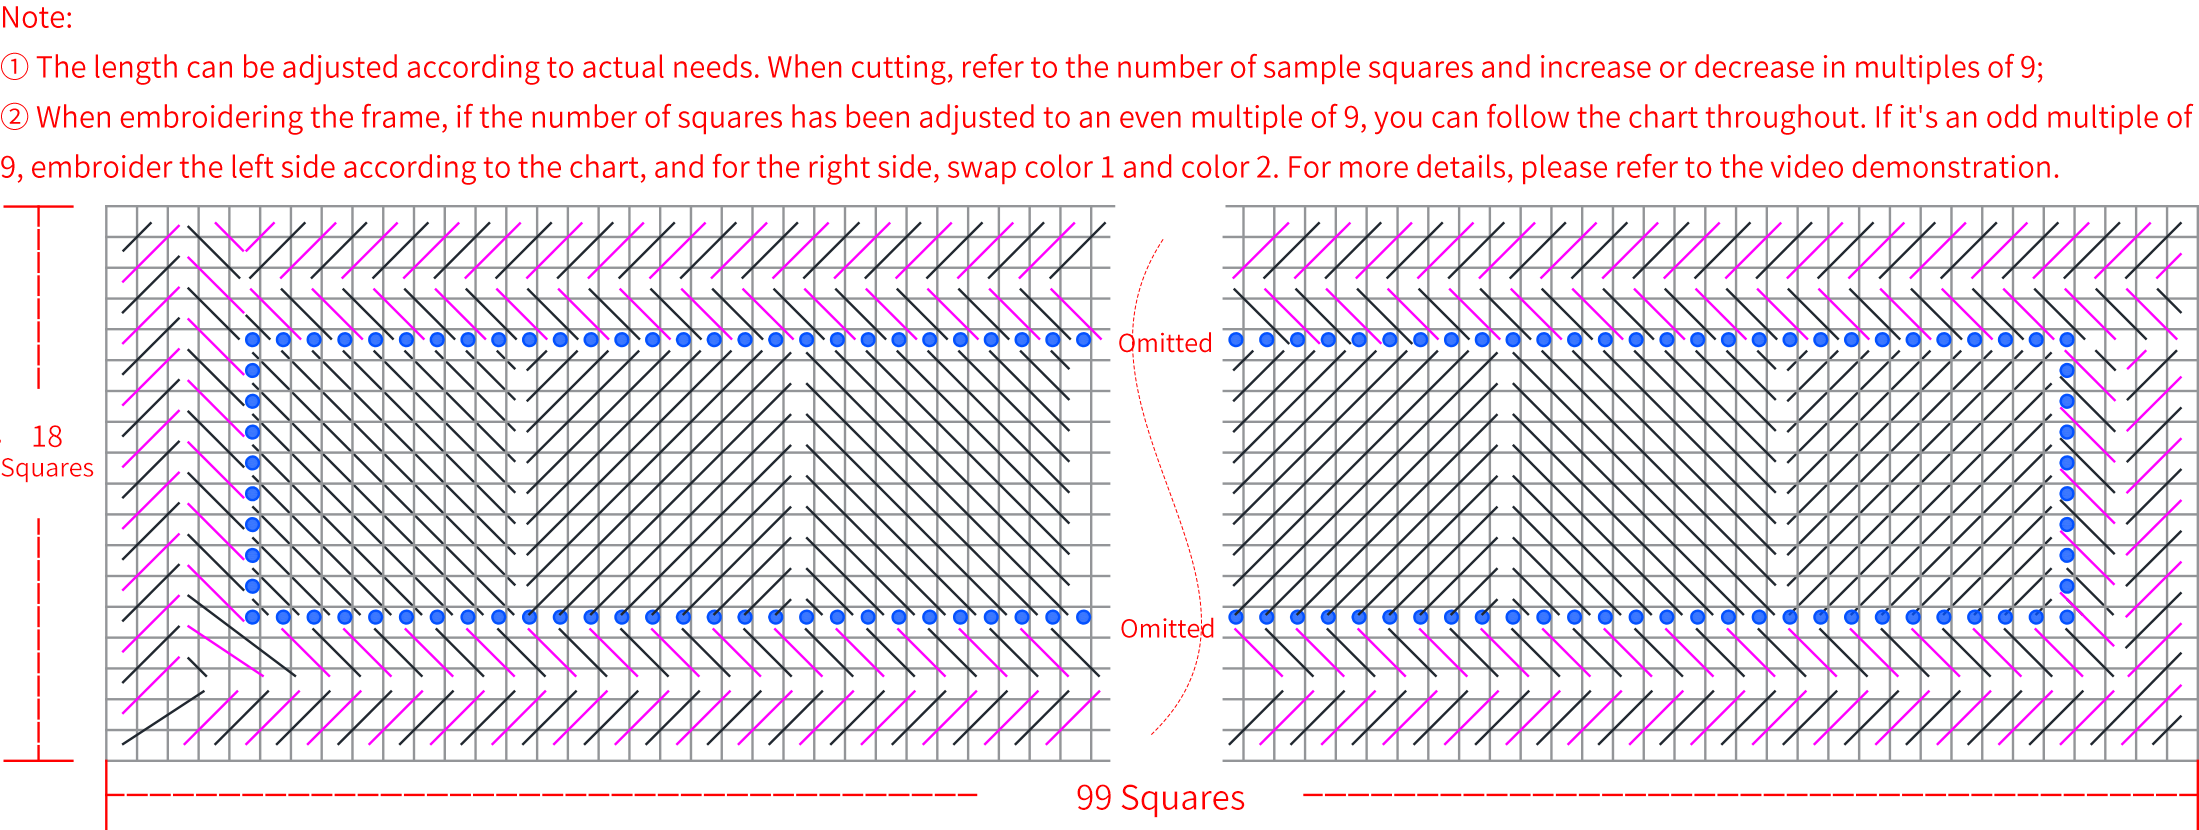
Start by cutting the mesh board. Then embroider the pattern onto the mesh board. After completing it, crochet the decorations. For more details, please refer to the video demonstration.
Part 2 Flower Branches B 26' 16''
Including flowers, leaves, buds, and decorations. There are two flowers: the large flower consists of 1 large petal, 1 medium petal, and 1 small petal; the small flower consists of 1 medium petal and 1 small petal; the bud consists of 1 calyx and 1 bud fabric piece. The rest of the decorations refer to the finished product diagram. For specifics, please refer to the video demonstration.
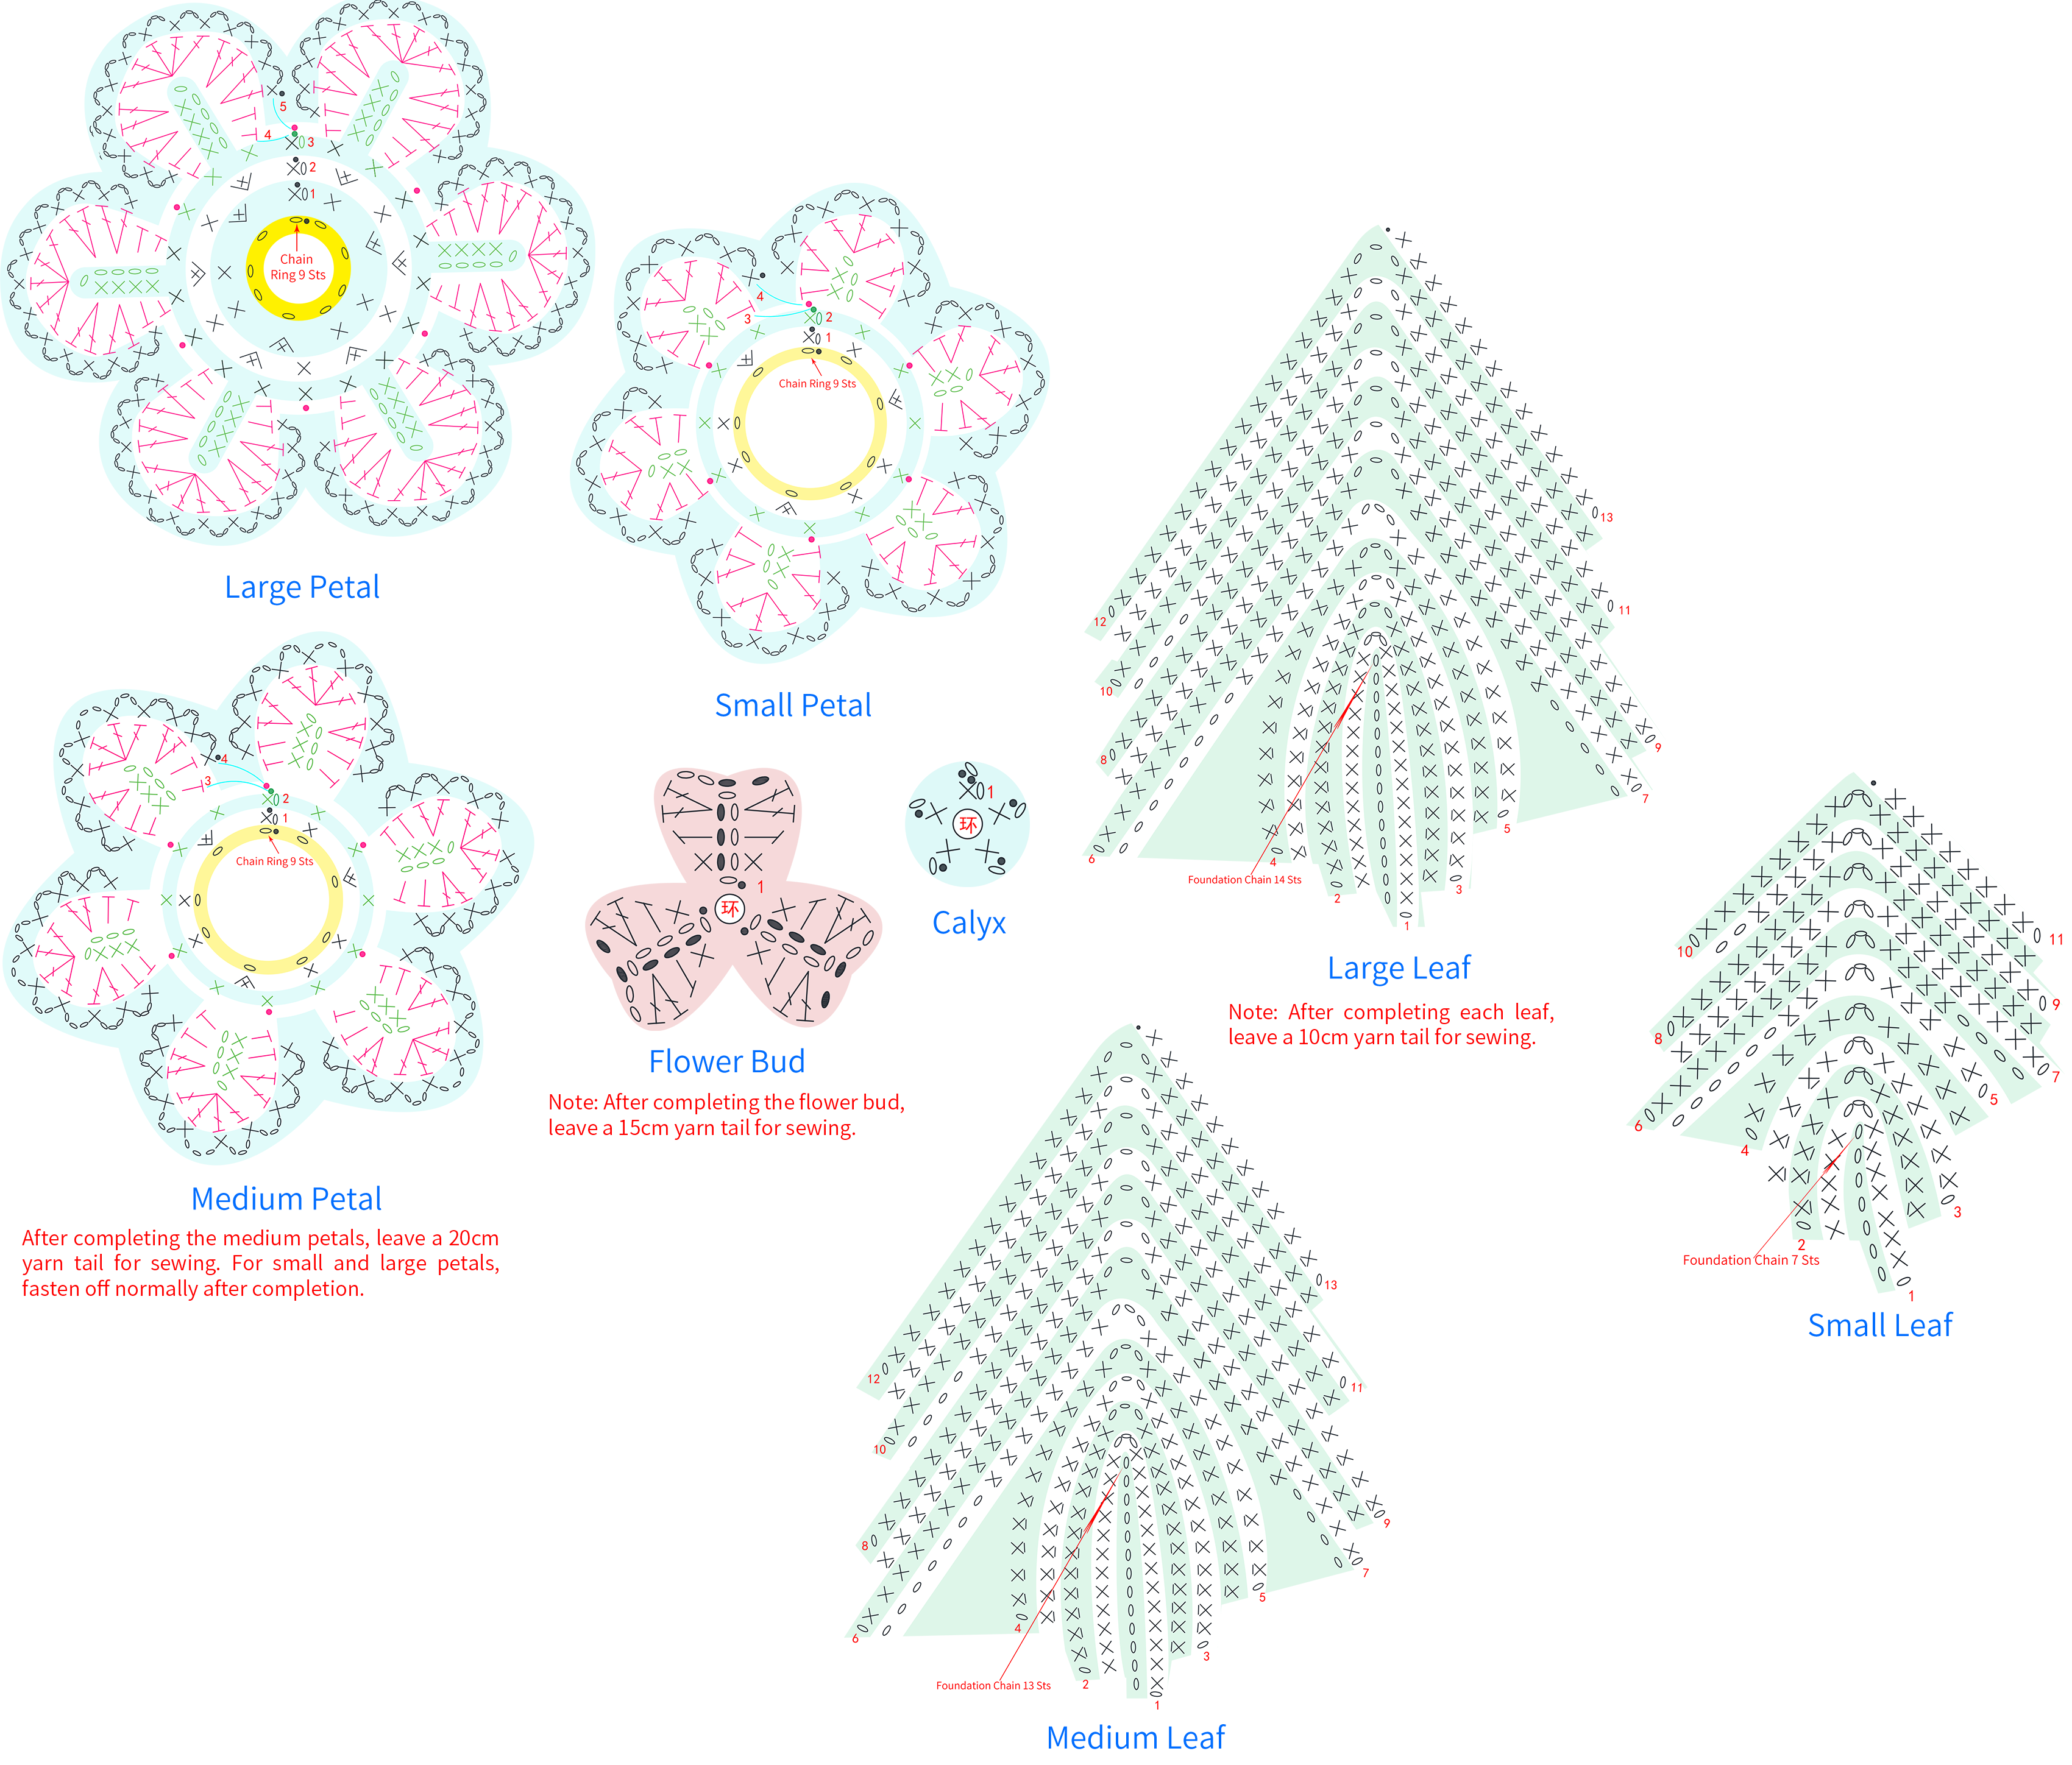
| Name | Combed 3# Lace | Quantity |
| Large Petal | 12#Lilac Snow | 1 |
| Medium Petal | 12#Lilac Snow | 1 |
| 06#Crystal Pink | 1 | |
| Small Petal | 12#Lilac Snow | 1 |
| 06#Crystal Pink | 1 | |
| Calyx | 19#Verdant Green | 1 |
| Bud | 12#Lilac Snow | 1 |
| Large Leaf | 19#Verdant Green | 1 |
| Medium Leaf | 1 | |
| Small Leaf | 1 | |
| Note: The quantity marked is the number of fabric pieces required for a single tie's flower branch. | ||
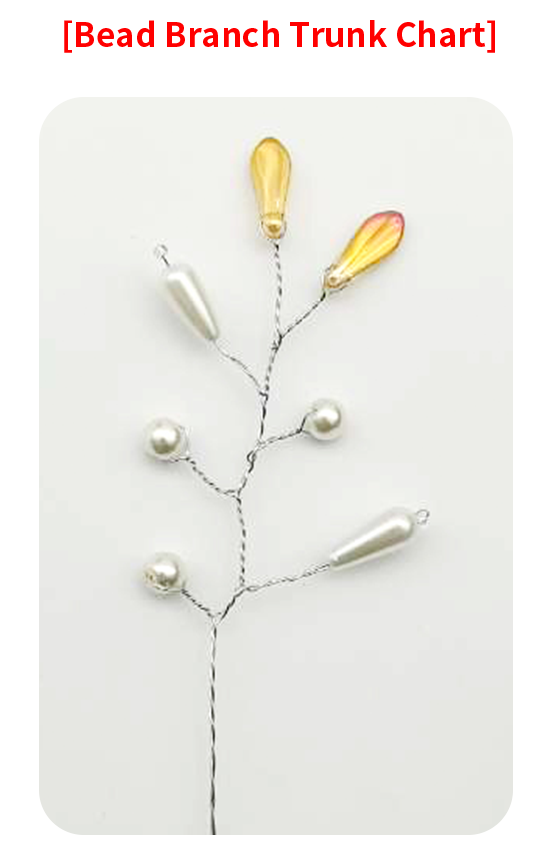
Part 3 Accessories C 95' 34''
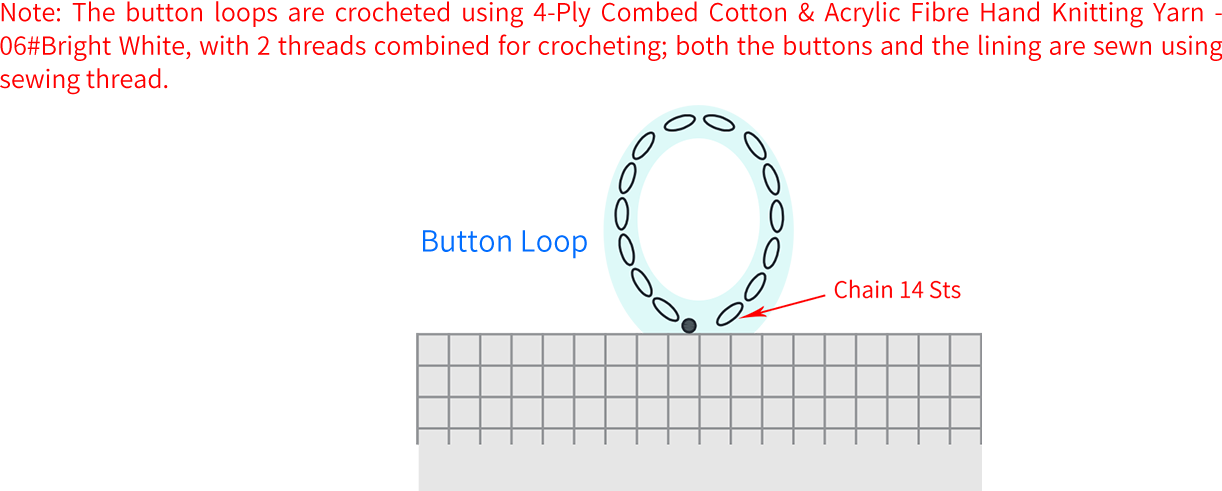
The accessories include button loop, buttons, and lining. Install the button loop and buttons first, then sew together the lining last. Please refer to the video demonstration for specifics.