Clothes
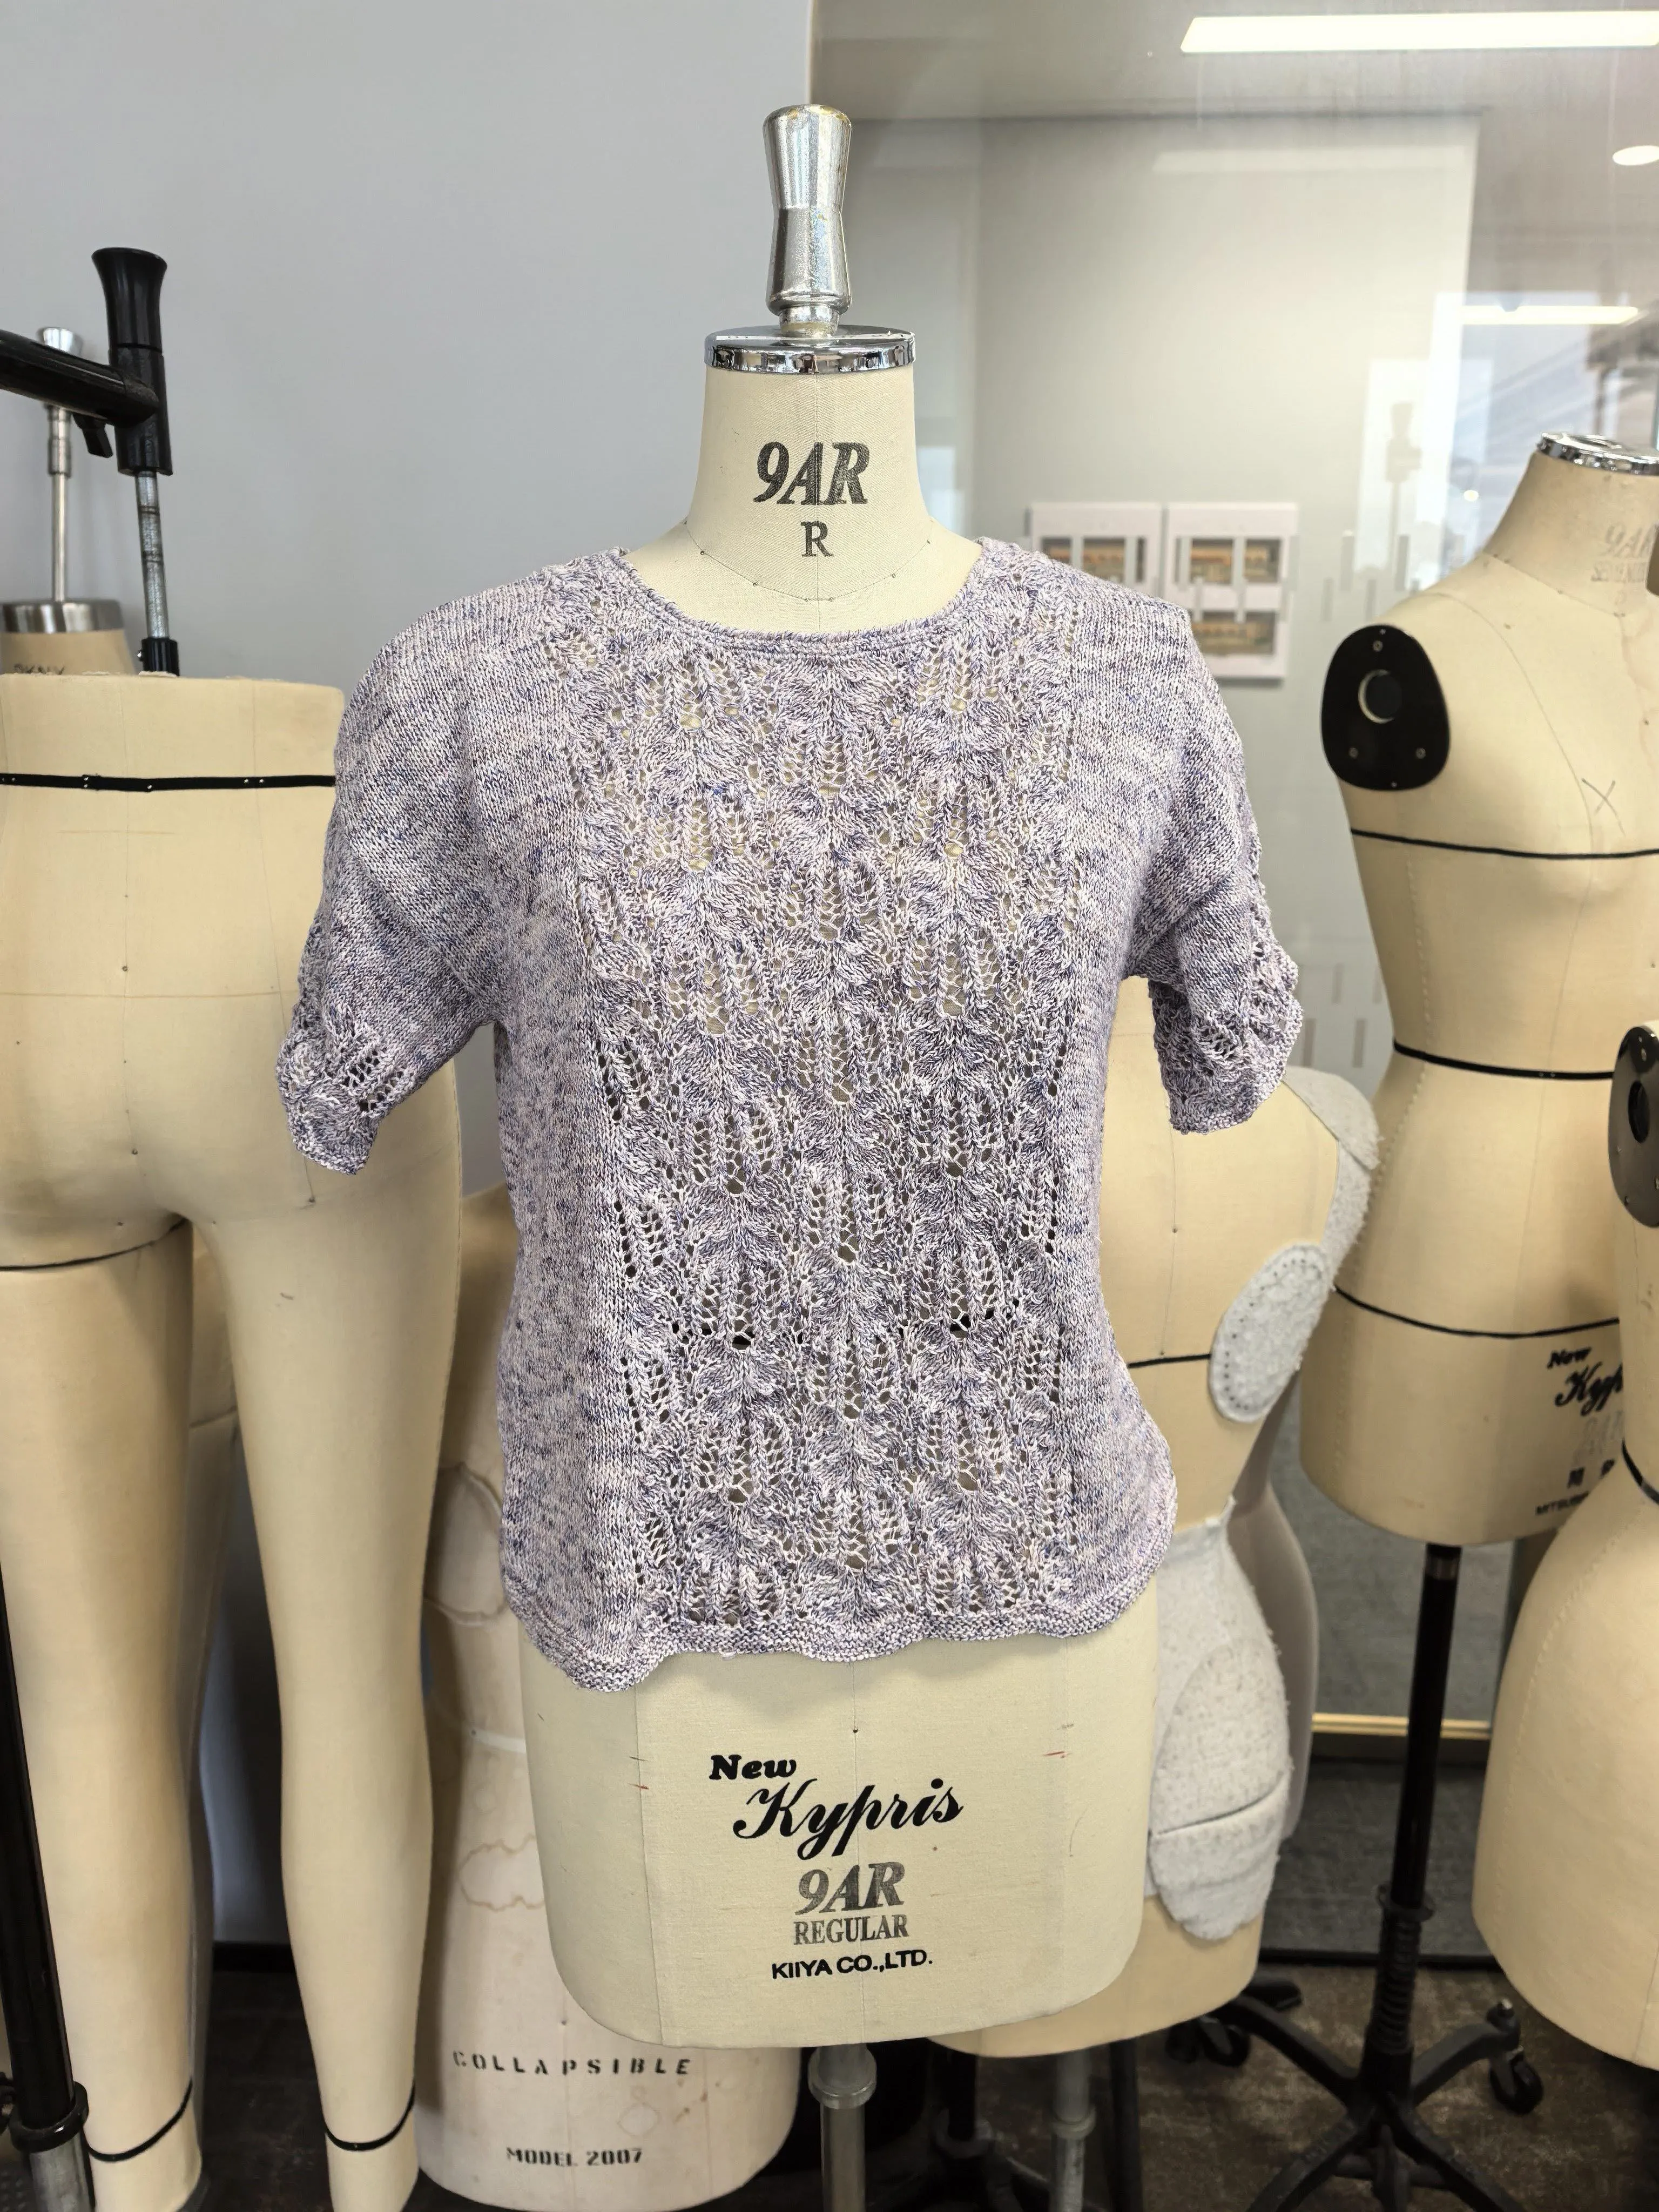
Flower of the Palm
Project preview
See the finished project
Pattern format
Instructions


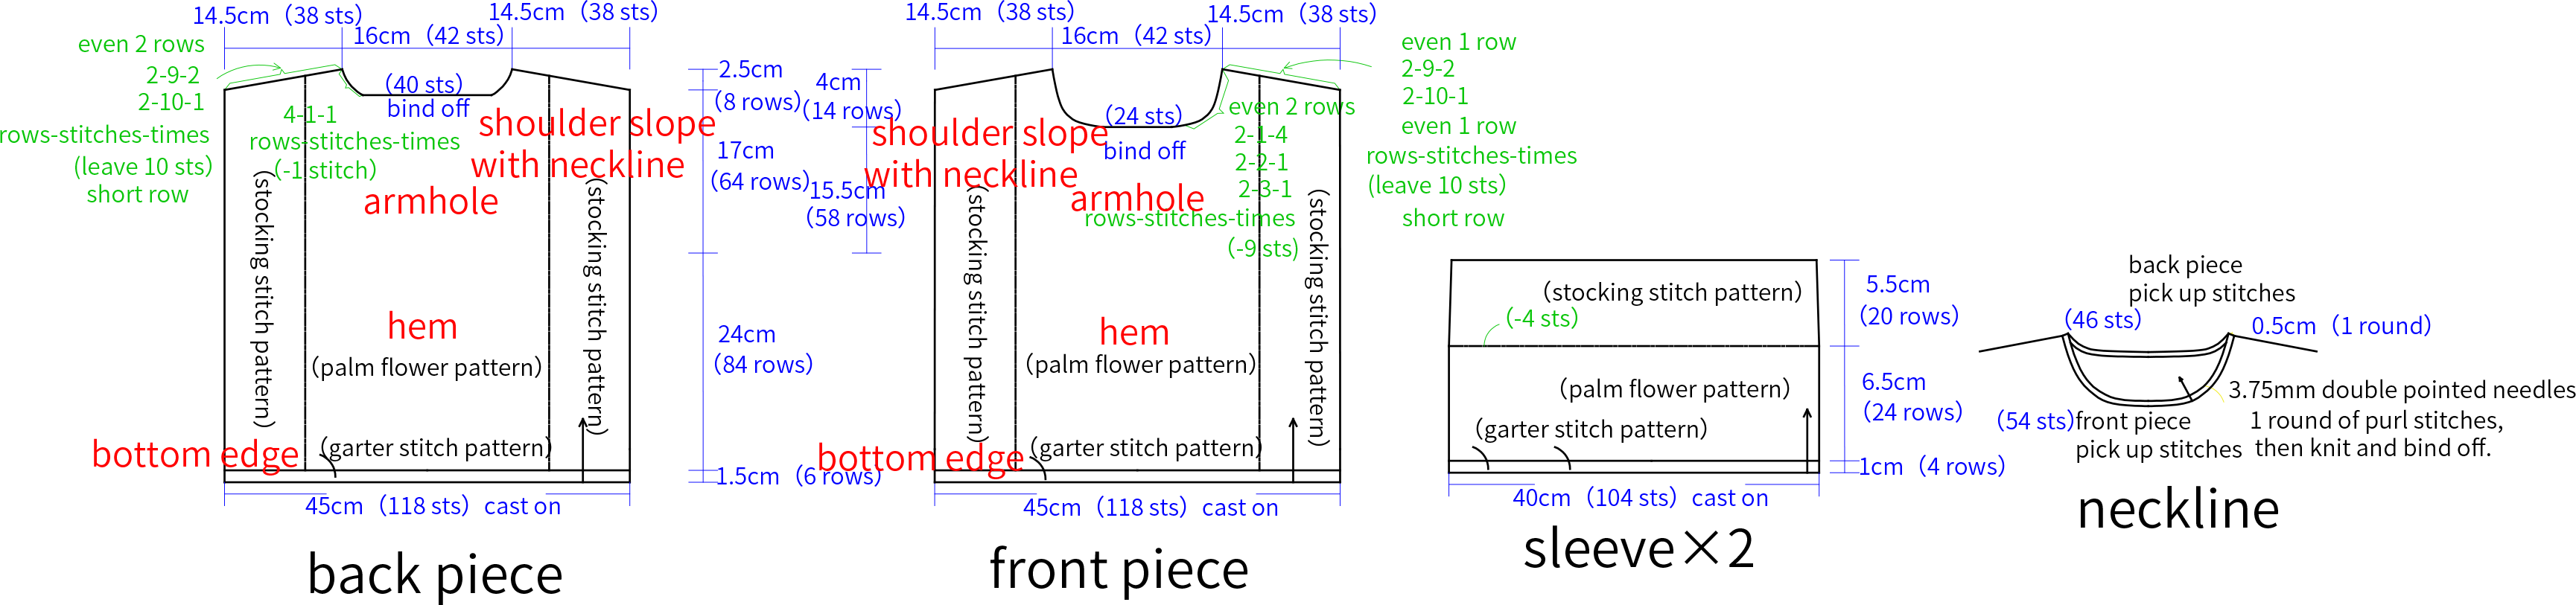
This sweater consists of the front piece, back piece, sleeves, and neckline. First, complete the knitting of each part, then sew them together at the corresponding positions. Finally, knit the neckline. The sweater comes in three sizes.
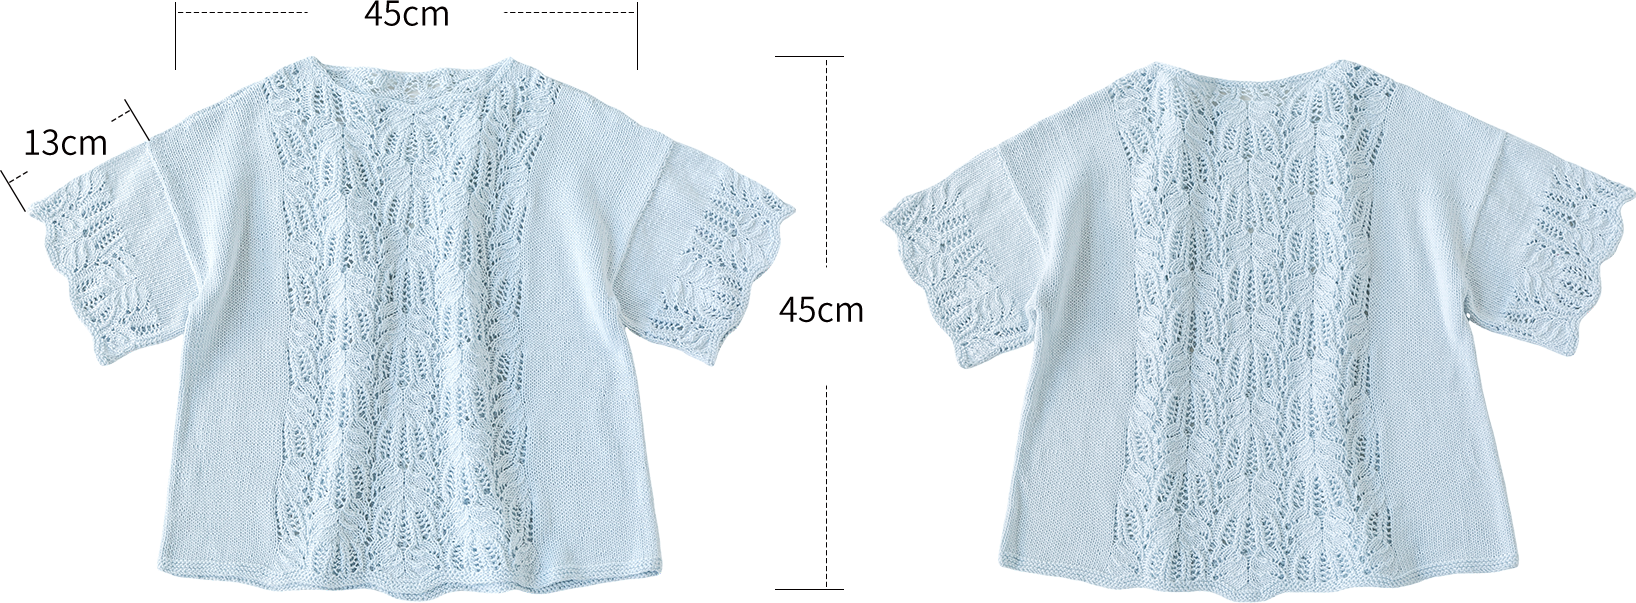
The handcrafted measurements may have an error, the size of the sample is for reference only.
Note: Except for the neckline, all other parts are knit using 3.75mm circular needles.
Materials: Combed 3# Lace / Morandi flax Lace yarn
Tool: 9# - 3.75mm circular needle & double pointed needles

Chart Key




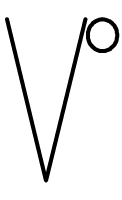
Note: The left and right on the charts refer to the actual wearing position. The chart represent the right side of fabric, so check the key to see how to work a certain symbol on the right side and on the wrong side.
This pattern is making in Chinese crochet pattern terms, and the stitch name is written using American terminology. All measurements in charts are in cm.

Part 1 Back PieceA
The back piece is divided into four parts: bottom edge A1, hem A2, armhole A3, and shoulder slope with neckline A4. It is knit from the bottom upwards.
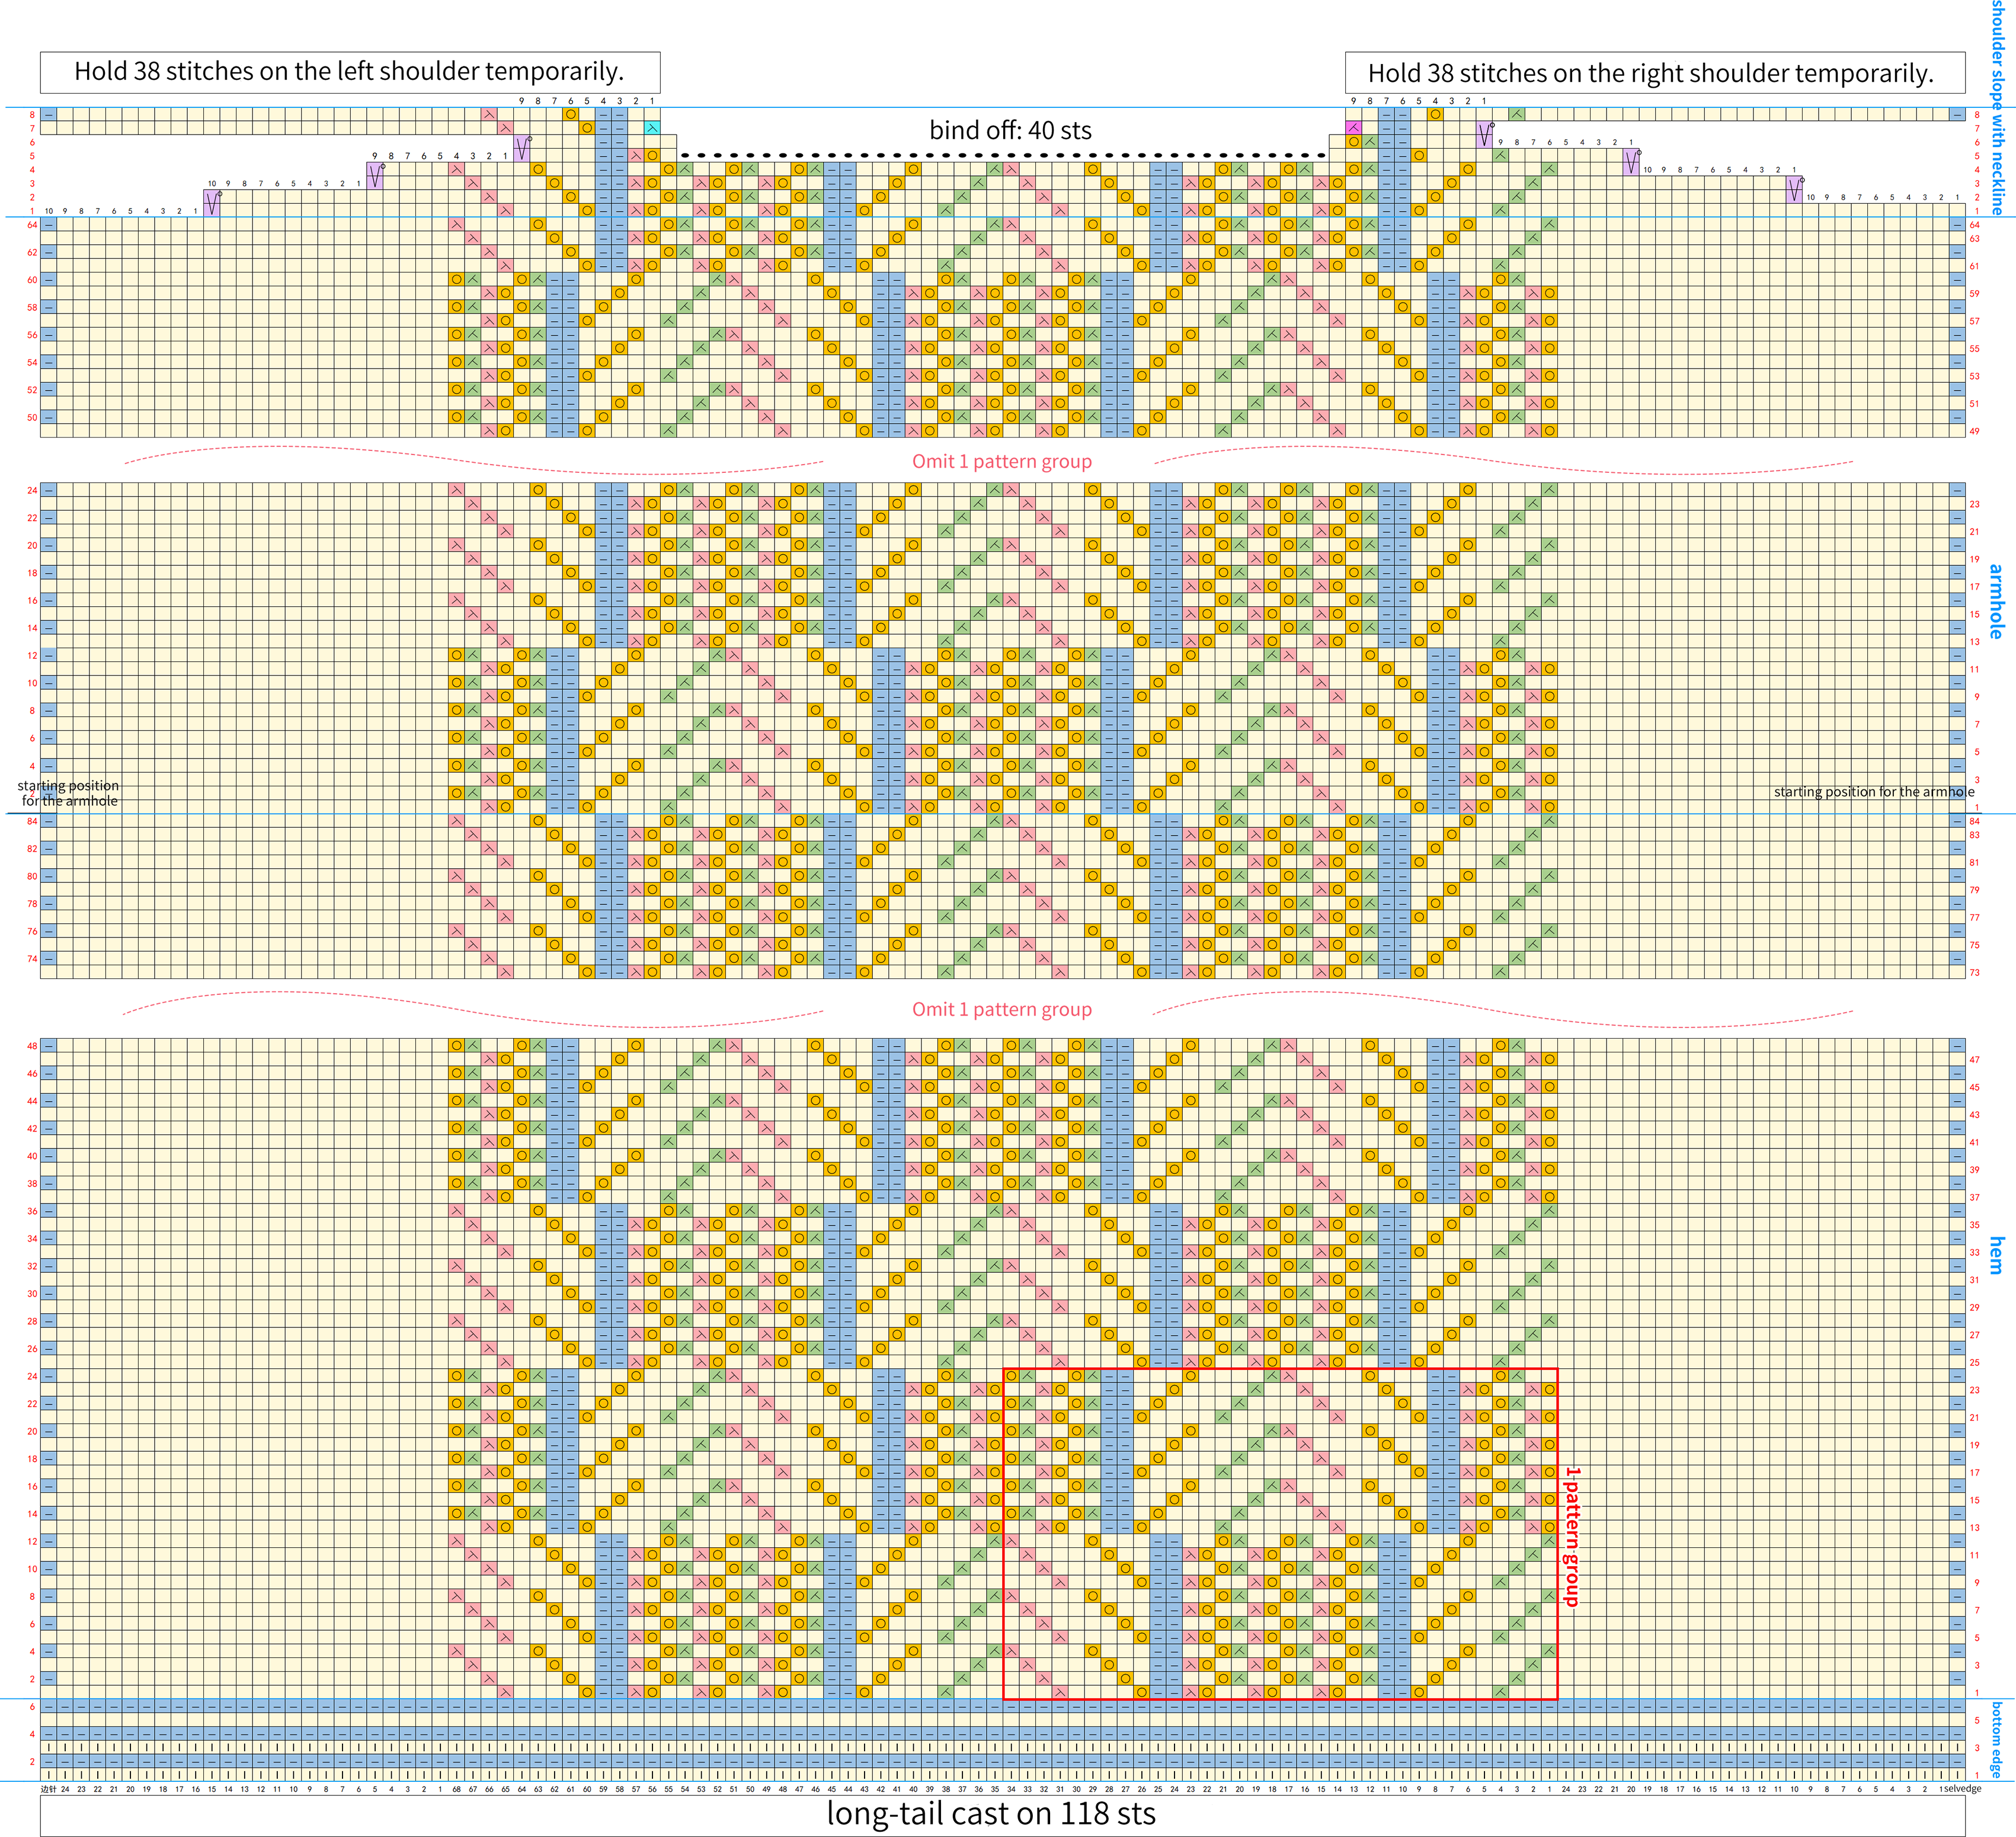
Note: The wrong side chart is read from left to right, and the stitches are worked in the opposite manner.
Part 2 Front PieceB
The front piece is divided into four parts: the bottom edge, hem, armhole, shoulder slope, and neckline, and is knitted from the bottom upwards. The knitting method for the bottom edge and hem is identical to that of the back piece. The row count for the armhole differs from the back piece, but the knitting method is the same; the knitting method for the shoulder slope and neckline is slightly different from that of the back piece.
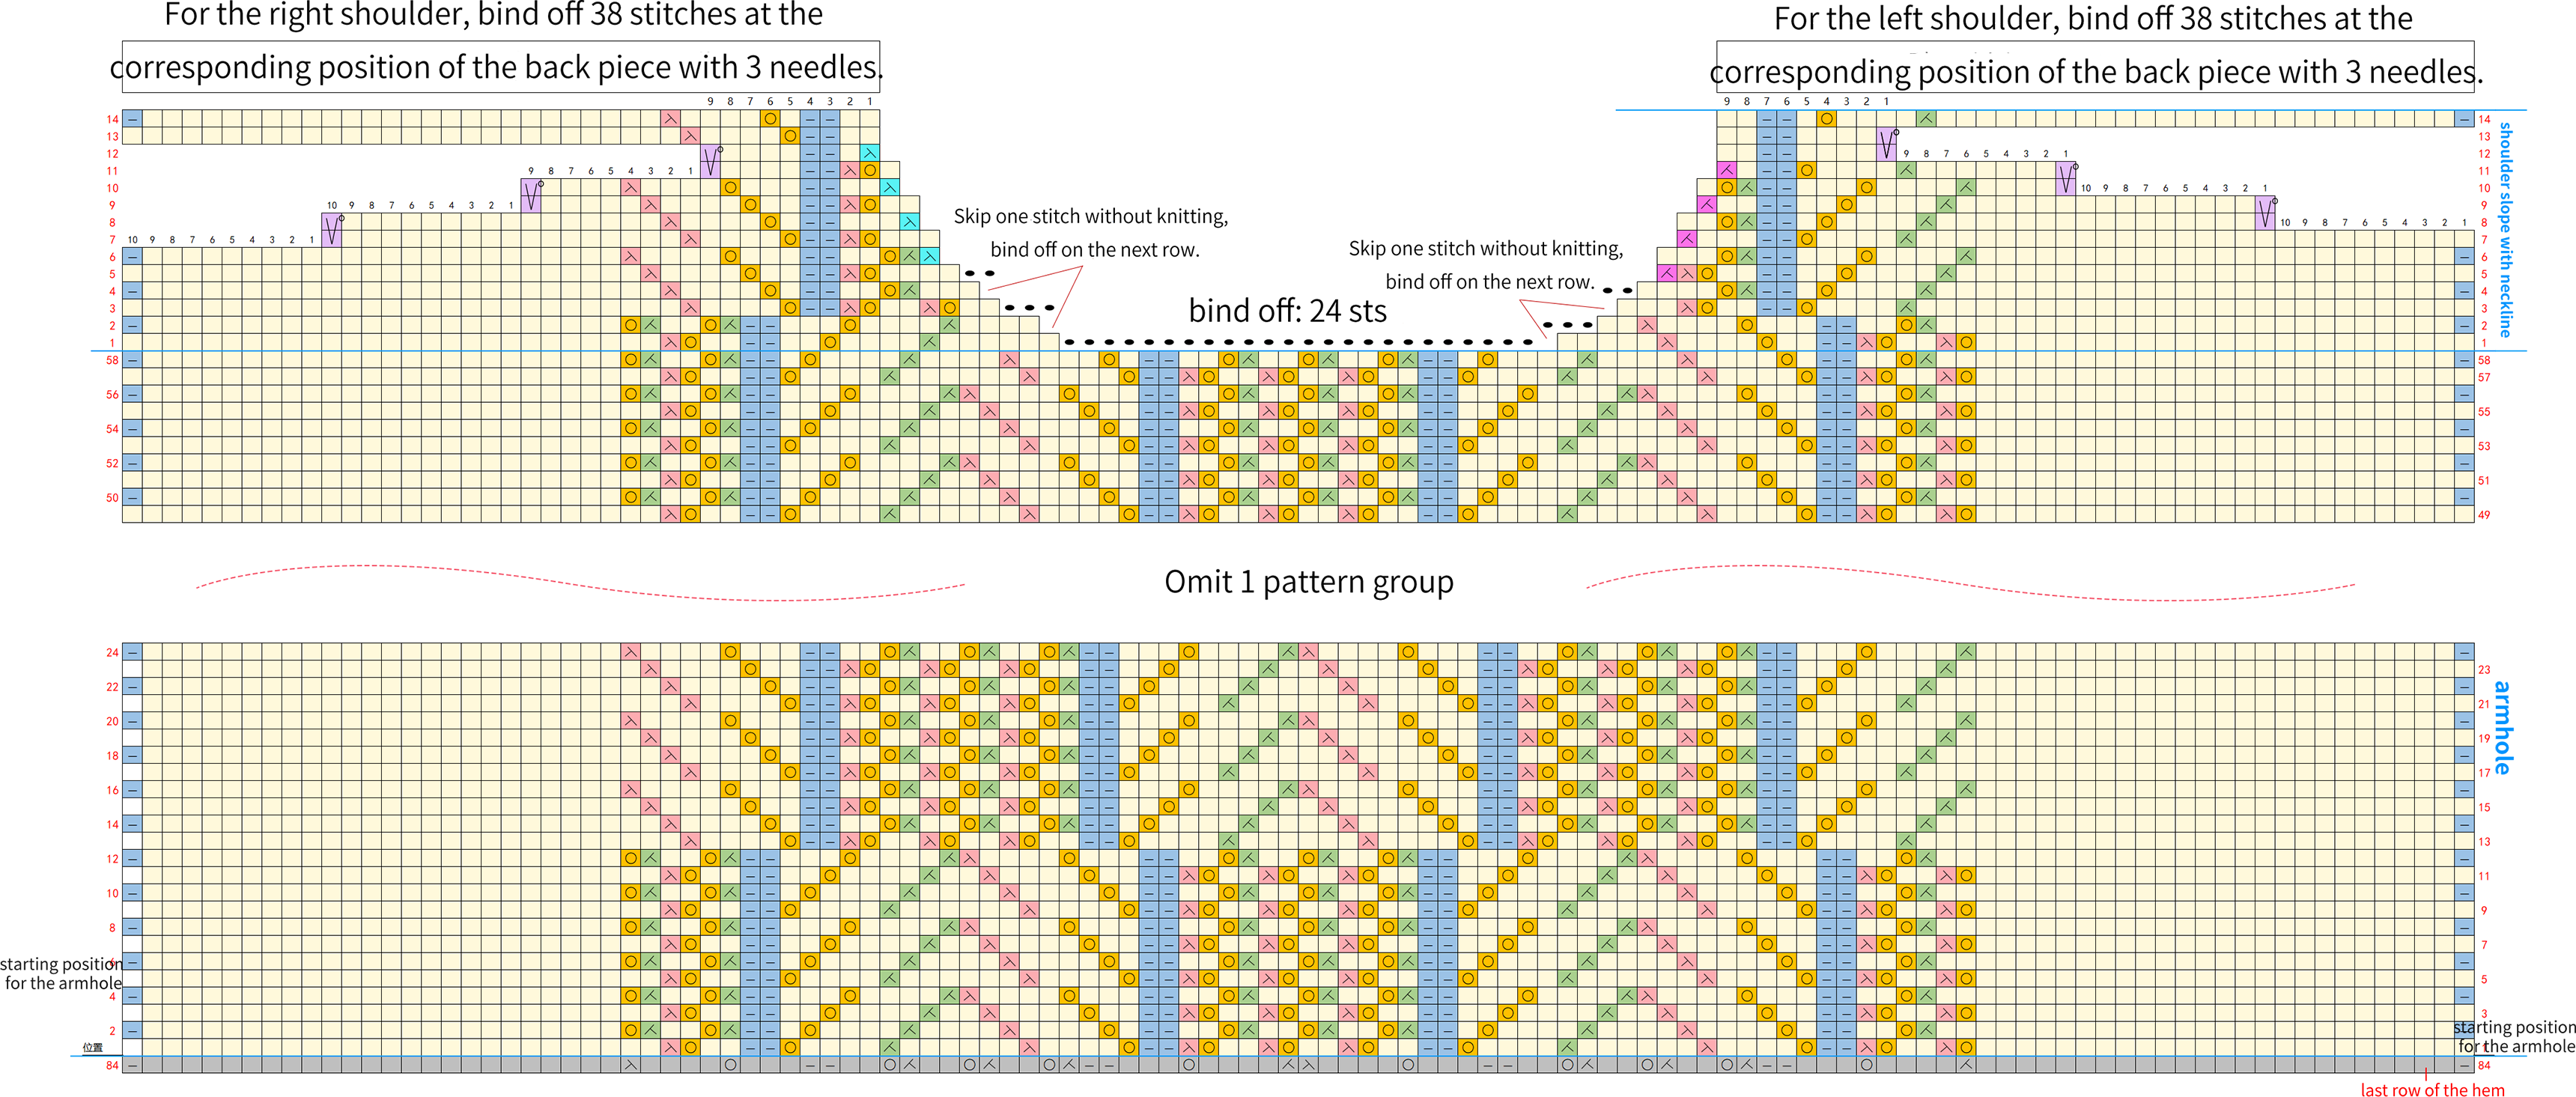
Note: After completing the shoulder section of the front piece, bind off together with the back piece.
Part 3 SleevesC (Universal for both left and right sleeves)
Sleeves are crocheted back and forth from the bottom upwards, and you need to make two.
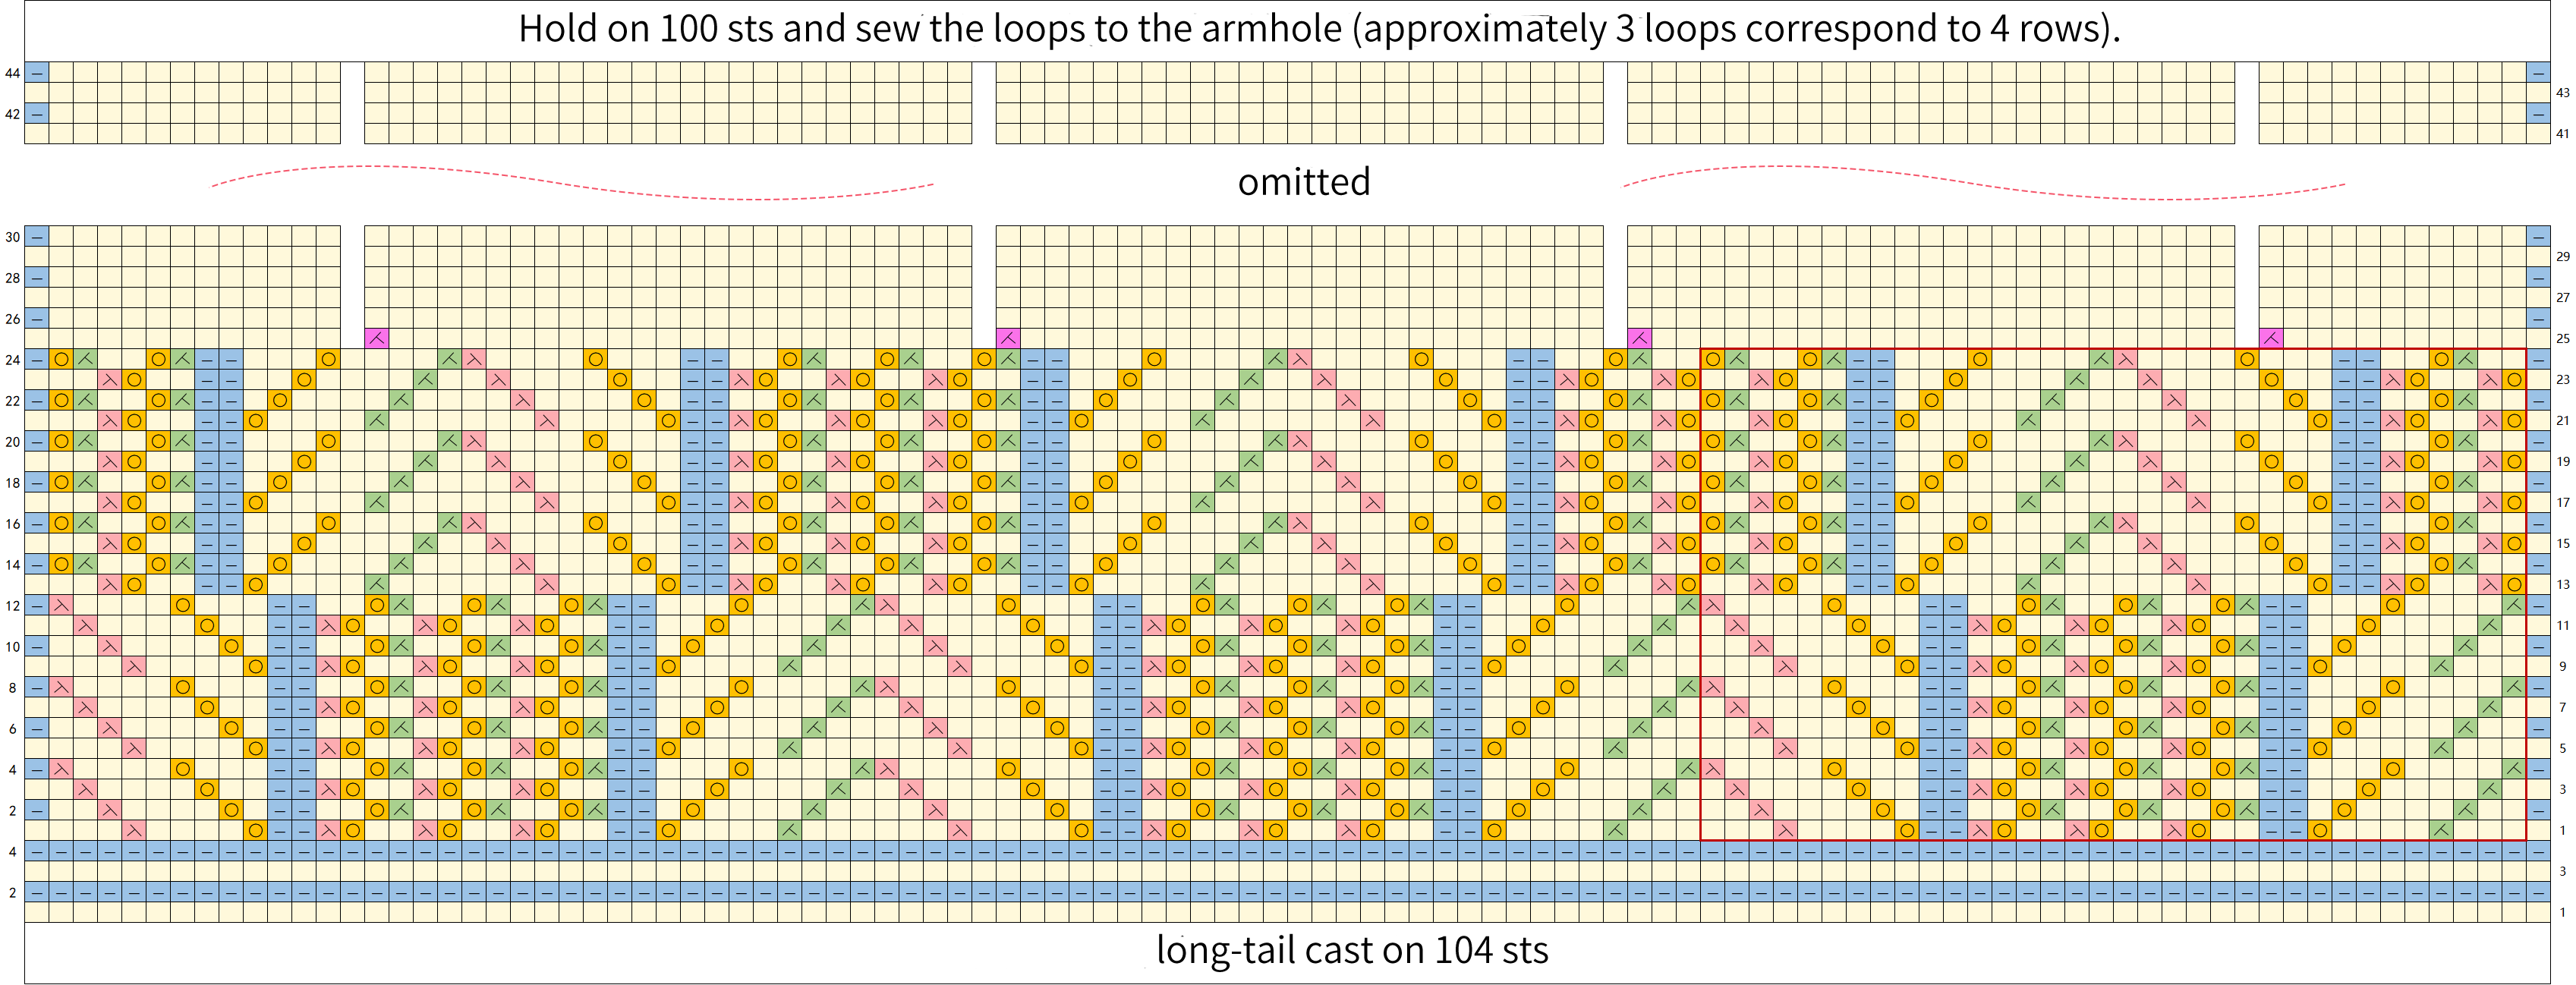
Note: In row 25, decrease 1 stitch after 11 stitches, then decrease 3 times after 24 stitches. A total of 4 stitches decreased. After completion, 100 stitches remain.
Part 4 Sewing TogetherD
Sew the front and back pieces D1 together at the corresponding position, and sew the sleevesD2 .
Part 5 NecklineE
The neckline is created by picking up stitches along the neck opening of the front and back pieces, crocheting in rounds with 1 round of purl stitches, then binding off with knit stitches.
Neckline: Pick up 46 stitches on the back piece and 54 stitches on the front piece, for a total of 100 stitches. Pick up approximately corresponding stitches, work one round of purl stitches, then bind off with knit stitches.
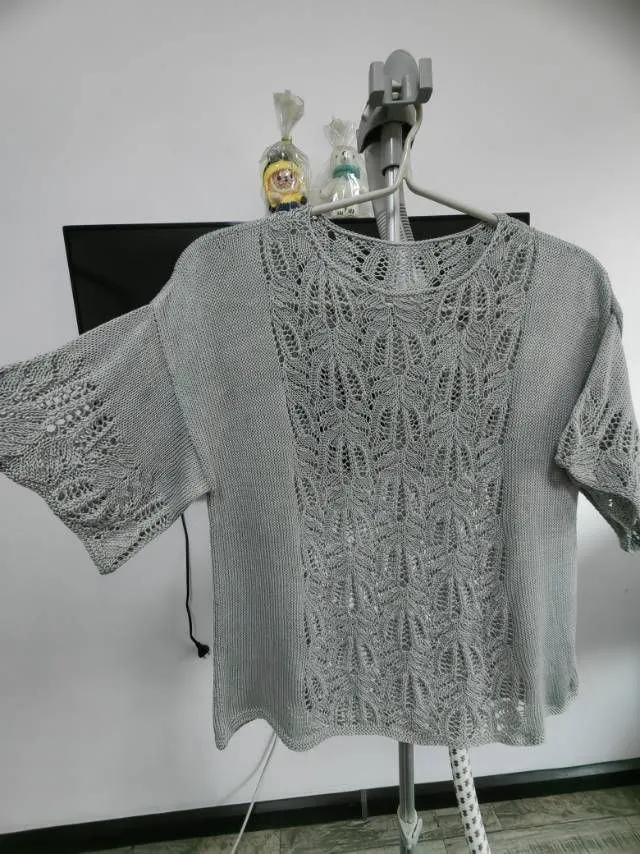
Made by the community