
Clothes
Form and Flow
Project preview
See the finished project
Pattern format
Instructions
Watch and follow
Video tutorial
| Style | Yarn | Color |
|---|---|---|
| Fragrant Lilac Version - S size | Lamb Wool |  04#Fragrant Lilac x 10 04#Fragrant Lilac x 10 |
| South African Soft Mohair Mixed Hand-Knitting Yarn |  01#Whisper White x 2 01#Whisper White x 2 | |
| Moonlight Jade Version - S size | Lamb Wool |  10#Moonlight Jade x 10 10#Moonlight Jade x 10 |
| South African Soft Mohair Mixed Hand-Knitting Yarn | 01#Whisper White x 2 | |
| Meadow Violet Version - S | Lamb Wool |  13#Meadow Violet x 10 13#Meadow Violet x 10 |
| South African Soft Mohair Mixed Hand-Knitting Yarn | 01#Whisper White x 2 | |
| Dusk Blue Version - S | Lamb Wool |  15#Dusk Blue x 10 15#Dusk Blue x 10 |
| South African Soft Mohair Mixed Hand-Knitting Yarn | 01#Whisper White x 2 |
Fragrant Lilac Version - S size
04#Fragrant Lilac x 10Moonlight Jade Version - S size
10#Moonlight Jade x 10Meadow Violet Version - S
13#Meadow Violet x 10Dusk Blue Version - S
15#Dusk Blue x 10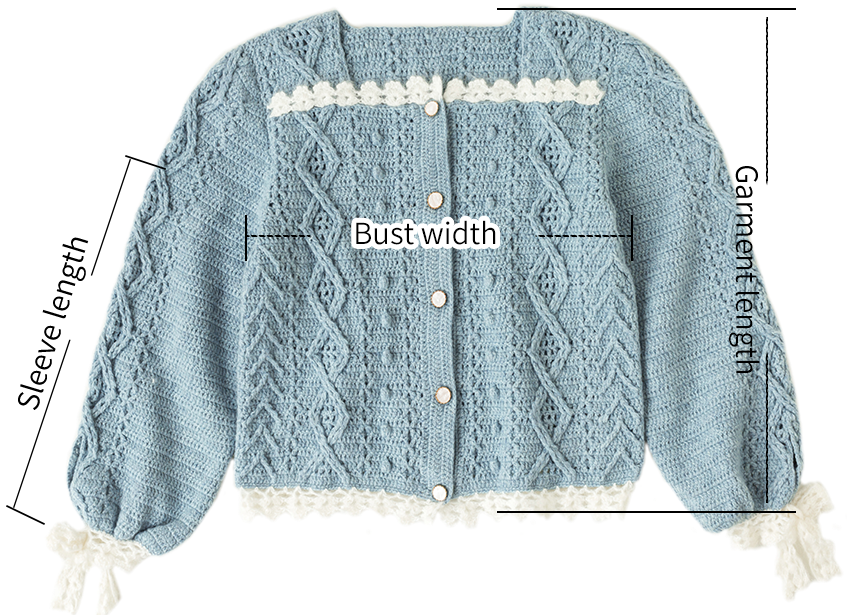
| Size | Bust width | Garment length | Sleeve length |
| Small | 47 cm | 49 cm | 38 cm |
The handcrafted measurements may have an error, the size of the sample is for reference only.
Materials: South African Soft Mohair Mixed Hand-Knitting Yarn (2 strands for hem edging rows 2-4; cuff edging rows 2-5; sleeve tab, lace trim)
Lamb Wool (2 strands for remaining parts)
Hook: 3.50 mm crochet hook
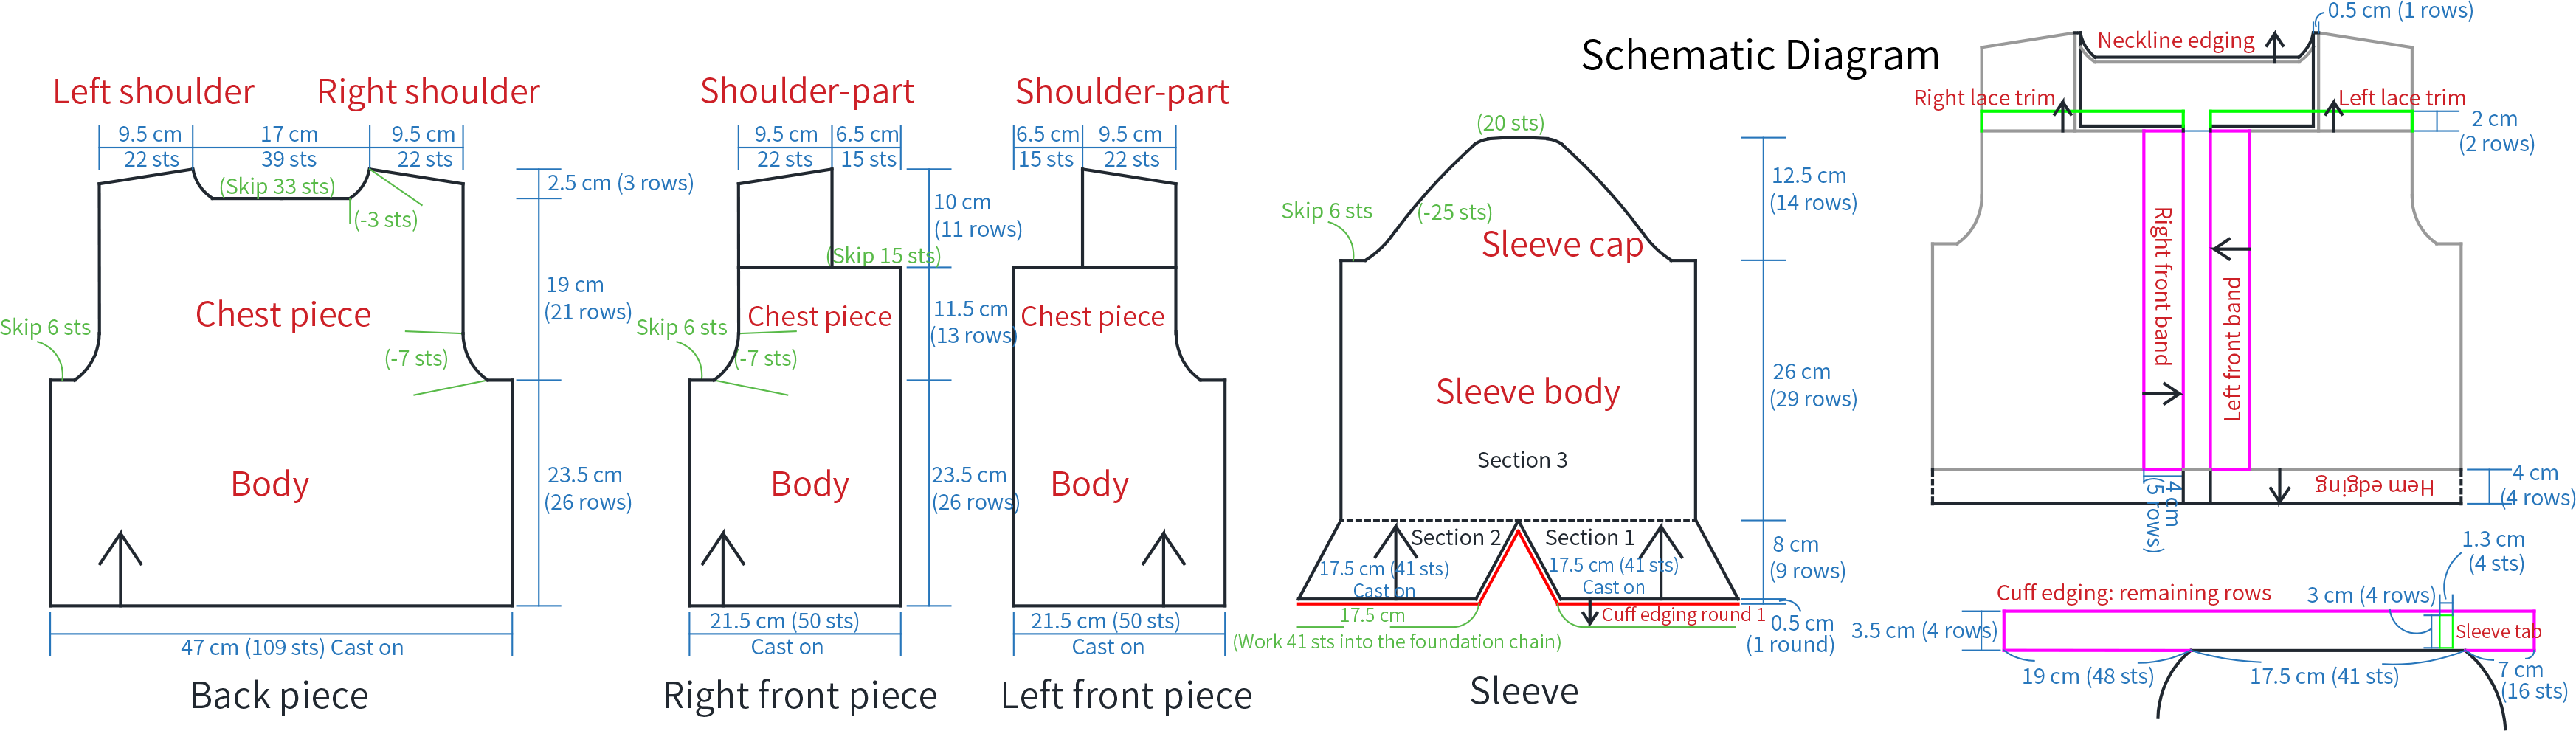
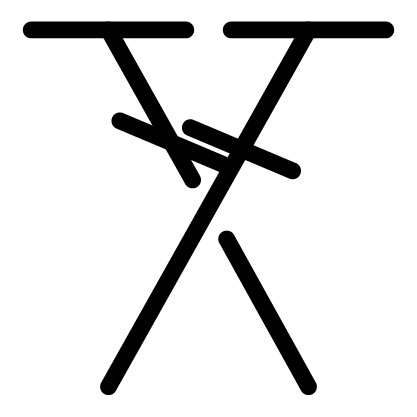
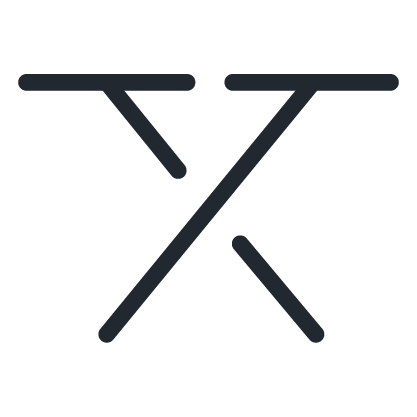
Chart Key










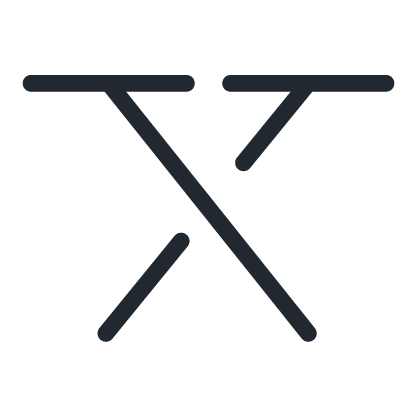
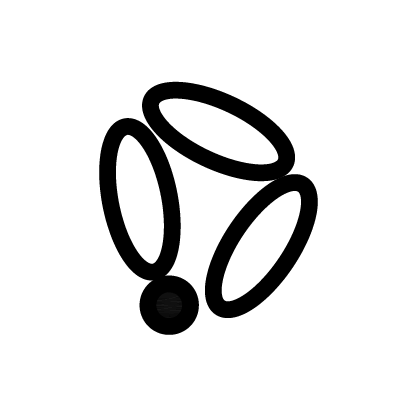
Note: 1. This pattern is making in Chinese crochet pattern terms, and the stitch name is written using American terminology. All measurements in charts are in cm.


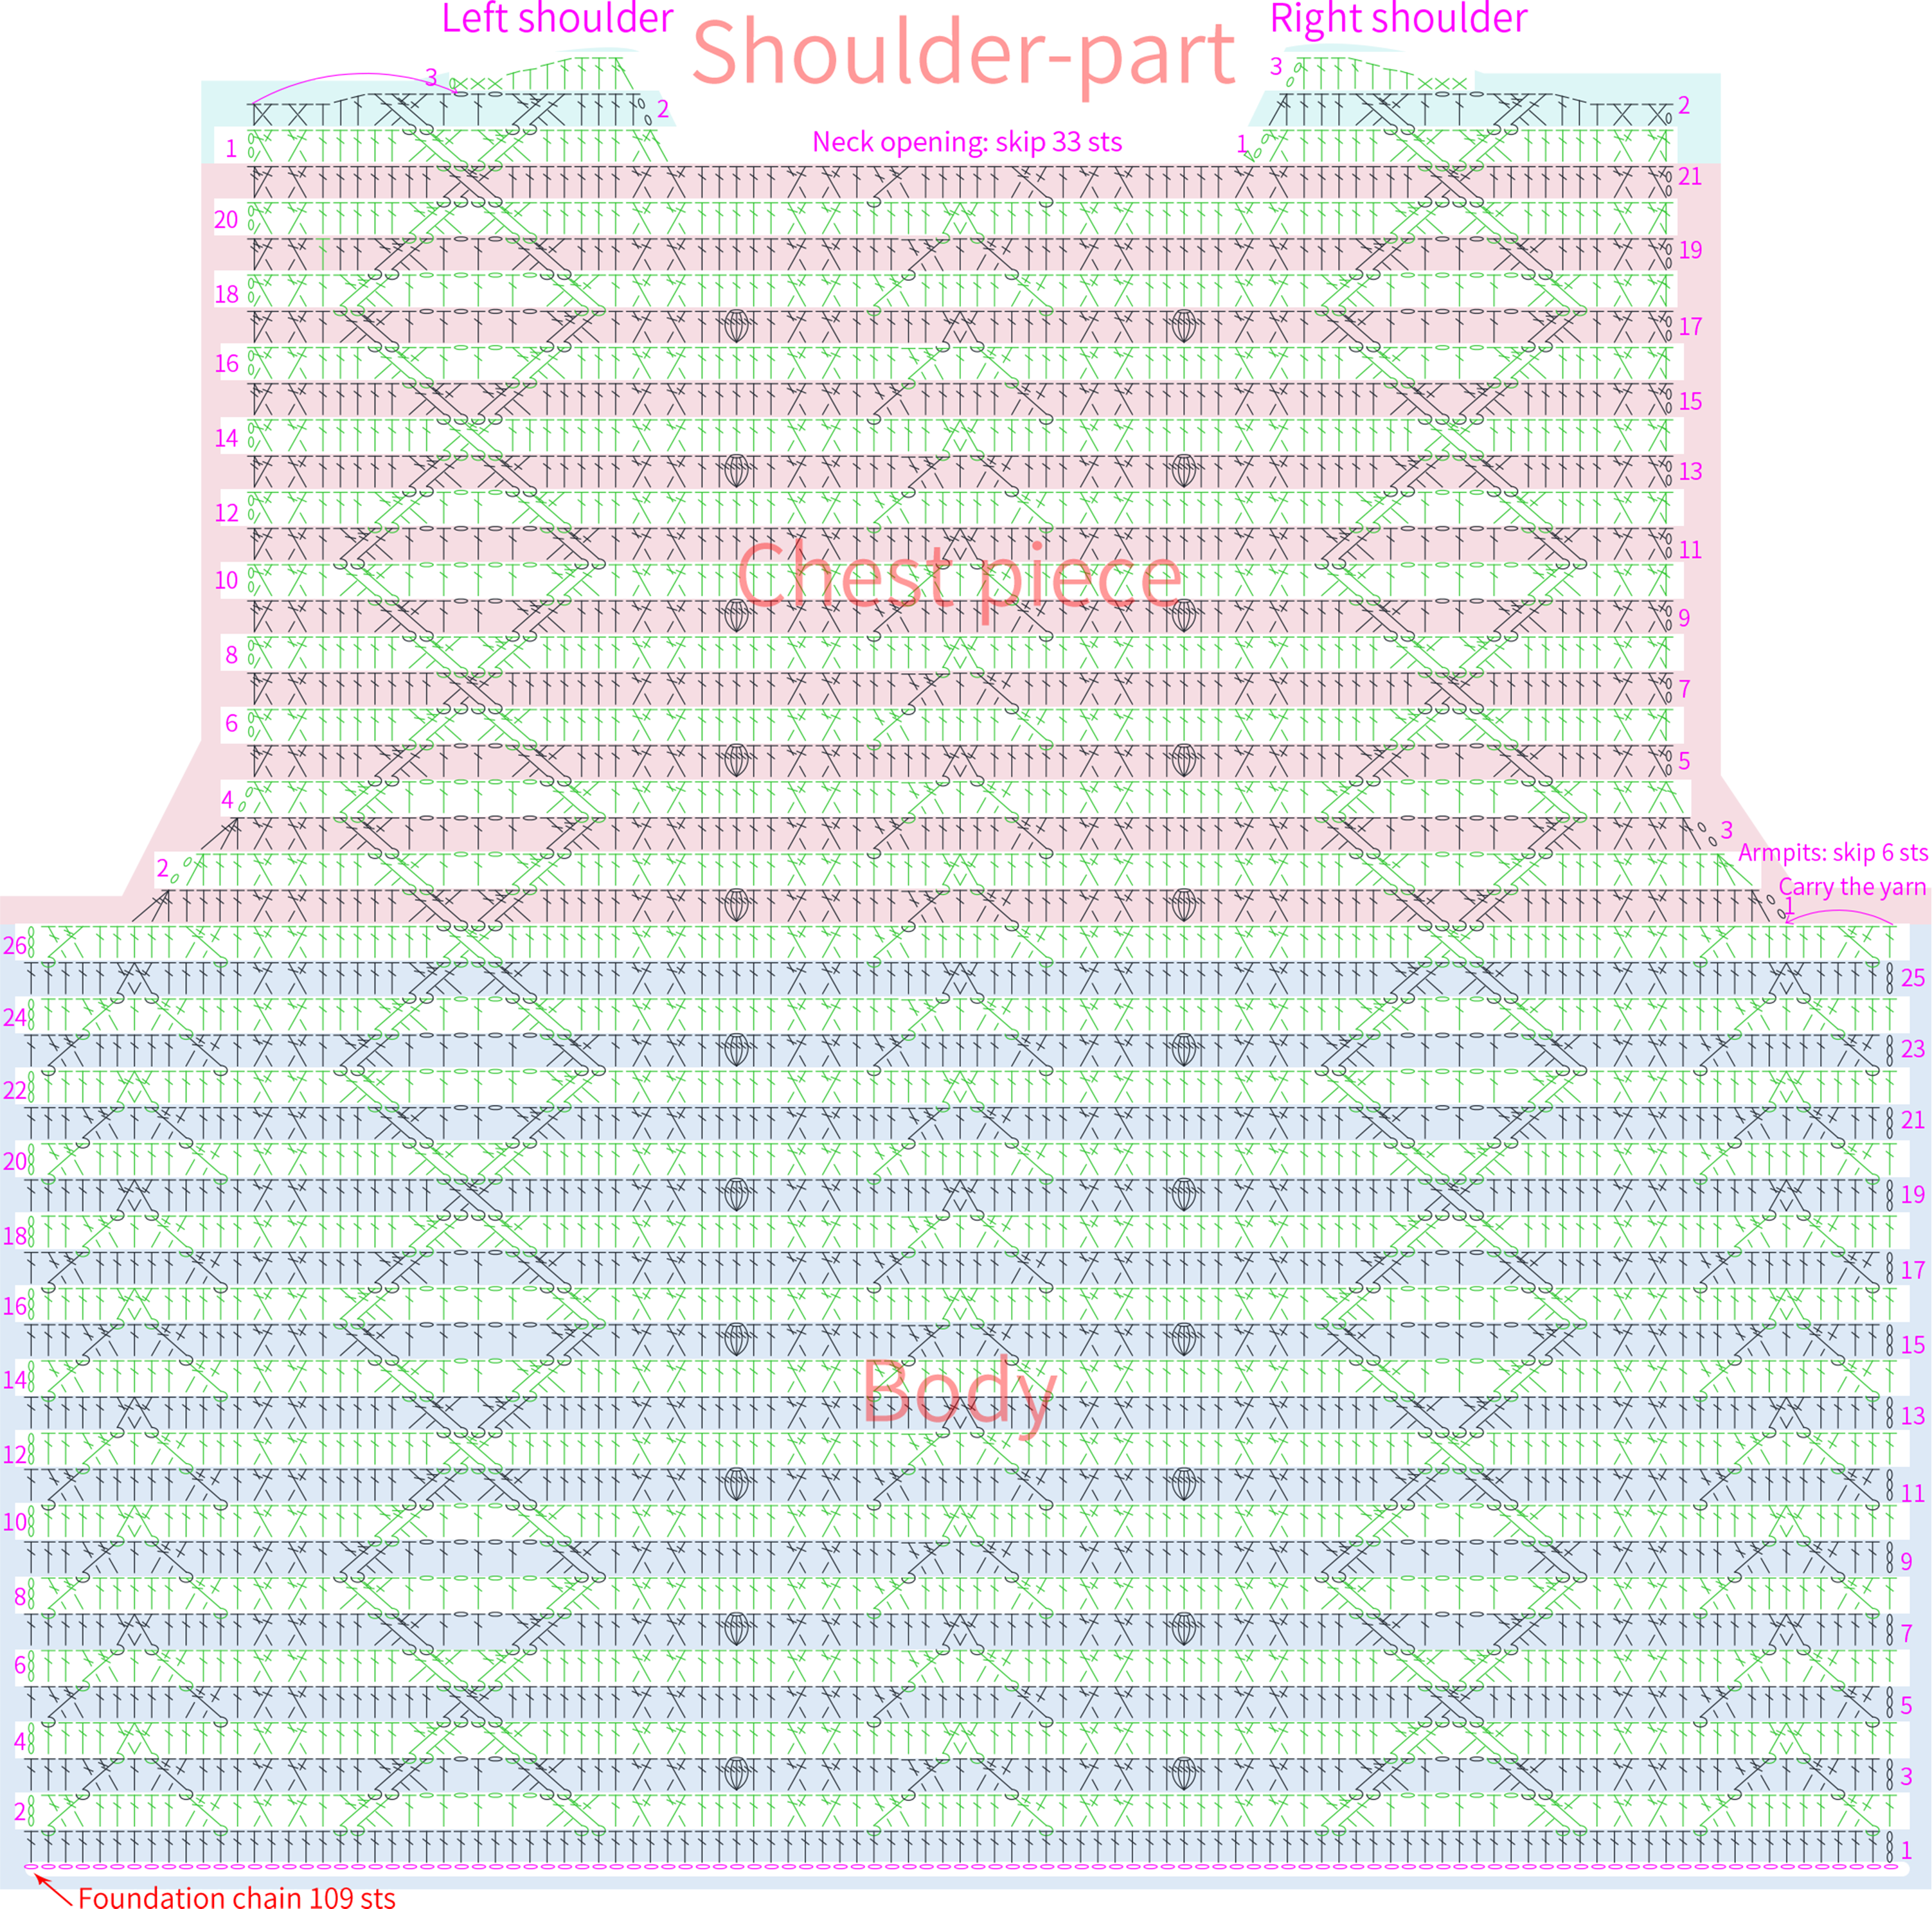
Part 1 Back PieceA 01' 13'' (Part1)
The back piece is divided into the body, chest piece, and shoulder-parts. The body starts with a foundation chain and work back and forth along the foundation chain. The chest piece continues by working back and forth after the body, leaving space for the armpits on both sides. The shoulder-parts are separated into the left shoulder-part and the right shoulder-part. Please refer to the video demonstration for more details.
Note: ① After completing the 8th row of the body, you can measure the dimensions and compare them with the finished measurement (about 47×7.5cm). If there's a significant difference, you'll need to adjust your tension and re-crochet according to the actual situation.
② The left and right on the charts refer to the actual wearing position.
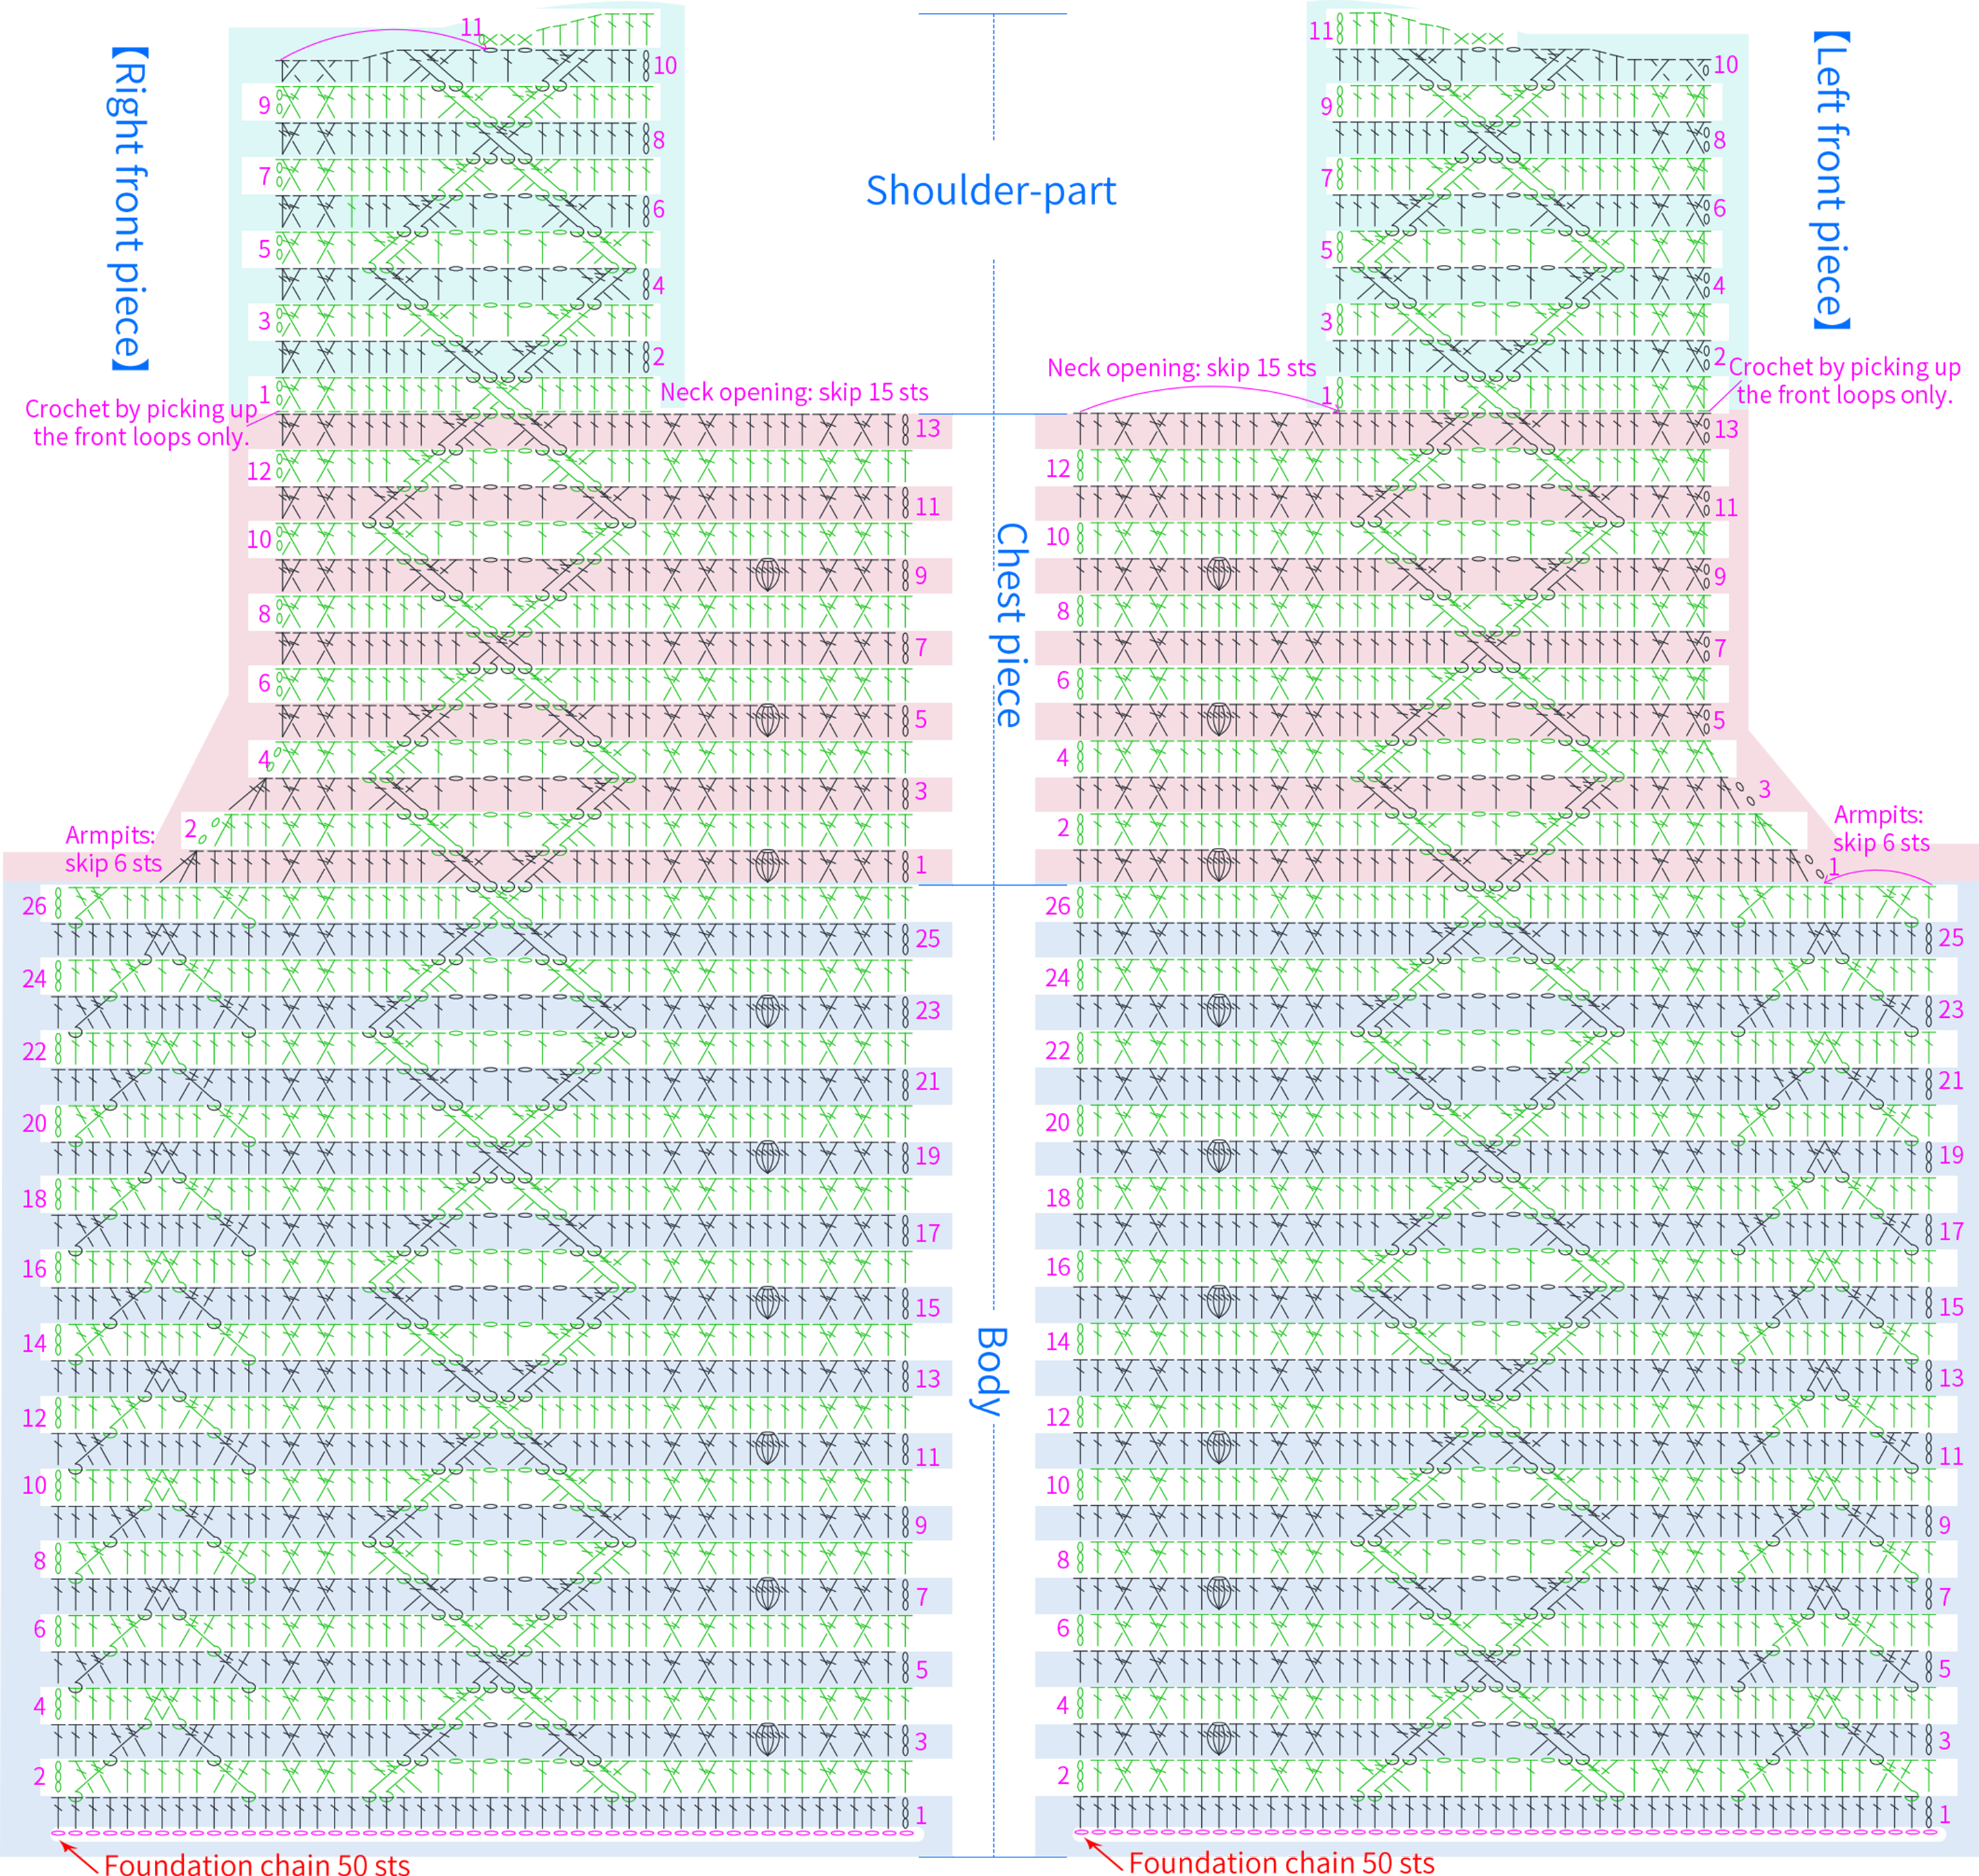
Part 2 Left and Right front piecesB 60' 05'' (Part1)
The left front piece and right front piece are also divided into 3 parts: body, chest piece, and shoulder-parts. The crochet technique is similar to the back piece. Please refer to the video demonstration for more details.
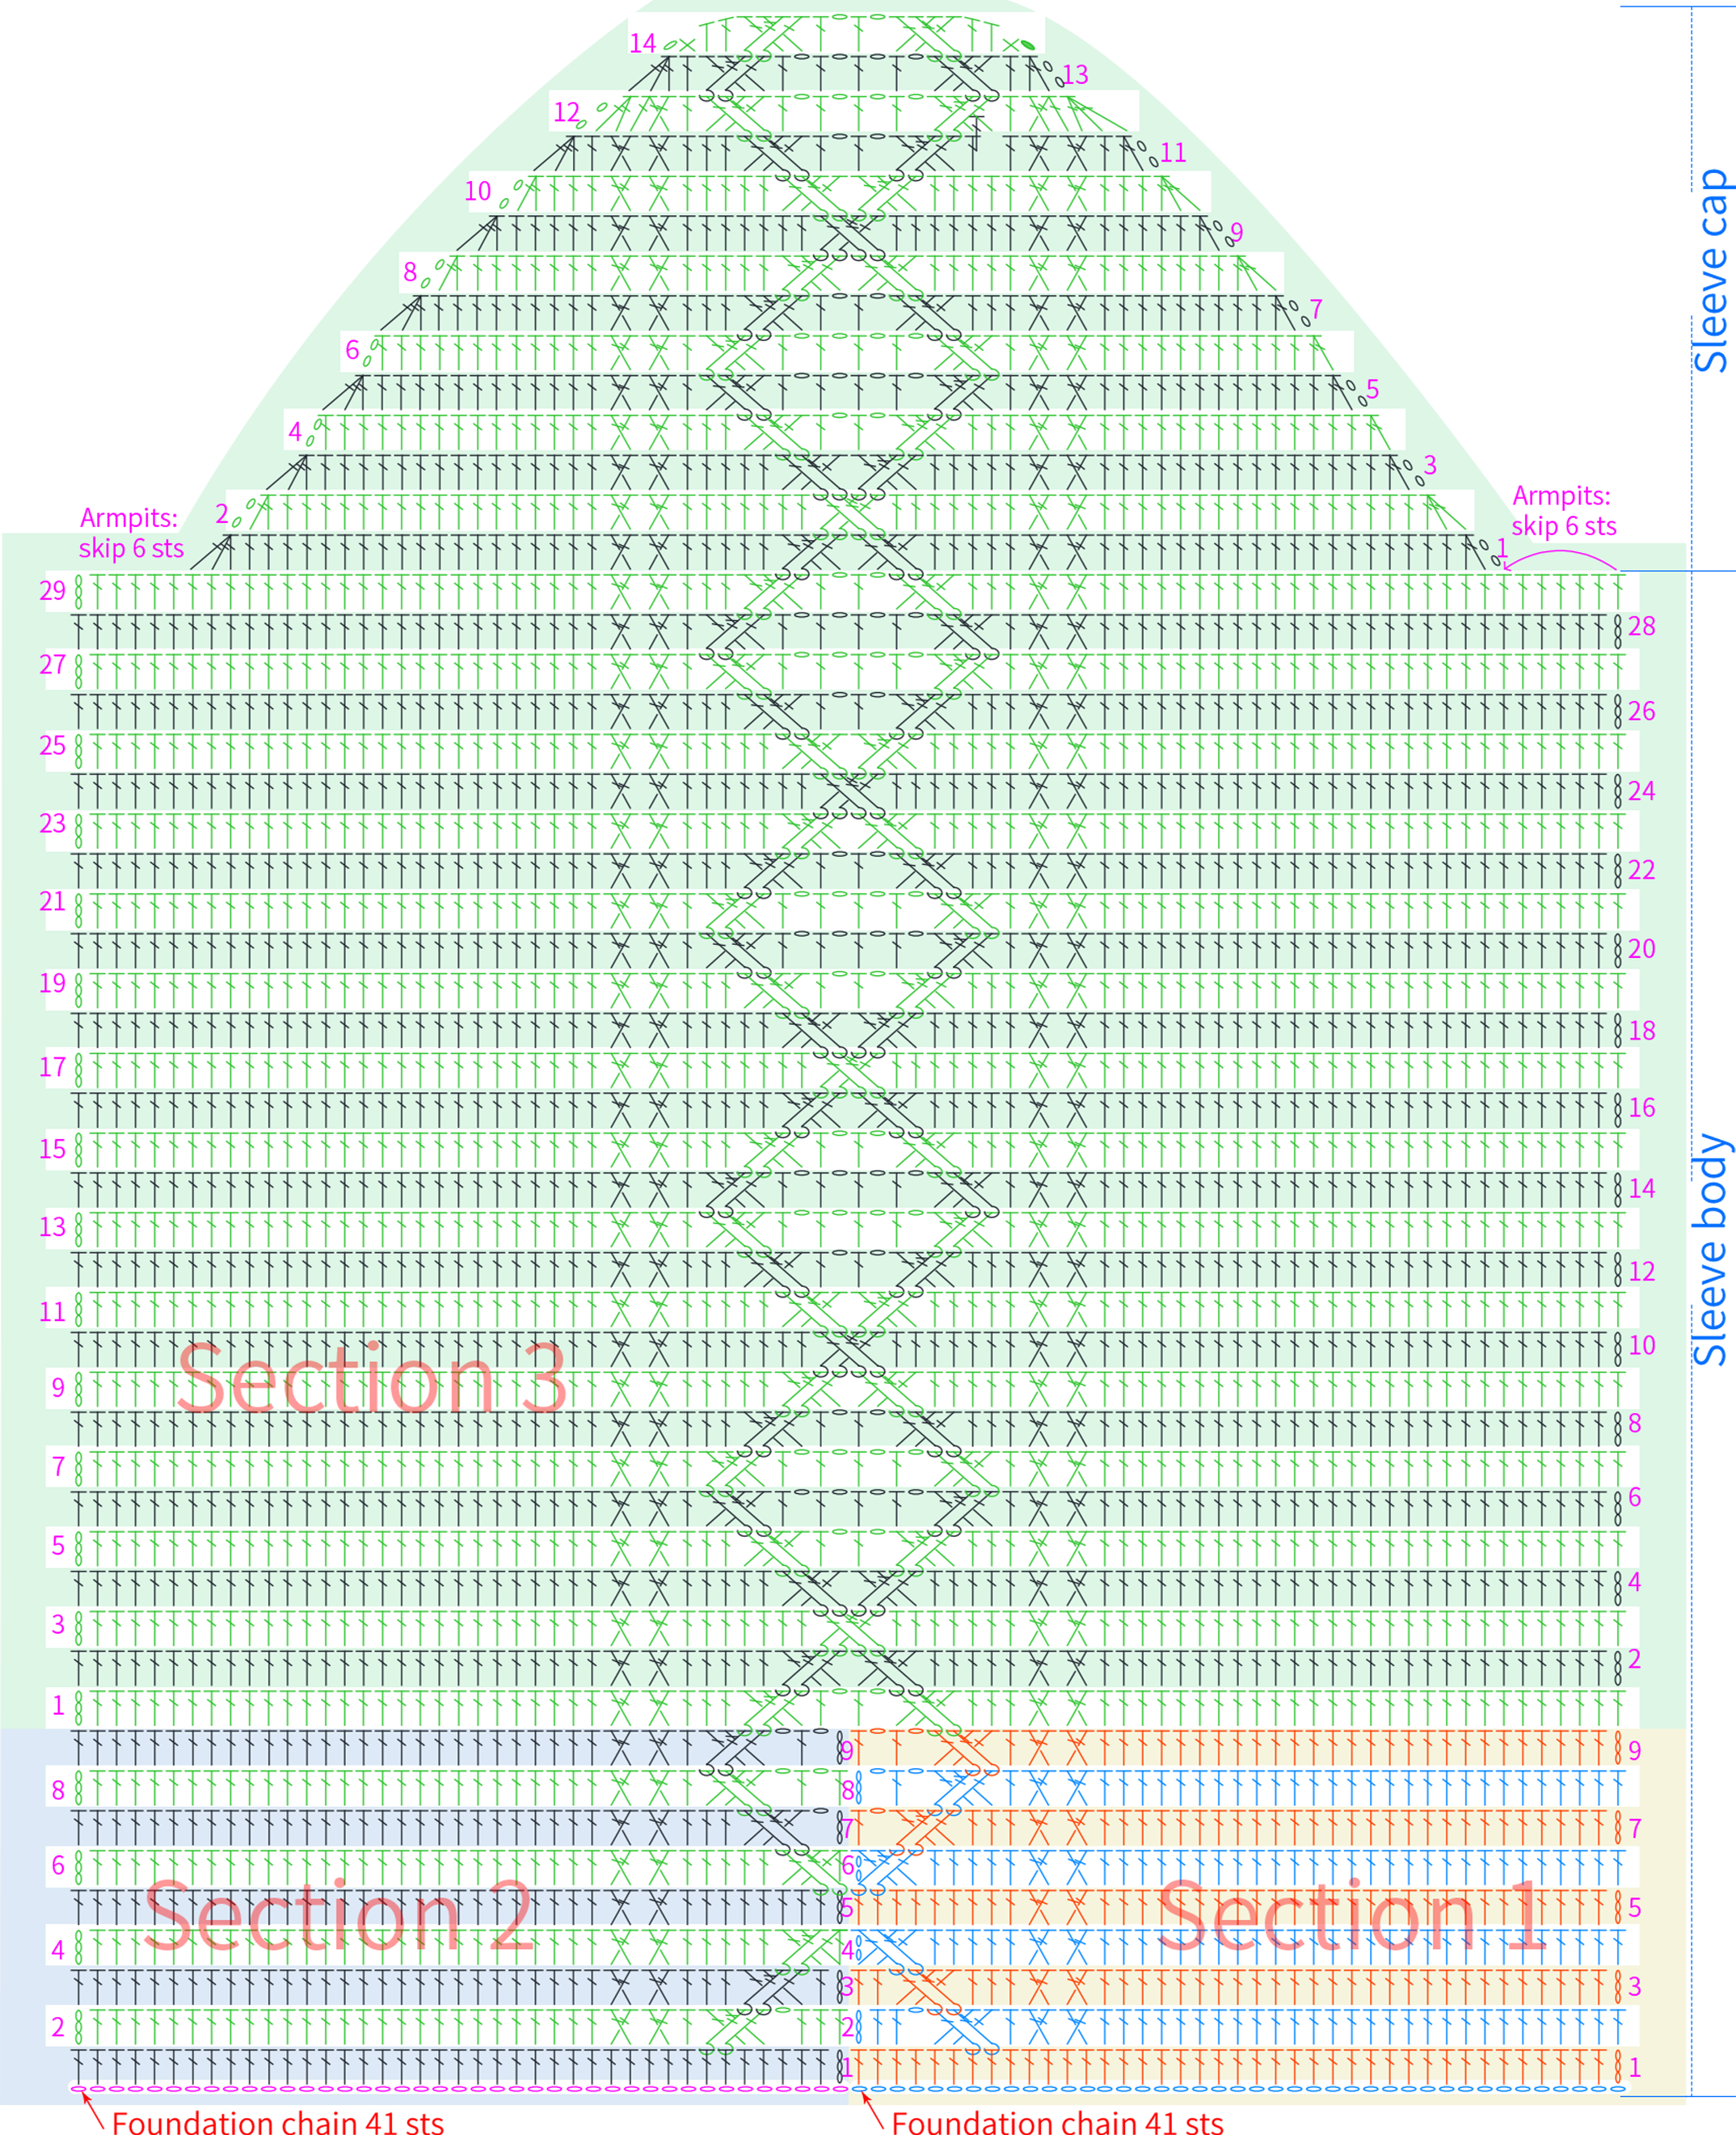
Part 3 SleevesC 75' 22'' (Part1)
There are 2 sleeves in total, and the crocheting method is identical. They are divided into the sleeve body and the sleeve cap. The sleeve body is further divided into the Section 1, Section 2, and Section 3. The first two sections both start with a foundation chain, working back and forth along the foundation chain, then merge to crochet the Section 3. The sleeve cap continues crocheting after the sleeve body. Please refer to the video demonstration for more details.
Part 4 JoiningD 00' 11'' (Part2)
Joining together is divided into several parts: shoulder-parts joining, body joining, and sleeves joining. Please refer to the video demonstration for more details.
Note: When joining together, you can adjust the insertion position according to your needs. Just make sure to join evenly so that the fabric lays flat.
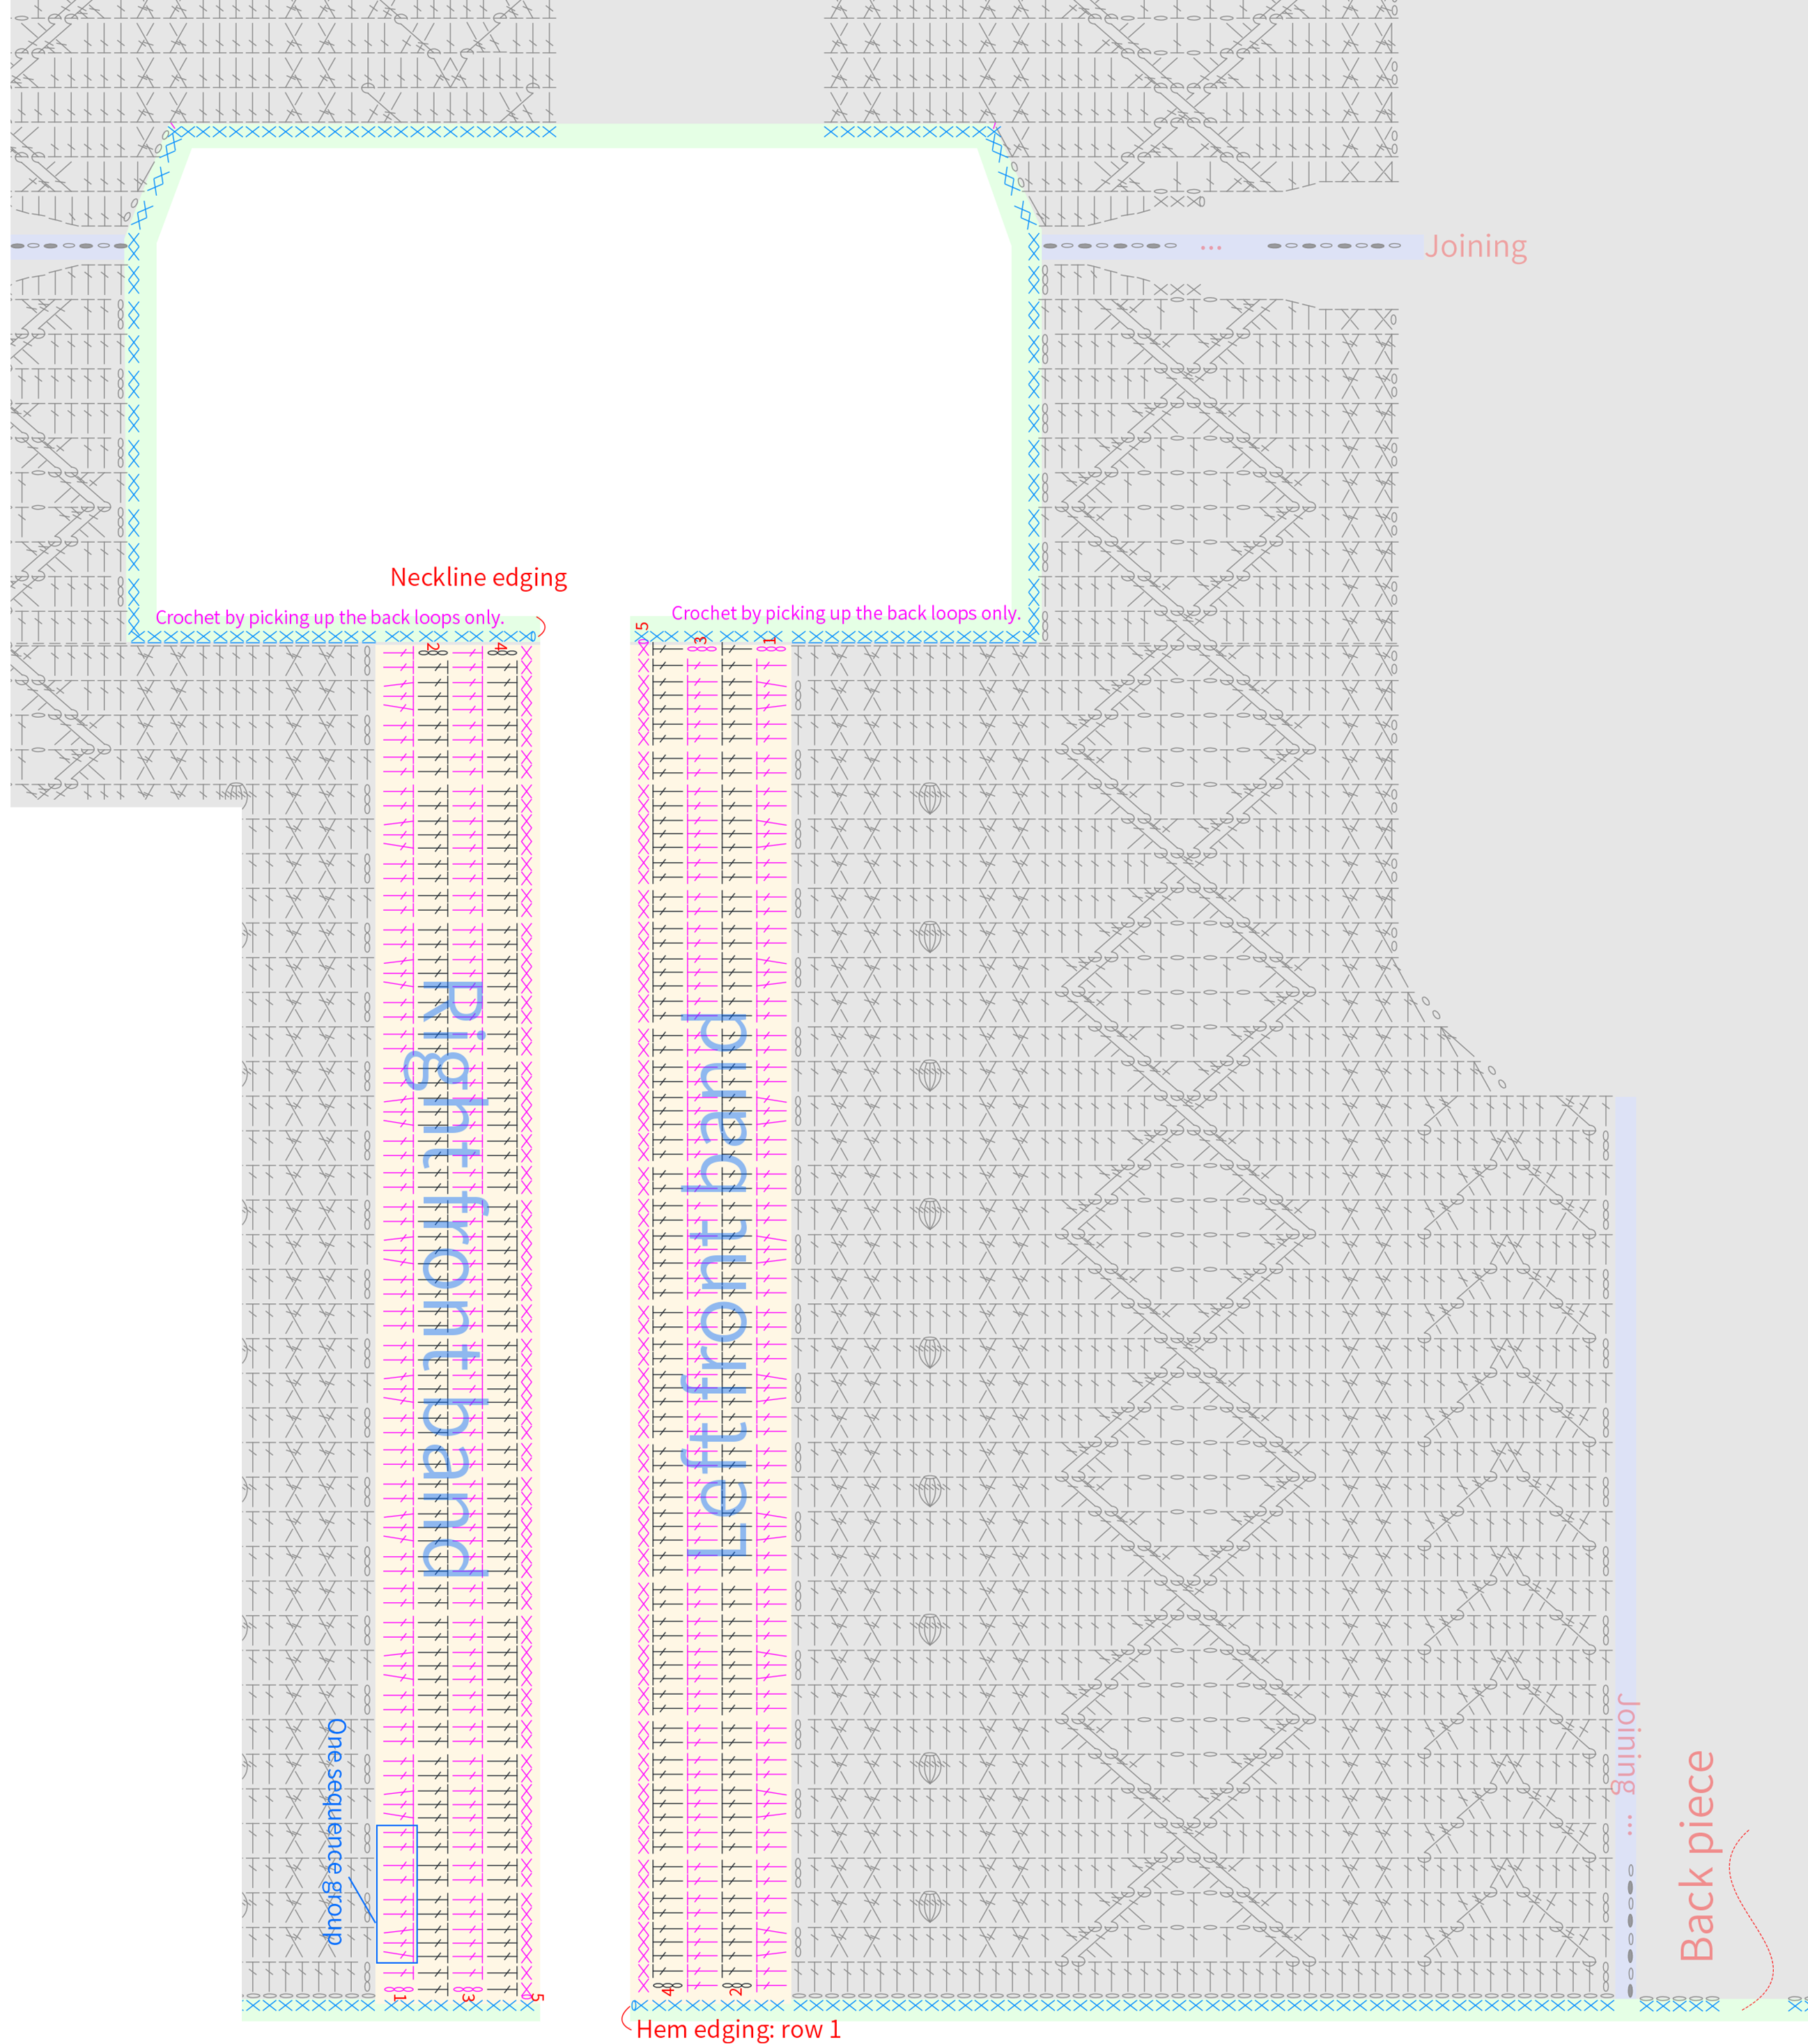
Part 5 Front bandENeckline edgingFHem edgingG 15' 15'' (Part2)
The front band is divided into left and right front bands. The crocheting method is similar for both, and they are both worked back and forth along the side edges of the front piece body and chest pieces. The neckline edging is crocheted at the neckline positions of the front and back pieces. The hem edging is crocheted back and forth along the foundation chain of the front and back pieces. While crocheting, you will need to switch colors. Please refer to the video demonstration for more details.
Note: The number of double crochets for the front band and the number of single crochets for the neckline edging can be adjusted as needed. Pay attention to keeping the fabric piece flat. At the end of the second row of the hem edging, mindfully adjust the number of stitches in the interval.

Part 6 Cuff edgingH 35' 38'' (Part2)
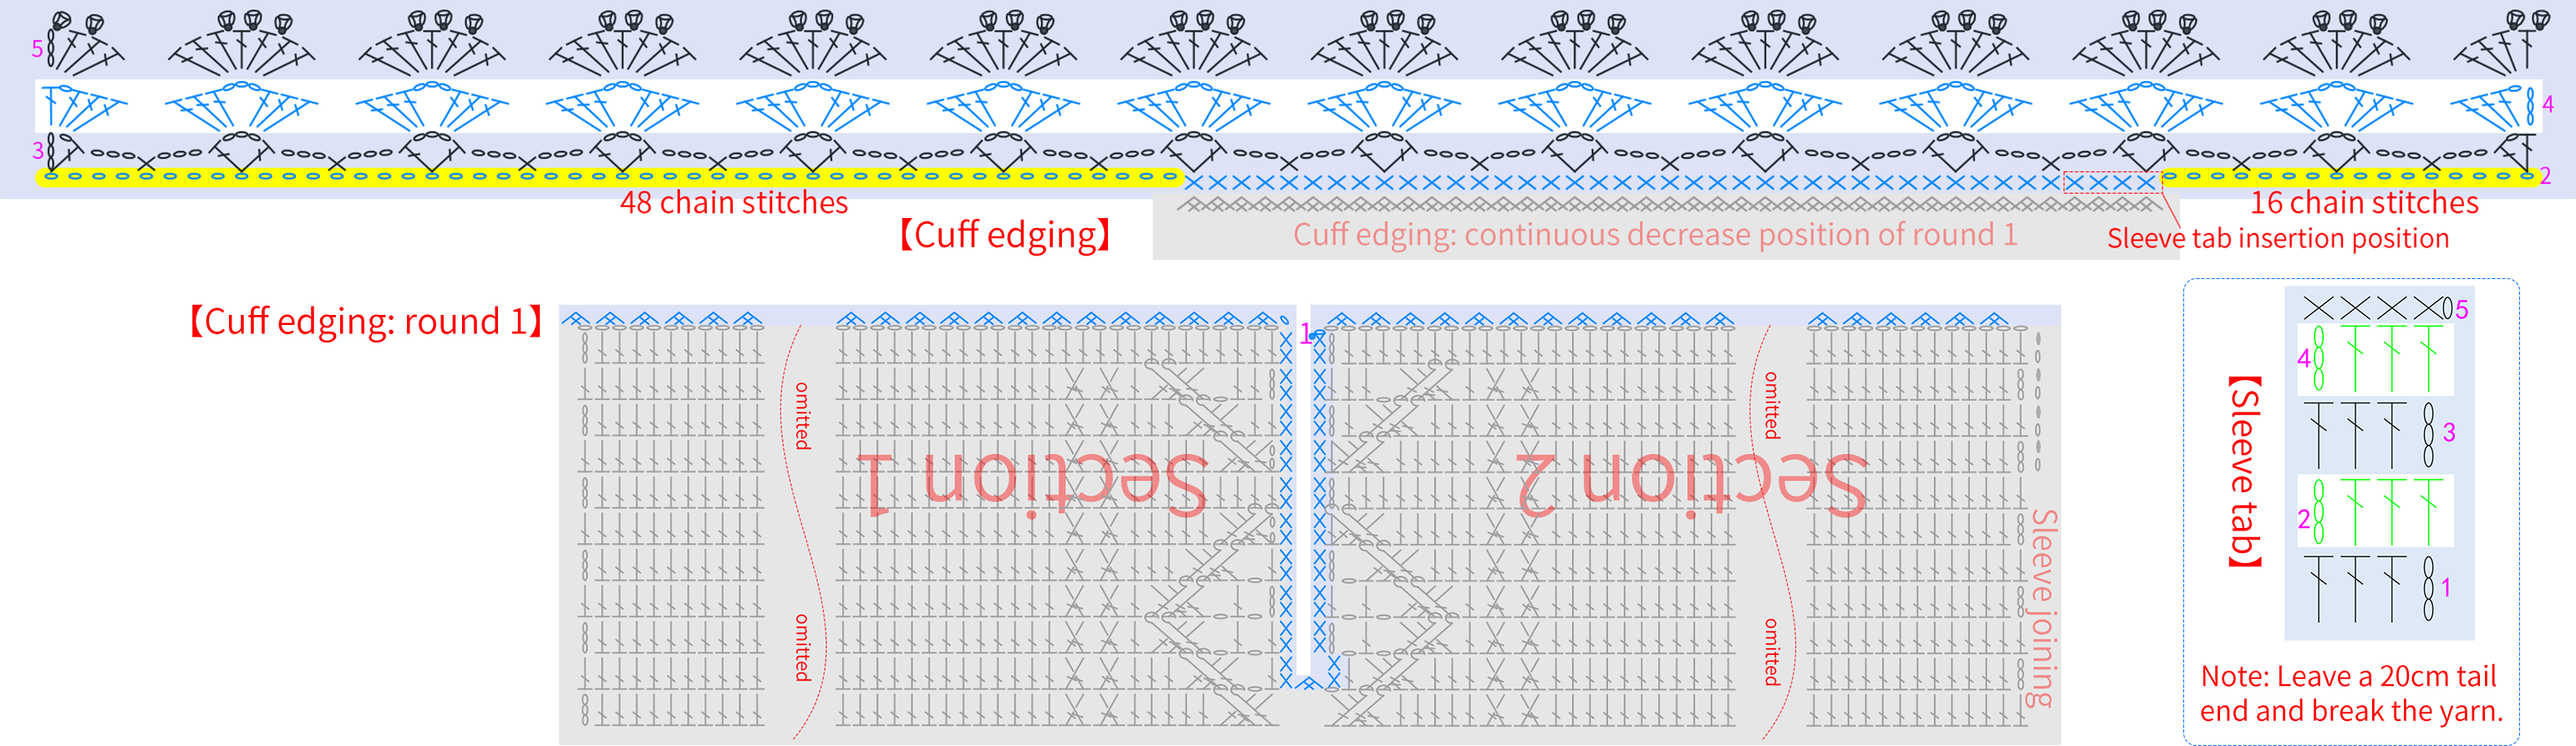
The edging technique for both cuffs is identical. First, crochet in rounds, then switch colors and work back and forth in rows, and finally crochet the sleeve tab. Please refer to the video demonstration for more details.
Part 7 Lace trimIButtonsJ 48' 52'' (Part2)
The lace trim is worked back and forth on the remaining half stitches of the last row of the chest piece and part of the neckline edging position. It is divided into left lace trim and right lace trim. After completing, attach the buttons on the left front band. Please refer to the video demonstration for more details.
Note: When crocheting the lace trim, if the corresponding insertion position is a front post stitch, adjust the insertion position according to the actual situation to avoid the front post stitch position. This will ensure the lace is flat and aesthetically pleasing.

Made by the community





