Clothes
Free Spirit Vest
Project preview
See the finished project
Pattern format
Instructions
Watch and follow
Video tutorial
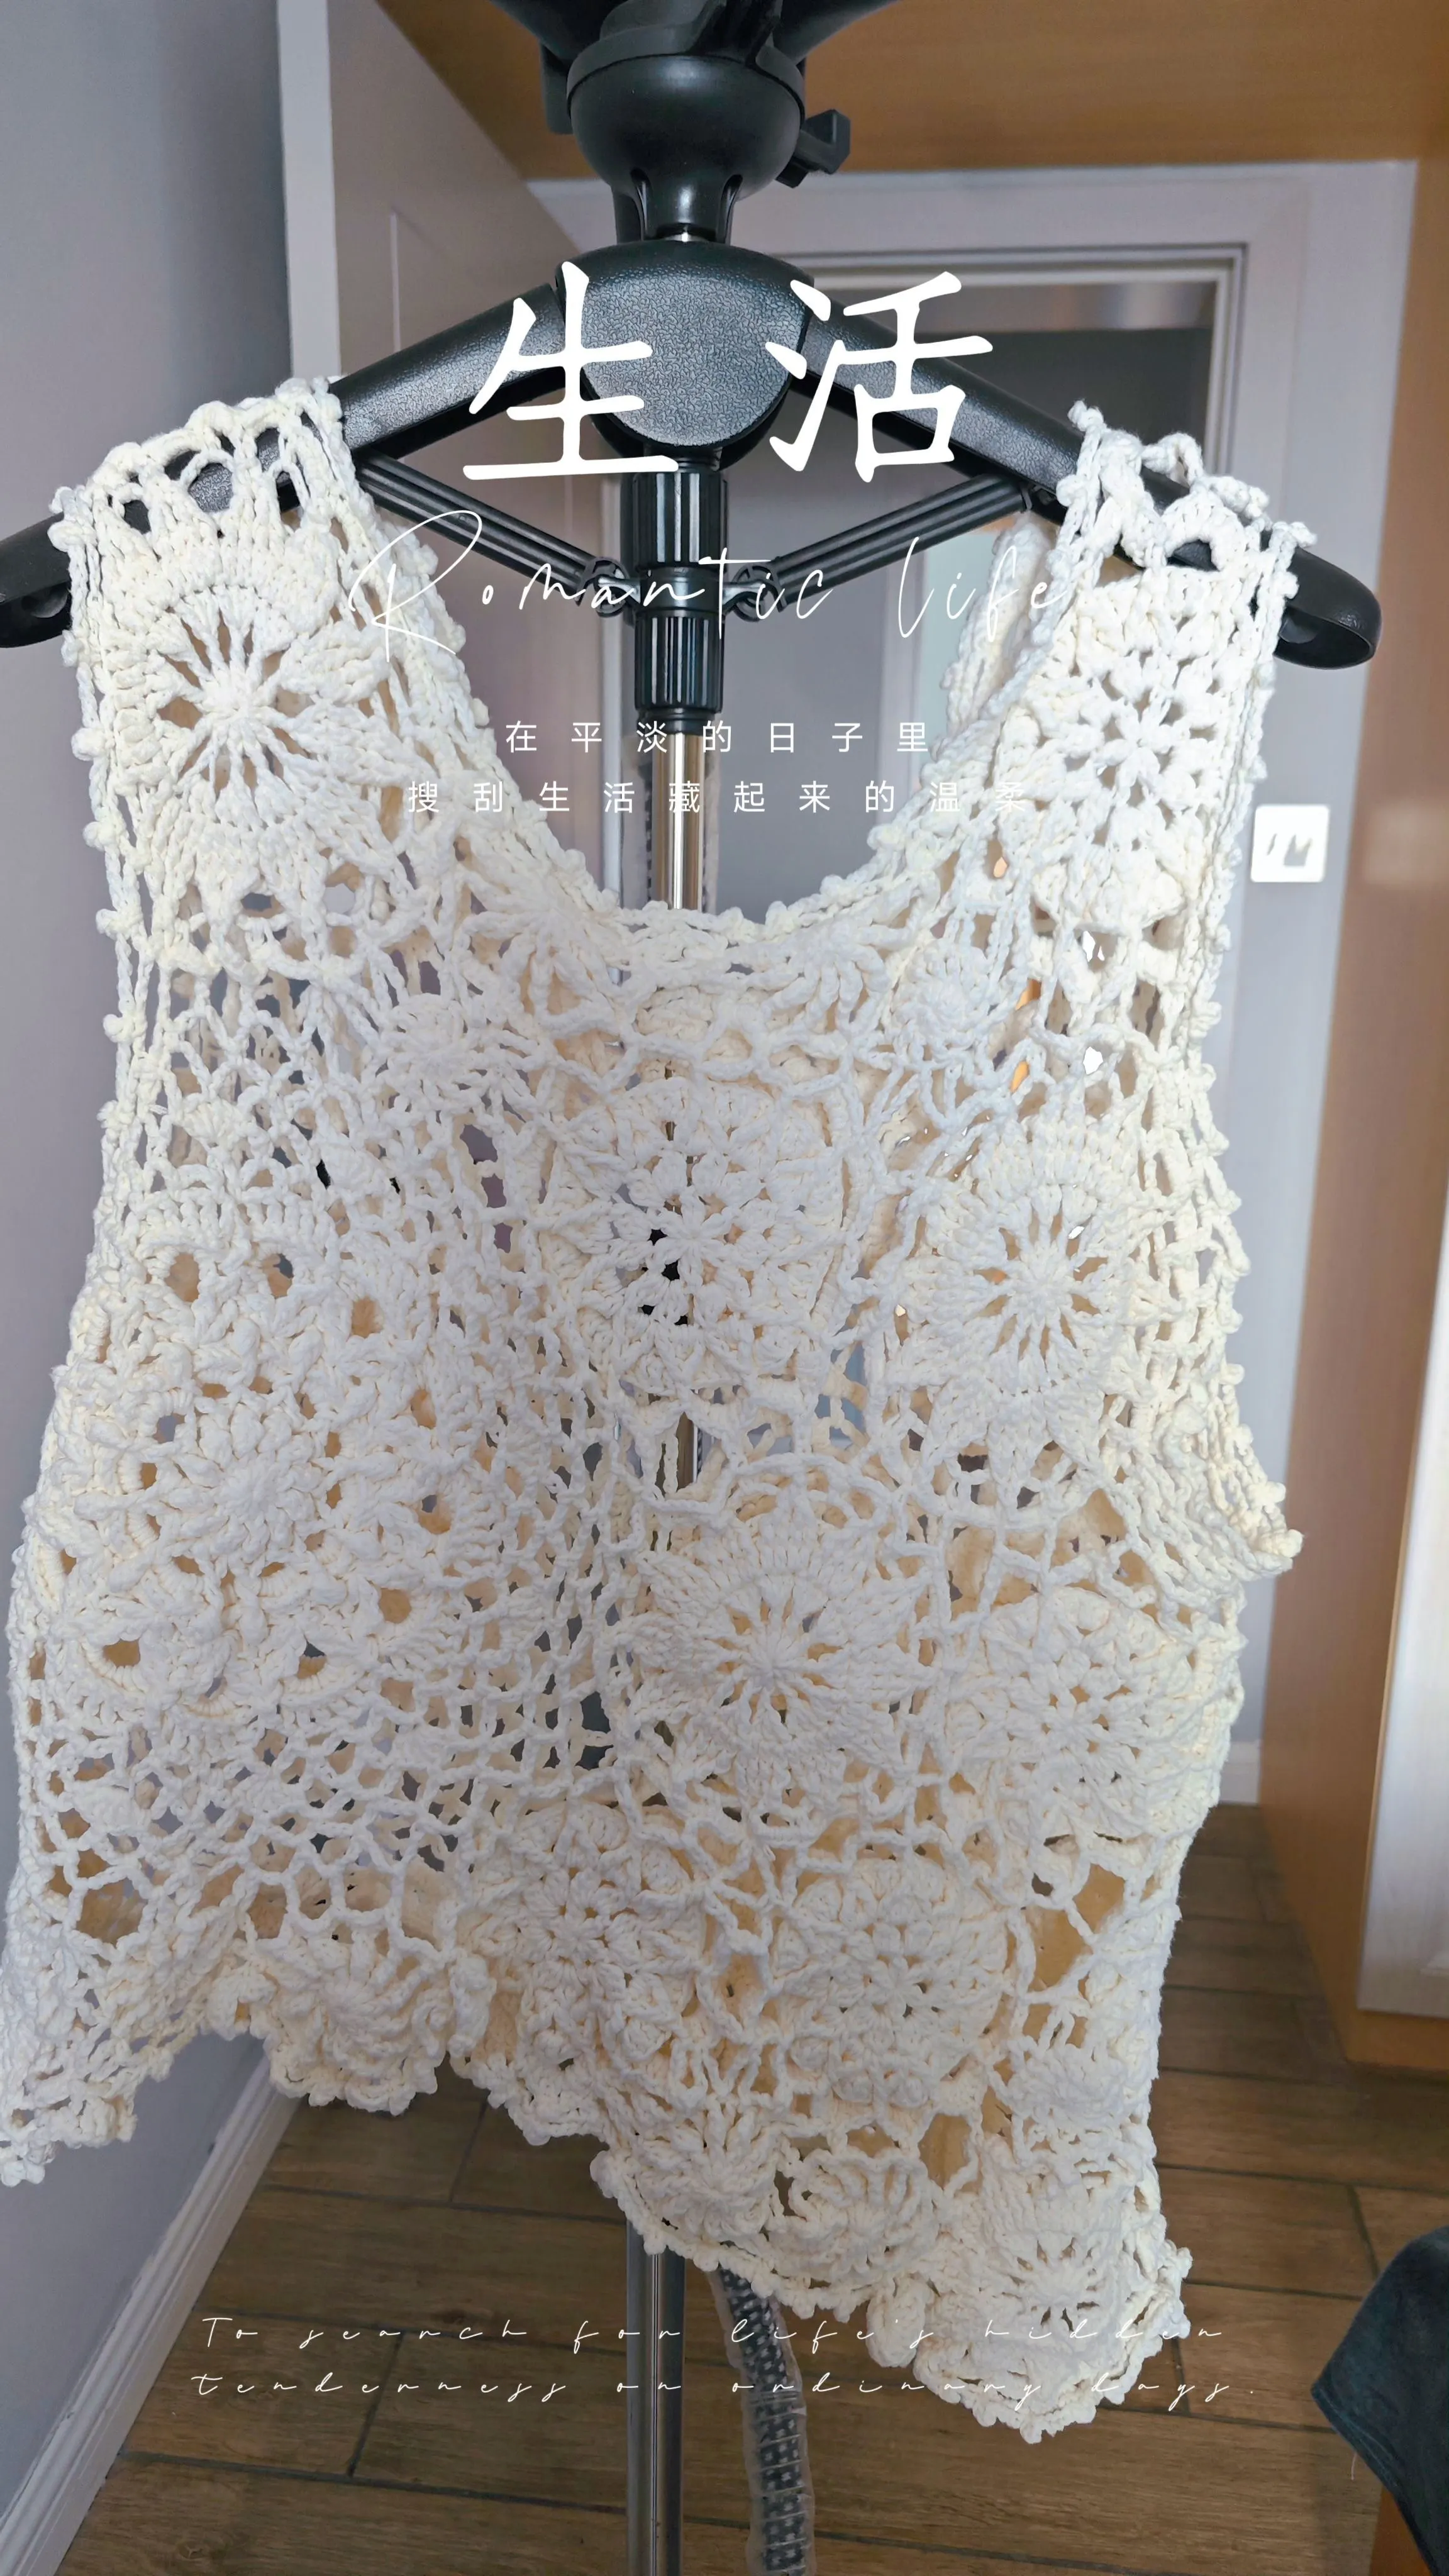
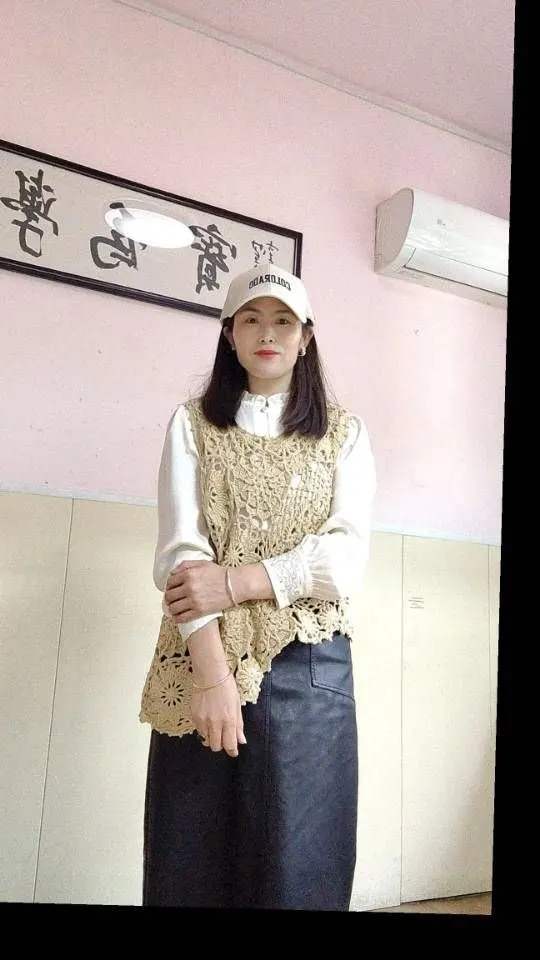
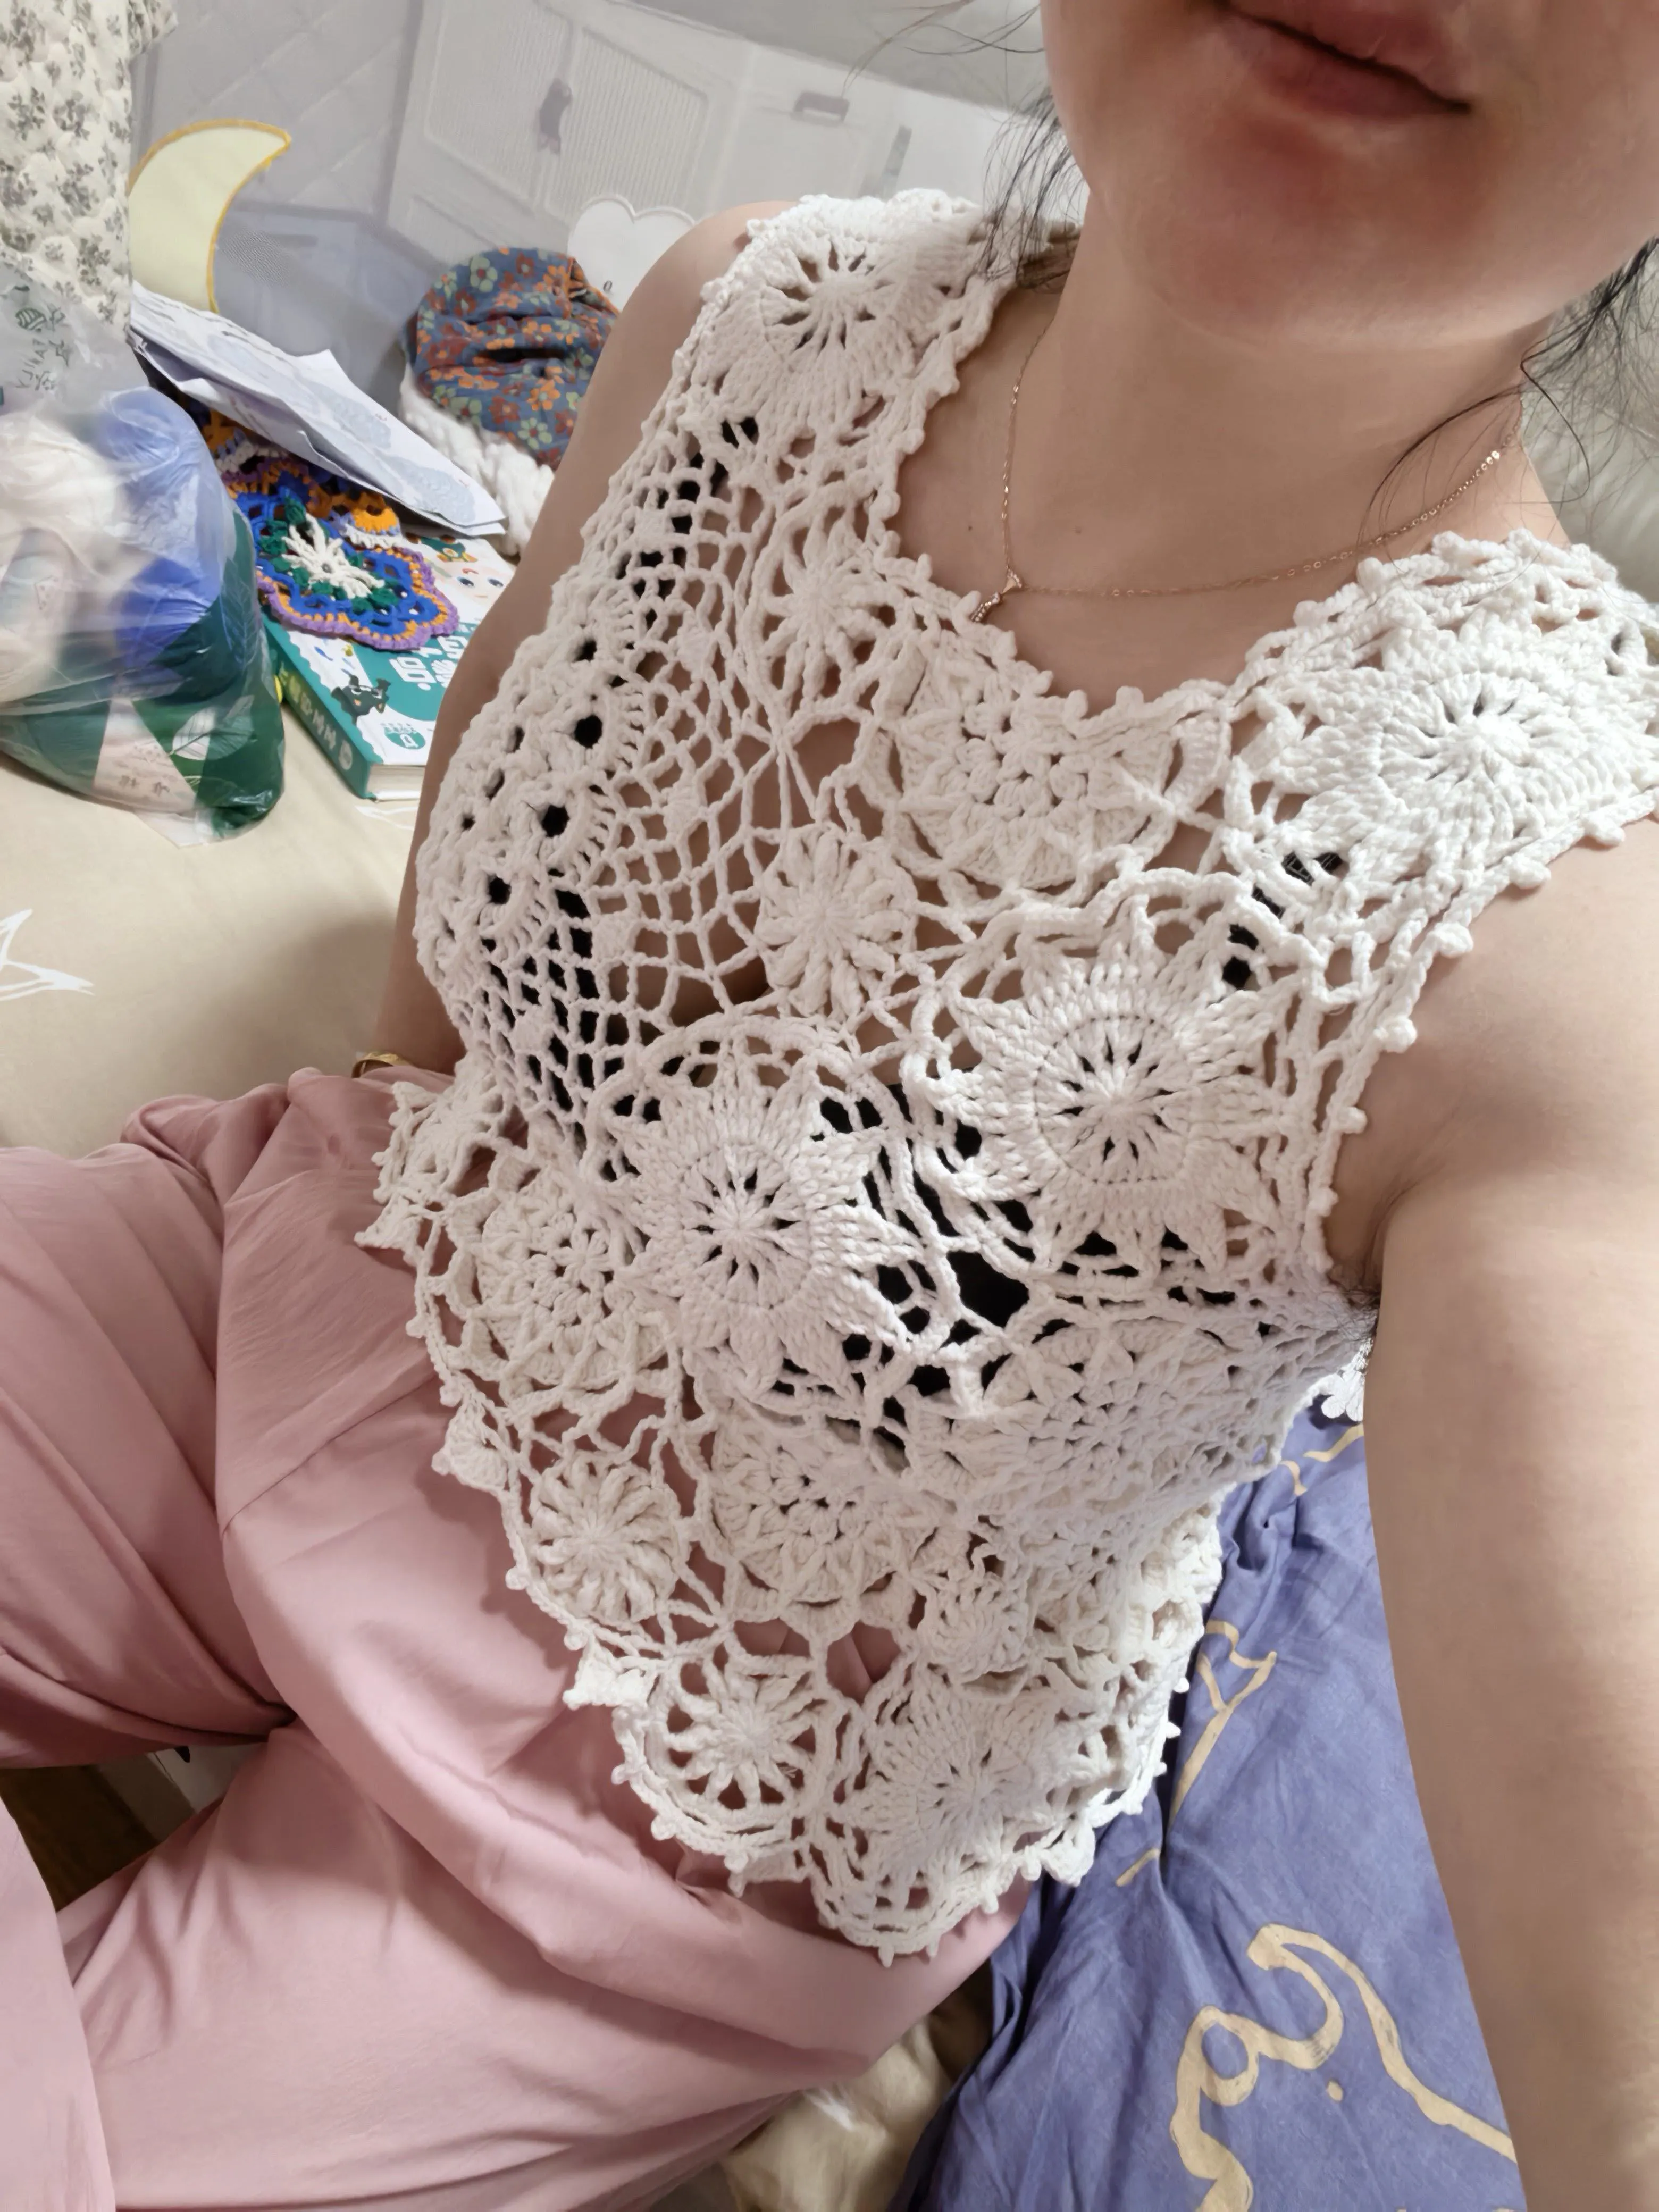
The vest is made by joining various motifs together. After joining motifs 1 to 4, then add motif 5 or motif 6 in the empty areas. After that, complete the grid pattern to the noticeably indented areas at the cuffs. Finally, crochet the edging on the hem, the cuffs and the neckline.
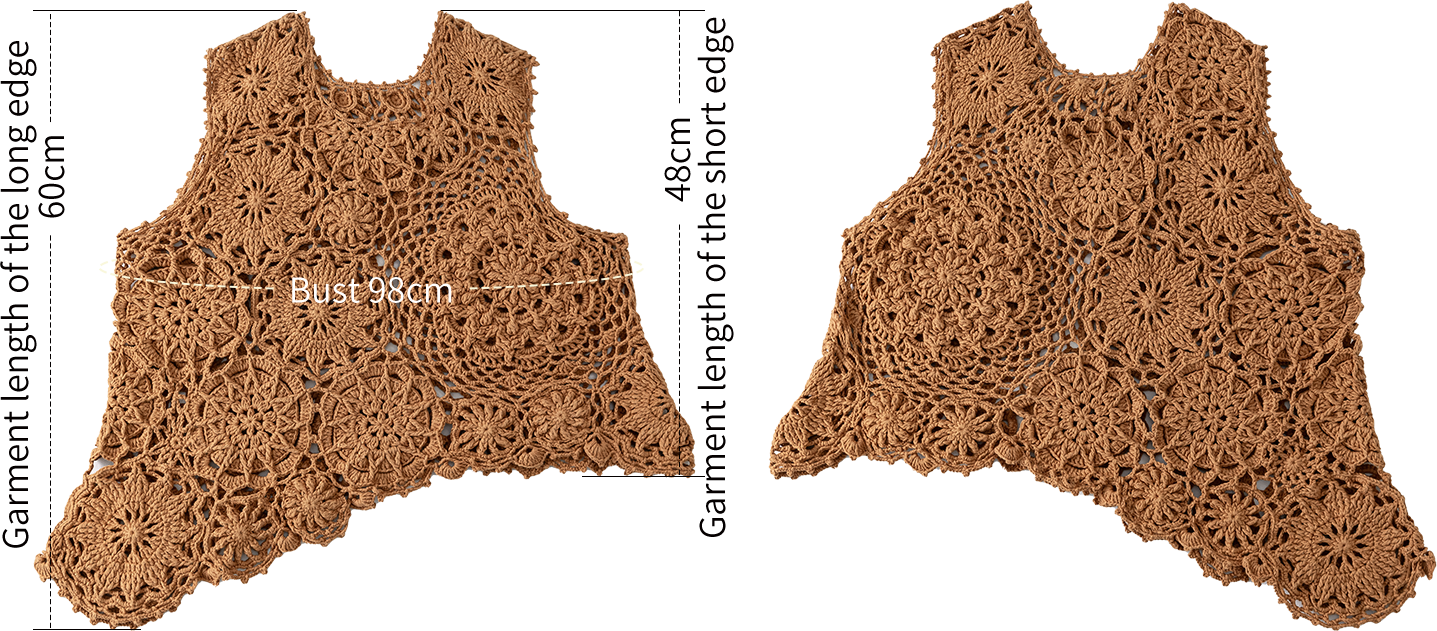
The handcrafted measurements may have an error of 1 to 2 cm. Due to variations in individual tension, the size of the sample is for reference only.
Materials: Susan's Family 4-Ply Combed Cotton & Acrylic Fibre Hand Knitting Yarn
Hook: 3.00mm crochet hook
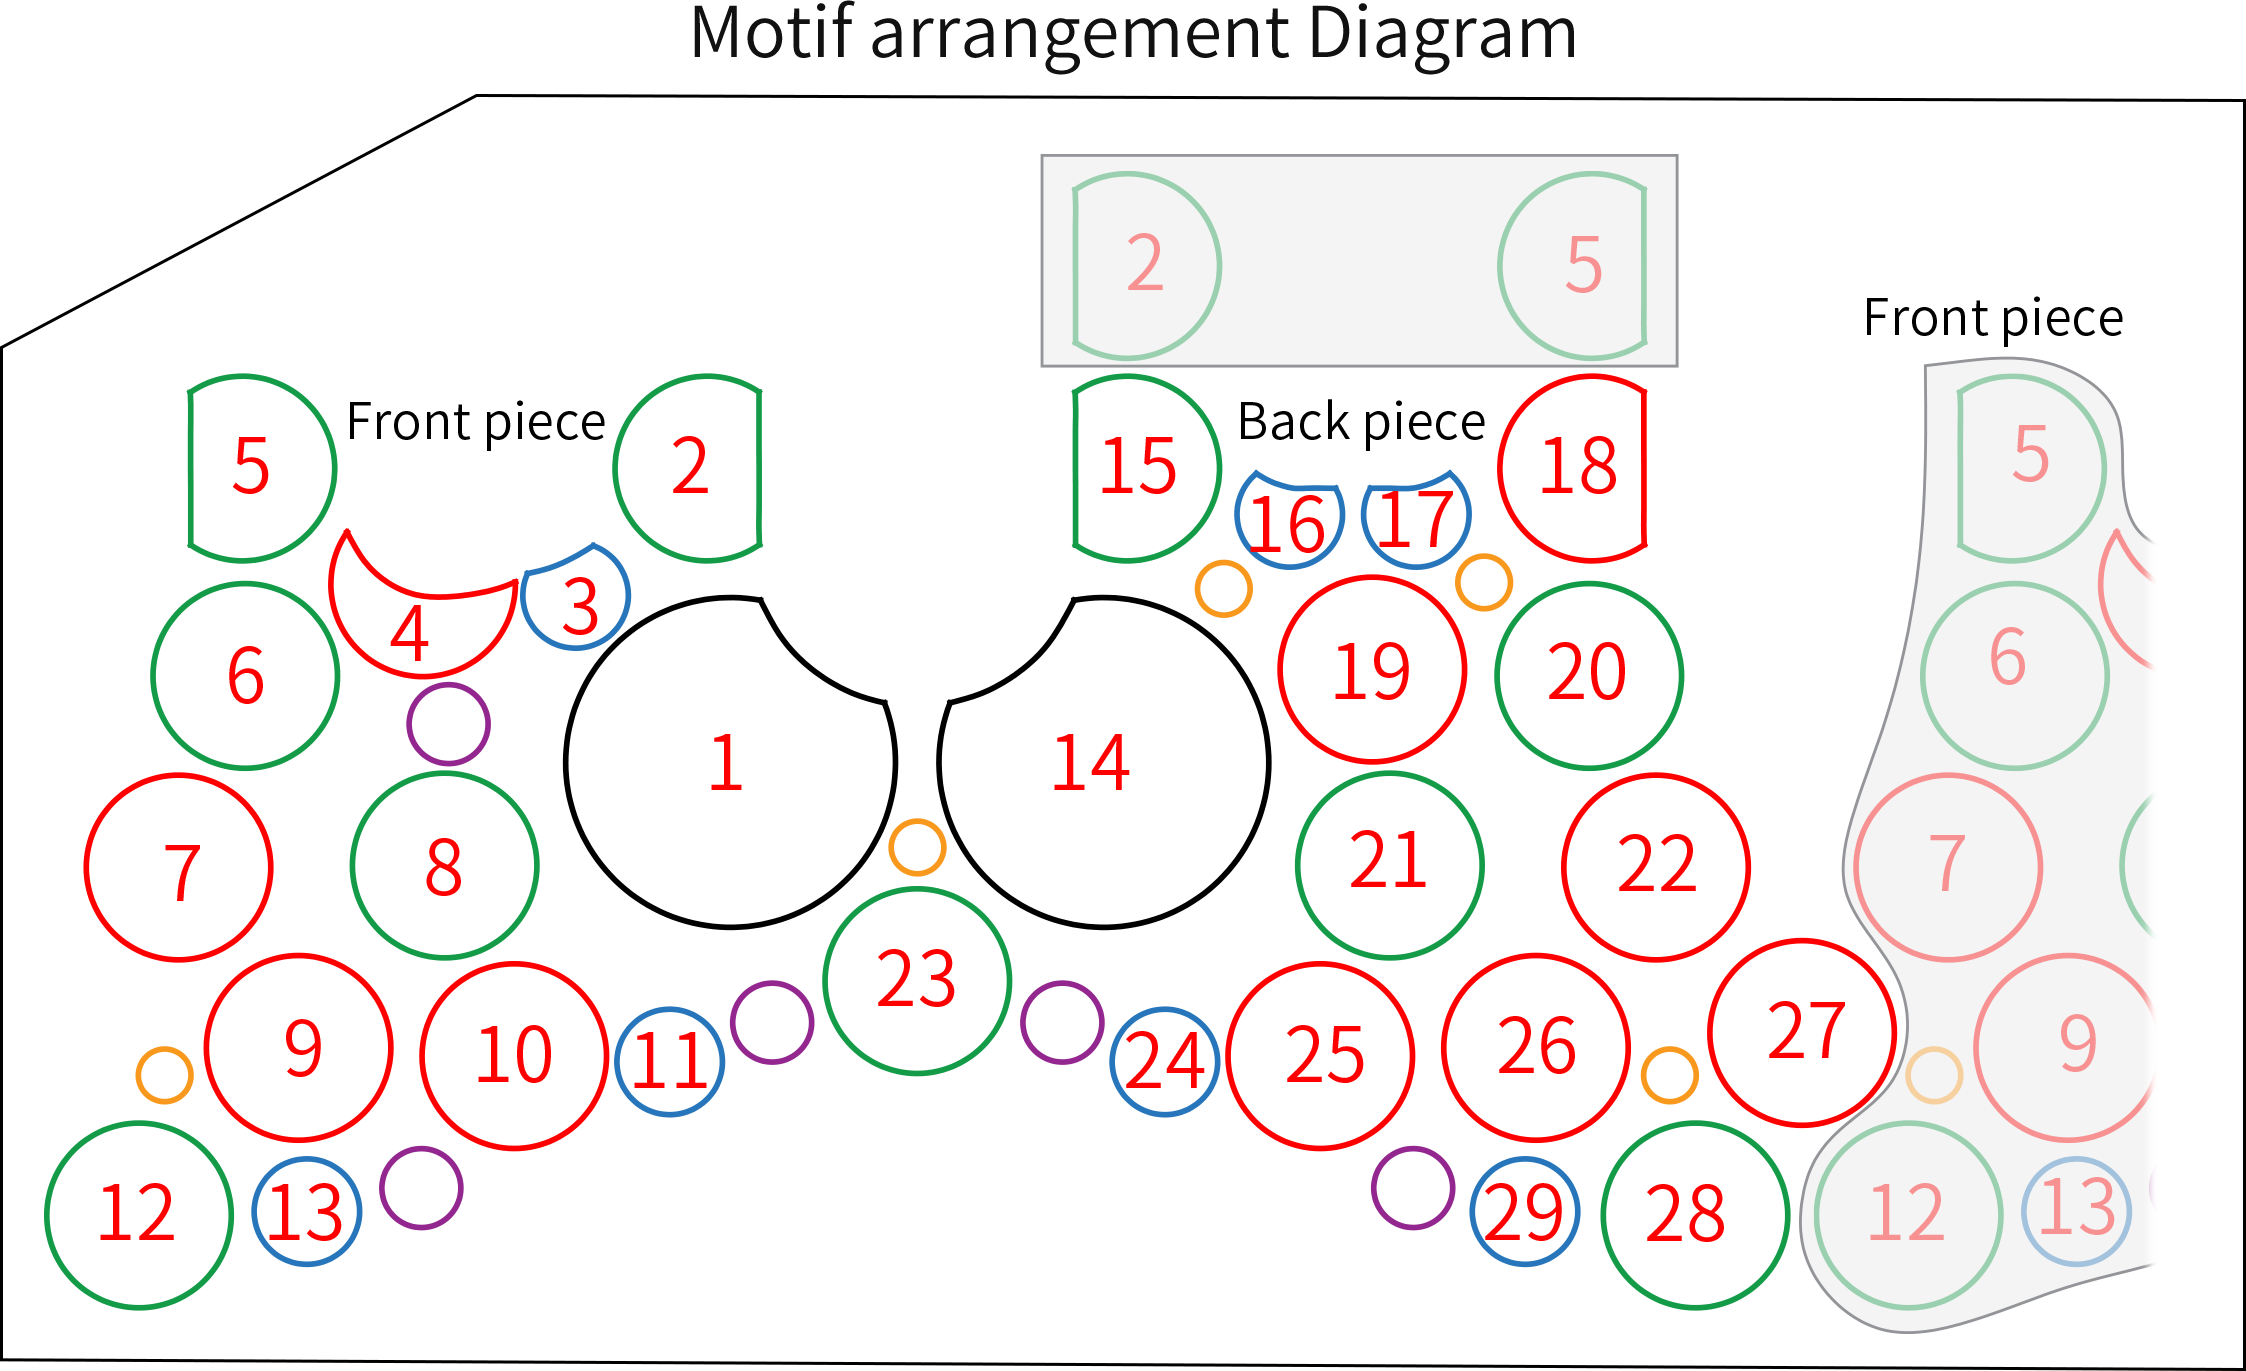

Chart Key






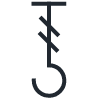


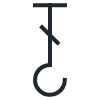
















Note: This pattern is making in Chinese crochet pattern terms, and the stitch name is written using American terminology. All measurements in charts are in cm.
Part 1 Motifs and JoiningA Supplement grid patternB 00' 38''
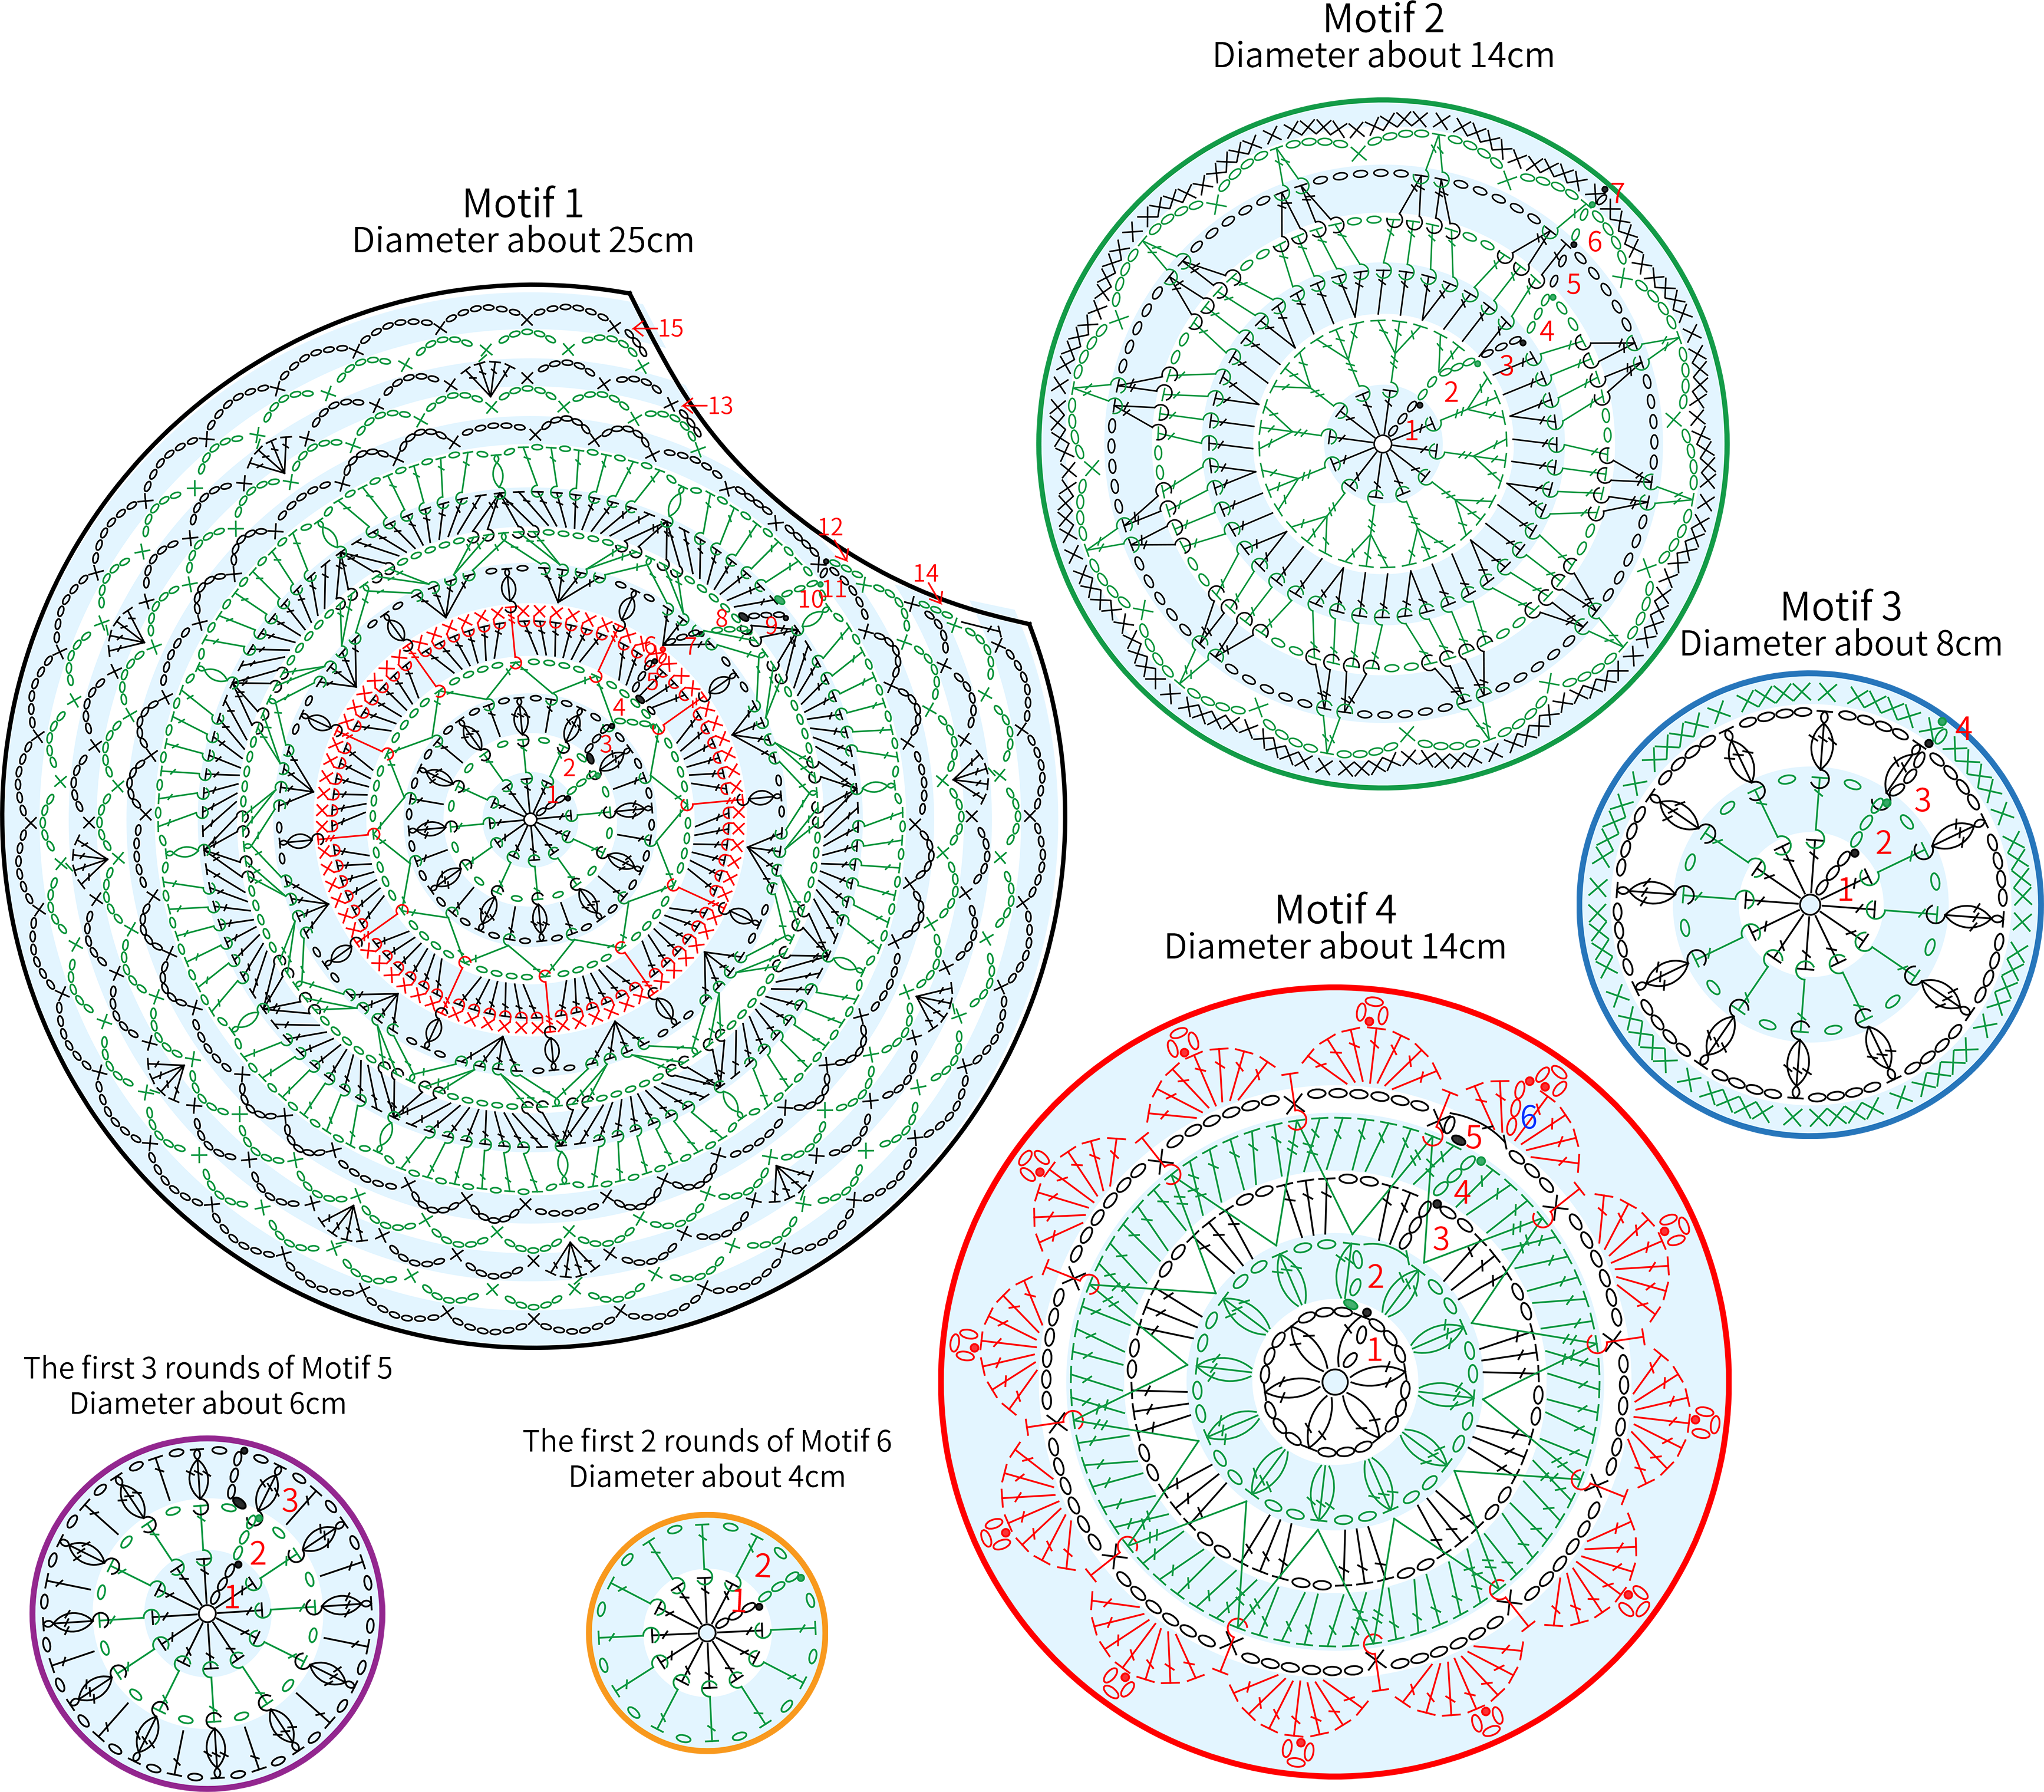
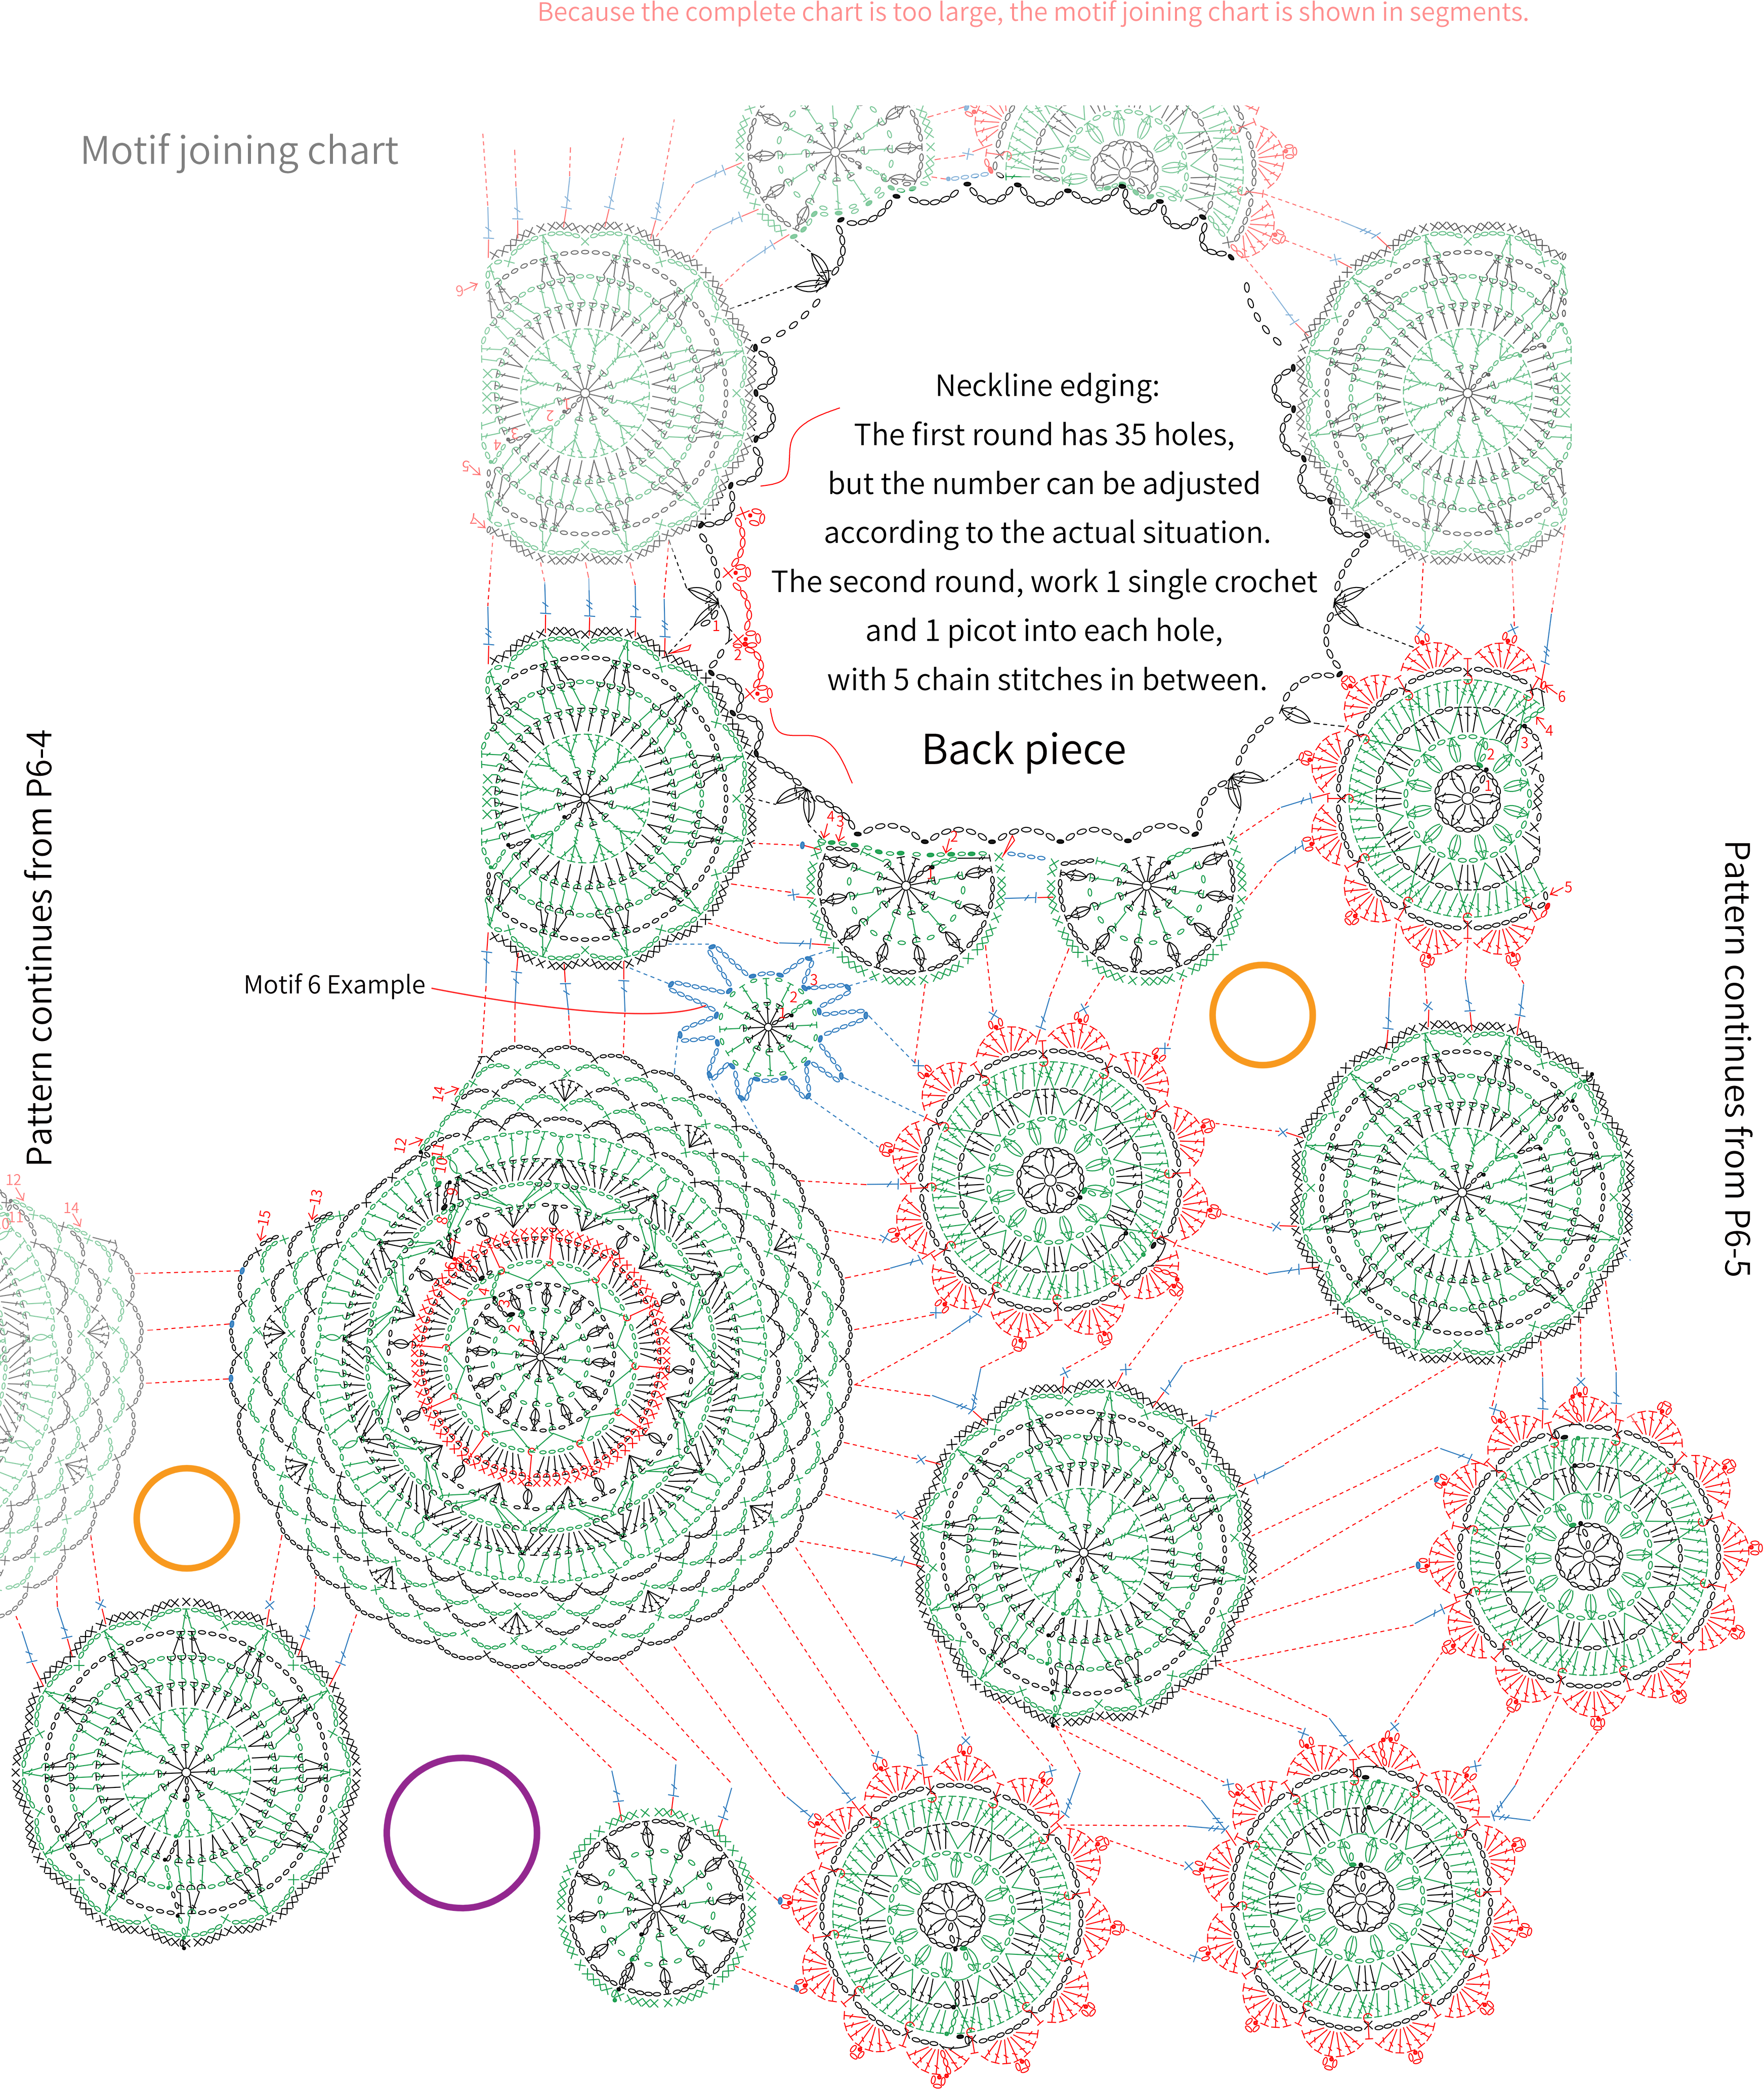
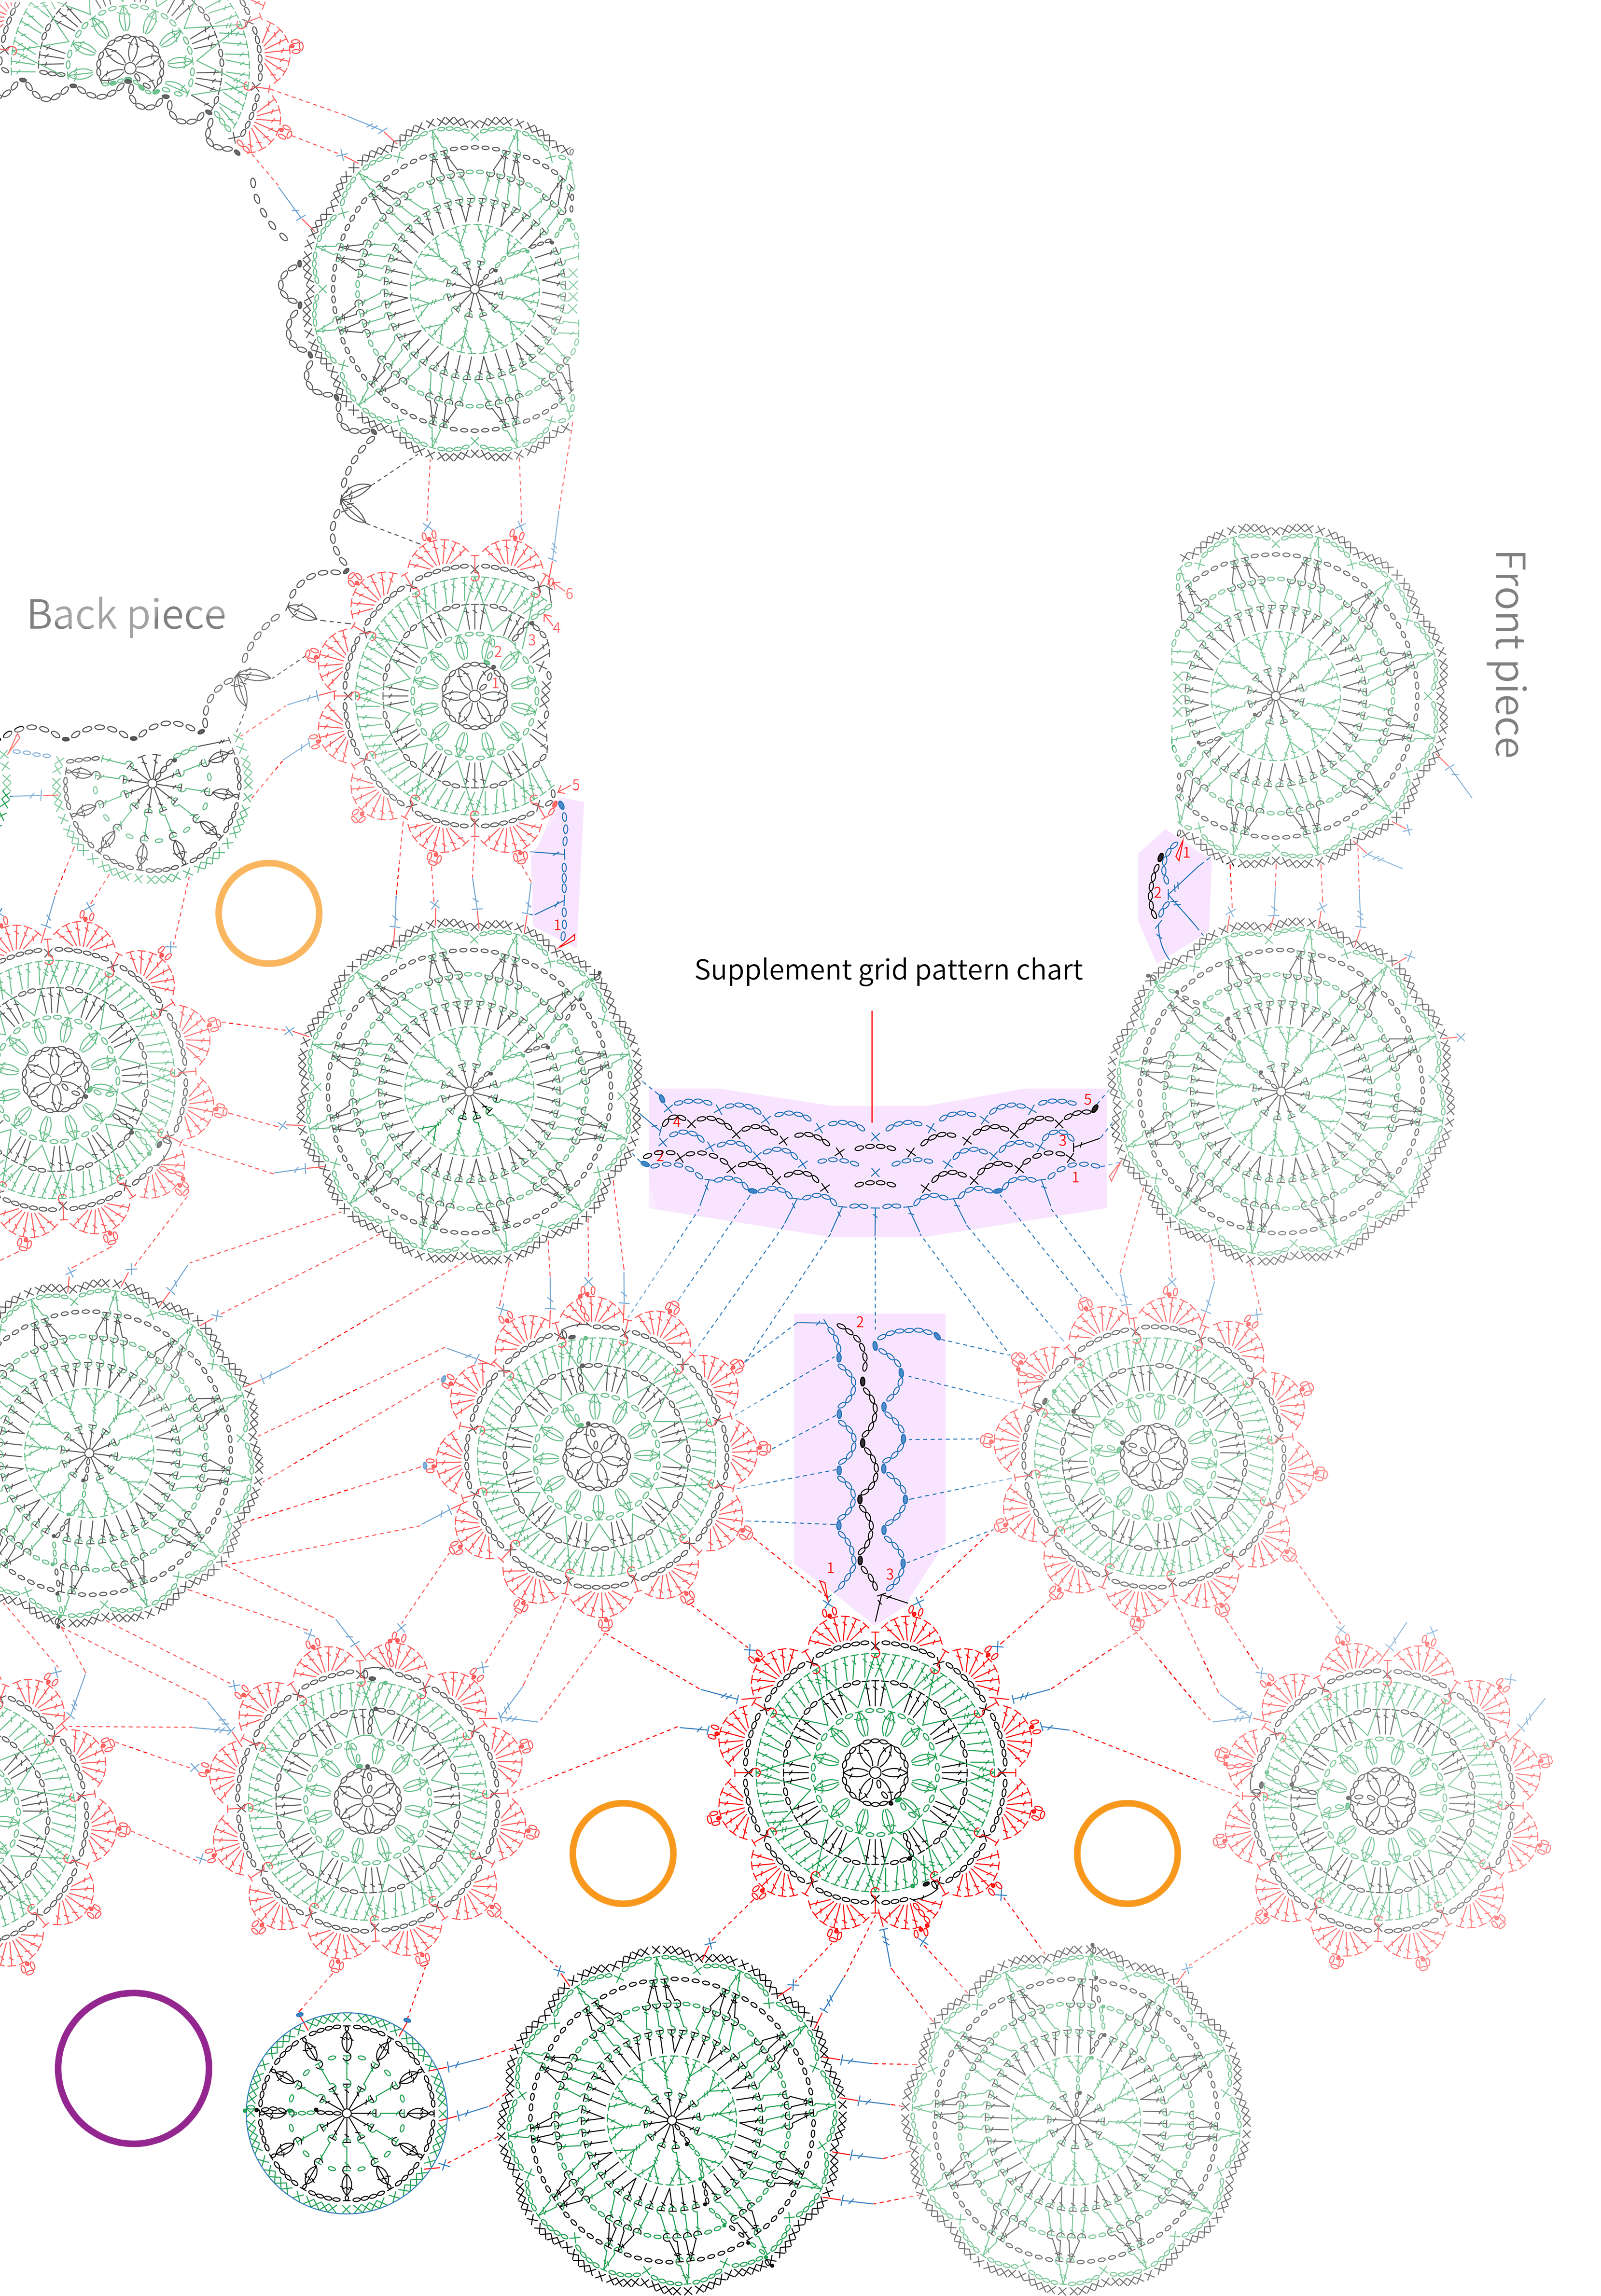
Divide all motifs as Motif 1 to Motif 6, all the motifs start with a magic ring. For the larger motifs, crochet them in the order that marked on the pattern. Except the first motif, join as you go for the last round to the remaining motifs. The motifs without numbers, are the smaller motifs added later. You can join them according to your specific situation. After that, complete the grid pattern to the corresponding position. Please refer to the video demonstration for more details.
Note: 1. The connection points and stitch techniques for connecting the motifs, as well as the quantity and arrangement of smaller motifs without numbers, can be adjusted according to the actual situation.
2. The first 3 rounds of all Motif 5 are identical, and the first 2 rounds of all Motif 6 are also identical. The 4th round of Motif 5 and the 3rd round of Motif 6 involve crocheting chain stitches and slip stitches for connecting with the surrounding motifs. The number of chain stitches and the connection points are not fixed and crochet based on the actual situation.
3. Motif 5 and Motif 6 can be arranged according to the arrangement diagram for additional crocheting. The final round should be connected to the surrounding motifs using chain stitches and slip stitches.

Part 2 EdgingC 85' 26''
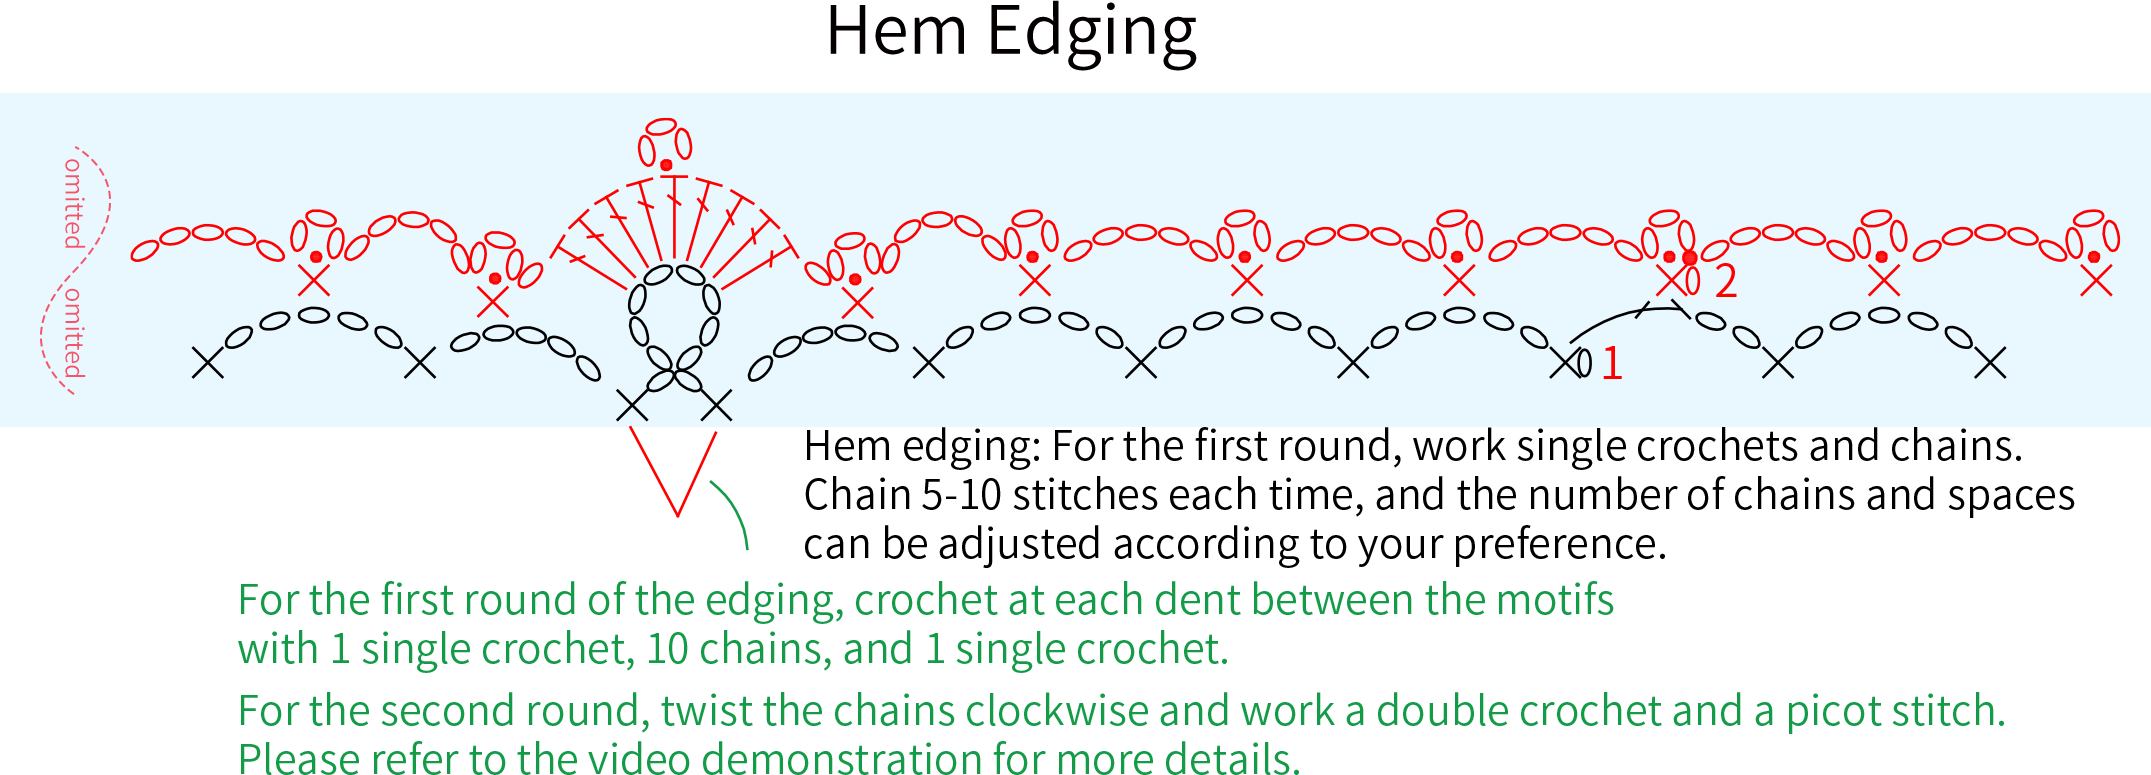
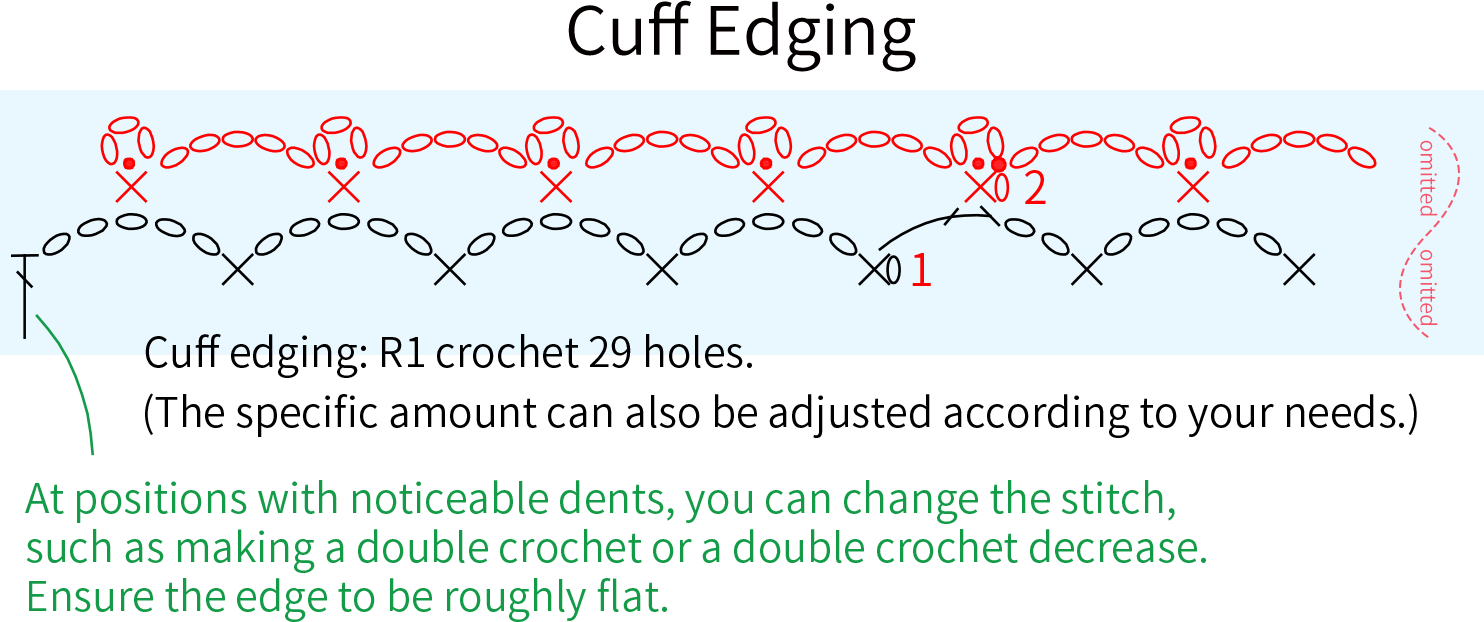
Finally need to crochet the edging on the hem, the cuffs, and the neckline. The neckline edging chart refer to above for the position of the neckline. Please refer to the video demonstration for more details.
Made by the community