Home / Pillow
Fu Cushion Cover
Project preview
See the finished project
Pattern format
Instructions
Watch and follow
Video tutorial
This pillowcase is made up of two identical fabric pieces. First, complete the pieces, then sew them together, and finally add a zipper.

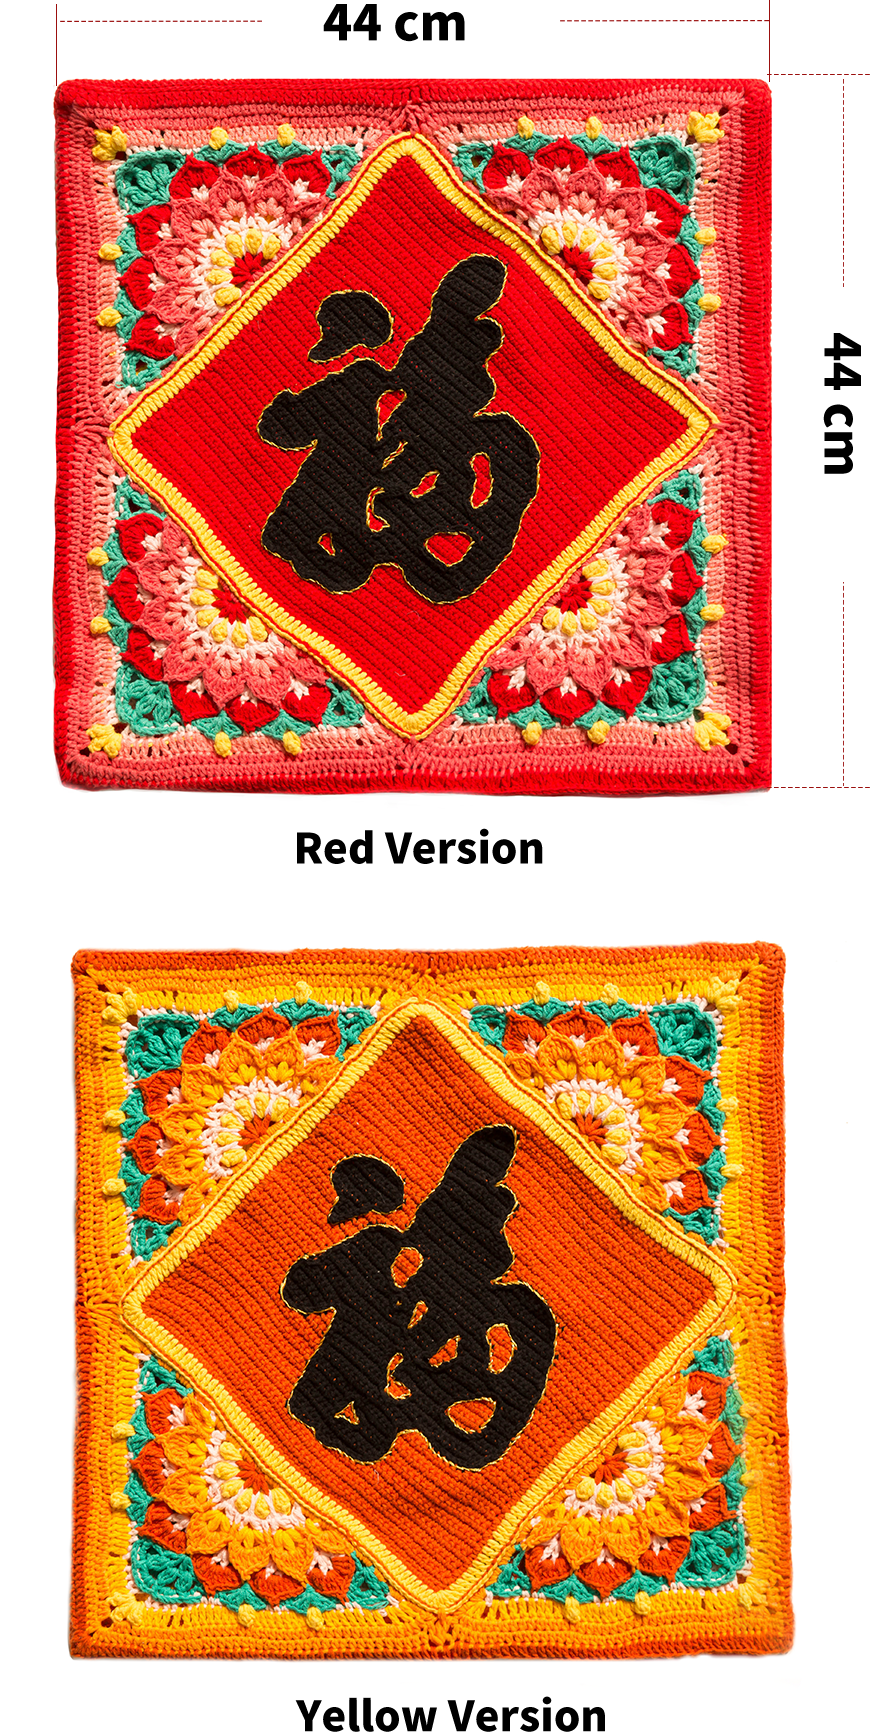
The handcrafted measurements may have an error of 1 to 2 cm. Due to variations in individual tension, the size is for reference only.
Materials: Ply Combed Cotton & Acrylic Fibre Hand Knitting Yarn. Hook: 3.0 mm crochet hook.
Chart Key








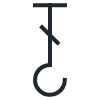







Note: This pattern is making in Chinese crochet pattern terms, and the stitch name is written using American terminology. All measurements in charts are in cm. 
Part 1 PieceA
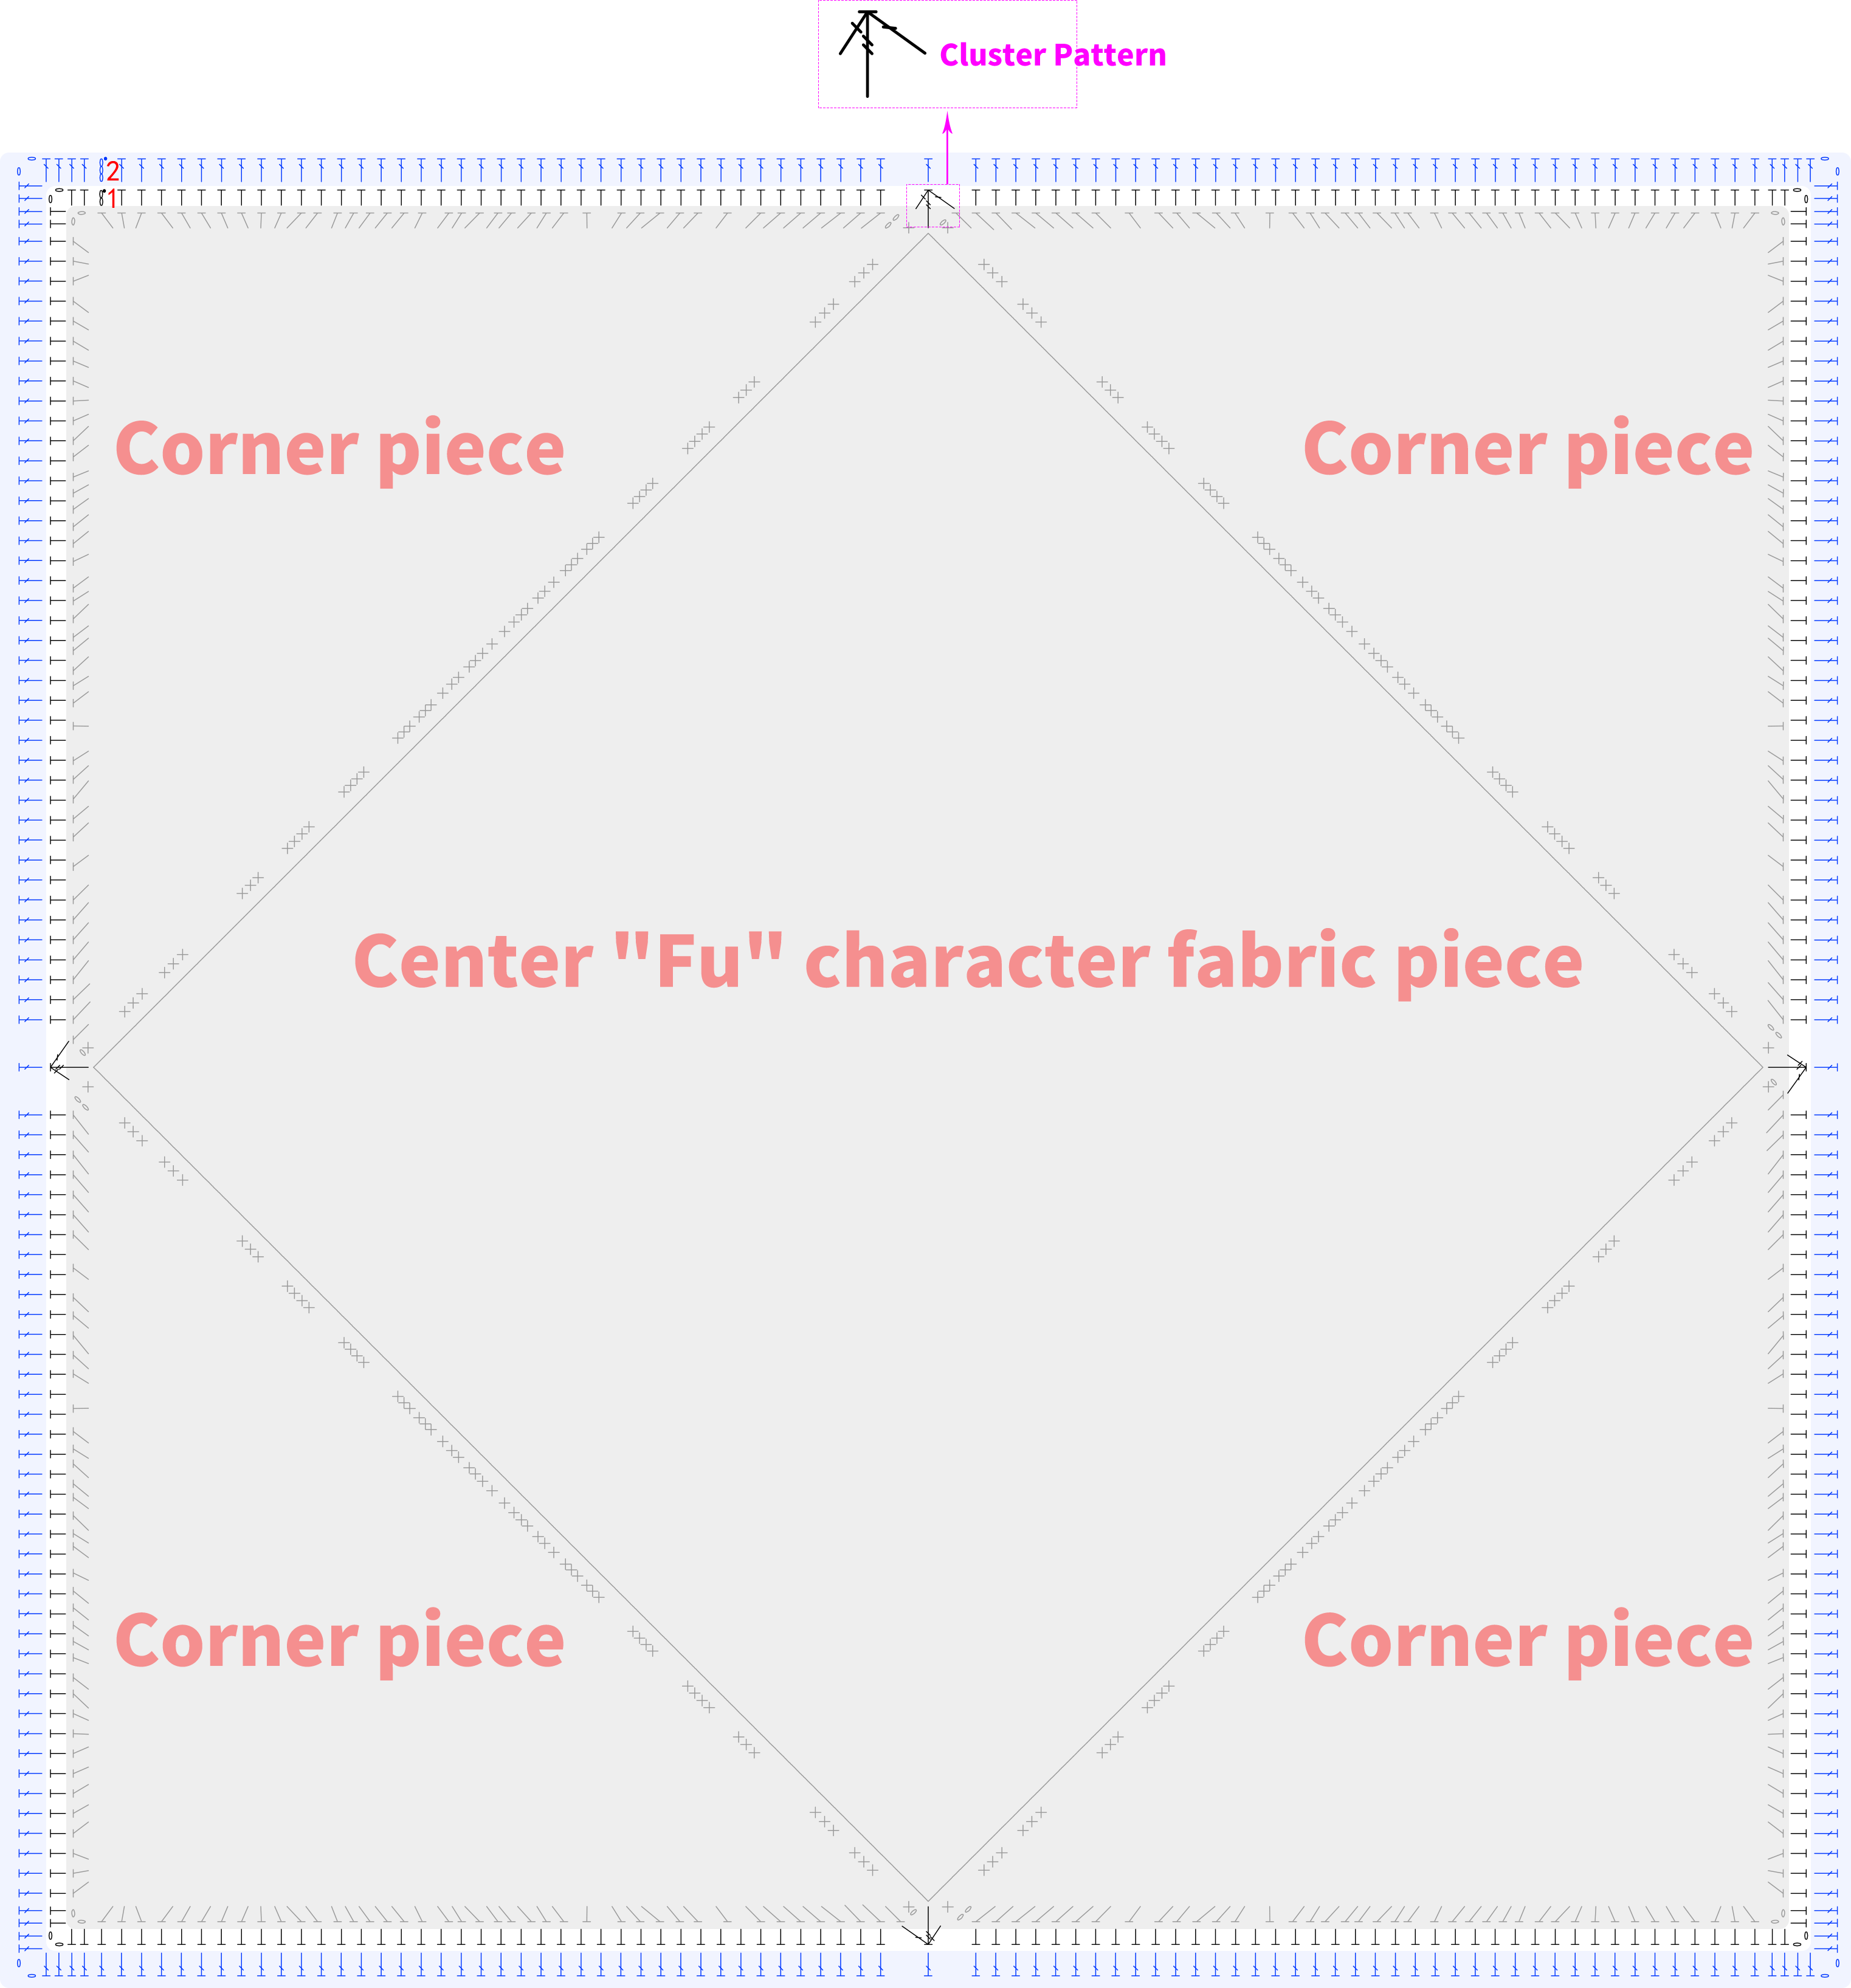
The crochet piece includes four sections: the central "Fu" character motif, the corner motifs, the joining together, and the overall edging.
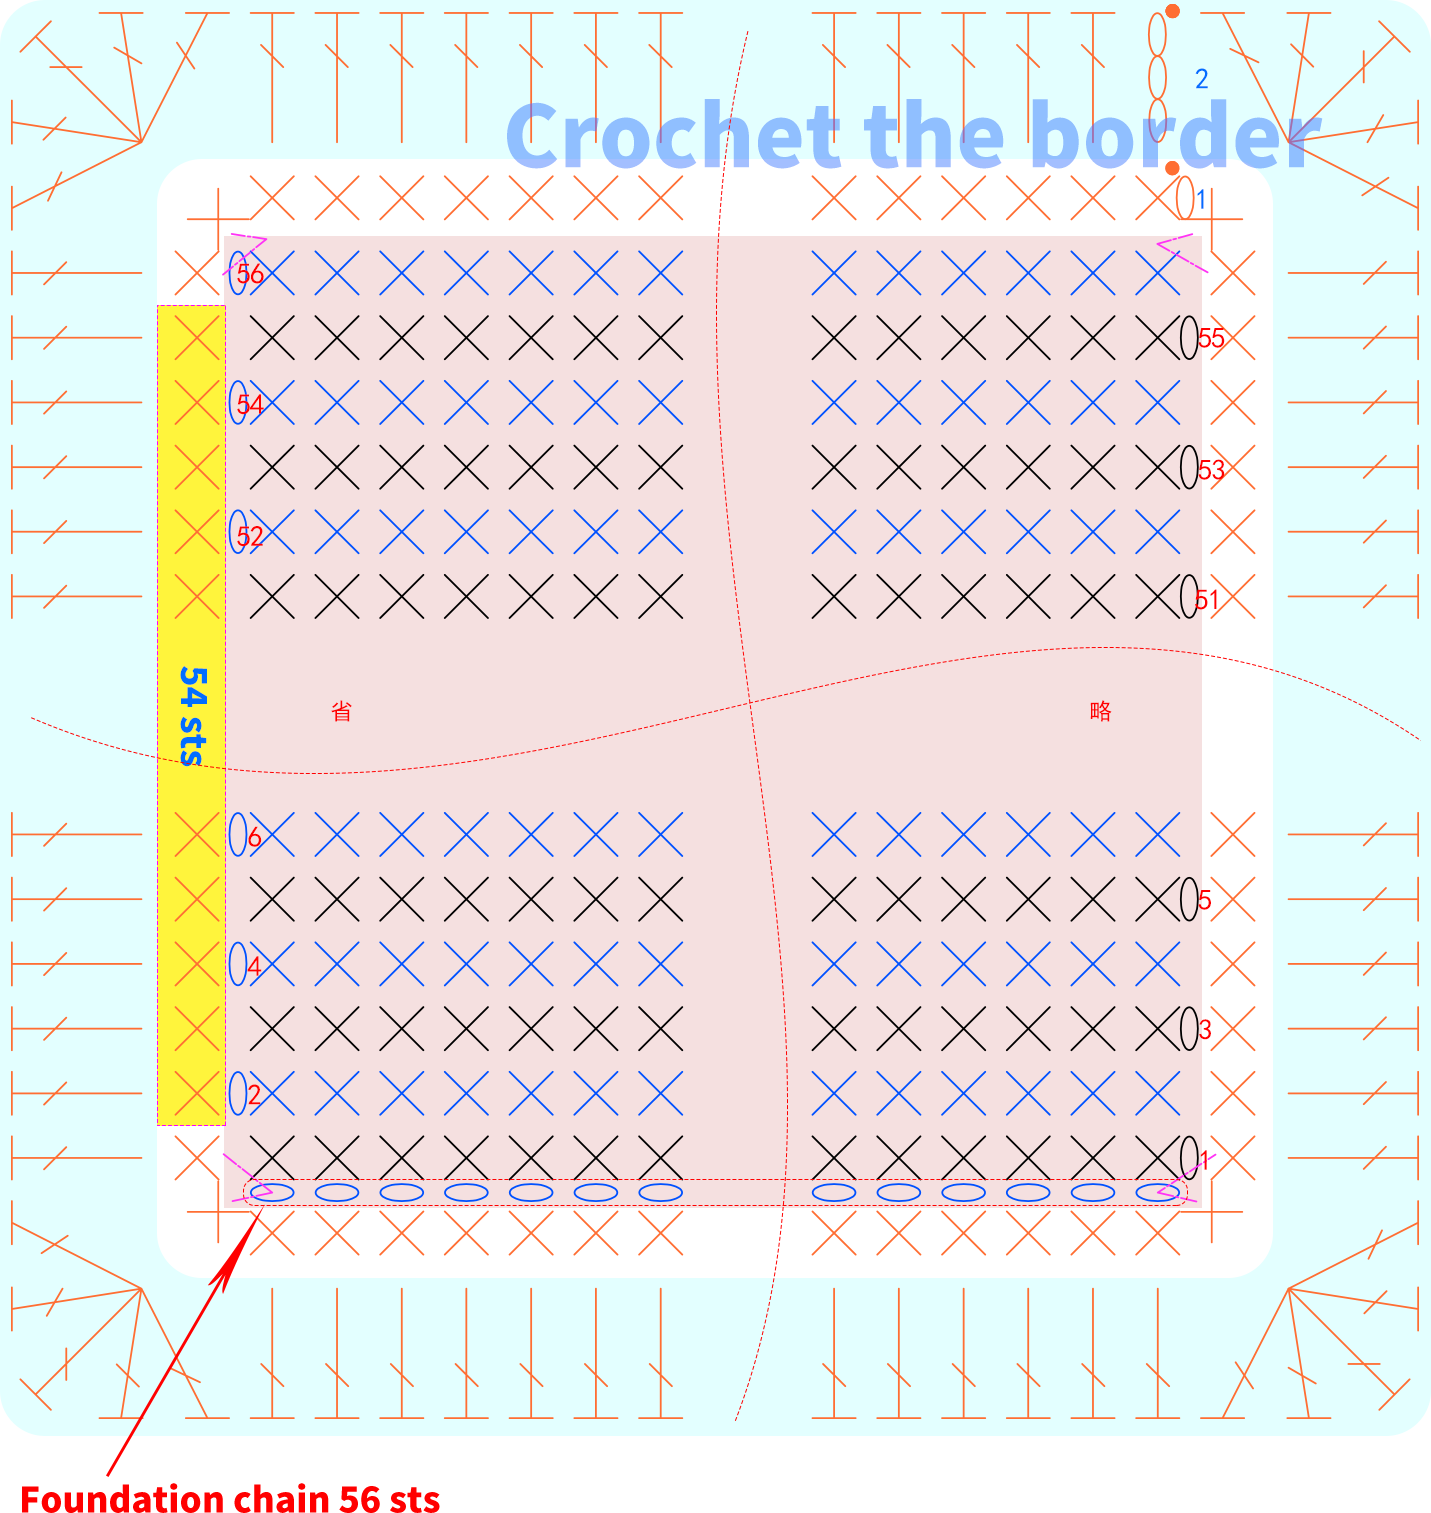
Step 1 The central 'Fu' character fabric pieceA 00' 56'' (Part 1)
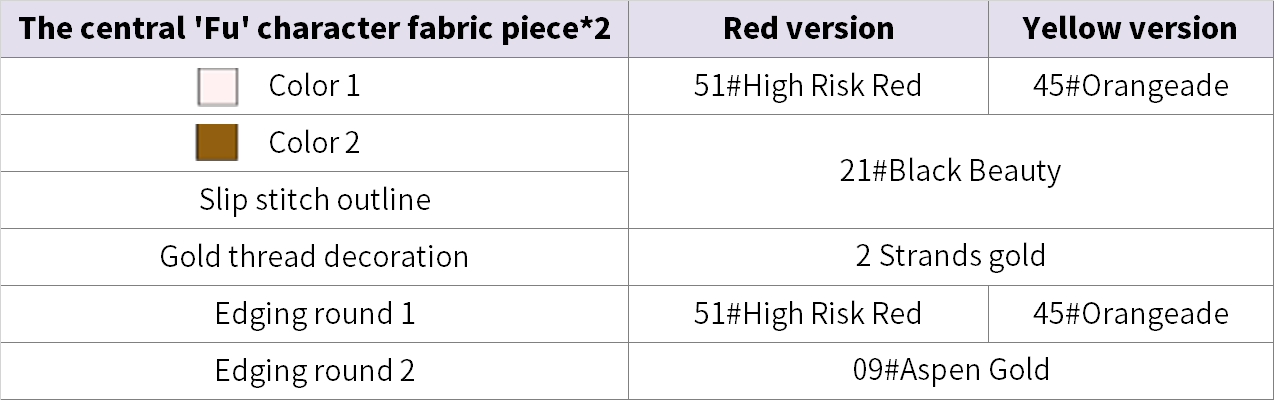
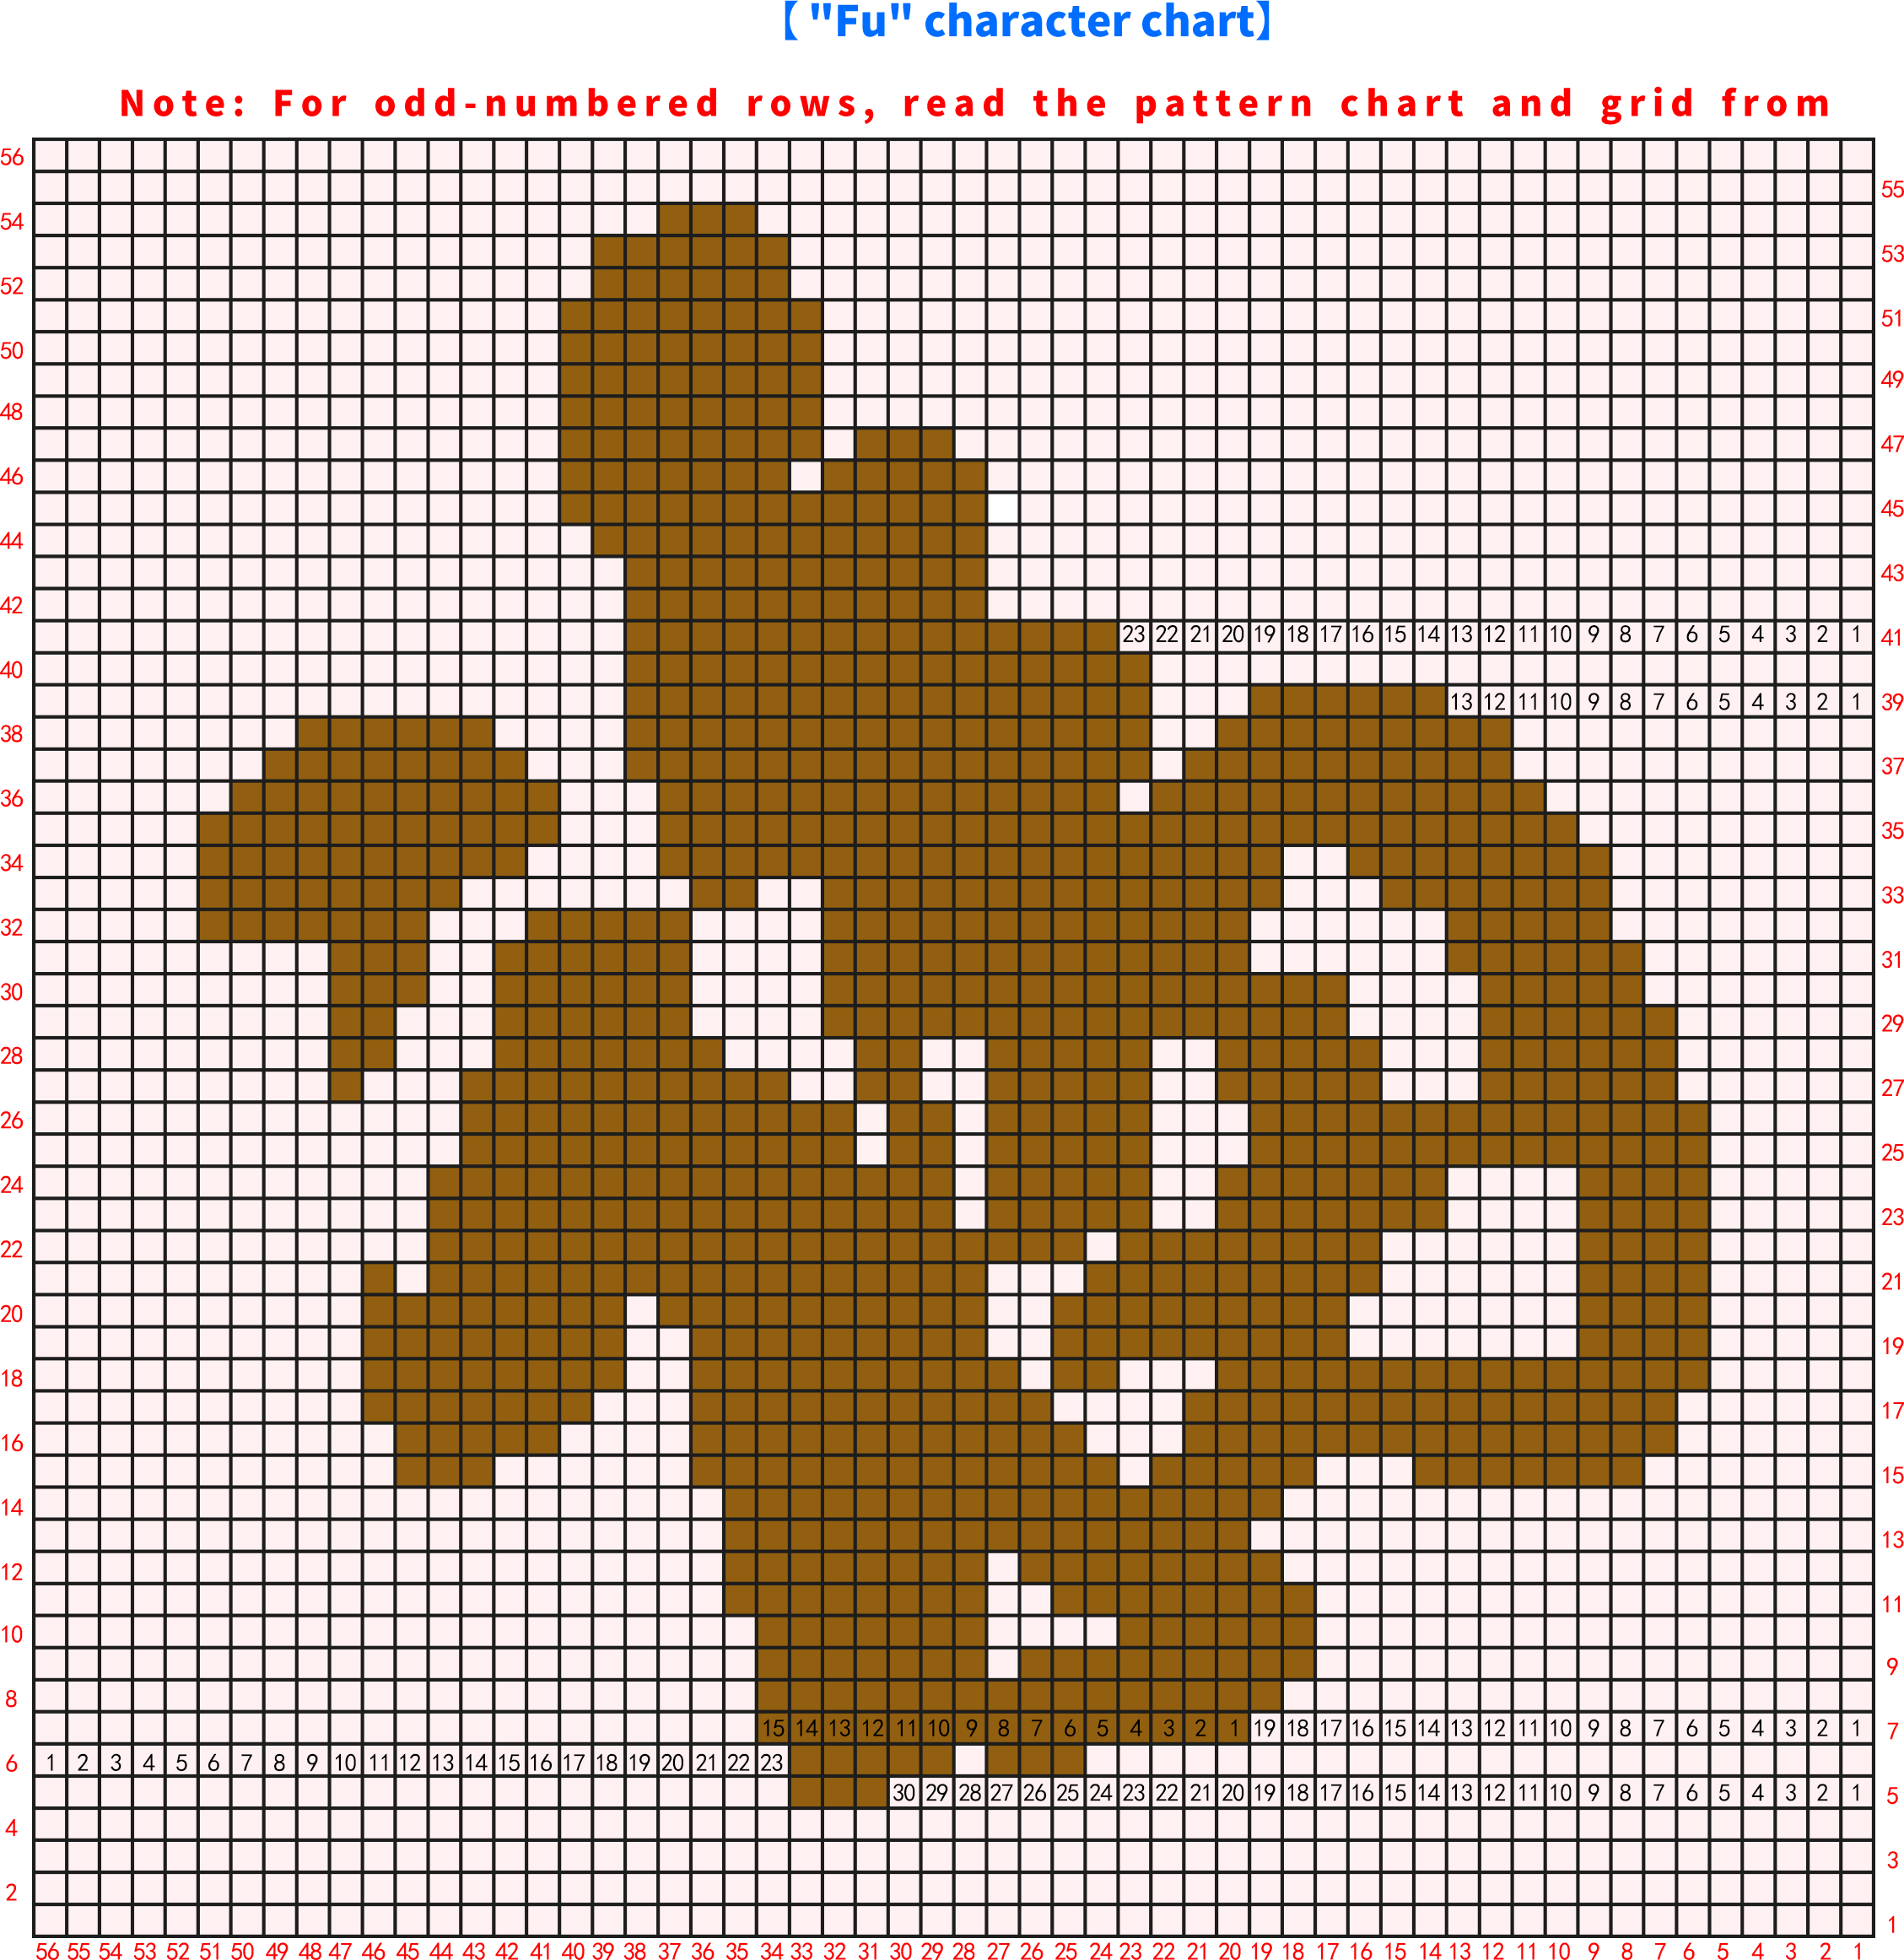
The central "Fu" character fabric piece starts with a chain stitch, and is worked back and forth. During the crocheting process, switch colors to form the "Fu" character, and finally add the edging. After completion, crochet a round outline at all the color change junctions of the "Fu" character, and embroider a circle of gold thread for decoration. Please refer to the video demonstration for details.

Step 2 Corner PieceA4 00' 11'' (Part 2)
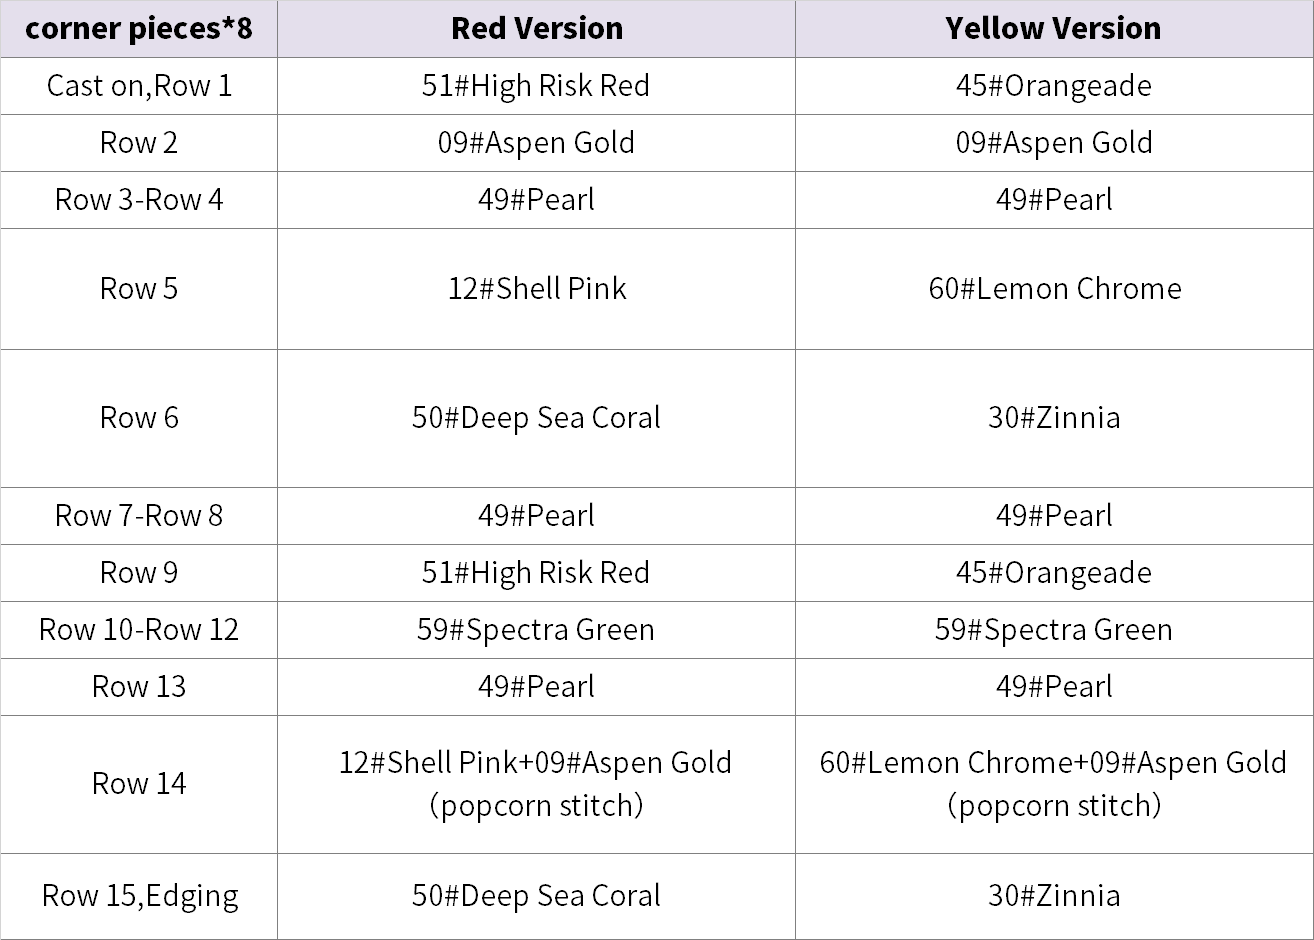
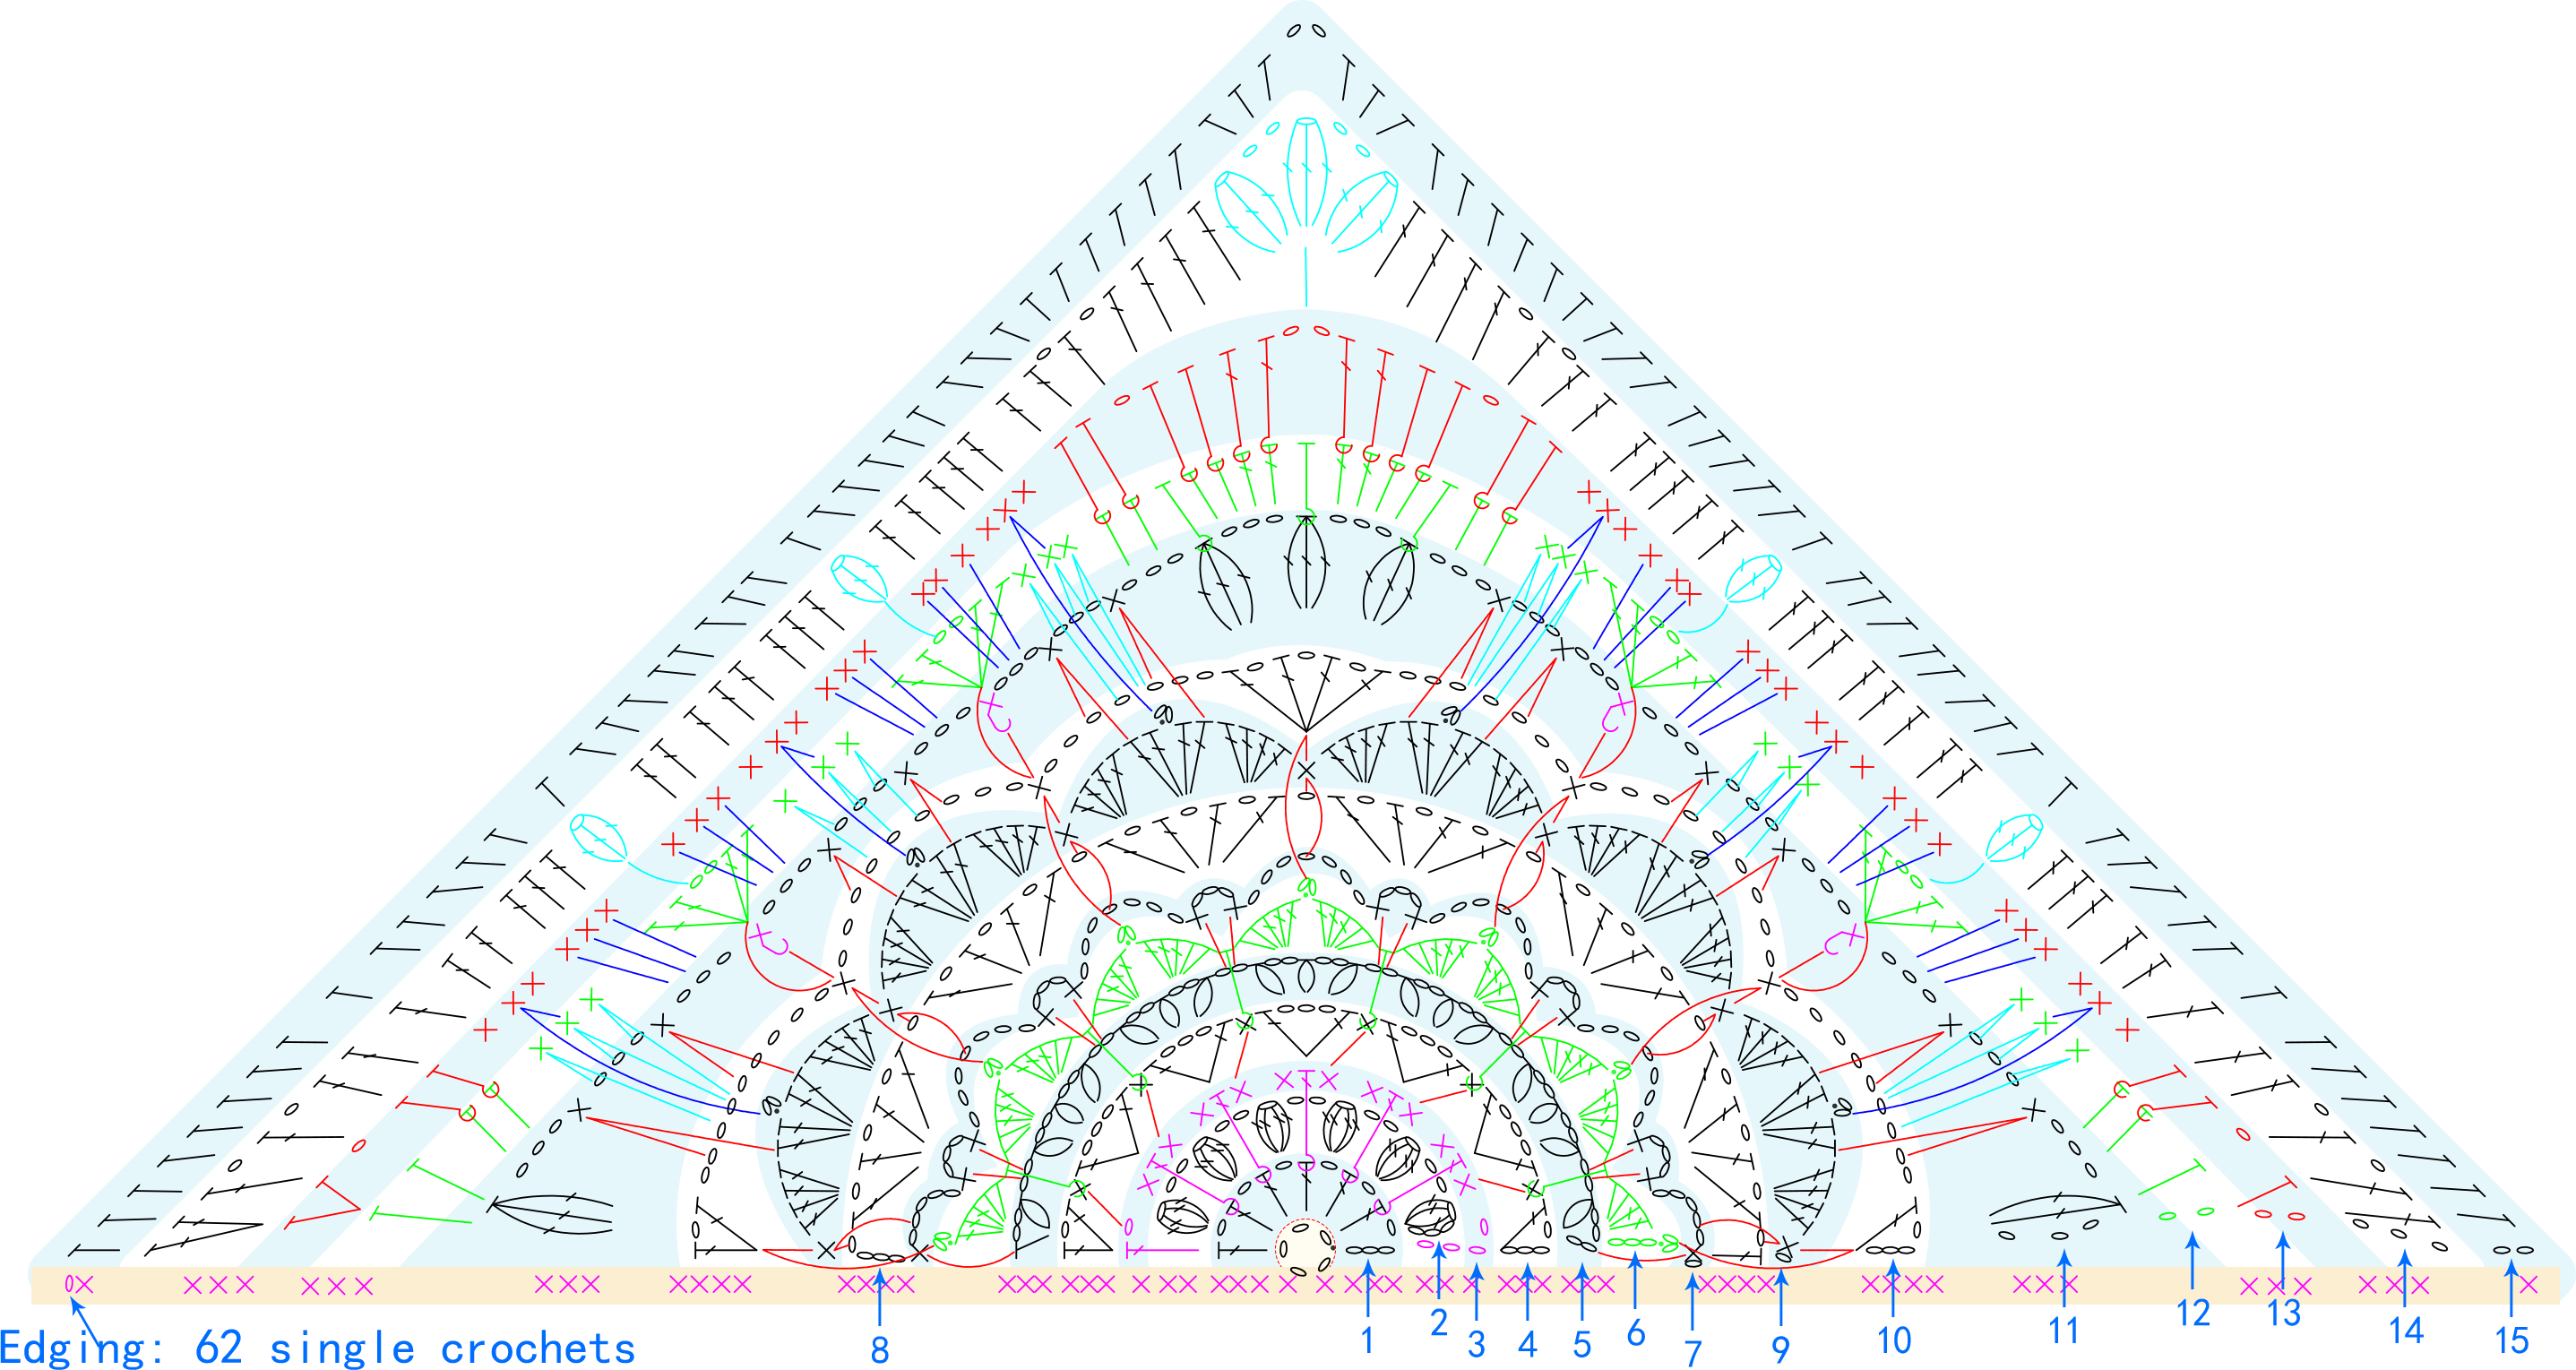
The corner motif starts with a chain ring method, working from the center outwards. While crocheting, you'll need to switch colors. Please refer to the video demonstration for specifics.
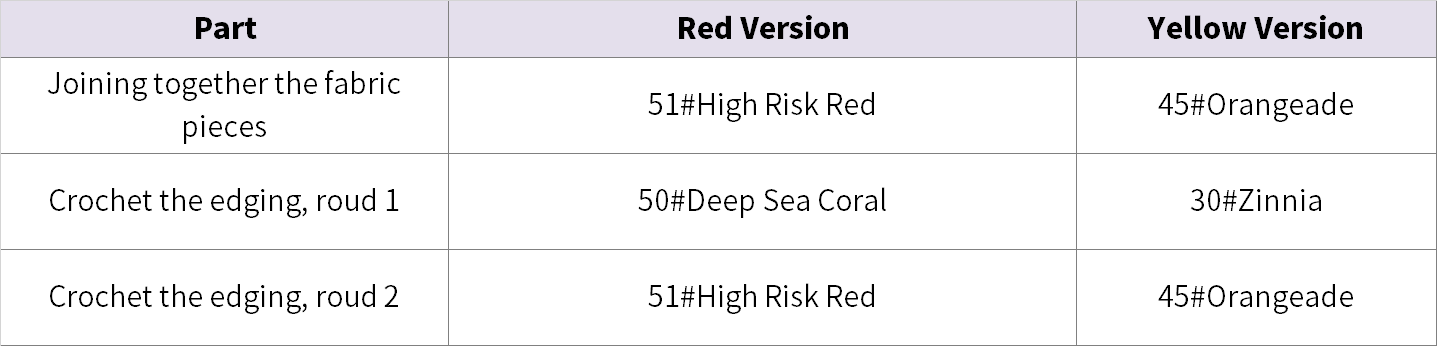
Step 3 Join A5 And Crochet the edging all aroundA6 80' 54'' (Part 2)
After completing all the fabric pieces, join the corner pieces to the central "Fu" character piece and crochet the edging around the entire piece. Please refer to the video demonstration for specifics.
Part 2 Sew the fabric pieces togetherB And Sewing on a zipperC 100' 36'' (Part 2)
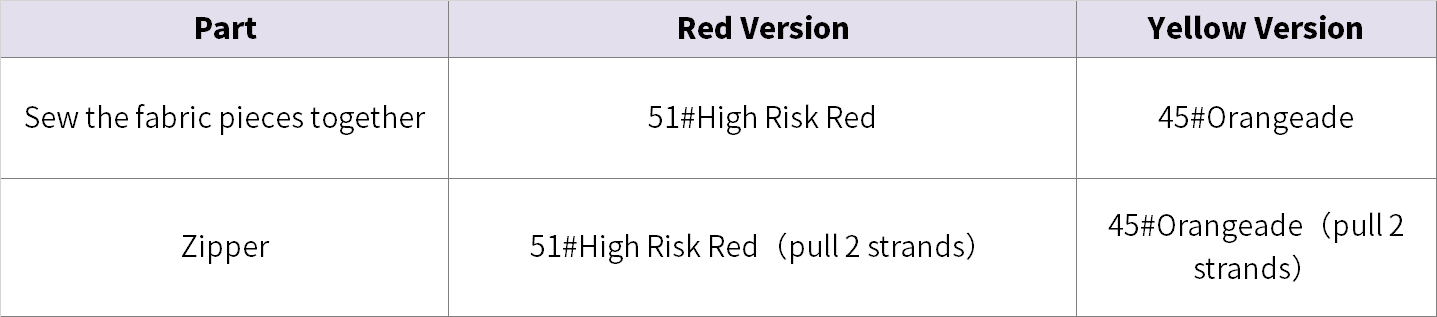
Finally, sew the two fabric pieces together, making sure the "Fu" characters are facing the right way. Leave one side at the bottom as an opening. After completing the sewing, attach a zipper to the opening. Please refer to the video demonstration for specifics.
Made by the community