Clothes
Gardenia Lace Pullover
Project preview
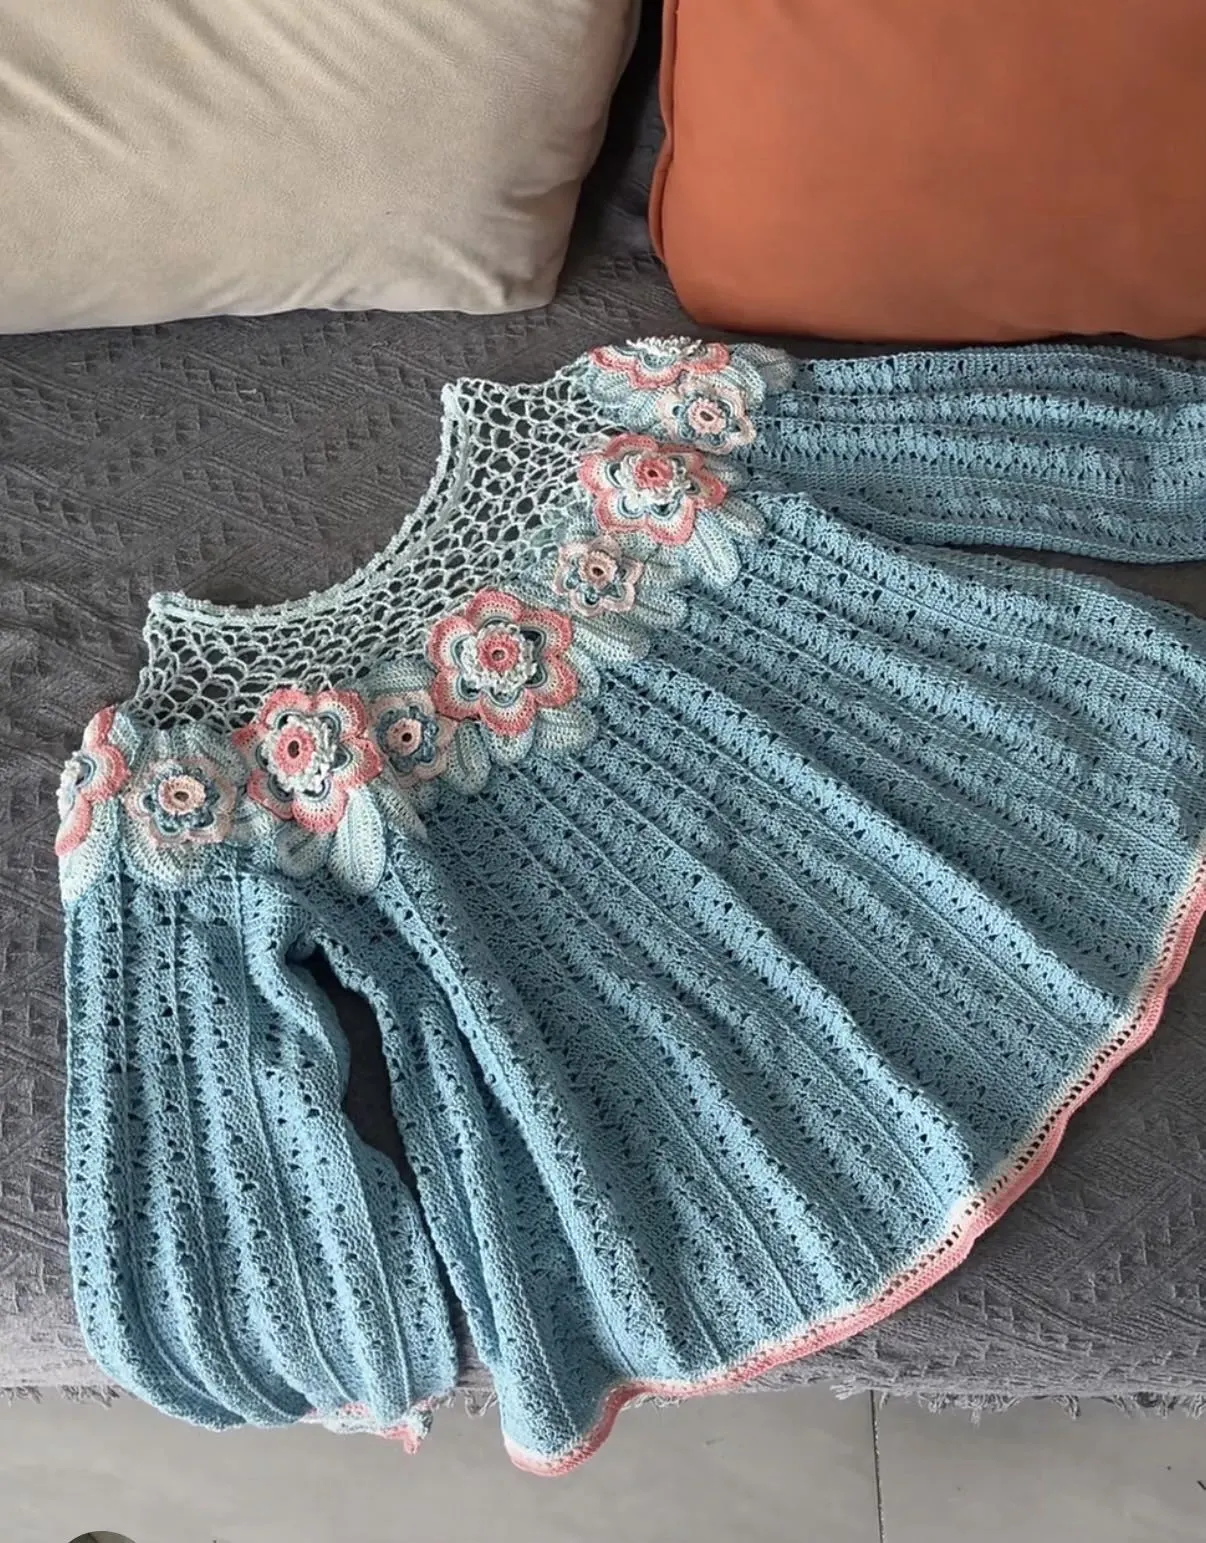
See the finished project
Pattern format
Instructions
Watch and follow
Video tutorial
This product is divided into the body, sleeves, yoke, and decorations. First, crochet the body and sleeves, then sew them together under the arms. Next, crochet the yoke section, and finally, create and attach the decorations.
The handcrafted measurements may have an error of 1 to 2 cm. Due to variations in individual tension, the size of the sample is for reference only.
Materials: Susan's Family Combed 5# Lace
Hook: 1.75mm crochet hook (for main part)
1.5mm crochet hook (for decorations)

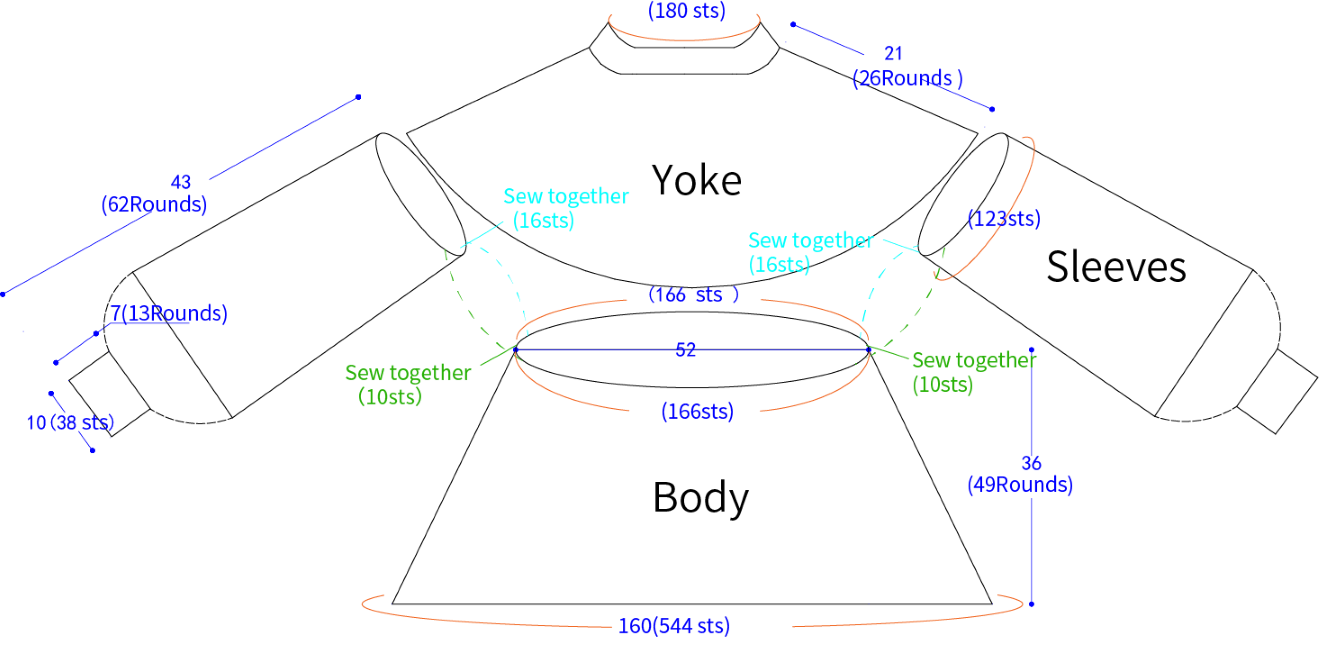
Chart Key









Note:
1. This pattern is making in Chinese crochet pattern terms, and the stitch name is written using American terminology. All measurements in charts are in cm.
2. Working in joined round
When crocheting in rounds without further guidance, working in closed rounds, start each round with a set number of beginning chains and close with a slip stitch. The beginning chain preceding a single crochet and the slip stitch used for joining rounds are not included in the total stitches.
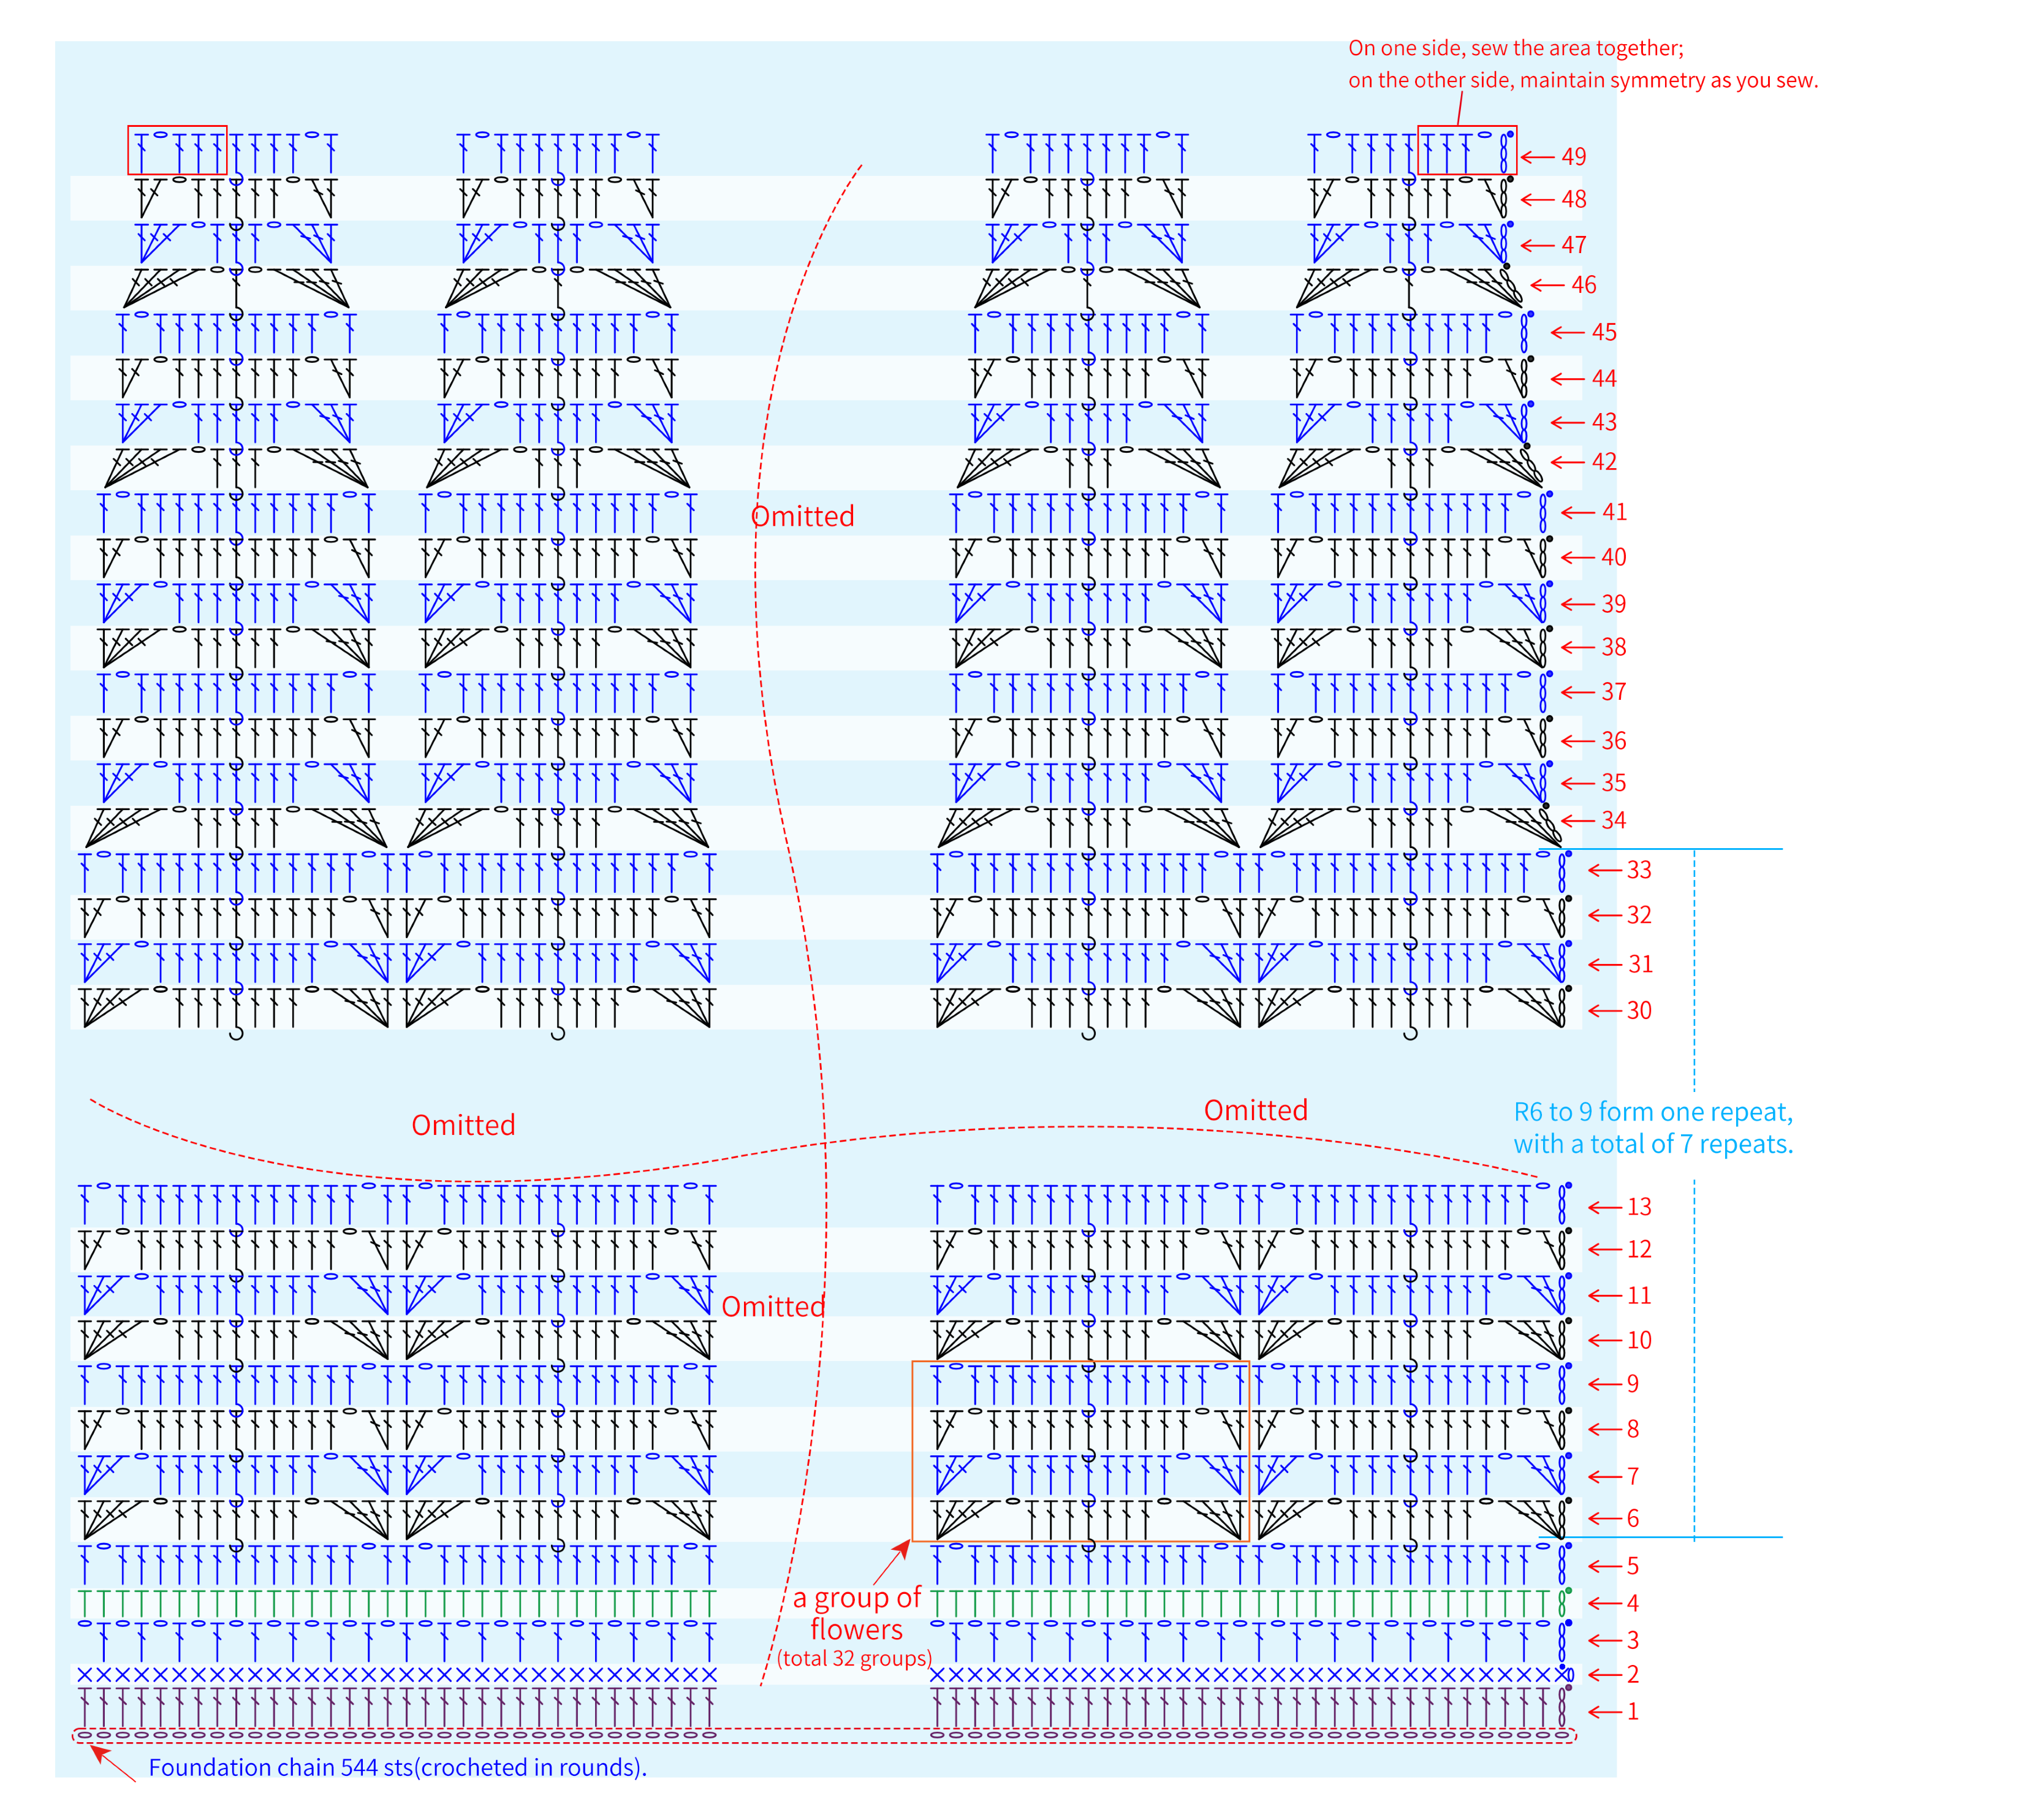
Part 1 Main partA 01' 03''
The body begins with a magic ring for casting on and is crocheted in rounds in a counterclockwise direction. Please refer to the video demonstration for more details.
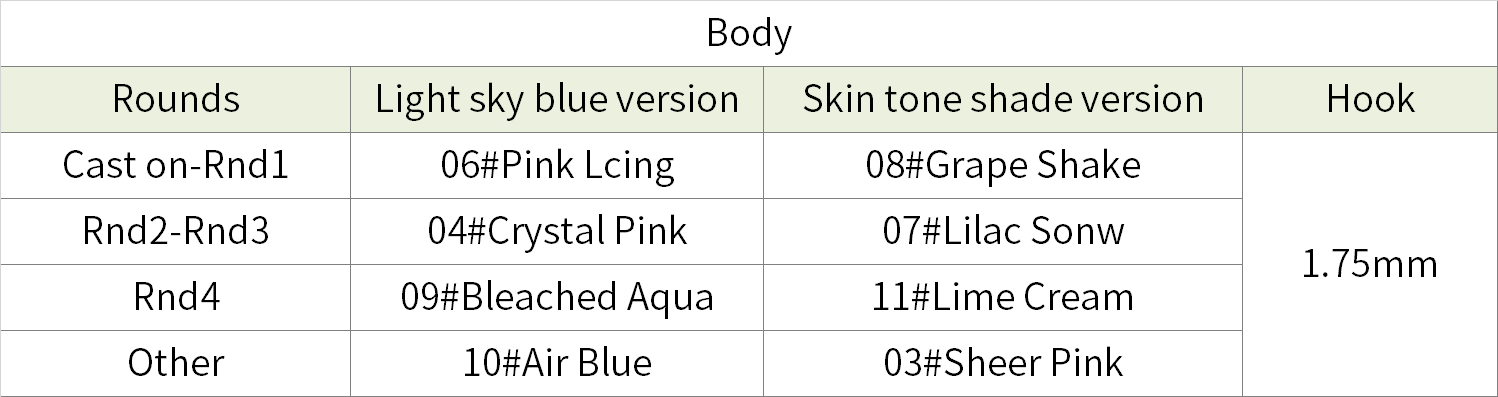
Note:Reserve a 30 cm tail at both the beginning and end of the shrimp stitch.
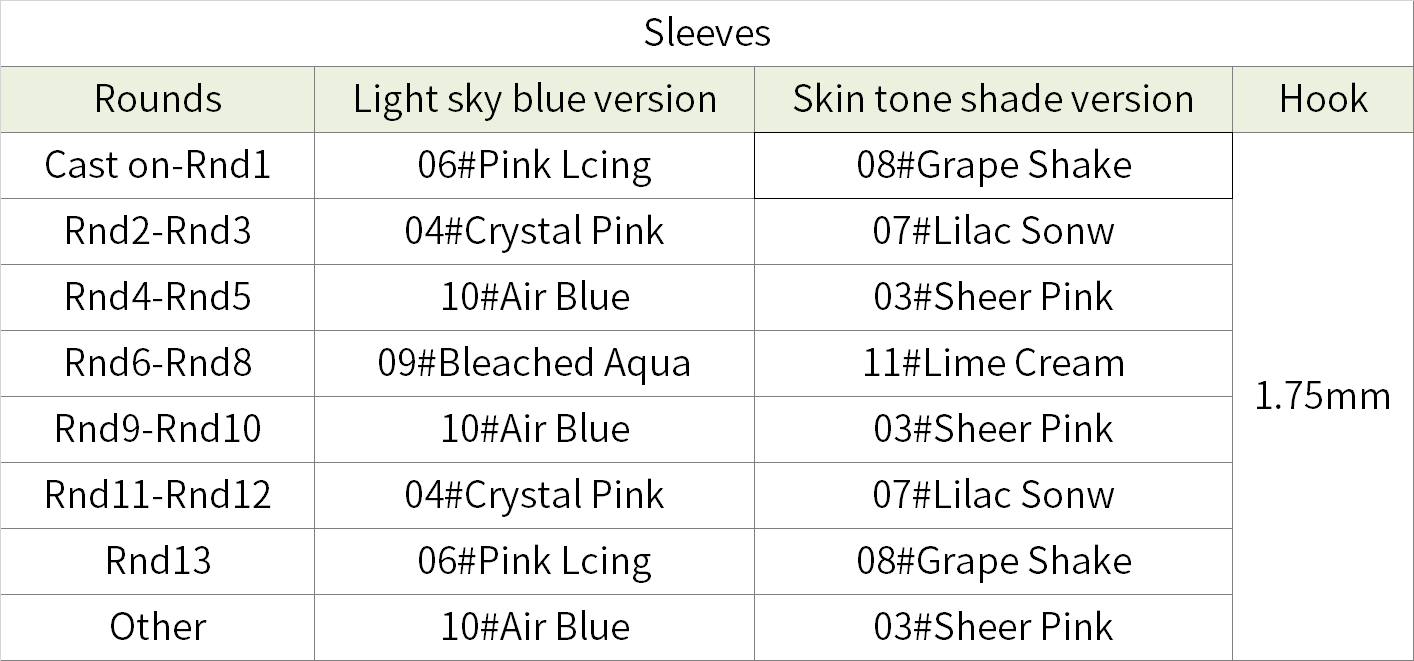
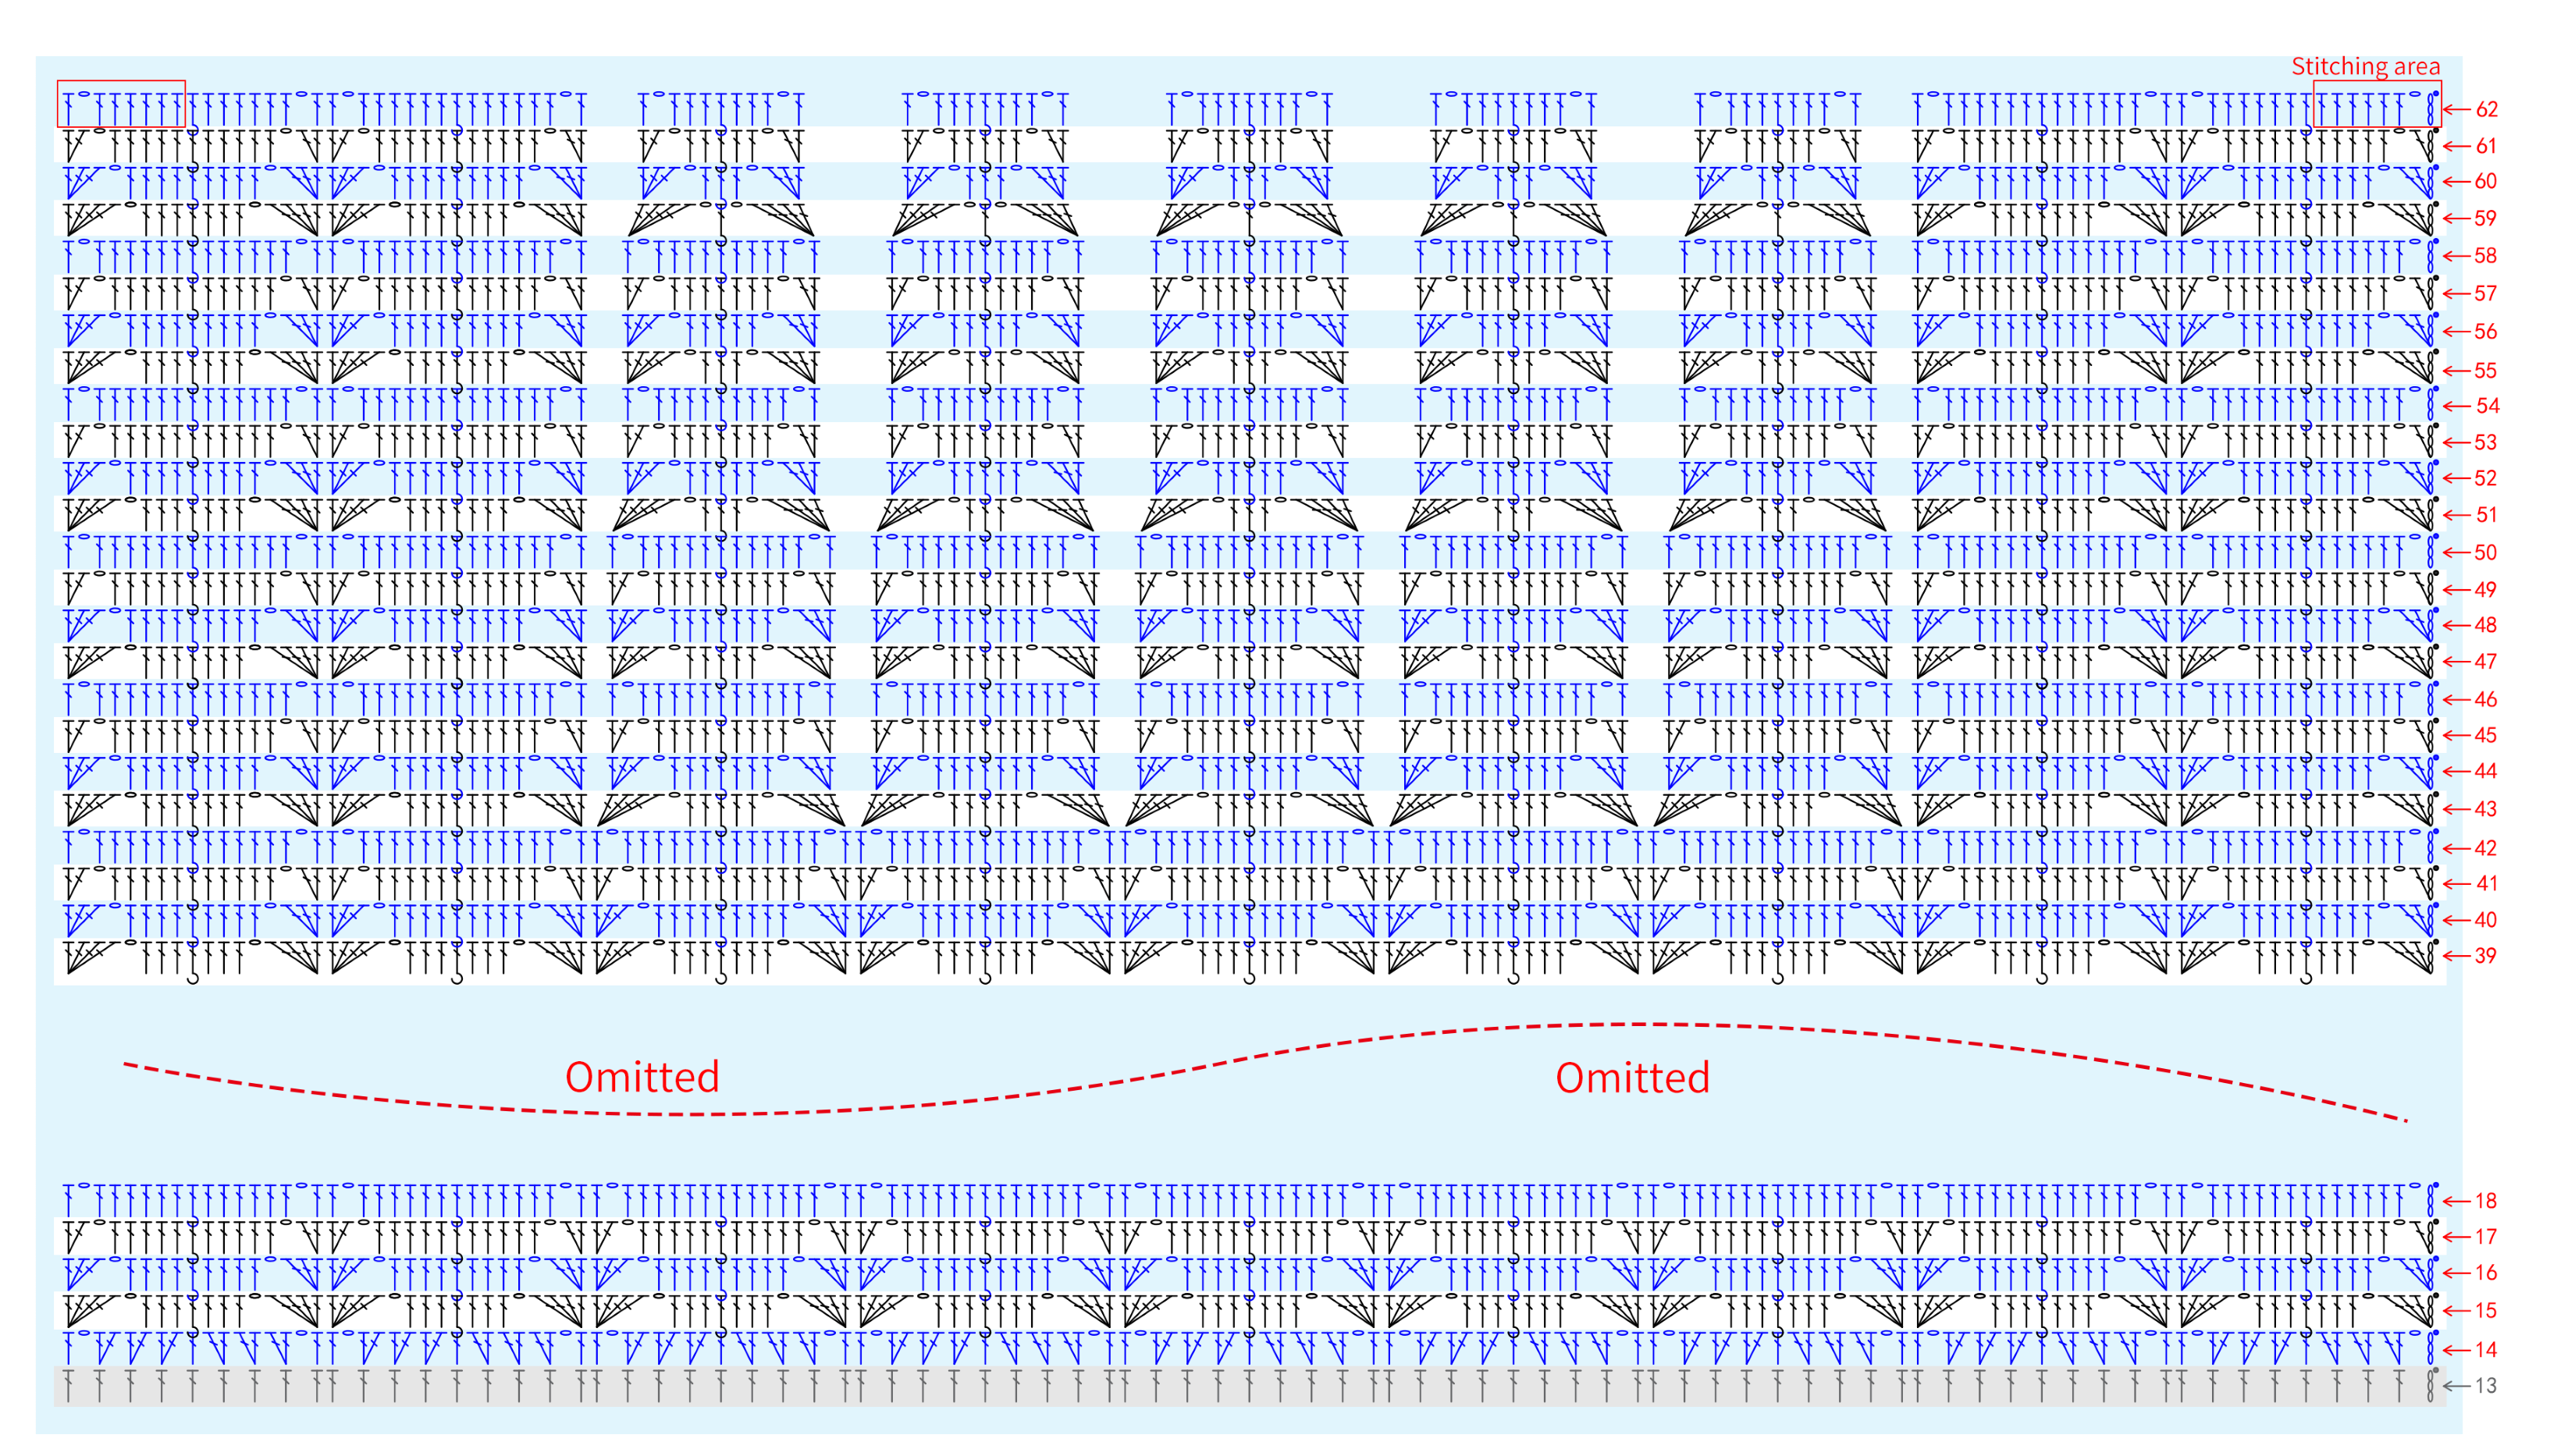
Part 2 Sleeves×2B 23' 31''
The sleeves are crocheted using a round starting with chain stitch, worked in a counterclockwise direction. Please refer to the video demonstration for more details.
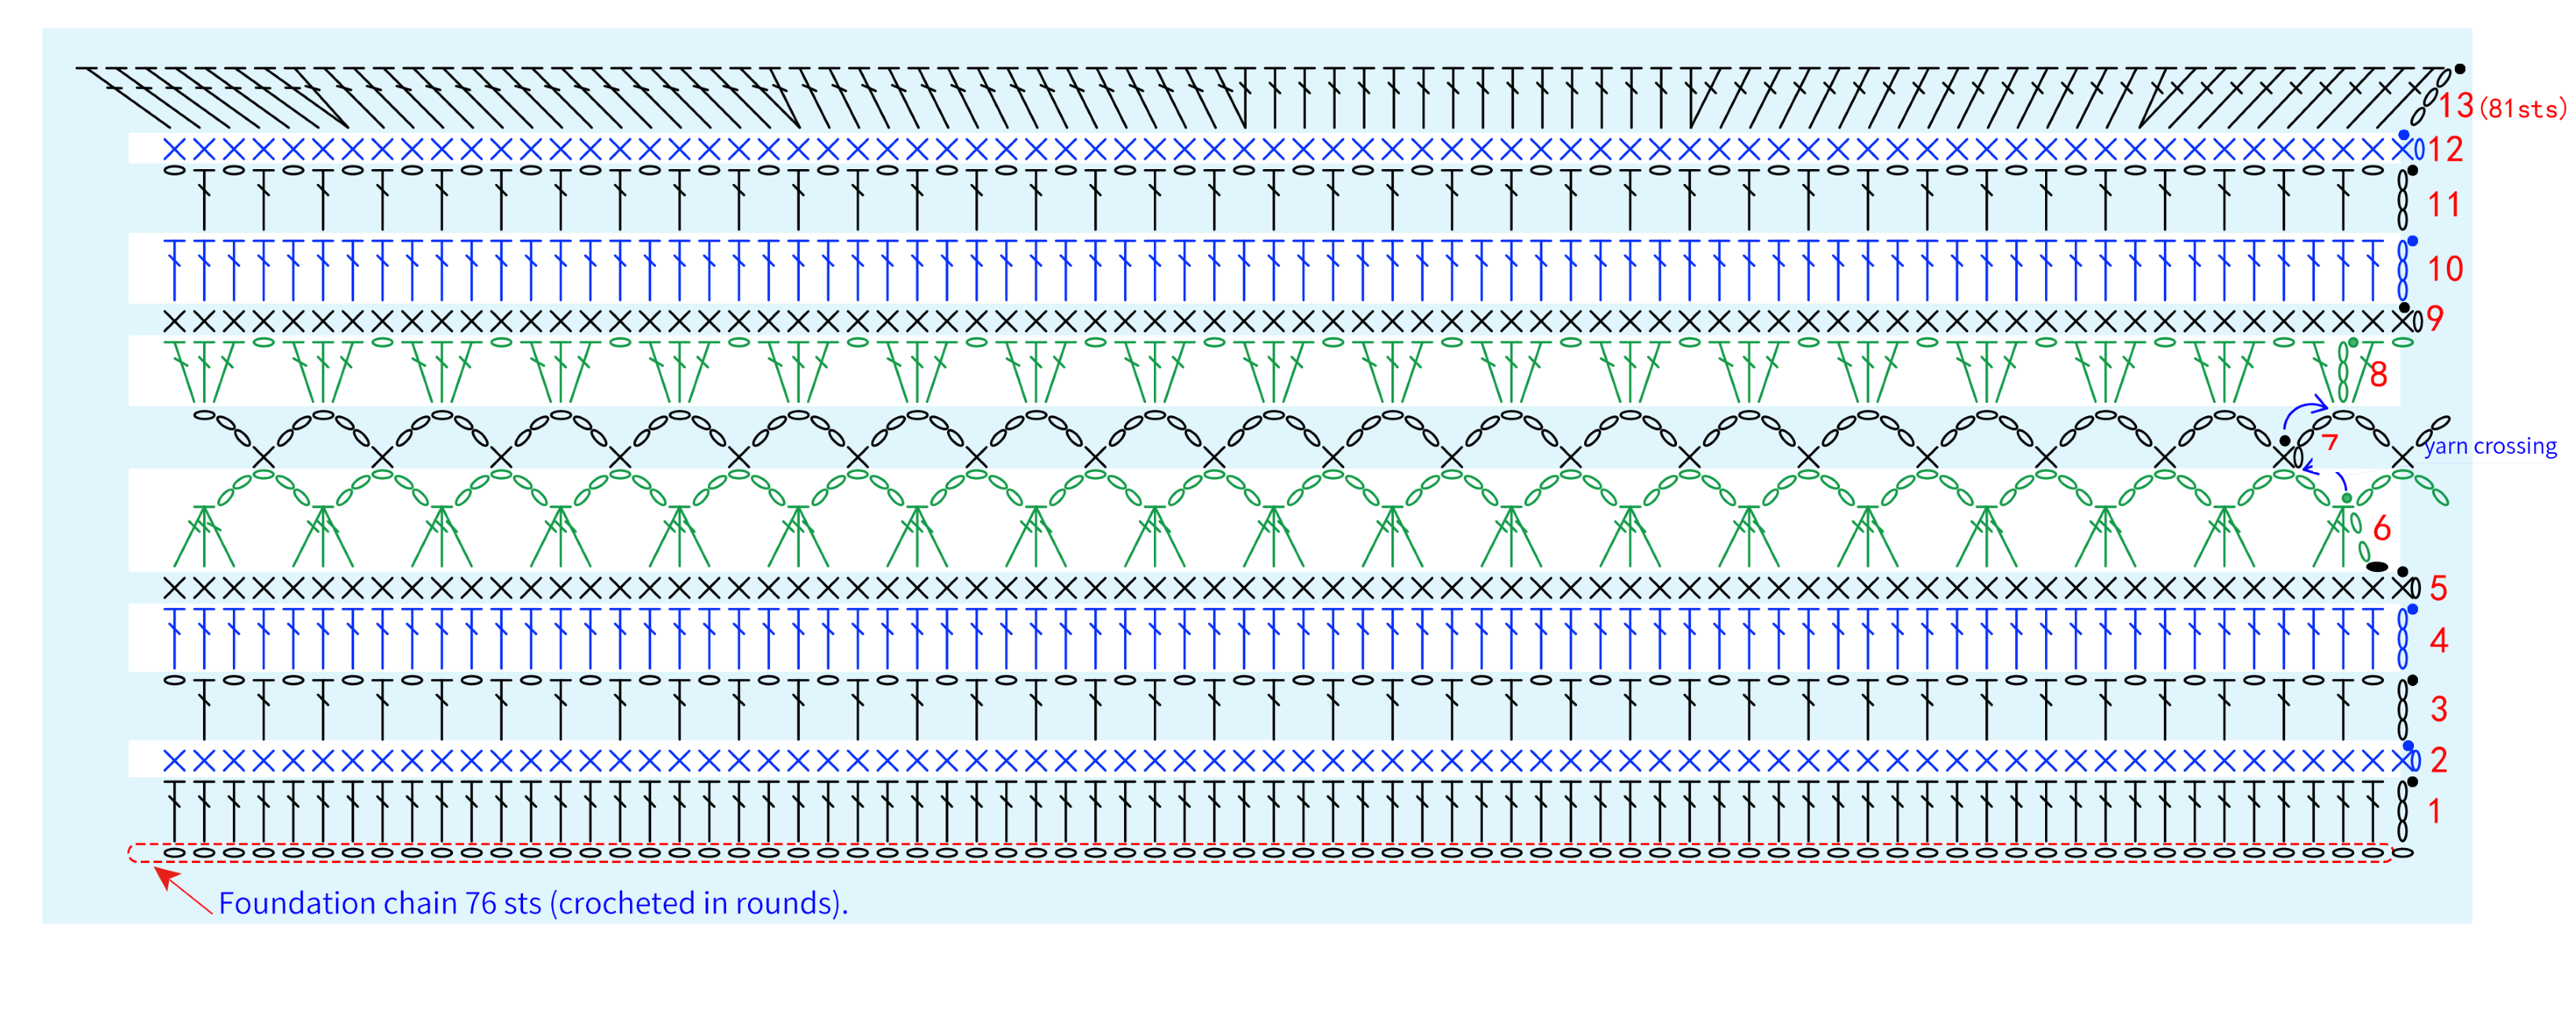
Part3 Yoke PartC 29' 31''
It's divided into Part 1 and Part 2. In Part 1, you need to first sew up the body and the underarm areas of the sleeves, and then crochet on top of it. After completing Part 1, proceed to crochet Part 2. For specific instructions, please refer to the video demonstration for more details.
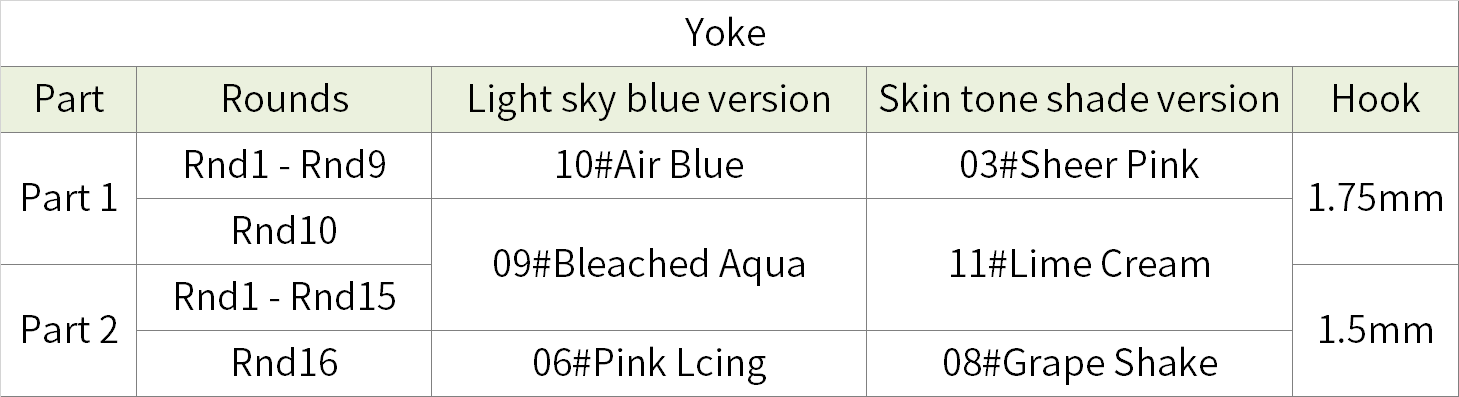

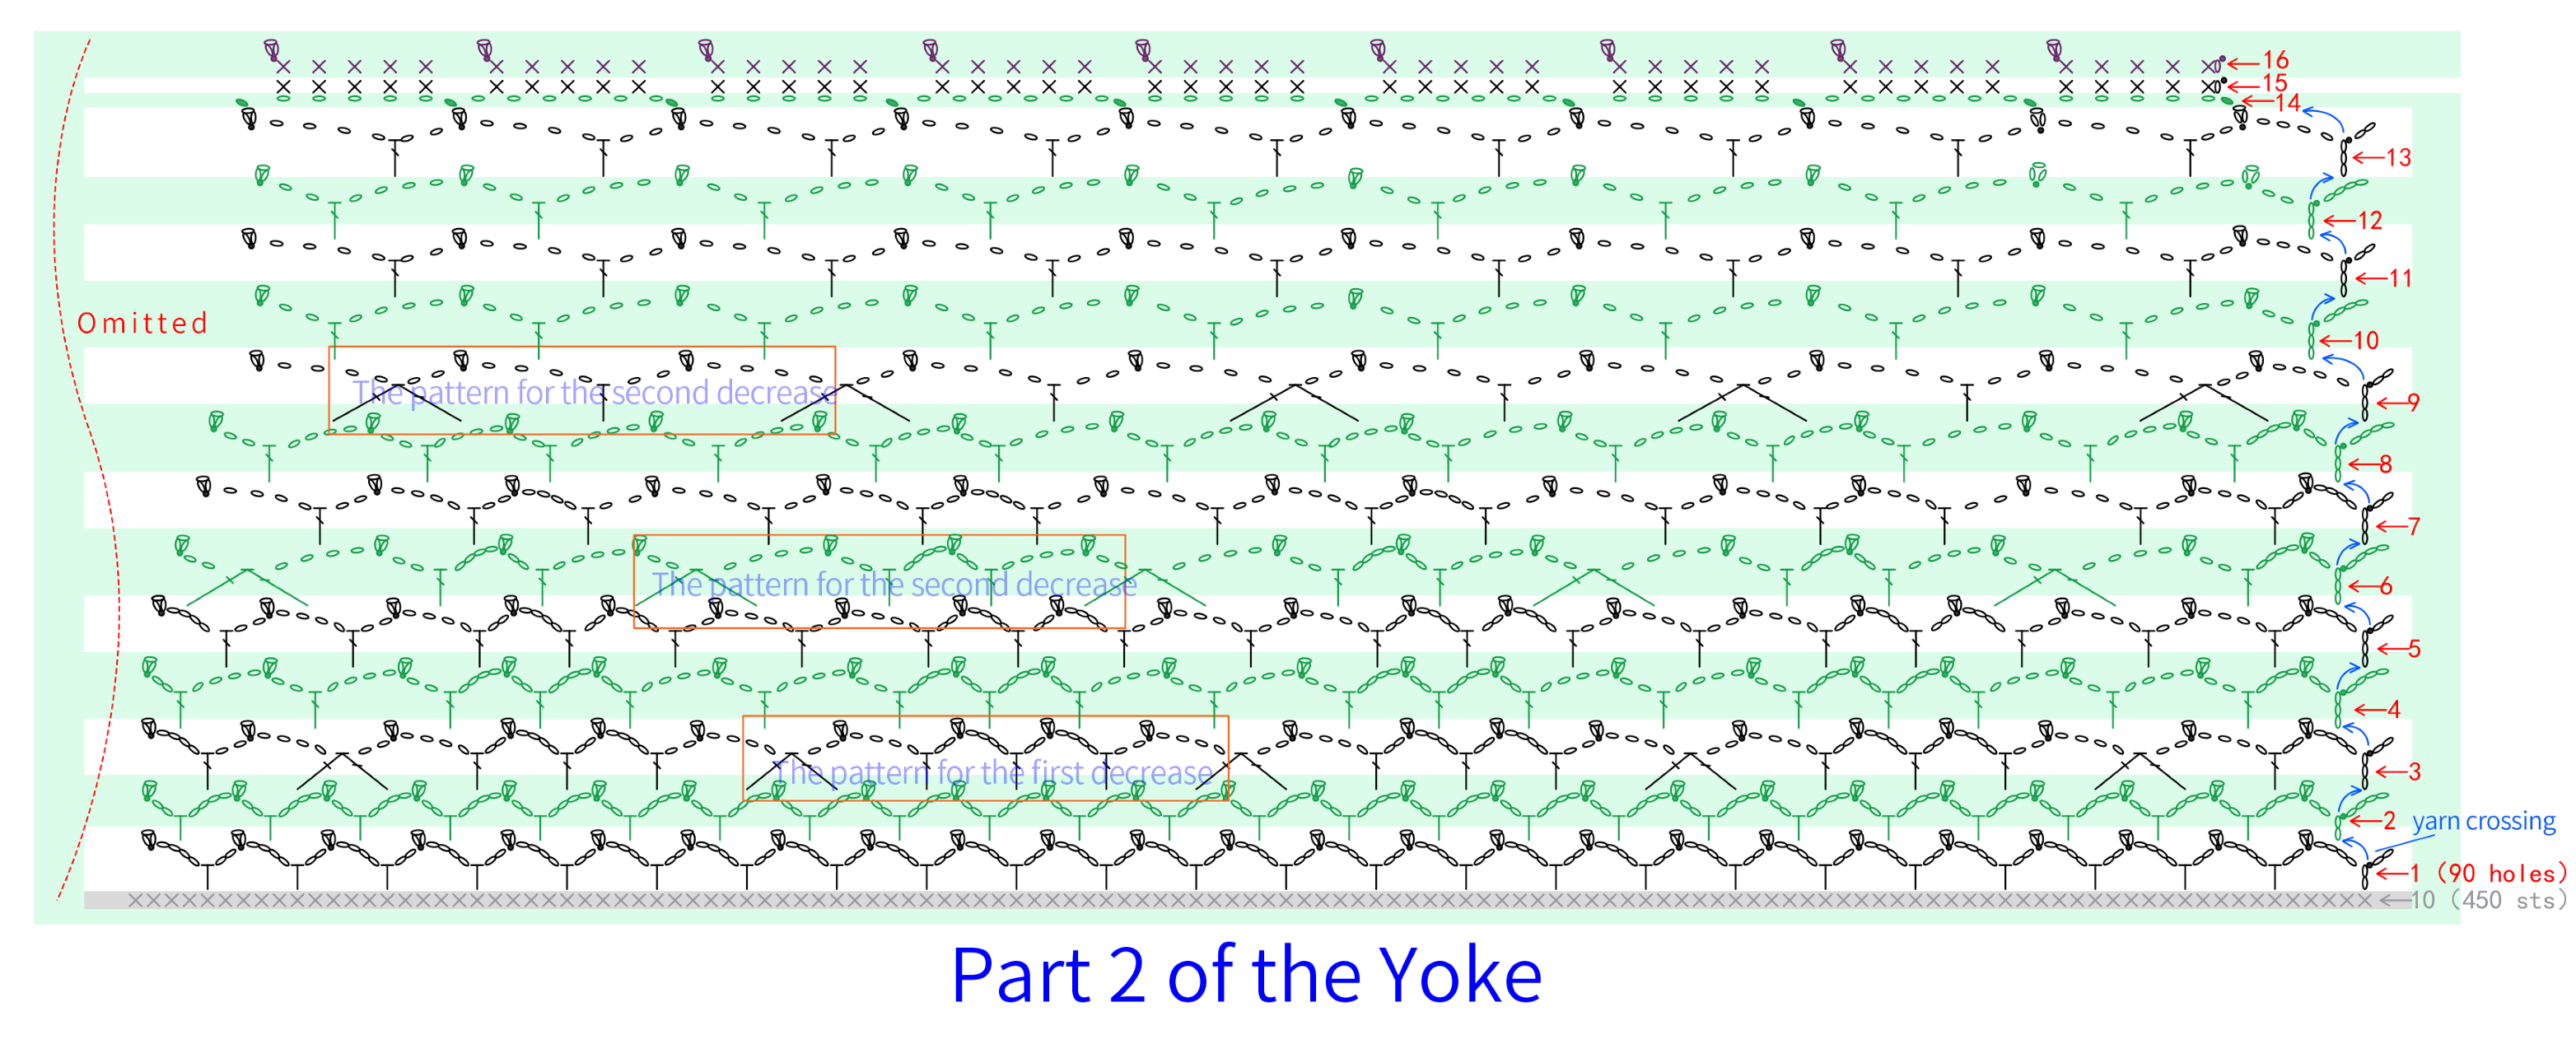
Part4 DecorationD 52' 30''
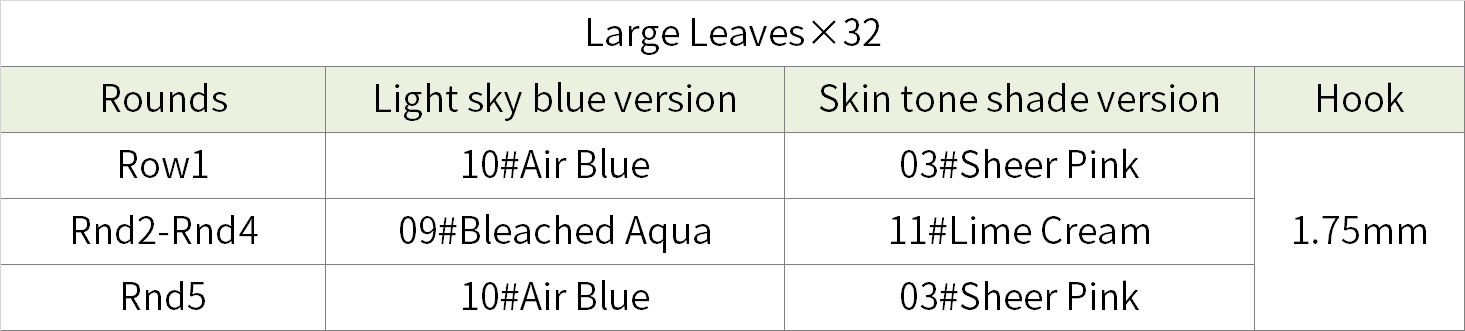
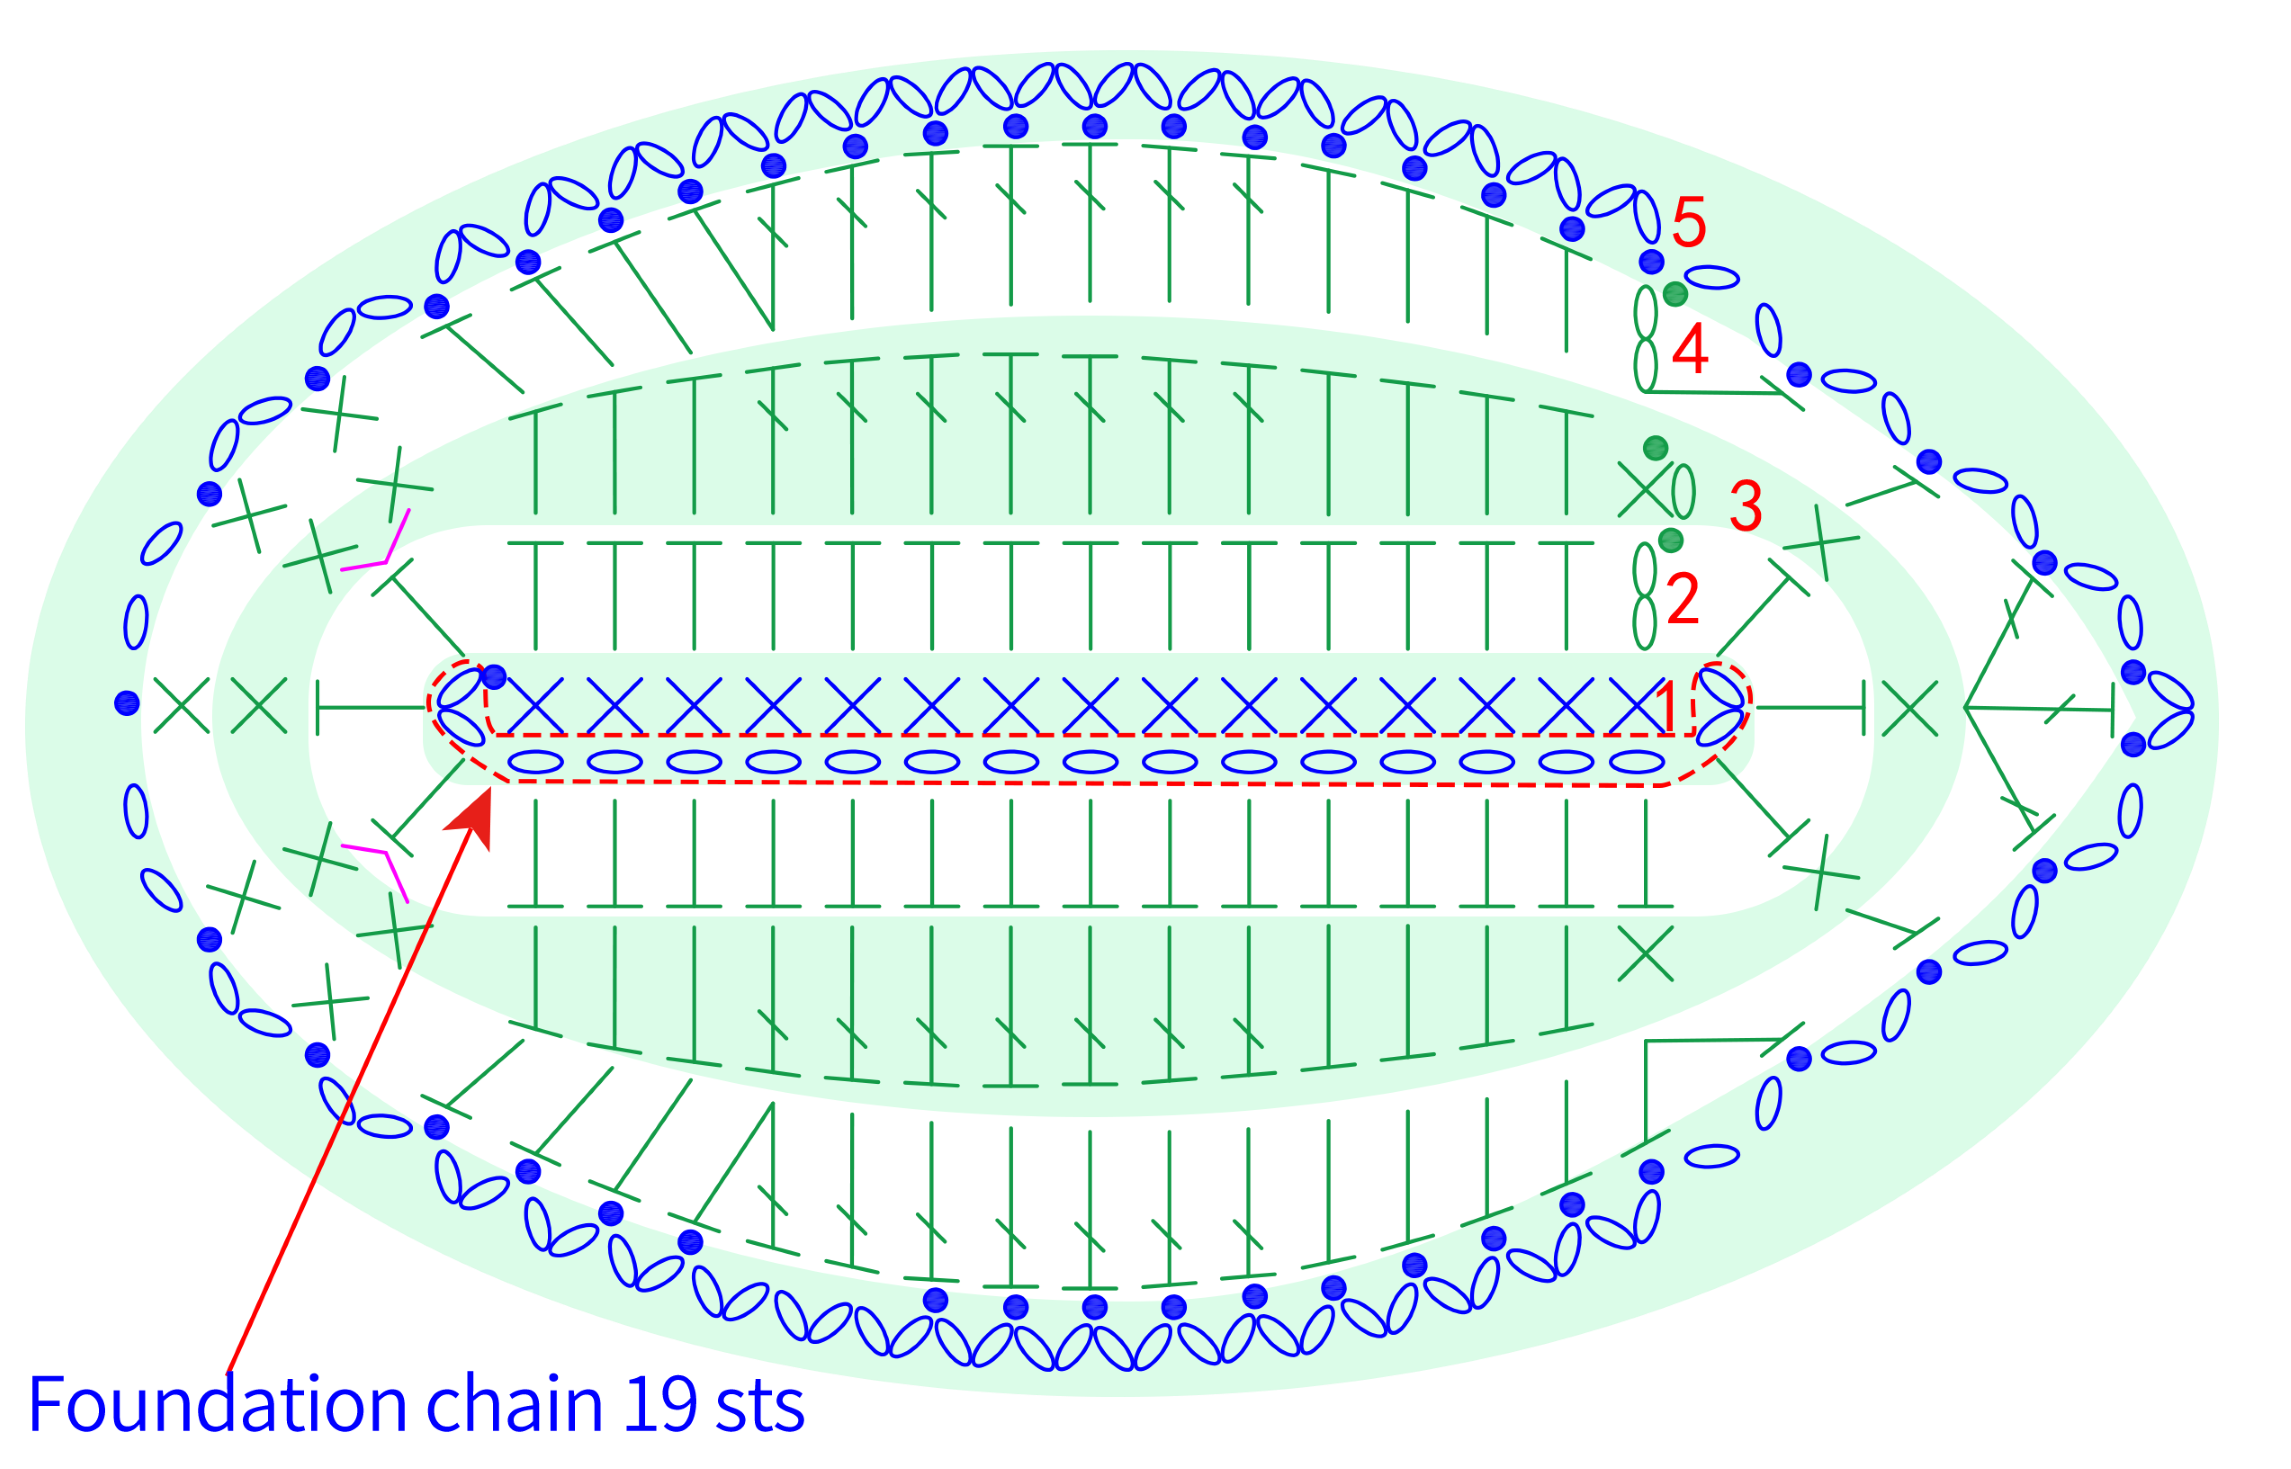
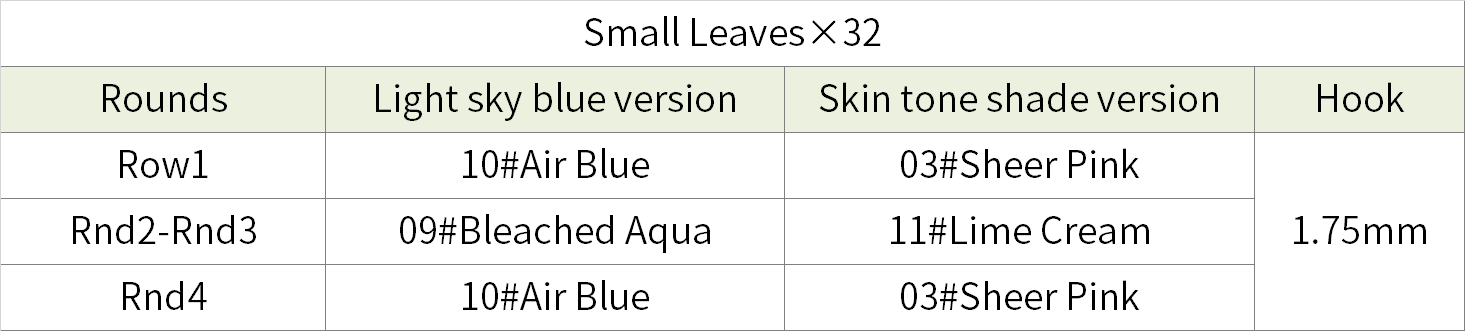
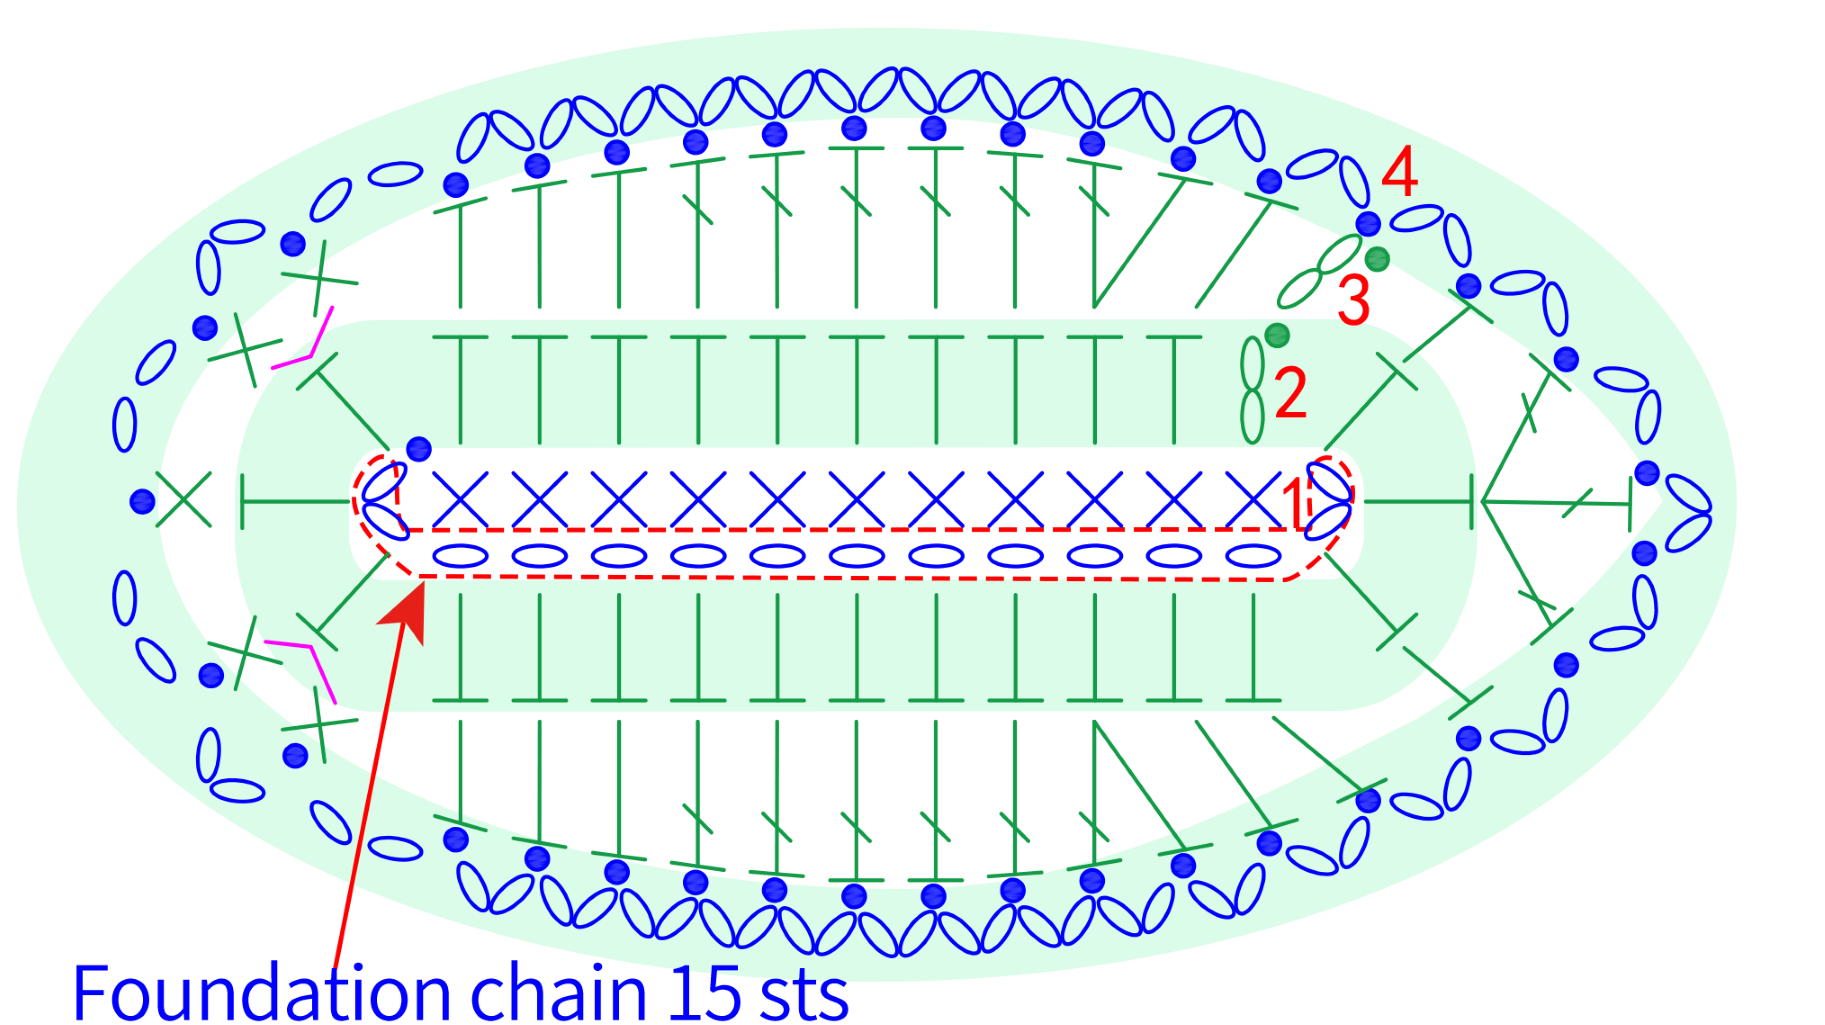
The decorative parts are divided into flowers and leaves. After all the decorations have been crocheted, arrange them according to the finished product diagram and proceed with stitching.
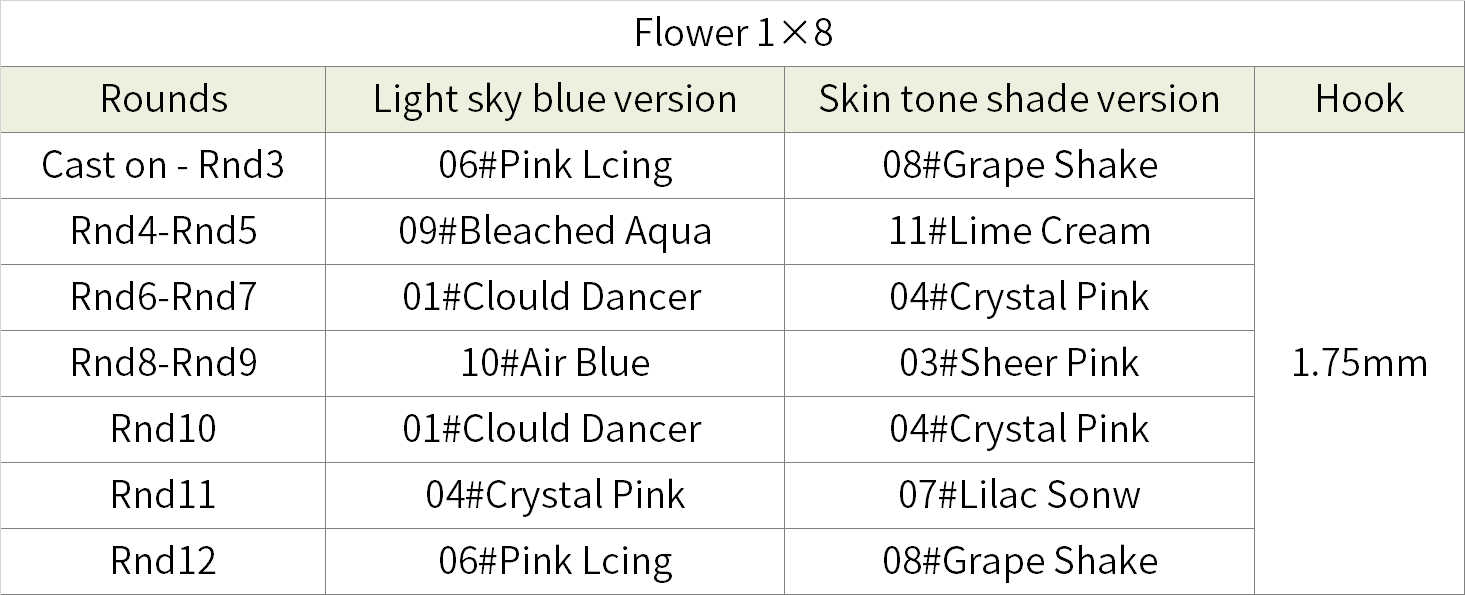
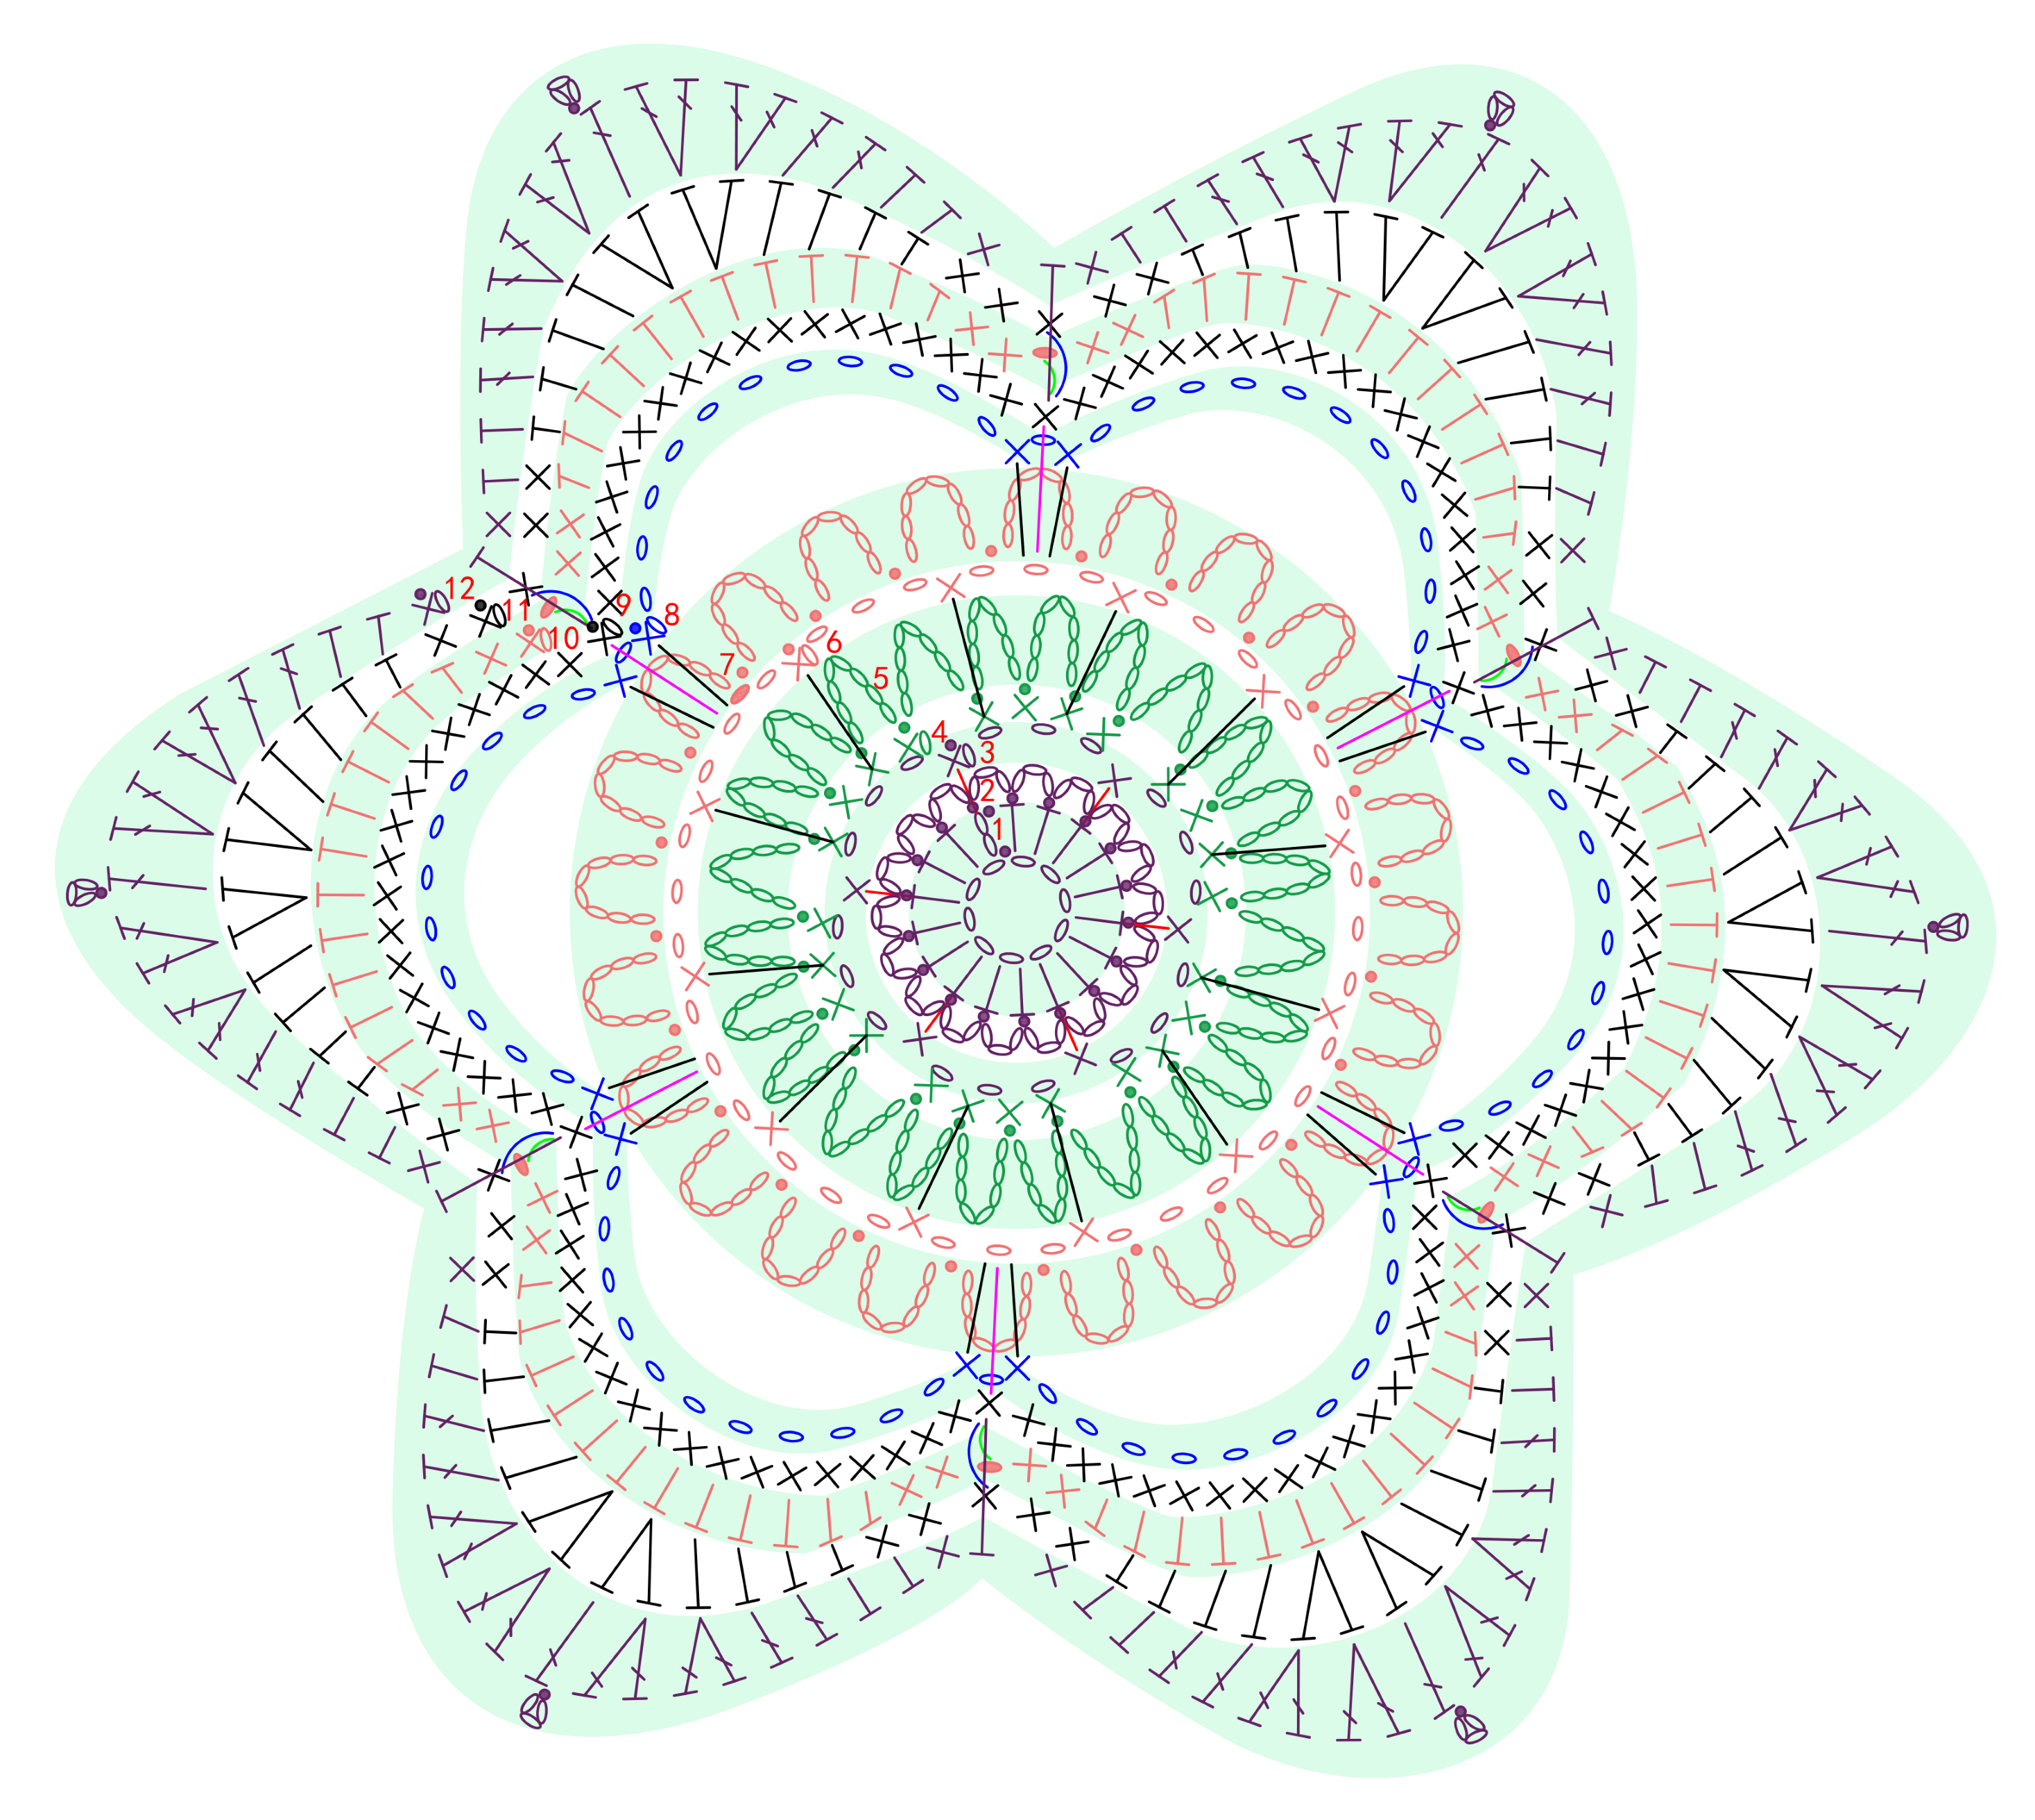
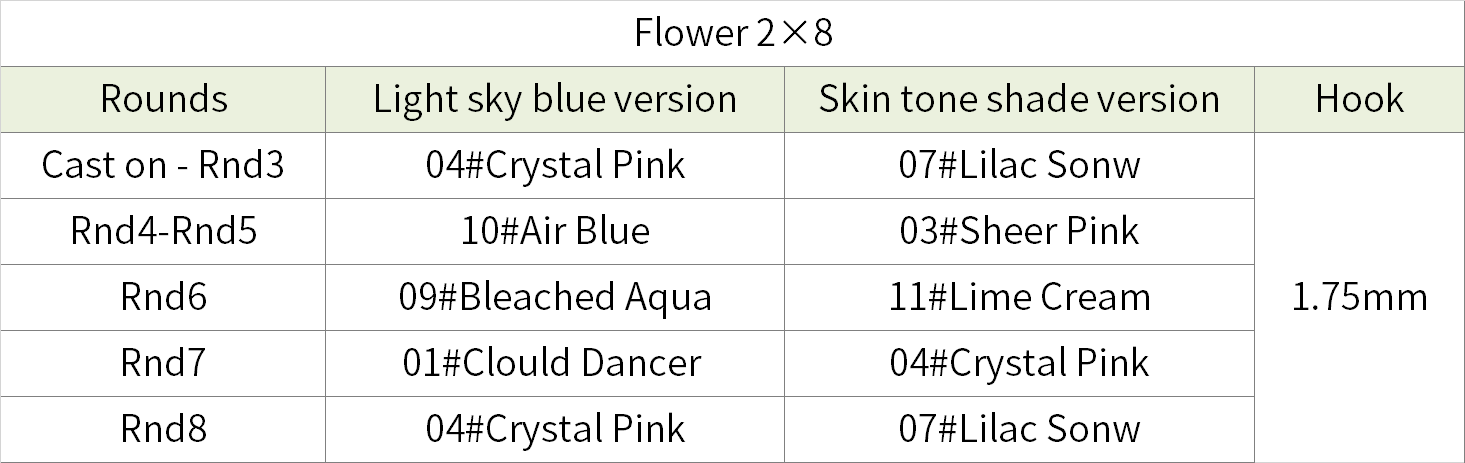
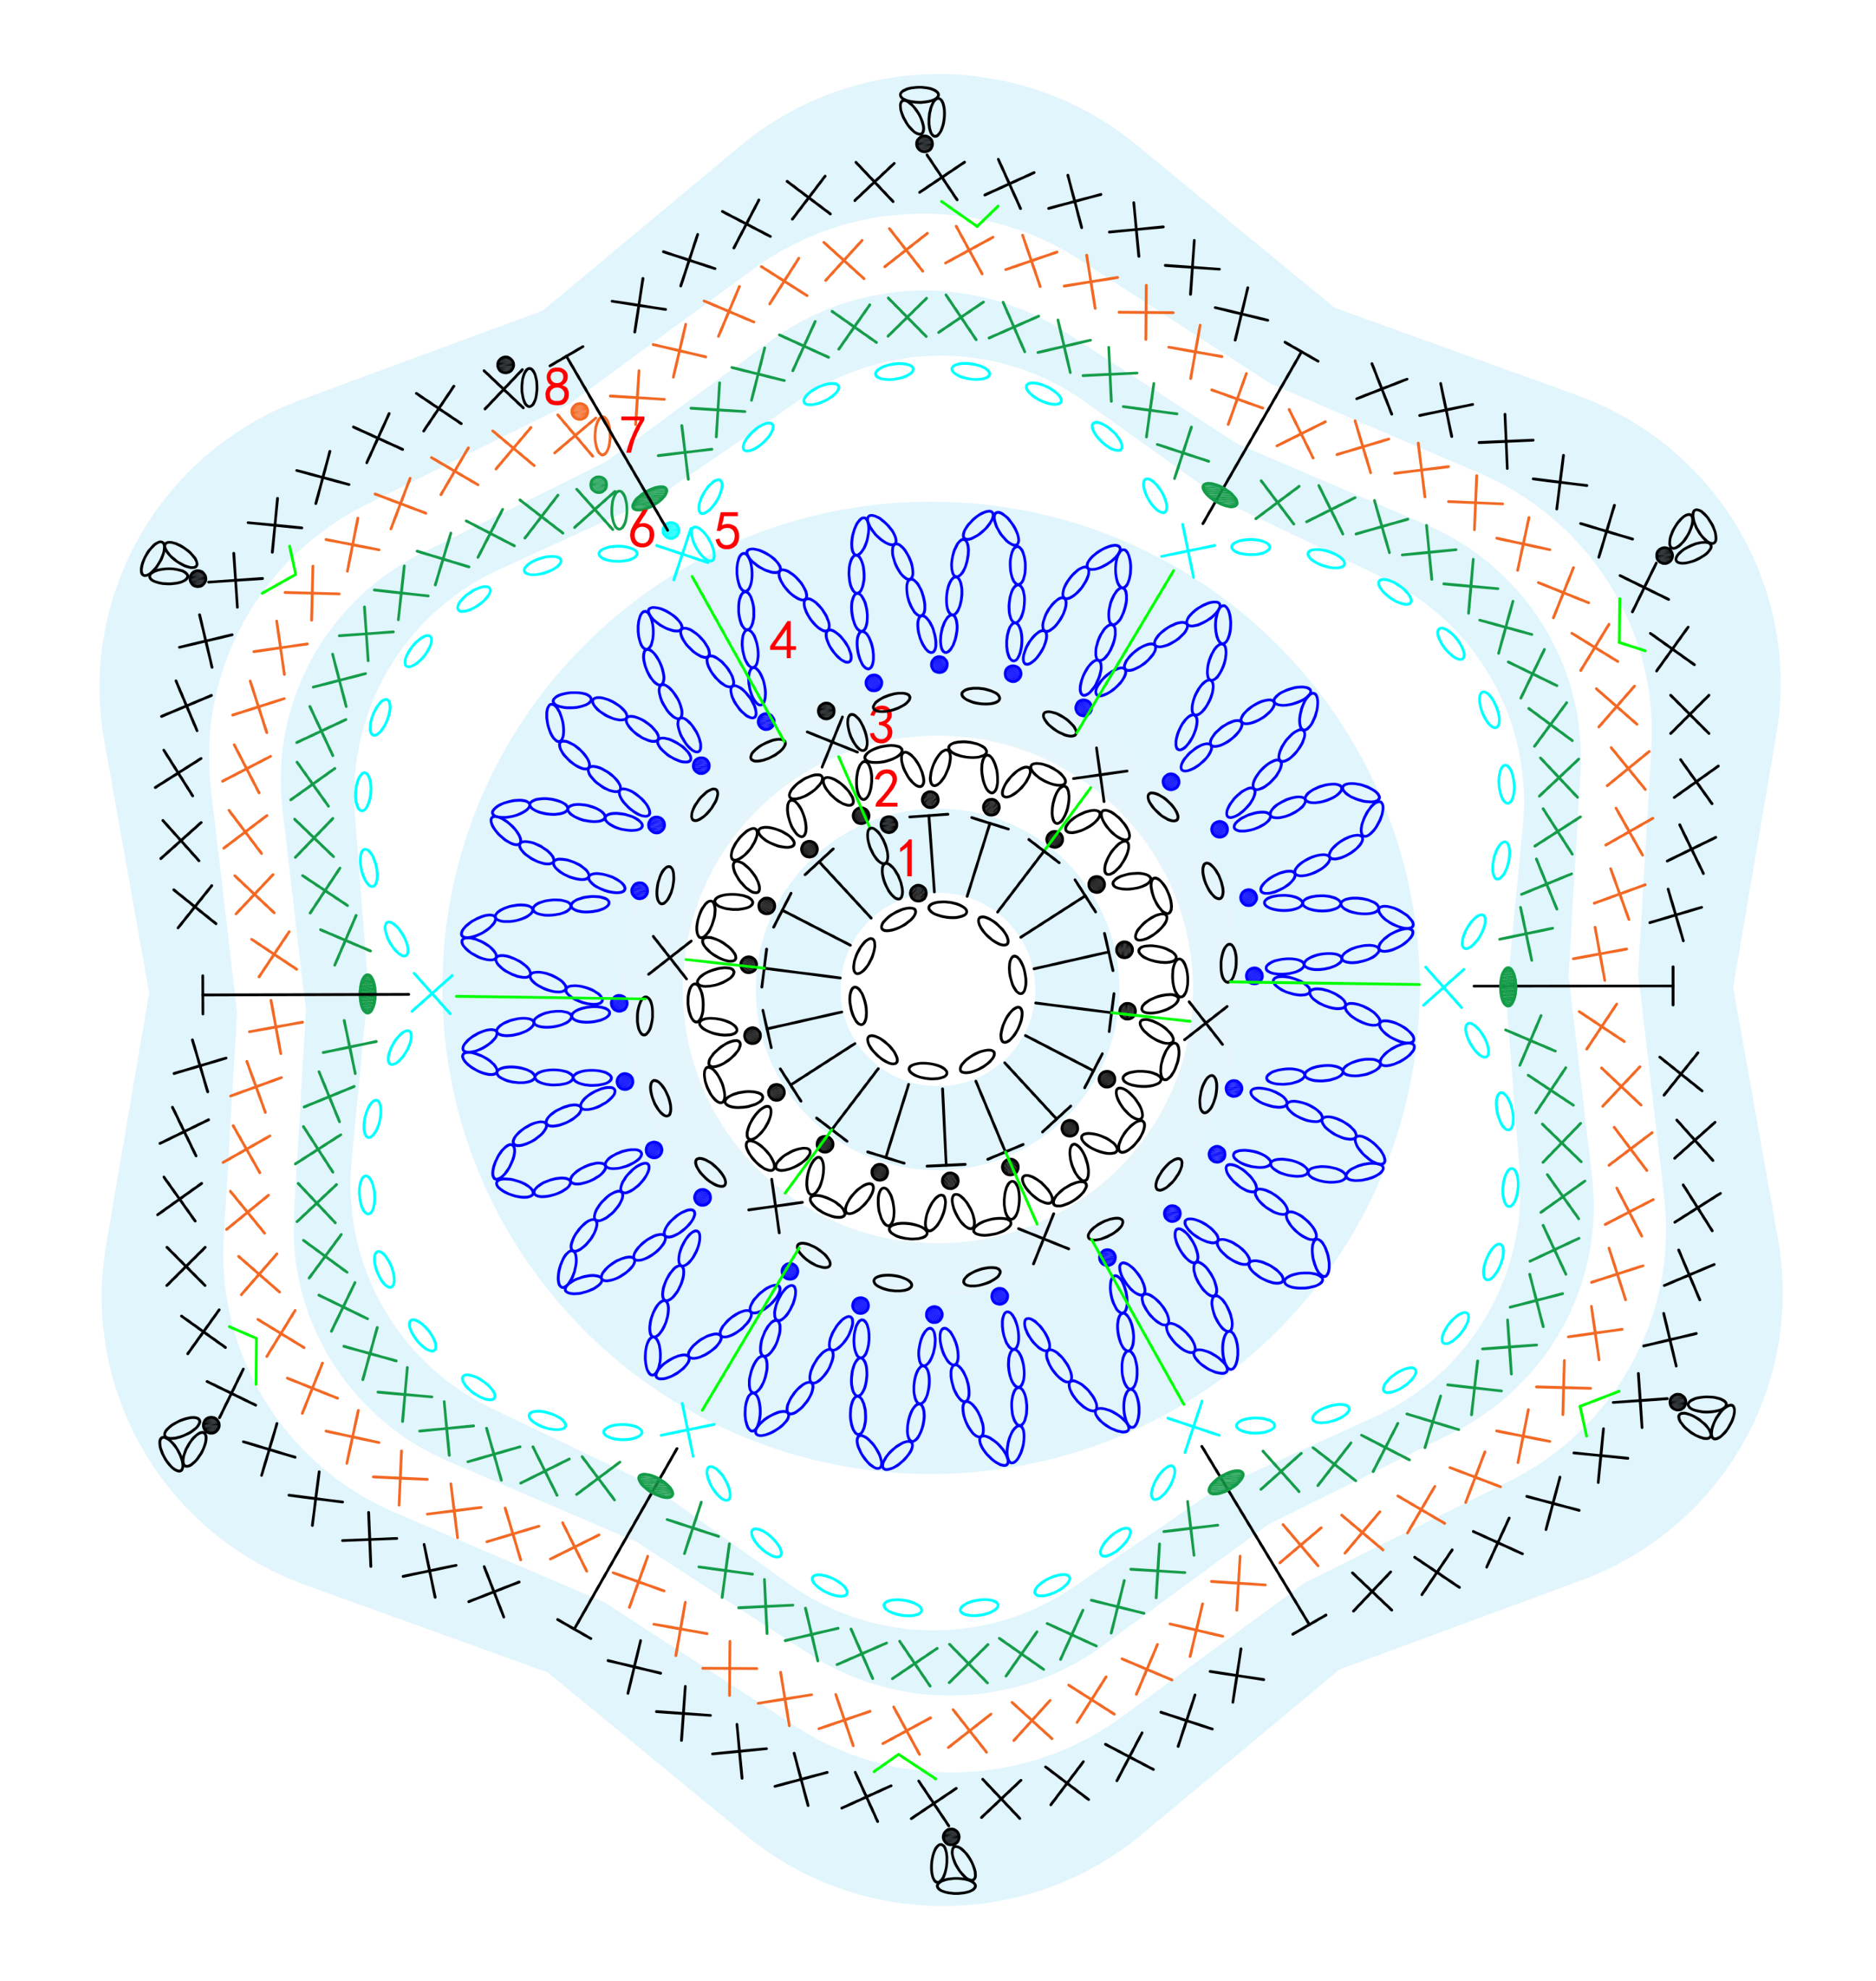
Note:Leave a 60cm tail at the end of each flower and a 40cm tail at the end of each leaf for stitching.
Made by the community