Bag
GoldFish Egg Pouch
Project preview
See the finished project
Pattern format
Instructions
Watch and follow
Video tutorial
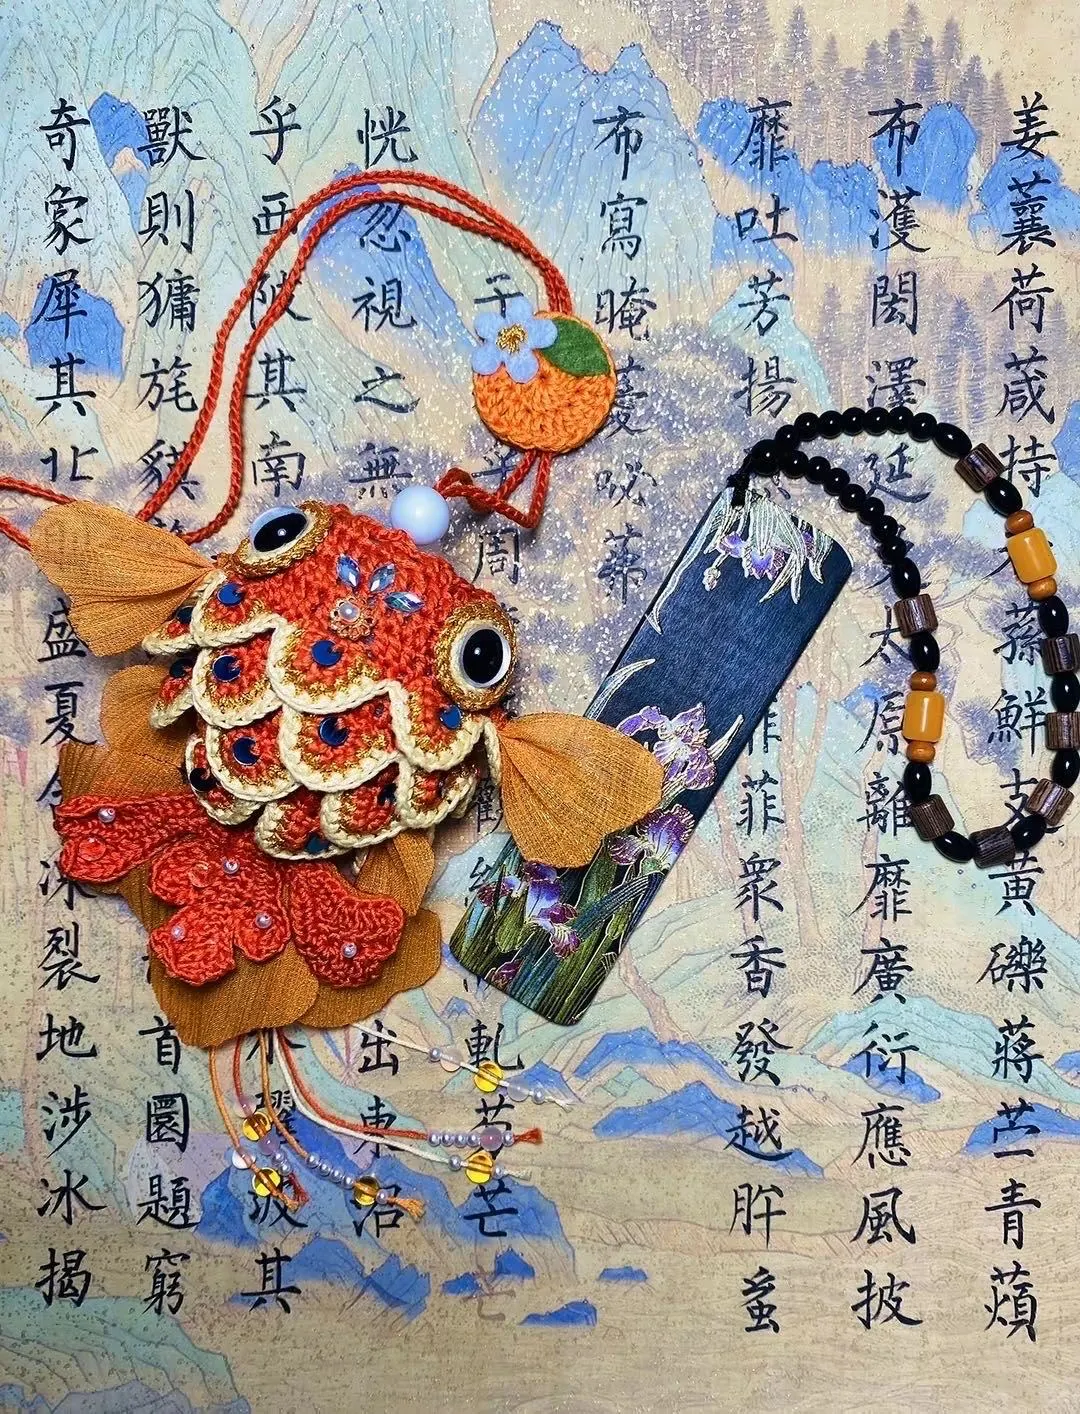
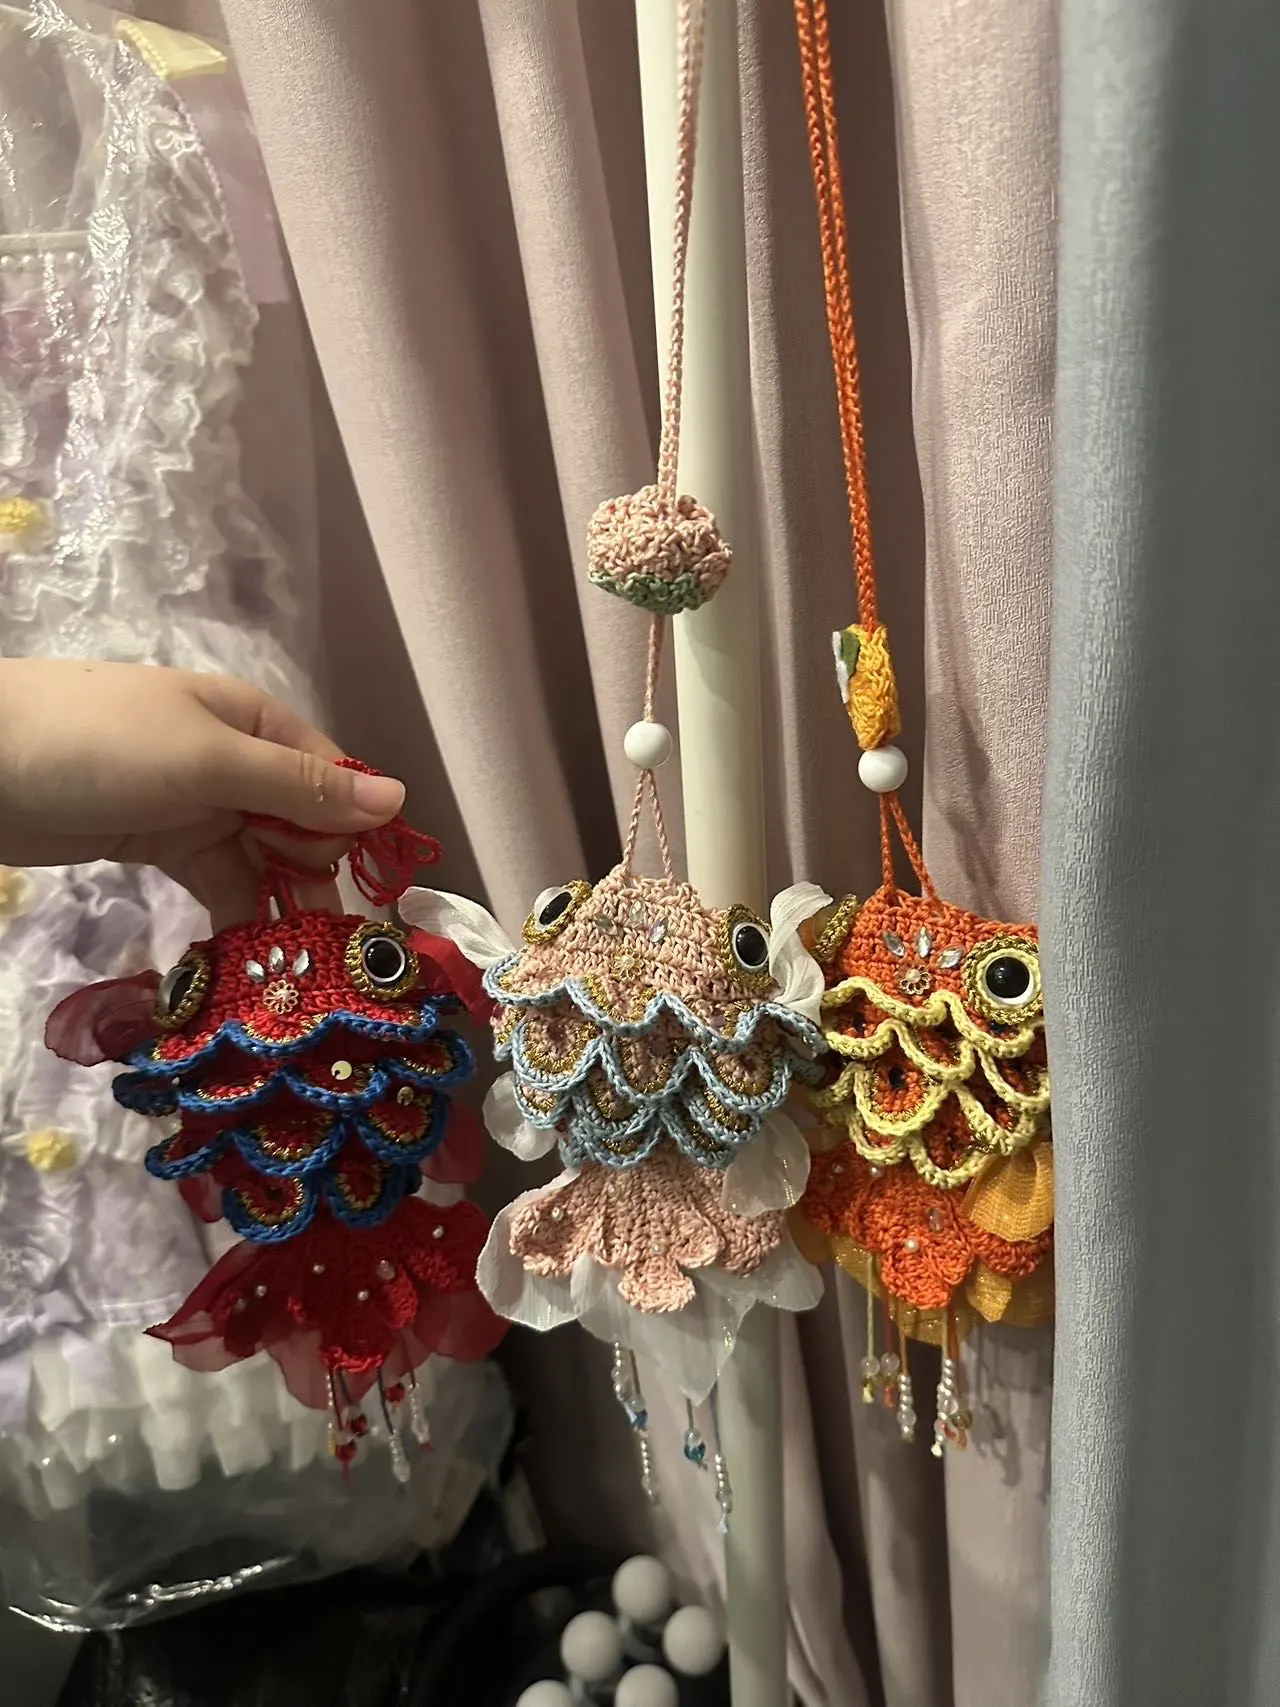
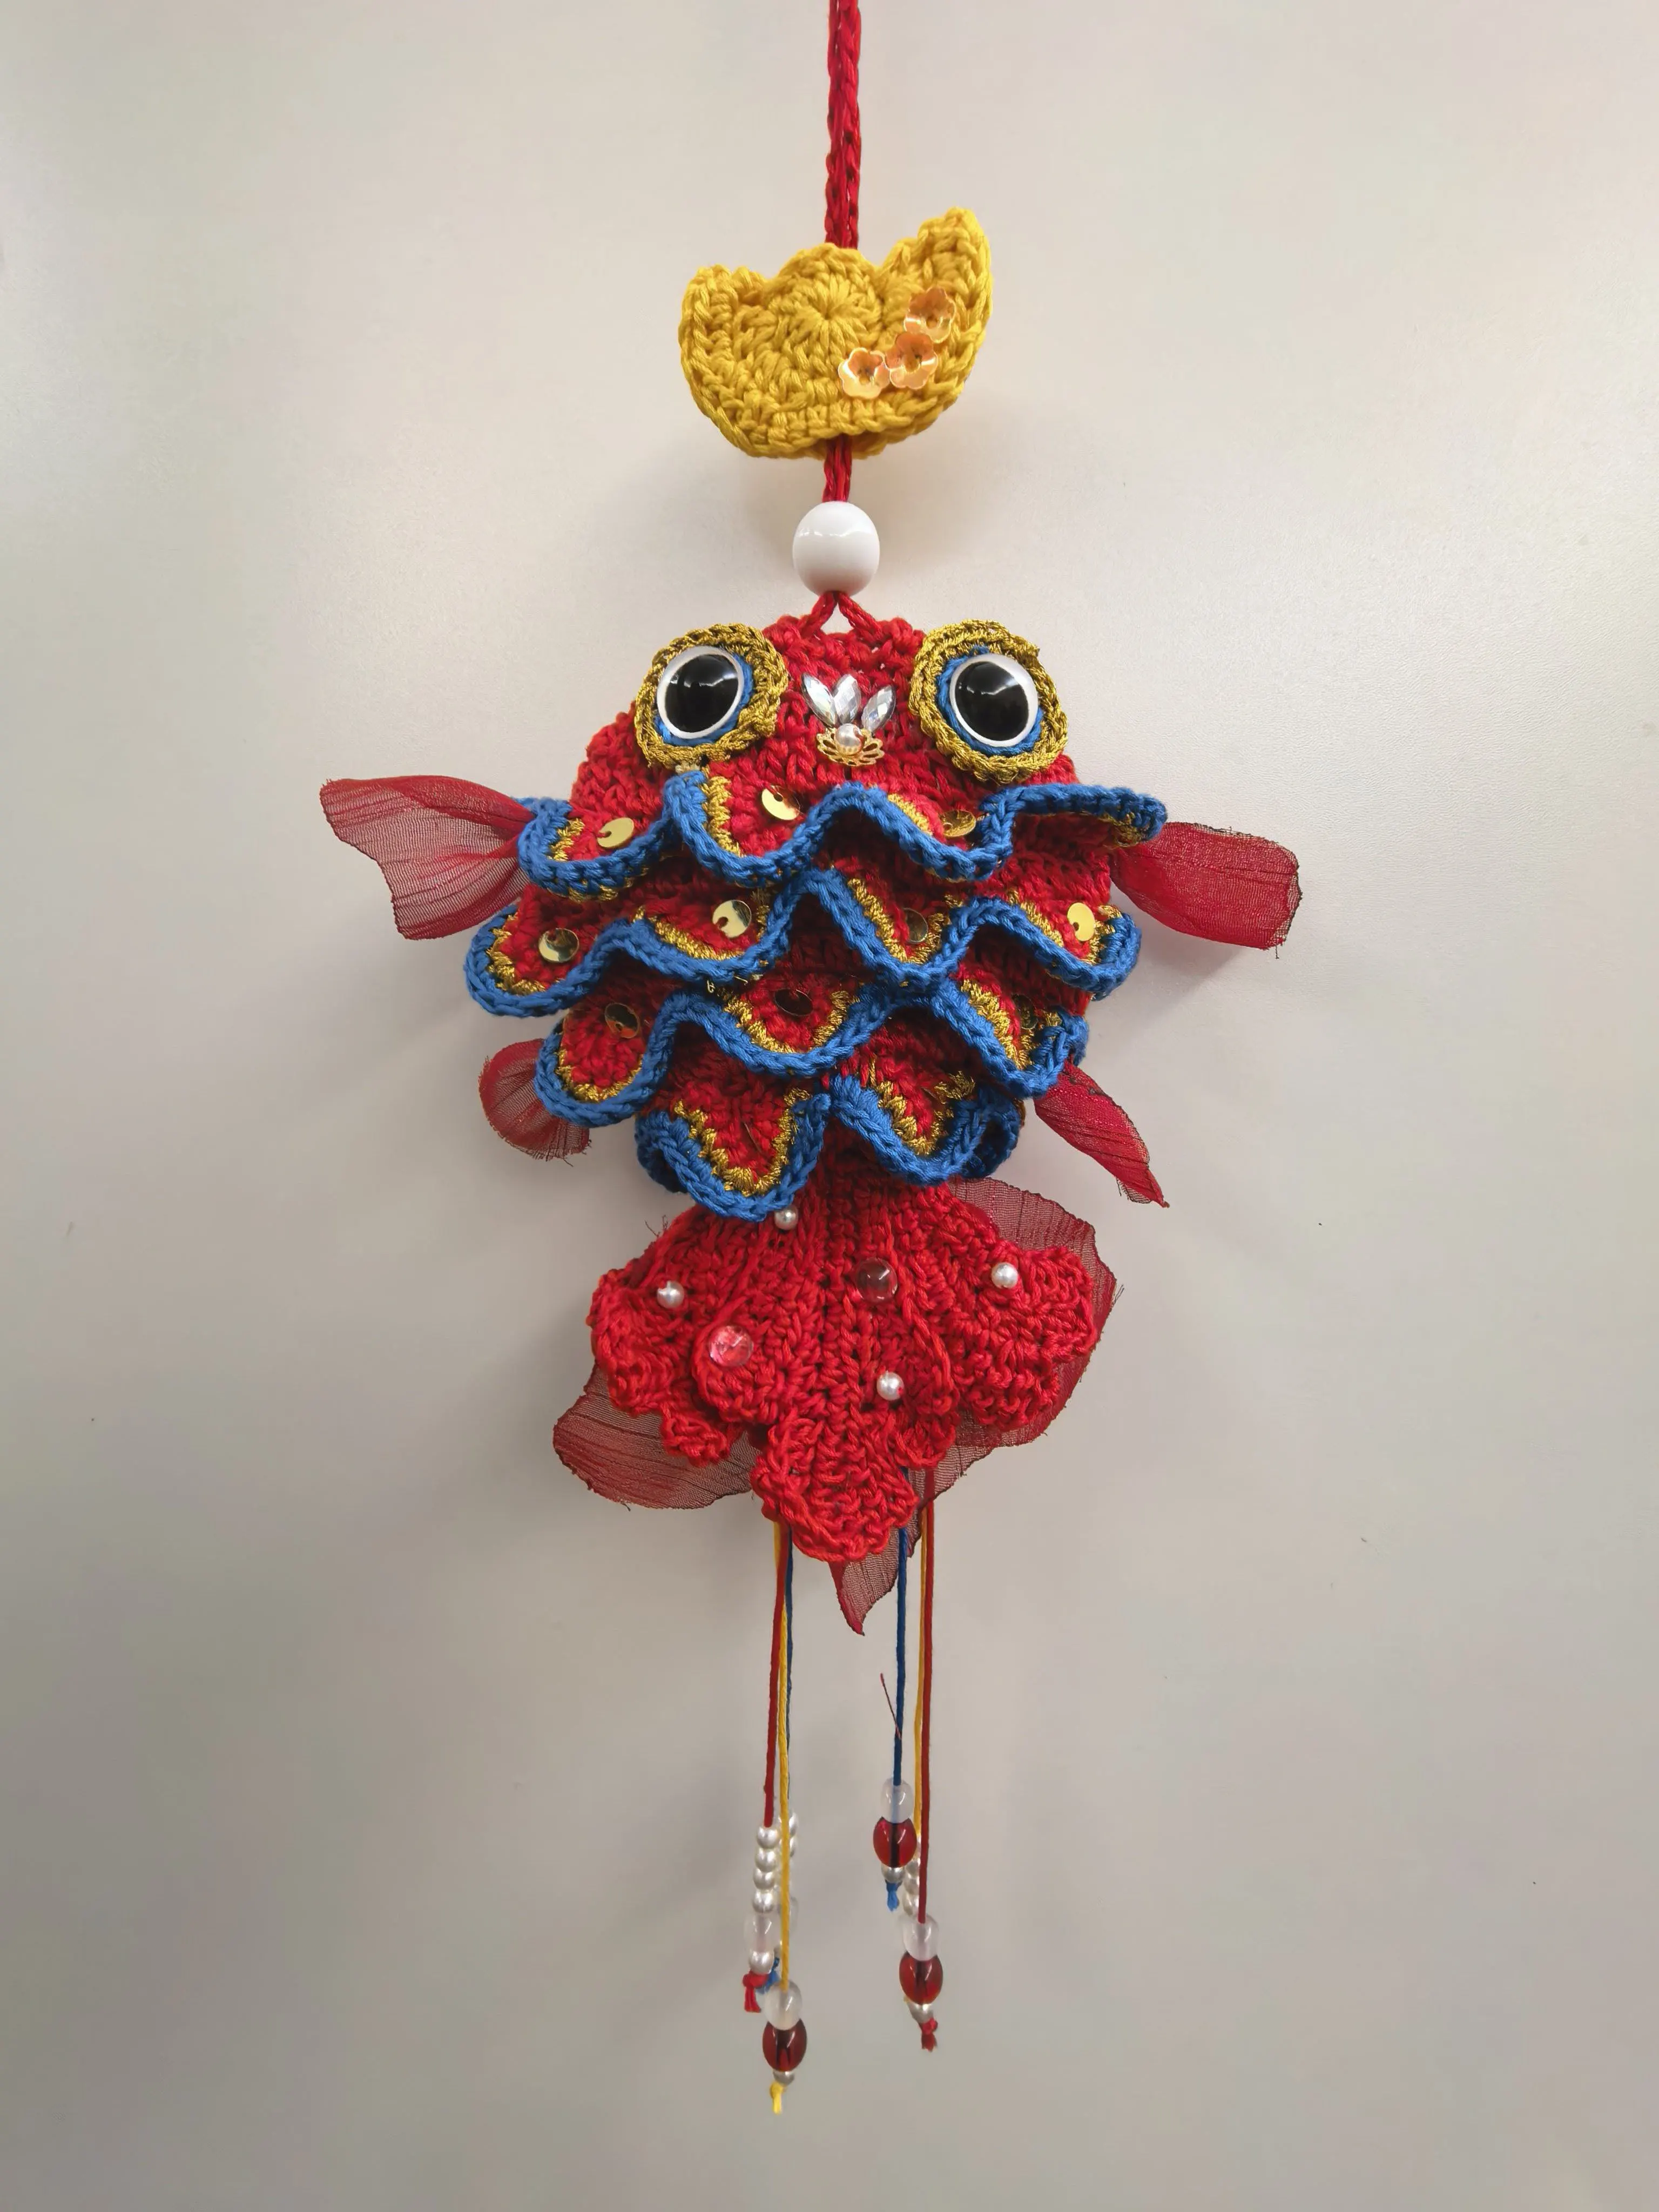
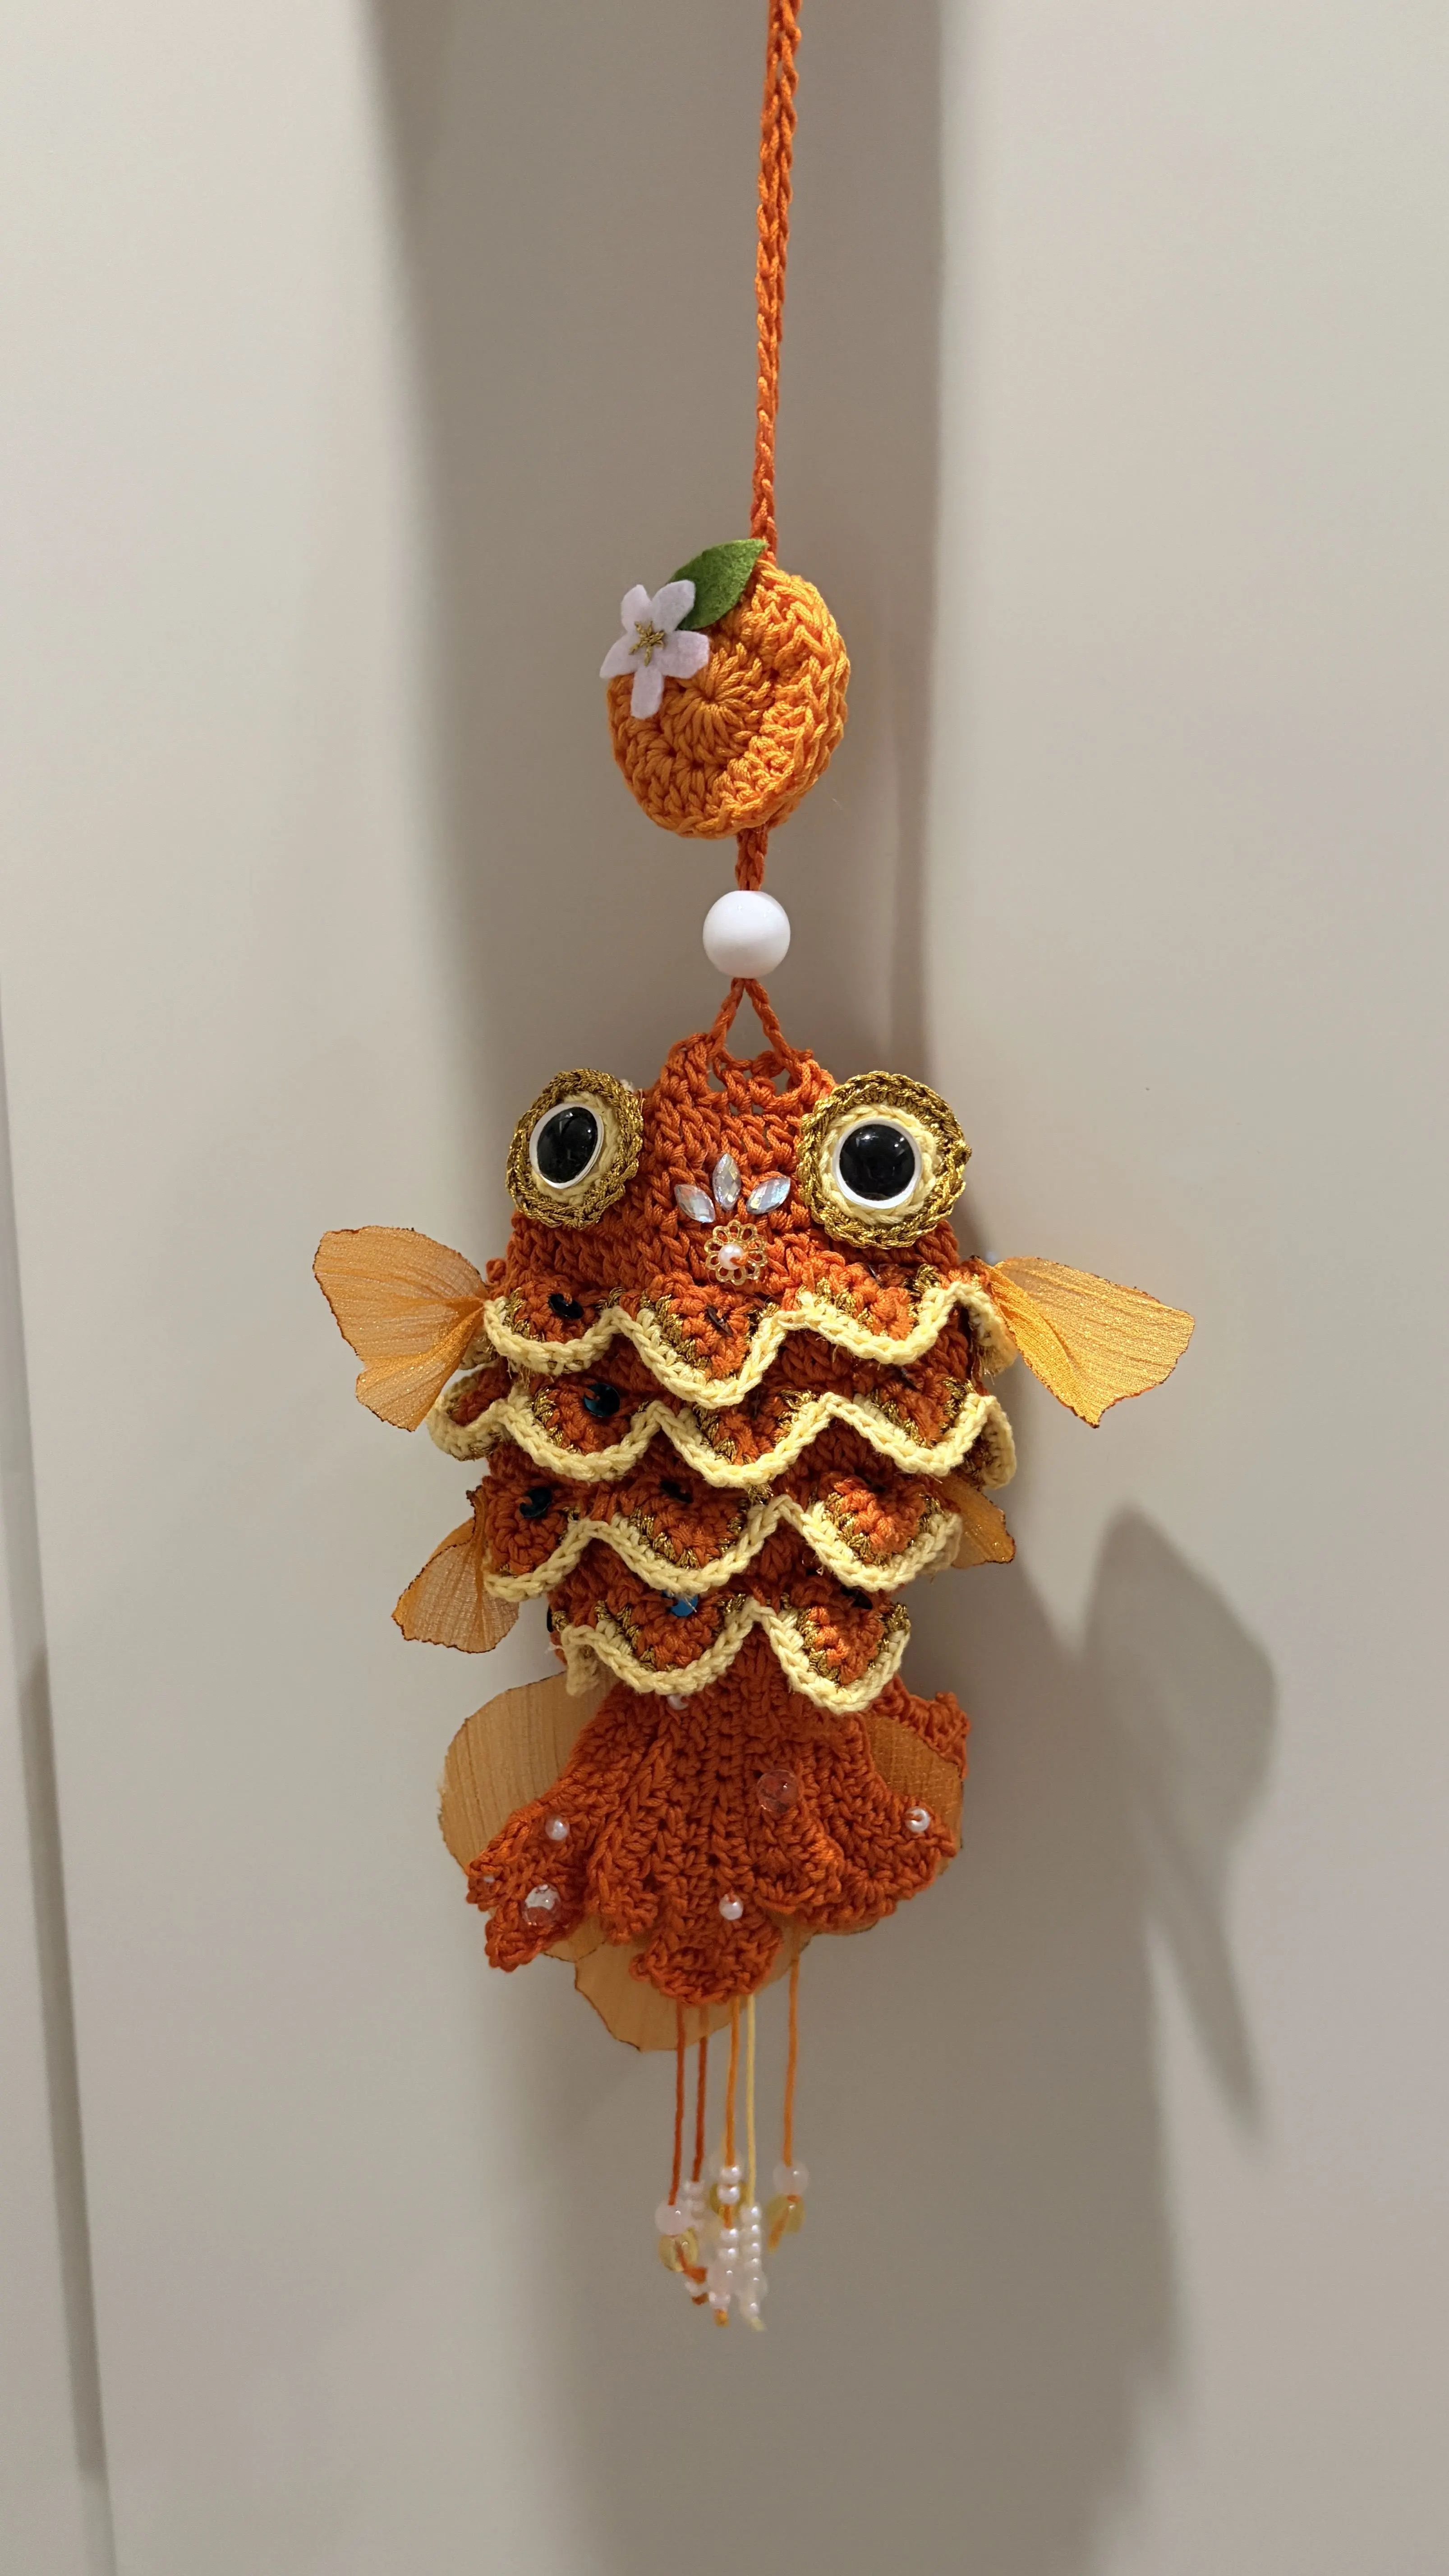
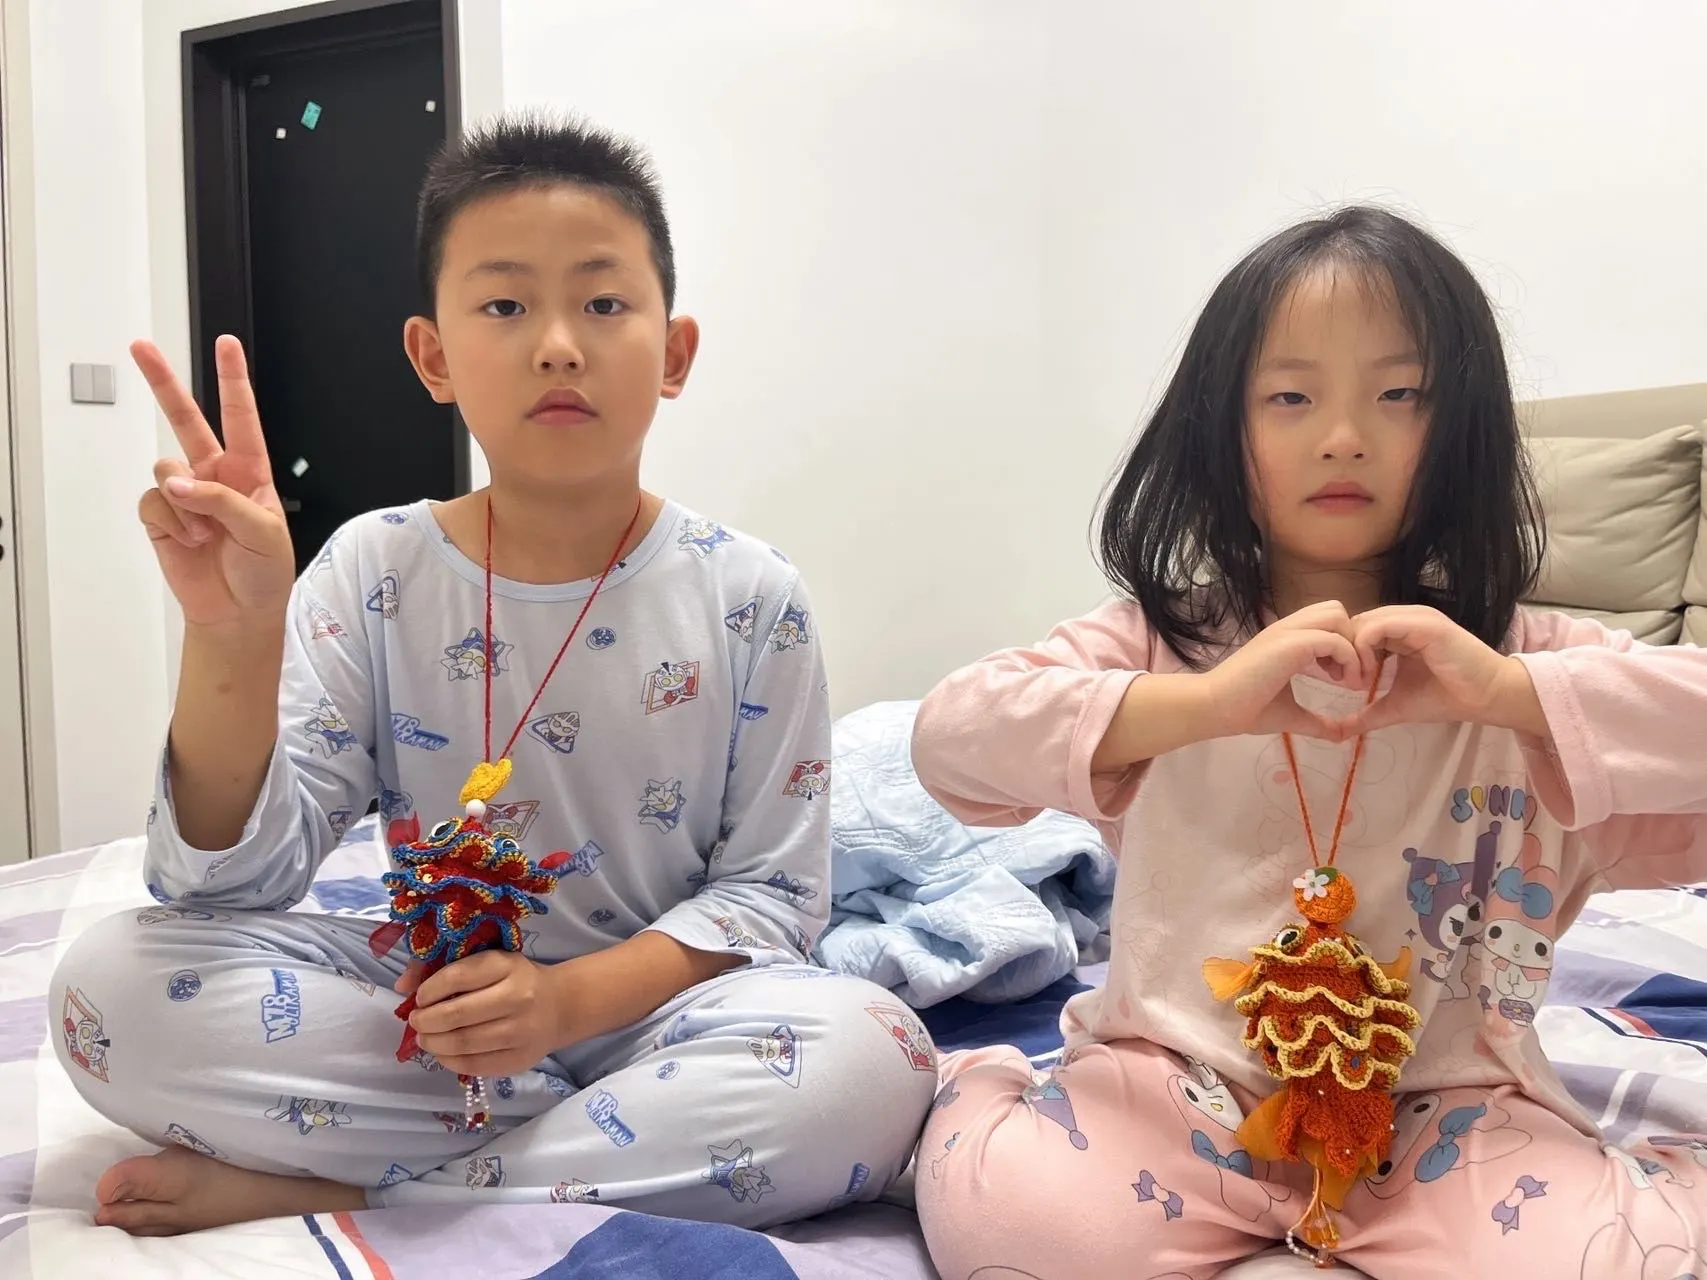
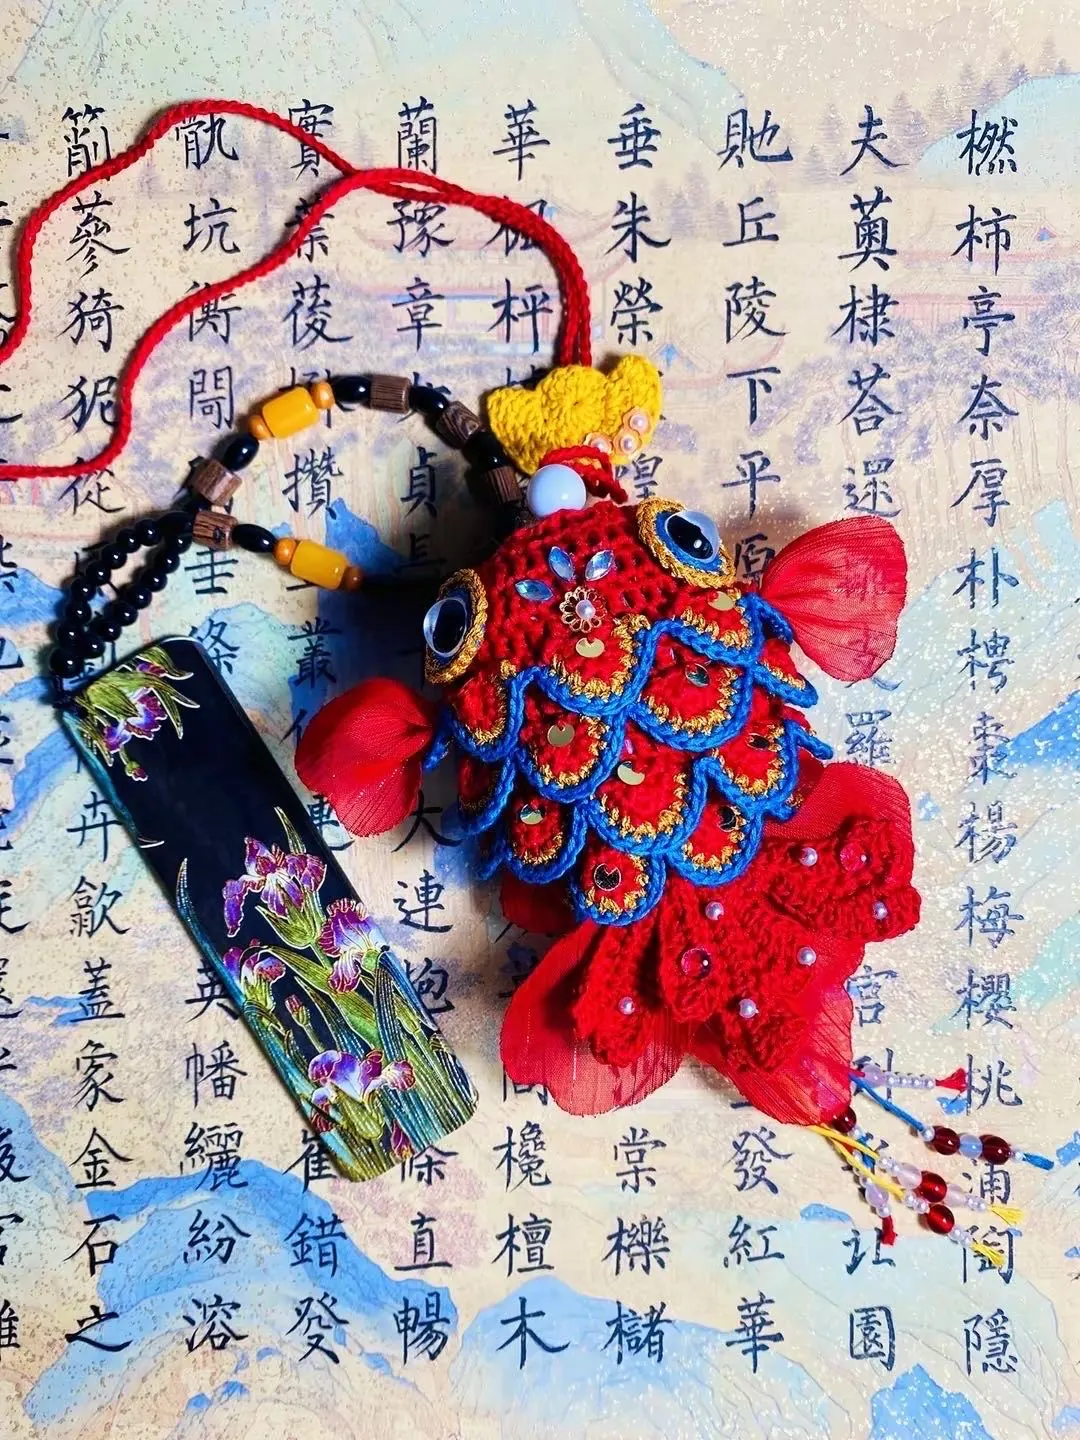
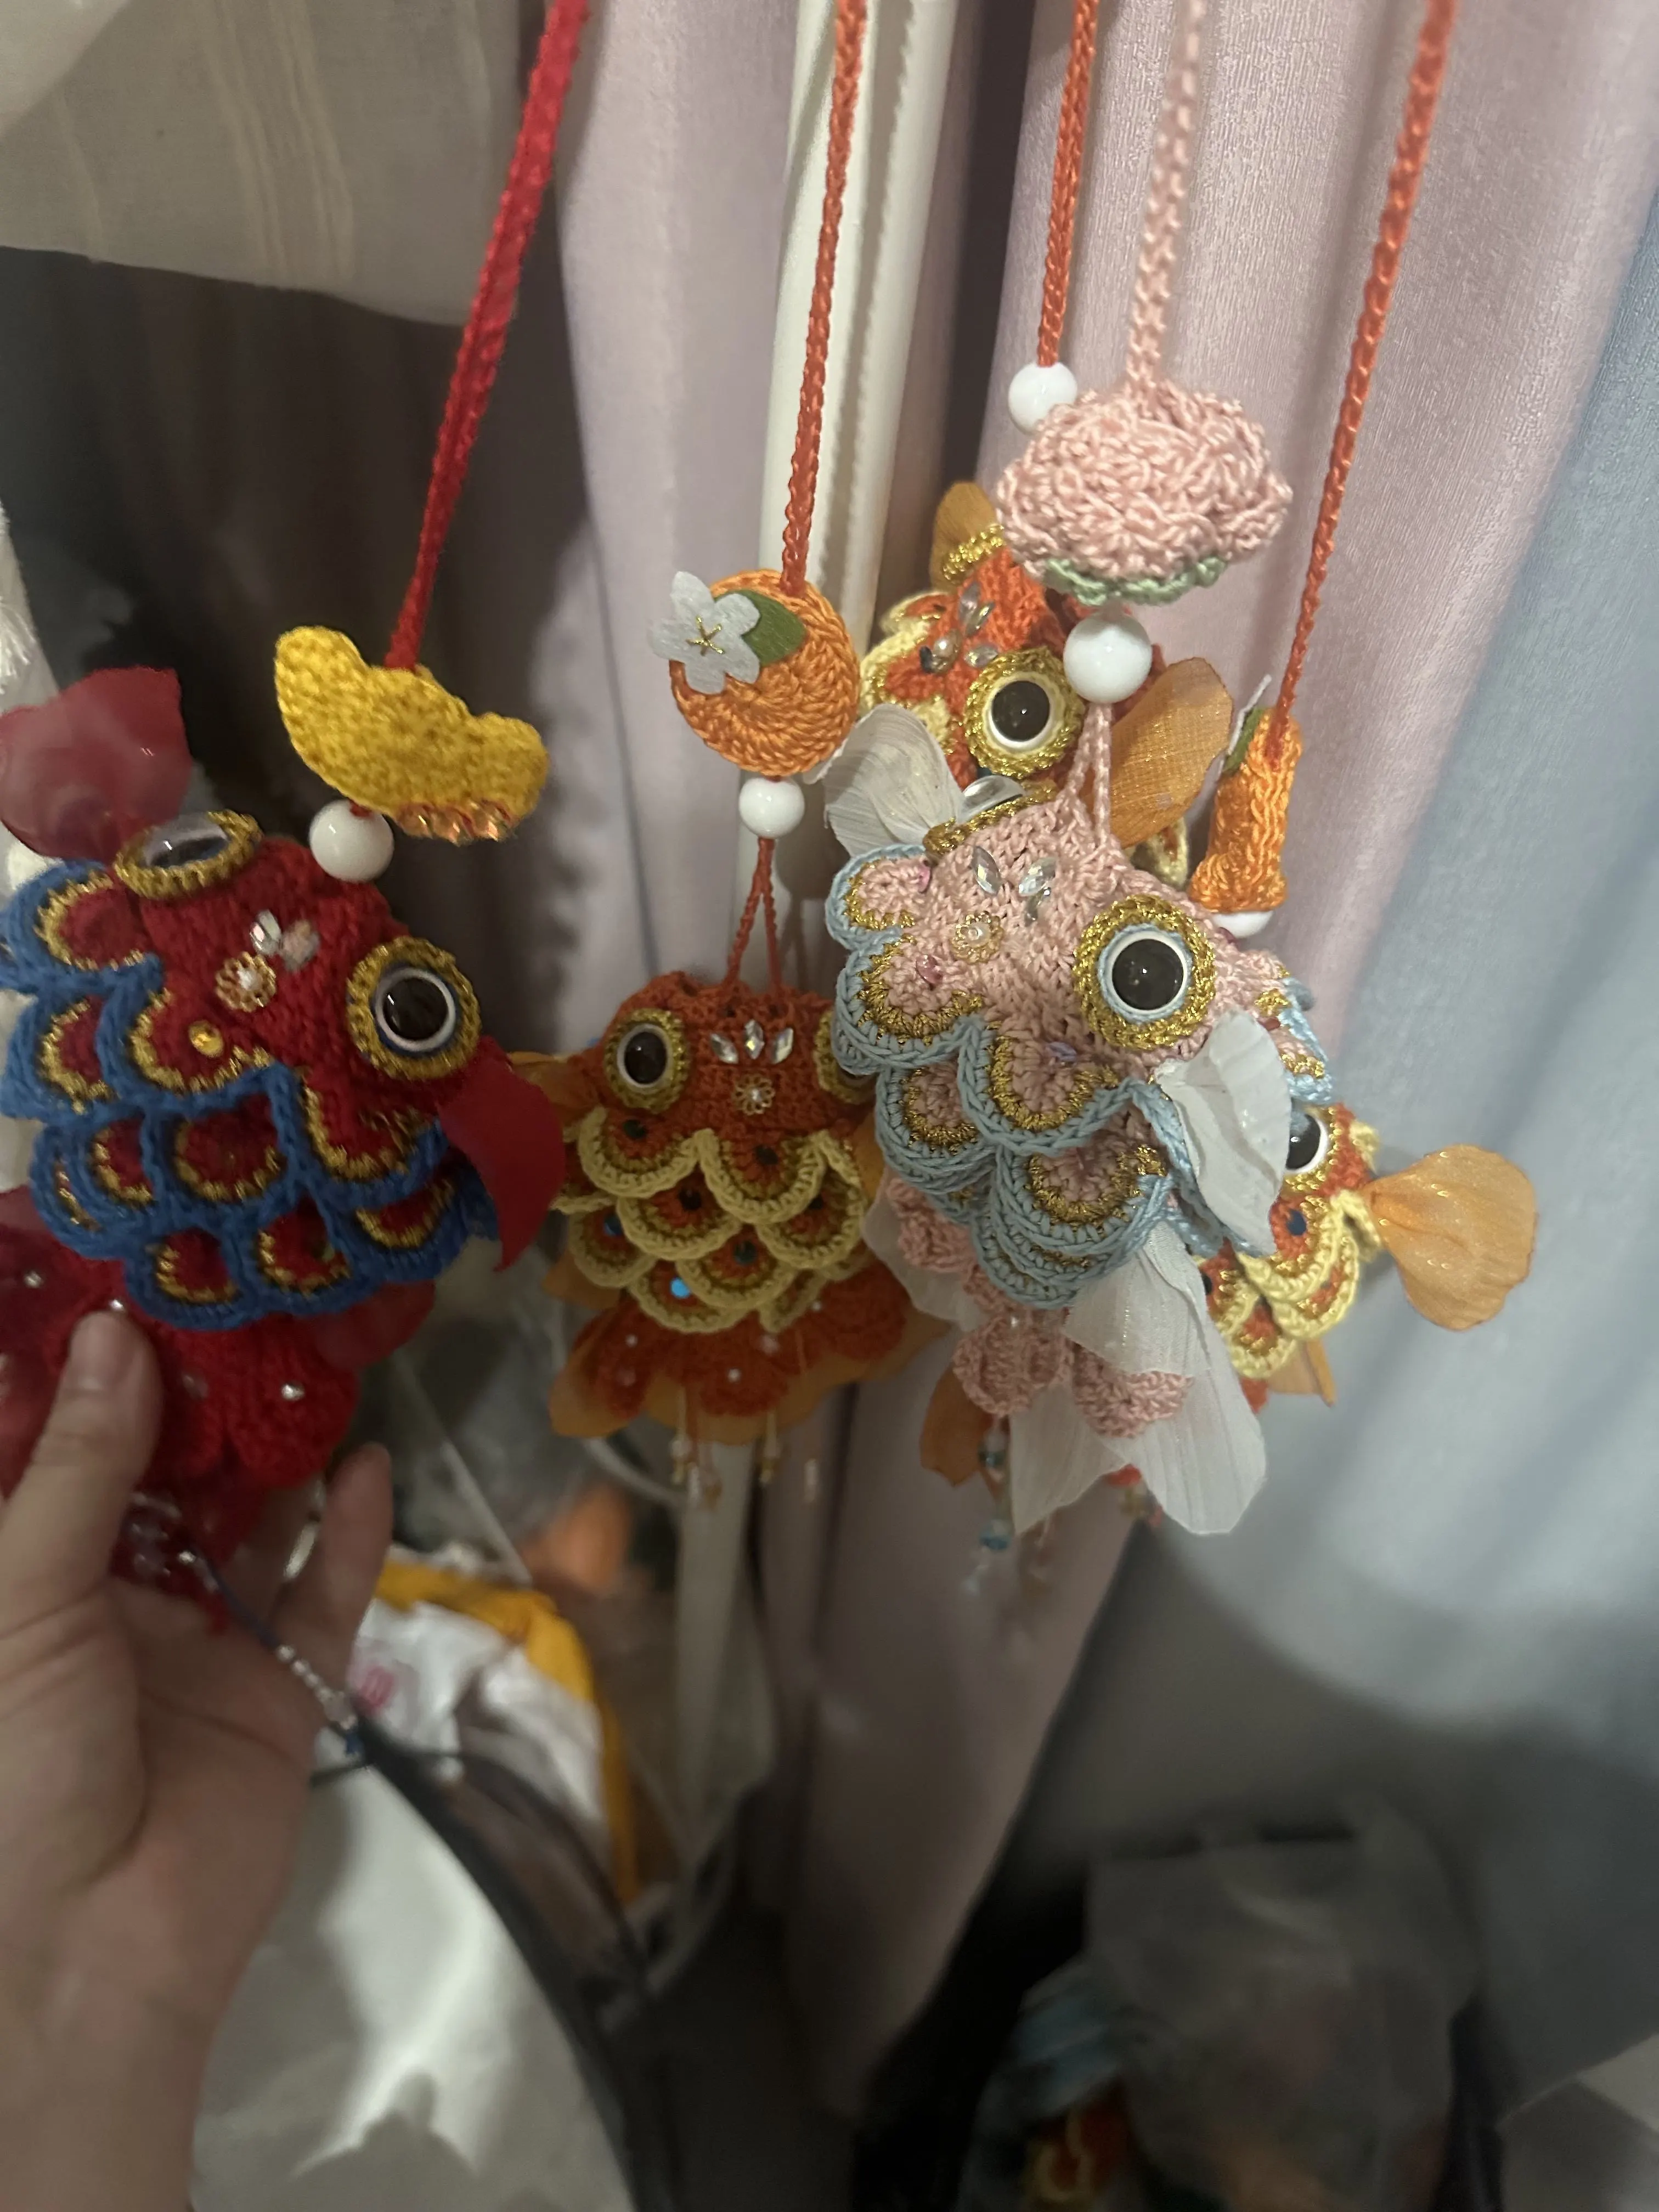
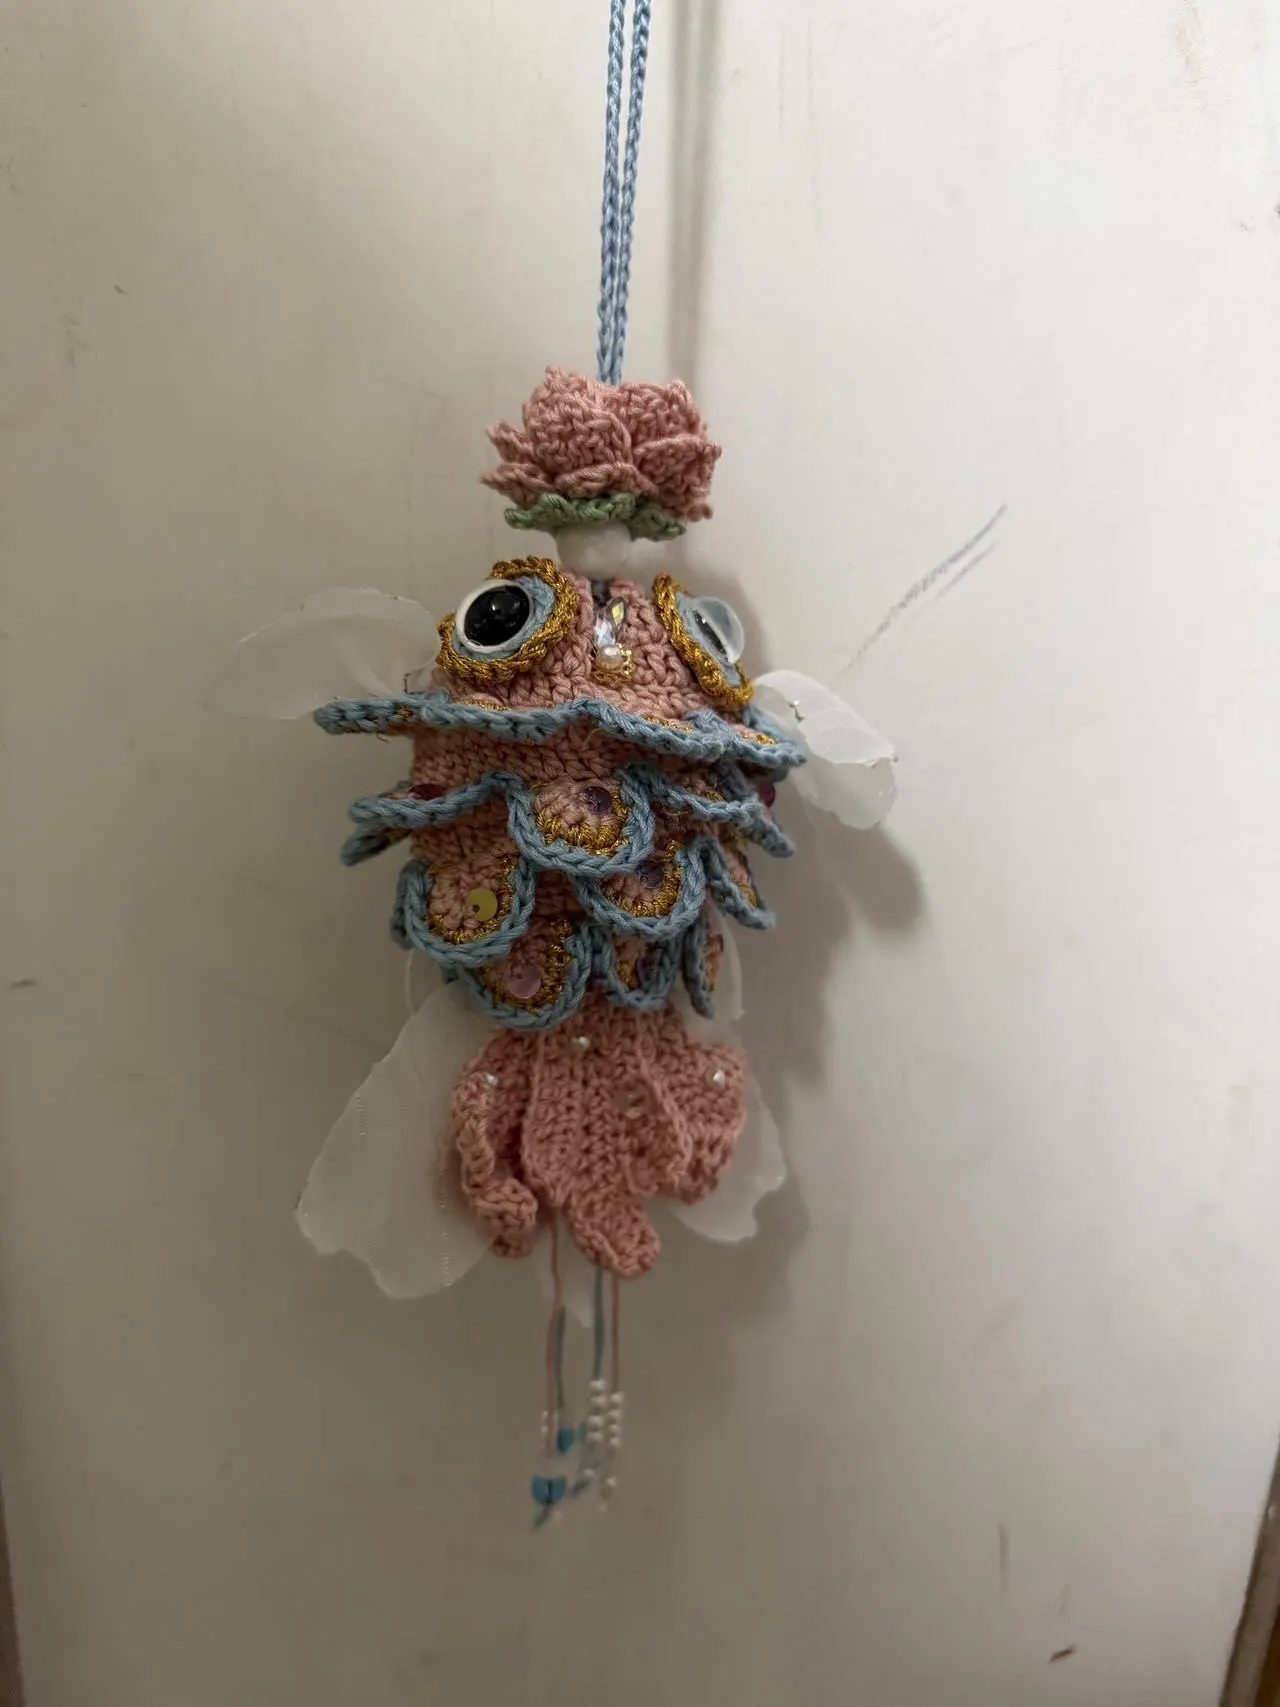
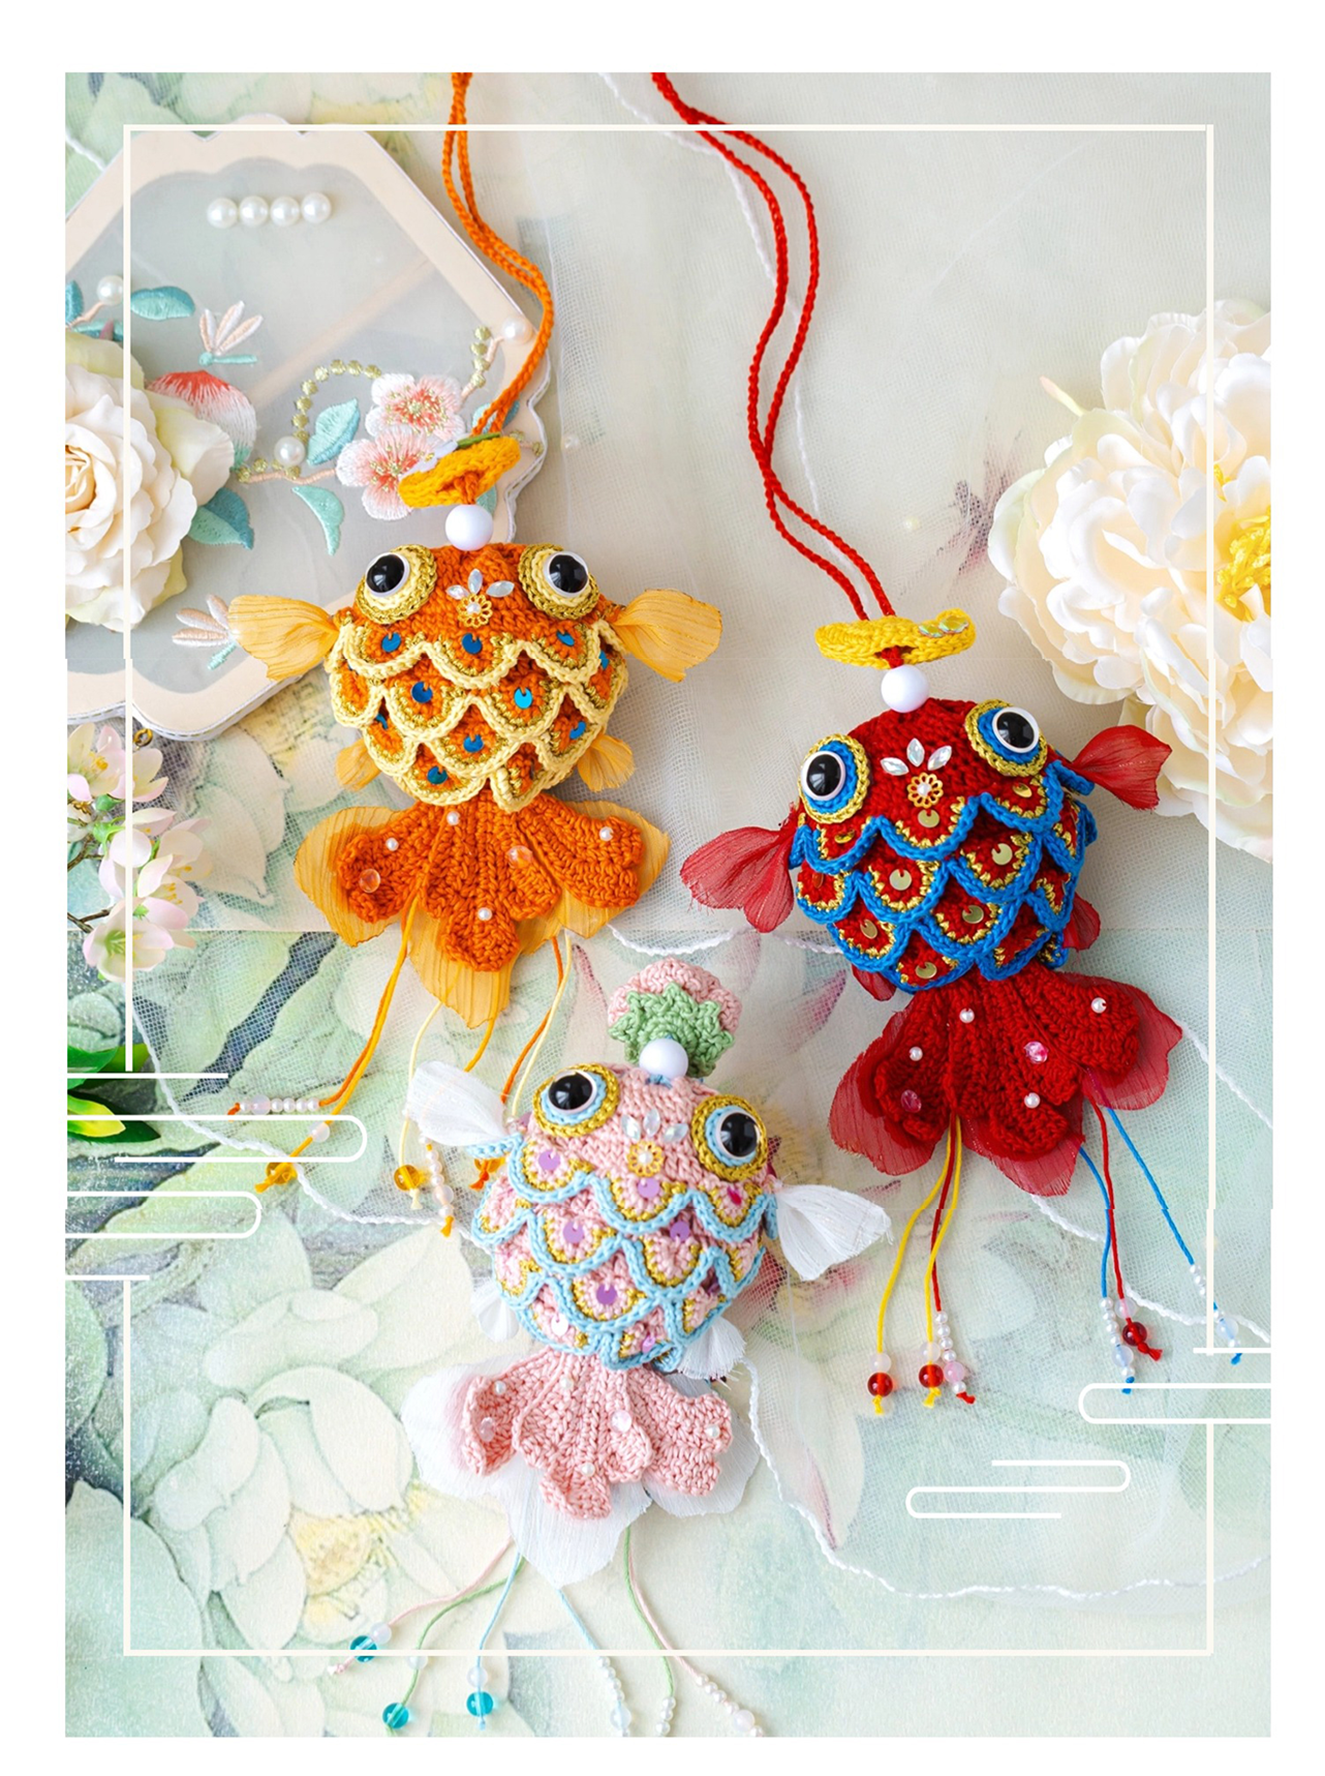
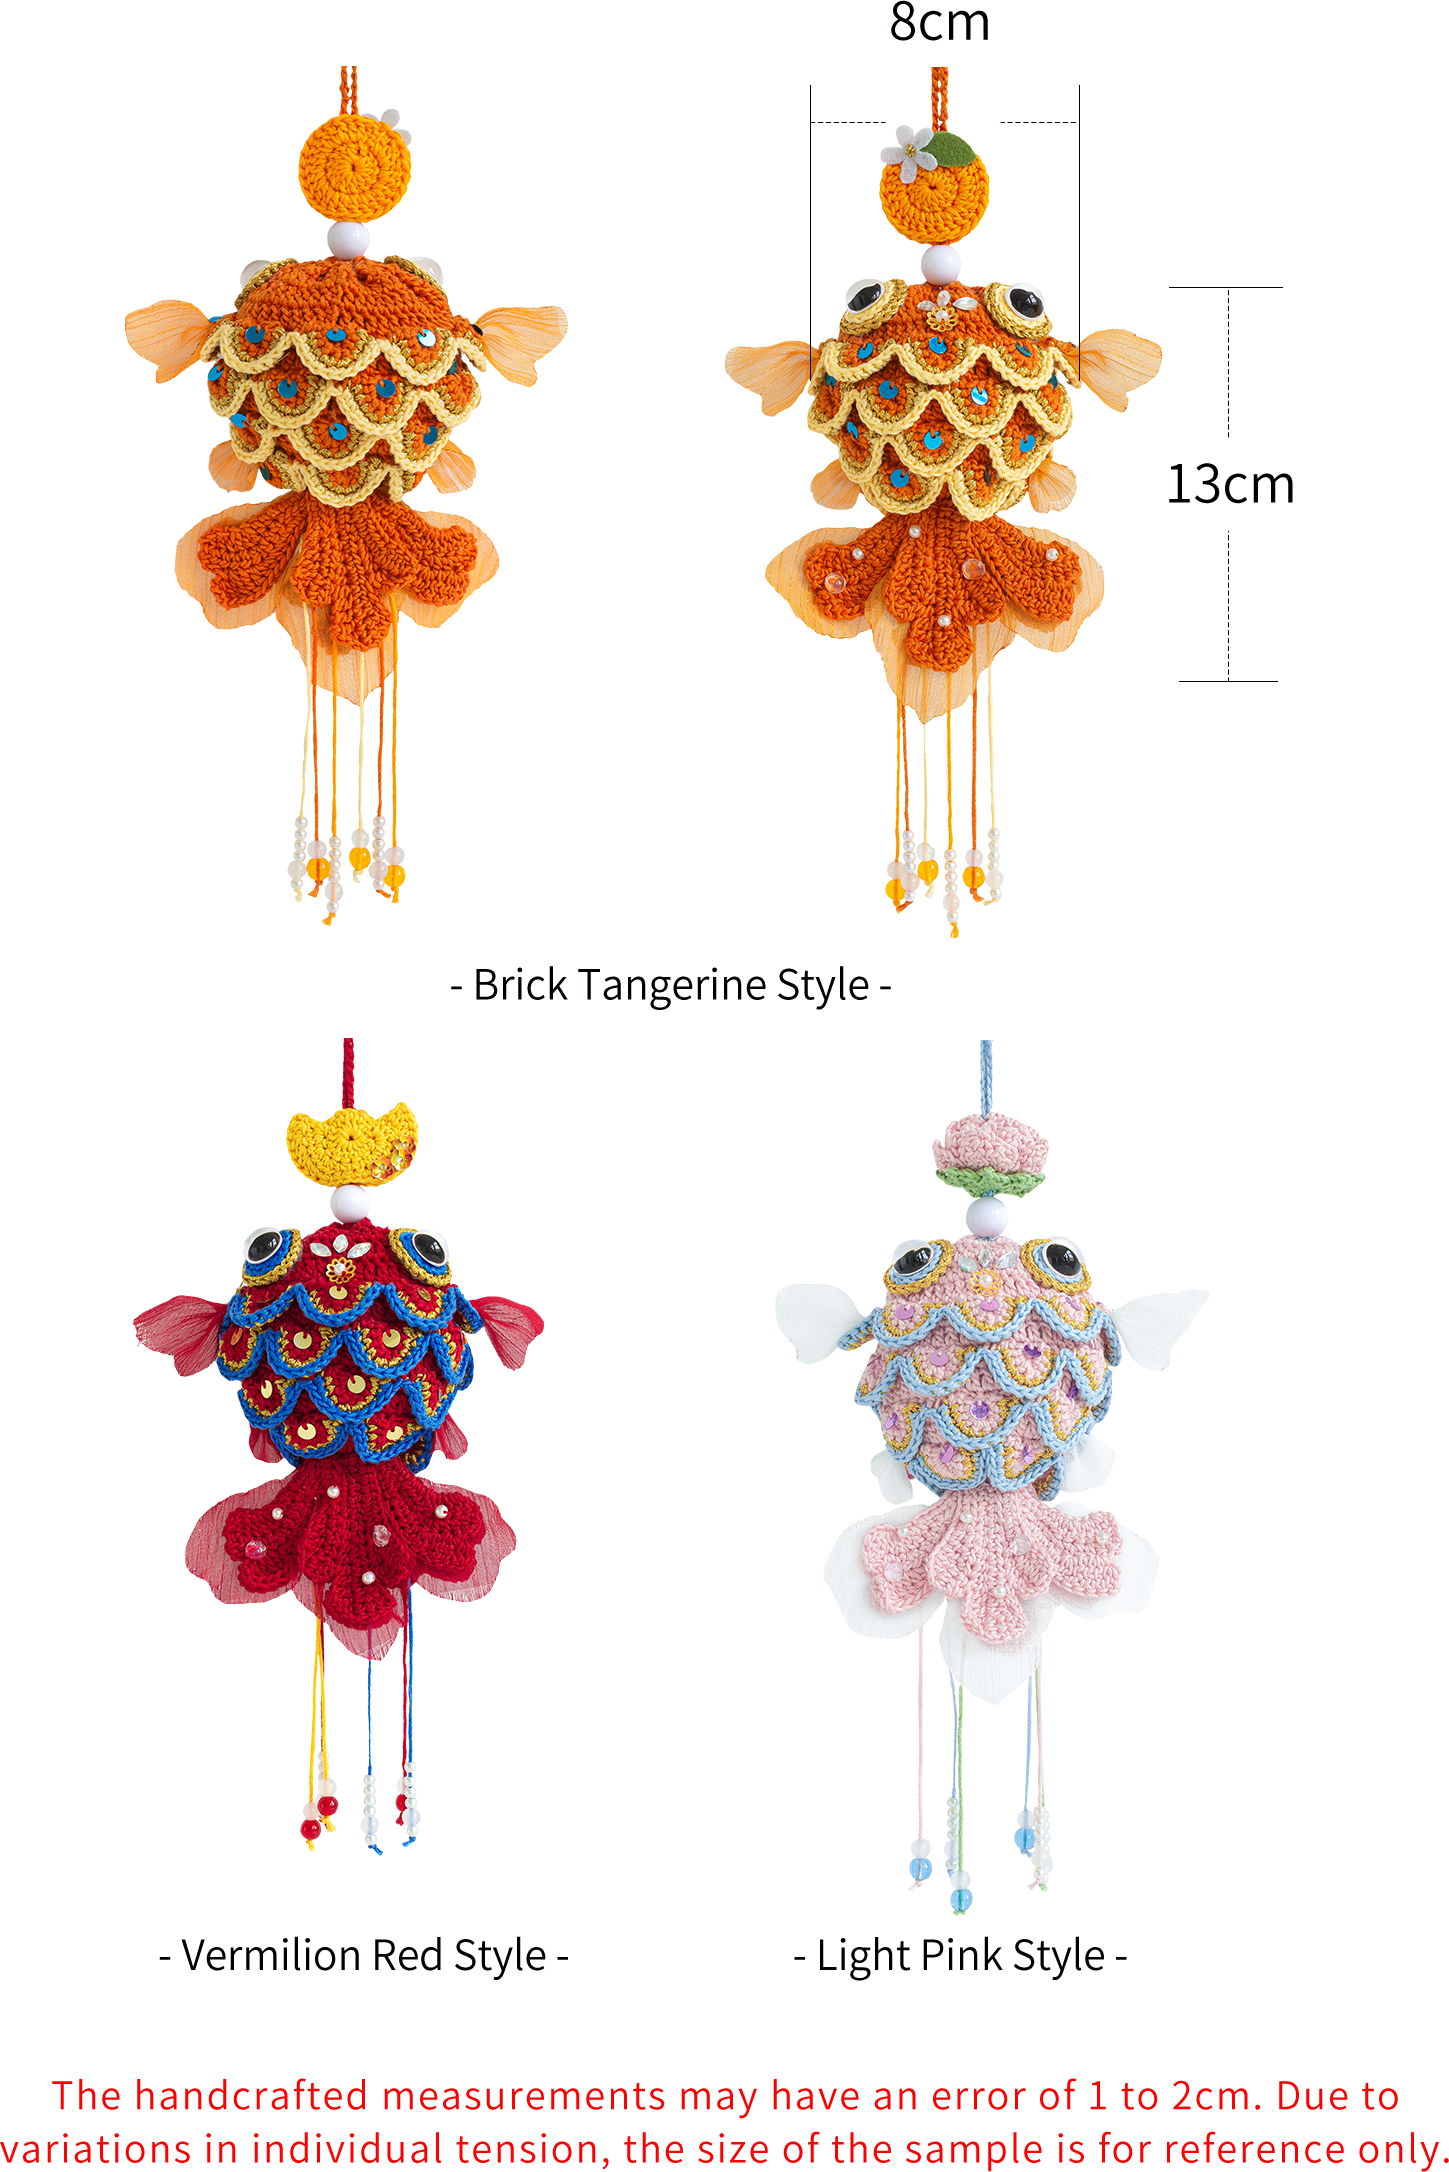
This goldfish egg pouch consists of the main body, the fish scales, the eyes, the fish tail and fins, the decorations and the drawstring section. The crocheting methods for differently colored egg bags are similar. Only the drawstring sections vary.
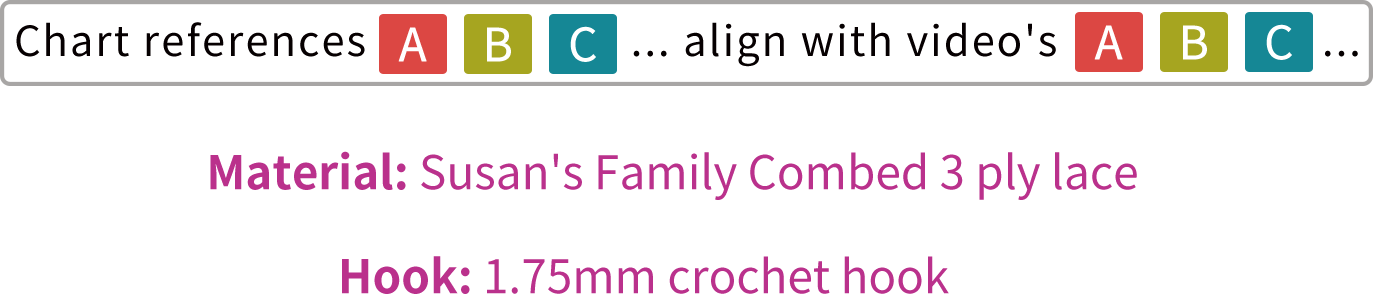
Note:
- This pattern is making in Chinese crochet pattern terms, and the stitch name is written using American terminology. All measurements in charts are in cm.
- When crocheting in rounds without further guidance, start each round with a set number of beginning chains and close with a slip stitch. The beginning chain preceding a single crochet and the slip stitch used for joining rounds are not included in the total stitches.
ABBREVIATIONS
MRadjustable magic ring
CHchain
XX stitch single crochet
V = sc2-in-12 single crochets into the same stitch
Thalf double crochet
TV = hdc2-in-12 half double crochets into the same stitch
(...)×6crochet item in the parentheses six times
[...]in the same stitch
FV = dc2-in-12 double crochets into the same stitch
FW = dc3-in-13 double crochets into the same stitch
Kskip
BLOback loop only
Chart Key















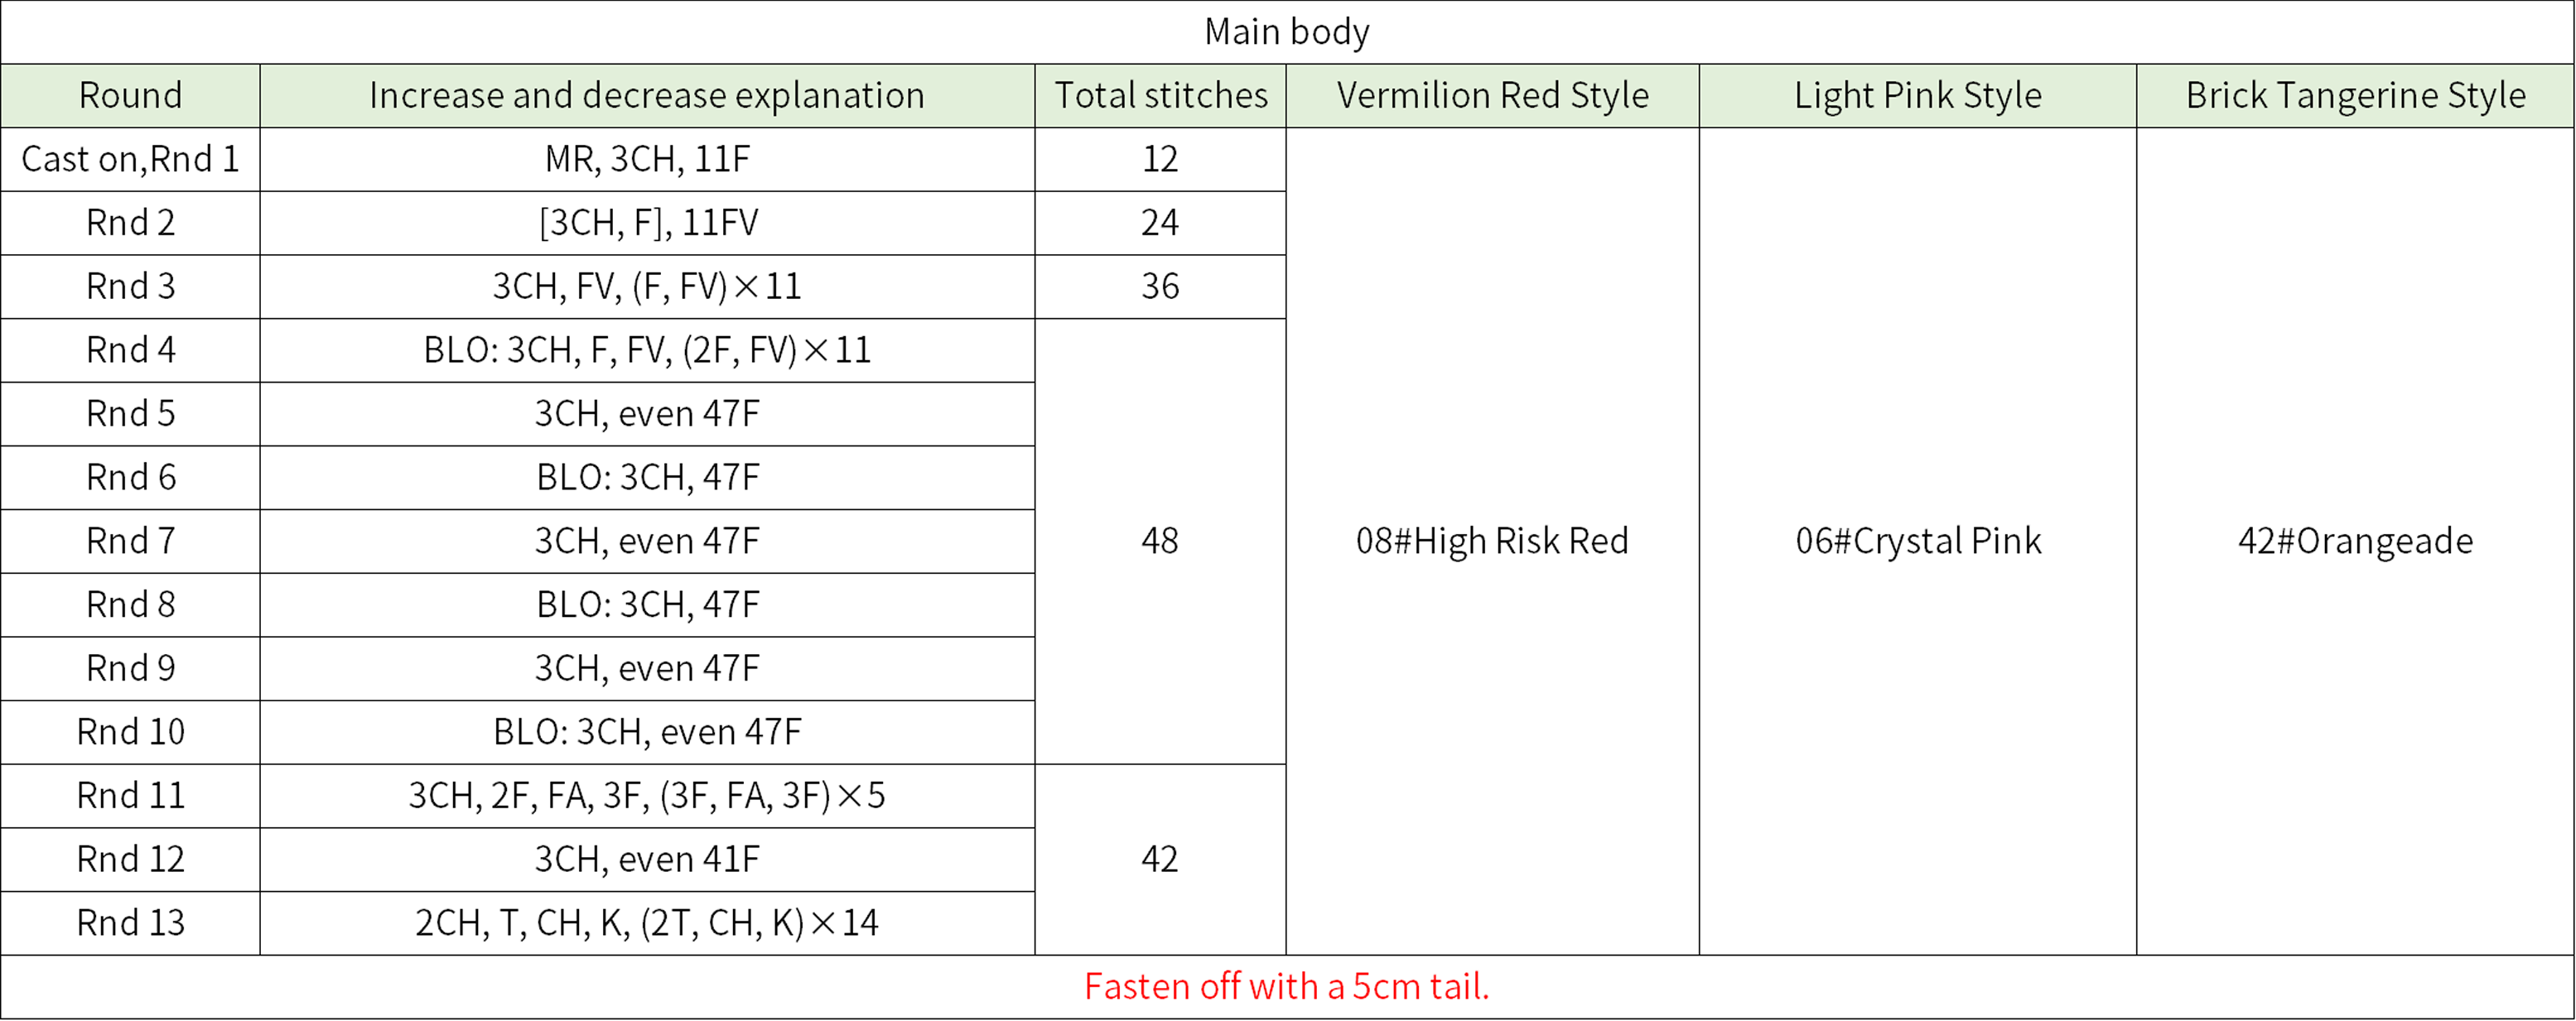
Part 1 Main body 00' 56'' (Part 1)
The main body is worked using the adjustable magic ring. Crochet in rounds counter-clockwise. Please refer to the video demonstration for more details.
Part2 The fish scalesA 14' 23'' (Part 1)
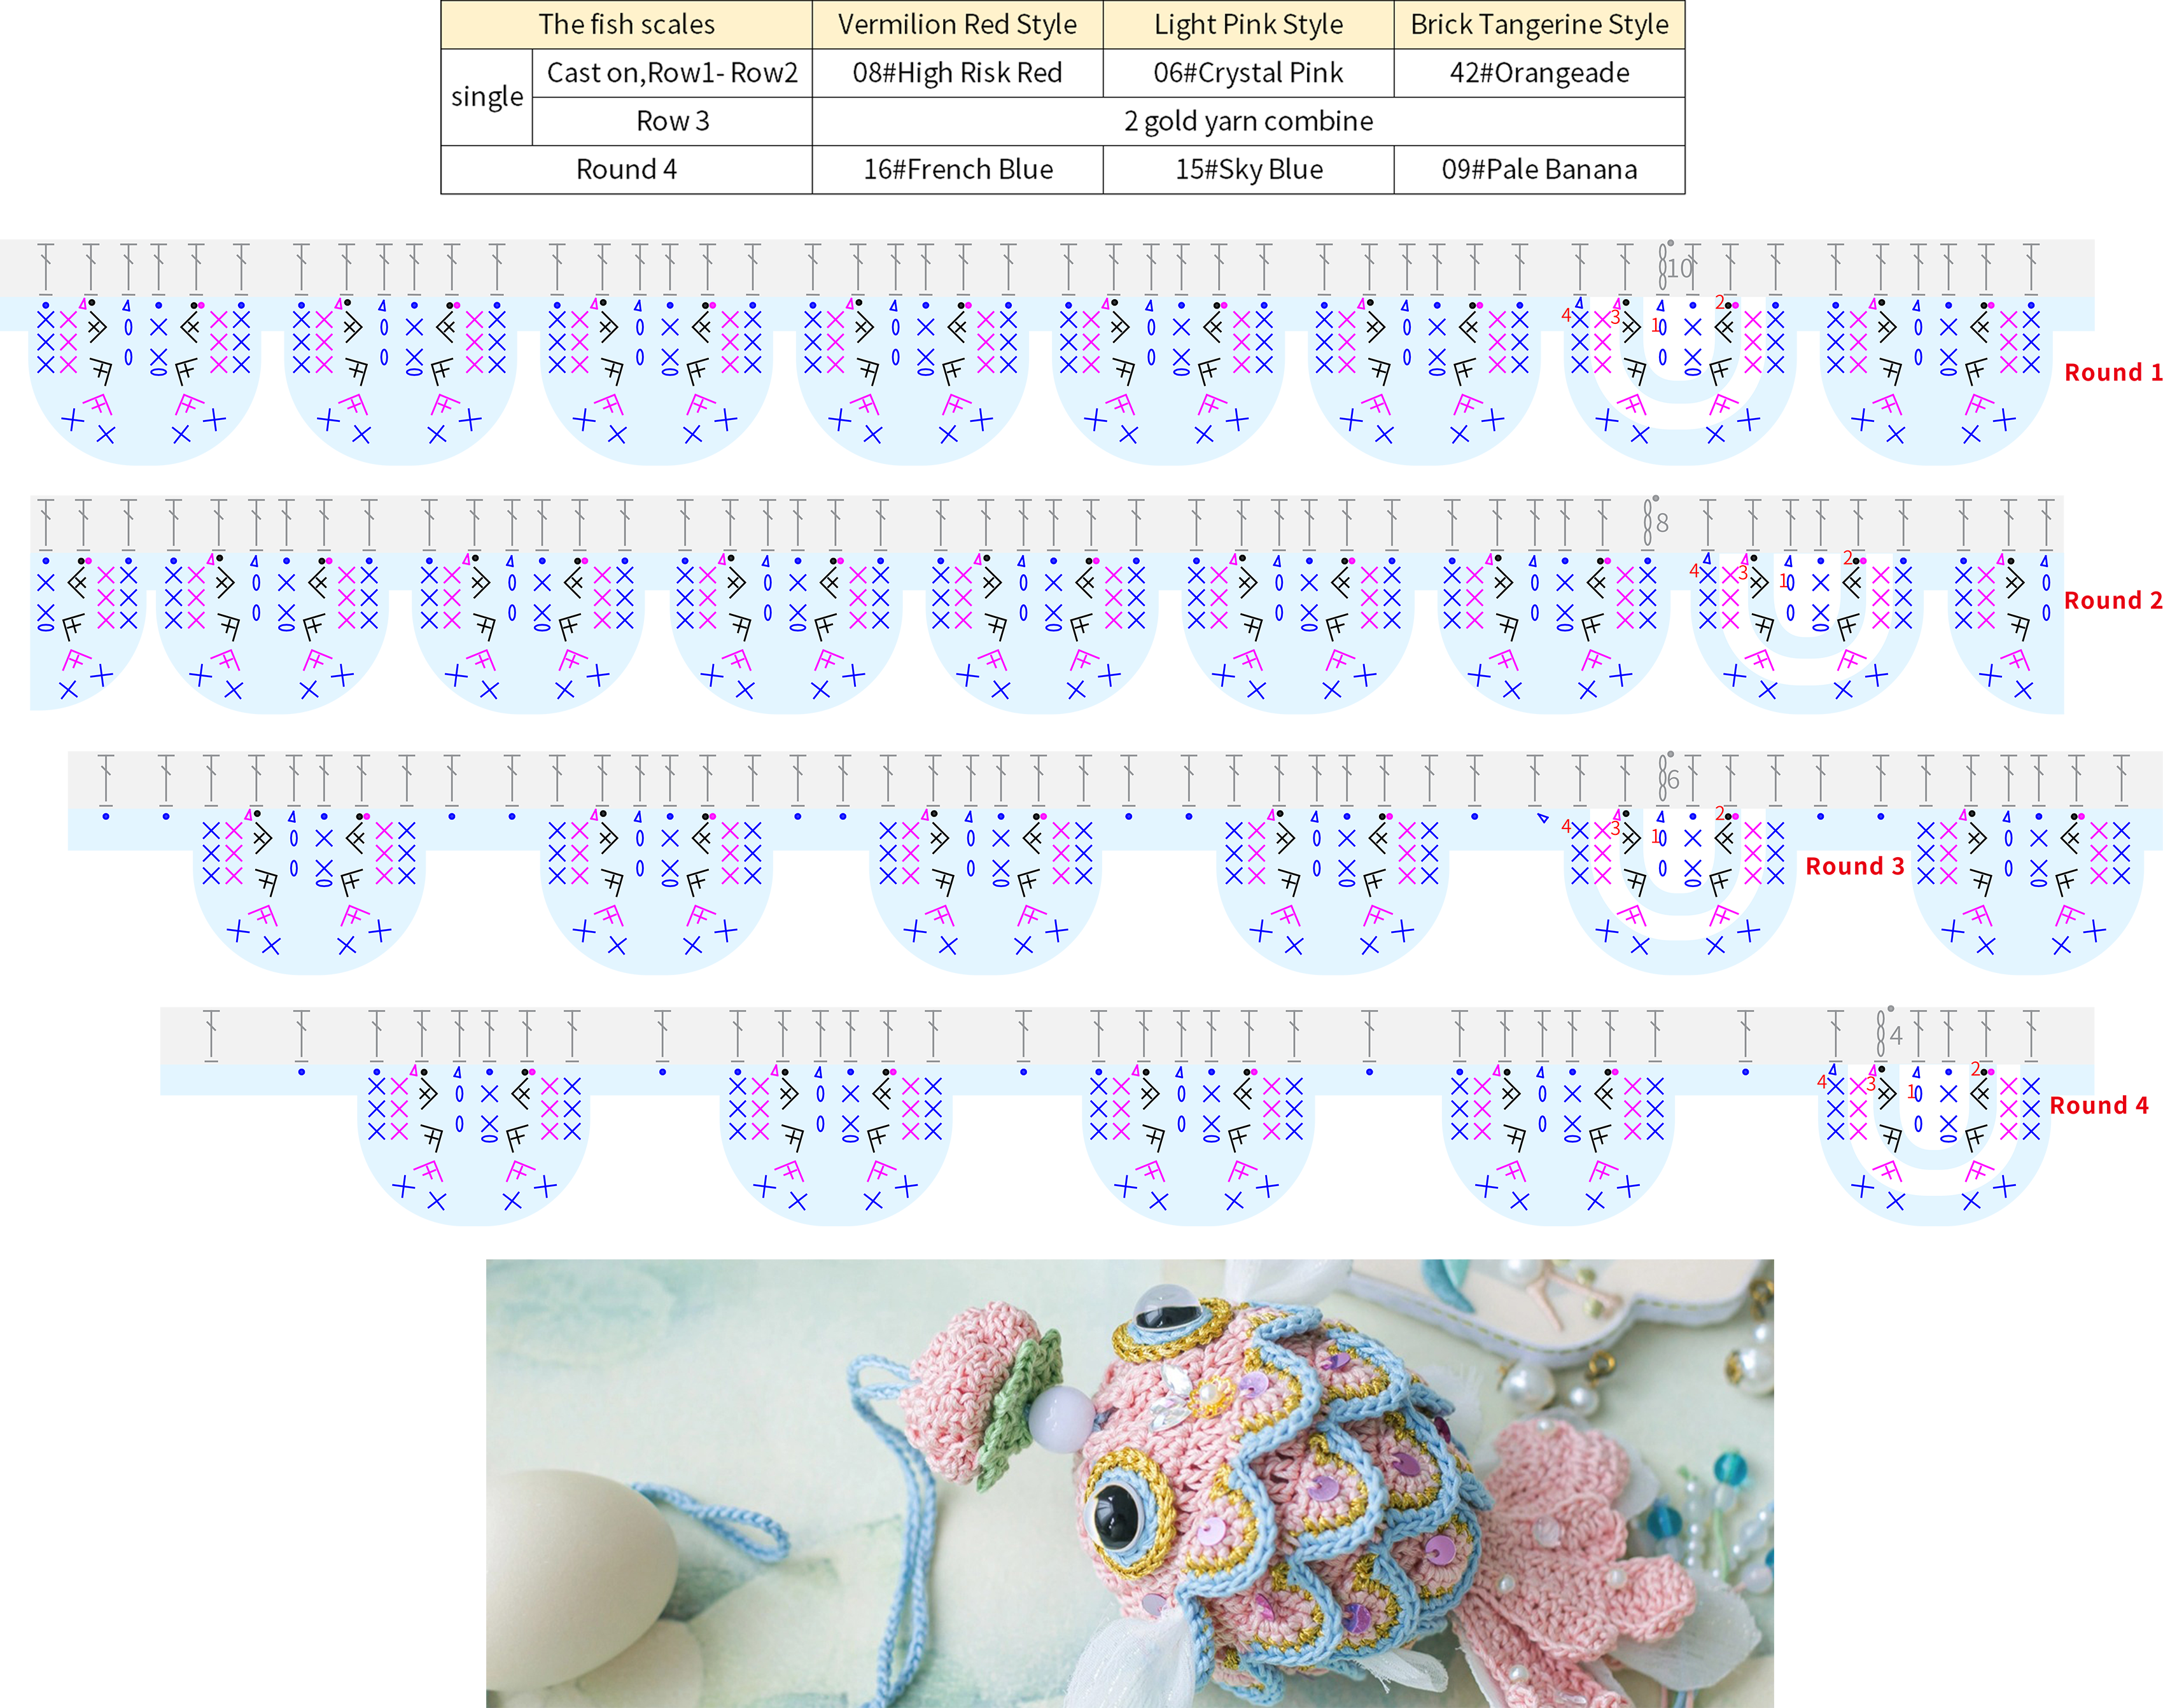
There are 4 layers. All worked onto the main body. Each layer starts with individual scales. Followed by edging around the scales. Please refer to the video demonstration for more details.
Part3 Eyes 26' 54'' (Part 1)
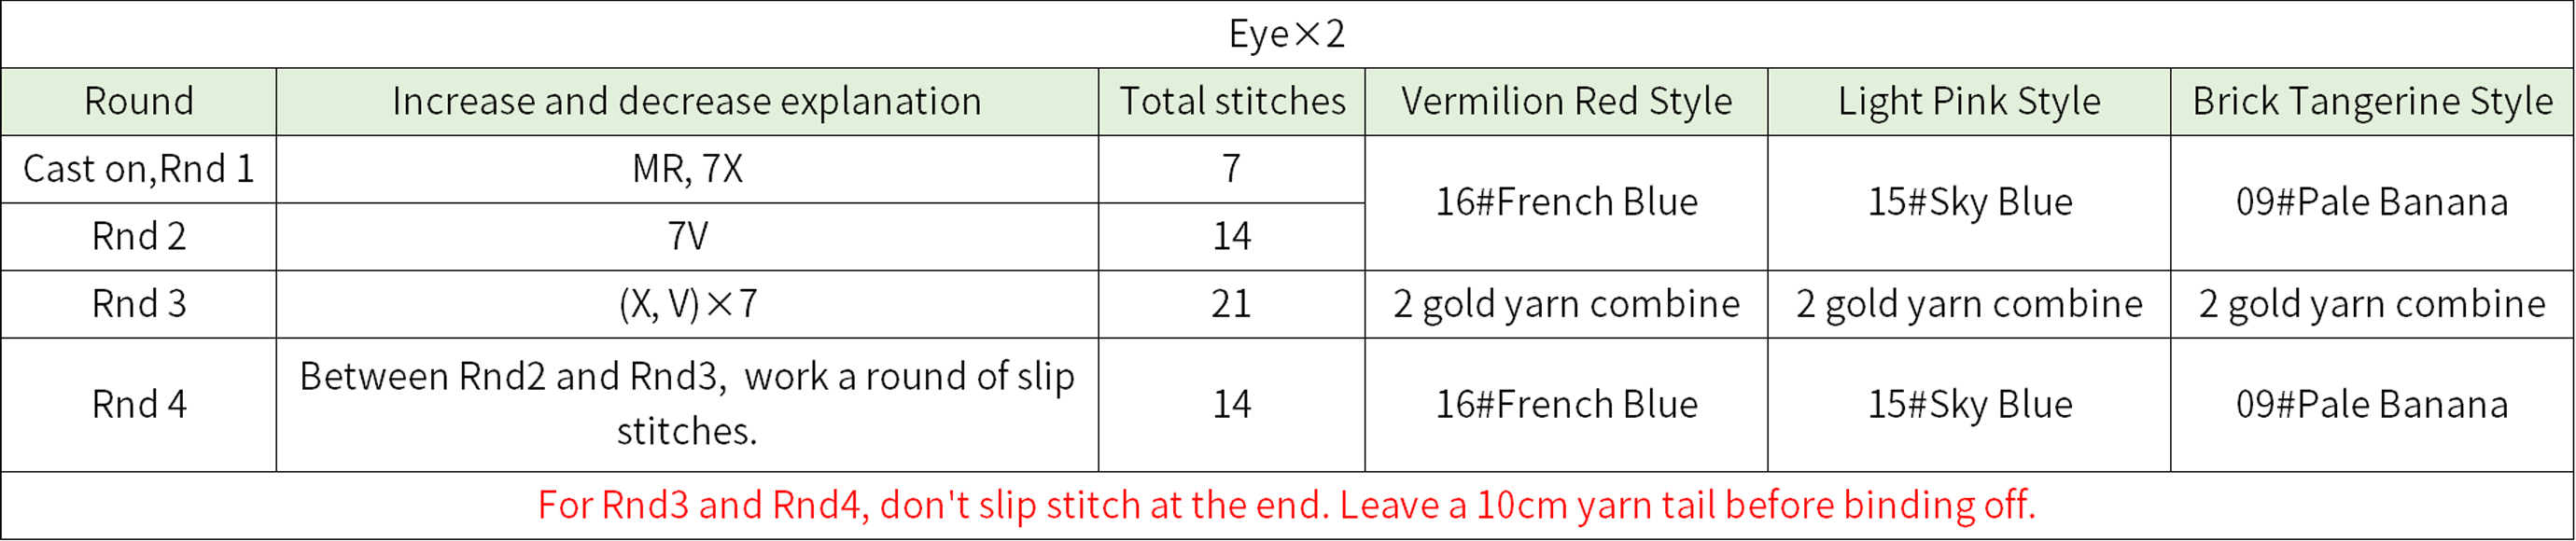
There are two eyes.Start by the adjustable magic ring. Crochet in counterclockwise. Then attach the eye patches. Finally, secure them in the corresponding position on the main body. Please refer to the video demonstration for more details.
The tails and fins 35' 32'' (Part 1)
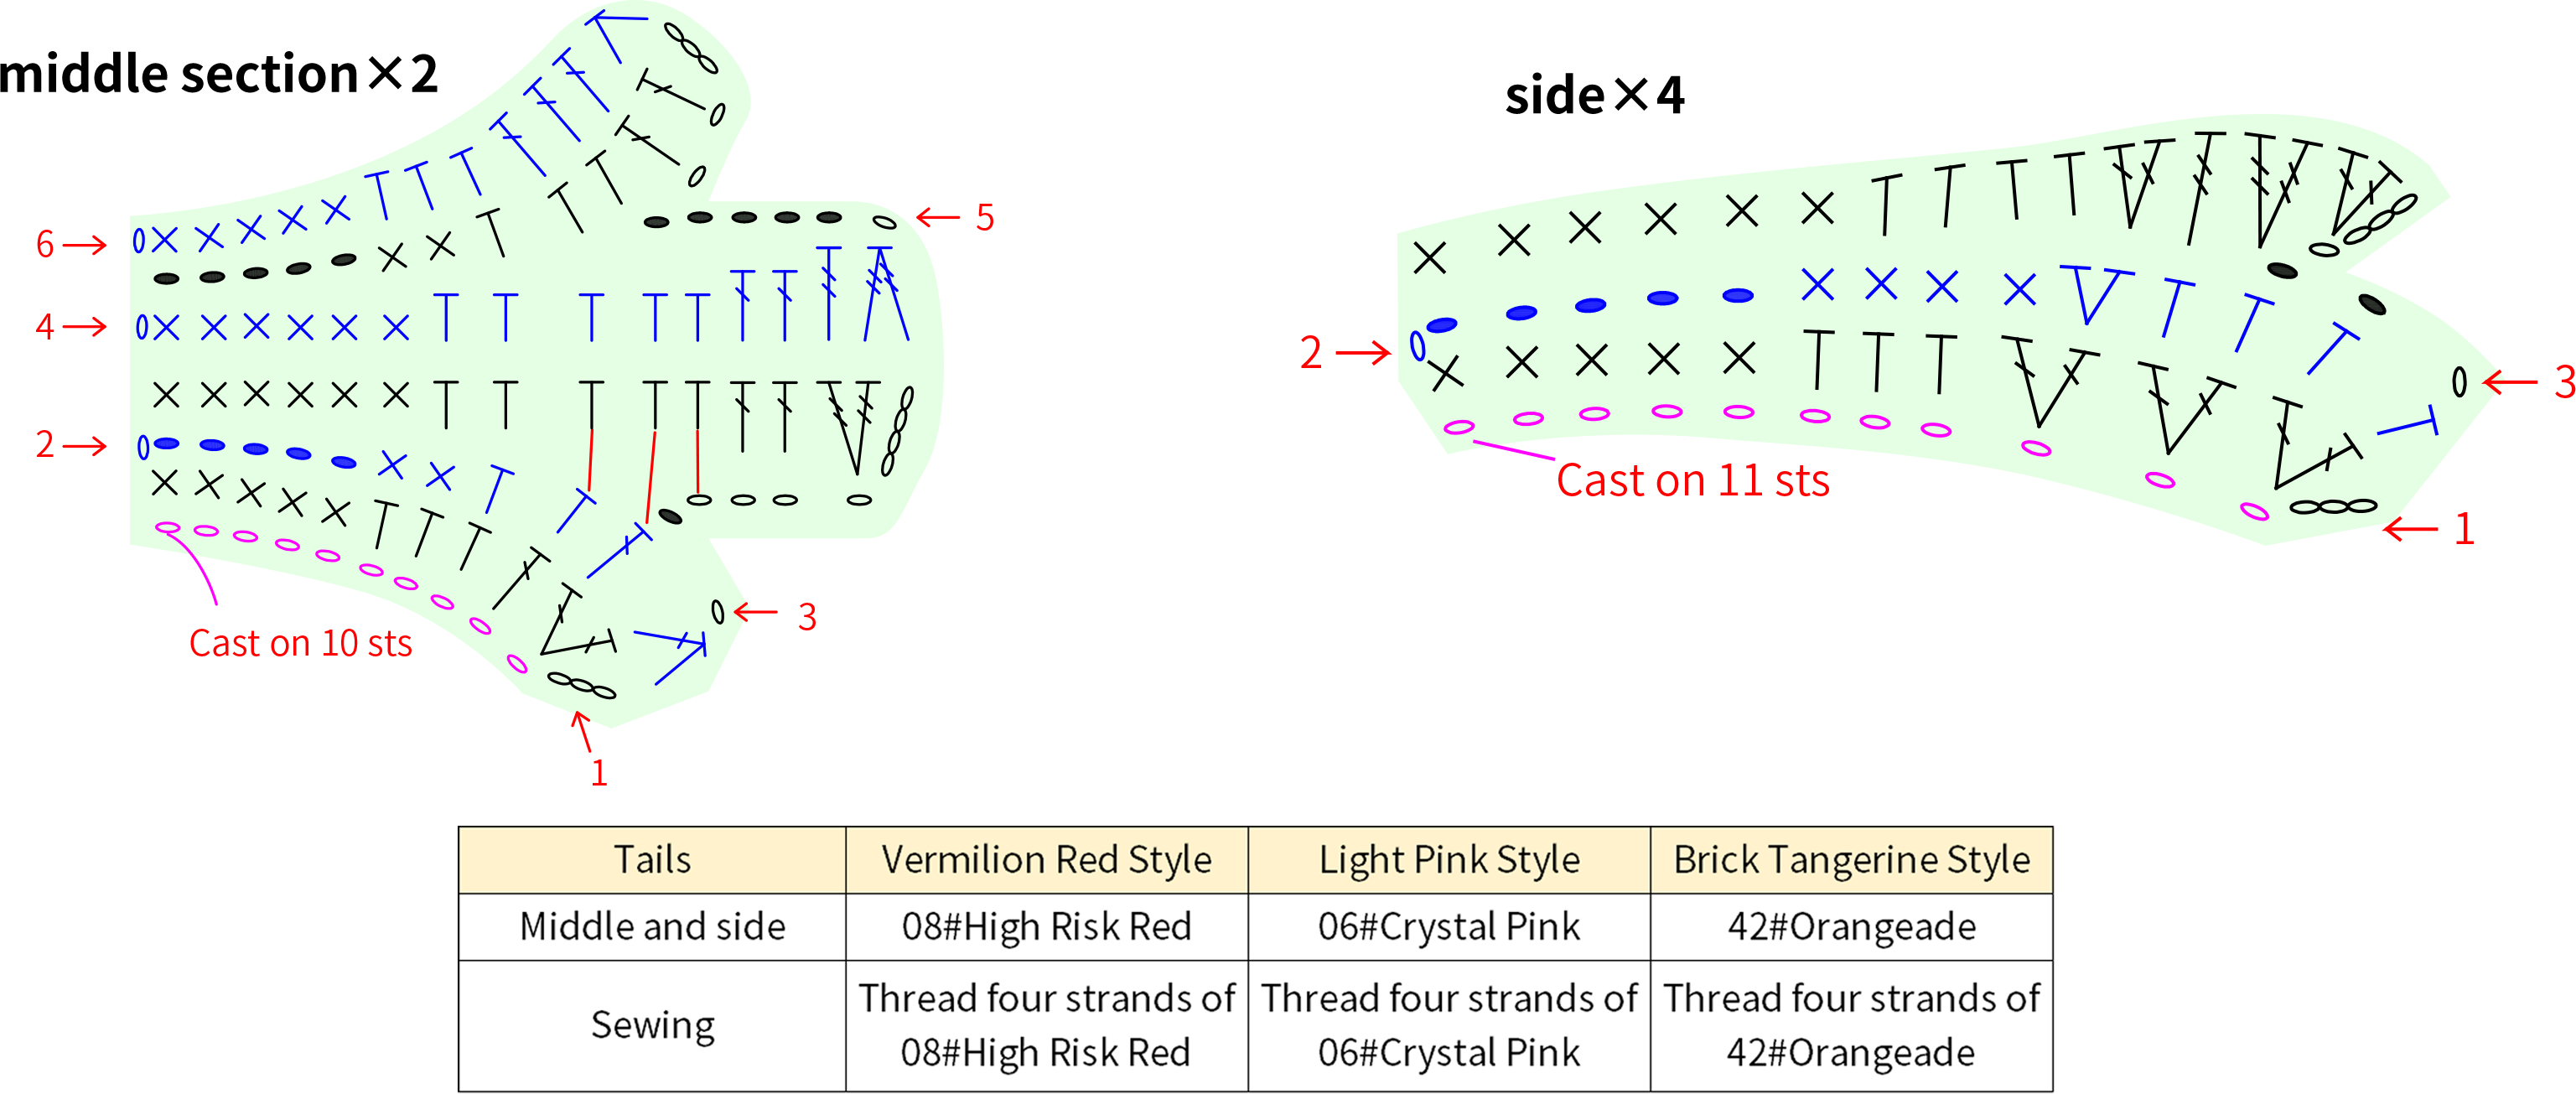
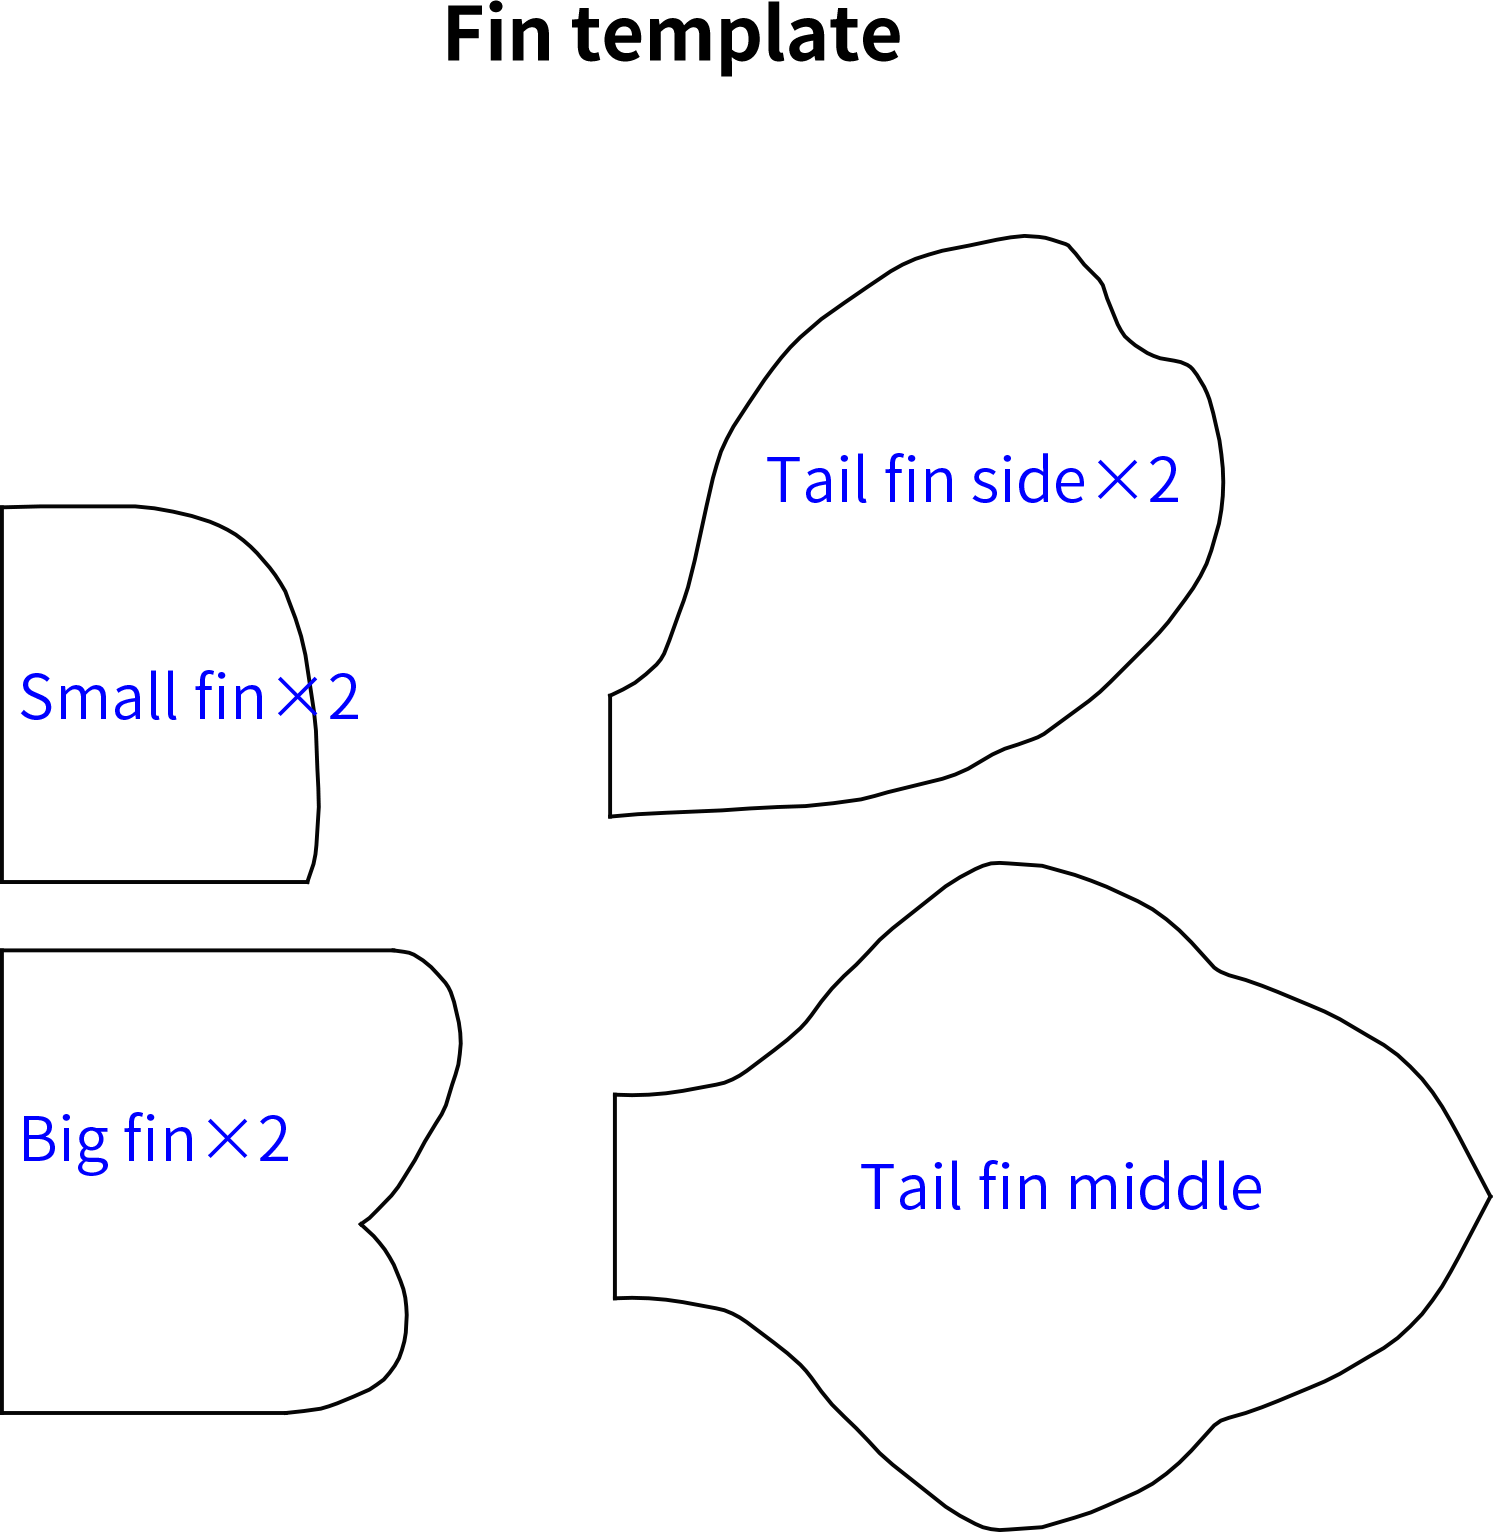
The tail consists of a middle section and sides. Start by crocheting the tail. Then cut out the fins and finally, sew everything together.Please refer to the video demonstration for more details.
Part 5 Decorations 00' 07'' (Part 2)
The decorations include the forehead decoration,sequins, fish tail tassels, and transparent patches. Please refer to the video demonstration for more details.
Part 6 The drawing section 12' 04'' (Part 2)
The drawstring section consists of the drawstring, beads, and the decoration.Different styles have different decorations.
Drawstring: Crochet a chain approximately 66cm long, adjust the length as needed. Thread it through the holes in the main part, then weave in the ends and finally add beads.

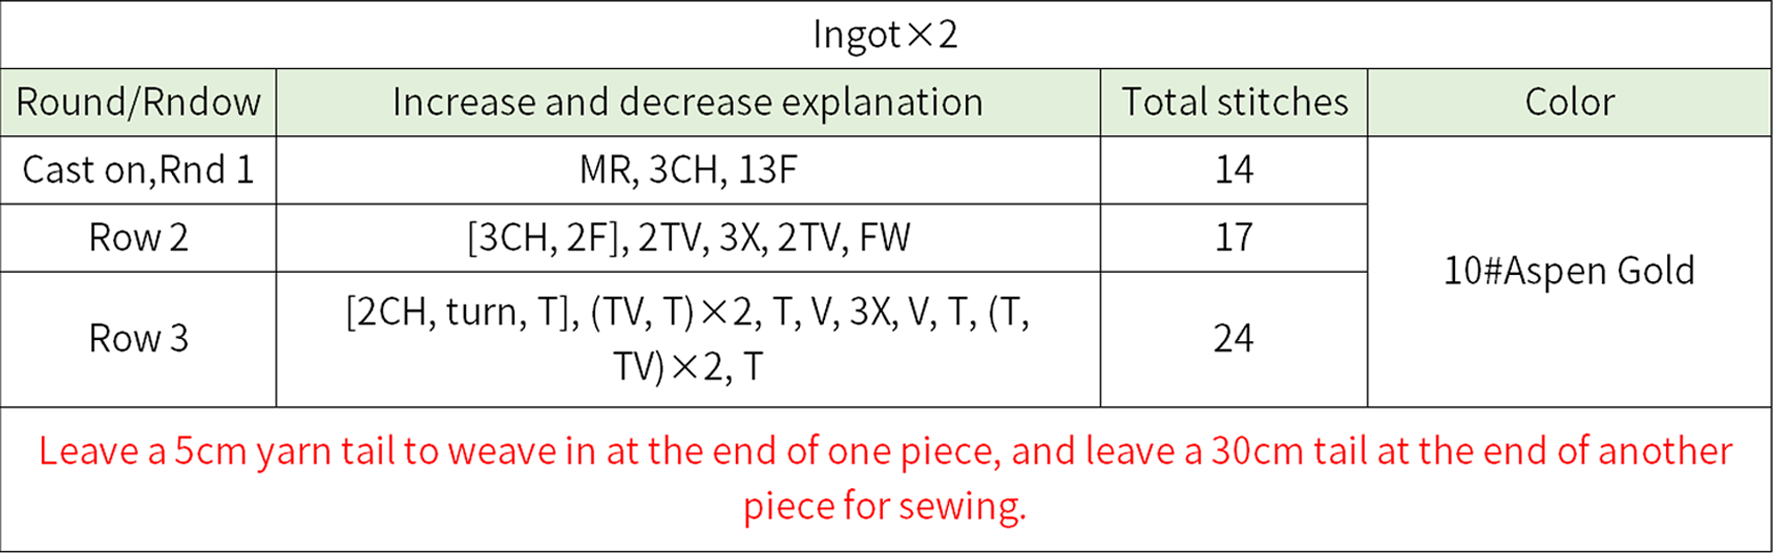
The ingot decoration for Vermilion Red Style 12' 04'' (Part 2)
Begin by crocheting an ingot decoration using the adjustable magic ring. Then, sew it on and thread the drawstring through. Finally, attach a flora batch.Please refer to the video demonstration for more details.
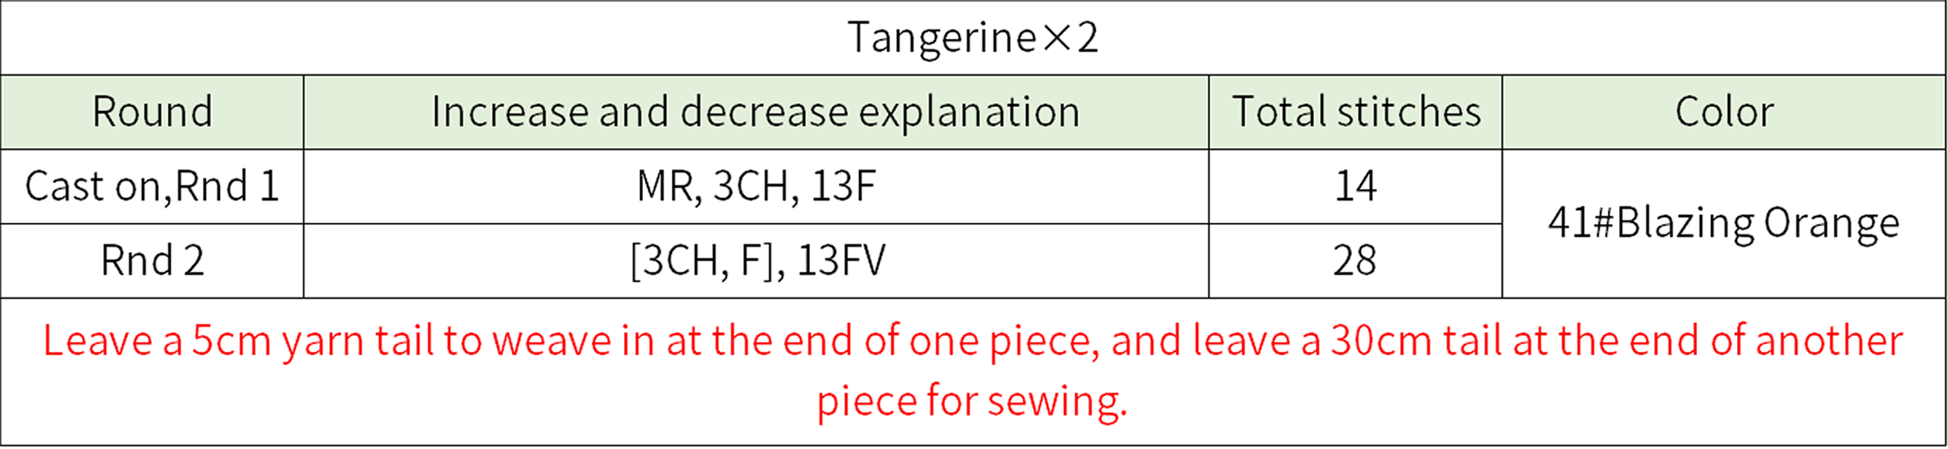
The ingot decoration for Brick Tangerine Style 19' 24'' (Part 2)
Start with an adjustable magic ring. Crochet the tangerine in rounds counterclockwise. Then, sew it on and thread the drawstring through. Finally, attach the nonwoven fabric. Please refer to the video demonstration for more details.
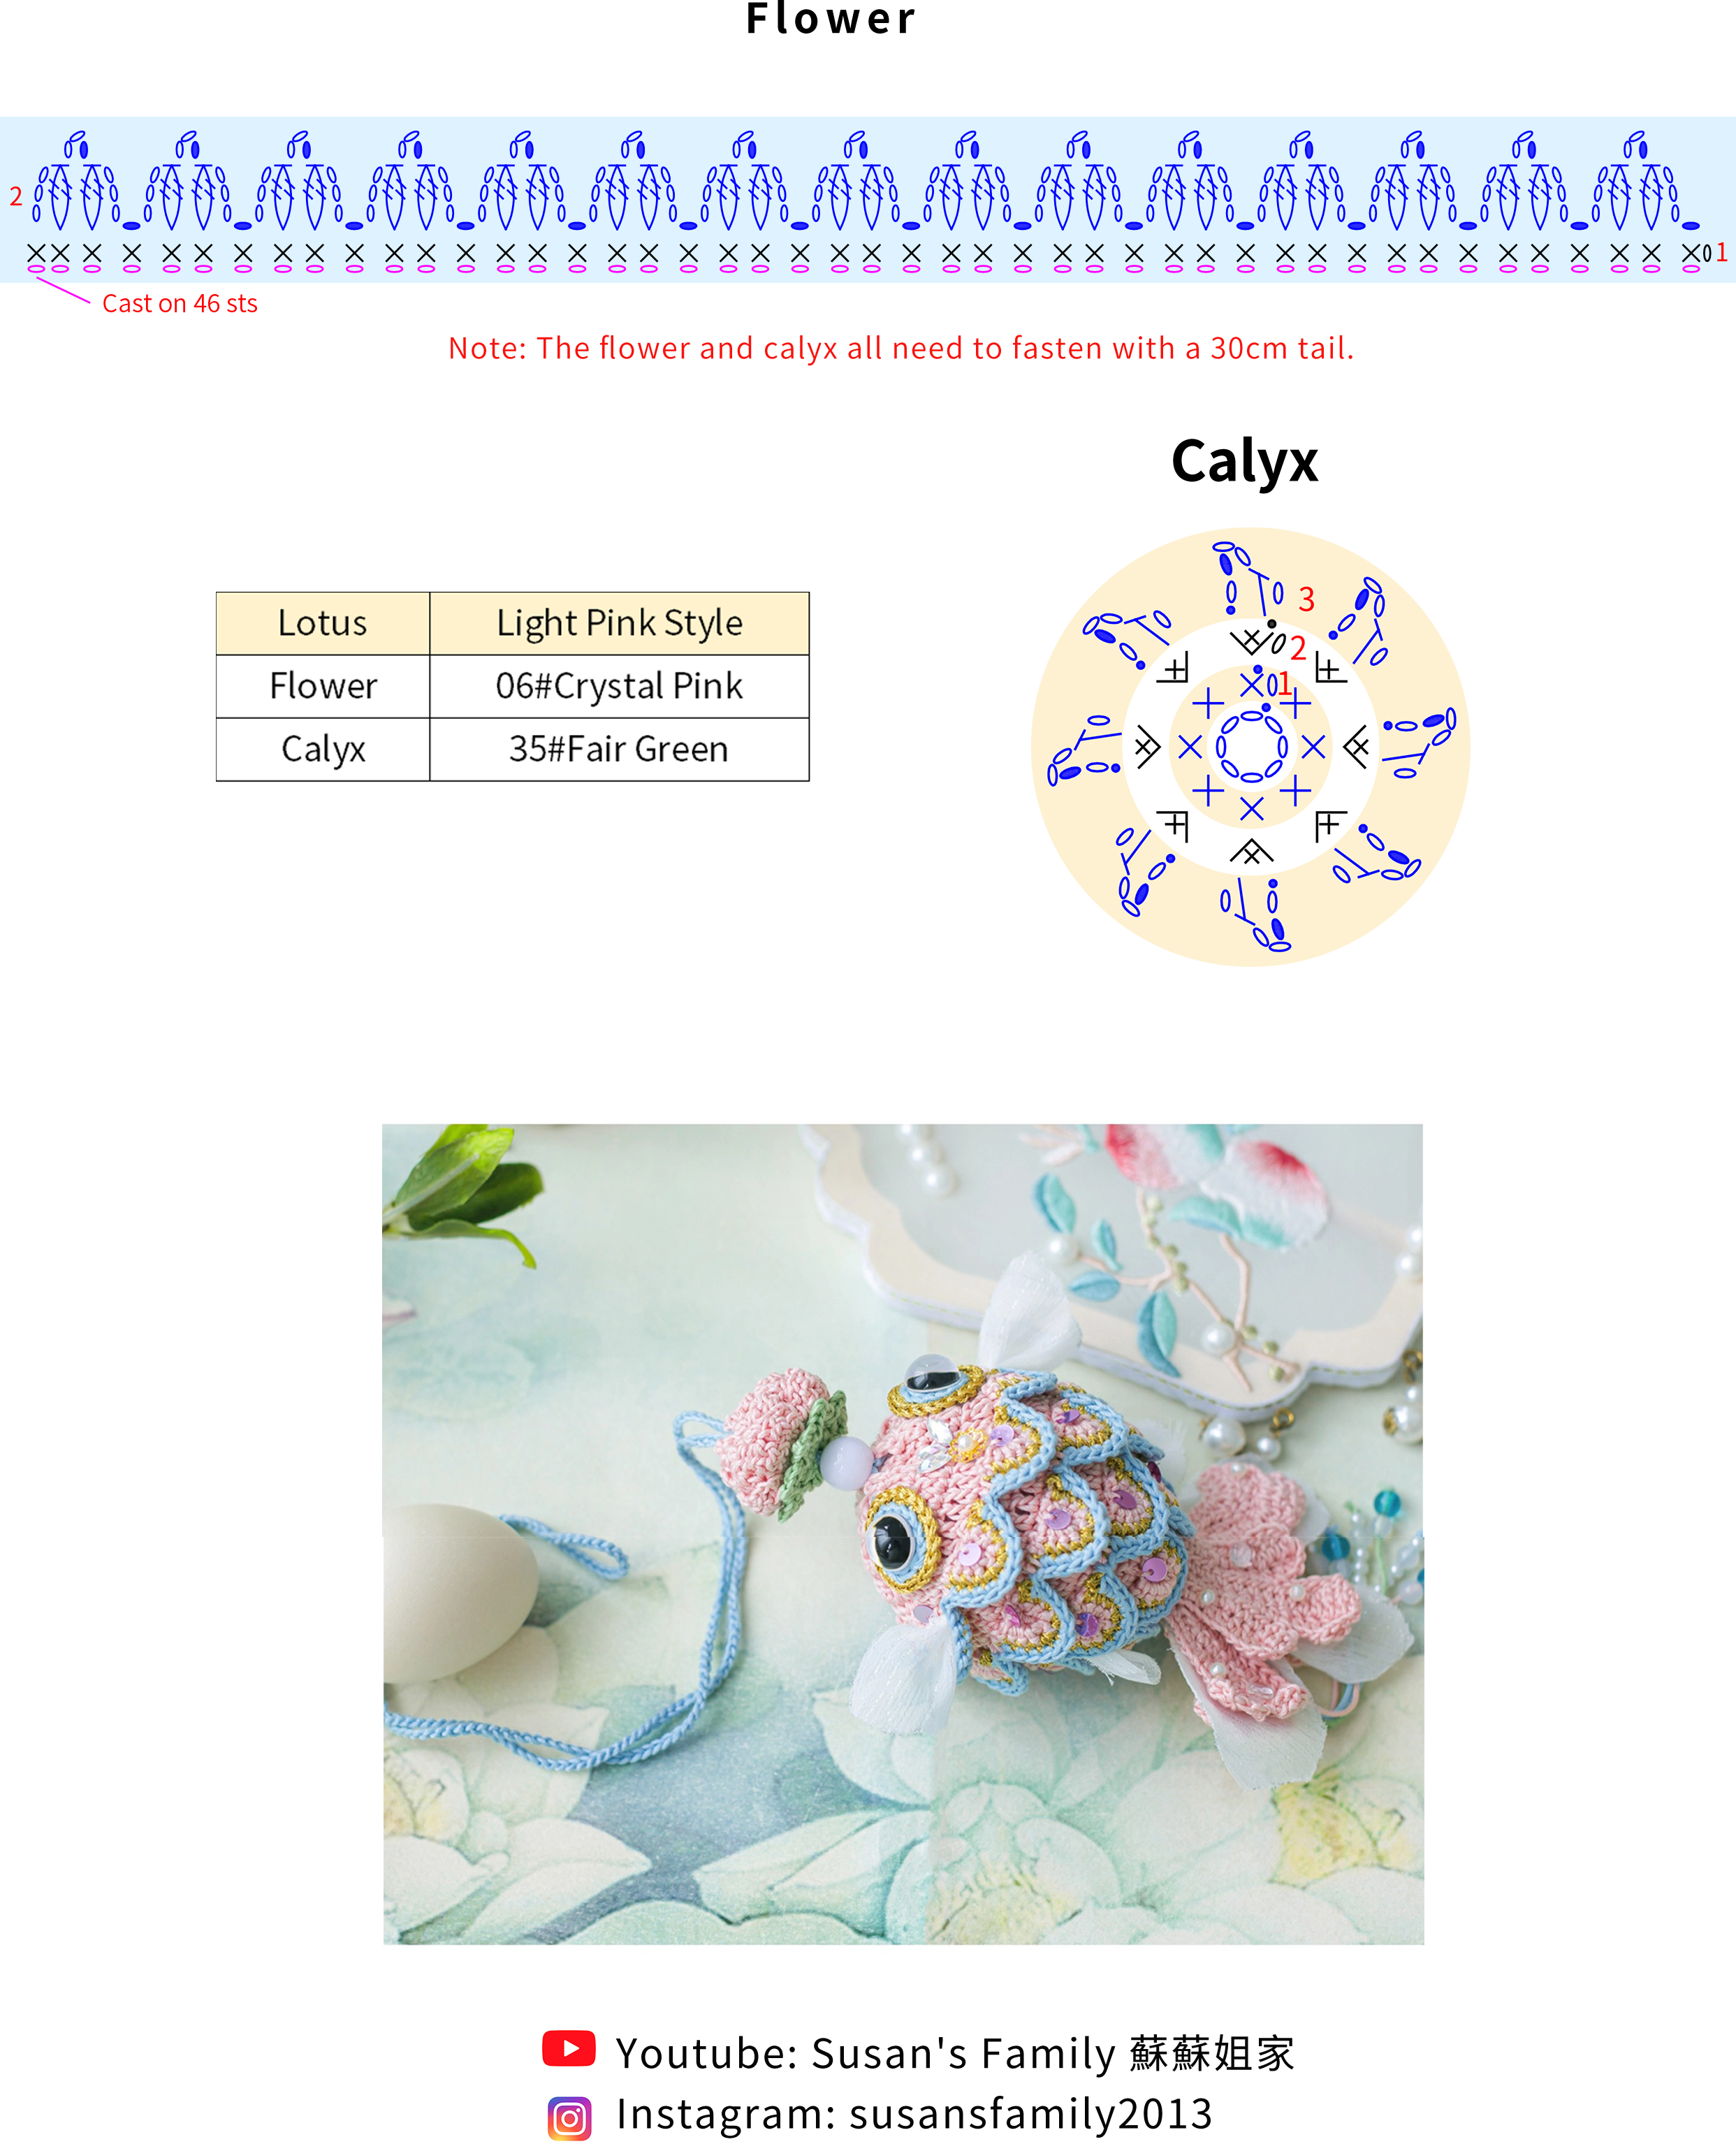
The lotus decoration for Light Pink Style 25' 47'' (Part 2)
The lotus decoration consists of the flower and the calyx. They are crocheted separately and then assembled. Please refer to the video demonstration for more details.
Made by the community