Clothes
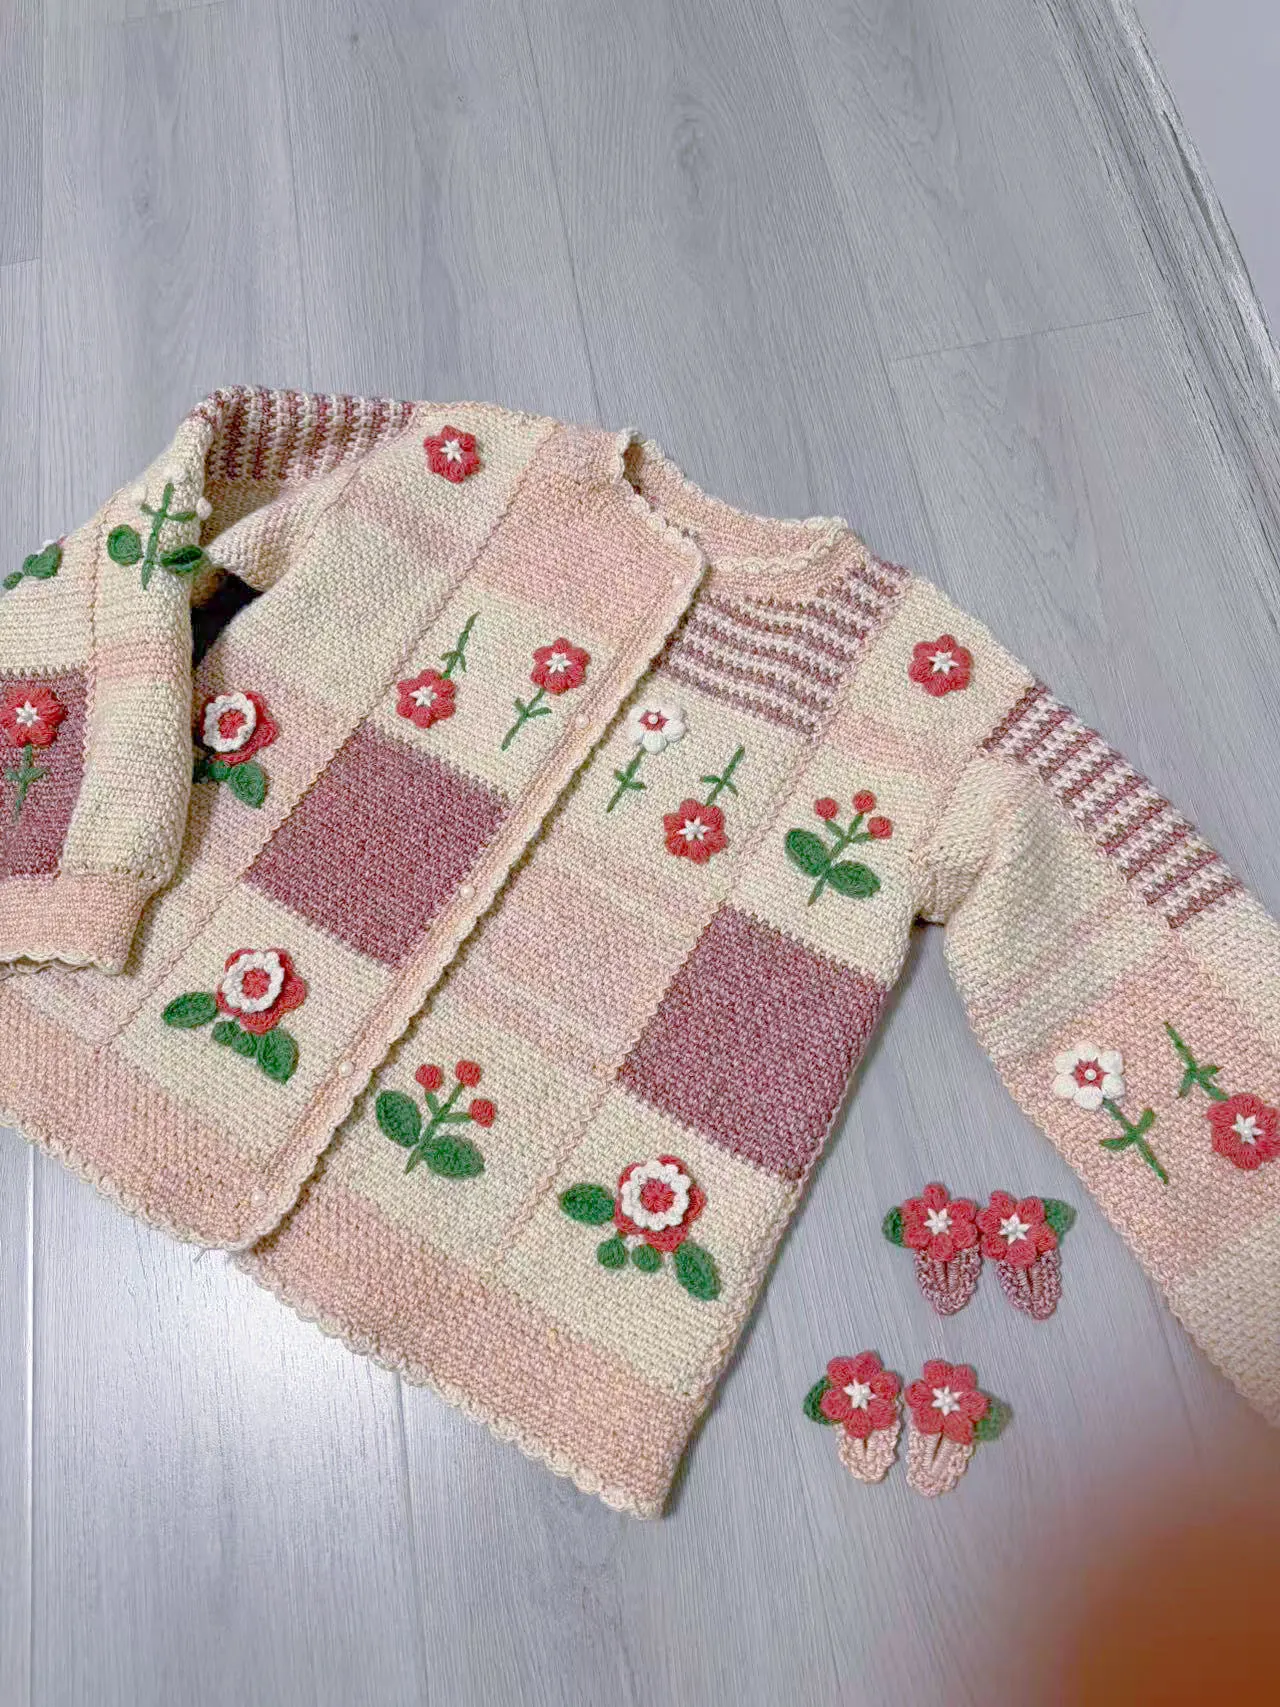
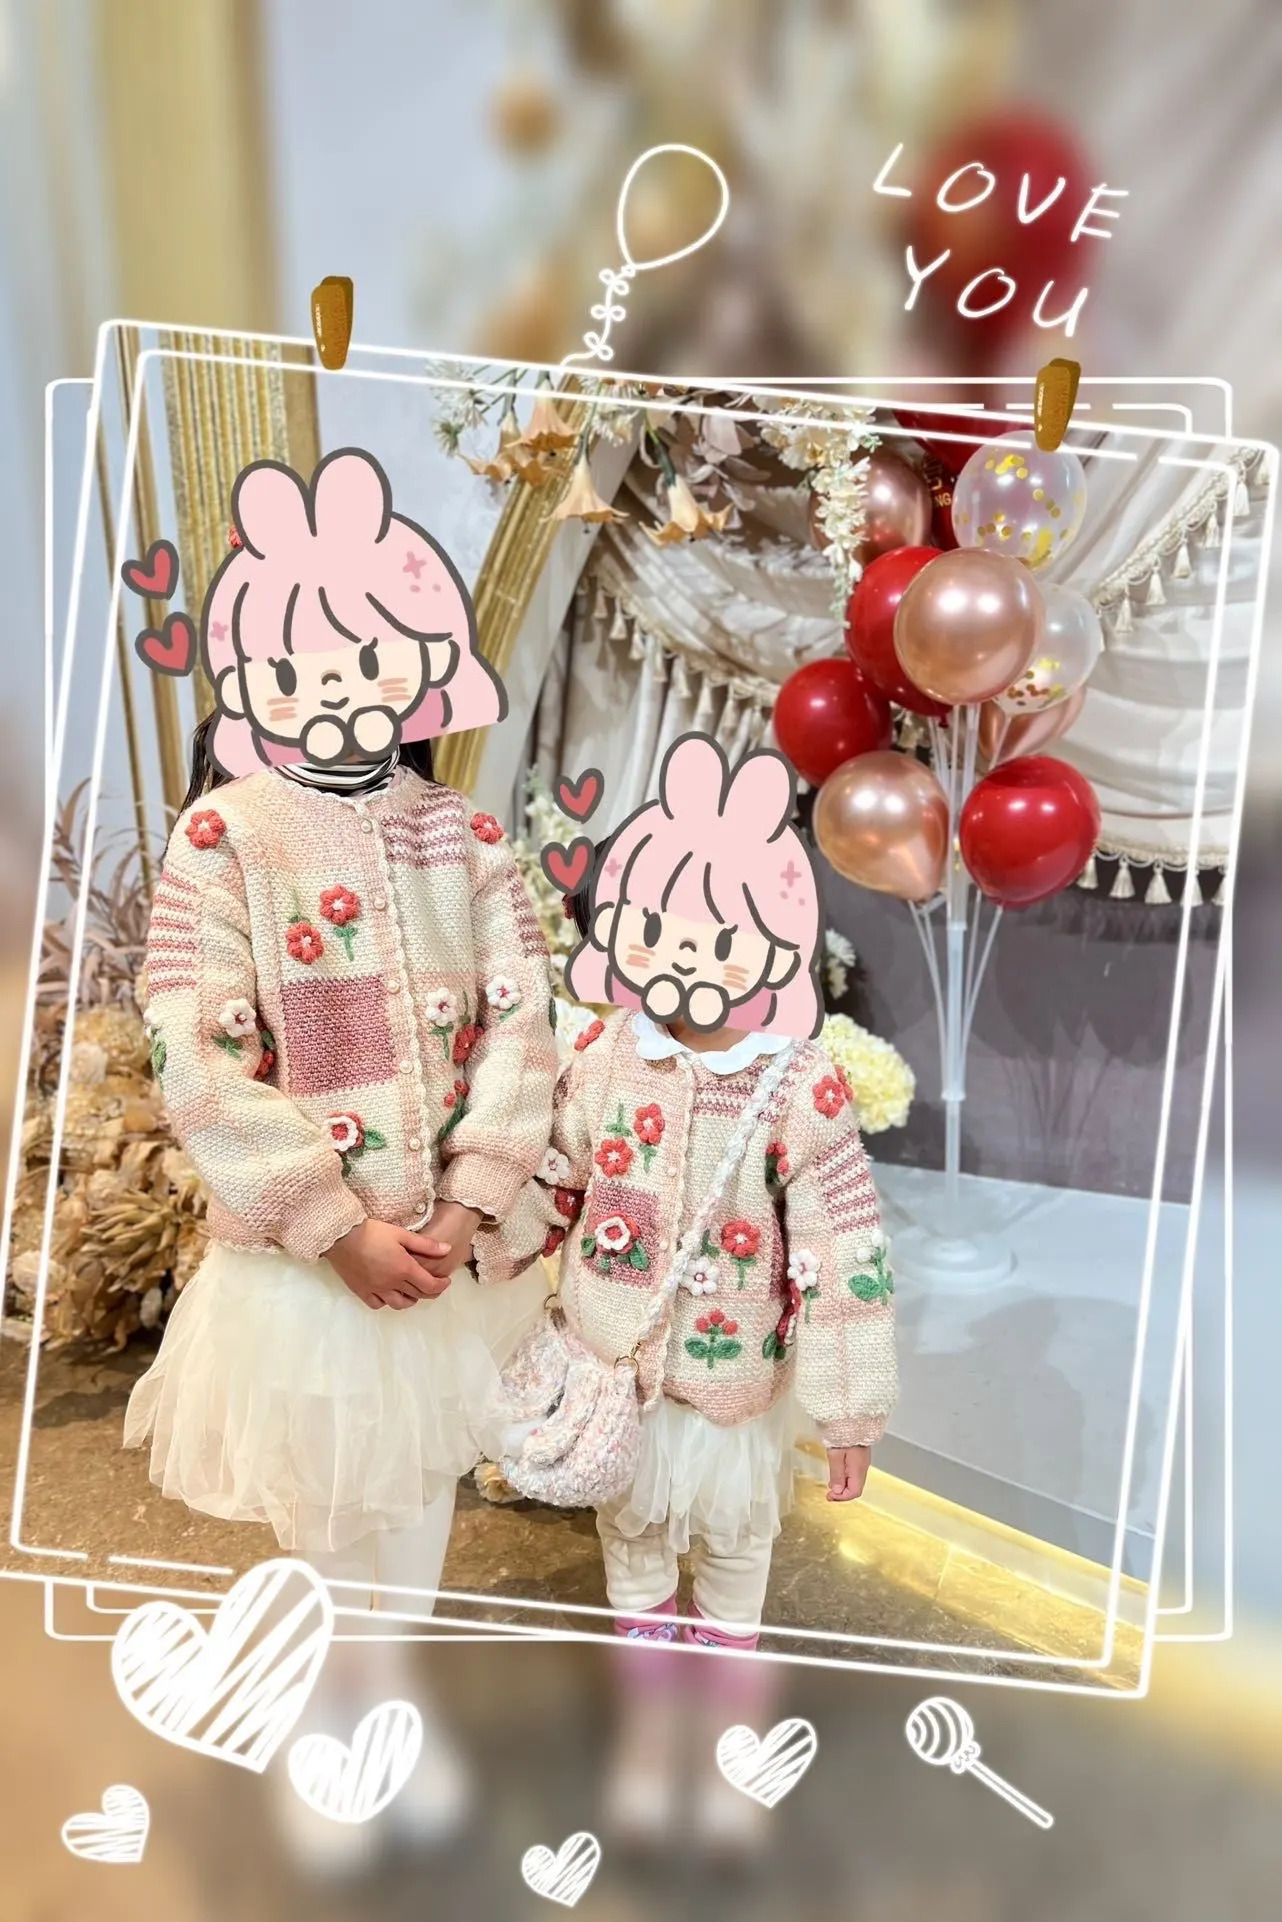
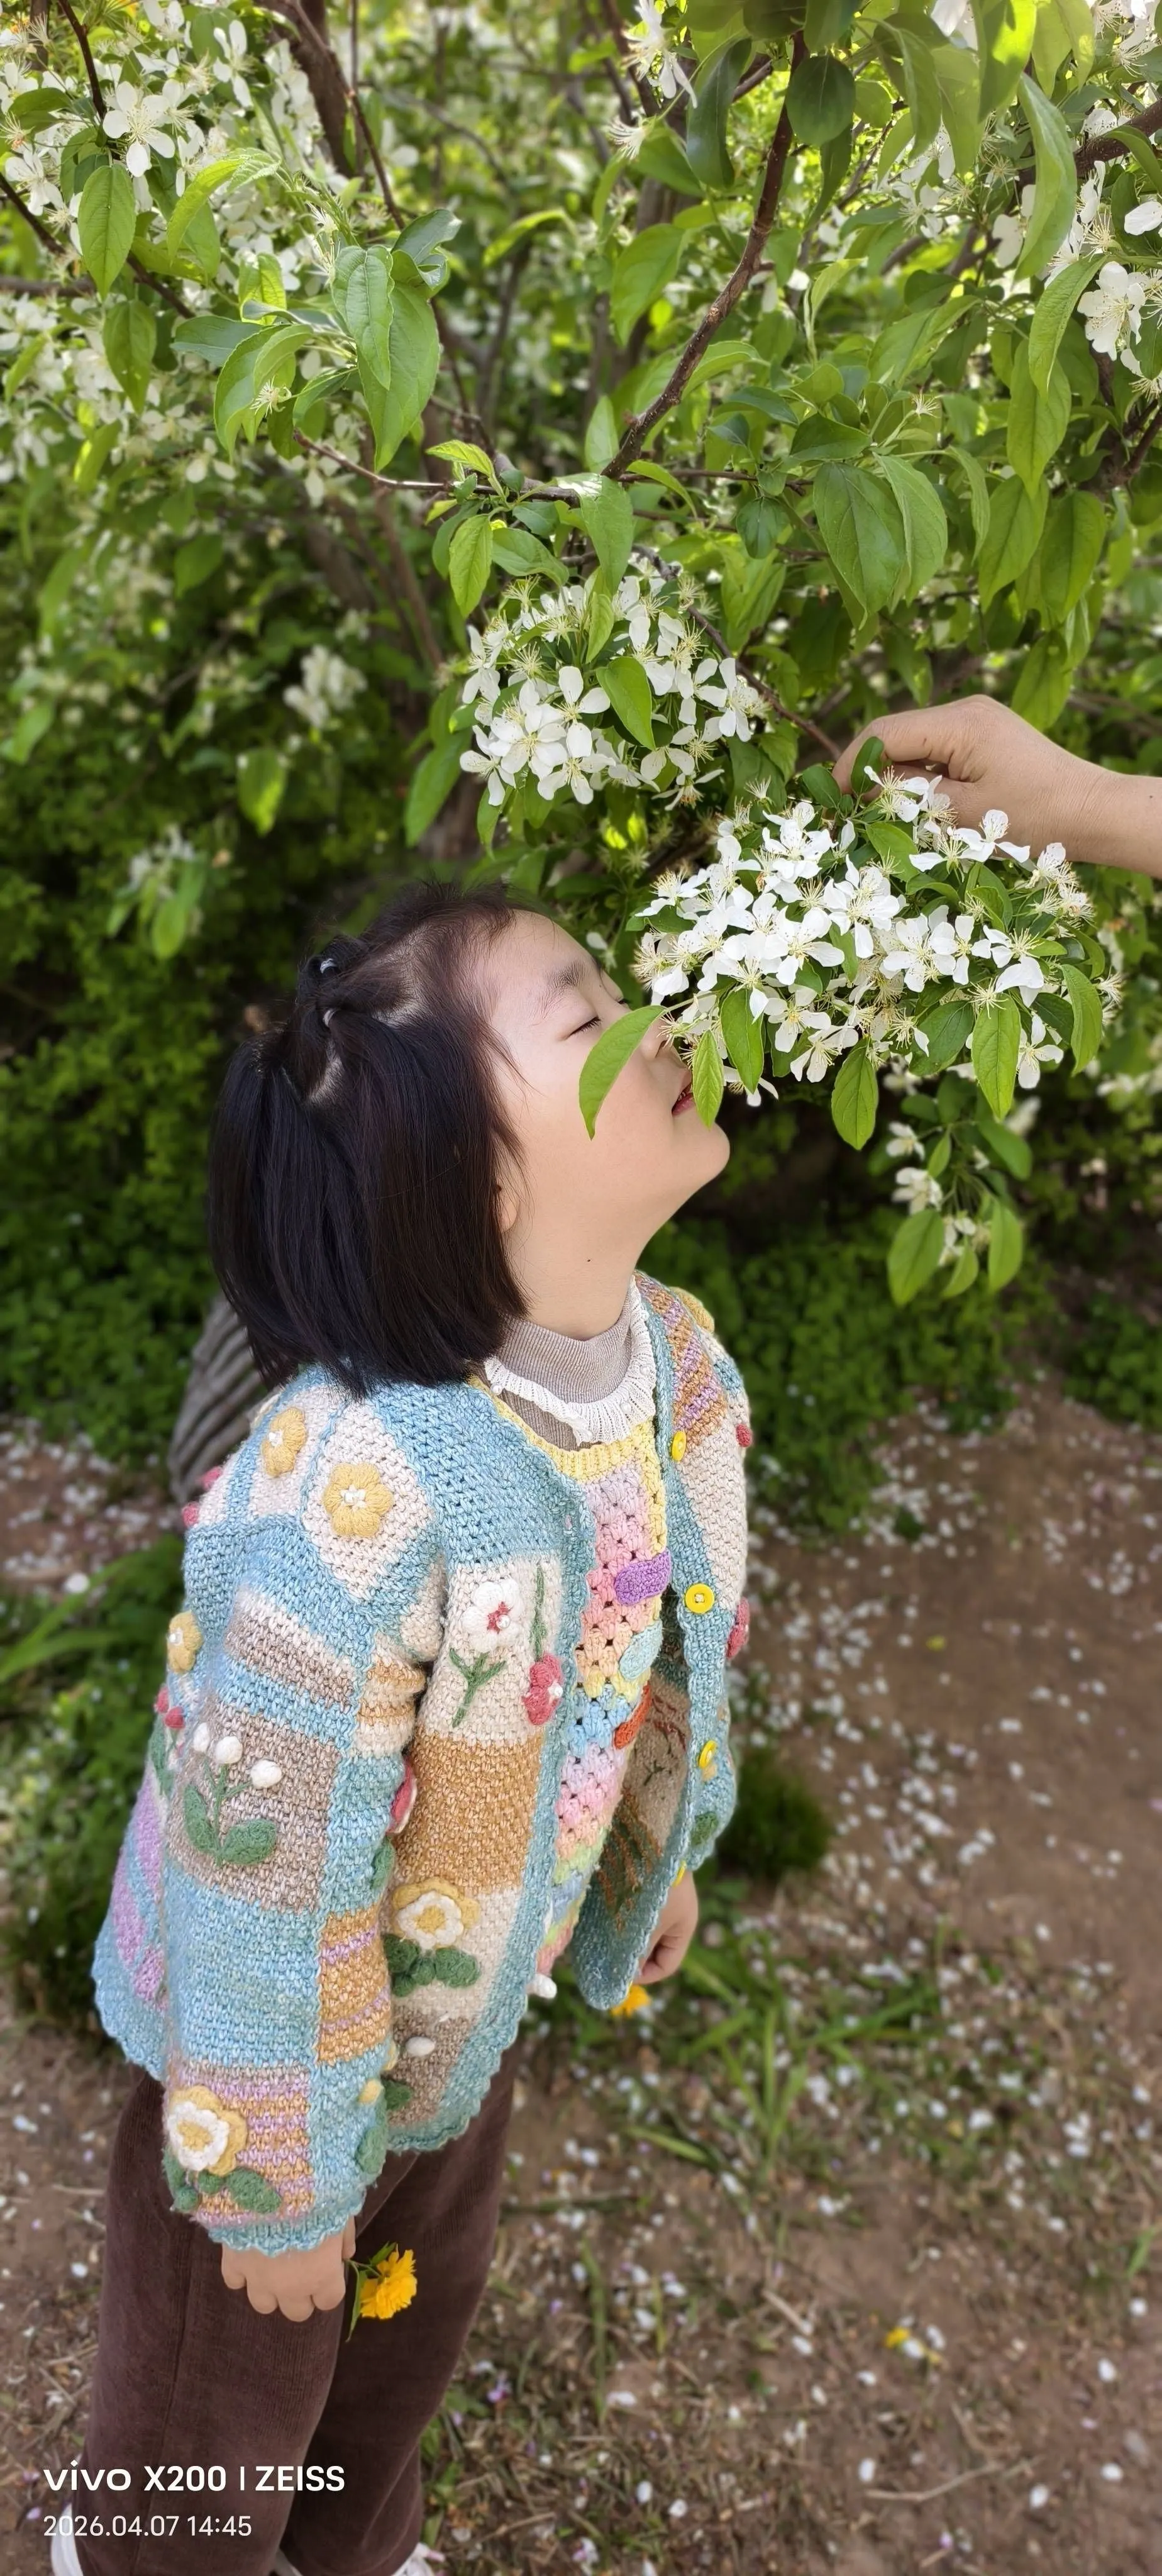
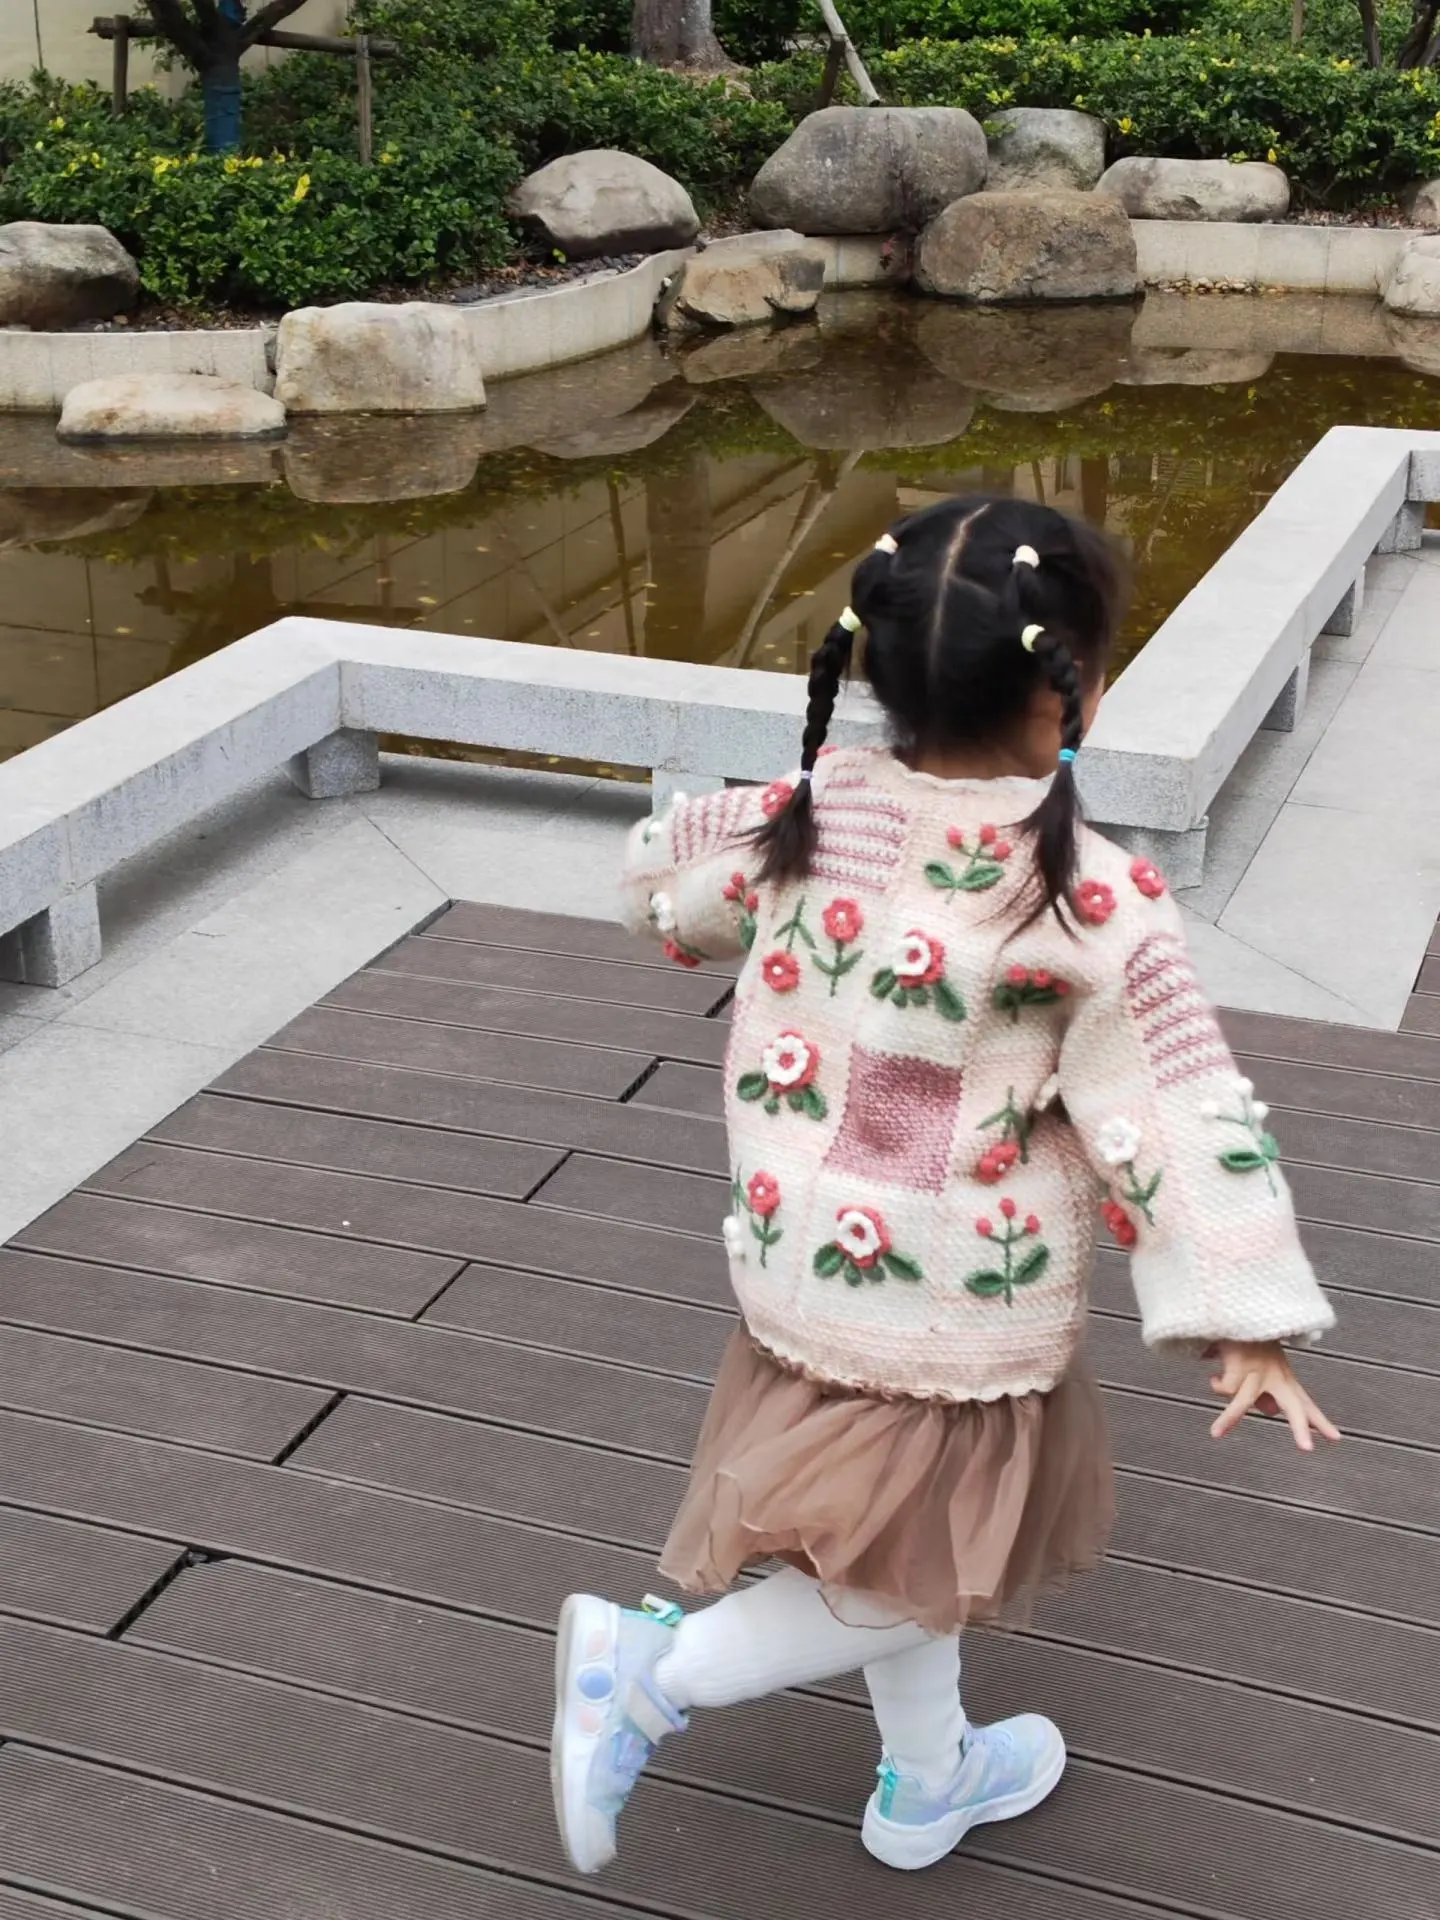
Grace Vintage Cardigan
Project preview
See the finished project
Pattern format
Instructions
This product includes a cardigan and hairpins. The cardigan comes in multiple sizes to choose from. No matter which size, the crochet method is identical, only the stitch count and row count will vary.
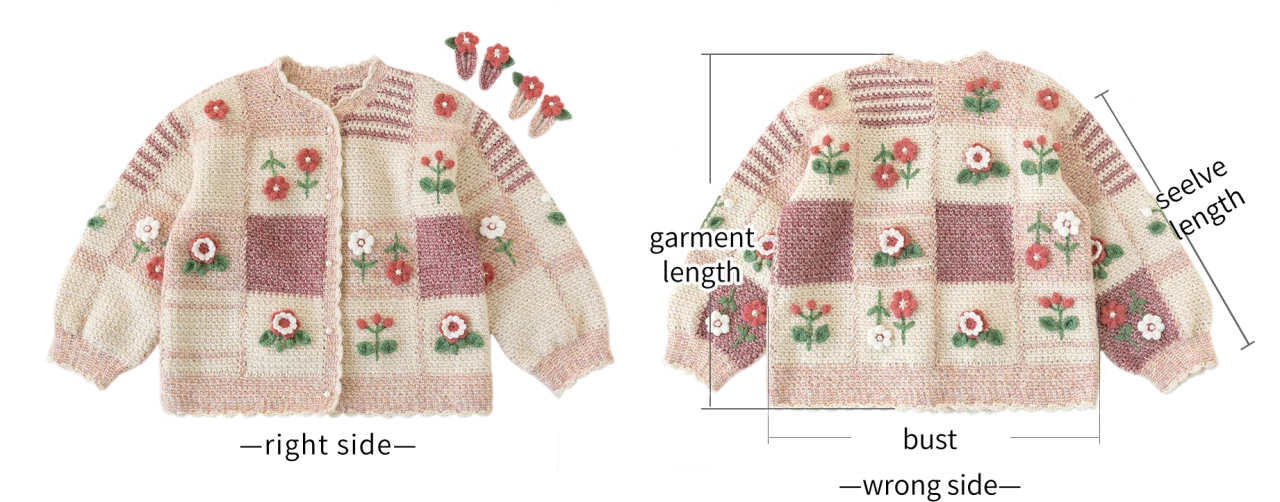

Note: Hand-measured, with an error margin of 1-2 cm.
Due to variations in individual tension, the size of the sample is for reference only.
Materials: Susan's Family Alpaca & Susan's Family Impression Misty Feather
Hook: 3.00 mm crochet hook & 3.50 mm crochet hook
Chart Key










Note: This pattern is making in Chinese crochet pattern terms, and the stitch name is written using American terminology. All measurements in charts are in cm.

The cardigan includes the main piece, decorations, hems, edging, and buttons. First, crochet the various pieces of the main part, then make the decorations, next join all the pieces together, then crochet the hem around the bottom of the body, and then crochet the edging along the edges of the hem, front band, and neckline, and crochet the edges separately on the cuffs as well, finally sew on the buttons. The main piece includes the back piece, front piece, and side pieces, as well as two types of sleeve pieces.
Note: The main piece of the cardigan, the hem, joining together, and crocheting the edging are all worked using a 3.5mm crochet hook, with one strand of Susan's Family Impression Misty Feather.
Main piece gauge:
22 sts * 20 rows = 8.5 cm * 8.9 cm
Note: When you've completed the first 20 rows, measure the dimensions of the piece. If it's too much off, you'll need to adjust your tension and re-crochet.
Part 1 Back PieceA 02' 03'' (Part 1)
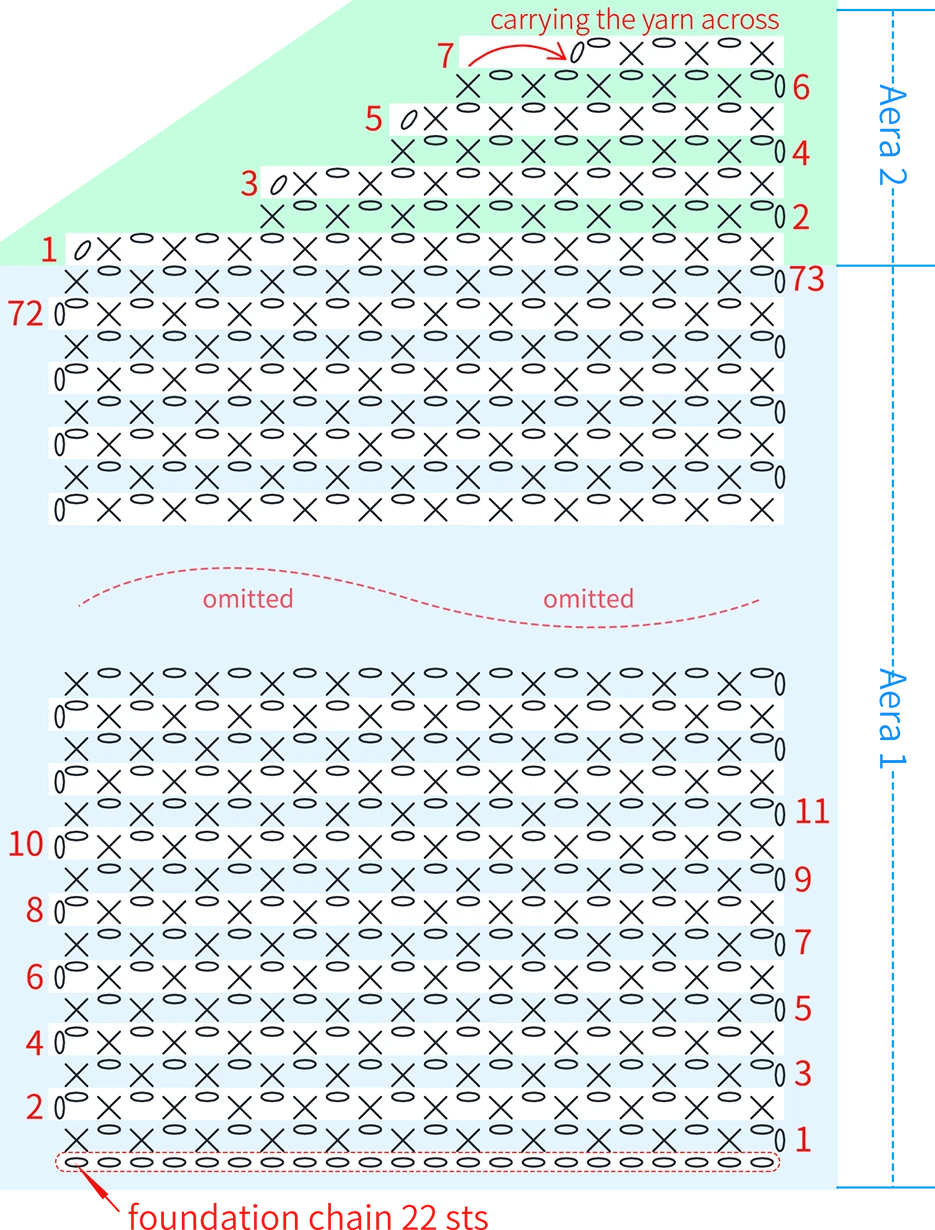
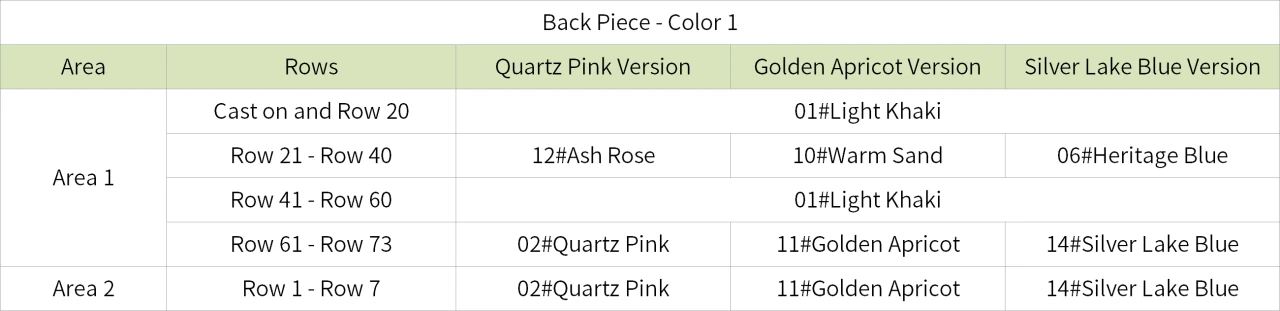
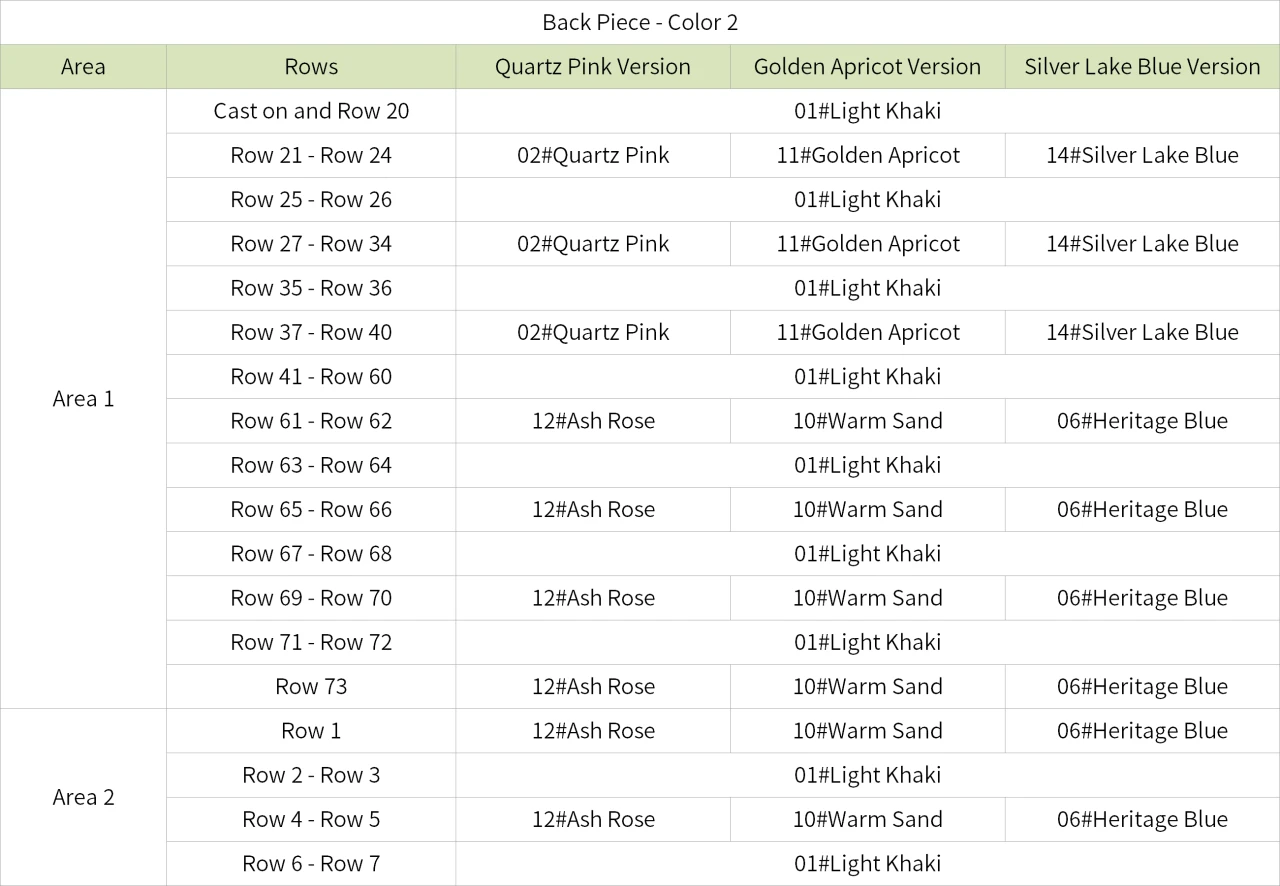
There are two back pieces, worked as the same method, but with different color schemes. The back piece starts with a foundation chain, and you work in rows up along the starting braid with corresponding stitches. It's divided into Section 1 and Section 2. Section 1 is worked even, while Section 2 requires shaping for the neckline on one side. Please refer to the video demonstration for more details.
Part 2 Front PieceB 27' 29'' (Part 1)
The crocheting method for the front body and back body is roughly the same. It also starts with a foundation chain, and you work up from this chain in rows, similarly divided into Section 1 and Section 2. In Section 1, you crochet evenly, but the row numbers differ from those of the back body. Section 2 also involves shaping the neckline, but the decrease stitch numbers and row numbers vary from those of the back body. Please refer to the video demonstration for more details.
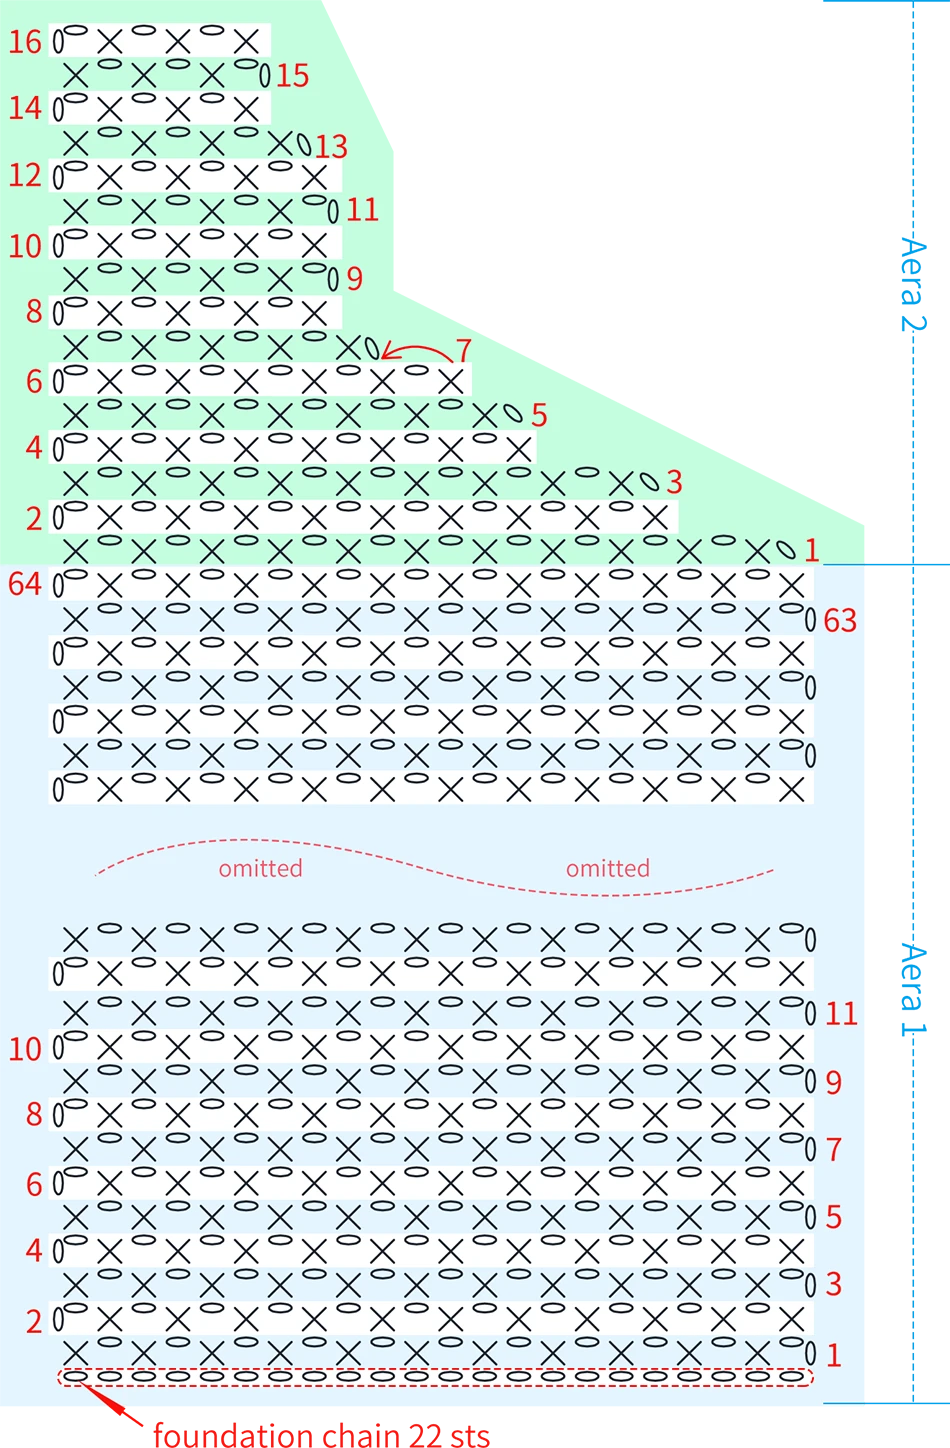
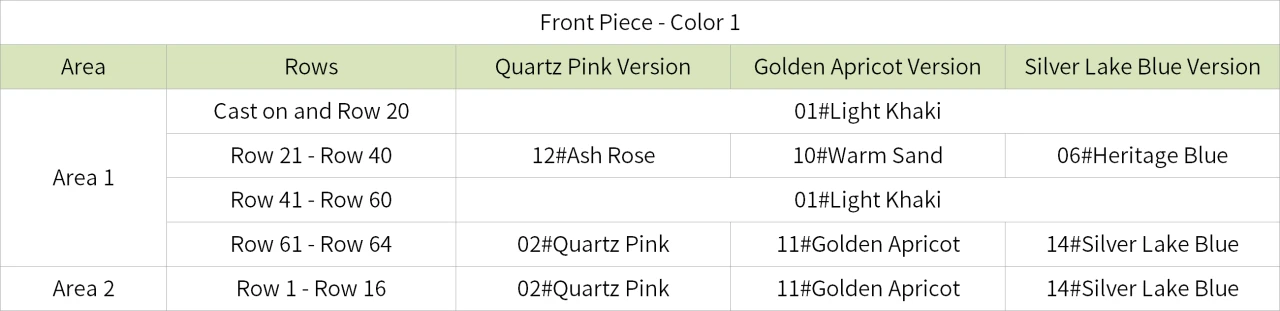
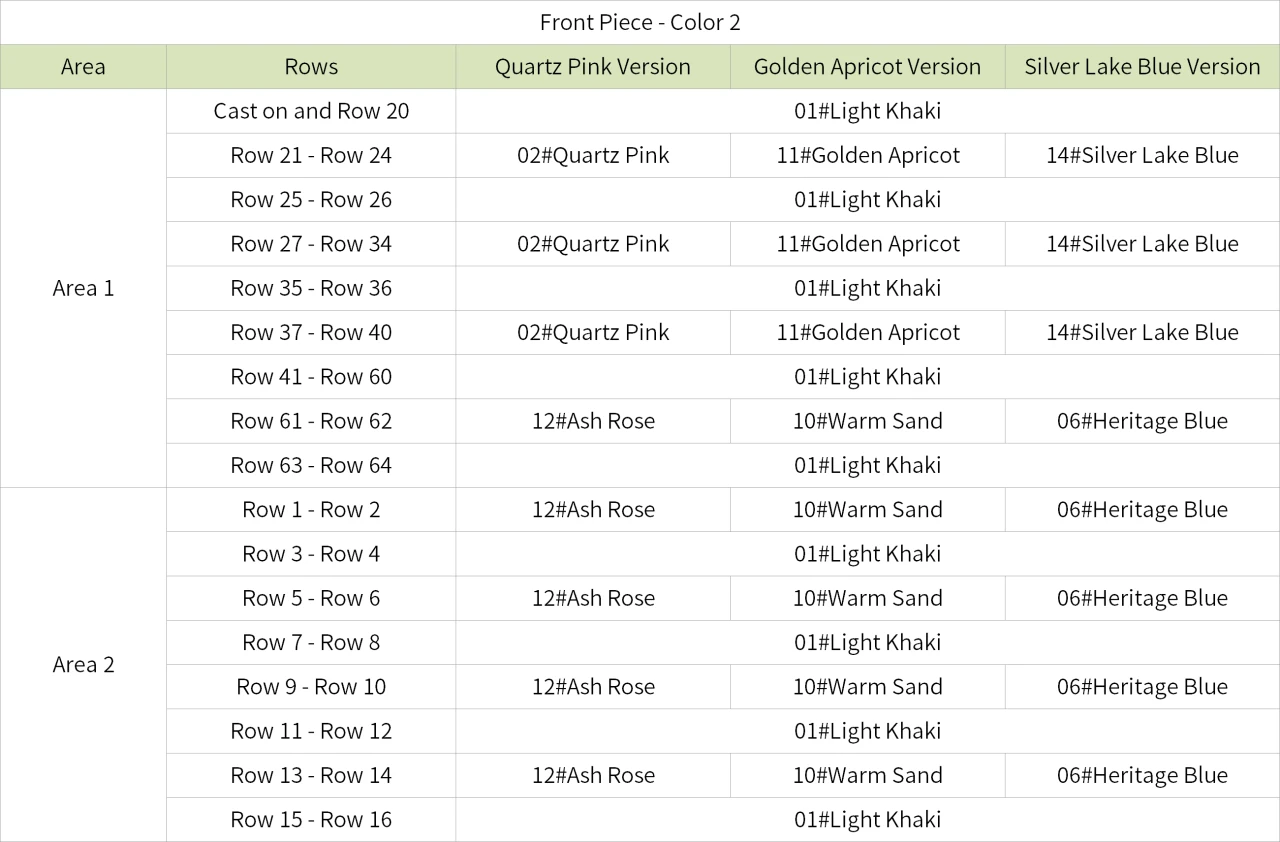
Part 3 Side Piece 30' 45'' (Part 1)
There are four side pieces, each divided into Section 1 and Section 2. In Section 1, work evenly. In Section 2, you need to decrease stitches on the same side for the first few rows and the last few rows, while working evenly in the middle. Please refer to the video demonstration for more details.
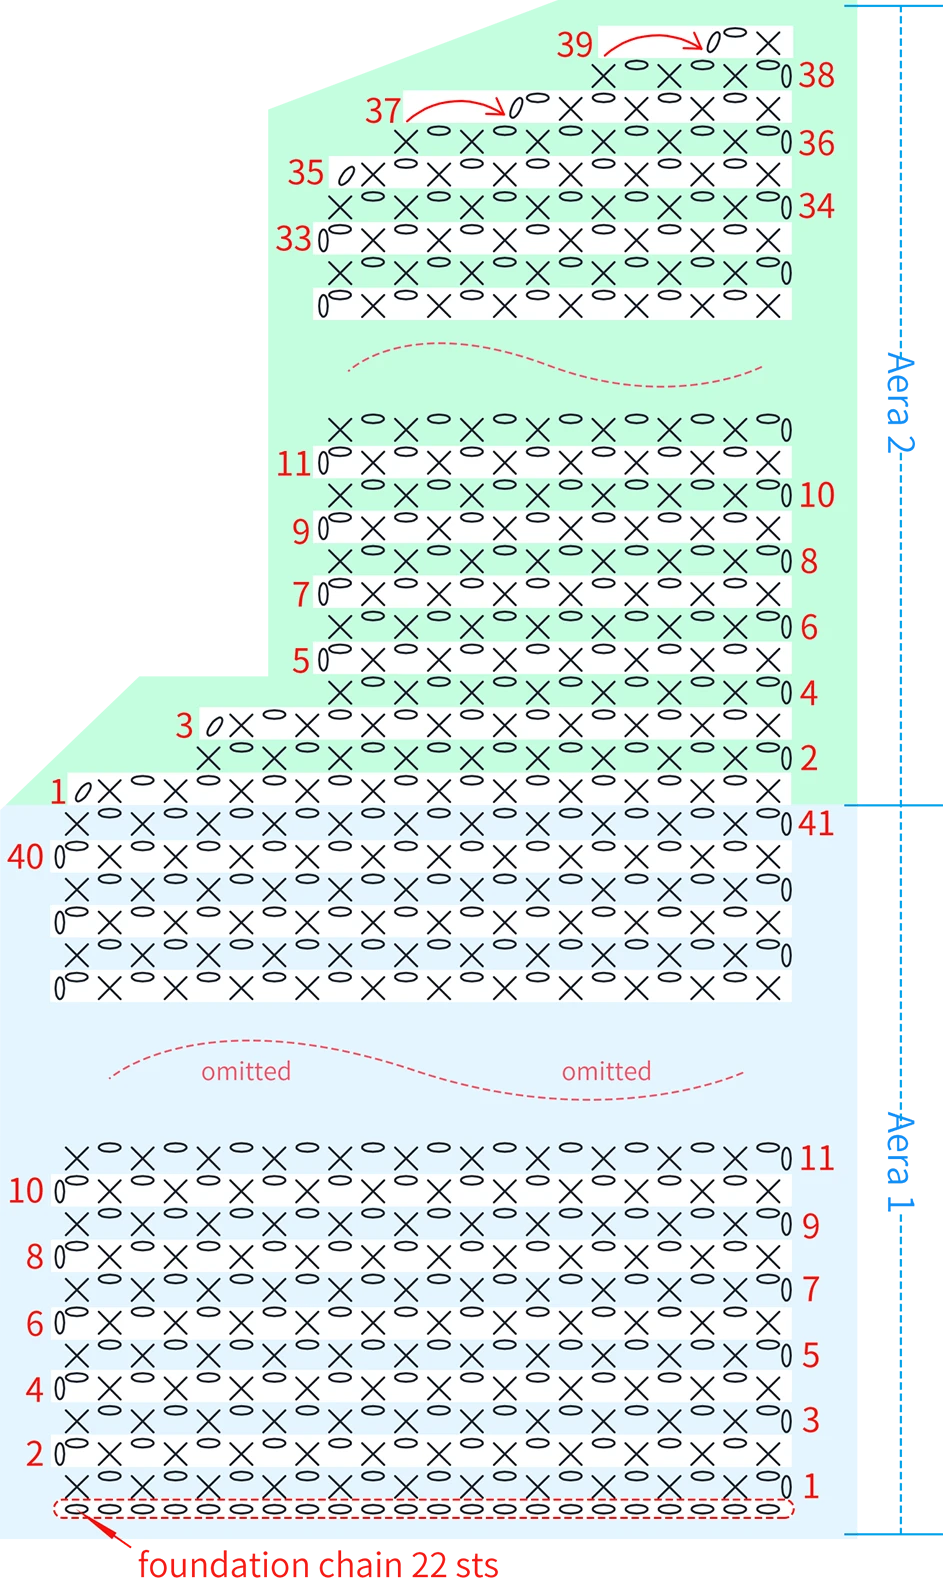
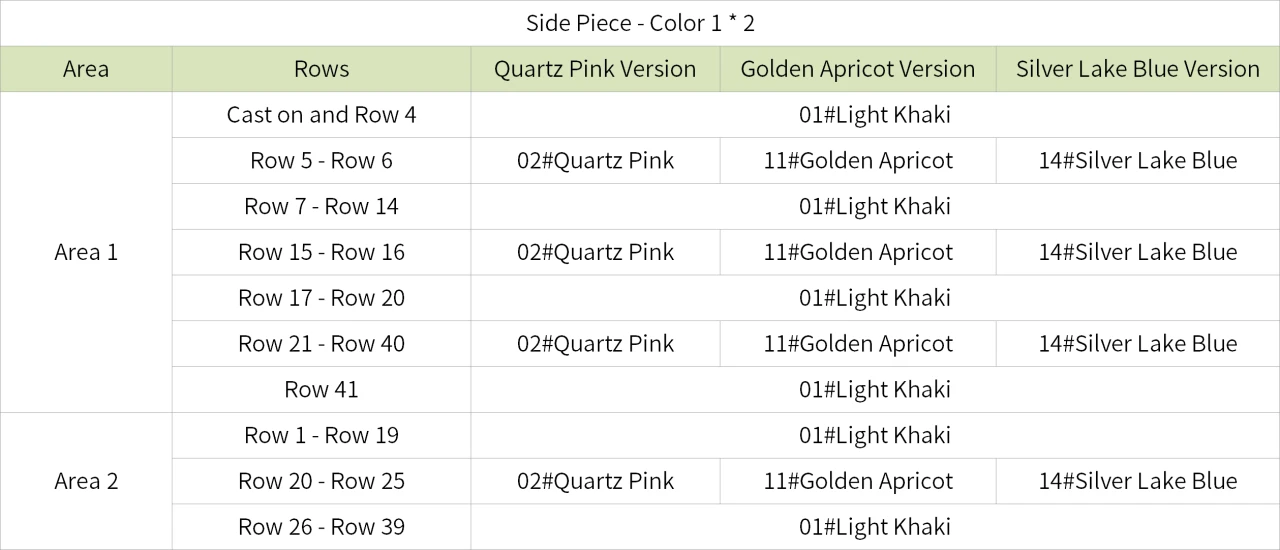
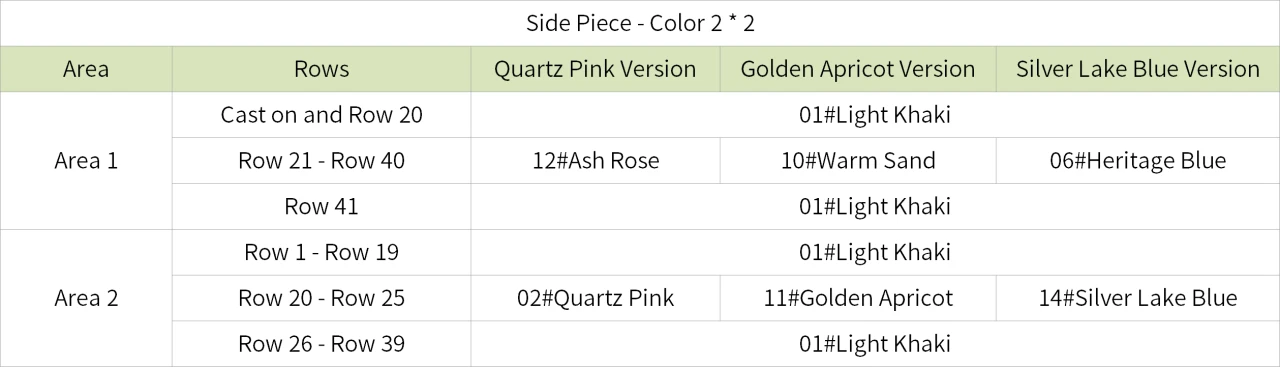
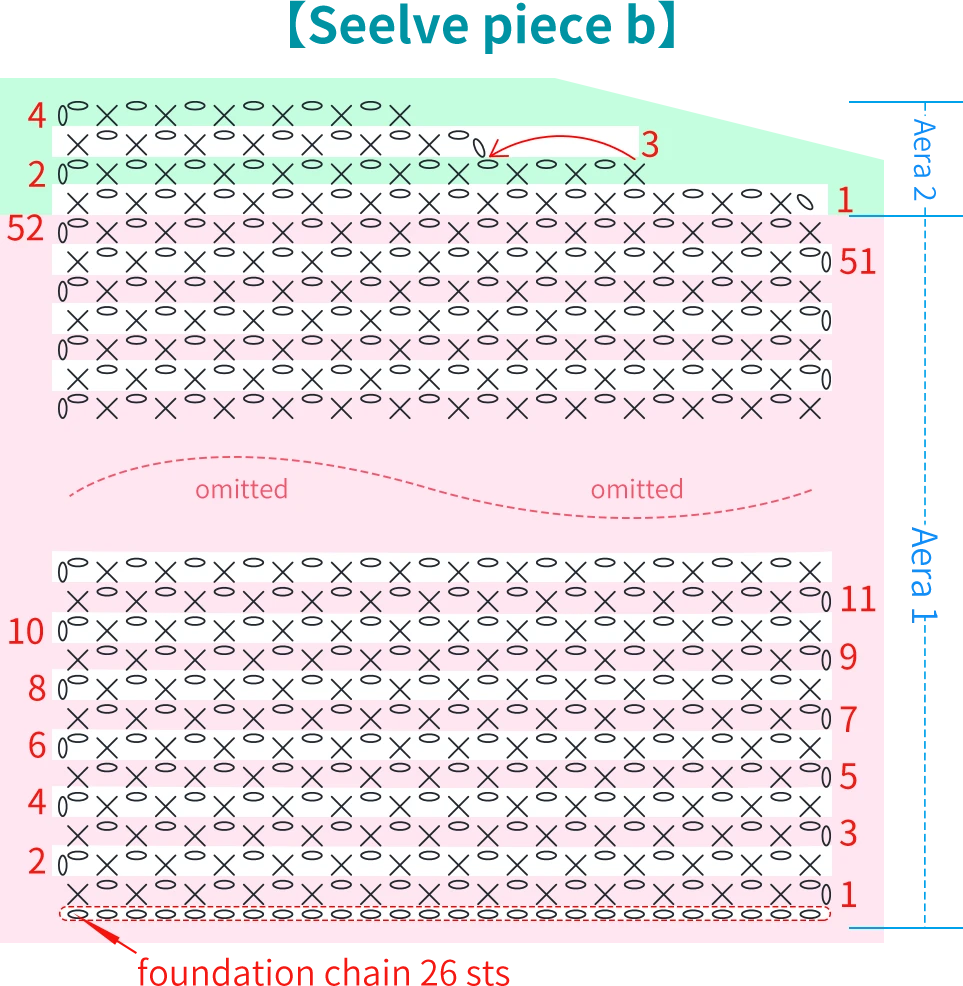
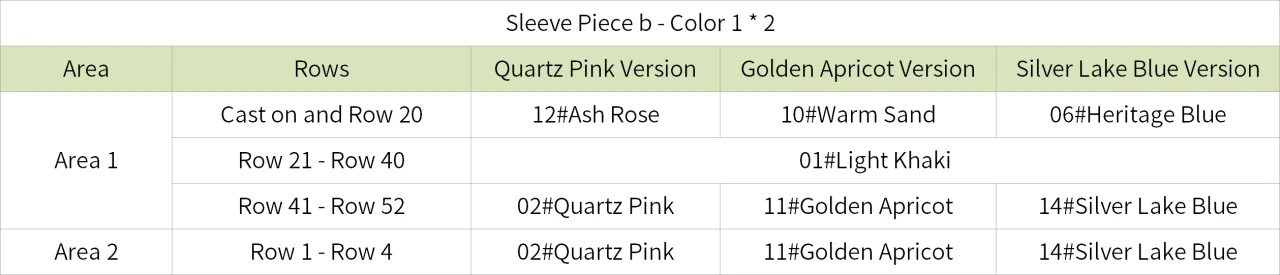
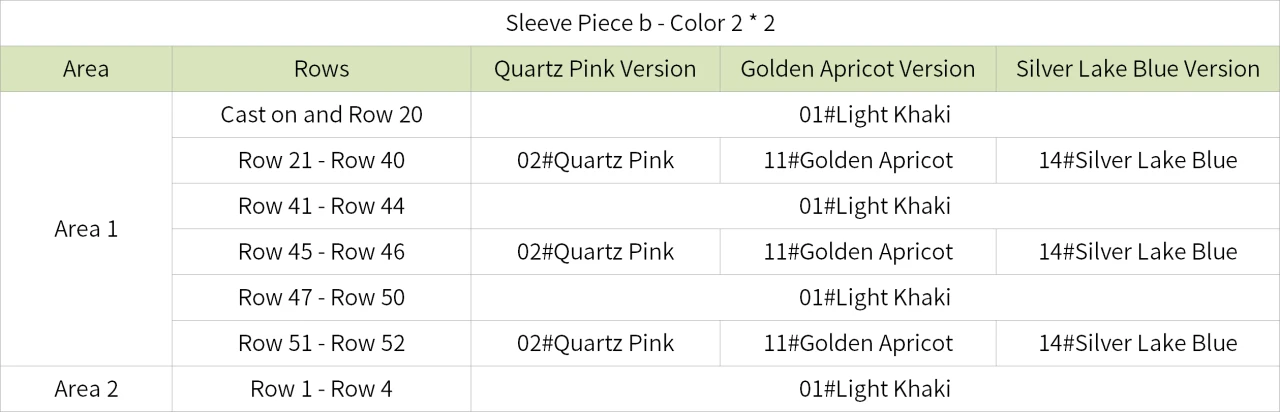
Part 4 Seelve PieceC 30' 45'' (Part 1)
The sleeve consists of 3 separate sections: one Section A and two Section B. For Section A, crochet evenly throughout. Section B is divided into Section 1 and Section 2; crochet evenly in Section 1, and in Section 2, decrease on one side towards the ending rows. Please refer to the video demonstration for more details.
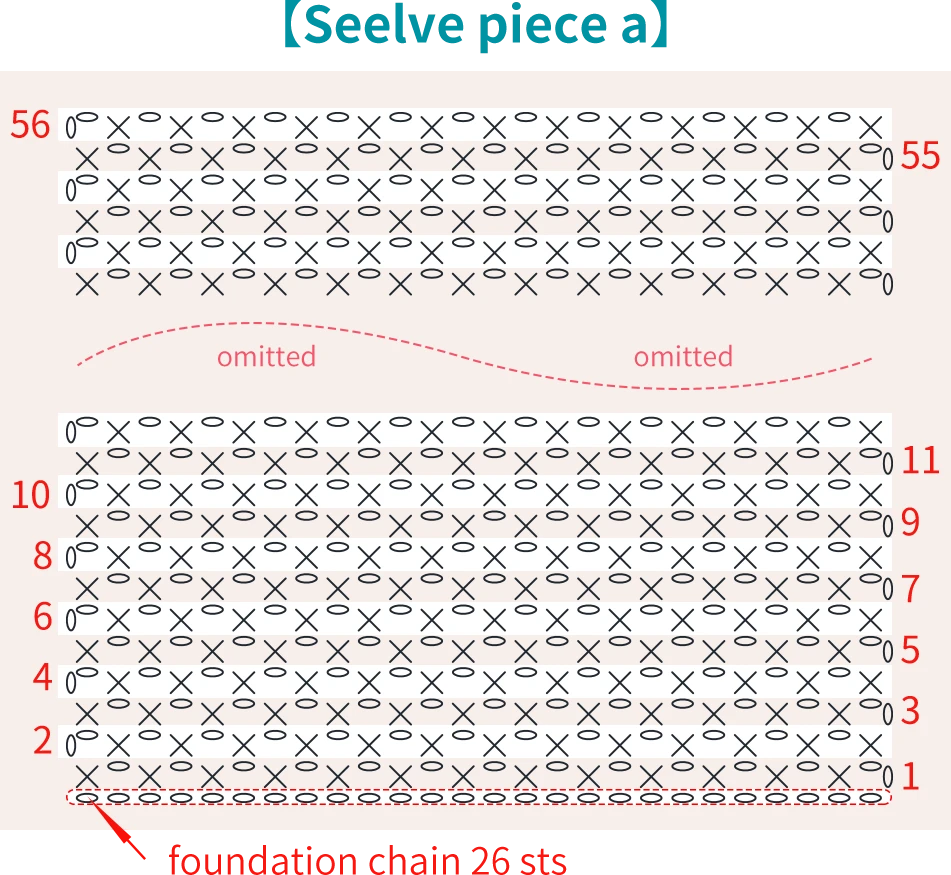
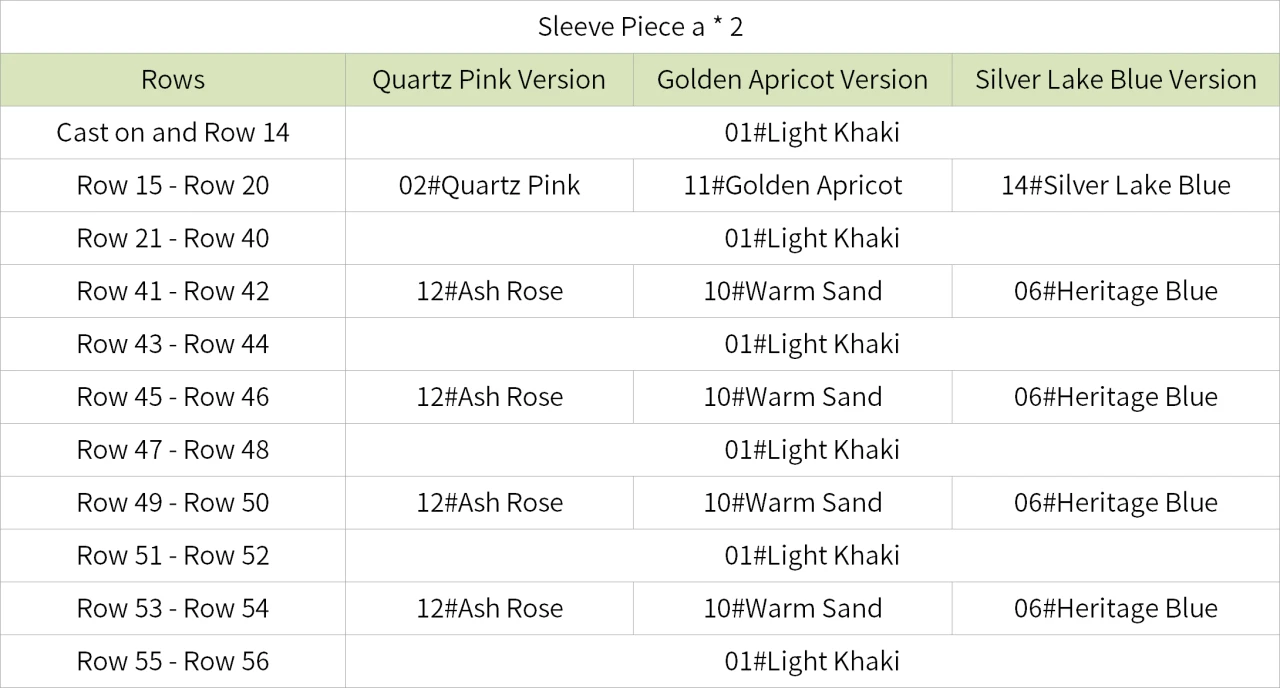
Part 5 Decoration 31' 43'' (Part 1)
(3.00 mm crochet hook or 3.50 mm crochet hook)
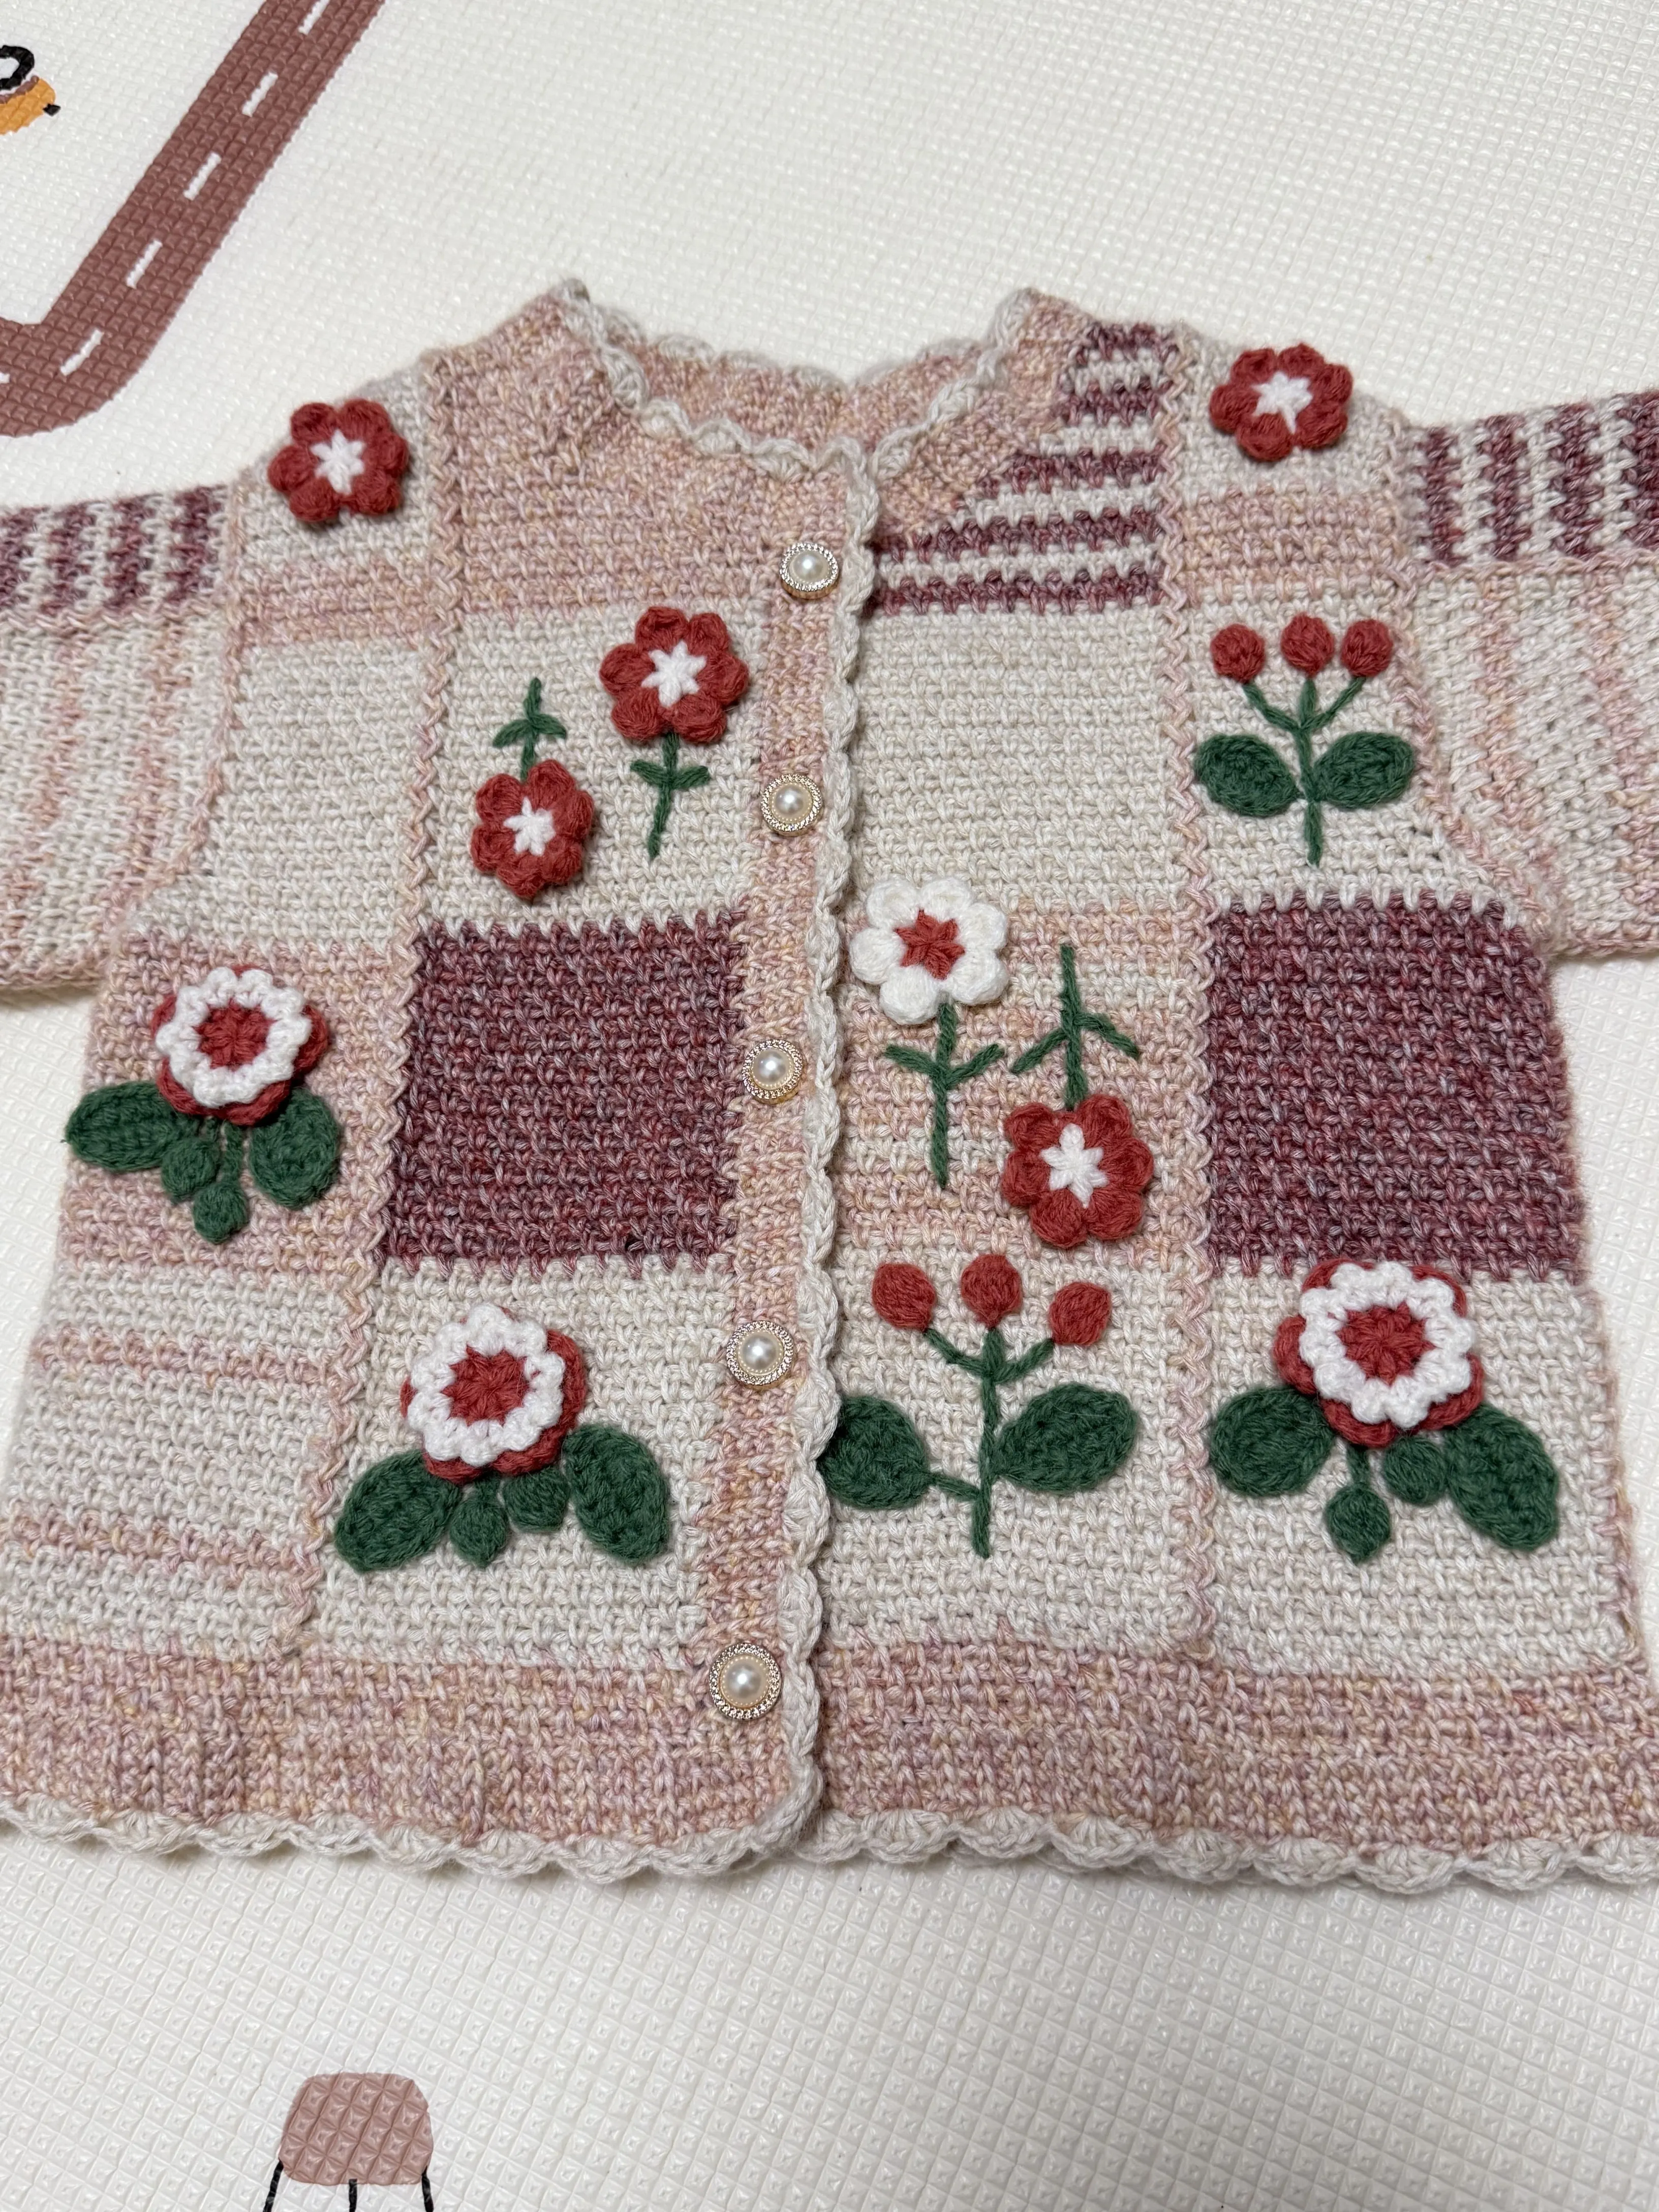
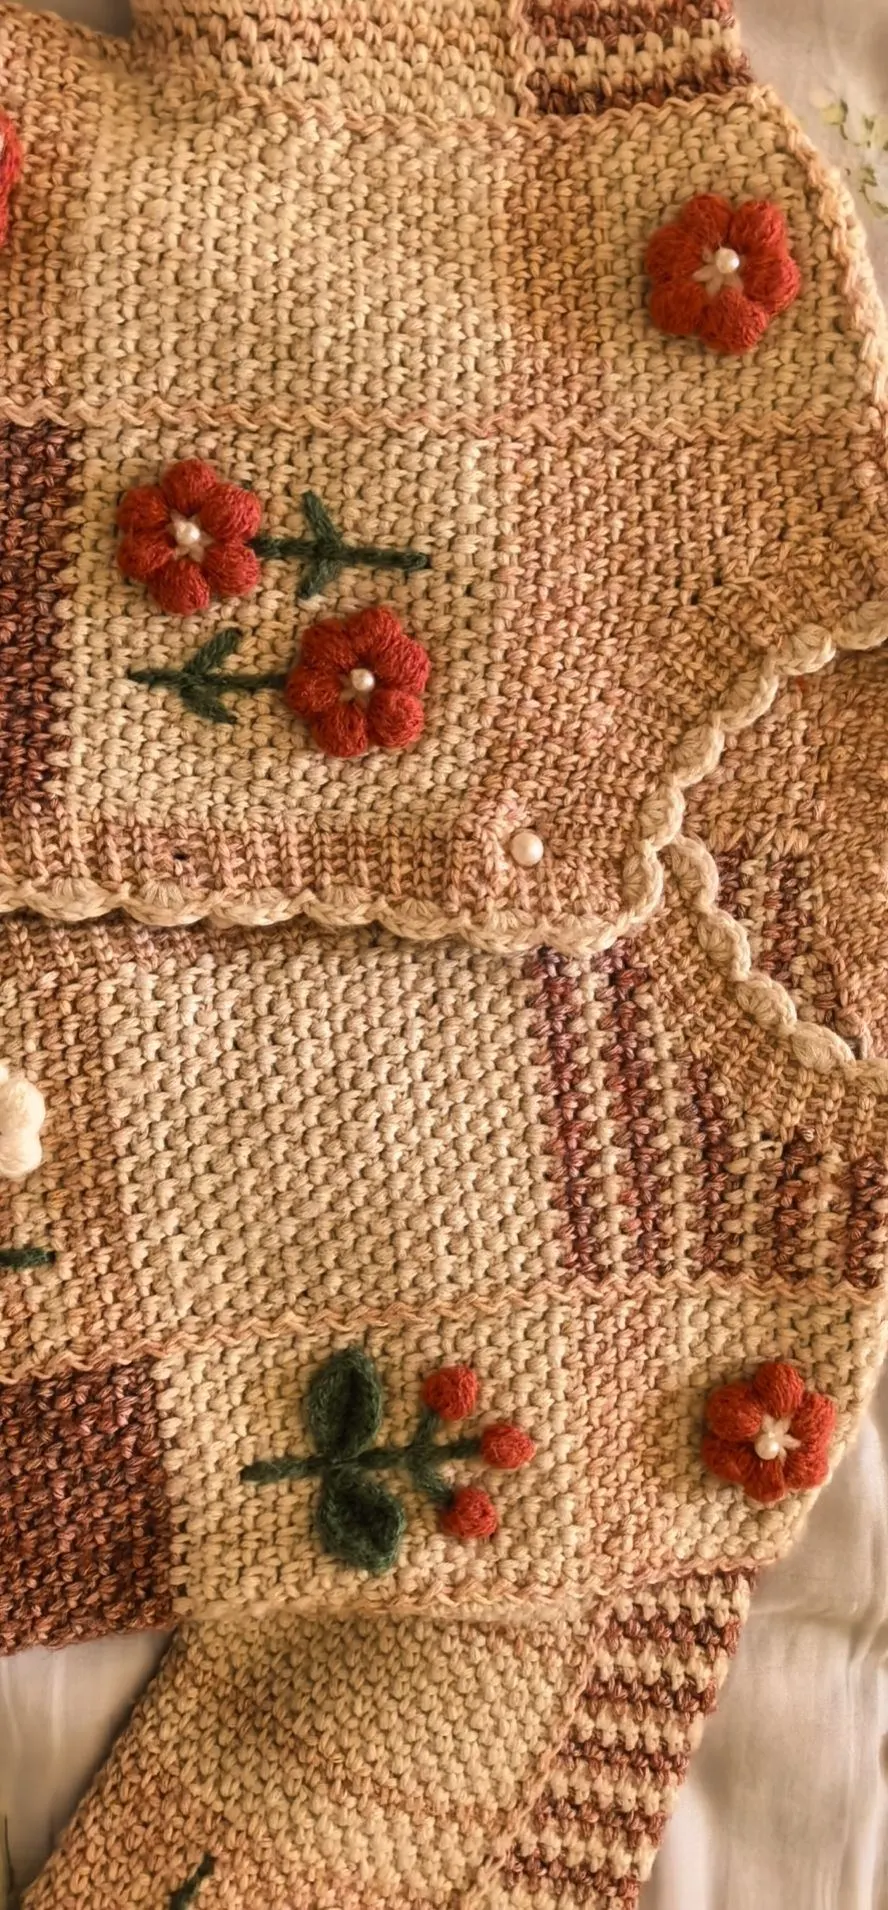
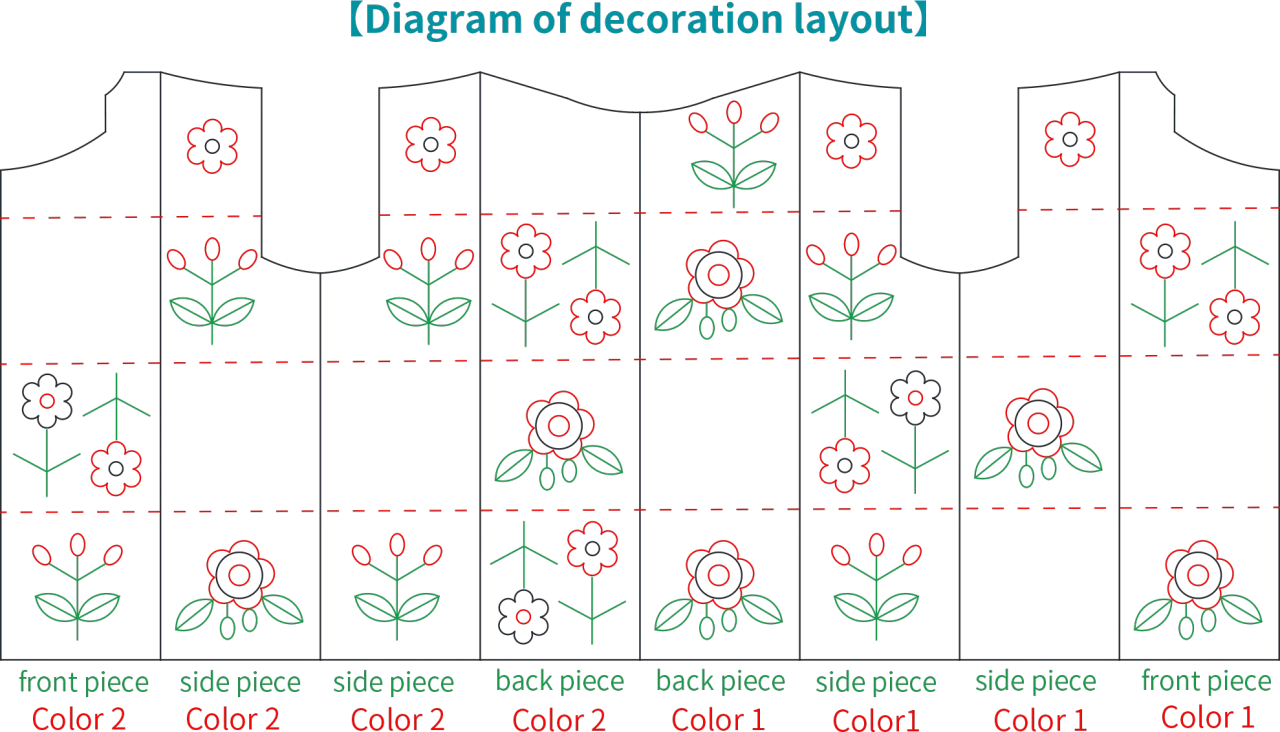
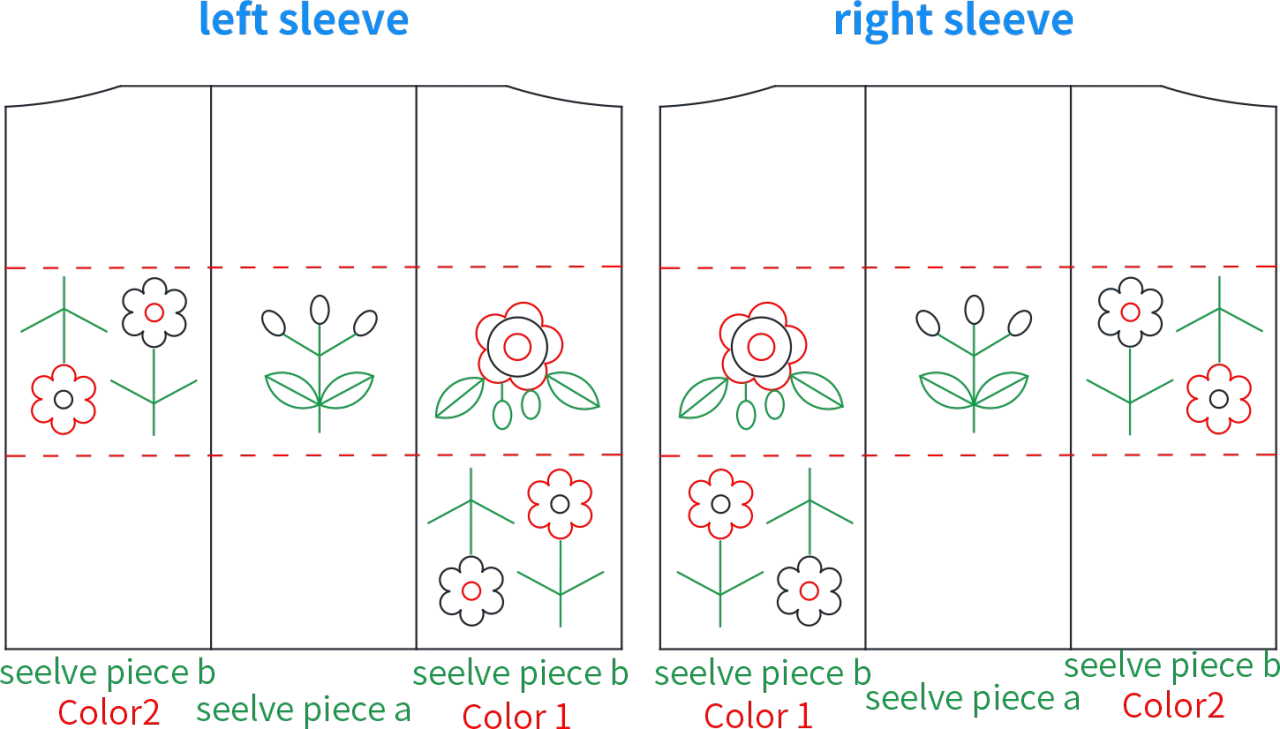
The decoration includes Flower 1, Flower 2, leaves, and beads, as well as stems and small pearls. Overall, it is divided into Cluster 1, Cluster 2, and Cluster 3. Besides these three clusters, some positions require sewing individual flowers. Please refer to the schematic diagram for the detail layout and the video demonstration for the sewing method.
Note: For all cardigan decorations, including flower 1, flower 2, leaves, beads, and stems that need to be embroidered, 2 strands of Susan's Family Alpaca should be held together and treated as one strand for crocheting or embroidering.
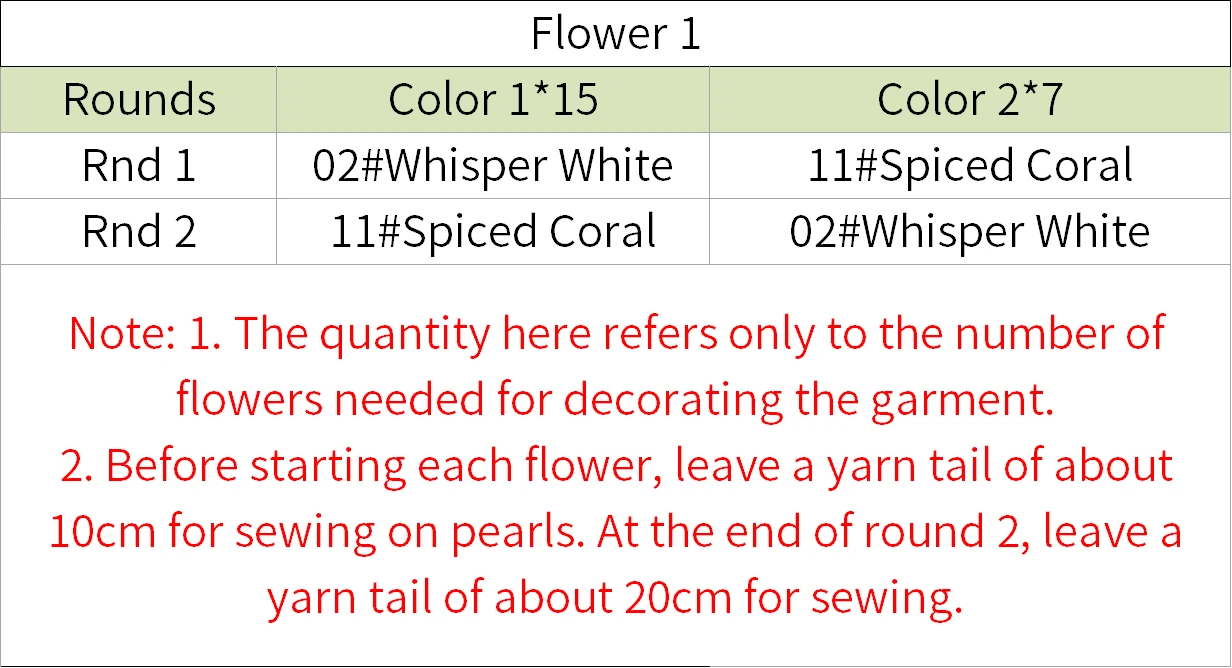
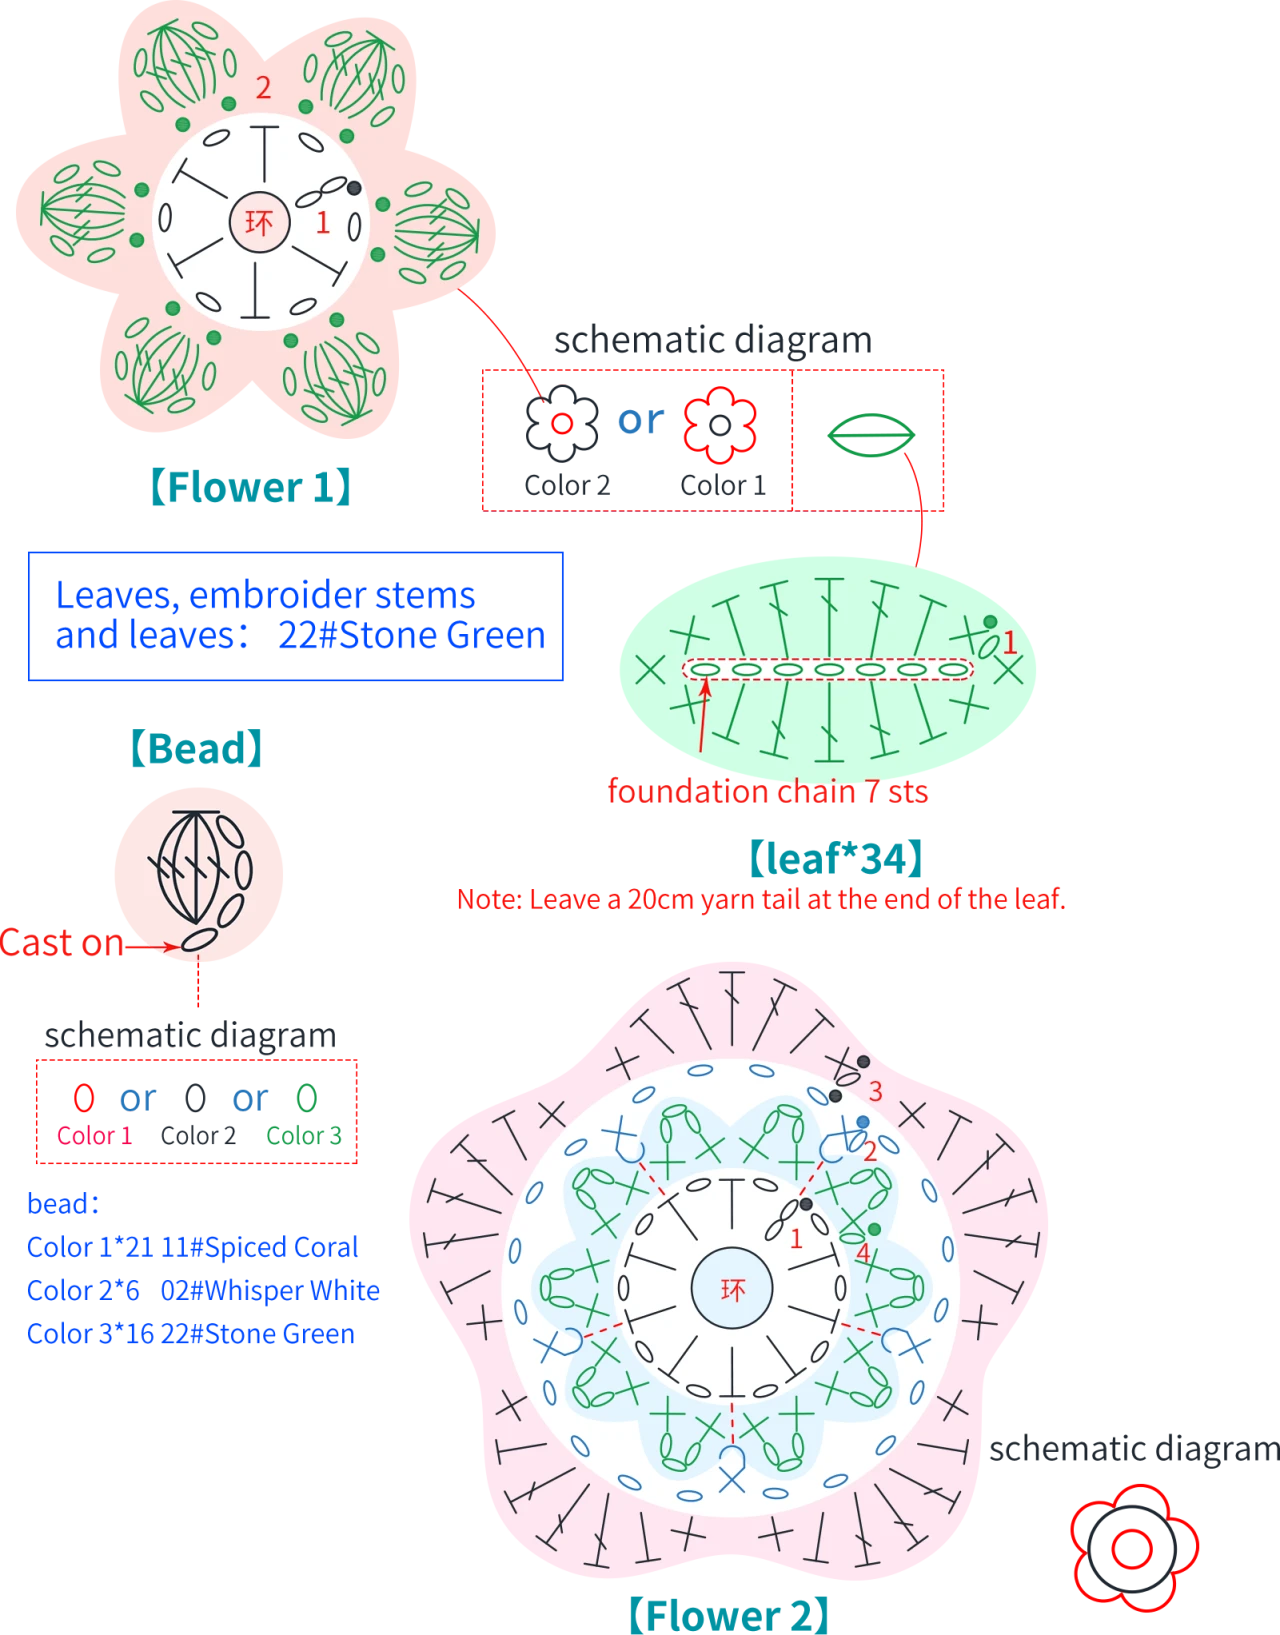
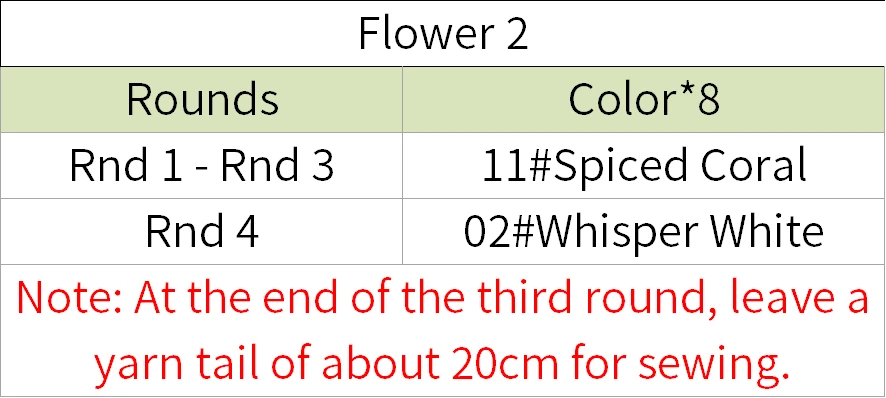
Note: When securing decorations, you can refer to the diagram and first lay out each piece flat in position. Once laid out, the side facing up will be the outside of the garment, and decorations should be attached to this outside. The arrangement and amount of decorations are just for reference and can also be adjusted according to your preference.
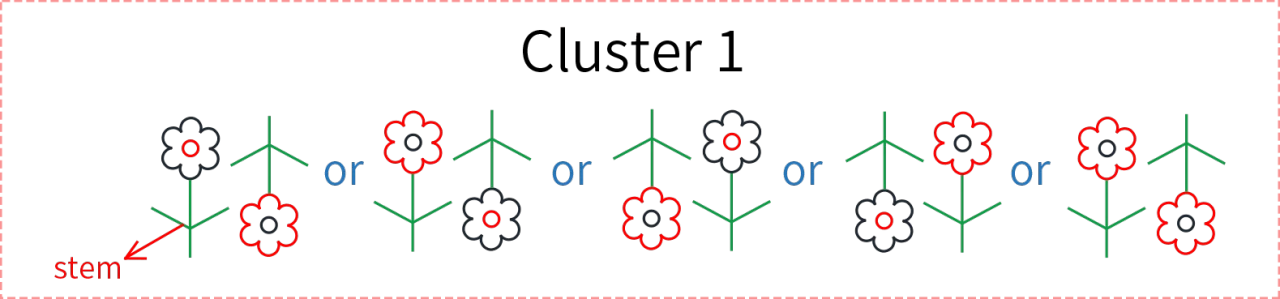
Cluster 1C1 : Includes two Flower 1 and stems with leaves in the opposite direction. First, crochet two Flower 1, then sew on Flower 1 while securing pearls, and finally embroider the stems and leaves.
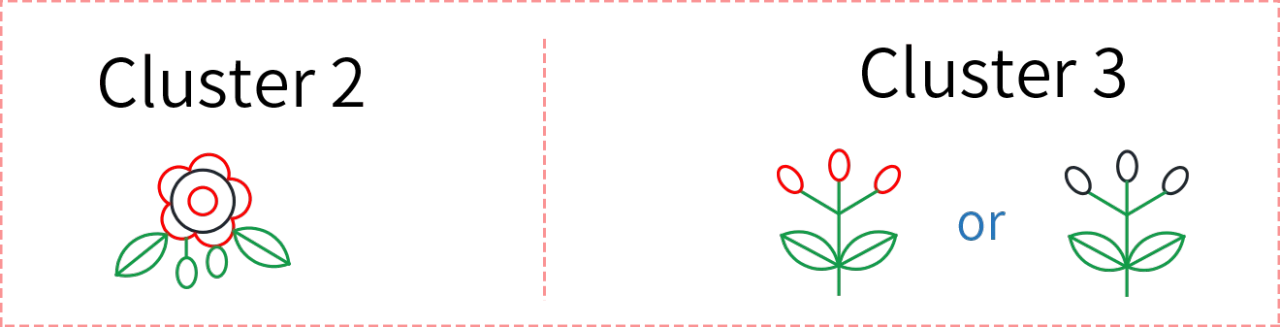
Cluster 2C2: Includes Flower 2, 2 leaves, 2 beads, and a small section of stem. First, crochet the Flower 2, leaves, and beads, then attach and secure them and embroider the stem.
Cluster 3C3: Includes stems and leaves, 2 leaves, and 3 beads. The separate flower includes flower 1 and 1 small pearl.
Part 6 JoinD 00' 12'' (Part 2)
All joining is done using slip stitches. First, join the two back pieces together. Then, join the two side pieces separately on each side. Next, join a front piece on each side separately. After that, join the shoulders together. Once completed, join the three pieces of each sleeve separately to form a tube, and finally attach them to the armhole positions. Please refer to the video demonstration for more details.

Part 7 Hem, Edging and Button 19' 05'' (Part 2)
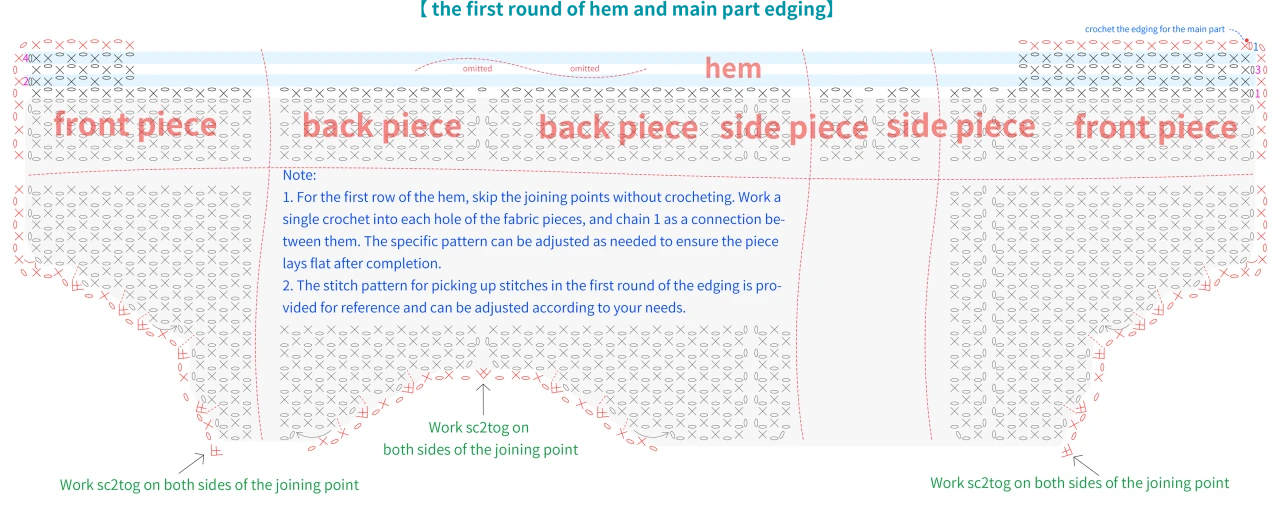
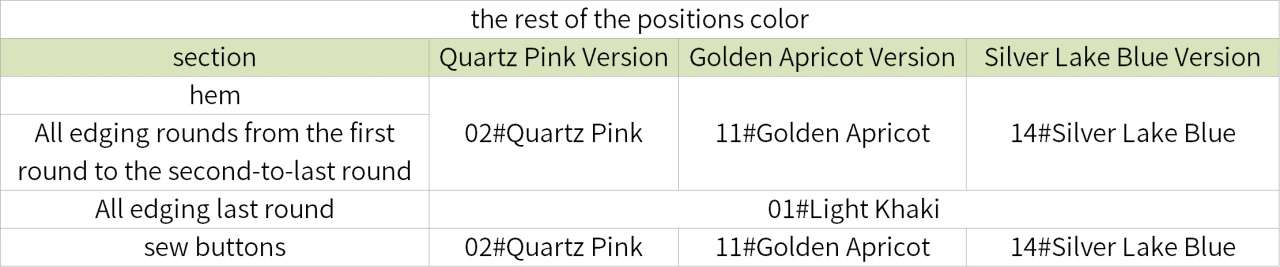
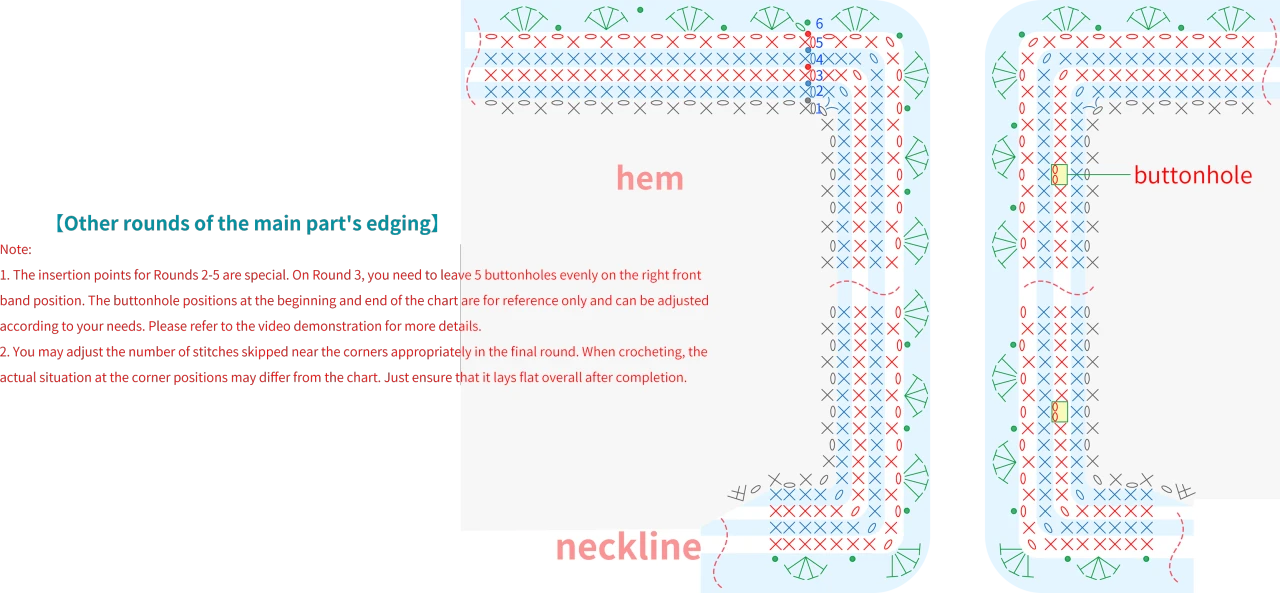
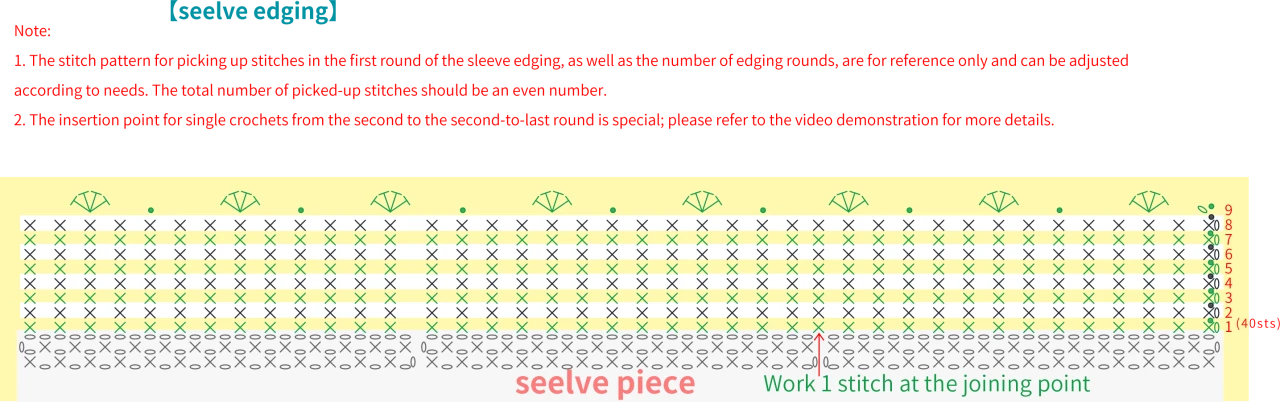
The hemE is worked by crocheting in rows with the corresponding stitch pattern at the bottom of the main piece. Then, work the edgingF continuously along the hem, neckline, and front band positions. Make buttonholes on the right front band. Next, crochet the edging around the cuffs of both sleeves. Finally, sew buttonsG in the corresponding position on the left front band. Please refer to the video demonstration for more details.
Part 8 Hairpin 68' 15'' (Part 2)
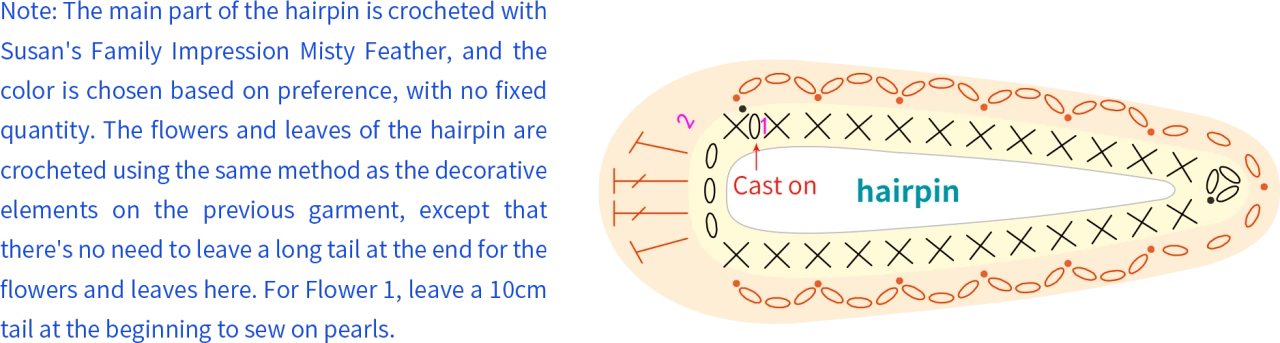
Both the main piece and decorations are worked with a 3.00mm crochet hook.
The hair clip includes the main pieceH1 and decorationsH2. The main part is crocheted in rounds directly onto the teardrop-shaped clip. After completing the main piece, secure the crocheted section to the metal hair clip. Then crochet and attach the decorations, which consist of one flower, one small pearl, and one leaf. Please refer to the video demonstration for more details.
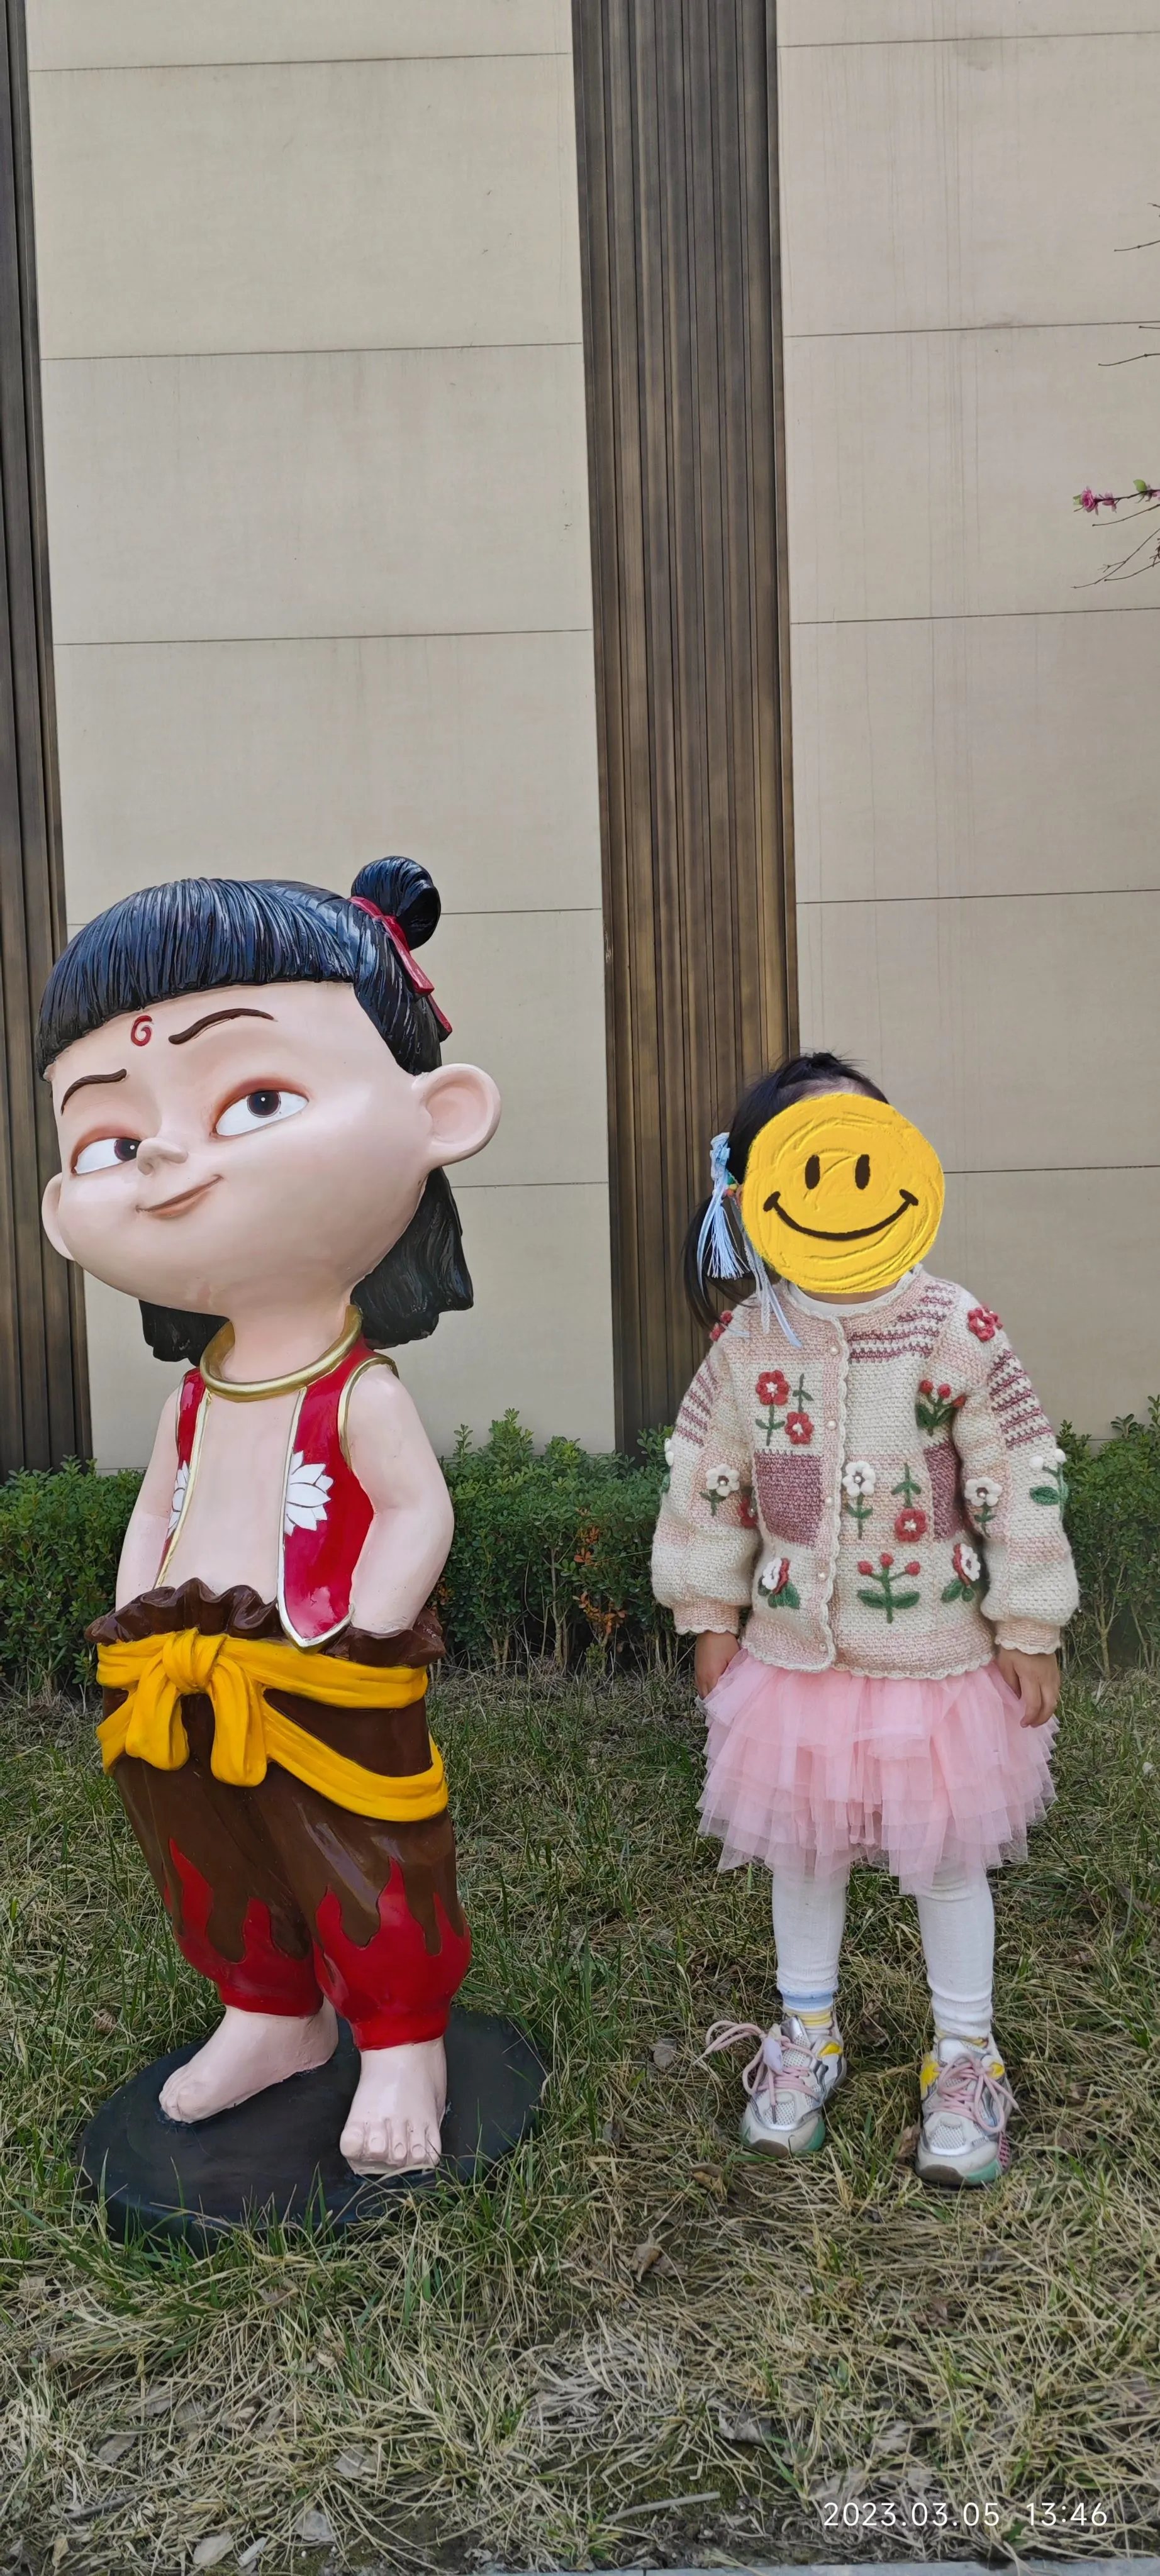
Made by the community