
Accessories / Ornament
Halloween Set
Project preview
See the finished project
Pattern format
Instructions
Watch and follow
Video tutorial
Each set includes a basket, headband, and hair clips. There are 2 styles in total, crocheted in the same way, with only the decorations differing. They are all divided into the main body of pumpkin, hat, the large and small pumpkins, and decorations.
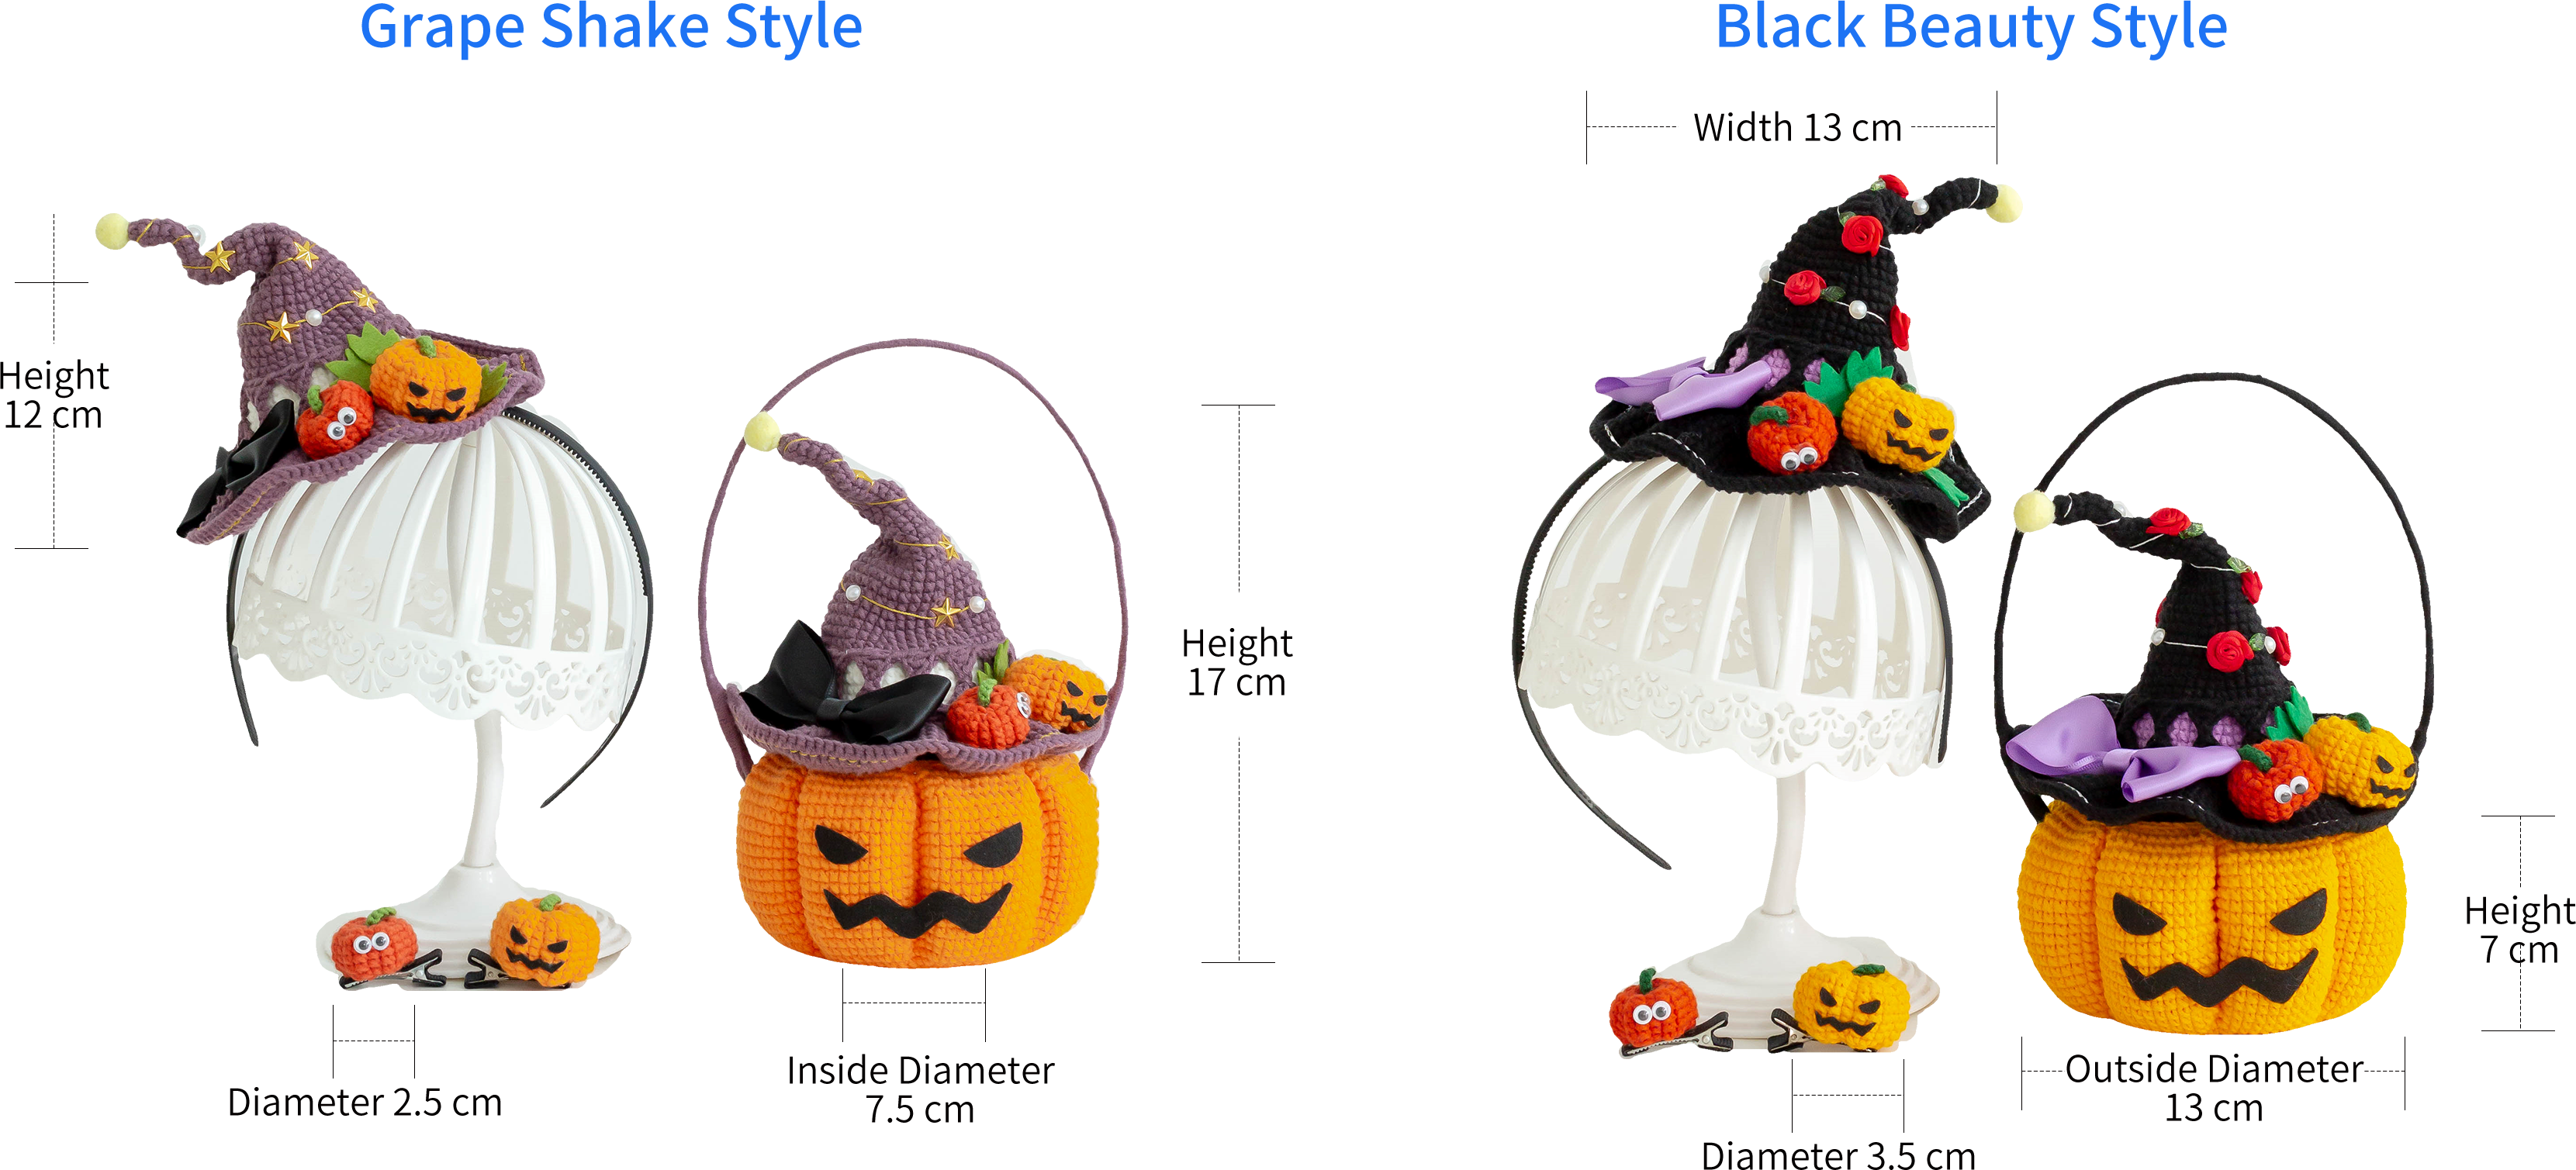
The handcrafted measurements may have an error of 1 to 2 cm. Due to variations in individual tension, the size of the sample is for reference only.
Materials: Susan's Family 4-Ply Combed Cotton & Acrylic Fibre Hand Knitting Yarn
Hook: 2.00 mm crochet hook

ABBREVIATIONS
MRadjustable magic ring
CHchain
SLslip stitch
XX stitch single crochet
Kskip
Fdouble crochet
V = sc2-in-12 single crochets into the same stitch
Thalf double crochet
Etreble crochet
A = sc2togsingle crochet 2 stitches together
BLOback loop only
FLOfront loop only
Dao2start in 2nd CH from the hook
turnturn the piece
Note:
1. This pattern is making in Chinese crochet pattern terms, and the stitch name is written using American terminology. All measurements in charts are in cm.
2. Working in joined round
When crocheting in rounds without further guidance, working in closed rounds, start each round with a set number of beginning chains and close with a slip stitch. The beginning chain preceding a single crochet and the slip stitch used for joining rounds are not included in the total stitches.
Part 1 Main body of the pumpkinA 00' 53''
The main body of pumpkin is crocheted in rounds on the acrylic board, and stuffing is needed during the process. Please refer to the video demonstration for specifics.
Note: Remove the protective film from both sides of the acrylic board before crocheting. When crocheting the inner and outer layers, pay attention not to crochet too tight. When stuffing, make sure it's firm and even.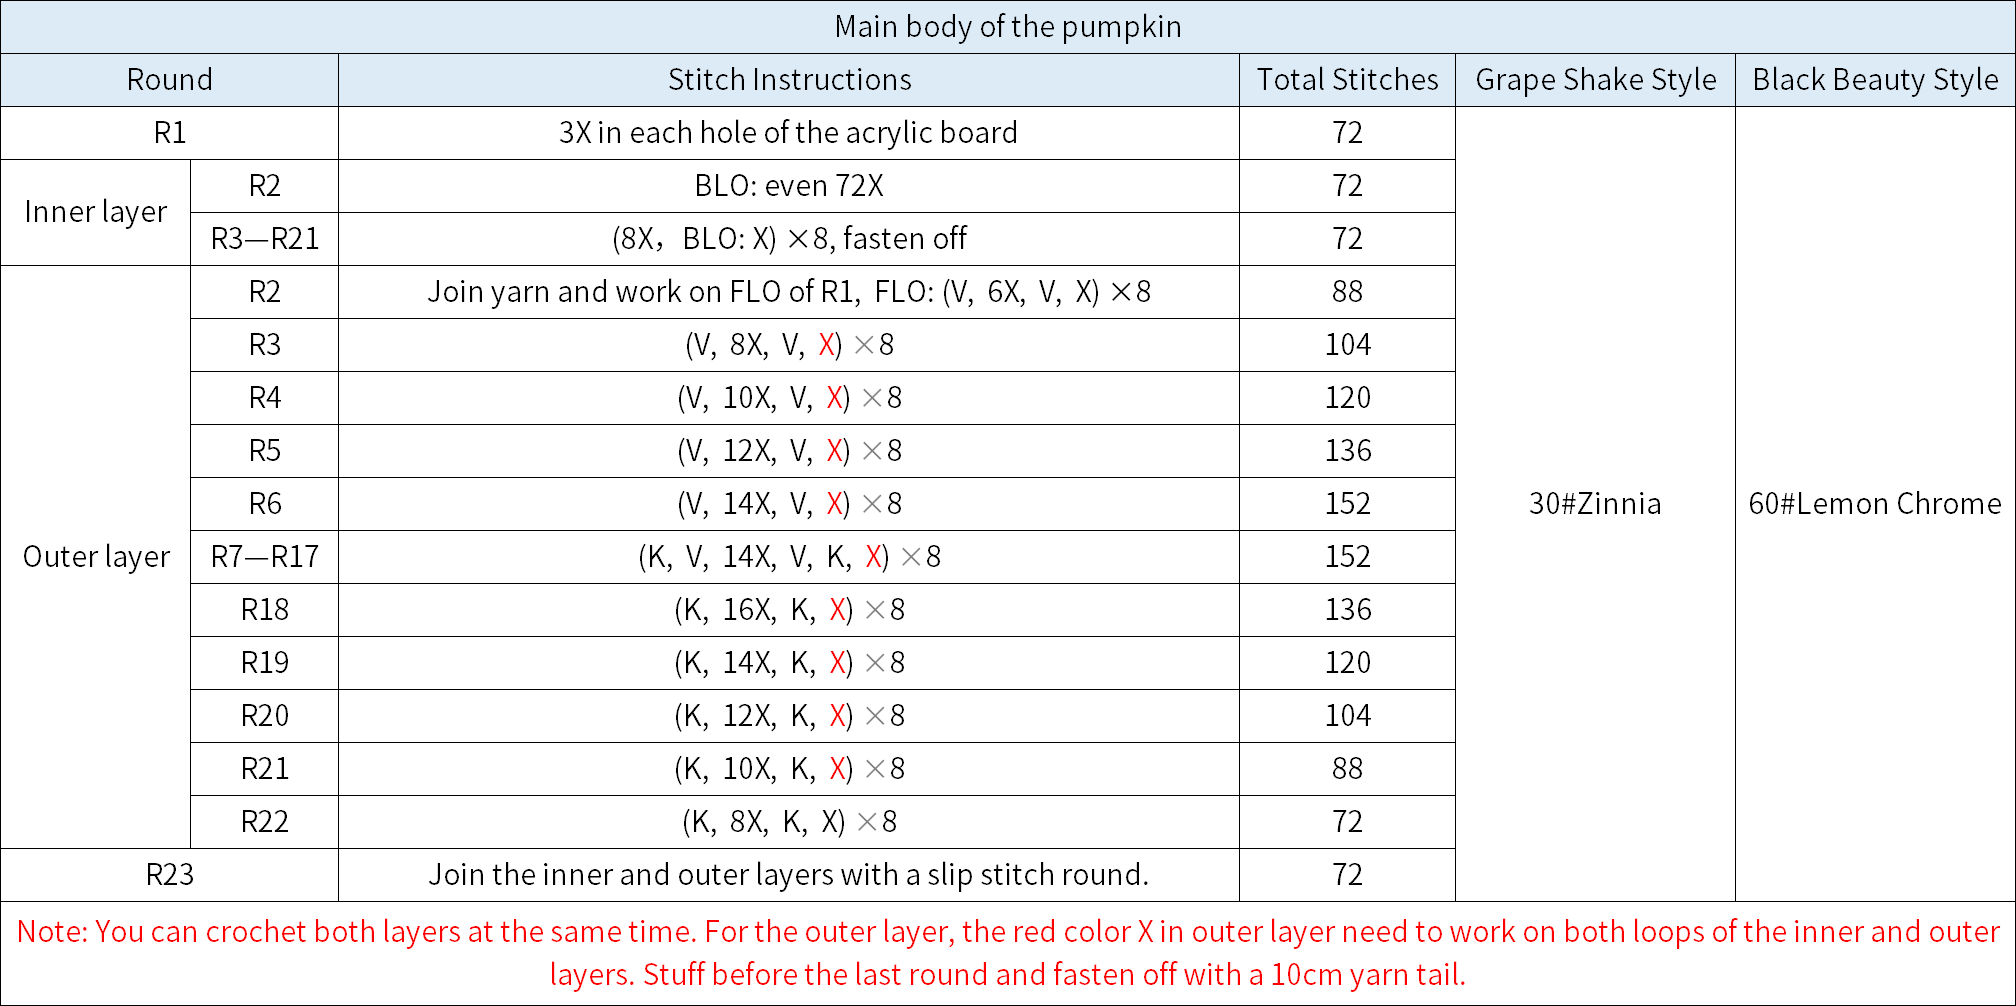
Part 2 HatB 24' 00''
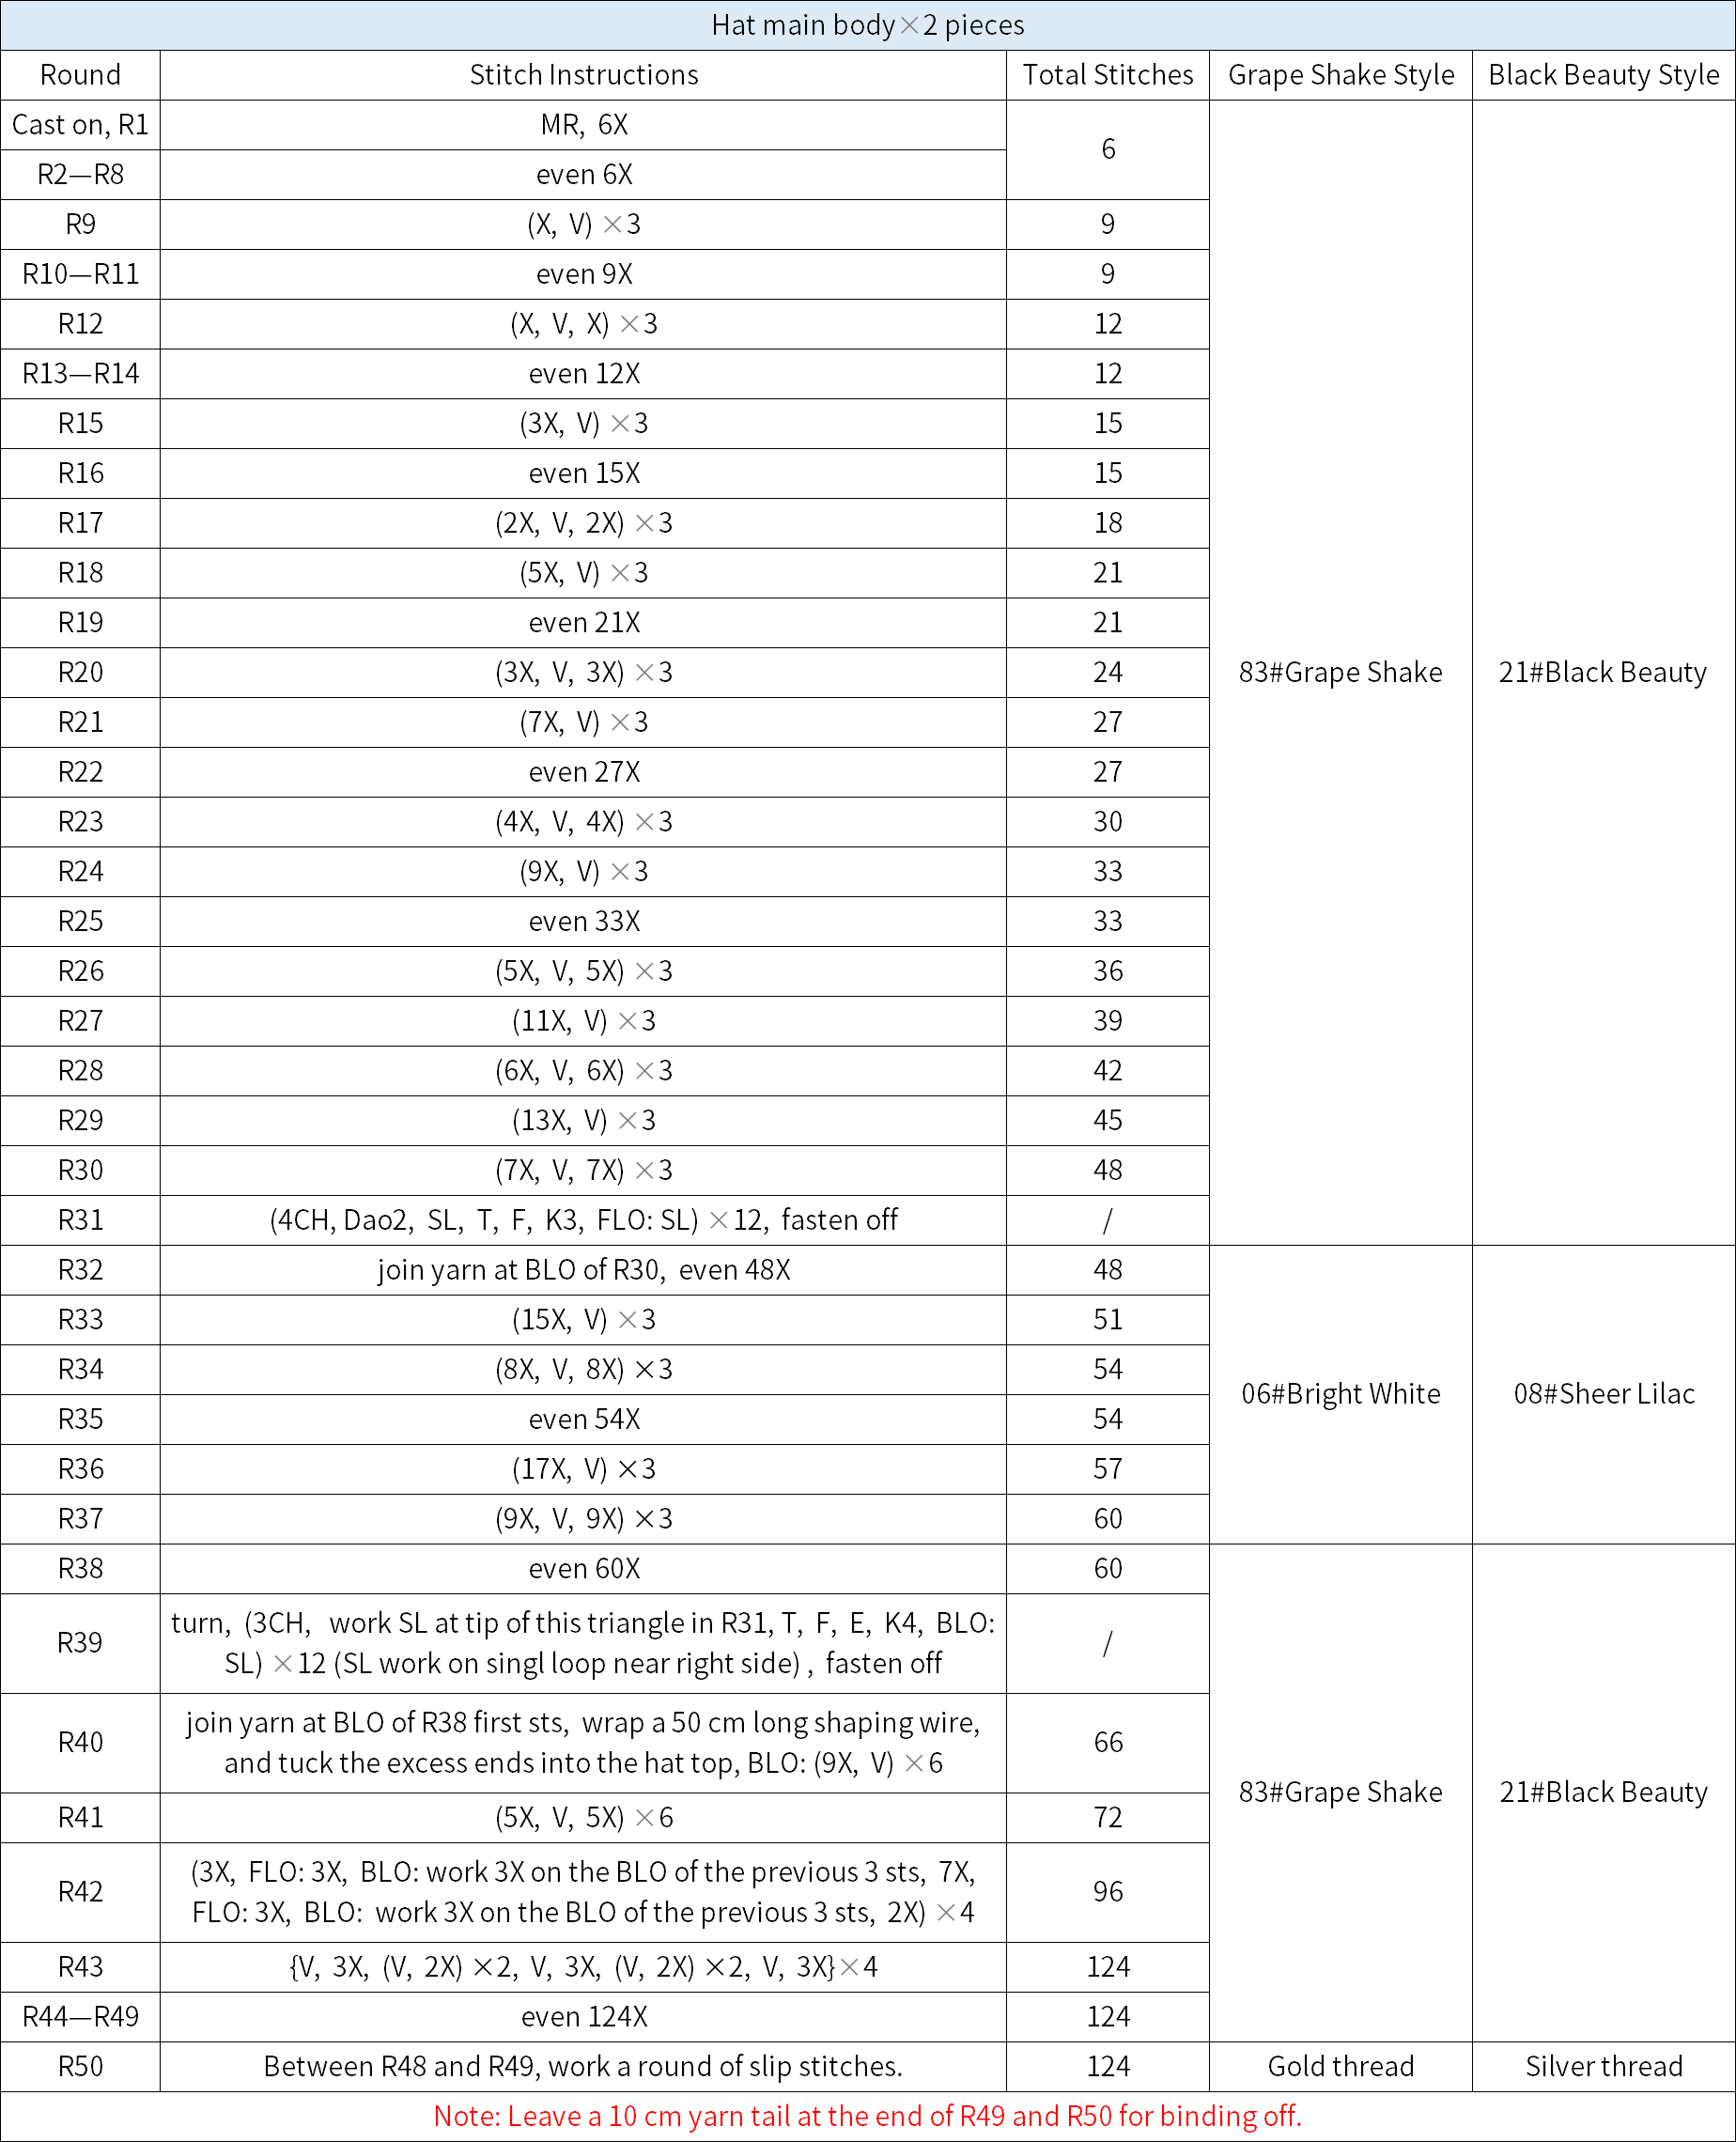
The hat consists of 2 parts, both divided into the main body and the circular bottom. Please refer to the video demonstration for specifics.
Step 1 Main body of hat
The main body of the hat start with the magic ring, crocheting in rounds counterclockwise. During the process, you'll need to switch colors. Please refer to the video demonstration for specifics.
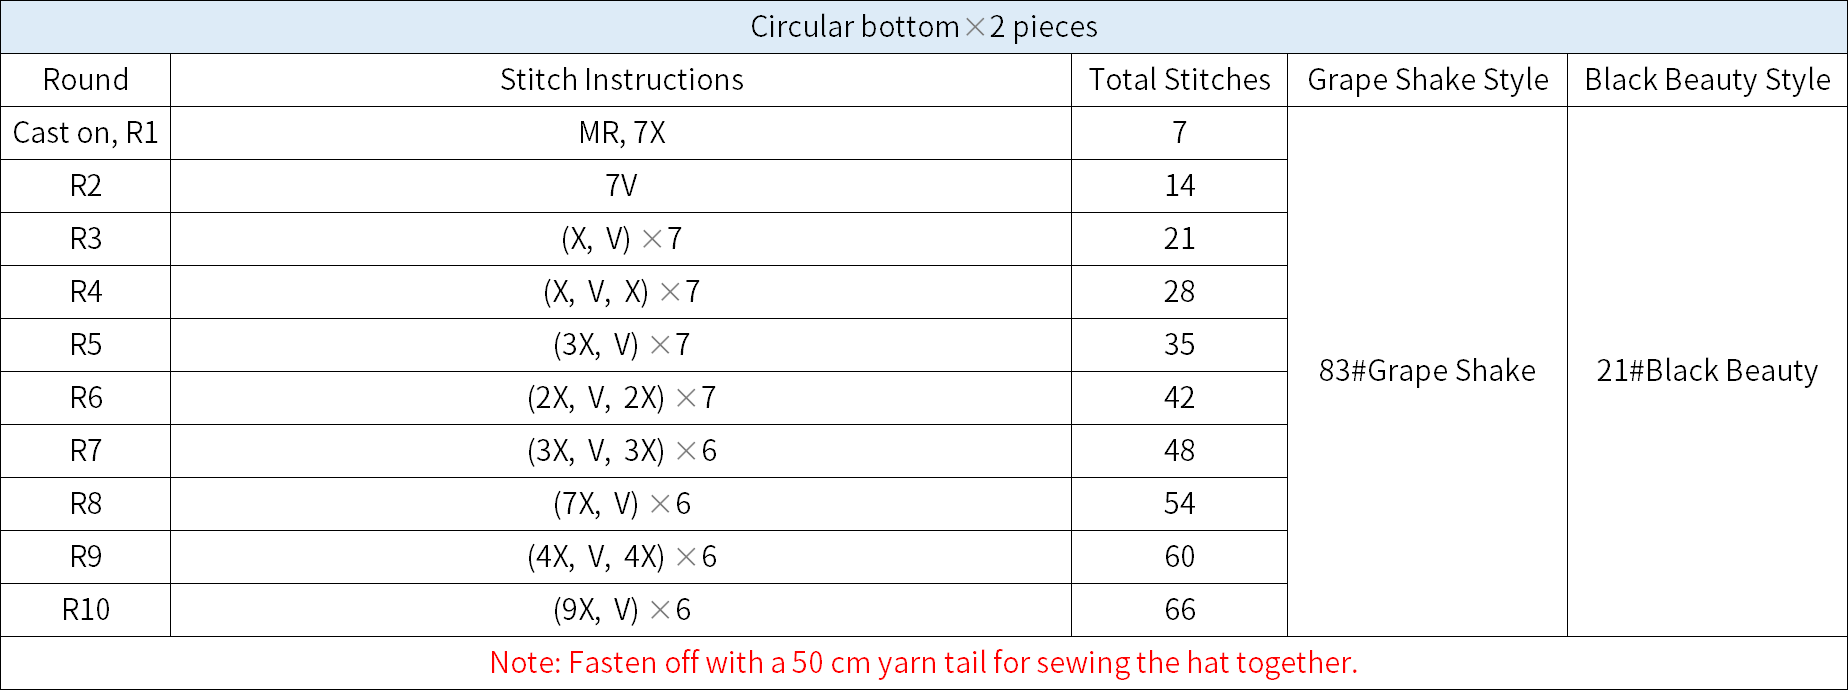
Step 2 Circular bottom
The circular bottom is start with a magic ring, crocheting in rounds counterclockwise. You can compare it with the positioning of the shaping wire on the main part of the hat as you work, trying to keep the sizes as consistent as possible. Finally, sew it onto the bottom of the hat's main body. Please refer to the video demonstration for specifics.
Part 3 Large and small pumpkinsC 49' 21''
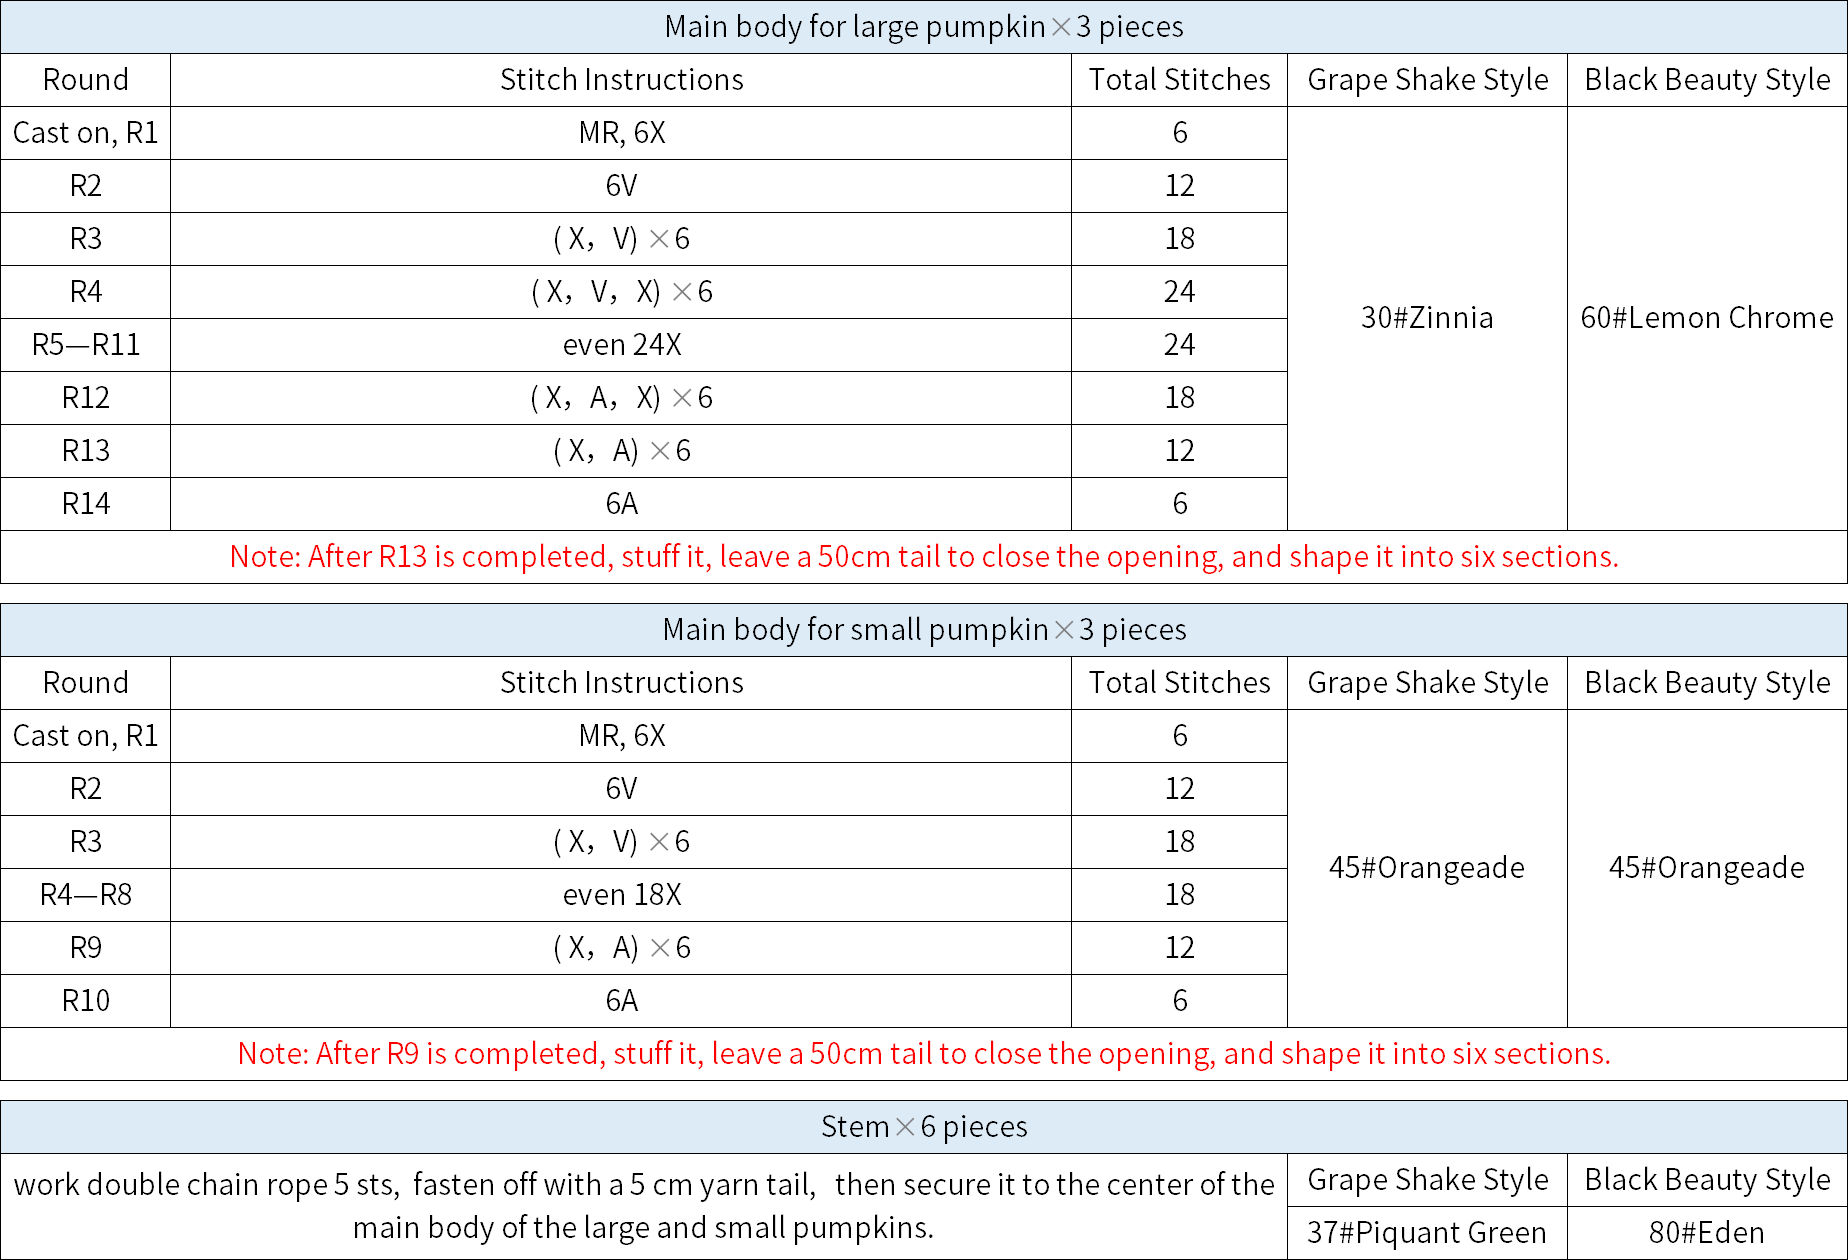
The large and small pumpkins each have 3, all divided into the main body and the stem. The main body of both the large and small pumpkins are start with a magic ring, crocheting in rounds counterclockwise. During the process, stuffing is added, and finally, the shape is formed. Then, crochet the stem and glue it on to secure it in place. Please refer to the video demonstration for specifics.
Part 4 Decorations assemblyD 61' 59''
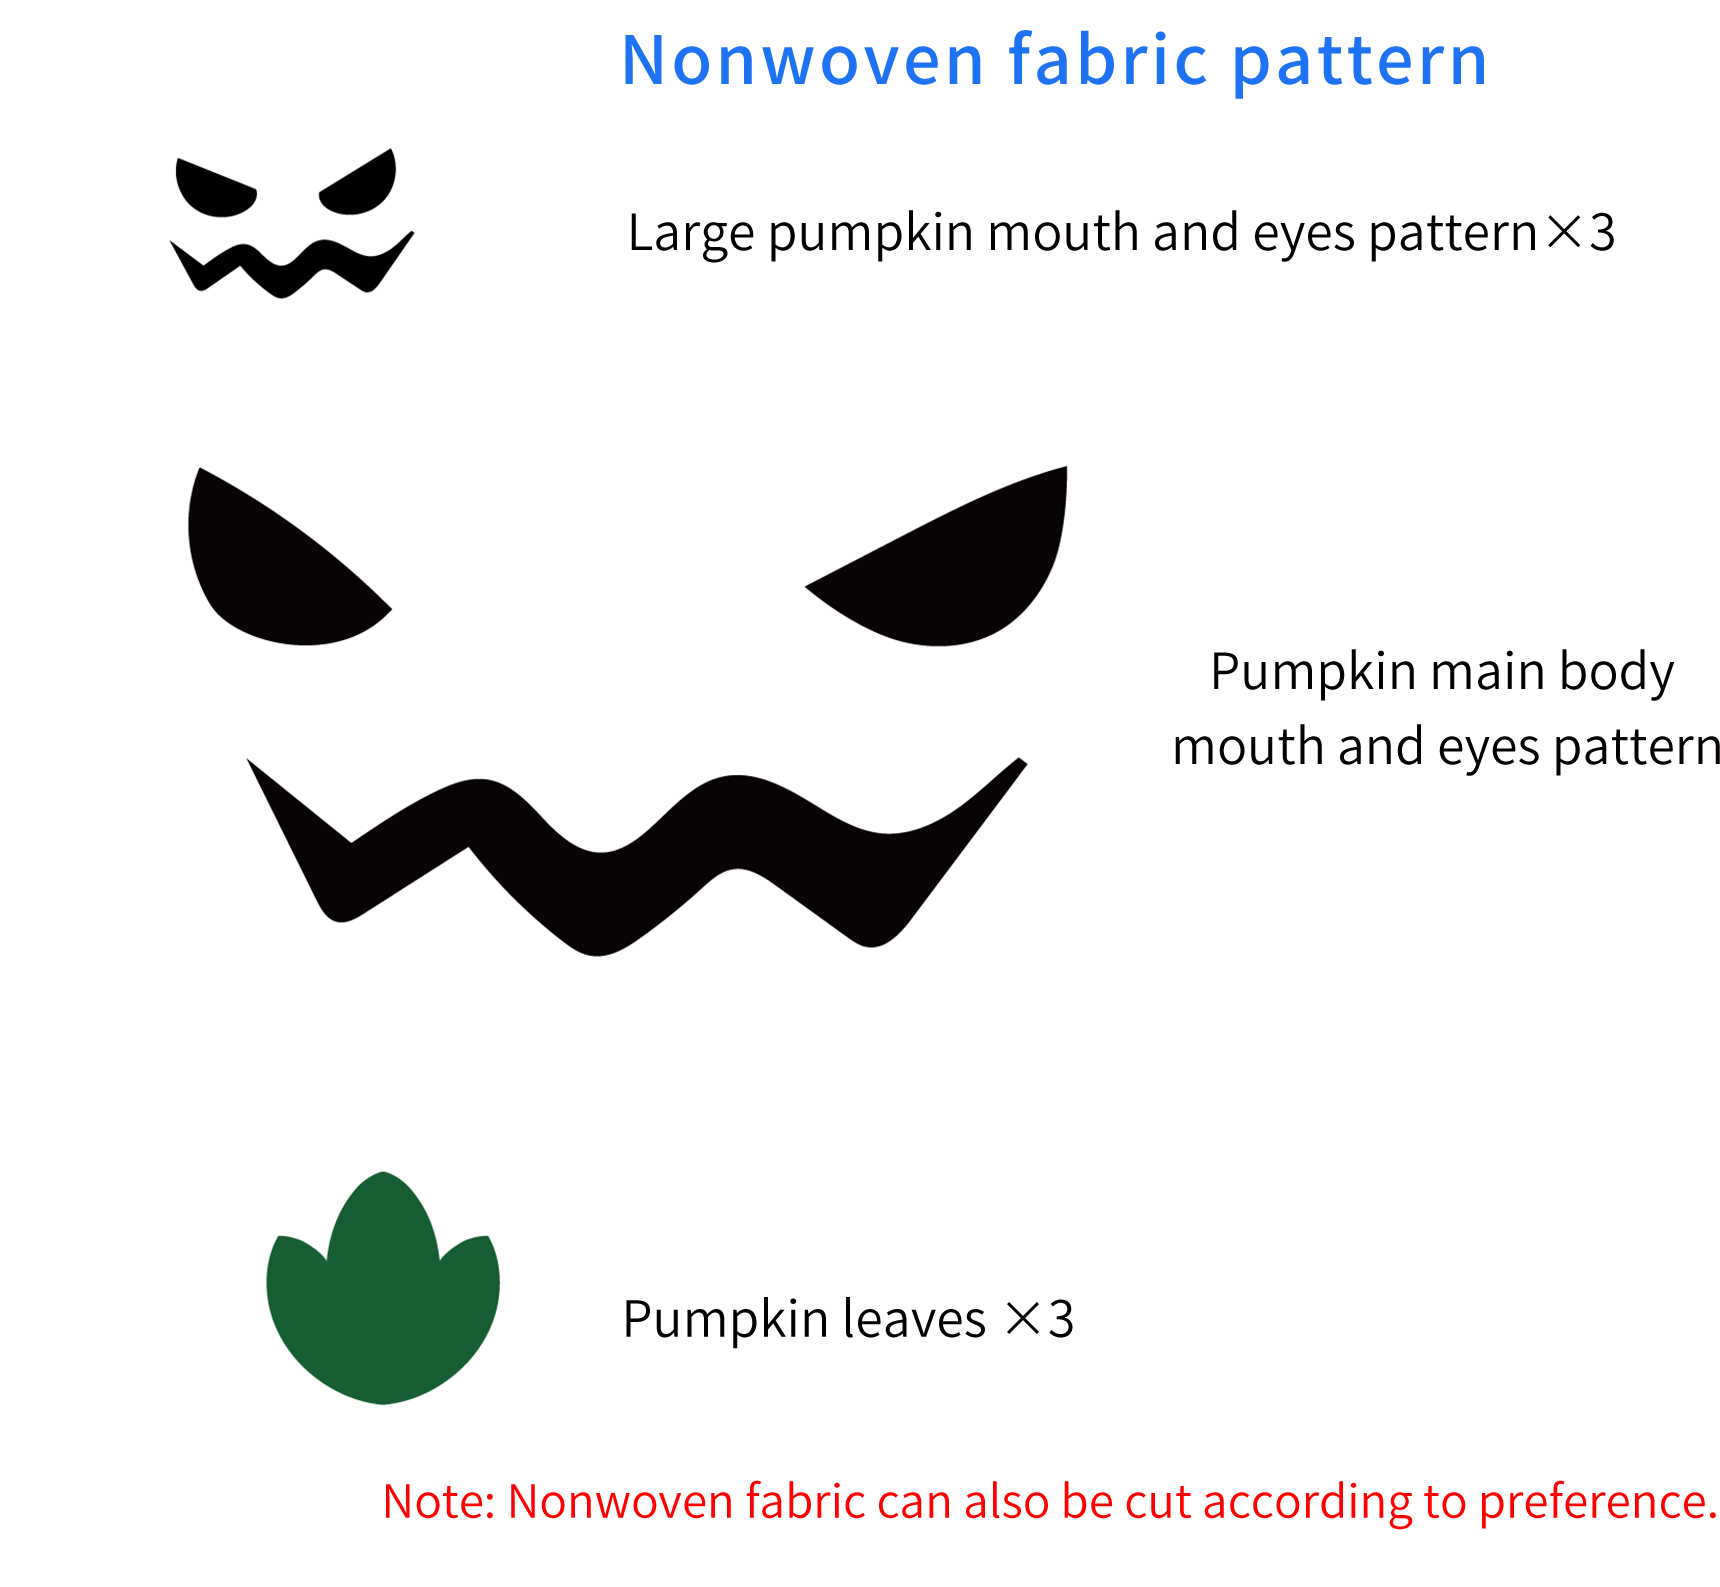
The decorations assembly includes handles, nonwoven fabric, googly eyes, hair clips, hat decorations, and hat attachment. For specifics, please refer to the video demonstration.

Made by the community


