Clothes
Haze Cardigan
Project preview
See the finished project
Pattern format
Instructions
This sweater comes in different sizes, and the method of knitting is almost the same for all sizes. This cardigan consists of the back piece,the front pieces,the hem,the button bands,and the sleeves.First, knit the back and front pieces separately.Then connect them at the corresponding positions.Second,Knit and attach the hem.Next, knit and sew on the bands.Finally sew on the buttons.Finally, make and attach the sleeves.
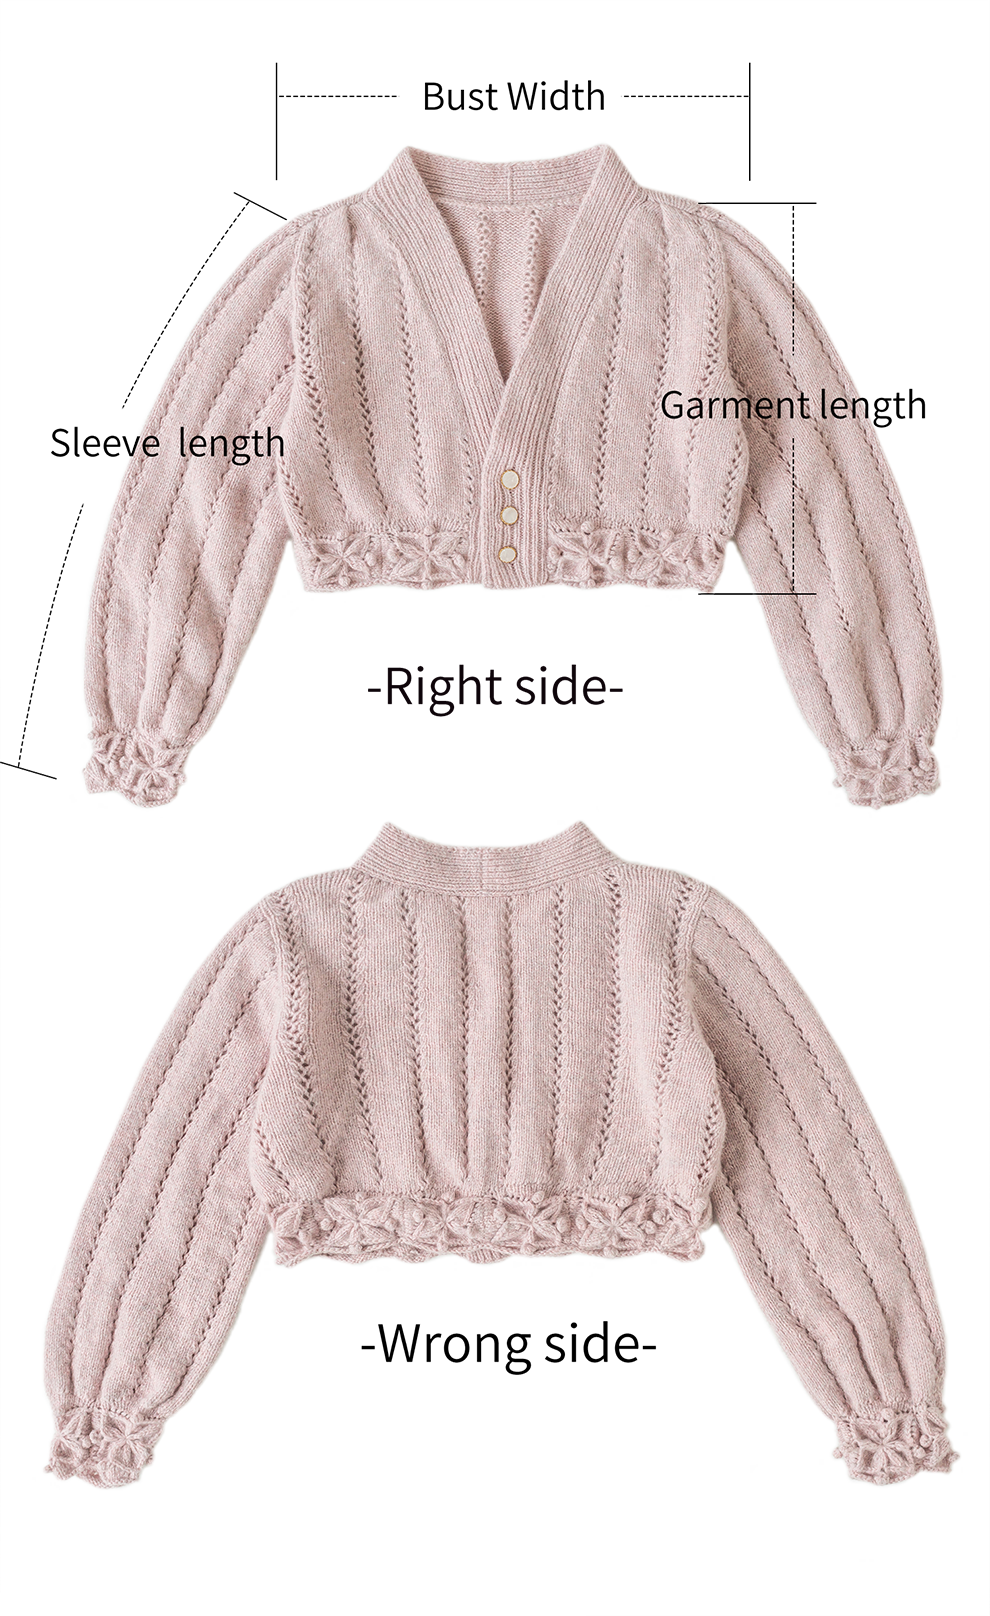
Small size : Bust Width : 51cm,Garment Length : 36cm,Sleeve Length : 57cm
The handcrafted measurements may have an error of 1 to 2 cm. Due to variations in individual tension, the size of the sample is for reference only.
Materials: Susan's Family Lamb Wool Two strands yarn held together
Hook: 2.0 mm crochet hook
Needles: 4.0 mm circular needle, 4.0 mm short straight needle

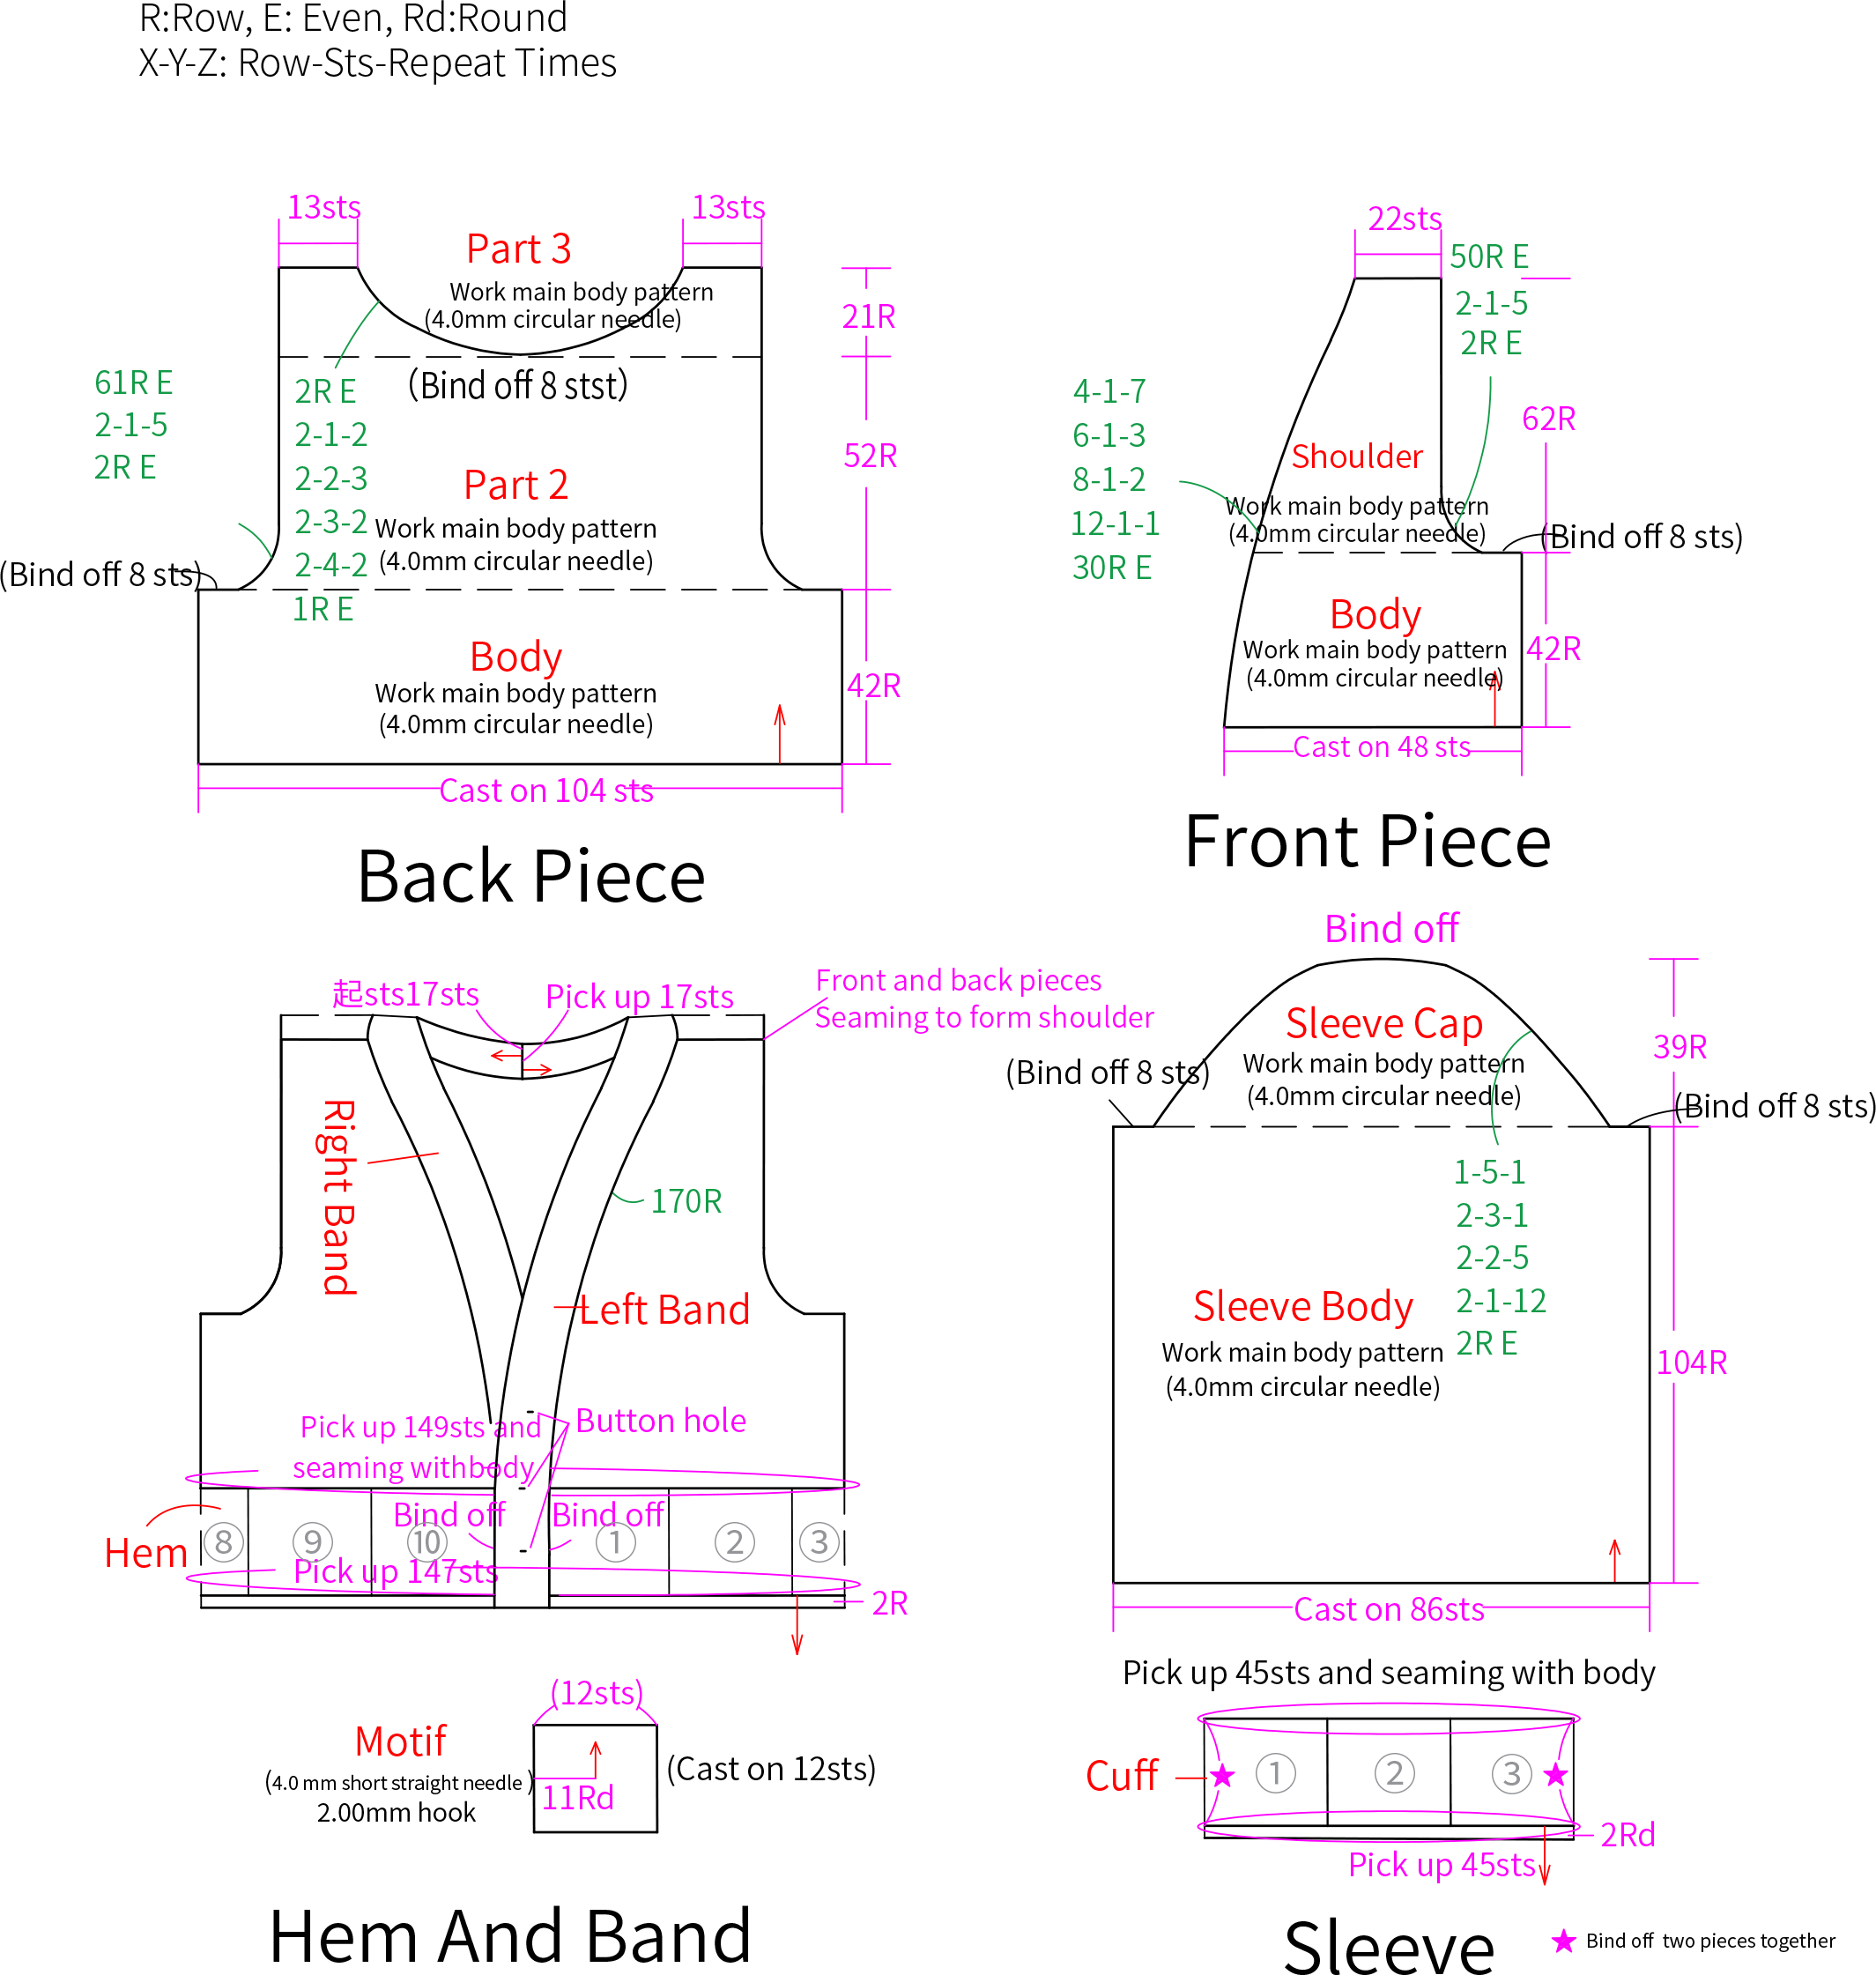
Chart Key






Note:
1, The chart represent the right side of fabric, so check the key to see how to work a certain symbol on the right side and on the wrong side.
2, This pattern is making in Chinese crochet pattern terms, and the stitch name is written using American terminology. All measurements in charts are in cm. 
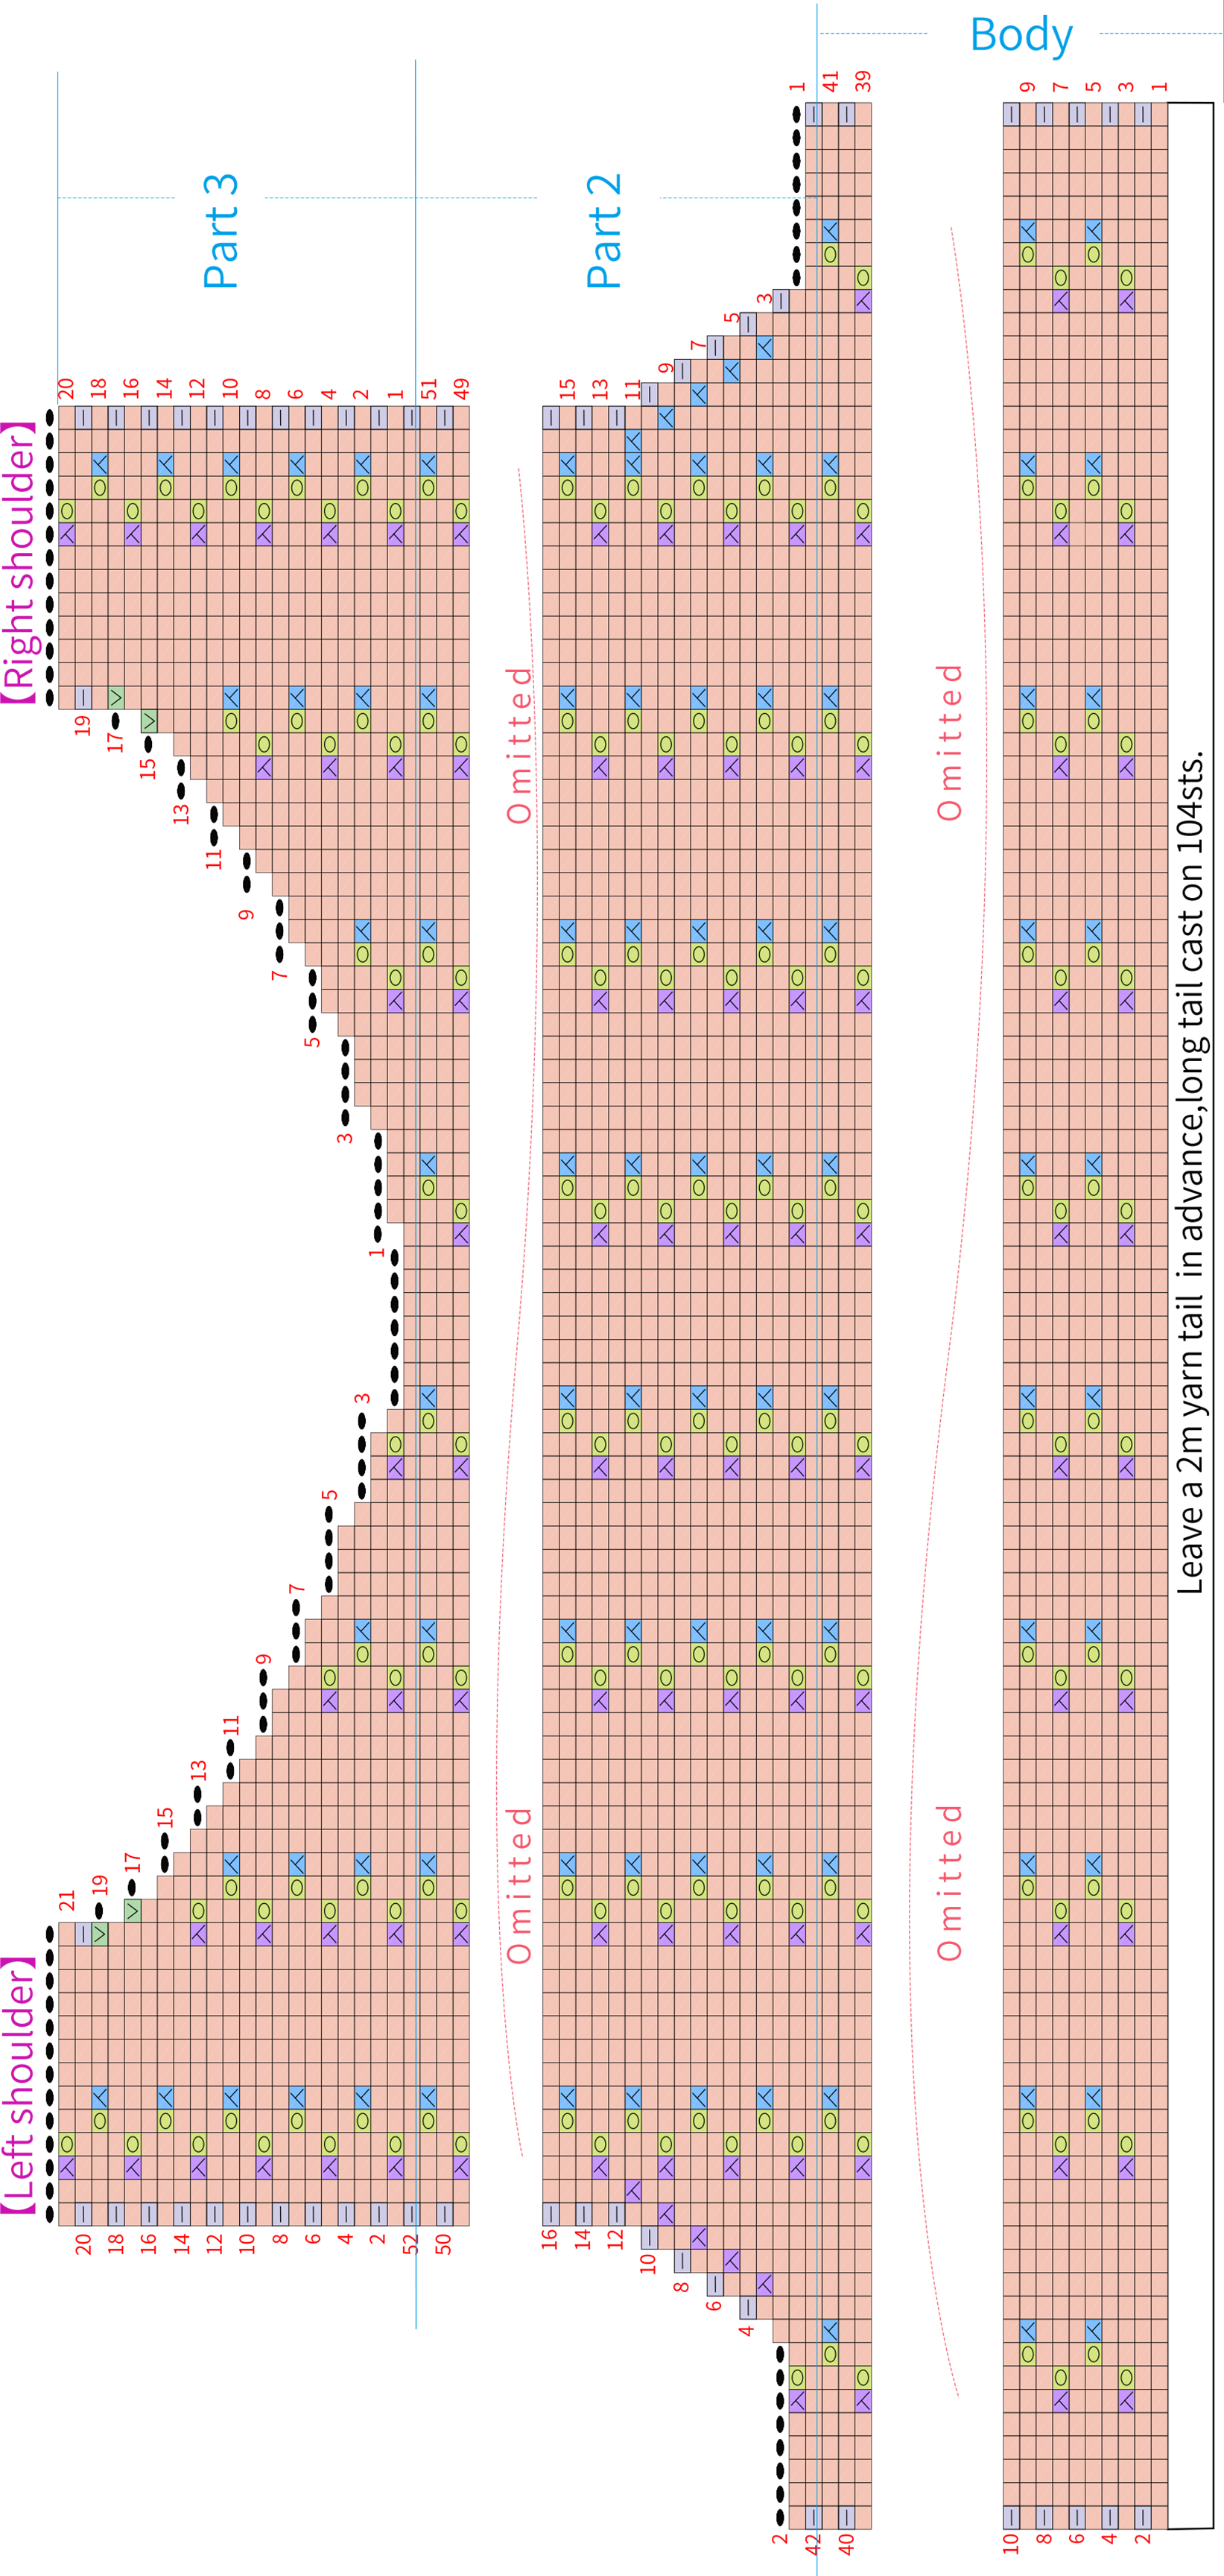
Part 1 Back Piece (4.0 mm circular needle)A 01' 13'' (Part 1)
The back piece is divided into the body, shoulder-part two, and shoulder-part three. The body is worked back and forth in the main pattern. Shoulder-part two continues the main pattern while decreasing and binding off stitches on both sides, then works even to form the armhole. Shoulder-part three is divided into the left shoulder-part and the right shoulder-part, each worked separately to form the neck opening. Please refer to the video demonstration for specifics.
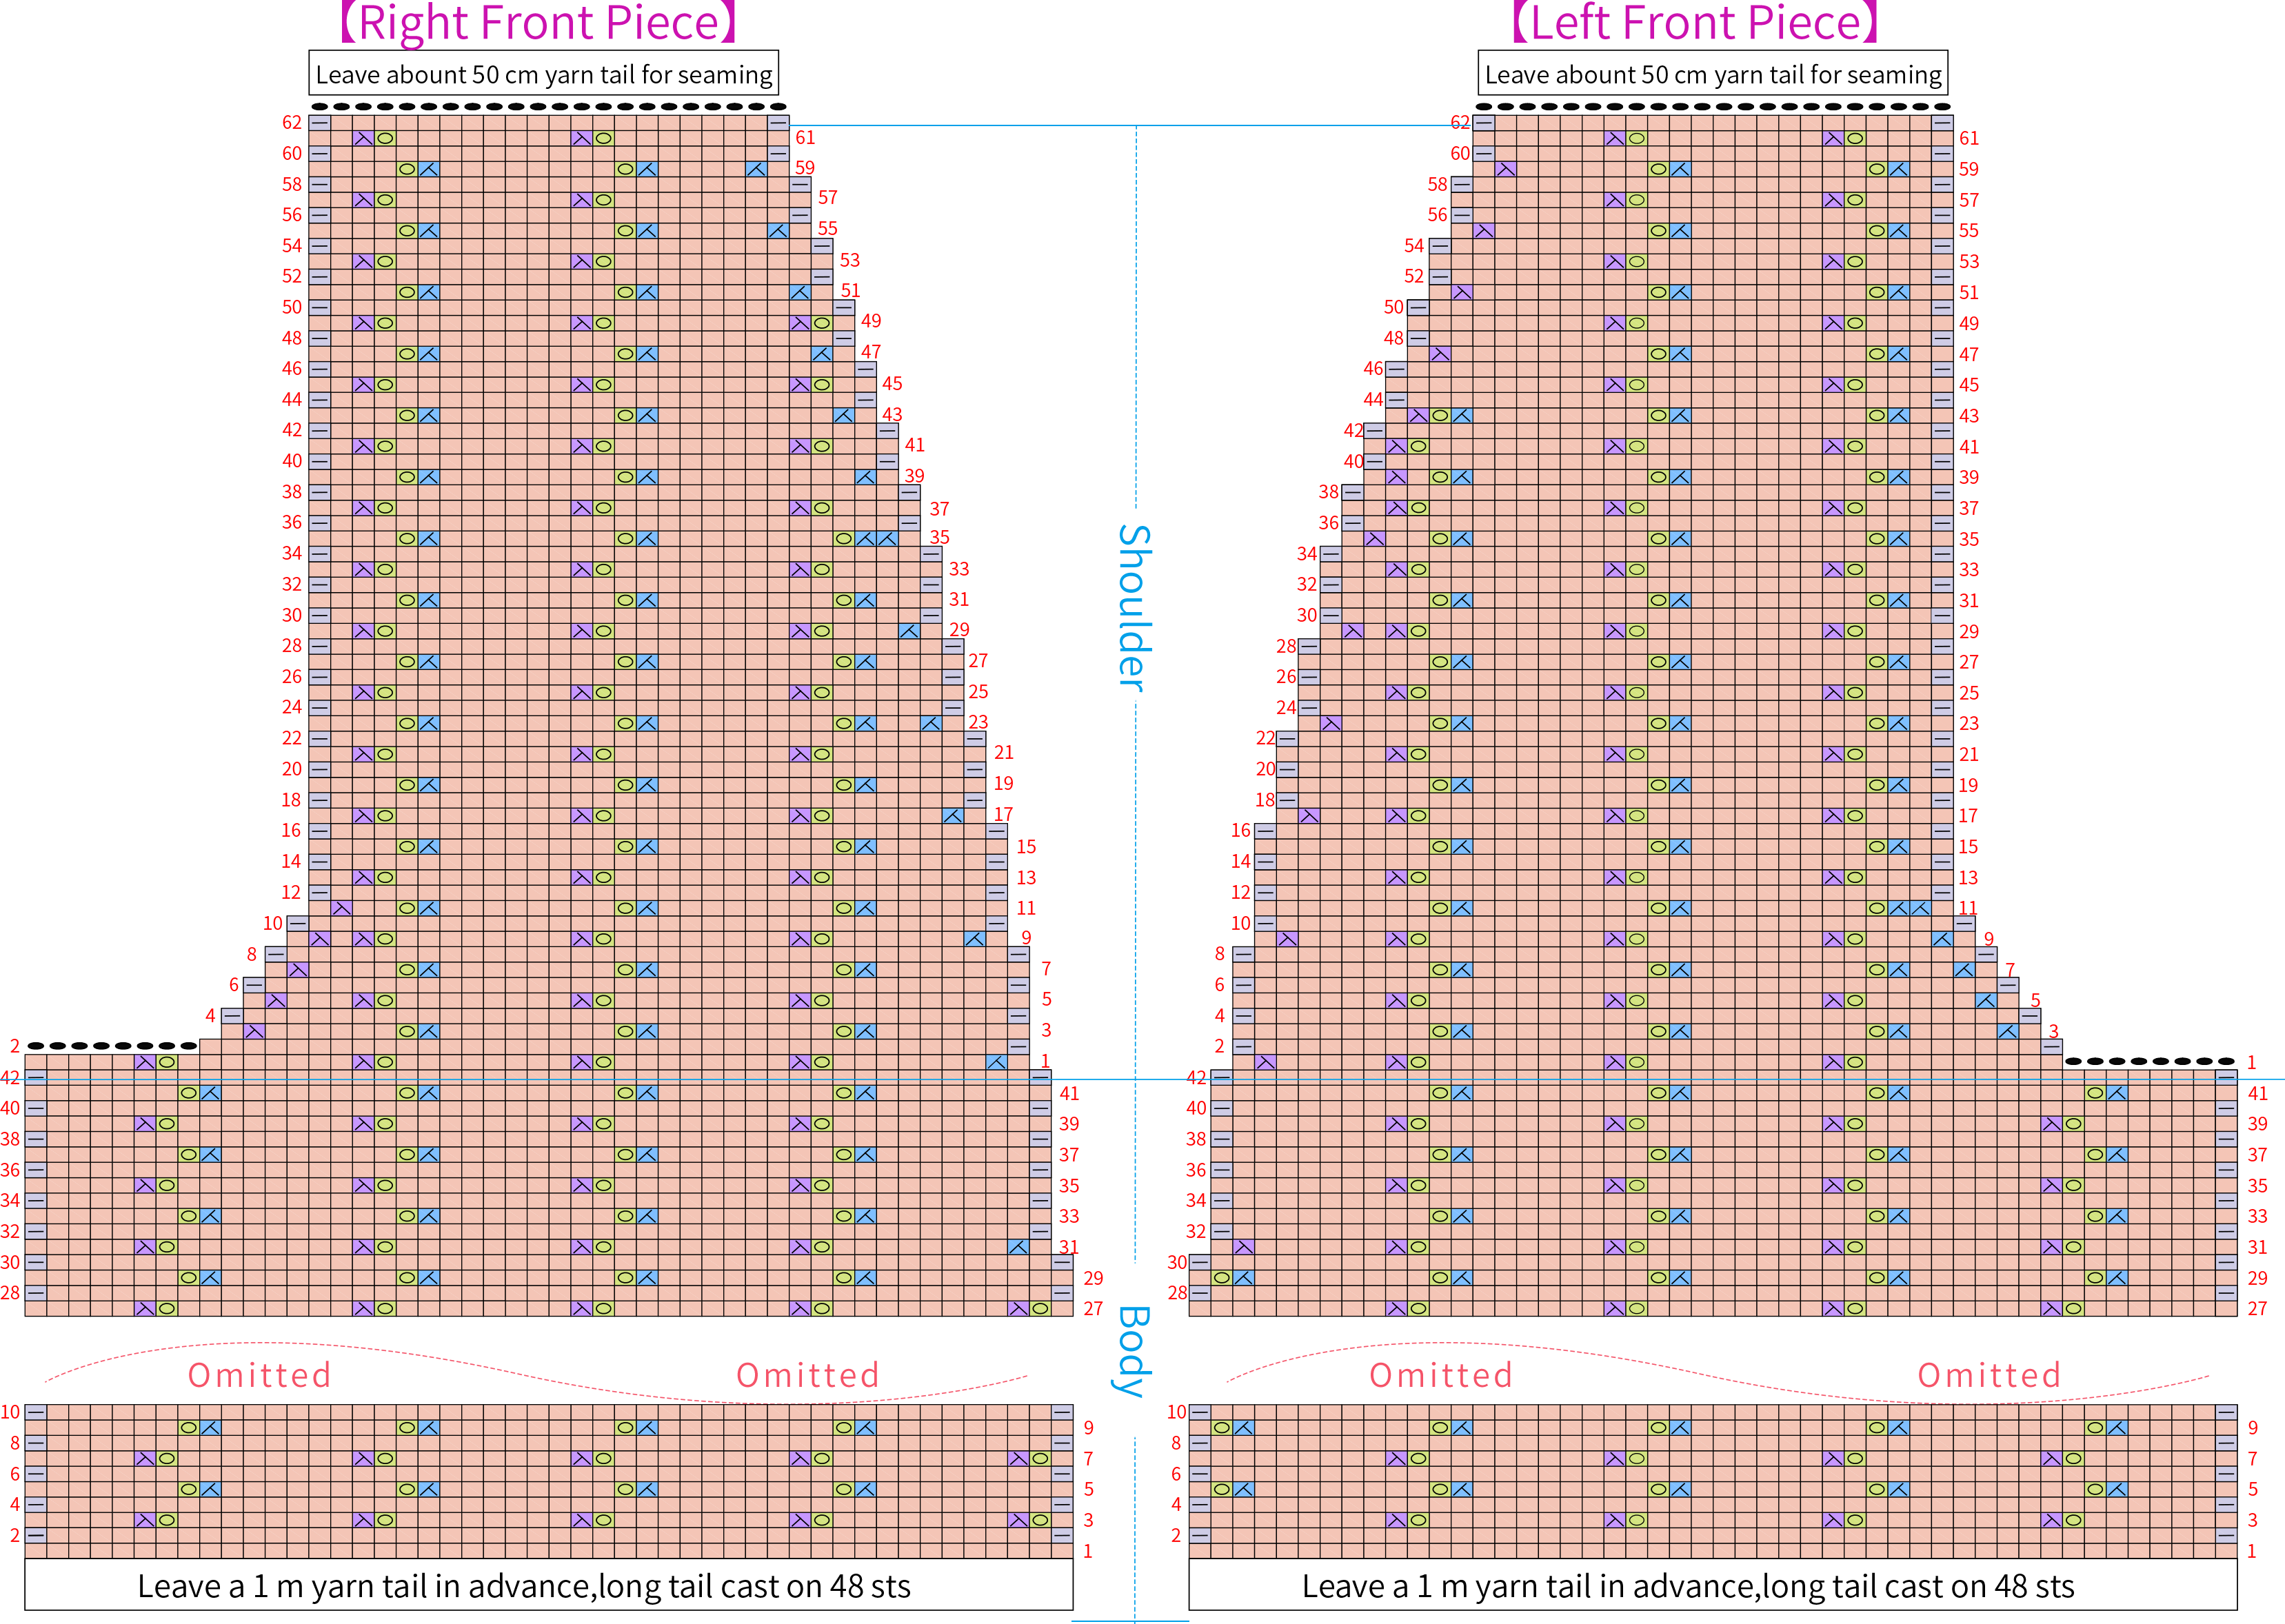
Part 2 Front Piece(4.0mm circular needle)B 35' 12'' (Part 1)
Front Piece divide into left front and right front sections, the knitting method is similar, and the direction is symmetrical. Both are divided into body and shoulder-parts sections. After completing them separately, sew them to the corresponding positions on the back piece (sew with 2 threads combined). Please refer to the video demonstration for more details.
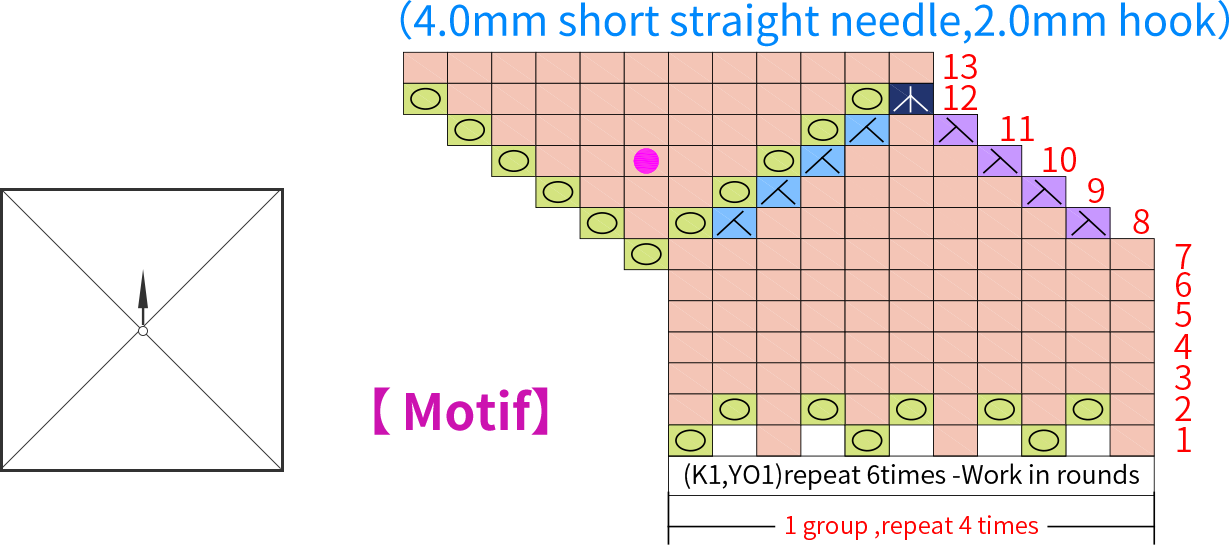
Part 3 Hem (2.0mm hook and 4.0mm short straight needle)C 46' 29'' (Part 1)
The hem is made by joining motifs. The motifs are started with a magic ring and worked outward from the magic ring in the corresponding stitch pattern. During the crocheting process, you will need 5 straight needles. Starting with the second motif, join it to the previous one after completing it. Once all motifs are joined, bind off at the bottom and sides, then sew the motifs to the bottom edge of the garment. Please refer to the video demonstration for more details.

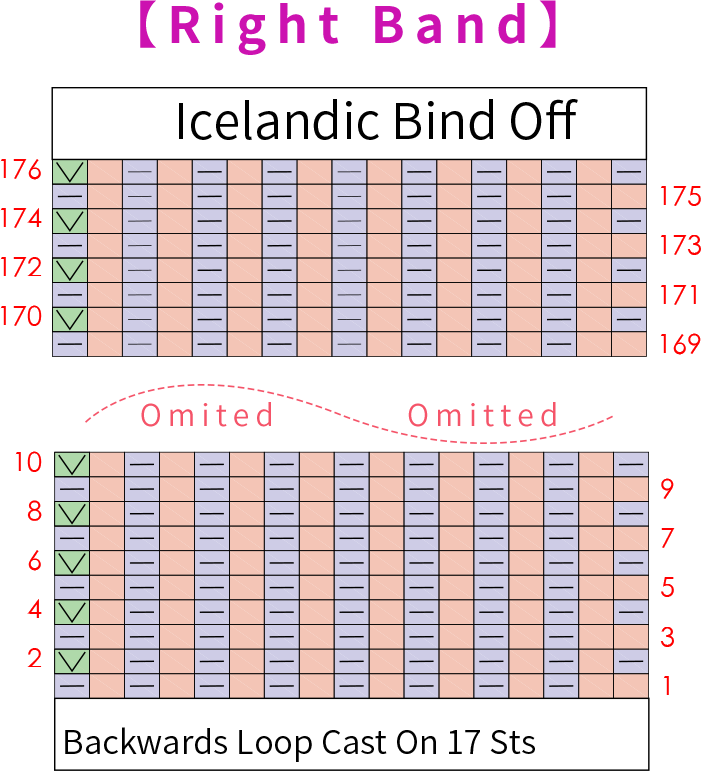
Part 4 Button Bands(4.0mm short straight needle, seaming with two strands of yarn)D 24' 25'' (Part 2)
The button bands are divided into left and right sections. First, use the backwards loop cast on method to work the right button band separately. Then, pick up stitches from the starting point of the right button band and work the left button band symmetrically, leaving buttonholes as you go. After completing everything, sew the button bands to the corresponding positions on the front and back pieces of the garment. Also, sew on the buttons to the right button band. Please refer to the video demonstration for details.
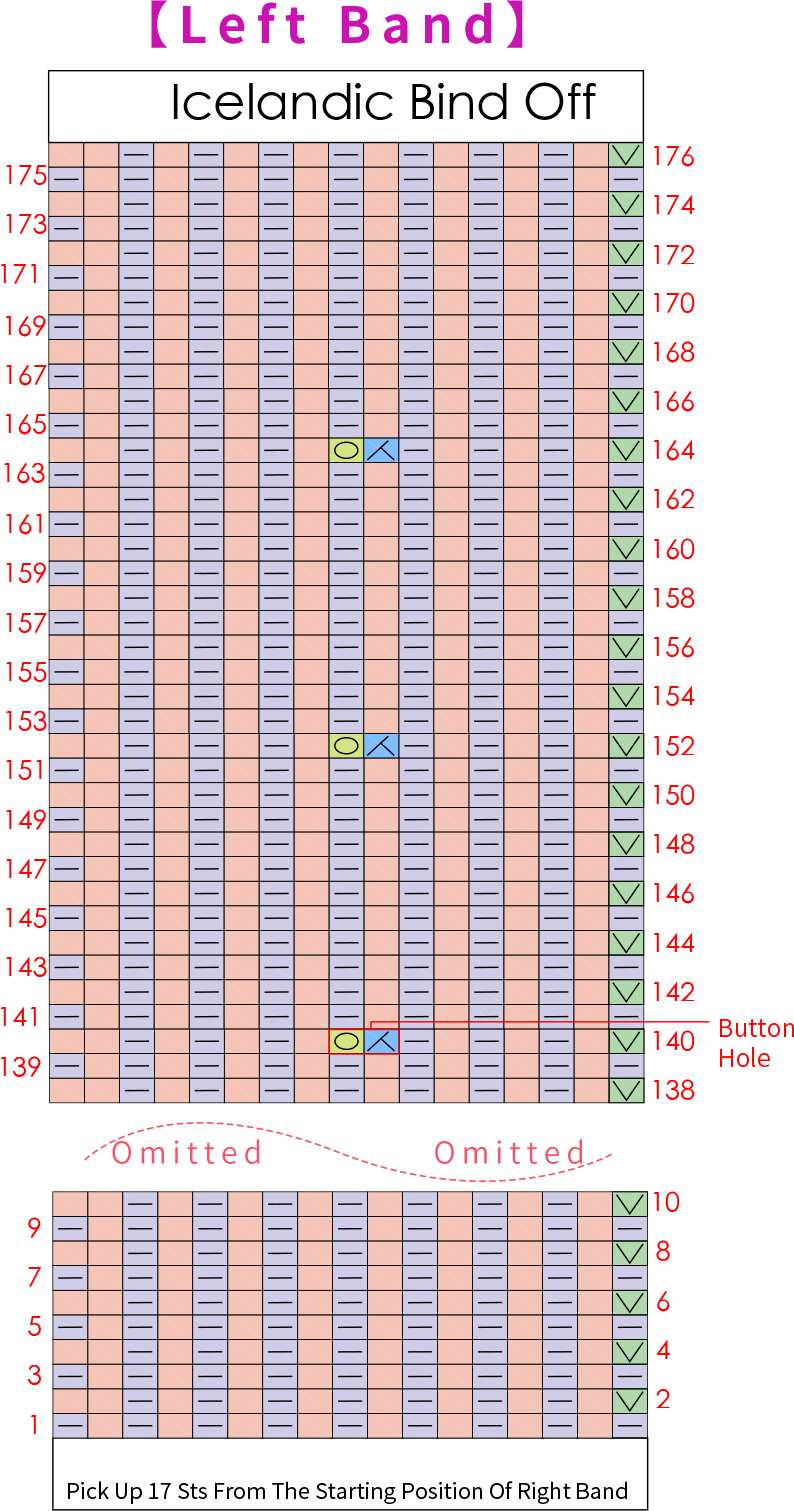
Note: The row count for the left or right front band is for reference only; the specific length should be half of the total front band length.
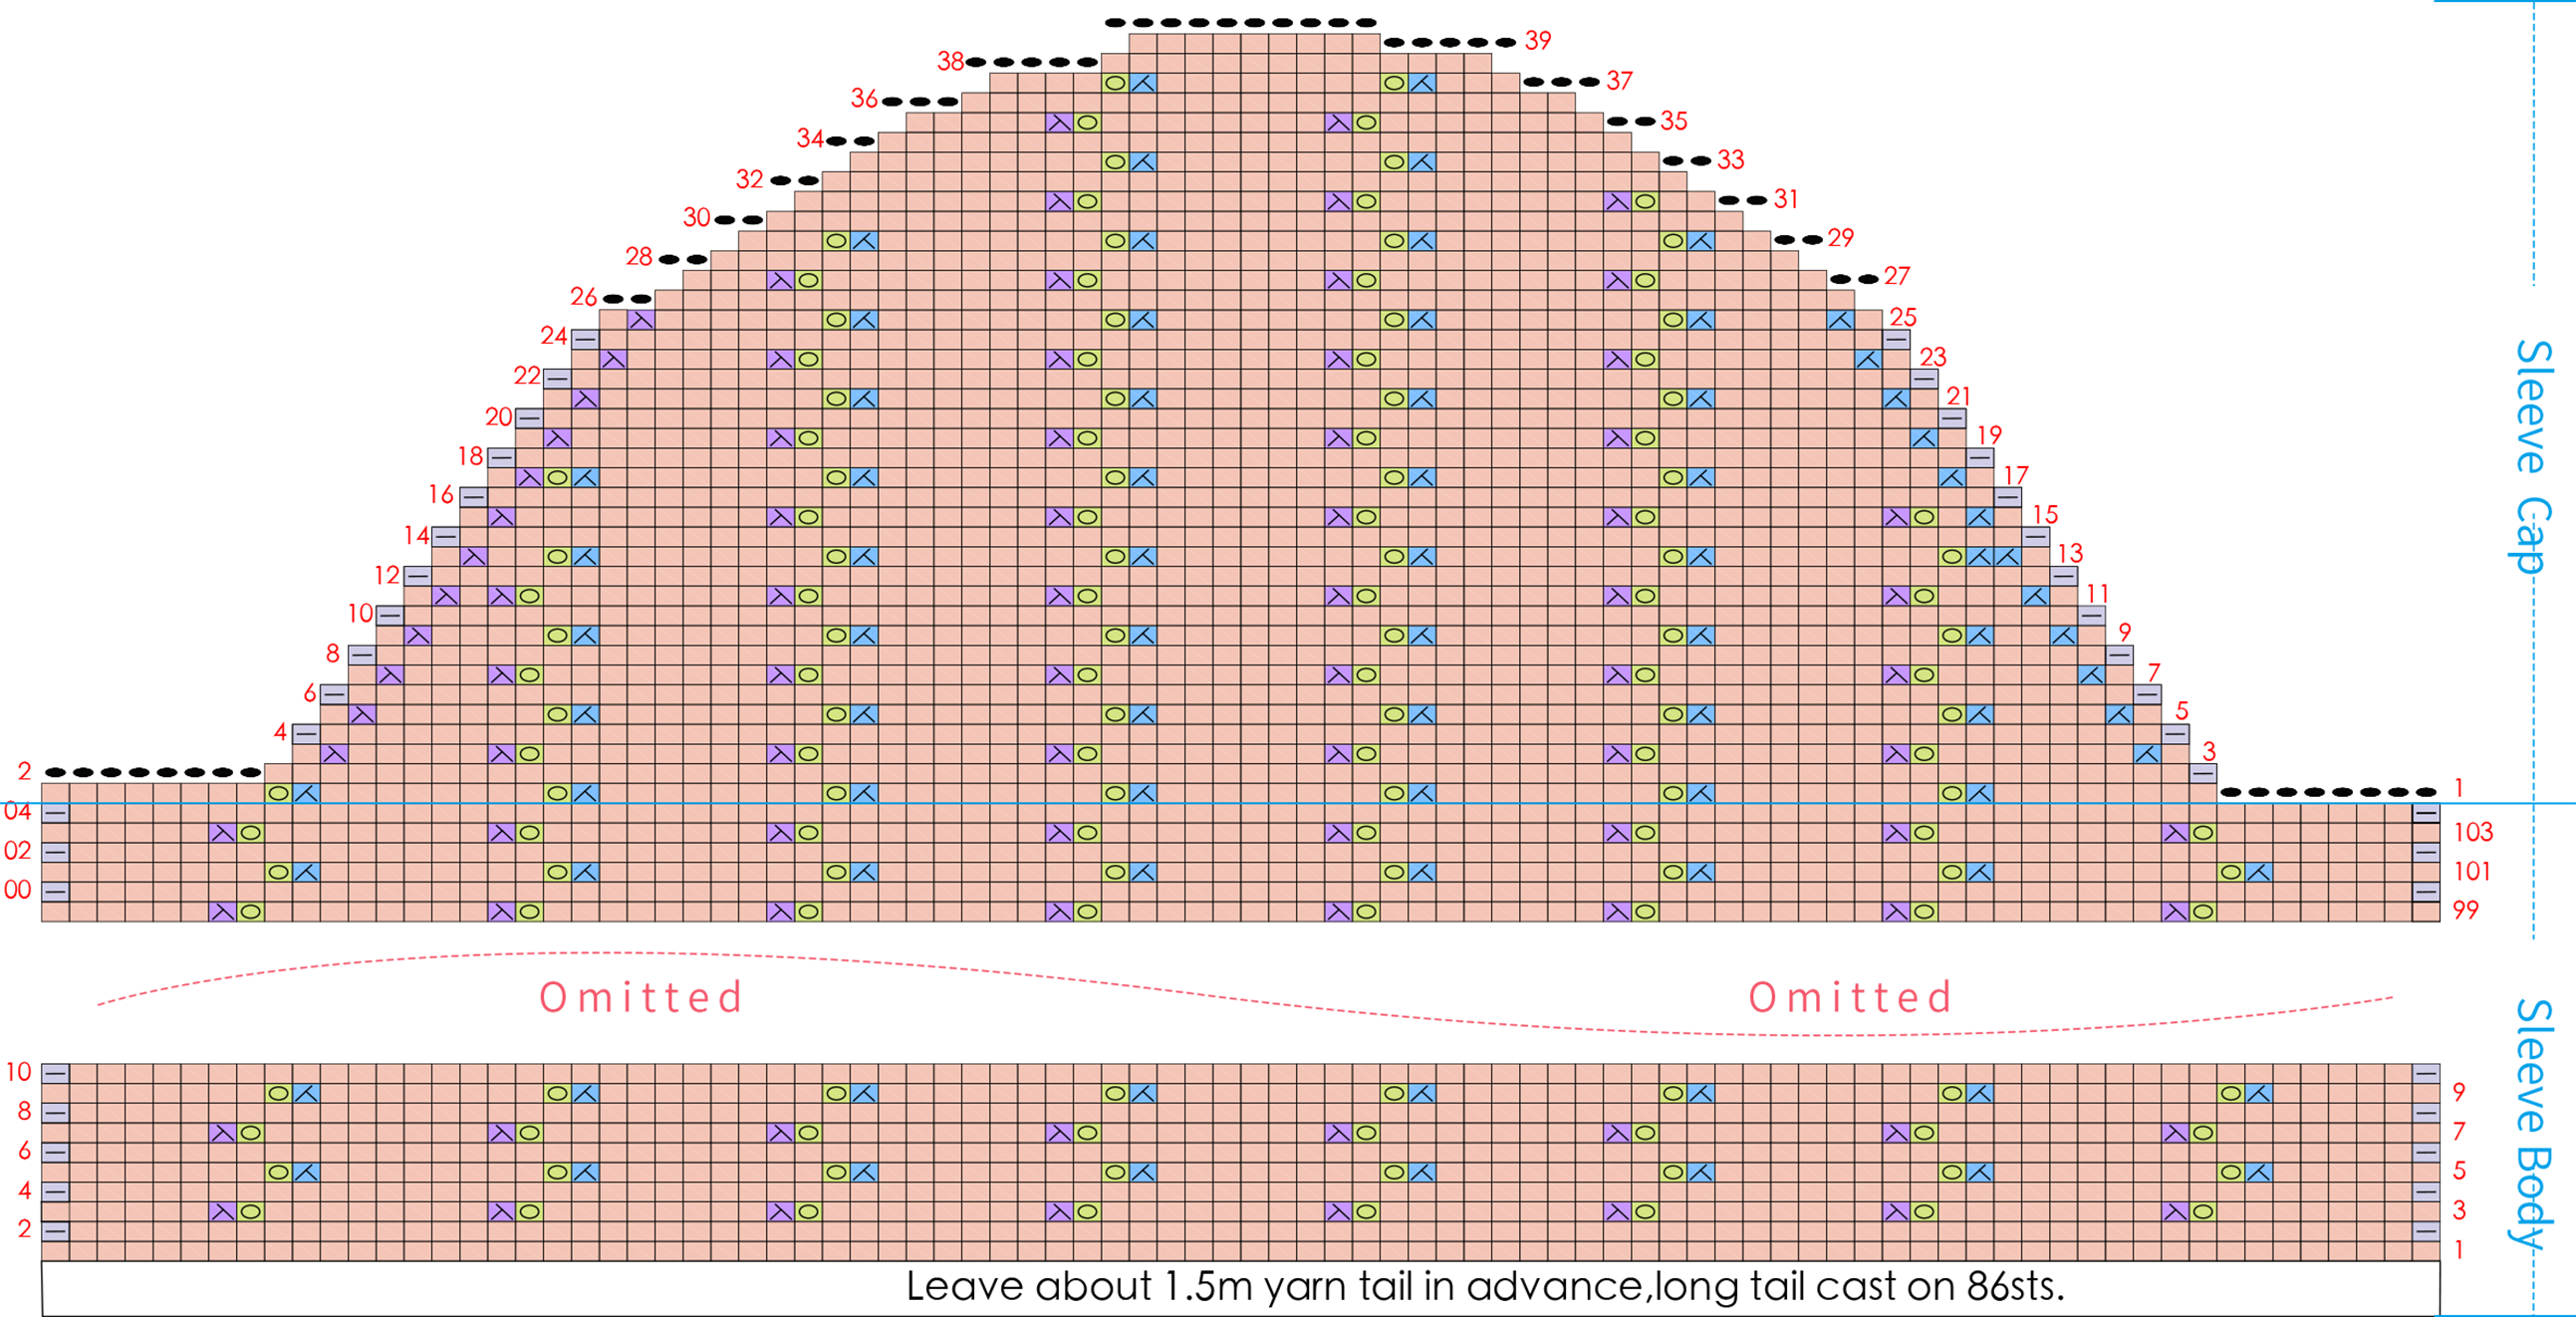
Part 5 Sleeve(Sleeve Cap, Sleeve body:4.0mm circular needle;Cuff:4.0mm short straight needle)E 43' 03'' (Part 2)
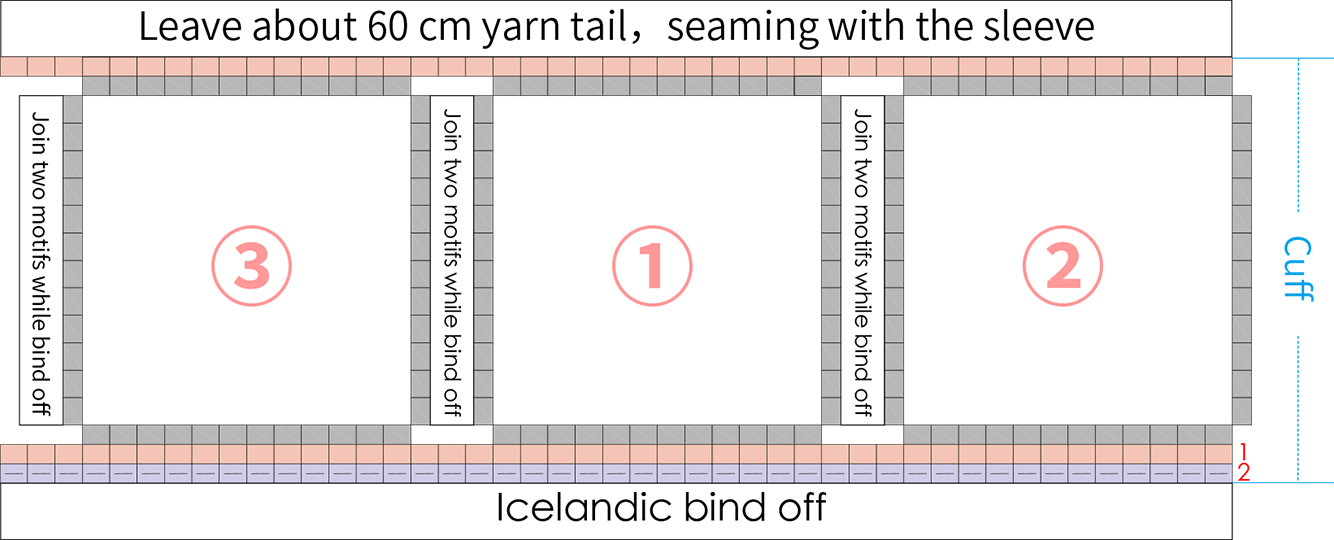
The two sleeves are identical and are divided into three parts: the sleeve body, the sleeve cap, and the sleeve cuff. The sleeve cuff is made by connecting the corresponding number of motifs. First, crochet the motifs separately and join them into a circle. Then, settle the edges of the sleeve cuff, and attach it to the corresponding position on the sleeve body. Finally, sew the sleeve to the armhole position of the garment (using 2 threads to sew together). Please refer to the video demonstration for details.
Note: After completing the first motif of the cuff, leave a 50cm yarn tail; do not cut the yarn after connecting the third motif to the second motif. For the specific joining method, please refer to the video demonstration.
Made by the community