Clothes
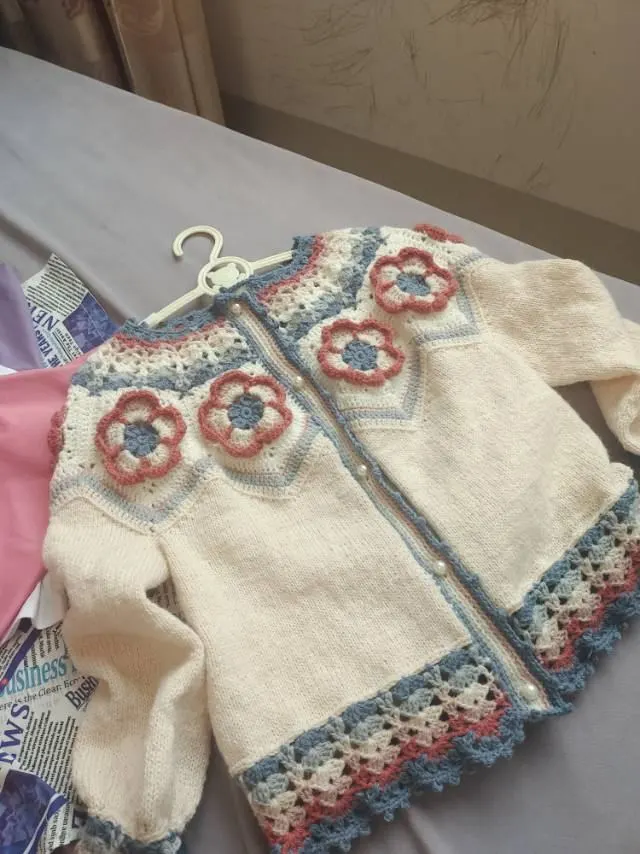
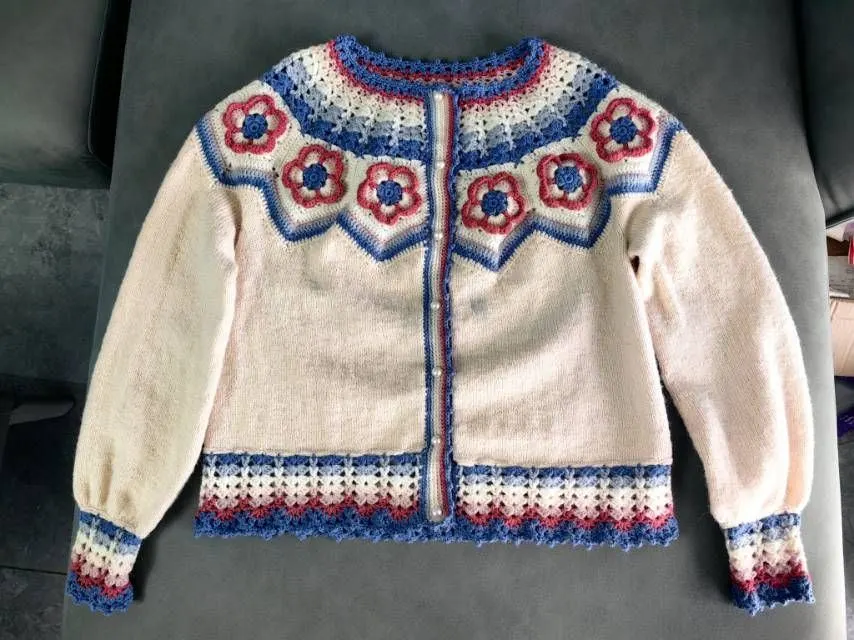
Hibiscus Parent-Kid Coat
Project preview
See the finished project
Pattern format
Instructions
Watch and follow
Video tutorial
This coat have multiple sizes. The techniques are mostly the same, while the stitch and row counts differ according to sizes. First, work the yoke part. Then, the body and sleeves. After that, we crochet the hem and the band and make edging around the outer ring. Finally, we'll sew on the buttons.


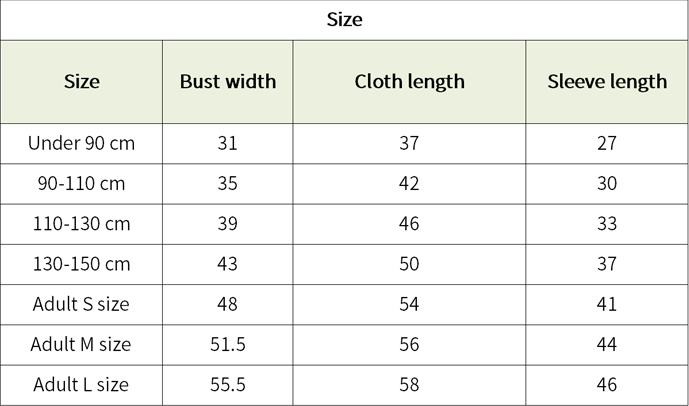
The handcrafted measurements may have an error of 1 to 2 cm. Due to variations in individual tension, the size of the sample is for reference only.
Material: Alpaca Wool (hold 2 together)
Hook: 3.50 mm crochet hook
Needles: 3.75 mm circular needle (60 cm), 3.75 mm straight needles (25 cm*4)
The Yoke motifs, shoulder-part Section 1, shoulder-part Section 2, sleeve cuffs, hems, front bands, and edging are all worked with 3.5 mm hook.

Note: This pattern is making in Chinese crochet pattern terms, and the stitch name is written using American terminology. All measurements in charts are in cm.
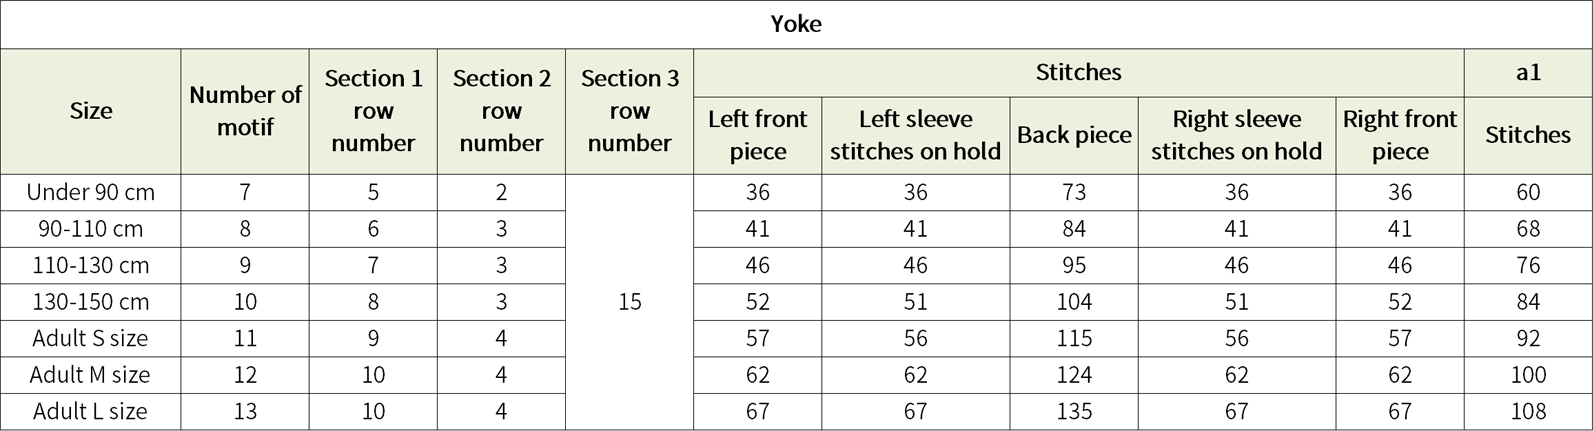
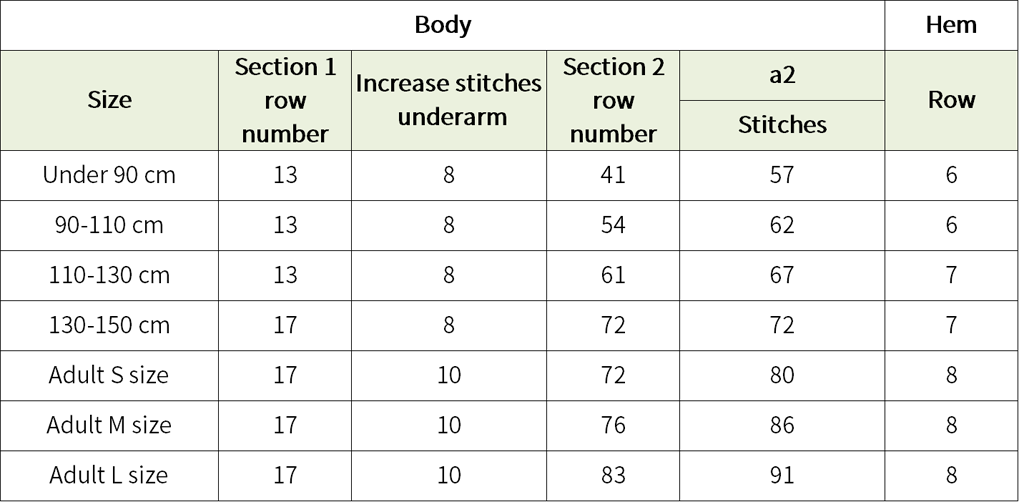
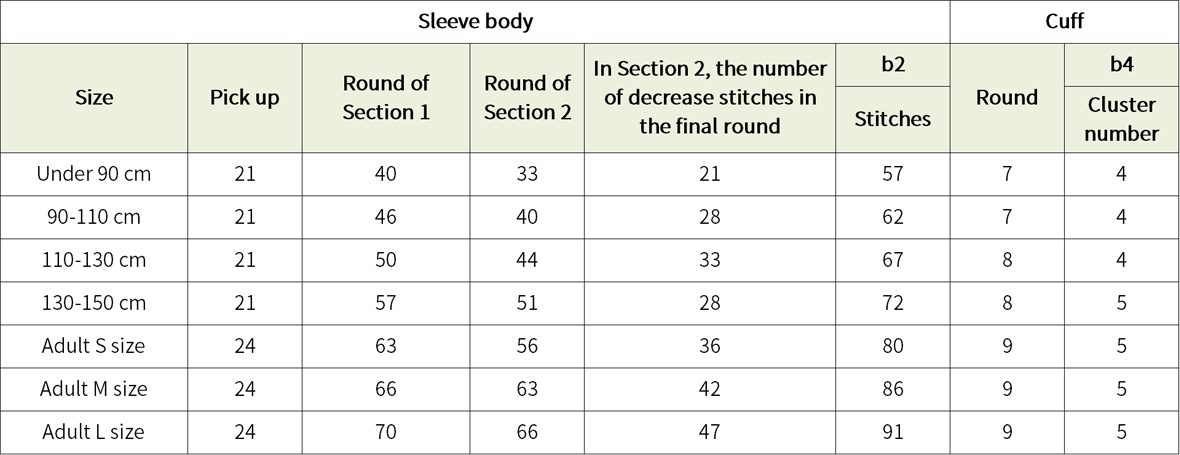
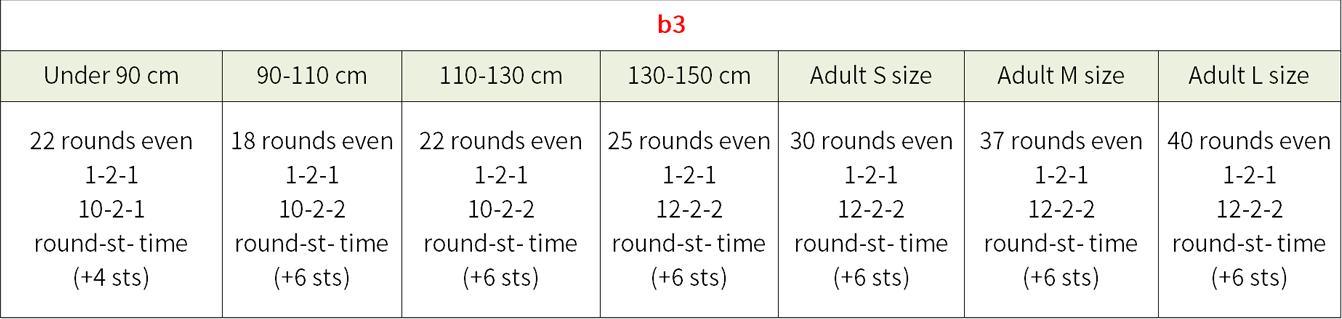
Chart Key



















Part 1 YokeA 00' 48'' (Part 1)
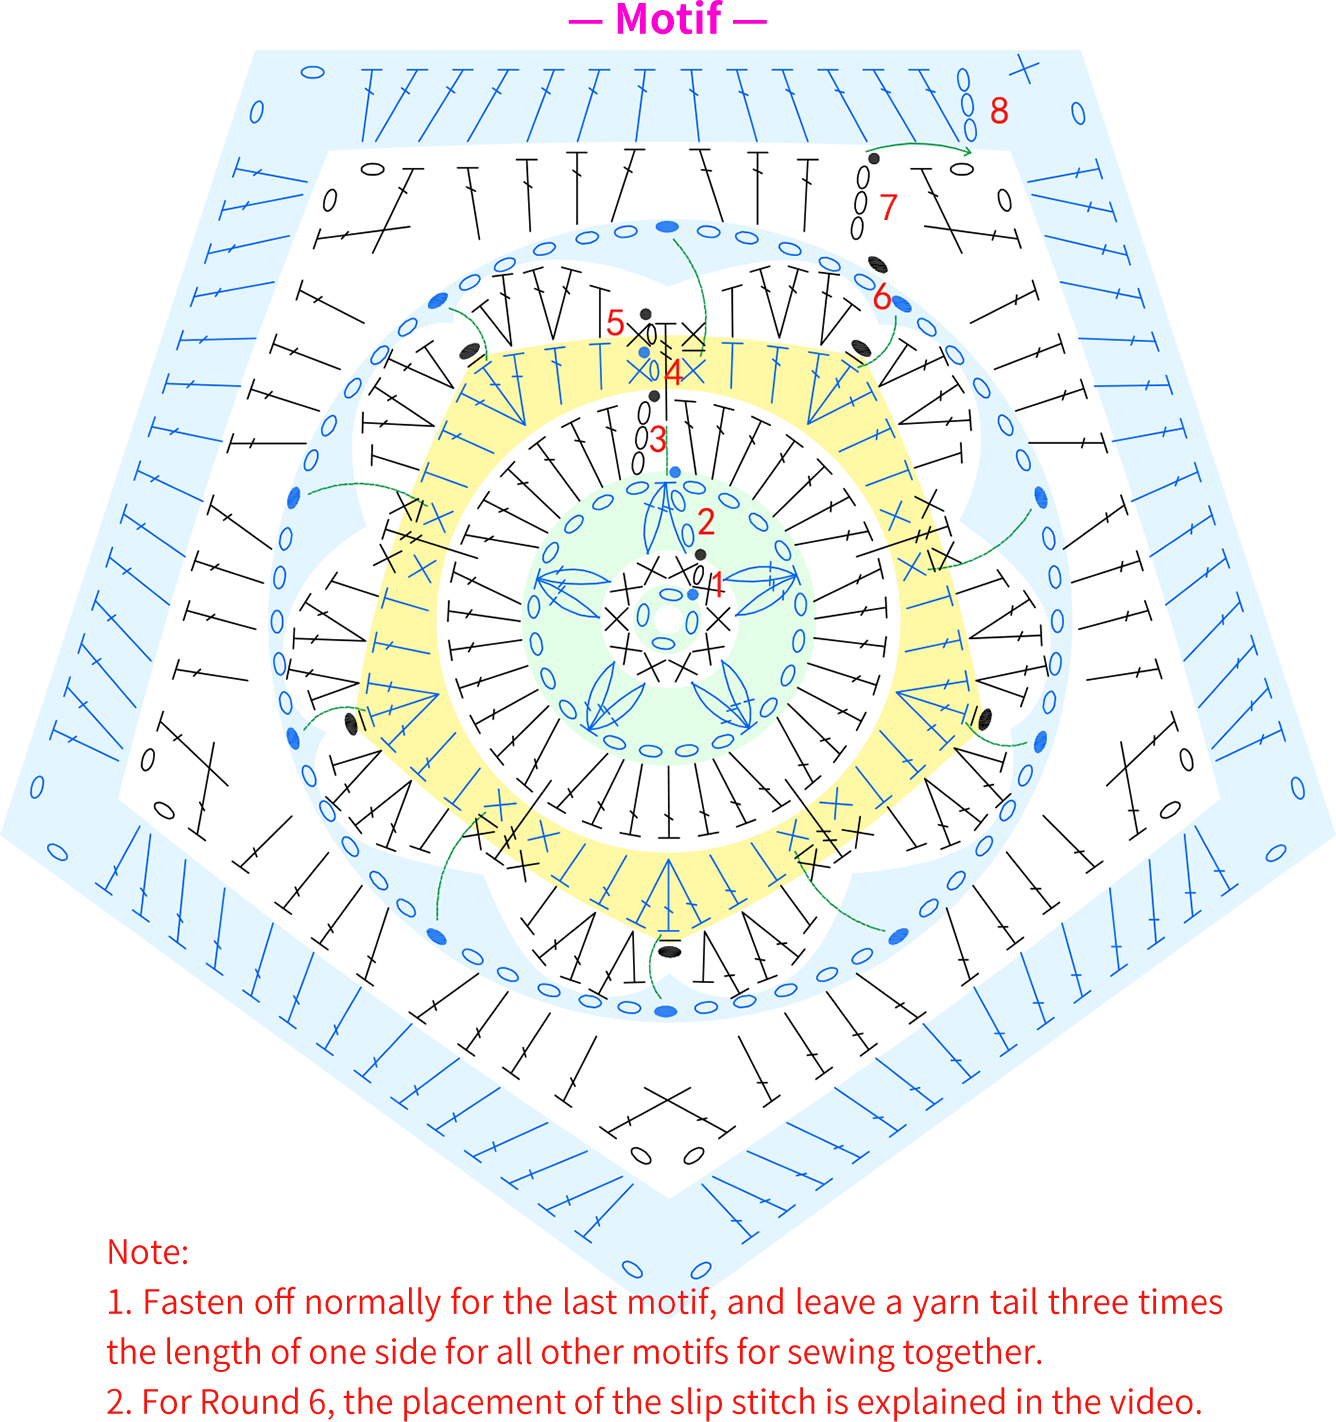
Firstly, crochet and connect the motifsA1 , and work Section 1 of the yoke part on themA2 , and Section 2 below themA3 , lastly, knit Section 3A4 . Each motif is crocheted in the same way. They all begin with a chain ring and worked in rounds counterclockwise. Please refer to the video demonstration for more details.
Part 2 BodyB 30' 18'' (Part 2)
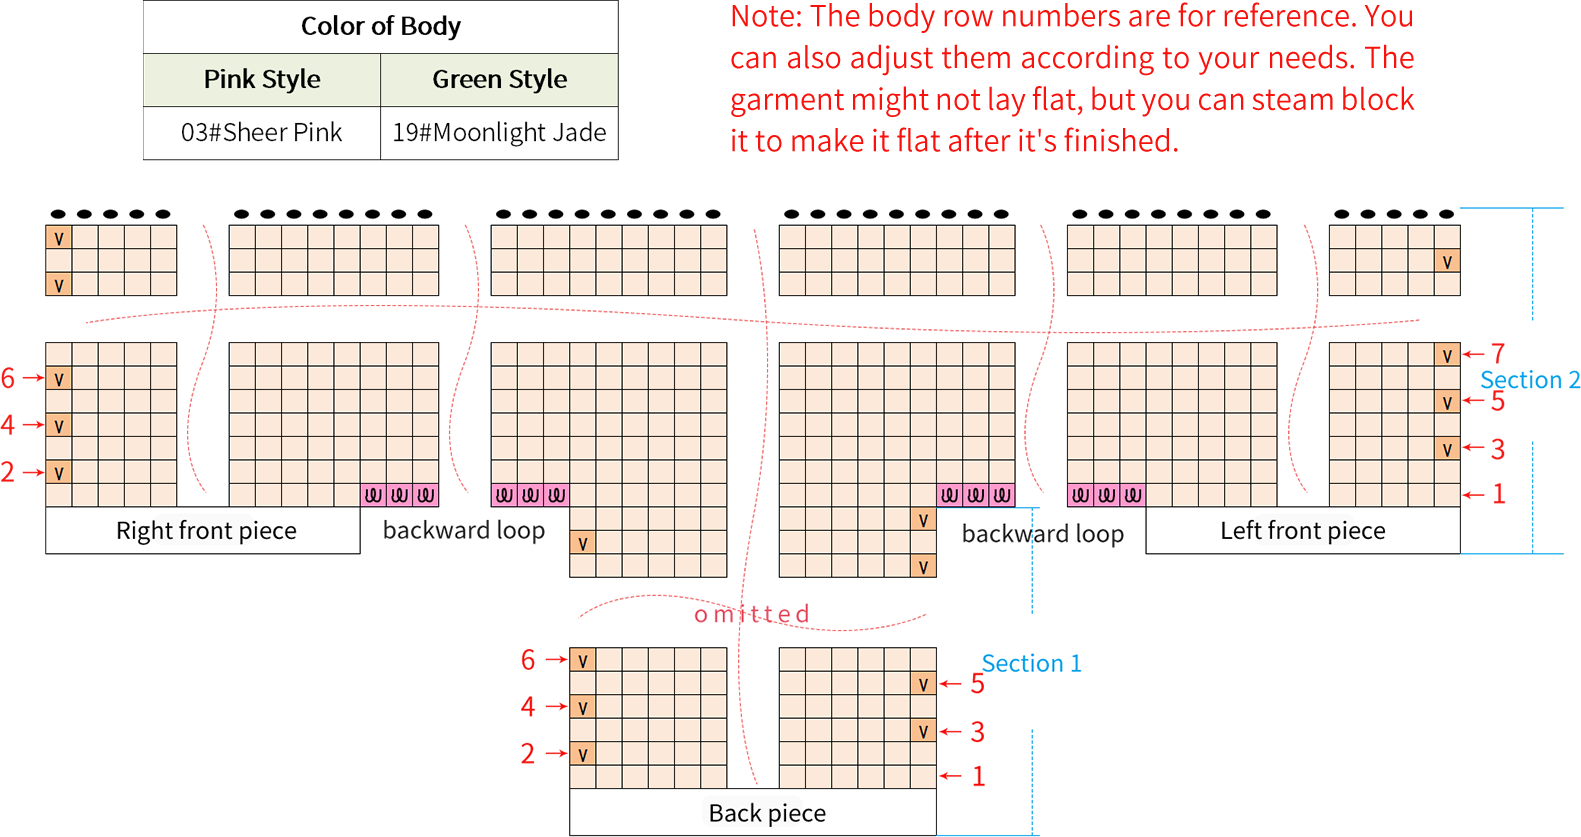
The body consists of two sections. For Section 1B1 , you'll create the neck drop on the back piece. For Section 2B2 , join the front and back pieces together and increase for the underarms. Finally, bind off. Please refer to the video demonstration for more details.
Part 3 SleevesC 50' 11'' (Part 2)
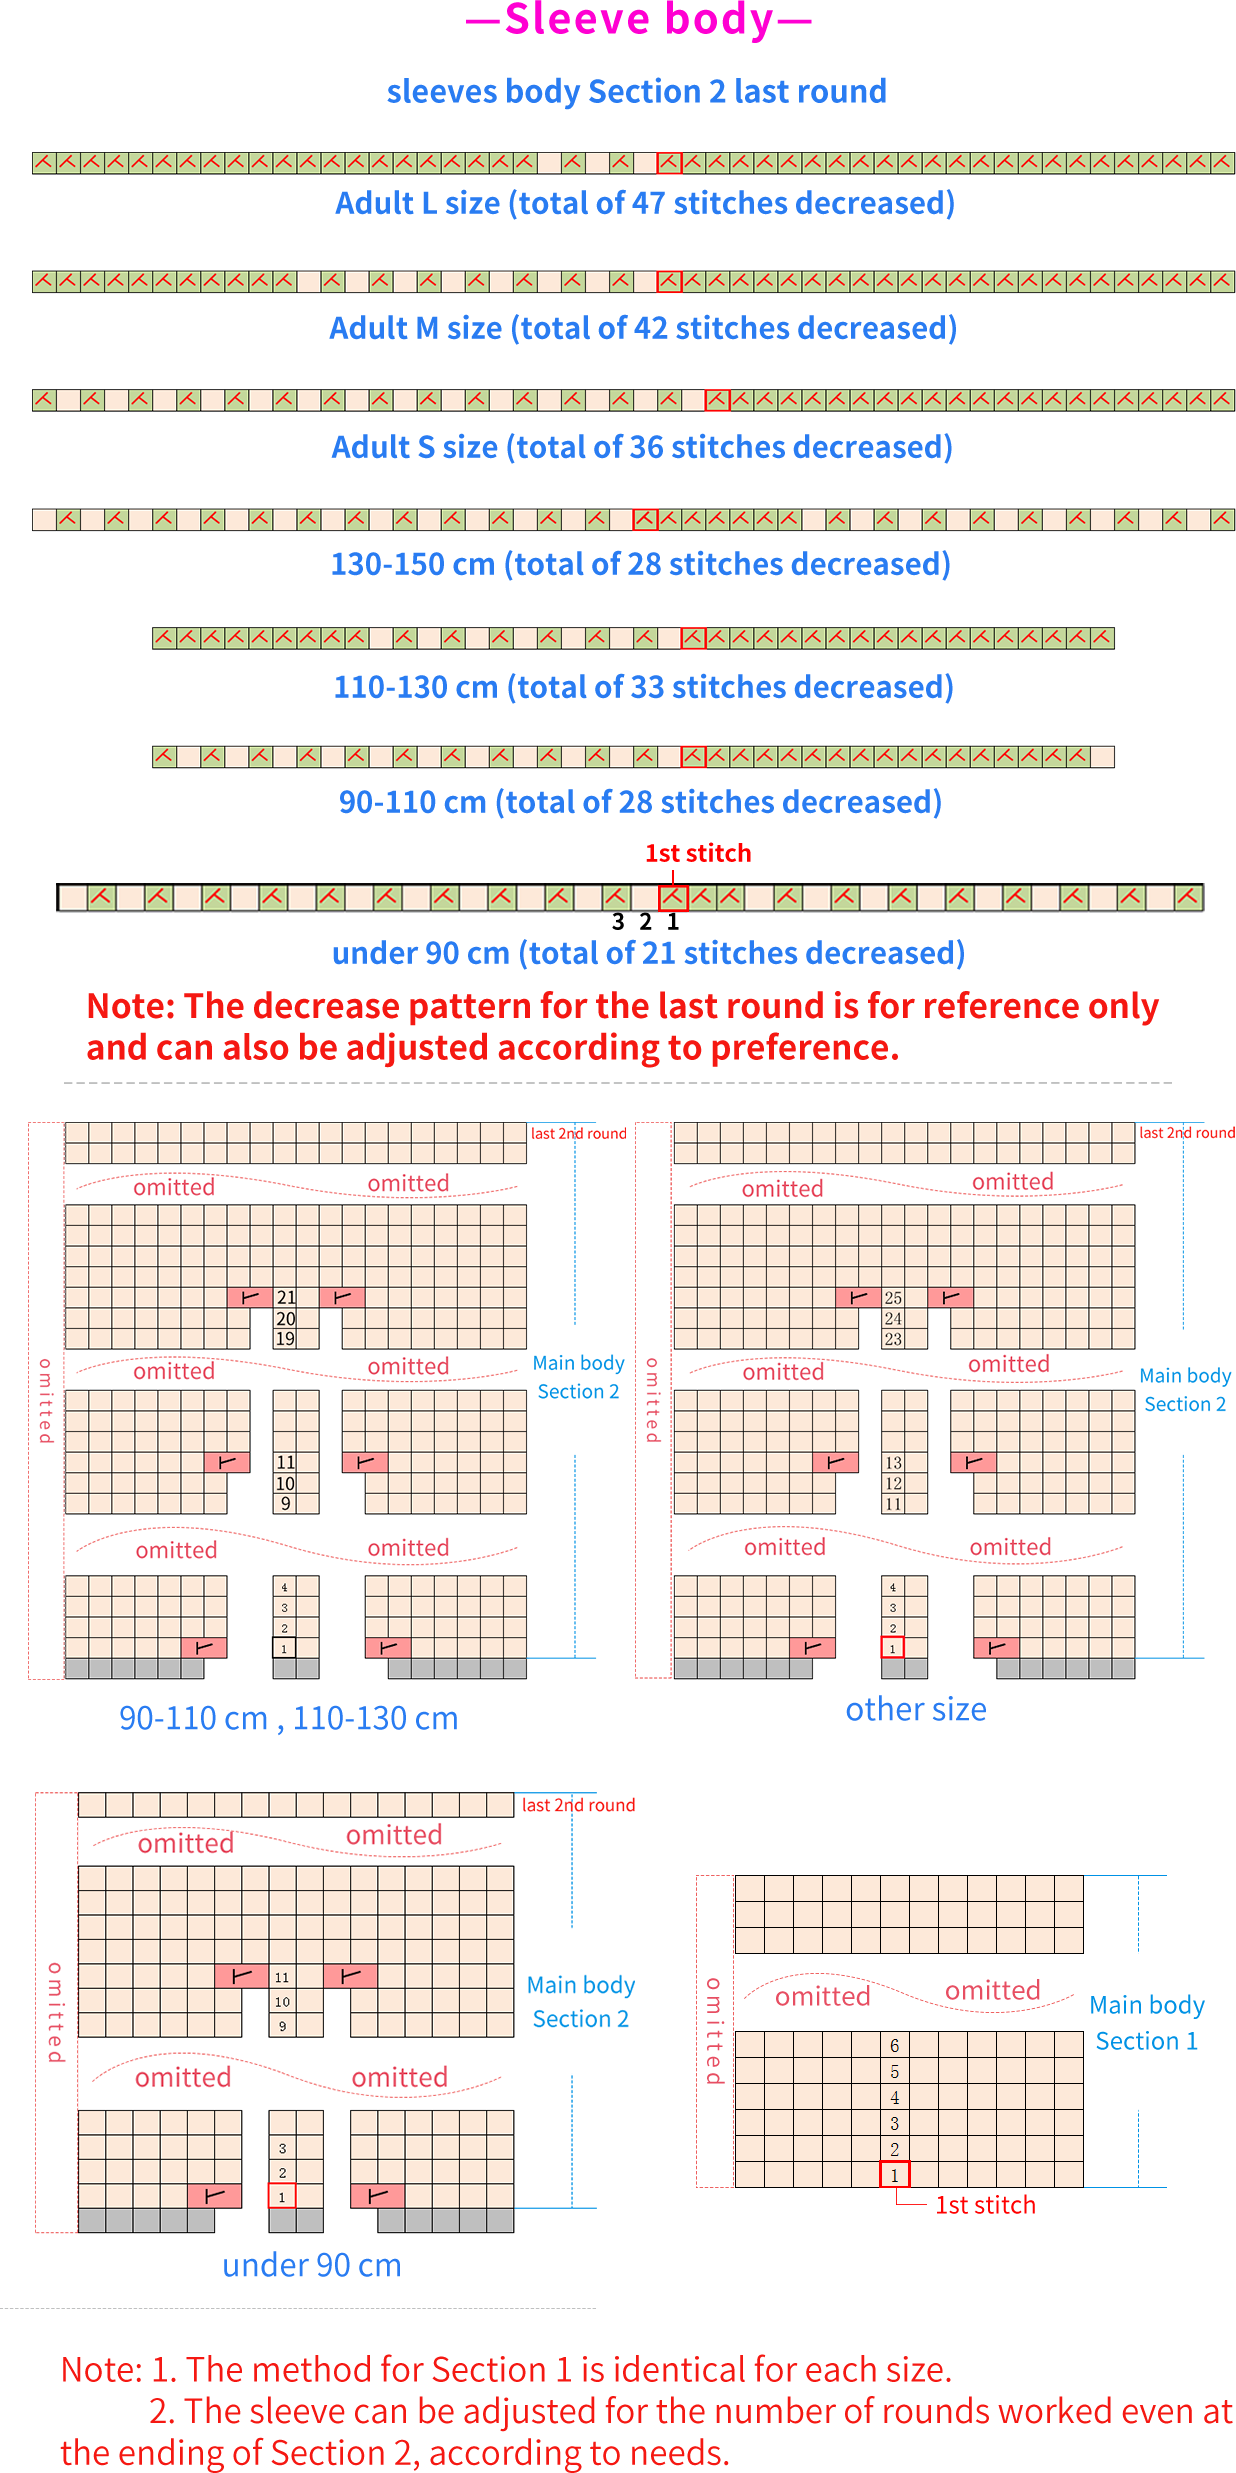
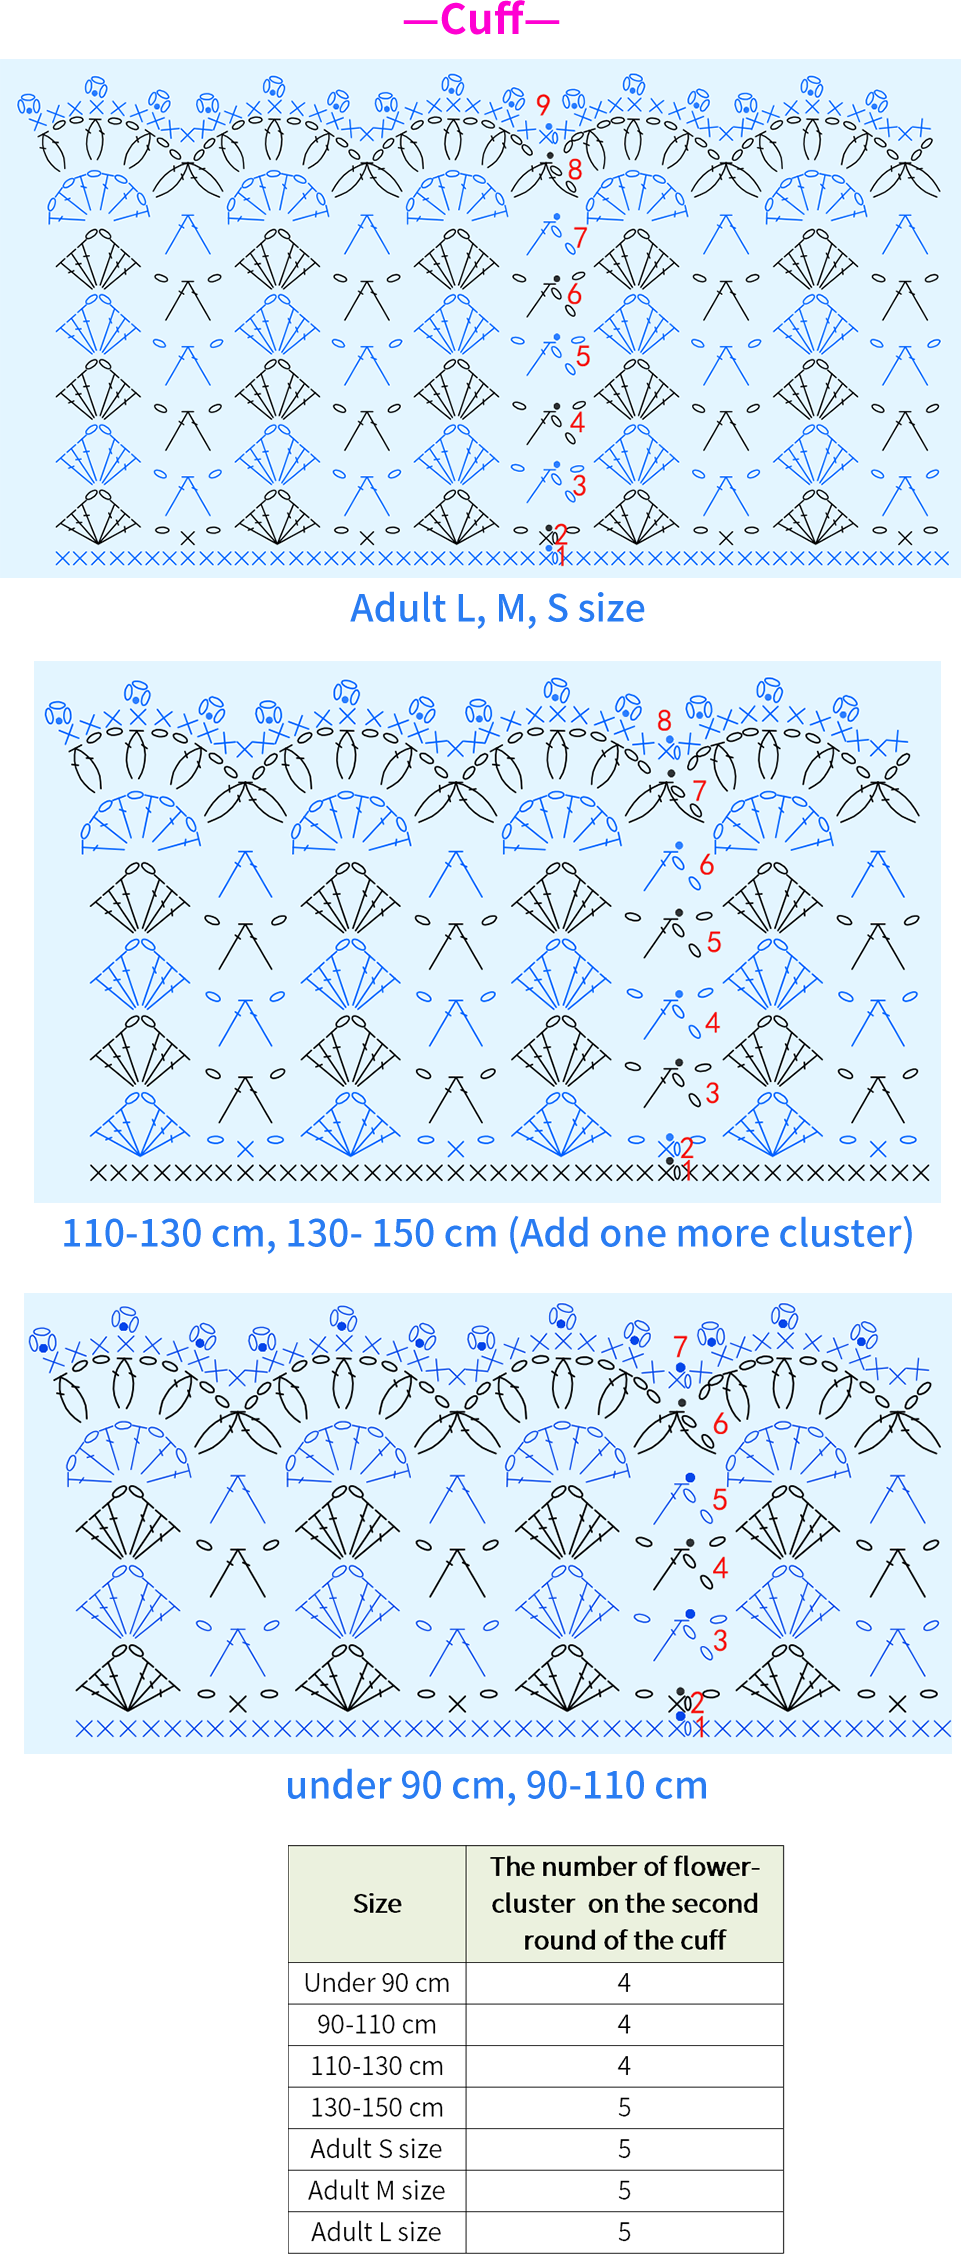
The sleeves consist of the sleeve body and the cuffs. The body itself is divided into two sections. For Section 1C1 , pick up stitches in Round 1. Knit evenly for the following rounds. In Section 2C2 , increase in certain rounds. And decrease in the final round. Knit evenly for the rest. And bind off when complete. Then, crochet the cuffsC3 . Please refer to the video demonstration for more details.
Part 4 Hem, bands, edging and buttons 80' 05'' (Part 2)
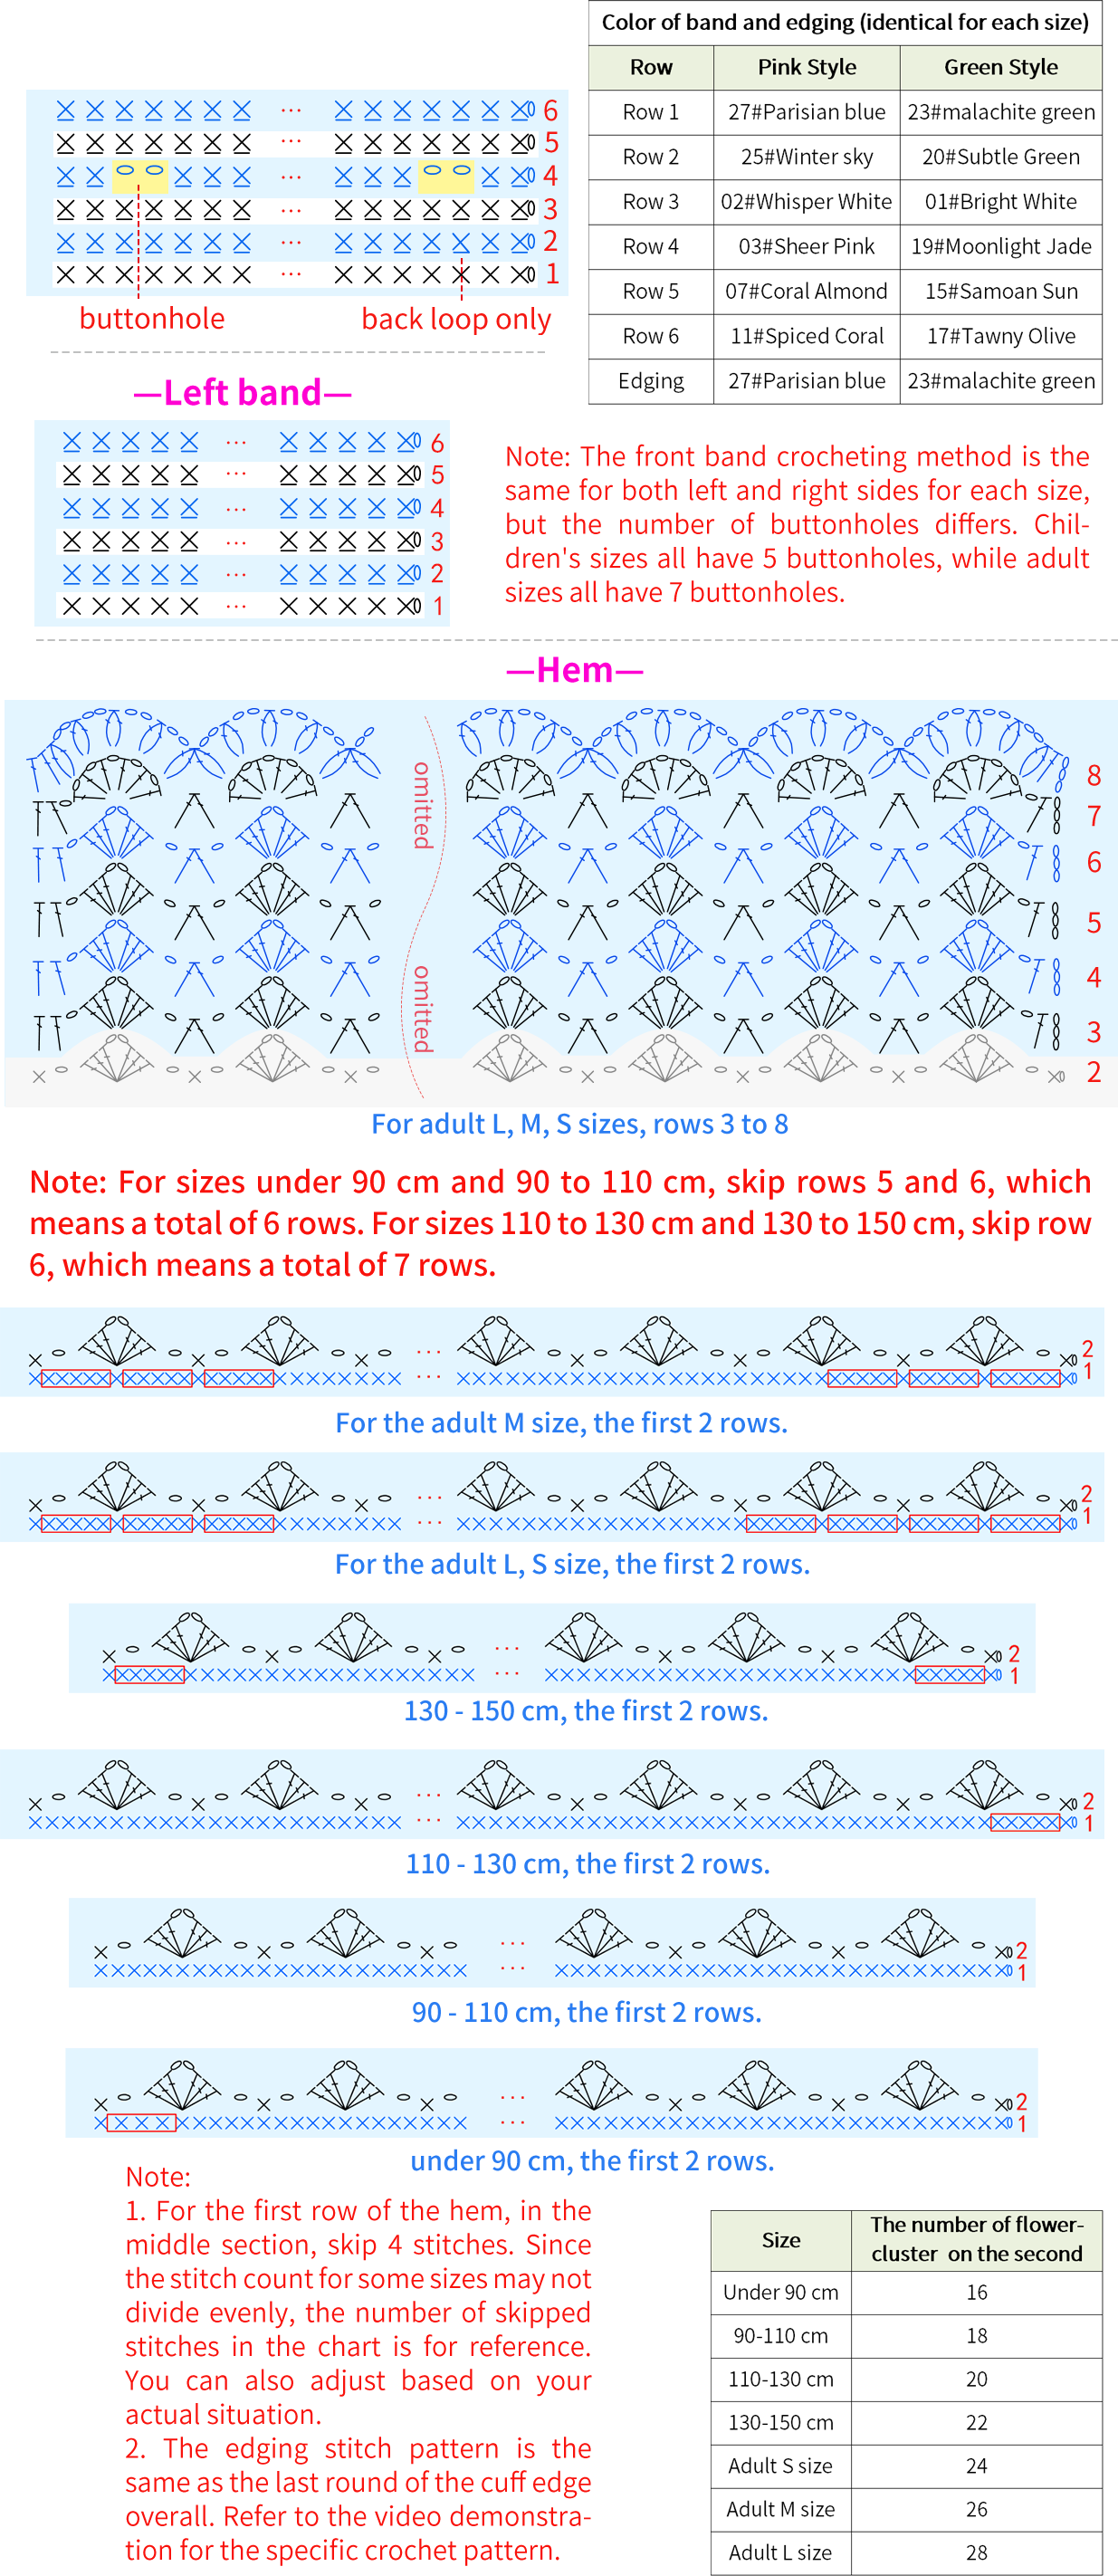
The hem is crocheted from the bottom of the body. Once done, crochet the bands on both sidesD1 . for the right band, make buttonholes, and work an edging along this sideD2 . Finally, Sew the buttons onto the left bandE . Please refer to the video demonstration for more details.
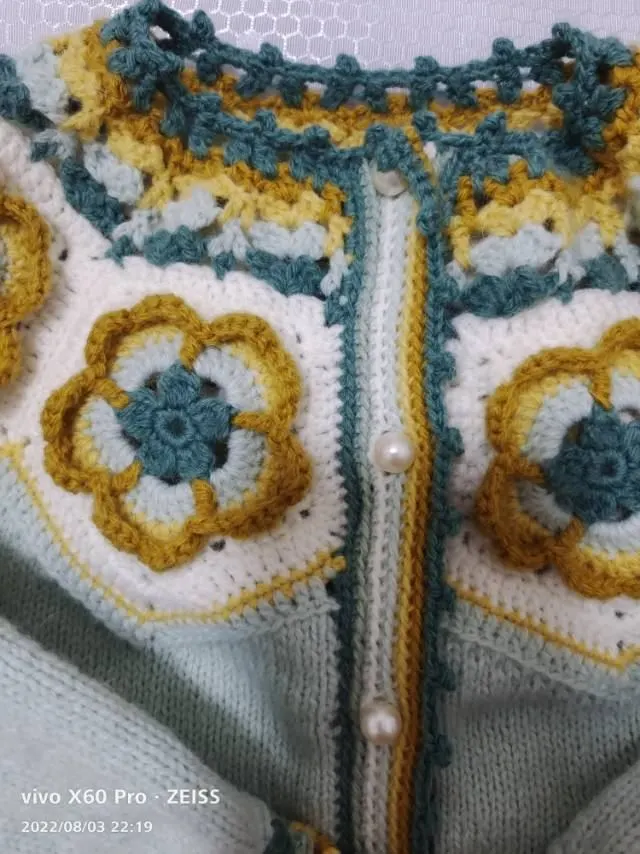
Made by the community