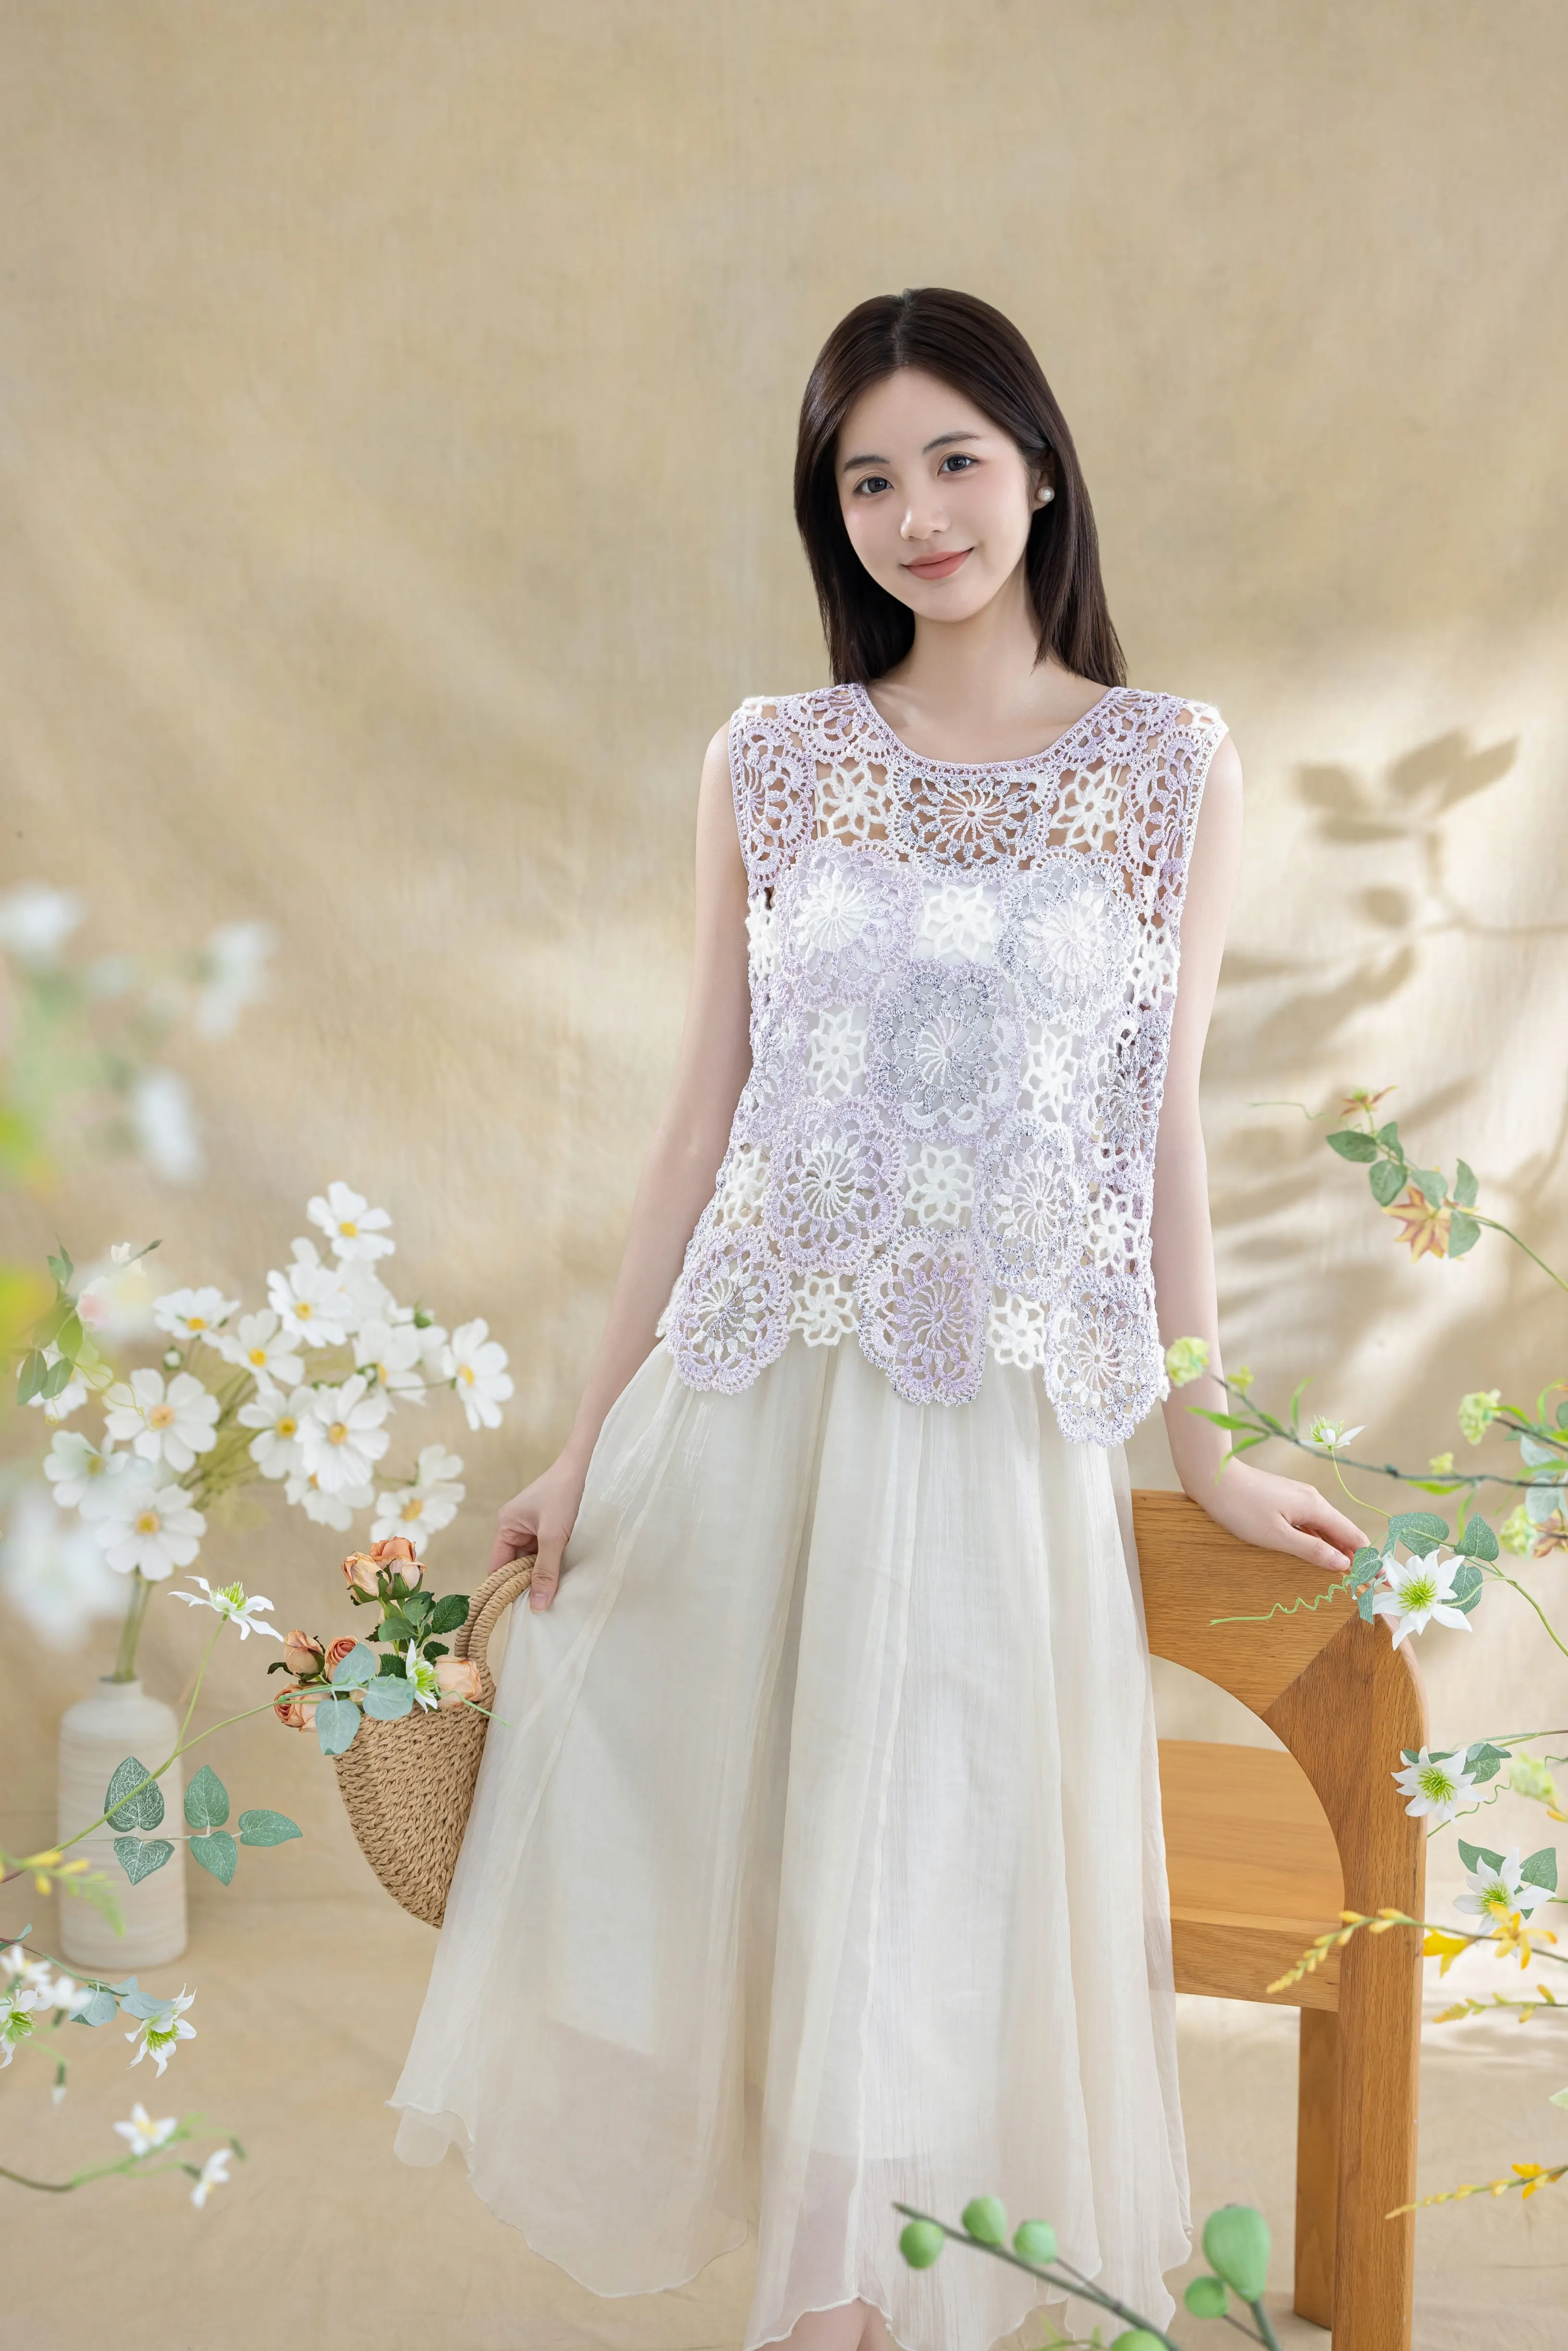
Clothes
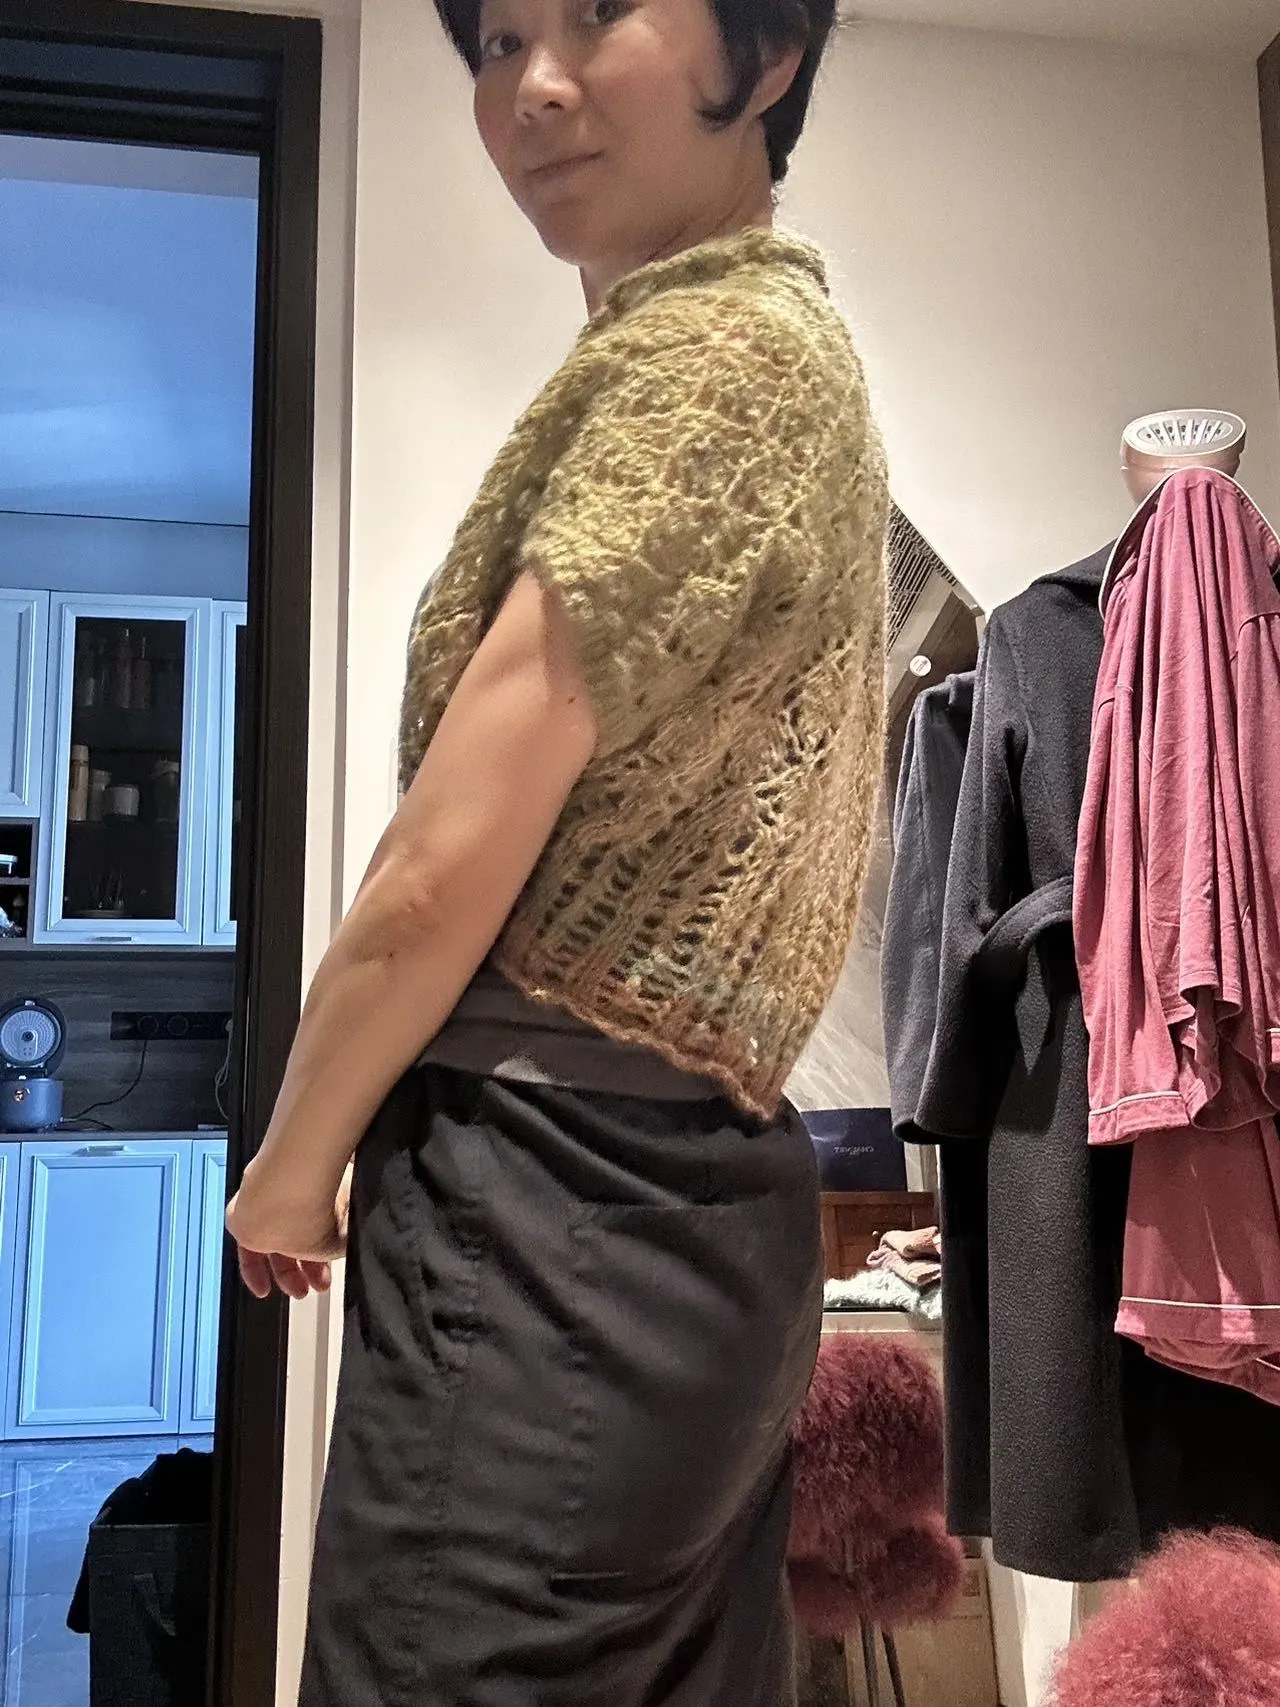
Ivy Top
Project preview
See the finished project
Pattern format
Instructions
| Style | Yarn | Color |
|---|---|---|
| Fair Green Version-Small Size | Combed 5# Lace |  17#Fair Green |
| Fair Green Version-Middle Size | Combed 5# Lace | 17#Fair Green |
| Lilac Snow Version-Middle Size | Combed 5# Lace |  07# Lilac Snow |
| Lilac Snow Version-Small Size | Combed 5# Lace | 07# Lilac Snow |
| Pale Banana Version-Small Size | Combed 5# Lace |  12#Pale Banana |
| Pale Banana Version-Middle Size | Combed 5# Lace | 12#Pale Banana |
Fair Green Version-Small Size
Fair Green Version-Middle Size
Lilac Snow Version-Middle Size
Lilac Snow Version-Small Size
Pale Banana Version-Small Size
Pale Banana Version-Middle Size
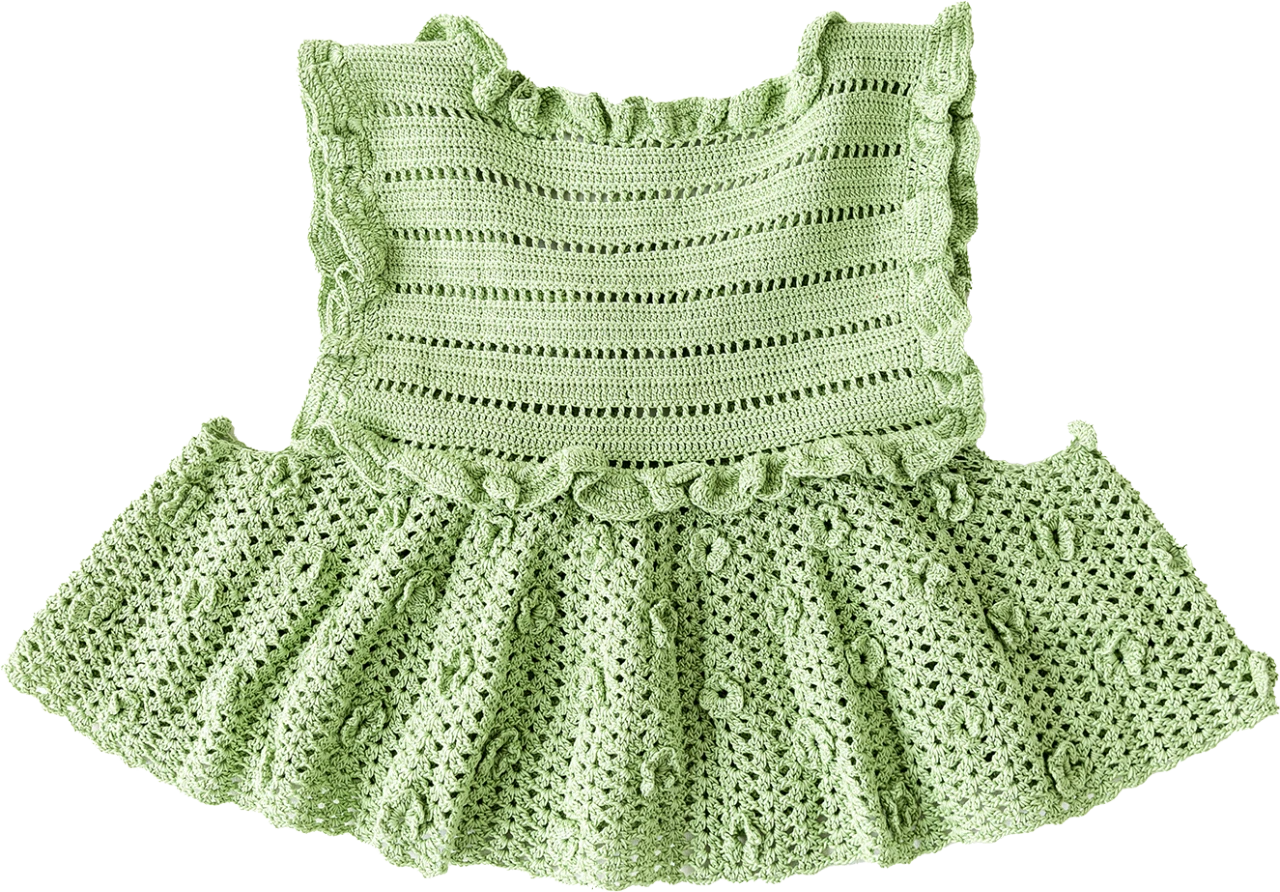
This vest is divided into back body piece, front body piece, skirt hem, flowers and lace edge.
Crochet sequence:
1, Start casting on from the back body, with the cast-on width being cross back width minus 10cm.
2, Crochet the body until reaching the back neck, then start decreasing stitches to work the right back neck separately.
3, Begin working the shoulder, right front neck, and right front band as a single piece.
4, Break yarn, then start working the left back neck, left shoulder, left front neck, and left front band.
5, Work the triangular decreasing section on the front side of the body, connecting the left and right pieces at this point.
6, Start working the skirt part as shown in the chart.
7, Crochet the lace edge around the neckline.
8, Crochet the lace edge around the armholes and the body.
9, Crochet the tie, a chain of 24cm length, and crochet flowers at the top end.
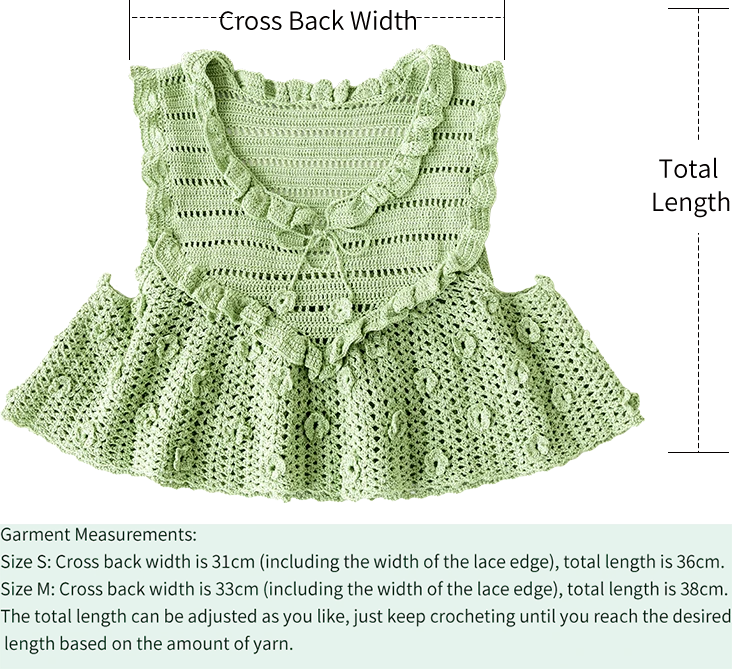
Note: Hand-measured, with an error margin of 1-2 cm.
Due to variations in individual tension, the size of the sample is for reference only.
Materials: Combed 5# Lace
Hook: Size S: 1.75mm crochet hook (for chest width), 2.00mm crochet hook (for skirt hem).
Size M: 2.00mm crochet hook (for chest width), 2.50mm crochet hook (for skirt hem).
Chart Key






Note: This pattern is making in Chinese crochet pattern terms, and the stitch name is written using American terminology. All measurements in charts are in cm.
Part 1 Back Body Piece, Front Body Piece
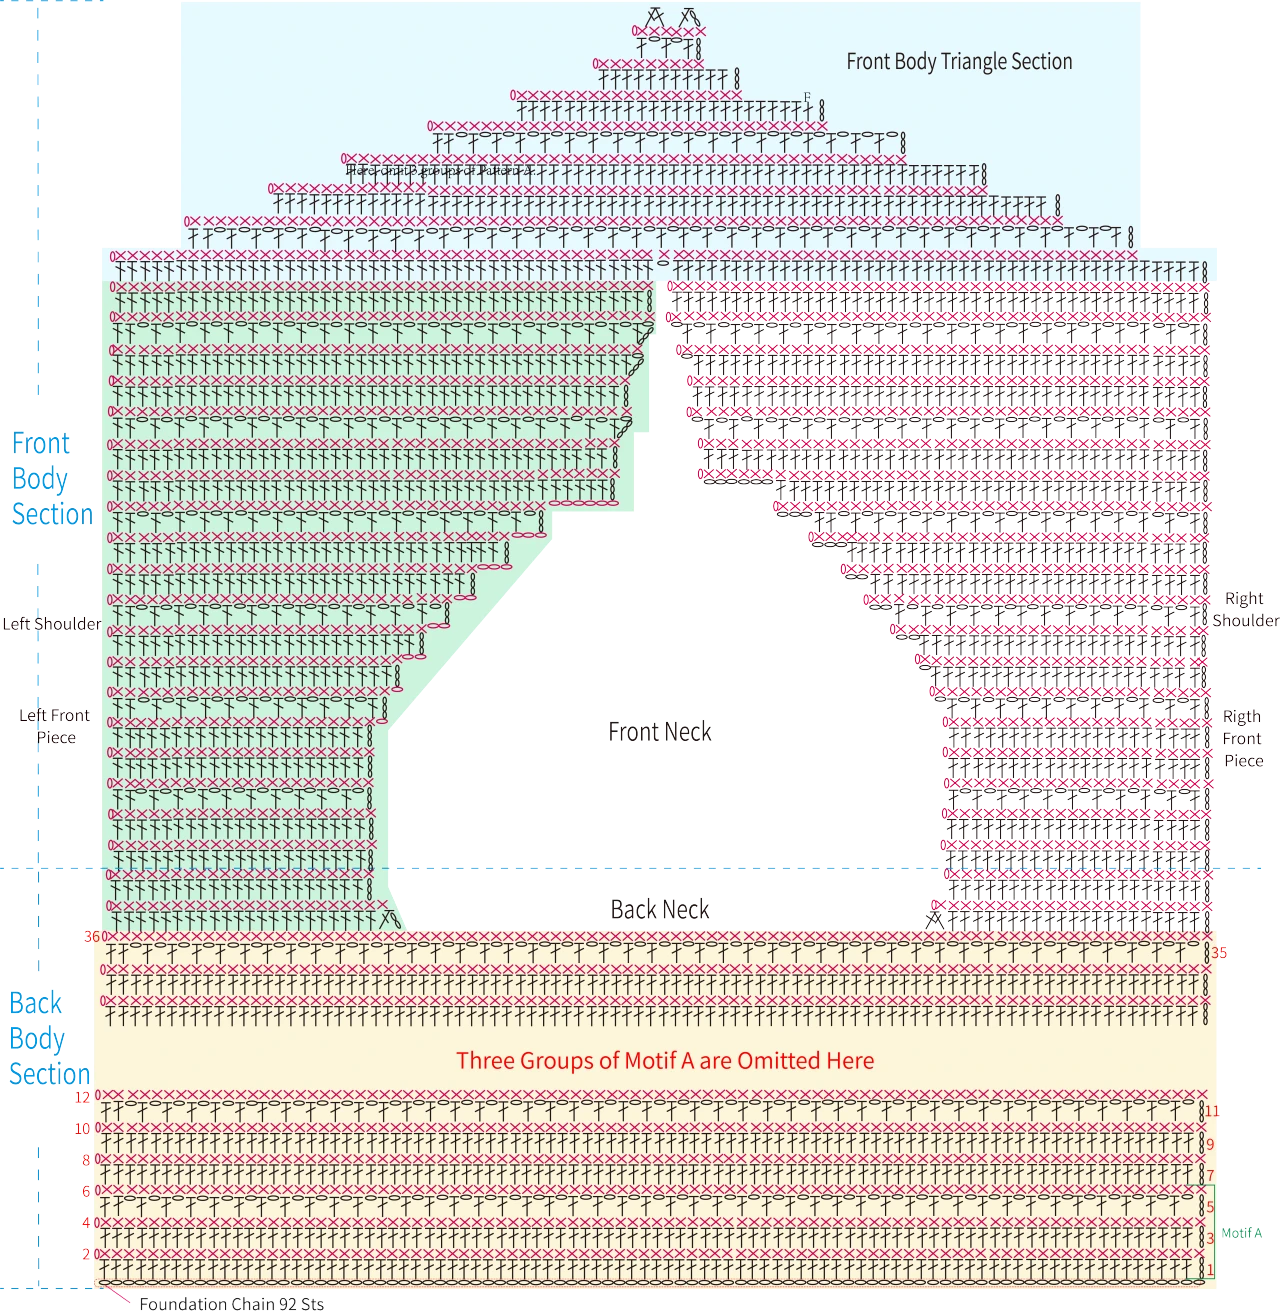
1, Start with a foundation chain at the upper part of the back body. The number of starting chains depends on your needs and should be an even number. Here, we start with 92 chains, which gives a width of 25cm. The recommended starting width is (cross back width - 10cm).
2, Work double crochets on the right side and single crochets on the wrong side. After two repeats of this sequence, the third repeat of double crochets includes one double crochet followed by one chain.
3, Six rows form Pattern A. After completing six repeats of this pattern on the back side, leave the back neck opening and proceed to work the right shoulder and right front section separately.
4, Once the right front piece is finished (the light yellow shaded area in the chart), break the yarn and continue working on the left side (the light green shaded area in the chart).
5, After completing the left side, work the V-shaped neckline area below the chest (the triangular area on the front body, shown as the light blue shaded area in the chart).
For the triangular section of the front body decrease issue:
1. After leaving the neck, the left front piece + right front piece = cast on number - 1
2. For the triangular part, you need to decrease 8 times. For example, if your cast on stitch count is 71 stitches, you need to decrease 10 stitches per row, and finally, the tip can be finished through decreasing stitches together.
Body neck opening section: (Here, one row refers to 1 row of double crochet + 1 row of single crochet)
1, The back neck consists of two rows in total. Reserve enough stitches for your desired collar width; the remaining stitches will be the shoulders that you continue to crochet. You can compare with other clothes at home to judge the collar part. I reserved about 17 centimeters for my back neck.
2, For the front body, work even for the first few groups according to the shoulder position for five rows, and start increasing stitches from the sixth row, following the principle of increasing fewer stitches first and then more.
3, Complete the increases for the neck opening within 14 rows, which corresponds to the -6 rows of my back piece. My back piece has a total of 20 rows, approximately 20 centimeters. You should decide the length of the back piece and front piece based on your own needs. The principle is that when the front piece reaches the pattern repeat count of the back piece minus six, the stitch count on one side (since we finish one side before moving to the other, like a cardigan) should be (starting chain - 5) ÷ 2. I started with 71 chains, and after 14 rows of increases, it became 33 stitches. Therefore, determine your increase pattern based on the row count.
4, Then continue working six more rows. These six rows form the small V-neck opening for the chest where small flowers can be attached. Only two stitches need to be increased in total for these six rows, making the stitch count on one side (starting chain - 1) ÷ 2. My stitch count became 35.
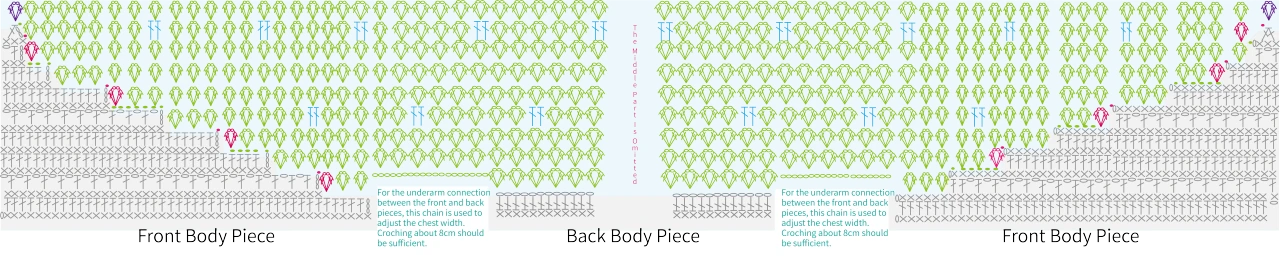
Part 2 Skirt Hem ( Total 18 Rounds), Flowers
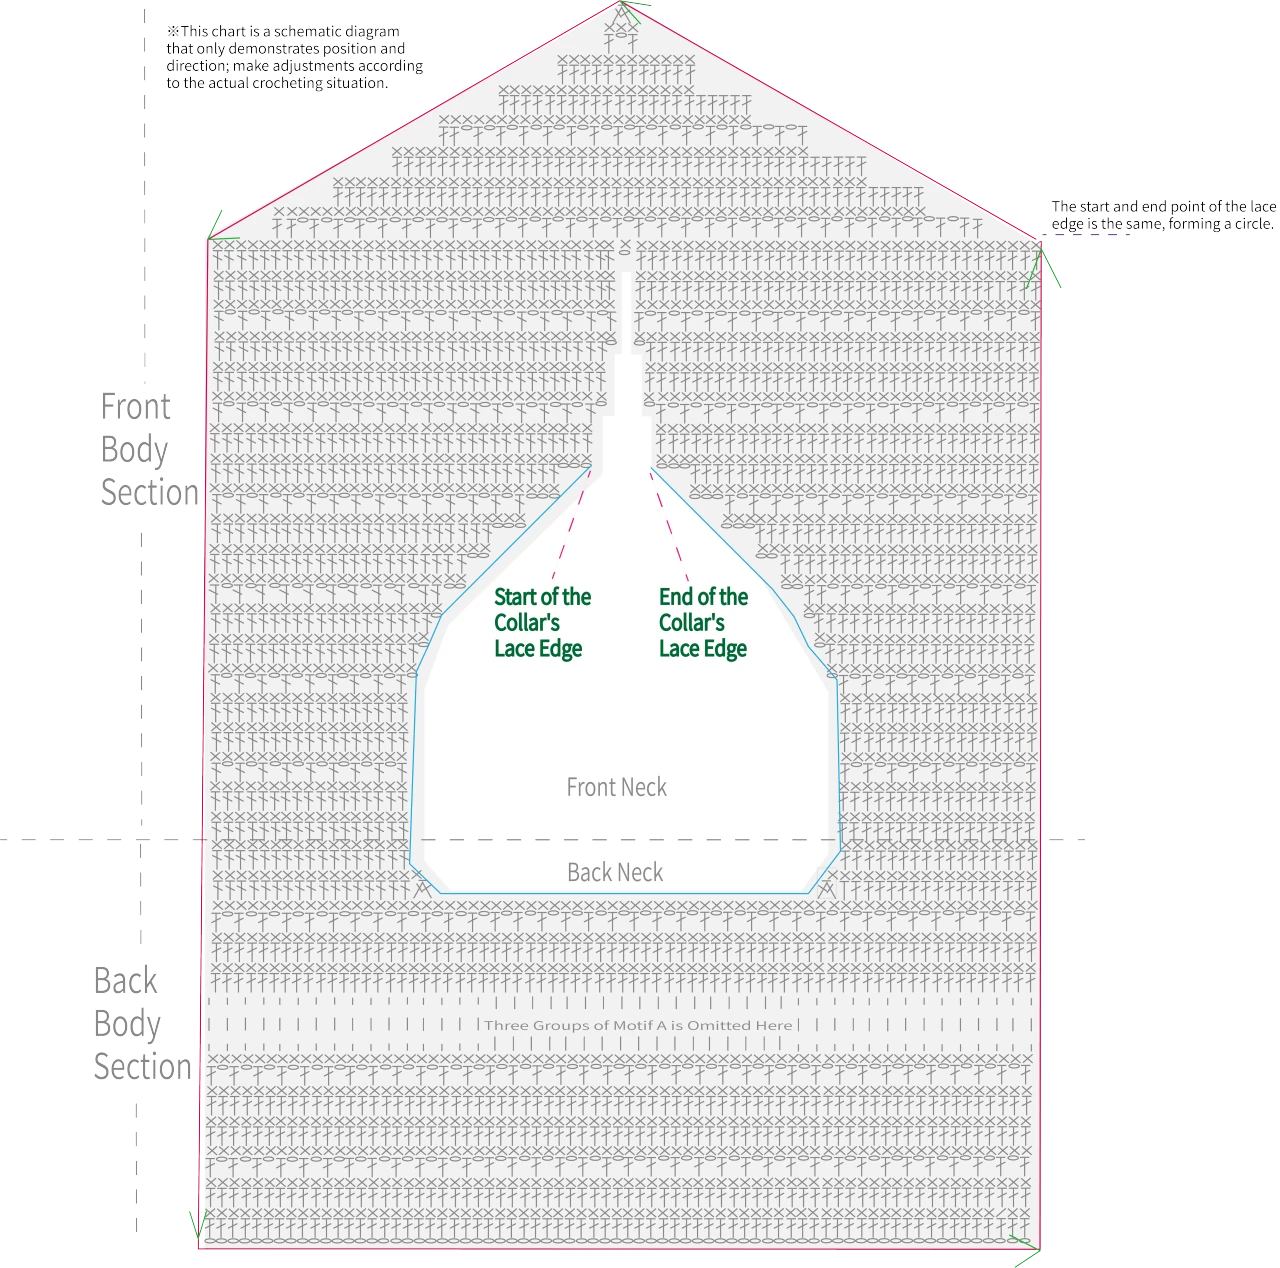
1, The red motif indicates the starting position, where each starting and ending position is joined with a slip stitch to the triangular decrease area of the front body. Work back and forth.
2, For the first three rows, crochet 2 groups of motifs in the decrease area, and then crochet 3 groups for the following rows.
3, The two purple motifs in the chart are identical, indicating that the entire garment body is now connected into a circle, beginning crocheting in rounds.
4, After starting to crochet in rounds, continue until you reach the desired length. I crocheted 4 groups of flowers and then added two more rows of motifs.
Flowers
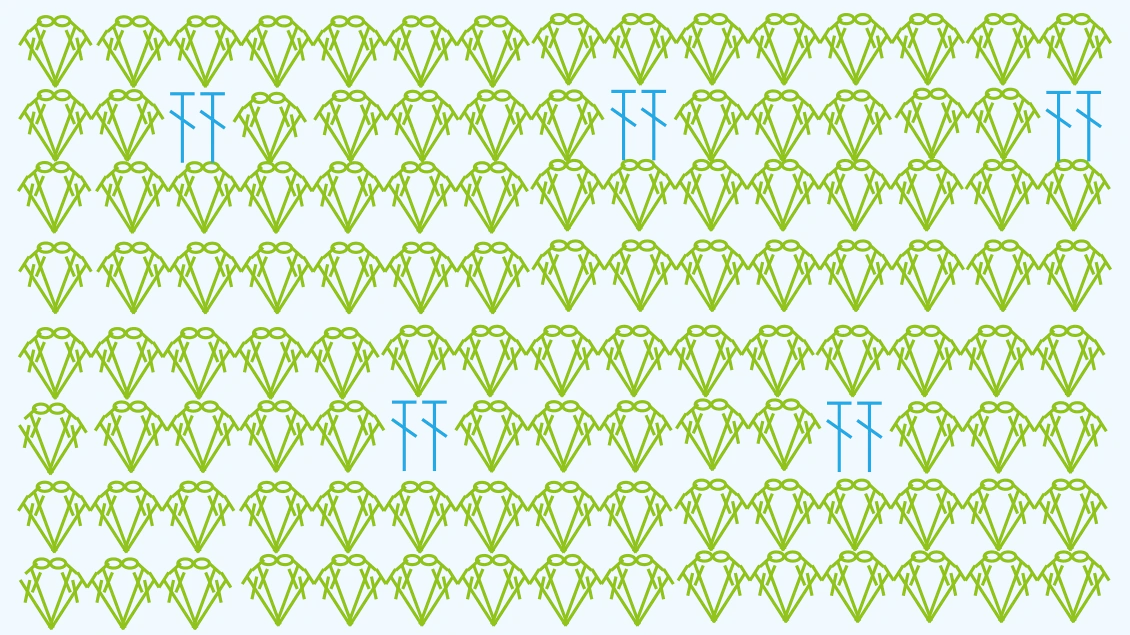
Flower crocheting is as follows:
1, Crochet two double crochets.
2, After completing the double crochets, crochet two chains, three double crochets, two chains, and then a single crochet around the post of the double crochet; this forms one petal. Make a total of five petals.
3, The first and second petals are crocheted on the second double crochet, the third petal is crocheted between the two double crochets (on the previous row’s two chains), and the fourth and fifth petals are crocheted on the second double crochet.
4, After completing the petals, crochet a slip stitch on the back of the first petal to join the last petal with the first one.
5, Between each flower, skip five pattern repeats. All flower crocheting is done on the right side of the garment.
6, After completing this row of flowers, skip three rows and crochet flowers again on the fourth row.
7. The position of the flowers in the second round should be staggered from those in the first round. Refer to the diagram.


Part 3 Lace Edge
The crocheting method of lace edge:
1. First, work a round of single crochet according to the position and direction shown in the picture. The basic pattern is that one row of double crochet on the body corresponds to one single crochet on the ruffle edge, and one row of single crochet on the body also corresponds to one single crochet on the ruffle edge. (Don't skip this step because the ruffle edge will create an open pleat, and this round of single crochet ensures that the armhole and neckline do not gape.)
2. Start working the lace edge from the second round. For both the neckline and body, after the round of single crochet, work 3 more rounds of double crochet.
3. The pattern for the first round of double crochet is 1, 1, 1, 1, 1, 6, 1, 1, 1, 1, 1, 6... repeating this sequence. That means for each single crochet from the previous row, work one double crochet for the first five stitches, then work six double crochets into the sixth single crochet, forming one group, and repeat this pattern.
4. The pattern for the second round is 1, 1, 1, 1, 3 repeating. That means for each double crochet from the previous row, work one double crochet for the first four stitches, then work three double crochets into the fifth stitch.
5. For the third round, work even, with one stitch for each stitch.
Made by the community