Clothes
Jane
Project preview
See the finished project
Pattern format
Instructions

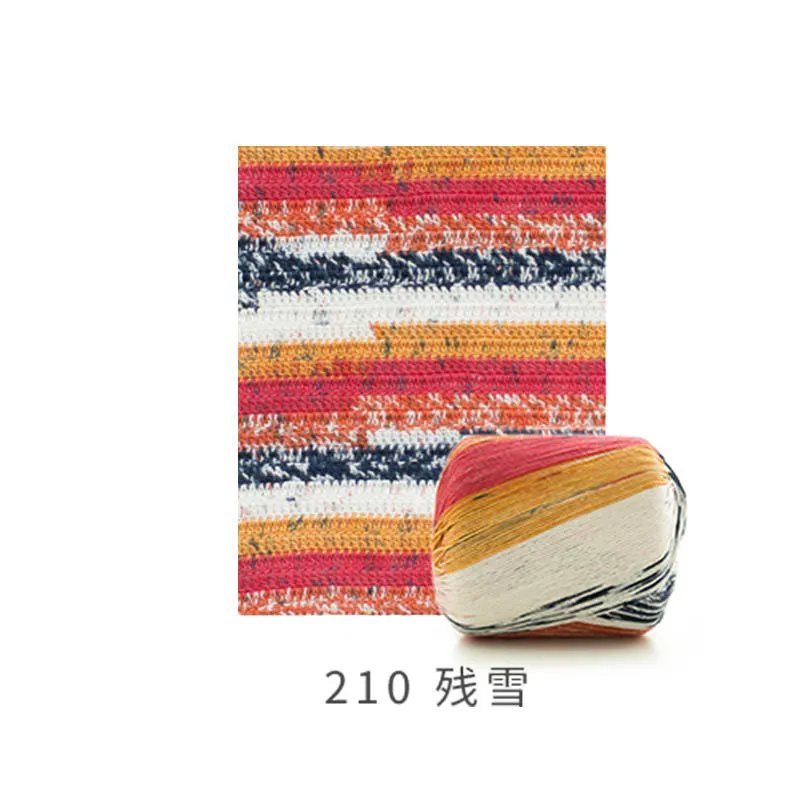
It is made up of the front piece and back piece. Crochet the front and back pieces separately first. After completing them, connect the corresponding areas, and finally crochet the edging.
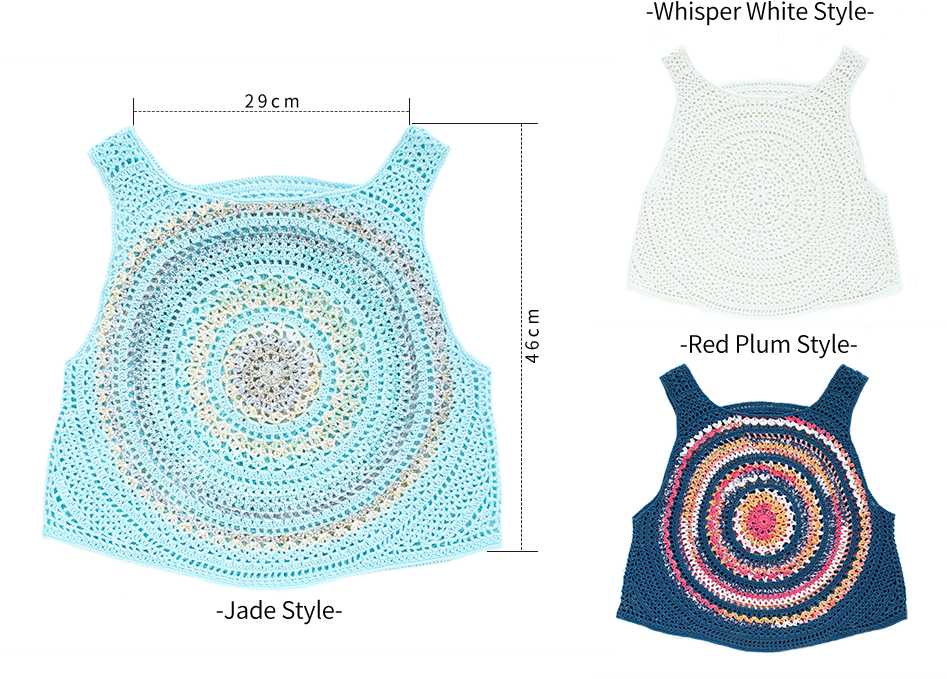
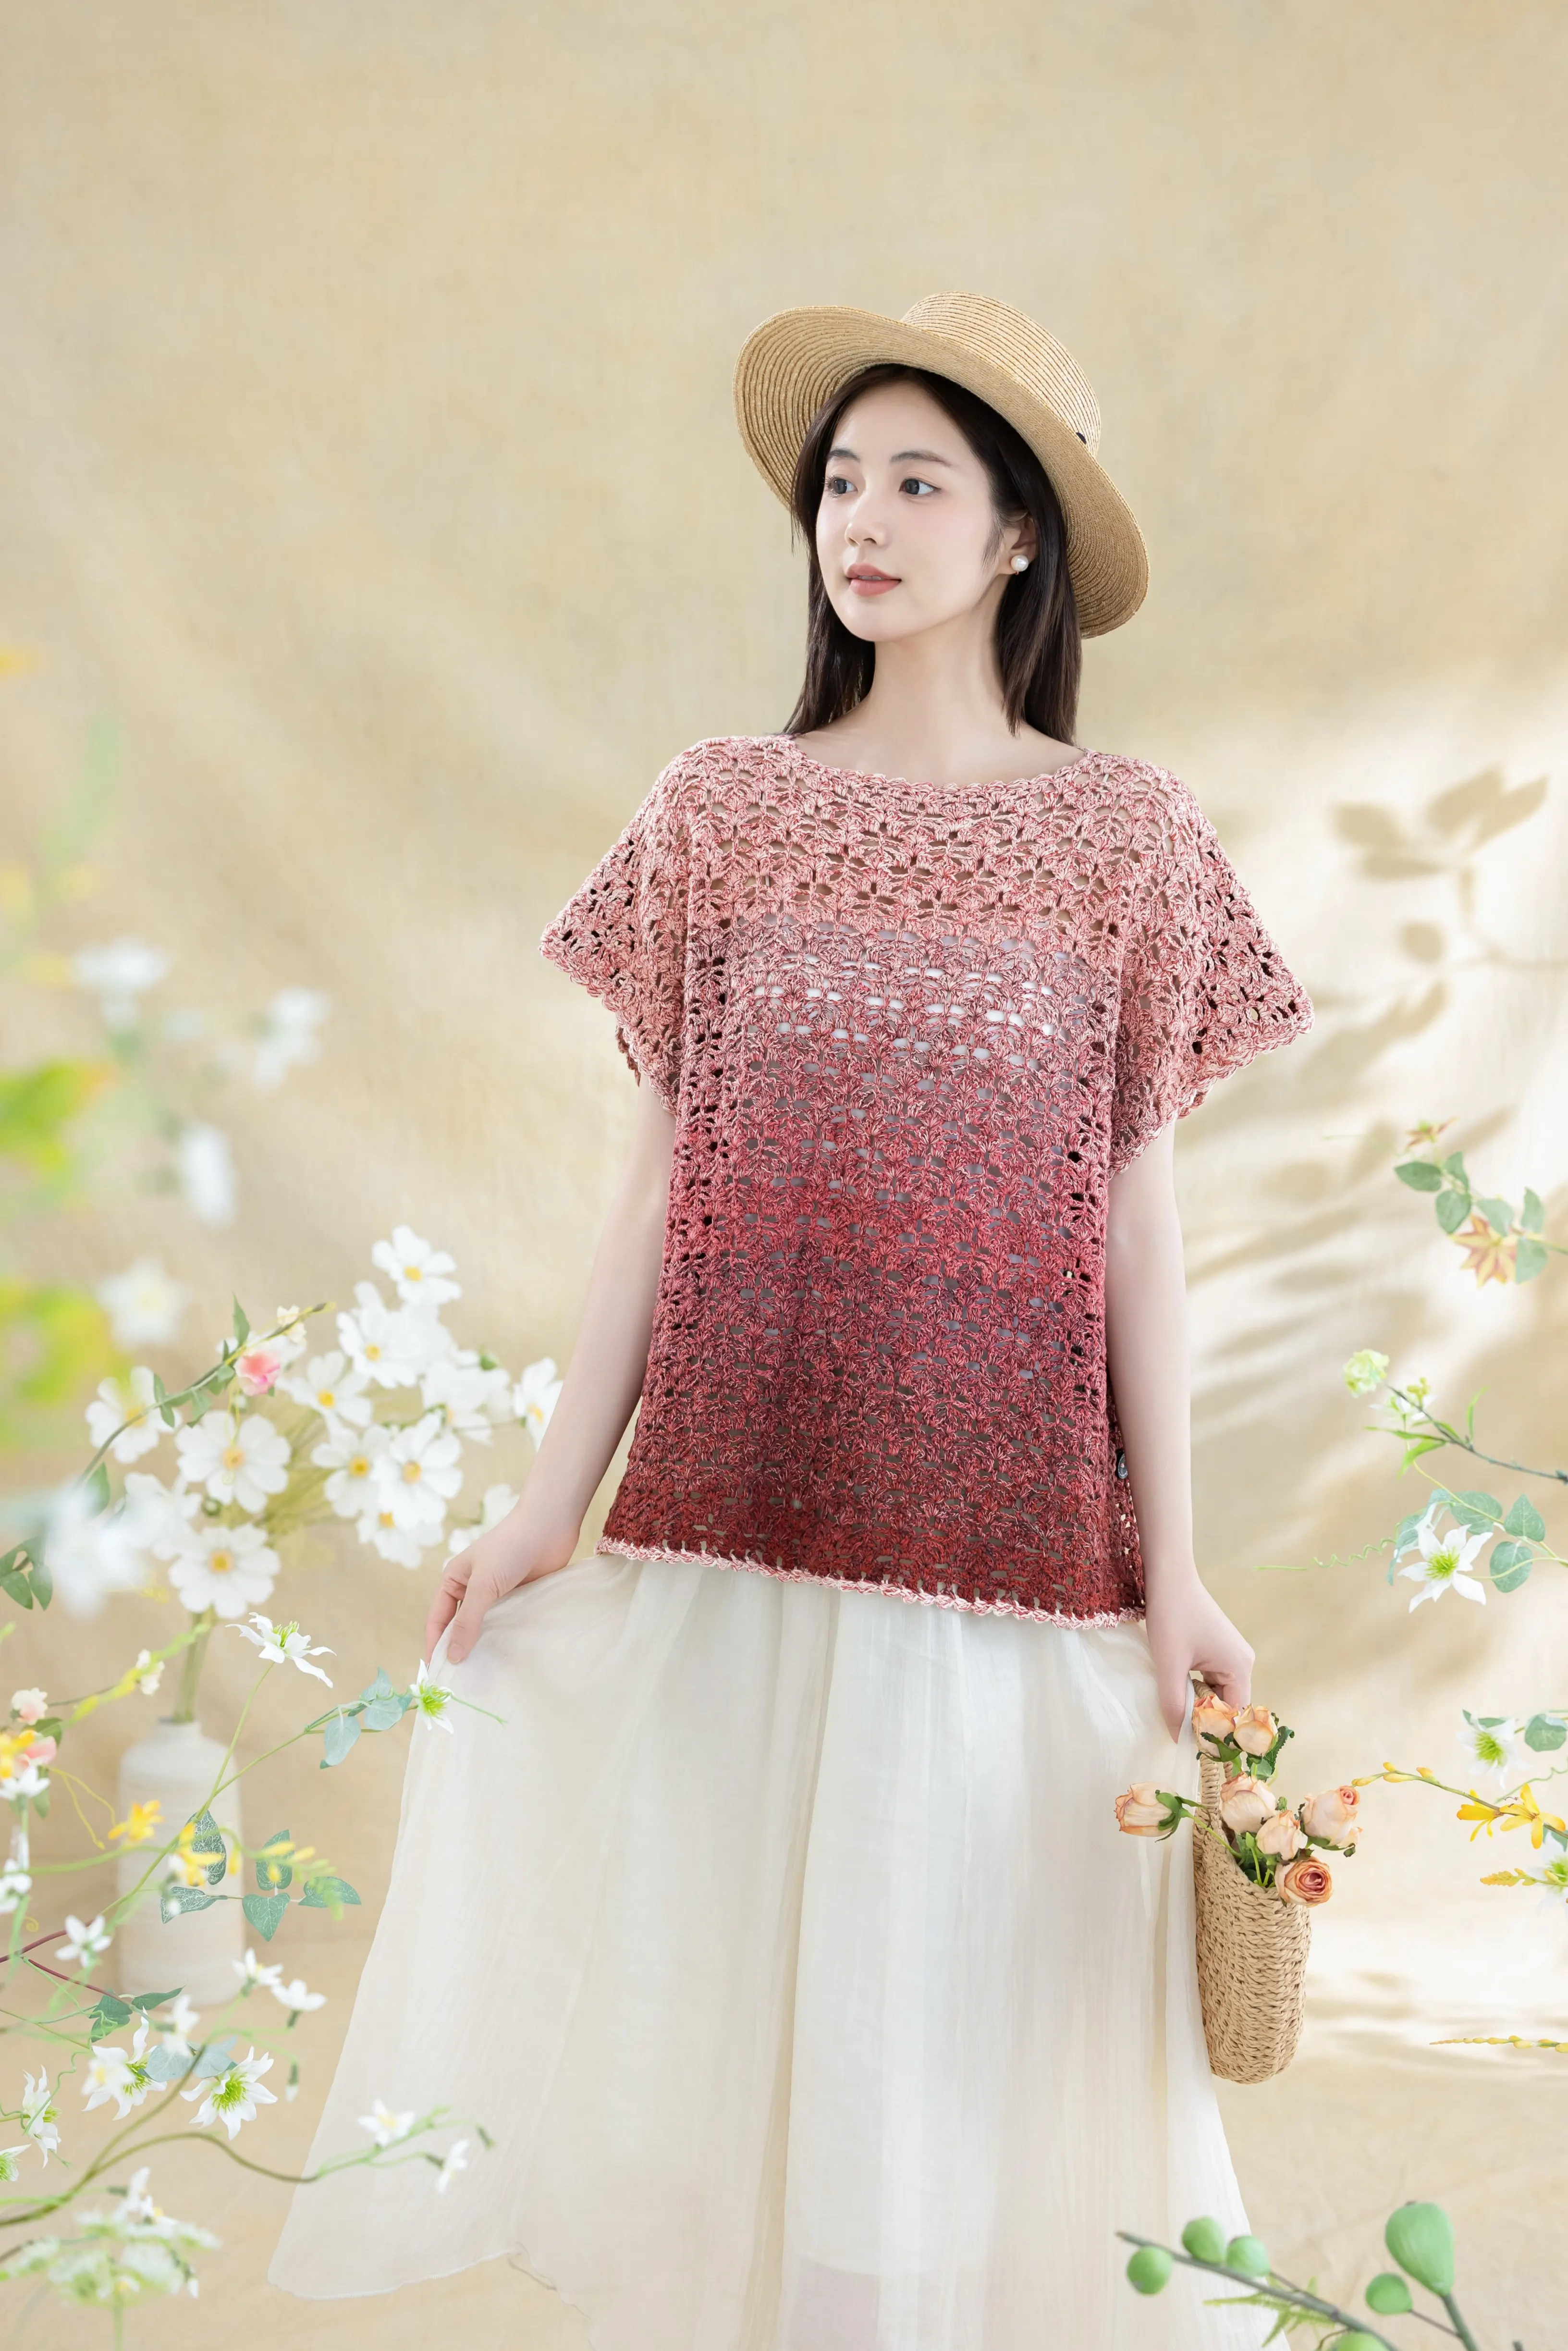
| Whisper White Style | Jade Style | Red Plum Style | |
| Color 1 | 02#Whisper White | 208#Jade | 210#Red Plum |
| Color 2 | 02#Whisper White | 39#Bleached Aqua | 38#Majolica Blue |
The handcrafted measurements may have an error of 1 to 2 cm.
Due to variations in individual tension, the size of the sample is for reference only.
Materials: Combed 3# Lace , Fancy Dyed Lace
Tools:2.00 mm crochet hook
Chart Key





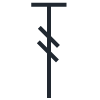
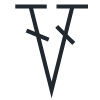


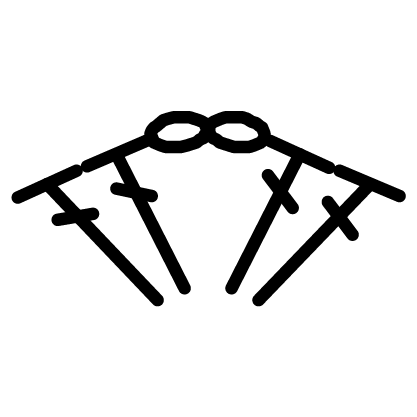
Note: 1. This pattern is making in Chinese crochet pattern terms, and the stitch name is written using American terminology. All measurements in charts are in cm.
2. In the tutorial chart, the colors for the Jade Style and Red Plum Style are directly labeled as contrasting color 1 and contrasting color 2.
3. The finished product effect varies depending on the color segments of the hand-dyed lace yarn. You can refer to the pre-made items or choose similar colors based on your preference to make it.

Part 1 Front and Back Piece
The two fabric pieces have an identical structure, with only slight differences in the crocheting method in some areas. Both consist of a circular pattern section, shoulder-parts section, and torso section. Start by crocheting the circular pattern section, then after it's completed, crochet the shoulder-parts in the corresponding position above, and finally crochet the torso section below.
Step 1 Circular Area - (Section 1)
The circular area is divided into two sections for explanation. The first sectionuses the chain ring method, and is crocheted counterclockwise in a circular pattern outward.
Note: Due to the size of the complete chart, it is displayed here in a flat layout. Actually, it should be crocheted in rounds.
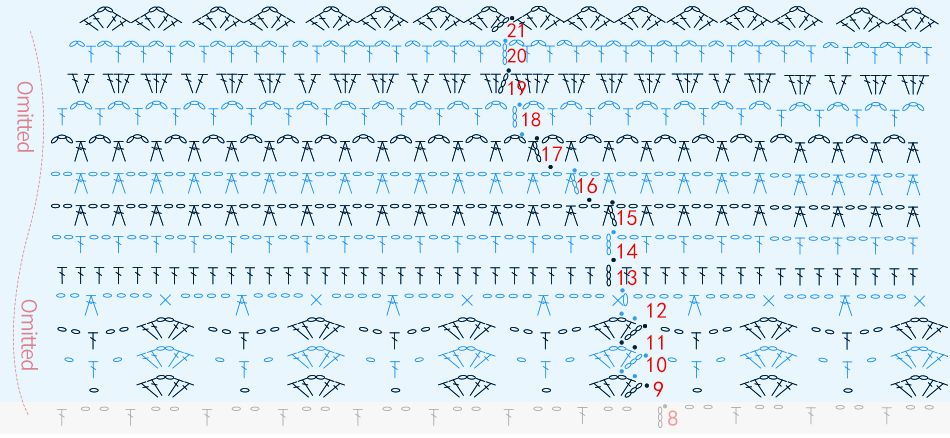
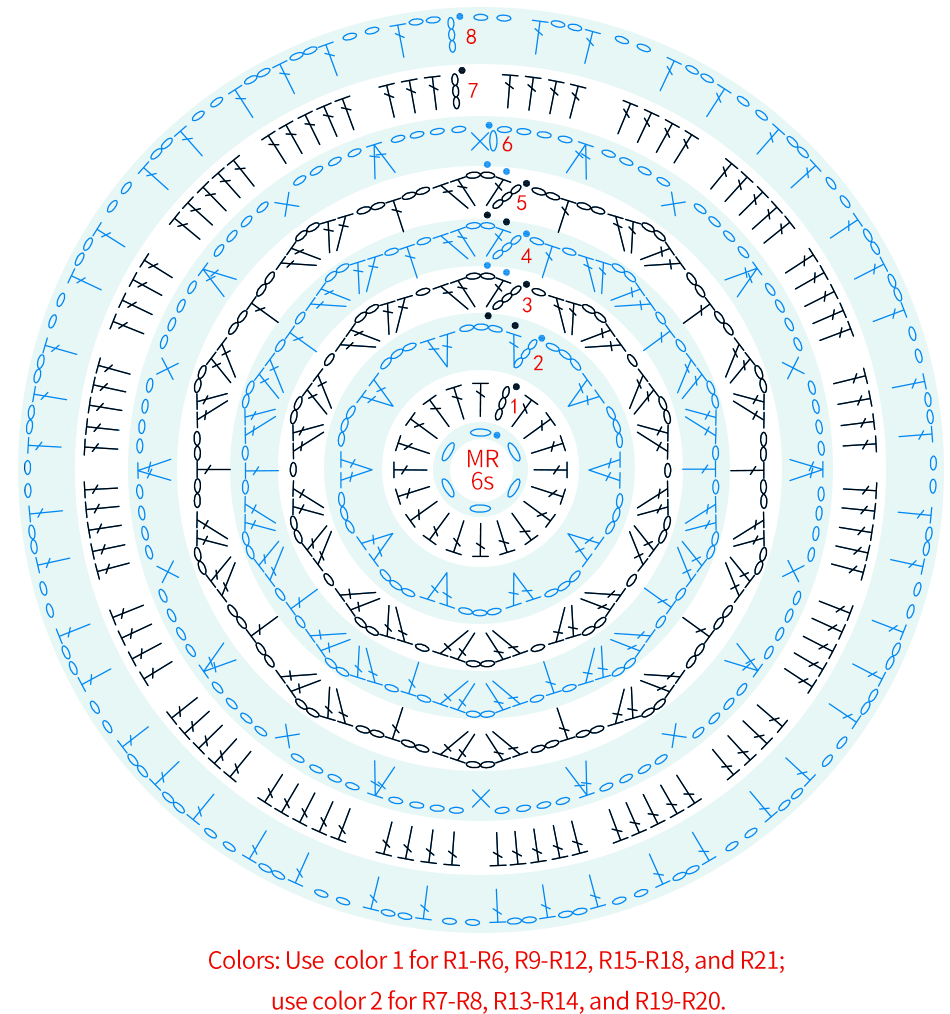
Step 2 Circular Area - (Section 2), Shoulder-parts (Color 2)
The section 2 of the circular area consists of 2 rows/rounds, with an opening on the front piece. There are two shoulder-parts, crocheted along the top of the circular area. First, work back and forth on one shoulder part using the previous yarn tail. After completing it, cast on again to crochet the other side.
Section 2 of the circular area colors: Use color 1 for the first round/row, and color 2 for the second round/row.
For the shoulder parts of the front and back pieces:
① When crocheting the back piece, the starting chain of circle 19 of the round piece should face downward;
② After completing the corresponding number of rows for a single shoulder part of the front piece, leave a yarn tail of about 50 centimeters for connecting.
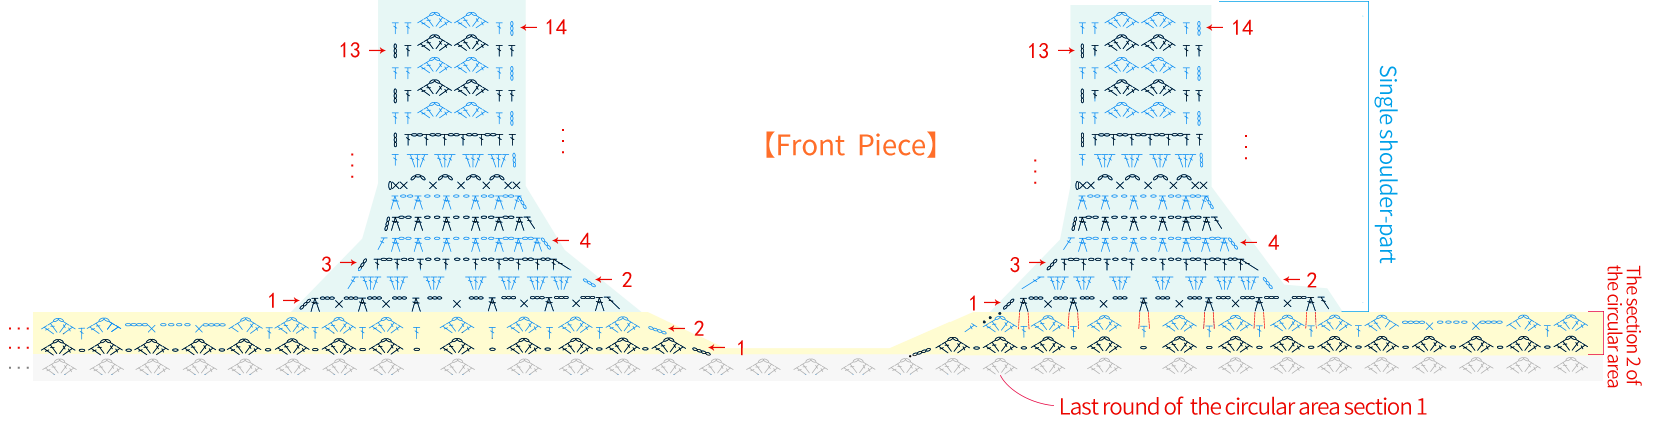
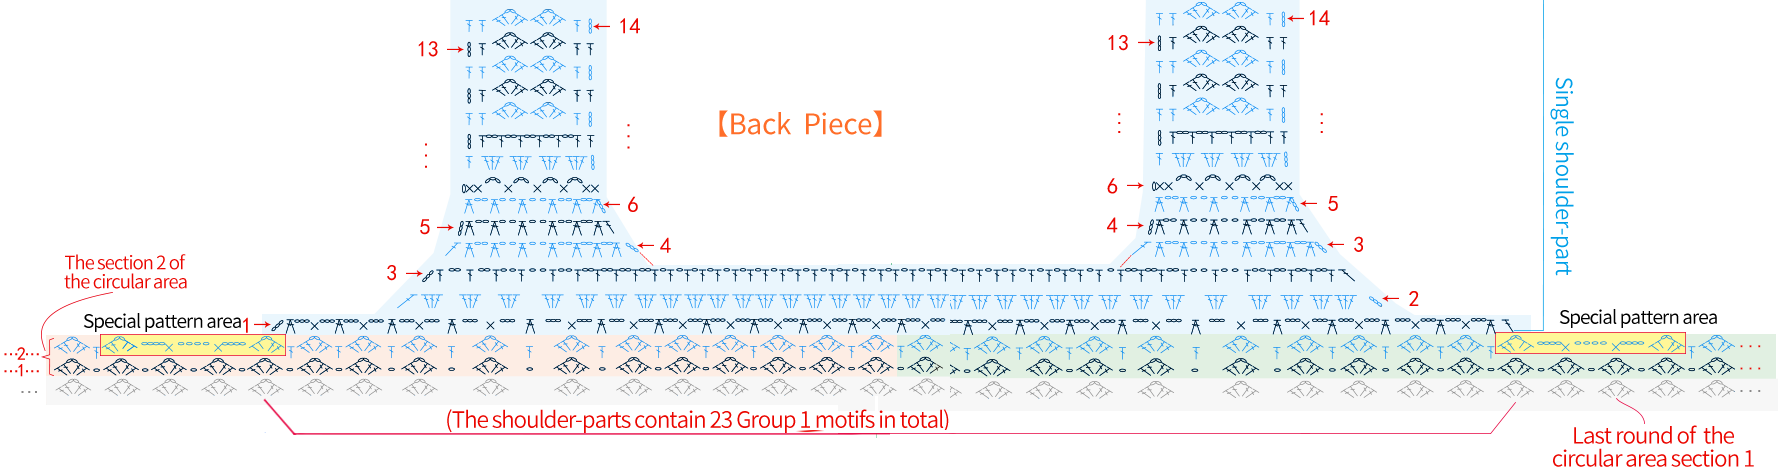
Step 3 Waist area (Color 2)
Divide into three sections. Section 1 is crocheted in rows along the corresponding position below the circle. There are two each of Section 2 and Section 3. Section 2 has a triangle-like shape and is crocheted in rows along the corresponding position of Section 1. Section 3 is crocheted along the side of the previous two sections.
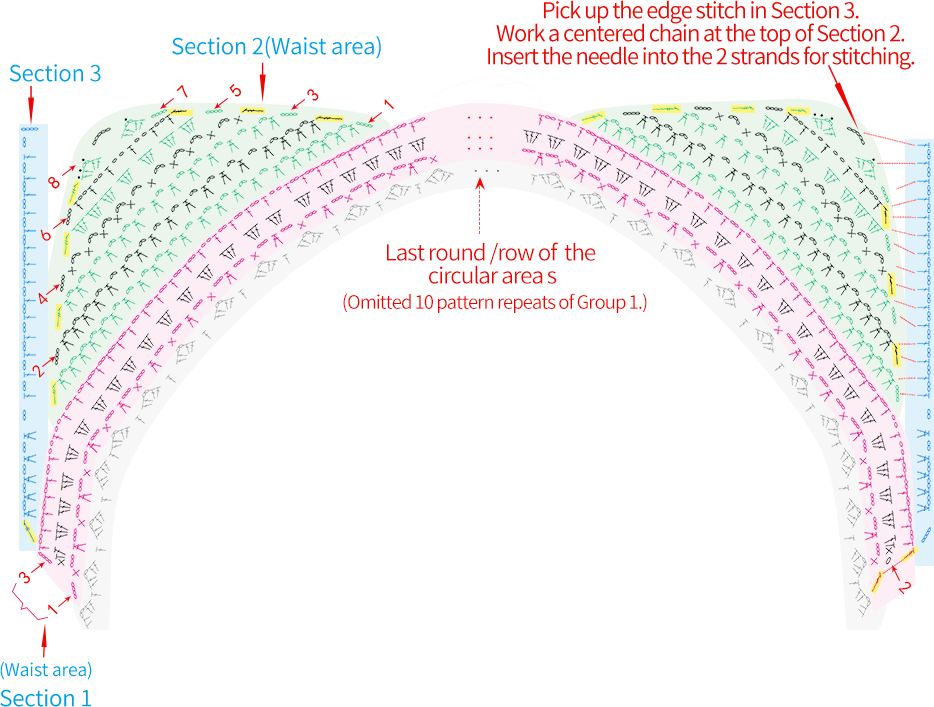
Step 4 Joining (Color 2)
It has shoulder joining and waist joining. The shoulders are connected using the slip stitch technique, while the waist is connected using the method of crocheting and joining as you go.
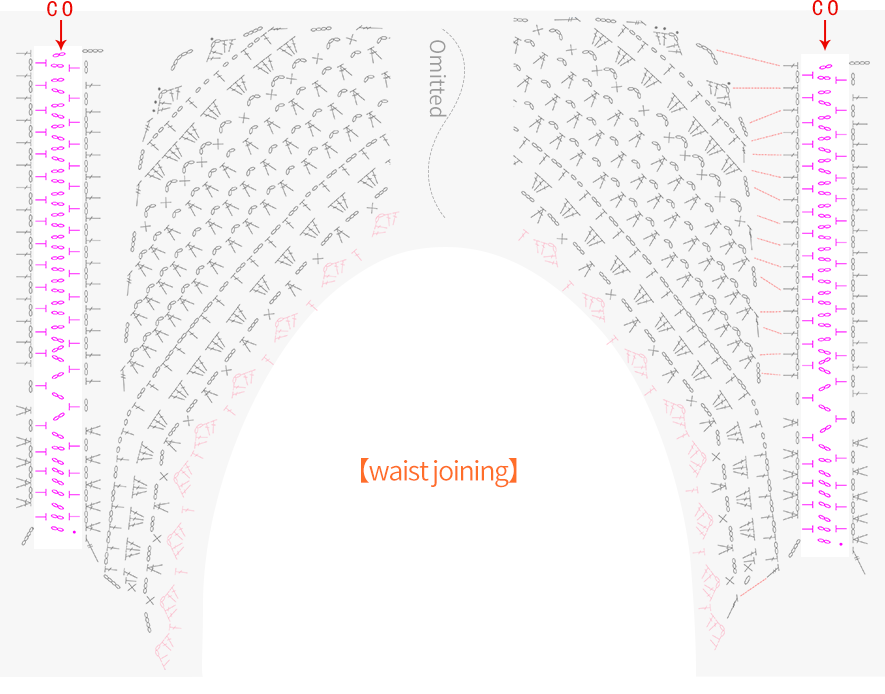
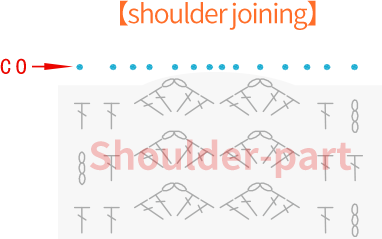
Step 5 Edging (Color 2)
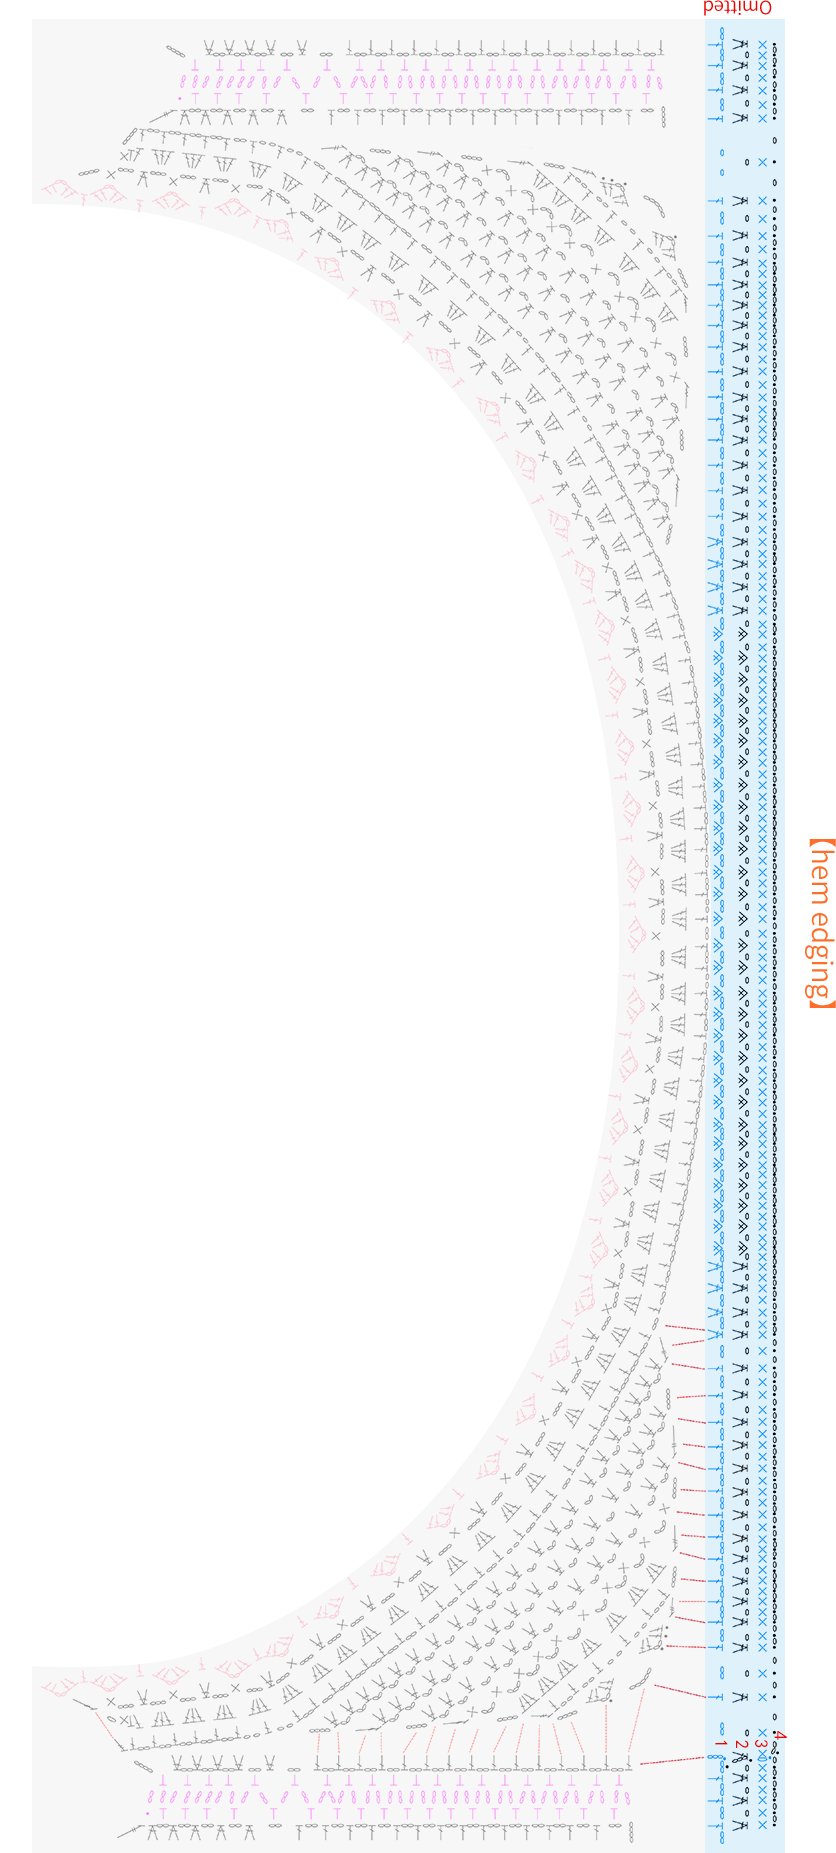
There's a neckline edging, cuff edging, and hem edging. Work in rounds separately along the corresponding areas, with two cuffs.

Made by the community